in this trip i went ultralight bike packing the west highland way in scotland.
full kit inc tarp, bivvy, sleep mat (attached to the outside!) stove and fuel, sleep bag, 1.5lt water food etc in the saddle bag, tools, spares and first aid.
inclueding water food and fuel the pack weight was around 7kg
The NeoAir mattress represents the world’s most advanced engineering in ultralight comfort. Beyond being the lightest air mattress available, we’ve utilized two patent-pending internal technologies, making it up to three times warmer and far more stable than any other uninsulated air mattress available. And when it comes to space in your pack, you’ll appreciate that it’s no bigger than a one-liter water bottle. Revolutionary by design, the gossamer NeoAir mattress makes comfort one less thing you’ll need to compromise when traveling fast and light.
* Ultralight & Compact: Weighs just 14oz. and packs down to the size of a 1-liter water bottle.
* Unrivaled Warmth: Our patent-pending reflective barrier returns warmth to your body and reduces heat loss to the ground, keeping you three times warmer than any other uninsulated air mattress.
* Sleep Stable: When inflated, patent-pending Triangular Core Matrix technology creates an internal truss system, resulting in the most stable non-self-inflating air mattresses.
* Lasting Performance: Achieving thermal efficiency without down or fiber insulation means the NeoAir mattress can be inflated directly without the added weight of a pump, or worrying about exhaled moisture wetting insulation and decreasing performance.
Specs:
Packed Size: 9″x3″ (S), 9″x4″ (M & R), 11″x4.5″ (L)
Weight: 9 oz (S); 13 oz (M); 14 oz (R); 19 oz (L
Sizing: S-20×48; M-20×66; R-20×72; L-25×77
Area/Dimensions: 2.5 in thick
Material: Nylon
This year’s AZT was a mixed bag.For a variety of reasons I arrived at the start with a sore back, 15 lbs over weight and my last training ride 20+ days ago.I was determined to ride smart, slow and just finish.An in the final analyses I did ride smart and defiantly slow.
The Body:
The only true problem I had with my ol bod was terrible, painful saddle sores, they were expected considering the lack of training but that was a small consolation.They started at the end of the 1st day and were a constant nuisance.I finally resorted to liberal amounts of oily Preparation H and a couple of Advil’s.This combo would get me about 4-6 hours down the trail.I also did a lot of walking to take pressure off the ol butt. Other than that I held up pretty good, by the last day the ol legs were actually starting to get stronger.Yup, nothing like a 300 mile multi-day ‘training ride’ to whip your self into shape.
The Bike:
I rode my new Trek 60er this year.Bike responded beautiful, I like the 69er format!!!!.And I never once pulled out my multi-tool.All I did was add a bit of air to the rear tire (it was new and not 100% ‘set’) for a few ‘burps’ and oiled the chain twice.That was it for the entire trip. Say YES WE CAN for STANS
The Trail:
The cool conditions made most of the ride quite present.I did have to deal with some sticky mud/clay and I did get a bit cold.The biggest problem with the wet was on the 1st night when my tarp arrangement sprang a leak and I got water in my bag before I woke up.I did not hit Mt Lemmon till after the big storm so that was a non issue for me.I did bivy up early just before you start the pavement; this was a nice warm campground, down below all the high altitude cold.Oracle is a pain a night, this year it was no big deal during the daylight.I saw lots of deer, road runners, rabbits, coyotes and two rattle snakes (one was ‘frozen still’ and I almost stepped on him) and my 1st ever wild Gila Monster!!
The Race:
Actually, for me, this year was a bit boring from a ‘race’ perspective.I was so far back the tire tracks were faded away.I was hoping for some ‘touring’ riders to leap frog with like last year but half the field was done and finished before I reached Mt Lemmon.I didn’t sleep a lot, or take more than a few ‘breaks’, but I never really ‘pushed’ like last yr.Just rode/walked along at a sustainable pace, some times happy, some times sort of sort of jaded. Sort of a mix bag mentally.
The Route:
Scott has done an excellent job of laying out a fun and challenging route.If you read the other accounts you can quickly see how the route can seem totally different to different riders.It all depends on your personal condition and abilities mixed in with your gear prep/choice and topped off with individual weather/altitude conditions.Kudos once again to SCOTT!!!
Attached is my “home made” video, don’t laugh to much, it’s the 1st video I ever made and I ran out of patience learning all the edit stuff.Anyway, it’s in two parts so I could put it on the web for free.Enjoy……..
Finally, after 2 years of watching from the sidelines and trying to figure out how to solve the puzzle, the pieces clicked into place and I was off to Tucson for a loooong weekend of riding the AZT-300. In the week leading up to the race, the forecast held steady for rain and cold temperatures on Saturday, the 2nd day of the race. The day I figured I would be going up and over the high point of Mt. Lemmon. Even the night before the start, the forecast remained the same. I thought it highly unusual that meteorologists could go a whole week without changing their tune, but it only made the prediction even more foreboding. And yet for some reason I still can’t figure out, I refused to heed the warning and only packed a single pair of socks and a rain jacket – no warm booties or insulating layers. But for good measure, I did throw in 3 sets of chemical toe-warmers just in case; I ended up using all 3 and my feet still froze…
My bike arrived in Tucson via Fed-ex, and Sebastian helped me put the wheels on while staying at Colin’s (my step-brother’s) pad.
Sebastian checks Dad's wheel
We all had an early dinner at a great Pizza place a few blocks from Colin’s and hit the sack early since we’d have to get up at 5:30 to make it to the start on time. Sebastian was having even more trouble sleeping than me, and eventually I ended up on the couch in the living room while Sheryl heroically rocked and held Seb to sleep in the wee hours of the morning. Surprisingly, when 5:30 rolled around, I felt quite rested and ready to ride. We picked up Marshal at his motel and made it to the start with plenty of time to pack bags and do a final check of the bike and gear.
AZT start sign
A bit of socializing and meeting the other riders ensued before we were off at 9:03 AM.
I had never ridden a lick of the AZT, but Scott summed it up pretty well on the race webpage:
HIKE-A-BIKE WARNING: You will not be able to stay on your bike the entire race. You will walk/push/pull/drag your bike. A lot. You may sometimes wonder why you even have your bike. If you can’t tolerate hike-a-bike, this is not your race. If you’re willing to accept this additional challenge, you will be rewarded with some of the sweetest, rarely ridden singletrack in the state.
Yes, there were times that I wondered why I even had my bike, but there were far more instances of railing singletrack turns while swooping around every manner of thorny plant you can imagine for hours at a time. Within the first several miles, I found myself in the company of Chris Plesko, Scott Morris, and Kurt Refsnider.
Chris in the Canelo Hills
Scott and Kurt in the Canelo Hills
These would be the only racers I would see for the rest of the trip! The Canelo hills actually proved a bit disappointing in the hike-a-bike department – a ton of trailwork has been done recently in this area, and we were able to stay mounted for long periods of time. Eventually, Kurt pulled away and even had time to make dozens of these smiley faces in the middle of the trail…
AZT smiley
They certainly made me smile as I rode to the side of them, trying to preserve the sentiment for the next riders.
The smiles remained large and frequent as the flawless day of riding progressed.
Beyond Patagonia, the wind blasted us up jeep roads past all kinds of old cars that had been blasted by more than just the wind…
Eventually, we turned onto some fantastic singletrack in the Elephant Head area and spent the golden hour of the evening railing through turns and flowing along a heavenly piece of trail with the wind still at our backs.
Not only was the riding terrific, there also appears to be some nice looking rocks to climb nearby!
My legs were finally getting warmed up as the sunlight faded, and it felt great to hammer in the last few miles of singletrack to Madera Canyon in my middle ring. A few sandy sections and some rocky bits to roll over made me grin as I powered through singlespeed style. It was such a perfect night to be out riding that I had almost forgotten I’d been pedaling for 10 hours already! The four of us regrouped at Madera creek for water and dinner (Chipotle, Yum!), and I was stoked to have brought my filter as the water spigot was surprisingly shut off. Kurt was definitely still wide awake…
Alert Kurt
After dinner, a fast paved descent chilled us down, but we easily warmed up climbing dirt for an hour or more. Kurt and I slowly pulled away from Scott and Chris and hit the singletrack together. The next couple of hours were what we all dream night rides could be like. Endless downhill singletrack swooping around hills and twisting through valleys! Just incredible riding!
Although immensely enjoyable, the trail only had half of my attention; the other half was pondering the best strategy for the night and next day in light (full moonlight, that is!) of the building storm clouds. The weather forecasters were proving spot on. So, would it be better to ride all night and try to get as high on Mt. Lemmon, maybe even up and over (Ha! In retrospect, that is downright laughable…) before the weather blew in completely, or was it smarter to bivy for a few hours while it was still nice out and then ride through the storm? By the time Kurt and I rolled into the Sevilla Picnic Area, I had made up my mind and told him I planned on bivying for a couple hours. He was still undecided as I pulled out my sleeping bag, but by the time I got settled in he had decided to sleep for a couple of hours too. 20 minutes later, I was still wide awake. The only sound in the night was Kurt’s snoring. 45 minutes later, I was still wide awake. The sound of Kurt’s snoring had been joined by the pitter-patter of raindrops. Another 15 minutes went by, and Chris rolled in and joined us, taking minimal shelter under another picnic table. I don’t know why I can’t shut my brain off and get some sleep in these situations, but it can be so frustrating for me. My Dad is an ER doc, and can fall asleep in 30 seconds. Seriously. So, at least I know it’s not hereditary. Oh yay, that really helps. It’s like I start thinking about how I really need to get some sleep, and how I’m not sleeping, and how I really need to get some sleep, but I’m not sleeping right now, but I really should be. Why aren’t I drifting off? Oh, wait a minute. I was almost asleep there. Try again. Getting close… almost there. Arggh! Apparently, I just wasn’t sleep deprived enough!
Eventually, I just got up and started packing. Kurt and Chris joined me, and we hit the trail in short order. Less than an hour later, I could barely hold my eyes open! WTF?! I let Chris and Kurt go and laid down in the dirt for 10 minutes. Ahhh, sleep. Crazy, but just enough to feel recharged for the push into Tucson. I caught back up along the pavement, and hit Basha’s with a huge hole in my stomach ready to be filled.
Mmmm, bacon and egg breakfast burrito! Wish I had a picture…
I think the rain and chilly temps kept us in the grocery store longer than any of us intended, but soon enough we rolled out into the misty dawn ready for battle. Mt. Lemmon was foreboding. Completely socked in, a giant grey and black monster beckoning us into its lair. Foolishly, willingly and stubbornly we pedaled into the trap.
The occasional burst of sun lured us onward like moths to a dancing flame.
And to think we were so worried about finding water along the AZT. Instead, it found us. More than once.
By the time we got to the Molina campground, I was more beaten down than a stray dog. My hands and feet, although warm while moving, were completely soaked and quickly going numb as we took shelter from a passing hail storm. Reports of heinous conditions higher on the mountain were on the lips of everyone we asked: A foot of snow at the top. $300 tickets for non-4WD vehicles past mile marker 14, and we needed to go to mm 26. Cars were coming down with 4″ of snow on them.
That was it. I was done. If I had continued in those conditions, I would have died. No kidding. Riding in snow and slush for 6-8 more hours when already soaked with no feeling in my hands and feet? It was unthinkable! Yet that was about the time that Kurt pulled on his booties and down jacket and said, “I think I’m gonna head out.” Kurt really is going nuts! Not only was I done, Kurt was gonna 1-up us all and continue in these Colorado conditions. Where does he think he’s from?! I gotta hand it to him though, he nailed the prep and was able to forge on through the worst Arizona could offer up.
I was still ready to quit, and would have taken a ride back to Tucson in a heartbeat. However, Chris Plesko never showed a glimmer of giving up and didn’t seem to be miserable at all. He calmly reasoned that it was foolish to continue in full-on conditions, but it would be no big deal to wait it out. The next day’s forecast was for more sun, so why quit when we had come so far already? His solid mental fortitude totally pulled my bacon off the fire. Well, maybe that’s not a good metaphor since we didn’t have any bacon (dammit!), and we certainly didn’t have a fire (double-dammit!) either… In any case, had it not been for Chris convincing me to just bivy for awhile and warm up – we can always get a ride down – I might’ve only ridden the AZT-150. I pulled out my sleeping bag and crawled in, shivering and wet, and somehow drifted off for an hour or so. I certainly needed it! I ended up waking up because my face was hot. Hot?! Sun! The sun peeked out for about 30 minutes. Just enough for us to dry out our soaked gear and sodden spirits.
We were both still cold, but the sun had definitely lifted our spirits, and we concocted a plan to start at just the right hour to put us on Oracle ridge in the morning sun. We figured if there was a foot of snow on the ridge, we’d need the sun’s light and warmth just to survive it! Sleep came and went for several hours with the rain, and out of sheer luck, when the final sleep went, so did the rain! We packed up and started pedaling under starry skies in the crisp morning air. The higher we got, the crisper the air became. Soon enough, the roadway was a sheet of ice in the middle and frozen slush on the sides. Kurt’s lone track a dinosaur footprint frozen in time.
The ride up the pavement was a surreal trip to Tel’aran’rhiod. Starry skies and sparkling city lights of Tucson were replaced by a swirling fog that engulfed us completely. Even the full, bright moon was shut out, yet an eerie light seemed to glow all around. It was the sort of fuzzy limbo where your imagination thrives, the intangible becomes tangible, and whatever you’re dreaming about might just step out of your misty dream and materialize into reality in front of your unbelieving eyes. And then suddenly we were elevated out of our lofty cloud prison as the wind began to blow snow out of the trees and into our faces.
Wearing all my layers, I alternated between walking and riding in a futile attempt to keep my still-wet feet warm. At the high point of 8000′, it was bitter cold and the trees were coated with rime. I put in chemical toe heaters and hand warmers, but my extremities were still tingling and numb. It became a challenge just to stay upright on the slippery road, and apparently 4 wheels don’t necessarily fare better than two!
Finally, we hit the control road and the start of Oracle Ridge. At first light, just as planned, but we were shocked to find a 2nd set of tracks in the fresh snow! After some sleuthing, we determined the shoe didn’t have a cleat which meant it had to be Jefe! Very impressive, but not surprising. Jefe has the ability to tolerate discomfort and lousy weather better than anyone I’ve ever met, and I dimly remembered another biker rolling into the Molino campground after dark while I was fading in and out of slumber.
Oracle ridge was practically devoid of snow compared to the other upper reaches of Mt. Lemmon, and Chris and I were not only making great time, but were also warming up nicely with the combination of riding and drag-a-bike.
Oracle Ridge - the trail is here somewhere!
Perhaps the lack of snow on Oracle ridge was because it was all blown off as soon as it hit the ground! Hard to imagine finding your way through here at night in the middle of a raging storm. Evidence of freezing rain and wind was all around.
Ice encrusted trees
Once through the super magic gate ending the traverse-o-death, the trail was once again ridable and we descended with gusto into the sunshine and warmer temps.
Prickly pear and barbed wire - good reasons to stay on the trail!
A blissful section of the AZT known as the Cody Trail broadened our smiles further and made the nightmare of freezing temperatures and uncomfortable, damp concrete-pad bivying seem a lifetime away.
Still 8 or 10 miles from Oracle, I slurped down the last of my water. Even though there had been water all around, until now the last thing on my mind had been being thirsty. Our last refill had been in Tucson well over 24 hours ago, and with the sunshine and warmer temperatures, I was getting parched. I began looking for puddles or a tank I could filter from when, lo and behold, a gallon jug appeared beneath a tree. Maybe this really was Tel’aran’rhiod! There was just enough left in the jug to fill one bike bottle, and that was gone by the time I arrived at the Kannaly Ranch house where a trailer labeled “drinking water” beckoned me over.
As I sat in the warm late-morning sun refilling bottles I began to realize how sharp my mind felt and also how my legs were yearning to keep turning over the pedals. I started to ponder where Kurt might be and if it was possible to catch him; he had left Molino campground about 11 hours before us, but I knew the paved climb and descending Oracle Ridge in the storm and darkness must have taken him significantly longer. Also, he probably bivied up someplace for at least a few hours of sleep. So, accounting for a couple hours longer on the bike plus a 4-6 hour bivy, my best guess put him between 3 and 5 hours ahead. A tremendous lead. And I knew first hand from riding a 100-miler with Kurt in Moab two weeks prior just how incredibly strong of a rider he was. There were still 90+ miles of riding left, but if he was feeling as good and focused as I was, there was no way I would make up any ground on him, let alone actually catch him. On the other hand, if he was sleepy and running on autopilot, there was a slim chance…
But alas, I still needed to go into Oracle and resupply for the final stretch and that would surely kill another 30 minutes and any chance I had of catching Kurt. Chris and I had planned on getting some lunch together, and he must’ve already rolled past the ranch house without seeing me. Turns out, he actually ran into Jefe in Oracle while expecting me to be right behind him. Instead, I was digging into my bag and starting to count calories. Almost a pound (!!) of Perpetuem that I had carried from the start, some fig newtons, a few Milano cookies, a handful of Chex mix, and 1 package of caffeinated cola clif-shot blocks. Hmmm, maybe 2500 calories? It just might be enough! Nothing very hearty or satisfying but enough to risk skipping Oracle!
As I turned right on the pavement, away from town, I could feel the commitment settling onto my shoulders and into my body and mind, yet I was determined to ramp it up and spin fast all the way to the finish. Several miles of great singletrack kept up my psyche, and blasting some tunes helped me blast through the ups-and-downs of the long gasline road towards Antelope Peak.
Looking ahead on the gasline
Looking behind on the gasline
I stopped only briefly to filter some water at a tank by this old windmill alongside the trail, and then ramped it right back up. I was eating and drinking well on the bike, the tunes were cranking and I generally felt unstoppable for hours on end.
Sun, sweat, sand and cactus were the motifs of the day.
Occasionally, I’d come ripping around a corner only to find a neat pile of Cholla balls in the middle of the trail. Twice, I rode straight through them, unable to swerve around in time. Several pieces would stick to my front tire, comically rotating around and holding on tightly until I could get stopped and pick them out. Each time I was both flabbergasted and relieved that these chundering Cholla chunks weren’t accompanied by a hiss of air. Unbelievably, I didn’t get a single flat for the entire ride!
Once past the high ridge near Antelope Peak, more stellar singletrack led me down, down, down through the Boulders and towards the Gila river in glorious evening light.
At dusk, just after I had stopped to change lenses and mix up another bottle of Perpetuem, I had to unclip and hike through a sandy wash and up the other side following Kurt’s ever-present tracks. Much to my amazement, where his toes had dug into the soft sand, there was still some darker, moist sand showing through! It had been warm, dry and sunny all day long, and the sun had just barely slipped behind the horizon, so I knew that these tracks had to be less than an hour old. Maybe even closer to 15 or 30 minutes! I maintained my pace up through the Box Canyon where I went by some beer-drinking ATVers and Jeepers playing on some gnarly rock steps. They told me I was crazy to be out here alone, and I asked if they had seen anyone else. “Yeah!”, they replied. “Maybe 20 minutes ago.” Holy Cow! Was I really getting that close?
It was time to start thinking out of the Box, so I ratcheted it up a notch and gave the climb out all I had. I flipped my light onto high and roared down the steep descent only to climb again. This time steeper. And Steeper. And STEEPER! So steep that I was forced to dismount. Traction was good, but granny just wasn’t low enough. Numerous times I would head up a rocky wash that I thought was the route, only to backtrack or bushwack back to the jeep road losing precious minutes on my hunted quarry. By the time I turned onto the final singletrack, I hadn’t even caught a glimpse of Kurt’s light and I knew it was a lost cause. Still, I had a blast riding and railing the newly built trail all the way to the finish. Yet another stellar piece of singletrack on the AZT and a hell of a way to end the race!
Kurt had been at the finish for 40 minutes, and he was already getting cold and a bit loopy from lack of sleep. At the Gila river, he had talked to his SO and realized I was hot on his tail, and thus hammered out the last 25 miles putting 20 minutes on me from the river. We exchanged congrats and high-fives, and since it was still before midnight, I convinced him to ride into Superior and get a motel for the rest of the night. Halfway to town, I ate my last bite of food, trading the rest of my Chex mix for one of Kurt’s Odwalla bars. We scarfed down some more food at the Circle-K, then rolled up to the only motel in town only to find out it was closed. There was an after-hours number on the door, so I called it and could hear the phone ringing just inside. Even as tired and delirious as we were, it was still funny! Or at least it is now…
So, we ended up bivying in the town park, and then joining Jefe and Chris for a greasy breakfast across the street in the early morning hours before Sheryl arrived to shuttle us all back to Tucson. With the help of some pink shoelaces bought at the Circle-K, we managed to somehow secure all the bikes and wheels to the roof, and then all piled in.
L to R: Kurt, Chris, Jefe, Stefan, Sheryl
Sebastian was thrilled to have so much company in the backseat, even if it was smelly and grimey guys that he didn’t even know!
Parting thoughts:
Wow, if you hadn’t realized it yet, the AZT-300 is one hell of an event. Shorter than the Grand Loop, with far, far better riding, it still felt as hard or harder. Posting my GPS-recorded elevation profile vs. time will certainly raise a few eyebrows, but I think this event has been run enough times that already anyone can figure out what their splits need to be to challenge the course record with just a little digging. Now, you know exactly where to bivy for 12 hours!
AZT-300 elevation profile vs. time
Geeez, that big flat spot just kills me… The other flat spots you can identify are Madera Canyon at 10 hours, Sevilla Picnic area from 17-20 hours, Tucson at 22 hours, and the Kannally ranch house right around 2 days and 1 hour. Every time I look at this plot, I keep telling myself, “Dang, I coulda done it 6 hours faster for sure!” But realistically, could I have? It’s just impossible to say how much faster I was able to go for the last day after such a good, long rest, but still… An 8 hour bivy would have been loads, 12 was just plain silly! Ah, the clarity of hindsight. Nonetheless, it was a fantastic ride with great company, and I’m already looking forward to the opportunity to challenge myself on the route again!
So there I was mid-winter in Gunnsion, CO. the ground covered in snow, the temps cold, spring riding month(s) away. I was surfing the net during lunch and stumbled onto some of MikeC’s amazing pics from the 2008 AZT 300, they pulled me in. After my awful attempt at getting down here, I was very reluctant to get in a car, much less drive the 15 hours to get here, so I had convinced myself that it wasn’t gonna happen. But those images wouldn’t leave my head, along with the mantra drumming through my head, ‘life is for living damn it!’ So I bought plane tickets, I was commited. So if you know anything about Gunnison, it is cold. So you ski, maybe you ride your trainer, get out of town when Fruita, GJ or Moab dry out, maybe if the days are nice, some road miles. I am active no matter what, but enough to do 300 miles self supported? Meanwhile I was working alot, putting some new bags together for the race and trying to keep my life in order, not an easy task for me! So to say the least I felt a bit underprepared, a bit nervious about blowing up in the desert heat, worried my poor butt was gonna get destroyed. But I was commited, I was gonna get down there and I was gonna finish unless I broke myself or my bike. So there, right?
So I made it down, my bike made it down, we all made it to Parker lake for the start, a huge smile wouldn’t leave my face, this is gonna be cool, the sky, the wind, the hawk soaring above all pointed to this, good things awaited out there. The leaders took off quickly, disappearing into the Canelo Hills and it’s wicked steep hike a bike trails. Within minutes my new seat post bag was coming loose and falling into my rear wheel, over and over, so much for my engineering! It took many tries to get it to stay put for more than a few minutes of actual riding on the rough trails. Although it was only about 75 degrees out, it felt hot, I felt heavy and slow. But I was still smiling, I was so happy to be here, in southern AZ, mere miles from Mexico, everything I needed for a few days, except water, on my back and on my bike. Miles and miles of unknown trails and adventures before me and a whole week before I had to deal with the dreaded four letter word, Work.
After Patagonia, I managed to go off trail a few times, I had a bomber GPS track to follow, but you have to pay attention, that satelite won’t turn your bike for you. Even riding miles of unwanted out and back I kept smiling, I made fun of myself and joked about how much of an idiot I was and deserved to put in extra miles. I stopped on the Elephant Head MTB route before the ‘devil’s cash box’ to bivy. I put on all my clothes, and crawled into my space bivy, only to see that the aged material I carried all these years was partially shredded, hmmmm? Still I was plenty warm and I tried to sleep, no dice, I just lay there, listening to the wind, staring at the sweet sweet stars. Still not bad…
I awoke, got loaded and rolled on, within minutes the moon disappeared and the snow flakes began to fall. After loosing some elevation, snow turned to rain, cold wind driven rain, the kind of weather that soaks you to the bone and leaves you feeling small and flimsy. On and on up Box Canyon I rolled, still getting pummeled by the storm. I missed a turn onto singletrack and had to bogey back to make myself feel better about the lost time. Then things went to hell. This section of trail had soaked up a lot of rain and had turned to the worst kind of mud, peanut butter like goo that sticks to your tires, then your frame and fork and within minutes the bike no longer rolls, the wheels simply won’t turn. I had no choice but to pick up the front wheel and drag the rear wheel along behind me. My loaded bike was now like a loaded downhill bike with the brakes locked tight, so so heavy. My shoulders ached, my head spun, my heart ached for the waste of time and energy this was causing, bad timing. I couldn’t stop to wait for the soil to dry, I was cold. Moving was all that was keeping me warm, my clothes were wet, my bivy in shreds, what have I done? I considered hiking out to the highway and DNF. No not gonna do it. So I just kept going, stop and breath, keep hoisting and dragging. Eventually the trail does hit the highway and I was rolling along at speed watching the sun slowly emerge from the clouds. Next came some really fun flowing singletrack, some of the best trail carving to be had, nice work here trail folks, good stuff. To top it off the sky was still sputtering a few scattered rain drops and the sun was peaking out through the hills and clouds. “Rainbow weather” I muttered to myself, and there it was a big fat rainbow, all that awful mud pushing faded as I railed sweet trail with that gorgeous sight over my shoulder. This section of awesome new trail took me all the way to La Sevilla campground where I got water, took a break, dried some clothes in the inermitten sunshine and took stock of my food supply. Tucson was only a couple hours away and I wanted to be sure to get what I needed to finish this adventure.
After another rain spell on the Old Spanish Trail, I got to Tucson, spent 60 bucks at Bashars, got a 4 shot americano and ate and ate food. Stuffing the rest into my pack and bags, filling up my water and eventually rolling out of the safety of town into the dark clouded unknown that lay ahead. Up Reddington I climbed, getting almost run over by half crazed four wheelers, past the Tucson Militia training grounds eventually dropping down Chiva Falls and strangely heading away from the Catalinas. At first I though that Scott was just some sort of sick puppy sending us all out far away from where we needed to go. I began to get a bit crazy wondering why so far, down rolling jeep trails, “but the catalinas are that way” I kept insisting to myself. Then we hit the AZT again and I felt better, then the trail begain to climb through the most gorgeous landscape of grey rock slabs jutting out of waving hillsides of pink dotting thistles and tall rain drop laden grass all glowing in the weird light of evening sun breaking through the storm clouds. So pretty, I saw the bouncing gallop of deer, hawks on a wing all in that golden glow. Eventually the sun set and I began the hike a bike out and over the ridge to Molina basin. There were glowing eyes watching from the sidelines in the grass, owls hooting me on and even some stars beaming down at me. Somehow it made the super steep and chunky hike a bike less painful to my weary shoulders and tired head as it was about a 20 hour day by the time I rolled into the campground across the Catalina Highway. There I saw that Stephan had taken up camp in the awning of a campground bathroom, dry atleast, it looked like another nylon mummy was next to him but wasn’t sure. It was the first time I had seen any other racer since the night before and many many miles ago. I crashed a campground site and tried and tried in vain to start a fire. I was cold, wet, my clothes soaked and apparently so was any and all fuel I could find. So after wasting too much time in my tired state, I crawled into a couple garbage bags, stuffed my shredded bivy inside for some amount of thermal protection and fell asleep.
The human body never fails to amaze me, both in it’s reslience and fragility, somehow I slept while so cold. I awoke with my teeth chattering uncontrolably, my whole body shivered and shuddered. I was up before my alarm went off, packed up with my shaking hands and started moving, thankfully uphill. Soon I was on the Catalina Highway and starting the epic climb up to Oracle Ridge. Now I knew this was gonna be a long push, but after 4 miles I saw the first sign, “Summerhaven 13 miles” Yikes, 3000 vertical, 17 miles, I guess it was a mellow grade, at least. Even so I had to walk every half hour for a minute, my legs felt hollow, my ass hurt like someone scrubbed it raw with some steel wool ( I told you I didn’t have many miles). The wild thing was watching the world change as I climbed, the trees got bigger and thicker, the snow got deeper, the air got very very cold. By the top I was freezing, cold cold cold. My hands and feet were numb, tingling, even with the plastic produce bags I put my feet in they were done. On the brief Downhill to Summerhaven the bike and I went down on the black ice, tires just slipped out from under me and I slapped my hand on the pavement and it went completely numb. I am used to being cold, I do live in Gunnison, CO. But this was just plain scary, I was begging for an uphill, I was just too cold and had no source for heat of more clothes to keep it in. Still I laughed at myself and the stituation. Here I was in southern Arizona in April, here to escape the cold wet spring in Colorado and I was bordering on hypothermia, at least I was still laughing! All suffering ends eventually and I did hit the control road and began Oracle Ridge. Even when I got to ride parts of it the going was slow and I stopped being frozen, soon it was all hike a bike and I was now feeling my feet and hands and the ache of my shoulders from the rough narrow trails insistance that you lift your bike up and over, up and over. Here is where I was also able to difininively see that it was just Kurt who was in front of me, (one advantage of being a bike geek is I memorized everyone’s tires at the start)
About half way down the ridge, or the traverse of death as it is called, the sun began to poke through the clouds and the lower hillsides could be seen to be glowing gold with the morning sun, it looked magnificient, warm and sunny. Still the clouds swirled and clung to the ridge, updrafting swiftly, it was pretty damn cool. The trail then meanders off the ridge and tacks east and back north, then west again and drops you close to Oracle. I rode into town to get some water and some food I wasn’t carrying and eating for over two days already. That is when I realized how fast I had been able to travel so far. There was about 90 miles left and it had been just over two days by the time I hit the Circle K in Oracle and wolfed down some 2000 calories right there in front of the store.
As I was about to leave Chris Plesko rolled up, after days of suffering alone it is so cool to see someone, especially someone out suffering the same thing as you. We talked about who was in front, behind, I learned that it was Chris and Stephan camped out at the Molina bathroom bivvy, and that Stephan was supposedly heading into Oracle as well. That the three of them, Chris, Kurt and Stephan hit Molina together and that the weather was so bad that they stopped, but Kurt was ready, he had enough winter clothing and the balls to heaad out and into the heart of the storm all by himself, leaving the other two to wait for 12 hours for a decent window to carry forth. So I ended up waiting for Chris to get set and we rode together out Tiger MIne Road, to the gasline section, talking, strategizing, I spoke up that it would be nice to get to the drop to the Gila River before dark, Chris thought it was possible, but said no more. Now Chris was on a rigid singlespeed, yet he is also one fast kid! So when I dwelved deep into myself and realized I still felt good, in fact the best I felt so far in the whole race, I decided to really try to throw down on this last section. So when I looked back after jamming out some of those gasline hills I really did expect to see him close behind me, yet I saw nothing. The crazy thing is I just kept hammering, now I am not that fast, persistent, resilient, stubborn and tough, yes, but fast, not really. But I was cruising, not stopping for anything, except pulling cholla balls out of my flesh, OUCH! I was eating on the bike, pushing those pedals with all I had and I still had lots in my gas tank. It was so fun, there is some more of that sweet singletrack out there, especially the Boulders Segment, wow, imagine very new, seldom traved trail that is almost hard to follow just carving these awesome turns through crazy forrests of Cholla and prickly pear, pretty much full speed trail riding. It was so so damn fun, again nice work trail folks, very nice!
After many more miles of trail, roads, one confused GPS track follower and a gorgeous red/orange sunset I made it to the Gila River, I was till cruising, but getting very tired, my back was getting super tight and it hurt to crank hard. But I refused to stop moving, it would be all over and although it was warm out I had no intentions of sleeping out on course one more night. Plus I was hoping to catch Stephan, maybe Kurt and try to stay ahead of Chris. Although to clarify; it is a race, we are trying to out do one another, but it really is a different sort of competitive spirit, more of using the challenge of the other racers to keep yourself moving, not trying to ‘beat’ someone else, hard to explain. I really like these guys and I am so very stokeed for what they are pulling off, I really do wish them the best of luck even when I am trying so hard to catch them.
So after crossing the Gila comes the Box Canyon, the second such named place, this one was rummored to be “brutal”. After all the crazy climbs I was mentally trying to be ready, well the “Box” wasn’t so bad. I pedaled almost the whole thing even pulling up over some slickrock benches and everything, much to my amazement and amusement. Yet that was not the true crux, that ended up being the crazy tangle of old jeep roads that goes on and on and on. I walked and walked and walked, my brain was swimming inside my head, my body wanted to just stop moving, my eyes were blurred and unfocused. As I kept telling myself, “all suffering ends” and “you will get there if you just keep moving” but it was so hard to overcome in my exhausted sleep deprived state. Eventually I hit the singletrack, this meant I really was only 5-6 miles from the trailhead finish, but I was numb to any excitement, the wonderful positive vibe that pulsed through me was gone, I was bent on the end, there was no joy in the final trail, only the reality of surviving the near misses of hitting rocks, going off trail, tossing myself over the handlebars. Then it was done, I rode around the trailhead parking lot, hoping desperately to see signs of the others, of someone’s significant other, something. I knew better than to expect a welcoming, a throng of spectators, it was 2:30 in the AM, yet it felt so odd to push so hard, to go way beyond my own limits. After hammering for 25+ hours without much of a break and no sleep, and here I was and I had no idea what to do. I was confused, I rode the trail to the highway, I hiked up and started towards Superior, then realized it was so early, I didn’t know if there would be any place to go, at least here in the woods I could curl up and sleep, so I rode back to the trail head, rode in circles, where to sleep, hoping that someone would find me so I could get back to Tucson, I curled up on the ground with all my still wet clothes and slept. No glory here!!!
Prolite Thermarest, SL Ultra Montbell Sleeping Bag, hammock, with water bottles, 32 x 20 gearing, GPS, EOS Princton Tec bike light, Carousel Designs large saddle bag for bag/hammock, dry bag mounted on front of handlebars with thermarest with some cinch cordes. 1/4 webbing to hang hammock.
In the Osprey Talon 22 Bag:
Ability to carry 200 ounces of water (I left Parker with about 100 ounces on my back and both water bottles full), extra bike parts, maps, sunscreen, food (like bars, fig newtons, etc. about 1500 calories to start), first aid kit and medicine, 3 extra tubes, pump, rain jacket, 1 dry bag for clothes, extra short liners for Pearl Izumi Versa shorts, arm/knee warmers, Woolistic zip sweater, extra jersey, SPOT, water tablets, Ipod Nano with classical music, CC/cash/ID, picture of family, Crank Brothers multi-tool, Gerber knife, 4 feet of duct tape wrapped around pump, EOS princeton tec light for helmet, extra batteries for light/GPS, tire lever, patches, cue sheets, and PI touring socks.
A cycling backpack built to take the punishment of a TransAlp race or your day to day commute. Double the capacity of our BD2, the Flink® Link ball joint equipped BC3 features a lightweight frame and allows for natural freedom of movement for the upper body yet still provides optimal load distribution. The BC3 utilizes a high-tech, heavy-duty water proof material (water proofed on both sides), with water resistant zippers, a helmet holder, internal compartments to keep you organized and a sleeve for a hydration bladder. The BC3 can carry your gear on an overnight mountain bike trip or your office clothes and laptop on an everyday commute. Gender specific carrying systems available in two sizes.
Please rate this product: (no login required) (66 votes, average: 3.64 out of 5) Loading ...
This is what I took on my first bikepacking trip ever. I decided to try to take as much as I could on this first voyage and narrow it down once i got out into the wilderness and could make better decisions on what i really needed and what was just luxury. However, Here is a list of what I brought on my first outing.
1 man REI tent, 25 Deg. REI Halo down bag, small 1 1/2 lb. REI thermorest 1/2 size, Smart wool socks/long underwear pants and shirt, 2 freeze dried meals/4 packets instant oatmeal/6 energy bars/1 package tuna, REI Flash 30 day pack w/ camelbak bladder, 2 Nalgene bottles w/ water, snowpeak cook stove (tiny) along w/ 2 cans of snowpeak fuel and a titanium cook pot that everything fits into and also a titanium spork. Trash bags, freezer bags for food and trash, 50 ft. twine to hang all cooking supplies and food from tree. Iphone w/ a movie to watch in my tent:), an emergency first aid kit, down camp pillow, Survival knife, Pitzle headlamp w/ extra batteries, Trek seat bag for bike tools, tubes, parts. Trek bike rack for sleeping bag and food, 3 bandanas, Marmot rain coat and performance waterproof bike pants, synthetic socks 1 pair, light breathable/convertible
Trek
Trek
Campsite
Tent
Bear Creek Campsite
man,bike,tent
Lenny’s Rest
riding jacket performance, Waterproof helmet cover, Colorado Trail guidebook, sunglasses, Waterproof specialized riding gloves, Full face and head cover for riding in cold weather, extra long sleeve synthetic undershirt for insulation, MSR sweetwater water filter, I think that’s it. I know I missed a couple of things but again I am refining this list quite extensively and it is hard to know exactly what I’ll bring on my entire ride of the CT in early July until I get my Frame bag and seat and handlebar bags from Epic Designs. If anyone has any insight into this I’d be happy to have some suggestions or constructive criticism.
I am new to bikepacking. I’ve been backpacking and camping in Colorado since the age of 5, and I am 29 now. I have also been mountain biking since around 15 years old. I don’t know why just recently I decided to merge two of my favorite things to do in this world. I’ve been researching different options for bikepacking and going with a very minimalist route seems to be the way to go. I am having some custom bags made for my Trek by a very nice man who hails from Anchorage, named Eric Parsons of Epic Designs. For the time being though I am utilizing my book rack as a substitute to store my sleeping bag, some food and such. I have had bikepacking on the brain all winter and I had to get out there and try some of the new gear I recently purchased and did so yesterday. I left the waterton canyon trailhead located in sw denver at around two and It was up wards of 72 degrees. I couldn’t have asked for better conditions. Although I found out really fast why you don’t want to have a whole lot weighing down the back of the mtb. I had to really pick up my riding a notch with such a heavy load on my back and with my rack. It took some serious getting used to and is something I will remedy on my next overnight trip on the CT. However, while the grueling upward slopes were tougher than usual, flying down the trail after reaching the top made it all worth while, as it so often does. I also came across quite a few icy patches/sections and had to hike the bike. around 12 miles in to the 16 1/2 mile section, I don’t know about anyone else but I think it’s safe to call in impassible. I hiked the bike for a half mile or so once it started looking too icy and wet to continue. In the back of my mind I hoped that by some kind of miracle I might pop out of the ravine i was in out into the sun’s shining rays and nice dry trails like earlier. To my discontent it didn’t happen and I was forced to turn around and make camp at around mile 9 or 10. I wouldn’t recommend any one try to bike the whole first section just yet. Within a month it will be rideable. The great part though is that everything up until I hit the ice staircases was phenomenal riding and well worth doing. In fact I am going to lighten my load a bit and do it again very soon as long as this beautiful weather holds up for a while.
AVAILABLE APRIL 2009: The NeoAir mattress represents the world’s most advanced engineering in ultralight comfort. Beyond being the lightest air mattress available, we’ve utilized two patent-pending internal technologies, making it up to three times warmer and far more stable than any other uninsulated air mattress available. And when it comes to space in your pack, you’ll appreciate that it’s no bigger than a one-liter water bottle. Revolutionary by design, the gossamer NeoAir mattress makes comfort one less thing you’ll need to compromise when traveling Fast & Light.
°
Ultralight & Compact: Weighs just 14oz. and packs down to the size of a 1-liter water bottle.
°
Unrivaled Warmth: Our patent-pending reflective barrier returns warmth to your body and reduces heat loss to the ground, keeping you three times warmer than any other uninsulated air mattress
°
Sleep Stable: When inflated, patent-pending Triangular Core Matrix technology creates an internal truss system, resulting in the most stable non-self-inflating air mattresses.
°
Lasting Performance: Achieving thermal efficiency without down or fiber insulation means the NeoAir can be inflated directly without the added weight of a pump, or worrying about exhaled moisture wetting insulation and decreasing performance.
Uses:
Large
Regular
Medium
Small
Weight
1 lbs 3 oz/550 g
14 oz/410 g
13 oz/370 g
9 oz/260 g
Rolled Size
11 x 4.5 in/28 x 11 cm
9 x 4.0 in/23 x 10 cm
9 x 4.0 in/23 x 10 cm
9 x 3.3 in/23 x 9 cm
R-Value
2.5
2.5
2.5
2.5
Thickness
2.5 in/6.3 cm
2.5 in/6.3 cm
2.5 in/6.3 cm
2.5 in/6.3 cm
Suggested
Price (U.S.)
$169.95
$149.95
$139.95
$119.95
Please rate this product: (no login required) (39 votes, average: 3.64 out of 5) Loading ...
The Tasmanian trail is a long distance walking/cycling/horse-riding trail linking Devonport and Dover. The total distance is about 480 km, however track deviations have since altered that figure.
Typically, the trail is completed from North to South, since this is the way in which all directions are given in the guidebook, however since my only chance for transport to the trail was to be from the South, then it was decided that this was the better option. Additionally, heading North allowed the more remote areas to be covered first, and the (hopefully) easier riding to be left towards the end.
The guidebook suggests covering one stage per day, or around 30km, however at that rate it would take more than two weeks to complete the whole trail; time which I did not have. As such, the Australia Day long weekend was the longest window of opportunity I had to attempt the Tassie trail. Obviously 3 days is not long enough to cover the whole trail, however I did want to see how much ground could be covered in the time I had. It didn’t matter if I rode 30km or three hundred, as long as I could finish near to a town where transport could be arranged.
As such, Friday night I was fortunate enough to grab a lift with my parents, since they were camping ‘down South’ for a few nights, and with a little persuasion I managed to coerce them into camping near to the start of the trail.
And so it began.
The beginning: Esperance River Campsite.
Saturday morning involved a reasonable start of 7:20am, before which I’d had a few obligatory photos taken, and ensured I had each and every item that I was likely to need on the journey. Before long I was on the trail, leaving Esperance river campsite and heading along well-made fire-roads through the ‘Southern Forests’, as named in the guidebook. Easy navigation and gentle climbs lasted an hour or so, while I continued through the forests, until a little later on I arrived at an intersection at which the nearby trees (and signs) had been logged. Referring to the maps offered little assistance, and I turned off on the gut instinct that this was the right way to go. 15 minutes of constant climbing confirmed my decision, as a Tasmanian Trail marker showed the way. However, soon after I arrived at another intersection without signage; it too had suffered from the recent logging, and again the maps proved useless. I continued on the main trail, rolling downhill for 5 minutes or so, before finding that this road had only recently been made, and was a dead-end used for logging (A quick check on Google Earth post-ride proved that the trail had existed for only a few months, much later than the maps in the guidebooks, which had been created 15-20 years earlier). After less than 2 hours I’d been unsure of my direction twice, and I was beginning to wonder how much time I’d spend riding up and down hills that weren’t part of the trail. And so I began the 10 minute climb up to the last turnoff, and had little choice but to ride and hope there was a trail marker not far away.
Thankfully, there was. And so I continued further, coming across more intersections with both trail names and Tassie trail markers, before travelling through Swearing Bob’s plain over rough stone ledges and around large puddles, all the while the clouds above appeared to be gathering and a storm brewing as a result. Soon after the rain pelted down, while I donned my jacket and continued to pedal. However, shortly after the rain started, a loud clunking noise emanated from the bike every time I’d hit a bump. It became loud enough that I soon had to pay it some attention, and so I had a quick look, hoping not to find anything that was going to force a premature end to the ride. Nothing was visibly wrong, although I had a sneaking suspicion that it was one of the rear shock mounts coming loose, the tightening of which required the only Allen key that I hadn’t packed (Murphy’s Law anyone?).
And so I continued on, unable to stop the noise, and all the while being annoyed at myself for not bringing the crucial Allen key ( I have a rule that if I think about a specific item while packing for the ride, but don’t pack it when I think of it, then I’m guaranteed to forget to pack it and then require it on the ride, and the more often I think about it without packing it, the more seriously I’ll need it; for this particular Allen key I’d thought about it half a dozen times without packing it, and as a result I REALLY needed it). The rain soon turned the 4WD trail into a slippery mudslide, and finding traction on the steep descents and ascents from the creek crossings occasionally proved difficult.
At about this time I was finding out that my jacket wasn’t as waterproof as expected, and so it clung to my arms like a $2 poncho – I was hoping that the bag wrapping my sleeping bag and sleeping clothes was somewhat more resistant. The rain continued on and off, while I continued on wet 4WD trails through more forests, before coming to a clearing and thence an intersection at which I proceeded to turn right, since it seemed the right way to go. Fortuitously I forced myself to stop and check the guidebook, which promptly told me to turn left.
More climbing then ensued, up through farmland and forests, before following more Tassie trail signs, which soon had me in Geeveston (about 2.5 hrs from the start) and then to the highway. Wrong! I knew I should never reach the highway, but had considered the trail markers to be heading in the right direction; however there are many deviations from the actual trail route to allow for easier passage through various sections (the deviations from the actual trail are marked with the same markers as the trail proper, and hence the confusion). A quick turnaround at the highway and a retrace of my steps to the last turnoff followed, at which I chose the only other option, left. I was now sure I was heading in the right direction, and a quick look at the map confirmed my assumption. However the trail soon became rough, and the trail markers noticeably absent, however the map said that the trail followed this path, and there were no other roads to take. Not before long, the trail turned into a rough firebreak, recently bulldozed along a fence-line, all the while I was telling myself that the trail has just been cleared due to lack of use. Steep climbs followed, forcing pushing of the bike, and lifting up and over logs.
Completely lost on a steep and rugged trail near Geeveston. Fallen trees and steep hills meant pushing the bike was the order of the day.
This continued for around 30 minutes, at which point I came across an intersection with an unformed road (again no trail markers), and so I remained on my firebreak ‘trail’. The firebreak soon turned skyward (even more so than before), and I was forced to really dig in to push the bike up the hills. Another 20 minutes of uphill forced me to reconsider my situation, and resign to the fact that I was nowhere near the Tassie trail, so as soon as the firebreak turned left, I turned the bike around and retraced my hard-earned steps, back to the intersection with the unformed road, where I turned and ended up at the edge of a huge cleared paddock on the top of a hill. At this stage I knew I was far from the Tassie trail, but didn’t want to retrace my steps all the way back to Geeveston, so I made a rough estimate of where I was on the map and cut directly across the paddock for a kilometre or two, attempting to find an exit to a road. Unfortunately, there was no road adjacent to the paddock, and I soon jumped the fence into the forests on the other side of the paddock. The forests were clear enough to ride through, albeit slowly, and I soon found myself in the back of a vineyard, at which point I crept through the avenues of vines, trying to find an exit to a nearby road.
A little while later, after quietly riding through the vineyards and then ever-so-quietly riding past the house of the yards, I was on a tar road; at last! A quick look at the map showed I’d deviated from the Tasmanian trail by some distance, but it didn’t matter, I was happy to know where I was again.
From this point it was relatively easy to meet up with the Tassie trail again, so I continued along the road until the next section of Tassie trail, noting on the way the point at which I was meant to have joined the road – I was now back on the Tassie trail proper! However it wasn’t for long, as another wrong turn forced an extended hill climb along another rough firebreak, which turned out to be a return trip back to the first intersection! After spending 30 minutes or so being lost and riding a trail which looped around on itself, I was beginning to get a little frustrated, which is probably a mild understatement. Nevertheless, perseverance paid off and I soon found another trail marker, which had me out of the forests and onto a rocky road through button-grass plains.
A rocky 4WD trail towards Judbury; progress was slow, but trail markers were common and navigation was simple as a result.
An hour or more was spent slowly crawling up the rough trail, all the while the bike groaning with the untraceable noise. This section was relatively uneventful, although the huge vistas over the ranges to the north south and west offered great views, and the dark clouds were a reminder to keep pedalling to more sheltered areas.
Nice vistas abound - this one looking West on the way to Judbury.
Serious rain clouds on the horizon, but flower-lined trails; who could ask for more?
By 2:30pm I had arrived in Judbury, a tiny town on the banks of a wide river, where I refuelled and filled up with water. This was the first real break for the day, and was immediately before the climb up and over the Wellington range; a climb and descent that was likely to take the better part of 3 or 4 hours. Soon after leaving Judbury, the gravel road began its ascent up to 900m; gradually at first, and then becoming far steeper as the road became a trail, and the trail became a 4WD track. Soon the rain did its thing again, and the ride became a walk, as I waded through several knee-deep mud bogs and many more of lesser depth. The rocky, wet climb continued well into the late afternoon; some sections rideable, while others were obligatory ‘pushes’. Nevertheless, eventually, the hill flattened and the trail became rideable, despite large rock sections interspersed with bog-holes and the occasional fallen tree, and even further on, the trail turned downhill, and the half-hour long descent into Lachlan began. This descent followed another rough 4WD trail almost all the way into town, before becoming a tar road for the short cruise to the local park.
Trail? More like river! The climb up and over the Wellington range didn't disappoint in terms of challenges.
The top of the Mt Wellington range proved a haven for 4WD trails – a visit in the car next time?
I’d packed precooked sausages for dinner for Saturday and Sunday nights, and a free gas barbecue at the park afforded a good chance to make them a little more enticing. It was here that one of the local kids and I had a long chat about the Tassie trail and the 4wd track I’d just descended. He also had great stories of previous Tassie trail walkers and riders, and was interested in how long it had taken me to get to Lachlan from Dover. He ogled over my bike and gear for ages, which reminded me of my need for an Allen key, which he happened to have nearby. A quick check of the bolt surprised me, as it wasn’t loose – even if I had brought the right Allen key it wouldn’t have helped earlier! After a quick-ish meal, we raced to the local bridge, where I thanked him for his help and continued on my way into New Norfolk, however this wasn’t before I noticed a flat front tyre, which had a slow leak, so I reinflated it and told myself I’d repair it in the morning.
By this time it was well after 7pm, and the sun was getting low; a quick stop for water at a park in New Norfolk and I continued on my way up into the Black Hills, where I found a quiet spot overlooking the valley and promptly laid out my bivy bag, after a hard day of 111kms and 14hrs.
Campsite one - minimal gear proved quick in terms of unpacking and unpacking each night, as well as maximising the distance covered each day.
A long, albeit intermittent, sleep saw me to 8am the next morning, when I awoke looking over the valley towards New Norfolk. A less-than-speedy packup and breakfast took almost an hour, before I began walking up the Black Hills road. A few minutes later I was back on the bike, slowly grinding up to the top of the hills, before a lengthy dirt-road descent towards Bushy Park, where a Chicko + sausage roll really hit the spot.
I didn’t hang around long, before heading to Glenora and thence followed the trail through a long paddock; the route depicted by “turn left at the large tree” and “descend until you see a fence on your left”, proved no hassle and I was soon on Meadowbank road, where I filled up at a local creek, and continued on as the day heated up. A few kilometres down Meadowbank road brought me to the next (well-defined) turnoff which was to take me on an extended journey though local paddocks and forests.
Farm trails near Glenora.
A climb for approximately 20 minutes along a rough bush trail ended with a huge cleared paddock overlooking the local surrounds, and continued with great vistas and well signposted turnoffs through forests and paddocks for an hour or so.
Climbing through paddocks and hopping fences was common.
Bike setup
A nice vista looking back towards Glenora
Bicyclist and Bicycle - atop a rise after Glenora.
Open fields with isolated trail markers offer the authentic epic feel.
At this point the trail intersected with Ellendale road, where a lengthy tar road section was a welcome change to the rougher bush tracks of earlier in the day. This tar road took me through Ellendale, and further on towards Ouse, where a turn into one of the local forests along bush trails soon had me pushing up sandy 4WD trails between huge pines.
Sandy singletrack on the way to Ouse.
Thankfully I was still on the Tassie trail, as confirmed by the markers on trail-side trees; however it wasn’t long before I was soon lost again. This time I’d seemingly deviated from the trail somewhere in the forest and had now arrived at an intersection. Again, the map proved of little use when I couldn’t determine where I was on the map – local landmarks didn’t help. So I turned right, thinking that was the right direction, but after a kilometre or so I realised it wasn’t and turned back to the intersection. I then tried left, which I followed for half a kilometre, before realising that this direction didn’t seem right either, so I then returned to the intersection and took the original turn to the right, which I followed for kilometres over rough corrugations, before arriving at Meadowbank Lake. What!??! A quick check of the map confirmed my suspicions that I was now a long way off track, and had headed south-east approximately 10km more than I should have. Nevertheless, I now knew where I was, and made good time along the tar road into Ouse, where a Chicko roll and drink again worked wonders.
By this time it was about 4:30pm, and so I continued on up the Victoria Valley road heading towards Victoria Falls. A tar road, which turned into a dirt road, followed by a dirt trail, and finally a 4WD track, climbed several hundred metres through forests over about 25km, and ended at the Falls, which are well worth checking out. A quick dinner at the local picnic area of sausage rolls and sausages recharged the legs and encouraged me to complete one last section before nightfall.
This section was all on well-made dirt roads, allowing reasonable speed and some rest from the bumps; as a result, it took little time to reach Dee Lagoon, which offered great camping, but wasn’t quite as far as I wanted to make it for the night. Further along I passed though Dee township – a tiny road-side town in the middle of a huge forest – and then on towards BrontePark.
Dee Lagoon - a welcome sight high in the mountains.
A few kilometres before BrontePark, I found a great little dell not far off the road, offering soft grass and being well covered by trees. I quickly laid out my gear and started a small fire to dry my wet shoes. Soon after a car came past but didn’t slow, so I must have been invisible to the road users, or so I thought. Not long after, when it was almost pitch black, another car came up the road, and then slowed not far from where I was camped, before turning around and slowly coming back to the roadside nearest the camp, where it promptly stopped. Voices were then heard as two people got out of the car and started pushing through the brush near the camp. When they came closer I could begin to hear what they were saying, “Oh geez, there’s someone camped in here!” at which point they burst into the tiny clearing where I was camped, in almost pitch blackness, and I told them what I was up to. The fire had been reported by the first car that had passed, and the second car, with farmer and son, had driven to see what was going on. I said that I’d put it out as soon as I’d dried the clothes, at which they commented that I should just make sure it’s out before I left in the morning. I quickly dispersed the fire and headed to bed, which was far more comfortable than the previous night.
Campsite two and the noteworthy fire.
Another relaxed start on Monday morning was the result of another long sleep, and it was about 8:30 by the time I got away. A 20 minute ride into Bronte Park was enough to get the legs working again, before heading west towards Pine Tier along various tracks and across green paddocks.
Flume #1 just after Bronte Park.
Follow your instincts, there’s a trail here somewhere!
A lake near Pine Tier - campers were aplenty due to the long weekend.
Great vistas of the local lakes and nearby hills were a nice reward for the efforts. However, significant climbing on fireroads followed, before seemingly becoming lost again for 20 minutes or so. The trail then descended onto the dirt Marlborough highway, for the long trip to Miena, with many long hills and plenty of traffic, amongst the always impressive amount of roadkill – not so nice when breathing heavily. An hour and a half to cover only 20 kms on the highway hinted that I was really beginning to tire, or that the road was steep, I’m not sure which.
The ‘Dashboard’ – such a system worked well, allowing quick access to the camera, and crucial distance data for navigation.
However, just before midday I reached Miena for another Chicko roll and pie, before heading through town and on towards Tod’s corner. From Tod’s corner my exposure to the sun really increased, and my sunburn was beginning to show, and now that I was following a flume, the shade was minimal. The flume trail continued for some time, all the while staying relatively flat and smooth – some good speed was made through this section.
Flume trail towards Arthur's Lake
The flume road then ended at Arthur’s lake, a popular fishing location offering one of the most rugged tracks of the Tassie trail. Along this section, the trail follows a powerlines road, made from large stones, and requires some effort to traverse, despite being relatively flat. A short rest for a tasty pack of 2-min noodles was enough before the 25 km road section to Poatina, however the extreme sunburn which I was now suffering from was so painful that I required frequent rests in the shade in order to keep going (4 days later my left leg is still swollen from sunburn!). Nevertheless, the highway section was uneventful, and the descent into Poatina enjoyable, as I dropped close to 1000m in one long tar-road descent. I made it to Poatina just before 4pm, where I rested in the shade for a couple of hours before meeting Mum and Dad for the trip home. All in all, 332kms were covered in the three days; still 145km short of the entire Tasmanian trail, however I was never really expecting to be able to ride the entire trail in 3 days, and was happy that I had seen as many new sights, and visited as many new places, as I had. All in all, a fantastic adventure.
The TransAndalus trail is a route designed specifically for mountain bikes, covering the southernmost region of Spain, Andalusia. Andalusia is a largely natural region, known for many scenic attractions.
Route description
The route does a complete circle through Andalusia, about 2000 kilometers in total.
Trail surface is largely dirt roads, with about 30% paved. 10% of the overall route is singletrack or beach trails. Mostly the travel is through rural countryside, and opportunities to stay in inexpensive hotels (as well as campgrounds) are available in most sections.
GPS Data
See www.transandalus.org for GPS and KML files. We are working on getting a complete track of the route for mapping and statistics and will post here when available.
The Tasmanian Trail covers the length of the island of Tasmania, from south to north (Devonport to Dover). Traversing a range of environments, from forests to farmlands, highland plateaus and past the bridges of some of Australia’s oldest towns, the Tasmanian Trail will take you on a journey rich in cultural and natural heritage.
100% of the trail is open to bikepackers, yet it is not designed solely for cyclists. It is a true multi-use long distance trail, designed with hikers, cyclists and equestrians in mind.
Route details
Those wishing to ride the trail are advised to obtain the official guidebook (details here). It fully describes the main route as well as potential alternates for bicycles.
The trail surface is primarily dirt roads and old tracks that are closed to vehicles. The guidebook warns against steep and rough conditions, and says that cyclists should be prepared to push their bikes.
Ultra lightweight sleeping bag by Peter Hutchinson Design in the UK.
Down Quality: 900
Outer Fabric: MX
Weight (g): 345
Weight (oz): 12
Typical Operating Temperature (°C)*: 8
Typical Operating Temperature (°F)*: 46
Insulation type: 900 down
Colour: Black
Construction: Boxed-wall (no stitch through seams)
For my stag (bachelor) party last year thought I would do something different and ride the length of Wales with a couple of friends and the best man over 4 days. I started gathering kit and trying to figure out how to carry it all and what I really needed. Turns out I could have left some stuff, brought some stuff I forgot and cut back others. In the end Tym’s bust hand (complete with wires holding it together) meant that Matt, Sheldon and me went from Tym’s place in Shrewsbury rather than Chester and kept (mainly) to country lanes as Matt’s Audax bike might not have been great on mountain tracks!
I used my Carousel Design Works frame bag, a Blackburn rack and two Alpkit.com dry bags lashed to the bars and rack to carry stuff. I also had my ancient Source hydration pack for water and a few bits even though I hate riding with stuff on my back.
Bars: 8L dry bag, Alpkit Hunkka bivvi bag and Highlander 1.5 season down bag (Ebay special). Lightweight poncho / tarp with paracord ties and 6 steel pegs. 3x straps to tie it on.
Frame bag: CDW with 2 compartments and zip-out divider. Waterproof lower zip, streatch gusset on upper. Amazing bit of kit.
Lower pocket: 1x 29er tube, Topeak pocketrocket pump, Topeak Hexus tool, Leatherman folding knife, Rock N Roll chain oil, rag, spare bolts, patch kit, tyre boot and spokes. 4x Lithium AA’s. Pretty much your normal stuff.
Upper pocket: First aid kit, snacks (too many), maps, sun cream, insect repellant, Assos “minty arse lard”, multi use soap, toothbrush and paste. Coffee press / mug combo with 100g of java. Small coil lock (OK for beer garden security!)
Rack: 13L dry bag with 3/4 self-inflating sleeping mat rolled to give bag shape and protect stuff. Cycling shorts, baggy shorts, merino boxers, merino socks, merino T shirt. Ti 1L mug and lid, Coleman micro gas stove and 100g cartridge, lighter, bin bags, scouring pad, spork, Ti+Rose wood Chopsticks (Alpkit again!) Toilet paper.
Bungee Net: on the top of the bag for extra food (in orange silnylon bag in photo, other is rubbish awaiting a bin) and drying shorts / tops on the move. Held on with micro carabinas.
Source Hydropack: 2L H2O, Montane Velocity jacket, Montane superlight rain trousers, glasses case (and regular glasses, bag and cleaner) Rico GR-D camera and spare battery, wallet and keys.
I would junk the coffee mug / press and pack a towel next time. A Wingnut Gear pack is also looking good for extra clothes and stuff I need on the move, plus the low carry position should make it better on my shoulders and neck. Less snacks as we were never far from a shop or cafe (love this tiny over crowded island!) and 2kg of “just in case” food is crazy! Everything else worked really well, despite me deleting the GPS track on day 1 and relying on the much drawn over paper maps.
The picture above is from a recent bikepacking trip to the local mountains. Overnight lows were in the high 20’s and daytime highs were in the mid 60’s. There were Santa Ana winds which were predicted to die down during day 1, but ended up blowing for the entire trip at a constant 20 mph and getting gustier throughout the day. Most of the items used were things I already owned (I have done alot of lightweight backpacking, climbing and mountaineering) but the bike bags and Osprey Pack were new for the purpose of bikepacking. Basically this seems like a set up that would take me through most 3 season conditions.
I learned a lot about what works by reading about other peoples set ups and through my experiences on this first trip. I hope this list will help others, but my true motivation for posting is to get feedback from others on how to further lighten my set up and streamline my packing. My goal is to tour the complete Colorado trail this summer with a light set up that is fun to ride with, but still provides adequate comfort and safety in camp. (i.e. I’m not looking to strip it down to a race kit) Since the time of this first trip I have changed a few things in pursuit of lightening up and welcome your thoughts, ideas, and feedback. I have posted my list following the conventions commonly used over on Backpackinglight.com to see where all the weight comes from and to make it easy to suggest lighter individual items and where to get rid of things all together.
Riding Clothes: Typically a pair of bike shorts and a short sleeved synthetic t-shirt. I currently own a pair of SIDI’s but am looking for something more comfortable to walk in.
Bike: Ellsworth Evolve, full suspension 29er, size large.
Bikepacking Gear List
Sleeping and Shelter
Mtn Hardware Phantom 32*
26.7 oz
6’6″ Length
Adventure Medical kits Emergency Bivy
6.8 oz
Adds an estimated 10* to sleeping bag, provides extra waterproofness under tarp and serves as groundsheet
Thermarest“Ultralight”1″ thick x 3/4torso length
16.2 oz
Older pad, not so ultralight, but more compact than the foam pad I use for backpacking.
Sil Nylon Tarp 8.5′ x5′
7 oz
Includes guylines
Stakes
2.3 oz
6 ti stakes, 2 Easton Nano stakes
SLEEPING AND SHELTER TOTAL
59 oz
3 lbs 11oz
Cooking and Hydration
1 Liter Bottle
1.5 oz
Recycled widemouth Aquafina Bottle
2 Liter Platypus water bag with hose
4 oz
Lexan Spoon
.4 oz
Snowpeak 900 Ti Pot with lid
5 oz
Whitebox alcohol Stove
2 oz
Includes windscreen. Switched from canister due to lighter weight, wider availability of fuel, and no more partial canisters to keep track of at home.
5 fl oz of denatured alcohol
5 oz
Includes recycled 8 oz water bottle with squirt top for storage
Small lighter
.4 oz
COOKING AND HYDRATION TOTAL
18.3 oz
1 lb 2.3 oz
Clothing Carried
Patagonia Puff Vest
11.7 oz
MontbellWind Shirt
6.4 oz
Montbell Wind Pants
6 oz
Marmot Precip rain jacket
12.8oz
Pearl Izumi Leg Warmers
4.8 oz
Pearl Izumi Arm Warmers
2.5 oz
Smartwool adrenaline socks
1.7 oz
Mtn Hardware Fleece Hat
1 oz
Sil Nylon Dry sack
1.2 oz
CLOTHING CARRIED TOTAL
48.1 oz
3 lbs 1 oz
Packing
Sea To Summit 8 L Dry Sack
2 oz
Strapped to seat with sleeping bag and tarp
Sea To Summit 4 L Dry Sack
1.5 oz
Strapped to bars with Thermarest and bivy
Jandd Frame Bag
6.1 oz
Flipped end to end, fits large frame after moving two sewn on straps.Carries small heavy items and bike tools.
Osprey Talon 22
27 oz
Carries food,cookpot, and clothing
Lash straps (4)
2oz
PACKING TOTAL
38.6 oz
2 lbs 6.6 oz
Since the time of the picture I have removed the handle bar bag and am debating the need for the tank bag.
Other
Water treatment
3 oz
Aqua Mira
Toothbrush and paste
2 oz
Black Diamond Spot headlamp
3 oz
Includes lithium batteries and small homemade Velcro strap for attaching to helmet.Good for dirt roads, marginal on rocky singletrack
Sun Block
2.5 oz
Glasses, contacts, solution in crush proof case
5 oz
Chamois Creme
2 oz
1st aid/ Emergency Kit
4 oz
Cuts, scrapes, wound cleaning, Ibuprofen, fire starter, whistle, waterproof matches
Lip Balm
.5 oz
Mosquito Headnet with metal loop
1.5 oz
Compass
1.6oz
Maps
2 oz
Weight varies by trip
Cannon Powershot Camera
11.6 oz
Heavy but nice features
OTHER TOTAL
38.7 oz
2 lbs 6.7 oz
Bike Tools and Parts
Crank Brothers Mini Pump
3.4 oz
29″ x 2″ Tubes (2)
15.1 oz
Shockingly heavy!
Park CT-5 Chain Tool
2.6 oz
Perhaps combine with a small multi tool
Park Mini Multi tool
3.9 oz
Perhaps replace with one that has a small but functionalchain tool
Tire lever with 1 yd of duct tape wrapped around it
1 oz
Rock Shox Shock Pump
7 oz
2 fl oz Stans Sealent
2 oz
Parts Kit
1.3 oz
Spare bolts, tire boot, tire patches, derailleur hanger, quick link
The Arrow, a roughly 500 mile Route from Telluride Colorado to Boulder Utah is near completion after five years of research and riding. Combined with the San Juan Hut Systems’ Telluride to Moab route this ride provides a six day break in period. At Moab the route comes into its own as one enters Lockhart basin which is adjacent to the White Rim and very remote. From Lockhart the route continues over the Abajos, down along Woodenshoe and Dark canyons to Hite. By the fall of 2009 the final legs from Hite over the Henry Mountains to Boulder or Torrey will have been completed.
Route Genesis
My three hardcore bike riding children are co-creators of this route which we have ridden self supported with a combination of a mountain tandem and various 20″ to 26″ mountain bikes. Once completed I and several friends will ride it point to point with a GPS. Look in the future to see the guide book and/or map of the “Arrow”. This route is extremely remote, after Moab there is no reliable potable water, and therefore it must be carried or cached before the ride, nor are there any towns or cell reception. Due to the crossing of three mountain ranges and the summer time temps. of the desert this route is only passable in the fall and maybe in the spring after a dry snow year. This route is being created in the hopes there will be more independently created routes with their own names and legend.
For more info contact: Will Kelley – wilburnicus AT yahoo (d o t) com
I just discovered this website and have become rather addicted to it over the last month or so.I have been backpacking and mountaineering all my life and spent several years working as an Outward Bound instructor where I got to spend 200 + days a year outside.Recently I have had far fewer nights outside and have taken up mountain biking. Lately I have been kicking around the idea of combining the two and going bikepacking. Reading this site motivated me to give it a try.
So this past weekend I took my first trip and it was great.Extremely challenging, but really fun.I spent Friday night sorting through backpacking gear and figuring out how to strap it to the frame.A trip to the bike shop for a Jandd frame bag and a handlebar bag and I had a system that seemed like it would work.Saturday morning I got up early and headed for the local mountains with a plan to use dirt roads to link together four very good local mountain biking spots, including Noble Canyon which was recently listed as an IMBA epic.On the way to the trailhead I stopped at the ranger station to look into what permits I would need.Permits were easy to obtain, but the ranger told me that much of the route I had pieced together would take me through private land.(no way to tell using the map I had)They were very helpful, assisting me in rerouting the connections between a couple of the areas I knew I wanted to include.A short drive farther and I was at the trailhead, loaded up and ready to ride by 10 am.
My set up: Ellsworth 29er, Jandd frame bag, REI handlebar bag, Waterproof stuff sacks lashed to seat and bars
As light and well balanced as my setup seemed to me, it quickly became apparent that bikepacking is a little different than normal trailriding.My trip started with a tough climb up the Kearnan cycle trail that I can mostly clean when riding unloaded, although I usually dab a few times.Today it was 50% hike a bike.The trail was steep and rocky.The rockiest spots were very chewed up by motorcycles, as this is one of the few legal OHV areas near San Diego. Topping out on this climb with good views of Lake Morena, the trail joined the dirt Bear Valley Road and leveled out for a little while, and the wind hit me full in the face at a consistent 20mph.
Lake Morena From near the top of the first HAB climb
After rolling along the road for a while the road began some steeper but rideable climbs followed by a fun, rocky descent into the small town of Pine Valley.During this stretch the only people I saw were four separate border patrol vehicles.
Looking towards Pine Valley beford descending for the first time
Once in Pine Valley I stopped for lunch and then followed Old Highway 80 west through the town of Guatay and over to the junction with Highway 79.A short ride down 79 and I was back on dirt following the Merrigan Fire road into Cuyamaca Rancho State Park.The road was sandy and pock marked with holes from the many horses that use this piece of trail and the wind was still blowing just as hard and getting more gusty.Soon this fire road narrowed into sheltered single track and became much more fun to ride as it paralleled highway 79, heading north up into the state park.
The trail through Cuyamaca Rancho State Park
I had planned to camp at Green Valley falls campground, about 35 miles into my ride because I had assumed it would have reliable water.When I reached the campground it was closed and no one was around.Fortunately the water had not been shut off and I quickly found a faucet and topped off my water.I decided not to camp here because I was not sure why it had been closed and what the legality of camping in a closed campground might be.So I continued on, aiming for Paso Picacho, another campground farther up the trail.I was still feeling strong but was a little nervous about getting to camp as this would put me near 50 miles for the day, much of which was climbing, and the wind was definitely beating me up.However, continuing on would also give me a chance to ride a very nice rolling descent into camp on a very well constructed trail, through one of my favorite parts of the park near Lake Cuyamaca.
View Of Lake Cuyamaca
Excellent singletrack near Lake Cuyamaca
About 15 minutes after total darkness fell I rolled into camp by headlamp having completed 53 miles for the day with a lot of climbing.I quickly rolled out my sleeping bag, made dinner and passed out.The winds blew steadily all night but I slept soundly unconcerned with when I would wake up, knowing that I had ridden about 15 miles further on day one then planned, thus creating the possibility of shortening day 2.
Campsite from night one
The next morning I awoke to find out I was the only one in the campground. I took my time eating breakfast, studying the maps for the days route, and packing up, in the hope that it would be a little warmer by the time I started pedaling as I knew the first part was mostly a rolling descent. I did spend some time trying to dial in my suspension for riding with a load. This is something I had not considered before yesterday, and I never really succeeded in getting it where I wanted it throughout the trip. The ride started with a short climb that was much steeper than I remembered from past day trips, but eventually it leveled off and began descending. Much of the state park is centered around a large valley that highway 79 passes through. The end of yesterdays ride climbed up the valley on the eastern side, along a west facing slope. This morning began by descending the same valley but on the west side and on an east facing slope. As a result it was quite cold in the morning shadows and I found extensive snow on the trail that was very unrideable for me. It was not deep but had a very uneven surface from people and horses walking over it and leaving deep postholes. It was also just about firm enough for me to float on top of, but would occasionally soften just enough to allow me to break through the surface crust very unexpectedly. Being from San Diego this was a bit of a novelty that soon wore off. There were also quite a few down trees as a result of fires a couple of years ago and a recent Santa Ana (strong local winds). What I had thought would be an enjoyable cruise this morning became a lot of work between getting through the snow and down trees.
Snowy trail and downed tree
More snow along the trail on the morning of Day 2
Soon I had lost some elevation and the trail opened up, becoming snow free again.At this point I did a small amount of backtracking (1-2 miles) over trails I had ridden the day before in order to arrive at the fire road up Oakzanita Peak.I found this to be an enjoyable, well graded climb, even though I felt I should be able to push a bigger gear than I was most of the way.After reaching the saddle near the summit my trail turned east but I took the short side trip to the summit, only to discover the trail became much steeper for the final PUSH.The views from the peak and the return trip to the saddle made this a worthwhile diversion.The next part of the day was mostly rolling terrain through one of the more remote parts of the state park.At one point I found myself in a race with a herd of deer that I startled as I came swooping through a turn.They were on the inside of the turn and unfortunately chose to race off across the field towards where they would soon intersect the road at the far side of the turn.This bend in the road was just long enough, steep enough and smooth enough that if I would have stomped on the pedals a bit more I could have met the deer on the far side of the turn.As it was I decided to back off and let them dash across the trail a few yards ahead of me at full speed.
Near the park boundary looking at the back of Oakzanita Peak
Eventually the trail exited the state park and headed into the Laguna Mountain Recreation Area.The trails through this part were definitely narrower, more overgrown and a little harder to follow but still very rideable.It just meant I had to look around a little more in order to keep from losing the trail.The transition from state park to recreation area was also confusing due to the trail signs and maps because several trails in the area change names as they cross this human created boundary.After a fun descent along a fire road that is quickly being reclaimed by the forest, I arrived at the base of the Indian Creek Climb, which is familiar territory for me as it is the way I usually climb to the top of Noble Canyon, one of the better rides in San Diego County.
Ther lower Part of the Indian Creek Trail from above
I debated riding some unknown fireroads to avoid the steep technical climb on the Indian Creek trail, but in the end decided I would suck it up and try to ride this climb.I was apprehensive because this is a tough climb even without a load and I had been struggling on many climbs so far this trip.Once on the trail, I was glad I had picked this route as I felt very strong and was cleaning most of the rockier parts despite the load.Soon I found myself not worrying about pacing, but determined to ride everything on this climb.As it turned out, I only had to walk two short stretches that I usually walk even without the extra weight.At the top of the climb I would normally descend off of Champagne Pass to join the Noble canyon trail.Today I turned left and continued out to Pioneer Mail Picnic Area along Sunrise highway.
The upper part of the Indian Creek Trail from just below Champagne Pass
The trail to Pioneer Mail was really fun, ridgeline singletrack with small rollers that allowed a little air time and it was all new trail to me.Once on Sunrise Highway I turned right and continued to the Upper Noble Canyon trailhead where I picked up the connector trail to the Big Laguna Meadow Loop.This is a smooth easy trail along a large, scenic meadow with several fun trails that drop down into the meadow on narrow single track with many turns that seem perfectly built for bikes.
Trail through Big Laguna Meadow
The nice part of this trail for me today is that I was never very far from my intended campsite at Laguna Campground and could therefore choose to head to camp anytime I wanted or just continue riding the many trails around the meadow.After completing the main loop and two of the descents into the meadow I headed over to the campground and settled into a site for the night.Again, I was the only one in the campground.I had logged a little over 54 miles of mostly single track for the day.I was glad I had pushed on yesterday and rode that extra 15 miles so that I had the time and energy today to enjoy the trails around Big Laguna Meadow that I may have otherwise skipped.
Wide view of Big Laguna Meadow and its seasonal lake
Over night the lows dropped into the 20’s and the morning was quite cold.As I was lying in my bag debating how I wanted to get myself back to the truck today, I had a strange experience.It was about 6 am when a grey passenger van, with government license plates pulls up and 10 guys in full camouflage and face masks jump out and jog off in multiple directions into the woods. As soon as the last person had disappeared from view a second van pulled up and 10 more camouflaged people jump out and follow a similar routine.Not sure what was happening, I decided to get packed up and head down the trail.
Closer view of seasonal lake while on my way back to Noble Canyon
I was really looking forward to today as it starts off on a long descent down the Noble Canyon trail that at times is rocky and technical and at others is smooth, swoopy, and very fast.After only a few moments on the trail I saw one of the camouflaged men sitting on the side of the trail near where I would soon pass by.As I approached I stopped and asked what was going on.As it turns out he was part of the Navy and trying to qualify for a SEAL team.There were a total of 60people out in the mountains for Navigation training this morning. Soon after passing him the fun really began on the descent down Noble Canyon.After the initial smooth, fast, upper portion of the trail I began to grow strangely apprehensive in some of the rockier and more technical stretches.Part of me was thinking this was a good thing, as I was truly in a remote area, alone and riding over some potentially dangerous obstacles.Another part of me was very frustrated with my lack of commitment to obstacles that I can normally ride and was afraid that this would eventually cause an accident if I did not start committing more completely to some of the tougher lines.At one point while riding through a sustained, steep rock garden with numerous small drops and squared off rocks I lost my nerve and grabbed way to much front brake while jerking the wheel to the side.Fortunately this did not send me over the bars, but it did break the seal between my tubeless tire and the rim, causing most of the air to burp out.Thankfully this small frustration helped me get my head together and the rest of the descent flowed much more fluidly.
A rocky patch along the Noble Canyon Trail
Another rock patch, but by now I had my confidence back
At the bottom of Noble Canyon I was only a short distance from returning to the town of Pine Valley and would have to choose between the efficiency of pavement and the fun of dirt but at the price of a steep opening climb.After a short food break, I chose the pavement and made great time through town, along Old Highway 80, and down Buckman Springs Road.It was during this stretch where it became apparent why the first day had been so hard. As I flew down the road at an average speed of 27 mph, I was rapidly giving away all of the elevation that I had steadily gained during that first day.In fact I was eating up the miles so quickly that I was going to be back at the car sooner than I really wanted to.So after a short map check I turned on to an unnamed dirt road and climbed back onto Bear Valley Road, the same road I had ridden early on the first day.The advantage of this was that it took me to the top of the rocky Kearnan Cylcle trail that I had hiked up to begin the trip.
This fun descent went quickly and I was back at the truck by 11 am with about 25 miles completed for the day.I ate the rest of my food and then headed off for a trip around the trails of Lake Morena in order to extend my day of riding and hit up some quality single track that I do not get out to ride often enough during the year. Unfortunately I also left the camera sitting in the truck after lunch, so no photos for the end of the trip. After climbing up to Four Corners along Stokes Valley Road, I dropped down Wrangler trail, climbed to Bronco Flats, then out Gunslinger and back onto Corral Canyon road.When I reached Corral Canyon Camp I cut through the campground and joined the Corral Trail back to Four Corners.I decided to skip the loop around and over Mt Pinos and chose to descend another piece of the Kearnan Cycle trail back to the truck.Upon reaching the truck the cycling computer was just ticking over 50 miles for the day.
All in all this was a great introduction to bikepacking and I will be back out soon. The trip measured at 157 miles on my bike computer with a lot of climbing on day one and a lot of descending on day 3. All of it was on dirt with the exception of about 12 miles of pavement. I would estimate the dirt sections were about 50% singletrack and 50% dirt roads, most of which are closed to motor vehicles. Overall the trails were very rideable and although I walked parts of several climbs and dabbed my way through parts of Noble Canyon, I would not be suprised if a strong, fit rider could ride every inch of the trail. I have yet to embrace a GPS unit so do not have exact information for this trip but have given many place names throughout this report so that any one with a set of topo maps or a forest service map (recomended for navigating private property issues) could piece it together on their own.
I especially liked the freedom to ride as late as I wanted into the evening knowing that if I didn’t reach my destination I could make camp wherever I was.If I became overwhelmingly exhausted I could stop and recover for as long as I needed.If I was enjoying the evening and wanted to keep pedaling, I could just keep on riding.It was a great sense of freedom.I also learned a lot about my set up and what worked and what didn’t.I loved most of the bags and packs I used.The only notable exception was a handlebar map bag that bounced around continuously, would dump all of its contents no matter how carefully I opened it, and which obscured my view of rocks when trying to pick my way slowly, with some finesse, through technical stretches that put a premium on following a good line.I also believe that I can get this set up somewhat lighter, with more of the weight on the bike.I hope to post up more info in the set up section soon to hear some ideas and feed back towards this end.I also know this trip would not have gone half as smoothly as it did if not for the pictures, ideas, and discussions on this site.This is a great resource and already has me planning for a trip along the Colorado Trail this summer.
A precision fork and shock pump with a carbonfaced dial gauge for accurate inflation. A bleeder valve and Pressure-Rite™ connector makes setting proper pressures easy and eliminates air loss when disconnecting.
Added Features Rotating Hose
Optional Hard Shell Case
Size (L x W x H) 21.5 x 4.3 x 4.5 cm (8.5” x 1.7” x 1.8”)
Pressure Tuning Air Release Button
Head Pressure-Rite Shock Valve
Handle Plastic/Kraton
Gauge Analog
Capacity 300 psi/ 20.7 bar
Barrel Aluminum
Weight 170 g / 0.37 lb
Art No. TPSMB-DX
A cassette lockring tool is handy to have a long, I have had a cassette loosen up during a ride. Regular ones are heavy and require a heavy wrench to use.
Here are two that are tiny and do not use a wrench.
Here is the start of my new bike, built with bikepacking in mind. I’ll start by listing my requirements for a bikepacking bike, comment on these would be interesting.
durability – obviously a ‘packing bike is subjected to higher loads and will be used for several days in a row, so this is paramount.
comfort and control – a backpack makes cockpit positioning more critical and the extra weight makes impacts harder. It is also less easy to control your body and bike with higher center of gravity.
low rolling resistance – the goal is to cover some ground after all, especially on sand and rocky terrain.
efficient pedaling – it’s hard enough work already.
stiff frame, fork and wheels – for better control with a heavier load
low weight – there is enough extra weight in the camping gear and food. Also bikepacking rides have a larger proportion of hike-a-bikes than normal rides.
I addressed these needs with the following choices (budget contraints were in effect):
29er: Low rolling resistance including through sand and better rolling over rocks and holes at low speeds than a suspension 26er, more control.
100mm travel full suspension bike with platform damping and low BB height: Provides control at higher speeds, as well as comfort without sacrificing pedaling efficiency, makes it easy to get on and off the bike.
Replaced stock fork for longer travel through axle fork: with the new offset this yields a similar trail number, stable enough at speed blasting into the unknown but quick enough for easy climbing. Extra travel yields more control at high speeds. I would have liked a travel adjustable fork but supply and budget issues ruled out the Reba U-turn. Through axle stiffens up the front and adds durability (though I don’t know of many QR forks breaking).
Stan’s Arch rims with butted spokes on Hope hubs, 6 cogs on singlespead rear hub: tubeless rims for less rolling resistance, less flats and more traction, fairly ligh and tough. Dishless wheels front and rear for max strength and stiffness without extra weight or cost. Bolt-on rear and though axle front for more stiffness and reliability. Quick engagement rear hub for ‘ratcheting’ in rocky sections. Would have used a lighter rim front than rear if available at the time.
High sweep Salsa bar with bar ends and Ergon grips: for ergonomics. I only ever use lock-on grips for safety and ease of adjustment.
Specialzied Command Post adjustable seatpost: More control on descents and in cornering, more endurance on climbs the best upgrade to any bike!
180 mm cranks with bash: to keep the weight a bit more forward with my freakishly long legs and to be able to just roll over anything.
Long stem: keeps us tall folks from having all the weight over the rear of the bike.
Juicy Seven brakes, 8″ front and 7″ rear: For the same feel you need a larger rotor on a 29″ wheel. Also larger rotors do better at heat dissipation, improving safety on long descents with a heavy load.
Armadillo Elite tire: super durable but reasonable weight.
Cut full for effective layering and utilizing the comfort of 3-layer waterproof technology the all-purpose Particle Jacket is an incredible value. Adjustment at the hood and hem, core vent pockets, articulated elbows, and subtle styling have you fully prepared for adventure: urban or backcountry.
This multi-activity jacket has advanced ventilation features providing high performance in the widest range of activities. Climbing and cycle friendly, the Vasco offers intelligent design combined with a contemporary look.
Technical Information
* Less prone to abrasion or damage through reversed zips. Front zip provides ‘two-phase’ venting option.
* Fully adjustable, wired and roll-away/ detachable low profile hood with multi-option collar storage.
* Maximum freedom of movement and increased comfort in the shoulder and arm area provided by articulated shoulders and sleeves.
* Less flap and weight through reduced arm volume.
* Adjustable venting and temperature control, with no restriction to movement or comfort through our upper arm vents.
* Further temperature control and weather protection from our multi-adjust, low bulk cuff design which also allows sleeves to be rolled up for cooling.
* Excellent weather protection in all conditions from our 2” drip skirt and scooped tail.
* Single-handed hem drawcord pulls help to eliminate rucking when load carrying and to retain body warmth when required.
* Reflective piping front, back and sides.
* Single-handed ‘on the move’ cuff adjustment provided by the ‘BiteTab’ closure.
* Adjustable back venting.
* Two handwarming/storage chest pockets, zipped with hook and loop secure flaps.
Showers Pass Rain Pants are cut for wearing over other clothing – whether tights or commuter/street clothes. We have tested them in all-day rain storms and stayed dry. They have enough knee flex to use for other sports, such as Nordic skiing, horseback riding, or hiking.
These rain pants use a medium-weight waterproof, breathable 2.5 layer fabric, that will withstand the stresses of daily commuting or cycle touring. In our experience, rain pants can get hot and sweaty if there is no active ventilation provided. Based on substantial field testing (riding in the rain – its a job, but someone has to do it) we have engineered effective vents that won’t let rain in.
Vents are in two places: the knee and at the upper waist. We have constructed an articulated knee, sort of like a shingle, that uses a sturdy lycra panel to provide lower leg ventilation and eliminates binding when pedaling. The vertical side pockets (with zipper closure) have a mesh liner, providing ventilation when the pockets are open. These four vents (two knees, two pockets) effectively prevent sweat buildup during hard efforts, like doing a long climb.
Additional features:
* Highest quality 3M reflective tape for night-time riding.
* Elastic back and velcro waist closures (allows wide range of adjustment).
* Ankle zippers so you can put on without removing shoes.
* Double velcro ankle closure prevents chainring snags.
* Fully taped seams to keep the rain out.
Size medium weighs about 12 ounces (340g). The pants easily roll up for carrying in a jersey pocket or pannier. Size medium rolls to approximately 8″ x 3.5″ (20cm x 9cm).
Available in everyone’s favorite color black (which also hides road grunge).
THE ULTIMATE TOURING, COMMUTER, AND BIKE MESSENGER JACKET
Full Cut and full featured.
DESIGN
We started making these jackets for our customers who are riding to work or need a solid, durable jacket. We have created a good-looking jacket that allows you to wear your street clothes underneath it or layer up for more warmth. If you are outside all day in the rain this jacket will keep the elements off but give you the ventilation options you need to stay comfortable.
FABRIC
The jacket is built with lightweight and durable mini-ripstop fabric. It is waterproof to a water column standard of 20,000mmm and the Moisture Vapor Transmission Rate is 8,000 g/square-meter/24hours
FEATURES
* Full cut provides additional mobility
* 12-inch two-way armpit zippers
* Two large front hand/cargo zippered pockets
* Large back vent for flow thru ventilation
* Exclusive airflow regulating gusseted-cuffs
* Adjustable elastic cinch-cords at waist
* Full waterproof two-way front zipper with garage
* Drop down protective rain skirt
* Reflective taping on arms and back
* Light loop on rear vent
* Soft Micro-Chamois collar
* Waterproof zippered chest pocket for valuables
* Chest waterproof pocket with audio port
* Approximate weight size medium 1 lb or 450 g
The Elite 2.0 jacket is the ultimate rain jacket that ALSO works well in cool dry weather.
The only cycling specific jacket recently honored in OUTSIDE Magazine’s “Gear of the Year Awards” Annual Buyers Guide.
The ELITE 2.0 has become the gold(enrod) standard of technical cycling shells and has been tag-named by the country’s top randoneers, long distance cyclist and commuters as the “Pass” jacket….and tell us they don’t leave home without it! We carefully engineered the Elite 2.0 as a wet-weather cyclist’s best friend. The Elite also works well for Nordic skiing, running, and other outdoor pursuits in cool and/or wet weather. Most people like the Elite 2.0 in weather below 55 degrees in dry weather or 65 degrees if its raining.
FABRIC
eVent™ fabric is a highly breathable waterproof fabric, and its also very expensive. In this case you get what you pay for – eVent is very durable and works super-well for high energy outdoor activity.
Waterproof: The industry standard for waterproof testing is the water column test. This measurement is accomplished by measuring the milimeters of water that can be held by the fabric without leaking. The minimum requirement is 1000mm for a fabric to be considered waterproof.
Breathable: MVTR (Moisture Vapor Transfer Rate) is measured in a chamber, divided vertically by the fabric being tested. A dry atmosphere is in one chamber, and a vapor-saturated atmosphere is in the other. A 24-hour test is run to see how much moisture passes through the fabric from the saturated chamber to the dry chamber.
The eVent™ fabric used in our Elite jacket has a waterproof rating of 30,000 mm and a MVTR of 22,000. The US Military has done extensive testing on waterproof breathable fabric technology. According to Dr. Phil Gibbons, the eVent MVTR rating is about 20% higher than Entrant GII XT from Toray. It is about 80% higher than Nextec from Patagonia, and 100% (or more) higher than Gore-tex XCR, Dermizax, Memebrain from Marmot, Sympatex, Conduit from Mountain Hardware, Omnitec Titanium from Columbia Sportswear, Schoeller WB-400, and Northface Hydroseal. eVent makes the most breathable waterproof fabric on the market today, and only a few companies are licensed to use it. Showers Pass spent almost a year working with eVent to obtain a license to use their fabric – they want their logo on only the best gear!
Features
* weight varies proportionally with size: a large weighs approximately 13.5 ounces (380 grams)
* front Napoleon pocket on left breast with waterproof zipper and internal audio port.
* large back pocket welded to jacket (reduces bulk and weight)
* waterproof front zipper with two-way slider
* fully taped seams
* waterproof armpit zippers
* large, covered back mesh vent
* airflow regulating gussetted cuffs with velcro closures
* tall collar to keep rain off your neck
* elastic cinch-cords at collar and hem
* extensive 3M scotchlite reflective taping
* light loop (for attaching an LED flasher) on rear vent
* micro-fleece collar
* Velcro attachment points for (optional) compact hood
Featuring high quality 800 Fill Power Goose Down, the U.L. Super Stretch Down Hugger #4 weighs just 1 lb. 5 oz. and will keep you warm in most 3-season conditions. With a draft tube and a foot adjuster, you can’t help but be impressed with this ultralight bag. With a 35 degree temperature rating, it makes an awesome 3-season bag and summertime bag.
Model: U.L. Super Stretch Down Hugger #4
Temp Rating: 35
Weight: 1 lb. 5 oz.(Reg)
1 lb. 7 oz.(Long)
Insulation: 800-fill down
Stuff Size: 5.3 x 10.4 in.
Shoulder: 53.2″- 70.9″ in.
Foot: 42.8″-57.1″ in. (at knees)
Shell: 15-D Ballistic Airlight Nylon
Designer: Montbell
Equipped with MontBell’s Super Stretch system to help enhance the thermal performance of the 650 power fill down insulation, the Super Stretch Down Hugger #2 helps keep the down hear your body while still allowing it to fully loft. Other features such as a neck baffle, draft tube and foot box adjuster help to round out this great bag that is perfect for conditions that won’t drop belowe 25 degrees.
Model: Super Stretch Down Hugger #2
Temp Rating: 25
Weight: 2 lb.6 oz.(Reg)
2 lb. 10 oz.(Long)
Insulation: 650 power fill down
Stuff Size: 7 x 13.8 in.
Shoulder: 53.2″- 70.9″
Foot: 42.8″-57.1″ (at knees)
Shell: 40-denier super multi fulldul nylon
Brightness : 35 Lumens (maximum) Flood beam: LED x 4 Powerful headlamp, 3 lighting levels, Boost mod
A single light source that addresses multiple lighting needs
* 3 lighting levels : maximum, optimum, economic,
* flood beam for sharp, proximity lighting (Wide Angle lens),
* spot beam shines up to 35 meters,
* Boost mode : shines 50 meters for 20 seconds.
Compact and lightweight
* single compartment for LED and batteries
* less than 100 g including batteries.
Battery level indicator light
* warns when the batteries are 70% and 90 % discharged.
Technical specifications
* Water resistant for all-weather use.
* Wide Angle Lens made of impact resistant polycarbonate.
* Strobe mode. Operates on 3 AAA/LR03 batteries (included).
* Weight : 95 g including batteries.
* 3-year guarantee.
The MiNewt is the light that began the high powered LED revolution. The MiNewt.X2’s measured real world output rates at 150 lumens on high and over 90 lumens on low! Look for regulated run times of 3:30 HRS on high and 7:00 HRS on low. The X2 also incorporates a low battery indicator in both the headlamp and power module, keeping you aware of the battery level. Optics are very important to the performance of any lighting system, that’s why a Borofloat lens and custom reflector are used in the MiNewt.X2. This delivers maximum light transmission and guarantees the light gets where it’s needed most…down the trail. The X2’s headlamp weighs a scant 82g, making it a perfect helmet mounted light. Tabbed mounting rings make for easy, hassle free handlebar mounting.
FEATURES
Borofloat Lens
3 Light Settings:
High / Low / Flash
Low Battery Indicator
3:30-7:00 HR Regulated Run Times
SYSTEM INCLUDES
LED Headlamp
Li-Ion Battery
Handlebar Mount – Fits up to 31.8mm
4.5 HR Smart Charger
The MiNewt Mini-USB is the first bike light to feature a Li-ion battery capable of being charged from the USB port of your PC or wall outlet, providing the ultimate in charging flexibility! Weighing in at an incredible 175g, the mounting options are virtually limitless. Although light on weight, the Mini is no slouch on power. Incorporating a high powered LED the Mini pumps out over 110 lumens and has a run time of 3 HRS! Never in the history of LED bike lighting has this level of technology and performance been offered for less than $100.
FEATURES
USB Rechargeable Li-ion Battery Pack Lightweight 175 grams
110+ Lumens
3:00 HR Run Time
Class Leading Lumens per Dollar Ratio
SYSTEM INCLUDES
LED Headlamp
4.5 HR Smart Charger
Handlebar Mount – Fits up to 31.8mm
The Corona Bike is a commuter’s dream and perfect for lighting up the trail. With the ability to switch between 8-, 5-, 3-, or 1-LED output, the Corona Bike allows you to choose the amount and type of light to satisfy every task. The varying levels of output and number of LEDs chosen create a wide variety of burn times, beam patterns and energy consumed.
need a photo from the trail, got one? let us know!
Overview
The Sheltowee Trace is a 270 mile trail that runs north-south across Kentucky. It has received National Recreation Trail status and is mostly open to bikes.
GPS Data
Complete GPX files are available on sheltoweetrace.com’s GPS fourm:
A must for any rider seeking a lightweight performance rack pack. With 400 cubic inches of carrying capacity of 5 lbs, this carrying system provides ample room to store all your essentials. Two shims are included to fit a range of seatpost diameters. The custom made tailgator bags come with a durable Hypalon bottom for added abrasion resistance and securily attaches to our own unique low profile titanium rack. Each component comes with a 2 year limited warranty.
WEIGHT: Rack + one shim= 125 grams
Complete System= 400 grams or 13.8 ounces
Bikamper is a personal shelter that utilizes a 26” mountain or 700c road front wheel in place of tent poles.
The main body is constructed of water-resistant urethane coated 45D ripstop nylon and features three mesh panels for ventilation and stargazing on pleasant nights. The fly is constructed of fully waterproofed 70D ripstop nylon for additional protection should the weather turn foul. Both tent and fly pack down to a small, space saving size.
Bikamper™ packs down to a compact size and has it’s own special stuff sack that straps to the handlebars.
Capacity: 1 Person
Weight (Tent only): 1.35 kgs / 2.98 lbs
Total Weight: 1.63 kgs /3.59 lbs
Season: 3 Season
Packed Size: (L X H) 26 x 14 cm / 10.2” x 5.5”
Floor Space: 200 x 90 cm/200 x 70 cm
Floor Area: 1.6 m2
Doors: 1 (Right side)
Windows: 3 (two side, one end)
* All-welded aluminum construction is extremely durable
* Frame designed to fit 26-inch bicycles
* Weighs a light 590 grams
* Covered by a limited lifetime warranty
* 1 year
Product Description
The Blackburn MTN-1 Bicycle Rack is constructed of all-welded aluminum, the MTN-1 is not only lightweight and durable, but it is capable of carrying heavy loads. Blackburn’s MTN-1 fits up to 26-inch bicycles, weighs 590 grams, and comes in black with a limited lifetime warranty.
Please rate this product: (no login required) (34 votes, average: 3.41 out of 5) Loading ...
Cane Creek’s original Ergo Control took the bar end to an unprecedented level of performance. Its ergonomic profile, extending both fore and aft of the handlebar, gave riders more comfort and control than was previously possible. The design fit the rider’s hands naturally and aligned his/her weight over the center of the steering. Now Cane Creek offers the Ergo Control II—with even more technology that makes sense.
Construction
The optimized shape offers more hand positions for improved comfort and reduced weight. The new aluminum spine clamp is engineered to be stronger and lighter.
The composite skeleton provides better, more uniform support with fewer grams. The outer rubber surface with raised Cane Creek skinks and logos is softer and tackier to improve your grip. And by integrating ODI®’s patented Lock-On System technology, Cane Creek has introduced the first bar ends that mate with Lock-On handlebar grips—including the Cane Creek locking grips.
Of course, the Ergo II’s are also compatible with traditional handlebar grips.
materials – aluminum spine clamp, composite support skeleton, and exclusive rubber grip surface
compatibility compatible with odi® lock-on system grips and traditional grips.
weight 175g per pair
msrp $55.00
Please rate this product: (no login required) (59 votes, average: 3.64 out of 5) Loading ...
For MTB or heavy commuting use. Improved QR mechanism is more secure and easier to use. Compatible with all MTX Trunk Bags, 20 lbs. carrying capacity. Includes two rubber bungees and safety reflector.
Added Features Rubber Bungee
Safety Reflector
RedLite Mount
Tail Light Mount
Bag Compatibility
MTX Series
Clamp QR fits ø25.4~ø31.8mm (shims Incl.)
Material Aluminum Beam
Max. Weight Capacity 9 kgs / 20 lbs
Size (L x W x H) 54 x 12.7 x 8.1 cm / 21.3” x 5” x 3.2”
Weight 680 g / 1.50 lbs
Please rate this product: (no login required) (46 votes, average: 2.80 out of 5) Loading ...
XC/TRAIL PERFORMANCE – HARDPACK/INTERMEDIATE/LOOSE CONDITIONS – SUPERIOR PUNCTURE PROTECTION – LIGHTWEIGHT DESIGN
We asked The Captain himself, Ned Overend, to help us design the perfect tire for control and predictability over any trail. The result is The Captain, with fast-rolling center knobs for exceptional transition and edge knobs to attack any trail. Lightweight, puncture resistant construction and 2Bliss ready.
Armadillo Elite technology offers the ultimate in lightweight puncture resistance
Located in western North Dakota the Maah Daah Hey connects the two units of Theodore Roosevelt National Park. The landscape consists of shortgrass prairie and badlands. The Maah Daah Hey is one of the best mtb trails in the US. It boasts over a hundred miles of pure backcountry riding. Except for a 10 mi gravel road detour around the Northern Unit of Theodore Roosevelt NP it is all off road riding, mainly on singletrack. The scenery is amazing and the trail is rideable for it’s entire length. It is a great destination for bikepacking because it is also a horseback riding trail so most of the climbs are gently graded and have wide switchbacks. Most of the National Park is wilderness so if you’re on a bike you will detour around the north unit on gravel roads and around the south unit on the excellent Buffalo Gap singletrack. The loop road in the south unit is a fantastic road bike ride!
Trail development is currently underway to extend the trail another 40+ miles south of Medora, this is sometimes known as the Maah Daah Hey Trail II, or the Deuce.
Info
The trail is at an elevation between 2000 and 2700 feet, the longest climbs are about 500 feet and only a few of those, most are much smaller. This means the trail is quite doable even with a load and with moderate fitness. The surface is mostly hard packed clay. Because of the erosion the trail is sunk in to the ground creating mini berms at just about every turn. Unfortunately this also means some serious ruts and hoof pockmarks from cattle walking across the wet clay. Which leads to the warning: you can not ride this trail when wet! The Bentonite clay sticks like glue to your bike and shoes. So check the forecast and stay home if it’s going to rain! The detour around the south unit is technically not the Maah Daah Hey but the Buffalo Gap trail, it continues south of I-90, in fact this is one of the best sections from a pure riding standpoint, rollers and berms like a giant BMX track.
There are campgrounds located near the trail at roughly 20 mi intervals. There is a short spur trail to the campsite from the trail. Be sure to factor in the extra mileage of the out and back to the camp in your total miles for the day. All camps have drinking water but it is turned off in winter, call the Forest Service to check the dates. Other than the camps there are a few stock tanks of questionable quality and some small creeks. The running water tends to be extremely silty due to the clay soil that the Badlands consist of. Filtering the water will be a major challenge for any water filter, so most people just stock up at the campgrounds. The campgrounds can be reached by car, as can many other trail crossings, so it is possible to cache water or food ahead of time.
It is a great plains landscape with extreme heat in summer and cold in winter. North Dakota is also one of the windiest parts of the US, and there is very little tree cover so be prepared for some epic battles with the wind.
For a small fee the forest service will mail you an excellent map of the trail, which has an elevation profile on it. Be sure to also bring a highway map/ coarse scale topo map of the area. If you need to bail, the highway that parallels the trail is just of the trail map in most spots, so being able to find a route out of the back country onto the highway requires an additional map.
There are several ranchers in the area who act as hunting guides/outfitters and can be hired to shuttle you and your bikes to the other end of the trail, Dakota Cyclery in Medora does as well. With some talking and explanation, we managed to get a taxi in Wiliston to drop us off on the trail. Remember that the Rocky Mountain Time Zone line runs right through this area, so be sure to check what time someone is on when making appointments.
Williston, ND is the closest airport and Amtrak station, it is about 65 miles north of the northen terminus of the trail. It is not very advisable to bike on the roads outside of Williston, they are in the midst of a major oil boom and the roads are packed to overflowing with double trailer tanker trucks and angry locals fed up with traffic.
Hazards
If you read any trip reports two warning stand out: bring more water and watch out for cactus thorns in your tubes. The water can be a challenge. The thorns are easily dealt with by using tubeless tires with Stan’s. I used an ultralight 127tpi casing tire and had no flats, but plenty of thorns in my shoes and shorts. Or you could use Slimed tubes. There are few sharp rocks, so you can use a lighter casing tire without to much risk. It helps if your tires clear mud reasonably well, because of puddles and stream crossings, the same goes for your pedals. The Bentonite clay is extremely sticky. It filled up my Candy pedals completely so I had to poke out the mud with a twig, a few times. The other hazard is the crossing of the Little Missouri river. If it is running high you might have to start or end at the river. Even in nice weather the water is fast and very cold.
We are looking for a complete GPS track of the MDH.
There is a McKenzie map at about 1:116,000 scale available from the forest service and a National Geographic map at 1:40,00 scale. Note that one of the maps claims there is no water at one of the campsites. This is incorrect. There is water at each one. (As long as the USFS hasn’t turned it off).
•New Wider fit for 08′ •Run & Ride nylon plate for easy hike-a-bike and great pedaling power •Carbon rubber lugged outsole for superior traction and durability •Combination closure system with premium power ratchet and forefoot Velcro strap •Flexible forefoot and a running shoe beveled heel •Low cut construction for a light, fast fit and feel •Quick drying, highly breathable mesh/synthetic upper •Endo-skeletal fit system securely wraps feet
Description: Clean and simple, the Mountain Handle Pac I was originally designed to fit Bull Moose stems. These triangular bar/ stem systems have faded into oblivion, but fortunately, the Handle Pac I fits any modern stem 3″ or longer, secured by three positive locking cam buckles on 3/4″ webbing. Designed to mount facing the rider, the Handle Pac I places weight in the optimal position over the steering axis and can actually improve handling on a loaded bike. The bag looks deceivingly small, but can be stuffed with an amazing amount of items, from maps and journals to binoculars and snacks-all within instant reach in the bag’s main compartment or the flat front pocket.
Specifications:
Volume: 218 ci/ 3.6 ltr
Weight: 6.7 oz/ 190 g
Dimensions: 7 x 10 x 4 (in) 18 x 25 x 10 (cm)
Material: Dupont Cordura®
Description: The Frame Pac is ingeniously designed to make use of the generally under-utilized space on your bikes frame (below the top tube and behind the head tube). The Frame Pac boasts an extremely steady four-point attachment system: a triple-stitched hook and loop sleeve running the length of the Pac wraps around the top tube, a 1″ loop provides additional security, and two 3/4″ webbing and cam buckle systems lock down around the tube to provide a positive tensioning system you can count on.
The Frame Pac features a full-length, zippered pocket that allows easy access to gear on the fly; the new and improved model also provides a second full-length, flat, zippered pocket to keep your stuff organized and accessible. Storm flaps protect both pockets.
Specifications:
Volume: 188 ci/ 3 ltr
Dimensions: 6.75 x 16 x 2 (in) 17 x 41 x 5 (cm)
Weight: 6.1 oz/ 180 g
Material: Dupont Cordura®
Our Chain Rings are CNC laser cut from .115″ thick 8/11 titanium alloy, then CNC machined to .071″ thick at the tooth area, spot faced and hand finished to a brilliant silver nickel finish. They weigh nearly the same as an aluminum CR, but will last 5 times longer. The machined edges stay sharp to ensure quick shifts and promote long chain life. Weight: 18 gr – 96 gr.
Available in 20 tooth, even for 4 bolt 64mm BCD cranks (e.g. any Shimano crank in the last ~4 years)
Actiontec makes large single cogs (36 tooth and 38 tooth) for use with their titanium cogsets. However, you can order a single cog and use it with Shimano or SRAM 34 tooth cogsets. A spacer is provided, so you simply remove one of the smaller cogs and add the large one. Note that this is not recommended by the manufacturer, but several riders have reported success.
From the manufacturer:
Our Titanium Cog Sets feature our own unique “Shark Tooth” design. This tooth configuration needs no shifting ramps, delivering flawless gear changes with or without high pedal power as when climbing and downshifting. With our non gated cogs, the cog will not grab the chain and make a ghost shift. Our cogs are separate from each other. This transmits power directly to the hub without the need for a spider. This allows a change of any cog due to damage, wear or a change in your gear ratio, without changing the complete cog set. And, with our “Shark Tooth” design, every tooth has a point, not a flat on top like other cogs. So when the chain makes a shift it can’t ride the top of the flats, delaying the shift. It drops on one side or the other, completing the shift. Weight: 136 gr – 237gr.
Essential for commuting through the city or pushing the limits during an all-day ride, the technical and feature-rich TransAlp is built for high-torque activity and is comfortable enough to wear for hours on end.
Features & Specifications
–Full-zip back panel access makes loading a full reservoir easy
–Air Support back panel with lumbar support uses 3-dimensional Air Mesh to enhance ventilation
–Easy fill, easy clean via the OMEGA Reservoir
–Includes the patented Ergo HydroLock
–Store helmet in the main overflow pocket and shoes in the secure side mesh pockets
–Raincover included in bottom pocket
–Multiple storage spaces include main compartment, exterior pocket for small gear, plus dual side mesh pockets
–Independent Suspension Harness keeps load stable as you move
–Includes dual side compression, stowable waist belt, and sternum strap
Capacity: 100 oz (3.0 L)
Dimensions: 20 in x 12 in x 8 in (508 mm x 305 mm x 203 mm)
Volume: Cargo � 1740 cu in (28.50 L) Total Volume � 1923 cu in (31.50 L)
Weight: Empty Reservoir � 2.95 lbs (1.34 kg) Filled Reservoir � 9.20 lbs (4.17 kg)
Please rate this product: (no login required) (24 votes, average: 3.25 out of 5) Loading ...
Purifying water couldn’t be easier, simply drop a Micropur tablet into a quart of water; drink with confidence and no chemical aftertaste.
* Features the same proven technology used in municipal water supplies; effective against viruses, bacteria, Giardia and Cryptosporidium
* Destroys viruses and bacteria in 15 minutes, Giardia in 30-minutes and Cryptosporidia in 4-hours
* Meets the US EPA purification guidelines; active ingredient is chlorine dioxide
* Each tablet is individually wrapped and sealed
* While a 4-hour wait time may be inconvenient, alternative disinfectants do not claim to destroy Cryptosporidium
Please rate this product: (no login required) (12 votes, average: 3.50 out of 5) Loading ...
The MSR MIOX™ Purifier makes water microbiologically safe using salt and an electrical current. Click on the link at left to watch how it works.
* Proprietary patented technology creates a small batch of an oxidant solution which is mixed with your water to destroy microorganisms
* MIOX uses a chemical reaction called electrolysis to create a powerful disinfectant that will destroy biological contaminants in your water
* More effective against microorganisms than chlorine or iodine
* Destroys viruses and bacteria in 15 minutes, giardia in 30 minutes and cryptosporidia in 4 hours
* Features a safety indicator so you can be sure your treated water is safe to drink
* Comes with 1 ounce of salt to treat 200+ liters of water; 2 lithium CR123 batteries; 50 test strips; instruction book; reference card; storage bag
* MIOX is compact, rugged and submersible
* Purifies water without iodine; no health risk or unpleasant iodine taste
This purifier works by creating a powerful dose of mixed oxidants (MIOX), which is then added to untreated water, inactivating all viruses, bacteria, Giardia and Cryptosporidium (which even iodine doesn’t kill). And since the MIOX Purifier needs only common camera batteries and salt to operate, it’s maintenance-free, delivering more water, more easily than any purifier ever before.
Please rate this product: (no login required) (19 votes, average: 2.84 out of 5) Loading ...
Its small size fits in a coat pocket or waist pack, making the Mini ideal for travel, business trips and day hiking and solo backpacking.
* Ceramic microstrainer removes bacteria and protozoans, including giardia and cryptosporidia
* Silver impregnation inhibits bacterial growth inside filter pores
* Comes with 30″ intake hose, cleaning brush and case
* Use iodine or chlorine where viruses are suspected
Weight 8 ounces
Dimensions 7 x 2.75 x 1.75 inches
Filter medium Ceramic micro-strainer
Housing material POM plastic
Removes Cryptosporidia, giardia, bacteria
Output 0.36 liters/minute
Pump force 5.3 pounds
Pump strokes per liter 167
Field cleanable Yes
Please rate this product: (no login required) (8 votes, average: 2.75 out of 5) Loading ...
Using proven pleated filter technology, this filter bottle provides easy waterflow, with carbon to reduce chemicals and make water taste better.
* Meets EPA standards for removal of Giardia and bacteria
* Delivers 160 refills (26 gallons) per replaceable cartridge, depending on water conditions
* Reliable 0.3 micron pleated glass-fiber microfilter and granular activated-carbon offer efficient water filtration
* Bottle holds 21 fluid ounces of water
* Can be upgraded to a purification system for international travel with the Katadyn Exstream ViruStat Replacement Kit, sold separately
* Carry loop on lid lets you hook a carabiner through to attach bottle to your pack
* Polyethylene is 100% BPA free
Please rate this product: (no login required) (10 votes, average: 2.50 out of 5) Loading ...
The lightweight and easy to use design makes the Katadyn Hiker a great choice for all-around use.
* Filter physically removes particles, protozoa, and bacteria down to 0.3 microns in size, including giardia, salmonella, cryptosporidium and others
* Glass-fiber element is pleated for increased surface area to handle silt and muddy water
* Activated-carbon core adsorbs chemicals and pesticides to improve taste of water
* Pre-filter at hose inlet filters to 150 microns, removing larger contaminants before they reach the main filter to increase its life span
* Quick-connect adapter sends the filtered water directly into your REI hydration pack or Nalgene® reservoir (both sold separately)
* Includes a carry sack and bottle adapter that fits most water bottles
Weight 11 ounces
Dimensions 6.5 x 3 x 2.4 inches
Filter medium Pleated 0.3 micron glass fiber/carbon core
Housing material ABS plastic
Removes Protozoa and bacteria
Output 1 liters per minute
Pump force 8 pounds
Pump strokes per liter 48
Field cleanable No, must change cartridge
Please rate this product: (no login required) (34 votes, average: 3.53 out of 5) Loading ...
With convenient panel access to a single main compartment, finding gear in the Atmos 35 is a breeze. Stow extra gear in the welded stretch woven front pocket and your hydration bladder in a spacious interior sleeve. Removable sleeping pad straps increase versatility along with dual ice ax loops and stretch woven side pockets. A zippered mesh pocket on the inside of the front panel keeps absolute essentials separate and safe with an exterior welded water resistant zipper.
* Full-length dual zippered panel loader
* Front slash pocket with welded water-resistant zipper
* AirSpeed suspension with 6005-T6 aluminum alloy frame and titanium flex rods
* Hydration cavity behind mesh panel with hydration tubing port holes
* Daisy chain with removable shockcord clips
Colors available: Cinder Cone Red, Slate Blue
Please rate this product: (no login required) (30 votes, average: 3.13 out of 5) Loading ...
# Comfortable foam grips for drop Handlebars, and a great choice for touring bikes
# NeoFoam construction is scientifically optimised to absorb shock and vibration for great comfort, and does not get too soggy if you are out in the rain
# The high quality foam offers good resistance to abrasion and is very durable, so the grips will last well and offer great value for money
# Supplied as a set of 4 with bar end plugs and glue
Please rate this product: (no login required) (23 votes, average: 3.04 out of 5) Loading ...
Originally developed using first-hand rider experience at the incredibly tough Transalp Challenge, this racing platform features the same grip body as the GC2. The lightweight 100% magnesium three-finger bar end provides the same advantages of a full size bar end in a reduced size. Its size and shape are ideal for small to medium sized hands (Size S: 6.5 – 8.5) as well as for medium to larger sized hands (Size L: 8.5 – 10.5). The bar end and the grip platform can be independently adjusted for the correct support angle and provides the perfect fit for your individual riding style.
Please rate this product: (no login required) (49 votes, average: 3.18 out of 5) Loading ...
Ergon’s original and ground breaking GP1 continues to set standards. Offering optimal pressure distribution and available in two sizes, it features a forged aluminum clamp for fast and secure installation. Adjustment of the support platform is achieved by simply loosening the clamp bolt and positioning the grip to the desired neutral position.
Please rate this product: (no login required) (53 votes, average: 3.43 out of 5) Loading ...
This was my first attempt at a bikepacking trip. I used gear I already had. The ride was in North Dakota in mid October, 6″ of snow the week before, estimated average lows 20, estimated highs 45 and chance of extreme wind. In fact we had sun most days, no rain and highs in the low 60’s!
I learned a few things:
Keep the weight and bulk down!
If you use a rear rack you need something heavy on the front to compensate
a backpack is not great, smaller is definitely better
Make sure rear bags (rack or seat mounted) don’t interfere with getting behind the seat for steep drop-offs.
Smartwool socks shed Bentonite clay better than bare feet!
I used a Cannondale Prophet with a Topeak seatpost rack. On the rack a drybag with my rectangular down sleeping bag and non-wp bivysack, 3 spokes, as well as food for the rest of the ride. Bag secured with small camlock straps.
On the handlebar a small REI bag that mounts on top of the stem/bar, has a map compartment. In bag:
map
gps
bike minitool
day food
arm warmers
chain lube
petzl tikka
small first aid kit
yellow lenses for glasses
Park cassette tool
quick link
Under the handlebar was one 2l Platypus bladder, tied on with giant twist-ties, and the hose routed straight up in the air on one of those.
On my back a 33l Black Diamond Stone pack with the frame removed. In it:
Cut to calf length and torso shape Ridgerest
Long midweight bib tights
spare Smartwool socks
Mtn Hardwear Tempest pants (a 2l WP/B fabric, not taped, with a brushed lining)
Mtn Harwear Epic jacket
Gore-Tex Paclite shell mittens
Pearl Izumi Amfib shoecovers
Vaude lightweight fleece vest
Merino wool boxers
Sprayway down jacket
Odlo balaclava
Mtn Harwear Windpro beanie
Golite tarp,with spectra guylines and Hi-vis orange Ti stakes
1 trekking pole
spork
derailleur hanger
brake pads
derailleur cable
film canister with Assos
second 2l platypus reservoir, not allways filled.
Wearing Northwave shoes, Smartwool socks, Specialized Pro bibs, Ibex merino wool zip-T, long finger gloves and Sunglasses.
My friend had the other pole and the canister stove.
The clothes were the lightest I had on hand that would give full waterproof protection in 35 degree weather on the bike, and keep me warm in the morning in camp in 20 degrees. The 2 hats because I used a bag without a hood. I planned on sleeping in all my insulating clothes. The fairly heavy pants were brought because they were only slightly heavier than my rainpants and substantially warmer.
After this I came up with some changes: The backpack needs to be lower, this one kept knocking the back of my helmet if I braked on a downhill. Lighter is better, both for the climbing and for the handling and the comfort of sitting on the saddle. I got lighter clothes and sleeping bag, a Wingnut backpack and much else. I would welcome some comments.
Ultralight and Durable. Sensing a need for a lightweight stove for a future of Arizona Trail tours, we built some Penny Stoves found at this link:http://www.csun.edu/%7Emjurey/penny.html.
Over the last few years I have been experimenting with a set-up. The order below shows the 4versions that I have used most. The multiday trip on the Yeti with the rack by far was the heaviest load. I am working on a set-up that will get the load more on the bike and less on me, as shown in the last photo.
It was a while in the making. I needed a large frame bag for multiday trips in an effort to get the load off my back. This cost about 15 bucks and around 11 hours total time. So, at the rate most people get paid, it was about 235 bucks. The satisfaction of making it yourself is hard to beat though. I will let you know how it works out shortly.
Note: The Freedom Trail is not open to tour at any time. It is not a wholly public route, although it relies heavily on public roads for most of its distance. Contact the Freedom Challenge organization several weeks in advance to arrange a ride on the Freedom Trail. An itinerary will be provided based upon your intended per diem mileage. A fee is required to cover permitting and both food and accommodations in remote areas. It is also possible to tour the route with complete food and lodging arrangements.
Overview
The Freedom Challenge is an initiative hosted by the Wilderness Foundation South Africa to establish a mountain bike trail that runs from Kilimanjaro to Cape Town. Already the lower third is in place (running 2300 kms/1450 miles from Pietermaritzburg to Cape Town) and the hope is to have the other two thirds set up by the June 2010 for the inaugural Kilimanjaro to Cape Town tour on the trail.
Trail Motivation
One of our goals is to utilize the trail to support rural economic development. There are accommodation stops provided by local communities at least every 4 hours of riding apart. All stops provide towels, bedding and 3 meals. The nature of the accommodation varies from huts to game reserve lodges. The current cost for riding the trail is ZAR450 per day (USD 45) which covers all meals and accommodation as well as downloadable maps and traversing permits.
The trail is focused on rural Southern Africa and runs through a number of conservation areas. In many places we offer a choice of riding surfaces. Riders can either stay on the main trail which is largely double track or single vehicle road, or they can opt for more technical single track which might also involve hike-a-bike sections.
The Freedom Challenge
Once a year we organize an event on the trail in order to publicize it. The Freedom Challenge Race Across South Africa draws about 50 participants and takes place at the same time as the Great Divide (June).
elevation profile from TopoFusion software
GPS Data
FreedomTrail-Tech-Merged.gpx – This file highlights the more trail / technical route, whenever there is a choice.
Multi-position grips with integrated cold forged alu barends, which have a dual function acting as the clamps for the grip. The shape of the grip is identical to the GP1. The GC2 is the replacement for the older R1 model. It features a longer, ergonomically optimized barend, which is adjustable in terms of its angle on the bar. Its size and shape are ideal for small to middle sized hands (Size S: 6.5 – 8.5) as well as for middle to larger sized hands (Size L: 8.5 – 10.5). The barend and the support platform on the grip can be independently adjusted for the correct angle to allow optimized fit for individual saddle position and riding style.
Please rate this product: (no login required) (68 votes, average: 3.53 out of 5) Loading ...
* Waterproof and breathable, this all-season jacket can simply be worn over a base layer or over an insulating layer when conditions turn a bit harsh
* PreCip coating has been improved with increased breathability and waterproofness
* Dry Touch™ finish with a dimensional print reduces condensation, eliminating that clammy feeling
* Improved hood design now allows full visibility with peripheral cord adjustment; rolls up into integral collar when not needed
* PitZips™ allow built-up body moisture to escape
* Angel-Wing Movement™ sleeve construction allows unrestricted range of motion
* Pack Pockets™ allow easy access even with a pack on
* DriClime® chin guard wicks away moisture and is soft against your skin
* Double storm flap over zipper secures with VELCRO® brand closure snaps
* Features elastic drawcord hem and 100% taped seams to seal out the elements
* Jacket has standard fit for easy layering
Please rate this product: (no login required) (50 votes, average: 3.68 out of 5) Loading ...
# Stiff nylon plates provide toe spring, flexibility and rigidity for pedaling while enhancing off-the-bike comfort
# Lightweight, soft EVA midsoles absorb shock, return energy and provide cushioning
# Quick-drying, breathable mesh and synthetic uppers offer protection and durability
# Rip-and-stick and lace closure system goes on like comfortable tennis shoes to secure the fit
# Rugged carbon rubber lugged outsoles supply superior traction; beveled heel enhances mobility
# Compatible with most clipless pedal systems (cleats not included)
Southern Utah is a spectacular chunk of planet earth. Deserts, canyons, mesas, mountains – it’s all here. There is good reason so many national parks and monuments dot the region.
There is also an abundance of epic singletrack and accessible but remote jeep trails, game trails & ATV trails. The area is ripe for a self-supported epic MTB route.
The Trans Utah vision is to devise a route from St George to Moab that can be done in about a week under the self-supported ethos. The route is currently established from St George to Escalante over approximately 400 miles and 60,000′ climbing. The first 170 miles includes a lot of dirt road/double track with some singletrack and decent (relatively speaking) services. Beyond Brianhead the route gets more remote, rugged, wild, with more singletrack, elevation and more difficult conditions.
The profile for StG to Escalante – it underestimates both distance and vert. Low point is about 2,400′ at the Virgin River, high point is 11,033 near Brian Head peak.
The event timeline is:
Oct 2, 2008: StG to Escalante. No finishers this year due to an untimely storm, so…
Oct 9, 2009: StG to Escalante.
2010: Escalante to Moab
2011: StG to Moab
The route has yet to be ridden in it’s entirety in a single attempt. It’s wild country. Check out Dave and Marshal’s trip reports.
The route is a big one. Check the map here. TransUtahV2 is the current route – the earlier route isn’t actually doable due to private land access. The route/GPS track will be refined using actual GPS data acquired in the ’08 attempt. Complete tracks for the C-Trail, FR 265, Marathon Trail and trailheads forthcoming. In addition, the final 30 miles may get some re-route action for ’09.
Route Description
Start at Desert Cyclery, StG.
All together prologue until the beginning of the Stucki trail.
Stucki to Micro loop.
Micro loop, down Curly, up Blakes, Left to Virgin crossing.
Into the AZ strip – follow power lines loosely for 20ish miles.
N on the Temple Trail
NE on Honeymoon trail
N to Goulds Rim trail
Goulds Rim, mostly S then E
Jem trail to Sheep Bridge
Climb up Smith Mesa (signed 1250 W), paved initially
Kolob road to junction with cutoff to Webster flat road.
Bear left downhill on pavement to the C Trail
Descend the C Trail to Cedar City
Cedar City to Summit: any route is acceptable so long as it’s done under your own power. Paved frontage on NW side of I-15, dirt on SE side.
S on FR 265 to Marathon Trailhead at Brian Head
Marathon Trail to Navajo Lake
Virgin river rim trail at Te Ah campground
Harris rim ATV route
NF roads to hwy 89
Bryce Woodlands road to Pole Canyon trail
Up Sand Pass to the Grandview trail
Grandview trail to Lower Podunk trailhead
Podunk trailhead to Skutumpah road
Skutumpah to Tropic
Tropic to Pine Lake via Henderson Canyon
Pine Lake to Powell point. Biggest view in southern Utah!
Powell point down a -30% grade, rideable, alpine singletrack.
Forest roads to Escalante.
GPS Data
GPS data, water locations, waypoint descriptions and other specific info available at the Trans Utah forum (registration required).
Trans Iowa started in 2005 as race across the state: on gravel, self supported, self navigated and underground. At 300+ miles and with a time cutoff of ~30 hours, this event is truly for the nutty, but it has proven to be a very popular event.
Route Details
The route changes every year and is kept secret until cue sheets are handed out minutes before the ride begins. Earlier versions crossed the state, but the route has evolved into a loop format. Version 4 (2008) was based out of Decorah, but the start/finish will move to get more of the “Trans” back into Trans Iowa!
GPS Data
TI-V3.gpx – Version 3 GPX data from planning stages (complete loop from Decorah) (Thanks to David Pals)
Also, head over to Motionbased (search terms “Trans Iowa”) to find a few Trans Iowa GPX files from V4 of the race. None are complete, but they will give you an idea of what to expect and something to look at in your favorite GPX app.
Ring the Peak is a fully signed and mapped route around 14,110′ Pikes Peak, near Colorado Springs, CO. Currently the trail is 80% complete, but 100% open to bikes! More singletrack is under construction by the Friends of the Peak, but on bike the 20% road detours are easy and fast.
Route Details
At only about 70 miles long, RTP can be done in a day. But it’s a long day, and you’ve got to suffer to complete it. With plenty of camping opportunities in the National Forest (including developed campgrounds such as the Crags CG), it’d be easy to break it into two days. You could even use Manitou Springs as the mid point, staying in one of many motels in the area.
There is quite a bit of singletrack on this route, and most of it is between 9,000 and 10,000 feet. The high point of the ride is about 11,200′, just near tree-line. Thunderstorms are definitely a concern, and they can happen any time of the day near Pikes Peak.
Sections of the trail can be pretty steep and rough. Solid bike skills are needed, and an ultralight bikepacking load would help reduce the amount of bike pushing.
The Ring the Peak website contains a wealth of information on the trail. Everything from access points to conditions is covered there. For a cyclist’s perspective on the trail, see the Trip Reports section.
Besides the main RTP loop, there are other side trails that are worthy of exploration, with or without camping gear. RTP has several “spokes” that connect to the top of Pikes Peak itself. Climbing Pikes Peak is an unparalleled experience, though only the Barr Trail is recommended for bikes.
Kokopelli’s Trail runs some 140 miles between two mountain bike meccas: Moab and Fruita. Is it not a constructed-as-such singletrack trail, and though it features quite a few smooth miles, it also has its share of technical surprises and steep sections.
The KT is one part of the Grand Loop, but it is often ridden by itself. Time to ride the trail ranges anywhere from five days to a staggering 12 hours (the current time trial record).
Originating as a self-supported, one day mountain bike race, this 130 mile loop on singletrack and dirt roads take in the best of the Kaibab Plateau south of Highway 89a and north of Grand Canyon National Park. It includes the Rainbow Rim trail, and the best parts of the Arizona Trail, as well as some seldom traveled roads to link them together. It’s a tough cookie as a one dayer, and would make an equally rewarding multi-day trip.
The profile reveals the routes variety and challenges. That almost 14,000′ of gain! The initial big drop is on well developed gravel, but soon the route turns onto FS road 423 and enters a zone of transitional flora, with mixed pinon, juniper, and pine country. This stretch, combined with the scenic climb back up a small canyon on FS 425 and 272a, gives one a first hand view of the changes wrought by the Kaibab upwarp. Similarly, the drop off the east side of the plateau, and the rather nasty climb back up around mile 118, takes one through a p-j forest, and then a moonscape of burnt trees from the Warm fire of June 2006. The proliferation of snags, when combined with the flowers of late spring and early summer, provides an aesthetic riding experience.
This 3D view of the aforementioned section shows well its difficulties. Only the strongest riders should expect to ride much of the climb back up to the plateau.
It should be noted that this detour exists for a reason. The AZT is closed several miles north of FS 213, as it passes through the Warm fire burn, with much exposure to falling trees. As of June of 2008, there was no anticipated date for its reopening. This section of trail is quite close to the road, and always paled in comparison to the outstanding meadow and forest riding to the south. Either take the aforementioned detour, cross the paved Highway 69 and find your way on other dirt roads, or take 69 itself.
Logistics for the multi-day rider do present some challenges. All of the terrain mentioned is USFS land, and as such camping is free anywhere, and excellent sites abound. Water is the primary challenge. The Kaibab Country store, located around mile 80 as mentioned in the cue sheets, is open during the tourist season (mid May to early October) and has basic supplies. The GCNP North Rim tourist complex holds similar hours, and has the same plus a nice restaurant, bar, and cafeteria. Other than this and Jacob’s Lake, there are no other traces of civilization. Surface water is rare, limited almost totally to cattle ponds and naturally occurring lakes. Neither of these are likely to offer an especially visually appealing source. Reliable ponds are found chiefly along the stretch of AZT between the park boundary and the burn area. Other sources may exist, but cannot be confirmed except by first hand investigation. Do your homework, and be prepared with lots of capacity.
On an average year, one can expect the route to free enough of snow to be rideable from late April or early May until early November. Even in summer night temps can be chilly, and day temps are typically quite pleasant (by Arizona standards) even during the afternoon. The fall foliage in early October is quite spectacular. It’s one of the more unique pockets of the American Southwest, and highly recommended for exploration.
Kaibab Monstercross Race. The race blog contains rough cue sheets for finding your way. Combine these (remember that the mileage is approximate) with the USFS North Kaibab district map and you should be good to go. There are plenty of variations and explorations possible, too. Looping south on the Point Sublime road to the North Rim Lodge would be a fun and scenic way to add a resupply point (good pizza and beer on the porch, with priceless views of the canyon), and would allow one to ride more AZT north.
The Great Divide Mountain Bike Route was put together by Adventure Cycling in the late nineties. It has since become the definitive route for dirt road bikepacking.
GPS Data
3D image from TopoFusion software – click to enlarge
TopoFusion’s Divide GPS Page holds the most used GPS track for the route. This track was used to generate the elevation profiles on the official ACA maps, and also to correct ACA’s GDMBR waypoint set.
The “Grand Loop” covers 360 miles of remote desert terrain between Moab and Grand Junction. The loop was officially finished in 1995 with the mapping of the Paradox Trail, the final link to the loop. The two other links are Kokopelli’s Trail (finished in 1989) and the Tabeguache Trail.
All three of these trails can be ridden themselves, or you can challenge them all. Some like to challenge themselves to ride the loop as quickly as possible. This page chronicles those efforts (see: Racing the Grand Loop).
Route Info
Not much singletrack was constructed for the Grand Loop. A few key pieces were needed to link existing dirt roads, and those were built by COPMOBA. But don’t let the lack of singletrack fool you — this is a rough and challenging ride.
Many of the 4×4 roads are technical enough to force dismounts and hiking. You will hike your bike, period. But the solitude, scenery and adventure afforded are unmatched, especially being so nearby to frequently ridden (Moab) trails and roads.
Services
There are few services on the route. If you follow the new (2005+) version of the Paradox Trail, there are actually no services. The Bedrock alternate on the Paradox takes you to the tiny town of Bedrock, where a small store with limited hours offers limited resupply. Nucla is also ~10 miles off route, and has cafes and a more substantial grocery store.
Seasons
Picking a good time to ride the Grand Loop is difficult. Snow typically lingers until late May or early June on the upper reaches of the Tabeguache Trail. Yet Kokopelli’s trail covers many a mile of low desert terrain that would be preferrable to ride in April, not June! Fall might be a tempting option, but key water sources may be dry, and lack of daylight is an issue.
Historically, most successful Grand Loop traverses have been in early June, but they have also involved a fair bit of night riding through the lower sections. It’s best to watch the conditions, particularly the snow levels. Some years it is possible to snipe a GL ride in May. Check the Columbine Pass snotel site for the latest conditions on the Uncompahgre Plateau.
Racing the Grand Loop
There is no set time or organized race on the Grand Loop. However, this page will serve to record all successful Grand Loop rides, and will rank them by time. In the true spirit of self-supported mountain biking, you are encouraged to ride the route whenever you see fit and report your time (and your experiences on the trail!). If you want to be on the course with other riders, see the Ultra Racing forum to coordinate with others. There is one such thread already.
Dave Harris (2009) – 2:12:44 (SS)
Jefe Branham (2009) – 2:16:33 (SS)
Dave Harris (2007) – 2:19:18 (report)
Mike Curiak (2003) – 3:02:37 (report)
Scott Morris (2006) – 3:02:45 (report)
Gary Dye (2001) – 3:03:03
Fred Wilkinson (2007) – 3:04:35 (report)
Jefe Brahnam (2006) – 3:08:10
Chad Brown (2009) – 3:11:02 (Clockwise, SS)
Scott Morris (2009) – 3:11:02 (Clockwise)
Lynda Wallenfels (2012) – 3:11:33
Cat Morrison (2012) – 3:11:33
Matt Fletcher (2009) – 3:20:40
Stefan Griebel (2006) – 4:02:00
Dave Kirk (2008) – 4:18:30
Jim Leikert (2011) – 6:06:14
Please comment on this page (or send us email) if you have a Grand Loop time to report. Please note that to be considered for listing here you must follow the commonly established rules of self support (no crews, no caches, et cetera). If you have any questions about what this means, ask on the forum.
The Grand Enchantment Trail is the brainchild of Simblissity’s owner and operator, Brett Tucker. It’s hard to imagine a more passionate and motivated creator of a long distance trail. A powerful army of one, Brett has created the Southwest’s premier long distance route.
The GET runs some 700 miles from Phoenix, AZ to Albuquerque, NM. It covers some of the more remote and beautiful terrain in the United States.
Though not an official, signed trail, the GET has an excellent set of maps available from Simblissity. Informal GET flagging also shows the way in tricky intersections.
Without a doubt, this trail is for the adventurous, experienced bikepacker. Exploration of the route continues in 2008 and into 2009. Wilderness detours and in general the concept of a bike friendly GET route are still a work in progress.
GPS Data
3D image from TopoFusion software – click to enlarge
El Camino del Diablo – The “highway of the devil” – so named from the original 1540 expedition commissioned by Francisco Vasquez de Coronado due to the hardships encountered. The route lived up to its name during the 1849 gold rush. Some traveled during summer to avoid Apache marauders, and they paid the ultimate price in 120 degree Yuma heat. Historians estimate from 400 to 2,000 people have lost their lives on the Camino, meaning that it is the most deadly immigrant trail in North America.
The route once linked Caborca, Mexico with Yuma, AZ. The modern version (after pavement) of the Camino starts in Ajo, AZ and ends in Yuma, AZ. It’s occasionally run in 4wd vehicles, but this route makes a good bikepacking route, provided you are prepared to deal with a little SAND! Enter fatbikes!
Permit Information
The Camino Diablo route enters the Cabeza Prieta Wildlife Refuge. A permit from the U.S. Fish and Wildlife Service (Cabeza Prieta National Wildlife Refuge) is required to travel on the refuge. You can obtain the permit at the Wildlife Refuge office in Ajo, AZ. You also need to call a number to inform the Goldwater military range that you are entering the Camino. They can explain it all at the Wildlife Refuge office — you just have to hit them when open. You can also obtain permits by mail.
If you ask any federal employee they will likely tell you there is no water available anywhere on the Camino. However, occasionally either of Papago Well and Tule Well may have functioning faucets. Also the Tinajas Altas (high tanks, just off route and near the Yuma side of the Camino) are very deep and almost always have rainwater stored, though it is not fresh. In general it’s best to carry all you need, and treat any you find as a bonus.
Border concerns
The Camino travels very near the US/Mexico border, so both border crossers and smugglers may be encountered. The border patrol runs regular patrols along the Camino. Border issues are no reason to not travel the Camino, but definitely something to be aware of.
The Camino through the Cabeza Prieta is almost entirely hemmed in by Wilderness on both sides, so the route options are limited. However, there is a loop that can be done by branching north to Wellton, following the I-10 frontage road to Tacna, then continuing back to the Camino via a quite sandy road. That loop could be done on its own, skipping Ajo completely and giving water resupply at the Tinajas Altas. Though a complete passage of the Camino is a worthy goal as well.
Please note, this page is about the CDT, which is long distance singletrack trail, for information on the “bike version” of the divide, see the Great Divide Mountain Bike Route Page.
Overview
Generally accepted as more difficult, in many respects, than the PCT or AT, the CDT is the big daddy of all long distance trails. It is also unlike the PCT and AT in that most of the trail is open to cyclists (outside wilderness areas).
The trail is a work in progress, with many sections unfinished or routed on dirt roads.
History of cycling on the CDT
There have been no known thru-rides on the CDT. Will you be the first?
Until 2014, there have been no known thru-rides on the CDT. Scott Morris and Eszter Horanyi completed the trail, from Crazy Cook to Waterton Lake, in the summer of 2014. There is still much to explore on the CDT, especially as it develops and changes over the years.
Besides a full thru-ride, sections of the CDT, are also frequently bikepacked. A prime example is where the CT and CDT overlap in Colorado. Other sections in New Mexico and Montana are also frequently ridden.
Many areas of the CDT are currently being considered for wilderness designation, despite historical mountain bike usage. There have also been indications that land agencies would like to discourage or not allow bikes on the CDT summarily. Since cyclists are already shut out of the other two major long distance trails, it would be a shame to lose access to the CDT!
GPS Data
Drop-n-Roll has current GPX files for the entire trail here: CDT GPS Data. They are based on Bear Creek Survey’s official CDT data as well as Jonathan Ley’s maps
CDTBike GPX data to come!
The following are two GPX files from different CDT loops along the MT/ID border:
CDTC: CDT Coalition Unfortunately no mention of cycling is made on their entire website, let alone bikepacking, despite the majority of the trail being open to bikes. They do not seem to view human powered and silent travel of the CDT as an acceptable use. Jonathan Ley’s site – his maps are the best source of current information on the CDT. Most thru-hikers use his maps.
The Colorado Trail is one of the classic singletrack bikepacking routes in the western US. Starting on the outskirts of metro Denver, the trail quickly climbs into the Rockies and stays high – at an average elevation above 9000 feet.
Route Details
The first ~200 miles of the CT are widely regarded as some of the finest trail for bikepacking. Highly rideable and very scenic, there are some unforgettable sections. After Buena Vista, the trail’s character changes somewhat, with more frequent hike-a-bikes and difficult conditions. Wilderness detours also force thru-riders onto dirt roads.
There are a number of route options for the CT thru-rider. All are described in the Official Guidebook. Most are required wilderness detours, however some are offered as suggested alternates around difficult sections.
The Colorado Trail Race route uses only the required wilderness detours. Previous versions of the race also included non-wilderness detours: around the Ten Mile Range outside Breckenridge and the Spring Creek Pass detour, following Cinnamon Pass instead. Both of these non-wilderness sections are possible and desirable for cyclists willing to do some extra bike pushing, but they are commonly skipped, too.
Challenges
The challenges of the CT are many, but a few of the unique ones are: elevation, snow and lightning. The CT has a rather short window: July -> Sept, since most of the route is covered by snow otherwise. This generally puts trail users on the trail during period of monsoonal moisture, meaning a daily threat of thunderstorms. Combine that with some of the higher treeless areas and lightning is a concern.
Support the CTF
Maintaining and improving the CT is a huge task. The Colorado Trail Foundation does a remarkable job and has been decidedly pro-bike throughout the years. They are huge supporters of bikepackers on the trail, and deserve our support. If you ride the CT, you should support the CTF at least at the minimum level: –> Support the CTF
The Arizona Trail (AZT) stretches some 800 miles from Mexico to Utah. Covering a wide variety of terrain, it truly showcases the beauty and ruggedness of the Grand Canyon State. At present, 100% of the trail is complete — it was completed in 2011.
The AZT was designed from the beginning to be a multi-use trail, thanks to a pioneering vision by the trail’s founder, Dale Shewalter. Though some sections are technical and rugged, others are designed with bikes and bikepackers in mind. It’s best to run an ultralight setup due to the demanding nature of the terrain. Even more necessary is some form of tire/tube sealant!
The Arizona Trail also serves as a backbone for smaller multi-day loops, utilizing parallel roads and trails.
GPS data
screenshot from TopoFusion
No one AZT trip has been the same. New sections are built, old ones rerouted, and the biggest question an AZT thru-rider should ask themselves is, “how much do I want to stick to the trail?”
There are two extremes of this route choice. Staying with the trail can lead to some long hike-a-bikes (but also amazing terrain). The other extreme is the route described by Andrea Lankford’s book, which sometimes follows parallel dirt roads.
The current recommendation is to go with a route that is somewhere between the Lankford route and the “trail-no-matter-what”. There are several key sections of beautiful trail that simply weren’t built when Lankford wrote her book. There’s no need to spend so much time on dirt roads.
Also see the Arizona Trail Race’s GPS page, which is updated every year. Included there also are full cue sheets for the route and some water source information (though the best source of info on water sources, is from the Fred Gaudet’s water table page.
AZT Network GPS data details
The above file highlights the options available to the Arizona Trail cyclist. Each track is colored according to the following table:
Cyan
The current recommended route
Green
Easier / road alternates, usually as described in Andrea’s book
Red
Hike-a-bike or otherwise adventurous segments for true AZT junkies
A number of waypoints are set as notes about some of the options. There are also waypoints set at each intersection in the network. The numbers on these waypoints don’t mean anything — they are simply a byproduct of TopoFusion’s network feature which was used to combine and filter the AZT network GPS data.
Crossing the Canyon
There’s one slight hiccup for AZT bikepackers. The Big Ditch, aka Grand Canyon, presents a bit of an obstacle. It is illegal to ride bikes anywhere in the canyon, and this is aggressively enforced (famous examples include the Sedona 5 and the Riding the Spine crew).
However, the corridor canyon trails (Bright Angel, North and South Kaibab trails) are not wilderness. So, it is lawful to possess a bike, as long as it is disassembled and the wheels don’t touch the ground.
Options for crossing the canyon:
Carrying your bike – This provides the best continuity for the trip, but it is also the most difficult. Morris and Blackwell strapped their bikes to their packs, including camping gear, and made the crossing on their 2005 trip.
Shuttling the bike – A number of shuttle services are available to get your steed from one side to the other, leaving you footloose and fancy free to make the crossing by foot. Hiking rim to rim is an experience like none other. Another option is to get a friend to shuttle your bike across. However, this option is subject to the closure of the North Rim. The shuttle services won’t run, and the gate south of Jacob Lake will be closed until the park is officially open. The optimal weather window for bikepacking the trail often dictates an arrival on the North Rim while it is still closed (to cars, not to human powered travel).
Riding around – This option works, and preserves the purity of “riding” the route (staying on the bike). However, to date no one has found a route that avoids significant stretches of busy and potentially dangerous riding along highway 89.
History of Cycling on the AZT
In 2000, Andrea Lankford led the first thru-ride on the AZT. Told by some that she “couldn’t do it”, she proved them wrong by cycling the length of the state with Beth Overton. The result of that trip was the guidebook, “Biking the Arizona Trail.”
In 2004, Tim McCabe ventured out to ride the full trail, exploring sections of the AZT not described in Andrea’s book, newly built ones, and ones not recommended by the book.
In 2005, Lee Blackwell and Scott Morris took up where Tim left off. They tried to stick to the official trail, and ended up exploring some interesting but arduous wilderness detours.
Also in 2005, Scott Morris was the first to time trial the trail, following Andrea’s route and finishing the 750 mile trail in just over seven days.
2006 saw the first AZT 300, putting bikepackers on a contest with the first 300 miles of trail. A race on the full distance of the trail, including the mandatory portage across the Grand Canyon, started in 2010.
The AZT was officially finished in December of 2011, though there is no official bike route. Various options for detouring around Wilderness are available, and some sections are still not recommended for bikes. The trail continues to be improved, with singletrack sections replacing dirt roads, and more bike options available.
Whether you’re just checking in, allowing others to track your progress, or calling for help – SPOT gives you a vital line of communication with friends and family when you want it, and emergency assistance when and where you need it. And since it utilizes 100% satellite technology, SPOT works around the world – even where cell phones don’t.
Size: 4.38 X 2.75 X 1.5” (approx. 111 mm x 69 mm x 44 mm) Approximate Weight: 7.37 ounces (209 grams)
169.99 USD (SRP)
Low-Cost satellite service subscription required.
SPOT features four key functions that enable users to send messages to friends, family or emergency responders, based upon varying levels of need:
Alert 9-1-1 – Alert emergency responders to your exact location
o SPOT sends one message every 5 minutes until power is depleted or 911 is cancelled.
Ask for Help – Request help from friends and family in your exact location
o SPOT sends one message every 5 minutes for one hour or until Help is cancelled
Check In – Let contacts know where you are and that you’re okay
o SPOT sends three identical messages to the SPOT service for redundancy. The first of those three messages is delivered.
Track Progress – Send and save your location and allow contacts to track your progress using Google Maps™
o SPOT sends one message every 10 minutes for 24 hours or until SPOT is powered off.
Battery Life
Includes 2 AA 1.5V lithium batteries; under normal usage a full battery charge should meet or exceed the following
* Power on, unused: Approx. 1 year
* SPOTcasting tracking mode: Approx. 14 days
* 9-1-1 mode: Up to 7 consecutive days
* SPOTcheck OK/√: 1900 messages
$99.99 USD/yr basic satellite service subscription includes:
ALERT 9-1-1:
Dispatch emergency responders to your exact location. Unlimited usage included.
CHECK IN:
Let contacts know where you are and that you’re okay. Unlimited usage included.
ASK FOR HELP:
Request help from friends and family at your exact location. Unlimited usage included.
Terms and conditions apply >>>
Upgrade Services:
TRACK PROGRESS:
$49.99/yr USD Tracking Upgrade Option
Send and save your location and allow contacts to track your progress using Google Maps™.
GEOS Search & Rescue Benefit
$7.95/yr USD (if purchased at initial activation. $150.00 USD afterwards)
Provides up to $100,000 USD of additional search and rescue resources, including helicopter extraction around the world and reimbursement benefits – underwritten by Lloyd’s of London – for any emergency service expenses incurred. For more information, including terms and conditions, visit http://www.geosalliance.com/sar
Bike backpack featuring a revolutionary carrying system. The central Flink ® ball joint allows for huge freedom of movement for the upper body. Pressure is evenly distributed on both shoulders, thus protecting the back. This makes for a completely new and comfortable carrying sensation. Gender specific carrying systems each in two sizes. Available as a lighter daypack with reduced capacity.
Sizes: S, L BD2-M Team Edition – for men
Sizes: S, L BD2-W Team Edition – for women
Gender • Male / Female specific
Capacity • 15 liter
Main fabric • 1000 D Nylon
Hydration Pack • optional
Bike backpack featuring a revolutionary carrying system. The central Flink ® ball joint allows for huge freedom of movement for the upper body. Pressure is evenly distributed on both shoulders, thus protecting the back. This makes for a completely new and comfortable carrying sensation. Gender specific carrying systems each in two sizes. Available as a lighter daypack with reduced capacity.
Capacity • 12 liter
Main fabric • 1000 D Nylon
Hydration Pack • optional
CamelBak’s most technical cycling pack offers both secure and overflow storage stabilized via two-level compression, plus hydration for 3-hour rides.
* Air Director™ ventilated back panel with Air Mesh shoulder harness enhances cooling airflow
* Padded shoulder straps provide a comfortable fit over the long haul; Dynamic Suspension™ harness keeps the pack stable as you move
* Slider SternumStrap™ lets you adjust the location of the strap up and down for a customized fit
* Removable waistbelt offers the option to use it for added stability or stash it away
* Cargo pocket with internal organizer can hold tools and keys
* MP3 pocket with weather-resistant zipper is conveniently located at the top of the pack
* External mesh pocket keeps essentials or jacket handy, featuring a cinch system that secures its contents and entire pack down tight
* OMEGA™ HydroTanium™ wide-mouth reservoir is built with a rugged polyurethane film with super-strong tensile strength and burst resistance
* HydroGuard™ technology embeds an FDA-approved silver ion compound into reservoir film and delivery tubes to inhibit bacterial growth
* Big Bite™ valve is ergonomically positioned for easy drinking; handly HydroLock™ securely shuts off water flow
* Full-zip panel access makes it easy to load a full reservoir into the pack
* Durable splash guard protects pack from mud and abrasion
This is the order I found and wrote everything as I unloaded after the last trip
Helmet
Bandanna
Western Mountaineering sleeping bagAntelope 2lb 7oz5 degree,
Thinpolypro long underwear bottom
Rainpants
29er tubes(2)
Simblissity (Brett) gaiters
Wooleatorwool socksone to wear one spare
One very thin cotton T shirt
One pair polypro glovesone pair MTB gloves
Epic Designs seat bag
Integral Designs 5 by 8 Siltarp
Thermarest Prolite 3 Small
Spare batteriesAA and AAA
Numerous boxes of matches
Shower cap very thin plasic
2 tent stakes
Northface Flight series raincoatwith surprising number of broken pretzels in pocket
Space blanketfor ground sheet
Melanzana scrap cap
Melanzana poly top sweater
Epic Designs handlebar bag
Epic Designs custom made frame bag
Mountain Feed Bagright hand
Target LED flashlight with hose clamps
Creative Muvo mp3
Map printouts
Micropur water tablets
Small bottle OFF repellent
Dental floss
Cortisone cream
Chap stick
Neosporin in single packs
Tiny toothbrush
Tiny headlamp with elastic band
Needle and thread
Whistle, compass, thermometer combo
A few Kleenex tissues
Pen
Boure pro bike shorts
EMS zip leg pants
Lite poly long sleeve T shirt
Osprey Talon 22 pack
Garmin 60 C GPS unit
Pump, patch kit, extra Stans sealant, tire plug kit, multitool, knife, small leatherman, first aid kit, chainlink, derailleur hanger, chain lube
100 oz bladder
Tall water bottle on frame
Wallet, money credit cards ID
Reading glasses
Sunglasses
Bellweather leg warmers
Cannondale mtb shoes
Sunscreen
Wool T shirt
Camera
Water filter, miox or katadyn
Ziplock bags
Cell phone
Crocks
Down vest
Helmet light Princeton tech
Food Ideas: Pemmican bars, snicker bars , bagels, roast beef, M&M’s, chocolate, salami,parmesan cheese,ultrafuel, apple, orange, celery, carrots, potatoes precooked, mixed nuts, tortillas, peanut butter, fritos, goldfish, pretzels, twizzlers, tuna in bag, salmon in bag, burritos, whiskey, Java Juice pre brewed coffee in distilled packets. Dried fruit,trailmix
Creative Muvo MP3 player (not for riding, for long fall nights…)
On person:
long sleeve technical shirt
bike shorts
wool socks
Pearl Izumi X-alp shoes
This was for a 4-5 day trip with several opportunities for resupply, so no stove. Sub freezing temperatures were expected at night (mid-fall in New Mexico). Only a slight chance of rain, so no tarp, just the bivy bag.
I’ve found that for steep descending or technical riding in general, I prefer nothing hanging from my handlebars. I left the feed bag on as it seems to make no difference. But when things got interesting and/or fun I pulled the sleeping pad from the bars and was pleasantly surprised how much handling improved, to the point where I nearly felt unloaded at times.
NEMO’s Gogo bivy is a great option for those who are short on space but don’t want to sacrifice space and comfort in their shelter. Weighing in at just 1.9 lbs. and packing down to 5.5 X 7, Gogo fits in the tightest of spaces. It packs down smaller than traditional tents and bivys because there are no poles. NEMO’s patented AirSupported Technology™ utilizes low pressure airbeams for support. The airbeams work much like a bicycle tire; you’ve got an inner bladder and outer shell. The airbeams are meant to withstand strong winds – they can bend without breaking and are stronger than traditional aluminum poles. NEMO’s OSMO™, their proprietary waterproof/breathable fabric, is sturdy, dependable and has been garned by gear reviewers as one of the most breathable fabrics on the market.
This pic (below) was taken the day before I left for the start. A few things changed that night before leaving, but they were pretty minor.
And I know it’s hard to believe, but on the bike or in the pack in that photo are:
gore rain jacket and pants
arm and knee warmers
warm gloves and rain gloves
extra shorts and shirt
2 days worth of food
water filter
ability to carry ~320oz of water easily and comfortably
3 lights (2 bar, 1 head) and at least 2 nights worth of batts
digi camera, 2 days worth of batts, and a spare memory card
cash money, credit card, calling card, ID
drugs (pain reliever, anti-inflam, antibiotic), basic first aid kit, chamois creme
multi tool, leatherman, tire lever, 2 tubes, full size pump, couple feet of duct tape, real patch kit, spare bolt kit, spare links of chain, spare brake pads, spare shift cables, spare cleats and bolts, chain lube and rag, sewing kit, spare spokes and nips
clear lens for night riding, orange lens for contrast
sleeping bag, sleeping pad, and bivy sack
cyclometer and all ACA maps and cue sheets
and a few critical things that I’m intentionally leaving out…
How to get it so compact and light? The devil is in the details.
Paula and I spent a morning gathering gear and packing. We left from the house, using a combination of city bus and pedal power to head southeast to the Arizona Trail.
Soon we were on the trail and the race was on. It was 93 degrees and we had ice cream and burritos on the mind. The desert spoon fresh air cafe lies about 0.1 miles off the AZT.
But it closes at four, not five, as we thought. With some sweet talking, the grumpy caretaker was convinced to sell us 4 ice cream bars, and confectionery bliss ensued.
We proceeded on the trail, with some 350 oz of H2O on board.
A wonderful evening for cycling. As if there are poor evenings for cycling!
I had a camp spot in mind, but when we got there Paula would have none of it.
“I’m having too much fun… and I never get to night ride!”
“You got it, hottie!”
We flipped on our headlamps, gliding down the sinuous trail. Through ocotillo and saguaro we dodged, trying to keep our eyes off the fading light over the Tucson mountains.
We stopped to observe reflective spiders, declared freaky with their robotic/mechanical movements.
Railroad tracks and interstate 10 preclude a quiet place to camp for while, so we just kept rolling, enjoying the cool air and smooth trail.
A beautifully still, warm night had us up early, anxious to gobble up more narrow trail.
After many a mile of bikepacker friendly singletrack, courtesy of the aztrail-build.org effort, we were forced onto the highway for about 5 miles. There’s still a missing link of trail.
As on any rural highway, the passing distance and speed of cars varies. After observing a small car with an Obama sticker slow down and give us a wide berth, we started joking that we could tell voting preferences based on passing behavior.
So, we started the bikepacking.net election pollster service. I’m sad to report that McCain is winning in the redneck Friday morning scenic highway 83 demographic.
We merged quickly onto new-to-me AZT on the Las Colinas segment.
Unfortunately a certain someone from the Forest Service exerted his influence on some pieces of this trail, and the result is a few fall line sections and wheel grabbing “knicks.”
Mostly a great ride, though, and knee high grasses and flowers were enough to take our minds off any misgivings of trail alignment.
Oak Tree Canyon was less sandy than usual. For whatever reason, going south on this section of AZT is always more enjoyable for me.
Some bonerbrain (me) left our bottle of denatured alcohol on his work bench. So, we had pasta, oatmeal and hot chocolate, but no way to cook it. We brought extra food, so we were fine, but the caretakers at Kentucky Camp were kind enough to offer to boil some water for us.
We were the only visitors they had all day, so we chatted as we ate pasta and watched the clouds float by. They were an older couple, and hardcore Obama supporters — perhaps there is hope to turn the tide in the aforementioned demographic.
It was a very pleasant break from the labors of the trail. Paula had successfully navigated some 50 miles of desert terrain, with all manner of sharpness–both vegetative and geologic–waiting to injure her. But it was the porch of the caretakers’ trailer that almost did her in. She stepped onto what she thought was a step, but it was a little table that was barely able to keep itself up. A big gash on her shin and a slight possibility of a fracture was the result.
But she kept riding.
Waist high flowers and nearly invisible trail were not so kind to Paula’s shin. I suggested leg warmers for protection.
Time for some cloud magic…
Lights…
Camera…
Action!
I live for evenings like this.
Clouds that provide dramatic eruptions of color also signal changing weather. But with warm clothes and a tent there’s nothing to worry about, no destination for the night. Freedom.
Paula’s hobo stove (campfire + rocks) cooked us some oatmeal for dinner. As I set up the tent I watched lightning cracking to the south.
The wind blew most of the night, and some rain fell. But it was still an above average night for camp sleep.
We tried to time the breaking of camp with a lull in the rain, but it was impossible. The clouds were in a hurry and there was no predicting it. From sprinkle to downpour in 30 seconds.
But strangely warm, so it was no big deal.
Enough of a deal for us to abandon plans of exploring Hog Canyon or riding anymore AZT (it goes into the wilderness anyway). We detoured off to the town of Sonoita, and every look back at the mountains we had descended from confirmed our decision.
Dark f-ing clouds.
Contrasted by bright fields of flowers. It was still a fine day to be out on bike.
While staring towards Patagonia, watching clouds, a woman came over and offered us a ride to town. One look at the strength and direction of the wind was all I needed. Sure!
We hopped in and 10 minutes later we were wandering around the Patagonia arts fair, petting llamas and looking at desert photography. In the sun!
Salero Road is a pleasant cycle. We saw two vehicles in the space of as many hours. Scenic, quiet and a solid road surface. It was a good day for those who like to watch clouds.
(I do…)
We were attacked from several sides by sudden storms. Visibility would drop to 40 feet without warning.
I haven’t been dumped on like this since living in Colorado.
Yet, it was still warm. So just a bit uncomfortable at being wet.
We descended into Tumacocori, through interesting new terrain.
You know it’s been a good trip when not rain, not direct headwind, not hunger can faze you (or your ever patient ride companion, whose interest in spending time with you outranks her interest in bikepacking and suffering on the bike).
We crossed the Santa Cruz river after marveling at the green corridor of the flood plain.
The spoils of bikepacking: tasty grub and a tail wind to blow us north to Tubac. We stayed the night at Lee Blackwell’s house, then he ferried us back to Tucson the next morning. Paula’s first grade class resumes Monday morning!
~120 miles riding, 18,000 feet climbing, and 3 days out on the bike. (~2000′ more climbing than descending, making it a reverse shuttle… doh!)
The Princeton Tec EOS Headlamp has three levels and a regulated Maxbright LED, delivering a smooth beam of white light from a shock-resistant waterproof housing.
The combination of a one watt Maxbright LED and Princeton Tec’s proprietary optics offers unprecedented brightness and beam smoothness in an ultralight, 3-AAA platform.
The Princeton Tec EOS is optimal for both localised needs and spotting at a distance.
The PrincetonTec EOS has been equipped with three brightness levels and a blinking emergency/signalling mode.
Key Features
* Power: 25 Lumens
* Batteries: 3 x AAA
* Weight: 105 g.
This “sleeping pad” will protect your car’s interior and perhaps give you a reasonable night of sleep. Most famously used by Mike Curiak in his 2004 Great Divide Race setup, this is about as minimal a sleeping pad as you can get.
Nothing to inflate, just throw on the ground and you are ready to crash.
Product Link: (Autozone? Checker?)
Please rate this product: (no login required) (33 votes, average: 3.55 out of 5) Loading ...
* Light and compact three season pad, with 2.5″ of comfort
* PrimaLoftTM eco: synthetic insulation made from 50% recycled materials used in all 20″ wide pads
* I-beam construction eliminates welded seams to reduce cold spots and ensures quick inflation/deflation, consistent air flow and stability
* 20″ pads: Durable, lightweight 50D nylon diamond rip-stop top and bottom
* Internal polyurethane coating
* Non-breakable brass valve with plastic coated EZ-FlateTM mouthpiece
Introduction of Fenix P3D (Cree Edition) Flashlight
Fenix P3D Q5
The Fenix P3D CE is a high-tech, rugged tool that’s perfect for any lighting application. It features six levels of output, which not only allows the user to select the best compromise between brightness and runtime for any given task but also has ability to aid in an emergency. What’s more, the Fenix P3D CE throws an awesome 160 lumens beam, an incredible amount of light for a light of any size. If you’re looking for a flashlight with solid reliability, digitally regulated brightness, and compact size, this Fenix is for you.
Features
Utilizes a Cree 7090 XR-E LED with a life of 50,000 hours
Two modes of output, selected by turning the bezel
General Mode: 9 lumens (65hrs) -> 40 lumens (13hrs) -> 90 lumens (4.8hrs) -> SOS
Turbo Mode: 160 lumens (1.8hrs) -> Strobe
33 days of survival use (2 continuous hours per day on the lowest setting)
Digitally Regulated for Constant Brightness
Low Battery Indication
Uses two CR123A battery (not included)
11.4cm (L) x 2.1cm (D) ( or 4.5 in (L) x 0.8 in (D) )
Made of aircraft grade aluminum
Durable Type III hard anodized finish
49.2-gram (or 1.7 oz) weight (excluding batteries)
Water-resistant (dunkable)
Toughened ultra clear glass lens with AR coating
Push-button tailcap switch
Capable of standing up securely on a flat surface to serve as a candle
Battery not included
Includes a holster, a lanyard, two spare o-rings, and a rubber switch boot.
Trainer. Navigator. Edge 705 pushes you to do your best, then shows you the way back. This GPS-enabled cycle computer knows no limits. Get heart rate, cadence, turn-by-turn directions, power data (from ANT+™-enabled third-party power meters) — the works. Even share your data with other Edge 705 buddies after your ride. All wireless with a color display, this is no ordinary cycle computer.
Ride with Flying Colors
Give your training the Edge with the Garmin Edge 705 — available in black and now a custom blue and orange design just like the devices used by Team Garmin pro cyclists. Take this special edition Team Garmin Edge on your next ride and show your team spirit! No matter the color, you’ll train like a pro with the Edge 705.
The GPSMAP 60CSx adds several performance-enhancing features to the popular 60-series products, including a removable microSD™ card, high-sensitivity GPS receiver, barometric altimeter and electronic compass.
Pinpoint Your Location — and Direction
With the GPSMAP 60CSx, you can find your way in almost any conditions:
* High-sensitivity GPS receiver gives you improved satellite reception even in heavy tree cover or deep canyons
* Barometric altimeter provides extremely accurate elevation data
* Electronic compass can determine your heading and direction, even when you’re standing still
* IPX7 waterproof case can withstand an accidental dunk in the water and still perform
* Large, color TFT display makes viewing the screen easy, day or night
* Built-in Americas autoroute basemap, including highways, exits and tide data, gives you automatic, turn-by-turn directions
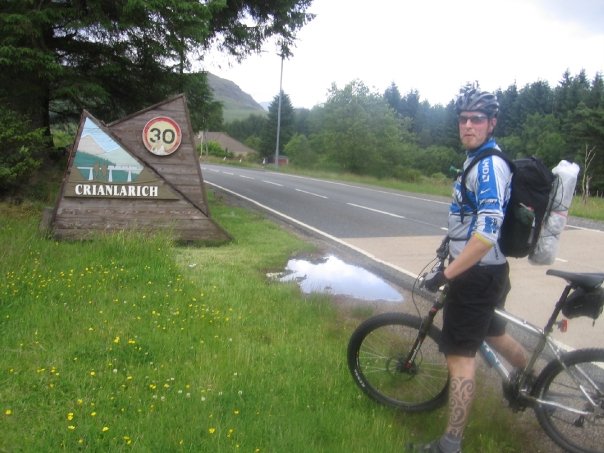
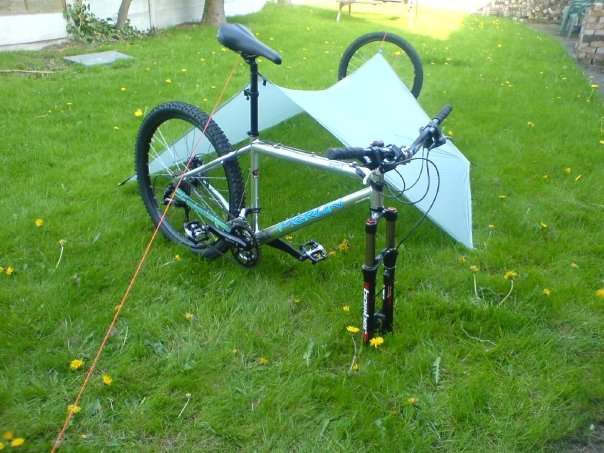


 (56 votes, average: 3.71 out of 5)
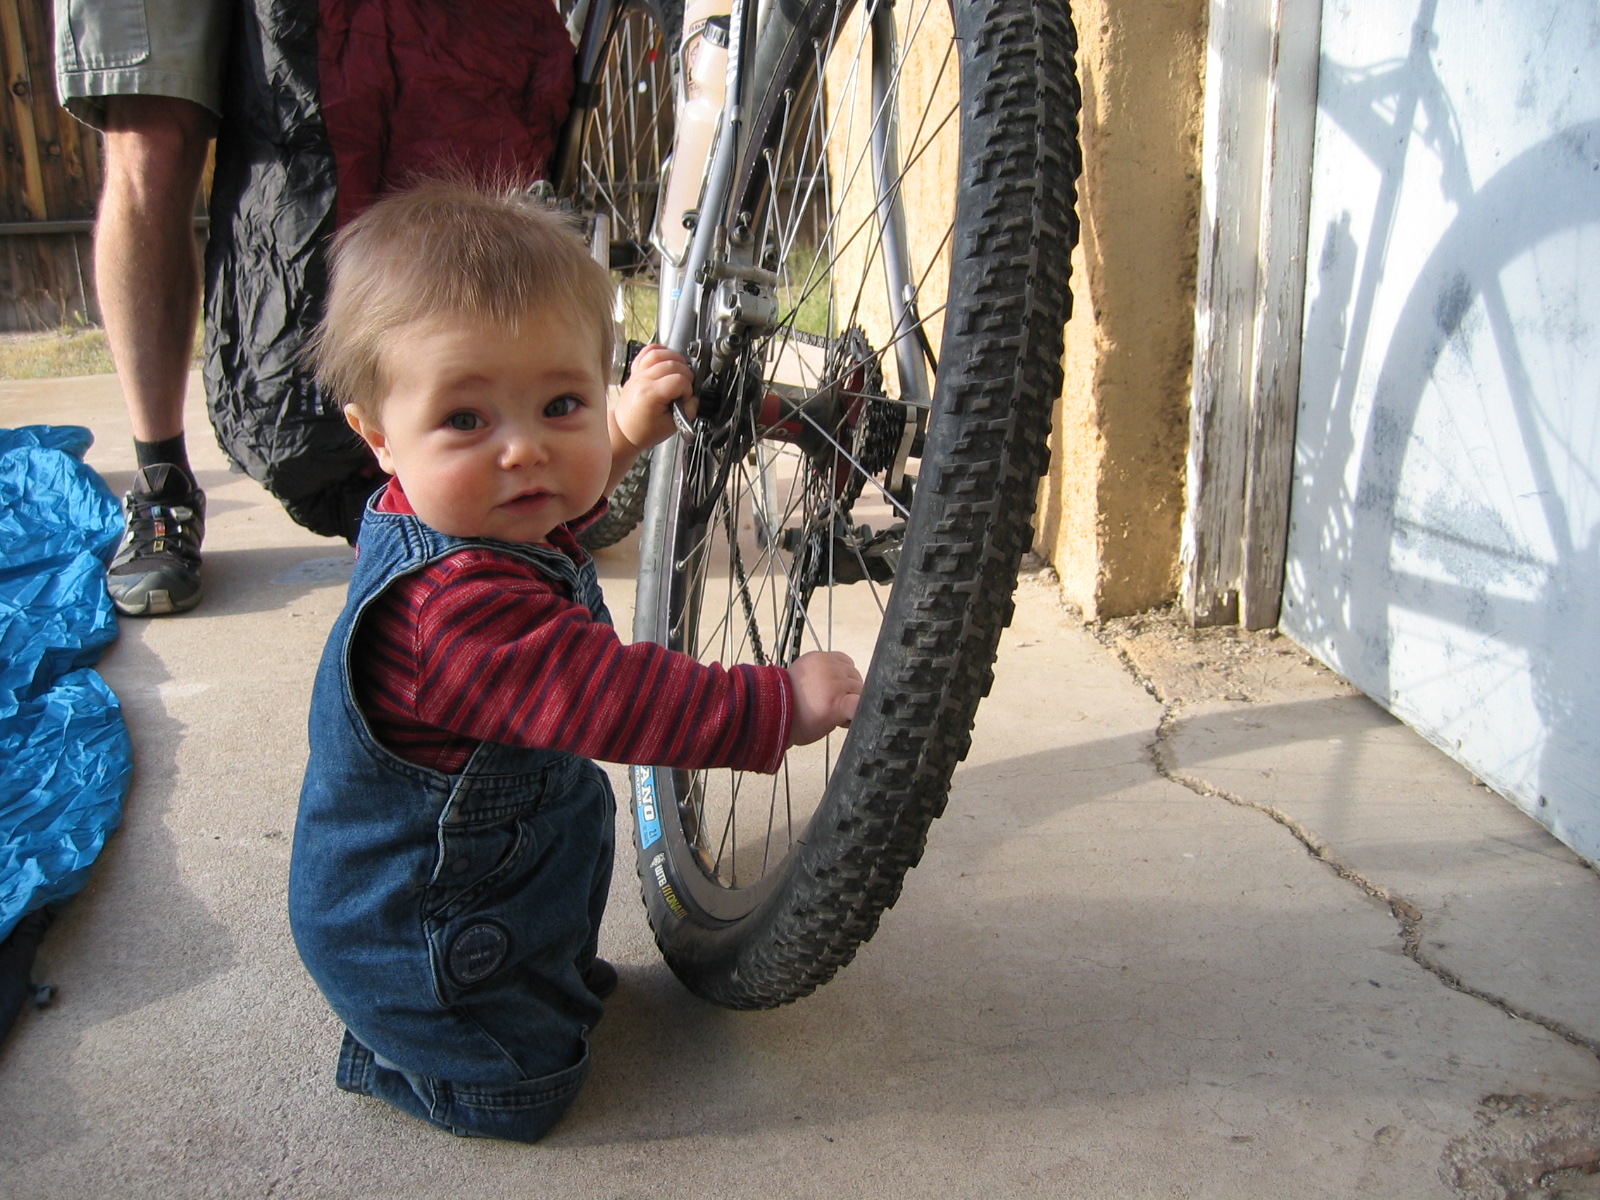
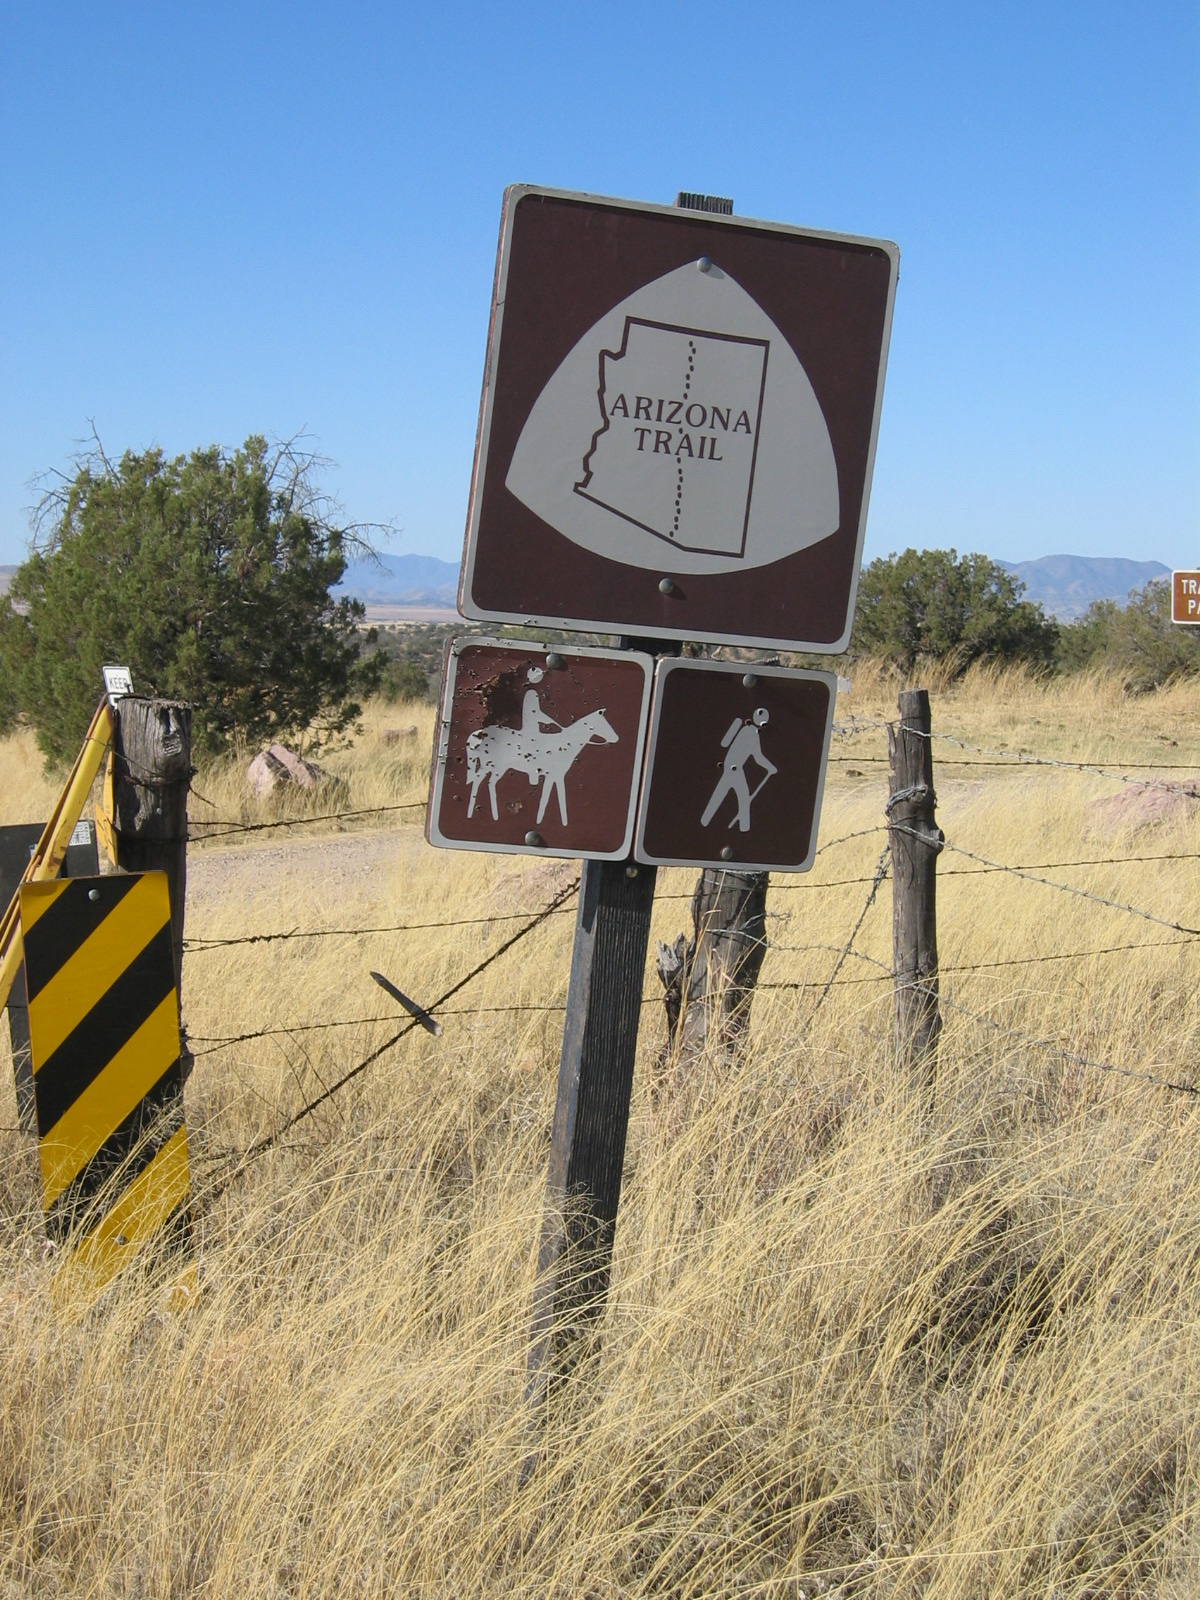


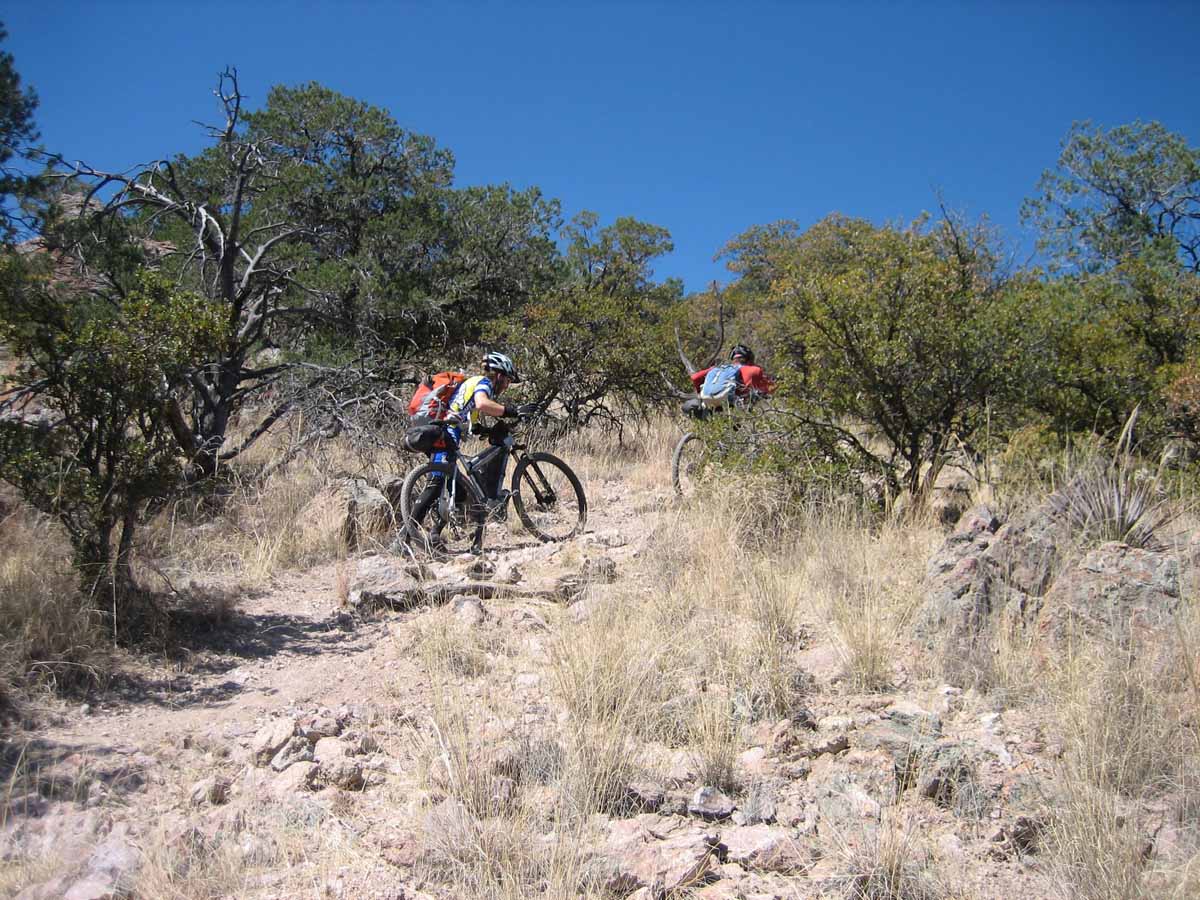
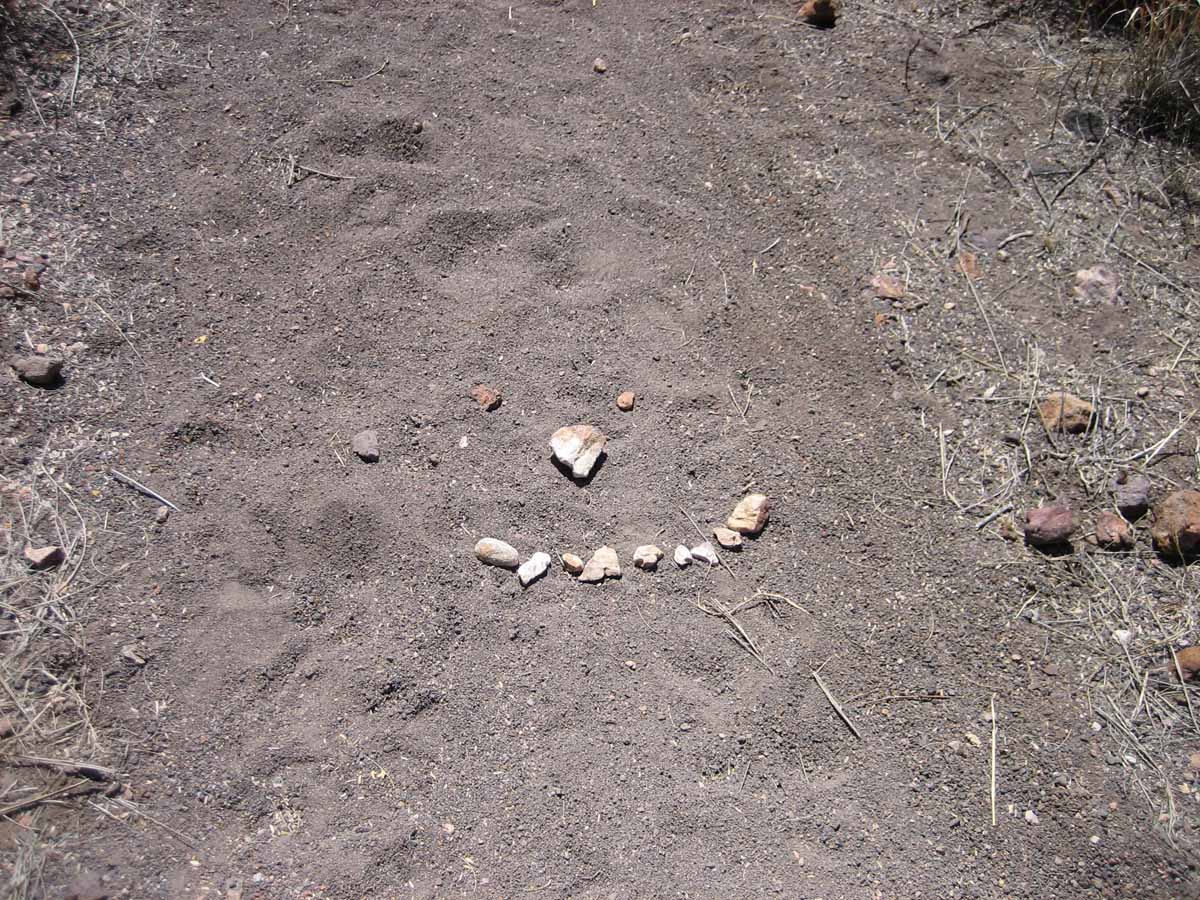
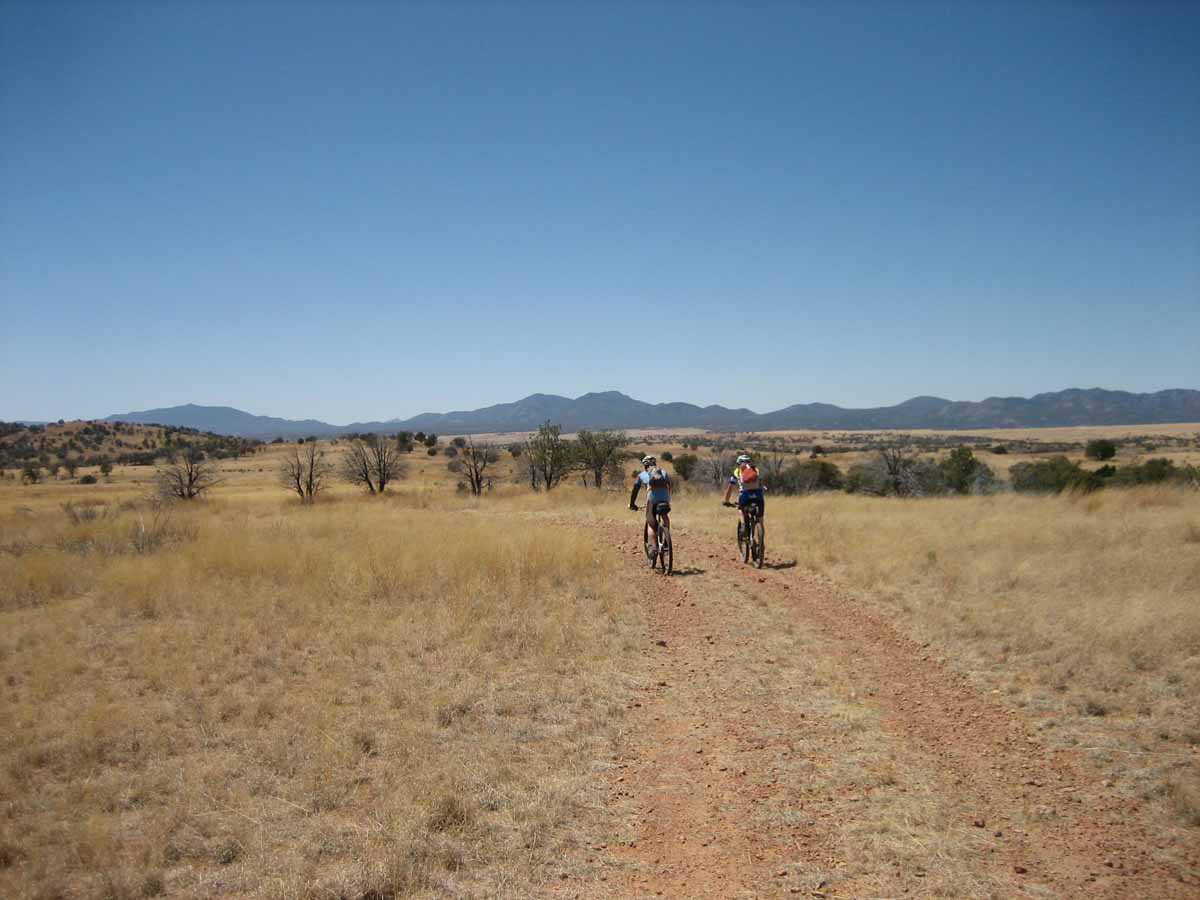
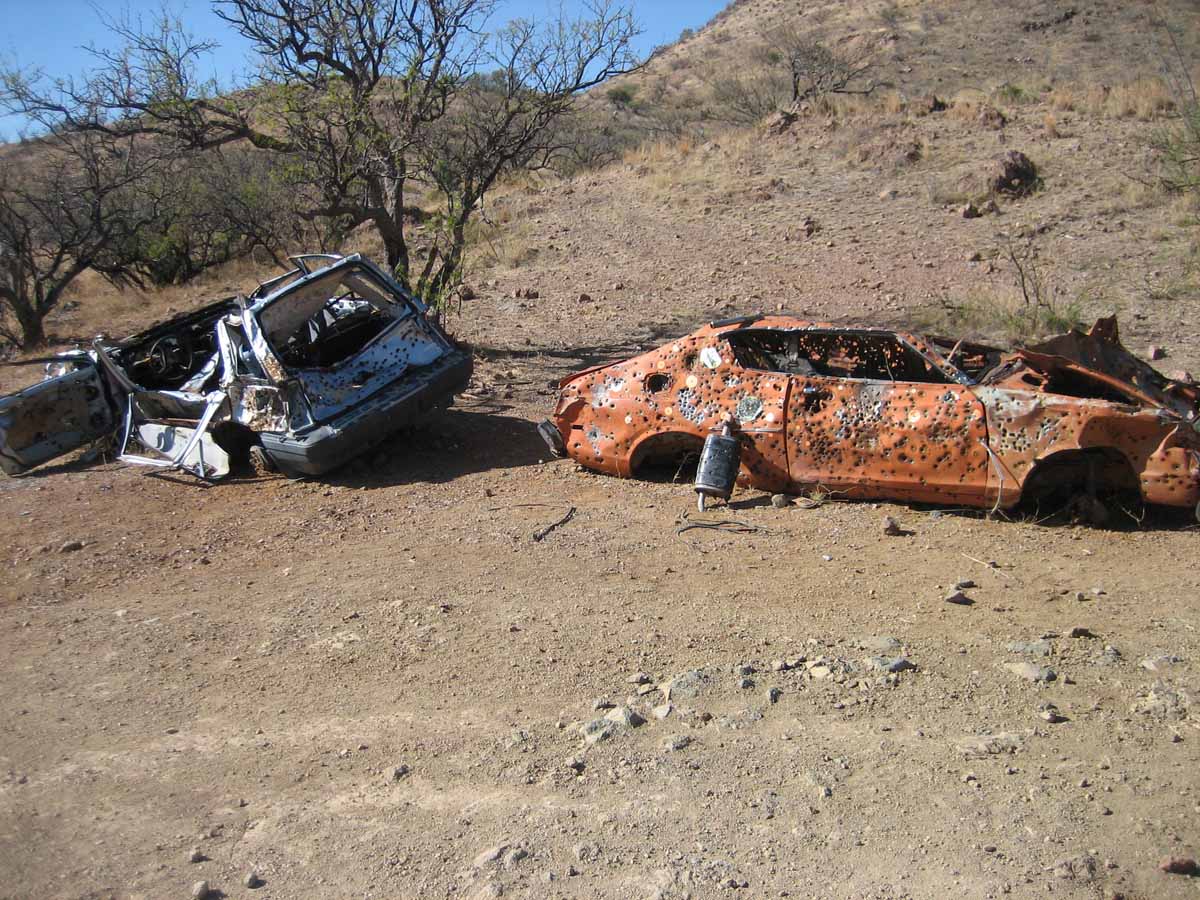
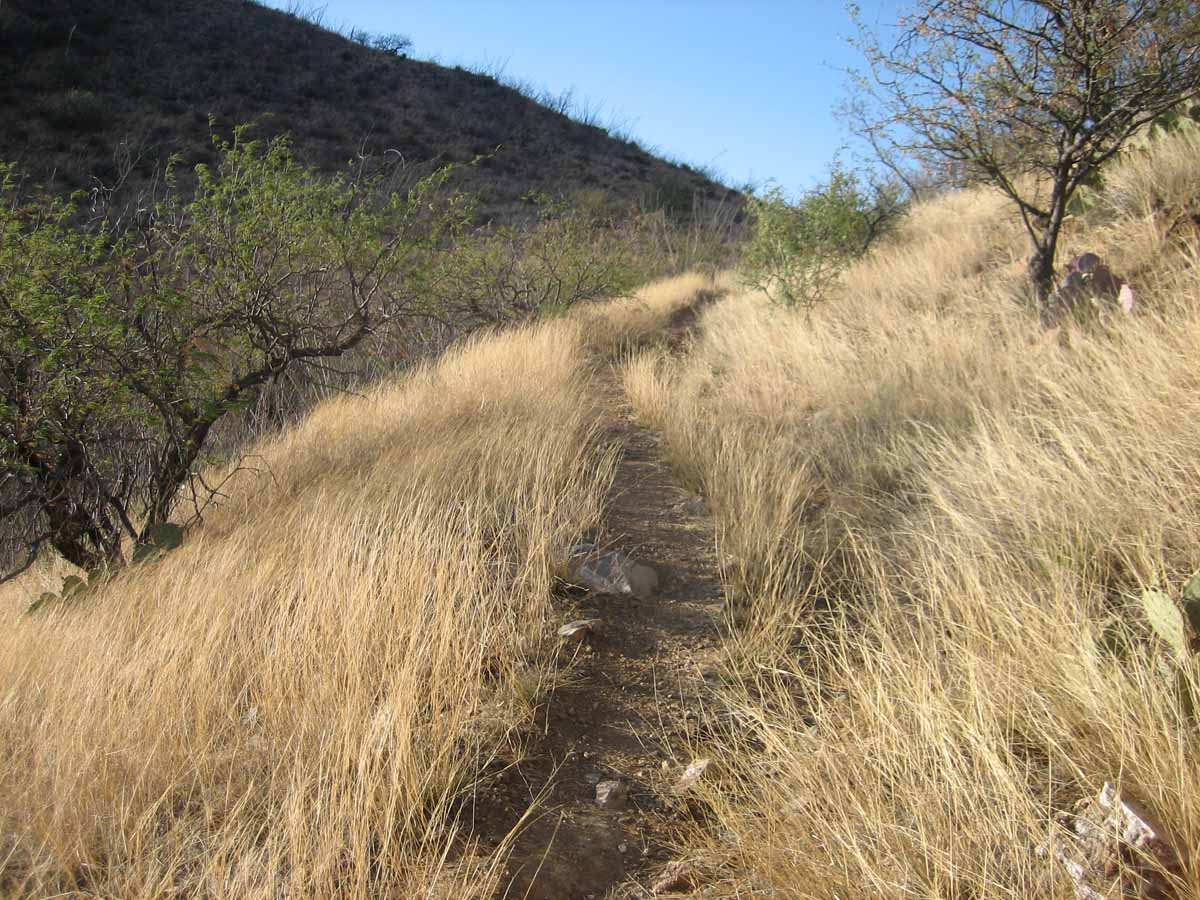
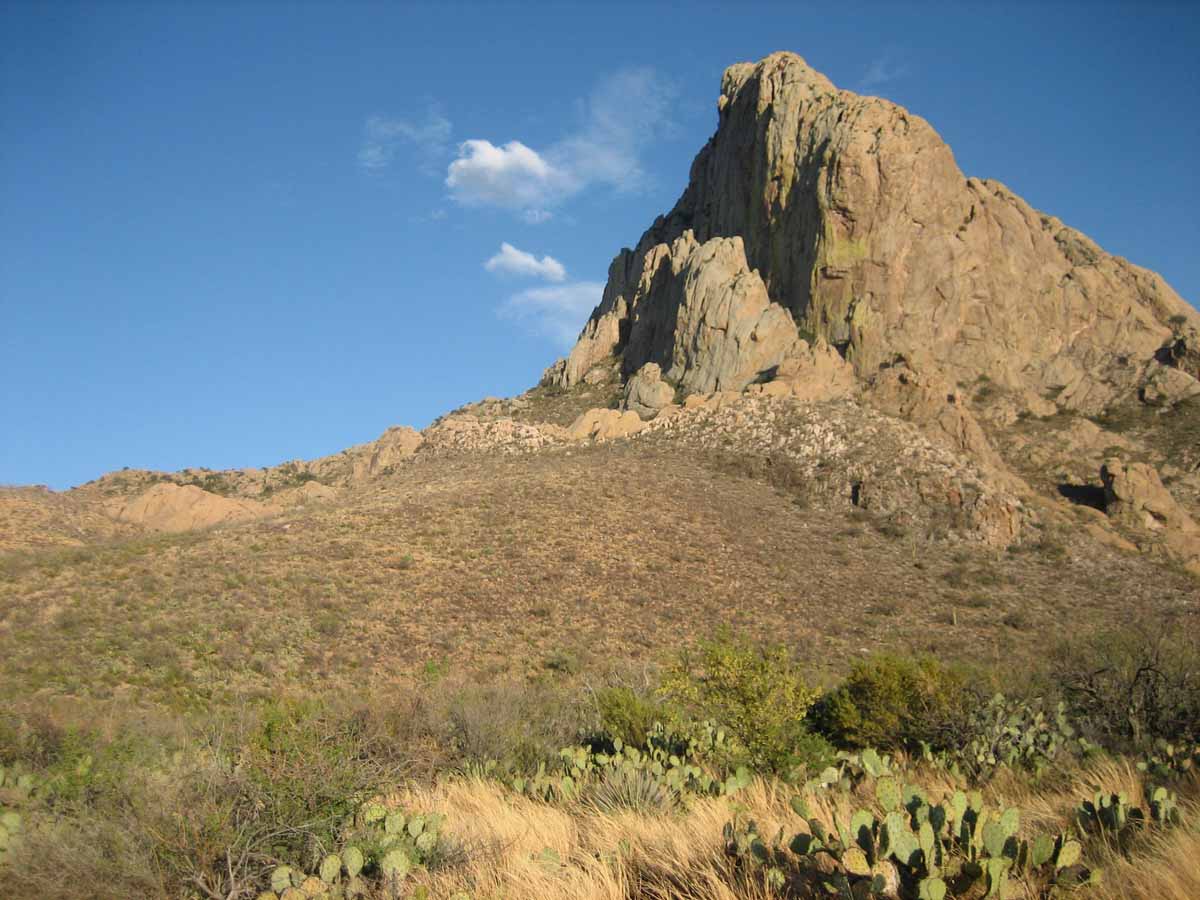
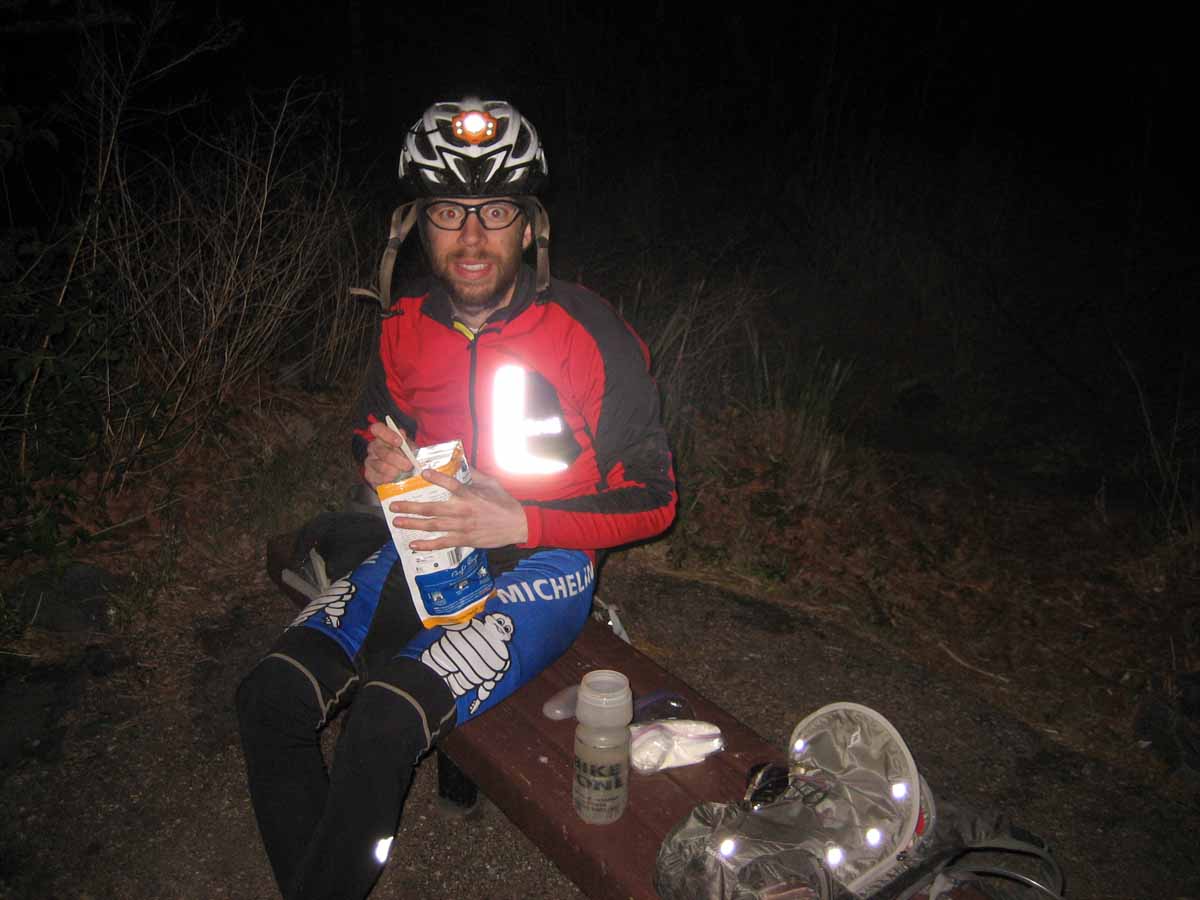
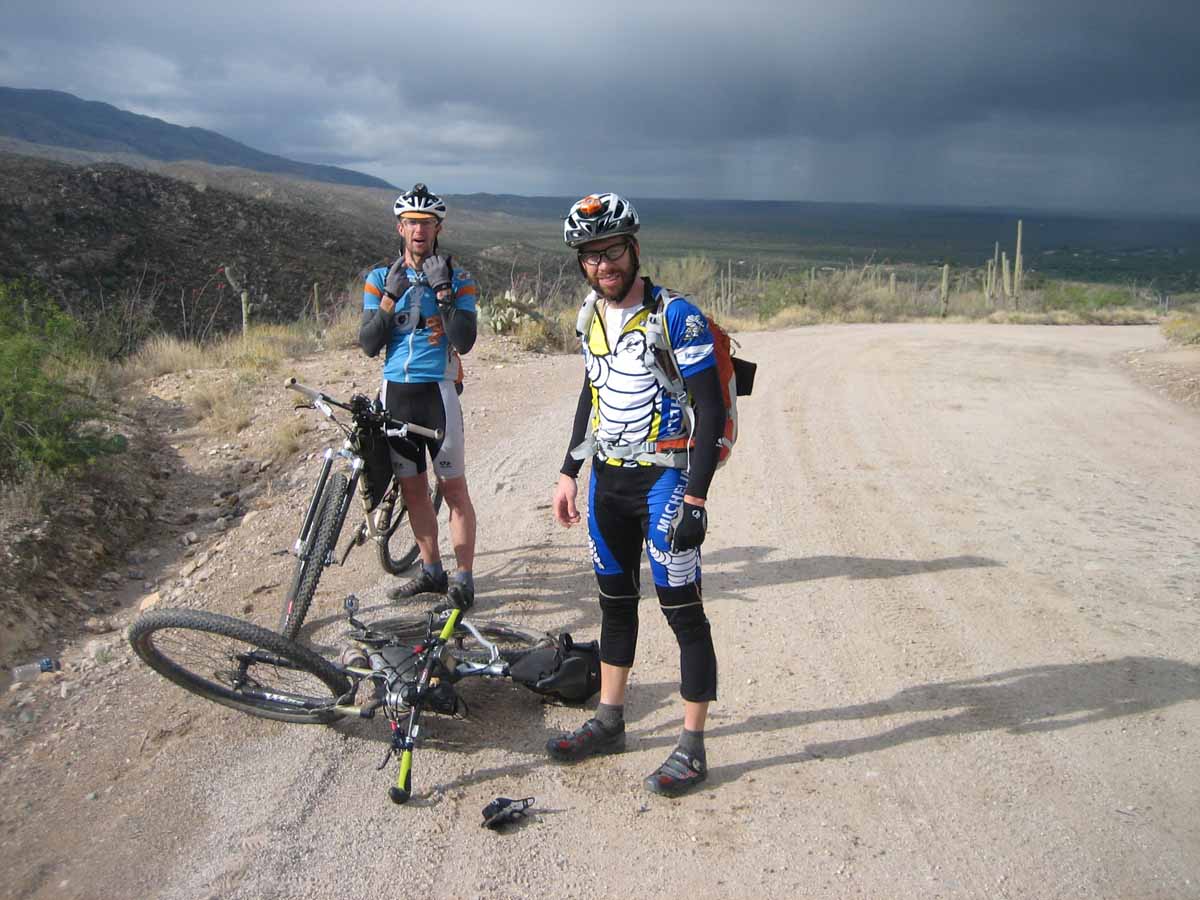
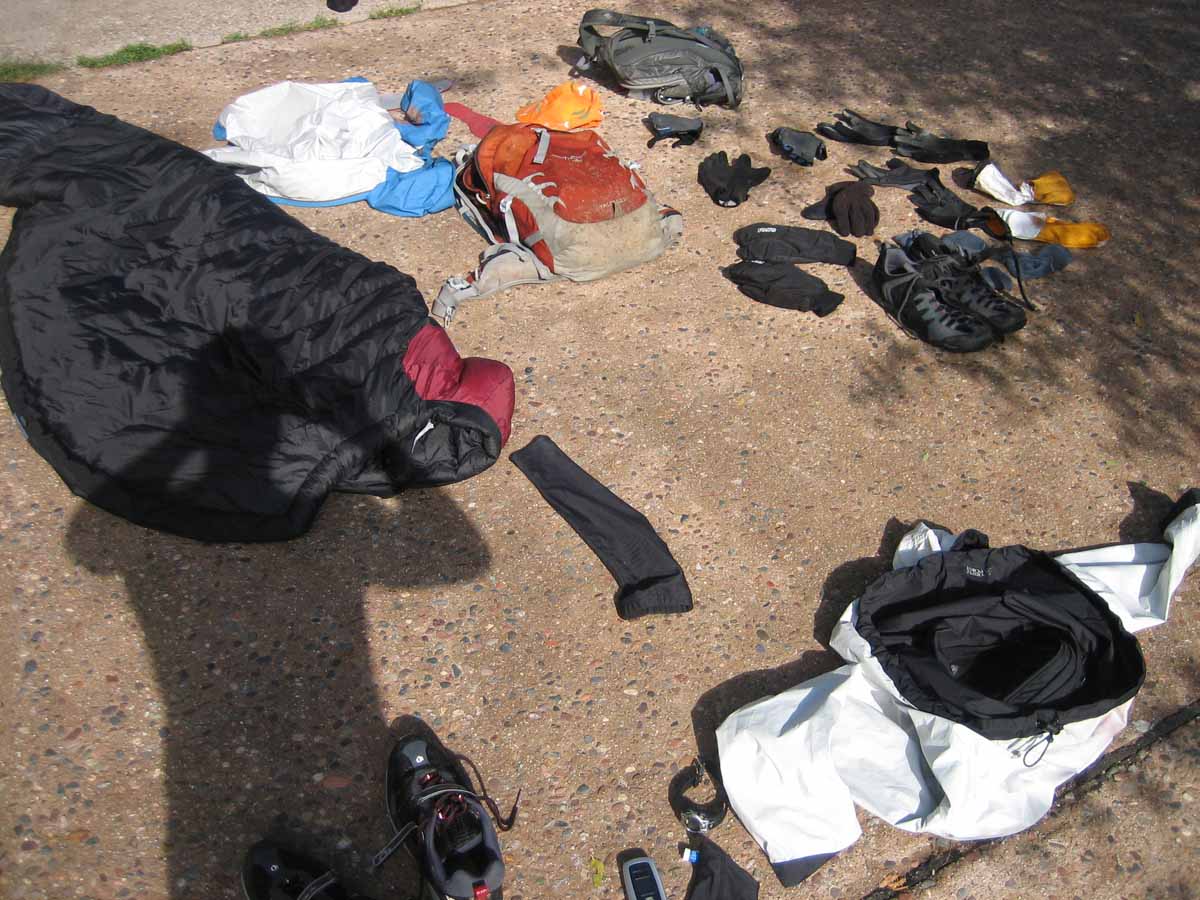
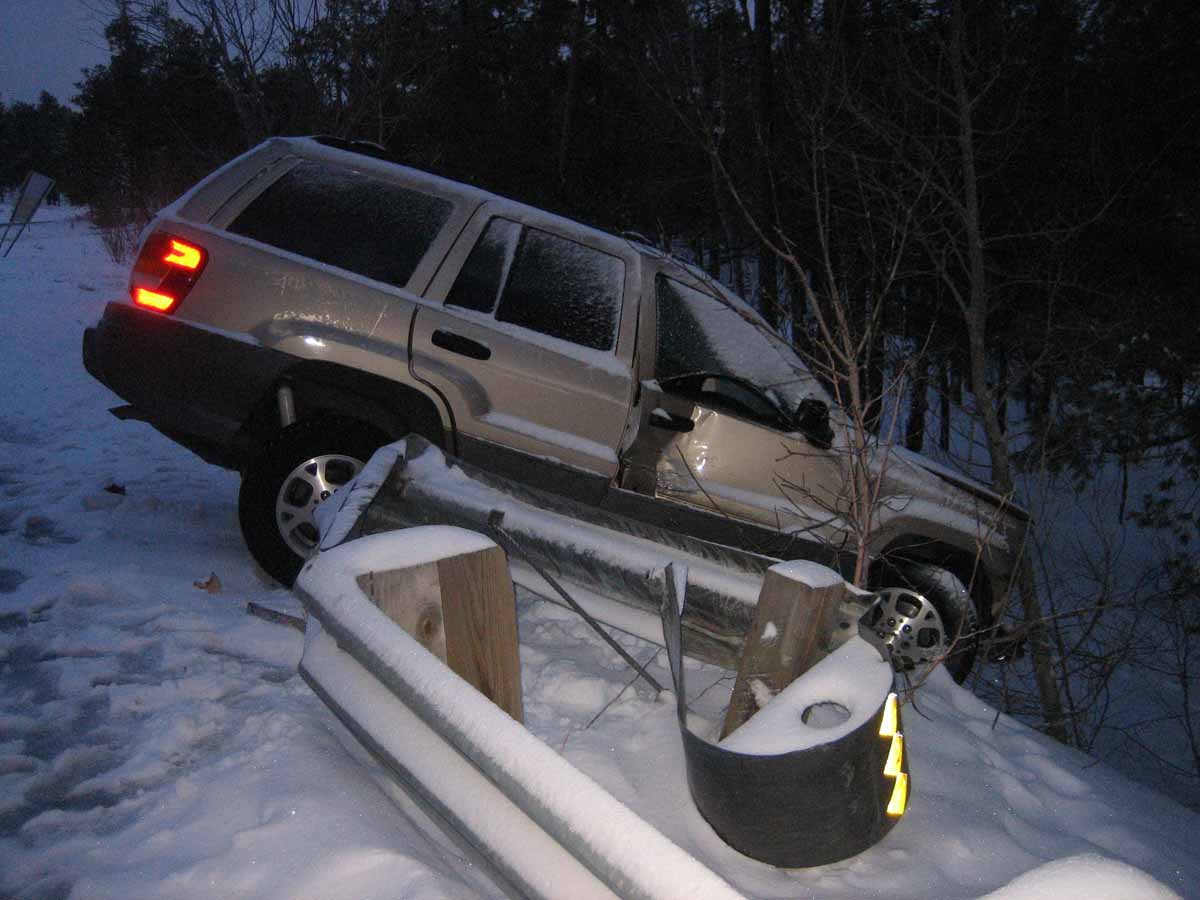


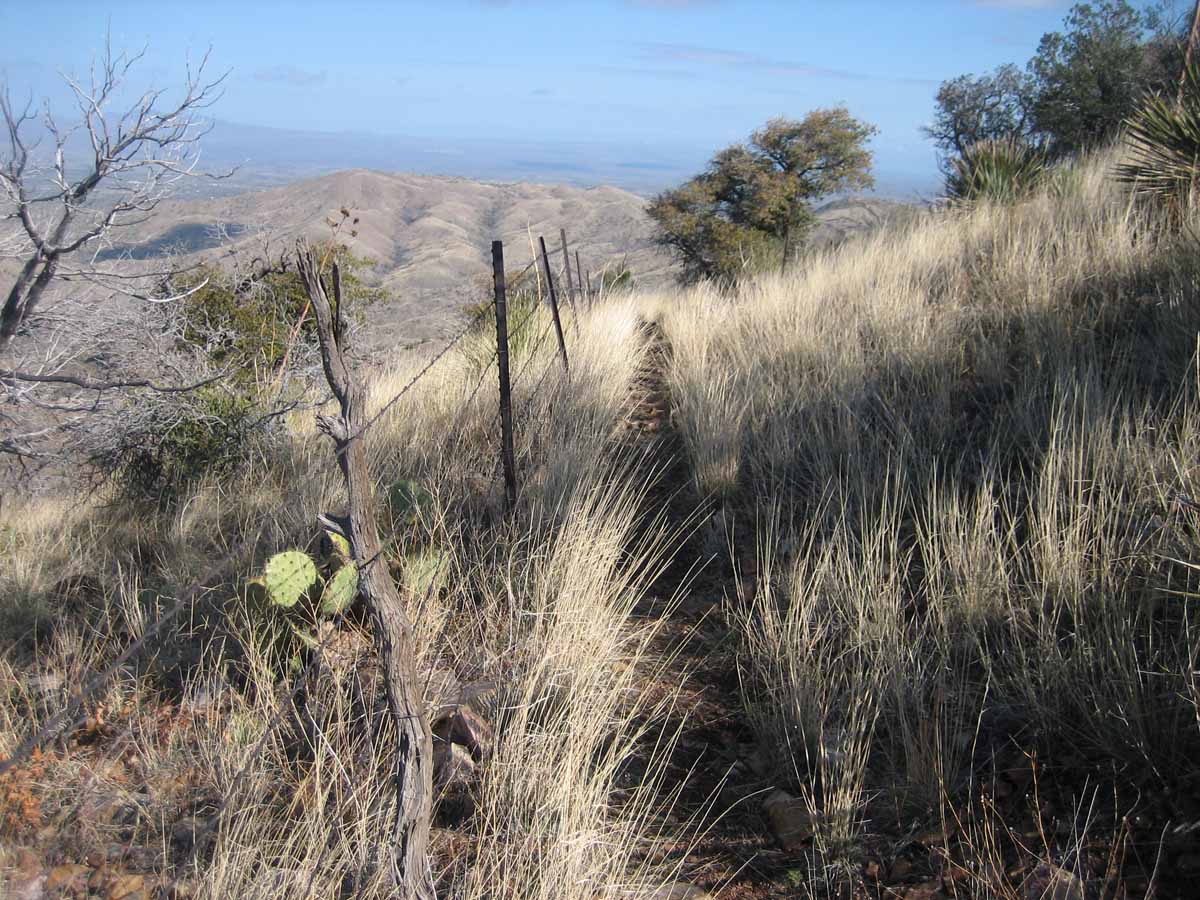
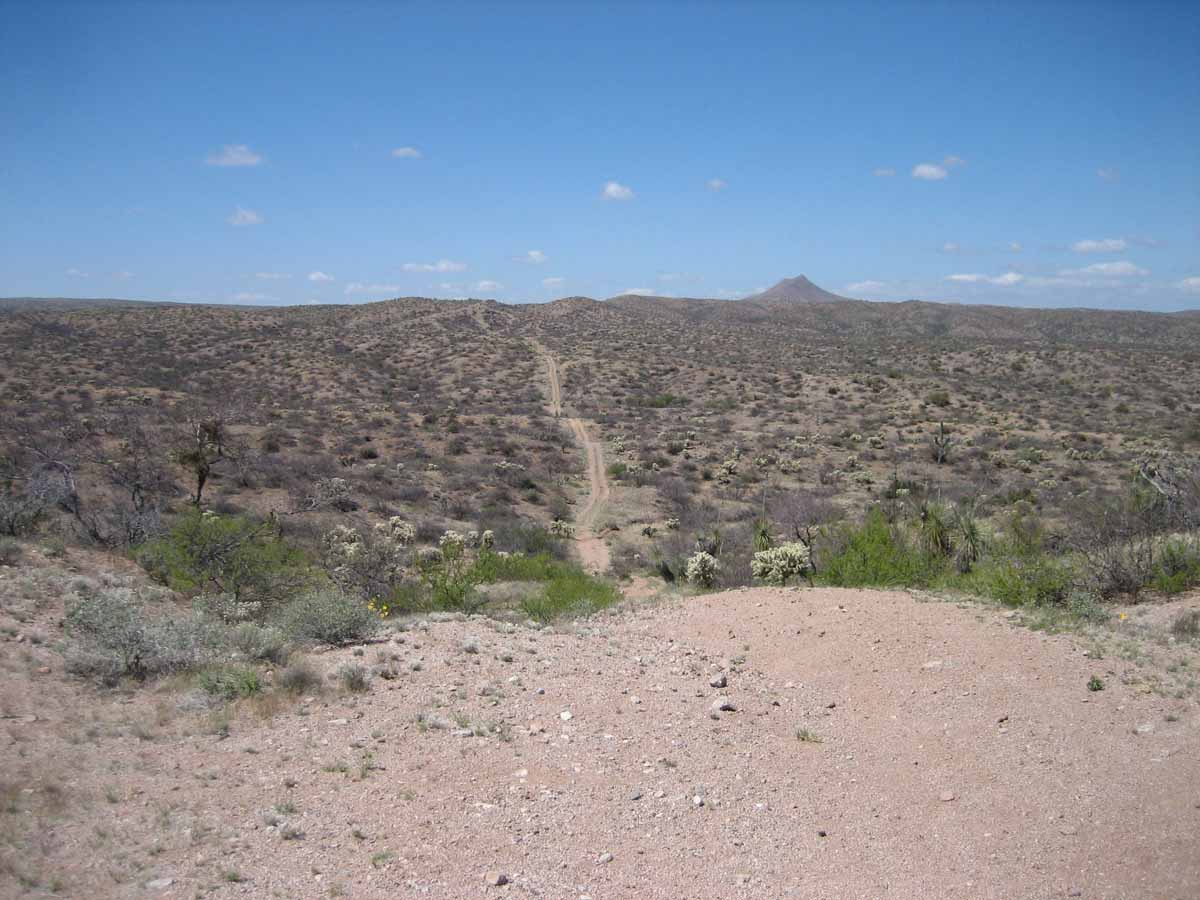
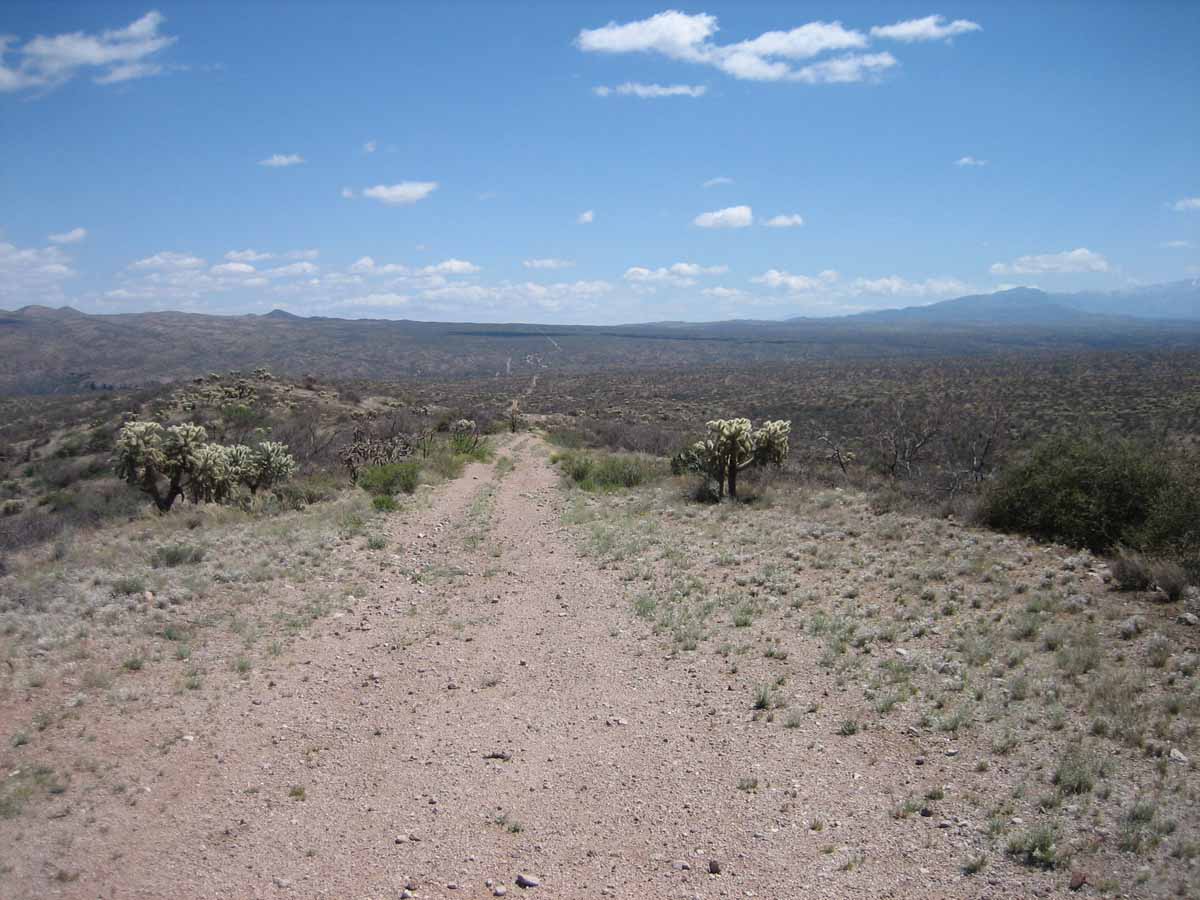


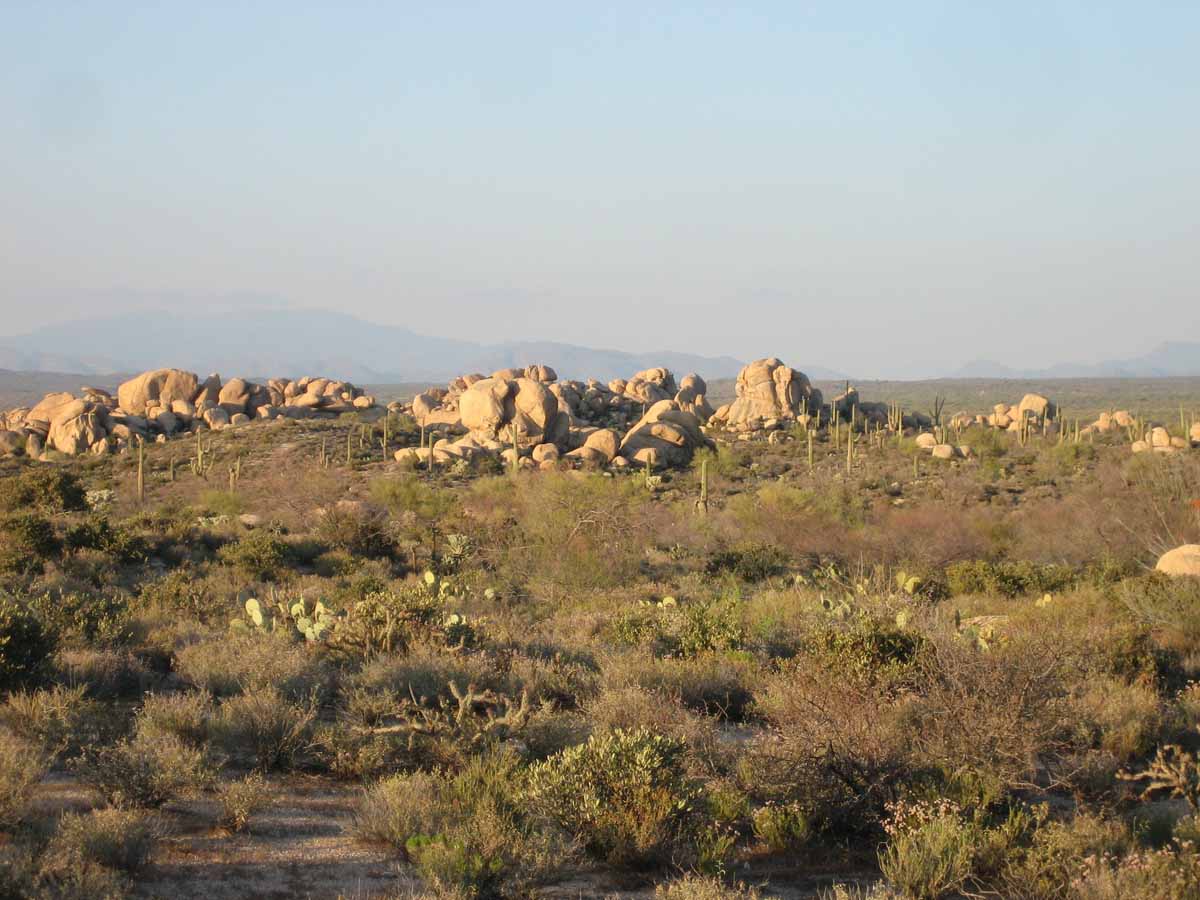
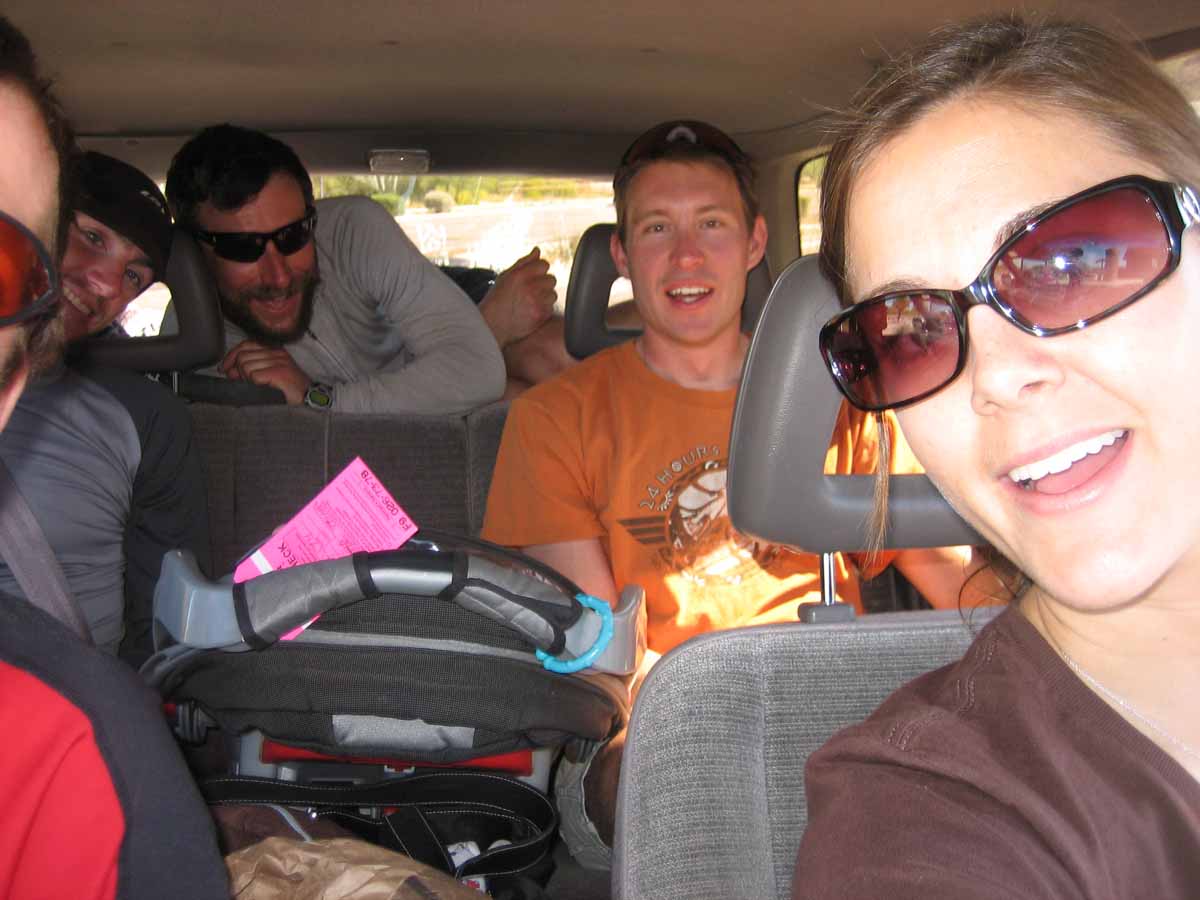
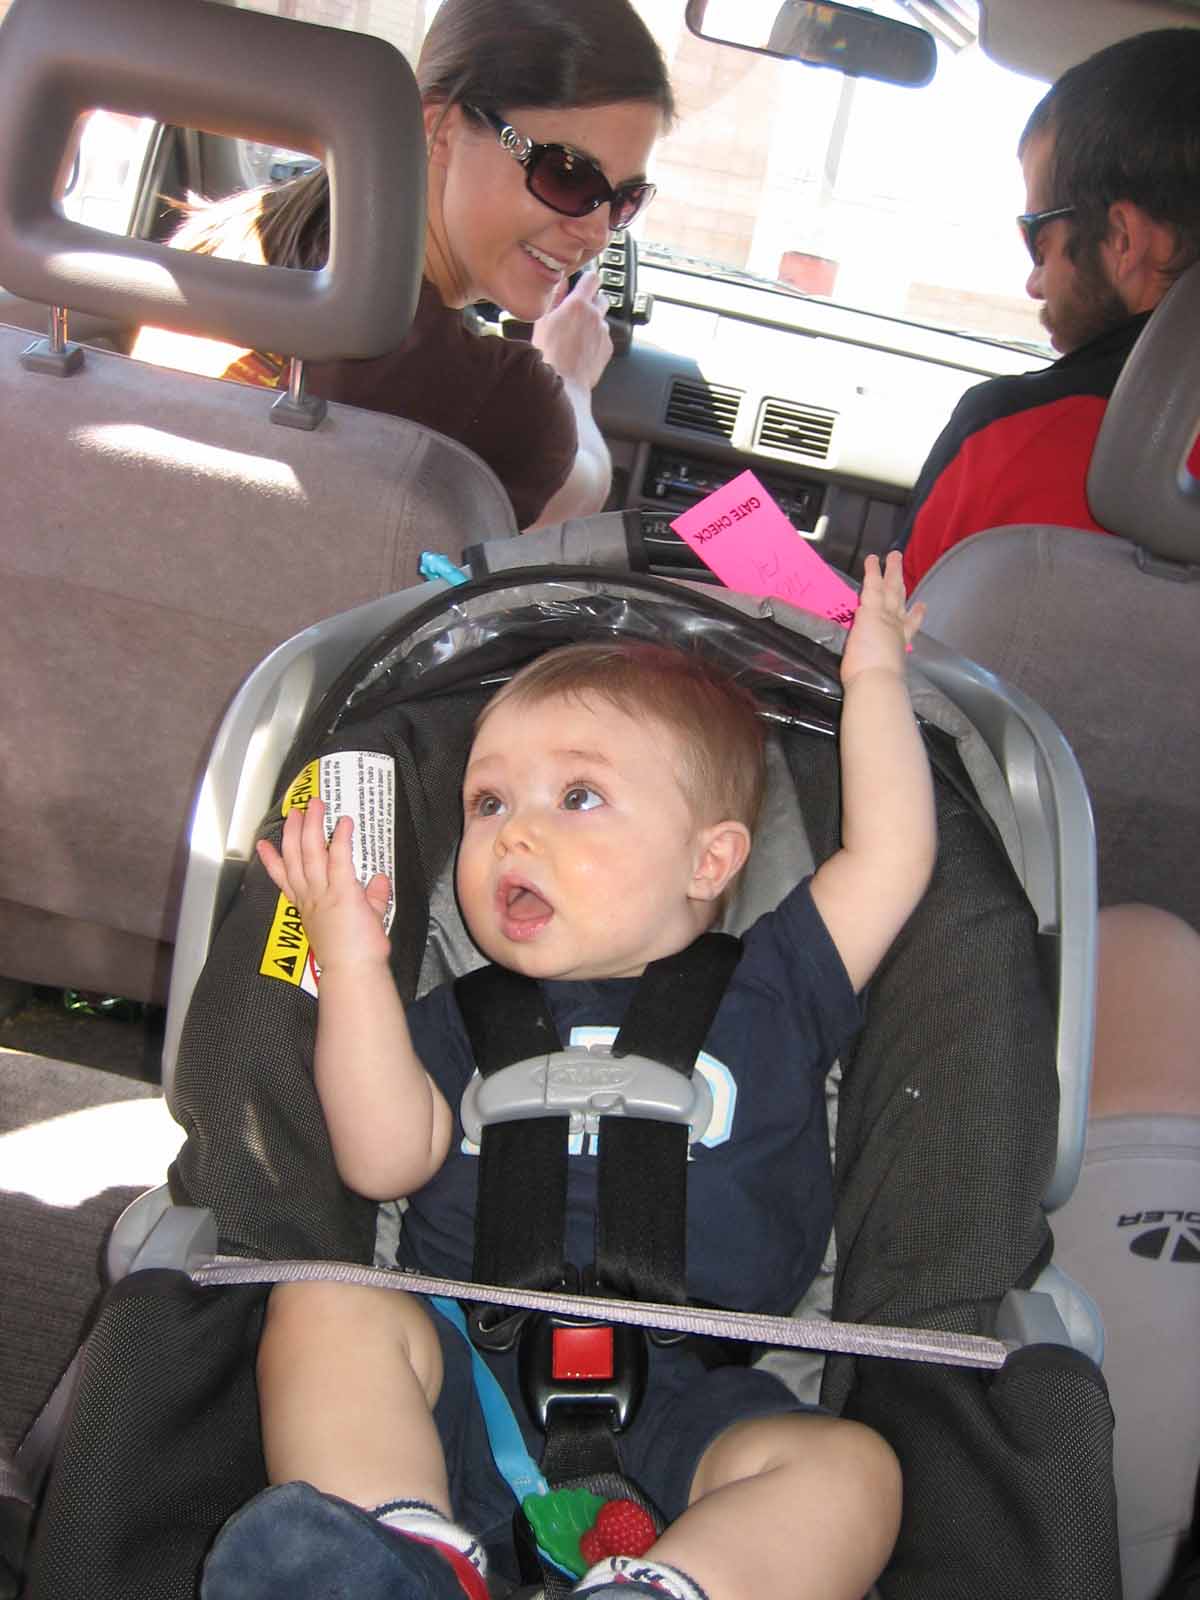
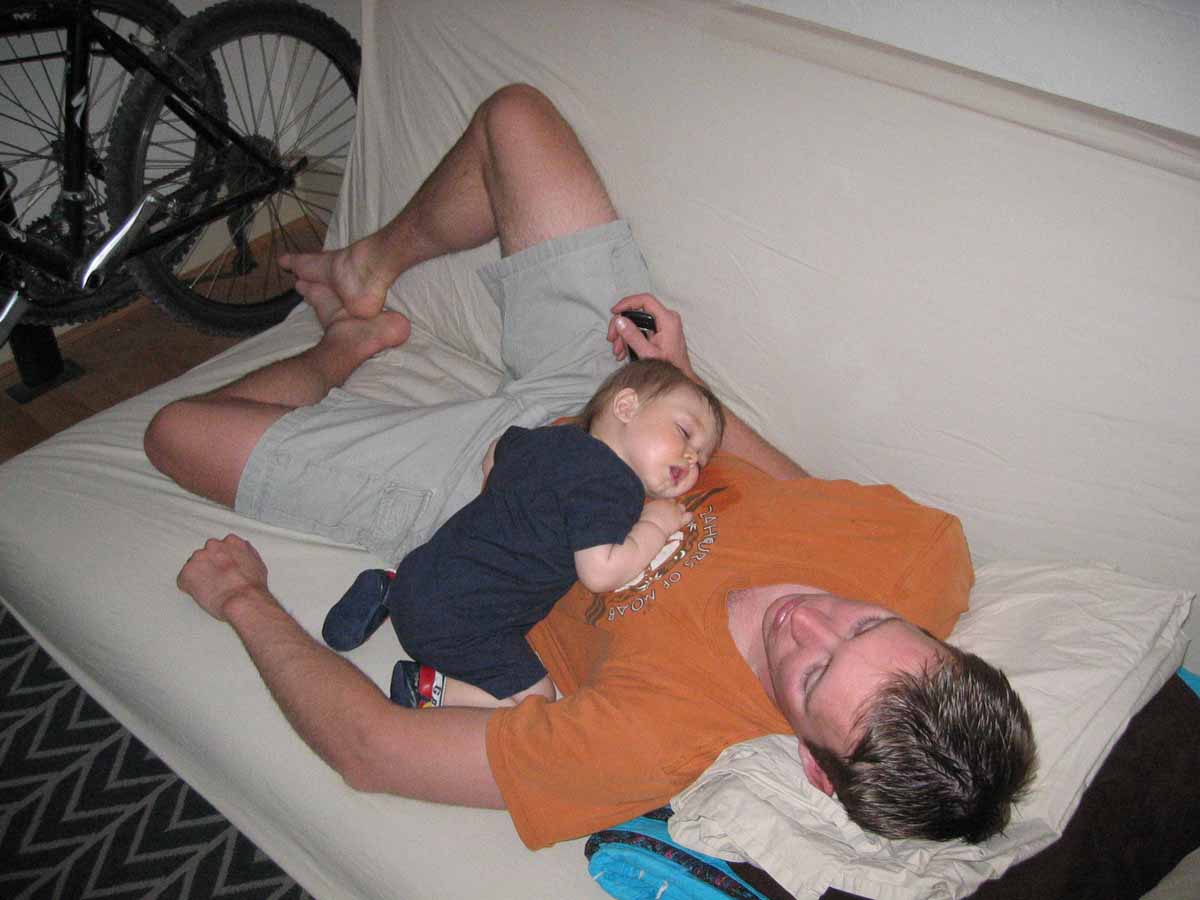
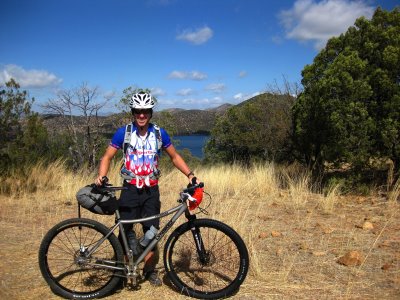
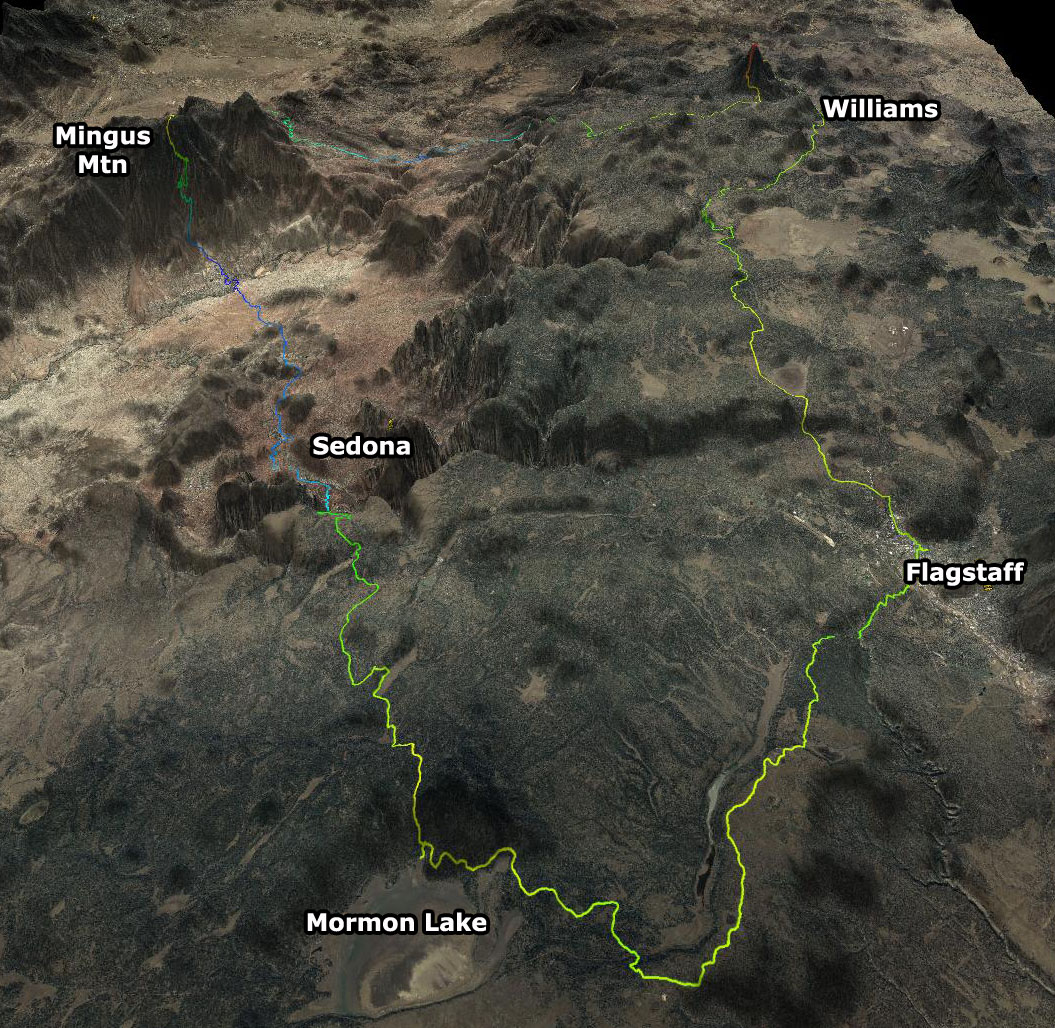
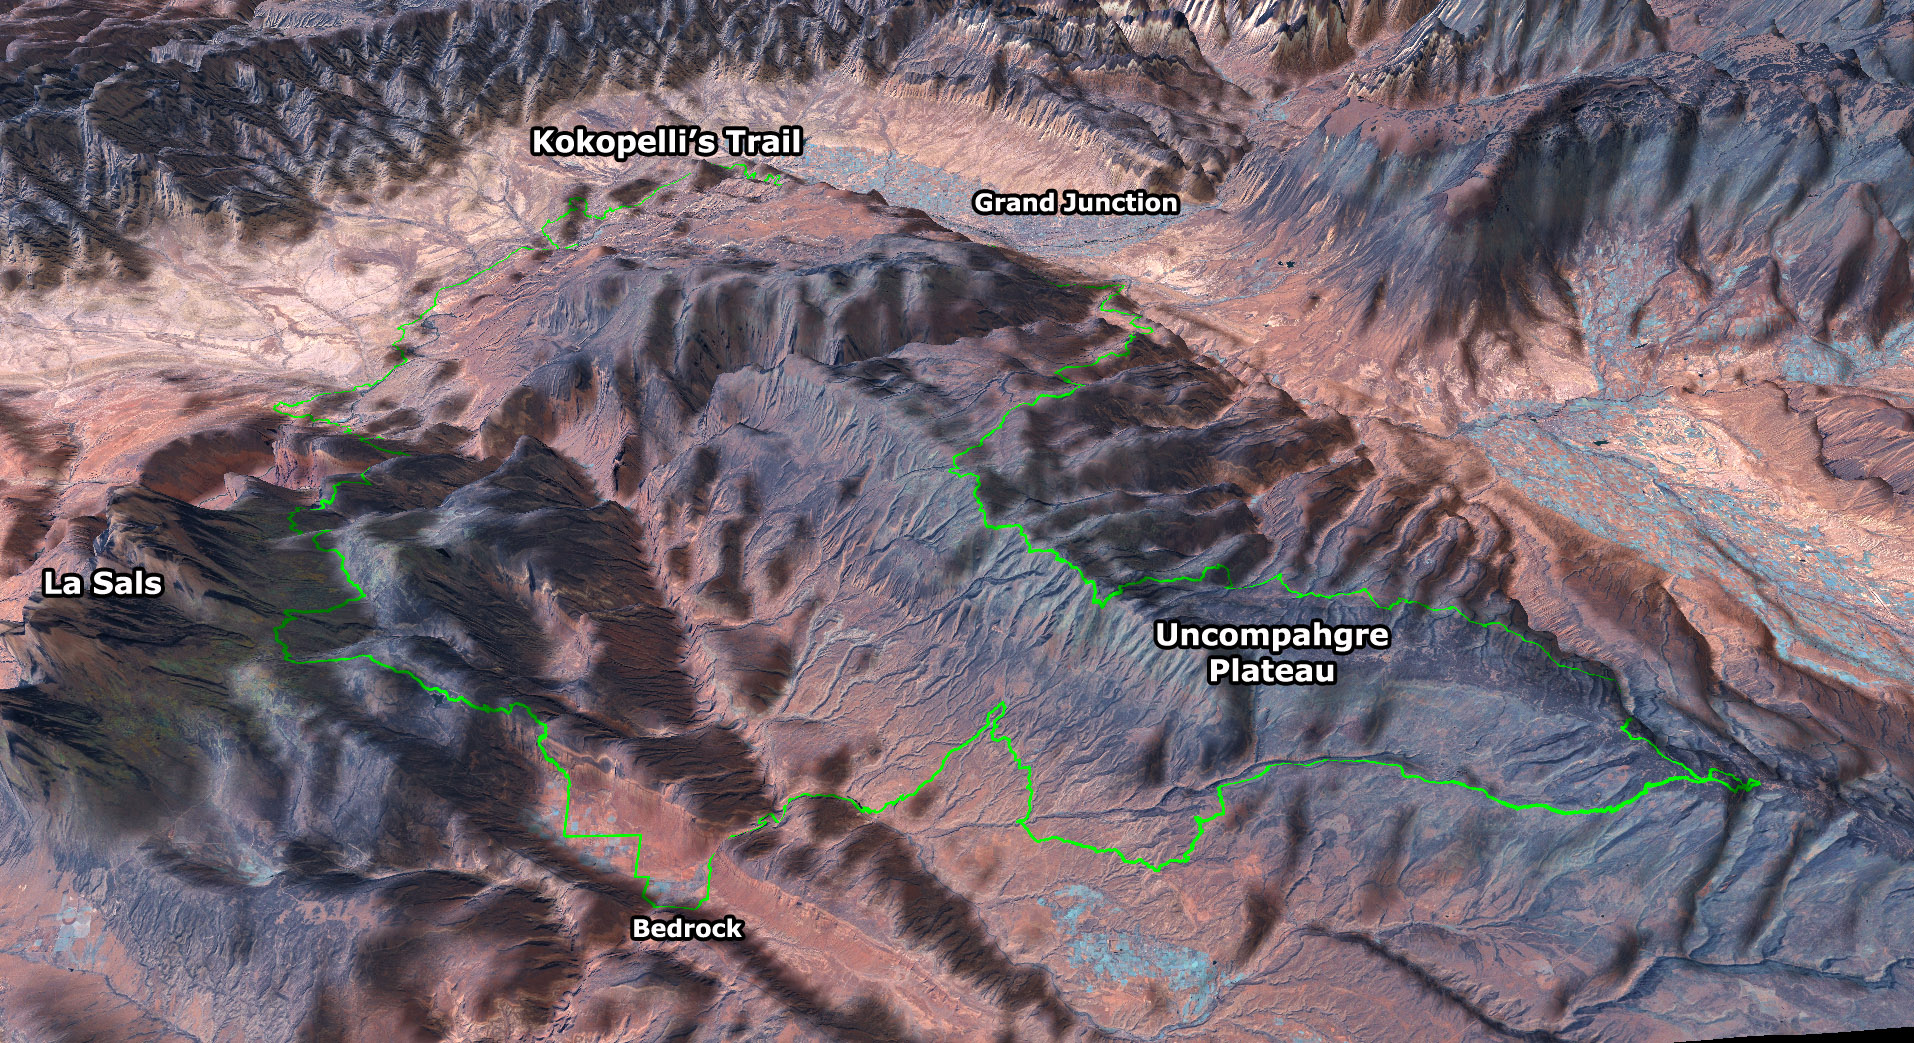
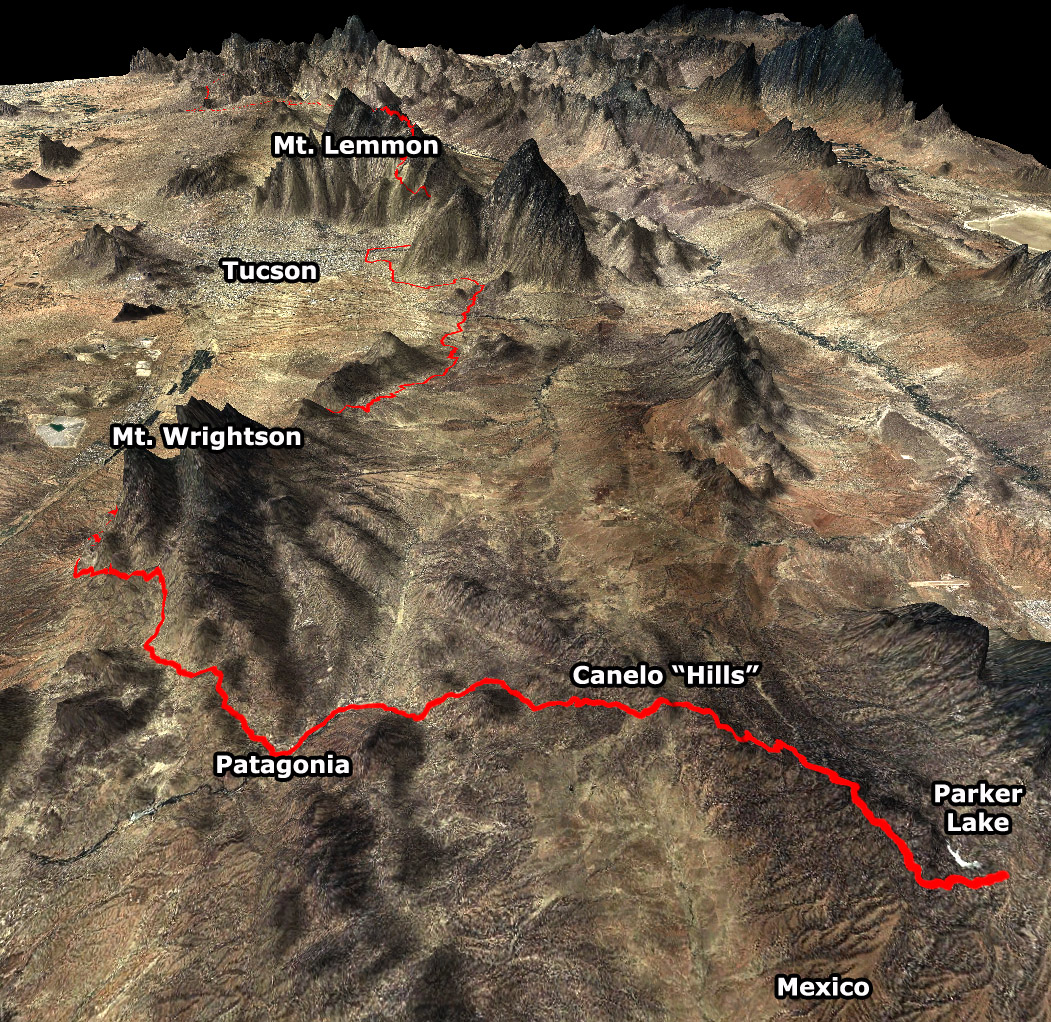
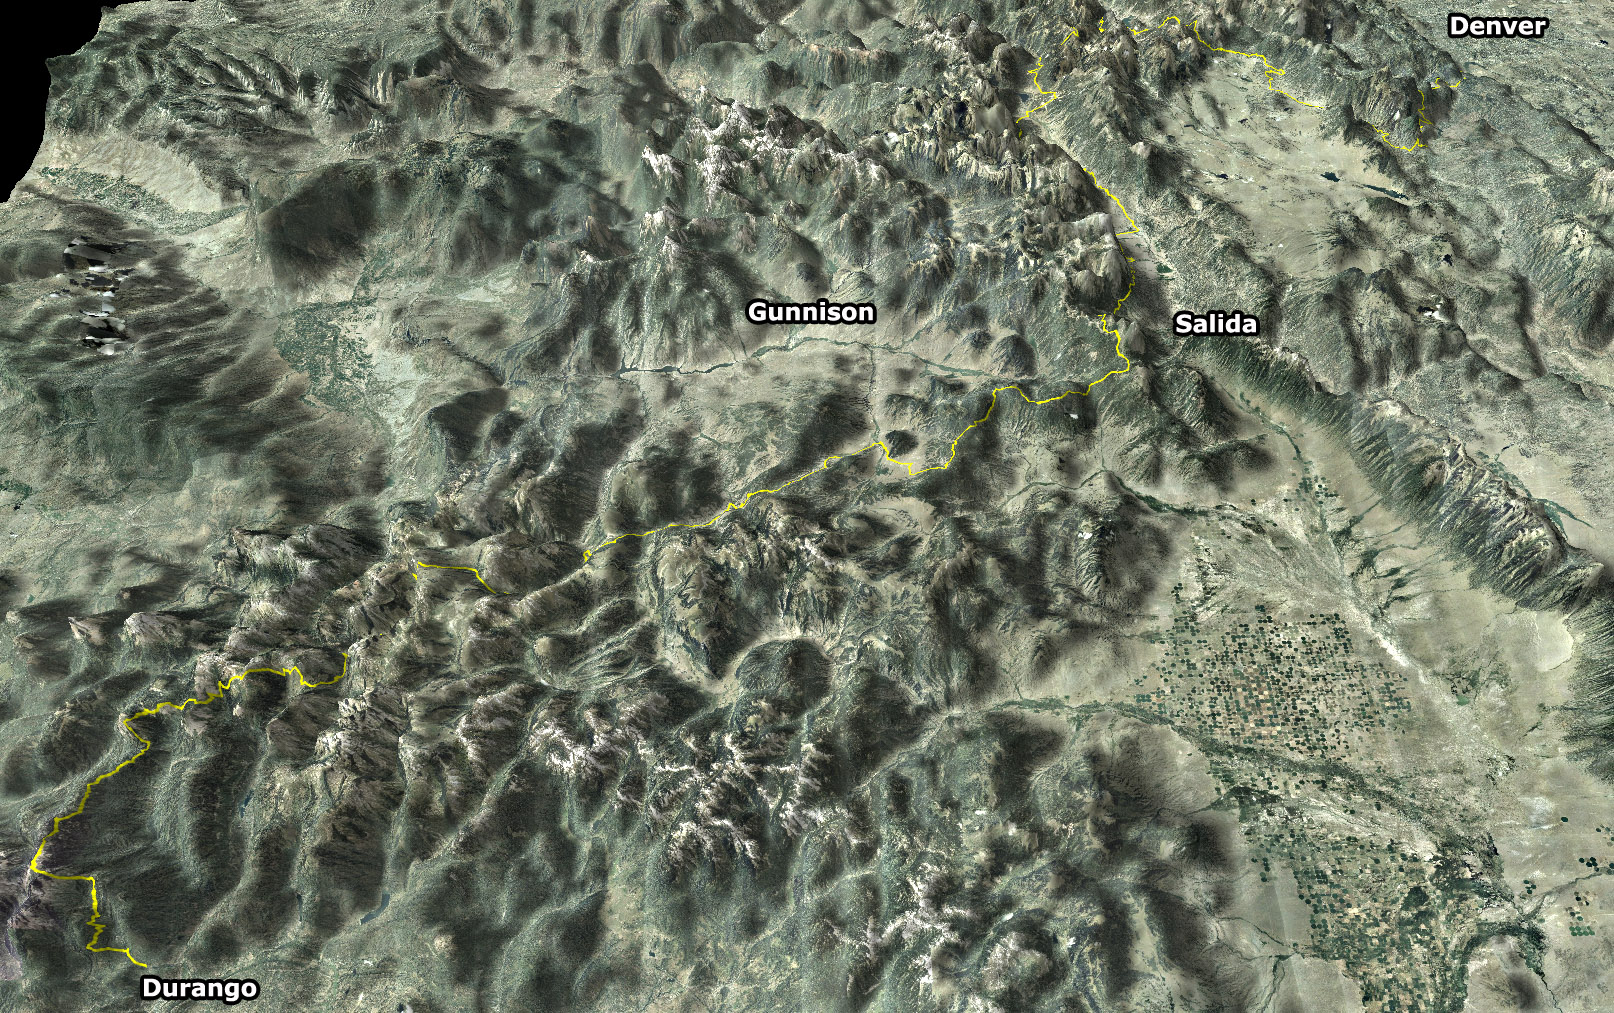

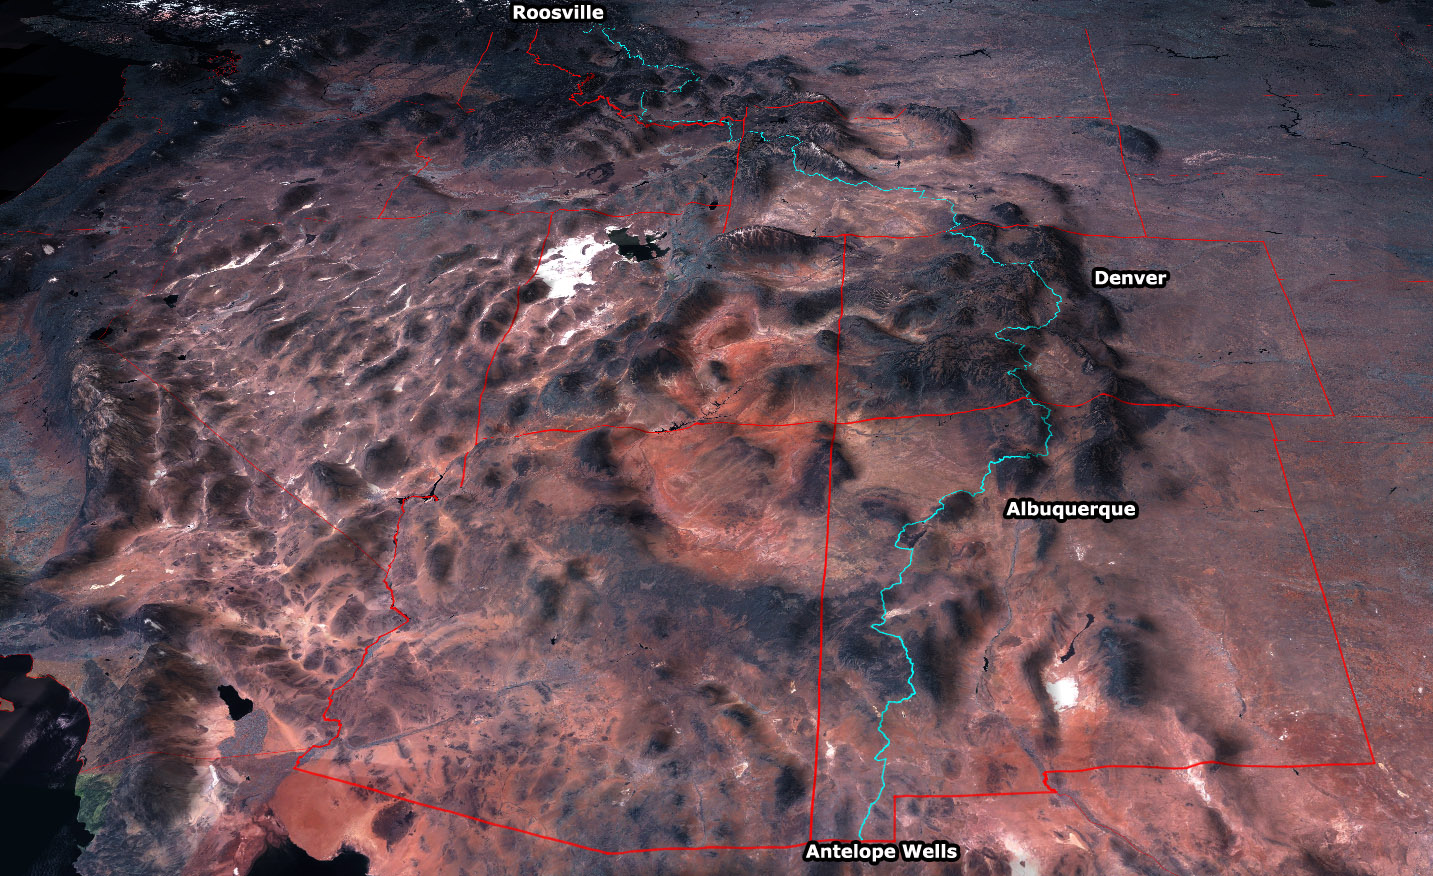
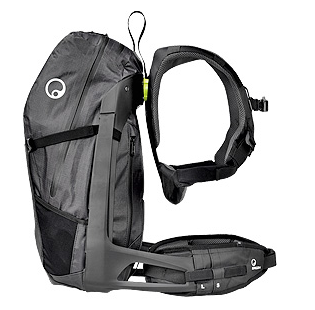
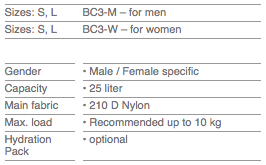
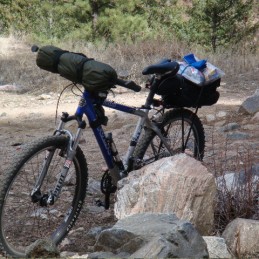
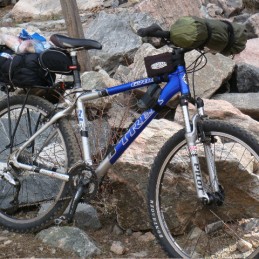
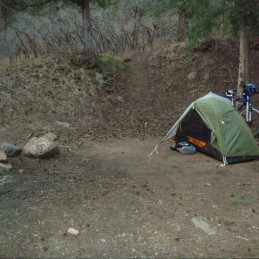

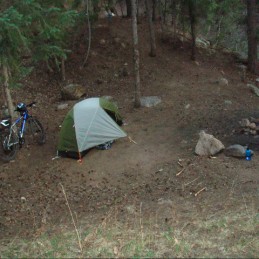
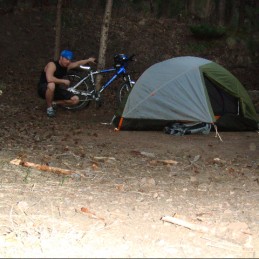
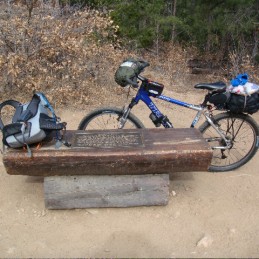


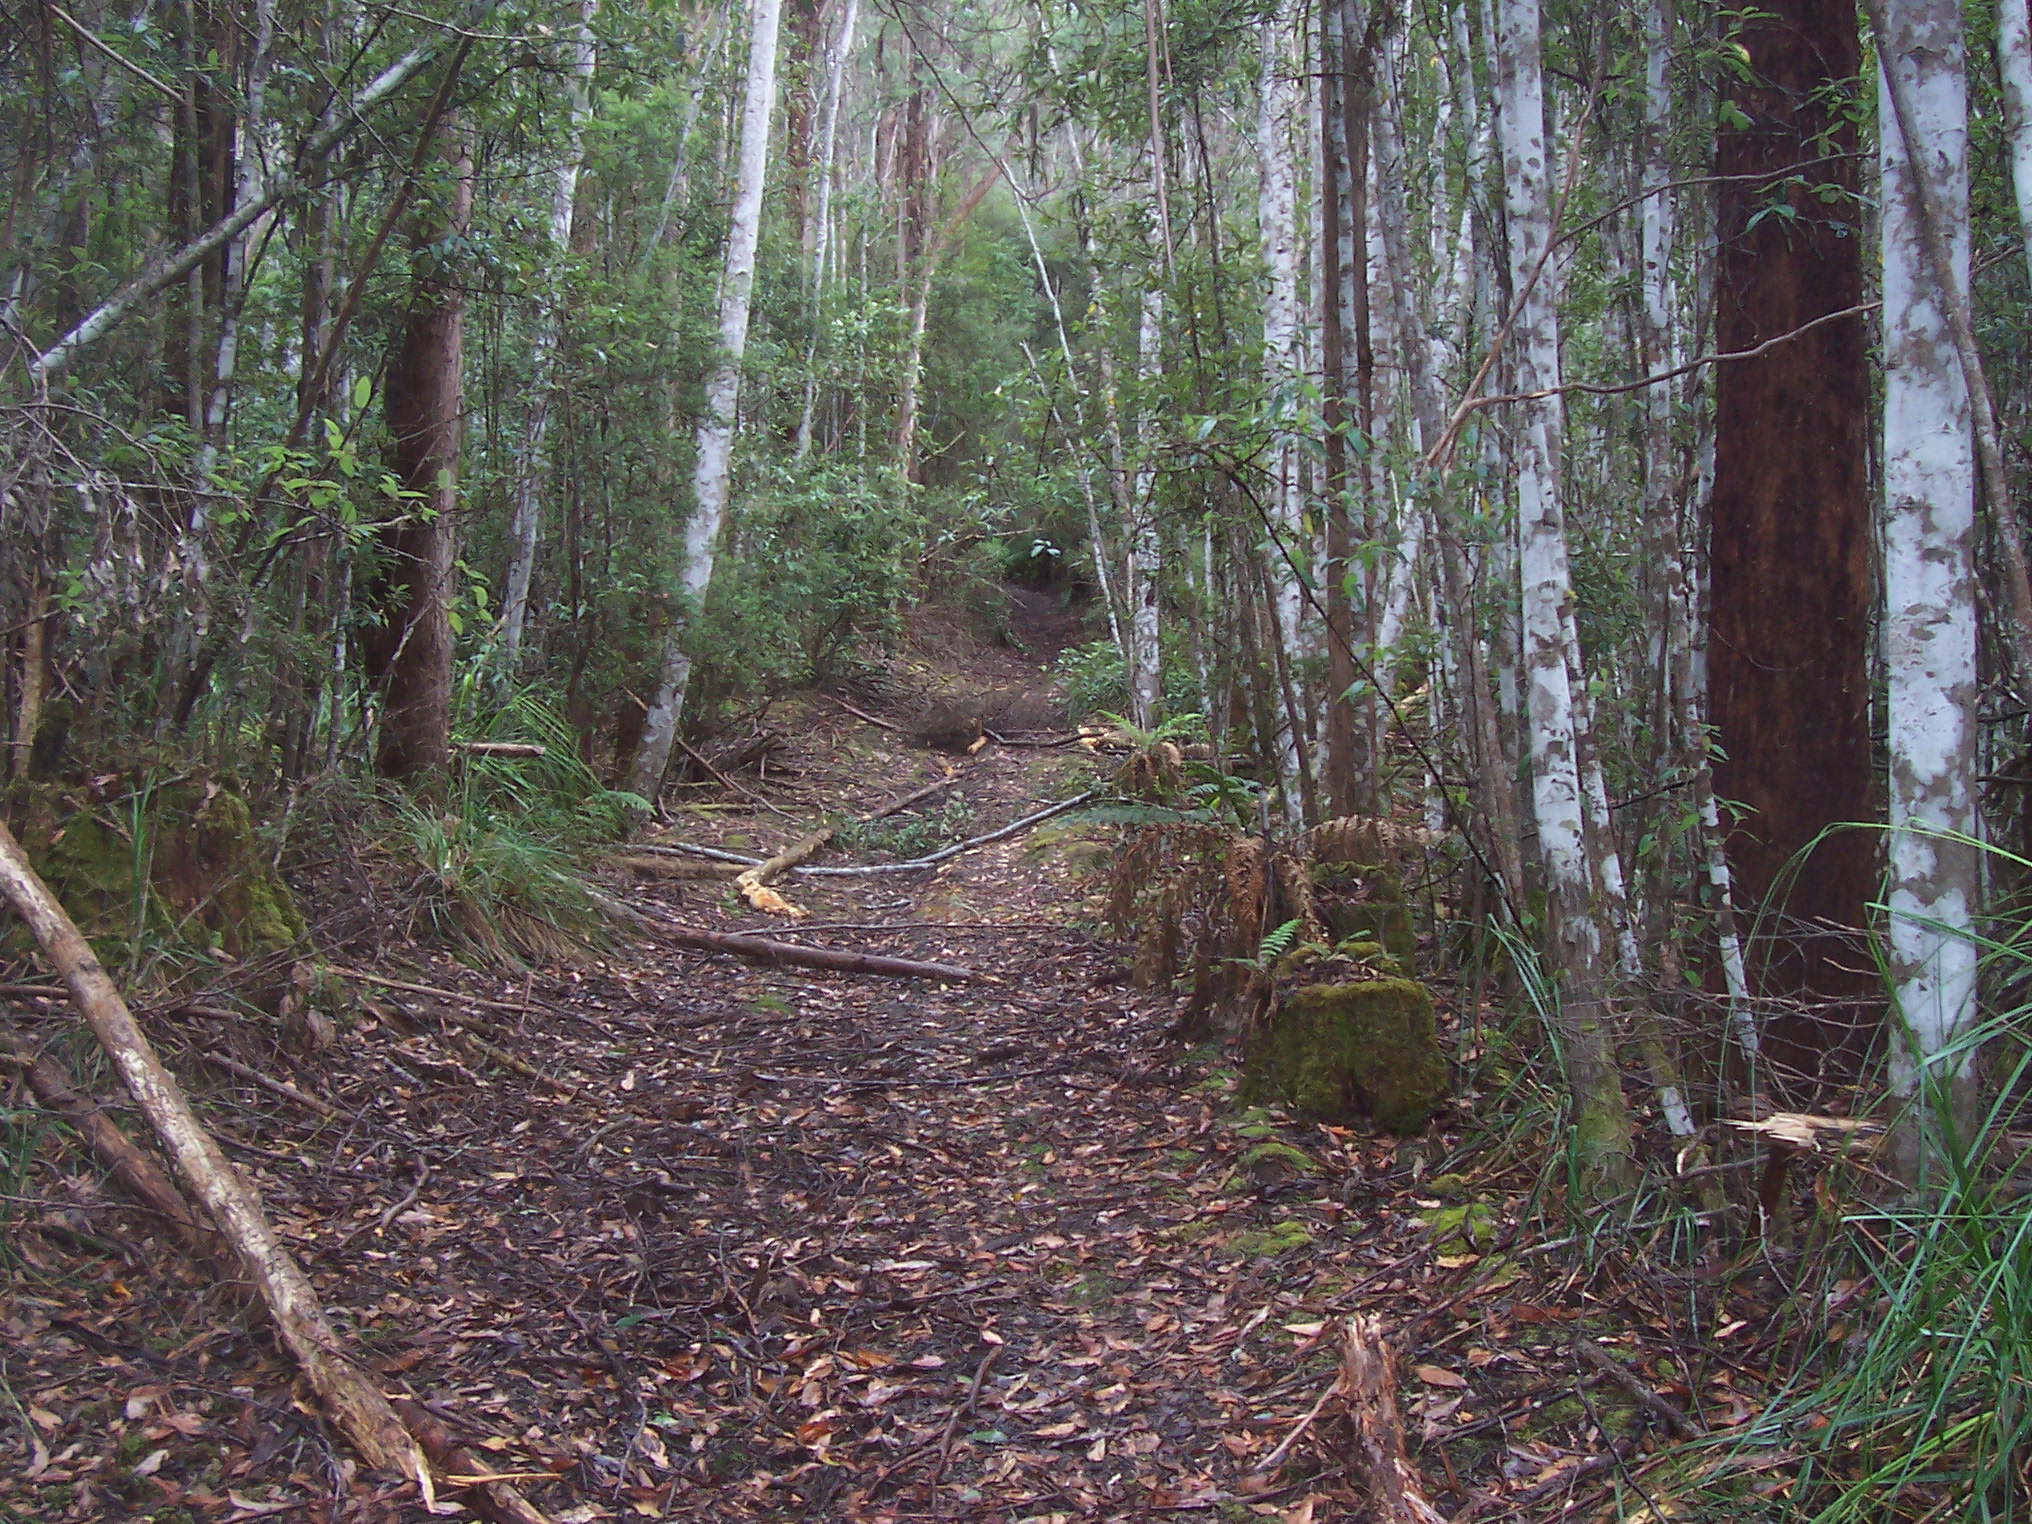
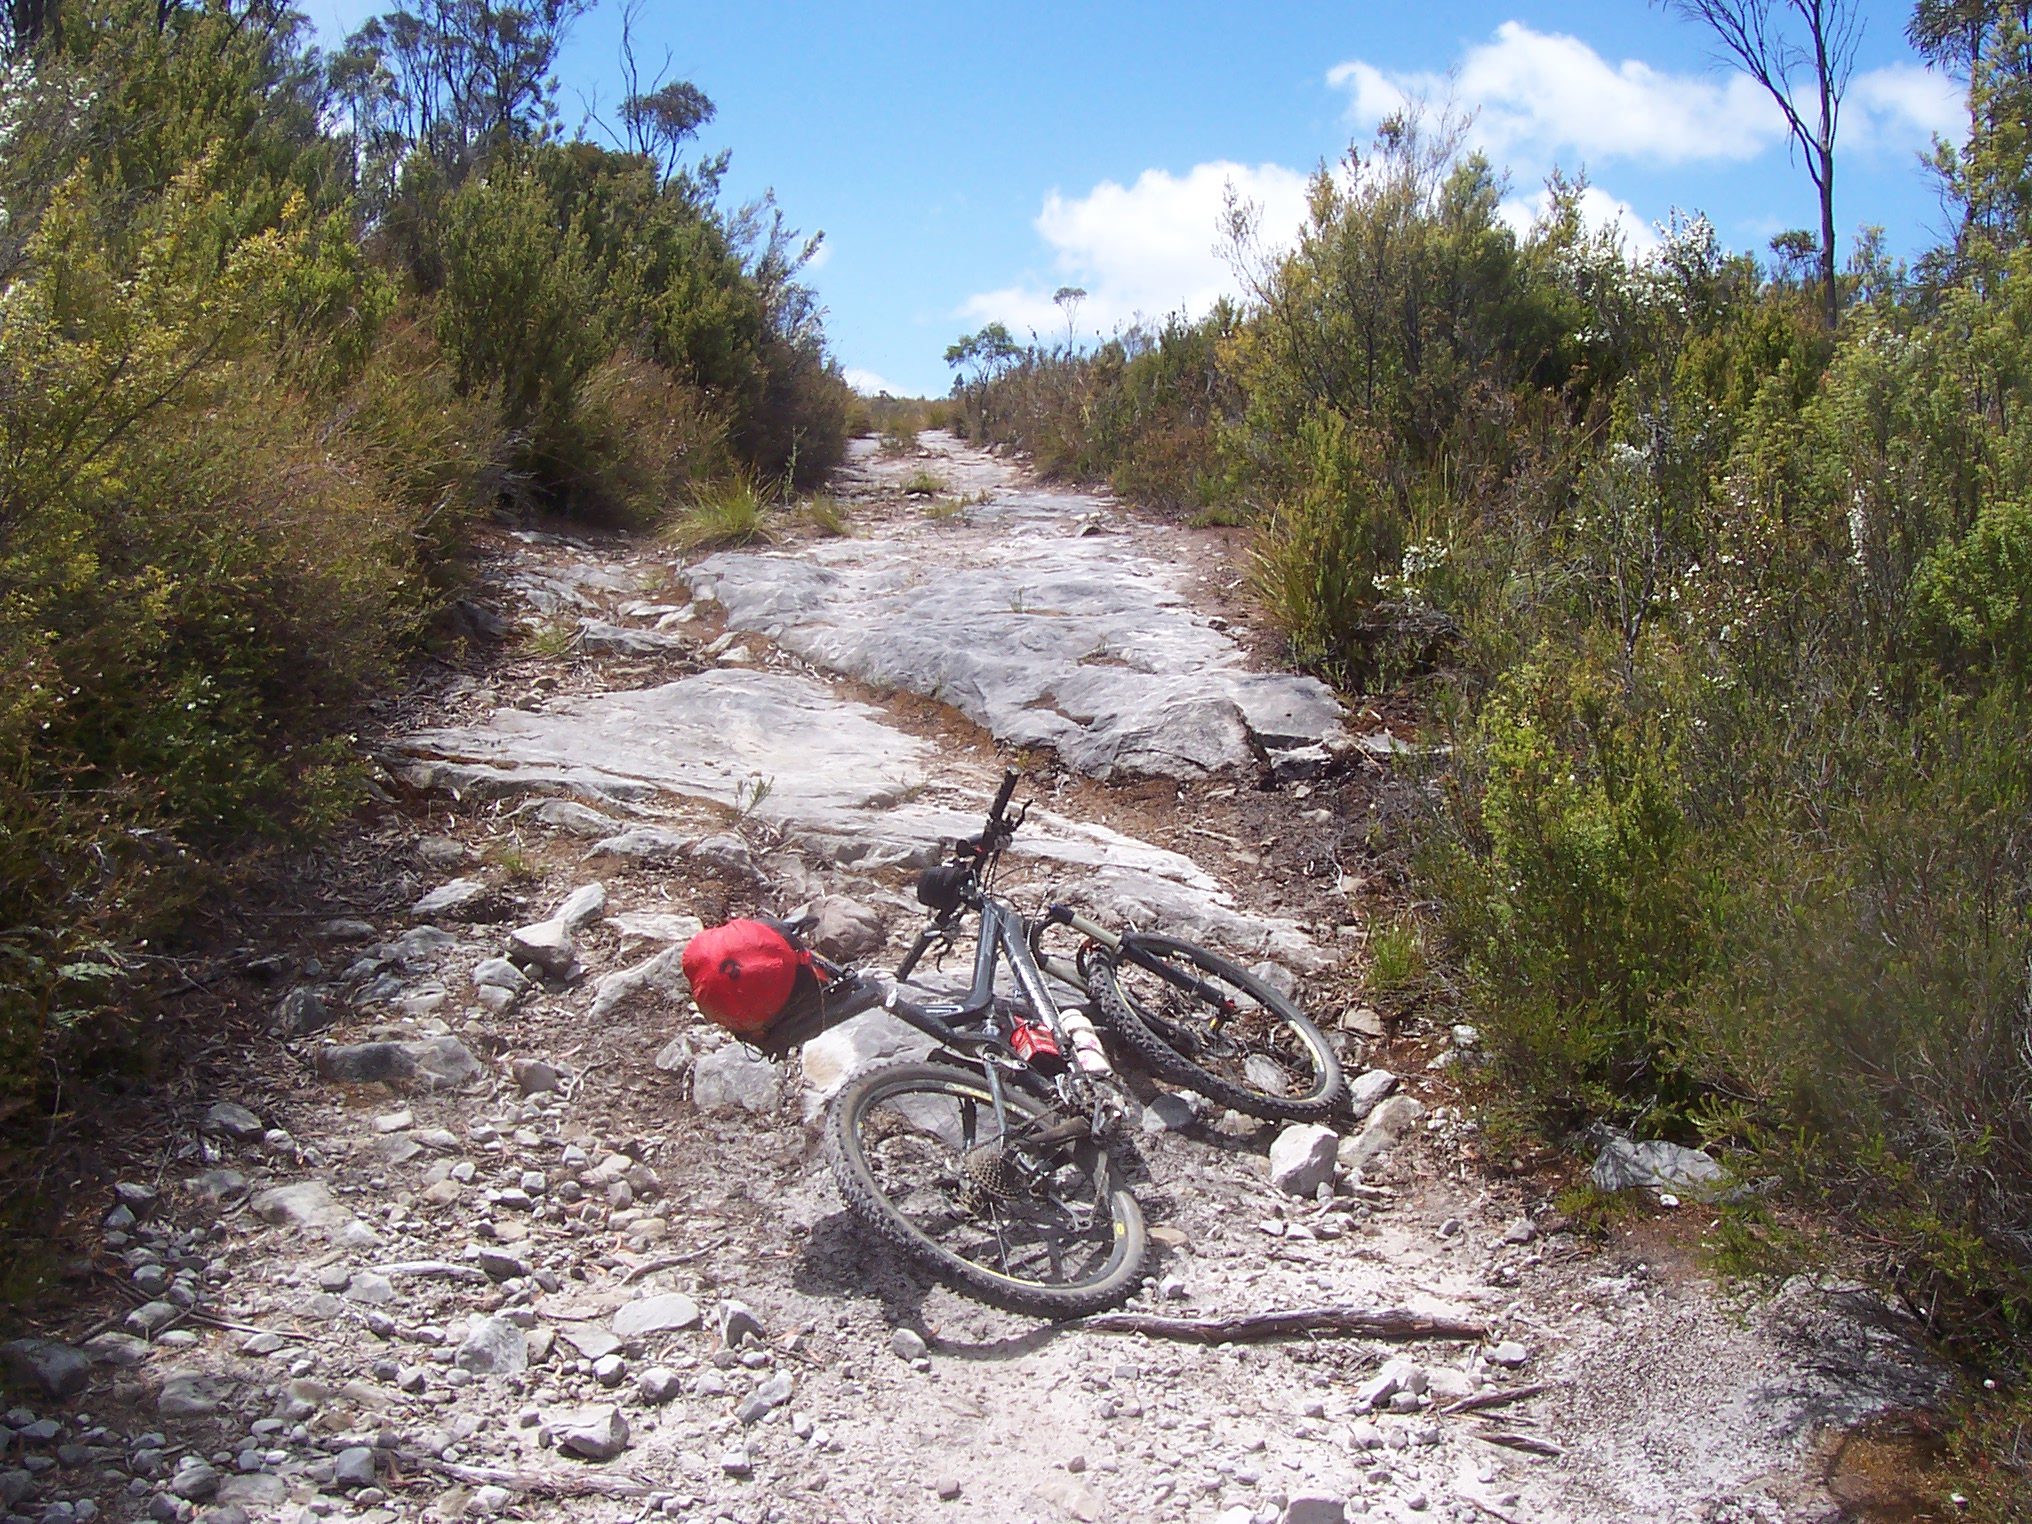

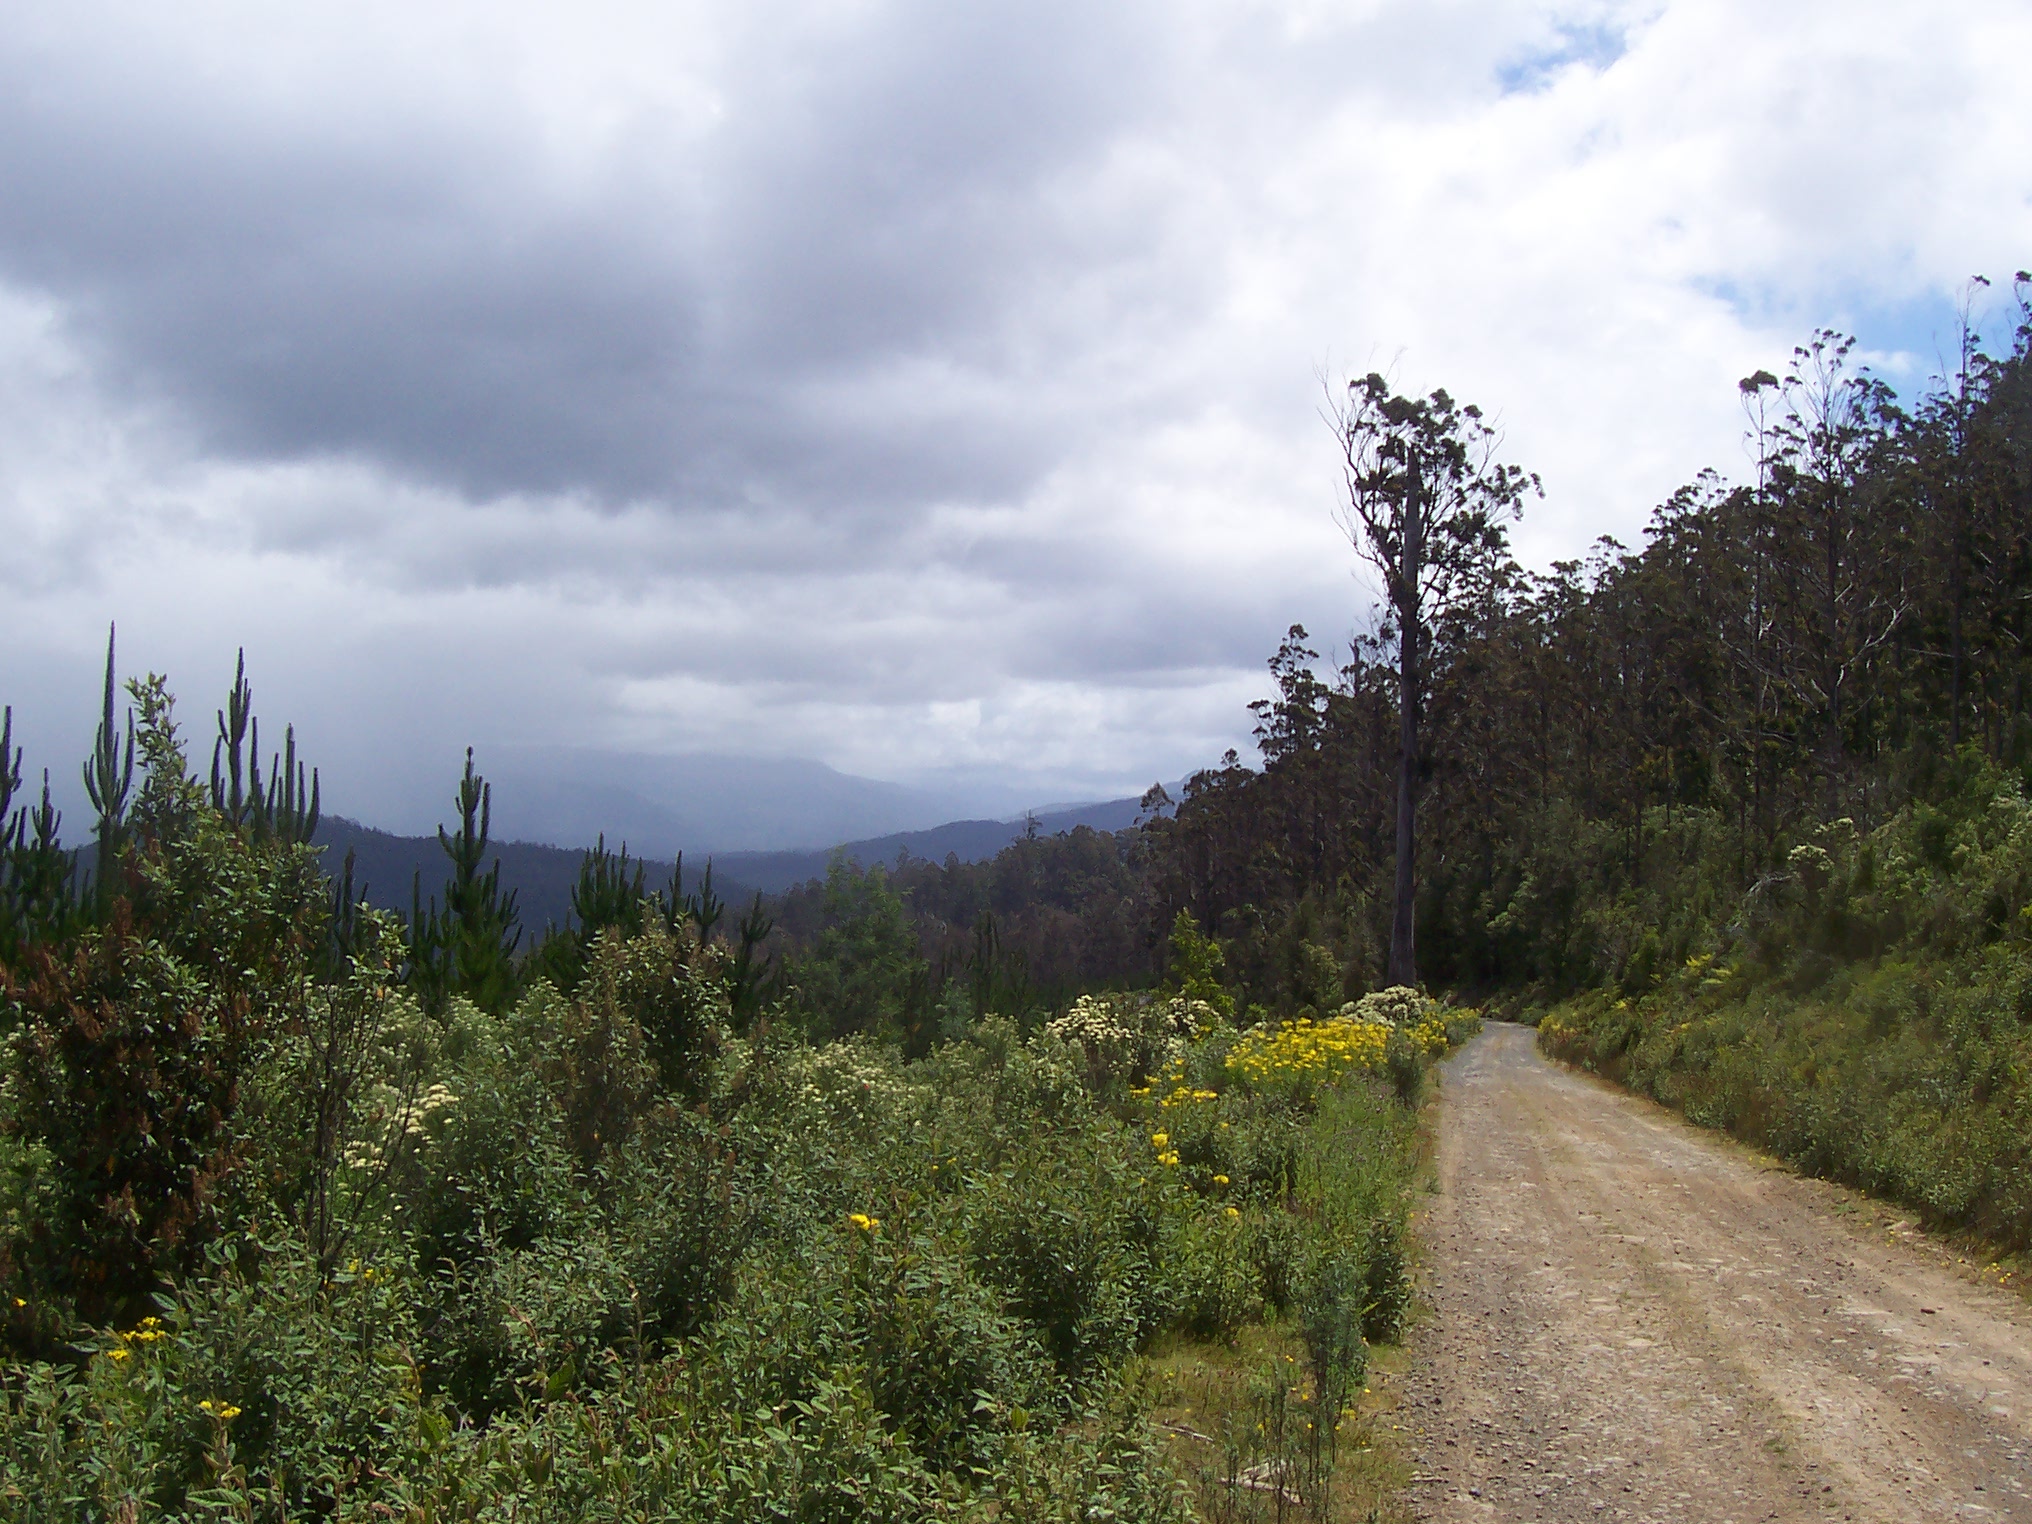

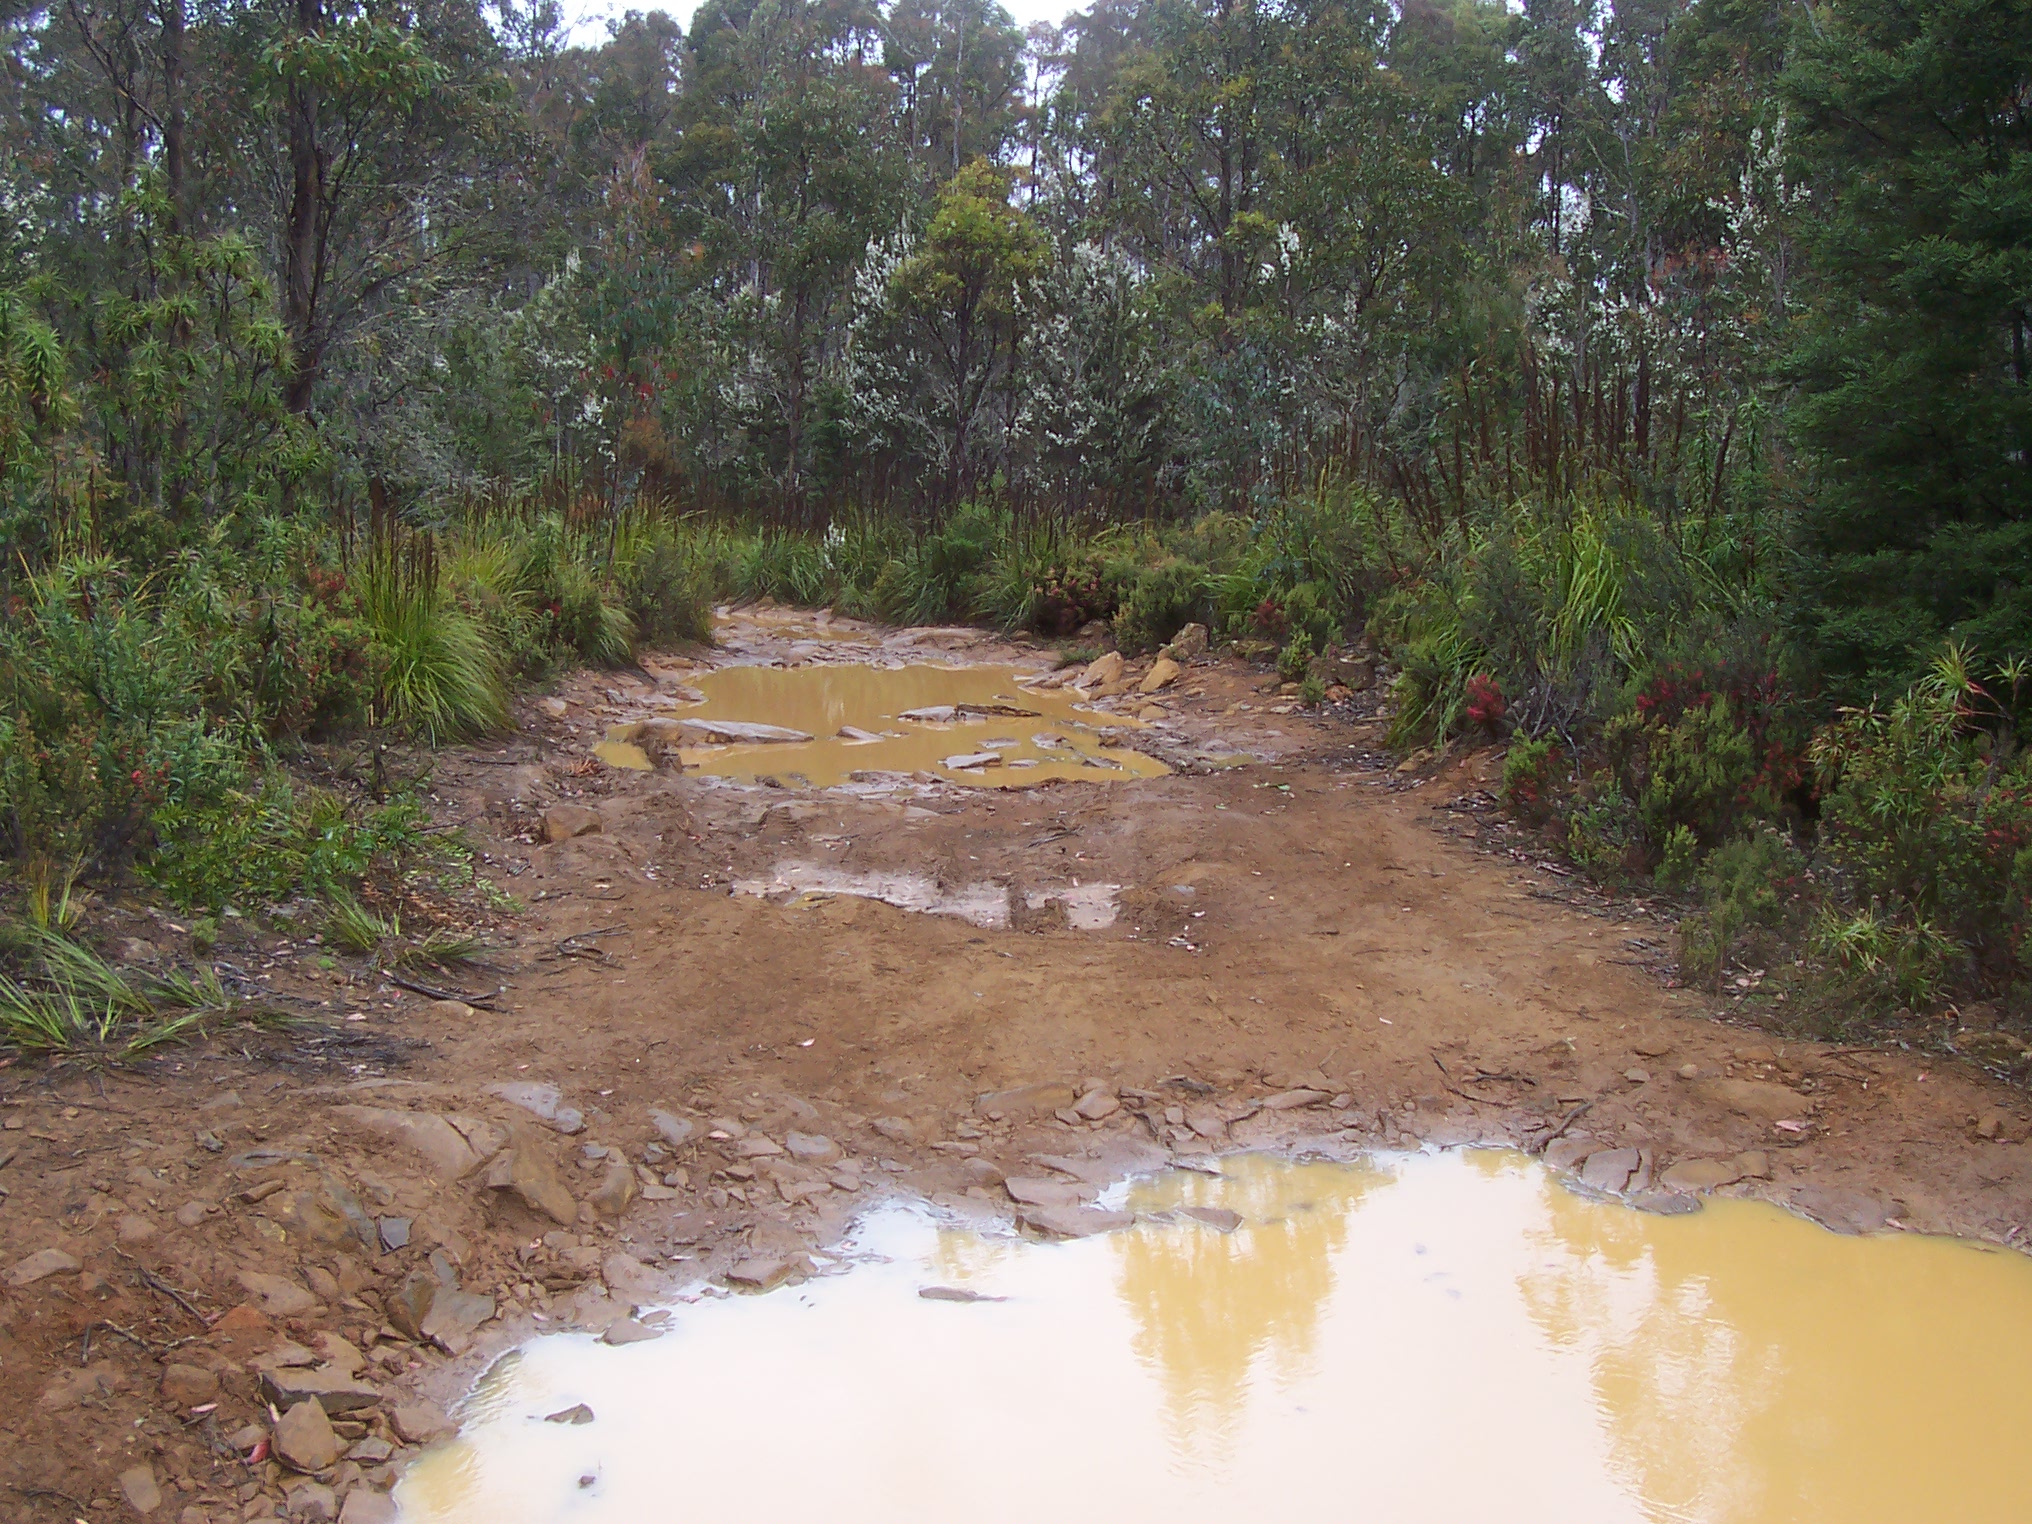

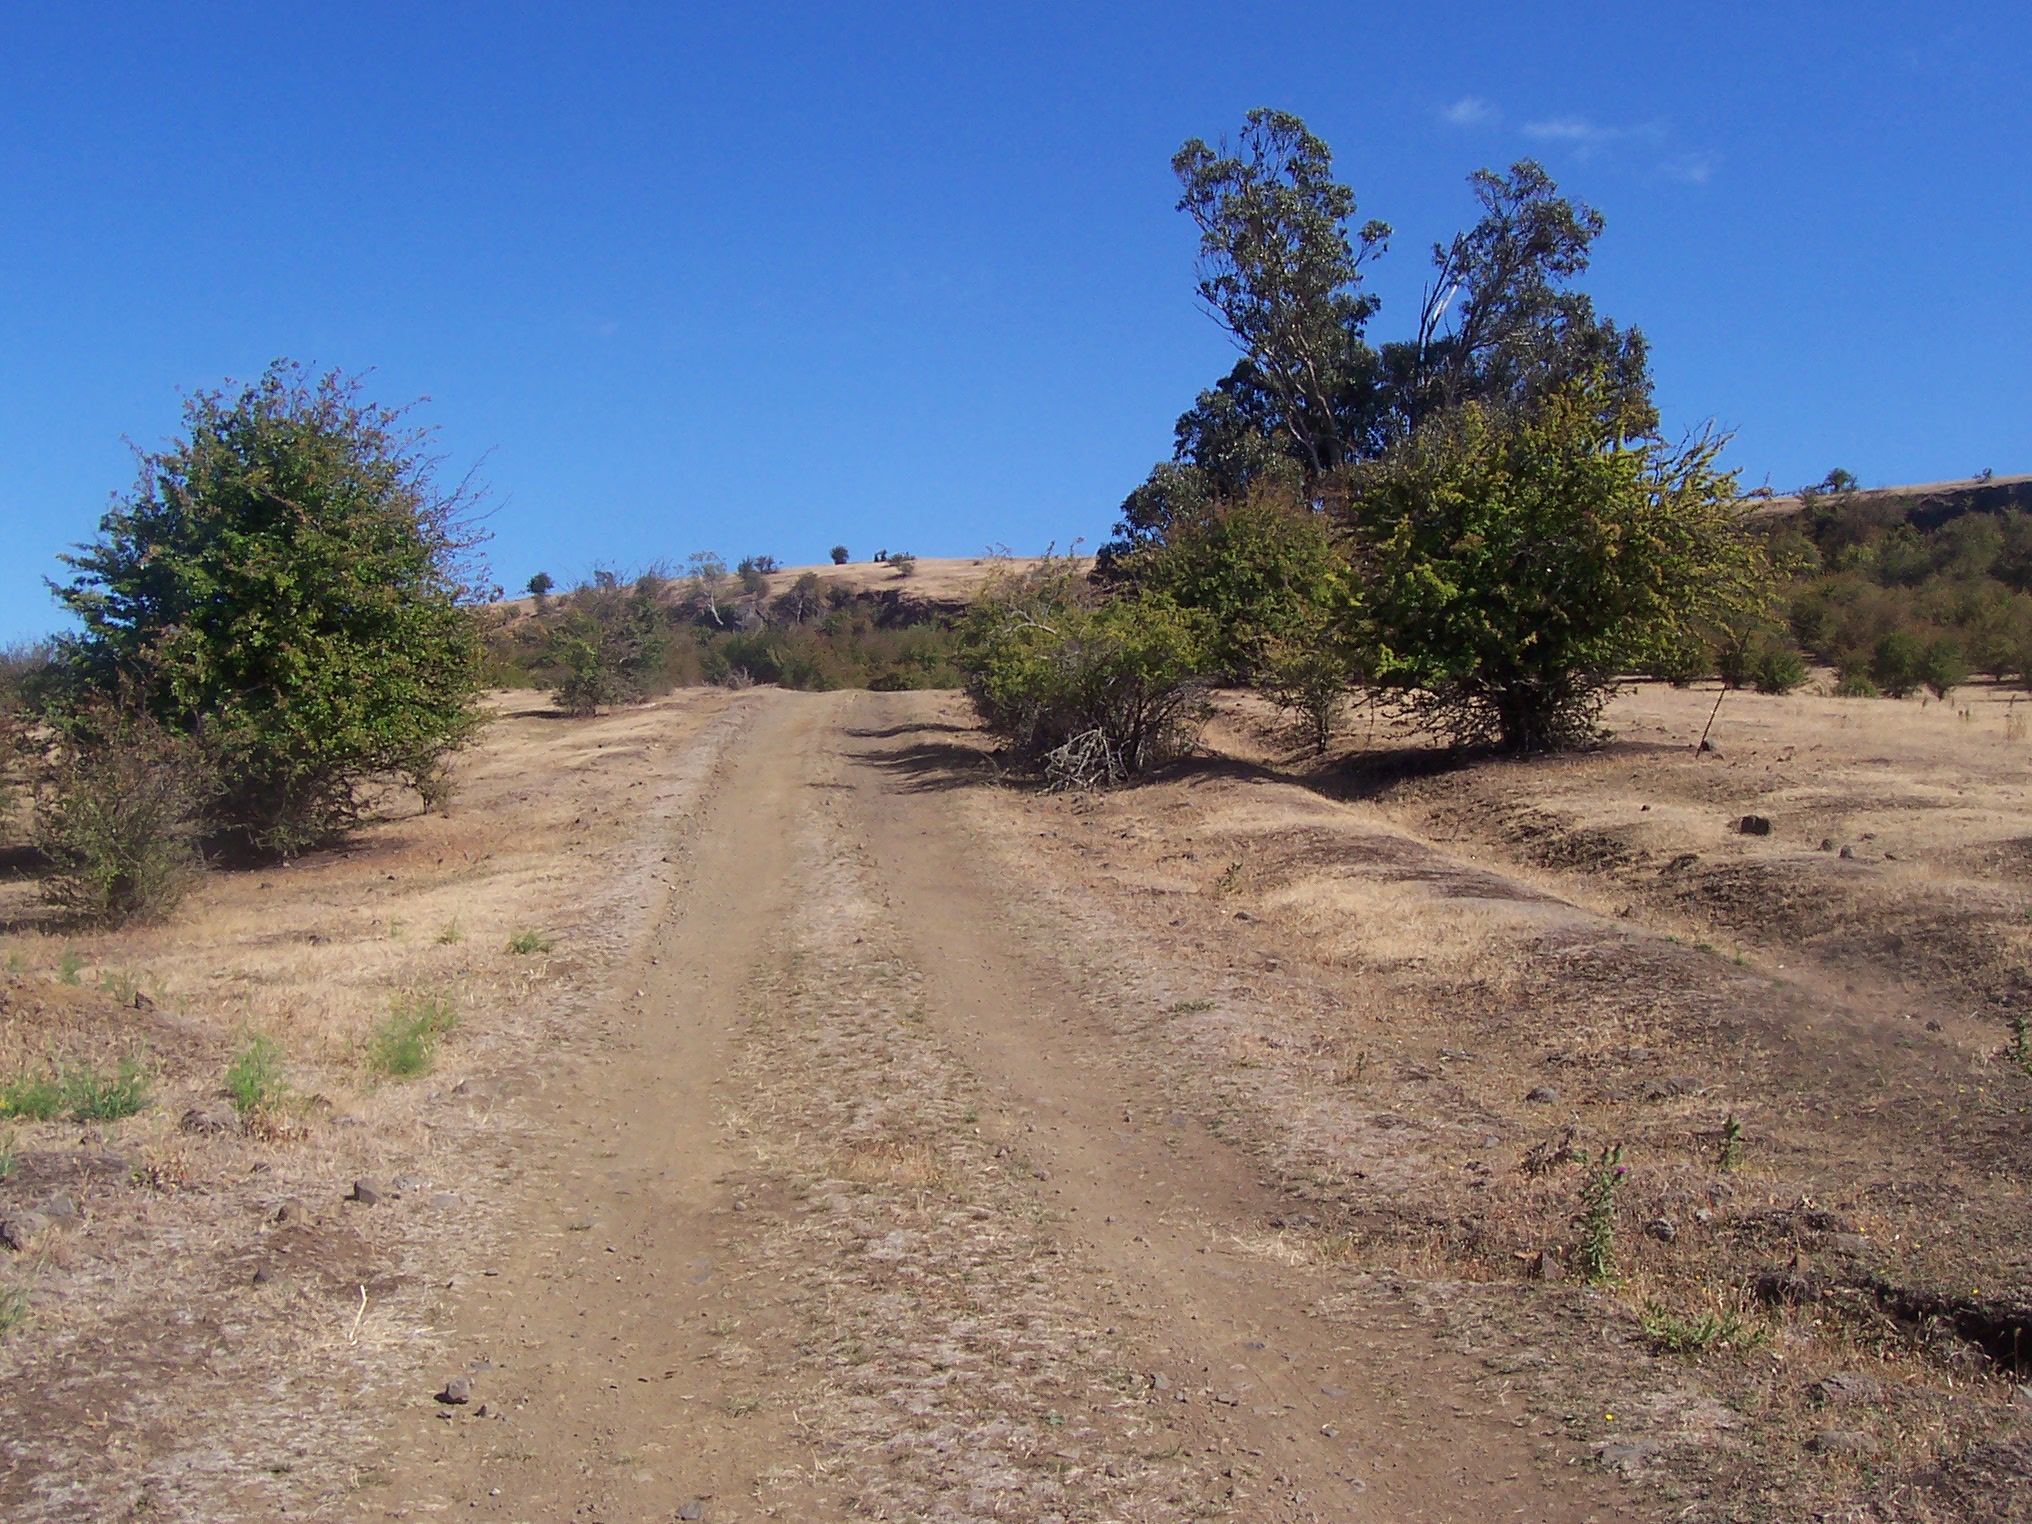
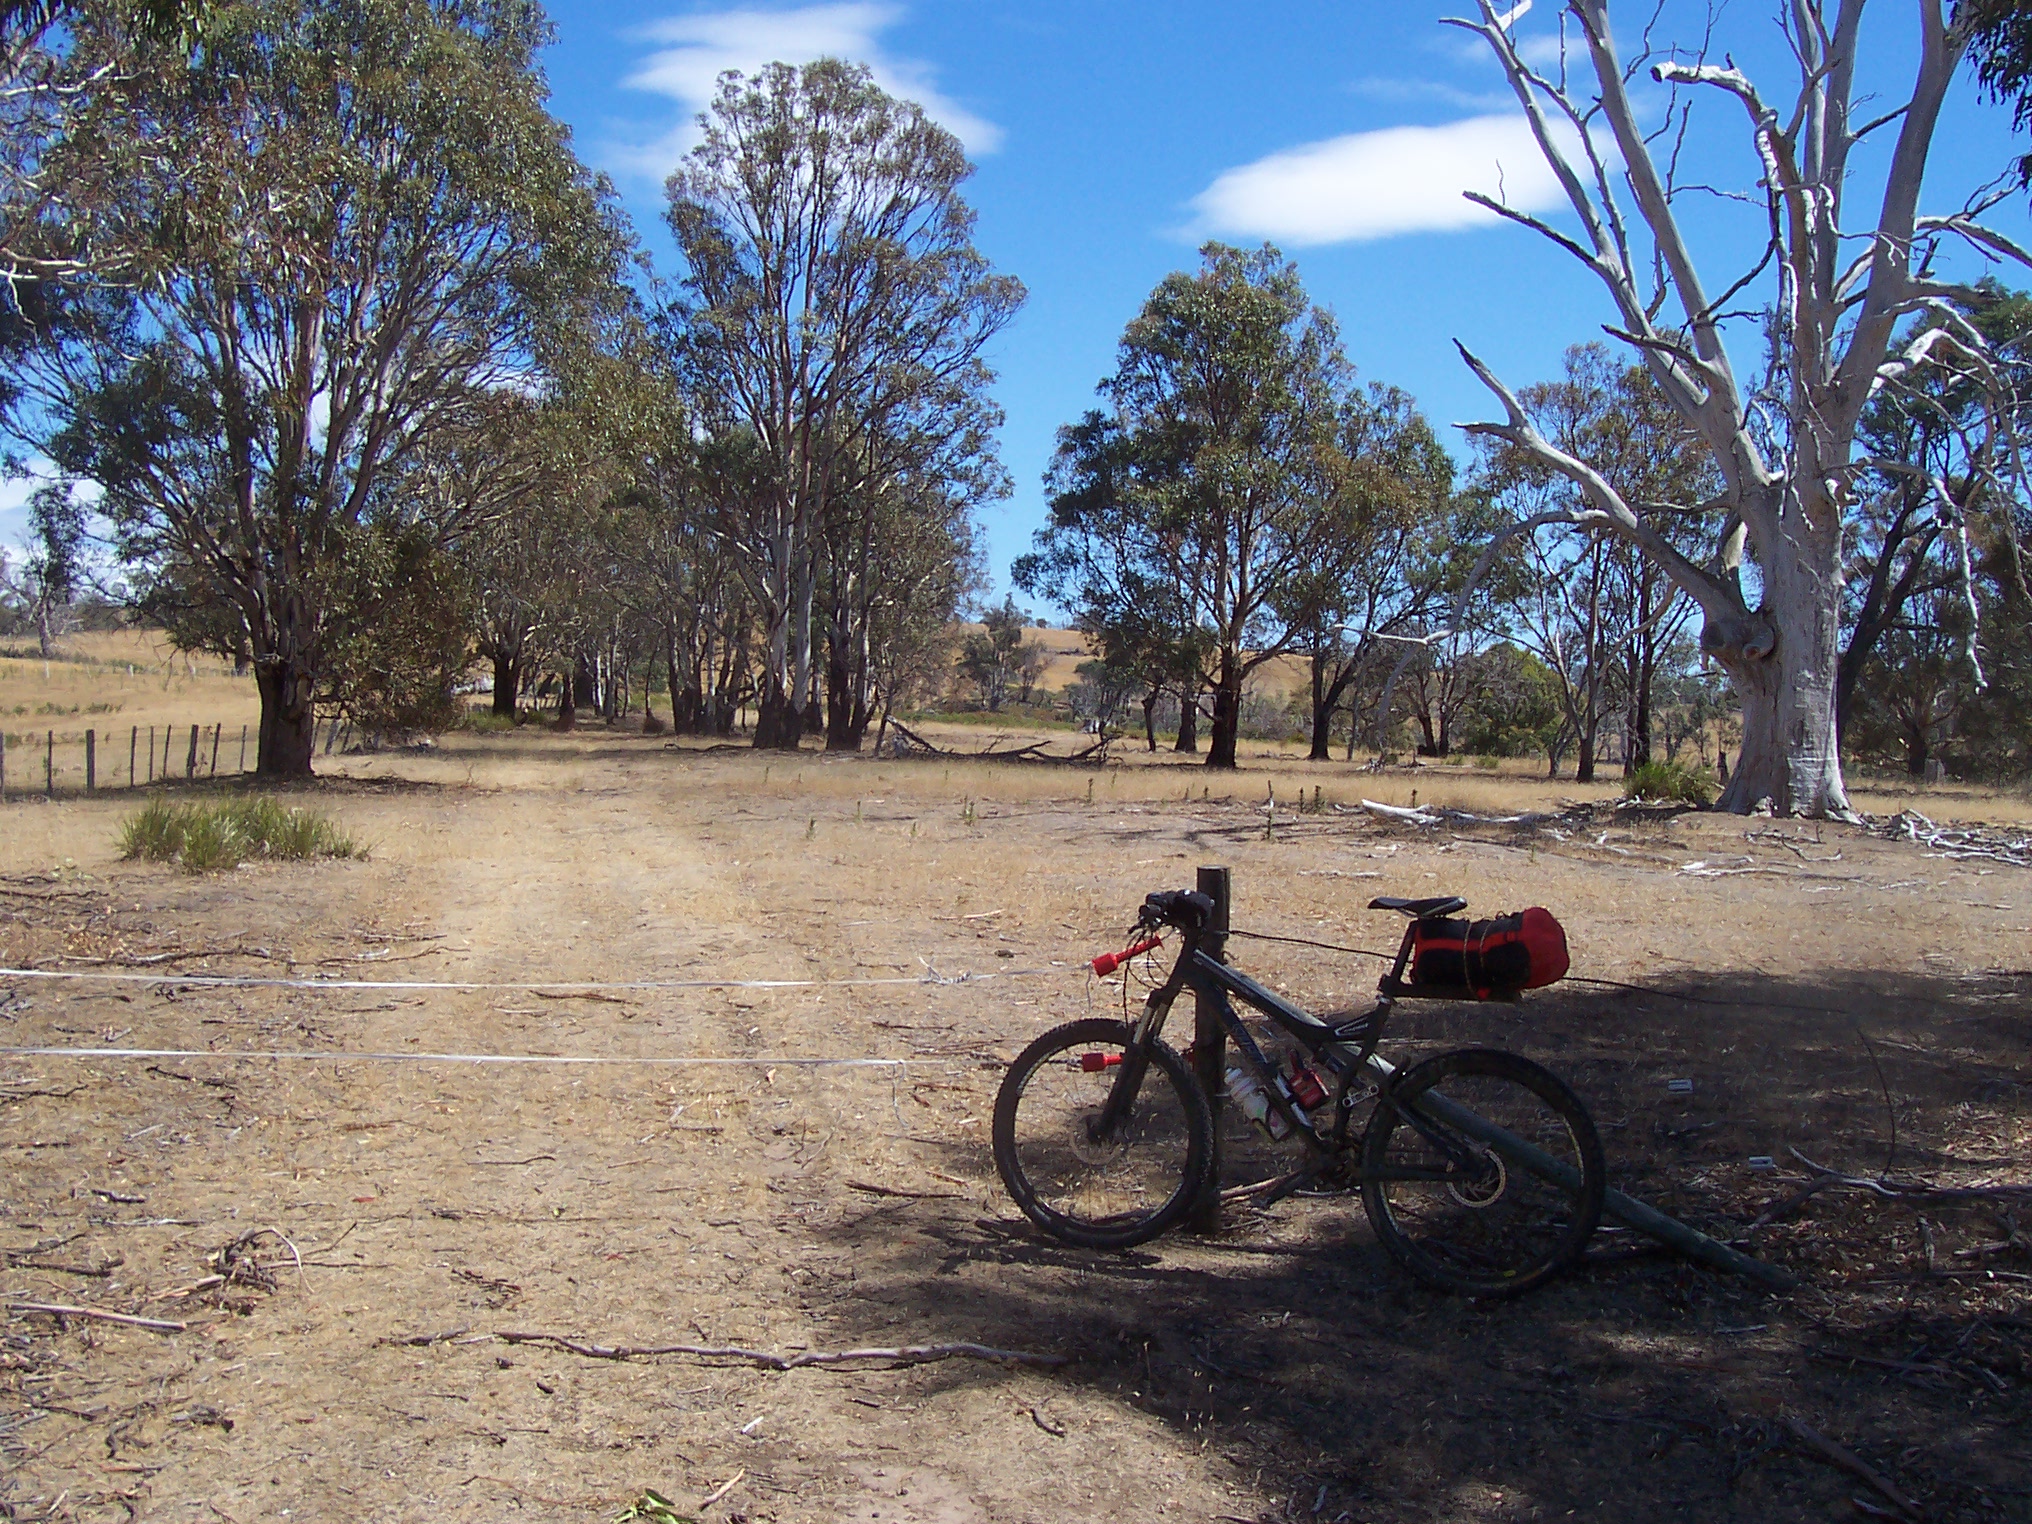


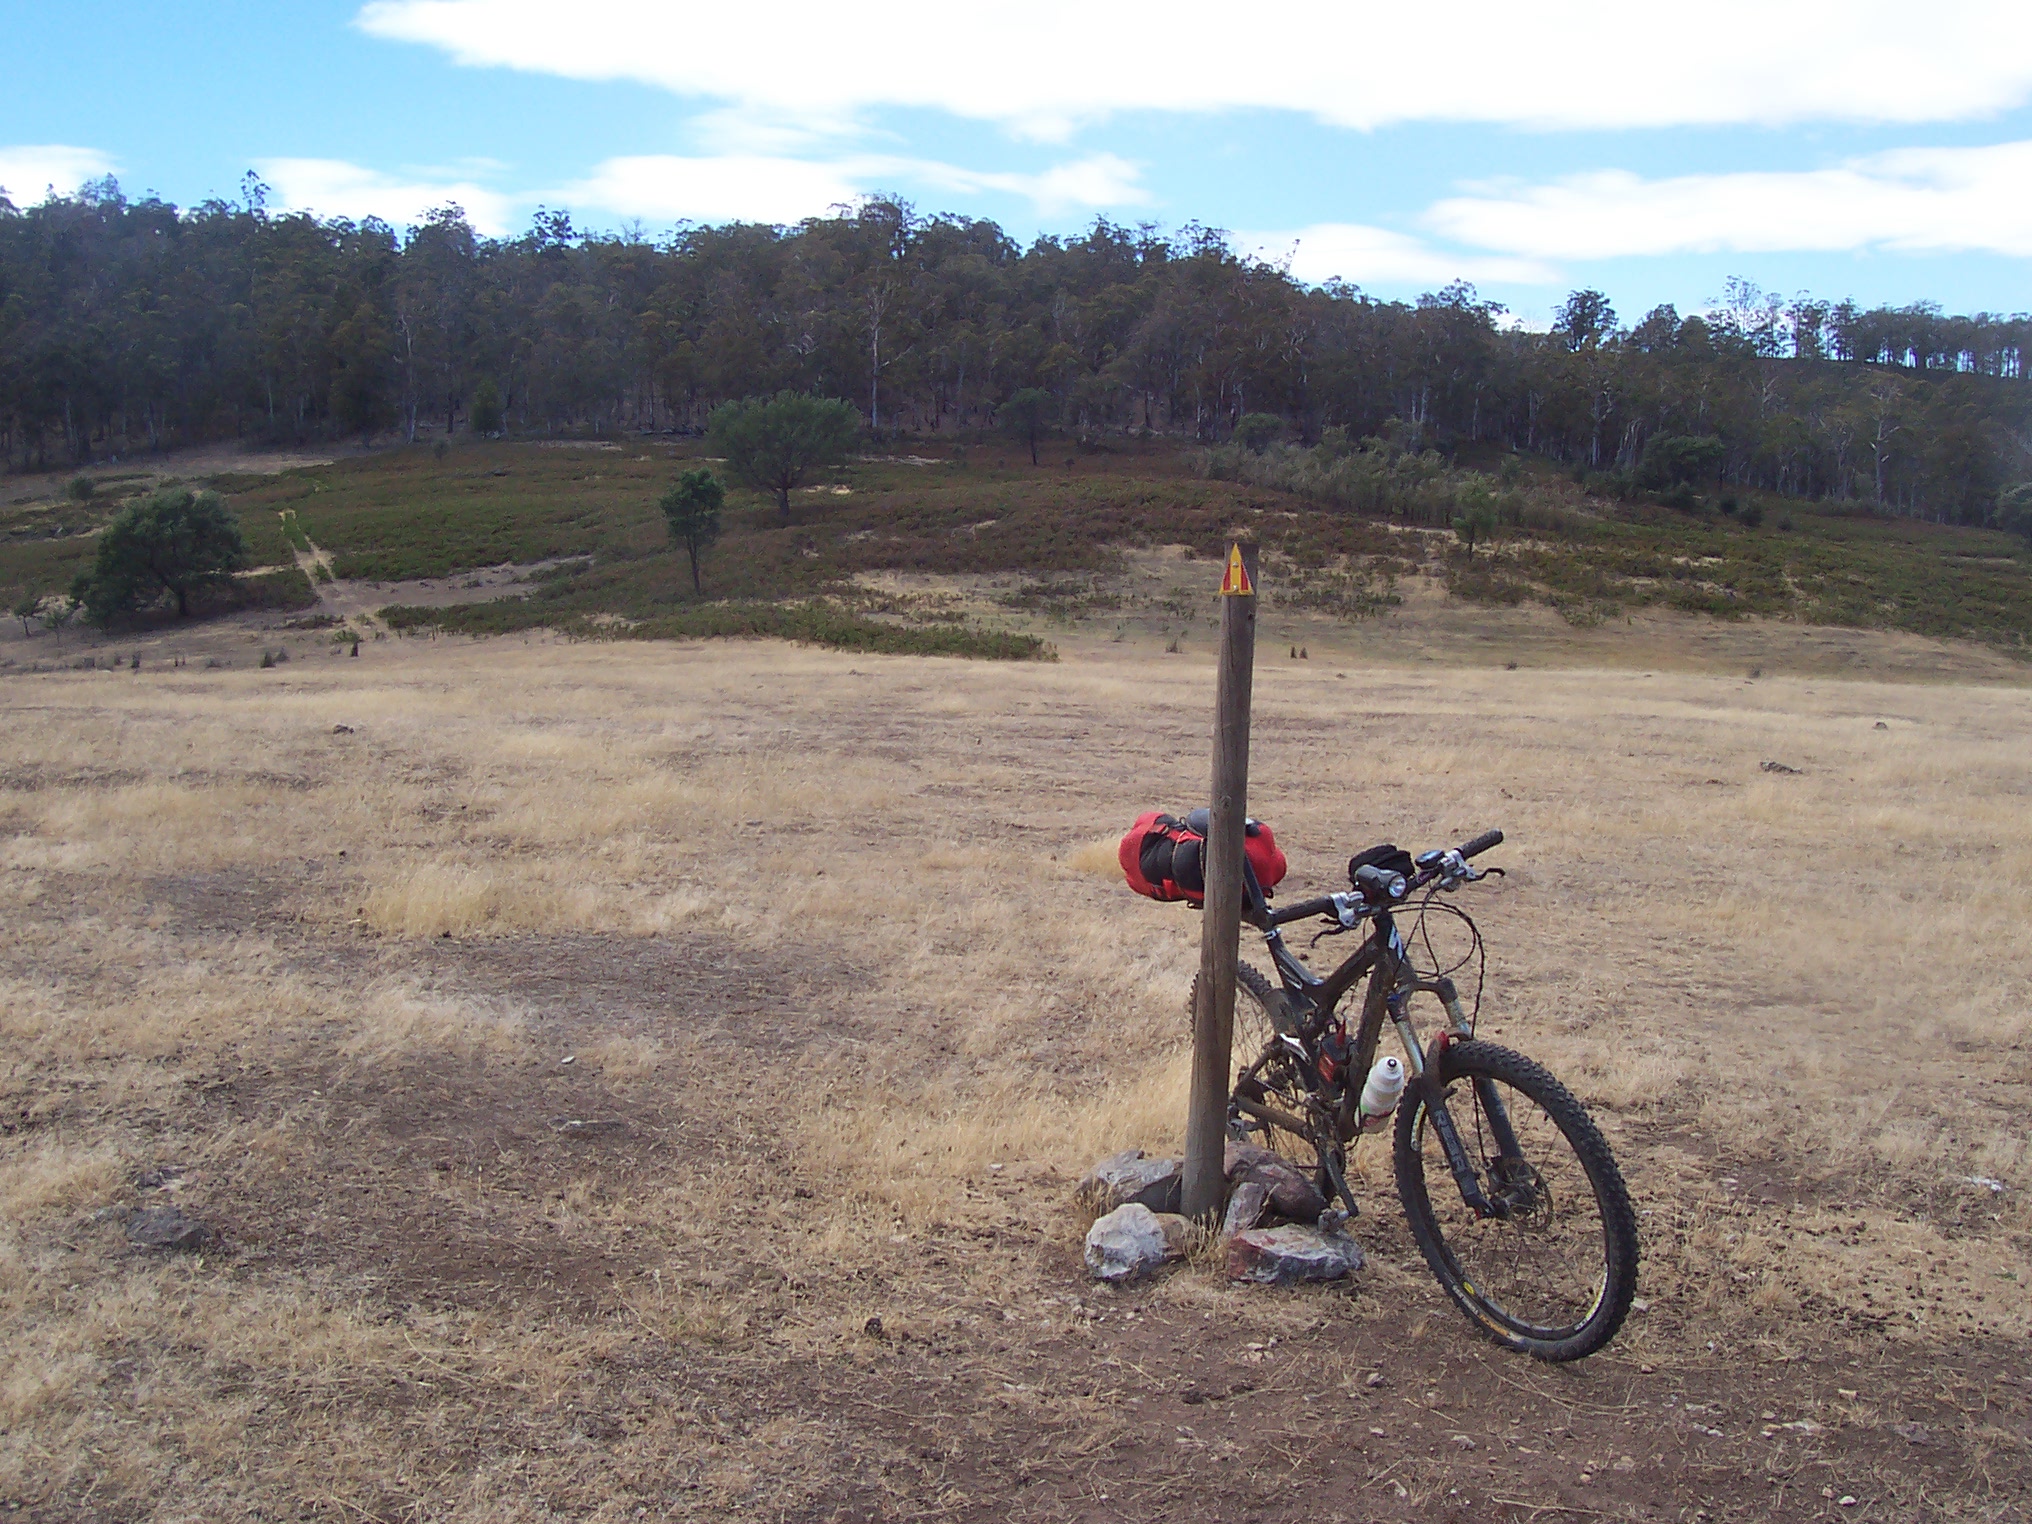
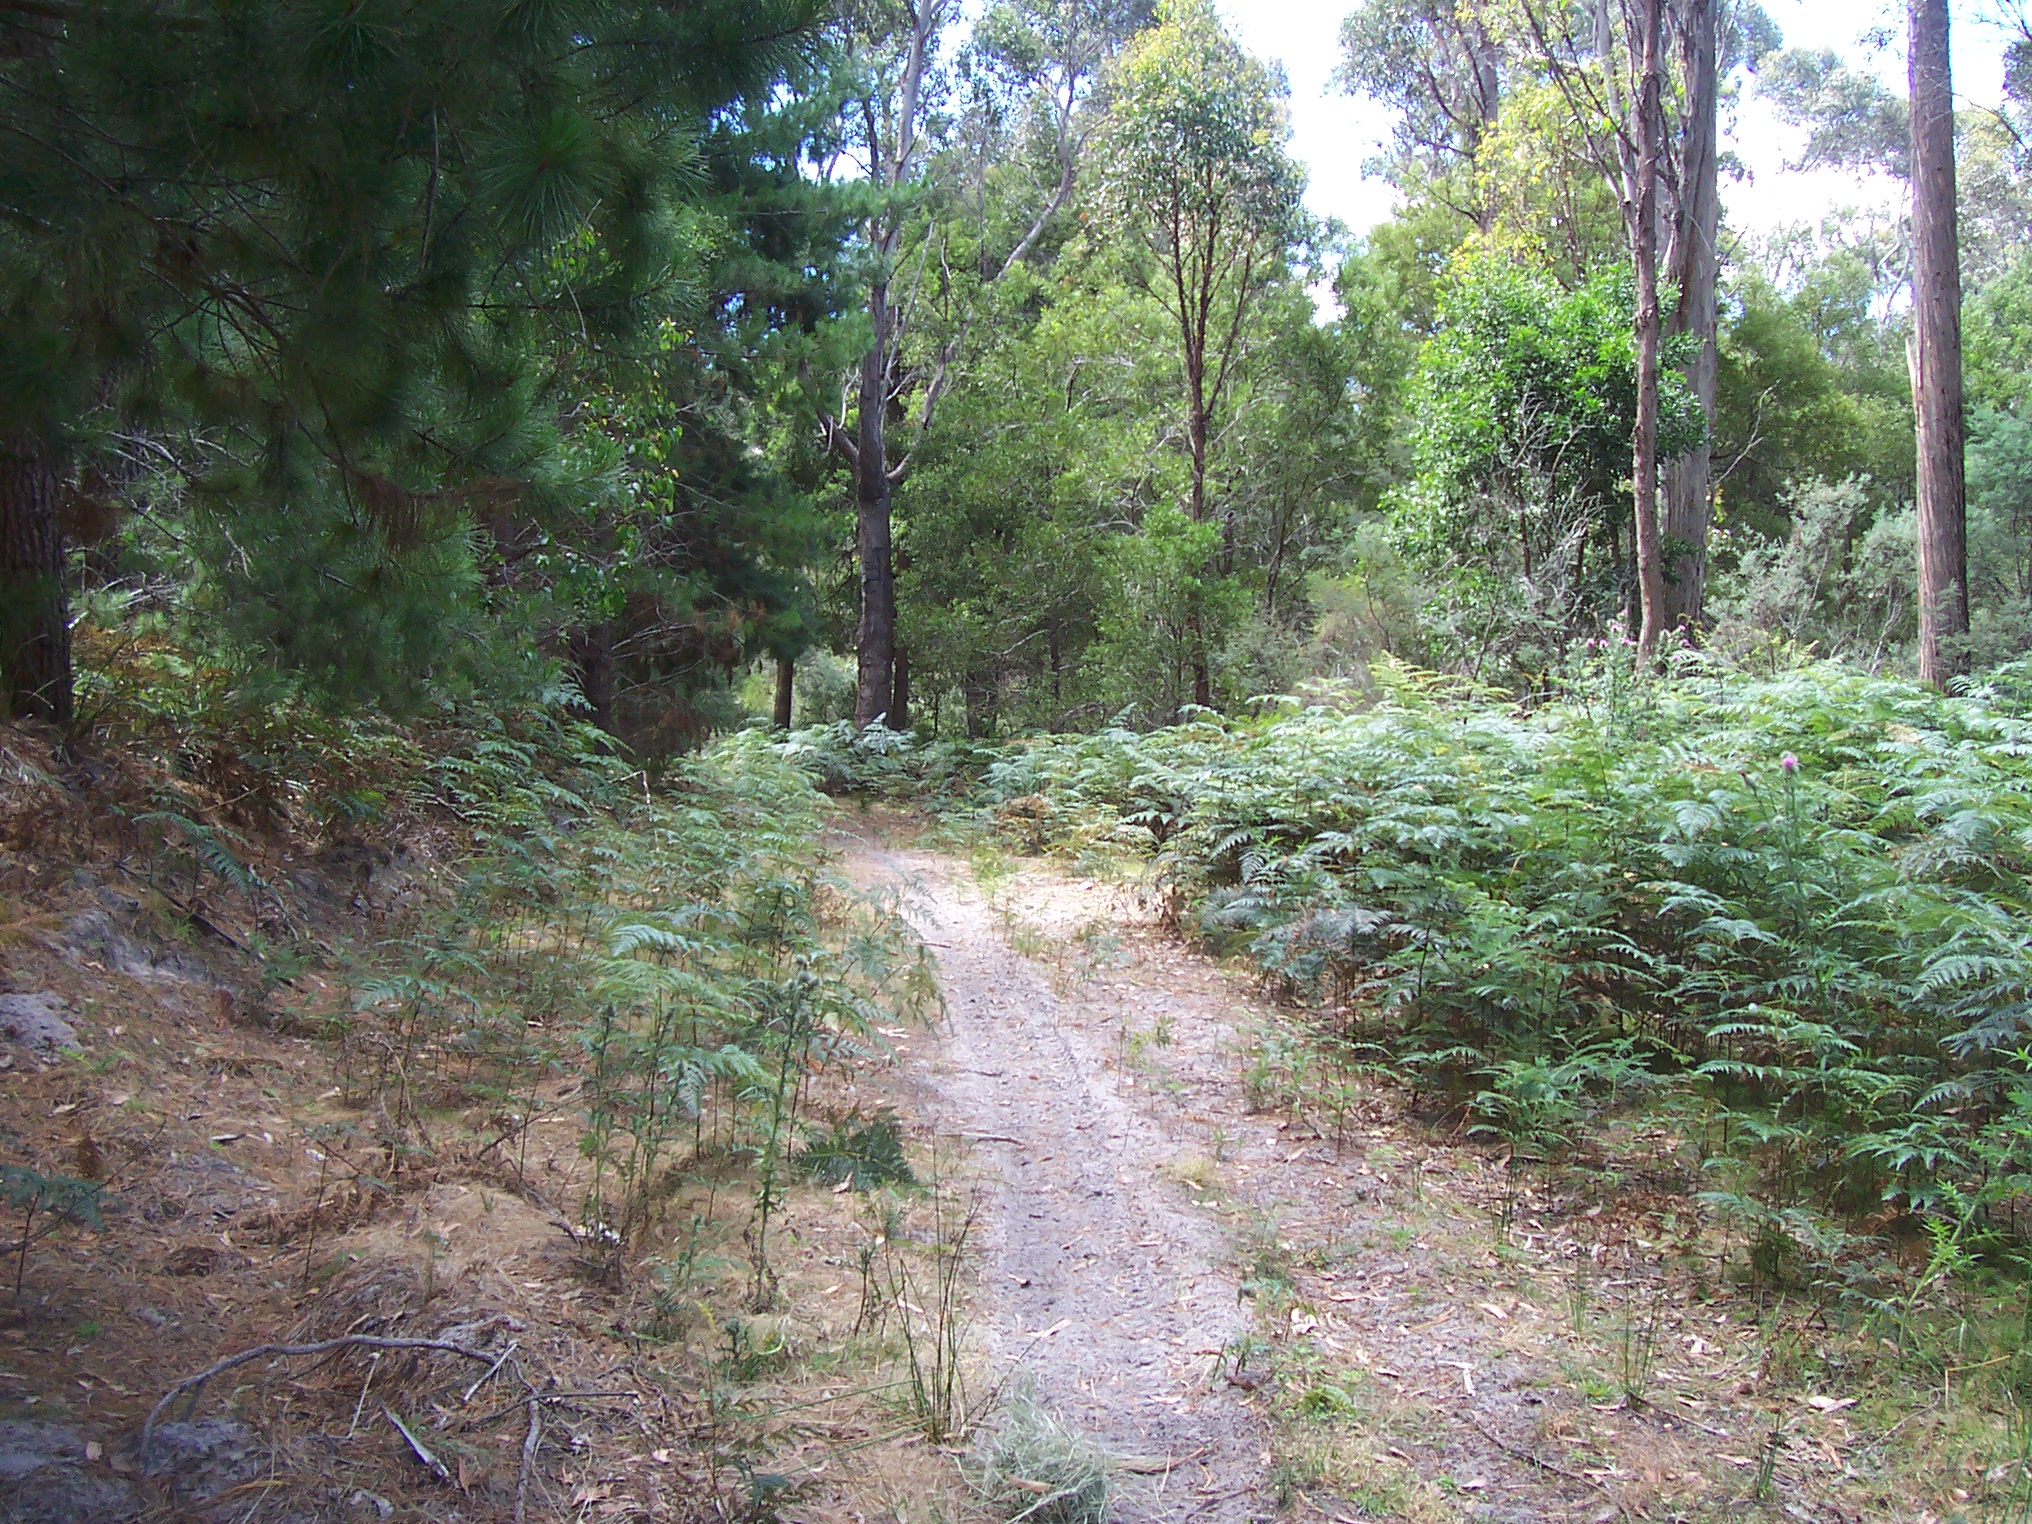
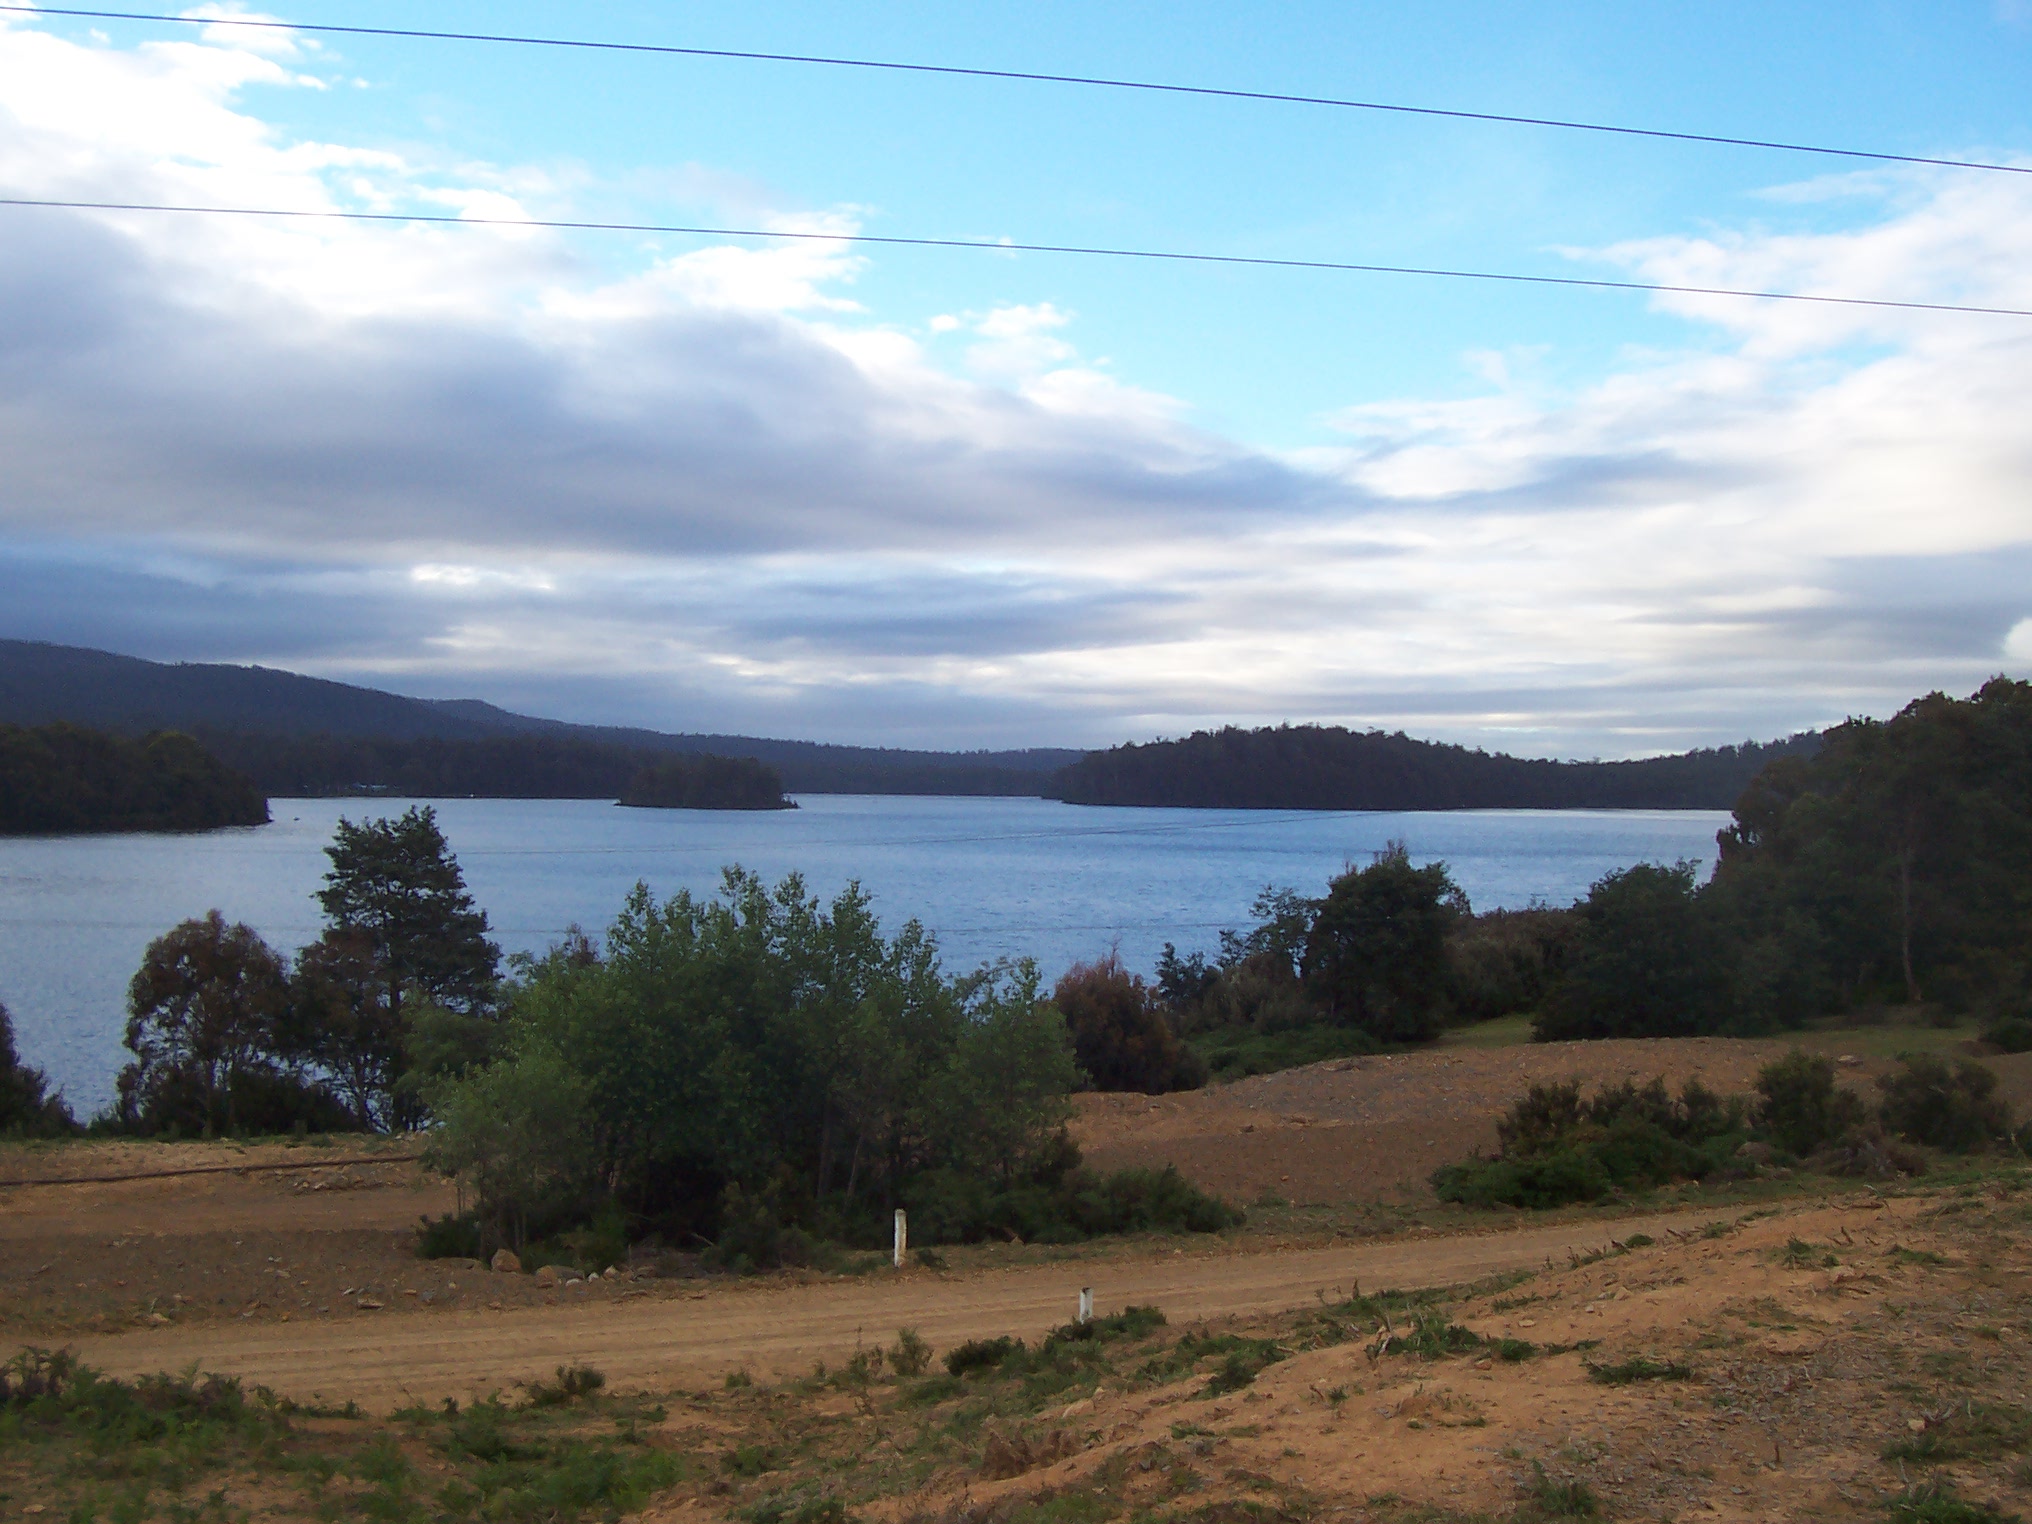
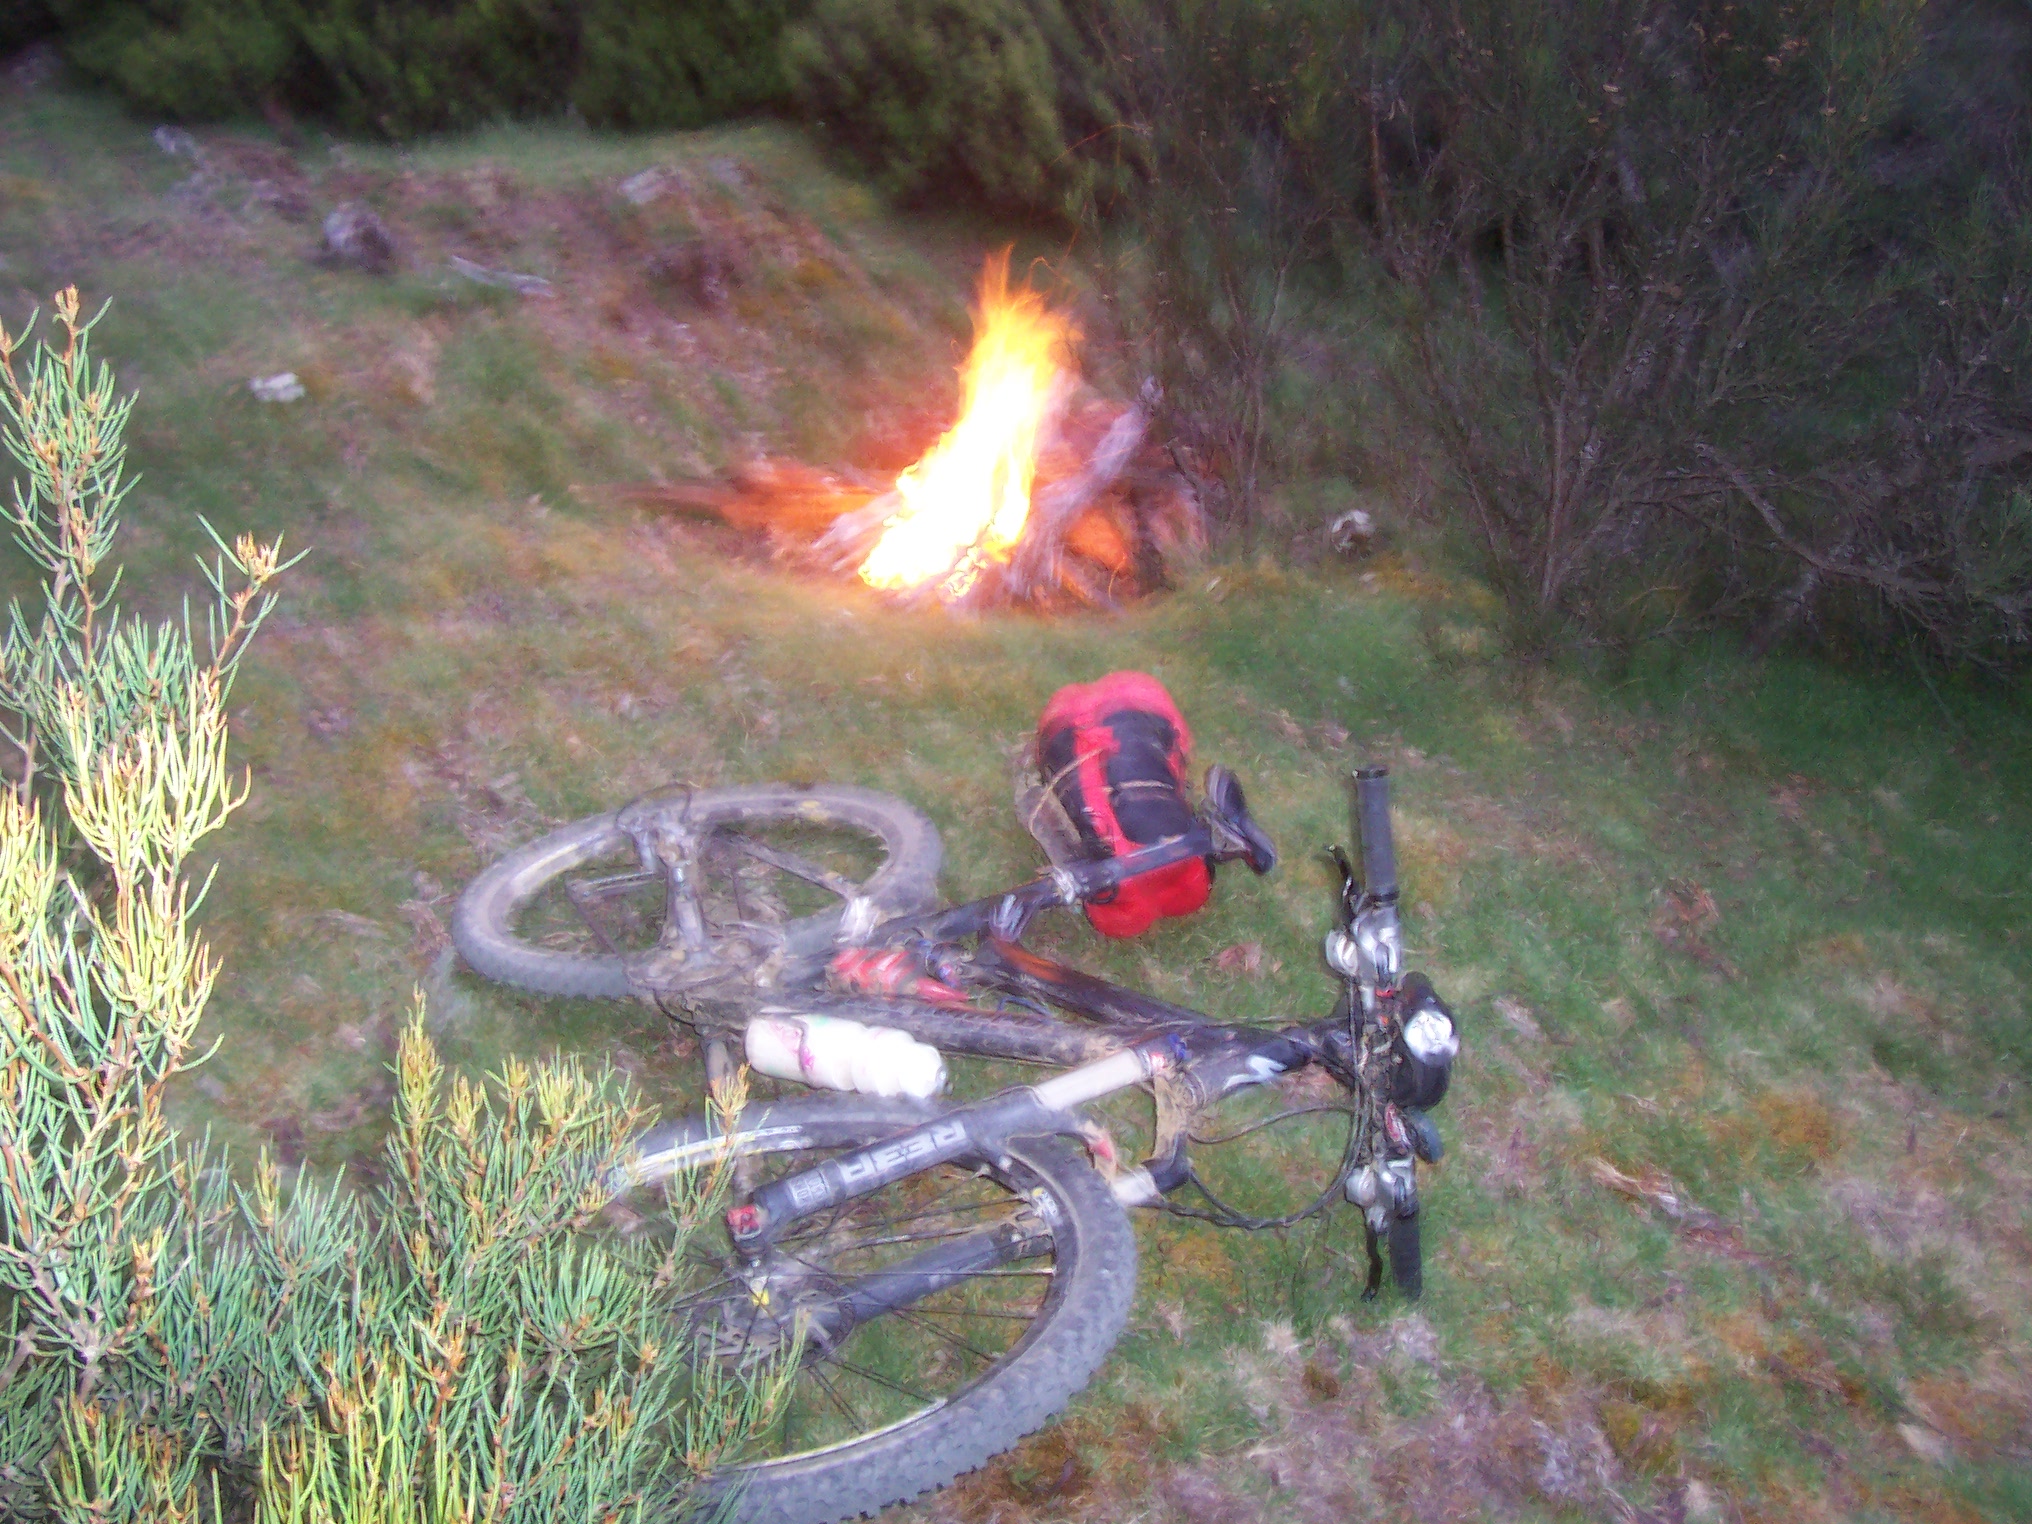
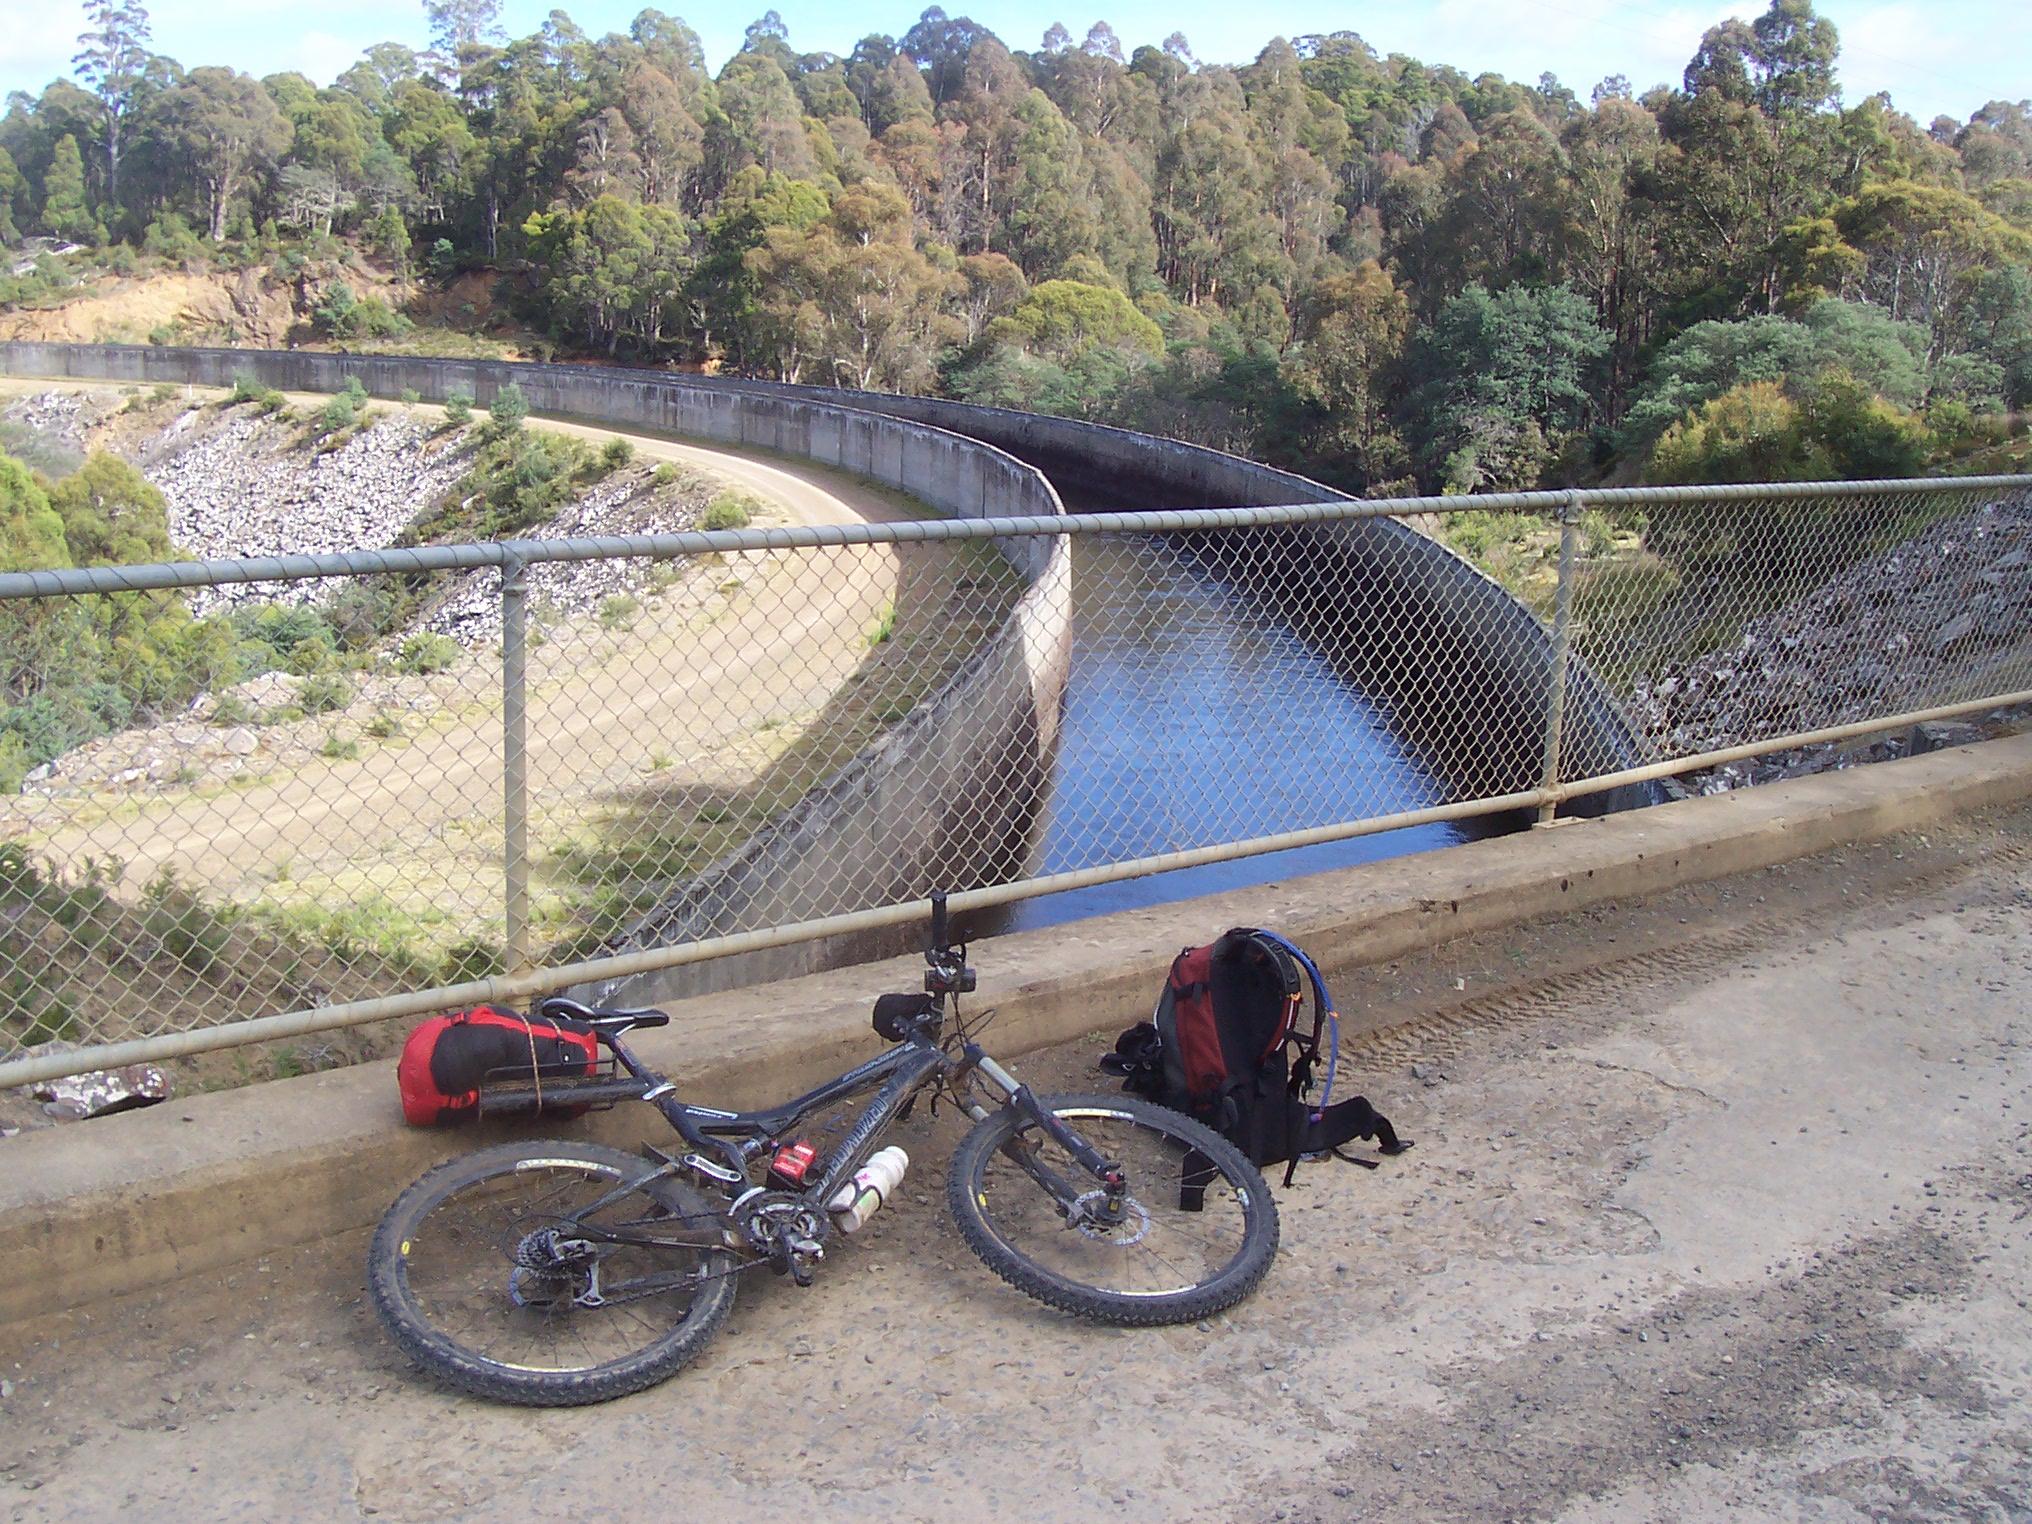
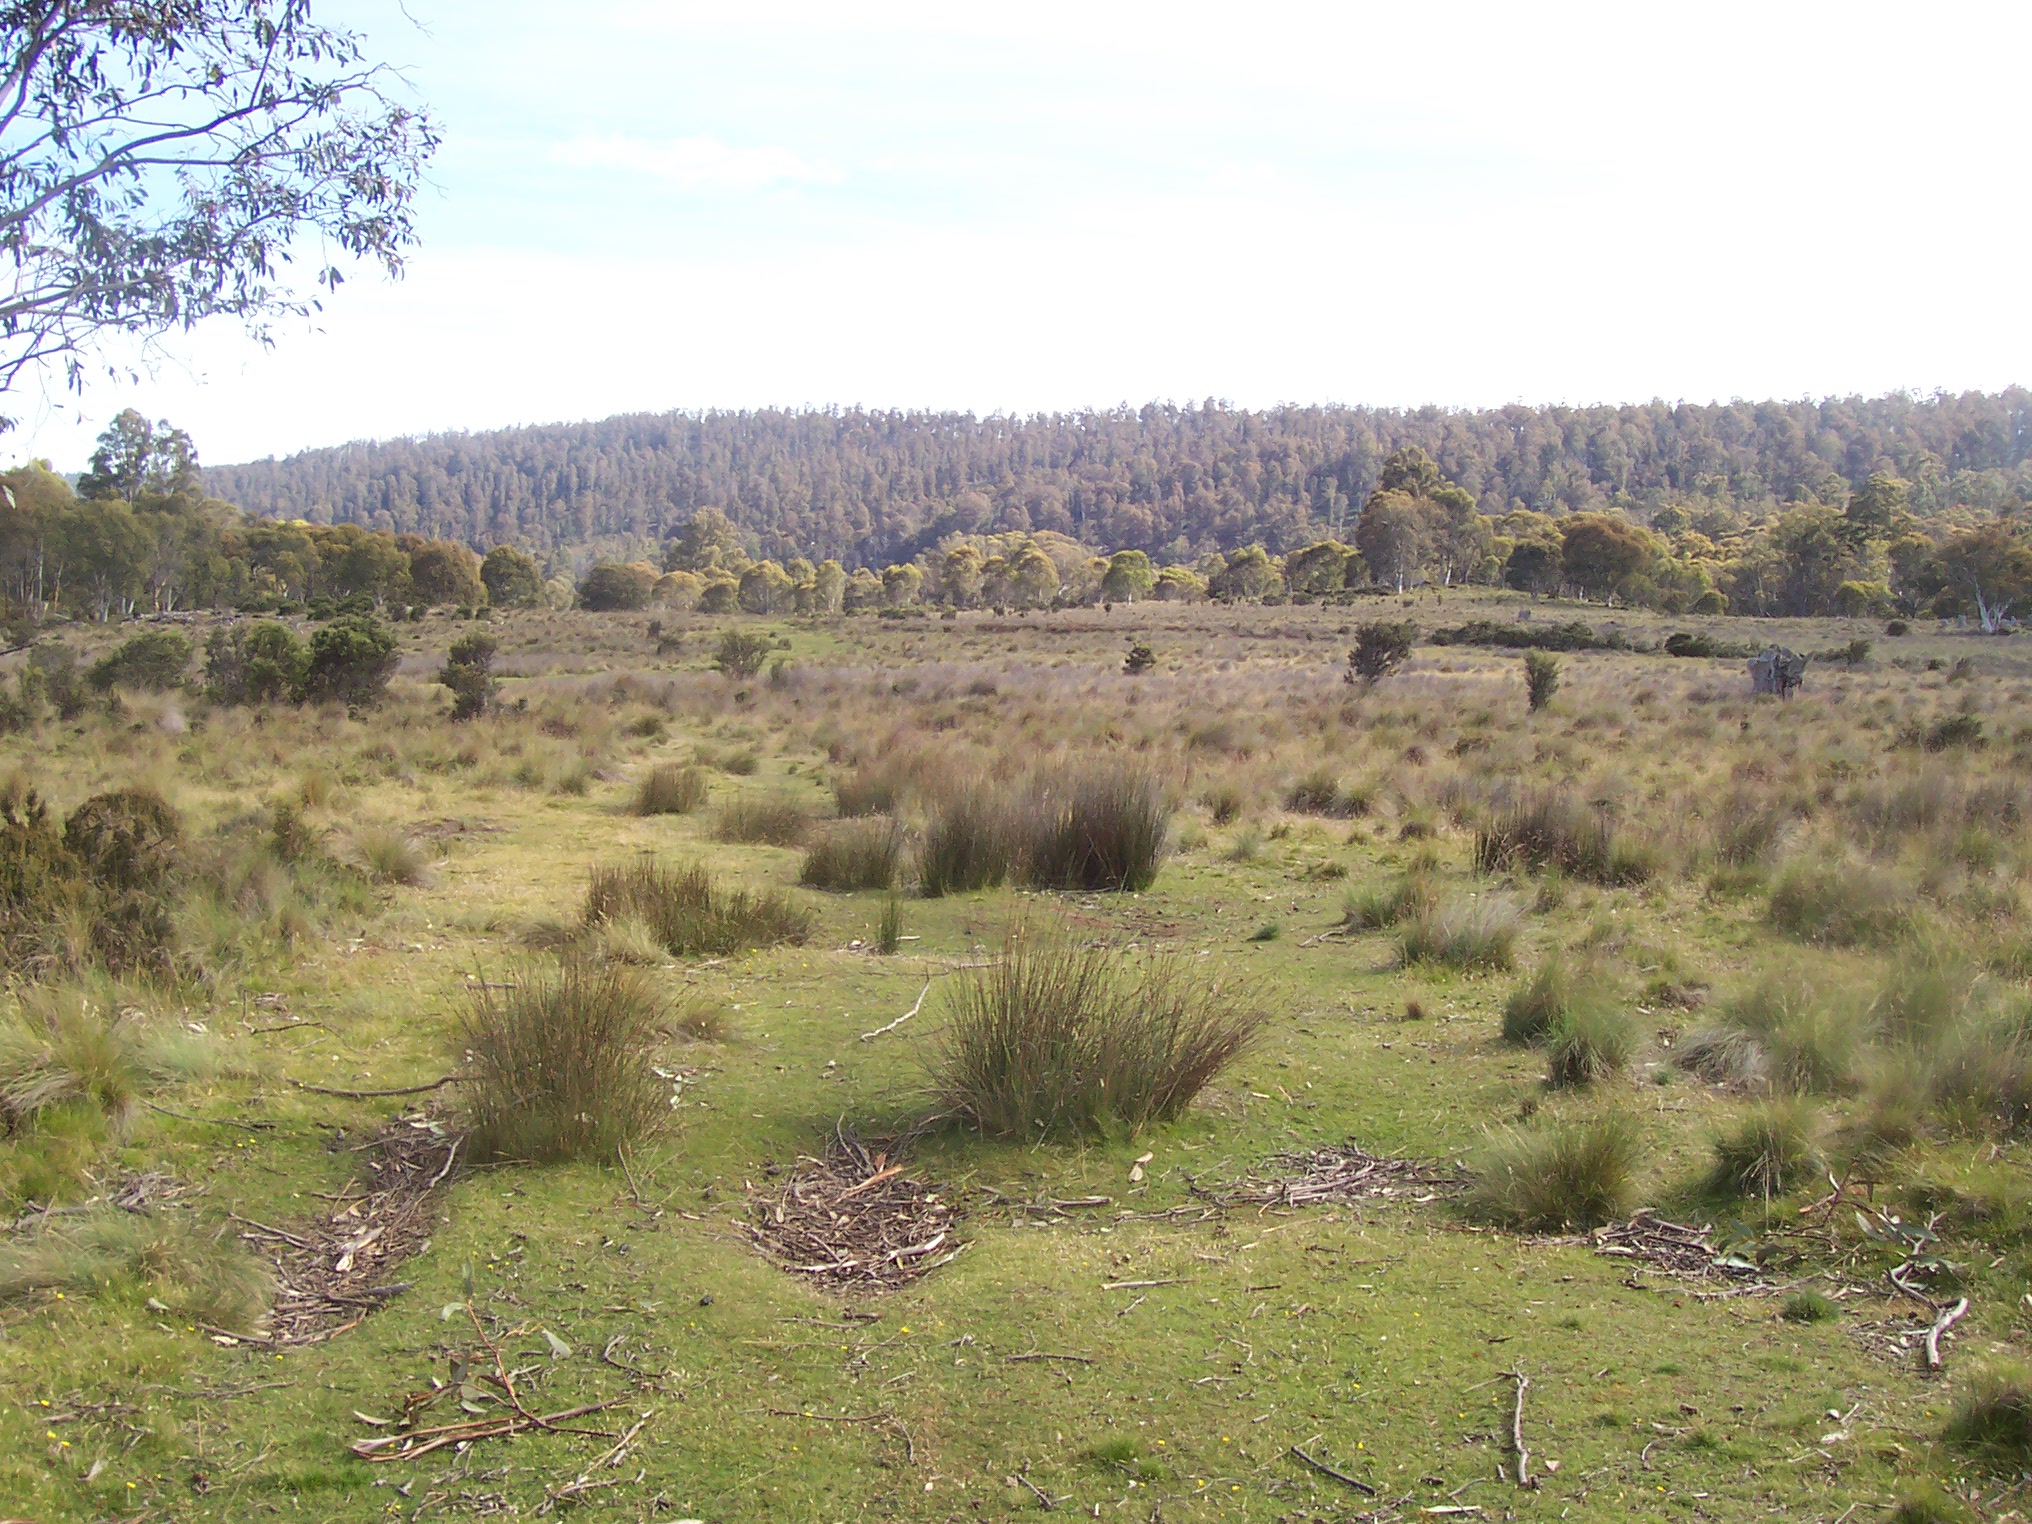
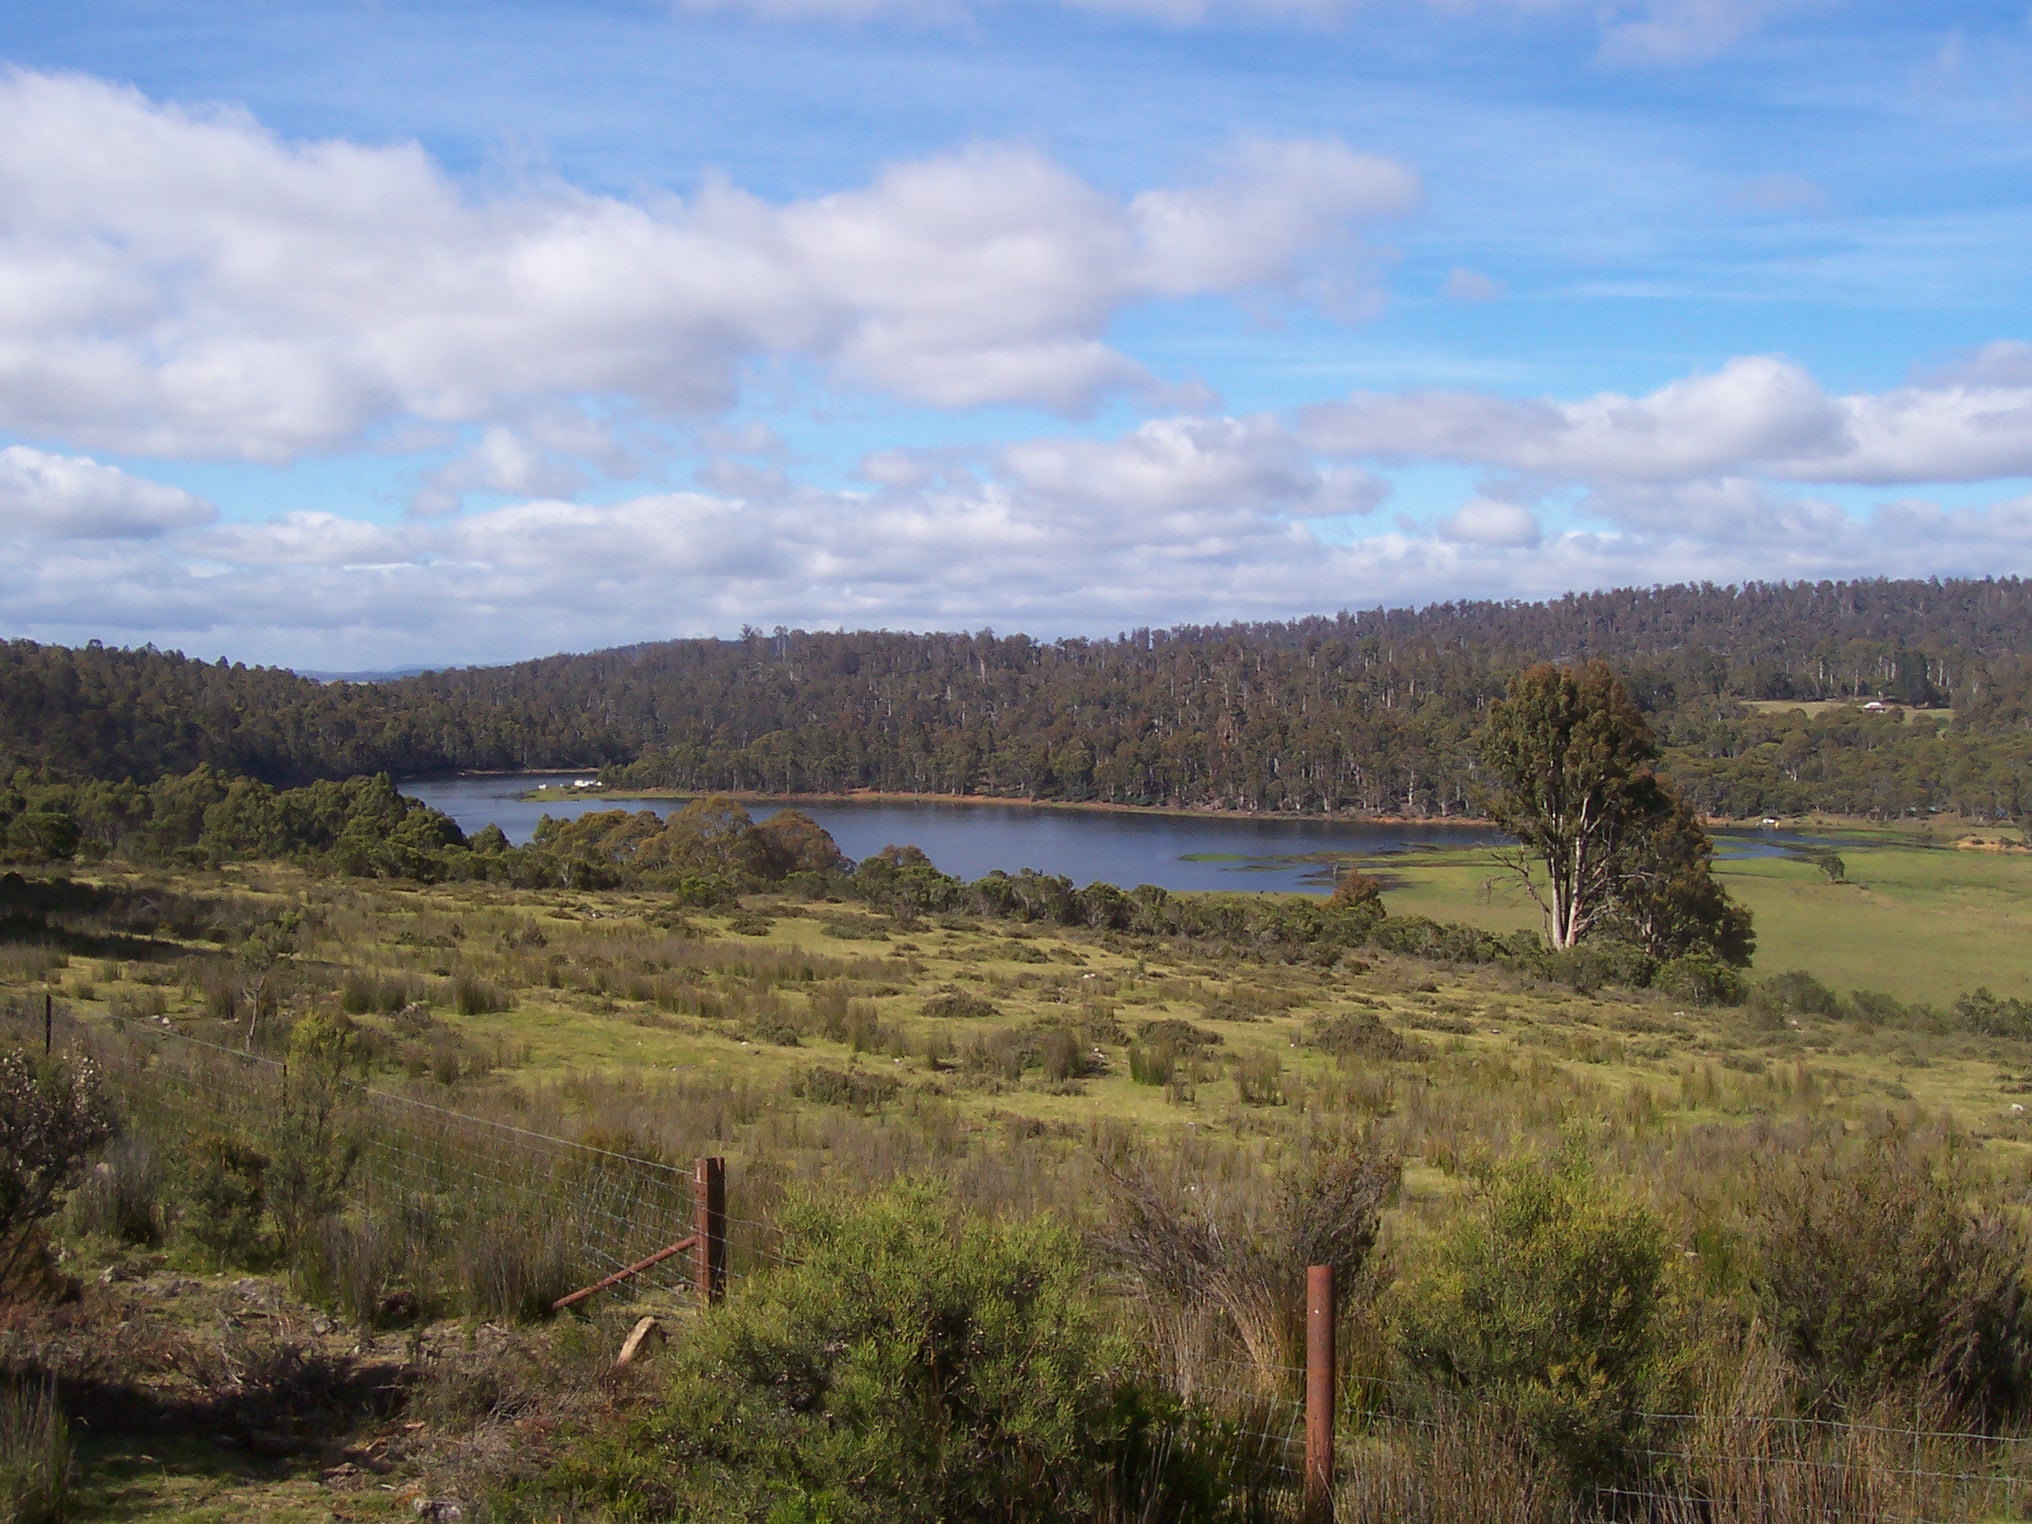
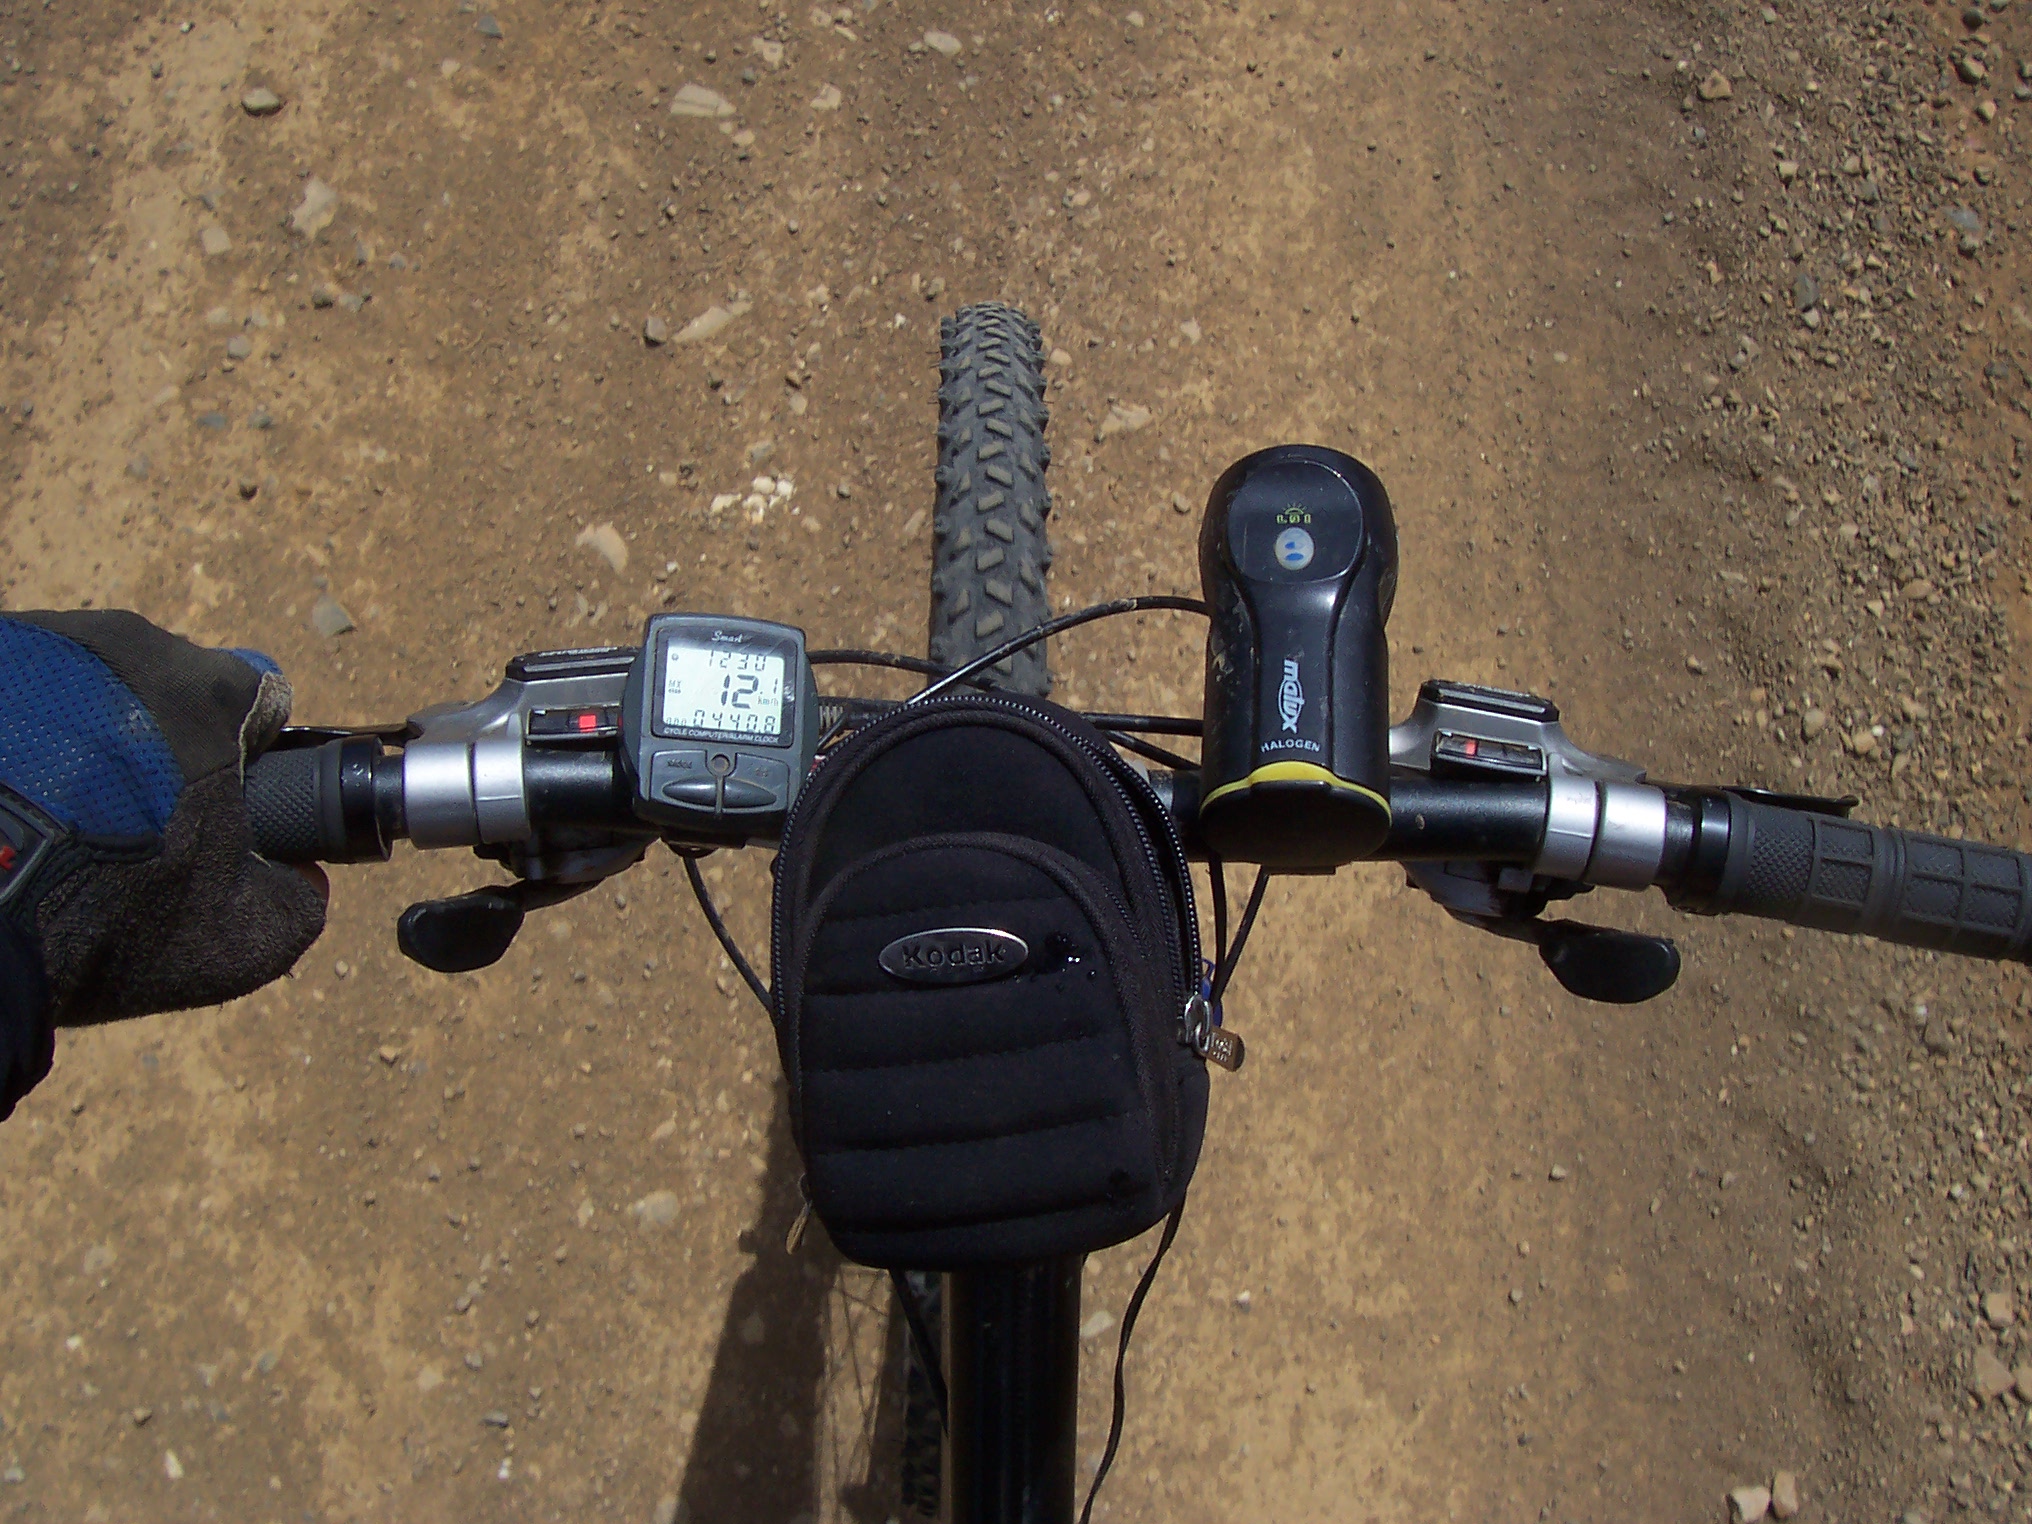
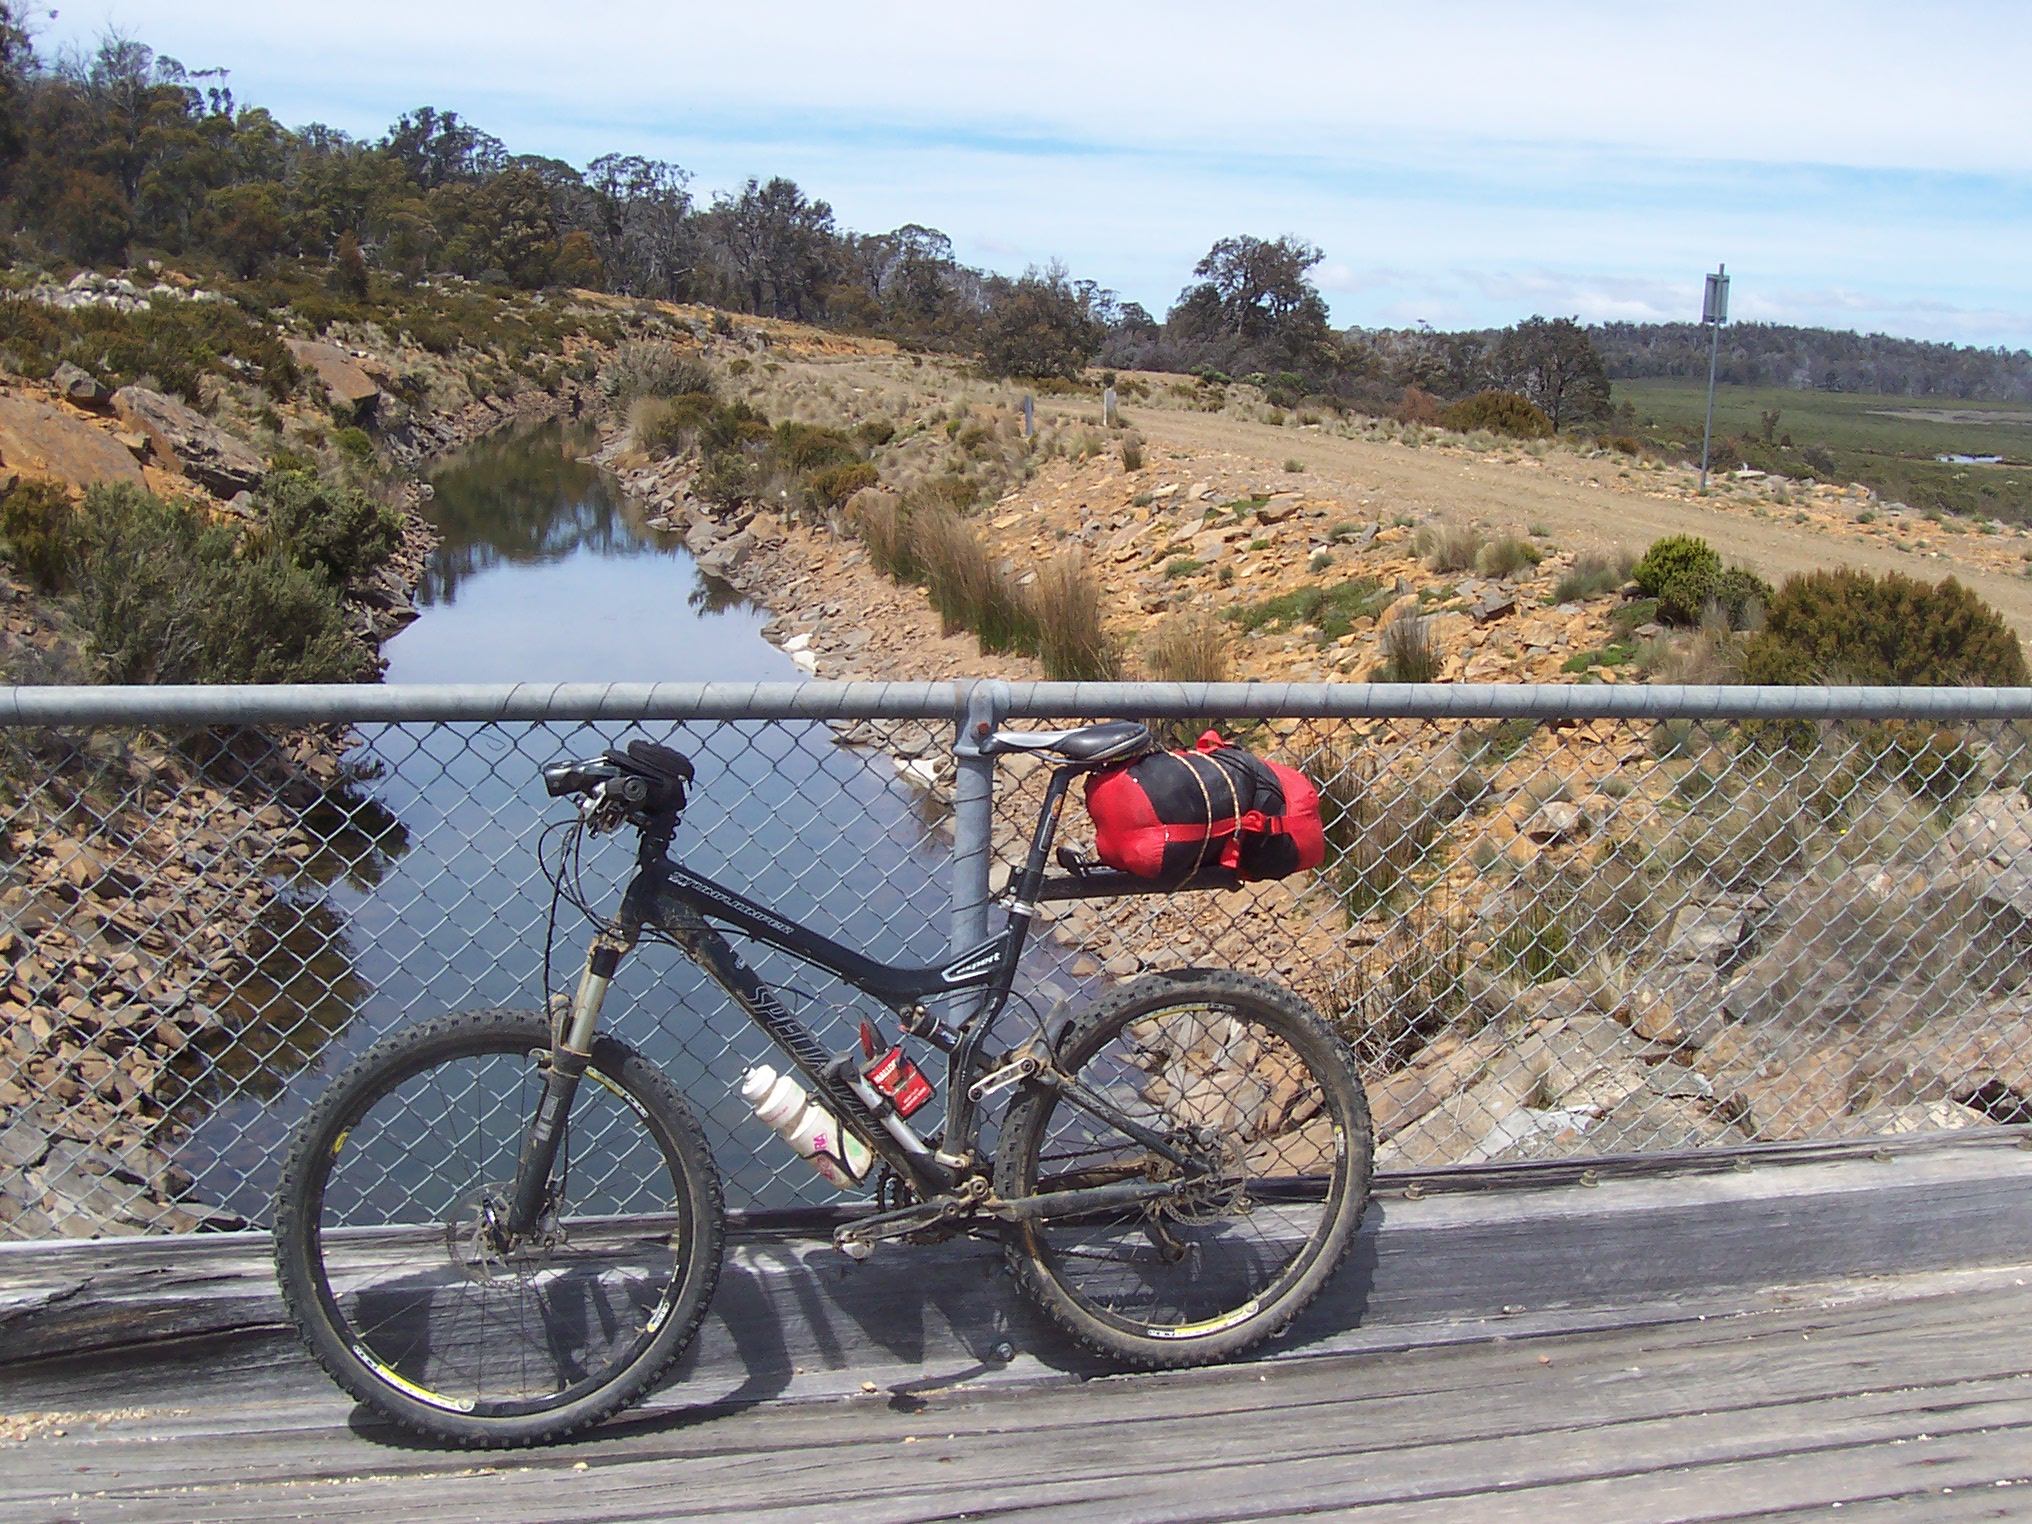


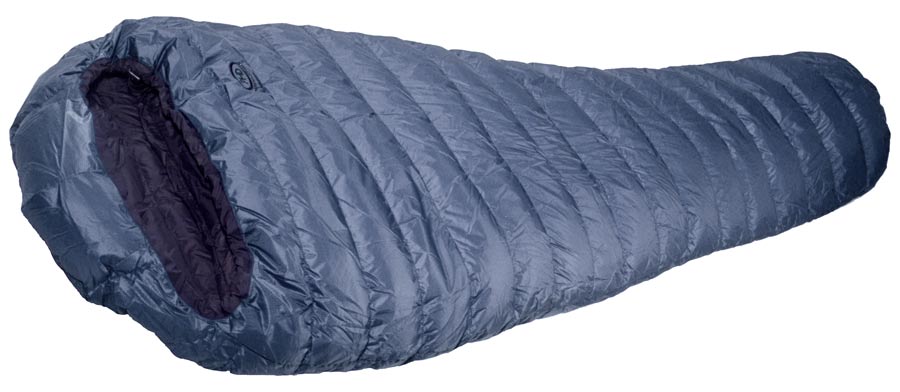

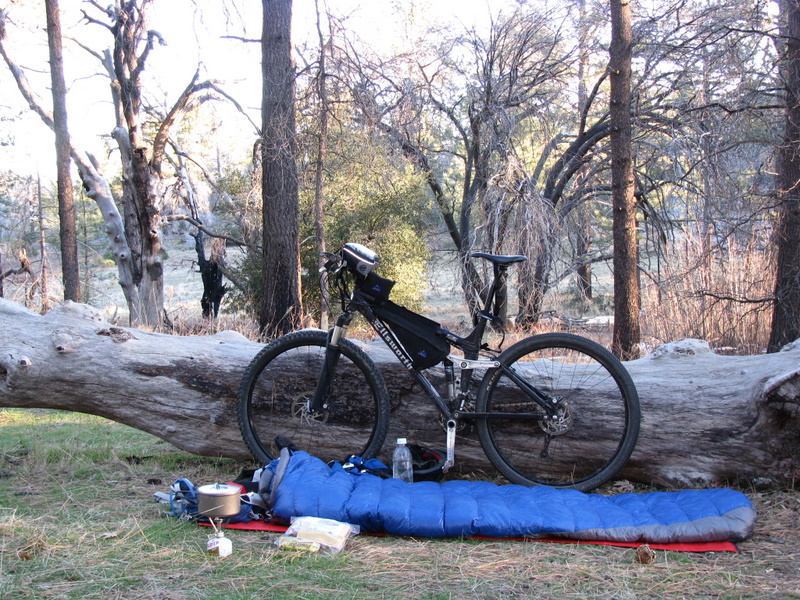

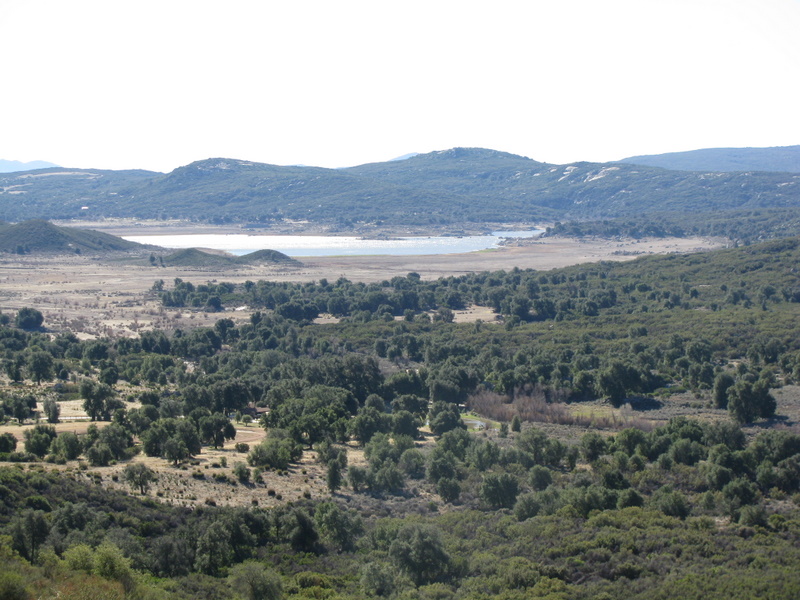
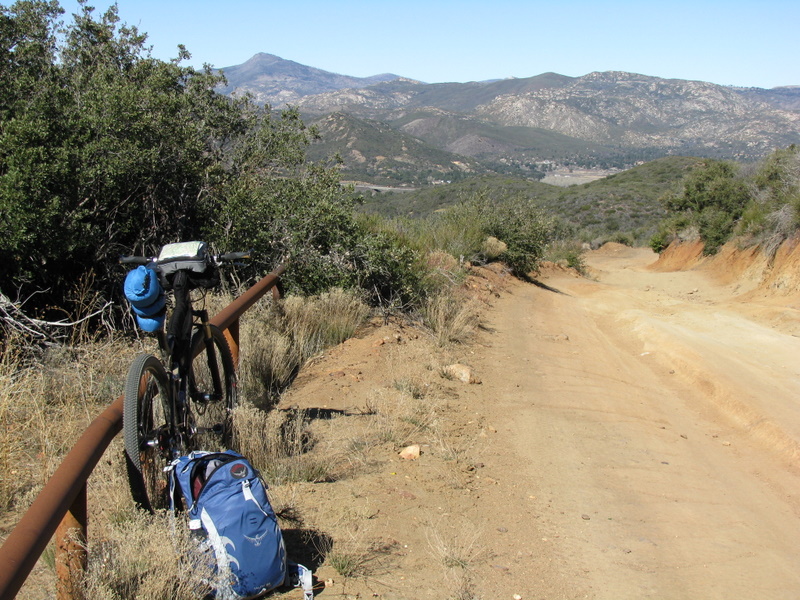
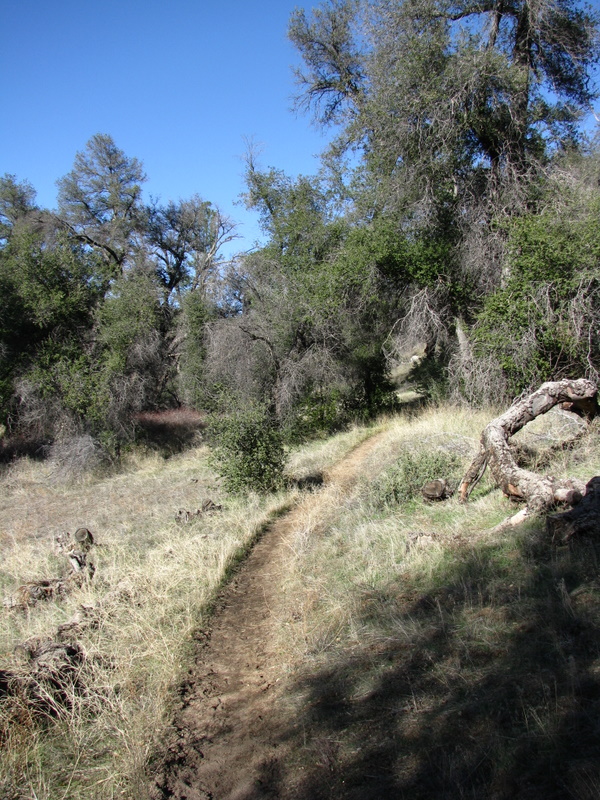
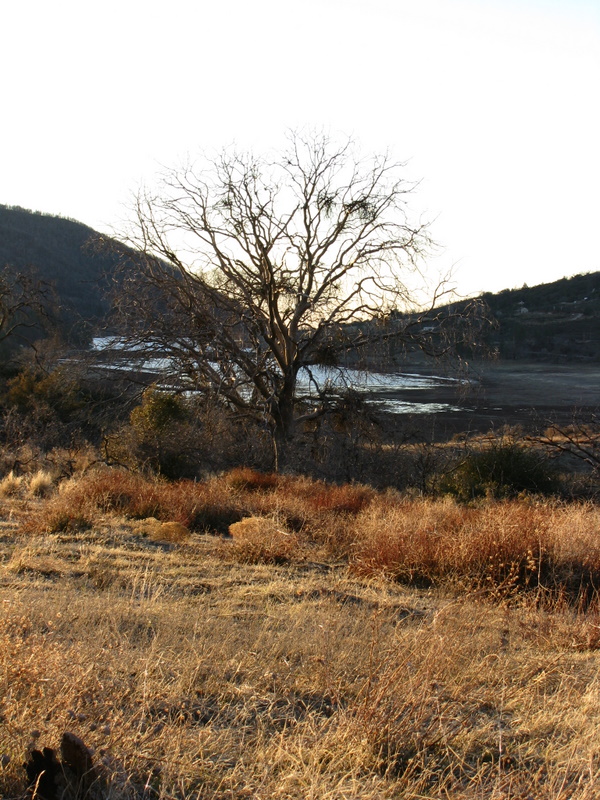
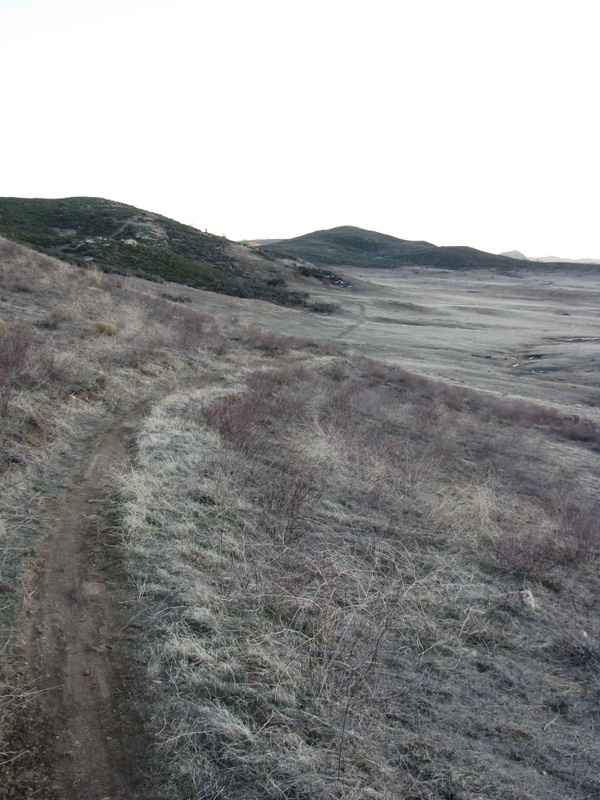
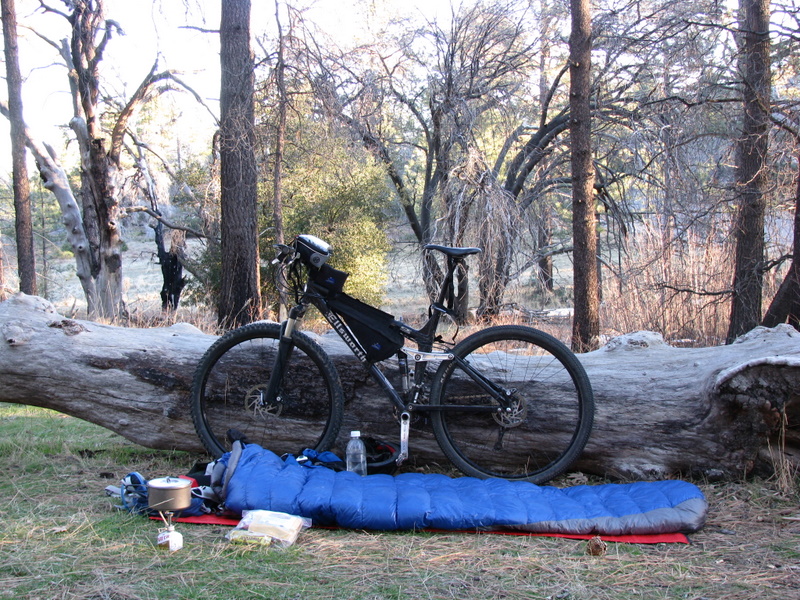
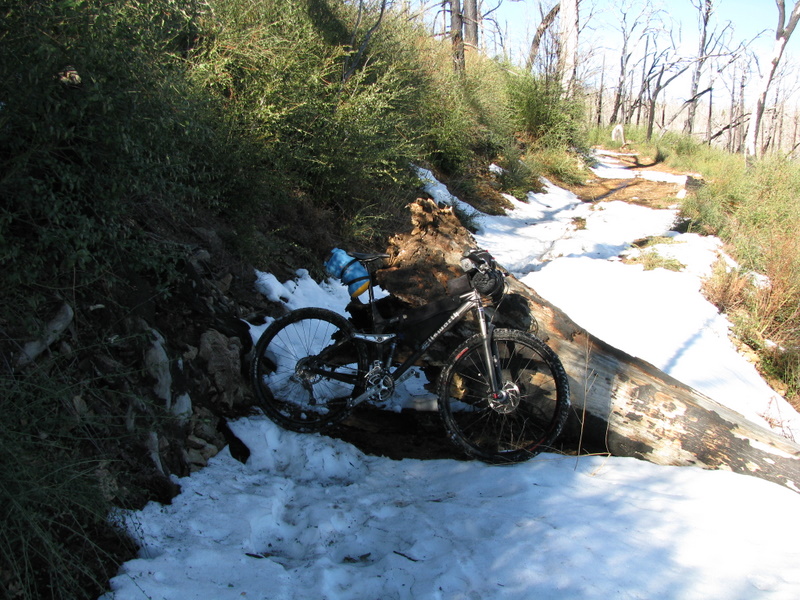


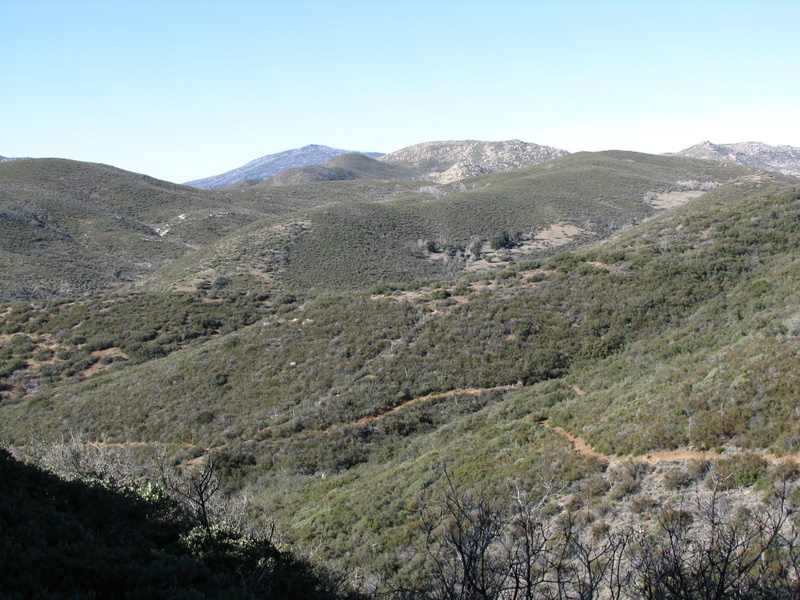


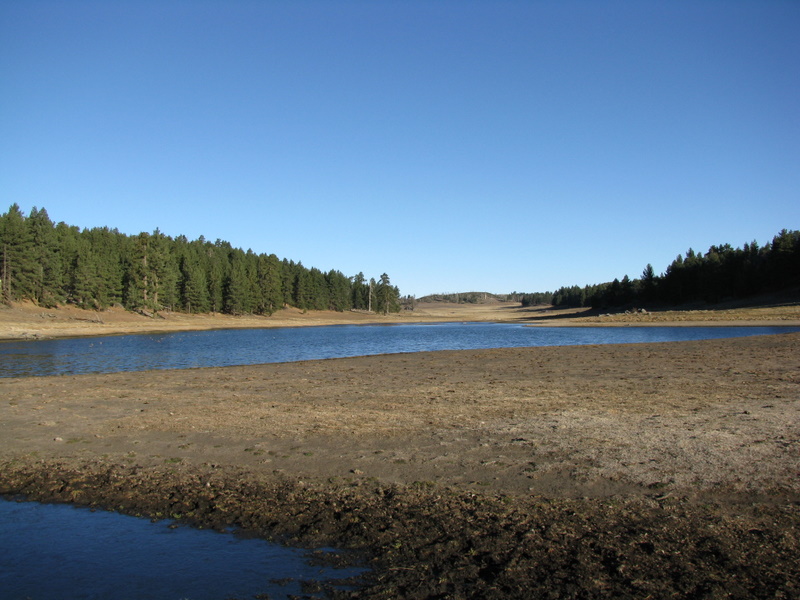
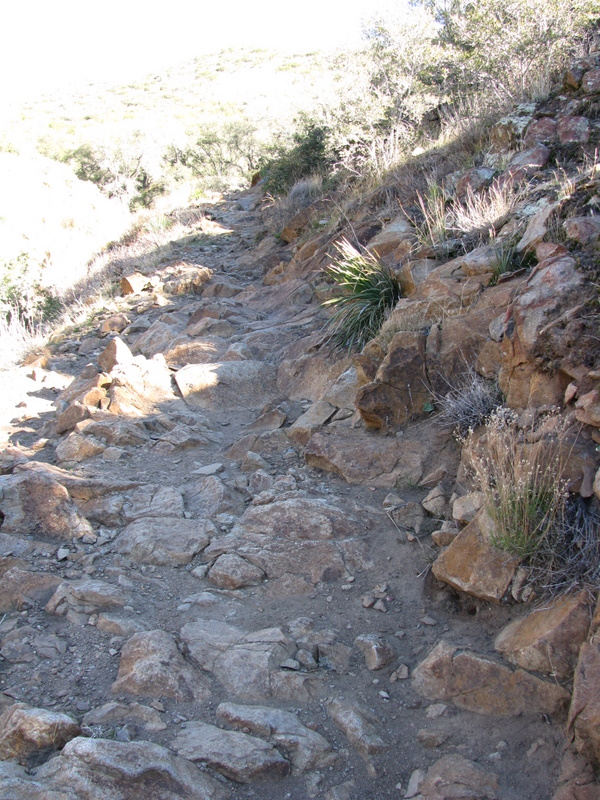
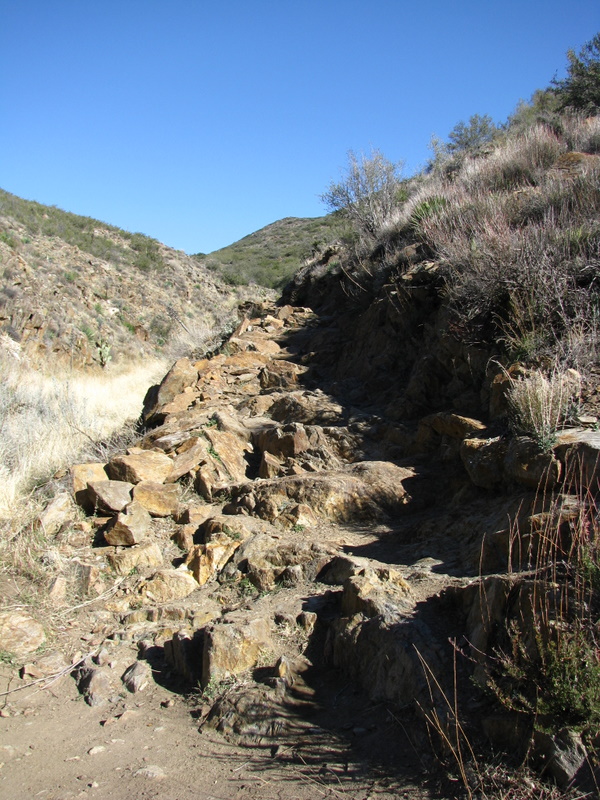


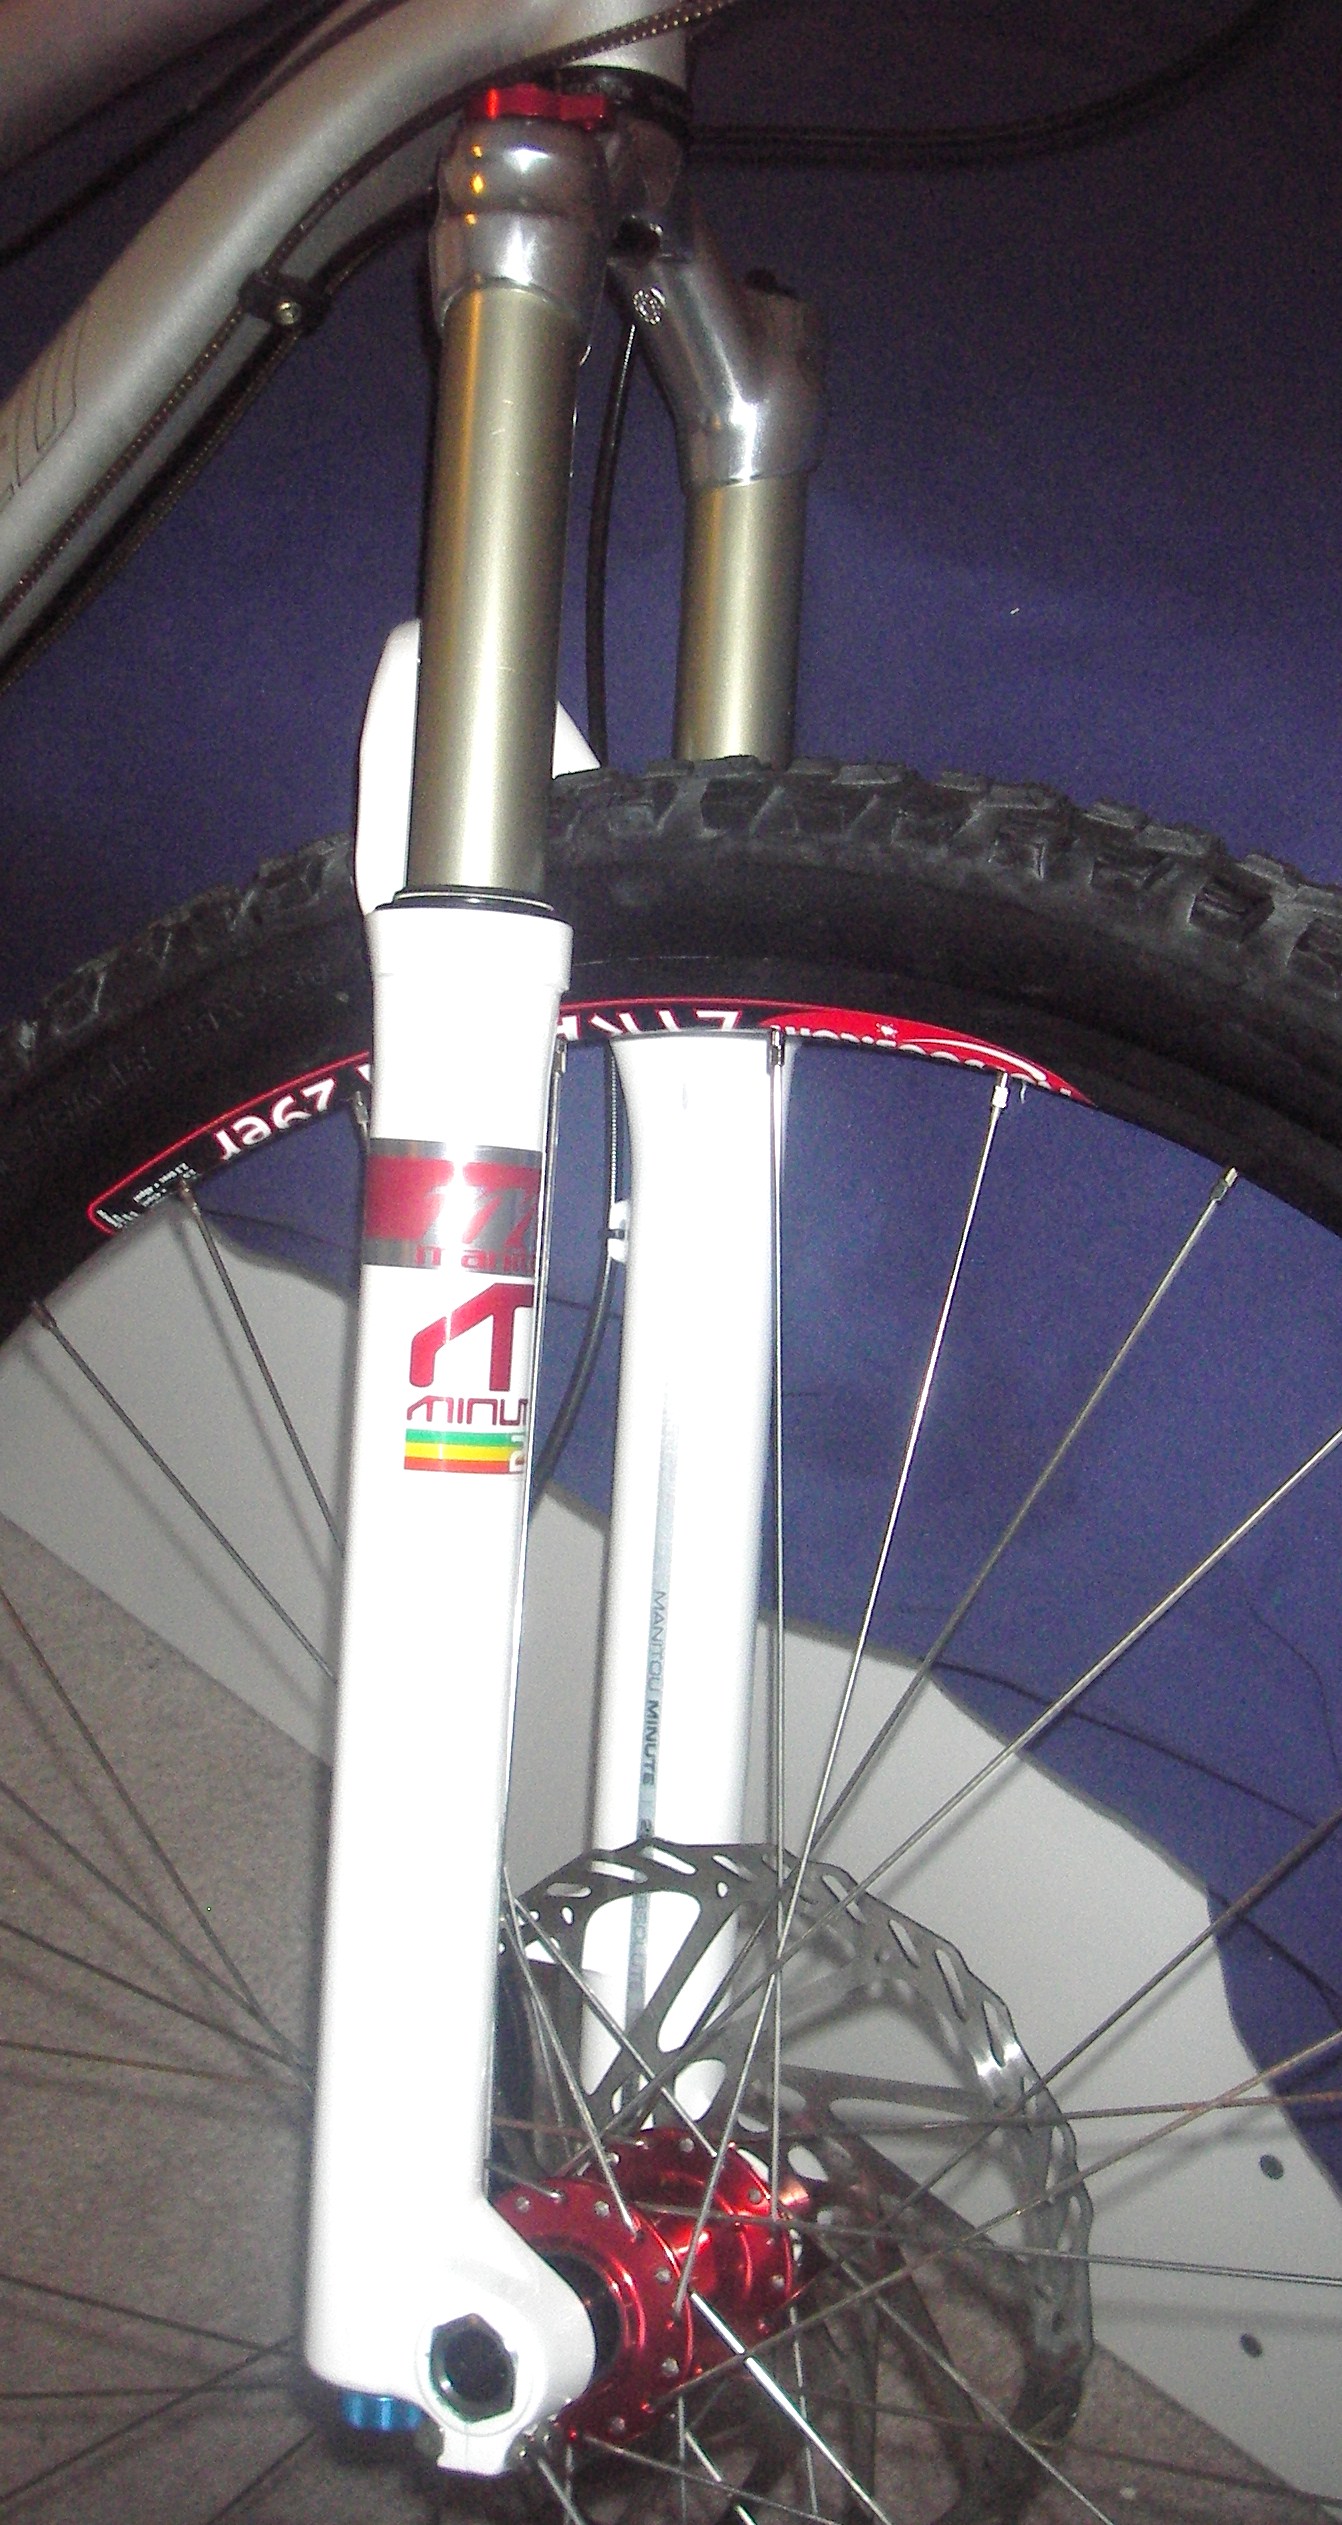
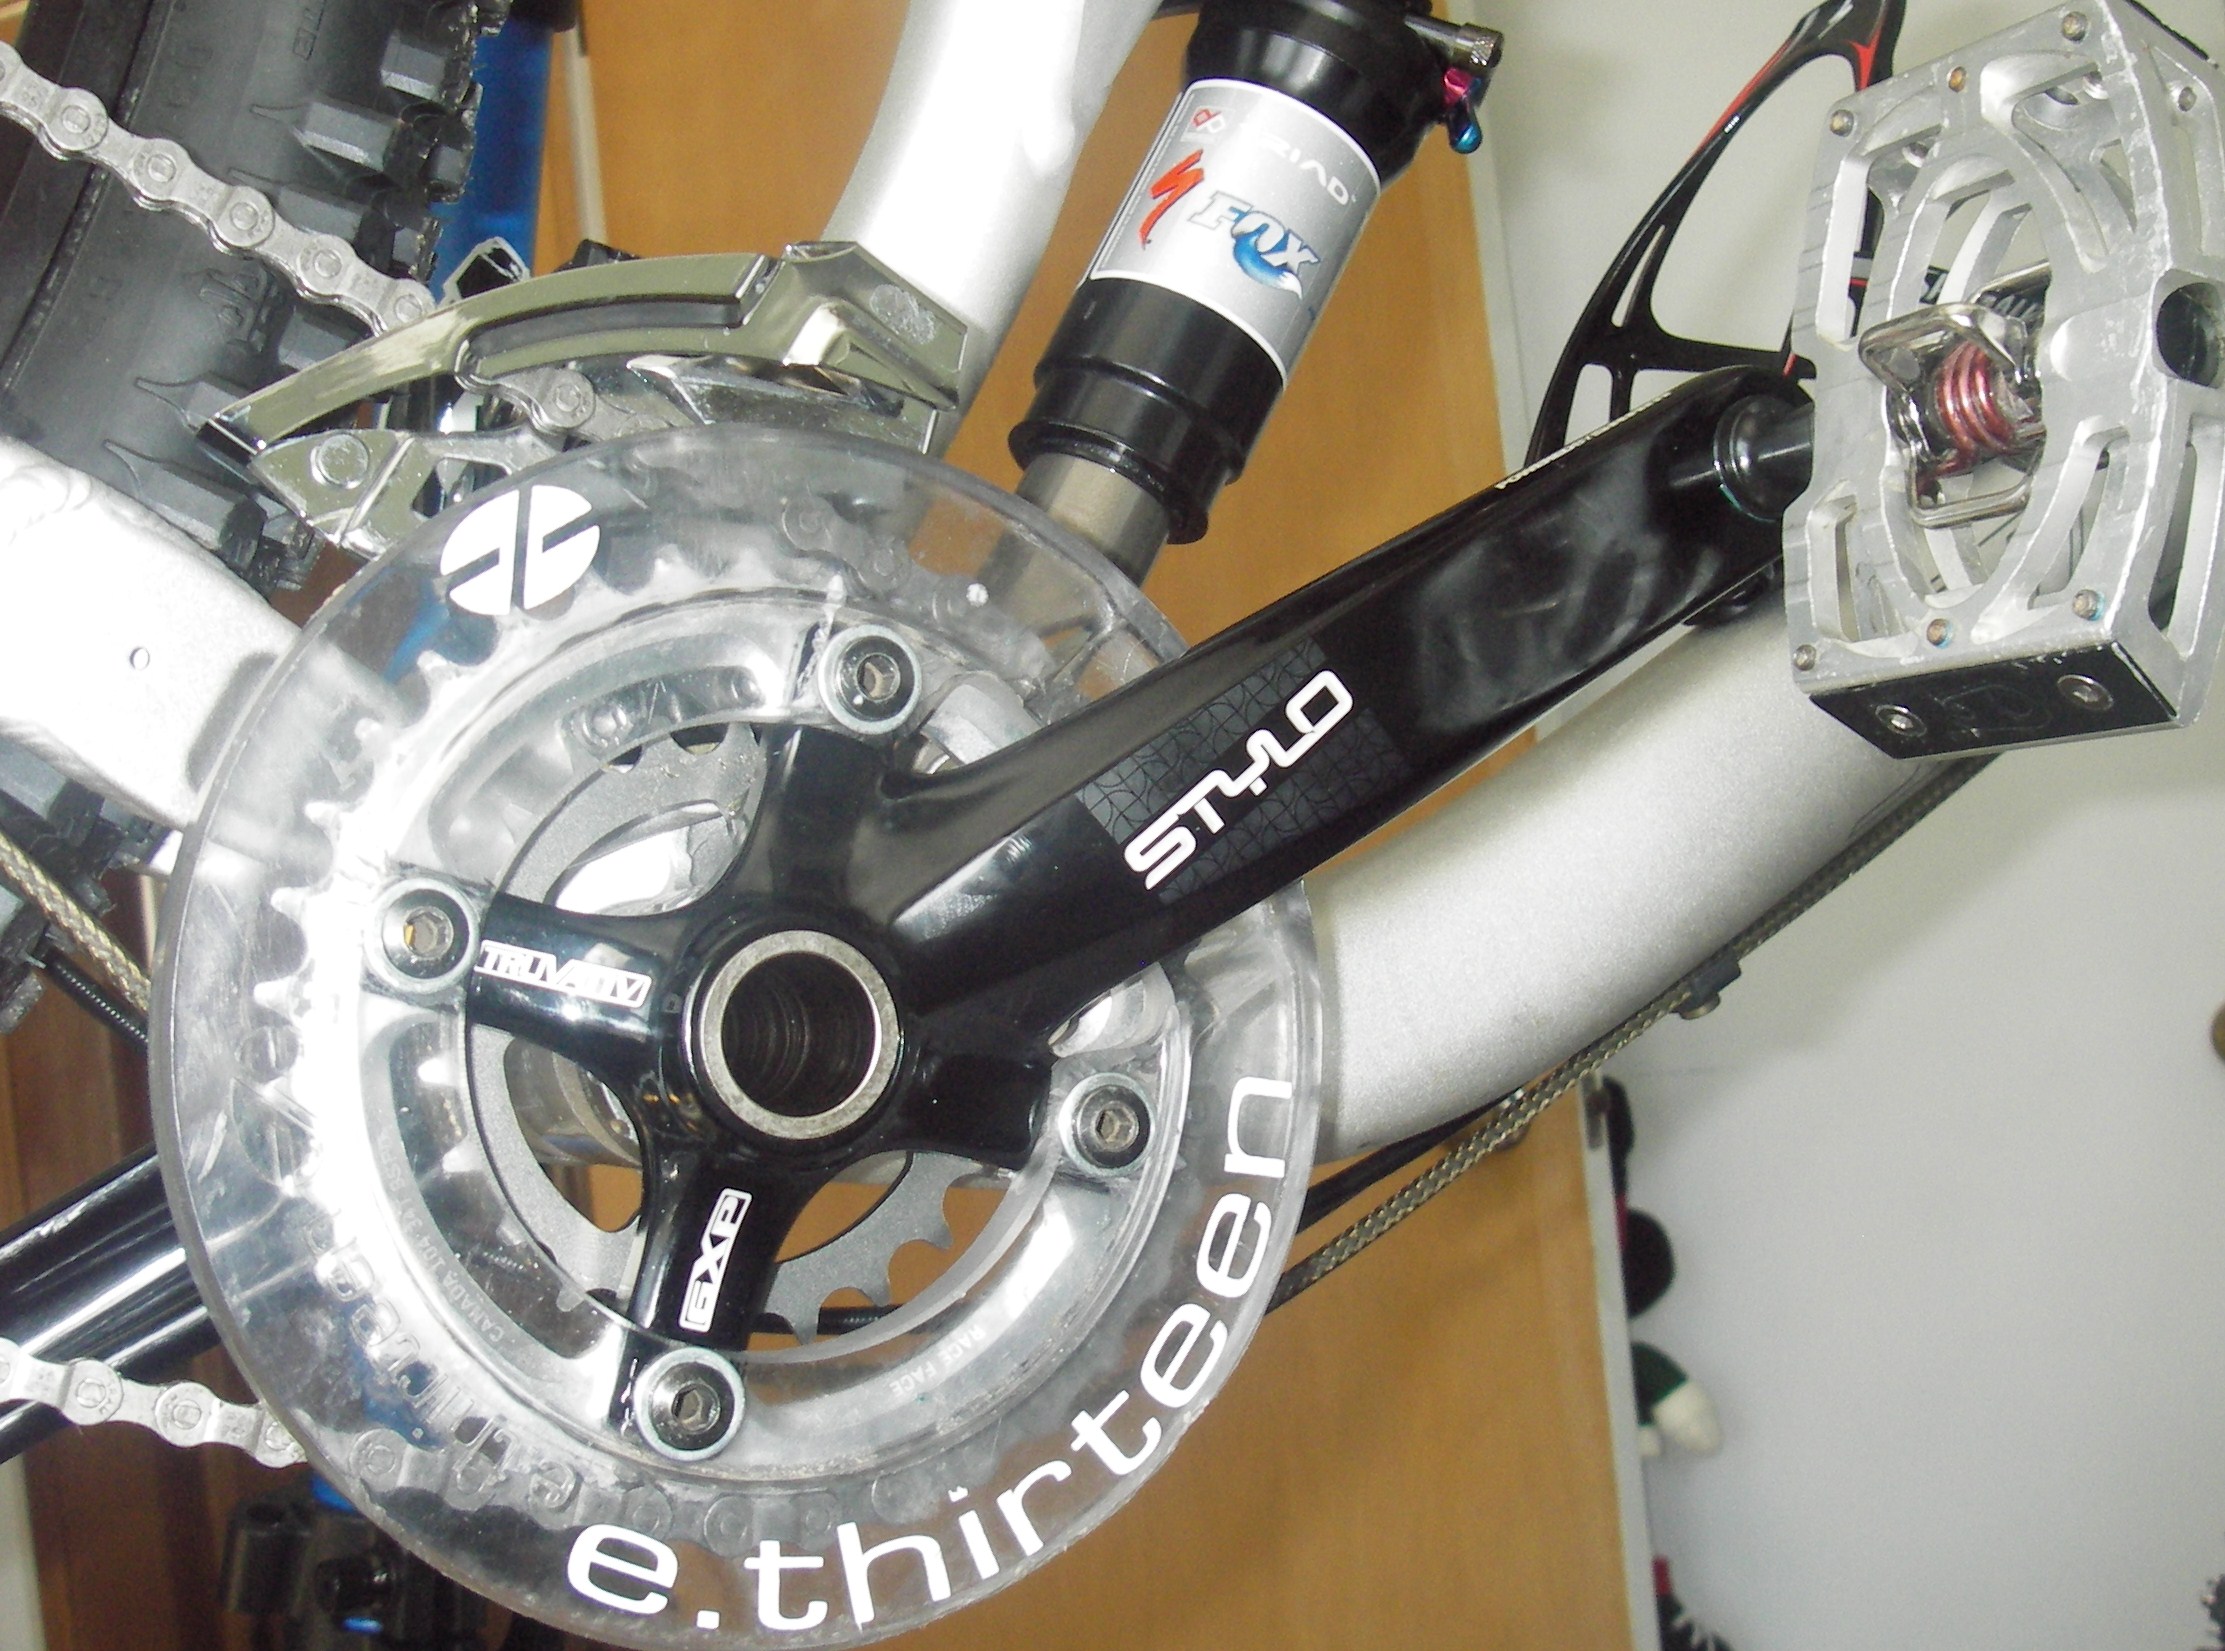


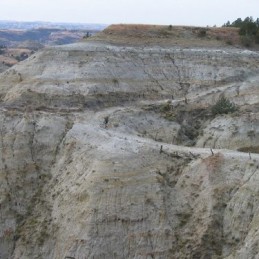


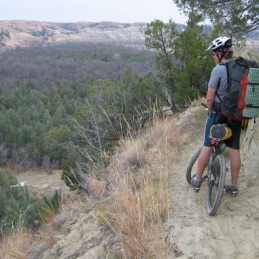
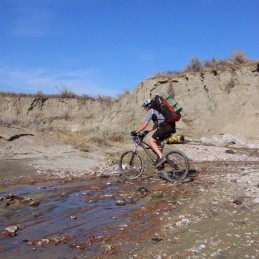
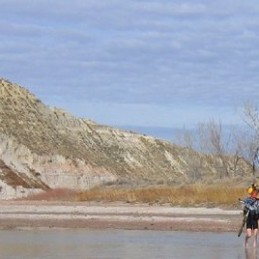

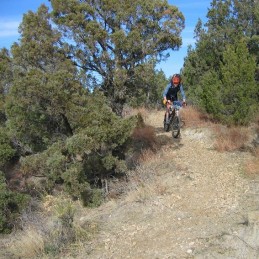

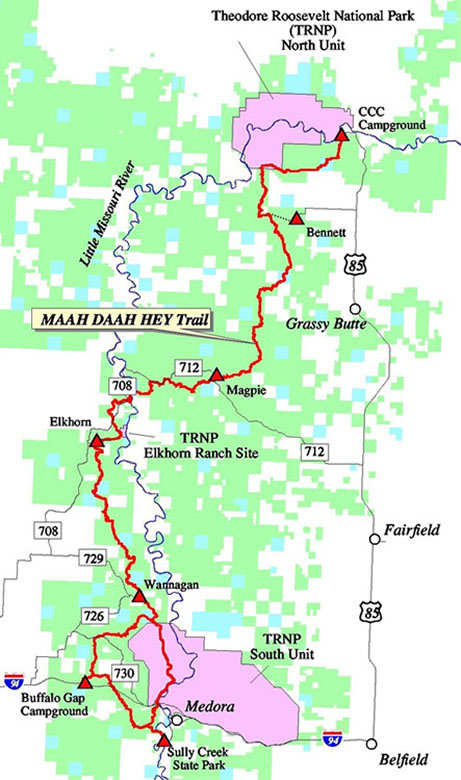


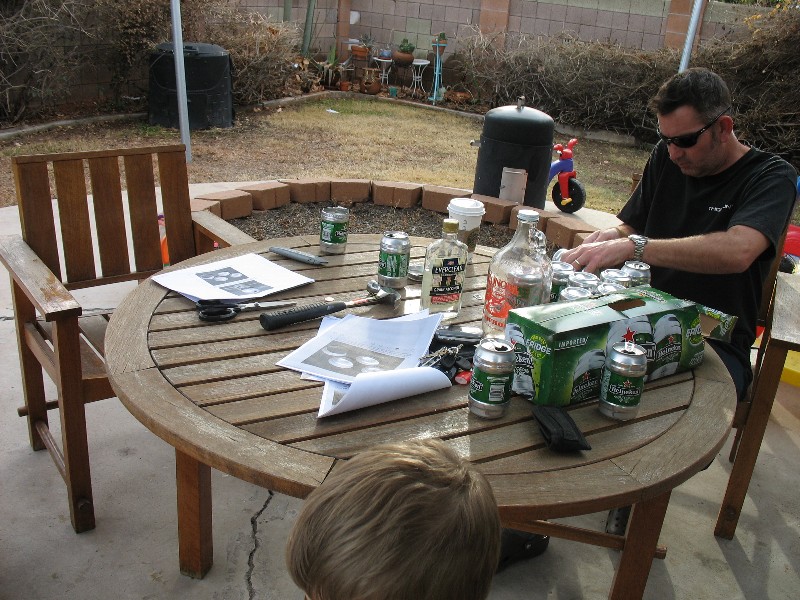


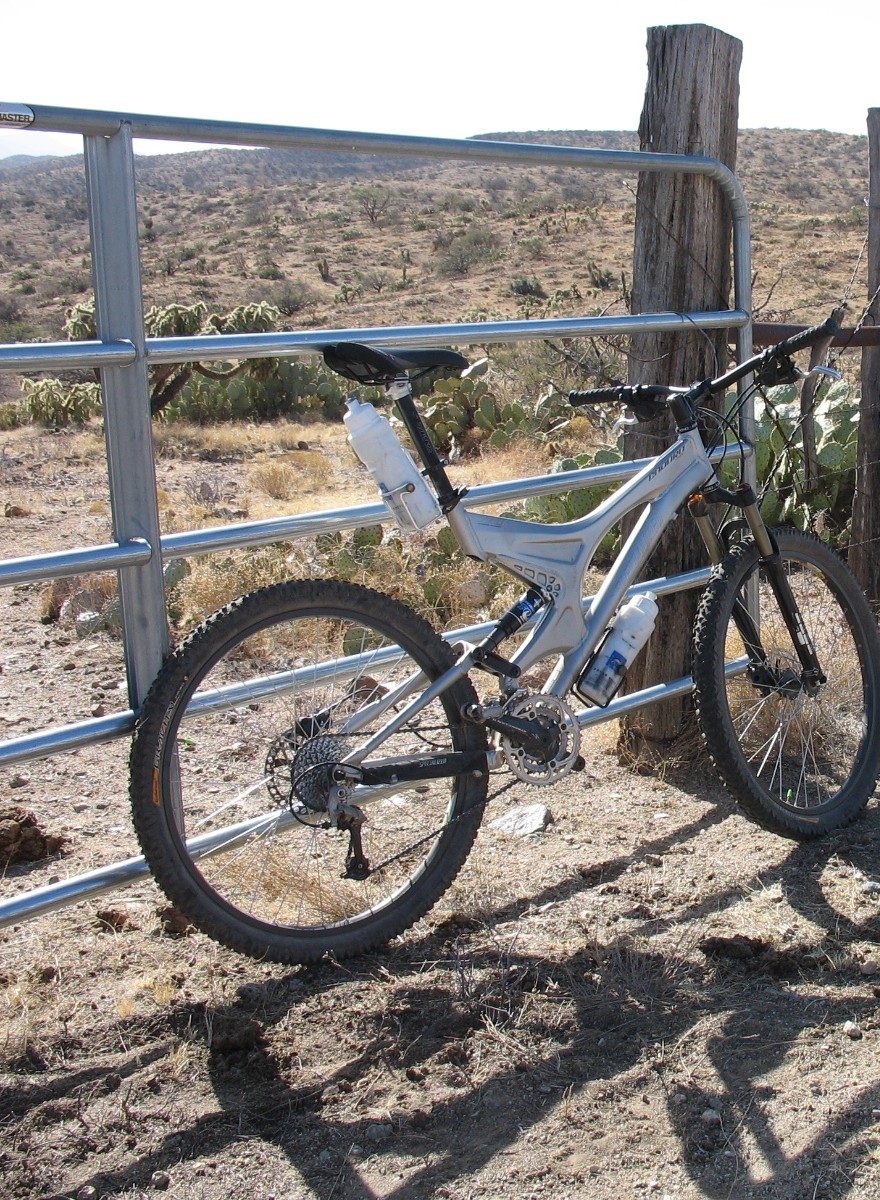

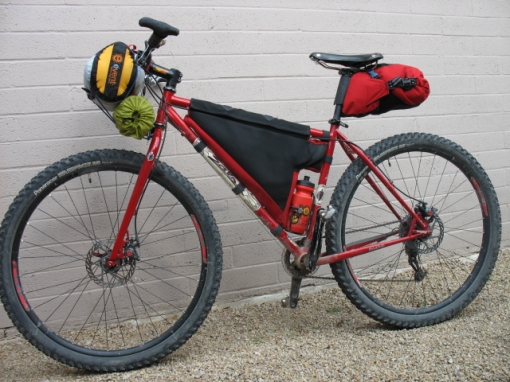


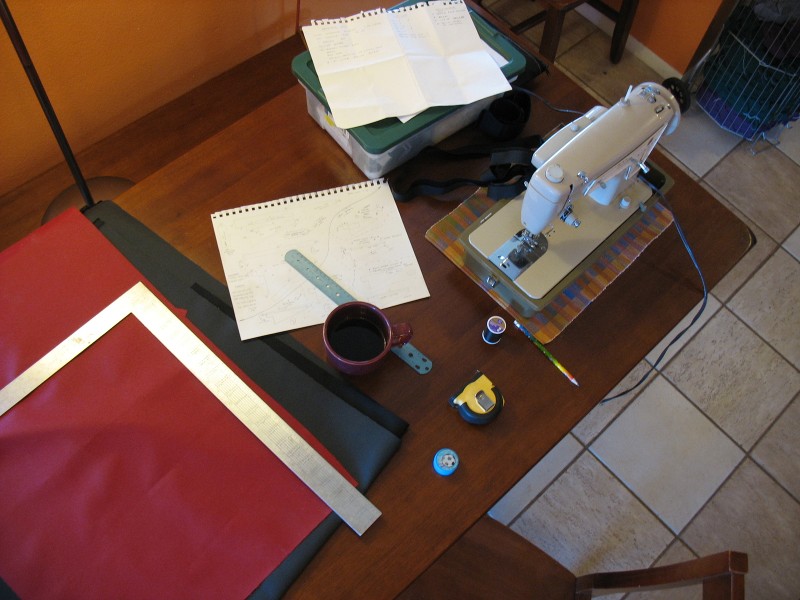


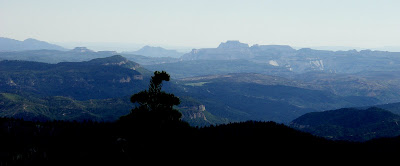
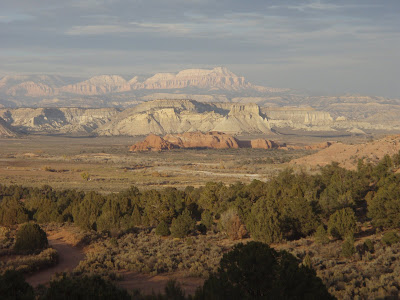
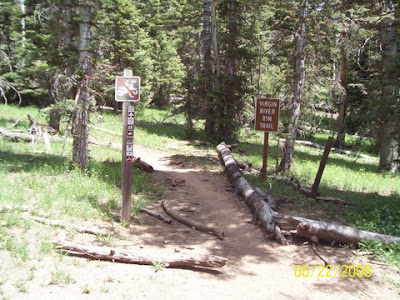
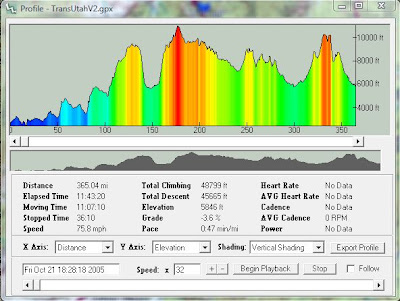
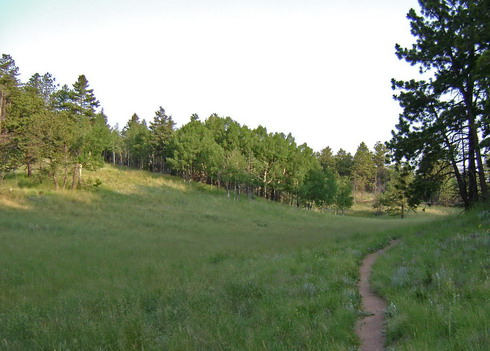
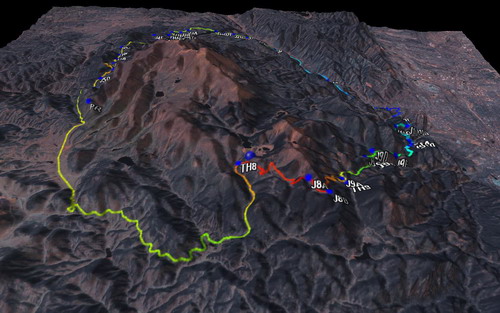
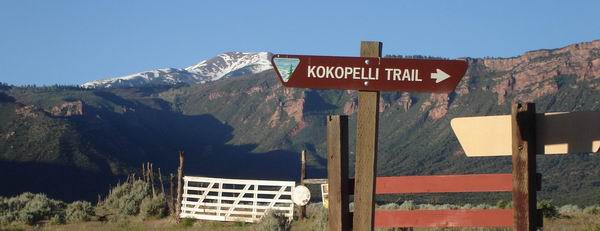
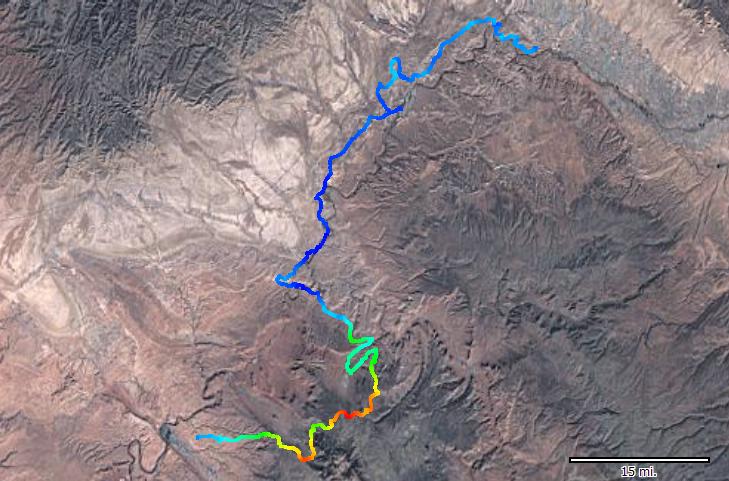
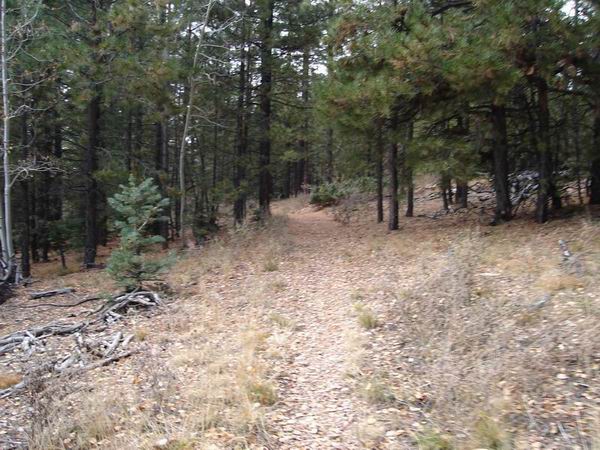

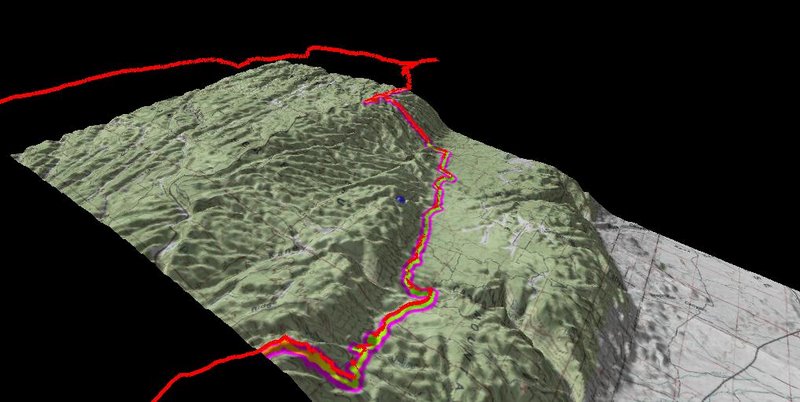
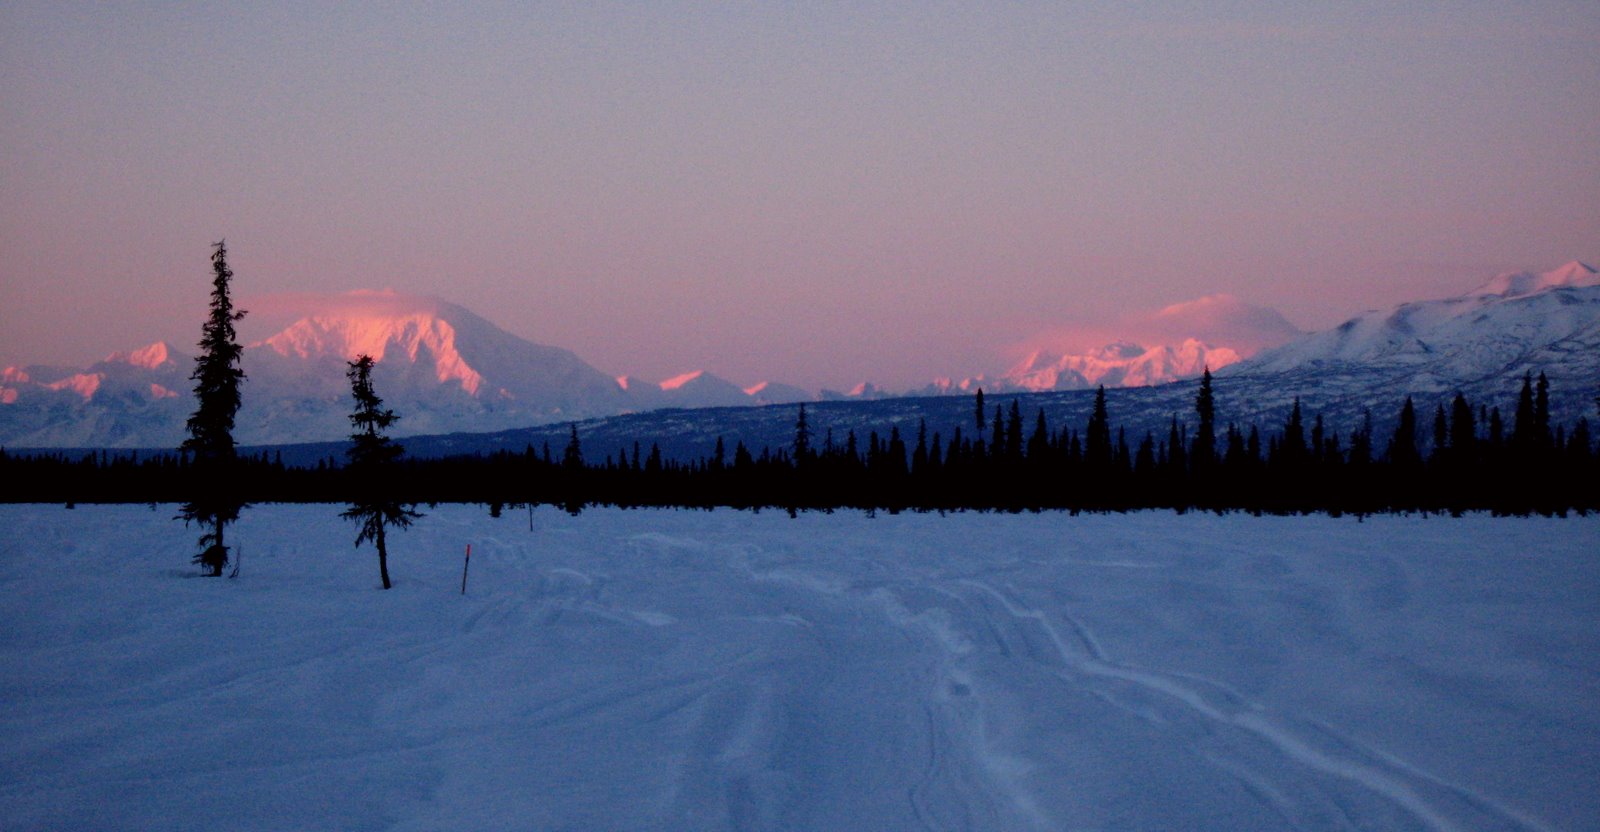
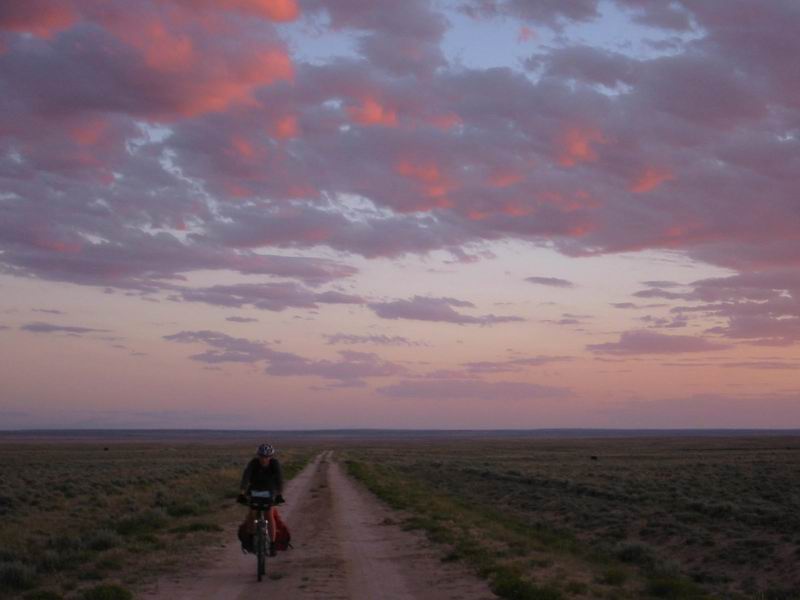

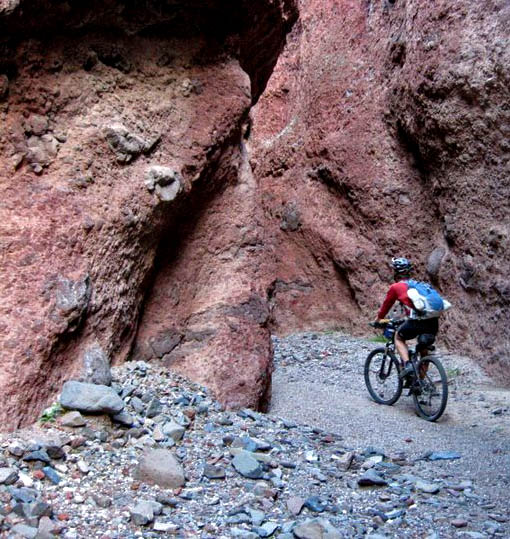
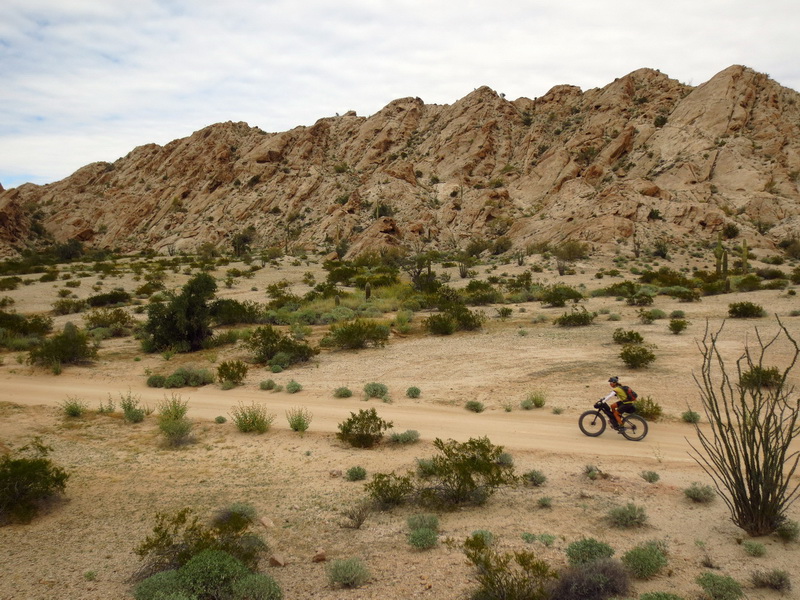

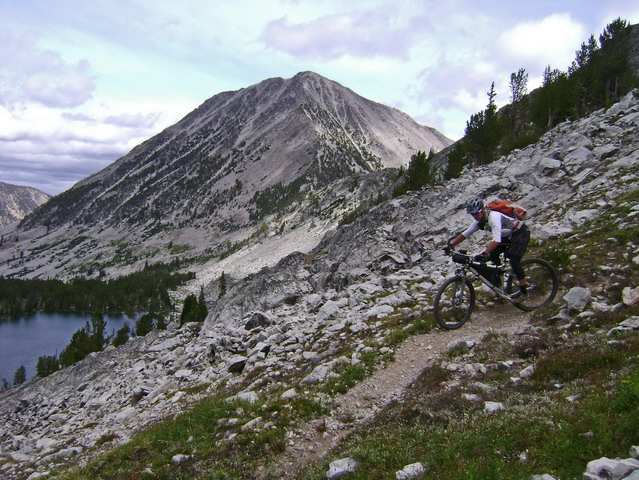
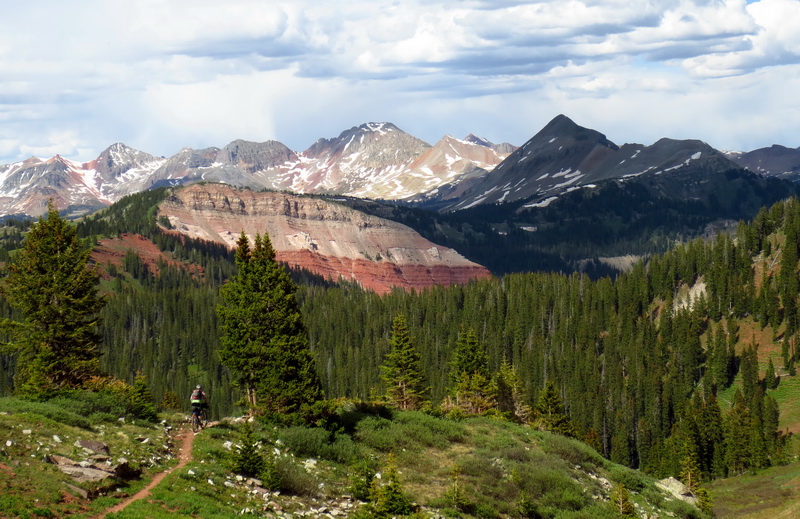
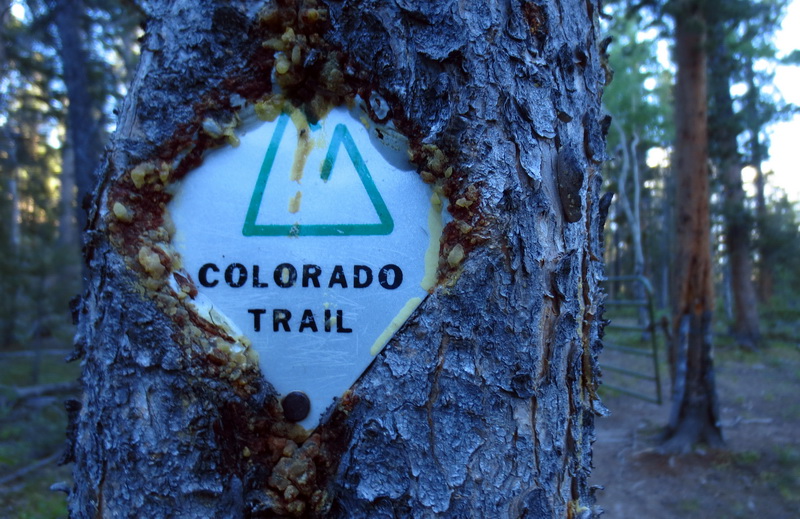
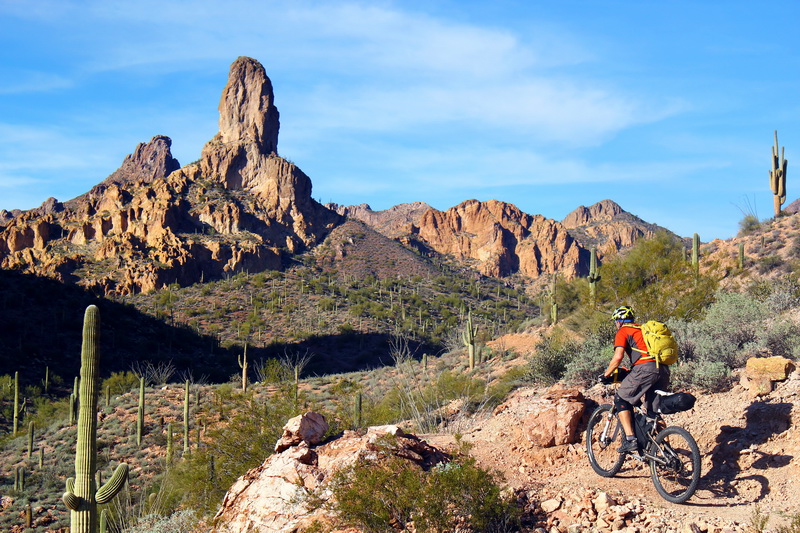
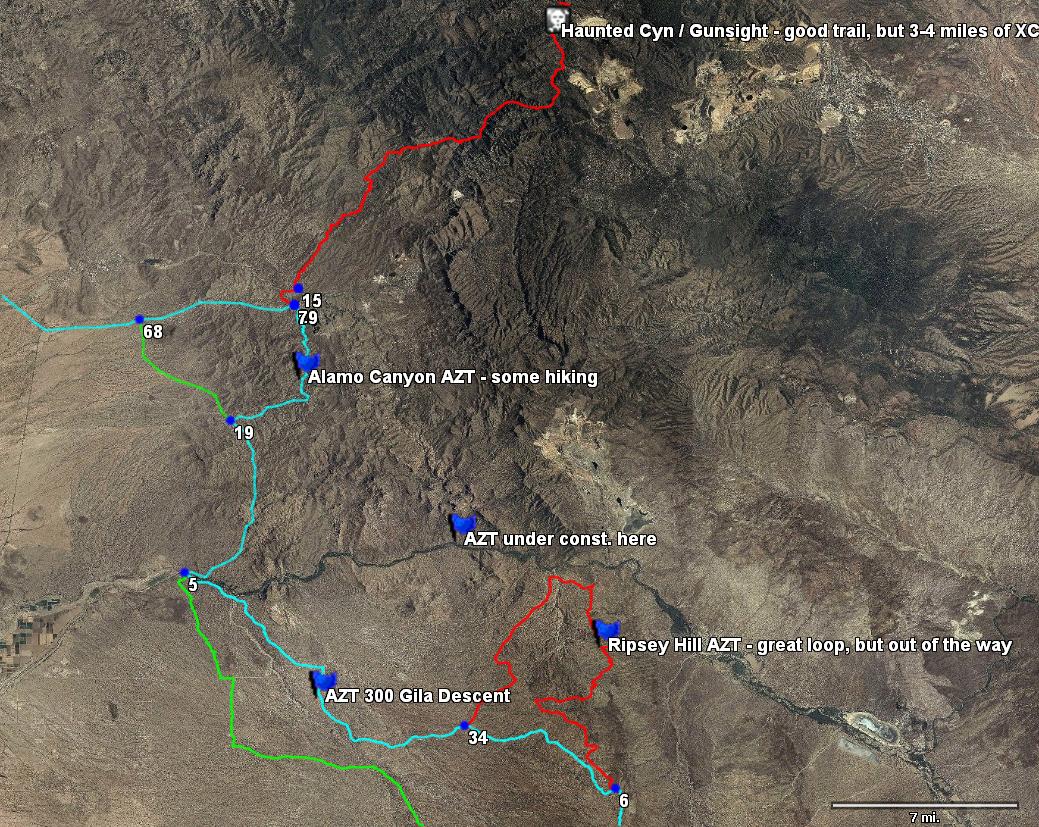


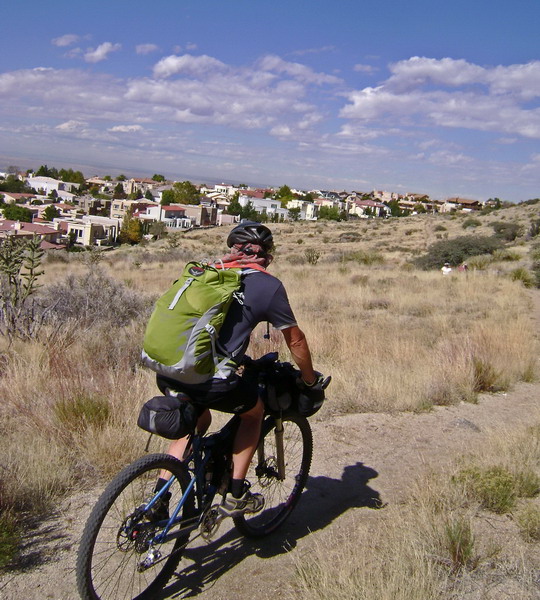
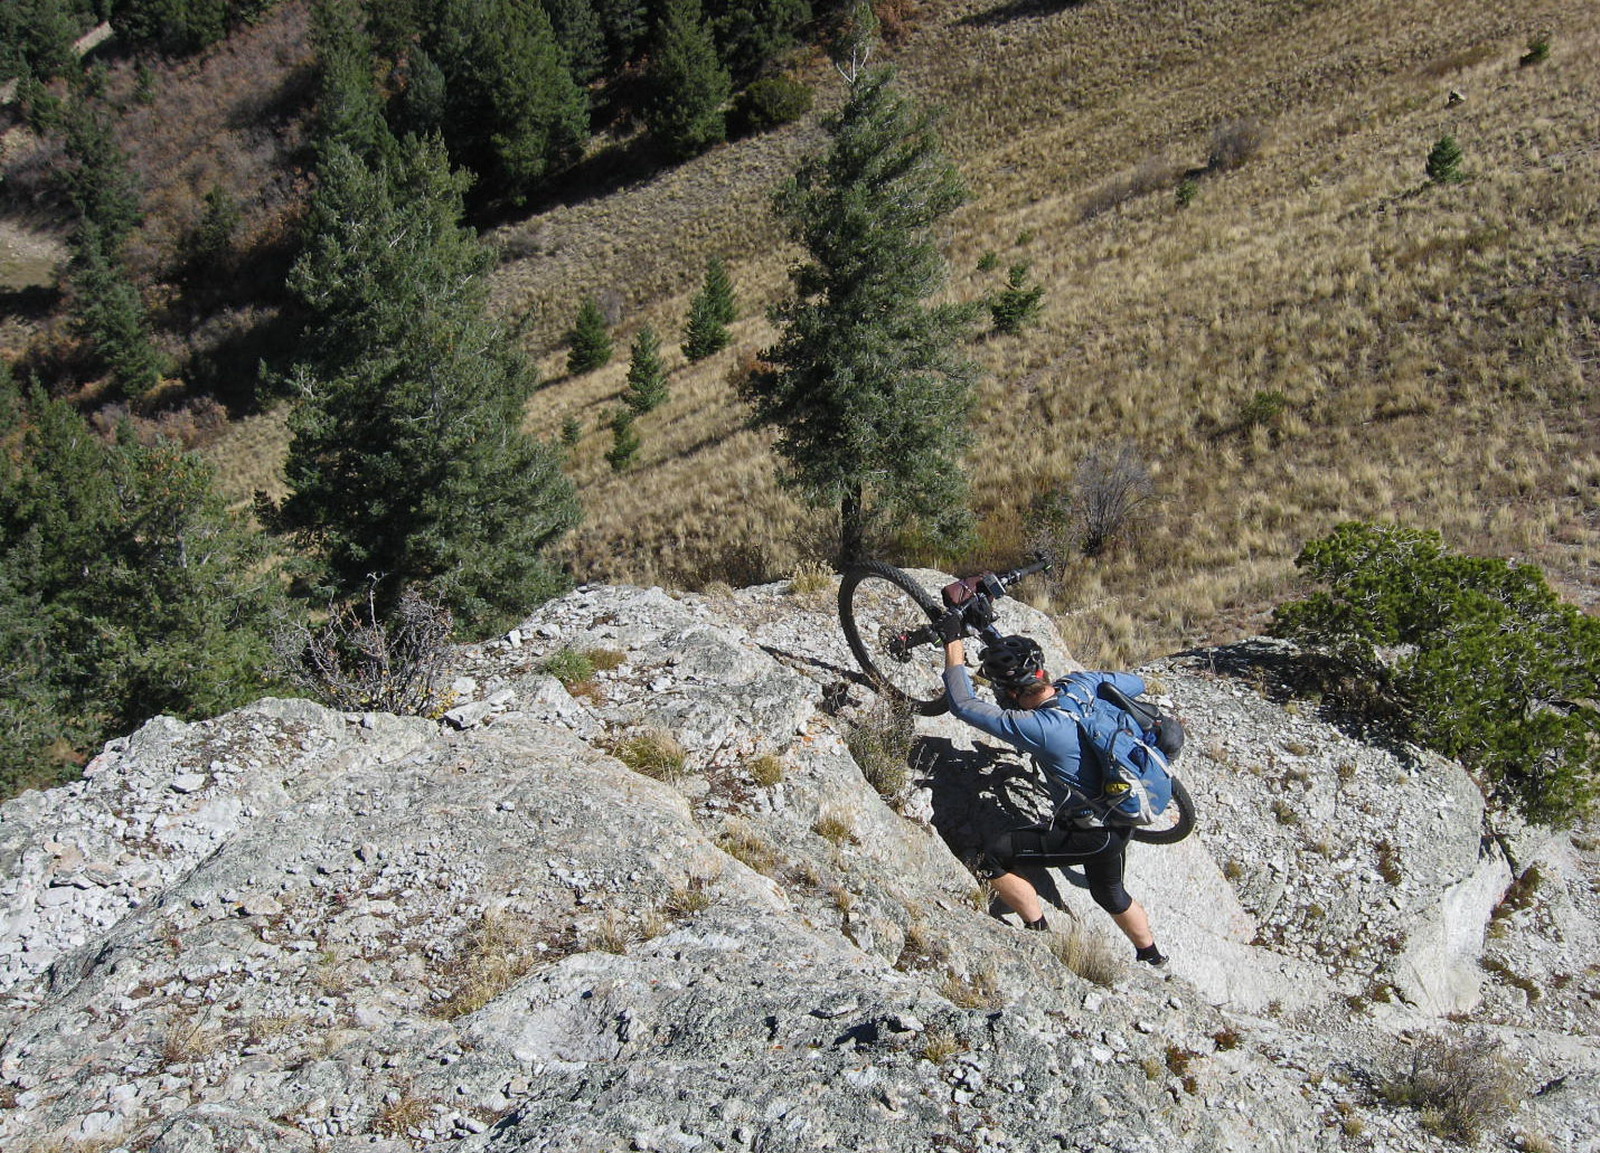
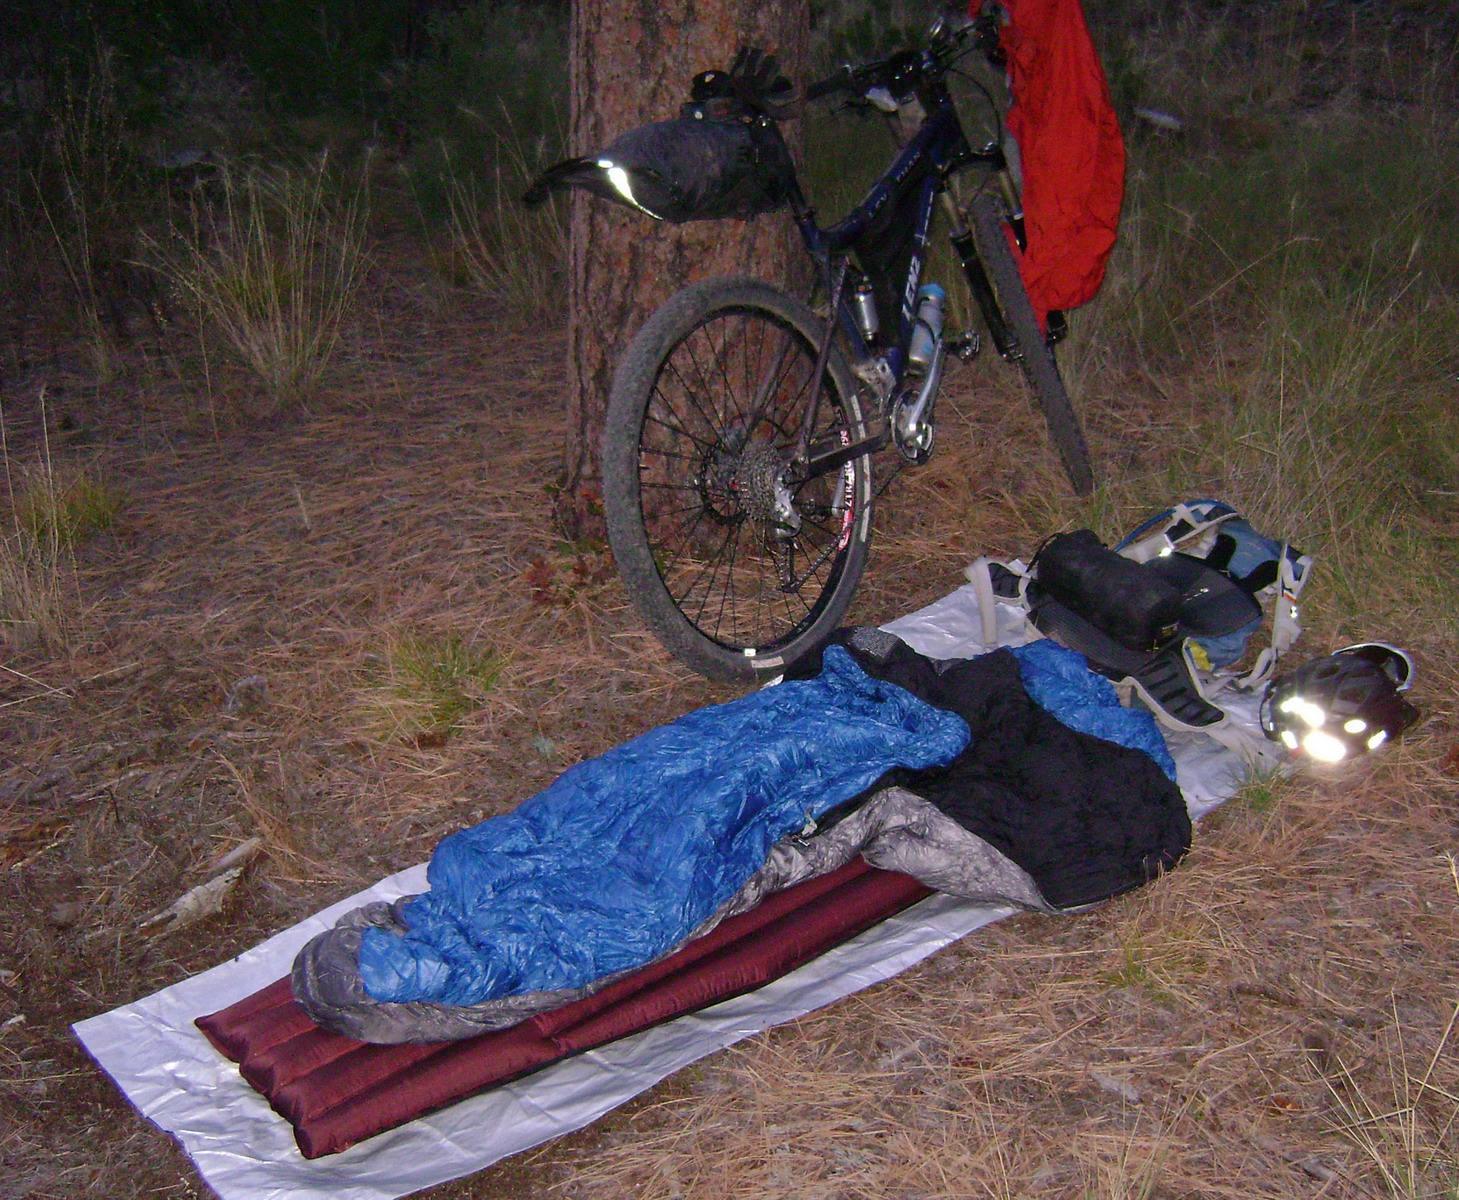
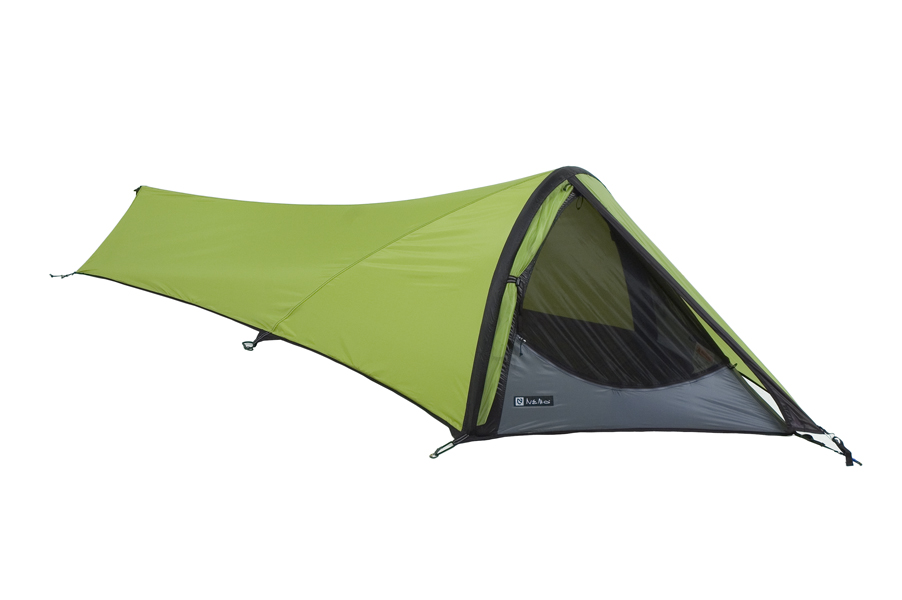
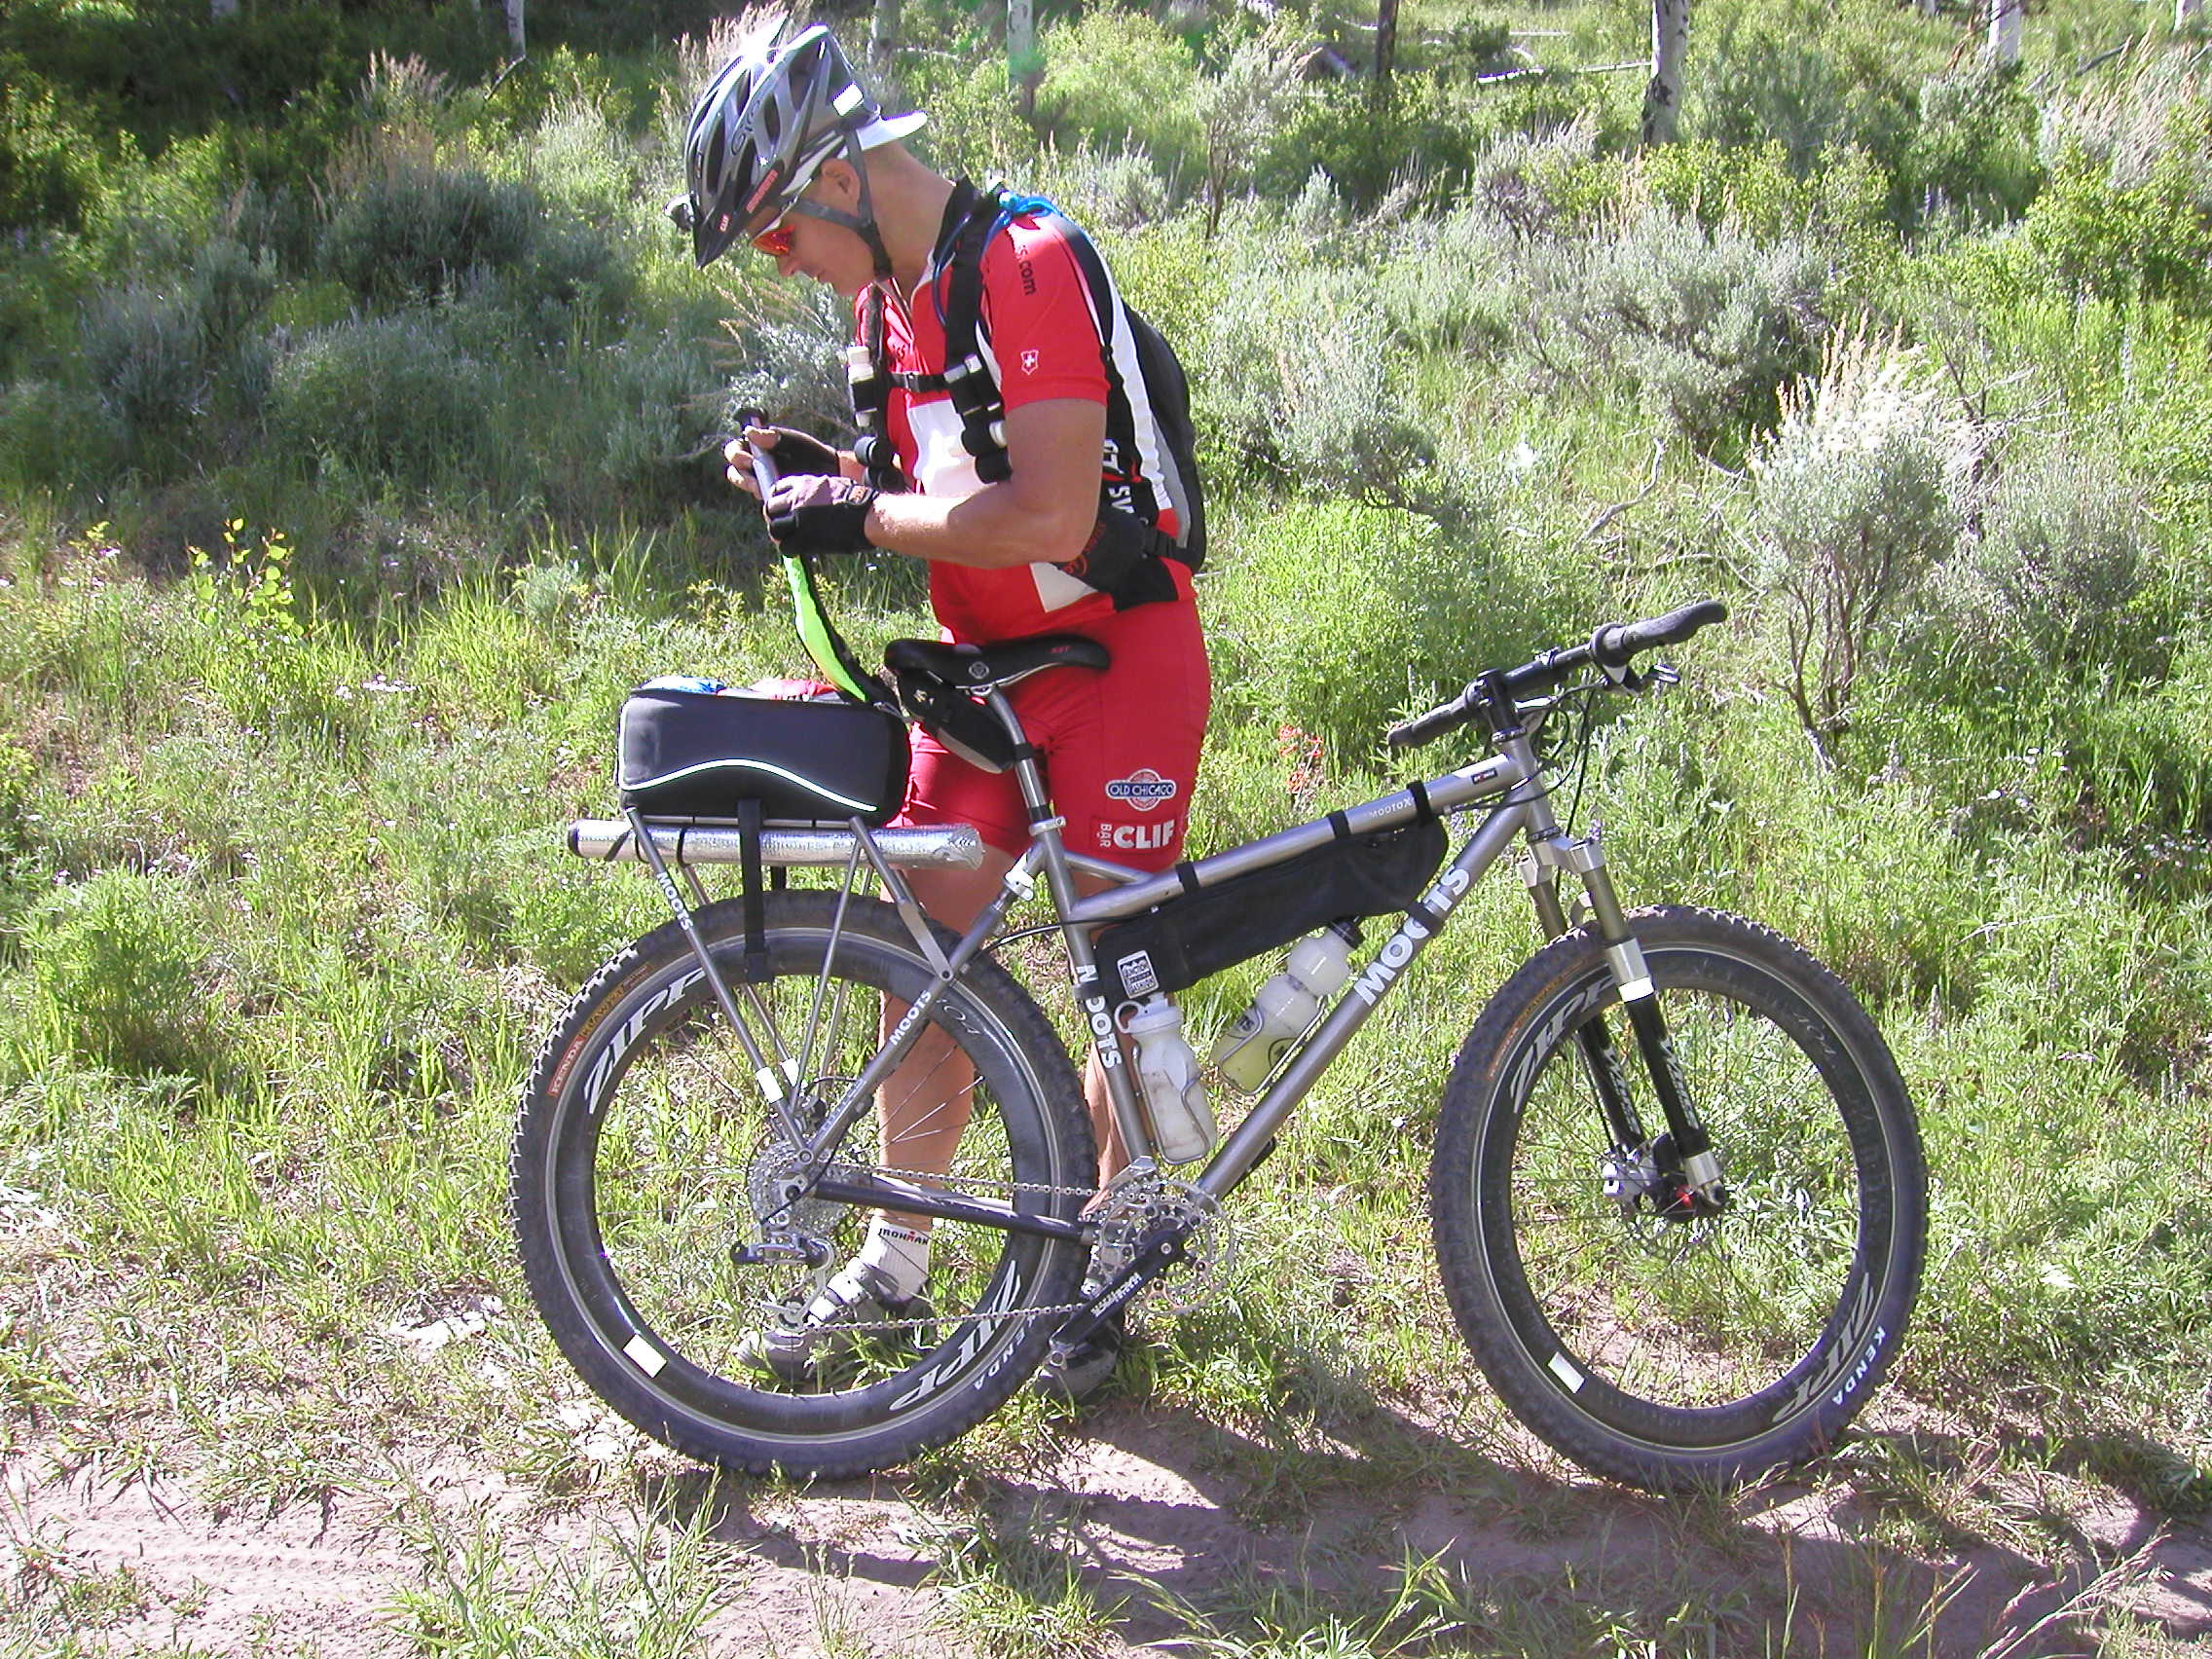
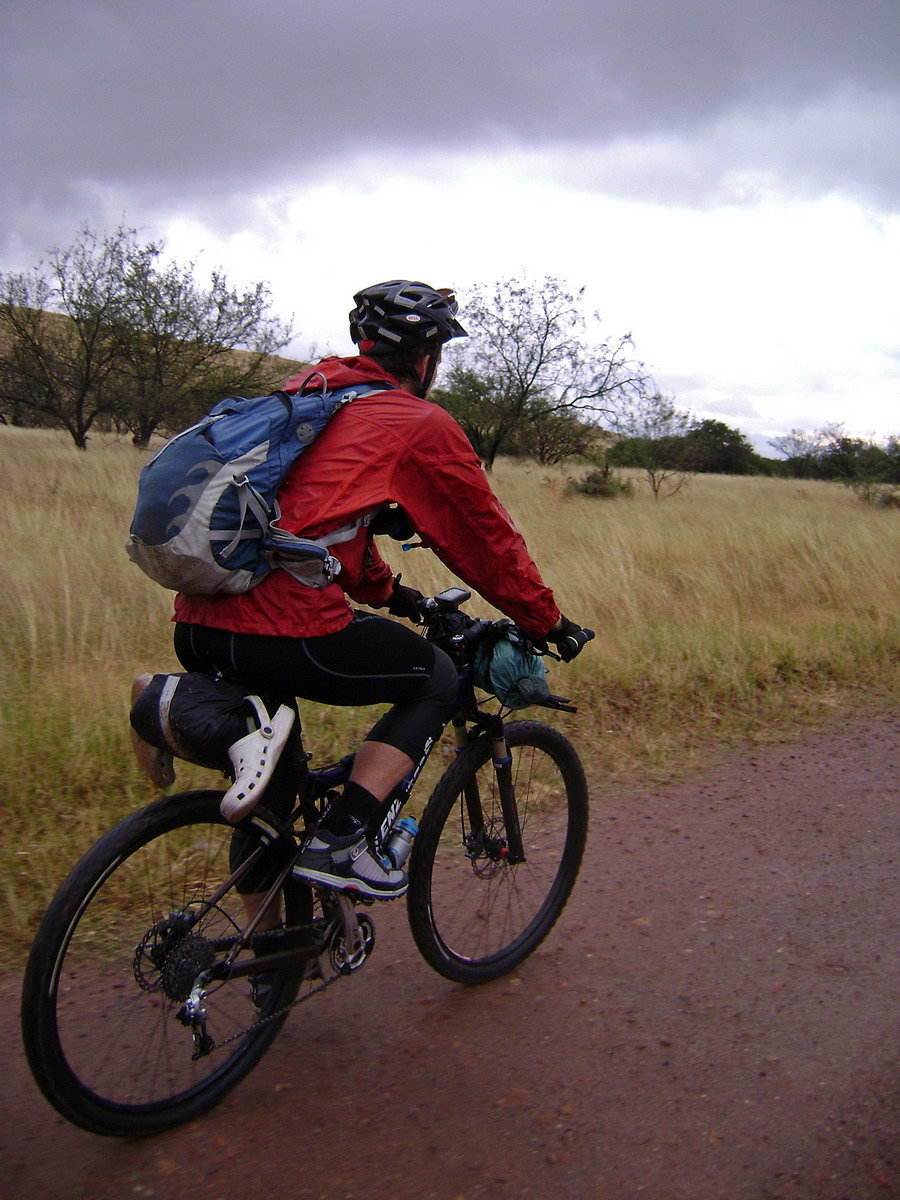
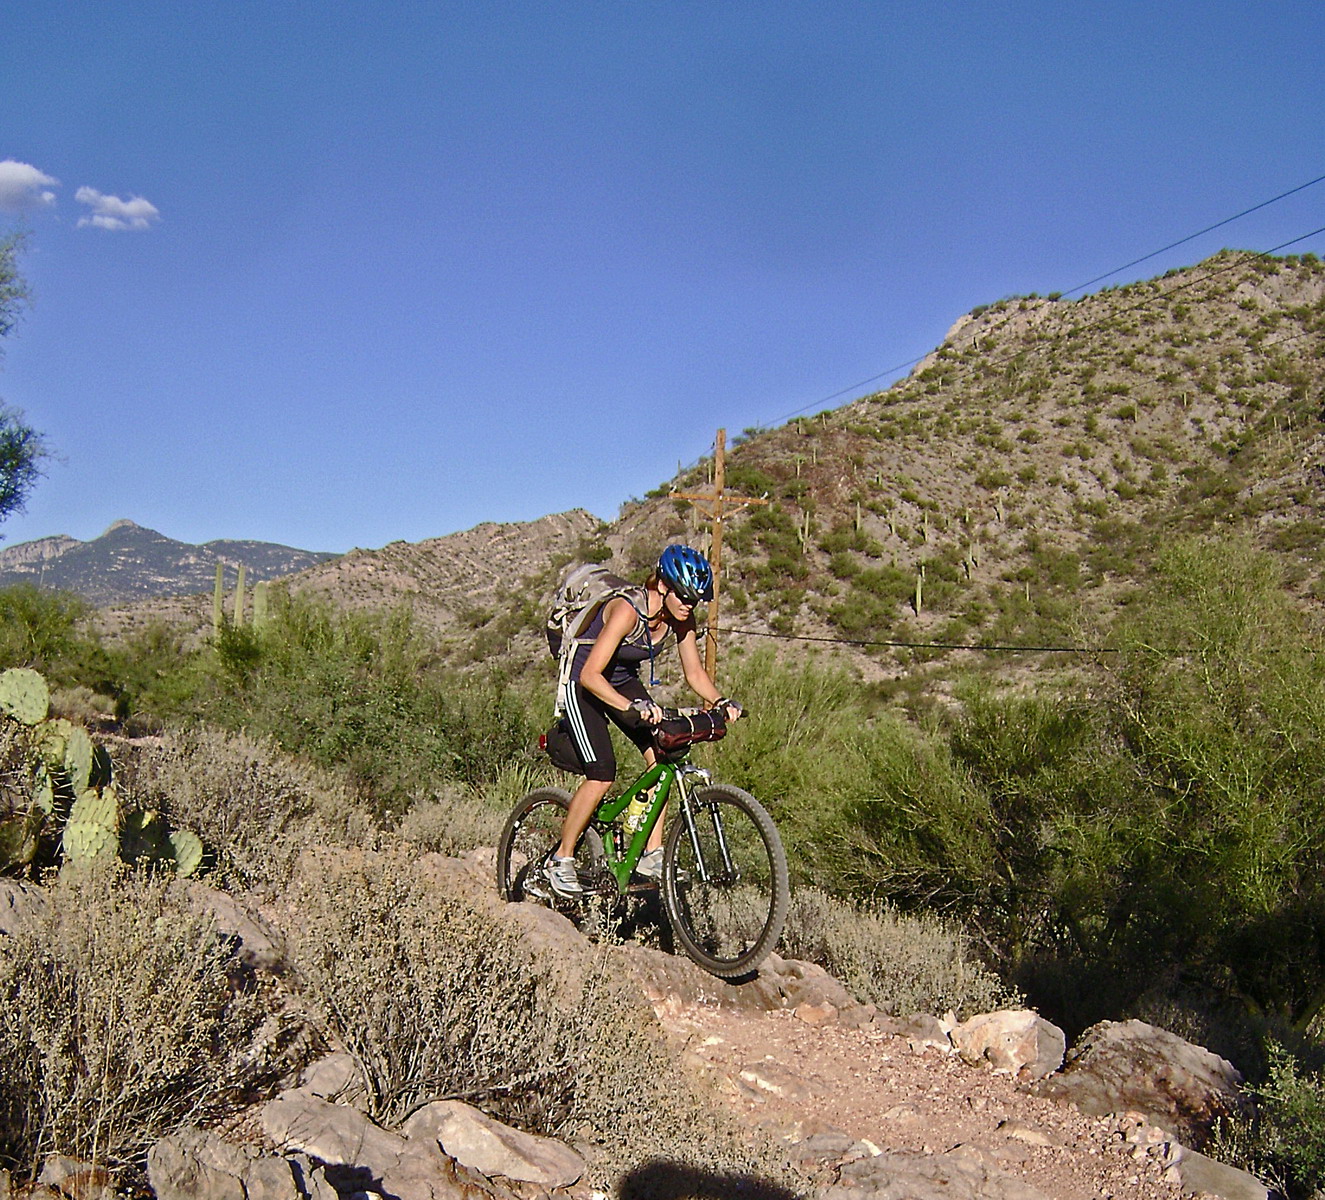

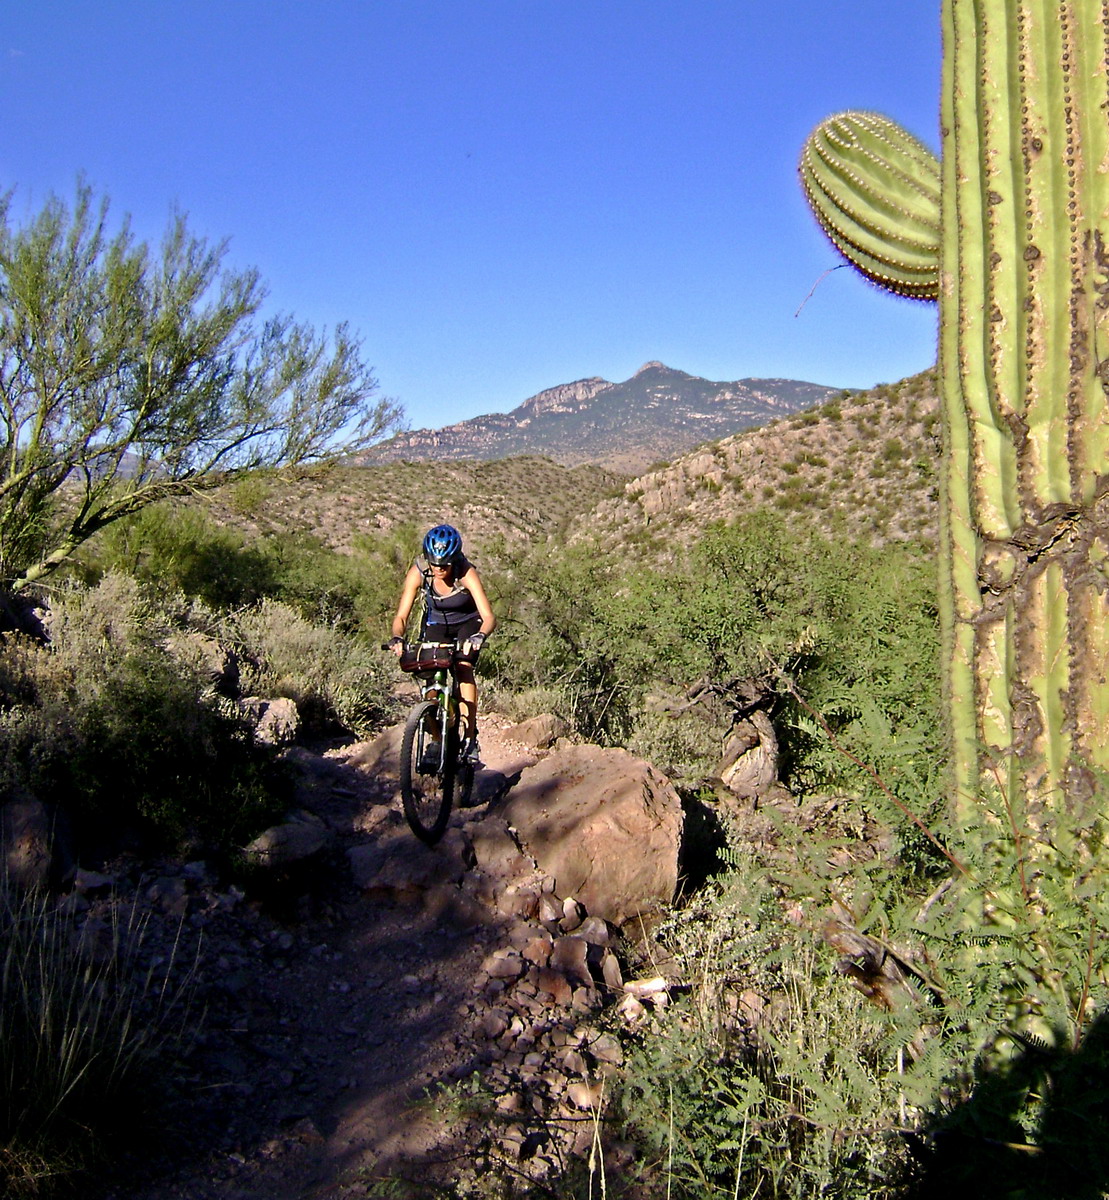
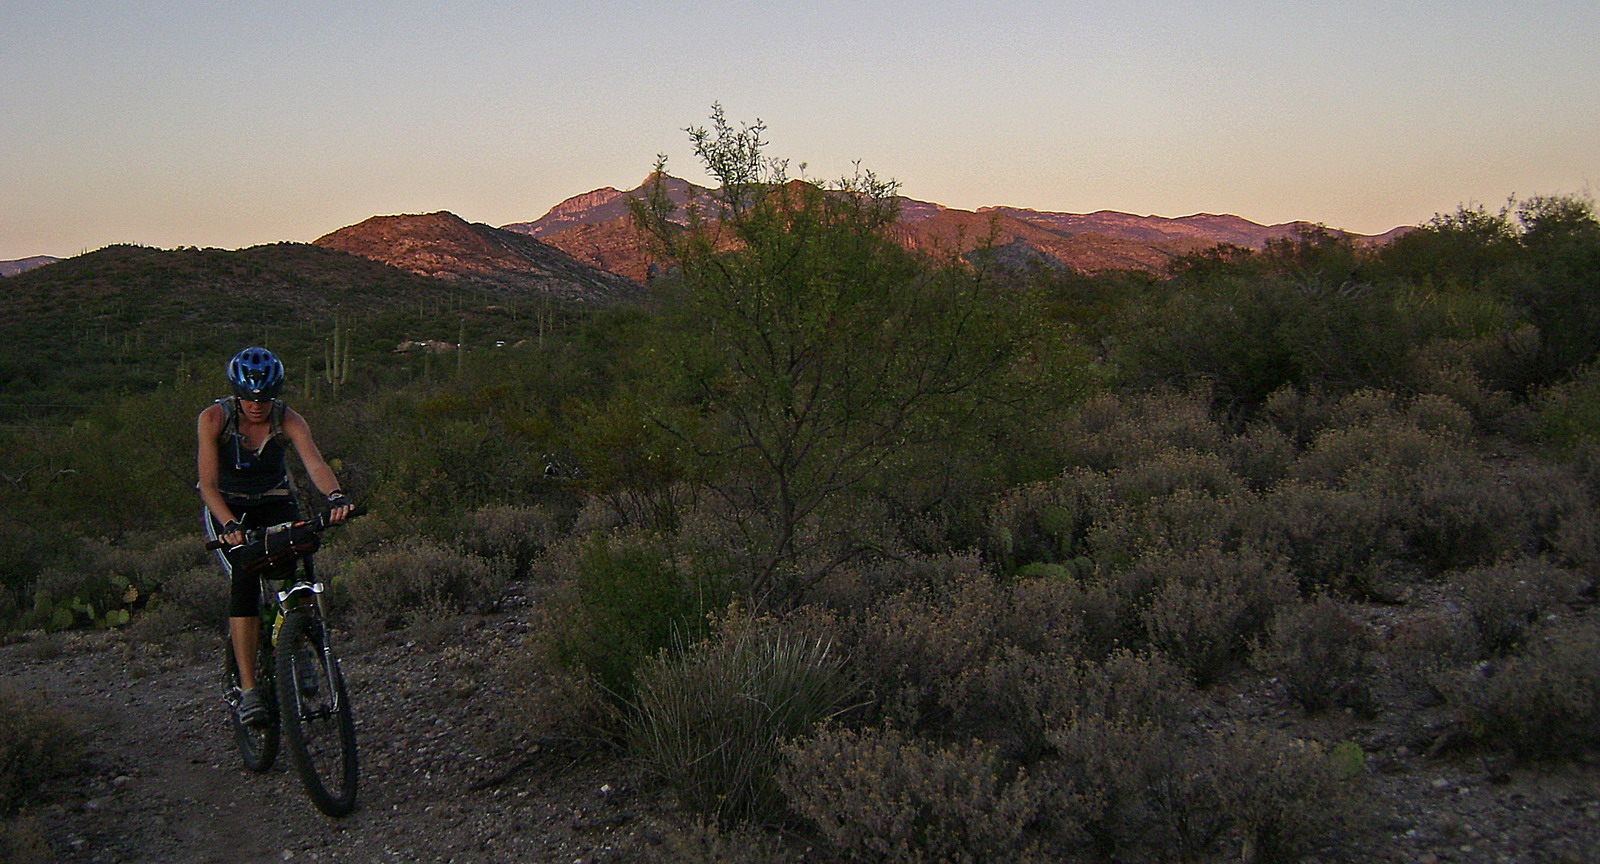
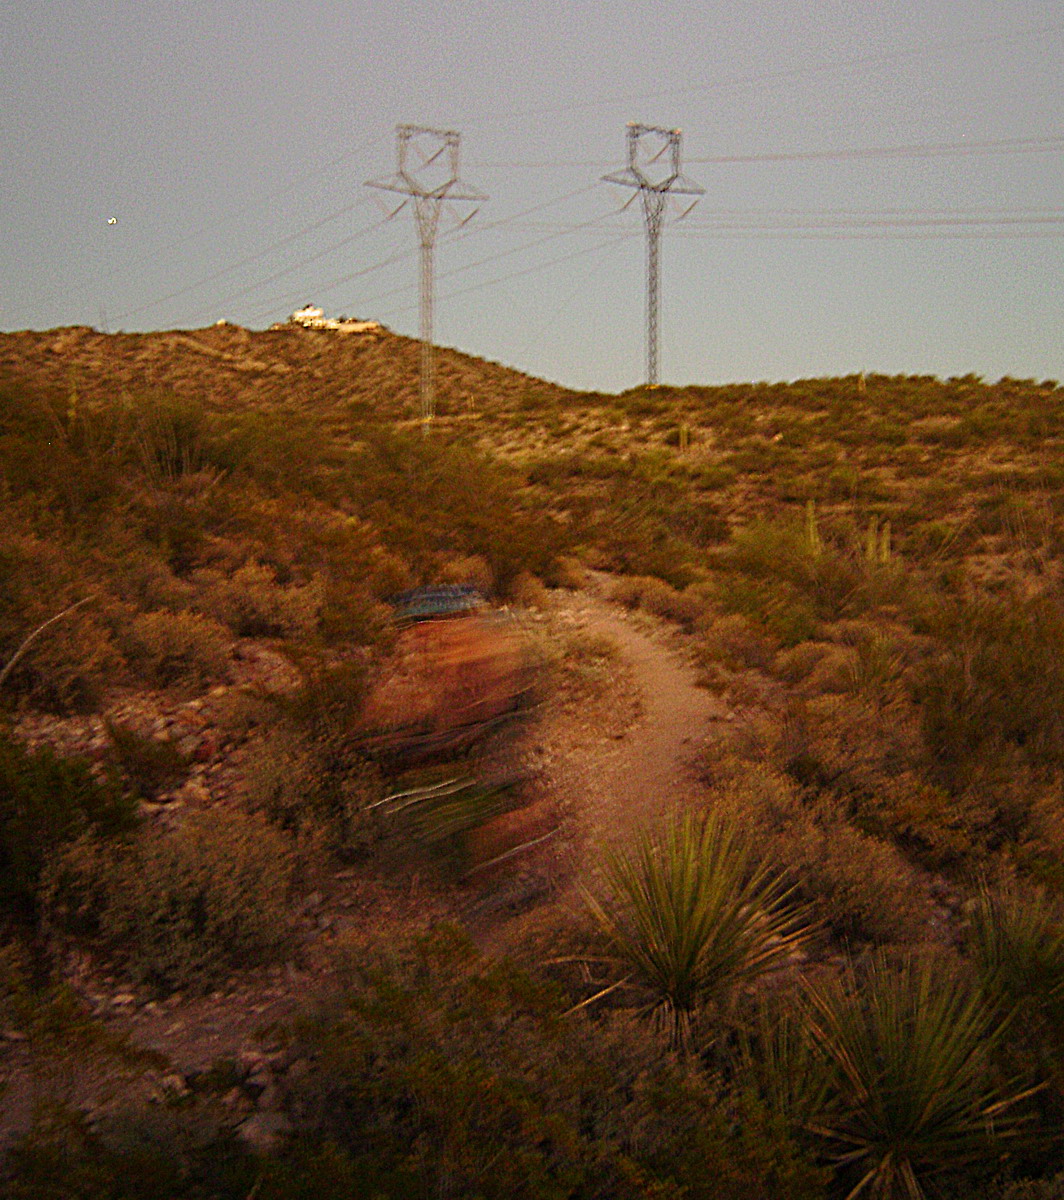

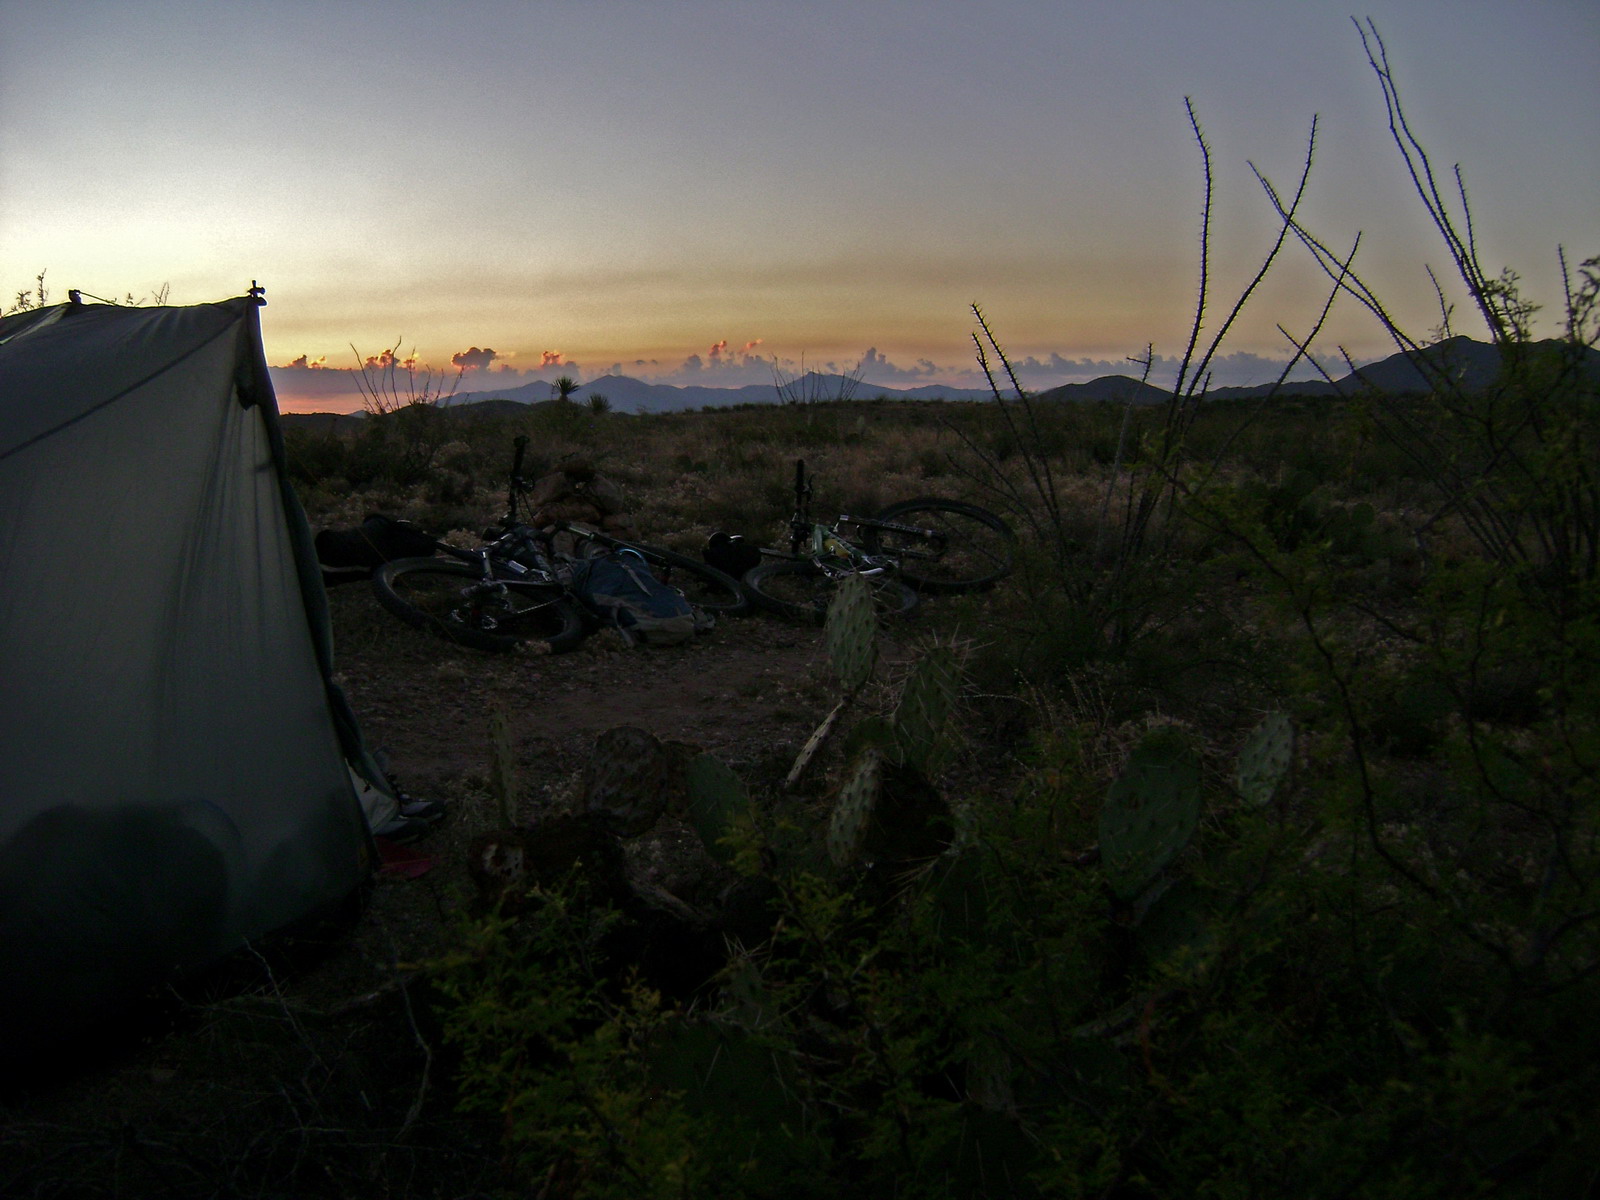
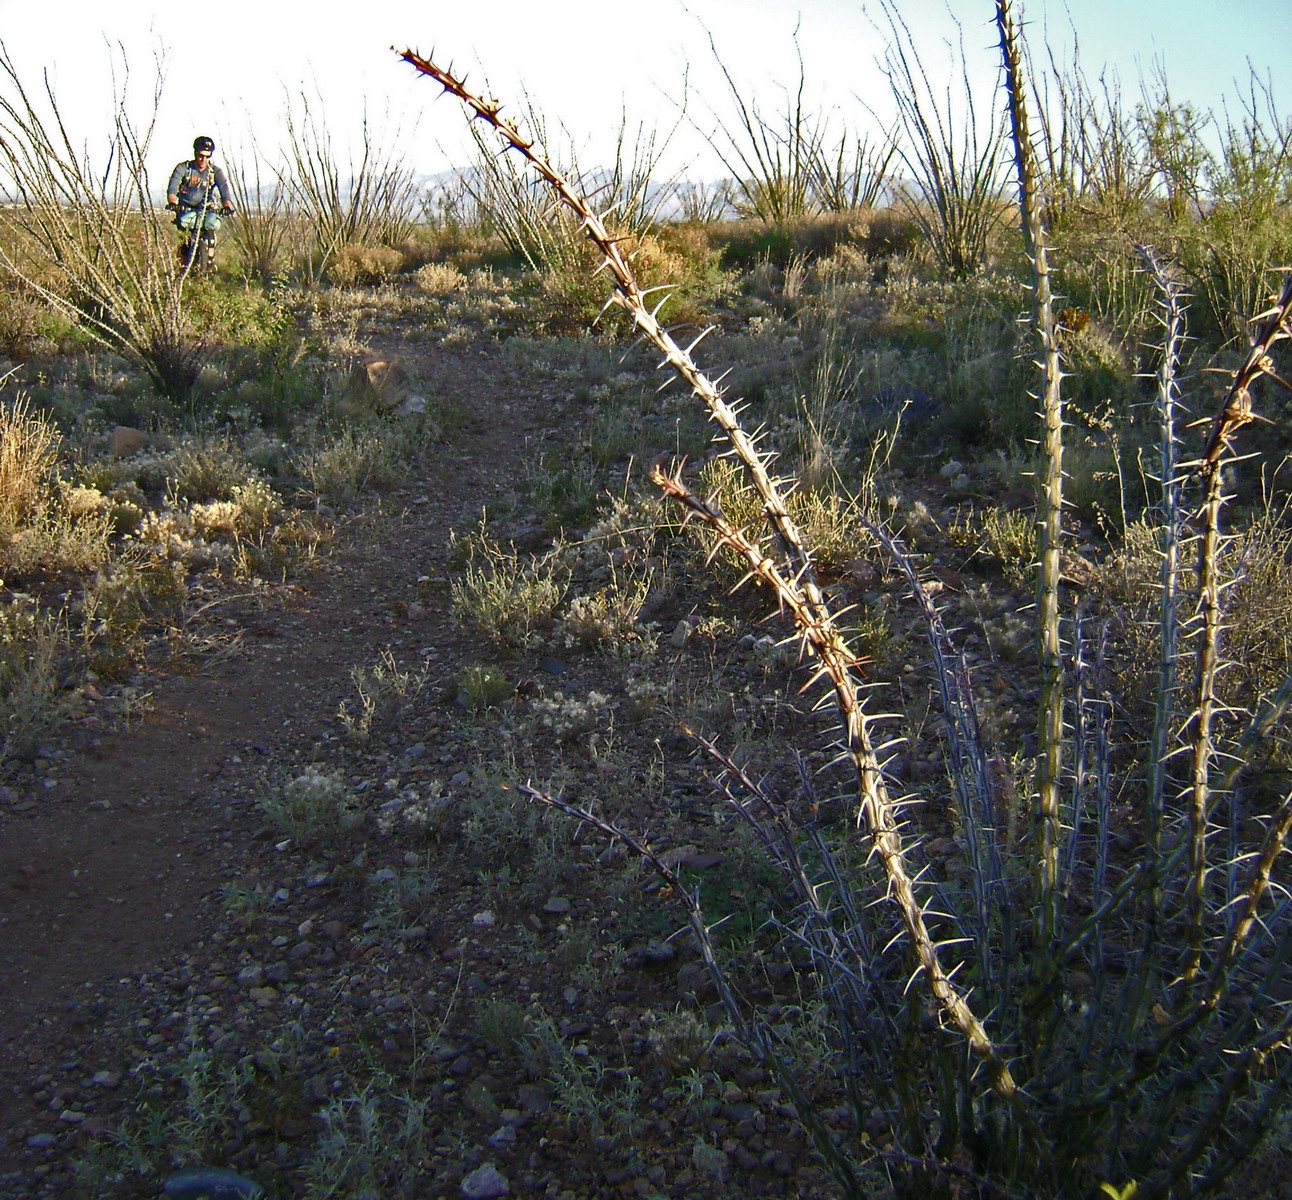


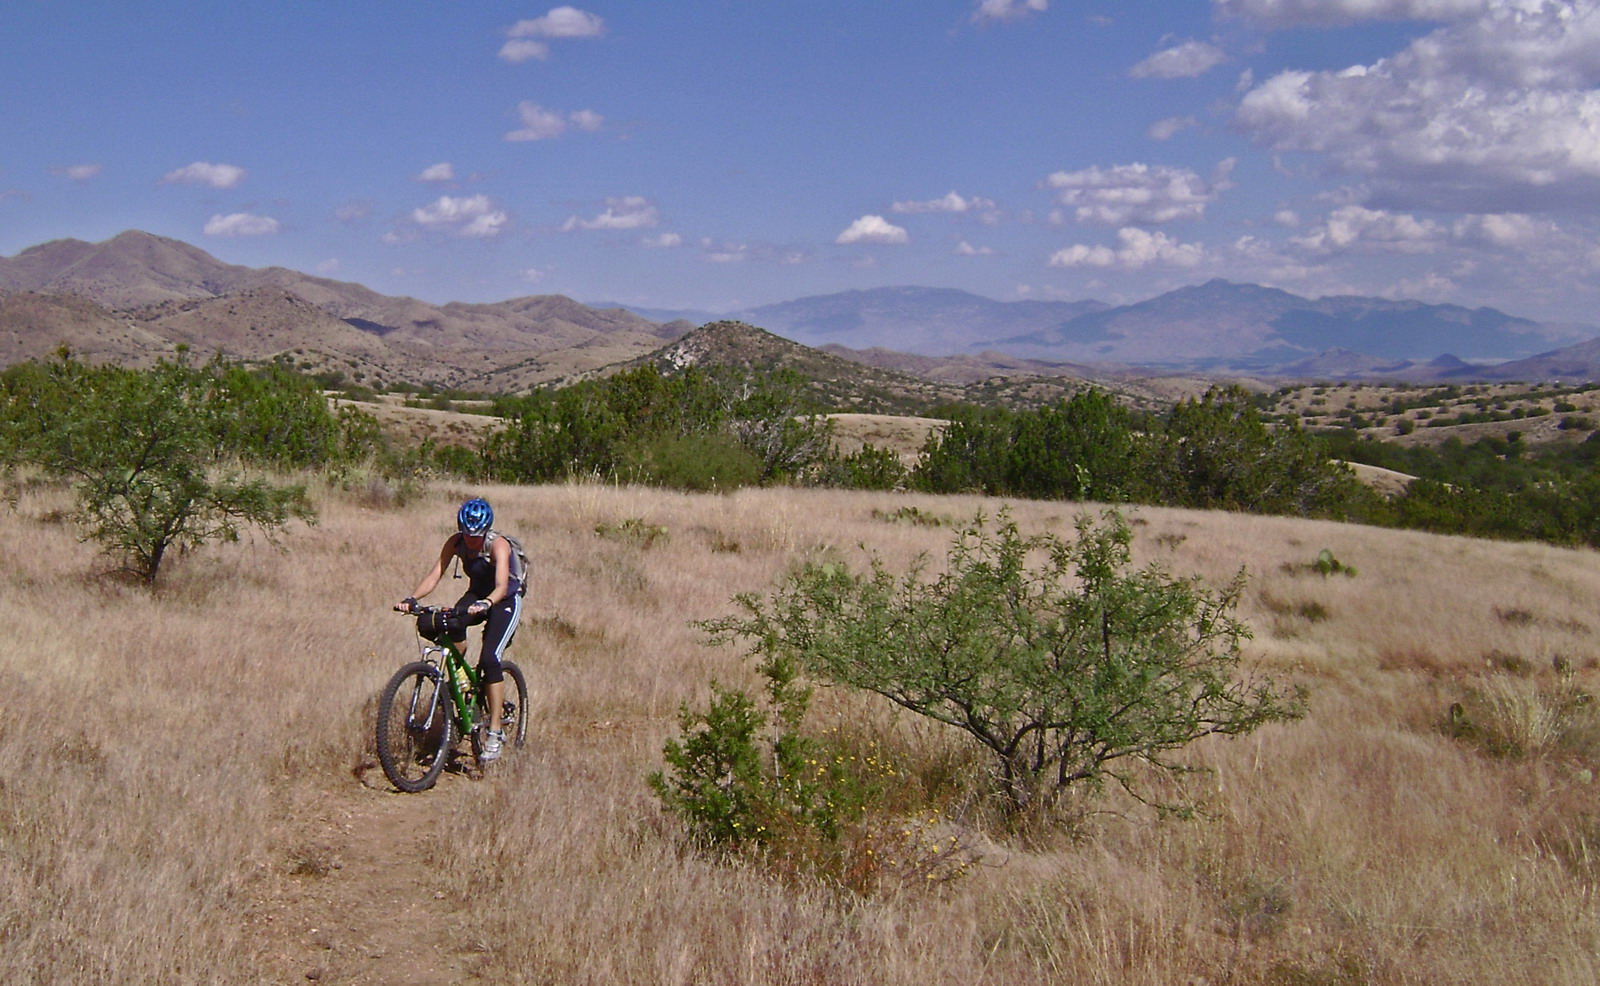
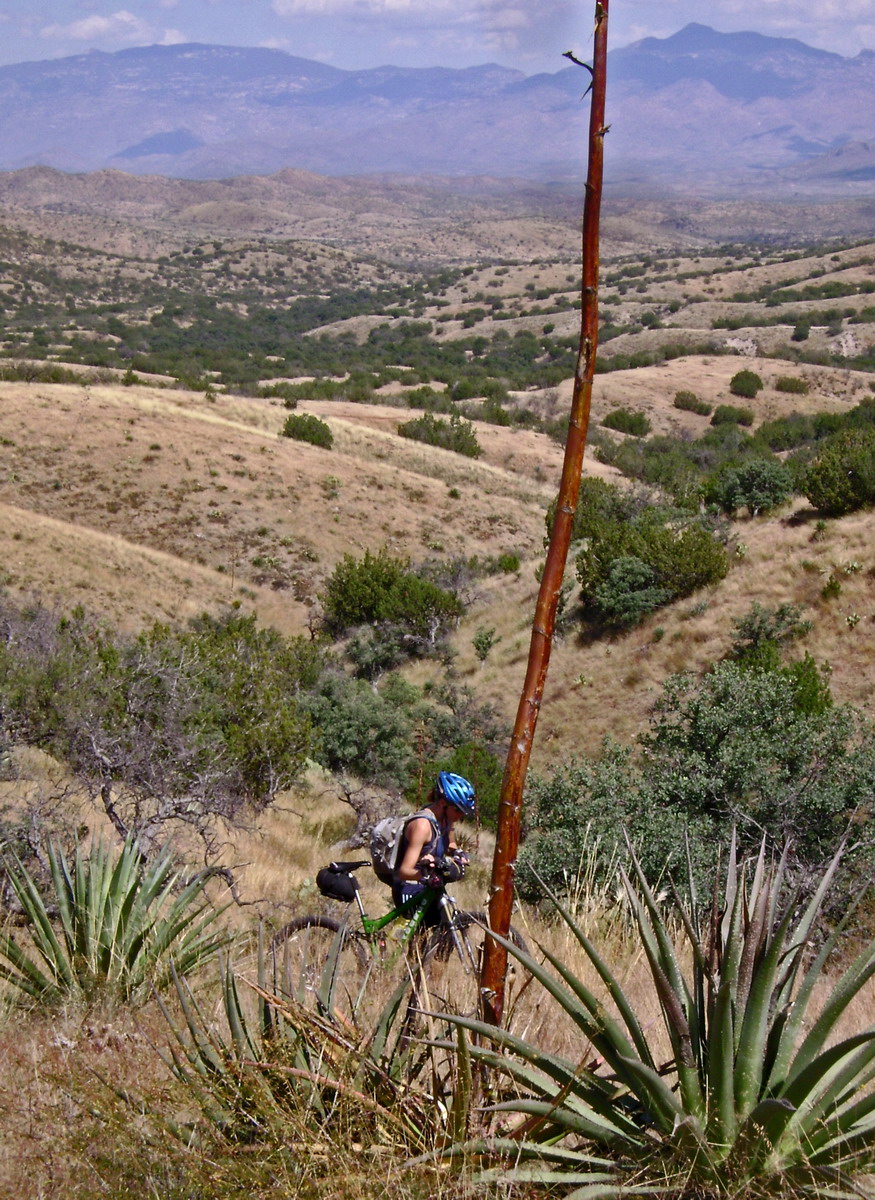

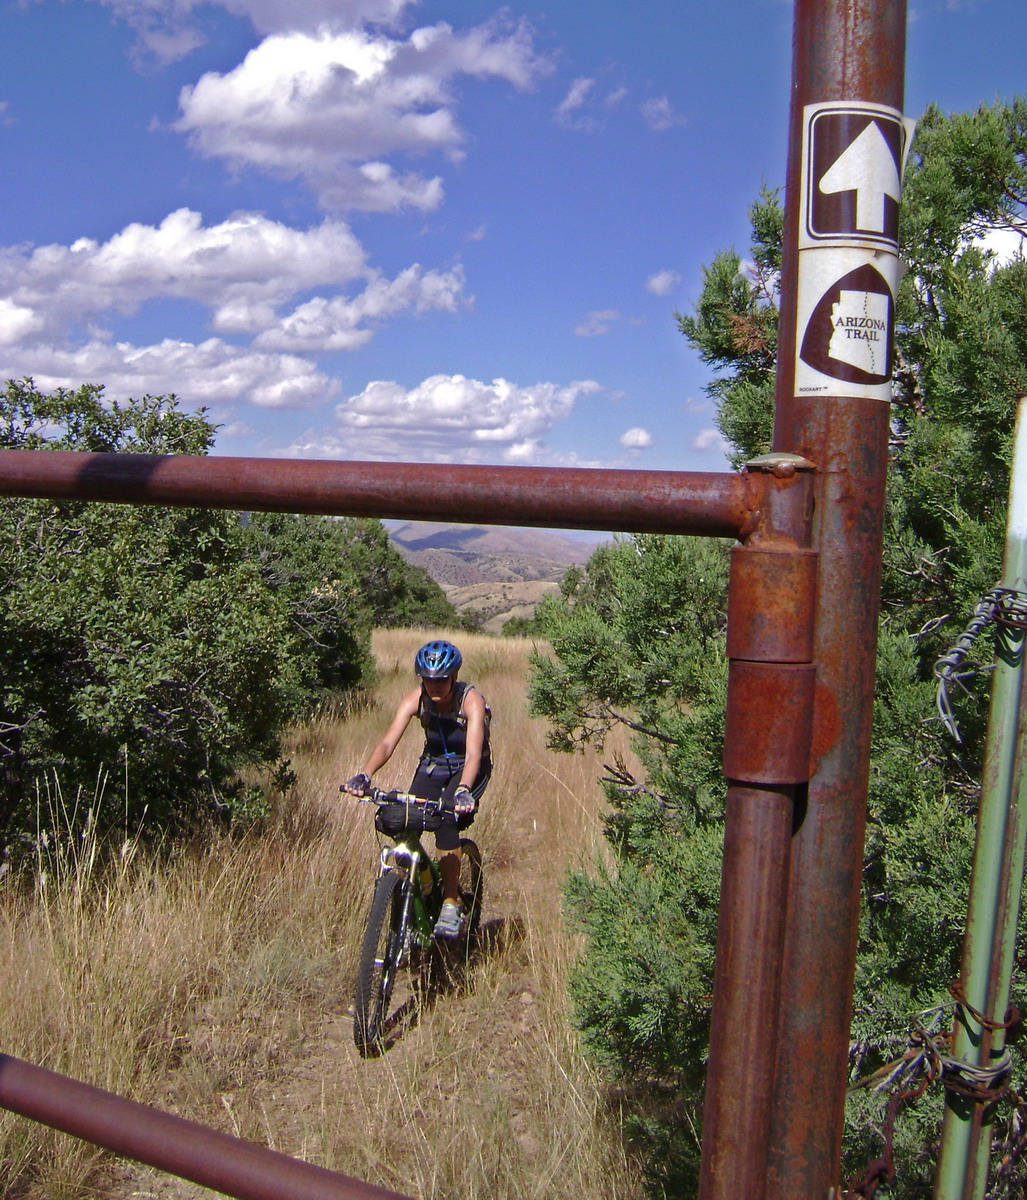
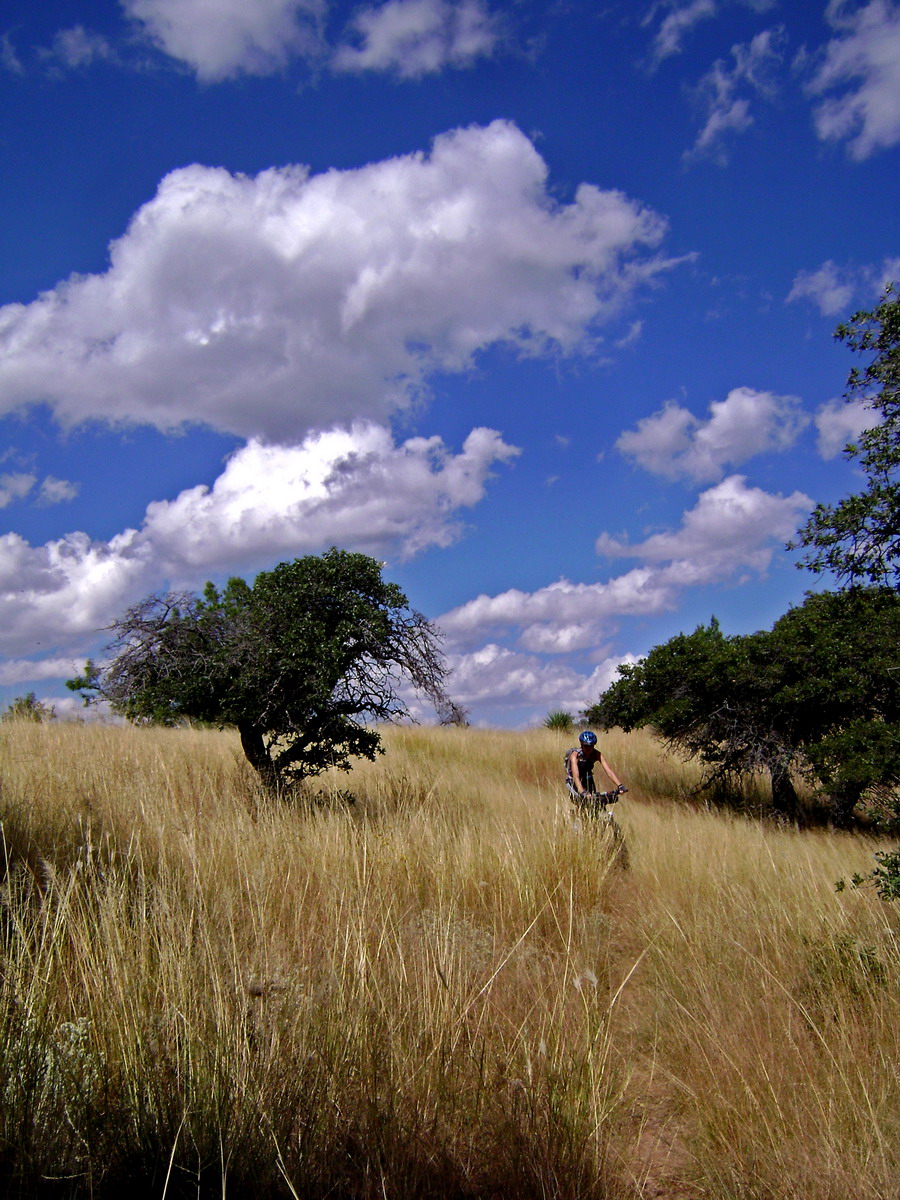

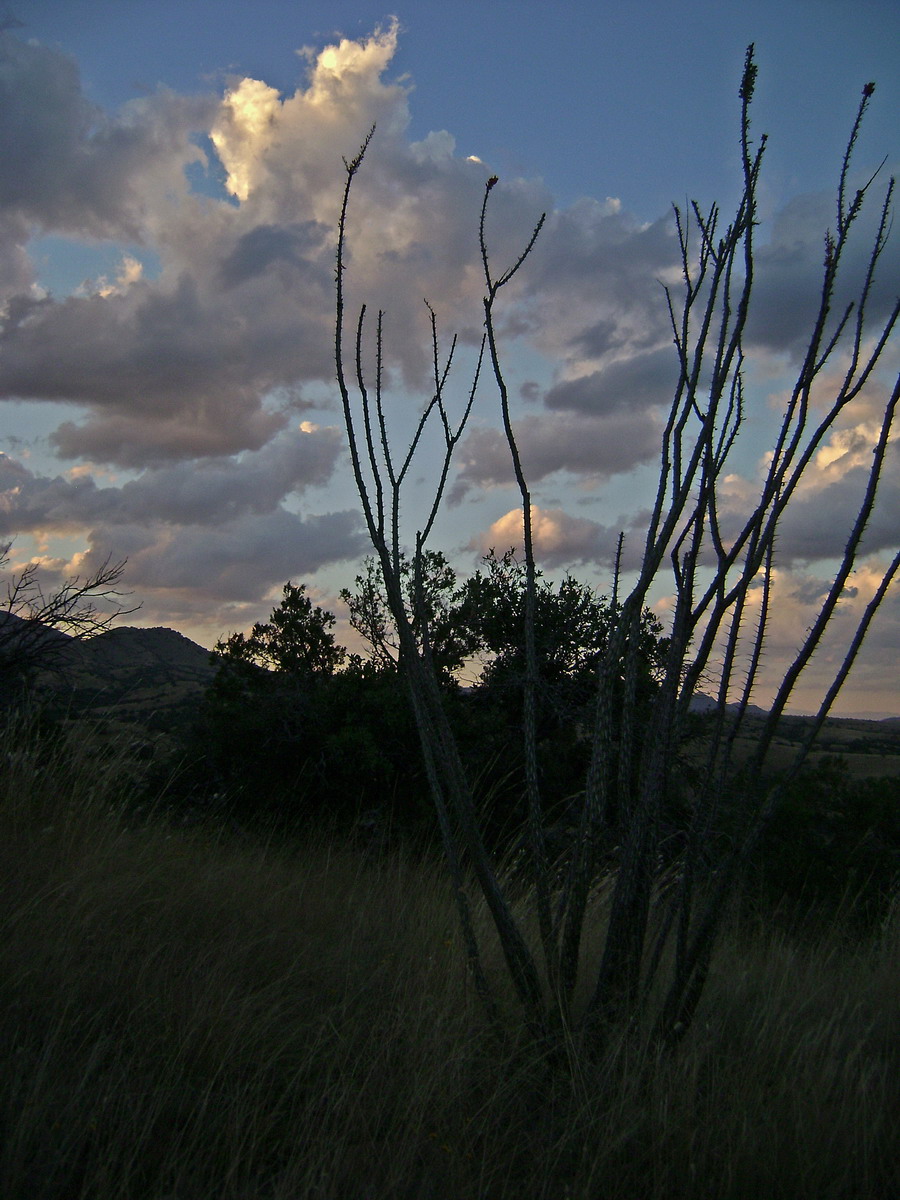
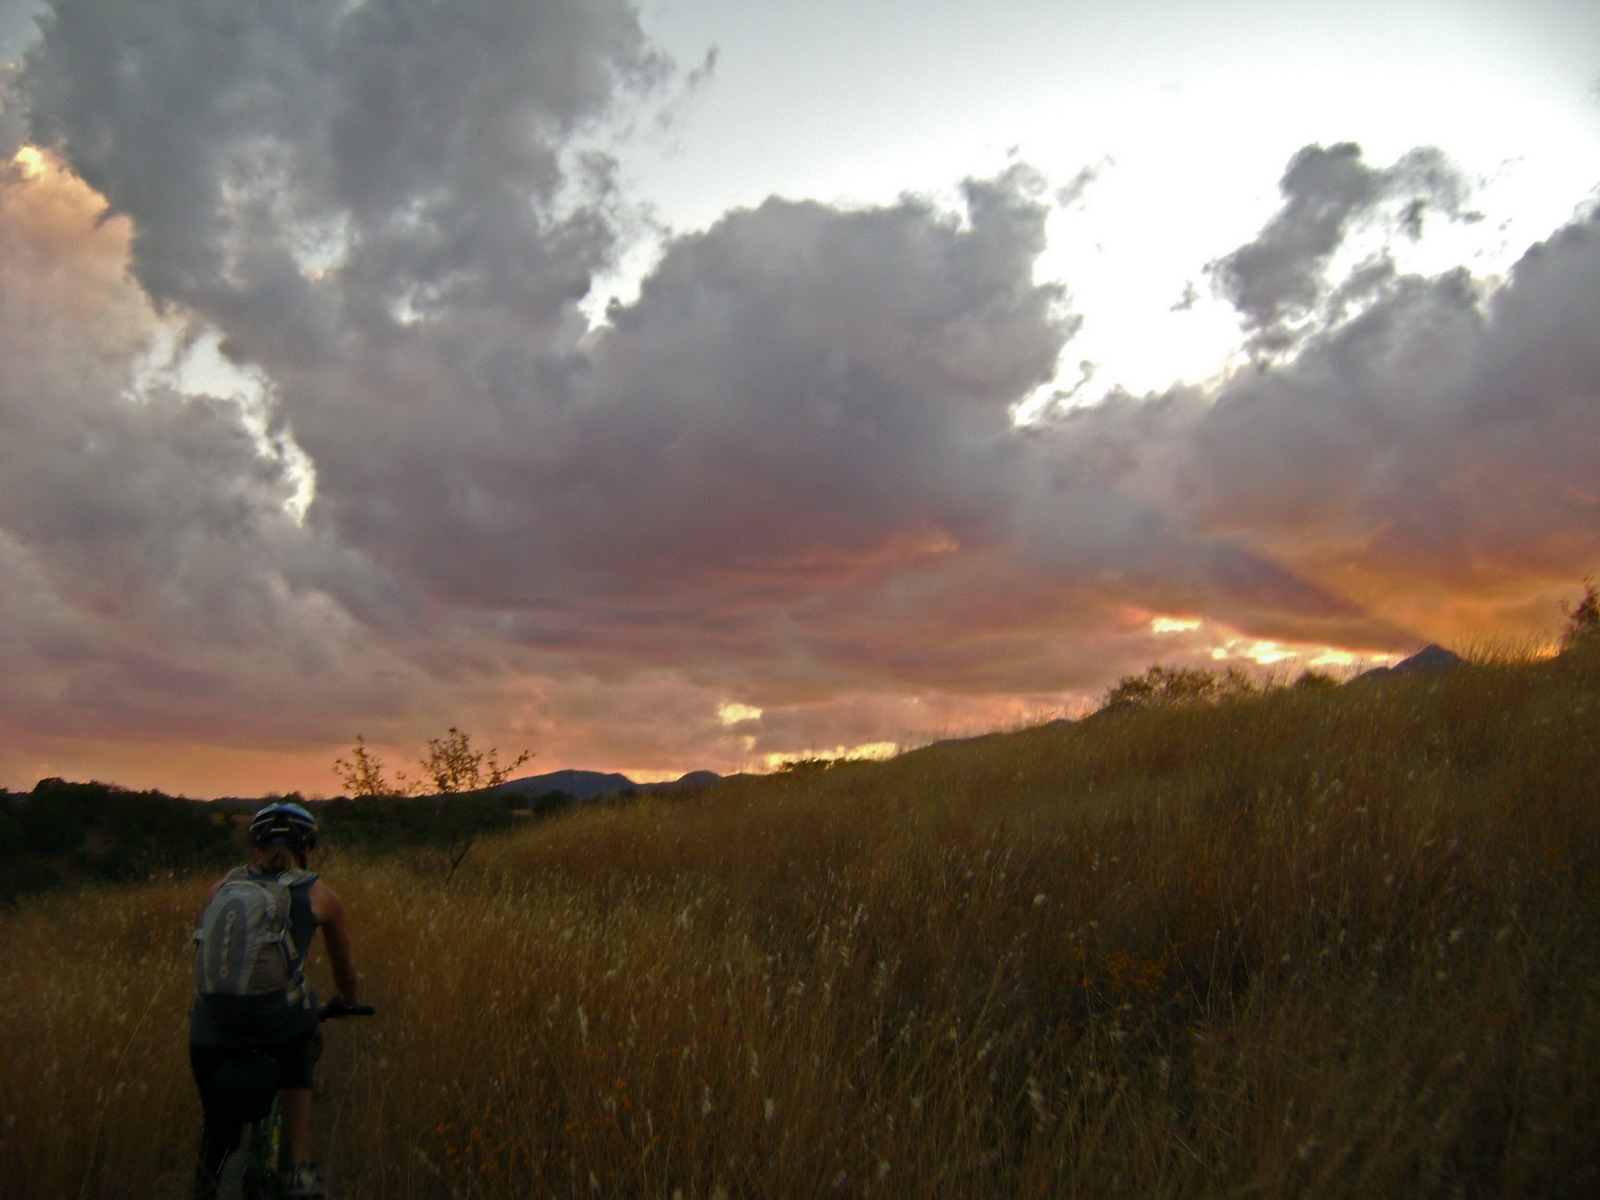
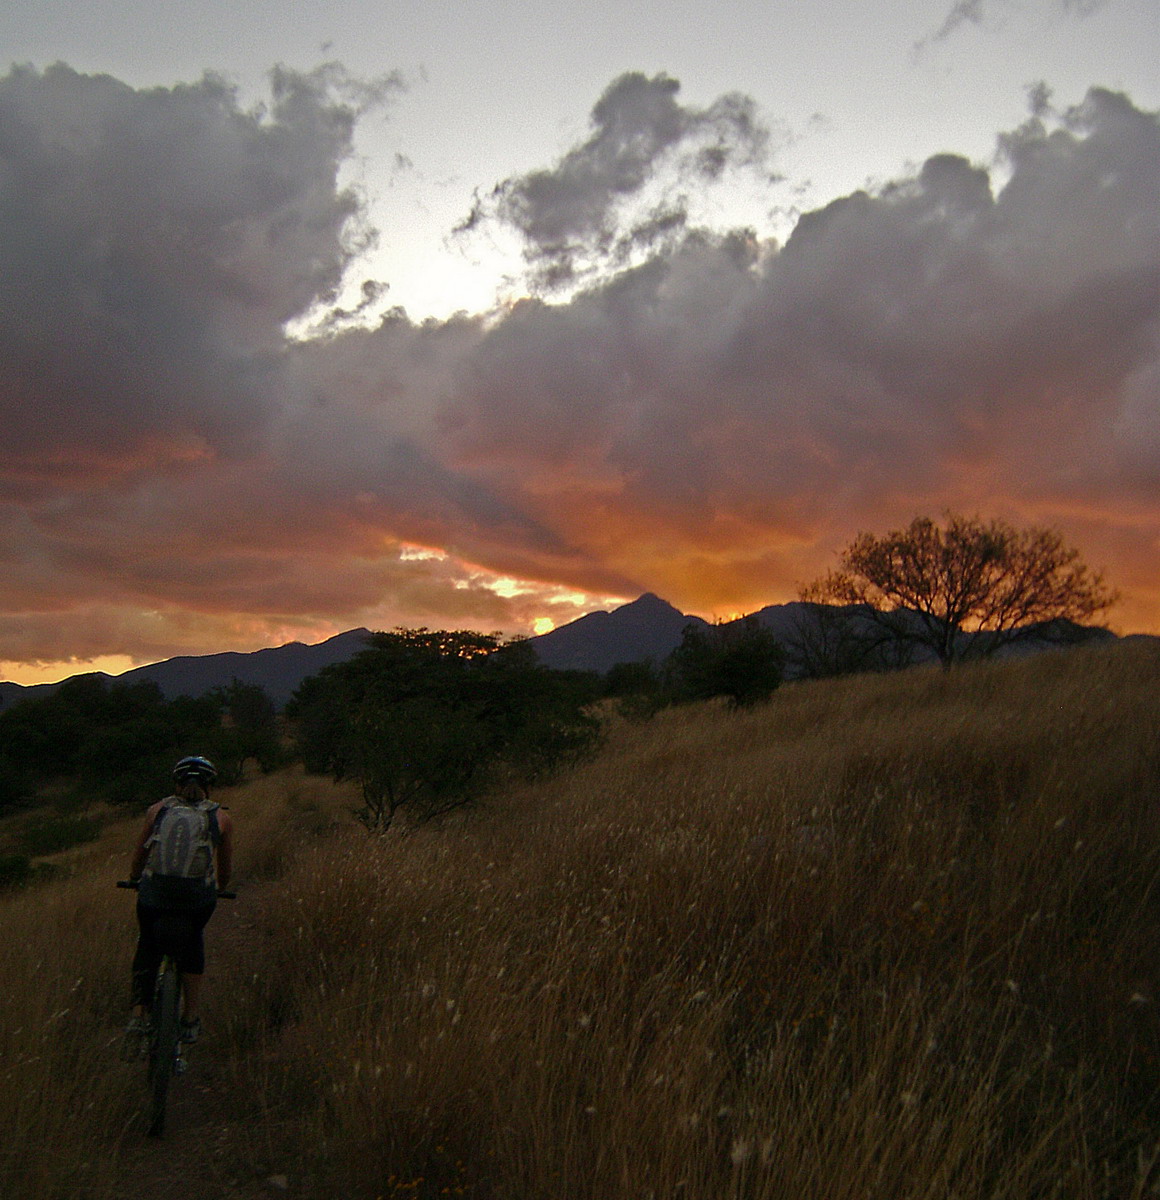
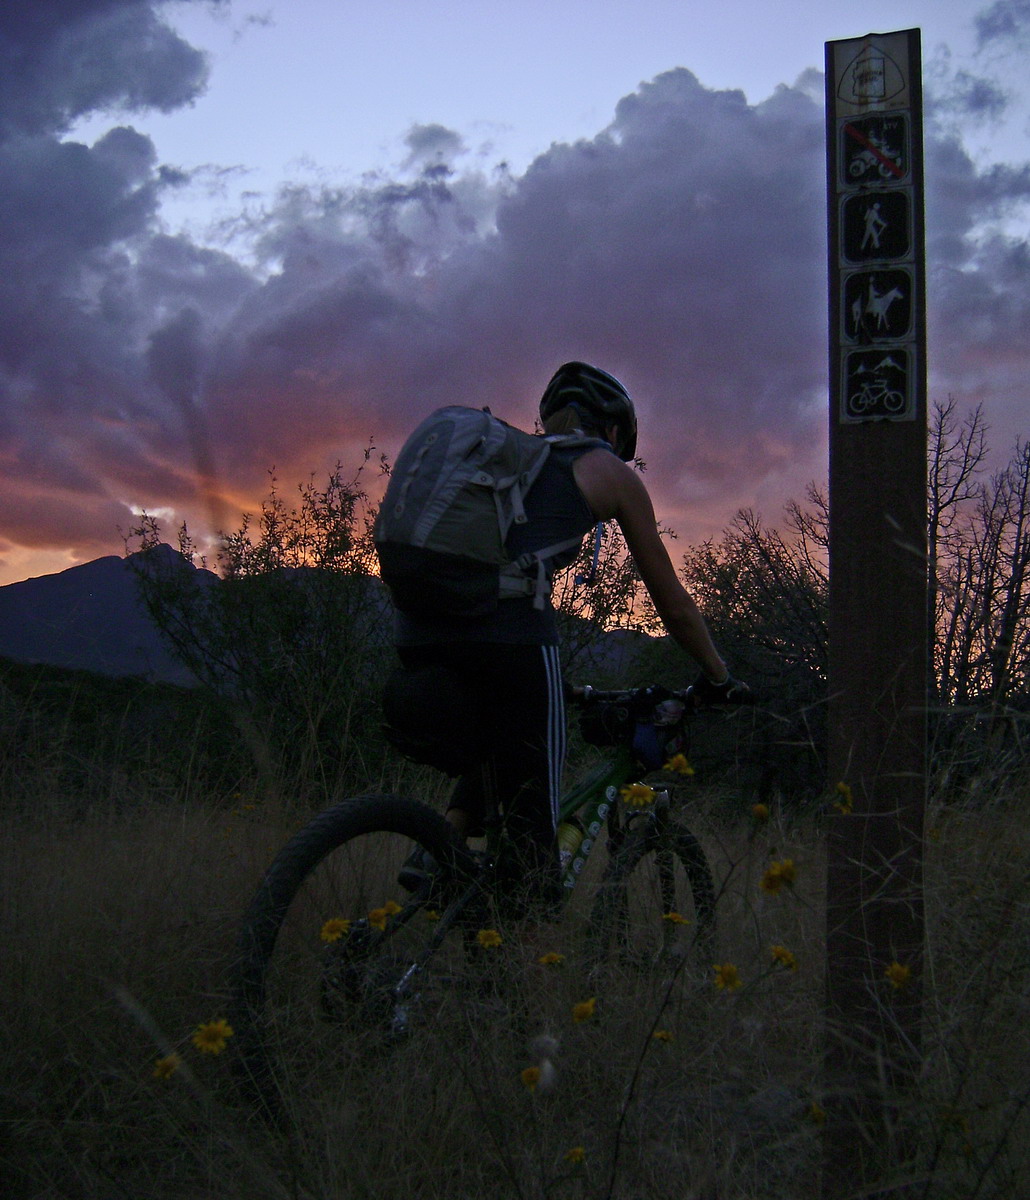
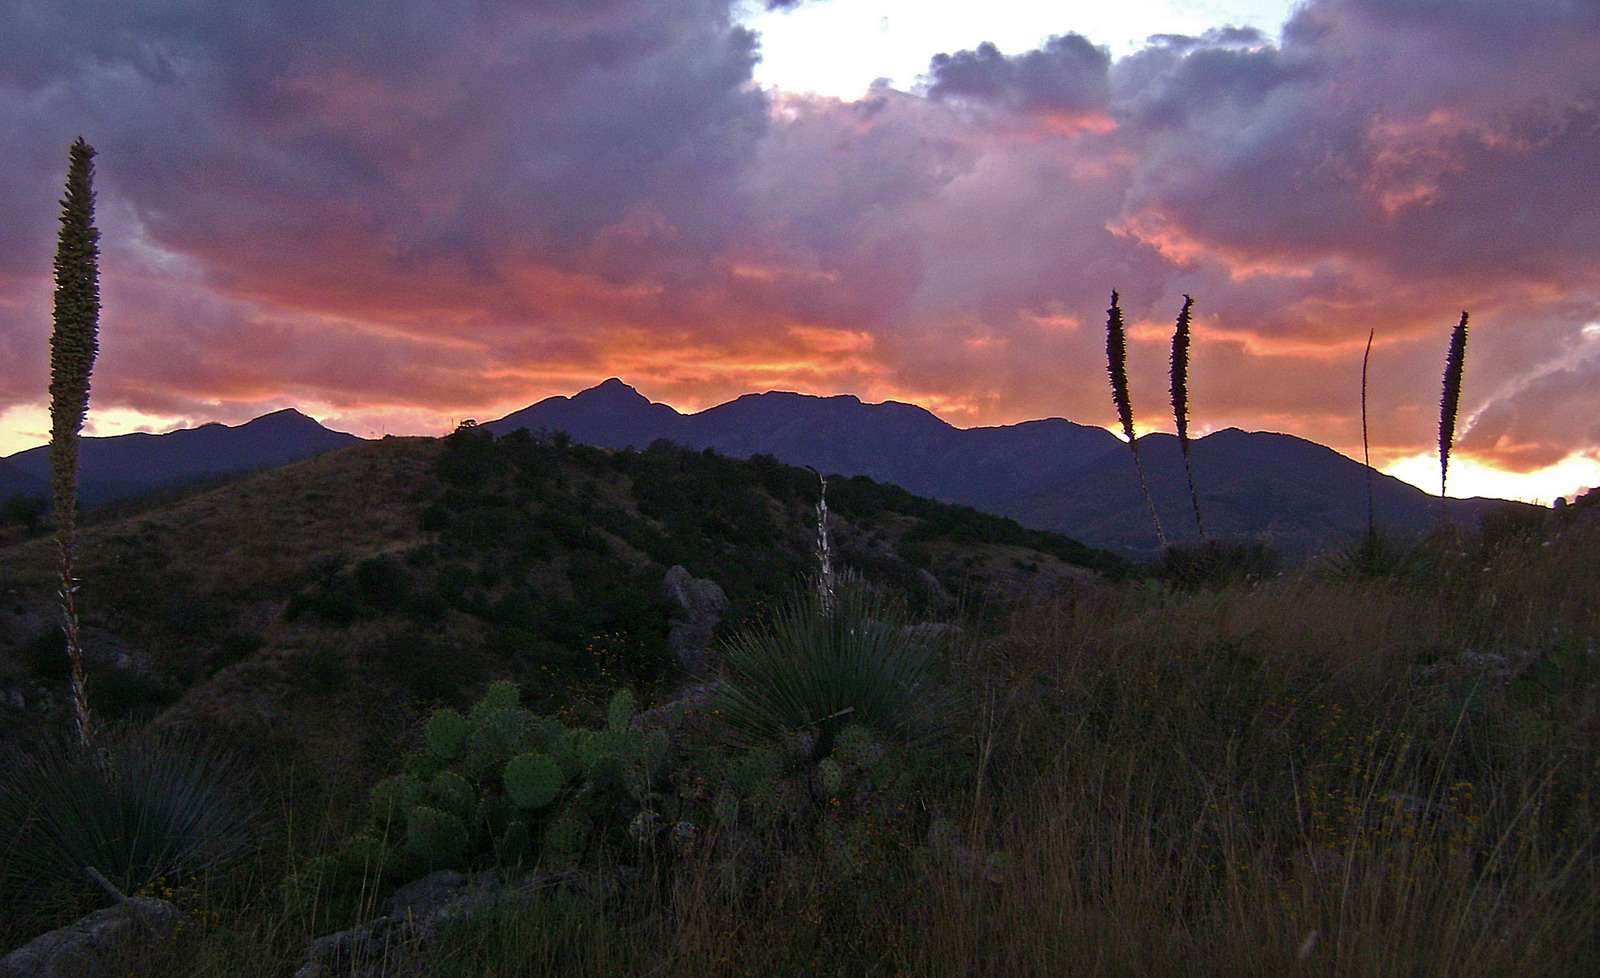
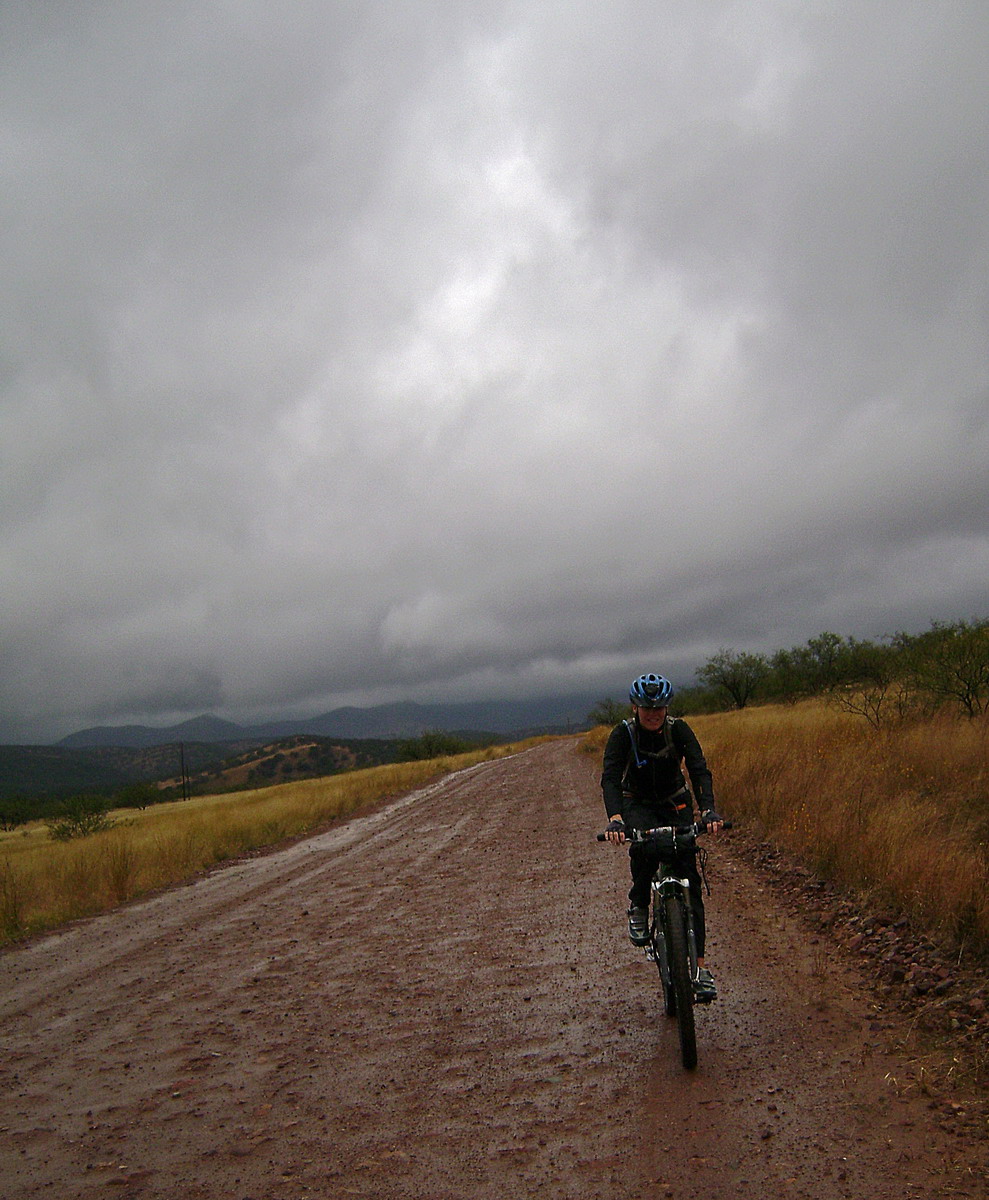
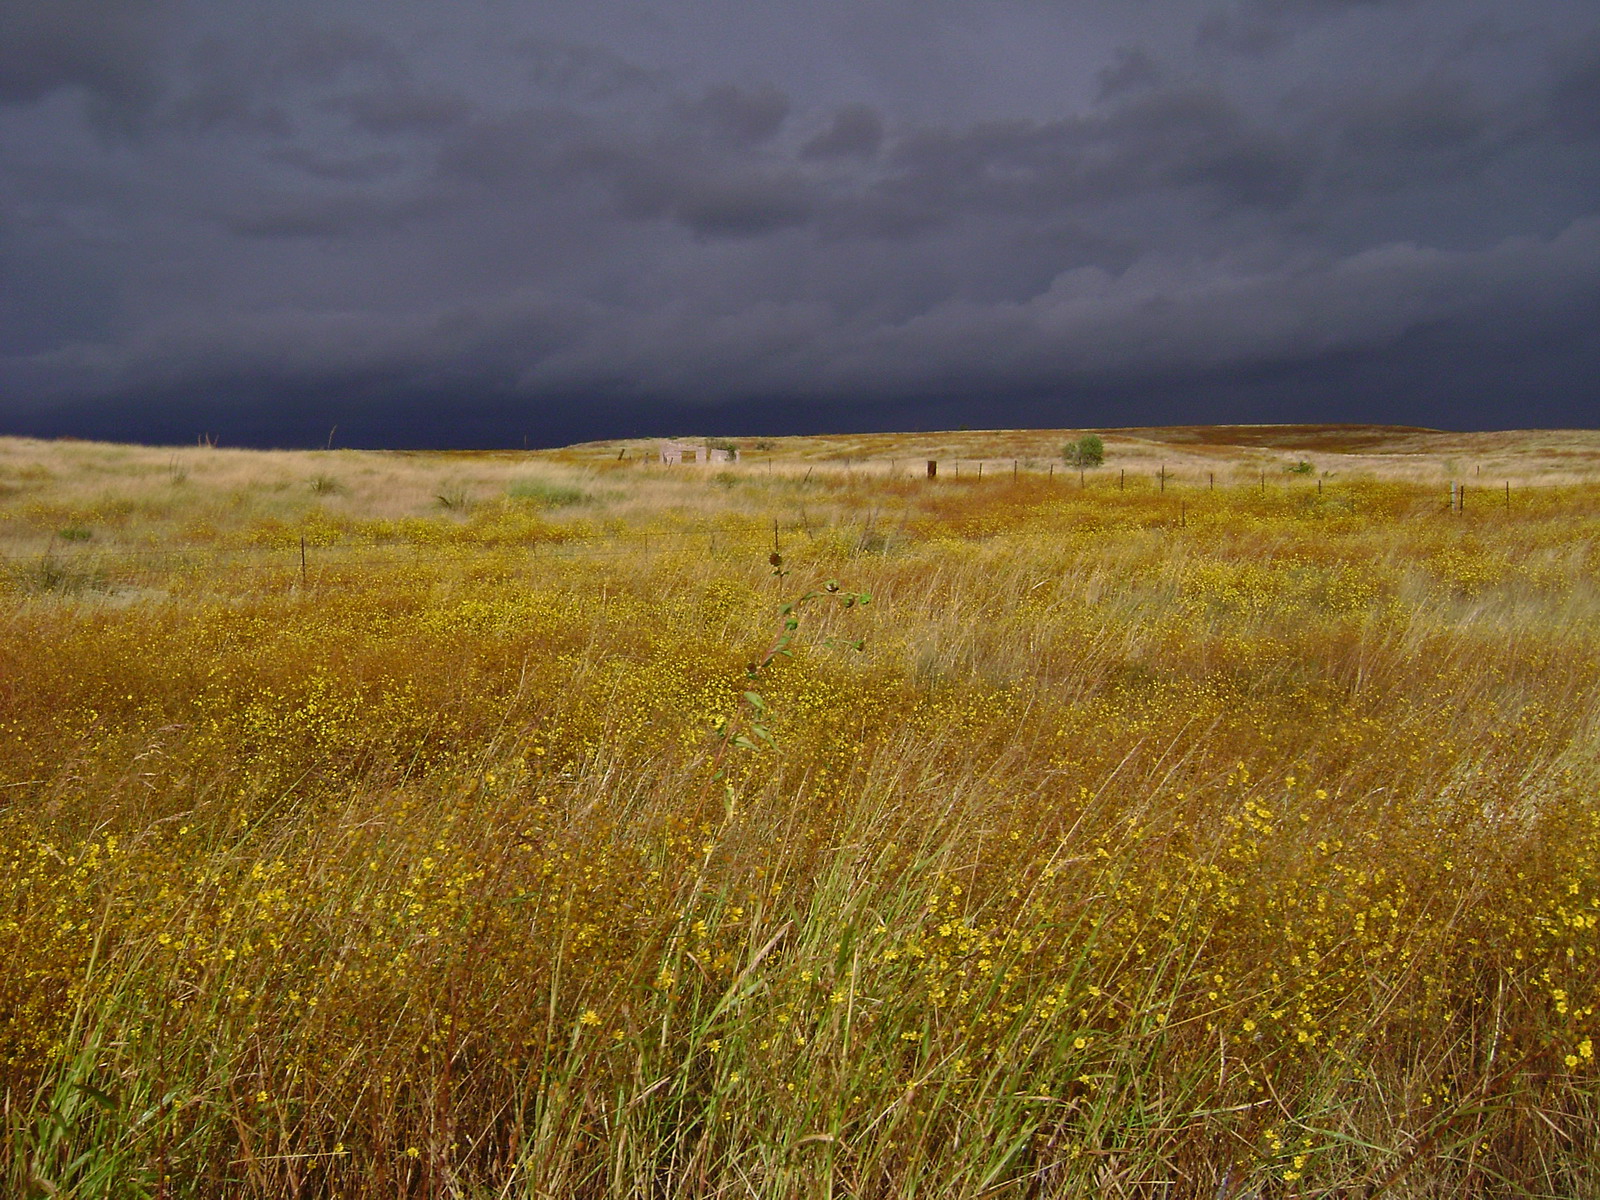

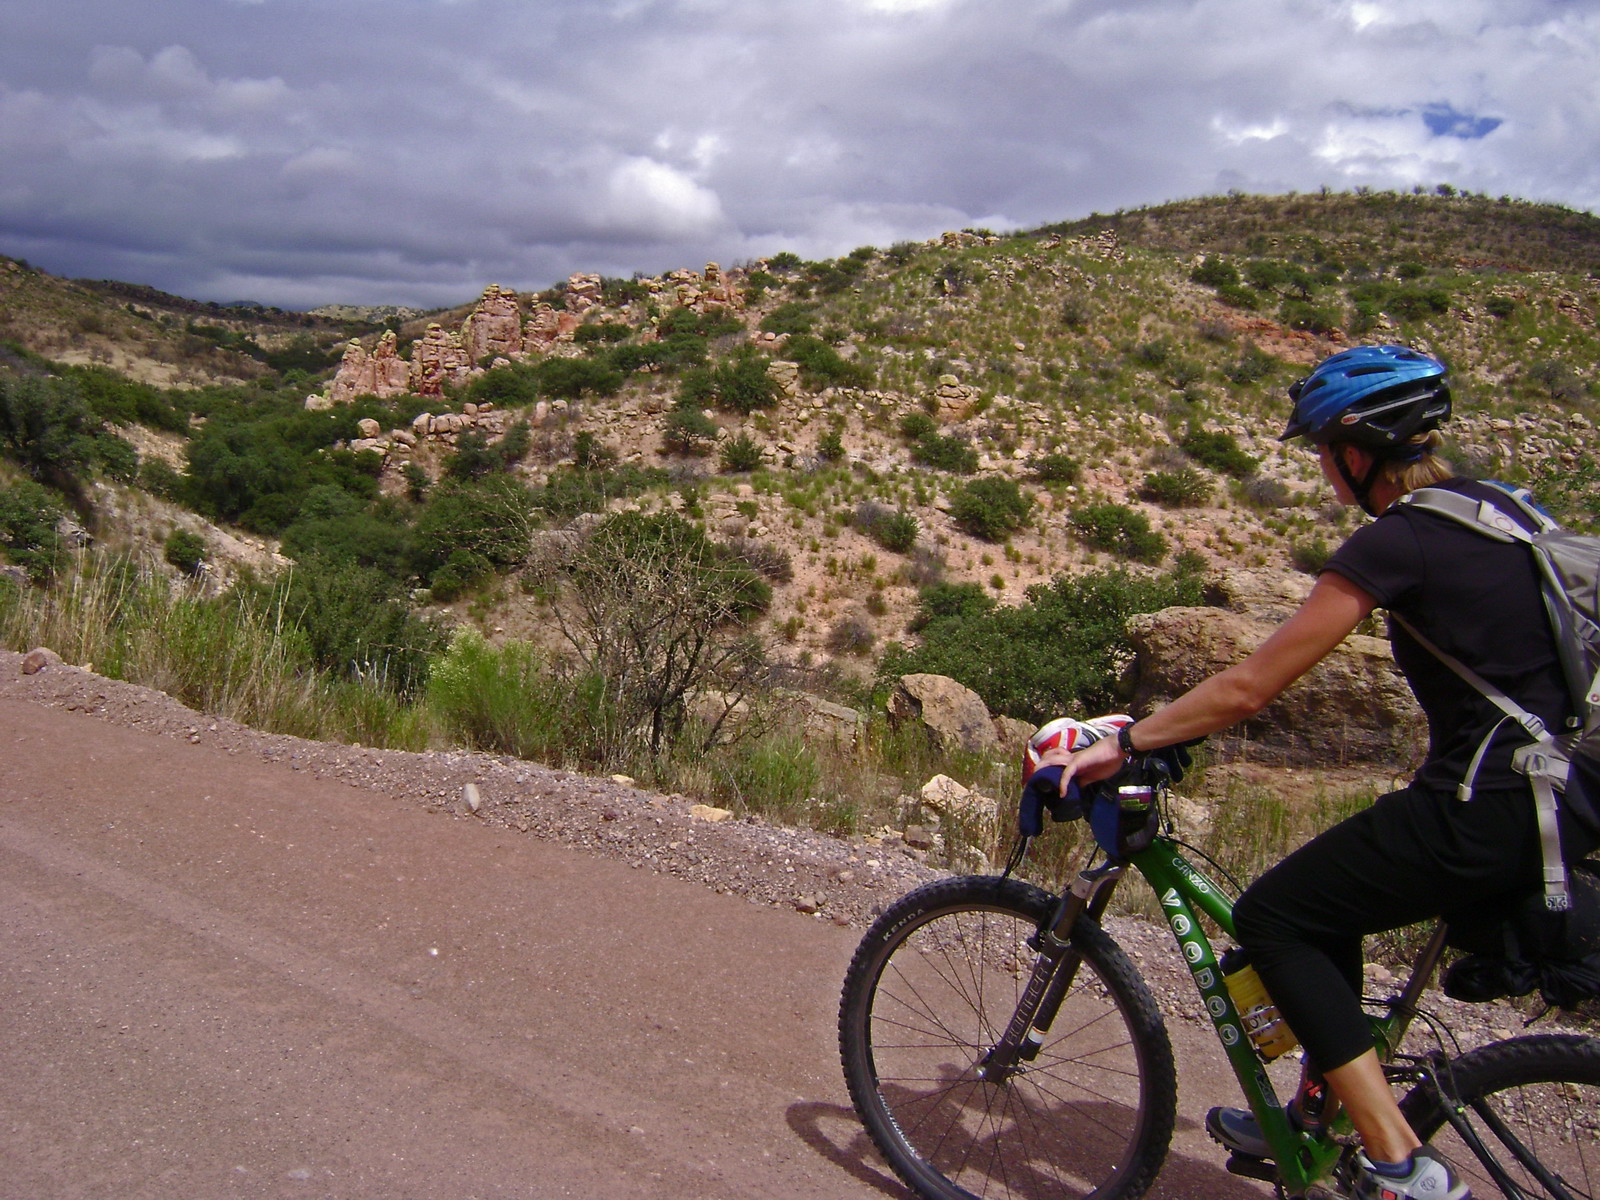

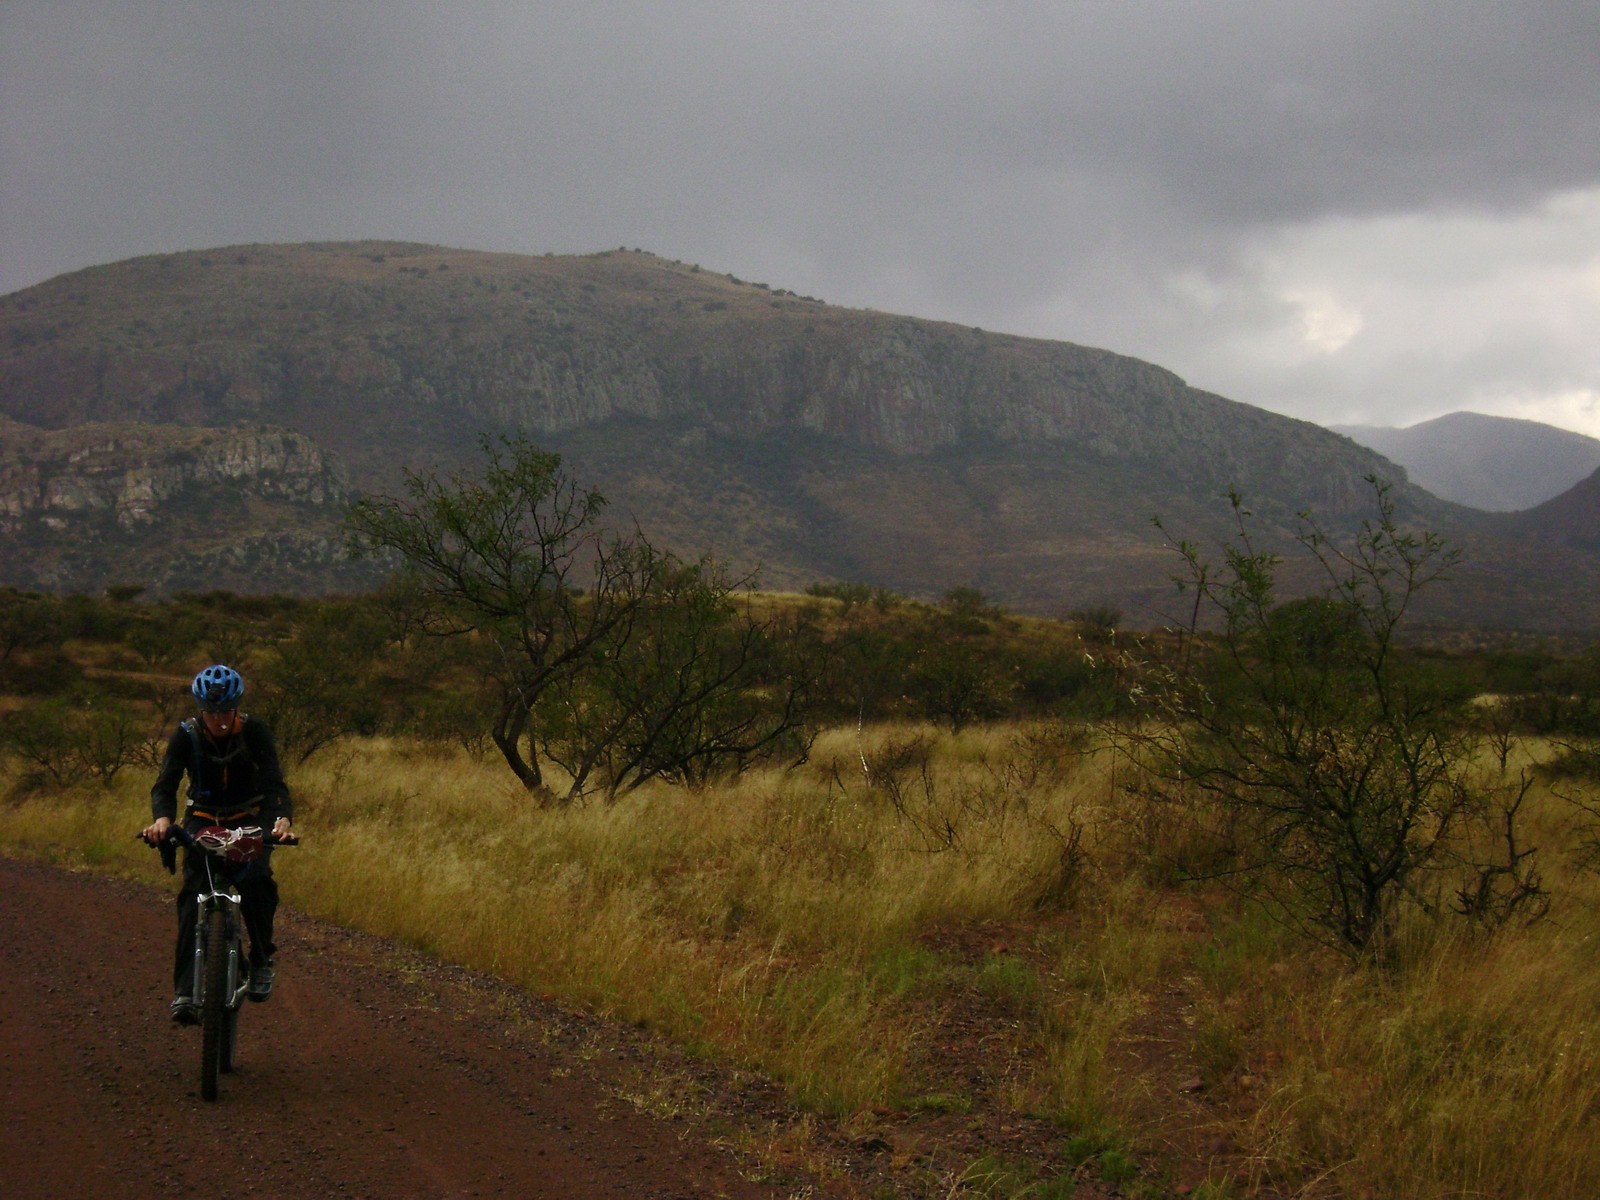

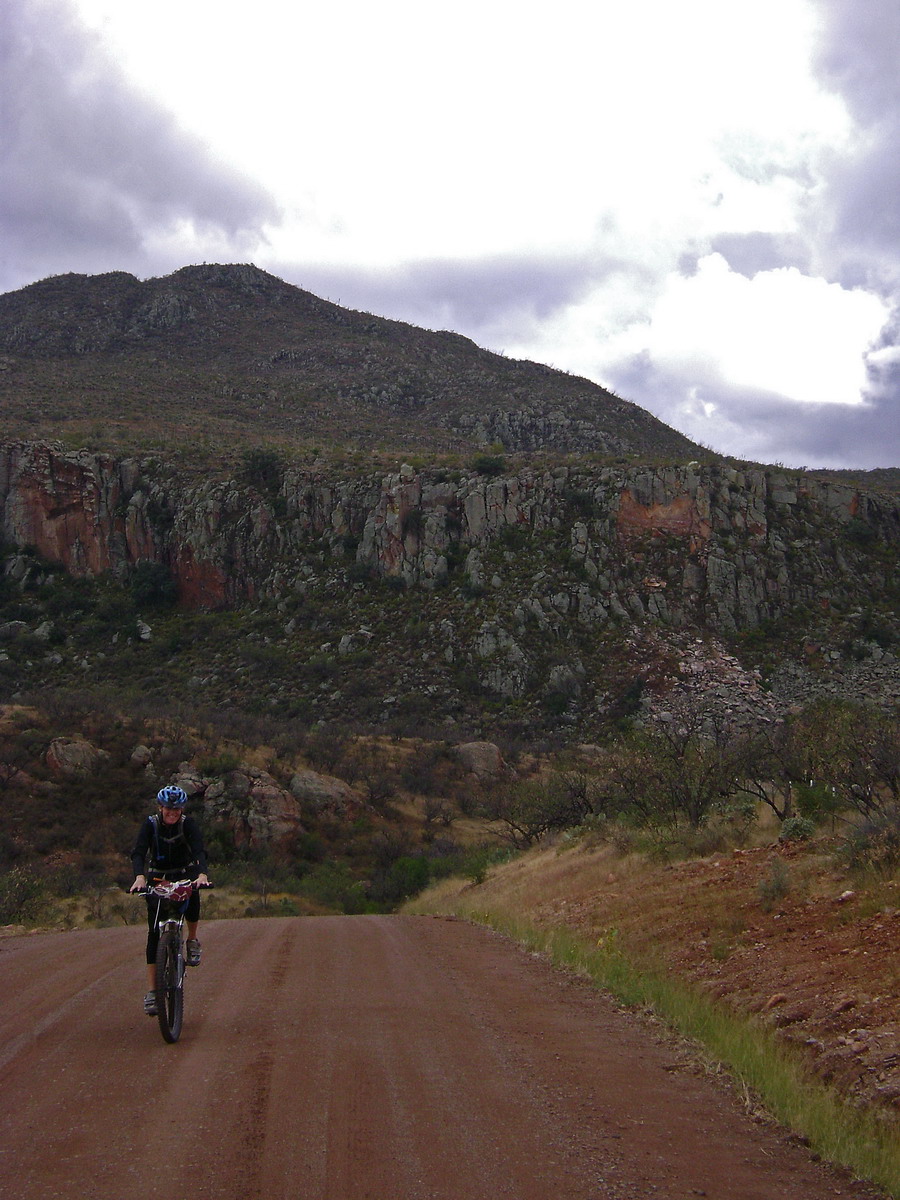
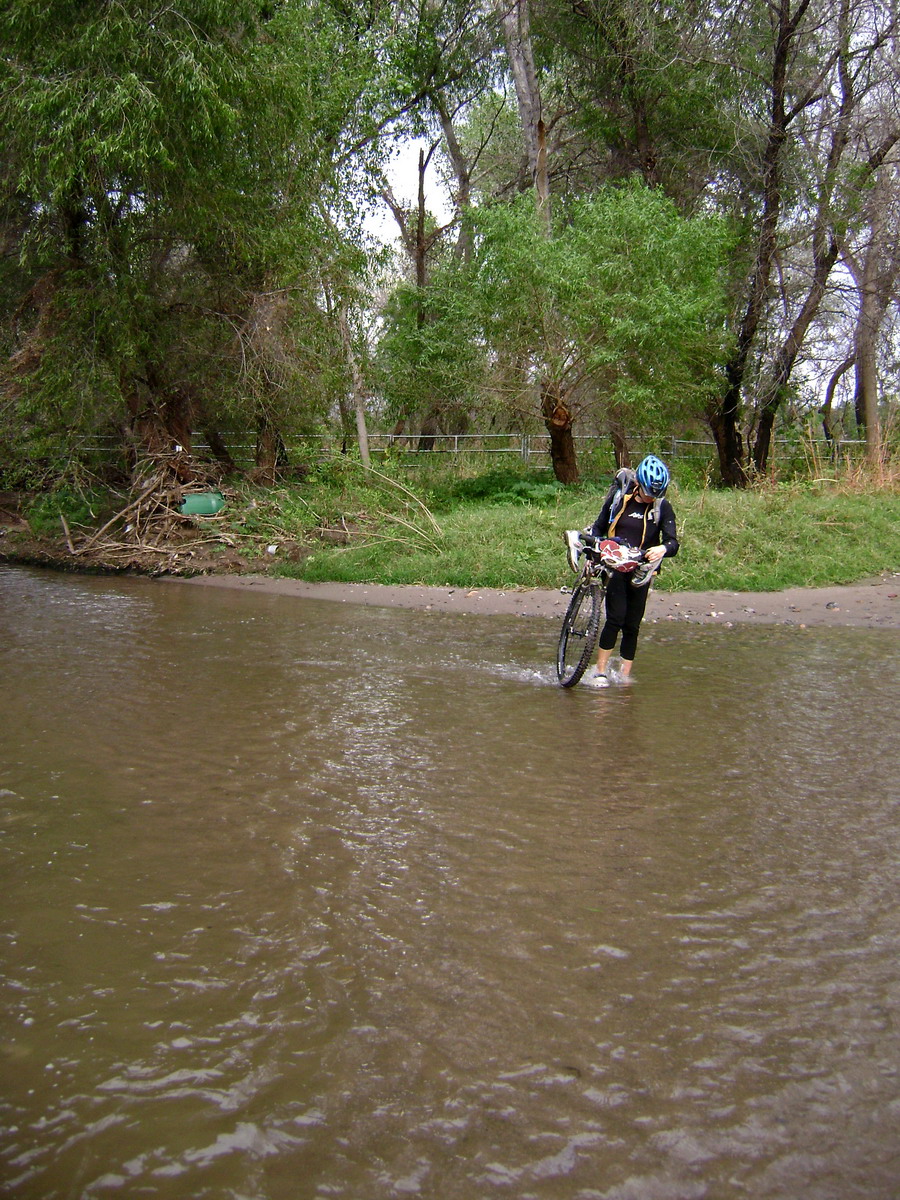
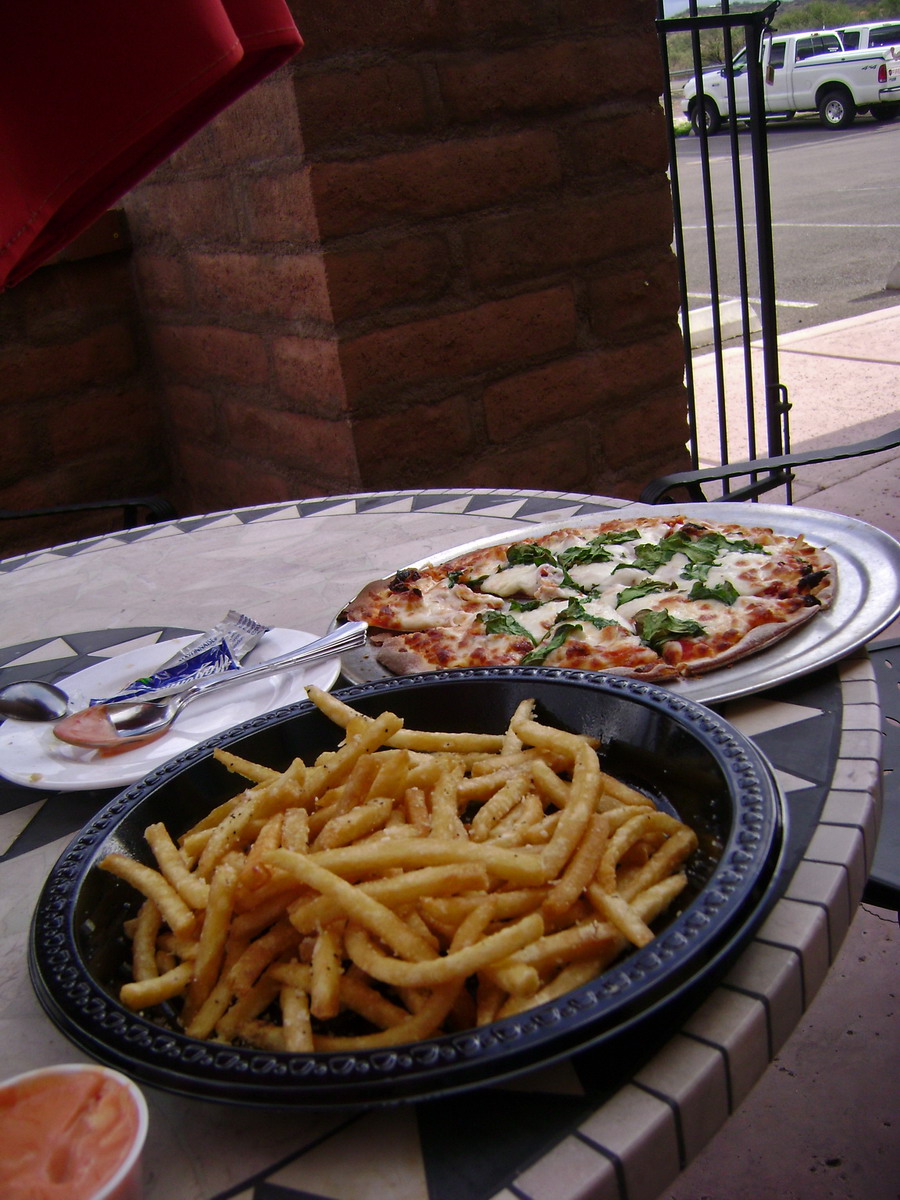
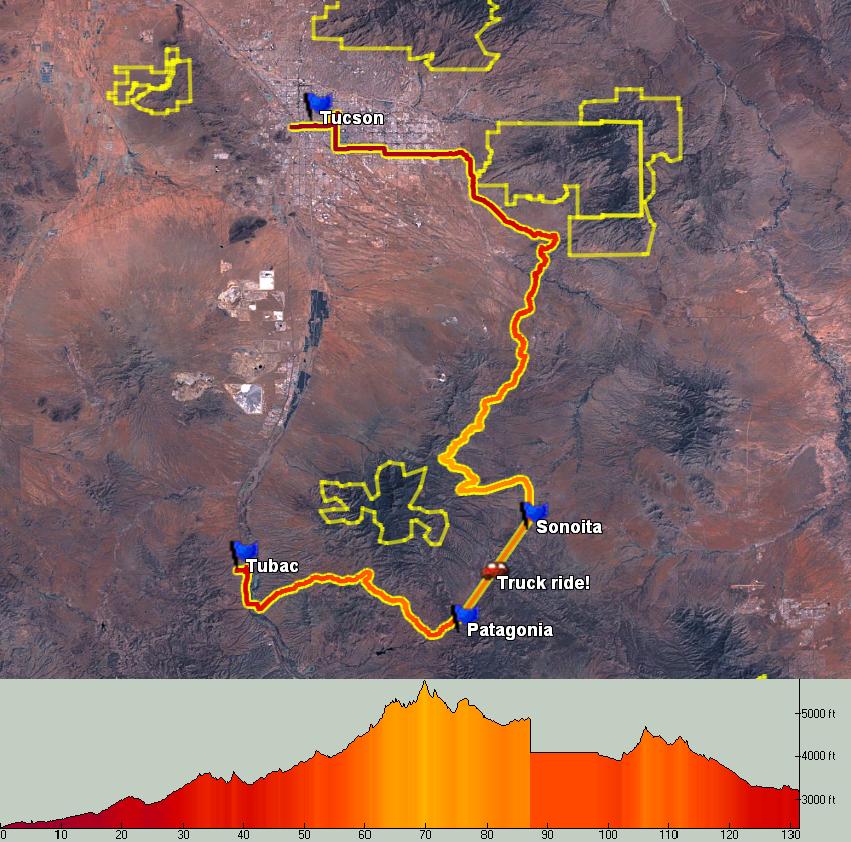


