I spent some time this spring building a set of bags for myself with many prior revisions, some of which never made it onto the trail… I’ve finally got a setup I’m happy with, but already have plans for the next generation to help the structure of the frame bag and top tube feed bag.
Siren John Henry with fresh powdercoat and durable, mid level components.
Seat bag, frame bag, top tube bag, and handlebar harness of my own making. Performed beautifully throughout a solid day of rain and muck, 4 days worth of bikepacking, and 160 miles around Mt. Hood.
Here it is, my Bikepacking Setup. This is hours of tinkering with things and making things fit, but hey, it all works and was fun to put together.
I have my gear list posted just below and some pictures as well.
2011 CTR Setup
Clothing
Thermal fleece pullover (In seatbag)
Patagonia Long sleeve (In back pack)
Pearl izumi jersey On
Riding shorts On
Pearl Izumi Thermal tights. On
Compression shorts for camp. (In seatbag)
Cannondale cycle hat. On
Pearl izumi gloves On
Stocking cap (In seatbag)
spare socks (In seatbag)
Helmet On
Warm gloves (In Backpack)
Rain jacket and pants (Backpack)
Miscellaneous gear
Backup contacts and case/solution (In seatbag)
Carmax (Backpack)
Chamois (Backpack)
Sunglasses On
Bullfrog sunscreen and mosquito repellent (Backpack)
Navigation
Garmin Etrex Legend and CTR databook.
Spot tracker
CompassX
Speedometer
Gear
Relevate designs seat bag and handlebar harness
Camelbak 100oz Reservoir and Backpack.
Water bottles (2)
Cash
Frame bag(jannd)
Extra batteries
Lights for bike and Petzl headlamp.
Camping gear
Emergency bivvy bag (as primary blanket) (Harness)
Sierra Designs Bivvy75 (Harness)
Mountain Alps sleeping pad (Harness)
Ziplock bags for keeping things dry.
Nutrients
Vitamins
Katadyn Hiker water filter. (Seatbag)
5,000 cals estim
First aid (All of this is inside a small kit in my Backpack)
Small kit of the basics
IBProfin
Tums or pepto tablets
Matches and metal striker
Bike Repair
2 tubes and stans sealent backup (Backpack)
FRAME BAG CONTAINS TOOL KIT.
Multitool
Chain tool
Chain links
Quick Links
Deraillur hanger (2)
Pump
Duct tape
Patch kit
Rag and small bottle of chain lube possibly.
Brake pads (1set)
Food
Most of my food will be on the right side compartment of the frame bag while larger foods and meals will be kept in the seatbag. GU packs and Hammer Gels, with many protein bars, trailmix, bagels with nutella and much more.
This was a trip from Rough and Ready (near Nevada City) to Downieville; off road.
The Sierra Nevada Mountains run roughly north/south and many of the drainages run east /west. As a result any journey through the foothills and low Sierra will involve dropping into and climbing out of these watersheds. One such watershed is the Yuba. It is comprised of three rivers; the north,south and middle Yubas. Each of the rivers is separated by huge forested ridges. The area is crisscrossed with old roads from the gold-rush and logging roads.
This is no greek tragedy. This tale does not end with sorrow but instead begins with it. I had rode a mere ten miles into this journey. The trip from Rough and Ready up to Nevada City had been mostly a road ride, climbing over a thousand feet and rolling for the final few miles. As I coasted past the Tour of Nevada City Bike Shop, I spied a car approaching with a bike on the roof. “Oooh” then “oh” I thought, scoping out an Epic from Specialized, which was perched on the car roof. At the exact moment the car passed me I heard a “pop” and then felt the “vrrrmmm” of my back tire rubbing the chain-stay. A broken spoke. The back wheel badly wobbling. I will always wonder if that guy somehow broke my spoke…I need someone to blame.
But I was right in front of a bike shop.
Which was closed. It was Sunday morning of Memorial Day Weekend.
I examined my wheel and saw it needed some serious help. The spoke had been a drive side spoke and the rim was being pulled powerfully toward the disc brake side of the wheel. So much so that it rubbed badly against the frame, bringing the wheel to a stop. I dug out my spoke wrench and set to work. To no avail. The spoke on the drive side are heavily “dished” to make room for many gears (If I were to have them, instead I ride with one cog). As a result I could only use the nearby spoke with a small effect on the wobble.
Then I heard a voice say “ I’ll be right over to open the shop. Amazingly the shop was going to open soon. I paused and contemplated my options. I weighed my desires against my wisdom and balanced that with knowledge of how engaging it would be to fix my spoke (which also needed a new nipple).
I decide to go home and fix it there. I didn’t want to spend money on a fix I could do myself. Plus my semi-custom tubeless set-up would have annoyed and possibly confounded the shop mechanic.
So I loosened and adjusted my rear wheel to a point where it would not rub. Then I set off for home.
For about 15 seconds. Then I decided that if I could make it home, then I could make it to Downieville.
So I turned around. Again.
I rode past the shop and out of Nevada City with my back wheel doing a crazy wobble.
The first Yuba: In order to make-up for lost time I by-passed the Round Mountain trails. This was a hard pill to swallow because they are fun trails, one of which drops all the way down to the South Yuba River Trail. Instead I took a paved then dirt route down to Purdon Crossing on the South Yuba River.
From here I climbed a dirt road up to “The Ridge” (A.K.A. San Juan Ridge) and joined the paved Tyler-Foote Crossing road. Eventually the road forks. One option climbs into the Sierras and the other drops into a river canyon. The Tyler-Foote road is the descending option. Joyfully this is also where the road turns back into dirt. This gold-rush era road has some parts blasted out of rock cliffs and others are supported by hand built rock walls. Also the canyon is very steep here, providing amazing “straight-down” views of the Middle Yuba River. At times it seemed you could toss a rock into the river which was a thousand feet below.
The second Yuba: Although rarely steep, this was a fun descent, ending at the bridge which crosses the Middle Yuba River. I stopped here for a hot lunch and water filtering. It turns out I can filter water while my water boils for soup and tea. So although I had a hot lunch, barely any time was “wasted”. ( This is a place so wild,so pretty and so remote that you could relax all day and not have any time “wasted”).
The road continues and climbs up the next ridge. Although not steep, it is a long climb with many many false finishes. About a mile from the top I had the classic “you’re almost there” comment from a family sight seeing from a truck. “Almost there” in a truck is entirely different from “almost there” on a bike. When I heard those words, I knew I needed to buckle down for more climbing.
My plan was to follow the road to its terminus at the “town” of Alleghany, but along the way I encountered a Forest Service sign showing an alternate route. Reluctantly I left the main route and followed a muddy steep logging road over towards my next destination, the “town” of Forest City. I rejoined the pavement for a few miles until I reached Forest City. This old mining and timber town still has many cabins and building on its main street. It also has a nice trail rolling right out of town. Also I saw a new trail under construction right nearby. Unfortunately the area was still snowbound, so no trails were taken. After a short break I headed onward and happily I was back dirt.
The third Yuba: The historic Mountain House Road rolls and then endlessly drops down to the North Yuba River at the “town” of Goodyears Bar. Here I picked up the North Yuba Trail and followed it upstream to Downieville. This newly constructed segment of the trail is a jewel. It begins with a climb up above the river and rolls and flows through the forest. All too soon it descends down into town (No quotes here…Downieville has stores, gas and pizza!).
Although I had packed food, it was dinner time and there is a pizzaria in town. So I had a (not so) small pizza and a big beer (or two). When my pie arrived I automatically thought of how I would transport my left-overs. I needn’t have bothered. It all went down and I barely felt full. This was good since I then headed out of town and up along the Downieville river. This part had a few steep walking sections and ever deepening creek crossings. The sun had set and dark was falling when me and my newly wet feet finally reached a riverside campsite I liked. At one creek crossing I dropped my bike into the creek. This is one reason I pack my sleeping bag into a waterproof bag
After a hot cup of tea and a few sips of whiskey I fell asleep to the roar of the river and songs of Bob Dylan.
I slept hard and deep.
I wasn’t on my bike until 7am the next morning. The route back to town was steep and muddy. This vindicated my walking sections the previous night. I retraced my tracks back to Forest City and rode right on through.
It was here I had surly encounter with a guy. As I left town a car stopped and reversed to where I was. So I stopped.
Them:“Hey”
Me:“Hey”
Them :“uh…hey”
Me: “you lost?”
Them”uh…are you lost?”
Me:”no…just riding along..”
Our communication didn’t improve much from there. My next planned stop was going to be lunch and they were holding me up. I tried my best, but I was annoyed. In the end it turns out that Forest City was having a trail building (first dig snow then dig dirt?) day and he thought I was trying to find the event. I suppose I had eaten my patience on the last climb, because I certainly had none left. My attitude left room for improvement.
Still curious about my original route I sidetracked to the town of Alleghany. This still active gold mining “town” is the true terminus of yesterdays historic Tyler-Foote road. I located the road and descended a bit until I found a waterfall where I could get water and make a hot lunch.
Back on the bike I discovered this was definitely a longer route than yesterdays. Again I felt vindicated. I followed the road down to the Middle Yuba and then back up to the ridge.
Upon rejoining the pavement my plan was to sidetrack to the historic townsite of Bloomfield and then descend Missouri bar trail to the South Yuba Trail. Those 8 miles of trail are truly wonderful. But I was out of time, a consequence of my late start. So just a short hop from the trailhead, I turned away and dropped down Backbone road and Bloomfield road to the South Yuba River. Along the way I finished my last morsels of food. It was a fun, fast and all dirt descent.
I re-crossed the South Yuba at Edwards Crossing and climbed the steep paved road out of the canyon. This section begins with crushingly steep switchbacks which are followed by painfully steep turns and ends with just plain steep climbing. At the top there is access to the fun trails of Round Mountain. Once again a lack of time removed this option from the menu.
The final stretch (15 miles) was all paved. I arrived home only thirty minutes later than I had planned. My wheel had lasted. As put the bike away I found a rear spoke almost entirely loose from its nipple.
Epilogue
Tough Choices:
One fun aspect of exploring new routes is the unpredictability. Regardless of planning, some decisions will need to be made on the spot. I enjoy knowing that I can handle almost any circumstance. Tough decisions can still remain academic.
Upon returning home I discovered I actually didn’t have any spare spokes of the proper length. If I had returned home the first day, it would have been a total waste of time.
Regrets
I missed out on too much singletrack trail. I sacrificed fun riding for the sake of getting to my “planned” destination. Surely it is better to “seize the day” than to be able to say ”I went all the way I had planned”.
Then again I did go all the way to Downieville.
And back.
P.S. Bikes Belong
Bicycles are a fantastic means of trail travel. Bikes belong in the woods and their impacts can be mitigated. Traveling by bike can remove the car from the equation, and thus bring the environmental impact down below that of foot travel.
I’ve been reading and enjoying everyone’s posts for awhile now and figured it was time to stop lurking and start contributing. This is my summer gear list for an overnight trip. Although the gear and bags are the same no matter where the destination, the bikes are not. If I’m heading up to the blue ridge mountains and riding single track then I’ll take my single speed redline monocog flight 29er with 32×16 gearing. If I’m staying around the hampton roads/eastern shore area, then I’ll take my single speed surly steamroller with 47×17 gearing.
In Autumn 2010 I spent 12 days on a dirt and road ride that encompassed a 260-mile section of the Great Divide and road riding between Silver City NM and Mesa AZ. Cheers! –Mike
This is a trip I took in October. Some details may be intentionally vague…
Day Two on the way to the Buttes
Day One
The day began at 4am with coffee, breakfast and bike tinkering. It was a slow start even by my own standards, I didn’t get rolling until 5:40am. The sky was dark as I rode up to Nevada City and the road was quiet. A perfect time to road ride…no cars. This is definitely one of my favorite times to be out on a bike. As I soft pedaled my way up I noticed an “odd” feel in my drivetrain. I chocked it up some sticky-ness which would loosen up. Wrong. After coasting down into Nevada City I had no drive…literally I would spin and nothing would happen.
I turned around and headed home, thinking dark thoughts. I made it home by 7:30 , ate some cereal and went to bed. At 9:30 I awoke and felt optimistic about my wheel. I had my “domestique” pack up the family for a possible road trip/drop off at Castle Peak (near Donner Summit). Then we headed to the bike shop where they worked some magic on my freehub and sent me on my way…I was back!
An hour later I had regained my lost time and was at Castle Peak thanks to my super domestique/wife, Susan. It was noon, the exact time I would have been there without the wheel mishap. I rode the famed “Hole In The Ground Trail” to Andesite peak and cut over to the XXX trail from there. I spun past the Peter Grub Hut and into the wild. I rode at a fun pace. Fast enough to have fun but easy on the hills, stopping to check the view often. I visited Paradise lake a mile off the XXX trail, a great spot that needs to be renamed paradise lost…since quads have trail-blazed their way there. Still a nice spot. Next I side-tracked to Whiterock Lake, another nice spot. After that the terrain became very rugged and remote. Stellar views were continuous as was the fun trail riding. It was on this section that I had my second wheel issue, an episode I will refer to as the “taquito incident”. The day was full of world class riding and views. I finished with a long fast descent into Jackson meadows, where I camped. Including four miles of bonus trail to the lakes I had covered around thirty miles of this Sierra crest trail.
Kitchen View
Day Two
Day two began at Jackson Meadows. A raspy voice had turned into a cough as I was now fighting a cold. I was on my bike by eight and minutes later I was riding remote trail along the Sierra crest. I would not see anyone on the trail all day long. The trail here was rugged and overgrown in parts. I had trouble riding because the views were so nice. Both the breath taking vistas and the eye popping rocky lush forest demanded inspection, often. After descending (seemingly forever) into the Wild Plum areas I had the “climb from hell” up the Sierra Buttes. It began as steep switchbacks on rugged trail and evolved into a long skinny pile of rocks. Miles long. I hiked a lot and rode very little. The trail scales the face of the Buttes and wraps around in such a way that I thought I had peaked several times, only to be crushed with the sight of more. Out of water and energy I reached the top and found a spring which was barely flowing. I love water filters! I sat and recovered for a while there. Out of the wind it was warm and nice. This is one section of trail I will avoid next time.
Again riding I followed the Sierra crest past packer saddle where I saw some MTB bikers getting dropped off. This is the start of the “Downiville Downhill”. They probably didn’t realize I was doing the same sport as them. But gear aside it is MTB riding that I was doing. I simply brought stuff to sleep in. The day ended with a goodbye to the XCX and a technical descent into the Lakes Basin….specifically Silver lake. This riding made the PXX trail look tame. I lowered my seat and loved it. I camped next to the lake with plenty of daylight to spare. I hate to waste daylight (by not using it to ride) but this was the perfect spot. I had enjoyed about thirty miles of the XXT.
Day Three
The day began with a stillness and quiet that cannot be easily found. The wind did not blow, birds did not chirp and silence reigned. After drying out in the sun I got rolling by 9am. My cough was a bit worse but not bad.
It was dessert for breakfast. I was atop miles of sweet technical single track and I hadn’t even broken a sweat. An hour later I was back to reality and roads. The next four hours were spent on logging roads taking me back to Jackson Meadows. On this section I saw lots of fresh huge bear scat making me feel foolish for not doing a bear hang with my food the night before. The first night I had used a storage box at the campground. Although the ease of riding was nice I got thirsty and hungry due to some poor logistical planning. At Jackson Meadows I had yet another little break and then set off determinedly to Sawmill Lake and beyond. At Sawmill I visited Mona and was taken by what a nice grave we had made her (Mona was a dog). Two years had taken no toll, I added a few rocks per Jewish tradition and moved on. Some campers watched quizzically. The climb to Grouse Ridge begins by crossing the dam. My first time here I had water flowing over my feet as I carried my bike across. This day I walked on the lakebed. After that it is hike-a-bike and tree hopping for over a mile of climbing. Not so fun but necessary. Then there is riding again and less-walking. Overall it is a grunt to go six miles up the ridge to the look out, yet it still manages to be a fun time.(At this time I also finally had phone contact with Susan, who had expected daily calls. Cell phones are false security, not a thing to rely on in any way.) I arrived at the peak just at sunset and had a beautiful finish to the day. Unfortunately I arrived at the same time as a cloud. The very peak was in a cloud, so I retreated to the campground below for my final dinner. I was down to one cup of granola, one Cliff Bar and one small bag of trail mix. Although I had enough food due to rationing, it was close and feeling hungry as I had, was undesirable. I figure I rode total of fifty miles this day but some was grueling and some was not. One tough trail mile equals five dirt road miles which equals ten paved miles…or something like that.
Silent Dawn...in a good way (Silver Lake in the Lakes Basin Area)
Day Four
Yet again the day started with amazing downhill singletrack, this time the Grouse Ridge Trail, which is rather wild and unused. Too quickly I connected with the Blue Lake trail and then onto dirt and even a mile of asphalt. At Fuller Lake I started the Pioneer Trail at its uphill terminus. From there I was 30 or so miles of single track to Nevada City where it starts. Although it is a net loss of elevation the trail rolls quite a bit and has one bona-fide climb out of Bear Valley. Before descending the final miles of Miners Trail to town, I stopped at the Harmony Ridge Market for a tri-tip sandwich and a big Budlight. Then with a full belly, I cruised the final miles home.
The view back at the Buttes
The Taquito Incident
A few hours into the first day I was descending through a lush forest and hopping fallen logs. As I hopped a small log , my front wheel sunk into a soft spot and the wheel was yanked sideways. As a result I did a slow speed endo and went over the bars, landing on my side in some nice soft dirt. When I picked the bike up I noticed the wheel was bent into a U shape and was rubbing the sides of the fork when spun. After an anguished primal scream I analyzed the wheel. I scrutinized the bend and made some mental calculations. I determined the exact torque and vector needed to repair the wheel. Then I carefully and scientifically held the wheel above my head and WHAM WHAM WHAM smacked it on the ground three times. Viola it was nearly perfect. No tools needed. The wheel was true again and stayed true for the rest of the trip.
My set-up plus or minus a few things:
One really good gear
My bike had one gear. This is partly because I love singlespeeding and partly because it is has advantages on this sort of trip. For one thing it makes you constantly change your type of exertion. Sometimes you hammer, other times you spin, the variation is good. I did walk a lot but rarely was it due to a lack of gears. Most sections I walked would have been walked regardless of how many gears I had. The other advantage is that there is no derailure to snap off. I can ride through rocky gaps, loose branches and sticks with near impunity. On the PCT there were many, many places like this.
My Gear List
Bike: Vassago Jaberwocky 29er
Tools: multi-tool, mini-pump, flat kit, tire boot, two tubes.
Bags: Carousel Designs handle bar bag, seat bag and frame pack, Camelpack Mule NV.
Camp gear: Northface down bag (20)REI minimalist bivvy, big Agnes pad
Reflecting back I brought too little lunch food and too heavy of dinner food for one of the nights. I loved the water filter even though it is kinda heavy. I could get water from any source and it looked and tasted good. My stove worked great but I brought too little fuel for enjoying hot drinks, next time I’ll bring way more fuel.
Disclaimer
While the XXX is designated as a hiking trail it is also very appropriate for expert MTB riding. The gradients are mostly gentle and large obstacles are rare. I saw only 3 hikers on the 60 miles of trail I rode. We had pleasant interactions. The trail had well built areas and poorly built areas. Bikes are not damaging it. Poor design is the culprit.
It’s pretty simple. Redline Monocog Flight 29er chromoly frame, which has outlasted multiple friends’ carbon wonder-bikes. Fox F29RLC fork, Shimano XTR/XT/Blackspire 1×9 drivetrain, Paul chainguide with some custom grinder work to make the fit perfect. XT brakes, Ritchey/WTB/Pro/ESI cockpit. I built the DT Swiss/WTB wheelset, and currently am using the WTB Bronson up front and the Wolverine in the rear, set up tubeless. If these continue to work as well as they have been I won’t even switch over to the 29er TCS tires when they are released! Obviously this is a single-speed frame, this is my first year back on gears after three spent riding SS… I have the sliders positioned so that chain tension is perfect in the 2ot, and I have two QuickLinks in the chain so that I can take out a section and create a SS in just a minute if disaster strikes the shifty bits. Overall I love the ride this bike offers, even though the frame is sub-$500. Good on ya, Redline! If I “upgrade”, it will only be to a custom-built steel or ti frame, likely with the same geometry as my Monocog. So far, no reason to do so…
Loaded with homemade bags (don’t laugh):
For my back I’m using Osprey’s Raptor 18, from their Hydraulics lineup. So far I love it, although I had to trim and sew all the straps (they allowed for much larger folks than I when they designed this thing). All three bags on my bike are handmade using an old cantankerous Japanese sewing machine I got at a yard sale. My friend Doom (Republic of Doom fame, he makes sweet stuff, check it out) hooked me up with some extra Gore-Tex, and I used it for all the bags. Lightweight and waterproof. The frame bag, muddy from yesterday’s ride on the Hermosa Creek Trail:
I salvaged all the velcro/strappy bits from various other bags/storage contraptions. It’s got an inner mesh pocket, the whole thing is seam sealed, and I wish I’d made it a little wider. The handlebar bag:
Dual-side roll-down closures a-la CDW, compression straps, and I also wish I’d made this one a little wider. The saddle bag, otherwise known as “what the hell is that?”:
Looks funny but works pretty well. It’s solid. Building on pro_out’s idea posted last year sometime, I decided on half rack/half bag, mostly because a typical saddle bag design is A) too complicated for me to sew with my ancient machine and B) I was trying to fit something almost 20″ long in there, not possible in most saddlebags. I have a Henry Shires TarpTent Moment, and while it’s light, it packs long (the sleeping bag and pad are also in there). I ended up using the bottom half of a very old Specialized FSR swingarm, bolted onto an Axiom Trekker seatpost clamp, which replaces the blue clamp seen in the first photo when the saddlebag is in use. It is tolerably light, very stiff laterally, and pivots up and down easily so the bag can come out. Most the straps in the photo stay with the rack, the bag is just a bag with a roll-top closure that interfaces with the strap system. The bag is seam-sealed. The rear-most strap to the saddle rails has a metal-buckle redundant strap so that all that stress isn’t handled solely by the plastic buckle. The whole thing is way lighter than it looks.
Finally, the gear:
From roughly top left onward: Mountain Hardwear Ultralamina 32* bag, Henry Shires TarpTent Moment with 3/4 length Reflectix insulation (cheap at the hardware store!) for a pad, glasses, gloves, helmet, bottles, Pearl Izumi X-Alp Pro shoes, latrine shovel/TP/sanitizer, mesh bag for extra clothes. Warm/waterproof Columbia gloves I got on sale for colder trips, cheap rain pants with all the exterior pockets cut out, a free North Face Gore-Tex jacket with all the interior pockets cut out, polypro longsleeve, tights for sleeping in colder weather. Garmin Oregon 550t GPS unit (gift, I sure as hell couldn’t afford that), extra lithium batteries, maps if needed (in this case CT databook), headlamp/taillight, bike first aid (assorted bolts, small parts, straps, tape, Kevlar spoke, etc.), human first aid (whatever my girlfriend said I should take – I’m a mechanic, not a doctor), small ratchet/bit set with spoke wrench, chain tool, a bit of Squirt lube in a different bottle, minipump, two tubes, a big knife (I’m from the midwest, sorry), and MSR water filter.
Usually I’ll wear a short sleeve polypro of some sort, Dickies shorts or cutoff capris (no chamois for me, not comfy), and wool socks.
Major thing missing is a light system. Still researching that. AyUp was gung-ho to sponsor our team (Bandwagon), but then flaked out and we never heard from them again despite repeated attempts at contact. Sure not buying one of those, I can only imagine customer service must be flaky as well, too expensive anyway. Maybe something relatively inexpensive, light, and medium-powered like the Cygolite MityCross 400… should get me through and I can carry extra batteries when they only weigh 140g.
Overall I have no solid idea of what this setup weighs. I don’t own a scale. It seems reasonable… under 15-17lbs with food and water? Not a racer’s setup, but I’m more a fan of being out there than anything.
Think that’s it. Thanks for reading. Now go outside!
As requested. Detail photos of my handlebar and GPS stem mount (I’ve added Syntace C2 bars since the original photo, but the GPS mount still works fine). Basically buy a standard Garmin GPS handlebar mount, drive the pivot pin out with an awl, hacksaw the extra bits you don’t need, curve the bottom with a file (optional), drill two holes across it and zip tie it to the stem on a piece of thick rubber. The only thing I would do different might be to not hacksaw as much of the rear portion down, so the GPS sits a little higher closer to the top tube (flatter visually). Just a preference making it slightly easier to see.
Bikepacking gear list updated 5/14/11
Bike:
2004 Moots Mooto-X YBB 29er , Bontrager TLR 2.5 tubeless tires, StansZTR rims and sealant with DT 350 hubs custom built wheelset from Mike Curiak (Lacemine29.com), Shimano XT front and rear derailleur/shifter, XTR cranks, Speedplay Frog pedals, Chris King headset, Easton Monkey Light bars, Rock Shox Reba front shock, Ergon grips, Easton Elite stem and set back seat post, Avid BB7 front and rear disc brakes, Carousel Design Works handlebar bag (md) & seat bag (md) with Fuel pod, Revelate top tube (Tangle) pack. Leashed Garmin eTrex Vista HCX GPS w/4GB micro SD card (homemade stem mount) with Mapsource Street and Topographic software with anticipated route (or race course) pre-waypointed, two Camelback water bottles (and or 100 oz bladder), paper maps, see-thru map sleeve for bars, 29er tube and tubeless tire repair kit*, mini pump*
Bod (some choices and deletions made considering forecast):
Wool short sleeve jersey (Ibex)
Synthetic short sleeve jersey (for over 90 degrees)
Wool undershirt (Smartwool)
Long sleeve wool jersey (Ibex) *
Pearl Izumi shorts (2 pair)
Pearl Izumi tights
Pearl Izumi arm warmers
Pearl Izumi knee warmer
Smartwool cycling socks (2 pair) *
Turtle Fur wool beanie
Buff
Marmot Precip jacket (the super lightweight adventure race one not made any longer)
Smartwool Liner gloves *
Smartwool Microweight top and bottom long underwear for sleeping
Marmot Driclime windshirt
Spare eye glasses
Osprey Talon 22 backpack with dry bag inside
Bandanna!
Helmet (with bill?)*
Suunto Baromter/Altimeter watch (Vector)
Cash, credit card(s), ID.
Spot Locator (if needed for race)
Cell phone (possibly calling card)
Camp:
Big Agnes Fly Creek UL1 tent with BA footprint
Mountain Hardwear Phantom +35 down bag in Sea to Summit compression dry sack
Big Agnes Air Core sleeping pad
Snow Peak mini solo titanium cookset
Esbit Stove with pack of fuel tabs and LIGHTER*
Titanium Spork *
LED Headlamp w/fresh batteries (spares)
Reversable stuff sack (fleece inside) for ‘pillow’
Water filter
TP
Dr Bronners Peppermint soap (can be used as body wash and toothpaste)
Fire making waterproof matches, lighter, etc.
Bike repair/emerg/maint:
Spare derailleur cable (with end cut)
Multi-tool (small)
1 inner tubePatch kit and tire boot
Tire pump
Park chain breaker and small tool kit allens, levers, etc.
Chain lube (waterproof)
Small rollup of duct tape or gaffers tape around pencil
Small first aid kit: ibuprofin, alcohol wipes, bandages, sunscreen
Whistle
Paper & grease pencil with gaffers tape wrap
Wet Ones or baby wipes
Chamois Butter
Assorted nuts and bolts, cleat bolt, spare hanger*, spare brake pad set, zip ties,
Food:
Coffee or equivalent (TBD)*
Freeze dried foods*
Assorted Cliff Bars, etc.
Gorp
Antacids
Scotch?
Bear bag and cord
Non-essentials:
Camera (Canon Elph) point and shoot
Small closed-cell foam sit pad
Addendum
Shakedown ride 12/14/2011
After some unplanned hand surgery which sidelined me for the fall, I finally got a chance to do a shakedown S240 on the new rig. Since the original setup in spring, I’ve changed a few things. Namely, I switched from the Esbit stove to a nice Soto burner w/butane setup and have gone to totally wool garments for my daily ride and apres ride clothes, which need way fewer washings and have some pretty incredible temperature ranges they can handle. The Soto stove boils water in a flash (something the Esbit really only ever just got water hotish), plus the Esbit had a smell that permeated the pots, food and any thing it was packed remotely near with a sort of dead fish smell. I loved the weight and simplicity of the little German stove, but the smell was a deal breaker on the fuel tablets. One other thing, my S240 pointed out was the Big Agnes Air Core inflatable sleep pad transfers a lot more cold air from the ground than I’d ever imagined. Even with the mild temps this past week in the Georgia mountains (high 60’s day 40’s at night) I was still moving around at night in my bag due to cold spots building up under the bag. The Air Core will be wonderful in Spring/Summer/Fall but winter will need something else. The bag was rated to 32f, which I’m fairly certain it can handle, but the Air Core is the culprit here. That will need to be addressed for anything colder than the 40’s at night. I’ve also (since these photos were taken) procured a larger gas tank bag from Revelate Designs for my camera gear. The smaller Carousel is nice, but I found the space lacking for more than a small point and shoot and nothing else. The bigger Revelate will also now play much nicer with my under the top tube Tangle bag which I absolutely love. One of the other observations in a real ride scenario, was the bike had a tendency to always feel front heavy and a bit too sluggish. On Day two I decided to not pack my tent poles in the front bag and strap them onto my Talon pack instead. This helped a lot with the front heavy feel. Anyway, I thought I’d update this shakedown on my personal setup page to make things a bit easier to find for the ongoing exploration and testing. Overall the bike and the gear are amazing and the feeling of being a self contained go anywhere turtle can’t be beat. Now for some photos from the overnight. Cheers.
Forest Service 44 along the Chattahoochee River just north of Helen Georgia. This is the main tributary for Lake Lanier, which attempts to quench the thirst of 5 million Atlantans and their water needs. No small task. Here it’s just a beautiful trout stream.
This is a what southern winter looks like most of the time in north Georgia. Leafless trees open up the challenging terrain and the FS roads can’t be beat. Also very few Atlantans (or Georgians) venture out when the temps drop. On a weekday on this trip I passed two cars total and saw one other (auto) camper despite the relative balmy conditions.
This is the expression one makes when they have ten seconds to run back to their precariously tipping toward the river bike. Ibex wool knickers, Vintage Velo wool jersey and Smartwool socks were all I needed most of the day. I also carried a knee high tall pair of Smartwool snowboard socks for lower leg warmth, which worked really well for the chilly next morning ride down the mountain.
High camp. although there were planty of river level camps 1000′ feet below (with water) I’d decided my plan was to camp high up. Banking on the theory that cold air sinks and warm air rises. High camp was warm enough, but I’d choose something with a spring nearby next time as I’d totally forgotten to filter a bladder full of water as I ascended to the higher (drier) campsite . Still, being a solo trip, this was where I’d told my wife I’d be, so I stuck with the original plan for safety sake. Bears are not uncommon in this area. Something I really tried to put out of my mind for the long, LONG night. On a personal note, take a book when the sun goes down at 5:30 and doesn’t rise until 7:30 in mid-December. That’s the downside of winter bikepacking in my opinion. Stargazing is pretty awesome though! BTW that little piece of blue sleeping pad closed-cell foam has been a backpacking/camping companion for 30 years. It has quite literally saved my butt more times than I can count. Knee pad, sit pad, head pad, back pad. Weighs an ounce and is a true friend.
Not exactly the sign you want to see on a trip. This was the FS road I’d be descending on day two. Turned out the Forest Service was just clearing out some tornado downed trees blocking the road and the crew wasn’t even working anyway as it looked like they broke their big dog tractor. Mountain tornados are not uncommon in Georgia and they tear great swathes through the forest when they occur. The dead and down timber needs to be harvested soon afterward, as it only becomes fire hazard later.
End of the road and back into the Germanesque tourist town of Helen Georgia. Nice parking and jumping off point as the tourist town has a sort of fun feeling to it. Bakeries, beer gardens and breakfast cafes operate year round here. Much to my chagrin, no pigtailed freulines were there to greet me and a dirty bike back to town. Overall I’ll give the shakedown an A- with just a few clothing tweaks and one gear upgrade it should be a killer setup and for racing it could be pared down to even less if I went with a bivy (which I have) and minimal sleeping bag or quilt. That setup will be tested soon as well. Very happy camper here with special thanks to Bikepacking.net for all the community tips and cool helpful information.
I bought a fat bike last fall (2010), inspired by many ride reports and epic trips from Alaska. In addition to pure winter use, I also intended to see if it would be a good alternative for multi-day trips during the summer on technical/rocky/rooty trails. As it turned out, the winter was an exceptionally cold and long one, and I really got to do a few very interesting tours with it.
At the same time as I was contemplating the matter, Salsa came out with their first fatbike, the Mukluk. It had almost everything going for it: the design, geometry and price point. My LBS and at the same time the local Salsa importer quickly found out that there was virtually no chance of getting one to Europe before the winter was over, though. I started looking at other alternatives, and the 9:Zero:7 would probably have been my first alternative unless I had started thinking about using an internal gear hub (IGH). Hence, the only (?) alternative left was the Surly Pugsey. My LBS ordered the frameset for me at the end of August and less than three weeks later it arrived. Another month went by sourcing the necessary components, but I still had it built up in good time before the winter. Before the winter arrived in the latter half of November, I had plenty of time to try it on ordinary singletrack. I liked it.
I equipped the Pugsley with a frame bag, light rear and front racks and fork mounted bottle cages. On the racks I used ordinary light drysacks. In cold weather I used a pair of cheap pogies (made for snowmobile use), which worked very well. The Pugsley was ready for bikepacking and proved its worth already in the end of November in real winter conditions. The winter was cold with lots of snow, making riding anything other than a fatbike very difficult.
Riding the very narrow and soft trails during the winter was often quite challenging, but still possible. The bike worked well and the Alfine 8 IGH was a good choice in the conditions. Packing the bike with more gear worked well, and there should be no problem getting the gear for a week to fit without having to resort to a backpack.
At the end of March, the crust was just strong enough in open places to ride on with fat tires. This opened up the possibility to ride on bogs that usually are unaccessible and I had two really nice overnighters in these conditions.
The bike itself is a lot heavier than an ordinary bike, partly due to the fat tires and rims and partly due to the IGH. The weight can be felt in some circumstances, as can the rolling resistance of the wide tires on hard surfaces, but generally the bike moves a lot easier than would appear from the looks of it. Despite the heavy bike, I still strive to use lightweight gear with it. A little more about the outdoor gear can be found in the post about my Salsa Fargo.
I have plans to put it through a real test this summer as well. A fatbike is not only for snow!
I did an overnighter up in the mountains near Santa Fe, NM. The trails there have a lot of elevation change, which makes going up tough-but coming down really fun.
Most of my riding followed Tesuque Creek up from town towards the ski area. This is not the most unvisited area. I saw many hikers, other riders, but not many campers.
The trails are part of the Santa Fe National Forest system, which includes the Pecos Wilderness. The wilderness encompasses most of the eastern half of the forest, leaving some good trails to ride on the west side near town. I took my big bike, because coming down is so much more fun with lots of suspension, big brakes, and big tires.
Dropping my overnight gear and stashing it at my campsite made it easier to push higher up.
The way up was easier on the access roads. They aren’t the most exciting, but they take less hiking.
I did run into some snow pack on the section of Windsor trail just below the ski area. There were also a few downed trees. This was kind of a drag.
But it was all worth it on the way down. This is why I like to bring the big bike.
Another plus of this area is the reliable water. A lot of New Mexico mountain trail systems are dry.
If you’re into tough climbs, and are ok with seeing lots of other trail users, I’d recommend the area.
Before AZT I scoped every bike set up I could find. My set up ended up pretty tight and worked well for me at AZT 300 so as payback and thanks to everyone who shared theirs, here is mine.
I faced some pretty big challenges with carrying capacity. My stats are 104 lbs and 5’2″. I do prefer 29ers but the wheels are so up in the frame/fork there is no room for a seat or bar bag without tire buzz. I chose a full suspension 26er bike for AZT. If I was a few inches taller it would have been a 29 for sure! Brian Blair at The Path bike shop helped me with the perfect set up and I had on board a 3 x 10 drive train with a 22×36 gear. Putting that on 26 inch wheels made for a super-duper granny gear which was key for me as it allowed me to keep riding up hills in the heat very slowly but without boiling the top off my head. It was hot out there BTW, really hot.
This is when I was clean before the start.
Thanks to Caroline Soong for the photo
Even with my 26″ bike there is limited rear seat to wheel clearance and I could only get a medium sized seat bag in there without rear tire buzz when the suspension compressed.
The main triangle is too small for a frame bag that is useful. I did have one, it was small and awkward shaped and I ditched it. In my main triangle I carried one 29 oz water bottle and two slime tubes tightly wrapped in Tyvek to protect them from spikey desert things. Held on of course by Gorilla Tape.
Fluids: One 29 oz water bottle zip tied and velcroed to each fork leg, one 29 oz bottle in my main triangle, 100 oz bladder in my pack and space in my pack to pick up a big bottle of soda at the gas stations.
Handlebar bag: Sleeping bag, neoair pad, bivy, emergency blanket, ear plugs, Teko socks. Sleeping comfy was on the plan!
Seat bag: Spare chammy, another pair of spare socks (I thought the heat/sweat would swell/damage feet so wanted several sock options), underwear, running shorts, waterproof pants, Craft Zero long sleeve, puffy jacket, thermal knee warmers, thermal arm warmers, bra, warm gloves, buff, thermal hat, cycling jersey (which I never used).
Front top tube bag: Ride food, lots of it.
Seatpost bag: Tools (pliers, multi tool, levers, pump). Spares (brake pads, der hangar, cleat bolts, zip ties, tire plugs, patches and glue, quick link, tire boots, gorilla tape, lube, rag). I didn’t have a spare cable and near the end my rear der cable was frayed and hanging on by only a few threads. I stopped shifting it at about mile 200 to save it. Batteries for GPS and for lights. More ride food. I could cram a lot in this little bag!
Lights: http://www.ayup-lights.com/ on head and bars with a total of 42 hours of runtime battery juice on board. No skimping here!! I was ready to be nocturnal.
Backpack: 100 oz bladder, more food, sometimes a big bottle of coke, a big tube SPF 100+ sunscreen I used liberally, chammy cream, lip stuff, wispa toothbrush, toilet paper, tampons (yes my friends these were needed the whole time…), trash bag, printed maps of the course, moleskin, wipes, 3M tape, water filter, chlorine dioxide tablets, matches, waterproof jacket.
This is my first attempt at a bikepacking setup. A friend and I are planning an easy overnight for this Sunday, and I’m curious to see how my gear works out so I can make adjustments for longer journeys in the near future. The one change I might make before this weekend is to add a rear rack that attaches to the seatpost, I’ve had a real hard time getting that dry bag cinched down well enough. It’s not heavy just awkward. So from front to rear, I’m carrying: a foam pad with a tarp and stakes rolled up in it, a Spot on top of that, two bottles, frame bag with stove/fuel/tools/camera, dry bag with sleeping bag/camp pillow/lightweight cookset/emergency bivy. I’ll also be carrying a large Wingnut pack with 100 oz. bladder/most of my food/fleece bottoms and top for camp/light down jacket/hat and gloves. Any tips or comments would be greatly appreciated.
This is my setup for bikepacking and for this years’ TD.
Frame is Kinesis chromoly steel – 21″
Bags are homemade by me. Demensions Polyant, 500d and 1000d Cordura, and water resistant YKK zippers.
* Frame bag is 3 compartment – top drive side holds 4L bladder, bottom drive is storage, non-drive is for flat items like maps and has small pockets for batteries and such.
*Top Tube bags hold tools, tubes, lube, food, sunblock, etc.
*Seat bag holds compressibles like sleeping quilt, clothes, socks, and down jacket.
*Bar bag holds sleep and rain gear.
Fred Bars for the aero bars
Delorme PN series GPS
Sram XO and X9 mix
FSA Team cranks
WTB Nano tires for dirt roads and the like (Usually Crossmax for other terrain)
No Tubes Arch 29er rims
Rear hub Hope Pro II
Front hub Shimano Dynamo
Ergon grips
Selle Anatomica saddle (best I’ve found for my rear end thus far)
The clouds saved us, as we stood next to Lee Blackwell’s car, unloading bikes and making final bikepacking preparations. The temperature was pushing 100 degrees in Florence, AZ. This is usually the place to go bikepacking in December. A place where sunshine is abundant and winter can be ignored. On this April day, powerful high pressure had brought record heat to Arizona, but we threw our legs over our bikes anyway.
(After all my whining about the cold and rain in last weekend’s True GRIT race in St. George, I couldn’t hardly bail from a trip due to heat. What a complete reversal from shivering hypothermia to stifling heat. But, oh, the clouds.)
We crossed the Florence Casa Grande canal on a small catwalk, pedaling east to the diversion dam construction site. The construction meant no bicycle access, so one goal of the trip was to scout a possible route for the Arizona Trail Race, less than two weeks away. Two minutes in I was reaching for water, my mouth already dry. Not a good sign. It’s too early in the year for heat like this.
We found ourselves face to face with a barb wire fence. But so had ATV riders before us. They had blazed a path around the construction, one that sort of worked and sort of didn’t.
We wandered around the desert, pushed bikes up stupid steep hills, and finally punched through to familiar ground. Dark caverns of salt cedars and piney trees along the south bank of the Gila River further shielded us from the sun as we made our way toward the promised land: Area 52.
We are getting closer to ‘the place’ now, and excitement is building. The sun is scorching us, but I’m completely ignoring it.
My mind is instead focused on the rock, and transfixed by this strange world, so familiar and so foreign.
If anything, the unnatural heat adds to the otherworldly feel, the uniqueness of the place and especially the moment.
The pedaling is hard, the route and lines never certain, just the way mountain biking is meant to be.
Through the white marbles, to sherbet land, up the windswept ridgeline, around the anvil, the keyhole; it’s amazing there exists a route through all of it.
three amigos
Shadows are growing quickly, our core temperatures are rising even faster.
photo by Chad Brown
Can’t resist a few side lines.
photo by Chad Brown
Deep in the waterfall canyon, we finally reach shade, but the rock radiates heat in all directions. We exit the mesa via a small chute, feet and tires sliding, hopefully not simultaneously.
A route error, or at least lapse in judgment has us climbing the difficult-to-crack slopes of the east mesa. It’s beautiful, but we aren’t riding much.
While exploring a spurious shelf, above the wash we should have followed out to Area 52’s exit, I hear a girlish scream. The first one is real, the next twenty are classic Chad overstatement. A healthy rattlesnake is absorbing the last rays of ninety degree heat, perched on the edge of the cliff and right in Chad’s line.
Chad leads the east mesa descent and together we absolutely nail it, half regretting several of the moves we find ourselves committed to. Only the last layer requires a dismount and forceful drop against palo verde and creosote.
Even as the sun drops to the horizon, the clouds are a blessing. They are blocking the sun, and leading to…
It was as if someone exploded a nuke behind South Butte. The sky is afire.
I contemplate which is more brilliant, the sunset behind my shoulder, or the Area 52 riding and the whole experience, of being here, now. It’s not possible to know. I’m just happy to be alive, to be here, now.
We climb a broken two track, along sweeping ridgelines, with fading views of the gnarled terrain that is Martinez and Battle Axe, across the river. Progress is slow, having to turn and watch the sky’s fiery progression. It’s cooler, but the coming of night is deceptive. A relief, for certain, but occasionally my head still feels hot, like something is wrong. It’s 90 degrees out.
chad brown is no longer in show room condition, and lee is looking pretty wild eyed as well
“It’s so freaking hot,” says Chad, having already stripped off his helmet and jersey. Funny that the first time any of us uttered a complaint against the heat was a while after sunset. The darkness was signaling our winter minds that it should now be cool, even though it’s not. A little break was all we needed to drop the core temperature a few degrees.
Subway sandwiches are pulled out and devoured, treats passed around and laughter is increasing at a rate directly proportional to the increasing ribbing and insults. We flip on the lights and continue the ride.
Lee and Chad are now entities defined only by the halo of their lights, ducking and diving in and out of washes up ahead. When bikepacking you can truly ride into the night, with no known destination or duration. The temperatures are at last pleasant, and I’m pinching myself that I get to be out here, experiencing the video-game-like thrills of pedaling a bike in the dark, on a perfect night. I’m wondering why we don’t do this more often. I’m remembering that to get here, now, a lot had to come before. A lot in life, and some hot hours on the bike too. Humans are such fragile creatures when it comes to temperature that it’s either nice during the day or nice at night, but very rarely both. Suffer through the bad, enjoy the rest.
We’ve blown through a few gallons of water between the three of us, so our thoughts turn to resupply. They also turn to ways to cut our intended route short. We don’t much like our chances against 14 hours of sunlight the next day.
Lee and I listen patiently to Chad’s semi-heatstroke induced ravings about water sources he knows about ahead on the trail, but don’t ever really understand what he’s talking about. We pedal until we reach a dry cattle trough, but we can’t figure out how to get water out of it. We make the wise call to throw out the sleeping bags for the night. It’s 9pm.
The night is warm, and the breeze is welcome because it’s just a hair too warm to be inside a 1 pound sleeping bag. I never even zip up my bag all night, and sleep well. Chad is rousing around at some point in the night, saying a critter is moving around and pulling at his pack. I’m so out of it that I only mumble “critter? no, no critters” and drift back to sleep.
I’m wide awake at first light, watching the layered tapestry that I only need to open my eyes to see. Pre-sunrise color is gracing parts of the patchwork, and the clouds are moving fast. Or maybe my mind is moving slow. It’s hard not to smile periodically, waking up where I am, and knowing that good riding is in store just minutes away.
Daylight reveals a second cattle trough, full of water and practically right under our noses. After filtering a little, Chad hits the right combination of switches and water comes blasting out of the spigot.
Now, let’s go find some singletrack.
Dropping towards Ripsey’s ‘big hill’ I notice I’ve got rhythm and the feel of the bike that usually takes days to find.
I brought my “Behemoth”, which weighs 33 pounds unloaded. But the weight has disappeared and the ability to lean and carve the bike is most welcome. I love the way the bike handles loaded.
Chad demonstrates the proper technique for turning a loaded bike 180 degrees, on a dime.
He continues on, cleaning the south side switchback series, which I’ve never seen done before. The exclamations and giggles of disbelief only get louder with each turn he clears.
I’ve never ridden Ripsey with such speed before. Never really been here with fresh legs either.
For whatever reason, I’m bordering on the edge of hyper, super excited just to be out on the bike, and especially in a place like this.
photo by Lee Blackwell
Pedaling in earnest, deliberate and exaggerated movements, leaning hard, carrying momentum, swooping, careful and quick reading of the trail. Oh yeah!
Citrus refreshment — combined with Trader Joe’s dark chocolate courtesy of Chad, the perfect ridgeline treat and the best food I ate all trip.
The views are big on Ripsey’s ridge, but there are interesting things nearby too.
Gila Monster!
Ripsey’s descent is a megaton switchback attack,
full of many twists and surprises.
There’s new trail at the end of Ripsey. It’s always a treat to sample new Arizona Trail, and this section was very well done.
My legs are yelling at me, “GO!”, when we turn to climb Florence Kelvin Highway. I listen, and it feels good. 1400 feet of climbing disappear beneath my wheels.
The three of us snake along yet another ridgeline, with killer views and even better riding.
We rally each other, surge up hills, coast the flats, float off ledges. It sure doesn’t feel like we are bikepacking, this is just mountain biking, and really good mountain biking at that. I’m in awe that a two track can be this much fun.
Our tires roll from sand to rock, pedaling up the standard ramp to Area 52. This will be a short tour this time, with the day getting warm and the mesa blocking our cooling headwind.
The heat almost makes us regret trying to clean the “toilet tube” climb, especially when we fail at it. But there’s more rock above, and even a couple drops to try to stay upright on in the ripping wind. A most welcome return to 52, however brief it may be.
We pedal once again along the river’s bank, when Chad has a genius idea — cool off by soaking in the river. The stop took the sting out of the return ride through the ATV path and the canal’s banality.
I snapped my fork’s spring in two on one of the last ledgey descents off Area 52. Luckily Chad had a shock pump of sorts, so I was able to air up the other side such that more than 2 inches of stanchion was showing.
Unfortunately we could not find a proper connection on the north side of the canal, forcing even more out-of-the-way miles for a possible AZTR/AZT 300 route. The construction on the dam is quite extensive, and it seems access even after construction is seriously in doubt. We found a route, but it’s not the greatest. The race will instead feature Ripsey and head to the north side of the river, a route that is pretty exciting in itself.
We wrapped up the trip with Gyros/greek salad/fries and beers(Chad/Lee) in Florence. Couldn’t have asked for a better weekend, or a better crew to spend it with. Thanks guys.
I have had the inkling to tackle the Bicentennial National Trail for some time now, recently I gave it a bit of a nudge. I only managed to do a small section due to some responsibilities on the home/shop front that beckoned my return. I did however, have a great experience and am keener than ever to go back and pedal the remainder.
blank sign pointing over a clif, get it?
Let me explain a little about the BNT. Firstly, it is in Australia and it is long and pretty much set up for horse riding. In Australia’s Bicentennial year 1988, the trail opened but due to it’s shear length is still being refined today. The trail was an initiative of R M Williams, who is quite well known in the horse and outback world where in Aus. It begins in the very South East of the Continent and meanders through ranges to the very North East. 5133km Check out www.nationaltrail.com.au for more info.
The trail is for walkers, horses and bicycles. Most of the trail can be travelled by motor vehicles but the intent of the trail in entirety is for non motorised transport. Some of the tracks I rode on definitely could not be driven on. I have done a little touring and bikepacking over the years and my approach with the BNT was to go lightweight. The country is rugged and in some cases remote, so I wanted to be relatively self sufficient. My plan was to have food enough for 4 days and carry 5 litres of water. I carried a sleeping bag and bivvy bag and a rain jacket. Of course I had basic tools and some spares too. I encountered some pretty extreme weather, so I was thankful of the huts that are strewn throughout the highcountry and provide great refuge for the lightweight bikepacker. Theses huts vary in condition depending on their location and heritage. Many are burnt in bushfires over the years but generally are rebuilt.
The trail’s highest point is 1700m above sea level, so doesn’t have the altitude of some trails such as the GDR. From the photos you can see that it is quite high in places, above the tree line, where the views are spectacular and the air is thin and fresh. For the first 6 days I rode with a friend Trent Lowe (an accomplished road and mtb rider). He was great company and we shared experiences throughout the Victorian high country, swimming in the rivers and
refuge on the Lazarini spur
staying in the mountain huts. We saw some of the iconic Australian flora and fauna including wedge-tailed eagles, black cockatoos, wild dogs, snakes, lizards, brumbies, deer and of course kangaroos and wallabies go without saying. (horses and deer are not native to Australia). Both Trent and I are fairly well travelled, here in Australia and abroad but we loved and appreciated being out in ‘our’ country without the distractions of modern living. Trees were aplenty but we would still occasionally slow and point out wondrous shapes, textures or forms to each other. The extreme heat and unusual rain (remnants on a tropical cyclone) made us revel in the simplicity of seeking shelter, food and water on a daily basis.
remaining roof of nameless hut
Trent’s plan was to ride to Omeo and meet with his father and do some hiking. Trent and I covered about 520kms and 10,500 m elevation change in those 6 days. Quite exhausting. I then continued solo, with the aim of covering as much country as I could in the next 20 or so days. Some more rain came from the skies and the little rivers became bigger. One night I stopped in to the luxury accommodation of the remaining roof of a nameless hut (see pic). The next day I woke to be almost enveloped by the Limestone creek that I was camping adjacent to. This proved somewhat challenging for the rest of the day as I had to cross that creek about 5 times on my path to the Victoria-NSW border which is the Murray River.
Of course the intent of any traveling is to move in some way or form and when confronted with a raging torrent of water the focus is to cross that body of water. Single mindedly I did this not without, however, taking a few little risks. At one point I was balanced on a slippery log simultaneously clinging to the log with my legs and grapling the rear wheel of my bike with my hand. I had lost balance whilst traversing the river on a fallen tree and the bike had gone under. Desperately I was trying to retrieve my ride, which was now completely submerged except for the part of the wheel in my hand. I ‘calmly’ assessed the situation and concluded that the bike had been pulled under another submerged tree. With all my effort, the bike would not be pulled toward me. I realized that the bike was only going one way, downstream. The flow of the water was deafening. I reached into the water on the other side of the submerged tree and grabbed the frame with my right hand. At this point I was at full stretch (which is quite a bit if you know me) still clinging around the tree with my thighs and my head was partly in the water, tilted so I could breathe. I then let go of the rear wheel with my left hand and let the bike go under. Low and behold the bike surfaced and I dragged it to the river bank. Water poured from my frame bag and under seat bag. Luckily I had the forethought to remove the sleeping bag and bivvy bag. I gathered myself, thoughts and belongings and took stock. If something had fallen off the bike it was gone now. I made the decision to go on and safely crossed the Limestone 3 further times, each time wondering if going ahead was the best thing to do. Needless to say I slept well that night after crossing the border and staying in the comfort of the township of Khancoban.
My journey continued north through the state of NSW and then into ACT (Australian Capitol Territory), covering some beautiful scenic countryside and finally mild riding temperatures. Often a day would pass without seeing another person, so when another soul was encountered it was nice to have a few words. I look forward to continuing from Canberra which is where I reached on my 13th day of riding. Maybe this year, maybe next…
Did an overnight trip on this trail south of Cabool, MO. Pretty typical Ozark terrain. Unfortunately there was a fair amount of deadfall on the trail, that slowed me down a fair amount. There are some hike-a-bike sections. Typical of trails in Missouri, they sometimes are built up a steep grade that is not rideable, particularly with a load. This is a good trail for solitude. I encountered a group of equestrians a short distance from the TH, but otherwise had the trail to myself. I suspect it gets light bike traffic at best.
The trail is 22 miles long total, a portion of it also is part of the Ozark Trail. Given the deadfall and some of the hike-a-bike, doing the entire length would be pretty difficult in one day. I treated it as a SB24O. Rode out 10 miles and camped and then back to the TH. If the forest service would get the deadfall cleared, I suspect I could have covered 12 miles or a little more in the same time.
I am relatively new at bikepacking so I have to refine my setup a bit. I probably had 4-5 lbs of stuff I didn’t need for an overnight.
I am a newbie on this site and having just finished making my first custom frame bag (sourced a lot of the info from this forum) so I thought I’d post the results with some further instructions and things I learned during my fight with a sewing machine.
I did the template on poster board as many have suggested. Worked like a charm. Ordered 2 yards of white widow spectra ripstop. In retrospect, 1 yard would have been plenty, but I will use the left overs to make some extra strong gaiters and some rain covers. The fabric is very flexible, waterPROOF and very light. I used polyester upholstery thread for the stitching. It’s amazing. I tried to pull it apart with my hands to no avail. It is, however, really tough on the machine. Go slow with the stitch, otherwise you will get your needle stuck or broken.
First I cut out the panels and then added the zipper.
Cut the opening for the zipper, pinch back the fabric and sew the cut down. I used a zig-zag stitch sized to cover the whole are between the zippers outter stich and the edge of the folded under fabric. Huge pain because this fabric is thick. Not cordura thick, but still…more than a standard sewing machine “likes” to handle.
Notice the pin below? Like i said, the thickness of the fabric meant it wasn’t perfect and i had to do touch ups by hand.
So I modified the bag to include an internal pocket. I made it from a left over mesh “soccer ball bag.” I cut the mesh into a triangle to fit on the inside of the bag, added a strip of elastic to the top and used the excess material from the seems (which you cut last) to sew the pocket in.
The side panels are 2.75 inches.
Next I sewed all the seems. I pined in the Velcro straps between the panels so i could sew it in the seam as well. I had seen some bags done with the Velcro straps on the outside and thought it would be stronger and better looking to put it up in the seems. Just back over it a few extra passes on the machine to give it some extra strength. For the top tube I added to pieces of fabric to which I sewed Velcro the entire way across it. I sewed it in the same as the straps. With the top panel seams. It feels really secure on the top tube. I also added a Velcro strap to the front tube to prevent it from sliding back. That was the hardest part besides the zipper, but it really secures the bag laterally
After the seems are finished (the bag will be inside out) pull the bag out through the zipper and test the size.
Finished! 4.5 hours. $38.00 in materials.
Custom frame bag for my old Iron Horse hardtail. Took it out this morning in a steady rain for about 2 hours. Crossed 3 larger streams. Stayed dry inside! I didn’t 😉
I just finished an overnighter on the AZT, Pistol Hill road to Kentucky Camp, and back the next day. 90 miles total, 45 each way, 14,521 feet of climbing. The one-way distance is 26 miles as the crow flies – the trail is so winding it almost doubles the mileage! The routing can be a little frustrating, especially with tired legs; up one ridge, down the next, repeat often, and throw in some hike-a-bike. The further south you go, the more rugged it gets.
I didn’t take many pics, but here’s a few. It’s very dry this time of year (carry at least a gallon of water), but the air is cool…
Incredibly blue skies…
The East side of the Santa Ritas…
A little rest in the shade…
A good way to get ready for an endurance race, 24hop!
A word of warning, there appears to be a beehive next to the trail, just up the canyon from Hidden Valley Ranch, right where the trail crosses the canyon. I heard the buzz of a hive on the way down, and on the way back I got stung on the face as I passed by. When I realized what happened, I rode on quickly for a mile before I stopped to pull out the stinger. A small mirror would have come in handy. Don’t mess with the bees here, they can be deadly. If you get stung, leave the area immediately.
Someone should offer a shuttle service to Kentucky Camp; this would be an awesome hard core day ride. Tucson is getting to be quite the mountain biking destination; you could visit here in the winter and do an epic ride in a new area every day for a week! Kudos to the local activists, keep up the good work.
In the March 2003 issue of Bike magazine, an article about mountain biking in the Adirondack Park in New York was published. That article highlighted the available mountain biking, the huge potential, and the unique challenges of mountain biking in the Adirondacks.
That article set the hook.
This trip report is a consolidation of information and highlights from 4 trips to the Adirondack Park to do multi-day, hybrid (road/dirt/trail) tours, day trip rides and general sight seeing.
The Adirondack Park is diverse. From remote, loon inhabited ponds to the high peaks around Mount Marcy to the Olympic venues of Lake Placid and the charm of the town of Saranac Lake.
Although about one half to the land is in private ownership, the legislation the created the park in 1892 stipulated the park was to be managed as ‘Forever Wild’ (more history).
The Adirondack Park Agency, administrative authority of the park, regulates land use (including zoning and recreational use) contained within a designated boundary, the so-called ‘Blue Line’. Of the 6 million acres within the Blue Line, about 1.3 million acres are classified as ‘Wild Forest’, where off road mountain biking is permitted. About ¼ of the US population is within 1 day d
These attributes make the ADK a prime destination for hybrid bike touring.
Highlights
There is something for just about every riding style. Technical single track, rail trails, dirt roads, ‘truck’ roads, snowmobile trails and scenic paved roads all offer riding opportunities. Points of interest include fire towers, state parks, remote lakes and ponds and deep, dense forests as well as tourist attractions and quaint, tourist towns.
It is easy to plan trips that include overnight stays at Adirondack shelters (there are around 200 shelters throughout the park).
Compared to Appalachians, the mountains and hills in the ADK are more ‘peaky’ while the Appalachians tend to be ridge and valley topography. My theory is that the peaks, combined with the larger areas that are relatively flat, and the large amount of water improves the sunrise and sunsets with more opportunities for low angle sunlight.
Imagine riding and in the late afternoon arriving a remote, uninhabited pond. Maybe take a swim in your private pond before having dinner. While cleaning up dinner, the sinking sun creates a spectacular sunset. As dusk draws nearer, the lonely call of the loon pierces through the evening coolness. What more can you ask for?
Bike Trip planning
It is kind of odd, given the proximity of the park to ¼ of the US population, the beauty and diversity of area that the mountain bikers do not flock to the ADKs.
There are a couple of published mountain biking books published for the ADK. These books outline day trip or shorter types of rides. (The books also duplicate some of the same rides!). Linking the rides listed in these books is an easy method of building a longer route.
Since land use categories limit where bikes and be ridden on trails. Planning a longer trip that includes riding trails requires a little research. The previously mentioned guidebooks just scratch the surface. Given decent computer skills, or access to a GIS system, the GIS info available from the APA is invaluable for trip planning.
Snowmobile trails in the Wild Forest areas can be prime for mountain biking, but the riding results can be hit or miss. My experience is that snowmobile trails in the ADK can easily be populated with basketball size rocks (technical riding), or be well overgrown (frustrating riding) or even totally blow down choked (desperation scrambling). One finds that many snowmobile trails end at waters edge in the spring/summer/fall but would logically continue across ice in the winter.
When to Go
All of my trips have been in late September. I like this time of year for a couple of reasons:
The family vacation season is over.
The bugs are gone. (if planning a trip in the summer, be sure to research black fly season)
The leaves are changing. The weather is crisp. Still shorts weather during the day. It is still warm enough to take brisk swims in the lakes and ponds.
Most commercial attractions are open, although many of the State Park campgrounds are closed for the season.
Unique Cultural Attractions
Lake Placid—you can get Olympic Overload in that town
Adirondack Museum, Blue Mountain Lake. A great place to absorb the history and traditions of the Adirondaks.
The Wild Center, Tupper Lake. A natural history museum of the Adirondaks.
Camp Sagamore, a ‘summer camp’ of the Vanderbilt Clan.
My first crack at serious bikepacking. I will be doing two test runs of 3 days each. One in late February, the other in early March. Here is what I am rolling with on the first run and I fully expected to revise this many times before now and April:
Bike: 2010 Gary Fisher Superfly 100 Full Suspension
Front Tire: Kenda Nevegal 29×2.2
Rear Tire: Kenda Small Block 8 29×2.1 (not pictured)
**Set of Maxxis Ikon 29×2.2’s on order, which is what I will most likely use for 2nd test run and race.
Frame Bag: Modified a used Epic Designs Bag to fit my Superfly frame
Seatpost Bag: Sea Line Dry Bag and strategic strap placement.
**I have ridden 3 rides with the Sea Line Bag full and other than rubbing against my left leg which I fixed with some adjustments, the bag did not sag or sway, which was a worry for me when making my decision to go with it.
In the Sea Line Bag:
Montbell UL Super Spiral Down Hugger #3 sleeping bag
Mountain Hardware Goretex Raingear (jacket and pants)
Pearl Izumi Leg Warmers
4oz Emergency Bivvy (to be used as primary bivvy and groundcloth)
Extra pair of Merino wool socks/extra underwear
MSR Hyperflow Water Filter
Repair Kit including:
Selected Allen wrenches, Tire boot, 2 oz bottle of Stans, 2 29er tubes, tire levers, patch kit, bit of duct tape, tiny sewing kit, small hand pump, small homemade bike lock, 2 oz bottle of chain lube, zip ties
**Thought about putting the repair kit in the frame bag, but I need the space for things to which I am going to need quicker and easier access (powerbars, gloves, sunscreen, camera, etc) and if I need that repair kit I am going to be stopped for a while, so opening the Sea Line bag will be no big deal.
In the Frame Bag:
Bottom pouch: Butt’r, sunscreen, extra hair ties (I lose them constantly),cell phone, some toilet paper in a ziploc, tiny toothbrush and toothpaste
Top pouch: gloves, maps, lighter and firestarter (need quick access), First Aid kit, iPod, Camera, NightRider MiNewt Light, Black Diamond Headlamp
In Backpack (GoLite Rush):
Hydration Bladder, SPOT, food, light fleece jacket, space for when clothing layers aren’t needed, balaclava
On me:
Giro Helmet, headsweat/skull cap, Under Armour Base Layer, Jersey, NorthFace Apex jacket, GoLite Thermal tights, Pearl Izumi Bike shorts, Merino wool socks, Pearl Izumi X-Alp Enduro II Shoes, cleats for Time pedals
Mounted on handlebars: Garmin eTrex Vista HCx, Garmin Forerunner 310xt with HR strap
Top-tube bag (not pictured): Hammer Gel, Honey Stinger Energy Chews, Peanut Butter M&M’s, Jelly Bellies, mileage cue notes, etc
I decided against a handlebar bag because I am not taking a sleeping pad and really don’t want the weight or bulkiness. I am the type of person that can fall asleep anywhere and have slept comfortably many, many nights out in the wilderness without a sleeping pad. I also decided to not bring a chain tool or extra link. Why? I guess I am trying to wisely play the odds….the likliehood of me, a 127 lb woman breaking my chain is nill…Is this a safe bet? Or should I take them?
So there it is….what have I carelessly overlooked? I will put a better picture up soon, this one is old. Tear it apart, guys. I really love feedback…Thanks!!
It was time for a bikepacking trip, so I loaded up the Siren with desert winter gear and 4 days of food, and drove to Willow Springs Road. Left the car at the highway at 9 am and rode up the pavement to the AZ trail on Tiger Mine Rd. The original plan was to combine the Antelope Peak Challenge and the Gila River Ramble, but plans change…
The start of the trail.
The first day I made it 5 miles north of Freeman Road, and finally camped next to the trail at 7 pm, total 48 miles. It was a long and rugged day, and the bike felt heavy, but the riding is beautiful here, and the atmosphere just sparkles. The night was cold and windy, and my 36 degree down bag plus Aurora bivy were just barely adequate. Maybe if I ate more calories… Those freeze dried meals for two are only 500 calories total, and how many did I burn that first day? A lot more than that!
The gasline road goes on and on…
Antelope Peak from the South
Ride all day through beautiful desert like this
Beware the cholla minefields. They look cute and fuzzy, but don’t mess with these suckers. At times you have to carry your bike down the trail, or else your tires will throw prickly balls into your legs. My front tire lost air every night, but no flats! Flat protection is a must.
The second day rocked, that Boulders section is really fun. I filtered a liter of water (it was barely dripping) at Bathtub Spring for emergency and continued. It looks green, but tasted ok.
Then you get to Ripsey, oh boy! It really is spectacular, and rivals the best I’ve ridden (401, Hermosa Creek, Rainbow Trail, etc.) and is likely a lot more fun without all the extra weight. First the climb…
Then the whopping moto-fun 2000 foot descent
By the time I got to Kelvin, it was 1 pm, so I thought better of crossing the Gila, and just headed back on the Kelvin highway, let the climbing begin. The sun was beaming down and it felt like 80 degrees, so I slathered on the sunblock and rode on uphill.
Made it to Freeman road by 7 or 8 pm, total 44 miles. I’m really starting to enjoy riding in the dark. Towards the end I could feel the bonk coming on, so I had to keep stuffing chocolate in my mouth. I ran out of water a few miles from the cache. I had an emergency liter I filtered from a dirty cattle tank during the big climb, but I really didn’t want to drink it, so I pushed on. 7 miles to go, then 3.5, then 1.5, finally the cache! Thanks guys, I owe you a couple of gallons, that is really a great service. Water is the big problem out here, and dictates your plans the whole way, where you sleep, how much weight you carry, etc. Even in winter you can go through 1.5 gallons a day.
That night was cold with no wind. The coyotes sang me to sleep under the stars. Early morning my toes got chilly until the sun rose high enough to warm things up a little.
Minimalist bike camping in the desert is it’s own special experience.
Two pots of coffee AND hot oatmeal and I was ready to get back. I skipped the Painterboy singletrack; I rode that section in November and the catclaw is pretty bad there, and I was having too much fun rocking the dirt road at speeds close to 40 mph with a tailwind, almost all downhill.
Another great trip!
116 miles total
17 hours 45 minutes pedaling time (I don’t think I could do it all in one day, even without all the gear)
Transardinia, Mountain Biking across the Island of Sardinia, from North to South.
The longest european off-road mountain bike trail. 444 km of dirt roads, singletracks and mule tracks in seven days, more than 12.000 mt of total ascent across the wildest and most beautiful mountains of the island. Mountain biking off the beaten track, far away from the cities and the busy coast resorts.
Sweeping singletracks, epic descents and cross country adventures.
In the pursuit of adventure across Sardinia’s less traveled trails. Miles and miles across a rocky and mountainous interior dotted with remote mountain villages which preserve a rich and diverse cultural heritage. From Olbia to Cagliari, riding on ancient shepherd paths, on the island east mountain range. From Gallura granite to Buddusò vast plateau scattered with oaks, from Supramonte candid limestone to the high lands of Gennargentu and Ogliastra buttes. And then across the Flumendosa valleys, finally reaching with treacherous downhills Cagliari and its beautiful beach.
Sardinia,(Italy) is the second largest island in the Mediterranean and is formed by a series of mountainous massifs, hills and narrow highlands. Its coast is jagged and rocky, interspersed with marvelous beaches of very fine sand and countless inlets. The seaside landscapes are among the most beautiful in the world. Numerous small, enchanting islets are scattered in front of its coast.
Sardinia has an endless network of dirt roads, double track and singletrack trails, The Transardinia itinerary makes the most of this opportunity. Guaranteeing an itinerary composed of over 80% of unpaved roads, providing at same time the chance to experience the best mountain biking and natural wonders of the island.
The itinerary has been planned in order to get the best out of its potential and an almost total cyclability. Whereas most of climbs are gradual and over good gravel roads, the downhills are among the most exciting and technical trails Sardinia could offer. Nevertheless this experience wouldn’t be a complete one if it didn’t give the opportunity to know the real Sardinia. Transardinia isn’t just about mountain biking, is also a journey through an island, its culture, its tradition and its people.
In this website, www.transardinia.net, besides the description of the official route, there is a long and detailed trip report from a 2004 adventurous Transardinia.
Today the Transardinia official route, is rideable in its full lenght with the help of mtb guides.
To permit to a higher number of bikers to ride the Transardinia, the route was slightly modified and the most technical sections were replaced with less severe trails adding more cyclability. The Transardinia Gps Route was created, a full description of this route is available in the Gps Tracks section of the Transardinia website, where the entire route is available, stage by stage, for download.
Paula and I loaded up the bikes with food and water for 3 days, clothes and sleeping gear for sub freezing temps.
My bike was really living up to its ‘Behemoth’ title, now carrying a zero degree sleeping bag on the seat and a tent on the handlebars. I was really impressed with how it handled though — there’s a reason this bike is so much fun to ride, hard.
Head for the rocks. To a very remote, semi-secret and hard to reach place. A place known only as Area 52.
Paula impersonating the saguaro (just to her left).
Following the AZT 300 route, through all manner of desert, eventually you come to a curious grove of trees. Like an oasis, but with no water, it calls to the cooked riders of the 300.
At 60 degrees the sun felt better than the shade to us, but it was fun to investigate.
Rocks and river are getting close now.
This slickrock ramp is the entrance to ‘the place.’
Area 52.
This will do. Unload the bike, set up the tent and begin devouring rock.
Paula went for the tent, having done a speed workout just that morning. Her legs were screaming at her as she pushed her loaded bike up the final pitch to camp 52.
I made a run up to ‘the anvil’ and ‘the keyhole.’ Neural rust had taken over some of my Area 52 mental map. Time to reinforce the pathways by putting tire to rock.
I had to hit the campsite huck a dozen times. Just so smooth, so much fun. And killer light.
But all too short. Nights are long in December.
Are we here?
Or maybe up there?
It was easy to forget what planet we were on as we walked around in the moonlight, through crumbly moonscape. Awesome.
Christmas morning.
Who needs presents when you wake up next to your sweetie, with bike and endless rockscapes only a breath away? Bright sun, no humans for miles, the emptiness of the wilderness and legs that ache to be spent throughout it.
Area 52, a dreamland.
A place where sherbet colored rock oozes, white gravel slides on hollow shells, where the riding is only limited by your imagination. Cycling as self expression, as art.
A place where strange creatures roam.
And strange things grow…
… and die.
OK, OK, the riding is also somewhat limited by your skill and willingness to take risk.
I kept it pretty conservative, with car and civilization far away, and with no one to inspire/push me to ride stuff above or at my comfort zone. But I did find some nice ‘up’ moves to burn leg muscle on. Like the above double step, which only went after taking a slightly different angle, allowing just two inches more ‘purchase’ and just enough to kick the front wheel up.
Can I get from here to there? Only one way to find out.
Paula floated around on foot (free running?) finding all kinds of interesting stuff to take photos of (most of the photos are hers). It was really fun to finally show her this area, because my words always fail to describe it. You have to be there to understand.
Up…
Down…
Eventually it was time to head back to the white rock, camp, dinner and another long but peaceful night.
I couldn’t resist the temptation for a third ride back up onto the mesa the next morning. With fresh neural pathways (some burned deep with adrenaline) it was a flash to cruise through the heart of 52, all the way out to above the waterfall, with only a dab or two. Then back, feeling the flow, and hitting the campsite huck just one more time before packing up.
First a bit of fully loaded free riding on the way out…
Then 4×4 roads…
ATV trails. It was cool to see our two tire tracks still fresh in the sand. We hadn’t heard or seen anyone, and this was further proof — no one had been on the road in three days — except for some deer prints on top of our tracks in a few places.
Climbing away from the Gila River and the rocks of 52.
Wouldn’t be epic without a little hike-a-bike.
We set a nice mellow pace on the roads back to the car. Saguaro spotting was the game, and we found many an interesting one.
The world is an amazing place. We were lucky enough to experience this small part of it, together, and at the perfect time of year. Thanks Paula — an awesome bikepacking trip!
First off let me start by saying thanks to everyone that has put up their set-ups on this site. It has been a big help to me in building my setup.
After years of reviews and 1000 of hour’s fine tuning my setup and then going back and readjusting, this is what I have come up with for my touring bike.
This is my 2011 tour divide set-up. It’s a Bianchi Sok 29er fully loaded (including water) I am at 48.625 LBS
-Front rim is a MTB mounted up on a White Industries MI6 hub
-Rear rim is a mavic 719 mounted up on a White Industries MI6 rear hub (built stronger for long distance)
-Front shock is a Rock Shock with a lock-out
-Handel bars are Salsa Wood Chippers with Shimano Ultregra Flight deck dual controls
-Brakes are Avid BB7 front and rear
-Seat is a Brooks B17
-Pedals are acid 2
-Drive train is Shimano SLX (next components for upgrade)
-Bags are Revelate Design Epic Bags for the frame, gas tank, and the seat bag. The handle bar bag is an Event.
In side these bag are fun toys front to back
Front handle bar bag
i. Black Diamond spotlight bivy
ii. Therm-a Rest NeoAir sleeping pad
iii. Lafuma Down sleeping bag +20
Frame bag
i. Water
ii. Spare tube
iii. Tools
iv. Medical kit
v. SteriPEN Water Purifier
vi. Cell Phone doubles as MP3 player
Seat bag
i. Extra shorts
ii. Extra shirt
iii. Extra socks
iv. Patagonia down sweat shirt
v. Patagonia rain jacket
vi. Leg warmers
vii. Arm warmers
viii. Extra food
Gas tank
i. Food
ii. Food
iii. More food
iv. Extra batteries
Not in a bag but attached onto the bike
Spot 1
GPS (Garmin Oregon 550 with built in camera)
Head lamp (not shown in picture but goes on handle bars) NiteRider MiNewt 250
Solar Charger (Solio Rocsta H1000 Hybrid) attached to top of Seat bag
These new bags are called handlebar buckets.
They are similar to the mountain feed bag, but provide more volume. The bags are handmade in Flagstaff, AZ and are large enough to hold a 1 liter nalgene bottle. They include a felt liner, external mesh pocket and rap around sewn-in safety reflector. I’ve been using a pair for 2 months and I’m pleased with their trail performance. I’d give these a five star rating if the buckles were replaced with velcro (like the mountain feedbag attachments). I find that velcro facilitates quicker installation. However, the plastic buckles of the handlebar buckets may last longer than velcro. 4 Stars! More information at handlebarbuckets.com.
Please rate this product: (no login required) (73 votes, average: 3.23 out of 5) Loading ...
I’ve never completely signed up to the ultralight camping manifesto that requires the adherent to remove all the labels from clothes and sleep on bubble wrap, but I do like to save weight by using light weight gear and packing sensibly as long as my comfort isn’t severely compromised. Over the years my gear list has evolved and so have my bags. One constant though has been my Carradice Nelson Longflap saddlebag which has successfully carried my gear over many miles. I admit that I have an emotional connection to this saddlebag because it gives me a warm and fuzzy feeling of those halcyon days of English bicycle touring, but it also works very well and has some excellent features such as the expandable long flap, the side pockets and it’s rugged dependability. It’s made of cotton duck material which is very un-ultralight and this became apparent when I recently weighted all my gear and made the spreadsheet below. The saddlebag, at almost 2lbs, is the heaviest thing I carry. So taking a page out of the “bikepacking” school of baggage I experimented to see if I could replace it with a 20 litre 100D nylon compression sack that weighs 5.4oz. This is made of heavier nylon than most compression sacks, but I think it’s important for it to be waterproof and fairly tough. The compression feature is vital as it stops items moving around and gives the bag structure so that it can be tightly attached to the bike. For a more extreme approach definitely look at this excellent ultralight site http://www2.arnes.si/~ikovse/weight.htm. But now to the numbers, click on the spreadsheet images and then click again to magnify them so they are readable, and if you want to copy it’s available at
Gear weights using traditional cotton duck saddlebag vs nylon compression sacks.
The result of all this weighting and typing is that by using compression sacks and updating a couple of items I can immediately reduce the weight of my gear, bags and racks from 22lbs to 18.7lbs. I also looked at my clothes and my choice of Merino wool has a definite weight penalty, but I just like the way it feels and performs so I think I’ll stick with it. So what does this look like on the bike. Well almost the same as using a saddlebag, except that my sleeping pad is now in the rear sack. It’s quite easy to strap the sack onto the saddle and Expedition Bagman using a couple of nylon straps through the saddle loops and the front sack is equally easy to attach by strapping it to the handlebars and looping one of the compression straps around the stem to stop the bag flapping up and down.
It works after a fashion, but there are a lot of straps and I think that having to undo the compression straps every time I wanted to get something out of the bag would get frustrating. The side pockets and large top opening flap of the traditional saddlebag are far more practical for touring, but the transverse width makes them less than ideal for off roading. The compression sack has one advantage over the Brand V handle bar bag as it has an expandable capacity, but there’s no way to access stuff when riding. So while this approach is a good way to reduce weight I think it lacks the functionality of my traditional bags for the road tourist. Carradice also make a 23L capacity Cordura saddlebag that weighs 1.3lbs, but it seems to be out of stock everywhere and I think it should be possible to use 100D waterproof nylon and come up with some ultralight bags (less than a pound) with the useful features of my traditional bags. If someone made something like that I’d buy it tomorrow.
After going through this exercise I’ve revisited the way I pack my saddlebag. By folding my Big Agnes sleeping pad in two, rather than three, before rolling it up (and putting the Nelson Longflap into Tardis mode) it now fits nicely it into my saddlebag. This makes the setup look cleaner, I never like having stuff hanging off the saddlebag if I can help it. So here it is: a traditional three bag set up using some ultralight principles that will allow indefinite, unsupported, civilized, three season touring at a weight of 22lbs. It can be installed on any bike, road, touring, mountain as it requires no eyelets and even if you don’t have saddle loops you can buy simple clamp on ones or use a quick release Bagman. If I can loose a few pounds I’m thinking of trying this setup on my DeRosa Neo Primato. That would be touring on an Italian steel bike with Japanese components and English bicycle bags. Call me crazy, but I just love the idea of all those weird juxtapositions.
Traditional setup, but now the Tardis like qualities of the Nelson Longflap have allowed me to pack the Big Agnes pad inside
I am working on my bikepacking setup up for 2011. I would like to travel the length of the Colorado trail. I will appreciate any advice or criticism on my set up or gear choices. I will publish my gear/food list as it evolves. I am fabricated a few items myself because I could not find them commercially. I first wanted to carry my Fly rod on sections of the trail that will allow it. I fabricated the rod carrier out of rolled Kydex. I cut out sections of the case to allow it to flex and decrease weight. I anchored it to the down tube bottle cage mounts. I then made a triangle bag that can rest above the rod case but still be secure without the case in place. I do not think it is necessary but I like the way is looks and works. I attached several pieces of Velcro to the top of the bag to anchor my tank bag. The Tank bag will carry the majority of my gear. I reworked the attachment ponts several times to minimize shifting and allow clearance for my knees. I built a rear fender/rack from kydex that will shape the seat post side of any stuff sack to allow clearance of my thighs on the pedal stroke. Here are a few pictures of my project so far. Thanks for any input.
you can see all three parts of my system in this image
Adequate clearance for my knees was my goat with the shaped bag.
This is my ultralight cooking setup. Stove is a mini sideburner chimney design from http://zenstoves.net/. I’ve built quite a few of these designs. I found the Snowpeak Ti cookpot on the JMT, next to a full roll of TP (not sure which they missed more!). Everything fits inside the pot, with a paper towel for cushioning and cleanup. Fuel bottle holds enough to boil three 2.5 cup pots, good for an overnighter. The stove heats fast! It pours out the heat, and doesn’t require a pot stand. It took a couple of tries to get the burner holes the right size. Preheat pan and windscreen are required, and get the stove roaring quick.
It’s very light and compact. Wind can be a problem, though. And if you step on the stove, forget it.
I used to use Heet in the yellow bottle, for drying auto fuel, but it’s toxic, so now I use denatured alcohol from the hardware store. Everclear works too, but it’s expensive (and versatile!).
on the 3 days leading up to thanksgiving of this year some friends and i decided to take a little trip into the ouachita mts of western arkansas to test some gear and to have a little fun. we had 3 totaly different types of bikes and setups and here’s a short report of what happened. josh had a carbon stumpjumper with a rear rack setup with most of his gear in panniers, jeremy had a newly builtup salsa fargo with a old man mt rear rack, girlfriend made frame bag and revelate designs handlebar sling setup. my bike was setup pretty much as i had it for a tdr attempt a few years back, a revelate design seat bag and a homemade (thx mom) frame bag that both worked perfectly then and now. tried and true is good. i also had just gotten a revelate front handlebar sling harness so i could go to a dry bag to keep things dry up front. i was a little worried about the sling but it turned out to work fine. the only mod i made was to tape a thin piece of wood across my brake levers to keep the bag off the cables. i am going to redo that design later. i carry sleeping and bivy bags in front dry bag, tools, 1st aid kit, water filter, a 100 oz water bladder with ext hose where i can drink on the roll in the frame bag and all extra clothing in the seat bag. food, toiletries in a wingnut waistbag and camera/phone/snacks in a cheap gas tank bag i picked up last minute at walmart. it worked pretty well but i will probably go with homemade/ revelate designs for the next one. forecast called for rain but pretty mild temps so we where betting the weatherman was wrong, he was right. light to heavy rain every day. anyway we decided to go for it and left out on the ouachita trail north of mena ar at foran gap. the oc trail is known for being rough and rocky. adding a carpet of wet leaves to hidden wet rocks made for slow going and a mile in i cut a sidewall. stan’s out tube in. i had a set of kenda small block 8’s laying around and decided to go with them. i should have known better and now have a heavier set of nevegals on order. i tried to save some $ and weight but it didn’t pay off. jeremy on the salsa had no bike or gear issues but the rigid fork and rough trail had him testing rock hardness pretty regularly. josh on the stumpy had gone with a set of panniers on a cheaper rack and after several hours some bolts on it left us and the rack was riding on his rear wheel. after trying several ideas time was running out and he decided to go with removing one of the bags and strapping it to his back and slinging his camelback on his chest. (the pix i should have gotten) with little load left on the rack it worked well enough to get us going again. josh didn’t look to uncomfortable but i am sure it was a pain to pedal sandwiched between bags. we had to get off the oc to make it to our first camp so we hit gravel making it in after dark. after setting up camp under a shelter (more rain coming) and some warm food it was time to hit the bivy sacks. during the night i heard the storm come in but being under a awning it was no problem. morning was cool but at least rain was lighter and after hot coffee and breakfast we did some bike repairs. i needed to install a better boot on my tire and josh was working on the broken rack. he stole a bolt from somewhere else on the bike and after some adjustments it was good to go. we headed out of camp on gravel to hit a section of arkansas epic trail known as the womble. it has much more flow and is a bit more bike friendly than the ouachita trail sections which where designed for hiking over biking so the second day went pretty smooth, only a flat at most. with more rain coming we decided to hit a spot on the ouachita with some small cabins and after the owner made us some burgers and threw our still wet and dirty gear into his dryer for awhile we where happy to get a shower and to dry off. of course it rained during the night but not a problem. day 3 was supposed to be more trail back to where we left the truck but once again rain was coming so we decided to hit road. 50 miles door to door but even with a stop at the cherry hill store for lunch and talking to the locals for a spell we made pretty good time. all in all we maybe got in only 100 odd miles of varied terrain but had a good time, found some flaws in gear choices we made, heard all of josh’s chuck norris jokes and where happy to head home for the next day with family and friends.
Hi there ! we are the Gonzalez Abrego, a 5 party family, I have always tought that we, the Regiomontanos are very lucky because we have a lot and near places to get into outdoor life , if we want desert, we get it at 30 minutes, the same as rivers and forest. the shame is that in this times in Northem Mexico we can´t be safe even in this places so we are scared and the better is to be at home.
So we decide to ride a 2 hour trail in Chipinque, a private park just 20 minutes from Monterrey N.L. Downtown, they have all the tools, people and infrastructure to keep all their visitors in a safe mode, I invited an old friend of mine and his daughter, we were short of one bike so guess what ?, ..I had to bougth that new disc brake Pro-flex bike I have been seeing during 2 past weeks (well, have to confess, I have not ride it, cause my wife ride the new bike, felt a little of guilt !).
After 30 minutes of packing all the things we carried in 7 backpaks (3 liters of milk, a dozen eggs, ham, nissin soups, chocolate, 2 dozen tamales, Cookies, potato chips, propane tank for a heater, and a little gas lamp, a litle grill for solid alcohol cans, and of course our tent and sleeping bags) we hit the road, it was a beautiful trail full of pines, encinos birds an squirrels, it took about 1:30 hour to get to Mesa del epazote, all the camping site and facilities just for us.
We had dinner, and that chocolate milk was so delicious, at “cold” temperature (about 10 C) we slept a little cold but the heater helped, the next morning the kids played with the frisbee we carried, and we took a 2 hour hiking route, ate that tamales I told you. at 3:00 PM we return to the trucks and took about 1/2 an hour to get there because it was down hill.
I strongly recomend it , the best part is that we have this place just 5 minutes from home
This trip was a 4 day loop ride began and terminated in Marlinton, WV ridden 9/6/2010 to 9/9/2010. The route cuts through parts of the southern Monogahela National Forest (MNF), and then across a large swath of rural WV to New River National River [National Park]. From the river, the route continued back to the MNF and into the Cranberry Backcountry area and finally returned to Marlinton. The execution of this ride ended up being predominately paved and dirt roads. Single track had been incorporated in the planning stage, but for one reason or another, the single tracked was skipped during the ride.
ROUTE:
A full route with linked pictures is here. Segments shown in red were part of the original route plan. The color codes of the segments coordinate with the elevation profile below:
The climbing elevation per day doesn’t seem that bad, but I will readily admit that the sum total wiped me out.
DAY ONE:
From Marlington, the route heads south on the Greenbrier Rail Trail. The Greenbrier Rail Trail is a crown jewel of WV rail trails. Beautiful scenery, excellent trail maintenance, camp spots with water and outhouses are all part of the well executed trail. I’ve ridden it before, so one this trip it was just used a conduit to other places as well as providing a convenient trailhead to leave the car.
The Greenbrier River
A short dash south on the Greenbrier River Trail followed by a turn east into Wagota State Park started the ride. Within Watoga SP, I was denied the first short shot of single track on the Allegheny Trail…
Single Track: No Dice
No biggie. Take the road. The upcoming county roads will make up for the loss of a little single track.
I’ve found that ‘county roads’ in WV are complete wildcard. At times, they are your typical, two lane, secondary, maintained paved road. Or they are something else. Single lane paved, rough gravel, smooth gravel, dirt, rough dirt down to 4wd high ground clearance required. This Yankee hasn’t figured out how you can know what to expect in advance… the only thing that seems standard is that single numbered roads (like “CR 32”) are generally higher quality than dashed numbered roads (like “CR 32-16”).
County Road and Creek Bed are Coincident
Thistle and County Road Double Track
After a good bit of county road, I ended up at Blue bend on Anthony Creek. I had every intention of backtracking a bit to pick up the second section of single track (South Boundary Trail), but decided a lingering swim and relaxing at the swimming hole was more appealing. The single track can be ridden on a trip latter this fall… swimming might not be as appealing once the temps start to drop.
Swimming Hole
After swimming, I cruised to a camp spot farther downstream at the confluence of Anthony Creek and the Greenbrier River.
Rolling to Camping Spot
DAY TWO:
Day 2 started with brilliant, late summer sunshine.
Morning Light
After crossing a few mountains, I arrived in Rainelle, WV.
Ginseng, Sassafras, ???
From Rainelle, it was west bound on US60 to get to the New River Bridge. The bridge was the main reason to ride this loop. The span is over 800 feet above the river–high enough for BASE jumping and is the focus of the annual Bridge Day Celebration. I’d driven over the bridge in the past, but checking out the bridge up close and in-person from the bottom made the bridge seem much more impressive.
New River Bridge from North Side of Gorge
New River Bridge From River Level
After checking out the bridge, supplies were picked up in Fayetteville and then a short ride to Minden-Thurmond Rail Trail. This is pretty cool rail trail; it clings to the mountain side and has a relatively steep grade for a rail trail. Night 2 was spent at the campsites at Stone Cliff Beach. Wed AM started with crossing the bridge at Thurmond to the train station (below) and the long grind on dirt roads towards Babcock State Park.
Thurmond Railroad Station
Shack
So here I am on an old strip mine haul road, numbered as a county road. This was not my expectation. The Delorme Atlas had a fish icon along the neighboring stream. I figured that this would be nice road tucked into hemlocks along a trout stream… the reality was a dusty haul road running along an acid mine impacted stream. You never can tell.
Getting Tired
By the evening of Day 3, I had made a decision to forgo 10 miles of single track through the Cranberry Backcountry and take the easy route on Forest Roads around the Backcountry area. I settled on a campsite along the river.
Night 3 campsite
DAY 4
The objective for day 4 was just to get back the starting point in a leisurely manner. The Cranberry Backcountry has numerous shelters along a 16 mile stretch of gated forest road. It looks like the shelters are popular with equestrians.
Typical Cranberry Backcountry Lean to. 1 of 7
Normally, shelters have some kind of journal…. this one had something different in the library:
Not a typical trail journal in the lean to
There is a Nature Center near the Cranberry Glades. Stopped in there and checked out the displays, and then road the final 20 miles back to Marlinton, arriving about 4:00PM.
CONCLUSION:
Most trips spur ideas for more places to ride and explore. This trip was no exception. A return trip needs to be planned to the single track that was detoured around, as well as explore more of the potential of the southern MNF.
I recently built this Rawland Drakkar as an all-rounder for ultralight bikepacking. It works great for a variety of terrain, especially single track, gravel roads, but also pavement. Recently rode it to Taos on a mixed terrain route including parts of the Great Divide Route.
Camping Setup
Lashed to rear rack in stuff sacks only
1.5 lbs, 20 degree bag from Kelty.
1.0 lbs, Goretex bivy bag by Outdoor Research
2.5 lbs, Sleeping pad from Thermarest (deluxe – I like a little comfort)
6.0 lbs, Stuff sack filled with tool kit, ditty kit and dried food (nuts, fruit, beef jerky
Other on the bike
6 lbs, water in 3 water cages. Used 1 liter Smart Water bottles to carry more.
5 oz, Spot 2 satellite messenger.
On my Back
1 lbs, Golight backpack
7 lbs, of contents in back including warm layer, shell, extra shorts, extra shirt, extra gloves, 2 bandanas, money, cell phone, hat, gloves and light cable lock. Also carried a few photocopied maps and directions.
My basic camping setup was definitely minimal, but worked well for about 3 nights until I was able to stay in a hotel in San Luis just north of the New Mexico border. I did get tired of eating dried food, but it worked. Going ultra light made the riding more enjoyable and was able to go further each day.
Bike Setup
Drive Train – Shimano XT for both derailleurs. 22-32-44 front chain rings. The rear cassette has an 11- 34 tooth spread. This arrangement maxes out the long cage rear derailleur’s range of 45 teeth. With a 29er wheel size I get a low around 18 gear inches and a high around 112. Shimano bar end shifters sometimes called barcons often used for touring bikes seemed a good choice. Bar end shifters are simple, easy and work well.
Handlebars – Salsa’s Woodchipper was the handlebar for me. The drops flair out, providing added leverage and stability for single track, but the bend flairs less allowing a more standard brake lever placement than other designs. Woodchippers are designed to ride off road in the drop position. For an old rider like me that meant raising the bars further than expected. I used all the steering tube provided. The only downside is the large width. One needs to be careful navigating in close quarters with these bad boys.
Brakes – Avid BB7 mechanical road disc brakes which were easy to install and adjust even for a first timer. I opted for a 160 mm front rotor, while the rear is only 140 mm. This asymmetrical setup saves weight, but the bigger reason is simple physics. A rear wheel provides less stopping power before skidding. For hauling big loads, I might reassess this strategy.
Wheels – With three wheel formats possible (650b, 700c or 29er), this decision was rather difficult. Sure, I could have ordered three different wheel sets and switched between them to create virtually three different bikes. But I’m interested in creating one all-rounder that will take me anywhere without carrying extra wheels. It was important to choose the single most versatile wheel set. I chose a Stan’s No Tubes factory wheel set with Arch rims and ZTR hubs. The Arch rim allows full 29er tire widths or wide 700c touring tires, virtually spanning the entire wide and medium tire width spectrum (but not skinny road racing tires). Arch rims can be used with tubes but are tubeless ready.
Tires – Schwalbe 45c Smart Sams which are marketed as all-terrain tires seemed a good choice. My hope was to find one tire that handles a variety of terrain well. Spinning extra rubber on pavement was not appealing, but neither was washing out on gravel or single track. At 1.75″ the 45mm width was a good compromise. While the 29er width Smart Sams come UST tubeless, the narrower and lighter 45c version did not have a UST stamp. I went tubeless anyway to save rotational weight and to reduce puncture flats in cactus country. Rotational weight is a big deal since a one pound savings at the rim and tires is worth 2 pounds on the frame (or other non rotating parts including rider and gear.
The Mountain FeedBag is an ergonomic, out-of-the-way, effective feeding system that helps you – the competitive mountain bike racer – get to the finish line faster! Functionally, it keeps you consistently fueled; ergonomically, it conserves your energy.
Store your food inside. Stuff wrappers outside. Feeding from Mountain FeedBag is way more efficient than jersey pockets or backpacks. Feeding is easy; in fact your food is just inches from your hand! It’s great for racing AND training.
Mountain FeedBagTM Features:
* Easy access to food while riding
* Crash/Spill-Proof – Won’t knock free from your bike or spill contents
* 80 cubic inches of energy storage (bars,flasks,packets,secret concoctions, etc.)
* Lightweight (64 g – 2.25 oz), durable and tough
* Water Resistant
* No more reaching for damp, gooey food in your jersey pocket
* No more having to struggle or stop to reach food
* Easy litter control in exterior mesh pocket
* Designed and refined by a 12 Hour Solo Mountain Racer, and further refined by other endurace racers
* Made in Oregon
Custom adventure cycling gear handmade and tested in Alaska.
Frame bags, Seat bags, Gas Tanks, Handle bar bags and specialty gear for winter racing.
Born out of a necessity to provide high quality gear for the Iditarod races in Alaska, Epic Designs also produces innovative gear for lightweight touring where ever it may be. Owned and sewn by a passionate mountain biker and who goes to great lengths to test his own products in the Alaskan wilderness.
Check out:
For about the past 3 years I’ve been wanting to do a big traverse of the Wasatch Range from Mantua to SLC, ending at my house. Through looking at guide books, maps and what not I found a link-up that would stay on the spine of the range for as long as possible. Earlier this summer I said, “Fuck it, I’m doing it this year.”
Wed. night I rolled up to Mantua with my gf to spend the night in the car and start riding at dawn. Pistols at dawn. Before we were even done rolling out our bags we had a nice blast of light coming our way from a Box Elder Co. Sheriff’s Deputy. What he wanted is beyond me. He said when he’s bored he heads up to the area, so after he asked for our ID’s and took down our info “just in case” he left. Yeah, that was weird.
I sluggishly got to pedaling around 6am after a few hours of on and off sleep.
The first 10 or twelve miles is an uneventful dirt road climb. I think the gain is just shy of 4K
Within the first couple minutes of singletrack was a hike-a-bike. I was plesantly distracted by these guys, there would be several goat heard sightings for the next few miles.
A little more climbing and the ridge was reached, ahh.
Looking down on Willard Bay and I-15
Yes, please
The trail from Inspiration Point to Ben Lomond is just plain stupid awesome. Lomond waits patiently:
On the summit some Weber St. chicks asked me to take their pic. I asked if they could return the favor. If you look closely you can see them hiding as to not ruin the shot, so generous.
Oh and the downhill…
…it lasts forever
Some hiking had me back on the ridges of the Southern Skyline Trail
I figured that I would be kicking myself if I skipped the Lewis Peak spur. Glad I went for it. Ben Lomond Peak in the BG
On my way back from LP this little plain buzzed me 4 or 5 times. It was cool as hell.
After another screamin’ 7+ mile dh I took a swim in Pineview and got some water
I climbed up to the base of Snowbasin where the ride changes pace dramatically. To the best of my knowledge there is no way to drop down to Weber Canyon on dirt. Following that there is no good way to gain the ridge to the south without going all the way down to the valley to the vest.
The first pickup truck that approached me at the Green Pond TH I thumbed down. He drove me to Weber Canyon and was going in a different direction than I needed so he dropped me at a gas station. I literally walked from his truck to one a pump and had a ride down the interstate lined up. That was too easy.
The second ride gained me some good beta on how shitty the Kays Creek hike-a-bike would be. From everything I could tell from research and talking to this dude was that the hike would be long, hot, steep, overgrown, and full of rattlesnakes. Sure looks like there is some nice singletrack on top though. I decided to skip it. It just sucks that I had to go so far while being that low.
After I got dropped off I stopped off for coffee on my way to the Layton to Kaysille BST. I devoured a big muffin and 3 espresso shots. I also snagged a huge peanut butter bar/brownie thing for later. A nice break it was.
At least the rich have a good sense of style
I opted to climb the dirt road up Farmington Canyon. Maybe it would’ve been more fun if I were on a ATV, Trike, truck, honda crx, or was shooting guns at the side of a hill. Redneck paradise, and the climb was long and dusty.
I made it to camp in the dark and slept nicely. Took this shot from my sleeping bag this morning. Then, promptly went back to bed for a couple hours. I was in no real rush for day 2 knowing it would be far less strenuous than day one.
Day two started a lot like day one ended, with dirt road climbing.
On singletrack again, dropping in front of Grandview Peak.
The Sessions Mountains trail is cool. Not as amazing as the North Ogden stuff, but cool in a remote, you won’t see anyone for several hours sort of way.
I kept rolling on the Lookout Peak trail to Killyon Canyon and finally down Emigration to finish off the tour. The End
For my first “real” bikepacking experience I chose to ride most of the Vapor Trail Race course near Salida, Colorado. I planned on spending 3 or 4 days out solo, depending on food, weather and trail conditions. Generally the route followed a portion of the Colorado Trail, then dirt roads, railroad grades and trails on the west side of the Continental Divide, then to a portion of the Monarch Crest Trail.
The first day began in Poncha Springs, riding up paved and dirt roads to a section of the CT between the Shavano TH and Chalk Creek. From there, I planned to head up Chalk Creek to the ghost town of Hancock. The CT in this stretch suprised me with its rideability, with just a few hike-a-bike sections. I met a half-dozen CT racers, who were weary from all of the wet weather.
On to the Shavano Trailhead
Small Sample of the CT
From Chalk Creek, I turned westward towards ATV land following an old railroad grade and then a dirt road to St. Elmo. I had decided to try to make it to the old mining ghost town of Hancock that evening, but my plans seemed to unravel as I encountered barriers and keep out signs erected by the forest service on the road I had planned to take. The road had been washed out and, according to someone, the road was now sliced by an impassable 40′ gulley . I thought to myself, “This is where the adventure begins”. I continued on, a little cautiously, and was able to slide across the gulley and the side (with possibly only a little deviation into non-public land).
Railroad Grade in Chalk Creek Canyon
Chalk Creek Canyon
I spent the first night in Hancock at the Alpine Tunnel trailhead. The next morning I followed this beautiful trail up an alpine drainage to the collapsed tunnel entrance. From there, I hiked up a steep trail 1/4 mile to the top, then rode down to the unique and historic Alpine Tunnel station.
Alpine Tunnel Railroad Grade
Alpine Tunnel Station
Until that point in my adventure, I had only done a minimal amount of hike-a-bike. The next several hours, however, began progressively more difficult due to steep, rocky terrain chewed up by ATVs. I had now entered ATV land where anything other than a personal 4-wheeler was an oddity.
ATV-Land "Road"
I rode/hiked up to Tomichi Pass, then onto the single track Canyon Creek Trail. The first mile or so nearly killed me, it was extremely rocky and steep and I had to lift my loaded bike up to the top of Paywell Mountain. I couldn’t believe these last few stretches were part of the 150 mile Vapor Trail Race; it took me about 1.5 hours to climb the mile to the summit and I felt completely crushed at the top. It would have taken me even longer but I was nervous about getting to the top before the lightning started.
Paywell Mountain
From the top, it was all downhill through some of the sweetest single track I’ve ridden. Mt. Paywell was appropriately named after all.
Canyon Creek Trail
It’s a great trail, with a good little stinger at the end up a steep, loose motorcycle trail. From Canyon Creek I rode out along the Tomichi Creek road to Highway 50, bypassing the Vapor Trail route which climbs up the Old Monarch Crest road. Frankly, I was beat and just wanted to get some junk food at Sargents and find a good campspot.
I camped along Marshall Creek up the Marshall Pass Road. The next day I climbed up the MP Road, which has a great easy railroad grade up to the Monarch Crest Trail.
Marshall Pass Road
The rest of the day I followed the CT to the standard Silver Creek Trail, then Rainbow Trail out to the highway and back to Poncha Springs.
Rainbow Trail
All in all, it was a great 3 days with lots of mountainous terrain and scenic vistas. My GPS reported over 14,000 feet of climbing, and 115 miles total (I can share my gps file if desired). I learned to moderate my expectations about how much distance I could cover – with this terrain, 35 miles a day was more than enough and took me around 8 hours with a lot of short breaks. There are plenty of other possible loops in the Salida area for bikepacking. In particular I would suggest explorations of the area southwest of Sargents, which appear to have an extensive network of trails bisecting the Colorado Trail.
Now that I’ve had the Salsa Fargo for a while it is time to do a short writeup about it. I got the bike in the beginning of January 2010 and since then I’ve had it out for lots of shorter rides as well as a few overnighters. Salsa Fargo is for me the perfect allround mixed terrain bike. It does all sorts of roads well, from asphalt to poor gravel roads, it excels on easy singletrack and can even be ridden on technical singletrack. On my rides with the Fargo I usually utilize this versatility and ride on all sorts of surfaces. This bike is also made for touring. You can put all sorts of racks on it and there are no less than six positions for bottle holders. I’ve settled for a lightweight packing system with a large frame bag, a handlebar bag and a rear rack on which I usually put a larger dry bag. No backpack is needed with this setup.
Salsa Fargo on a winter overnighter
Salsa Fargo in the summer
Some points about the bike itself and the basic gear:
I made the frame bag myself and I’ve been very satisfied with it. There are also commercial alternatives available from Revelate Designs and Carousel Design Works.
I opted for a rear rack instead of a large seatbag for several reasons. A rear rack is more versatile and can take panniers as well, it works better with the Thudbuster seatpost and it gets the center of gravity notably lower. The Blackburn EX 2 rack is very sturdy and still weighs no more than 590 g.
The handlebar bag will be moved down to reside on the new Salsa Minimalist rack, as soon as it becomes available.
During the winter I use the Nokian Extreme 294 29×2.1 studded tires. My summer tires are now the Continental Race King 29×2.2 which seem quite suitable for my use.
The Cane Creek Thudbuster LT is necessary as soon as you start moving to real singletrack, at least if you do it for more than a few hours at a time.
The Salsa Woodchipper bar is very comfortable. The 46 cm 25.4 mm version also has a nice springy feeling to it, which is nice when riding a fully rigid bike on real singletrack.
The rest of my overnighter gear is just typical lightweight outdoor gear, as well as basic bike repair stuff, and what I bring depends entirely on the weather and time of the year. Some items are mentioned below:
I usually sleep in an Alpkit Hunka XL bivy bag, since I feel much close to the surroundings without any extra tents or tarps around me. If I’m actually expecting rain or there are bugs, I take my Tarptent Double Rainbow instead.
The 600 g North Face Beeline down bag is comfortable a bit below freezing by using it in the bivy bag and complementing it with a light down jacket. The down jacket is needed for camp life in temperatures below freezing anyway. For winter use I have a Marmot Never Summer, which is a very warm bag for the money. I’ve used it it in -27ºC (-17ºF) with a down jacket on top.
My old MSR PocketRocket stove is still very light and usable. For winter use I have a Primus Gravity MF.
The GSI French Java Press is a really nice luxury item, which I can justify bringing, since the rest of my gear is quite light and good quality French roast coffee is an important part of life! Lately I’ve been using the the GSI Ultralight Java Drip filter instead, though. Very small and weighs almost nothing.
The Katadyn Hiker water filter gives a lot more freedom during the summer and drinking water is never far away anymore.
The short Thermarest Prolite 4 has served me well for several years now and is quite comfortable. In very cold winter weather I complement it with a ordinary full length foam pad.
The Canon S90 compact camera is on of the best in its class. It is small and still takes very good pictures. It resides in the small home made gas tank bag, and I can get it out to take a picture in just a few seconds. If I intend to do more photography, I take my EOS 60D DSLR and 24-85 mm lens in a small Lowepro SlingShot 102 AW backpack. This is of course possible only when the bike can take the rest of the gear.
While I do most of my outings on the Salsa Fargo, I also have an FS 29er bike for endurance races, hardcore singletrack riding and even bikepacking on technical singletrack. The bike is a Gary Fisher Hifi 29er, the first incarnation of which cracked in August 2009. During the spring 2010 I got a replacement frame through the warranty program, and it has seen quite a bit of action during the summer.
With this bike I’m forced to use a backpack, since there is no room for a reasonable frame bag. I have been contemplating getting a large seat bag, but I’m not sure whether that would work well. I fear the high center of gravity would affect the bike handling negatively in very technical places. Currently I just use a small seat bag to hold some bike tools and repair gear. The rest of the gear is in the Deuter Trans Alpine 30 backpack, which is specifically made for this sort of use. I find it very comfortable and have used it with up to 12 kg (~27 lbs), though I prefer a lot less. A small handlebar bag could possible make sense, but I have not yet tested it with this bag. On the Fargo 2-3 lbs in the handlebar does not seem to affect the handling much, so it might be worth a try on this bike as well.
The rest of the gear (outdoor stuff) is shortly described in my other setup post about the Salsa Fargo.
A freak of sorts, the Woodchipper bar is our off-road drop bar. Aren’t drop bars for road bikes? Not necessarily. The Woodchipper delivers multiple hand positions and is designed for either road STI style brake/shift levers or bar end shifters. Constructed of super strong 7075-T6 aluminum, the Woodchipper is available in 31.8mm clamp diameter.
Multi-position, off-road drop bars
Bars bend along three planes to create extra wide lowers while still maintaining a shallow drop
Ergonomic design works well with integrated road shift/brake levers
Bar ends accept bar end shifters
Front cable groove for clean cable routing
110mm drop, 80mm reach, 38° drop angle, 26° flare angle
42cm and 46cm widths
31.8mm is AL-7075, 46cm is 332 grams
Black bead-blast finish
Moto Ace Woodchipper
The Moto Ace Woodchipper Bar delivers the same features as the premier Woodchipper Bar but in a more affordable package. As an off-road drop bar it delivers a multitude of great hand positions, and compatibility with either road STI brake/shift levers or bar end shifters. Constructed of 6061 aluminum. Available in 25.4mm clamp diameter.
Multi-position, off-road drop bars
Bars bend along three planes to create extra wide lowers while still maintaining a shallow drop
Ergonomic design works well with integrated road shift/brake levers
Bar ends accept bar end shifters
Front cable groove for clean cable routing
110mm drop, 80mm reach, 38° drop angle, 26° flare angle
42cm and 46cm widths
25.4mm is AL-6061, 46cm is 353 grams
Black bead-blast finish
If you haven’t tried Drop Bars on a Mountain Bike you are missing out.
Please rate this product: (no login required) (59 votes, average: 3.61 out of 5) Loading ...
The Route: We followed the Colorado Trail Race route & CT suggested bypass route w/ a few shortcuts. Skipped segment 7. I caught a ride (about 10 mi) from Leadville to the beginning of section 11, half moon creek. I bypassed section 13 & the first 3.9 mi of section 14 because I’ve ridden them several times and wanted to save myself for the new stuff. I rode into Salida for a day of R&R and then got a ride to Monarch pass, skipping the climb up S Fooses. Got a ride from Silverton to Molas Pass. I did ride sections 22 & 23 (Spring Crk – Stony Ps). We took the highway bypass through Bailey, around Lost Creek Wilderness (the only crappy part of the trip).
The Gear:
Pivot 429 (both of us)
Revelate Viscacha Seatpack (both of us). It worked great once I figured out how to pack it and keep the back end low, & took it just a bit easy. I put food, down jacket, and sleeping bag in here, Mo put food & clothes. In hindsight the Pika might have been better since I couldn’t load this up with out it getting in the way on technical descents & the wheel could hit it sometimes with a good compression.
Revelate Gas Tank (both of us). Worked great.
Revelate Handle Bar Harness/bag (me only). Worked great, awesome harness design. I did have to be careful on big hits or the front wheel would rub for a second. I put my tent & pad in the harness & misc junk in the bag. Mo just strapped her pad to the handlebar.
Camelback HAWG Backpacks. We kept these light w/ no water most of the time. Mo put her sleeping bag, rain jacket, socks and toiletries in here, I had food, clothes, cook pot.
Sleeping Bags. I used a Montbell Spiral # 3, 30 deg bag. It is only 20 oz and packs up very small. It was adequate, but barely. I wore clothes to bed including down jacket most nights. 2 – 4 more oz of down would be nice. Mo had the Montbell Super Spiral #1, 15 deg bag. It is 36 oz and much warmer, and bulkier. For her this was a perfect compromise for the warmth.
Tent: Tarptent Cloudburst 2. Adequate for 2. Worked great in several rains, but 1 night during a hard rain, after much rain earlier, the hard drops hitting the tent knocked condensation off the tent so I felt a bit of a mist. Annoying, but I didn’t get very wet. I probably could have had it ventilated a bit better, but I’m not sure you can eliminate condensation in a single wall tent when it’s rainy. Another camper w/ a similar go-lite tent had the same issue that nite. We’re glad we had a bug proof tent & not just a fly.
Pads: Big Agnes insulated air core
Hydration: We carried two 1liter bottles on the bike so we wouldn’t have to carry the weight on our back. Sawyer filter bottles and Zefal 1 liter bottles. I had to put spacers under the back of the cage so the bottle didn’t hit the shock adjusters. A 2 liter Platypus for the occasional long dry spell and for camp. I set up a gravity filter w/ the Platypus and Sawyer filters in camp.
The Trip:
Day 0 – to mile 11.8
11.8 mi , ~ 1900 ft., 1:54 whl time,
The wiser half suggested that we start a half day sooner since we had a lot planned for the 1st 4 days and this would put us on the hot climb from the S Fork Platte River earlier in the day.
Day 1 – to Santa Maria
46.7 mi (29 mi single track), ~5000 ft, 6:49 whl time, 9:45 ttl time
Sections 2 & 3 & part of the bypass, to near Santa Maria along the highway.
Climbing up from the river to Top of the World was much better since we hit it early in the morning and it wasn’t so hot yet.
Brad was running out of gas on Wellington Lake rd. Rolling hills that seemed like a lot of climbing. Burrito & Coke at Conoco in Bailey hit the spot.
Riding on highway sucked, lots of traffic even on week day, poor shoulders. Missed a turnoff for camping & had a difficult time finding a camp spot along the way due to wilderness/private property. But found a good spot near Santa Maria.
Day 2 – to North Fork of the Swan
30.9 mi (19.7 ST), ~5000ft, 4:53/5:27 whl time
Santa Maria – up highway 285 to top of Kenosha. Slow tough climb. Nasty camp host wouldn’t let us get water.
Up to Gerogia – Maureen fading now and having to walk way too much. In fact, the entire section above timberline.
Downhill to Middle Fork of the Swan. Fun, fun, fun – some reward for all that climbing.
Nice camp at North Fork of the Swan, lots of mosquitoes – no problems, just went to bed.
Day 3 – to Janet’s Cabin
35 mi (22 ST), 5:24 whl time
North Fork to Frisco, fun – climb wasn’t bad and the downhill again was a blast. Ate in town, tried to take the bus to Copper but it was full – no room for bikes on the front, so we had to ride up the path. Stop in town took too long and our food choices were not as organized as we should have had them. Probably better to have sent a care package, or going to city market instead of health food store.
Ride up to Janet’s cabin – steep first section, and then more pushing then we normally have to do. Cabin was great, awesome single track climb.
Great company came in around 8:00 doing a 3 day bike tour. Ashley & ? – from North Carolina.
Day 4 – to Leadville Hostel
30 mi, ~2500 ft, 4:02 whl time
Up over the pass to Kokomo – not too bad
Downhill to Camp Hale, some steep loose rocks, other downhill’s in Colorado are much better.
Camp Hale to Fremont Pass – ups and downs, seemed longer than expected.
Ride down CT after top of Freemont Pass was Wonderful. Would be a great Out and Back. NOTE – come back and do this area again
Ride into town on highway was long – got to town about 3:15 though and that felt great
Leadville Hostel was wonderful – they have a group dinner for $10 which is really nice for meeting other folks.
Day 5 – to Browns Creek
59 mi, ~3100 ft, 6:10 whl time
I cheated and got a ride from Maureen to the seg 11 trailhead. Segment 11 started w/ a hike, then the rest was mostly good ST, worth coming back to. Flatted close to the road, but the sealant seemed to be holding. Maureen left to rest up at home (& ride up Mt Evans).
The highway bypass was OK and went by quickly, the dirt rd along the river was pleasant and scenic. Stopped to watch boats.
Stopped at the Trailhead Store in Buena Vista to pump up my tire and buy some bars. Nice folks, but they don’t carry the old fashioned power bars.
Decided to skip segment 13 and the 1st bit of segment 14 since I’ve ridden them many times, and there would be a lot of hike-a-bike.
Rejoined the trail at Raspberry Gulch
Camped about 100 ft away from Brown’s Creek, but still lot’s o skeeters.
Day 6 – to Salida Hostel
30.7 mi, ~2000 ft, 3:33 whl time
This is a really fun technical section. I had to walk much more than usual due to gear & fatigue.
Before I got to hwy 50, I hooked in a little bit of the railroad grade, then more later along the highway.
Another great hostel
Day 7 – Hang out in Salida
Picked up my food package, which I had mailed here, caught up on email at the library, bought new insoles.
Ate food, drank beer
Day 8 – To hwy 114
46.4 mi (all dirt), ~6000 ft, 8:00 whl time, 11:00 ttl time
Got a shuttle ride to Monarch Pass from Kimberly, one of the hostel owners. My brother & sis-in-law joined me up to to Silver Creek
The sidewall hole that I got on day 5 blew out again so I put a tube in.
I wasn’t tired yet, and didn’t want to make the 0.5 mi, 250′ detour to Baldy Lake, so continued on. Planned to camp at Razor Creek, 3.6 mi ahead. In retrospect should have camped here.
Up to this point every water source that was shown in the CT data book as a half cup, and many that were shown as empty, or not shown at all, had water. Razor Creek was virtually dry. There was a little wormy water, but it wasn’t even deep enuf to put a water bottle into. I continued on.
WARNING: This segment doesn’t look hard on the profile, but it follows the continental divide and goes up and down every hill along the way. Every climb was a steep rocky hike-a-bike. Or maybe I was just tired. I didn’t run out of water but I was completely spent by the end of the day.
Got to the bottom of the ST (finally a long descent!) near Lujan Creek and there was a ‘trail angel’, Apple, w/ shelter set up. Four hikers were hanging out so I joined them & enjoyed an orange soda and hot dog. Nice company after a hard day. Set up camp at the first marginal spot I could find.
Summary, some really good ST on this day, some heinous, but rideable descent, lots of hike-a-bike. Some ST intersections that might be worth coming back to. NOTE: For those who think hike-a-bike doesn’t sound fun, I don’t think it’s too bad, much better than hike-a-backpack.
Day 9 – To Spruce CG on FS 788
54mi, 5:48 whl time, 7:10 ttl time. Arrived at camp at 4:20 which felt early compared to yesterday.
Some good ST on segment 18, then a long bypass.
LONG bypass, lost a bunch of elevation going down to road NN14, then a long climb up to Los Pinos Pass. It isn’t that much gain, but I was dragging. After dropping down to Spring Creek, the climbing up Cebola Creek was much nicer. I’m sure it was all mental.
Met Andy who stopped by on his CT race scout trip. I lost my knife a day ago, & he gave me one! Awesome guy, GO Andy!
Day 10 – To Big Buck Creek
21.9 mi, 3:42 whl time
Short day due to rain
About 2 more hours of climbing to get to Spring Creek Pass. I found a logging rd short cut which probably saved about 1 hr of road riding. It’s not quite legit since there is a sign that says it’s closed for logging, but there was no logging, or evidence of recent logging, and at the other end of the road it didn’t say anything. I’m going to write the FS and CT foundation about getting it legalized. About 3 miles before and 900 ft below Slumgullion pass go left on a road, it eventually runs into county rd 17 or FS 729 in the Cebolla creek drainage before Spring Creek Pass.
Some gorgeous rough riding (& hike-a-bike) above treeline in segment 22 across Jarosa Mesa.
Thunderstorms came in early, at 11 AM I was hunkered down in some 4 ft willows btwn Jarosa Mesa and the next mtn. Hail and rain lasted about ½ hr. Looked clear ahead so I hurried over the next saddle and camped in the ‘marshy headwaters of Big Buck Cr’.
Rained off and on the rest of the day, and rained hard that night. Met 4 nice hikers from Boulder, need to right names down, cuz I sure can’t remember.
Day 11 – To Silverton Hostel
25.1 mi, 6:11 whl time, 8:30 ttl time to Stony Pass. Another 11 miles and 45 minutes down to Silverton on dirt rd. About 2 hrs to finish section 22 quicker than my guess, about 4 hrs for section 23 (longer than my guess)
Beautiful scenery and hard riding (pushing). Weather was cloudy and threatening, but no lightning. Started raining just as I was getting to Silverton.
This section is really hard but really cool. I’d do this again.
Another great hostel.
Day 12 – Hung out in Silverton
Ate food, drank beer.
Maureen rejoined
Rob at hostel is great.
Day 13 – Molas Pass to West Lime Creek
8.7 mi, 1:50 whl time
Got a ride from hostel owner Robbie to the Molas Pass trailhead.
Several ups and downs, easy water access, picturesque,
Camped 8.0 miles in because of rain, had to backtrack a mile.
Met some other folks camping and taking a break due to the rain. 2 bikepackers from Colorado Springs trying out their gear. Richard & Dave from Arkansas rolled in about 4:00. We debated about going on but since the tent was set up and we didn’t know how long it would take to get off the ridge we decided to take it easy. Instead had time to get to know Richard and Dave. (Good thing)
Day 14 – Mechanical Detour, ended up at Bolam Pass
35.3 mi, 4:43 whl time. Seemed longer.
Climbed to pass – high on ridge with exposure in about 1 hr. Nice views.
Dropped down, a bit dryer climate, water still easy access.
Pushed on to Bolam Pass, made good time; about 1:50 into ride derailer hanger broke just before Cascade creek on the downhill. Tried single speed, but wouldn’t stay put w/ any suspension movement, locals riding the CT Jamboree suggested some bailout.
Turned off 3 miles short of Molas Pass. Took road 578B to ski area – was 10 miles long with ups and downs
Made it to ski area, took wrong turn (no signs to highway) and went 6 miles downhill out of our way. Ended at Hermosa creek and figured out where we were and turned around.
Backtracked the 6 miles up hill to correct turn marked Harris Park. Fortunately after that, it was a fast, steep, easy downhill to the highway.
The folks who showed us the map in Hermosa Creek parking lot agreed to take us up to Silverton where the car was parked. Craig was from Tuscon and he kept an eye out for us. Showed up with 2 turkey sandwiches from his biking companion Laurel (sp) very sweet. Between gas and cash we gave him $20.
We had a spare derailer hanger and were able to fix the bike. Decided to forge ahead and get back to Bolam Pass that night so we could continue the journey. Figured we would drive up to the pass and figure out the logistics later. (We could get a ride to the ski area and bike up to the car – probably a 3+ hour ride up hill – how trusting we were that it would work out OK.) The drive took over an hour to go 17 miles, 9 miles of slow rough road with holes from rain. Got to top about 6, had to set up camp and cook in the rain. 11200 elevation. Other campers up there in their tent due to rain.
Summary of riding: Probably could do the entire section 25 in 4 ½ hours wheel time maybe less if you were fresh and pushing it. We didn’t do the last 3 miles so have no real idea of the difficulty of the last climb.
Day 15 – To mile 12.3 of segment 27 (might be called Cape of Good Hope, or Indian Trail Ridge)
23.5 mi, 4:35 whl time, 6:10 ttl time. Left at 9:05, rode until 3:15. Note, this is about the right amount of riding for us, & the only time we hit it.
This was the day of the Colorado Trail race – 5 folks were trying to complete the entire 4 sections in one day. First guy rolled through Bolam Pass at 8:30, 2 more at 9:00. We took our time so we could clean up, wash shorts and take advantage of the cooking tools from the car.
The other campers turned out to be Richard and Dave from Arkansas – who we camped with the night before. They had a knee injury and had to change plans as well. They agreed to take our car down to the ski area and leave it in the parking lot for us to get when we finished. This would be much easier than having to get to the top of the pass. What a stroke of luck for us. They were so wonderful.
Went from Bolam Pass – over Hotel Draw and then beyond Straight Creek – (another high spot for Maureen, So beautiful with flowers in full bloom – green and lush) Weather threatening again. Seemed to rain daily by 2:00
Camped at ridge about ½ mile above a seeping water source, the headwaters of Deer Creek, 11,220’ . Lots of mosquitoes so had a fire for the first time to give us some peace. Water source was a hike but turned out to be easier then we thought.
The ride, Still quite beautiful – especially Blackhawk – fields of wildflowers and a hillside of columbines the size of bushes. Amazing. Mountains very colorful due to mineral content. Can’t remember any hike-a-bike, except for brief times when the lungs couldn’t take it like Blackhawk Mt.
Camp turned out to be a great spot, nice overlook where trail had been rerouted. Great Spruce tree protecting us from the rain. And that night the weather was intense all around us. We were protected. Winds were really blowing as well.
Day 16 – To Durango
30.2 mi, 5:20 + whl time, 8 hrs ttl time
Next morning – not sure of the cause for this – but the fog was rolling into the valley below and rolling over the ridge across from us which was higher than we were.. It was so pretty and amazing. Left camp at 8:15 to try and keep ahead of the weather again.
Stop – we’ve been riding for 45 minutes and what? Another broken derailer hanger?? On no – once again, fixed it up as a single speed, which worked out OK since it was climbing and hike a bike to Kennebec.
Climb ahead of us was to be 1000 ft (No big deal). Three hours later with tons of hike-a-bike, we arrived at Taylor Lake. With the ups & downs it was way more than 1000’ . You have steep switchbacks up to timberline and climb up and over the top of 2 ridges – all rock fields which are impossible to ride up. Some of it you can ride down. Views are amazing and again we got to watch the clouds/fog roll around. The low fog was building, but we seemed to be just 1 step ahead of it. So far, weather was holding and we were safe.
Taylor Lake was absolutely amazing. 1 mile below Kennebec Pass. Worth the effort for anyone! Climb out of lake to pass was easy.
Reached the pass around noon, after taking a lunch break and some pictures. Feeling good, 26 miles to go and mostly downhill (Yea, right!)
First 3 miles – fun, then some climbing, not bad, but Brad had his chain totally off by this point, so we were a bit slower. Not a problem though, fun descent with mild climbing until Junction creek. Getting lower now and warmer and a bit less threatening on this side of the mountains. No concerns for rain at this point.
Climb begins at Junction Creek. Total about 1 mile straight up, another mile where you go up and down and then another 1 mile of pushing your bike. Very hard and Maureen started to bonk. Finally the last 1 mile – although it felt like Déjà vu because every turn looked like the last one, was rideable and a nice change of pace. At this point you still have 17 miles to go so you get a bit worried you have the energy regardless of the elevation gain or loss.
Once at the high point, it was a fun, varied descent. Some really rooty sections, rocky sections, smooth sections, cow shit areas and slippery mud. The last 6 miles are the best. Steep switchbacks and rolling smooth areas with some obstacles.
Finished at 4:15 and a female runner at the end took our picture. Brad asked her for a ride and she decided to give us a ride up to the car at the ski area. Maureen went and Brad stayed behind with the bikes. It was about 25 miles and she wouldn’t take any gas in exchange. The quick ride was great AND finding the Rav at the ski area was a relief as well. You never know when you hand your keys over to complete strangers. Thanks Dave and Richard, and runner girl!
31 August to 20 September 2004
I spent spent nine months planning my first bicycle tour while serving as an Marine Corps embassy guard. The tour journal can be found at http://jaymekohler.com/cycling. They include audio and video clips as well. The Picasa photo gallery can be found here.
Typical daily riding gear
Helmet – Bell X-Ray ’02 I rode without a visor the entire trip because a) I lost the damn thing in a road race in South Africa, and b) it doesn’t obstruct forward vision when riding for hours on end in a modified tuck. The X-ray also has a great retention system with a micro-adjustment dial that adapts to headbands or bandanas.
Headband – Pace USA I like wearing a headband because it keeps the sweat from running in my eyes and extends the life of the pads in my helmet. I avoid wearing bandanas in hot weather to avoid overheating.
Sunglasses – Smith Buzzsaw The Buzzsaw’s interchangeable lenses were great. I kept two sets on hand, an amber set for overcast or rainy days and a dark set. It pays to always wear some kind of eye protection in all light conditions. The glare off asphalt will wear you down.
Jersey, short sleeve – Fox The jersey I wore was loose but not flapping, snug but not constricting. Find a happy medium that affords mobility without excess fabric.
Gloves, fingerless – Performance Men’s Classic CoolMax These gloves were a steal for just under $10. They had a CoolMax back and slightly padded palms without bulkiness. The fingerless feature was great for increased dexterity in all situations. Don’t spend $50 on high-tech gloves that promise the world. Bar ends and correct handle bar and seat position are more important in avoiding numbness.
Shorts, cycling, spandex mid thigh – generic Baggy cargo shorts take too long to dry. They’re excessively bulky, heavy, and not nearly as efficient as spandex in a tour. I maintained two pair of spandex riding shorts on opposite ends of the cost spectrum and spent the majority of my time in the more expensive pair (whenever they were relatively clean). Considering that all your time spent in the saddle will be on your butt, do NOT cut corners with cycling shorts. Buy the best you can afford and leave the $200 binoculars on the store shelf.
Socks, cycling – DeFeet Cycling specific socks are a must. They’re airy, comfortable, quick drying, and synthetic, making them easy to maintain. I wore the DeFeet Speedos (black or gray to avoid stains), which came to ankle bone level.
Shoes – Diadora Gecko ATB I had my Geckos three years before I rode this tour, but they began hurting my feet after 1300 miles. Regardless of choice, use a pair proved to be comfortable over time. Ensure a stiff sole but flexible upper. Shoes don’t disintegrate suddenly, regardless of age, so rushing out to buy a brand new pair before a tour is useless. Simply inspect the area where the cleats mount to the shoe for cracks or tears and be on your way.
Bicycle
Eclipse – fully rigid frame I bought and configured this bike in Ottawa, Canada specifically for my Lewis and Clark tour. The only things that really made it unique were 14 gauge spokes, a rigid front fork, and an adjustable stem (which I traded out for a standard stem soon after). The key to a good touring bike is one you are comfortable on and is maintained well.
Handlebar bag – Topeak Tour Guide This handlebar bag is wonderful, but the mount sucks. It didn’t matter how much I shimmed the mounting brackets with rubber or how tightly I cranked the bolts. It still rotated downward to the point I couldn’t get into the top pocket without grabbing it and moving it back into place. By trip’s end I had strapped my sleeping pad over my front rack and let the handlebar bag rest on it. Mounting bracket design flaws aside, it was a great little bag with plenty of pockets and room. A handlebar bag is a must for maps, documents, money, snacks, and little odds and ends you find yourself needing without having to dig through a pannier.
MP3 player – Rio Cali 256MB (w/ extra 512MB SD card) I used a 1/8” jack mono earbud, with a 1/4” stereo adapter, in my right ear. This way I could hear traffic approaching on my left with a slight turn of my head. Do NOT wear full headphones while cycling in traffic. It’s stupid and dangerous. Having music and/or radio on the tour was a blessed luxury. Ensure you’ve got plenty of music to keep you motivated/occupied while spending 8+ hours a day in the saddle.
Pepper spray Pepper spray is a great way to ward off pursuing dogs, porcupines rummaging through your panniers, or crazed backwoodsmen missing most their teeth. Unfortunately, my pepper spray was confiscated by airport security when it was discovered in my handlebar bag (which I was using as a carry-on from Bismarck, ND to Portland, OR on the initial push to the trail head). Bring it, just stow it in a pannier under the plane. Thankfully, I never needed it.
Leatherman Wave A multitool on crack, the Leatherman Wave can grip, fix, cut, or screw practically anything. Again, ensure it is stowed under the plane.
Assorted chow Snacky stuff. My handlebar bar had an assortment of Twinkies, Snickers, Nutrigrain bars, and tooth rotting candy to aid in my blending with the locals. A snack an hour keeps fatigue away.
Lock – generic 6ft coiled cable I used a very thin, lightweight coiled cable lock for the trip. Any 10 year old with their dad’s pliers could have broken it, but it simply made the bike longer to steal. I actually only used it once in a city park in Pomeroy, OR while I was eating breakfast at a restaurant.
Camera – Canon A80 4.0 megapixel digital Don’t be caught without adequate storage for plenty of pictures and video. It’s the only way to prove you weren’t holed up in a brothel the duration of your tour.
Important documents – money, map, schedule I didn’t dig through panniers for these items. I kept them up front where I could reach them at any time.
Navigation – Garmin eTrex Vista GPS The best thing about having a GPS with me was the shear volume of data I collected about my ride on a daily basis. It also helped me navigate through cities better than any map I had. I recommend taking a GPS if you’ve got the option or the cash. For a few extra bucks and some time, you can get one and input your course with detailed directions. Regardless, bring a map and compass!
Wheelset – Atomic/Ace-19 14g The wheelset itself isn’t all that important. Just make sure they’re built for a touring load and the hubs have been serviced recently.
Tires – Continental Top Touring 2000 Despite a few shady reviews of these tires about excessively tight fits on some rims, I was impressed by every facet of their performance. They’re narrow but not dangerously so, take gravel roads very well, and have minimal rolling resistance. Continental makes the best touring tire. Stick with them.
Tubes, presta valve – Slime 26” with Slime liners I’ve always ridden with Slime liners and tubes. My only flat tire in almost 1500 miles was a pinch flat from running over a jagged rock.
Fender, front – Zefal Use a front fender that tracks the tire. A down tube style fender isn’t good enough. My Zefal fender is an old style that I could mount to my rigid fork, but modern models have quick release mounting that hides away in the steer tube.
Fender, rear – Zefal I used to love my Zefal rear fender, until I cycled in a couple deluges and realized how inadequate the frontal coverage (near the bottom bracket) was. The front of it mounted about 2/3 of the way down the seat tube, causing water from the tire to kick up and over the entire drive train and my feet and lower legs. Find a rear fender that extends to at least the chain stays, near the bottom bracket, in order to avoid Ice Foot on cold, wet days.
Bar ends – Bontrager Bar ends are a must in order to vary hand positions and maintain comfort. If you’re currently using bar ends that you like on another bike, use them for a tour.
Cycle computer – dB 4LW Wireless A cycle computer is an absolute necessity to gauge distances and averages on a tour. Wireless computers kick ass, but make sure you bring an extra battery just in case. Mine was relatively new so it wasn’t a concern. They are also susceptible to neon signs, which cause them to tick away mileage at about 120 mph. I leaned my bike next to a neon Open sign of a restaurant and came back thirty minutes later with 73 extra miles on the odometer.
2 water bottle cages – Performance Terra Lite Buy water bottle cages that you cannot physically see the weld on. They will break at the weld after only days of use. I buy bottle cages that have the weld at the top and is covered by a small, metal sleeve. I’ve never had one break. They’re tough to find but are around if you look enough.
Water bottle, 2 33 oz (1 liter) – generic In addition to my two 32 oz generic water bottles on the bike frame, I kept two 32 oz Gatorade bottles in my panniers for reserve. As tempting as a backpack hydration system sounds, carrying 3 liters of water on your back for 75 miles a day is a real pain in the ass. Literally. Keep the water on the bike and off your back. A Camlebak bladder attached to my front rack and an extended drink tube was an option I considered, but never got around to exploring.
Pump – Topeak Mini Master Blaster DX In my opinion, Topeak make the best pumps ever. This little number was lightweight, solid, and stayed out of the way until the one time when I needed it. If you’re running good tires, tubes, and liners, you don’t need to worry about a rash of flats. A mini pump that uses more stroked per tire should work just fine.
Rear rack – Old Man Mountain Cold Springs This rack is the next best thing to hot wings at Hooters. I can’t say enough good stuff about it. If you’re going racks and panniers for your tour, buy this one. Now. It’s worth every penny.
Nashbar ATB panniers These panniers are Cordura nylon. In other words, not waterproof. I kept my MREs in them and a few odds and ends that I didn’t mind getting wet. They were fairly cheap, too, even when I bought them in 1997.
Front rack – Headland Rover As this ride developed into a self contained tour, which meant carrying the majority of my own chow, I purchased this rack at the last minute (literally, it arrived the day before I was scheduled to fly out). Headland is a less expensive version of Old Man Mountain but made by the same company. There are precious few differences in weight and characteristics. Pick the one you like best. Again, worth every penny.
Panniers – Serratus Aqua-Not I purchased these panniers at Mountain Equipment Co-op in Ottawa, Canada (but you can order them online with greenbacks). The good: Almost indestructible, truly waterproof, awesome retention system. The bad: only one big pocket. If you’ve got some semblance of organization skills, the bad won’t affect you that much. I recommend waterproof panniers and NEVER “waterproof pannier covers” because they generally are not. Plastic grocery bags are a no-cost alternative if waterproof panniers aren’t an option. Regardless, ensure all your things are waterproofed.
Seat wedge – Jandd mini mountain wedge A seat wedge always contains my bike survival kit (patch kit, tire boot, mutiltool). Get one. Use it. Multitool – Topeak Hummer There was a time I swore by the Topeak Alien, which is the Swiss Army Knife of cycling multitools, but the Hummer has everything important you will ever need in a much more compact package. The best part of it is the integrated tire levers. Tube, slime – 26” Slime tubes are gooood. Buy them. Patch Kit/tire boots – Park I’ve had good luck with Park instant patches, so I use them. If you want a longer, more durable repair job, a traditional rubber cement patch kit is a must.
Front Panniers contents
Camping supplies
Flashlight, AAA mini mag Extremely compact and uses the same batteries as my MP3 player.
Water purification – Katadyn Micropur Purification Tablets I never needed these, but they took up almost no room in my 1st Aid kit and are great in emergencies. The downside is it takes about four hours to make drinkable water. It’s not last minute decision to use these.
Sleeping bag – generic My bag was 2lbs 3 ozs and rated to 35 degrees. I slept in running shorts and a t-shirt. The average night time temperature on my tour, in my tent, was 45 degrees. I never got chilled.
USMC issue Gore-Tex bivvy cover Another pound in the mix, a waterproof, Gore-Tex bivvy cover is a great addition to any bag to extend its temperature rating and keep it dry on damp ground. It doubled as a ground cloth, but a custom cut piece of Tyvex is nice to have.
Liner, silk A sleeping bag liner is used primarily to keep your bag clean when you get all grungy for days or weeks at a time. I had great plans for this $50 dollar add on, but I only used the damn thing once. It was way too cramped. I packed it back up and didn’t take it out again. If you’re concerned with a nasty sleeping bag by the end of your tour, take a few extra minutes before you crawl in and rinse the road grime off your legs.
Bungee Cords – assorted generic I took a crapload of bungee cords and only used four. I attribute this to my last minute packing job and never figuring out how many I’d need. Don’t make my mistake.
North Face Roadrunner 2 tent (fly only) This fly only option was the perfect compromise between a full tent and a tarp. With a little adaptation and nylon cord, I could pitch my North Face fly only and save 3 lbs off the total tent weight. It was also a breeze to set up instead of messing with a tarp. Investigate your options.
Fire starter – Bic lighter, matches Campfires kick ass on a cycling tour, given the opportunity. Bring a fire starter to give yourself the option.
Clothing
Pants, zip-off – REI Sahara Convertible These are the best pants ever. Quick drying, comfortable off the bike, and stylish, they double as shorts if you’re chillin’ around town after a hard day in the saddle.
Jacket, Performance clear rain I sweat like a beast in this thing. On cold rains I froze my butt off. Bring a permeable rain jacket and pants (Gore-Tex or equivalent) and save yourself the misery.
Shirt, 2 long sleeve T – generic (synthetic) Layers, layers, layers. I wore the long sleeve under the short sleeve so I could shed accordingly. Cheap, synthetic shirts can be found at Wal Mart for under $10 a piece. Don’t break the bank buying these shirts, but don’t wear cotton either. Nylon and polyester are the fabrics you want.
Shirt, 2 short sleeve – generic (synthetic) Same story as with the long sleeve. Find them at bulk or discount clothing stores.
Shirt, 2 tank top – generic (synthetic) I only wore a tank top once on the tour because it was fairly cold. Watch out for chaffed nipples with tank tops blowing in the wind. I’m serious.
arm warmers – Performance polypropylene My tour started two months behind schedule. I threw arm warmers in at the last second. Thank God! I used them extensively. They take up very little weight and space.
helmet liner The helmet liner worked great on or off the bike when I was hanging out in the cold or sleeping with my head out of my bag. I fleece skull cap would work just as well.
Headband – Pace USA Extra headband for convenience.
Shorts, cycling, spandex mid thigh – generic Extra cycling shorts because they get dirty quick.
Shorts, cycling, spandex briefs – Andiamo CoolMax Padded These were a good idea for use with my zip off pants, but I never wore them. Next time they’re staying at home.
Tights, cycling reflective – Performance Illuminite Another cool to cold weather necessity. Leg warmers may be substituted. I used these all the time.
Socks, 4 pair, cycling – DeFeet Avoid trench foot! Extra socks don’t waste space or weight.
USMC issue PT shorts I slept in these things to give “the goods” time to air out at night.
Sandals I didn’t bring extra shoes, just slip on Nike sandals. I wore them whenever I stopped for the day. Tevas are bulky and heavy. Get a pair of cheap sandals that weigh practically nothing.
Personal health & hygiene (travel sizes)
First Aid kit – Campmor Hiker (stripped down to bare essentials) Light but slightly bulky, I used the kit bag to hold extra little stuff like cables and water tabs. I never got hurt or needed it, but you can bet it’ll come with me on my next tour. Microfiber Towel/washcloth The towel is awesome, super absorbent, large, and dries very fast. I forgot to buy a washcloth. Next time I’ll steal one from a hotel room. Toiletry kit toothbrush, toothpaste, floss Don’t be caught with furry teeth or dragon breath. soap – Camp Suds Camp Suds was chosen over regular soap for its versatility in washing body and clothes. The only change I’ll make is going with a cap that I can pop open and squeeze rather than just dump. Q-tips Baby powder Whatever else happens in the world, nuclear war, global famine, or Hillary Clinton being elected president, bring baby powder on your tour. It will save the thing(s) you hold most dear from undue wear and tear. wet wipes A bath in a box, wet wipes are good for scrubbing the funk off your, well, whatever and powdering up for the next day’s ride. I brought wetnaps and didn’t have to deal with some bulky container or leaky bag.
Bike parts & tools/miscellaneous
Shifter cable – generic Brake cable – generic Cord – generic Tie anything, to include a clothes line, to your panniers, or that 18 year old hooker that you picked up at the last Greyhound station. Chain lube – White lightning I used to think that White Lightning was God’s gift to chain lube, but it’s simply not designed for a tour where a good drive train scrubbing is difficult to do. As a wax based lube, it gunks up too bad. I switched to an oil based lube in Great Fall, MT and never regretted it. AA and AAA batteries Batteries for my camera, GPS, MP3 player, and flashlight. Don’t get crazy and buy dozens to carry with you. Pick them up along the way. Keep an extra set or two on the bike and that’s all. Sunscreen Carry 30 SPF. Anything higher and you’re wasting money. Anything less and you may spontaneously combust. Mosquito spray Mosquitoes have been known to bring silverware to feast on you. Keep them at bay or you’ll be itching like a leper. Notebook & pen For journal writing or scribbling “Show me your tits!” signs to passers by. I brought a full 8.5″x11″ notebook and didn’t use a fraction of it. Next time I’m bringing a smaller sized one. Umbrella The umbrella made a great temporary shelter on the side of the road while I waited for storms to pass. It weighed ½ lb and was ultra compact. It didn’t survive the tour due to mechanical failure. Blame it on the hailstorm I got caught in.
Rear Paniers Contents
Chow
MREs (Meals Ready to Eat) Food on a self contained tour is always an issue and matter of debate. I didn’t want to have to cook my chow or bring along a stove and fuel, so I went with MREs. The good: they’re ready quickly, have plenty of calories, and are diverse. The bad: they’re heavy as hell. Three weeks of MREs, at one meal a day, weighed over 35 lbs. My rear panniers were nothing but MREs. As the weight of my rear panniers decreased with every meal I ate, I eventually switched them with the front panniers. I’m investigating other options for my next tour with the weight, quantity, and space debate with a stove, fuel, and dehydrated food configuration. On a side note, don’t expect to do your daily food shopping at C-stores along the way. They’re an intestinal turning combination of candy, junk food, and microwavables designed for the overweight motor tourist. Stopping by grocery stores is a better option.
I wanted to know what the road into Bailey was like, so I parked at the beginning of Section 3 at 10 am. The map said it was 20 miles to Bailey, and for me that could mean between 4 to 5 hours. My plan was to get to Bailey, eat something fulfilling, and then ride back to the CT where I would find a nice place to camp.
Since my last outing, I decided that more water was important, so I started out with 225 oz. instead of 150 oz. Other changes included more bag space in the frame so I could move the first aid kit, but I lost 1 waterbottle spot.
It took 3.5 hours to get to Bailey *at a medium pace* and there is alot of downhill from FS560 to town. I ate a bacon cheeseburger at the Knotty Pine and checked out their snack selection (not bad). I thought the return trip would be terrible, but the hills seemed to be over with quickly.
At 5:45 I found myself at Buffalo Creek, 12 miles from Bailey, and only 8 miles from my truck. I kept going since I wasn’t very tired. There was a water source only 1.5 miles past my truck, so I decided to refill there and find a camping spot somewhere at the end of Section 2. This part of the CT is treeless because of a fire 15 years ago, but I figured there would at least be a decent spot.
At 7:30, after some wandering around, I didn’t find this water source. Darkness was closing in, and being only a couple miles from my truck, I decided to pack it in and call it a day.
Though not a “bikepacking” trip, I did ride/push a fully loaded bike for 45 miles over 10.5 hours. Section 3 was definitely easier for me than the first 2, and having the means to stop whenever I wanted brought me further than I’d ever been.
Water is not really a concern on the CT. I never used more than 100 oz. at once, so the 225 oz. was overkill. For the future, I think that high water capacity will be important, but I will never miss that 4-6 extra pounds on my back.
I didn’t bring a stove this time, and had I actually slept on the ground, I would really have enjoyed a hot meal. Something lower volume might be in order, although the Jetboil is pretty slick…
I’ve read on other peoples’ reports that the kit refining is unending and I couldn’t agree more. This trip my bike weighed 42 pounds with 3200 calories of food and my pack weighed 15 pounds with 200 oz. water. Overall, 2 pounds less than my last trip, but at the end of a long day things start to feel really heavy…
Pictured is the gear show: 18 pounds, not counting food or water.
59 pounds with 150 oz. water and 5.5 pounds of food
The bike:
Surly Karate Monkey 18”
32 X 22 gearing
2 water bottles
900 lumen LED flashlight
In the CDW High Roller Bar Bag (Med.):
Rain fly from tent
2 poles to give shape
7 stakes
REI 1.0 half pad
Small length of foam pad
REI minimalist bivy
Mtn. Hardware Phantom 32 sleeping bag
2 gels and 2 bars in front pockets
In the Jandd frame bag (3500 calories for the day):
Olympus camera
600 calories cashews
600 calories trail mix
400 calories peanut butter pretzels
2 Paydays
1 clif blocks
4 water bottles Gatorade powder
1 water bottle Ultragen
2 oz. sunscreen
Crank bros. multi tool
Track tool
Patch kit
Spoon
In the Pedro’s bag:
1 Tube
2 Tire levers
In the CDW Escape Pod (Med.):
1 tube
Ibex short sleeve base layer
Ibex sweater
3500 more calories
Patagonia Torrent rain jacket
Extra bike shorts
Fleece hat
Extra socks
In the Wingnut Adventure Pack:
Jetboil Flash stove
Lasagna bikepacker meal
Instant coffee
TP
Hand sanitizer
Nathrapel bug spray
Salsa sleeves
Steripen
Iodine tablets
Headlamp
100 oz. bladder
Bandana for filtering water
2 extra batteries for light
Lighter
Strap for mounting light to helmet
First aid/toiletries: Toothpaste, toothbrush, 2 ace bandages, plenty ‘o gauze, steri strips, xeroform, moleskin, scissors, medical tape, Tylenol, Benadryl, tweezers
The ride:
I went 42 miles in 21 hours. I left Waterton Canyon for the Colorado Trail at 2 pm (95 degrees F) on a Friday and made it to 4.4 miles past the South Platte river by 8 pm. I learned many things on this trip:
Too much food for an overnight. I knew this ahead of time, but I wanted to know what the extra weight felt like. I had enough food to go a little more than twice that distance. Even so, my goal is to make it to a town every day on the CT, so the idea is that I can move faster with less food.
Clipless or not? A 40+ pound singlespeed gets pushed (by me) a lot.
This trip was clipless and I must say it was nicer for on the bike, and the hiking was not that bad. I’ve mostly been riding flat pedals and the extra concentration to “click in” did wear on me a bit. The next trip will be with flats.
The following items will be removed from the kit for going faster: Ibex sweater (1.1 pounds) [too warm], Jetboil (1.2 pounds) [too bulky, plus too much work to do much at the end of a long day], the shorter of the 2 poles from rain fly, 2 stakes, extra socks, big bottle of bug spray (can make do with 1 oz.), and the extra calories (2.5 pounds). This will make my kit around 5 pounds lighter.
This was my first time sleeping in a bivy sack. Mine has a mesh screen over the face and the mosquitoes really bothered me. I ended up scooting way back into my rain fly, exposing the foot of the bivy, but eliminating some of the buzzing in my ears. There is a big part of me that wants to go back to the tent, but I’m going to give the bivy another try.
Water. It was a hot day. I consumed 70 oz. Gatorade and 50 oz. water in 17 miles over 4 hours. I got 150 oz. more water via the Steripen at South Platte. It can treat 1 liter at a time, but my water bottles only hold 25 oz. I need to find a way to treat the full amount in a safe and consistent manner so I don’t spend so much time at the creek. Also, by the time I climbed up 4 more miles, had my recovery drink and Lasagna, I was left with about 20 oz. water for the rest of the night. This was a problem. I either need to camp at the creek or find a way to carry another liter (at least) of water.
My goal is to cover at least 50 miles a day for the CTR… I’m slow.
Well, after upgrading all my older backpacking gear over the winter, I dropped about 8 lbs of trail weight. I planned on doing a fair amount of lightweight backpacking this year, in addition to my nomadic car camping, trail riding ventures, but oh how things change. As the new gear rack started coming together, I really started thinking about bikepacking and how I could make it all work. Here is what I came up with.
Bikepacking Setup - Enterprise, UT
My Stumpjumper FSR has a very restrictive front triangle and I couldn’t see waiting months for a seat bag and custom frame bag. So, I decided I’d put my noggin and limited sewing abilities to the test to come up with a seat and frame bag setup to compliment my new Osprey Talon 33. I had the vision, and you can see it wasn’t pretty. But, in the three trips and 200 miles I’ve done with them so far, they’ve been dragged through the bush, performed superbly and aren’t showing any signs of wear.
The seat bag is made from a 20+ year old, 8 x 18 stuff sack that was available for sacrafice and a lot of spare Velcro. (Thank you Red Green for helping me see in Velcro what you saw in Duck Tape!) To get the placement of all the straps, I simply put some filler in the stuff sack, formed it into place, creating the angled front to the bag, and made plenty of alignment marks with a Sharpie. I have three attachment points on both the post and rails. The front two rail straps (6″ length sewn on each side of the bag) also allow for compression on the bottom of the bag. In addition, there is one compression strap on the back end of the bag. Although I haven’t had any problems, I do want to put a vertical compression strap on the back too – just for peace of mind.
The sewing on this was a comical adventure. Broken threads, knotted knots of stitching, serpantine stitching… Not to mention the fun doing all this work on an already completed bag. The stitching is well reinforced, but this thing is a Frankenpack.
I made a bit of a mistake in how I did the two front seat rail straps. They work, but are a little bit difficult to tighten down. I’ll have that corrected before my trek this weekend. Just making a splice with a couple pieces of velcro and some duck tape, which will allow these straps to be tightened down much like the rear strap, which is a fully removable velcro strip of hooks. The splices will still be holding strong after the bag turns to dust.
For the frame bags, I originally wanted to make a single, wide bag to fill in the entire front triangle space and be capable of carrying 96 oz of water. After making the bag template, I realized this wouldn’t be enough space for much at all, and certainly not for the 2 48oz water bladders I’d be using. So, I came up with this dual-bag setup.
The key features that make this work as well as it does are the velcro strips across the back of each bag that let them be connected together, helping stabilize the bags, and the middle top attachment point, which allows the bags to be opened and accessed without the bags sliding or falling down.
The Osprey Talon 33 is a great ‘little’ top loading pack. At 1800ci for the Small/Medium version, it’s around 600ci more than a Talon 22, but the brunt of the size difference is in the top compartment; you get a bit more than 200ci extra space in the main compartment. The pack really is bigger than what I need, even on the 3-day trips, but I just fold up the air pad into a big block and have it standing against the outside of the pack. That uses up extra space, provides padding and protection for everything else and helps stabilize the load. I don’t experience the pack interference with my helmet like some have mentioned (on the Talon 22 review page), but the pack isn’t getting loaded full up either. It would definitely be a different situation if were loaded for a weekend of backpacking.
At home, off the trail - just to show the packing concept
One last piece to the setup that I haven’t used…yet. I have a couple Energizer LED headlamps that I modded to work with my old Nightrider halogen light mounts, both bar and helmet. The lamp assemblies have a pivot point, which is nice. But, I do keep a couple pieces of duck tape on the bar light to keep it from moving from excessive vibration. I’ve been using these for the last year for my normal night road training rides. They’ve only been on the trail a couple times, but gave me everything I needed. One night ride at Campbell Mesa in Flagstaff and a dark 1st descent of Smith Ravine Trail (near 1000′ singletrack descent using only the helmet light) at the end of my own Prescott Monstercross.
Bar-mounted light and stem-mounted GPS work well together
So, here is the setup I’ve been using:
On the bike – 2006 Specialized Stumpjumper FSR 120:
– Garmin GPSmap 60CSx with stem mount
– Sigma Sport wireless bike computer
Homemade Seat Bag:
– Kitchen trash bag to keep everything in and dry, just in case
– REI Flash Kilo 40+ down sleeping bag
– REI Minimalist bivy
– Marmot PowerStretch tights
– Mountain Hardware PowerStretch top
– Big Agnes Seedhouse2 Fast Fly Floor (finally cut some plastic though and shaved off 6.5 oz!)
– 2nd riding kit (jersey, shorts and socks) if on a 3 day trip
Frame Bags:
– If needing to carry water, 48 oz Nalgene Cantene in each bag (96 oz total).
Otherwise, in one bag:
– Tool bag (levers, patches, spoke wrench, leatherman, chain tool with pins and links, multitool)
– Air pump
– Zip-loc with chain brush, zip-ties and small bottle of Tri Flow
– Fresh/used riding shorts
– Fresh/used riding socks
In the other bag:
– 2 tubes
– Fresh/used riding jersey
– Duck Tape strips
Osprey Talon 33:
In the main compartment:
– Camelbak bladder with 64 – 72 oz fluid
– Big Agnes Insulated Air Core Regular (72″) Mummy sleeping pad
– Evernew titanium 750 ml tall cooking pot and lid
– Brunton Talon stove
– 8 oz / 220 ml IsoPro fuel canister
– Katadyn Hiker water filter
– Insulated coffee mug
– Energizer 2 white / 1 red LED headlamp
– Marmot PowerStretch gloves
– Outdoor Research Novo Watch Cap
– 1 pair camp socks / footies
– 1 pair sleeping socks
– 1 pair underwear
Typical food per day (1 lb 8 oz per day):
– 2 snack cakes for breakfast
– 1 packet hot chocolate
– 2 – 3 coffee mixes (coffee, creamer, sugar)
– 1 Clif, Balance, etc…
– 2 oz peanuts, cashews, almonds, etc…
– 2 oz Goldfish, sesame sticks, pretzels, etc…
– 1 Mountain House dinner (or perhaps 2 salmon packets, some aluminum foil and spices, if campfires are permitted)
– 64 oz worth of CytoMax or Gatorade mix
– 1 or 2 pieces of some type of hard candy
– Always the extra Cliff or granola bar that doesn’t get eaten
Camp off of Indian Spring Trail - Apache-Sitgreaves NF
It’s not yet an ultralight racing setup, but a good light setup that keeps me comfortable exploring and camping for the weekend. Still plenty of room to add in the Marmot Precip jacket and pants for rain season. And, I’ll be making a lightweight shelter (small-scale prototype performed well) for use with the bivy to provide dry coverage, storage and working space.
As for things to change, I want to get this all to work with something like a 700ci Talon 11. Without the sleeping pad, which can easily be worked into the seat pack, I can almost fit it all into my older and smaller version Camelbak HAWG, my normal trail riding pack. It will be!
Evolution - What Was (not on the bike), What Is, What Will Be.
Now, for weight reductions (some ultralight and racing ideas here):
– A 3-8 oz replacement for the aqua socks. Just some neoprene slippers at 2 or 3 oz? Gotta take care of the feet, they suffer enough during the day!
– Replace the BA pad with a Neo Air, when they make a shaped (think ProLite) regular version – short (heels) or thin (hip) pads don’t work for me.
– As the weather gets even warmer, test out an Adventure Medical Emergency Bivy as a replacement sleeping bag. For now, I still want the enclosure of the real bivy too, though. I do live and ride in the desert Southwest.
– Go kitchen/stoveless. I’ll be trying some of the Esbit solid fuel tablets with a sierra cup. Lose the fuel canister, stove and cooking pot.
– Just stank a bit more. Meaning lose the extra ride clothes. Maybe one extra pair of socks and shorts for a 3 day trek, otherwise, forget ’em.
– A better, lighter camera.
Put all those together and that’s about 6 or 6.5 lbs of weight loss still to go!
handlebar packs…total weight 8 lbs 20f. goose down bag w/ 4SSHH system shelter…foul weather gear rain suite etc…
frame pack …food storage…gas tank pack for other little items
super twinkie..several days worth of clothing…w/msr international stove and mess kit…
two 22oz fuel bottles front forks
3 27oz water bottles…also i carry a msr micro water filter for those just in case moments of needing water…
any way just thought i share with you all
After 10 years of mountain biking and almost 4 years living in Colorado going backpacking I stumbled upon this forum which gave me some great ideas on how to combine two of my favorite sports. So last Saturday June 5th I headed out for Littleton CO to Waterton Canyon to do an overnight on the Colorado Trail. I considered this trip a good training opportunity and also it gave me the chance to test out my gear. I plan on doing a longer 5-6 day CT trip later in the summer probably going from Kenosha Pass to Buena Vista or Salida.
My Packing List Included the following:
– In the Jaand Frame Bag – Small Metal Pot and Cup, food and coffee, MSR Waterfilter
– Yellow Granite Gear Stuff Sack lashed to the bar w/ 2 straps – Sleeping Bag and Down Vest
– Camelback – Big Agnes sleeping pad, 1.5 liter bladder, small towel, Compass, Pencil wrapped w/ Duct Tape, Lighter, Chapstick, 2 gel Energy Packs, Rain Jacket, 1 tube, a few zip ties
– Topeak RX TrunkBag – MSR PocketRocket Stove and Fuel Canister, Bug Juice/Sunscreen, 550 Cord, Small First Aid Kit, Hand sanitizer, 10×8 Plastic Tarp for shelter and 4 stakes, Longsleeve HeatGear Shirt, Extra Pair Socks, Warm Hat, Leg Warmers, CT Data Book
– In the small underseat pack – Patch kit and SRAM powerlink, Multitool, Tire levers, 1 tube
– On my person – Sunglasses,Helmet, Bike Gloves, Riding clothing
Here’s a short synopsis of the trip:
I started around 4:30 on Saturday afternoon at the Waterton Canyon trailhead. Since it was a weekend there were the normal bikers, hikers and fishermen in the first 6 miles of trail that is really just a dirt road that parallels the river.
I stopped at the CT trailhead to snap a picture and then continued on the initial singletrack portion that climbs to Lenny’s rest.
I immediately noticed the added weight on the bike during the switchbacks and the front end felt much heavier when trying to lift the front wheel. I stopped for a short breather at Lenny’s Rest then continued on the trail. This was my first time past the bench and I enjoyed the downhill into the valley. For the rest of the evening I only saw 1 other biker and a few backpackers that were camping along the first section of trail. I rode about 12 miles and decided to stop when I saw the rain coming over the mountains.
My site was on top of a ridge overlooking the South Platte river below. That night it stormed on and off all night. The lightning was amazing but definitely made me think twice about being so high on the ridgeline.
In the morning everything was soaked including almost all my gear, the bike, and my sleeping bag. Luckily I stuffed almost all my clothing in the waterproof stuffsack. The views of the valley below were phenomenal and that made up for the lack of sleep I got during the night.
I hung out for an hour or so and the sun came out over the valley. It warmed up quickly and I was able to hang most of my stuff from the trees to dry out. I decided to continue on the CT for the 1500 foot drop down to the river to refill on water then I would turn around and retrace my path back to Waterton. The descent was amazing including switchbacks, rocks, roots and great views. At the bottom I ate some oatmeal and made coffee then started my climb. It took me about 3.5 hours on the return trip to the trailhead. Total mileage was roughly 34. All in all a good trip and excellent learning experience.
Some things to note and change:
I will probably buy a solo/lightweight one person tent as I wasn’t a big fan of sleeping under the tarp in the pouring rain
I’ll also pick up a small dropper tube and add some Prolink Gold lube and small rag to the packing list for the drivetrain.
The Topeak rack held up quite well. It was a model made for road bikes and not heavy duty but I had no issues with it
Also electrolyte drops or tabs would be good for the morning – I haven’t tried any yet so suggestions would be great
Any other help or advice would be appreciated.
This was a trip from last summer. It was a loop from Sheridan, WY to Tongue river canyon and back. I traveled along the old stage coach roads (gravel and two track). I didn’t want to get too far from civilization as this was my first experience with bike packing. It wasn’t an extreme trip, but it was fun. Total trip was 68 miles according to the bike computer. This was mainly to try my hand at bike packing and test the gear.
After trying to decide whether or not I wanted to do this, I finally decided to go for it. Unfortunately the temp was now around 95 degrees at 11am.
Long way to go.. It only got hotter.. it was up to around 100 degrees now. I came across at sportsmans club in the middle of nowhere. Nobody was around, I chilled out under a tree for a bit to cool off. I’m really glad I tossed the extra water on top of my sleeping bag. I had my 2 L hydrapak, and 2- liter bottles of water.
Some info on the stagecoach roads
It turned to 2 track after this, I didn’t take to many pics of this section, I was pretty much just in the zone having fun riding the roller coaster like hills. Where I missed my turn, which unfortunately added a few miles of pavement to get back to where I was headed..
WATER!!!
Finally got to Tongue River Canyon
Yummm
I explored the canyon a bit, had an excellent supper then settled down for the night.. And awoke to a flat tire – damn thorns.
The ride back was a bit cooler as I got going earlier. Scenery still beautiful.. Ride back was relatively uneventful, outside of some cows hogging the road..
HOME!!!
The setup-
GPS, map and phone in stem bag.
Sleeping Bag strapped to bars.
Tent strapped to down tube in bag, Tent poles taped to frame.
Standard tools in seat bag and back pack.
2 liter hydrapak – tools, food, matches, etc..
2 x 1 water liter bottles strapped to handle bars
Conclusions-
Need to improve sleeping bag strapping it shifted a bit.
Bike rode pretty well and total setup was not too heavy IMO
The weather borked my trip this weekend so I decided to geek out and document my setup.
A – Frame bag and gas tank from Epic Designs.
B – Mountain Laurel Designs Grace Duo Tarp
C – Thermarest ProLite 3 short sleeping pad
C#2 (should have been D) – Thermarest pillow
E – SealLine 10 liter dry sack. Already has Marmot Hydrogen sleeping bag & Mountain Laurel Designs Serenity net tent stuffed in it. I also had shorts and a capilene silk weight t-shirt in the dry bag.
F – Silnylon bag for dinner and breakfast.
G – Vintage Camelbak MULE bag & bladder.
H – Snowpeak 600… switch between this and BackpackingLight Trapper’s Mug depending on the trip.
I – Fuel canister and Snowpeak TiMax stove
J – Snowpeak french press – luxury coffee on bike and kayak trips!
K – First Aid Kit
L – MSR towel, mirror, three small droppers with Bronners, sunblock & eye drops.
M – Old DAC tent poles re-purposed to serve as tarp poles.
N – Tent stakes (2 MSR Groundhogs, 4 MSR needle stakes, 4 Ti J-hooks)
O – Granite Gear zip up envelope that I keep all the miscellaneous small stuff in. Brunton Wind, Gerber LST knife, small aluminum whistle, Petzl e-Lite.
P – Simple tool kit: pump, chain break, ratcheting driver with a few different insert bits.
Q – MYOG Bear bag & line.
R – MYOG reflectix cozy for meals
S – Paper & pencil (pens always seem to fail)
T – Wet Ones
U – MSR HyperFlow water filter
Here’s a shot of everything packed and on the bike.
Its a tight fit getting everything packed using the Camelbak. You can see that I had to strap the sleeping pad and pillow to the back of the backpack which would be a real problem in the rain. There’s also a little too much volume close to the seatpost with the dry bag. My leg hits the bag as I’m pedaling. This wouldn’t be a problem on short trips but I can imagine it would be annoying on longer trips. I could solve all these problems by getting a seat bag from Epic Designs or by using a proper backpack like my modified GoLite Ion or MLD Burn.
Total weight for the setup ended up being around 8lbs on the bike and 7lbs in the Camelbak with 1L of water.
(This is from an 09 trip that I finally wrote up.)
What should the focus, or nature, of the bikepack trip be… exploratory? known route? killer views? some fishing? alpine expanses? forest depths? mainly singletrack, or mix of 2 track? get from point A to point B, or start out here, and end up wherever we might? That was what I pondered on for a few months, ever since the request came in from my Alaskan bro-n-law who said he wanted to fly down and try out bikepacking. So I was going through all the trail possibilities of a 4-6 dayer in the CO mountains. Now he’s 7 years my junior, decidedly in better physical condition, but he does live at sea level. That has leveled the playing field in the past on our CO adventures, and I was not above using it to my advantage again, but then I didn’t want to kill him, since when I go to Alaska for trips he hosts he definitely believes in pay back. I finally decided on the CO Trail Molas to Durango segment, with a few choice day rides in the mountains on the way down to acclimatize him.
Introducing the bro-n-law to the 401 trail in CB, acclimatization as good as it gets.
As background, my spouse and I had started out on that CT segment the previous year, before having to bail out half way at Hotel Draw due to an early peak-whitening cold front. So I was familiar with half the route, and from memory it seemed doable for him. Ahh, sweet and fallible memory. Since that trip I’d refined our bikepack gear, got some good seat bags, made a frame bag, traded out an old tent for a new Tarptent, and felt like we were much improved gearwise. Then my spouse blew out her knee in late spring . Funniest thing, she had said that bikepack trip was the hardest thing she’d ever done, and so I thought I’d have to really coax her into doing more, but damned if she didn’t mainly cry over the knee because it nixed all the bikepack trips we’d planned for the summer. What can I say, she rocks! So, being the supportive husband I told her I’d wait until she’d healed up in fall before venturing out on a bikepack trip. But! When the bro-n-law request came in, it provided me with a very guilt free excuse to get out and try all the new gear. That’s the background, and so off me and the bro-n-law went, with plans for my spouse to pick up our remains at Durango.
We planned for the 70 or so mile route, which is mostly above 10K ft in elevation, to take 4 days, so having a few extra days we stopped in Crested Butte on the way down, to test gear, lungs, and some sweet trails. The gear all seemed to stay on the bike and the bro-n-law’s lungs seemed to work, well enough anyway. Turns out he was real apprehensive (possibly a relic of a past ski trips I had taken him on) about the elevation and lack of oxygen, so that gave him some piece of mind.
My apprehension was the CO mountain weather. There is a lot of exposed alpine riding on this trail. The ever present possibility of sudden summer thunderstorms on exposed ridges, hmmm,.. how shall I say it, it has my un-DYING respect. So, we uneasily started out at Molas with some definite weather on the horizon, but at least a beautiful morning to get moving.
However, we almost immediately aborted back to town due to a mechanical. Bro-n-law had shipped his bike down and assembled it at my house, ….without my oversite. I keep forgetting that about my bro-n-law. Yes, he’s a mechanical engineer, but he really does need oversite on whatever he does. Thus, as we’re loading gear on the bike, I notice his bike’s headset has all this play in it. Crap! So we try to tighten it, no go, so then we take it apart, everything looks good, except….. the bottom race/bearings are upsidedown. Magically it goes back together, no worse for him riding it upsidedown for 3 days on CB trails. I take mental note of this for future bro-n-law “ammunition”.
Always smiles at the start!
We’re on the trail now, all smiles, bluebirds singing, sun shining, awesome temps, yes, some clouds were starting to move in overhead, but for now just perfect. At least for me, turns out this Alaskan gets colder easier than I, former Floridian that I am. This starts out the banter and I find out he was really born in Texas, hmm, another round of ammo for me. And so we’re off to a great start. But, it’s not long before what I remembered as an easy, did I actually tell the bro-n-law a relatively level trail, is recognized as NOT. One round of ammo for the bro-n-law against me. So, we start getting into the ride (and smack) routine. Seems he can go twice as far at a stretch on his stronger legs than I, but I’ve got better lungs, so we end up at the same rest spot after my taking a short muscle stop inbetween his breathing stops. So, all in all, it evened out, but I could see the elevation wearing him down as the day wore on. I then made the mistake of telling him the spouse and I made 14 miles the first day. He then by damn was going to do 14.5 miles if it killed him. Going over Rolling Pass nearly did, between the lightning that was hitting as the weather moved in and the cold wind and sleet sucking his core temperature warmth.
Smiles going.
Smiles gone.
But, we made it over and heartily bombed down the other side. We also then started doing more “scenic” rest stops, since he was visibly feeling it now.
The bro-n-law, ahem, enjoying the scenic view.
This was great for me, since at our stops we got to meet several of the 2009 Colorado Trail Race front runners, as they were going through that section at the same time. The first guy we met was Doug, who turns out was really relieved when he caught us. He’d apparently been chasing us two since Molas because people he’d been meeting on the trail had told him two bikepackers were ahead of him. He apparently thought somehow he’d gotten passed by other racers in the night. He had a good laugh about it and thanked us for helping him get a good buffer on the guys behind him. Later that day the bro-n-law needed to take another five to recoup, so to kill time I hiked back up the trail some and came across Stephen and Jefe (kind of startled them coming out of nowhere I think) filling up with water at a stream, so we talked a little. Great guys. It was fun getting to meet some of faces behind the names I see here on this site.
We made it to mile 16 by late afternoon and luckily for the bro-n-law, who was about catatonic at this point, the weather was really threatening to let go. So, we hastily set up the tent and snoozed off the rest of the late afternoon. End of a good long first day, and some lessons learned.
Day 1, DONE!
The second day dawned and nether of us felt exceptionally rejuvenated, but the weather seemed to be clearing out, so with the promise of bluebird skies we headed up the trail. We both improved as we made our way over first Bolam, then Blackhawk passes, having finally figured out that he did best when he didn’t eat or drink much (I started calling him a camel) and me having to do both almost constantly (guess I was a hummingbird). The coolest part (other than the views, trail, flowers, etc) about this section from Molas to Hotel Draw is Engineer Mtn. It is this very recognizable, huge, fixed point that you are able to use as visible evidence of your movement through this vast array of mountains. It’s verifiable proof that even when moving at times very slowly, you do over time move great distances. Great reassurance, that! The second night we camped at a spot on the ridge of the mostly waterless section from Hotel Draw to Kennebec Pass, thus we filled up every water carrying container we had at the last spring and had a frugal camp and most of the next days ride water-wise.
Engineer Mtn, with Kennebec Pass, which is near trails end, way in the distance.
The third day found us on the ridge traverse heading to Kennebec, new territory for me, since my spouse and I bailed before these remaining sections the previous year. All my apprehensions about weather catching us on this mostly exposed ridge were for naught, the bluebird skies were merciless. Pretty damn uncommon for the most part in the mountains in August, so I counted my blessings. Really, all we had to worry about was breathing, moving forward, and not falling off the trail. But, between the trail being just plain steep,.. to being steep and rocky,… to being steep, rocky, and exposed, this section just kicked our butts at times.
Steep, rocky, exposed,….good day to hikeabike though, so no complaints.
Easily the most walking we did was along here. However, what views! And we felt like we had front row seats as we watched a wildfire explode in the distance throughout the day. What began with us asking each other in the morning if that little puff of smoke in the distance was a fire, ended up in the afternoon looking like a volcano going off. Quite the display of nature’s power.
Wildfire, safely in the distance.
We did make it up and over Kennebec pass, said goodbye to Engineer Mtn way the hell to the north now, shed some hard earned elevation at a brake burning pace, and settled back into the abundant oxygen that the trail offered along Junction Creek.
From whence we came, Engineer Mtn waaaaaaay off there.
Looking back up the final pass.
That night we shared a creekside campsite at the bridge with some horsepackers and some hikers, ..all women. Why did something like that never happen when we were young and single. Anyway. Later that night we heard and saw the headlamps of some more CT racers coming through on the trail. All I can say is I am in awe of those guys, since they were likely covering in a day what we were doing in four, and that was after they’d already ridden hundreds of miles. Just in AWE!
It was a cool night, actually frosted us, and of course the bro-n-law was too cold. But, with a good cup of coffee we got moving and out on the trail early.
There’s that smile again, just needed caffeine.
At this point we were starting to have visions of “real” food and pitchers of beer, so lots of inspiration to get going into Durango. This last section had some great parts and some steep parts. I do remember getting passed by a hiker at one point going uphill, but overall this section was a downhill (towards beer) run. Actually, there are great parts and wicked parts on all the sections, but I’m sure by next year all I will remember are the great parts (and that the trail was relatively level).
As we descended we started seeing more and more people on the trail, proof, without Engineer Mountain to verify it, that we were moving, and getting closer to civilization, and the end of the trail. We eventually popped out of the singletrack and onto hard pavement at about noon and then really started making fast tracks to town. A couple of curves later I spied my wonderful spouse pulled over at one of the shaded corners standing by the road with our pups. Of course the bro-n-law, who’s in the lead, cruises on by without the faintest recognition. One last piece of ammo on that guy.
Beer, just around the corner.
Overall that section of CT is just one incredible stretch of Colorado, but it was also one of the hardest things I’ve done in a long, long time. I think that’s how I’ll interpret the bro-n-laws assessment as well, with his final statement concerning the ride, said over a beer later that afternoon, something to the effect “I’d like to do that again,…. just NOT real soon”.
The last weekend of April, 2010, I went for an awesome bikepacking trip with a small but great group of folks from the Portland Hiking Meetup Group. We spent three days leisurely exploring the lower Deschutes River area in central Oregon. Along the way we enjoyed the expansive views, relished the fine weather, and poked around some of the ancient farm buildings and railroad relics.
The route is a Rails to Trails project. It runs from the state park near Interstate-84, upstream to a place called Macks Canyon. It’s about 24 miles one way, though we only did the rideable part which is the first 20. Our group was led by my pal Claudio, and included my friend David from Portlandhikers.org, a nice chap I’d not met before named Mark, and myself.
For three of us, this was our very first bikepacking adventure. Mark was the only one with bona fide bike camping chops. Claudio, David and myself are all experienced backpackers though, and I thought our first bikepacking trip went really well.
Here’s Mark doing a few laps around the trailhead parking lot as Claudio snaps a few pics:
We rode the single track that hugs the river’s edge for the first two miles, then cut over to the actual railroad grade. This is Mark, David, and Claudio as we make a quick stop for pictures by the rock arch about 2 miles in:
About 5 1/2 miles in we encountered the first of two old railroad cars:
Two miles later, we stopped at the more dilapidated second car:
Farther along we caught a glimpse of a coyote as he or she scurried away from our considerable ruckus:
Photo by David
April is really the perfect month for this trip as the weather is usually decent, the rafting season isn’t yet under way, and the canyon is verdant and lush with spring grasses and other vegetation. Lots of gorgeous wildflowers too. In another month or two this place will be baking hot, brown, and crispy.
By late afternoon we were making camp at Fall Canyon Camp, otherwise known as Operation Desert Snore:
Fall Canyon is just one of the many campsites along the Deschutes that were set up primarily for rafters. We didn’t see anyone rafting the river this weekend though.
Afterwards we struck out to explore the eerie, yet strangely beautiful Harris homestead a mile down the pike:
Back in camp, Mark and David watch as a freight train rumbles by on the opposite shore:
Saturday morning we enjoyed a leisurely breakfast, then left our camp set up as we headed upstream for more explorations.
Getting our gear together for the day’s ride:
The view from camp that morning:
Beyond the Harris homestead were more old buildings to explore:
Photo by Claudio
And then it was on to the old railroad water tower:
Continuing upstream:
A gorgeous butterfly along the way:
And caterpillar:
Photo by Claudio
Around mile 20 we came to the end of the official bike trail. The path continues for several miles to Macks Canyon but it gets very rugged. There are six side canyons on that stretch that were once spanned by trestles. The trestles are gone now, and the only way through each of these canyons is on sketchy foot paths. Also, the unimproved railbed between canyons is rocky and difficult to ride.
Claudio and Mark forge ahead through the first canyon with their bikes to see how feasible it might be to continue:
Photo by David
David and I followed on foot. After some discussion we decided the remaining few miles likely weren’t worth the effort, so we opted to end our upriver explorations here and have some lunch:
The river wraps 180° around a bend at this spot:
Photo by David
Mark takes in the view:
Photo by Claudio
Mark and Claudio hefting their bikes back through the side canyon:
Back on the rideable stuff:
The skies had threatened to rain on us all day, but only managed to spit a little here or there. Then as we headed back toward camp the weather began to improve quite nicely:
When we got back to the water tower, we decided to head up the nearby side canyon to see if we could find the remains of the old Mays homestead that had been mentioned in an old trip report on portlandhikers.org.
A look back at the water tower from the road up to Mays Canyon:
Along the way, Mark and Claudio spotted some deer on a distant hillside:
All we found at Mays Canyon were a few pieces of metal roofing and other bits of debris. Nothing resembling a cabin, or much evidence of the fire that was mentioned in the report either. It’s all very lush, green, and overgrown now:
Photo by Claudio
The area was simply gorgeous though, so we scrambled up an adjacent hillside in search of some views:
Photo by Claudio
Heading back down:
On the home stretch, Mark had a blowout about a mile from camp. Rather than fix it there, he opted to walk his bike back to camp so he could work on it in relative comfort:
Actually, he ran with his bike and hardly broke a sweat. The guy’s in amazing shape.
Nature’s bike rack:
Back at camp another freighter rolls by:
The evening turned breezy and chilly. Later on Claudio and Mark hunted up some firewood for a very welcome fire.
David played his harmonica as we sat around the campfire:
With David’s harmonica, the roaring campfire, and the rumbling freight trains, the evening took on a sort of folky – hobo – Woody Guthrie kind of vibe that was really fun. OK, granted, Woody didn’t have lycra shorts or titanium cookware, but it’s still fun to think about. As we reflected on the day’s adventure we realized we hadn’t seen any other people all day. And only a few the day before. Amazing considering how beautiful this area is.
Sunday morning dawned bright and sunny. The nice weather made it all the harder to pack up and head back to the big city, but return we must.
My little corner of the campground, ready to pack up:
I started the trip with about 11 pounds in the day pack, including food, and 8 pounds in the trunk pack. Plus my Tarptent strapped to the handlebars. I think the main thing I want to change for next time is to switch to a hydration bladder.
My rig, all packed up and ready to roll:
Our four aluminum steeds, ready to roll:
Yours truly, ready to roll:
Photo by Claudio
On the road again, headed north:
The remains of an old trestle caught our attention:
The day was young with plenty of time left to explore, so we headed up the side road called “Rattlesnake Grade” for some views. Claudio and Mark motored all the way up to the canyon rim on their bikes, some 1400 feet vertically. I didn’t have the legs for that steep, long climb, so I hoofed it about halfway up. Got some nice views nonetheless:
The awesome view from the top of Rattlesnake Grade captured by Claudio:
Photo by Claudio
Back on the main trail:
Near the end of our journey is a short, wet, paved section of roadbed with a “Caution Wet Floor” cone, the kind you see in the supermarket.
Yeah, I’m not making that up:
Great group and an awesome trip! Thanks guys, I can’t wait to go back!
Here is my setup for the AZT300 this year. Not a ton of experience with multiday bikepacking and I spent a good deal of time tinkering and tweaking on this system to get good and confident with it. Overall, it performed flawlessly for the two days I was out and I would run the exact same setup again tomorrow without changing a thing.
Goals for future iterations include the always looming interest in lightening things up, and more compartmentalized spaces for things like food. I found myself digging around a lot to get the the things I wanted. I will also be tinkering around with making some custom bags, especially for the handlebar bag. Access to this area with my current setup is a bit tedious and inefficient.
mgindle's bikepacking setup
Bike
Siren John Henry, Semi-custom with extra bottle mounts, and stronger downtube.
Stans Wheels, tubeless
Specialized Captain front tire, Geax Saguaro rear tire
Sram X9 drivetrain
Avid Elixer Brakes
Ergon grips and barends for multiple hand position comfort
On the Bike
Carousel Seat bag (with extra mojo from SirenMary as she used for her Tour Divide run)
40 degree sleeping bag
Bivy
Aircore sleeping pad
Jandd Frame bag in front Triangle
Tool kit including:
Multi-tool
Leatherman (tankish but useful)
Patches
Tire boot
Tire Levers
Nuts and bolts miscellanea (Chain links, water bottle bolt, cleat bolt, brake pad set, misc, m5 and m6 bolt,
I have always been a set-up troll, just always checking everyone’s system out, so thought it was time to share.
Bike: Salsa Dos Niner, medium, Reba U-turn, almost always at 90mm, but I love the maxle. XT Cranks, front hub, cassette, chain. XTR der’s & rear hub. Stan’s Flow rims, WTB seat, WTB WW LT front tire, Geax Saguaro UST rear tire, both set up tubeless. Flat pedals, Thomson stem and seatpost, Salsa 17* bar, Serfas silcone grips, Cane Creek bar ends.
Bags: All home made, custom stuff. Homemade Backpack, weighs less than a pound! Seatbag, Micro Frame bag, two stem/handlebar bags, one stem/top tube bag.
Gear: Sleeping System; Homemade bivy, silnylon floor, Pertex momentum top. Custom modified sleeping “bag”, bottom is a bivy sheet, top is a sleeping bag liner sewn together to be double layer. Micro thin pad, for insulation only. All together close to a pound. Options are a silnylon tarp w/ ti stakes and line, leave home if looking dry. (PS I don’t really sleep)
Extra Clothes: Knee warmers, Icebreaker wool long sleeve, light weight fleece shirt, wind shirt, warm gloves, glove liners, Sealskin socks, headband, Patagonia Traverse Pants, O2 shell. Last years race taught me to be prepared!!! But if it’s looking nice might leave pants and socks out.
Clothes Worn: Shorts, Pearl or Sugoi, Icebreaker wool T-shirt, wool socks, Montrail Mtn Masochist shoes, helmet.
Hydration: 6 liter MSR dromedary, 2 Zefal Magnum 32 oz, one 28 oz bottle, I like water! The bladder will be full only a few times and it isn’t that heavy, the bottles are nice cause I plan on using more liquid fuel/food.
Bike Kit: Pump, 2 cross tubes w/stans goo, tire levers, modified chain tool, allen keys(4 & 5mm), spoke wrench, Lube an Rag. Extra bits; chainring bolts, chain links and pins/master links, nipples/spokes, seatpost bolt, h2o cage bolt, brake pads, think that’s it.
Hygene Kit: Toothbrush, bit of paste, Handi Wipes!!! Alcohol swabs, chamois creme, tylenol, few other salves.
Emergency Kit: Lighter/matches, compass, ace bandage, few sponges, duct tape, benedryl, zip ties, Chlorine Dioxide tabs for water treatment, superglue, xtra batteries, hmmmm?
Lights: I want lots of flexibilty, ie low and bright. Fenix ld20, pd30 on bars, ld10 on helmet, w/batteries&mounts, less than, 300grams
Spot, old one. GPS, 60 CSX, big old tank.
What else?
Swiss Army locking blade knife, heavy, but just a great piece. It like has a cork screw?!
Food: Rice Cereal w/protien& dried fruit crushed into ziplocks, Sharkies, Bloks, Clif Shot electrolyte mix one or two bottles, protien in other bottle(s). Salmon in foil pack.
Over view: I carried too much food from the start last year, so trying to go lighter there. Also all my bike bags blew up last year, so did some refining there as well. Better sleep system this year, better lights, overall much lighter set up, but I feel like it is solid and can handle some amount of the nasty. The great thing about the AZT 300 is there is a fair amount of convenient resupply on course, I generally carry my water from town to town, without treating it. I have been really trying to imagine going lighter, but I am too paranoid to ditch mush else. Still it kills me to see some folks with next to nothing on their bikes, How They Do That? Hope this helps someone get their kit rolling, bikepacking is the $H*T.
The Banjo Brothers are a small entity, located in one of this nation’s great cycling cities – Minneapolis. We are a fine purveyor of cycling accessories, or more simply put, we make bike bags and stuff. Our mantra is to be known as the company who makes solid, well-designed bags for commuters and recreational cyclists without cutting any corners.
The bag is not yet on the Banjo Brothers web-site but here are the details per the hang tag and my observations.
This seat bag is 400 cu in. with a waterproof outer. Inside is a snap-in welded waterproof bag. Two straps on the outside strap under the seatrals and serve to compress the bag. One strap on the bag closes the bag. The inside is supported by a hard plastic sheet to maintain shape. Small zipper pocket on top to store Credit cards/money/keys. A small loop on top for lashing a light jacket.
THE MANTA SERIES brings Osprey’s Hydraulics™ solutions to a multisport pack. Utilizing our HydraLock™ system, these packs offer great features for adventure oriented pursuits. Osprey carry and torso-specific fit help you focus on the adventure and not on what’s on your back.
BioStretch™ Harness
• Built-in magnet for quick bite-valve attachment AirSpeed™ Suspension
• Mesh backpanel supported by LightWire™ frame with side vents and ridge foam backing
• Stretch sternum strap with magnetic hose attachment
• Lightweight webbing BioStretch™ Built-in Hipbelt
• Mesh covered, perforated hipbelt
• Modified straight ErgoPull™ hipbelt closure
Shared Features
Top zippered pocket
Helmet attachment daisy
Front stretch woven pocket
Upper side compression straps
Integrated rain cover
Ventilative mesh backpanel
Stow on the Go™ trekking pole attachment
Zippered fabric hipbelt pockets
Safety blinker patch
Full elastic stretch sternum strap
Magnetic sternum buckle
3-Liter reservoir included
Please rate this product: (no login required) (36 votes, average: 3.69 out of 5) Loading ...
The Gila river runs between Kelvin and Florence, cutting through some of the most amazing country Arizona has to offer — from rhyolite cliffs to deep saguaro studded canyons, singletrack to freeride rock mesas and brutal roads. This loop has a little bit of everything, using an incredible stretch of the Arizona Trail as its backbone.
At around 100 miles, this route is perhaps doable in a day, but don’t let the mileage fool you. There is over 10,000 feet of climbing and plenty of slow riding. It is best done as a three day bikepack. Maybe four to really take it in.
GPS Data
3D image from TopoFusion software – click to enlarge
Overall the riding is rugged and technical at times. Full suspension mountain bikes are the best choice if possible.
The core loop is a 110 mile figure 8 that starts and ends near Kelvin, AZ at a large trailhead. The ride can easily be shortened by skipping the northern loop. That also cuts out the resupply option in Superior.
A few reliable water sources are shown as waypoints. Others may exist in wetter times, such as a flow down Box Canyon.
There are two short alternates in the core loop GPX:
LowWater_Ford_Shortcut: Fording the Gila River with a bicycle is generally not recommended, but is sometimes possible. The river is dam controlled. November->January the flow is usually low, making crossing easy — this can seriously shorten the loop on the west side. Most times of the year, however, and especially in the spring, the flow is swift and deep. Check the USGS streamflow gage at Kelvin. Over 200 CFS is not recommended. If the river is low, this shortcut route can be taken to chop a number of flat road miles off. Know that the shortcut is also overgrown and not heavily used!
Area52_Adventure_Route: Area 52 is a rock mesa that can be an adventure in itself, for those so inclined. There are no trails, however, and a guide is recommended. The Area 52 Alternate track follows a moderate route through some of the lower lines, but Area 52 can also be bypassed completely by taking the 4×4 road just north of the mesa as the main track does.
Spring (late March into early April) is the prime time to do this loop. This area typically has some of the best wildflowers in Arizona. But generally the season is October to April. The rest of the year is quite hot and these are low AZ elevations.
Aussie living in Japan here – long time MTB rider and hiker, about 5 years ago started combining the two with regular touring (mostly 2-3 day trips, but always dreaming of longer) and last year made my first foray into proper BPing land. It went pretty well, I used a DIY-modified rear rack and Topeak bag plus some dry bags strapped to my bike.
I’ve just come back from my second overnighter after testing a new tent and some more modifications to my Topeak rack (poor man’s copy of OMM rack) that worked really well.
On the bike I have the rack, with the Topeak bag containing most of my food, cooking gear (Ti mug, mini sized gas burner, spork-thingy, chopsticks) and clothing, plus my sleeping pad.
In the blue drybag under the seat is my sleeping bag, inadequate for the late-spring cold snap we just had.
On the bars I strapped another drybag containing tent (minus poles and pegs) – next time I’ll put my sleeping pad and something else here too to help balance a little bit.
In the backpack I had a bit more food, a jacket, spares and tools, tent pegs and poles, and not much else really, I should have filled it up more. The weight was very reasonable, not much more than the camelback I’m accustomed to riding with.
Although it isn’t the lightest setup, I like the rack/Topeak bag – they are integrated – it slides on and clips into place. Very easy to take off and helps packing/unpacking, and it was much cheaper to use gear I had or could buy locally to ordering CDW or Epic Designs bags and paying for international shipping. Plus the rack is ready for my panniers for that tour of the length of Japan I’ll do someday.
So far this setup has proven to be rough singletrack-rated – and the balance is quite good – up or down on technical terrain hasn’t been a problem at all. As it warms up I’m looking forward to finding more adventure in the mountains of central Japan that are right at my backdoor. By the way, my sorry little camera didn’t pick it up, but Mt Fuji was visible to the naked eye in the above photo.
If anyone would like detailed photos of my rack mods, please let me know. I’ll be happy to take some close up pictures and ramble on some more.
My gear list from this past weekend’s excursion. I like it, but I’m not saying it’s my end-all kit. I’ll continue to work on it and make improvements.
Bear in mind, this is my kit for singletrack, as opposed to big dirt road mileage. I used this setup on two consecutive days last weekend with temps ranging from freezing to the 80’s, elevations from 1500-5500 ft.
In the Carousel Design Works seat bag:
sleeping bag
3/4″ sleeping pad
tyvek bivvy
(packed in that order)
In the Epic Designs bar bag dry sack:
1 pair wool hiker socks
warm knit cap
Marmot precip jacket
Patagucci R.5 warm shirt thing
Black Diamond ugly but lightweight and warm fuzzy long underwear bottoms
1 pair undies. Boxers not briefs.
In the Epic bar bag brain pocket (extra gizmo in front of the bag)
maps
lip balm
sunscreen
A&D ointment
iPhone
SPOT unit
some snacks
arm/knee warmers as I pulled them off
water treatment (iodine in a small bottle, some tablets)
bandana
In the Wingnut Hyper 3.0 pack
2 26″ innertubes
minipump with duct tape stowage
Minitool- huge do-everything variety
Esbit stove & fuel tabs, lighter (for a luxurious trip!)
Titanium mug, lexan spoon
Robot Food; Sustained Energy, endurolytes, various unidentified Hammer pills, Gu2O or something like it
More food (4 oatmeal packs, TJ’s pasta chingus, canned smoked trout, almonds, candied ginger)
1 brick o’ ramen noodles. Good calories & salt, very lightweight
2 beers, canned.
Wake-up kit: Starbucks Via brew packets, Emergen-C packets
Pretty Guy kit: Toothbrush, cut to fit inside mug, travel toothpaste, floss, TP, Tums moleskin
Bike Love kit: 3 zip ties, patch kit, tire plug kit, a couple random bolts, chain links, tiny bottle of lube
a couple Clif bars. The cherry almond kind was edible
Compass, tethered to the pack straps. Mileage marked in dots on the string to correspond with the scale of maps we were using
a piece of fruit
wallet
Snickers bar, cleverly hidden next to my water bladder
reserve platypus bladder for extra water capacity when needed
In the Carousel Design Works top tube fuel cell:
more snacks; dried apple dealies, Panda licorice, fig newtons
bought pop tarts and other goodies acquired along the way
On the stem:
Gel flask, loaded full of maltodextrin goodness.
On me:
Shorts
jersey
knee warmers
arm warmers
vest
smartwool socks
gloves
Uvex helmet
home made black diamond headlamp adapter chingus to fit the helmet
Shades- two pair; light lens for morning & twilight, dark lens for daytime pimpin
Pearl Izumi shoes (racer guy shoes, not the cool hike-a-bike shoes… yet)
On the bike:
3 water bottles.
Robot food stayed in the insulated bottle to help prevent stomach funkiness
Cateye velo 5 bike computer
Contemporaneous notes:
Things to bring-
ipod shuffle
Hammer Recoverite
more blister stuff
hand sanitizer
sunglasses bag
salty snacks (Synders pretzel bits are evil & full of MSG, oh-so-good)
razor blade for cutting things
altimeter
99 cent womens stretchy gloves
Things to think about-
more cork tape on the Jones bars, especially around the tube intersection
possibly modify the bar bag/ handlebar interface for better hand room
watch wheel tension/ tire pressure with loads
pack for 2 starbucks coffee dealies per morning
more esbit cubes, maybe 2.5 per day?
maybe a roomier pack? Considering the Wingnut Adventure Pack
the bike computer doesn’t register miles at hike a bike speed
might move gel flask elsewhere (off stem) for hike a bike situations
I’m Steve Wilkinson from the UK, a 35 year old guy who sometimes rides bikes. In 2009 I competed in the Tour Divide, and after the event I started to compile some words about my time on the route. Over time however, the number of words grew and grew as I began to add what was going on in my mind and why. I also wanted to write down, and get out of my head, all my thoughts about racing the Divide from my two trips down it. As my write-up expanded, I began to realize I also had a story to tell…
I was one of eight riders who finished up the 2009 race on the same day, some of us reaching the border together, and spending much of the race in each others company. We were in the middle of the pack and termed ourselves the peloton. This is my story of riding in that group, and my trip through the Rockies – The Story of Eight. I’ve saved it into a PDF document to download since it’s become more a short book than a write-up.
If you followed the race, and became a red dot junkie, I hope you are able to enjoy this, and are able to build a better picture of these anonymous cyclists who were behind the tags. If you didn’t follow the race, and don’t know much about it or the route, I still hope I’ve managed to explain enough about it to engage you. And if you’re planning on racing the Divide, I hope it gives you an insight into what such a journey is like.
X-Fibre .7 denier synthetic down is here, the smallest ultra-fine microfibers available. This results in a lightweight insulation that is very compressable and warm. X-Fibre micro-fibers are softer and finer than silk, creating a feeling smoother than down. X-Fibre tears up the competition with an amazing 5 to 15X smaller denier insulation. You must feel the difference!
• Color: Mint
• Bag dimensions: Length 94″, Shoulders 35″, Foot 24″
• Bag weight 2.2 lbs
• Fill weight 1 lb
• Pack size 8″ x 10″
• YKK Zipper
• Double Zipper
• Free Compression Sack
Please rate this product: (no login required) (21 votes, average: 3.57 out of 5) Loading ...
I’m only just now getting into bikepacking, but I’ve got a decent backpacking kit already that I plan on using. I have several options for some items, so don’t think I will carry all of this.
I don’t have any kind of racks for my bike yet, so I plan on carrying it all in a pack for now. I will add at least a trunk rack eventually.
I have two bikes I could do this with:
2000 Diamondback Topanga Comp (hardtail)
2003 Specialized Stumpjumper FSR Comp (FS…many upgrades from stock)
Pack:
Osprey Atmos 50
Shelter:
Shires Tarptent Cloudburst 2
-or-
ENO Doublenest hammock (I don’t yet have a bugnet or tarp for this, but will be adding them)
Sleep:
homemade 20deg down quilt or 40deg Lafuma down bag
Big Agnes Insulated Air Core
Cooking/water:
Primus Alpine Micro
Primus Litech tea kettle
MSR Miniworks EX (considering a move to a Katadyn Hiker Pro)
MSR Miox
Katadyn Micropur tablets
Ursack w/vapor barrier bag
Light My Fire spork
Orikaso plate/bowl/mug (I take only what I need)
Lights&Navigation:
Garmin GPSMap76CSx
Garmin Edge 705
Brunton Eclipse 8099
waterproof map case
Princeton Tec EOS
Magicshine bike light
Misc stuff:
First aid kit
Leatherman Squirt P4
Buck Whittaker
Stormproof lighter
sanitary kit
fishing tackle & collapsible rod
bug dope
Motorola T5950 radios
Typical pack weight for me would be about 15lb before food & water, though I’m acquiring some gear that ought to lighten my load some. Moving to the hammock should be nice. It should save me a fair bit of weight compared to the tent, groundsheet, and inflatable pad. I’ll be able to use just a CCF pad, no groundsheet, and the shelter weight should be a wash. Maybe cut a pound? I’d be happy with that. I should also be able to save some weight by switching water filters. Swapping the 76 for the Edge will cut a little weight. Overall pretty solid. I’m not accounting for bike repair gear here. I haven’t gone through cataloging all of that, weighing it, and adding it to my gear list yet.
Ultralight cooking kits for multi-day and S240/Overnighter experiences.
What I’ve learned has been through my experiences and from the folks in the ultralight backpacking world. Backpacking Light is just the tip of the iceberg in this respect. From BPL there is an endless stream of resources.
First up: What I’ll call my Luxury Ultralight kit. If I am going on an overnighter or touring this is the kit I take. Contents of the kit include:
This spoon comes as part of a fork & spoon kit. You may be tempted to buy a spork, but do yourself a favor and don’t…you will ultimately find it does neither well.
DIY/MYOG Alcohol Stove (Pot Pressurized or Penny Style depending on the experience)
DIY/MYOG Windscreen and Stove Plate
Bic Lighter
I use a clear lighter so I can see fuel levels. Bic also makes mini lighters that are more compact and lighter. I carry a handful of matches in my ER kit for backup…always, always carry more than one way to start a fire.
Bandana
simple cotton, good for cleaning up and using for other needs in/around camp and on the trail.
Mesh SnowPeak Stuffsack (came with my SP700 Mug)
Total kit weight comes to 350g/12.5oz. without fuel (more on fuel later)
SP700 on a Pot Pressurized Stove
I made one modification to my SP700 that’s worth noting. The mug lid comes with a feature to hang it on the side of the pot. While it is clever, I ultimately found this feature useless and it snagged the side of the mesh stuff sack when unpacking. I cut it off, ground, then polished the affected area to finish it. I then drilled two holes in the center of the lid and used some paracord as a lid handle.
SP700 on a penny stove using two titanium stakes and the windscreen for pot support.
I consider this kit luxury as a result of one item in my kit. There is nothing better than sitting in the woods, leaning against a tree, drinking coffee or a cup of tea from this, my SP450 double wall mug. Without the double wall mug, this kit weighs in at 255g/9oz.
Now this kit is great! It’s light, flexible, and durable. However, to purchase this kit, costs well over 100US dollars.
This brings me to the second part of our discussion, The DIY/MYOG kit. Contents of the kit include:
24oz. Heineken can pot.
Ziploc 32 oz. storage container
Plastic Disposable Spoon
DIY/MYOG Alcohol Stove (Pot Pressurized or Penny Style depending on the experience)
DIY/MYOG Windscreen and Stove Plate
Bic Lighter
I use a clear lighter so I can see fuel levels. Bic also makes mini lighters that are more compact and lighter. I carry a handful of matches in my ER kit for backup…always, always carry more than one way to start a fire.
Bandana
simple cotton, good for cleaning up and using for other needs in/around camp and on the trail.
Total Kit weight comes to 200g/7oz. without fuel
Heineken Pot on a P.P.S. The lid is removeable via the yellow cord. The top is cut just below the rolled rim. Many users of this pot will insulate with cotton cord, and/or silicon for handling and drinking from the pot. I’ll get to that at some point.
All contents of this kit fit inside of the Ziploc storage container, which protects it during transport. The pot fits upside down; lid, stove, lighter, and bandana go in the pot while the windscreen fits between the pot and container. The storage container can also be used as a mug or bowl.
This kit is affordable, accessible, and a full 50g lighter than my luxury kit! You just have to like Heineken, or be willing to dump it out.
Finally, Fuel.
Alcohol stoves can use two types of fuel Methyl and Ethyl Alcohol. Before you use either of these I suggest you read up on the types of alcohol and potential hazards of handling and burning them. Zen Stoves has some great information regarding where to find them and what the risks are. This is not meant to deter you from using alcohol stoves. It is meant to encourage you to read and understand the tools you are using. I sound like Norm Abrams.
I’ve used both types of alcohol, but I prefer Ethyl. Ethyl alcohol is found at nearly all hardware stores, packaged as denatured alcohol. It is also found in several other products including the beer in the Heineken can and the hand cleaners found in nearly all public spaces these days. However, to be used as a fuel the product must have Ethyl alcohol near the 90% range or above.
My stoves use somewhere between 1-2oz. of fuel per burn. Depending on the length of a trip, opportunities for resupply, meals planned, and stove fuel consumption the amount of fuel needed can be determined. Typically I carry 4-8oz. of fuel in a Nalgene squeeze bottle.
Nalgene squeeze bottle with 8oz. of fuel.
You can also find your own storage solution for fuel. An empty water, soda, or juice container, a used shampoo bottle, etc… All of these will work. Just make sure you won’t confuse it with your water supply.
So there you have it a luxury, go out and buy it kit and an ultralight, go out there and make it kit. Both are fully functional and both are elegant in their own way. The beauty of these two kits for bikepacking is that they are self contained. Everything fits in either the SP700 pot, or the Ziploc container, protecting it from bouncing around in your pack and keeping it quickly accesible.
Sporthill uses a unique fabric they call 3SP. It is a densely woven stretch polypropolene with a brushed back. As far as I know there are no other fabrics made like this. It feels like a thin version of Polartec Powerstretch if you are familiar with that, but it’s wind resistant! They make several different models, one that appeals to me because of it’s minimal features, and thus light weight, is the ATV pant.
My last trip was the first time I used it for bikepacking and I realized it offers a very good option for this use, but many people are unfamiliar with it. Sporthill is mainly known as a crosscountry ski company. REI sells them as do many other ski shops.
These are a great option for riders in weather below 40F/5C or so. Other fabrics that are this warm and wind resistant tend to be to warm at the warmer end of the scale, and less breathable or they are heavier or both. Remember there is no membrane to impede beathability or comfort. Polypro is also the fabric that absorbs the least amount of water , so they are faster drying. They are both lighter and warmer than most softshell pants (Schoeller etc.) as well as more comfortable under rainpants or in a sleeping bag.
This was my first bikepacking trip though I have done some minimal onroad bikepacking before I even knew to call it bikepacking and never involved dirt.
So on the 28th December in the hottest part of the year me and a mate rode the Great Dividing Trail from Ballarat to Bendigo a total of 200km in 2 days staying at Mt Franklin (the location not the bottled water). The Great Dividing Trail follows the old goldfields and logging area of the 1800 and early 1900s so you see some pretty cool histoic sites along the way.
I was lucky in that my partner in crime had previous completed the Ballarat-Castlemaine section and had it tracked in his GPS. The trail is never far from civilisation with the trail evenly split up into 3 section
Bikes and gear for the epic
Ballarat-(Daylesford)-Castlemaine-Bendigo of approximatley 60-70kms each. Perfect for a first time bikepacking. The trail is very well marked though you will still need maps which can be bought for $9 each. Most intersections are marked and there are often reminder markers between
intersections. If you get to the next intersection and there is no marker you have probably gone the wrong way.
Personal setup
We left Melb on the first train to Ballarat and headed towards Daylesford which is separated into two sections split up with some aspahlt at the halfway point. The first section consists of some sections of ST near Salty Creek and St George Lake and large sections of Rough Fire Trail through Creswick State Forest. Decided to skip Cresswick which was a mistake cos I ran out of water in the Wombat State Forest. The trail markers are a little dodgy here with one sign at the Koala park hidden by a fallen branch and after crossing Jackass Rd the trail appears to continue as single track but actually veers off here
The Wombat section was consisted of bout half-half ST (pretty rough and not well used with lots of downed logs) and FT, a bit of disused rail trail. I decided to grab some water at Sailors Spring which was dry and took my chances with some untreated stream water with some chlorine. The last section into Dylesford is heavily overgrown through a green valley so take it careful, lots of hidden booby traps
Had lunch at Daylesford Lake with a swim which was very welcome. We bought some dinner to cook at Mt Franklin (which has ‘washing water” which turned out to be rainwater {stupid!}) and a six back of cider to drink after a hard day. The problem is that MTBers are not allowed/unsuitable to use the trail between Daylesford and Hepburn Springs so some back road touring is need and where we got lost for the first time! (thanks Juddy) Be careful even with a GPS we took a wrong turn and didnt check it again till we had climbed a large hill ridden down and up one massive rollercoster type valley and found a fence line blocking our way to the highway. Not what you want with dinner, full water containers and ciders on your back, so we decided to take the safe route and head back the way we came to get the right route rather than risk it. The bypass is in Keiran Ryans “Off-Road Cycling Adventures book”
Dinner, a cider and fire what more could you want
Bike from the access rd of Mt Franklin
Mt Franklin was a very nice place to stay (apart from the cityslickers who need a generator, satelite dish and RV to camp. It is a old volcanic crater which a bunch of decidious trees, some toilet and wood BBQ that we scavenged wood for by pushing over a 15m tall dead gum. Had a dinner of cous cous, bean and tuna and went to bed in my 10C sleeping bag (sans tent) and froze all night. Seems that it is a little cool for me and too small. Realised that night after looking at my HRM that I burned around 7000 Cal and didn’t go near eating even half of that, so the next day made a concious effort to eat alot more! We were now more than halfway through our trip.
Slept in till 9am the next day due to the craters tall walls, tried and then couldn’t be bothered climbing to the top of Franklin then headed off. Had lunch at Vaughan Springs and had a killer awesome descent into Castlemaine following an old gold water race. Very fast and heaps of fun. Grabbed some Subway and realised we would need to push it to make the last train at Bendigo. This was when we realised that juddys tube was popping out a scratched sidewall (note take a spare tyre cos my front tyre was also grazed but not critical) so we replaced it and headed off on the hardest part of the trip in 35C weather and some killer hills. The section trhough Castlemaine Digging was a little annoying with some killer steep ascents and descents in full sun.
We had decided to avoid Mt Alexander on the advice from http://worldwiderichmond.typepad.com/wombat_forest_trails/2009/05/lenaganook-trail-western-bypass.html We decided to head to the Freeway and then to Harcourt before hooking onto the bypass as recommended except the freeway had a cyclone fence which necessiated lifting our bike up onto a retaining wall and crossing the freeway. We hooked up to the flat and well maintained Coliban Water Channel service road as we slipstreamed the rest of the way (including riding through one of the channel tunnel which is a engineering feat for back in the day though you need lights) to make the last train we cut our trip short and popped into Kangeroo Flat to get the train, a sock shower( like a sponge bath but with a sock) some KFC and then a free (no train conductor) trip back to Melb on the train.
Juddy Manboobies sweat
Learnings
Have a better understanding of how much water I use and how often and when to fill up (nb this doesnt work for my camel mate Juddy)
Have a basic GPS onhand just in case and recheck your route 5 min down the trail just to make sure.
Setup the suspension based on the extra weight and a fatigued rider
get as much weight off my back (it was KILLING me 3 days later) will prob get a seat post rack and use a medium sized hydration backpack
Rehydrate even after the ride (I spuued the next day)
I will do a seperate review of my gear which I will upload soon
While the ride is doable in two days, three would make it much more fun and would mean you could hammer the hills and MTB sections a bit more rather than just slogging it
dont sleep in and try and avoid the heat of the day
Been working pretty hard the past few months to get everything together for a decent 3-season set-up for bikepacking the local National Parks up here in Norcal. Managed to get it all down to around 16lbs, which im very pleased with.
Bike: Mongoose Tyax Comp disc 2008. Had this bike about 7 months, since someone ripped off my GT avalanche. I like this bike a lot better. Equipped with Cat-eye 8 computer, Forte Campus pedals (i was a total newb to clipless before these and i wasnt completely confident so i figured a pair of ‘training wheels’ was best. In retrospect should have gone straight for regular clipless), generic alu rear rack and a home-made route cue sheet holder. All this at 34 lbs. I can drop the rack in summer if i forgo using the sleeping bag. In that case, the mat goes in the back pack, or up front. Shoes: Shimano something-or-other mountain bike shoe. I like very much, but the cleats have a habit of coming loose. Even red loctite wont fix it.
Cockpit view- Cateye 8 and route cheat sheet. Tent in blue stuff sack.
Jannd Frame Bag: 3-litre capacity in a location that is usually under-utilised. Really wanted an Epic or CD bag, but couldnt justify the cost. Will hold bike tool kit, slime tube, leg+arm warmers, tent stakes (coleman heavy duty x 4), compact binoculars and some trail food, once it arrives in the mail.
Tool Kit- Multi-tool, Chain breaker + 5 extra links of chain, 2 tire levers, very small leatherman knock-off, glueless patches x 6, assorted zip ties and 5 feet thin cord, 5 feet duct tape wrapped around one of the levers, small bag of assorted bolts and screws and a 4″x6″ cotton rag cut from an old t-shirt. Contained in a small 6×4 zippered pouch.
Backpack- OGIO backpack, 28 litre capacity. Using this because its what i have and its held up on trail for the past year ok. Little heavy, no waist strap but is pretty comfy regardless. Have a small velcro camera pouch low on the left shoulder strap for the camera which works better than i expected. Doesnt get in the way and keeps the camera very handy.
Tent: Eureka Spitfire Solo. Awesome tent, plenty of room for 1, pitches in about 5 minutes with 2 stakes. Weighs dead on 2lbs 8oz (replaced the pegs with lighter aluminium ones). Straps to the handlebars in a small REI compression sack. Poles strapped to the frame. In summer, there is zero precipitation, so i can leave the fly behind and save half the weight.
Spitfire solo and REI Zephyr bag
Tent in small compression sack.
Sleeping bag: REI Zephyr 20 oF bag. Weighs 3lbs, but packs down into a medium sized Sea to Summint eVent compression sack. Got the bag at one of REIs used gear sale for 60% off- only thing wrong with it was the toggle for the large cotton bag it stores in was busted. Total Steal. With the cost, im very happy with it. Again, with summer being so awesome up here, i ditch the bag and take either a light sheet or a very light (300g) down/polypro blanket. This packs down into a 1 gallon ziploc sandwich bag. Saves 2.7 lbs, and means i can also leave the rack behind, saving another lb.
Sleeping mat: REI lite-core 1.5 short. Another bargain- $16 at the same sale, since the patch kit was missing. Holds air perfectly and rolls down to maybe the size of a 1 litre bottle. Weighs 1 lb 2 oz. Use the emtpy backpack to provide insulation under the legs.
The bag and mat go great on the rear rack, strapped with a generic elasticated cargo net
Hydration: Camelbak Unbottle, 100 oz. Lots of extra padding with the insulation, so removed the bladder from the pack. Comes in at 3 oz empty, little over 7lbs 5 oz full.
Katadyn Hiker Pro filter– essential for spring/summer riding in my local park, Henry Coe State Park. Very dry, but with ponds and springs available for water. Later in the summer, these become more scarce and a bit more ‘fragrant’ so a good filter is necessary. Weighs 1lb.
Petzl Tikka Plus 2 Headlight– weighs a touch under 30z and has plenty of battery life to outlive anywhere i want to go on a fresh set of batteries. Kinda liking the red led feature even though i didnt think id use it. Great for in tent, reading etc. Picked this over the PT EOS simply because this was slightly cheaper.
First aid kit:Contains all the usual bits and pieces plus poison ivy wipes and a small survival kit. Comes in at 9 oz. Have a couple 4 oz pouches of emergency water that i tend to throw in at the last minute, so really its 17 oz. Could probably lose those.
Stove: Ultralight super cat alcohol stove, windscreen and heinekin can pot. All over the inter-tubes, so im not going to go on about mine. I like it very much and works really well for the FBC method of ‘cooking’ i like to do on trail.
Food: General FBC food, oatmeal, dried fruit and nuts, milk powder, coffee, peanut butter for breakfast. Instant rice, noodles, pouches of tuna and chicken supplemented with olive oil and freeze dried vegetables for dinner. Flatbreads. Snacks include Snickers bars (King Size) trail mix, peanut butter. Figure about 2-ish pounds/ day- i get hungry.
Shakedown ride: Went for a day out almost fully loaded (- the sleeping bag) at a State Park (Russian Ridge if anyone is familiar with Norcal Bay area)- 15 mile loop, little shy of 3 hours, good mix of double and single track (nothing remote and nothing too single-tracky, if you get my meaning) more climbing than not. Couldnt even feel the stuff sack up front. Also, loaded my pack up with a little extra weight (typically expect to load 10-12 lbs in the pack, essentials plus full camelbak and 2 days food), taking it up to 17lbs for this ride. End of the 3 hour ride, zero fatigue on the back or shoulders, and everything seemed pretty well placed in terms of COG. I was looking to get a talon 22 or similar, but after today, i really dont think ill need it any time soon. Might have to do something about my crappy brakes though.
I have a feeling that i am going to really love this next season worth of riding!!
Decmeber 12 – 15, 2009
Salem, AR to Watson, OK
portion of the OT
THE TRIP
if you look back at my plans, (bottom of the post) i hoped to be on the OT for two full days. this to me would have been epic. the creation, the views, the trail; i was looking forward to this. unfortunately i really spent 1 full day on the OT. the rain and fog cut into the incredible views, so i will definitely be hitting the OT in better weather.
Day 1 took me about 50 miles from Salem, AR to Iron Springs Rec area 7 miles north of Jessieville, AR. this honestly was really tough on my legs. the cramps wore on me and made my riding much slower than i had anticipated. however, i made it to Iron Springs around 3:30pm and was able to set up camp (the hammock) at 5pm on the OT. called it a night with much rain and fog. the forecast had said the rain would move out by 5pm Sat. ends up it stayed until 8:30am Mon. a little homemade spaghetti sauce and ramon noodles for dinner (thanks babe).
pre-trip
dirt road
on Day 2 i started about 1.5 miles from IRON SPRINGS. the trek from here to the Blue Mountain Shelter was brutal. i didn’t anticipate how much i would be hiking my bike. i actually traveled 17 miles in 8 hrs. it was the roughest day of my trip. you top that off with fog and wet clothes and things aren’t really looking up. thankfully i came to the Blue Mountain Shelter (one of many on the OT). they are a three walled log shelters with a metal roof. this makes for a comfortable night. due to the 2 days of rain and fog i didn’t expect to get a fire started. i managed to get a little flame going and was able to dry my gloves and socks. one thing that was a great tip i found was hot chocolate and protein powder. i had this about 1 hour after i sat up camp every night. great way to help muscle recovery.
2nd morning wet and foggy
bridge and water source
Blue Mountain Shelter/Clothes Line
the next morning i had to decide how my plans would change. i couldn’t make to my pre-planned destination for Day 3. so i chose to ride pavement (highways) to Mena, AR. this was really a nice day. the sun popped out and i enjoyed upper 50 degree weather (break out the shorts). Story, AR is a small community with a Post Office and a store. i made a pit stop that turned into a burger stop, man was that sweet. come to find out i would end up needing that burger. i was on my bike for 11 hours. road 65 miles, just south of Mena to Shadow Mountain (campsites). this turned out to be sweet. hot shower, fire pit, and the nice owner even loaned me a towel and washcloth. once again i enjoyed a night in my Crazy Creek Hammock. i hung the rain fly to cut the wind down a bit, but it was still cold (around 33 degrees).
Day 3 morning Blue Mountain Shelter
great view
HWY 298 Trail Head
just a cool pic
the great thing about my change of plans meant i only had 15 miles to Watson, OK. the next morning i road about 5 miles south and stopped in Hatfield, AR for a cup of coffee and some time to read and journal. i took dirt roads over to OK. if you are ever riding from AR to OK on dirt roads, don’t expect road signs. it was pretty much a guessing game, heading West following the sun. i made it to Watson, OK around 3pm on Tuesday. it was the perfect moment to sit in front of Sulfur Springs Missionary Baptist Church and thank God for an amazing trip. to be honest, it was nice to complete the trip, but it was even more incredible to spend some quality time with the Almighty. he helped me see so much about myself and my life.
Day 4 - Shadow Mountain Campsite
Hatfield Grocery Store
lonely tree - Kiamichi Mountains
not every day you ride up on a pony in the road
ridge above Grandma's house - Watson, OK
Sulphur Springs Baptist Church - Watson, OK
trip complete
WHAT I LEARNED
1. plan your trip so you can enjoy some down time.
2. you need lots of calories – find away to pack light and still get what you need
3. learn how to build a fire when everything around is wet
4. if you go alone, communicate with someone often. it was so nice to talk to Mandi whenever i was able (for her sake and mine)
5. get the weight off you back.
6. take a compass. not sure how i forgot this. there were a few moments where this could have saved me a ton of time and worry.
ORIGINAL PLAN
DAY 1
Start in Salem, AR :: ride pavement to Hwy 9 :: head west to Lake Winona :: will hit dirt road close to the lake :: ride west to HWY 7 :: at HWY 7 and Iron Springs Recreation Area i will jump on the Ouachita Trail (OT) (north of Jessieville) :: i hope to ride about 10 miles in and set up camp :: this should be the coldest day and night :: approx. 60 miles
Day 2 :: head west on the OT approximately 30 miles to the Archer Trail Shelter :: this will be a lighter day as i hope to get some down time, journaling, prayer, and taking in the creation :: plans could change if riding goes well.
Day 3 :: head west on the OT approximately 48.5 miles to Tan-a-Hill Gap :: i better have my legs ready for this day :: weather should be great
Day 4 :: continue west to HWY 270/71 then head south toward Mena :: there will be a lot of pavement and dirt roads this day :: south of Mena i will hit Hatfield, AR and head west into OK :: all dirt roads into OK :: final destination is Mary Johnson’s house in Watson, OK :: will definitely be ready for a some of Grandma’s good cooking and see my baby girl and baby mama’s face (Mary Beth and Mandi) :: approx. 51 miles
OT Bikepacking List
Cooking
MSR Stove
MSR Fuel
Cooking POT
Coffee Cup
Tools
Matches
First Aid Kit
Patch Kit
Extra Bike Tools
Ace Bandage
2 Extra Tubes
Gerber Knife
Hygiene Toiletry Pouch
Baby Wipes
Water Containers 2 Liter Bladder
2 Bottles
Clothes
North Face Jacket
North Face Pants
North Face Vest
Extra Clothes
Other
Head Lamp
Bible
Journal
Camera
Phone
ID & Cash
minus water and food – 21lbs
originally had 17 lbs, then added north face items and other clothing since the cold moved in.
I’ve seen a few riders wearing the Pearl Izumi X-Alp Enduro shoes for bikepacking rides and races. It seems that PI has stepped up and added a lighter, stiffer version to the lineup. This could be a great shoe for self supported riding/racing. I believe at least one 2009 TD racer that was on a set of proto’s…
The X-Alp P.R.O. take the award winning X-Alp bottom and adds the peformance of a uni-directional carbon plate.
* All new uni-directional carbon X-Alp Ride and Run plate delivers hike-a-bike functionality and exceptional on the bike power transfer and efficiency
* EVA run shoe midsole for off the bike cushioning and comfort
* Carbon rubber lugged outsole for superior traction and durability
* Combination closure system with premium buckle and forefoot Velcro straps
* Anatomical Buckle Closure System reduces hot spots and removes pressure from your instep
* Low cut construction for a light, fast fit and feel
* Quick drying, highly breathable mesh/synthetic upper
* Flexible forefoot and a running shoe beveled heel
* SPD compatible sole
* Weight: 390 grams (size 40)
Please rate this product: (no login required) (36 votes, average: 2.89 out of 5) Loading ...
My Salsa Fargo with some new bags that I sewed. Seat bag contains my Golite Ultra 20 and a jacket. Frame bag contains fly, footprint and poles of Big Anges Seedhouse 2, Thermarest Prolite short sleeping pad with pillow and frame pump. I throw my alcohol stove, water and some food in my little Gregory daypack.
I arrived at this setup after an interesting trip to the Great Divide this summer. My girlfriend and I hastily prepared with Surly racks and Ortlieb panniers and different camping equipment than listed above. We drove my uber-crappy, uninsured ’94 Ford Escort to Banff and donated it to the local fire department. Don’t plan on doing this by the way, we were lucky in pulling this off. But the weight distribution on my girlfriend’s Specialized Myka was horrible and she crashed on a mountain descent still in Canada. She was lucky to get only gravel burn and contusions. Thanks to some friendly people we made it back to Banff before the fire department ensued using the car for training purposes.
In the next year or two we are going to give it another go on the Great Divide with our new lighter gear and bike bags. By cutting our gear weight almost in half, it should be a totally different experience.
A sub-24hr overnight trip with 2 adults and a 2 year old.
Weather:
Rainy and 35-45F on Saturday, dark at 5:30 pm, mid 20’s F at night, Clear and possibly windy on sunday, 35-45F
TRailer for child bikepacking
We used road bikes but wanted to see if we could pack light enough that we could go MTBing also.
Jessica’s bike:
Niterider Minewt Dual bikelight
A Jandd frame bag with some snacks, windbreaker and other small items. Not full yet.
A small seatbag with tools and tubes
2 Panniers: food, cooking, clothes, diapers, changing pad
On rack: Tent and stuffsack with my and Sanne’s insulated jackets.
My bike:
REI handlebar top bag with snacks, headlight, wallet, phone etc.
Niterider Minewt Mini bikelight
Compression sack on handle bars with sleepingbag
Sanne’s trailer:
2 long skinny stuffsacks, one on each side of her, one with her sleeping bag, one with raingear, Under her seat diapers and some other smal stuff, under her feet 2 closed cell foam sit pads.
This gear could go on the MTB’s as well: The contents of the panniers would go in a backpack for each of us, the tent would go on Jessica’s bars and the other stuffsack could go on a seatpost bag or rack.
For clothes I brought a pair of bike shorts and a pair of merino underpants lightweight merino socks and a midweight merino zipneck. This was my warm weather riding option(unlikely but you never know).
Then Pearl Izumi Optic jacket (an ultralight windjacket) and Sporthill 3sp pants. Fully zipped up this is plenty warm for active use and fairly wind resistant. It is still very breathable though for slightly warmer conditions. Also very lightweight.
A pair of long finger bike gloves for the riding, a pair of paclite mitts for rain/wind and a pair of liner gloves for colder weather or to wear in camp if the bike gloves were wet. A midweight headband for riding in cool weather and a lightweight craft balaclava and fleece stocking cap to add in camp (none of my jackets or sleeping bag had a hood)
Then Powerstretch tights for in camp use and a Golite Polarguard vest and Bozeman MW Cocoon pull-over (also polarguard) and heavy weight wool socks. This was my stay warm sitting still after dinner outfit, as well as part of my sleeping insulation.
An ultralight rain suit from 3M Propore. Walkable bikeshoes. Shoe covers.
Sanne’s clothes:
2 set’s of Patagonia onesie/long underpants
1 REI thin fleece zipneck sweater
1 midweight fleece vest
1 patagonia Puffball suit: a very thin insulated suit with hood
2 pairs of heavy weight wool socks
A waterproof pair of pants and parka from Cioch Direct, using the Paramo Pump liner, a fabric that feels and breathes like a fleece and microfiber shell.
A REI skullcap for under her helmet and a thin balaclava, some thin gloves and thick mittens. And Disney Princess winter boots.
This we figured would give us a warm enough system for cold camp morning, a fully waterproof system if it was raining in the evening (I’d rather not eat in the tent with a toddler) and enough spares in the case of something getting wet, and all quick drying too.
The clothing systems worked well, except for the fact that I forgot how thin her sleeping bag is, and how I had planned to use it with one of her sleepsacks from home. Now she actually had less insulation in the tent that at home! So she started squirming and moaning a biot in her sleep after an hour or so, so we brought her into our sleeping bag.
Sleeping like a Toddler
I stayed up outside reading for a while and used the bike lights to light up my book, saving my headlight for emergency nighttime prowlings.
Sanne loves camping in the tent and this time was no exception. She enjoyed the campfood and collecting sticks, she really liked hanging out in the tent too, with one of the bike rear lights as a tent light we read stories and played with small toys.
Bike : On-One Pompino XL with XT hubs, mavic 719 rims, DX brakes
On the front is my little tent a Eureka Spitfire SUL. Attached to the bars using a custom mount
The framepack is a standard jandd framepack. It contains alle the bike stuff and my lights.
The rear rack is a Nitto. On it is a waterproofbag which contains:
Sleeping bag (go lite ultralight)
Matress: Short therm a rest
Spare set of cycle clothing and camp clothing
Toiletries and first aid
As a backpack I used a haglofs 12 litre backpack. In the backpack I carried:
kitchenstuffs: Pepsicanstove and snowpeak cookset
foodstuffs (enough for about 3 days)
maps/batteries/money/keys
This year I hitched a ride from holland to Gotenborg (Sweden) from there I rode back to holland in about 8 days. My goal was a much dirt road as possible and that goal was achieved. Lots of lonely backroads and nice views. No mechanicals and on average 180 Kilometers a day. My gearing was 42/ 16-18-20. So the chaintool saw lots of use because I had to shorten en lengthen the chain according to my gearing needs. In Sweden I mostly used the 42/20 and all the way through germany and holland it was the 42/18.
I also have a Salsa EL Mariachi with new (recieved october 2009) epic frame and seatbags. Gonna give that a nice testride in the spring and report on that one when it’s done.
The state of Sinaloa in northwestern Mexico has several beautiful bays, some of them have inspired many dreams in the past.
A while back I envisioned a route to cross them while mapping a loop that will take me from my home and back.
As summer creep on me, it became impossible to do the trip, so I just put the plan on hold, and as autumn slowly came, the route was finally on.
The plan was simple enough, ride the dirt roads from my home to a Campo Pesquero (Fishing camp), hitch a ride in a Lancha to the other side of the bay, cross a few hills, look for a place to camp, repeat on the next bay and ride home.
So off we went, trying not to hit too much pavement and on route to Paredones on the Ohuira Bay.
After riding for a while on a very nice Saturday morning we started to see some blue on the GPS.
Exchanging some beer money for gas, we were on the water in a matter of minutes.
Happily riding across Ohuira Bay.
We even saw some friendly dolphins along the way
Seeing Lazaro Cardenas across the bay made us realize that those hills were not going to be as easy as once thought.
Lazaro Cardenas doesn’t have a channel, so they make do with high tides and some resemblance of and unfinished pier.
After some huffing, shouting and just hopping along the rocks, we thought it was over, only to find this.
Every town in Mexico has a house that will either give you or sell you some food, and we weren’t about to cross those hills on an empty tank.
Ahhh, the joys of Shrimp season, Camarones Rancheros, rice and tortillas.
Slowly riding out of town wearing a couple of pounds of shrimps and tortillas.
A newly constructed small ditch got us lost, as we began contemplating a mosquito infested camp in the middle of nowhere.
Getting out of that mess was not hard and soon we were doing Photo opps on the salty flats.
Putting miles to the ground.
You can laugh at us flatlanders, but those short hills were mean late in the day.
We set up camp in a nearby beach in a cloud of mosquitos that later on succumbed to the evening wind. Falling fast to sleep I woke up to this view.
After some fumbling trying to get a ride, we talked a fine gentleman into taking us to Cerro Cabezon, our next town in the trip.
Upon arrival, we setup to ride, with a stiff wind at our face and a morning of riding along farming lands.
The fine steed, at the end of the ride, Best damn bike I have.
Overall a very nice trip, some great company and great practice for some future Bikepacking trips.
A 3 day loop consisting of bits and pieces of: the Centennial Trail, paved and dirt roads and a portion of the Mickelson Rail Trail.
Background:
I’m live in PA and was itching to do a little riding in the arid west for a change of climate. South Dakota became the destination because: a) I haven’t been there, b) relative lower elevations (max 7000′), c) interesting history d) point to point trails are well documented.
Centennial Trail 111 mile multi-use trail, (couple of sections, no bikes, National Park and Wilderness)
I’m pretty much a paper map person. Prep includes downloading USGS DRGs, overlaying UTM grid, magnetic/true/grid north arrows and any other available data. In this case, the Black Hills NF website had a SHP file with good data. Finally, I trace out routes, measure distances and create a waypoint file… and of course print out hard copies.
The northern portion of the Black Hills
The Route:
A Google map with the Route, Background Info and linked pictures is here. The map is fairly cluttered–toggle stuff on and off to improve readability. (The map includes some photos not included in this write up).
This trip was to be a bike tour combined with tourist type activities, so I limited the multi-day ride to 3 days. Part of the reason was I didn’t want to get in over my head and suffer…I’d rather enjoy the ride and the scenery. After the 3 day tour, I did a handful of day trip rides, checking out other trails and other segments of the Centennial as well as some hiking and tourist stuff (excursion train, museums, etc.) The Black Hills is something like 100 miles N-S and 50 or so miles E-W in which tourism plays a large role in the local economy–there is plenty to do and see in addition to the riding.
The Ride:
Day 1:
(Labor Day Weekend, 2009)
I was surprised that it only took 1.5 days to drive the 1500 miles from Pittsburgh. I arrived in the Sheridan Lake area around mid-day on Labor Day Sunday and did a little scouting ride on the Centennial and decided on which trailhead to leave the car. Monday AM the ride started. Heading north from Sheridan lake, the trail goes through pasture. Some of the grass approached 4′ tall. Back home, one would be soaked from the morning dew, but in the dry climate, there was no dew to speak of.
The Centennial is a mix of single track and double track blazed with those fiberglass posts…no blazes on the trees. In most places the trail is easy to follow, but more than a couple times I wandered off the trail and had to backtrack.
A little overgrown, downstream of Pactola Dam
Climbing up to Pactola Dam I sort of wandered off the trail on a well worn cow path. Of course, one doesn’t discover navigational slip ups before you push up the mountain, but at least the view was worth it.
Cowpath–trail is on the next knoll NW
The trail N Pactola Dam is a hoot. It stays at relatively the same elevation as it runs in out of the draws that lead to the lake.
Continuing on, I stopped and took on a charge of water from a stream near the Pilot Knob Trailhead. Finding water was not an issue on this trip. There are enough streams and lakes around. From Pilot Knob the trail’s definition of ‘multi-use’ includes ATVs. I think that I came across maybe 6 ATVs in the 10? mile section that is shared use–pretty low for a holiday weekend. I stopped to chat with one group of ATVers. It seemed to be an extended family, riding in 2 of those utility ATVs (side by side). One young women in the group looked pretty fit, and was packing some big biceps, here it comes out she was a moto-cross racer (from Wyoming) who had competed earlier in the weekend at Steel City Raceway. Talk about a small world, I live about 3 miles from that race course and had ridden past it on the Friday night before my Saturday AM departure for this trip.
The edge of the Black Hills, Definitive change in vegetation at lower elevation
One thing about this trail I found sort of unexpected was the lack of ‘informal campsites’. Either users are really good at ‘leave no trace’ or most users utilize the developed campgrounds along the route. I’m not really one for the developed campsites, so I eventually found a suitable place for the night.
Day 2:
Day 2 started with another 20 miles or so of the Centennial trail. The highlight of this portion of Centennial is the descent into Bulldog Gulch.
Fun
At the Fort Meade Trailhead, I broke off the Centennial and headed into Sturgis. Sturgis looks like a good place to get a tattoo or patronize a biker bar. I stopped at the grocery and at a sub shop and keep on moving. The next stretch took roads over to the twin towns of Deadwood and Lead. Deadwood is the terminus for the Mickelson Rail trail and also a place with a history steeped in the wild west. Gambling is the town’s lifeblood these days.
Deadwood ‘working women’ in the second floor windows
Rather than jump on the Mickelson in Deadwood, I headed up to Lead and back into the forest and found a campsite.
Day3:
The overnight low temp and frost was a bit of surprise….and the brilliant morning sun was welcome. That is one thing I noticed. The sun out here is relentless. Hardly any clouds and the Ponderosa pines give weak shade which makes the sun seem even more intense.
Morning Sun
I rolled through Spearfish and checked out the town before taking the Spearfish Scenic Highway South and finally joining up with the Mickelson Rail Trail S of Deadwood.
A rail trail? Well it was going my way and I’d rather loop than backtrack. As far as rail trails, the Mickelson seems to have A-1 scenery.
Mickelson Rail Trail
I think it was about 40 miles of rail trail to Hill City, where I took paved roads back to the car.
Surprises:
Lack of users. I saw 2 day hikers and the mentioned ATVers along the 60+ miles of the Centennial I road, nobody else on the trail. Mickelson had more users, generally retirees.
Very nice looking city campground in Spearfish adjacent the fish hatchery and along a bike trail.
BLM campground (water source) just N of I-90 on Centennial, I didn’t research BLM in the planning, only researched National Forest info (BLM was off my radar because there is no BLM land in the east)
Lack of ‘informal’ campspots as mentioned.
Tree thinning. The active tree thinning in the forest kind gives the forest a open feel. In PA, we have to do the opposite of thining, deer consume so many saplings that areas need to be fenced in order exclude deer so that saplings can grow taller than the deer.
Conclusions:
I enjoyed this ride and the trip to the Black Hills. When I read about the Centennial being multi-use, I was kind of unsure if there would be enough single track. My fears where unfounded. The relatively low elevation is helpful for us flatlanders not wanting to spend days acclimatizing. The Black Hills are kind of touristy, but it easy to get away from that type of activity. For day trip riding, there are some areas that have the stacked-loop type of deal. For those looking for a longer ride, an obvious option is to link the full Centennial with the full Mickelson. That was kind of my original thought (refer to the Google Maps and the detours around the Wilderness area), but then I backed off and decided to cherry pick what I though would be an interesting and varied route.
In summary, I’d take another trip to the Black Hills.
Post Script:
Here a couple of pics from Centennial trail of the portion S of Sheridan Lake. These section of trail was done as day trip. They are included them to show a little more of the diversity of Centennial Trail.
Outdoor navigation meets touchscreen simplicity in Dakota 10. This rugged, palm-sized navigator boasts touchscreen navigation, high-sensitivity GPS with HotFix™ satellite prediction, and a worldwide basemap in one affordable, power-packed punch.
Touch and Go
Dakota 10 makes outdoor navigation effortless with a tough, sunlight-readable, 2.6 inch color touchscreen display. The interface is easy to use, so you’ll spend more time enjoying the outdoors and less time searching for information. Both durable and waterproof, Dakota 10 is built to withstand the elements: bumps, dust, dirt and water are no match for this rugged navigator.
Display resolution, WxH: 160 x 240 pixels
Display type: Transflective color TFT touchscreen
Weight: 5.25 oz (148.8 g) with batteries
Battery: 2 AA batteries (not included); NiMH or Lithium recommended
Battery life: 20 hours
Waterproof: yes (IPX7)
Our burritos capture the essence of restaurant style and flavor using premium ingredients and authentic seasonings. Each burrito is meticulously hand-rolled in a traditional hand-stretched tortilla with generous fillings, like lean beef steak strips, shredded beef, grilled chicken, chorizo, egg, bacon, and smoked ham topped with real cheese and fresh vegetables. We use no preservatives, lard or tropical oils in any of our products. Try all our delicious burritos — available at your nearest supermarket, convenience or club store, sold both frozen or in the refrigerated deli section.
Please rate this product: (no login required) (50 votes, average: 3.56 out of 5) Loading ...
This is what I used for a recent three day solo off-road tour incorporating geohash attempt, lots of offroad, and some rather extreme mountain biking.
Setup
Bike: Specialized Tricross Sport 2009. Only significant modification is a 26t granny gear – very useful. Vittoria Randonneur Cross Pro 35mm front tyre, Maxxis Locust CX 35mm rear tyre. (The other way would have made more sense, I was lazy.) 600 mL water bottle underneath downtube, collecting mud.
Front: 1.8kg “2 man” tent stuffed into an old sleeping bag, just hooked over an existing Topeak handlebar bag mount. Cable-tied for a bit of extra security.
Frame bag: Epic Designs bag with internal divider (not used) and left side pocket.
Main compartment: Exped down mat 7 (bungeed, standing against seat tube), tent poles (along down tube), tent pegs, 2l water bladder, mapholder when not used, some food, softshell jacket, pump.
My custom-built Epic Designs gas tank (Eric's photo)
Gas tank (sits on top tube): Epic Designs custom extra large size, to fit my SLR (not taken on this trip). Filled with museli bars and other food, and usually my wallet and phone, and sometimes GPS too. I ended up cabletying the flap to the steerer tube, and just using the two zips to get in and out.
Seat bag: Size #6 Outdoor Research drybag jerry-rigged to hang from seat with a bunch of bungee cords. Inside just my Mont Zodiac 700 down sleeping bag.
Inside: : Burton Pinnacle gore-tex gloves, Gore City III overshoes, rain jacket, first-aid kit (including anti-inflammatories), snow Skins, 2l water bladder (yes another one), water bottle, maps, more food (mmm biltong), sunscreen
How did it go, what would I change? Great, and not much. Although I was never far from civilisation, water is notoriously hard to find in Australia these days – hence the five litres’ capacity. I was very comfortable at night (more than I needed to be), so maybe next time I”ll try just a tarp instead of the full tent.
I used almost everything except the ski gloves, rain jacket and booties – almost no rain. I’d bring repellent next time and a good head torch.
The drybag hooked under the seat almost worked, but I had trouble getting a stable setup where it never rubbed on the wheel. And if I did, it was usually rubbing on my legs. Obviously an Epic/Carousel seat bag is the way to go.
The setup holds together even when you hit a post hole. This is exactly how the bike landed, I just crawled out from underneath.
Hanging the tent over the handlebars worked amazingly well – especially considering how little effort it took! It really helped balance the bike, and because it sits lower than a handlebar bag, didn’t cause any new problems, and best of all, didn’t block my sight of the wheel. For one extremely steep technical section, I took it off and attached it to my backpack, mostly to prevent it falling off. The bike of course isn’t suited to steep slippery narrow single track, but it did ok within the limits of its traction.
I try to do a couple 1-3 day trips every month and put together a basic setup which works well for 3 season camping in Colorado. The saddle bag, frame bag, and handlebar carrier were made from heavy ripstop or cordura salvaged from old laptop carrying cases. Most of the buckles and straps were taken from old wornout Camalbaks and packs. Thread, additional buckles, and straps cost under $4. The tarp is made from 1.1oz ripstop with a light waterproof coating. 3 yards cost just under $20 shipping included.
The setup
The front end
30 degree Sierra Designs down bag
5x9ft homemade tarp, 8 stakes, cord
groundsheet
carrier
Total weight – 3lbs 3oz
Frame pack
2 li ion batteries – 15 hours of run time
inner tube
patch kit
tire irons
misc tools
oil
frame bag
Total weight – 1lb 4oz
Rear
medium weigh wool shirt
nylon shorts
wool hiking socks
wool hat
waterproof jacket
knee warmers
zip lock containing fire stick, matches, emergency blanket, toilet paper, tooth brush and paste, water treatment pills, swiss army knife, small first aid kit.
Total weight 3lbs 7oz
Misc
1 or 2 180 lum led bar lights, spot and flood
2 water bottles
air pump
On the body
Camalbak Hog with 100oz water
Montbell 120cm sleeping mat
rear flashing led
led headlamp for use use around the campsite and reading
food
spoon
2 trash bags, one large and one medium
550 cord
Optional
Cooking kit – homemade alcohol stove and stand, small Primus pot and cover
reading material – paperback book
My gear is pretty light and has held up well. I plan to make a quilt and lightweight bivy this winter and possibly a larger saddle bag for winter use.
My hands get cold easily in windy cold weather on the bike, especialy in the rain or wet snow. However, most waterproof gloves are not breathable enough to wear all the time, and too heavy to bring as extra’s. The solution: an ultralight, ultra breathable pair of mitts.
Here is a good candidate from MLD:
MLD rain Mitt
2009 ALL EVENT CONSTRUCTION- 3 Layer on High wear palm with 2 Layer on low wear areas of lower palm and back of hand
• Medium .90oz / 25gms per pair
• Large .95oz/ 27gms per pair
MLD Rain Mitts have been along for The Ride with multiple long distance hikers in 2007 all reporting excellent performance.
* Andrew Skurka (2007 National Geographic Adventure Magazine Adventurer of the Year) on the 6,875mile Great Western Loop
* Francis Tapon on the first successful 5,800 mile CDT Yo-Yo
* Anitra “Nitro” Kass on her 2,900 mile CDT and Tipple Crown finish (AT, PCT and CDT) One of the few women to tripple crown primarily solo.
* Erin and Brentwood Higman on thier 4,000+ mile Journey on the Wild Coast. At one point in an early season Alaskan blizzard, they were forced to stuff grass into the mitts as insulation!
The Coconino Loop seeks to highlight the best of Northern Arizona mountain biking. From buffed singletrack among the pines of Flagstaff to technical red rock Sedona country, this ~250 mile loop is a grand tour of Coconino Country.
Route overview
Starting in downtown Flagstaff, access to singletrack is not far. Urban bike paths lead directly to quality Arizona Trail singletrack. The AZT navigates through the labyrinth of Walnut Canyon, traverses Anderson Mesa then wraps around the perimeter of Mormon Lake. After some 40 miles of AZT, the Coconino Loop follows forest roads to descend into Sedona along Schnleby Hill, first on a dirt road, then on technical singletrack — the Munds Wagon Trail.
Food and mystical curiosities can be found in Sedona. The route rides through town briefly before resuming singletrack with stunning red rock views and plenty of technical challenges. Nearly non-stop trail leads out of the Sedona area to a historical trail, Lime Kiln, that links Sedona and the town of Cottonwood.
Water up in Cottonwood, then ready yourself for the hardest part of the route — attaining Mingus Mountain. Mingus is not that massive, but the climbing is steep, first on graded roads, then 4×4 then singletrack. At the top imagine flying off the mountain at the hang glider launching ramp, but instead launch off the back side of the mountain on the wild and wonderful Yaeger Trail.
Here the route joins the Great Western Trail, passing a nice spring and following a railroad grade around the backside of Mingus before dive-bombing into the Verde Valley. The Verde is a solid water source and also the low point of the biggest climb.
It’s (nearly) all uphill to Bill Williams Mountain, at 9000 feet. The last 2000′ feet of the climb are on singletrack that is well graded, full of switchbacks and surprisingly rideable. What goes up must come down, and the down on the Williams Trail is an absolute hoot.
Forest roads link the route from the tourist town of Williams to the technical Sycamore Rim Trail. Views into Sycamore Canyon are great, if you can keep your eyes off the demanding trail.
Finally, the route passes by Wing Mountain, sampling some ‘brapp brapp’ moto trail fun, then wraps things up on some classic Flagstaff singletrack, dumping you back in downtown Flagstaff.
Credit to Mike Curiak for the photos/video, from his fall 2010 tour.
Trail type
Every effort was made to maximize rideable singletrack on this route. There is still a fair amount of dirt road riding, but over half the time is spent on singletrack, and hike-a-bike is pretty minimal, especially compared to other classic bikepacking routes.
Mingus Bypass Alternate
The Coconino Loop is one of the most rideable singletrack bikepacking routes out there. That said, the push up Mingus Mountain can be a bear. New in 2010, there is a GPX for the “Mingus Bypass” that circles around the south side of the mountain, first on dirt roads, then on a very rideable trail that rejoins the main Coconino route just in time for the Yaeger descent.
Arizona Endurance Series puts on a “concurrent individual time trial” style event on the route. 2009 is the inaugural race along the route, also introducing the first self supported stage race format. For more on the race see the AES website:
The Great Western Trail (GWT), as it has been proposed, snakes north-south, from Canada to Mexico, on a patchwork of forest service roads, 4×4, ATV, and single track routes. It links trails in Montana, Idaho, Wyoming, Utah, and Arizona. However currently, there are many sections that are not much more than game trail, let alone just a concept. One recurring ambition I’ve had is to tour different sections of the GWT across the beautiful state of Utah. On other trips, I have traversed sections along the rugged spine of the Wasatch range, as well as the Southern Wasatch Plateau that links Hwy. 6 with I-70. Those landscapes are indelibly marked in my mind. And while being away from Utah for the last year, those memories kept calling me back to once more ride south.
I recruited two good friends to ride the section south of I-70, through the Fishlake National Forest, with the goal of riding to Torrey, Utah. We planned to take two days to go about 65 miles. This section passes diverse landscapes, first climbing through the sherbet sandstone of Salina Canyon, reminiscent of the formations further east in the San Rafael Swell. Further on we passed through scrub oak woods, and then quickly on to the high aspen glades that characterize most of the route.
Salina canyon desert
The trail itself is nearly entirely rough ATV track with constant climbing and descending. We passed many bowhunters out doing their thing. FishLake is ATV country. Despite current controversies surrounding ATV use in the West, just remember that the trails here would not exist without them. All the guys we met out there were courteous, safe, and stayed on the track. I saw several riparian zones that were growing back nicely, and I have to applaud their collective efforts. Not every place is kept so nice.
The first 20 or so miles of the route can be characterized as one big climb, the denoument is to crest a 10,900 ft. pass east of Mt. Terrill (11,546 ft.).
Mt. Terrill pass
After all that climbing, and some hike-a-bike, the reward is a descent, to which Ben remarked “now I see why we brought bikes.”
The GWT offers great opportunities multi-day bikepacking. One could conceive of a continuous bikepack starting Salt Lake City-area Wasatch range, all the way at least to Escalante, Ut. The main challenge would be finding food for a self-supported run, since the only towns close to the route would be Salina, Torrey, and Boulder, all in the south. The northern section would have to be cached or packed in. Consider the gauntlet thrown down…
There are advantages of bikepacking in a large group by sharing tools and other heavy items. We shared a two-pound Black Diamond Mega Light floorless tent, modified with a sewn-on drape of mosquito netting to keep the bugs out.
tenting
The only miscalculation was on water filtration. We brought one filter. Despite constant cleaning of the filter, pumping was slow. Between the three of us we consumed about 9 gallons in a day and a half, and took roughly 2 hours of riding time away from us. We could have put down significantly more miles if we brought more filters. Also, water is plentiful on this route. However, Fishlake is cow grazing country, so I would not count on iodine alone to keep your guts working.
With about 15 miles to go we were descending onto a ridge north of Torrey that traverses just west of the Waterpocket Fold of Capitol Reef. Up ahead we spotted a forest fire burning furiously right where the trail headed near Geyser peak, and so we retreated down an alternate route to Hwy. 72, to the neighbouring town of Loa to end the ride short. It was a wise choice. Winds were high, and by the late afternoon the fire had spread up the canyon near where we bailed.
I was looking forward to that last section through the red rock, but I didn’t really mind. After living a world apart in the flatlands of Eastern Canada for a year, to be out there with good friends, a flask of scotch, and a high-mountain Utah sunset was enough.
The sun has set and the last alpenglow on Mount Guyot has faded off, the mountains begin to brood as darkness settles over the continental divide. I flip on my handlebar light and continue peddling upward into the last gasp of tree line as the temperature starts to drop. I need to find a campsite.
Wendy dropped me at Kenosha Pass at 6pm on a beautiful evening and we parted ways as she drove back home and I headed west toward Georgia Pass. There were scattered clouds and the temperature was short-sleeve weather…I knew it would be a perfect night. On my bike with me I had the following: hammock, sleeping bag, stove, freeze-dried meals, oatmeal, rain gear, bike tools and spare parts, extra clothing, and all the accessories (camera, gps, maps, sunscreen, etc) My bikepacking kit felt pretty good, a little heavy in the rear but nothing I couldn’t handle. The extra weight on the bike actually seemed to make it handle a little smoother. This would not be the case on future hike-a-bike situations!
I set up my hammock in a small copse of trees right at tree line about one mile below Georgia Pass in darkness. I put on my extra layers, cook my dinner, eat my dinner, organize my stuff and then sit back and realize how quiet it is. Freaky quiet. I look around suspiciously for a few minutes getting my resolve up. It has been a long time since a solo overnight in the wilderness. Then the heavens open up and the stars literally burst open. They shed enough light without any moon at this point to see my way around. I walk up the trail a bit to get a glimpse of Mount Guyot and soak in the moment. What a place to be by yourself in the dark on a perfect night at almost 12,000 feet in the Colorado high country!
Sunset high on Georgia Pass
Sunrise on Mount Guyot
Georgia Pass – 11,600’ Elevation
Day 2 – 630am
August 12, 2009
65 Miles
It is cold. Really cold! I had planned to get up and make a cup of coffee while I watched the sun light up Mount Guyot, but the temperature has forced me to put on all the clothes I have brought including rain gear. I mount up and ride to the Pass in order to warm up, which works very well, and soon I am sweating under all the layers. At the Pass I shed my rain gear and let the un-wicked moisture dry out from inside while I make a hot cup of coffee. It is a glorious place to have a cup of coffee for sunrise. I hike up to a high point to try and get a signal on my cell phone to call Wendy. I wish she was here for this, she would enjoy it. But I get no reception and all I get is a sighting of some mountain goats down on the end of the Old Georgia Pass road.
I mount up again and start my descent down the Colorado Trail on the north side of the Pass; it is some great buffed-out singletrack. At about the 3 mile mark from the Pass I begin riding the old flume trails above the South Fork of the Swan River. Immediately there is a nasty steep detour around a washed out trestle and I am pushing my loaded down bike up some seriously steep grades, but it is a short detour and I am back on the bike soon enough only to run into some deadfall…off the bike to haul it over the deadfall and then back on again. This is the trend for the next 15 miles or so as I weave in and out of the South Fork of the Swan River valley and French Gulch, where I pick up the French Gulch Road into Breckenridge. The old flume trails are some interesting piece of history. It is hard to imagine the effort put into making those trails, and fun to think about what the old loggers would think about us riding our bikes on them nowadays.
Down in Breck, I buy myself a cycling cap to keep the sun out of my eyes because it is a beautiful cloudless day and then I get some lunch. At the Conoco I load up on two days worth of food: beef jerky, gummy bears, peanuts, Fig Newton’s and a Gatorade to pour down my throat. I am only making the pack heavier for the 10 mile climb up Boreas Pass, but it is a gentle grade and I make it to the top by 3pm. I chat with a hiker at the top who snaps a picture for me and then it is off the other side heading for the Gold Dust Trail. This trail is flat out fun and I fly down to Como where I cross Hwy-285 and head out into the flat empty nothingness of South Park on Elkhorn Road. This is the Great Divide route and I picture myself heading all the way to Antelope Wells in New Mexico. That only lasts for a moment as I turn north onto CR-32 and head into some strange country. Brown, angular heaps of rock stick out from the plains and catch the late day sun. I am in a covenant controlled community but there are so few houses that it feels odd, and all the dirt roads are named: Benton Circle, Travois Road, Mustang Road. But where are all the people and houses? A lonely place to live.
At around 6pm I pop onto the Tarryall Road – CR 77 – at Stage Stop Road and run into the Stage Stop Saloon. The sign out front says, ‘Food, Ice, Groceries, Drink’, and I think: ‘ah, perfect, I need a cold drink and some fresh snacks’. So I pull up, drop the bike and walk inside and realize it is just a bar, an old bar, an old country bar complete with rickety slamming door and creaky floorboards inside. There is no one inside, and I look around for a while trying to figure out what to do. I decide to use the bathroom. As I wash my hands in the sink, I see mouse turds in the sink and next thing I know a soaking wet mouse runs up out of the drain into the sink! Startled to say the least, I turn off the faucet and walk back out into the bar. This time there is a bartender and I tell him he’s got a mouse in the sink, and he tells me he’s been here for fifteen years and never heard such a thing. He goes in after it and comes out with a bite on his thumb. For his second attempt he brings a cat from out behind the bar and goes into the bathroom. I never find out how the cat fares. After a while I realize that nobody is going to ask what I want. At this point there is one guy at the bar and the bartender and his wife behind the bar. So I get a cold draft PBR and a bag of chips and slam them both. Back outside I chuckle at the quirkiness of this place, and climb back on my bike with a little buzz. I head up CR-77 to CR-39/Rock Creek Road and head north back into the Pike National Forest. It is 7pm and sunny and extraordinarily beautiful as the sun gets low. I try Wendy again on the cell, and this time I reach her and tell her my mouse/bar story which I think is a pretty good one. We have a nice chat and then I head north on Rock Creek Road looking for camp. At the 65 mile mark for the day I find a nice Aspen grove and string the hammock up between two good ones. Another nice camp on another beautiful day. The freeze-dried beef stew for dinner is fantastic!
old trestle bridge on flume trails above Breckenridge
french gulch flume trail
French Gulch Road
Boreas Pass Road
Flume trail on Gold Dust
Sunset on Rock Creek Road
Lonely road somewhere in....
The Hennessey Hammock in action...
Road 131, Pike National Forest
Day 3 – 8am
August 13, 2009
45 Miles
I wake up a little late this day and I am sore. I have cramps in my quads and calves and feel significantly older than I did yesterday. There is widespread cloud cover and the general feeling that it is not going to break. I make some coffee and oatmeal at a ridiculously large fire ring, look over the map and then pack up my gear. Climbing back on the bike is a good feeling and I get rejuvenated as I continue heading north on Rock Creek Road for Lost Park Road. This is national forest land, dispersed camping land, and there are RV’s tucked into the trees off unnamed roads. There is little to no traffic. I gain Lost Park Road and begin the climb up toward Long Gulch. I have no water and need to filter some so I pull off and look down at Rock Creek and realize it is stagnant and covered with swarms of bugs. Not looking good. At that moment an older couple from Boulder pulls up in a Subaru Forester and the women gets out to stretch. I ask her if she thinks this water looks good to drink (a stupid question, knowing myself that it looks horrid) and she immediately says: ‘oh no…we have some water, here take some, we are heading home to Boulder and plenty left over’. Thank you couple from Boulder in the Subaru Forester that filled up five bottles with fresh cold water!
I regain the Colorado Trail at the Long Gulch trailhead and begin the 2 mile climb up to the beginning of a magical stretch of singletrack through a grand meadow in the North Fork of Lost Creek. And it just keeps going and going, down and down, beautiful twisting smooth singletrack. The weather begins to turn on me at about mile 6 or 7 in the meadow and it is exposed and open and I need to get out of this meadow. I finally do so at the North Fork trailhead, and climb up a rutted road back to Lost Park Road. And at this point begins the Nate Stultz trail, the bane of my trip.
The Nate Stulz trail connects Lost Park Road with CR 77 and is one of the few ways up and over the Tarryall Mountains at this point between the Lost Creek Wilderness and Kenosha Pass. I gain the trail and begin climbing up Monkey Creek into another meadow and it is apparent immediately that no one ever uses the Nate Stulz trail…ever! I have a friends GPS track that I am thankfully following otherwise I would have been lost. The weather continues to worsen, but no rain, just dark skies and I am back in another meadow…exposed…open. And this darn trail keeps petering out. Finally out of the meadow the trail turns to an old road and for me it becomes a straight pusher, up and up and up. I reach an old road, cross it and find a great overhanging rock to take shelter under. I brew some coffee, put on my rain gear and expect the rain to come crashing down and the lighting and thunder to strike and roll…but nothing comes. It just stays dark and I can’t wait forever. So I pack up and continue on under oppressive skies. Climbing now ever higher and thinking this is the wrong way to be going in this weather. At the top is High Park, yet another meadow at around 11,000 feet and again I am exposed to the dark purple clouds that don’t seem that far away. I try to cover ground but the Nate Stulz conspires against me with deadfall, and disappearing trails. Finally I get through the meadow to a steep descent on a loose, rocky unused trail and carefully weave my way down. At the bottom near Gooseberry Creek I am supposed to head left across the creek to the Cabin Springs Road trailhead. But there is no heading left, the trail keeps taking me the wrong way, my map is off. So I begin a 1-hour ordeal of a bushwhack through thick alder along the stream, manage to fall in the stream, the bike keeps getting horribly caught up in the underbrush and I emerge on the other side with a steep hillside in front of me. I push up the crest and find the damn trail that I couldn’t find before. Finally I get to the trailhead, say a good riddance, and fly down Cabin Springs Road back to CR-77/Tarryall road.
All this time the skies have just been dark and forbidding but they haven’t done anything. I fly down on smooth pavement to the Tarryall Reservoir and find a nice picnic shelter with a bench that I take refuge in again. I spend about an hour looking over the lake, watching people fish from canoes, eat some food, apply some chain lube, and wait for the weather to move off. I want to talk with Wendy, but I have no service. So I pack up and ride off. I get to the Ute Trail River Ranch fifteen minutes before they close their General Store and I stock up on Starbucks Cappuccino drinks, Gatorade, M&M’s, and Goldfish and have a nice chat with the owners who tell me about ‘the European bikers who come through expecting to ride the whole Colorado Trail, but get chewed up by Matakut Road and decide to turn back at the Ranch’. Matakut Road is of course my route home.
I make it to Twin Eagles campground and find a nice spot on a hillside above Tarryall Creek. I get Wendy on the cell surprisingly and chat for a while. Tonight it is freeze-dried Chicken and Rice and man is it tasty!
Morning planning
Colorado Trail meadow
Tarryall Road
Twin Eagles Campground
Day 4 – 530am
August 14, 2009
55 Miles
I wake early to light rain on my hammock rain fly, and say a silent curse. All day yesterday under purple skies and no rain, and now rain in the morning, so rare in Colorado to have rain in the morning. But ah well, today is my last day on the road…I set up a meeting point with Wendy at Buffalo Creek for 630pm. Plenty of time. The rain lifts as I head out to CR-77 and I cruise into Tarryall before sun-up, it is a lonely place and I wonder what these people do that live there. I make it to Matakut Road/FS-211 in 30 minutes and turn left onto the dirt road. I shed my rain gear and begin a steady climb up into the Hayman Burn area. There are numerous signs warning of flash floods, falling trees, debris in the road, blocked trails, and the need to climb to safety during floods. The sky of course is just screaming rain again, a dark solid mass of clouds in all directions…no sign of breaking up with the dawn. I find a nice spot for some breakfast, drink some coffee, eat some oatmeal, and watch as the wind begins to pick up and I can see the undersides of the leaves…never a good sign. So I mount up and head out into the hugely exposed area of the Hayman burn area: 138,000 acres of human caused burn. There are still many trees standing but they are dead and black and eerie looking. You can see for tens upon tens of miles and it is all burned and dead. It is a bit spooky and under dark skies it is even worse. I keep peddling expecting rain but it never comes and I pull into the Goose Creek campground before 9am. I get some fresh water from Goose Creek, use the bathroom, and take a nice breather. At this point I realize I am way ahead of schedule and will have no problem reaching Wendy in Buff creek by 630 barring any bike issues or major malfunctions. So I slow up and take my time to Wellington Lake, where I get a campsite for six bucks and set up my hammock for a nice afternoon of relaxing.
I get kicked out by some campers who have had the site reserved since February (yes, since February…that is some forward planning) – shouldn’t a reserved site have a reserved sign on it? Oh well, time to move along anyway. But of course as soon as I get packed up, around 4pm, the rain decides to come. So I move out into the Buffalo Creek area under rain and seriously dark skies. But again, luck is with me and I miss the worst of it. Peddling down Buffalo Creek Road, the storms have moved east, and the sun comes out in the west. It is a beautiful time of evening as I cruise down my home turf.
As I get close to the parking area, I am hoping Wendy will be there, but I am a little early…but sure enough she is there walking up the road with our dog and it is a great site. We have a little reunion and she laughs at my knee high socks. But I’ll tell you right now that the knee high socks are a seriously good piece of gear to have!
All in all, a really fabulous tour through some little visited country. I will wait a while, but I’ll be back to get Lost in Lost Park again some day.
Actually designed with mountain bike trans-alps in mind but do with it what you want. It makes no difference. This favourite amongst the bike packs with its Airstripes back, Soft-Edge mesh wings and anatomically formed shoulder straps will sit firm and comfortable doing anything you set your heart on. For its fans to have a bit of variety, there are new and extra colours. The SL version with different anchor point and angles to the hip fins, narrower shoulder straps and slightly shorter back is geared up for women’s trans-alps.
Details:
» Airstripes back
» Soft-Edge comfort straps
» padded edges on the mesh wings and zipped mesh pockets
» load adjustor straps
» dividable main compartment
» Neoprene helmet flap
» two front pockets with zipped valuables pocket
» compressions traps
» 3M reflectors
» two stuff compartments
» light-coloured lining for a better contents overview
» mesh side pockets
» safety blink loop
» rain cover
Please rate this product: (no login required) (35 votes, average: 3.69 out of 5) Loading ...
Hi everyone! I know that it is more common to hear from the winner of a race, but I thought that it might be fun and maybe a little helpful for me to post some of my personal experiences while doing the 2009 Colorado Trail Race for any future first timers. Of the 40 or so people who started, I finished Dead Friggin’ Last (18th) and am surprisingly really proud to say that! It was by far the hardest thing I have ever done! (after a 18 year mountaineering/ice climbing and rock climbing career and countless 24 and other endurance races that is at least saying something.) I met some amazing athletes out there on the trail and it was an honor to join them in this brutal event. Hands down I came in over confident in my fitness and underestimating the severity of the course. So if you are going to take this thing on, don’t be lulled into thinking that it is going to be 5 to 6 days of sweet singletrack and some cool camping. The trail is really nothing like the more urban and overused ends of it. Nor does it look much like the pretty pictures either on this sight or in the guidebook! It is rocky, steep and much more “designed” for backpacking than it is for riding a fully LOADED bike!Make sure that you have shoes that are up to the challenge with LOTS of rubber! (I completely wore through a fairly new pair of Specialized carbon soled race shoes by Buena Vista and had to get new ones by Salida)
Ok so here goes: Started out feeling like the cold I was hanging onto was still clinging pretty tightly to my immune system….Not a good omen! I also started with the idea that my buddy Steve and I would ride together for the whole thing. Steve it so happens is a really active semi-pro cross country racer with top 10 national results…..I am a kinda chubby 44 year old father of 1 and 1/2 . Clearly NOT a good match up. I was pushing too hard too early just to try to keep him from having to wait too long for me. Early on it was clear that this was not going to work…..He had been waiting 30 minutes or so for me at the Kanosha trail head and we had started in Baily together….Anyway, you get my point. Do this race alone. Whether you are planning on being competitive or just finishing, you HAVE to keep it slow and steady! Just because some guys can do this in 4 or 5 days, you probably aren’t on your first try! Be the tortoise young Skywalker. All this early high intensity stuff pushed my into a state of pretty severe asthma/bronchitis type symptoms. While rumors abound that the real “business” comes in the last half of the race, I found section 7, 8 and 9 to be EVERY bit as hard as the stuff found further south. Safe to say it was harder than I ever imagined. (Seg 7 sick, sick ,sick……but so worth it!) Coming into Leadville on day 3 I couldn’t get 5 good pedal strokes on a climb without stopping and wheezing for 3 minutes. Thank god for the road into Leadville or I woulda been hosed! Got a room at a motel and tried to get my s*** together, but it didn’t help…Was up all night coughing(I’m sure the Harley guys next door were PSYCHED!) Limped through the road section up to section 11 and was SOOOOO psyched to find it really moderate and super fun! Then a sweet chunk of road into BV and a chance to talk to other folks and refuel and organize my massive amount of gear (more on that later). The grind up Cottonwood pass wouldnt have been so bad had it not been for the fact that it was like 200 degrees and baking sun..man the river looked good but I knew that some guys were hot on my heals and I didnt want to give up any precious spots…………LOL! Once I got on the trail it was a little irritating to lose ALL of the elevation I had just gained to be thrust into an endless H-A-B! By the way 13 and 14 look easy on paper………….NOT the case! 14 sucked my will to live and I was forced to leave the trail and charished the 30 mph cruise into Salida for a rest and some new shoes. I was literally on my insoles and a big wad of duct tape! I was still breathing through a coffee stirrer into lungs the size and consistency of golf balls but was convinced a night in a warm room would fix me up so I got a room at the Simple Hostel ( 5 outta 5 stars!!!!) and proceeded to the river to hang out and watch kyakers. After a full day and night nothing had changed so I figured it was time to pack it in and go home. It actually took quitting and calling in the wife for a ride home to make me realize that this was not something I could quit. I would never get another chance to finish this! I could do it again next year, but it still would not have been THIS year! I had raised 1000s of dollars in per mile pledges and I was going to have to tell every single one of those people that I was too weak to finish something that I had put a whole year into. People with cancer don’t get to just quit having cancer…they have to fight through to the end no matter what that end might be. As it would so happen too, I woke up feeling fantastic on the morning I was supposed to head home so I no longer had ANY excuses. It was as if I had actually improved my fitness and had a bigger engine after all that low elevation and good food! My wife is a hardass too and she was offering absolutely NO sympathy. She was like.”if you can walk……you can finish”! If this takes you 3 weeks, you gotta do it!” So I cut down my gear to the BARE essentials and headed back out! After stripping 8 or 10 pounds of excess my bike felt like a Tour race rocket and I felt like a new man! The ride up to the trail kinda sucked but once I got there it felt like home. Section 15 Foose Creek was really tough with super chopped up horse trail but the scenery was incredible and the hike-a-bike gave my taint a chance to recover. Yah, my sit parts were RAW until day 9 or so….Thought I had enough miles but once again…NOPE. The fact that my pack was so much heavier than usual was not something I had accounted for.
SIDELINE: A & D ointment saved me from having an agonizing experience out there. One good glop and I was ready for 2 or 3 hours pain/friction free. Plus no saddle sores resulted. Oddly enough, you can use that stuff on: your chain, your cables AND I even glopped it in the tube of my pump when it stopped developing pressure around the gasket! Stuff saved my ass literally!
Section 16 was challenging but super fun! Beautiful mellow and everything I was hoping for. 17 was another hard one and LONG! The first 12 miles of Section 18 are BLISS! Look for the “Trail Angel” coolers! The detour was a nice break and the camping next to Dome Lakes was stellar. I did the rest of the detour over Los Pinos Pass and Slumgullion (brutal day already) which brought me to the big decision at Stoney Pass……do 22/23 or opt for the detour around. For me this was a pretty easy choice. It was a miracle to me that I had made it this far (9 days in already) and there were several factors that made the detour the obvious choice. I was almost out of food. I didn’t have a spare tube. It was getting lateish 1:00pm and some clouds were building AND after minimizing my gear my sleep system sucked! I was FREEZING the night before at 8000 feet so I wasnt too into being out at 13000 if something went wrong. I proceeded DOWN at warp speed into Lake San Cristobal and thought I was in for a relatively easy ride up and over Cinnamon Pass into Silverton ( A 100 mile day with about a billion feet of climbing) . Once again….NOT THE CASE! This climb ’bout killed my ass. I should have known something was up when all the 4 wheelers were wishing me luck as I headed up. Brutal and endless is all I can say. The descent was amazing and pulling into Silverton I really felt like I was in to the home stretch and was starting to count myself a finisher. I went into the Gear Exchange (5 outta 5 !!!!) and met Kim who pillaged a pair of cleat screws from her husband for me as well as had a 29er spare tube and Clif blox for $.50. Grabbed another night at a Hostel and was up early to try to knock off the last 4 sections into Durango NOT! Section 25 is arguably the most beautiful and difficult section of the whole race! (Figure the climb up Molas on the road on a 70 pound bike would kill 99% of the population!) It’s also where my flatitis began. The rocks are insanely sharp and tore my rear tire. Once I started with the tubes it was flat city. 4 flats that day and 8 on the last had me in tears almost! My pump would only generate about 20 pounds so the rear was super soft and susceptible to pinch flats no matter how carefully I rode! Section 26 was incredible! That night I slept VERY warm as I had “obtained” a cotton bed sheet from the hostel in Silverton ( I sent it back already!!!) and by adding that to my Deuter 60+ crap sleeping bag I was much warmer thank god. Section 27 was REALLY hard at the end but was awesome for the views and sweet descent into the lake at the top. Section 28 was amazing except for the 4 mile CLIMB/HAB brutality in the middle that you dont really see in the guide. Be ready for some work on this section. I was down to little peanut butter crackers 1 every 3 miles to get me through….I told you I was broke! I was bonking for sure but still conscious! Finally the reality set in that I awas going to actually finish the Colorado Trail Race and I started to go as slow as I could because I knew that the real world was waiting for me as soon as I left Junction Creek Trailhead so I savored those last few miles until………………….pssssssssssssssst! Another flat at 4 miles to go! I was so pissed I stuck the freaking rotor on both knees simultaneously and seared myself like a total fred! OUCH! After duct taping the tube one last time I finally hobbled into the parking lot and realized I must have just missed the brass band ’cause the parking lot was empty and the race was over. Coasted into Durango on a slow leak and checked into the Best Western and the best night sleep I have EVER HAD! OK so my trip report sounds more like the Colorado Trail Hostel Tour but looking back, I did it the way I had to to get all the way to Junction Creek. If anyone wants to question how long it took me…………I got my kit all ready to borrow if they want to give it go!! LOL I am so thrilled that I got this crazy idea last year to do the Colorado Trail Race as a fundraiser and that I put myself through everything just to be able to say I DID IT!
MY TIPS:
* If you start this thing—–FINISH! You’ll beat everyone who quits!
* Ride alone* Skip the Ipod – After Salida was so nice without the distraction!* Use a GPS and use OFFICIAL WAYPOINTS – I bought mine from some guy online and they were all screwed up!*Every moment of agony is offset by a moment of BLISS!* Use Fuji instead of Kodak box cameras.* Do 22/23 cause Cinnamon Pass SUCKS!* If riding a 29er, invest in a 20 x 36 or lower!* Petzl myo XP is a ROCKIN” Headlight that will allow you to haul ASS! I descended the 10 mile into Copper FAST!* Hutchinson Pythons UST are perfect for this as long as you have a co2 to re air on the trail!* Use barends! Sure they are dorky looking on riser bars but the change of hand positions is killer!* Ergon Packs ROCK! You can hook your saddle on the exoskeleton and it helps on HAB.* Wear hiking/spd shoes not race shoes! NO CARBON* Bring extra cleat screws.* Drape one of those .99 cent mylar emergency blankets over your bivy setup and you will sleep a lot warmer for almost no weight penalty!*Cheese sticks make great trail food.*Raman and Jimmy Dean pre-wrapped sausages make THE BEST trail dinner. I brough a tiny Primus gas stove and got through the whole race with one canister. If you are FREEZING at night a blast of the stove under an emergency blanket “tent” feels awesome!
* I’ll think of more and add them later!
Seven sunrises on the bike. The first was on pavement, pedaling a prologue to meet some forty fellow bikepackers at the eastern terminus of the Colorado Trail. A singular goal was on everyone’s mind: ride self supported to Durango, over 470 miles away.
I’ve never seen so many bikepackers. Pretty damn cool. SPOT units were handed out as I crossed my fingers that everything would go swimmingly with the tracking software. I had fixed a glitch, via Rob Kranz’s laptop, at just 10pm the night before.
We rolled out for a mellow neutral start. Finally, everything is said and done, all that remains is to ride and live with the decisions and preparation now behind us. Freedom on the bike.
The front runners launched their attacks. I thought myself ‘smart’ by being the first rider to let the gap grow. “I don’t think that pace is sustainable for 470 miles.” But I was fooling myself. Neither was mine.
Still, you have the strength to go fast, so why the hell not? At a cost, but it feels good and energy has been building for weeks without an outlet. Outlet found.
Rather than riding hard, I made my transition in Bailey quick, getting a jump on several riders. Highway 285 was frightening. My heart rate never slowed, thinking this was by far the most dangerous part of the race. An ambulance passed me. The last thing I wanted to see was a biker down up ahead. Please, no.
At the town of Grant, CDOT grants mercy upon CTR riders — a shoulder. I whipped out the phone and dialed Matthew Lee, getting a tracking update while pedaling. All was working, and he gave me updates on where people were. Relax. When I shut the phone and extended my arm it cramped, bad. I spent the rest of the climb trying to regain usage of that arm.
At Kenosha Pass singletrack resumes and I was surprised to run into Ethan, Jason and Stefan. Thoughts of racing hard and pushing through darkness with them ran through my head. False dreams.
A small storm crashed us at the base of our first climb above treeline — Georgia Pass. It went on just long enough for Stefan to pull out his full rain gear, then it was gone.
We climbed the semi-slick trail, cresting with plenty of daylight remaining.
An attempt at recreating the bikepacking.net header pic — same bike, same trail, different day.
Jason Shelman and I rode the descent off Georgia Pass together. We both cracked. He’s on a rigid singlespeed. I had no excuse, I just knew I had been riding too hard. “That would have been fun any other day,” he says. Good point, so why wasn’t it fun today?
Stefan, Ethan, Andrew Carney and I found ourselves at the base of the 10 mile range climb, a vicious hike-a-bike, at dark. I knew I was more or less done for the night. Carney and I pushed on for an hour or so, making little progress, before throwing out the bivy gear.
Jefe and Dave Harris passed us early in the morning. We pushed bikes for quite a while before sunrise #2 presented itself, perhaps not technically ‘from the bike’, but pushing it…
It was going to be a long day, both on trail and paying retribution for day one’s aggressive pace. Once you accept and know that, though, it gets much easier.
Andrew enjoys one of the steepest parts of the hike-a-bike in the morning glow.
The top was reached, and magical tundra riding ensued. I may not find myself up here on a bike ever again, so I had to savor it.
Hopefully you can see why. There’s about a mile of amazing trail up there. Then you start the descent and hold on for dear life.
Cracks were evident. We detoured into Copper Mountain, first to the store, then to Tuckers for breakfast. It was the only way to salvage the day, race or no race.
Properly fueled for the first time in the race, the climb to Kokomo Pass still went slow. Andrew had some shut downs, but news of three racers cresting the pass and one snoozing on the trail (must be Harris!) motivated us to keep the strength. Sure enough it was Dave, and we caught him too easily.
“I’m looking for the quickest way outta here,” he says.
What’s a good way to motivate Dave? Pass him. He didn’t let us go easily, but was obviously struggling. We waited a few minutes at Searle Pass before beginning the descent together. Riding several miles of narrow trail at 12,000 feet had done well to put me out of race mode.
Searle’s massive descent is a real ripper, laced by an abundance of flowers. I wanted to take a bunch of pictures, but Andrew and Dave were in no mood to stop. Soon I was behind. Now at ‘low’ elevations (sub 10,000′ is low for the CT), Dave smoked up and over Tennessee Pass, never to be seen again.
We were ‘SPOT stalked’ in Leadville, by a prospective CTR racer and by Lee’s wife Joan. It’s strange, but a still kinda cool to see spectators getting so excited about the race and the live tracking. We ate, and I thought about trying to find Harris to share his hotel room, but we were motivated by the possibility of making it to Buena Vista that night, so we pushed on.
Pace was high throughout the Halfmoon area. GPS track errors abounded, and darkness fell early. “I’m tired as hell, but this is too cool to stop.” Moonlight bleeding out of our souls, the lake shimmered, showing a very clear goal. The singletrack was easy to ride, but not easy to follow. We did a full circle down by the dam, why can’t I remember where to go?
When CDT (but not CT) signs directed us away from the GPS track I finally yielded. Enough for now. Mental fog was getting thick, and it was time for rest.
Just as we flipped off the headlamps, around midnight, Brian Taylor came rolling through, all amp’d to push into Buena Vista. Impressive, I thought. This wouldn’t be the last time Brian passed me late in the night.
Dave Harris left Leadville at 2am (!), passing us just as we were tapping the potential energy of the pre-dawn darkness. Once again I watched the world come alive (sunshine!) from the bike, though this time most of the action was obscured by the forest.
We turned off the Colorado Trail for another welcome wilderness detour. Tail breezes pushed us effortlessly along the banks of the Arkansas River, through old railroad tunnels and safely into the backside of town.
Not sunlight, not pedaling, not mp3 files, not conversation, not beautiful views were enough to lift the fog. Breakfast at Poncho’s did it. We swung into action, aiming to get out of town and back onto the trail as soon as possible.
There was quite a sight at the City Market. Dave had set up shop, buying groceries that looked more like he was filling his apartment’s empty cupboard than filling his bikepacking bags (a full box of cereal!?!).
Dave said to Andrew after I left, “damn, what took me two hours took him twenty minutes.” But I was planning to get more food later on. With full food bags I expected Dave to move slowly, but he quickly passed us and quipped, “no drafting!” As if that was even possible. He disappeared seemingly into thin air.
At Princeton Hot Springs, the next waypoint on the trail, I found a surprising amount of food to stock up on. Now I was fully loaded, and relatively confident I could make it to Silverton, ~3 days away.
Mishap struck Andrew on a briefly rideable part of the climb away from Princeton Hot Springs:
Ugh. The little ring is pretty much the only one you use on the Colorado Trail, though on the present climb no rings were useful. We hiked together, rode some wonderfully contoured trail to the bottom of Raspberry Gulch, then studied my GPS basemap for Andrew’s best escape route to Salida and Absolute Bikes.
It was a bummer to watch him pedal away. We had been well matched in pace and mindset, and it looked like we were set on a solid pull to the finish. I called Paula to get a bearing on where other riders were. Dave was not far ahead. Ah ha, a carrot. Go, go!
Segment 14 is somewhat legendary for being nasty, but I didn’t notice much. The fog was in the troposphere by now, and said ‘sphere was still happily free of anvil shaped clouds and electricity. I was pinching myself at all the good weather we’d had so far. I was on top of the world, and no vagaries of trail conditions or lack of flow could tear me down. Although you hike, it seemed the top of every hill held a nugget or two of tasty singletrack, breezing through the trees.
After the Angel of Shavano Trailhead, it was new territory for me. I bailed into Salida here in 2006, before the CTR existed. Occasionally I’d see a camper or hiker and ask if they’d seen another cyclist. ‘About an hour and a half ago’, ‘maybe an hour back?’, ‘just a half hour.’ I was gaining, but night fell just as I caught a glimpse of highway 50, ready to descend.
I found Dave Harris just about to nod off a little ways up the Fooses climb. I decided to stop early, hoping Andrew would rally his new chainring and catch back up. I never saw him again, though the SPOT replays show that he was within an hour several times.
Dave was rolling early, so I joined him for sunrise #4, moving near treeline, aiming to gain the Monarch Crest Trail. The sun’s rays were enough to burn off the morning fog, and I was soon reveling in the chase of Dave, whose lights I had seen fade into dark long ago.
I saw him, then I caught him, just like that. He was not moving fast. Seeing me behind, he quickened his hike-a-bike pace for a moment. Then he collapsed on a rock. Between gasps and coughs he said ‘AMS, I have all the signs.’ AMS being acute mountain sickness. It was clear that he wasn’t getting much air in, regardless, and I was starting to worry. I offered my inhaler that I carry but rarely use, touring or racing. That seemed to help, and we continued up the ridicu-steep push up to the crest.
You can see in that pic that Dave’s not in a happy place.
NOW, he’s in a happy place!
I tried to nap, but I was psyched to ride the Monarch Crest Trail and couldn’t really settle down. I didn’t want to leave Dave until I knew he was OK, but also there was no one to chase. The next racer was 8+ hours ahead, and not being in race mode, I didn’t want to ride solo. I enjoyed the psuedo-tour feel of the day.
Eventually we stood up to cheer Brian Taylor up the ridicu-steep push.
He was happy to be on flat ground again.
Then, all of the sudden… cyclists everywhere! Wow. We outdistanced them soon enough, and then made the fateful turn at Silver Creek. Shuttle riders go down, CTR riders make trail for Sargents Mesa.
Sargents is legendary as being the most brutal section of the CT for cyclists. The Oracle Ridge of CTR. Suffering was guaranteed, but in many ways I was looking forward to it. Everything is worth riding once, and I really had to see this one for myself.
Joe Bagley and Steven Garrett caught Dave, Brian and I. It sounded like Dave was OK, but likely bailing, so I jumped up at the chance of riding with somebody new.
I thought this was supposed to be hard? Mellow singletrack through aspens? OK, OK, we’re not yet to Sargents proper. I had expected the hell to begin much earlier on, though.
Joe had an interesting setup — panniers and no pack. In a way I was envious, and in a way… not so much. Joe didn’t have much to say, a strong and stoic rider, but he did say his setup was working well for him (the bags become messenger bags for extended hike-a-bike sections).
I spent most of afternoon riding with Steven from Illinois.
We climbed up a long and pleasant meadow, which finally gave way to what I had been waiting for: impossible rocks. For the next few hours the trail climbs up and down, always unnecessarily, going out of its way to reach each and every highpoint in the area. The ups (and even some of the flats!) are so rocky that you’d be a fool to try and ride them. The downhills are occasionally enjoyable, but always full of punishment.
Steven nailed the description of Sargents Mesa: “SOUL CRUSHING.”
Just as our souls had nothing left and the clouds and fog built steadily around us, we emerged into a meadow near Lujan Pass, and my brain malfunctioned. I saw a large tent, reading ‘Trail Angel’. Next to it, a cooler, reading ‘please, help yourself.’ Surely a mountain mirage.
But there was trail angel ‘Apple’ from the Appalachian Trail, setup for all Colorado Trail hikers and bikers, for two whole months. Besides providing snacks, sodas and encouragement, he was counting trail users via infrared beams and a radio relay of his own design. He had learned about the SPOT tracker from Ethan, and was pretty excited to talk to me about it. We took some sodas, cookies and the like, but refused his offer of driving us to Gunnison for chinese food!
It was a huge boost to the spirits. Dave rolled in, somewhat to my surprise, and had a similar reaction. Is this for real? This is the middle of the most remote stretch of the race!
We all debated about staying the night near the shelter of the trail angel tent. Once it started sleeting it was an easy choice.
Before we drifted off to sleep Dave and I agreed that we’d had our fill of hike-a-bike (me) and high altitude suffering (Dave). We resigned to ‘finish the CT’, but not the CTR, and take Cinnamon Pass instead of this year’s addition to the race — Coneys and Cataract. That resignation put a lot of fear and anxiety out of my mind, and sleep came easily.
Coneys and Cataract add up to some 33 miles above treeline. The miles are slow, full of hike-a-bike and trail-less riding. You are highly exposed to storms the whole time, and woe be to anyone that runs out of food out there, some 200 miles from the last resupply point. It’s enough to soil the shammy of even the most experienced bikepacker.
Dave and I were up at 3:30. We got organized and headed out for sunrise #5. Per usual, an hour’s morning fog meant Dave was long gone before I was moving at non-glacial speeds. I usually don’t have a problem getting moving in the morning, and I wasn’t sleepy, just couldn’t get my body to limber up and quicken to normal functionality.
Cochetopa Park was a perfect setting for sunrise 5. The dirt road detour was a bit on the long side, but it mattered not. I transferred nearly all my carried weight to my bike (thanks to the big Epic Designs seat bag) and even got my pack to rest on the seat pack.
The Los Pinos descent and associated Cathedral views energized my weakened psyche. I began to think more positively about Coney/Cataract. Clouds were building, but I cared not. I’ve come this far, why not try? Nothing like a long dirt road detour to inspire you to more singletrack. With that said, I truly enjoyed the dirt riding through what seemed like such a remote area of Colorado. A lot of the CT is missing big views, but the roads afforded quite a bit of scenic gawking.
When Dave caught up to me (somehow I had passed him) it was clear we were operating on the same wavelength, even though we hadn’t seen each other all day. We formed a pact, determined to push through any and all challenges that awaited us on Coney and Cataract.
It wasn’t looking so good as we crested Spring Creek Pass to begin Coney.
But the bright green bag on Dave’s handlebars isn’t just to grab attention. It’s got a full on tent in it!
We made good time for a couple hours, but a wall of white approached from the south. Dave threw out the tent, fiddled around a bit, then we climbed in and drifted off to sleep as it drizzled down on us. The storm looked worse than it was, but boy was it nice to climb in the tent and drift off without a care in the world. I woke up on fire — the sun was out, cooking us, and it was time to ride!
For a number of reasons, everything seemed to come together that evening, and the riding was off the charts bliss. I got camera happy, and I hope you can see why.
photo by Dave Harris
Amazing doesn’t even begin to describe the riding, the views, and the trail up there. What a privilege to be up there as the sun set, the wind howled, and everything in the world seemed strangely at peace. At least from my perspective.
photo by Dave Harris
Yep, big smiles from this bikepacker, and it only got better from there. We pushed up to 13,000′ through a brief section of climb-a-bike. Darkness surrounded us. Our lights revealed the smooth trail ahead. Lights behind us revealed two chasers, likely Joe and Steven. The visceral thrill of being chased, far off in the distance, kept focus strong.
I found myself cleaning switchbacks, at 13,000′, in the dark, and still yearning for more. Holy crap, can it get this good?
The moon outlined a faint cloud, then flooded the tundra with white light.
Several false summits led to Coney Summit proper, the high point of the entire Colorado Trail (wilderness included). To my surprise, the first 600′ of the descent is butter smooth, well graded and, well, a damned hoot to ride. Pinch me, is this for real?
We continued descending past Carson saddle, to the lowest spot for a day in either direction. And that was about 12,000 feet. We found a flowing creek, but no trees. Full on water, we threw out the bivy gear and was just settling in when Joe and Steven rolled up. They decided to bivy at the same spot.
Clouds zoomed across the effulgent sky, ghostly dancers to these tired eyes. So fast and so close, almost as if I could join them in their waltz through the troposphere. Just as the sky dancer dreamscape began to unfold I noticed something larger moving in, just as fast. Grey and solid. Rain clouds.
I tried for a minute to finish setting up my tarp, but with 30 degree cross slope and nothing but a bike and CT marker to tie to, it was pretty pointless. I scooted down into the bivy bag and sleep was intermittent as grey cloud after grey cloud scrolled across.
It felt more like a brief pause than a night’s rest, as it often does when you watch sunrises and sunsets from the bike. All the better, because the ride was picking up momentum, and I wasn’t keen to lose any.
Dave contemplates the strange world we found ourselves in after sunrise six.
I left early from camp, by headlight, and thinking Dave would quickly catch up. But 12,000′ was enough of a slowdown for Dave to match my morning fog. Or perhaps there was no fog.
Dawn’s climb brought us to 12,900 feet, and we were now ‘in the game.’
An infinite wilderness was ours to explore.
A strange planet, so beautiful and yet so inhospitable.
A place where humans are only passing visitors.
Following rock piles on faith.
Having a hard time imagining that a world this large exists inside the state of Colorado.
Dave soldiered through it, fighting off the altitude demons at every hike-a-bike. My inhaler helped, but in my mind it was determination that won the day. He was loving it, and only at the last couple hills did he admit, “OK, I’m ready to be done with Cataract.”
Some things thrive up here…
I sure was (thriving). Bikepacking (and especially racing) has always been such an ‘ultralight’ endeavor for me that there’s usually an element of discomfort involved in it. After a couple days out I long for town, for the food and beds that civilization offers. It’s something I struggle with, the dissonance between wanting to be away from it, and yet back in it all the same.
But despite being in the hardest, most remote and most inhospitable sections of the route, I didn’t want to go to town. I’d slept poorly, never for more than five hours, since the beginning of the race. I’d spent less than an hour, total, indoors, in the last week. Only a few hundred calories sat in my bags. I couldn’t even remember my last actual meal.
But I was sad when segment 23 ended, we hit Stony Pass and it was time to blast into Silverton. I looked longingly at a group of horse packers, able to continue with the infinite wilderness of the Colorado Trail.
Whammo. We were quickly in town, modulo a stiff headwind for the last couple miles.
While scarfing carne asada I watched Joe and Steven roll by. That’s strange, I’d never seen anyone behind us, and often the view is of the last hour+ backwards on the course. Matthew Lee checked trackleaders.com and found they’d bailed on Cataract, taking Pole Creek out.
Checking in on the race happenings was fun. Owen, Doug, Stefan and Jefe had finished under five days. Incredible. Max had dropped out, sadly, but that meant he was going to pick me up in Durango, simplifying what could have been a very long and tiring set of logistics to get us back to Tucson. And to top it off, the forecast was for zero percent chance of rain today and tomorrow.
Still pinching myself! What are the chances everything could go so well?
We dried out our bivy gear from last night’s rain at the visitor center, then started the paved climb to Molas Pass. Dave pedaled with strength. I caught a glimpse of him as he turned onto the Colorado Trail and his muscle memory took over. He was on fire, not to be seen again until he stopped to eat.
photo by Dave Harris
It was yet another magical evening to be on a bike, pedaling through the high country of Colorado.
The fly in the ointment was Dave’s dying rear wheel. It had been giving him some grief for the last 200 miles at least. But this evening the cogs started deflecting, causing ghost shifting. The freehub also was failing to engage more frequently. It did not look good, but I remained hopeful it would stay together long enough for us to finish at the same time.
This looked more doubtful as the sun lowered. It was getting frustrating for Dave, having to pedal in high gears and only some of the time having it engage. Though I was fired up to push on into the night, I suggested stopping early.
After midnight I woke up to a headlamp and freewheel in the trees. It was Brian Taylor, passing us yet again.
The cold night made it easy to get up at 3:30 and head out on the trail. It was the only way to truly warm up.
We passed Brian, snoozing not far from us. Dave forged on ahead, despite failing gears. I pushed my bike in the darkness until the seventh and final sunrise burst into the sky.
I found Dave at the side of the trail, wheel off the bike. He couldn’t pedal anymore.
We spent the next hour trying to figure out something to do. I got the hub open and fiddled/lubed the ratchets, but there didn’t seem to be anything we could do. Finally Dave told me to just go, he’d get there or he may have to bail. I suggested the zip tie fixie method, not really sure if it was good idea or not. After a few more futile attempts I realized I was losing my hands. Frostbite from bike repair wasn’t really on the agenda. I was reluctant to leave Dave, wanting to finish as a ‘team’, but I was even more desperate to get my hands back.
Wearing all my clothes, and climbing hard, it took the better part of an hour before feeling returned. I was sweating like a pig in my rain gear, burning hot and yet so cold. It wasn’t particularly pleasant, but boy did it start a fire that was beyond my power to control.
It raged unabated for hours and hours. I stood to dig deep into the pedals around Hermosa Peak. Cleaned Blackhawk Pass’s monster climb, and ripped the ensuing descent and endless flowing ridgeline.
Only at the climb to the Cape of Good Hope did things finally simmer down. I needed to eat, put my head back and close my eyes. Pedaling forward seemed like the last thing I wanted to do. But it only lasted a few minutes, and soon I was above treeline, battling it out on Indian Ridge.
That’s actually a big smoke plume in that pic, not clouds.
As I began the final descent into Durango, I was on top of the world. I was overwhelmed with how well things had gone on this ride. My body had held up beautifully, injury and nagging pain free. I hadn’t even done so much as a barrel adjustment to my bike the entire time–flawless. The weather and trail conditions had been near perfect, and far, far better than I expected. Company had perfect too, I was able to ride on and off with a number of good folks.
Through circumstance and chance, but also an element of deliberate determination, it seemed I had found the perfect balance. A balance between suffering and bliss, moving fast and rest. I was one with the Colorado Trail, and the entire ride was flow.
Or so it seemed to me. Maybe I was just having fun ripping what is arguably the best descent on the trail. Krista Park met me for the last five miles of trail. She expected me to be tired and limping in (what, after 470 miles on the Colorado Trail?) not catching air at every opportunity and dancing down the trail.
photo by Krista Park
What can I say? It was disappointing when there was no more Colorado Trail to ride.
Max was waiting there. Krista was able to get online by her truck and I was happy to see that Dave was not that far behind, likely finishing about three hours after me. After grabbing a shower and some grub we headed back to the trailhead to wait for him. How he finished that fast, with no freewheel (the fixie thing didn’t last long), I’ll never know. Brian Taylor finished just a half hour later.
I was 6th place in 6 days, 13 hours and 29 minutes. This is getting long, but I just want to thank a few people. Stefan the organizer and smoking fast racer, Matthew Lee for watching the tracker, Chris Plesko for the updates, Joe Polk on the audio, Max Morris for picking me up and driving from Tucson, Lee Blackwell and Joan for getting us to the start and also my car to the finish, Apple the trail angel, Dave Harris for making Coney/Cataract happen, Rob Krantz for the hotel room and laptop the night before the race. And most of all to Paula (and the rest of the fam) for supporting and cheering me on from home. You guys all rock.
The Lake MX 190 features an action leather and mesh upper that combine to create a durable yet very breathable shoe. The ratcheting buckle with dual straps keeps your foot secure, transferring power to the pedals. This is a great shoe with a great fit, don’t miss out!
* Action leather and mesh upper
* Micro-step bucket w/ dual strap
* Vibram Mountain V sole
* SPD cleat bolt pattern(2 bolt style-crank brothers, time, shimano, ect.)
Distance is something that we like to measure, yet there are things that can not be simply measured in miles, vertical feet, etc. One such thing is the Colorado Trail. It covers some 470 miles, something like 65,000 vertical feet. But what the numbers don’t speak is the incredible difficulty that so many of these miles contain, not to mention the raw beauty of the places it traverses. Just ask anyone who has hiked or biked this monster, their legs, backs, shoulders and minds will attest to the fact that the CT is an experience best described as amazingly hard, brilliantly gorgeous and life changing.
This years Colorado Trail Race is no exception. The 2009 race course differs from the two year’s previous courses by adding more of the actual CT, thus more trail, less dirt road detours. The funny thing is the course is actually shorter, by some 50 miles, but the difficulty is sky high. It can be described in minute detail, the vertical plotted against mileage, etc, but as any of this years racers will tell you, it has to be experienced in order to be grasped and understood.
I came into this years race with high expectations for myself. I knew I was capable of doing it fast and maybe pulling off a win. The reality was to be a bit more difficult than I had imagined. I was a bit over tired, I was a bit distracted by the world of work and such I was trying to leave behind. I was perhaps a bit overconfident in my ability to rise to the occasion and be able to suffer through. In a nut shell I was not quite ready for battle with this monster, yet I was going into the ring anyways.
The start had some 38+ riders lined up to tackle this 470 mile beast, there were plenty of big guns here, some of the most experienced and fast multi day riders around. It was a gorgeous morning, weather calm and clear, I was giddy with excitement. About 15 miles into it I was already feeling myself fall apart. I went out a bit too hard in those first switchbacks combined with my lack of sleep the week before the race and I was melting. My legs were cramping up like never before, I felt hot, draggy and slow. I made a poor dismount sliding off a corner and tweaked my right knee. I was suddenly in 20-25th place. I convinced myself that I was committed to making it to Leadville, no matter what. So I plugged away.
The trail is a blast to ride all the way to Wellington Lake Road, plenty of climbing, but also fast and fun. Then a fast bomb down to Bailey and the unfortunate climb up 285 to Kenosha Pass. The busy pavement climb was choked with Sunday afternoon travelers, themselves racing for home or to get away. It was nuts, kind of like getting the s#7t scared out of you every minute or so, way too many close calls to mention. All the while my legs were cramping into tight knots, my head swimming and my knee twinging with pain.
Once off the pavement it is more delicious singletrack all the way from Kenosha to Highway 9 outside of Breckenridge. I stopped near Tiger Run to sleep, but sleep wouldn’t come, I was wound just a bit too tight and couldn’t come down despite being oh so tired. Instead I pushed on up Miners Creek Trail in the wee hours of the morning, up and up and finally over the Ten Mile Range into Copper Mountain. This was a new section for the race and it contains some of the steepest hike-a-bike on the CT. Next more singletrack through Copper, then on up the Searle and Kokomo Pass, a very very gorgeous section of trail, high above treeline, just amazing. From here a fast descent into Camp Hale, then a nice climb and another descent into Leadville.
I resupplied in Leadville, about mile 200, now my pack and bike bags were bursting with 2 plus days of food. Although I was to hit Buena Vista next, I wasn’t sure I would be there early enough to get to the super market, so I made sure to have lots of quality food to get me to Silverton, the next true resupply point. After some dirt road riding I was back on the CT and again climbing. The trail up out of Halfmoon has been rebuilt and was so much nicer, but still a burly climb. Again this is some very sweet singletrack from here all the way to Clear Creek Resivour, were we leave the CT for some pavement and dirt road to Buena Vista. I managed to get there by 9:30PM, got a bit more food and climbed up Cottonwood Pass Road and rejoined the CT. I stopped here for a nap. I was able to get comfy and melt into unconsciousness, ahh sleep.
From Cottonwood Pass Road the CT follows mostly trail all the way to Cotchetopa Pass, there are so many climbs and descents, miles and miles of trail and not much else. Very pretty and fun stuff including the legendary Crest Trail. It was along the Crest that I was attempting to multi task by riding and applying lip balm that I snagged a rock with my front tire spun my handlebars into my chest and fell onto the bike. I got up but felt a serious knot in my chest and my stem was crooked. Ahh you will be fine I told myself, but every deep breath was followed by a sharp pain, I did my best to ignore it and push on. The trail turns west as it leaves the Crest and it begins the dreaded Cotchetopa Hills, or as most remember it as, Sargents Mesa. This is the one of the hardest sections of the CT, it is rough, it is remote, it is pretty dry, it tends to crack open even the toughest nuts out there. I was able to keep myself positive through this crux but it did beat me up. It was also along this section that I took my second nap break between Long Branch and Baldy Lake Trails.
After Cotchetopa Pass it is a bit more of dirt roads and then we leave the CT to detour around the La Garita Wilderness. This goes up Los Pinos Pass, down into Cathredral and up Mill Creek to Slumgullion Pass to Spring Creek Pass, and back on the CT. Here lies another new section for this years race, known as Coney’s(17 miles) and Cataract(15.9 miles). I had reconned this in the lead up to the race so I knew what was to come, yet I was still blown away. From Spring Creek Pass, 11,890, mile 360+, it is all above treeline and hits the high point of the CT at Coney’s summit, 13,200+. It is amazing up there, but also a storm magnet. Sure enough as I tried to push over I was hit by a sunset storm dumping rain and mostly hail on me for an hour. So I napped for an hour and pushed over in the dark with clouds whipping over the ridge in the moonlight. I was feeling extremely tired and had to stop often and gather up strength to keep moving, no good place to stop up there, all the while wanting nothing more than to curl up and sleep.
I was truly questioning my whole mission at this point, like why don’t I ever take a normal vacation and sit on the beach, drink margarita’s, sleep in. Why am I out here beyond tired, feeling like hell, wincing with every deep breath? I can usually come up with a good answer, like I love this stuff, or I can’t think of anything I’d rather be doing. Yet that night up there at 13,000′ with the icey wind cutting through my clothes, knowing that miles and miles of this was to come before Silverton, knowing damn well I was not going to let myself go off course to find shelter, I really didn’t have a convincing answer, I just stubbornly pushed on.
I made it down to Carson Saddle, and to Lost Creek, where I passed Doug Johnson, sleeping next to the trail, I pushed 50 feet past him and curled up on my bivy, hoping the storm was over. I got up after 3 hours of somewhat restfull some sleep, packed up and started to hike. Soon there were two sets of lights in pursuit. I made a wrong turn in the dark following the cairns, as there is no trail, here Doug and Stefan passed me and I had to backtrack to the “trail” and catch up. We rode and hiked the rest of Cataract Ridge in the glow of the rising sun, this is perhaps the most wonderfully gorgeous sections of the CT and in the morning light it was just amazing!
We all bombed down Stoney Pass and into Silverton, mile 400+. We ate food, drank coffee, Stefan somehow was able to chase own a new chain, next the Post Office to send home some extra gear not wanted for the last 70+ miles, then the grocery store for enough food to make it to the finish. It was a slow process as my brain was tired and unable to put together what I needed to do. Yet the t’s were crossed and the i’s dotted and up Molas Pass and the return to the CT for the remainder of the ride.
I can not say enough how cool this section of trail is, very fun singletrack to ride, huge swaths of wildflower covered hillsides, creeks filled with waterfalls, just too much to put into words. Yet it also seems to take much longer than any other 70 miles to cover, much more energy to complete. Hitting the top of Molas just before noon I wanted to make as many miles as possible before the sun went down. I figured out that when the sun was up I felt pretty good and was able to stay positive and make good time, once the sun set I slowly fell apart and into the negative trap.
Luckily I was leap frogging with Stefan through out the last section. Although I usually enjoy time alone during these races it was good to have someone to push off and chat with. Yet I a couple hours after sunset I started to fall apart. Every one of these multi day races teaches me something, often many things, the 2009 CTR taught me this; I am oh so human. The other races I did this year, AZT 300 and the GLR were so damn fun and I was able to find this amazing place of peace and happiness that propelled me through the miles, through the suffering. I just never really found that place in the CTR, I had to fight for every mile, struggle through every sleepless moment. It was hard to except that I couldn’t just tap into that glorious energy of feeling completely one with what I was doing, instead suffering physically, mentally unable to rise above my worries and anxiety. A very Hard thing to accept.
None the less I pushed on through the night, the finish and the food I was gonna chow down on keeping me moving, chasing after Stefan. I was amazed at his energy, he was riding almost all the uphills, just pedaling through it all. I was walking everything that wasn’t flat or downhill, I just had nothing left. As we approached Indian Trail Ridge the calm night sky began to fill with dark clouds sparking with lighting strikes. Soon the lightening became audible, my heart shook and pounded with fear. In my exhausted state I became irrationally scared of getting struck, getting soaked by rain above treeline. So I ran, I ran up and over those talus strewn mountains with the image of death behind me ready to take me if I should slow. I made it over, I could smell the fear in my sweat soaked body, my heart pounded on, I thought I was tired before, now I was done.
Yet the trail goes on, why didn’t I lay down and sleep, why not take a break and see if I feel better, recharged? I just don’t know why, by now I didn’t care a drop about beating anyone, or making a certain time, I just wanted to be done, no more trail, no more wet bivy nights, so I kept going, my heart, mind and mouth groaning aloud. As we climbed out of Junction Creek, I could see Stefans lights always ahead of me, always higher, it was killing me, there was more and more. I was cracking apart like never before, I wanted to lie down and cry, yet no one would hear me, no one would scoop me up and take me to the finish. There was no escape from hiking and biking the last 15 miles. The only way was me moving forward, yet I didn’t care, I wanted to curl up and disappear. I somehow had some thread of determination left that I was able to lean on and use to keep moving, yet with every step I fell more and more apart. I began to hallucinate, I began to believe that the trail was gonna go on forever and I was to be forever riding this trail in the dark wanting only to sleep. I began to swear, I began to cry, I felt the edge of madness creeping ever closer. It was right there tempting me to give in, go ahead throw your bike into the woods, lay down, give in, cry. I clung to my pain, my throbbing eyes, my aching knees, I clung to sanity as I gripped my handlebars tighter, I rode on, groans escaping my mouth, agony rippling through every cell. I made it to the finish, just behind Stefan who must have waited for me, we crossed into the trail head parking lot and we were done.
It was over but my head was still a blurry mess and I still had no answer to the question that started to plague me so many miles back, why? The best answer I have is to see if you can do it, cover the miles, keep it together. Also to see what else you can learn, especially about yourself. What I learned is that deep inside I still have this hope that when it all falls apart that someone out there is gonna magically swoop down and save me. It bothers me to come to this realization as I try hard to be a self supported kind of person in all aspects of my life. I feel so small, I feel so humbled, I feel like I have much, much to do.
Congratulations to all you attempted and finished the 2009 CTR, you are all my heros, you are all inspirational in your efforts, keep on keeping on…peace Jefe
I stumbled upon this site about a month ago. Great stuff! I got into mountain biking 6 months ago and pretty much got hooked. The concept of bikepacking took it up a couple of notches , so I decided to dive in. Here is a review of my first attempt at it.
I figured for the first trip I should stay close to home with an easy bail-out option just in case. I work in Santa Monica, so the obvious option was somewhere in the Santa Monica Mountains. Since dispersed camping is not allowed, I had to plan my trip around the camp sites. My plan was to leave Santa Monica on Friday afternoon around 4:00pm, ride the streets up through Brentwood into Sullivan Canyon, link some single trail up to dirt Mulholland, then take fire road #30 through the hub and Eagle rock to the Backbone trailhead (Musch Trail), hike the bike 1.5 mile down to Musch Camp in Topanga State Park ( hike-in, primitive campsite ) since there is a “no bike” sign in this part of the Backbone Trail.
My bike, Cannondale F600 hardtail. Sleeping bag and shelter strapped on to the handle bar, handle bar bag with a map case, GPS, sleeping pad strapped onto the top tube, tools and patch kit in the small saddle bag, all the rest in the Talon 22.
3 liter hydration pack + the two bottles on the bike. Food for 2 days.
Getting ready to leave Santa Monica. Friday afternoon.
Westridge up to Sullivan Canyon right of Sunset Blvd. Some of the cars fly by on the blind corners. It’s a mile up this rode on a steep incline that is a bit scary; once you get up to the flat part it is much more manageable.
Sullivan Canyon
Problems with the Cannondale headshock. This fork is a loner from Cannodale. It was a pain to adjust. (My fork was being repaired at the Cannondale shop).
Top of Sullivan Canyon (Farmers Road). The intersection with Sullivan Fire Road. I rode up here without hiking the bike, the last section is steep and somewhat technical. I was expecting to hike my bike for some parts of it, given the added weight.
Riding some nice single trail.
Some sketchy sections.
How did this car get here?
Getting to dirt Mulholland.
On the way to Eagle rock.
A patch of the Pacific.
Hiked the bike down this “no bike” section of the Backbone Trail. As I was going down I kept wondering if any of the hard-core hikers would be offended by seeing a bike on the trail even if it’s not ridden. I did receive some stern looks.
Musch camp, Topanga State Park. 25 Miles / 2,200 foot gain. Riding with a loaded bike + a heavy backpack is not as easy. I can feel the difference mainly in the heavy backpack. I need some frame packs!
7:00AM Saturday morning getting an early start. It’s going to be a hot day. My plan is to take Topanga Canyon Blvd. (Hwy 27 ) to Old Topanga Road, then head up on Red Rock Canyon (dirt) to Stunt Road. This way I can get to Mulholland and ride it to Malibu State Park. This is the only way I can ride through using some dirt.
Going through Topanga Village on the way to Red Rock Canyon. Feels like 1967.
Red Rock Canyon.
Malibu State Park 9:00AM. It’s getting really hot: 95-100 degrees F. I bet all the mountain bikers unloading their bikes are not going to ride far today.
Getting all the water I can carry with me is essential since there is no water until my destination. I planned to take Crags Road ride up Bulldog to Castro Road and find the section of the Backbone Trail right off Corral Canyon Road. Then I rode the Backbone in three sections: Corral Canyon to Latigo Canyon; Latigo to Kanan, and Kanan to Encinal. From Encinal Canyon I climbed on asphalt for about 2.5 miles to Decker (hwy 23) which took me down to PCH. 2 miles north is Leo Carillo state park, where I spent the night.
CORBA inner–city and other at-risk kids program at Malibu.
Trailhead at Crags Road.
Single trail section.
Visiting the M.A.S.H. site. There is a field museum right at the original location.
Looks Familiar? M*A*S*H opening credits.
Up Bulldog Lateral
It’s a climb! Extremely hot and I have to hike my bike for long sections.
Here is where I came from.
Made it to the Backbone.
Chain with love, on the Backbone Trail
At the Backbone and Kanan. Met some nice folks on the way, the only brave ones who ventured out in the heat.
Getting ready to jump in.
The Pacific in full view.
Leo Carillo, end of day two. 40 miles, 6000ft. gain.
Conclusions:
1. Need to shave off some weight and arrange for a better packing system. I have put an order in with Jeff at CDW , should be set pretty soon.
2. Dealing with the heat was the worst of it. I came close to my water limit on the second day. I definitely need to pack water treatment of some sort. I came across at least one live creek on the way. Replenishing my water supply at that point, could have eased my mind quite a bit.
3. I packed way too much food.
4. I need to figure out how to prevent/treat skin rashes.
5. Is it better to have clipless hiking-style shoes for the hike-a-bike section? I wonder…
6. Is having so much fun legal in California?
Third day. I have to ride 2 miles south of Leo Carillo to rendezvous with my truck for a day in the ocean. The idea of getting in the saddle is not very tempting.
Kitty and Helen came to meet me with my truck and my kitesurfing gear.
A nice way of cooling down and reflecting, as long as my backside is free floating.
Im new to this site (just joined yesterday) and wanted to share my experience riding the CT, which I just finished last week. I rode the roads up to Denver from my hometown in Durango, and then rode the trail back home. A loop ride that was kind of just like one of my favorite day loops near home, only longer, and with more varied surfaces to ride on. Im not a super crazy racer like some of you, but I just thought perhaps someone might enjoy a few pics, trials and errors, and what not to do’s, as well as hopefully a few things I could recommend for some people, who are in a riding class, such as my own level of riding. I was not racing and so ultra light was not my priority. In fact not at all, eating well and eating plenty and having fun, was my priority and I will try to upload some pics to show you just how heavy, and loaded with great food I was on my trip. I rode with 2 ortlieb panniers which are kind of designed more for road touring I think but I should say, I had no problems with them- they held everything I could ever dream of having and more and they kept all my stuff completely dry, without the sacrifice of handling, or at least as much as I was concerned. Of course I would rather have rode without them, and had the feeling of a truly light bike, being able to climb, unwanderingly in a completely straight line, and not hearing their, somewhat loud at times rattling and bumping, but I just kept figuring, oh well keeps the bears off the trail in front of me, and usually lets the dayhikers know Im coming up behing them- my natural bear bells.
I took off from my home in Durango, Co on June 1st with a map I happened upon by chance outside the local library, or was it the chamber of commerce or somewhere else? I cant recall just where I got the map actually, but it basically just showed most major roads in colorado and had different color coded roads to match the icon symbols bar section, explaining that a red outlined road meant a road with a shoulder of greater than 4 feet. Black meant a road with a shoulder narrow than 4 ft. different colors also meant highways with a 10′ shoulder and highways with 4′ shoulder, highways and freeways with their associated shoulder space, as well as freeways in which cycling is prohibited. (I-70 in portions). It also showed bike paths, and in particular one long bike path running parellel to I-70 that went on for miles and miles. This simple map and ones like it are a tremendous blessing and Im truly grateful to whoever produced it.
I took off with my map, and food, 0 degree sleeping bag (It was early June and still cold), sleeping pad, lots of clothes and rain gear, and headed north on 550 passed purgatory, and up coal bank pass to molas pass, to silverton, to red mtn. pass to ouray to ridgeway to delta to hmm I think I’ll check out paonia- Ive never been there. I was just picking little towns off the map, to which Id never been, or to which some I’d like to go again. Most of them Id been to a million times but it was just the idea of going day to day, or night to night without a care in the world, other than exploring spontaneously. I’d been on road tours following set routes before, and it just isnt my bag. How would somebody making maps know where I wanted to go years later? So I headed out of Delta toward Hotchkiss (they hate bikers)(they have narrow roads maybe its not entirely their fault) felt unwelcome, especially when I went into the local auto part store and they actually had fliers printed up on how unfair (this world) is toward the special treatment to cyclists and their rights to share the road. I needed a small wrench so I bought it, and exchanged a few words of small talk with the somewhat anxious seeming store associate, and grabbed a flier about bicyclists, which I had just noticed on my way out. I was furious that I’d done business at this store even though I’d only spent like four bucks, I felt like returning the wrench. Oh well that action alone would have hurt me more than them so I just started thinking about it and what would make this ol farmers wanna hate bicyclists so much for. In the end I came up with many many reasons, ranging from jealousy, to narrow roads without shoulders to just plain ignorance and many reasons in between. I also noticed other flyers aroung town for which the town chamber were actually having a couple of larger road cycling tours coming through town with campouts, beer gardens and other celebratory events in the name of cycling and well……..I just decided that this hatred towards cyclists would just sort itself out in the end. There would be no reason to inform the tours’ management or anyone else of that towns’ (or some people living in the town) attitude because either those with the attitude will just either shut up and take the touring cyclists money and learn to like it, or they can just deal with it later when year after year hordes of cyclists keep returning to their town and with that bringing change to the structuring of their roads, such as widening them and such. Also I thought many cyclists over time could decide to move to the area and over time these people and their attitudes will just be minoritized by people with better attitudes and perhaps cycling hobbies even. So I packed up and headed to paonia- definately a nicer little town, not huge amount to see though, so up a road to another, and up and over a pass (kebler) to Crested butte- beautiful as always, but almost froze near lost lake camping out in a lightning snowstorm. Its early June and I know its early to be in the mtns. camping out every night, but man that was some crazy windy rainy weather. I slept in a forest service installed bathroom. Gross yeah, but it was the chosen and more desirable misery of the two choices. I noticed how it really didnt stink much and was grateful for that. Another thing worth mentioning is my usual disgust for the forest service going in to almost all leveled primitive camp sites in the national forest boundaries and erecting bathrooms, and developing the campgrounds. i.e. installing picnic tables, paving the roads, or graveling, adding grills and what not so they can charge a huge fee, (the forest service corporation) but this was one time where I could actually see the benefits of having a greedy forest service corp., at a time when I was most in need of a dry and wind proof shelter, here the forest service has gone above the call of duty, and provided me with a pleasant shelter from the elements- some call it a bathroom; I called it salvation. Hehe. Too gross- so sorry- I was happy, that is until morning and I was discovered in my shelter by a man who camped out that night in his pickup camper shell. I was a little embarassed I should say. Ha well thats the stuff memories are made of- mine anyway.
It was warm and dry in May in southern colorado, and everyone was worried about our prematurely melting snowpack; worried about how wildland fires would be such an expensive disaster this year. We’ll see about that. The month of June sure did its part to ensure that wouldnt happen. I was about a week or more into some of the most bizarre June weather that anyone in CO can remember for a long time. Cold. Not record breaking temps or anything, just windy, rainy, and dreary grey skies, which were not the ones I wanted to contrast the beautiful green trees and shrub that the rains were contributing to. Still lovely to be out though.
On the road again- up over Cottonwood pass and cutting my day short to soak in the Cottonwood hot springs…ahh. Riding into Buena Vista and then up to Leadville. Forgot how hungover I can become from drinking at over 10,000 ft. Oh well made a friend at the local waterin hole called the “Scarlet”, a cool hippie dude, who let me use his couch for my recoveries. 🙂 Leadville turned into Minturn and and I was soon riding the paved bike trail that would take me all the way into Denver, with just a few interuptions of it through various towns, and sometimes it subsided where a frontage road was already in place and worked well as a bypass and alternate route to the freeway. In fact there were only like 3 or 4 freeway miles to be ridden, the entire length into Denver from this route-awesome, more time looking at beautiful mtn. less time thinking about death via huge hummer and other ginormous SUV bicycle crushers…….coolest thing ever to me, was that bike path. I just didnt know it was there, until I saw it on the map and then I had to re-route and go a longer path to my destination. I wasnt trying to go the shortest route anyway. I had noone to race not even time, so…. I found myself distracted many times on my trip up along the roads, and after going over vail pass, and passing A basin on loveland, I descended into the small towns that lie outside of Denver along I-70, and I began touring all these spooky weird little towns, like silver plume along my route…. creepy is all I can say about that town. Anyone know whats with masks that are like over 2 ft. tall sitting in the windows in a couple houses, and one in a commercial looking buildings front window? Maybe it was these masks, and a real big spooky looking building, contrasting the dreary grey sky with its old brick exterior built for the gold miners years ago. I think in former years not too long ago it was a high school or something. I dunno- Im just glad I didnt go there. I also overheard an older brother standing near me telling his younger brother that he wasnt supposed to be playing, on that side of town. Hmm I dont know it was probably just the looks of the place, and maybe the residents know this and even want to add to the towns creepiness for some reason, with the masks. I dunno I just didnt want to be their after dark, so on I went to the next town. I met a woman at the sandwhich shop, and I inquired about the strange town, and the woman just shrugged, and said she didnt know “although this town is haunted by ghosts, and was even featured recently in a couple documentaries as having such uninvited citizens”. Hmm maybe the last town was just trying to get there own share of fame. I dunno, didnt care just happy to be moving on. I was supposed to be riding and savoring beautiful country not all this weirdness, so Im off riding my bike again (even if it is on pavement) (I love singletrack and am devoted but its not worth driving a motor vehicle just to get to it just because its easier- road riding is still fun and there is nothing easy about bikes at all anyway- thats not the point right?)
I had been looking at this trip as a loop ride. Maybe a bigger loop than some rides. Sure I could have done an out and back- start in Durango and ride north on the CT to Denver and then turn around and go back, but number one it was still early june, I was poking around and waiting in some of these towns, and letting all the time I could afford to slip by, I left thinking the snow would be gone in no time with the bizarre and warm weather we had in may. What I didnt expect was the contrast of June’s weather to follow and not only not melt the snow pack further, but possibly even add a few inches? Whatever may have been added was undoubtedly insignifant, but whatever was happening to the snow pack in June, it wasnt fast enough for my plans no matter how unreasonable they were, and so I was dilly dallying along the road ride up, and that turned out to be just fine, for exploring and smelling the roses (and bathrooms) hehe. I just wanted as much snow to be melted as could be for my start at the Waterton trailhead near Denver. The other reason for doing a loop, as opposed to an out and back, was that even if I waited till later in the summer (which I recommend actually-and is recommended Im sure by anyone else for mtn. bikers) to do an out and back (as opposed to vehicle support) I dont think I would have enjoyed the return as much because I would have already seen it all just days before anyway, so I probably would have just wanted to bail. This ended up being a super cool loop for me, and I had great fun on all sections, no matter what type of matter was under my wheels. I would even go so far to say that as much as I love singletrack, I would come to find out later that there were on some occasions, moments along the trail, where I was actually ready for the next detour around a wilderness area, for no other reason than just to have a flat rolling, hardpacked surface in which my wheels could roll freely, (and I never thought Id choose anything over singletrack, except maybe moabs’ mars surface, seeming slickrock, and maybe it was something similiar to that effect actually, because even in road riders defense- not that they need one, but like moab, and other places that are great to ride, even though they lack singletrack the views are still amazing, which is a big part of why any rider rides, at least thats my opinion). So now after all the road, and town drama, im finally in Denver (somewhere around the 9th or 10th of June probably- I was going real slow like I said) and after some minor bike repairs and mainenance I was heading to waterton canyon for the start of the fun. ….
Id been riding along with traffic and people long enough, and here was my reward, sweet singletrack for miles and miles all the way back home (minus the many-too many detours around wilderness areas)(definately found myself a bit ambivalent to these detours. I was happy to have a change and have a hardpack surface under my wheels for a bit of traction for awhile, but what was I missing in the wilderness? I can’t help but feel that Ive been left out, and was missing vital, prescious moments of beauty. But the grass is always greener, and I chose to be happy with what I had. And this was a trail through the rockies for hundreds of miles, in which I was privileged to be able to ride, somewhere around 40-50% or so of it, depending on If I elected to ride the optional detour routes, or stick to the trail. I stuck to the trail on most of these, and overall just happy I had a trail like that so close to home; most don’t.) So here I was finally I couldnt beleive it. I was in Hog heaven, and I started comparing the pics in the colorado trail book, to the panoramas I was actually seeing with my own eyes out there. Man it was beautiful right there near Waterton, right from the start- so close- I actually didnt expect it to be so hmm well pretty just yet, but it does it just starts out that way. Its steep right off the bat though, right when the singletrack starts, I didnt realize how steep the trail was actually going to be, and Im glad I didnt realize it right from the start also for motivational reasons probably, but that could or should have been my fair warning. Im glad at that point I didnt realize it though. I just thought it was a steep section, singled out in the book as such, and the rest of the trail was alot more, well mild, ha…..but Im glad it wasnt. Now that Ive ridden it, the CO trail is not the CO trail I set out to do, and once again I wouldnt want it to be like the pics in the book, like I expected. When I looked in the Colorado trail book, I read parts of it, and looked at all the wonderful pics that were in it, and upon looking at the pics, I had gotten the impression that here is this lovely, and fairly flat stroll through river canyons and up on ridges, which maintain a fairly flat grade for many miles at a time. Ha I would say that was a faulse impression. Nevertheless its a rockin trail.
After thinking about this many times along the trail, and having my own pictures reflect the trail as flat and easy going. I came to the conclusion that the reason it appears this way, is that when your out there hiking, or biking, or horse back riding, if you were to prefer, (hope not) whatever your mode of travel. Your either huffin and puffin up the steep terrain, and just dont want to stop and take pictures and lose momentum, or your flying down steep terrain yelling and whooping for joy (at least I was-but Im not right in the head either). I found on the CT that I didnt want to let up my concentration much on the downhills, without the worry of flipping over the bars, from a big rock or something. Mainly for myself I was just so strained climbing the hills that I was just thinking, man I hope it flattens out around this next turn, It wouldnt have ever dawned on me to stop in the middle of giving 100% of my effort to the pedals, and the rest to sweat, to actually stop and take a picture. So the way I see it, is that pictures are mainly taken on the flat parts, where the views are more wide open for ascthetic value, or because the hiker, biker, rider whatever actually has breathing to worry about, and secondary motives like touring, and snapping pictures are well just kind of that, secondary. And so in my opinion, I wouldn’t be surprised that a number of pics turn out that show the trail as being flatter vs. the true reality, or at least the way I perceived it, as not being that flat at all. Anyway that was my impression from the book is that it was kind of a stroll through the mtns. back home…….haha its much more of a work out than that, and its a great trail.
For multi-day endurance rides (i.e. Tour Divide) many racers use aerobars on their mountain bike rigs. Even though specifically designed for triathlon and time trialing events on smooth paved roads, they offer increased range of body positions and more efficient power transfer on gravel, too.
Syntace name has long been synonymous with Ironman triathlons. Their C2 and C3 clip-on aerobars were designed for absolute comfort when pedaling for 5-6-7 hours, or longer.
The latest C3 version now offers:
Updated 20 degree forward/downward slant at the grip
Ergonomic Double Helix grip bend prevents fatigue
Forged 24.0mm diameter 6061 Syntalloy
Shock absorbing Biowing cups
It clamps onto 31.8mm handlebars but a conversion kit for 26.0mm bars is available. There are plenty of accessories available: light and computer mounts, replacement pads, conversion kits, etc.
Sizing: S (up to 5’7″ height), M (5’7″ to 6’0″) and L (above 6’0″)
Completing the Grand Loop last month left Chad and I feeling a little empty. We knew there were better loops out there, waiting to be dreamed up, explored and possibly raced. One such route presented itself to us as we drove back from the Grand Loop, through Northern Arizona. The idea – Flagstaff, Sedona, Prescott, Williams, in one fell swoop.
Not even a month later, we saddled up to try it. I called Lee, knowing it was an outside chance, but he signed on instantly. You know you have good friends when an impromptu 4-day bikepacking trip quickly becomes a reality.
And what better way to start a bikepack than by rolling out from home? Courtesy the new digs in downtown Flag, we staged from here. After some last minute track cutting/merging/simplifying in TopoFusion, we were ready to roll.
We headed south of town on urban paths, jumping on the AZT. Lee and I missed a few miles of trail here on our 2005 trip, due to inclement weather (mud). And I’ve only ever ridden it in the dark, limping into Flagstaff. So it was great to be riding in daylight and with Lee along, setting out for adventures anew.
It’s a nice ride, and new fences meant horses and/or elk were kept off the normally uber-bumpy stuff on Marshal Mesa. It was in the best shape I’ve seen it in.
Ah, the life of a bikepacker…
This was the start of some very sweet and new-to-us AZT. Whoever built the contour trail around Mormon Mountain deserves an award.
We filled up on water at the Knights of Columbus campground. Then it was time to bid the AZT farewell after 30 enjoyable miles.
We thought we could improve on Chad’s Coconino Dirty Century route, but bushwhacking isn’t really much of an improvement. So it goes in exploratory riding.
Soon enough we were on Schnebly Hill Rd, destined to bomb off the edge of the world and into Sedona.
Another feather in Lee’s cap — bikepack Sedona!
Thanks to Chad’s knowledge of the area we needed no GPS track, and we hooked onto Hot Loop, doing some techy climbing to a prime campsite.
The views from camp were, as they say, pretty OK.
Chad tries (and fails) to capture the beauty on his iPhone. Still kinda cool that he was able to make live facebook updates with pics during the ride.
It was an eventful night, with warm temps, a few bugs and a skunk in camp. The skunk dined on nuts out of Lee’s feedbag, and later walked over to visit me. It was a little tenuous for a while, but he was friendly enough and just looking for a snack.
Chad takes in the morning view, before saddling up for some Sedona singletrack.
It was a most excellent descent, into the heat of the morning.
photo by Lee Blackwell
Breakfast burritos at Circle K. We filled up our packs with ice, knowing it was going to be a scorcher of a ride down to Cottonwood (elevation ~3000 feet).
Sedona singletrack is hard to beat. Descending down to Oak Creek was a hoot. Stopping at Buddha Beach for a dip was pretty much mandatory.
We pedaled some pavement to Red Rock state park, where there was rumored to be a trail leading all the way to Cottonwood.
Such rumors were true. A bit of Sedona-esque ST, some fun double track, and then very faint but quite rideable and followable singletrack on the other side of highway 89a. It was pretty cool to be exploring this rarely used trail.
Plus… a bit of hike-a-bike (note Sedona in the far background).
The real treat was the last few miles, which were adorned with IMBA stickers and graced with many a bike tire. That can only mean one thing — sweet riding.
It reminded me of the Lunch Loops in GJ, with drops, side lines and even similar vegetation. It was extremely hot (98 degrees) and sunny, but for some reason I really liked it. I’ve been more cold than warm up here in Flagstaff (that’s not a complaint!), and it felt good to finally not have any doubt that it was too warm.
photo by Lee Blackwell
Pulled Pork and burgers were destroyed at “Hog Wild”, as we plotted for the next challenge — climbing. We had dropped some 4000 feet from Flagstaff (seemed like much more!) and now it was time to pay the piper.
On our way out we randomly passed the bike shop. Chad bought a new tire and I tried to hit up the grumpy employee for Mingus Trail info. He didn’t really want to talk.
The whole Mingus area was the biggest unknown of the ride, and it had the potential to be the most difficult. Information was sketchy and consisted mostly of grunts and half sentences from shuttle monkeys on MTBR.
We stalled at Maverick in town until passing clouds became building clouds. It was hot and uncomfortable as we pedaled uphill with 200+ oz of water. But clouds blocked the sun and spat life giving cool water onto us. It was downright comfortable by the time we got to 5000′.
“What if not for these clouds?”
“I’d be back in Cottonwood, at the hospital, with IV’s in my arm right now.”
The climb was STEEP, but just rideable. We contoured briefly before meeting singletrack. It started off well and I thought we were really on to something. But before long it turned super steep, eroded and full of challenging hike-a-bike.
It was a tough spot to be, and the towers did not seem to be getting any closer. Some contouring near the top gave hope, but the summit push required just that — a bunch of pushing. At the top we couldn’t find any obvious water, but we did find a prime camp site:
(Taken the next morning). Another 4000’+ view to wake up to! I fell asleep instantly and only awoke once during the night. Best bikepacking sleep ever. Sunrise view from the bivy bag:
There was no water to be found at the top. The water system was shut off for maintenance. Our map indicated a Yeager Ranger Station at the exit of our singletrack descent, so we figured it was no big deal. We also had plenty that had been hand carried from Cottonwood.
Expectations for the Yeager (#28) trail were not high, given the quality of our climb up the mountain (which was trail #106, the “view point” trail). But it did not disappoint! This trail rocked our world!
Checkout Prescott in the distance in the above pic.
Hit it Chad! Hit it! Umph!! He needs to work on his bikepacking micro hucking skills.
Sweet singletrack brought us to the ‘site’ of the Ranger Station that was no more. Doh. Next reliable source of water was the Verde River, some 40+ miles of unknown territory away. Once again, good thing we had carried so much up the monster Mingus climb.
I spent about 60 seconds drawing this route on TopoFusion, and I did not trust it. There was some pleasant riding, good views and such, but we got into some hassles too. Fence hopping, private property skirting, ah the trials of the exploratory bikepacker.
photo by Chad Brown
A sub-optimal water source is better than nothing. We filled up some bottles “just in case.”
They weren’t needed. The Great Western Trail took us on an old railroad grade around the backside of Mingus and onto Perkinsville Road. Time to drop!
Bill Williams mountain is right above Lee’s head in the above shot. We dropped to 3500′ again, and this time were eying to climb to 9000′.
The Verde wasn’t the best tasting water, but you can’t be picky in the desert. We jumped in to cool off, with Lee trying to get his core temperature “just a hair above hypothermia” for the climb ahead. Our timing was perfect — sun while we hid under the bridge, and glorious clouds as soon as we were ready to leave.
The Perkinsville climb was made possible solely by the grace of those clouds. In a way it’s amazing that we were about to complete this ride in June (without hiding every afternoon). Luckily it has not been a typical June, and the clouds and occasional micro drops were our continual saviors.
Lee left both Chad and I in the dust throughout the Perkinsville climb. I laughed as Lee attacked Chad and Chad responded, getting ahead for a while. By the next time I caught a glimpse of them Lee was well ahead and showing no signs of slowing down. Even later on in the climb it was clear that Lee was feeling very strong and that his pace was too much for both of us. I felt good/strong, but not at such speeds. It was really cool to see Lee flying.
photo by Lee Blackwell
Chad, shambilized by Lee’s blistering pace.
Suddenly we were in the forest, and glad of it. Heat worries were no more, and dark clouds foreshadowed our fate.
Pleasant forest riding led to a trailhead. We didn’t know what to expect, but designation as a National Recreation Trail is almost always a good sign.
Benham was a bikepacker’s dream — 95% rideable uphill — even the switchbacks!
I took the lead and was in the zone, busting out switchback after switchback in my 20×36 super granny. Chad yelled from below, “look to the left… we’re about to get wet!”
We had planned to sleep at the top, but that looked doubtful with the widespread rain and given the elevation (~9000 feet). We rode deliberately towards the top, hoping to get as far down the trail as we could before the rain really settled in.
We made it over the top before things got too wet. Chad and I took the lead down the holy-crap-this-is-awesome trail! We were flying, and it was hard not to just keep riding, pushing in to town. It’s not that we were riding in a panic, just a small sense of urgency with rain and darkness creeping in. I stopped to wait for Lee, who had been layering up and readying for the descent. While stopped I realized there was nothing to hurry for. It was warm, I was comfortable and the trail wasn’t going to turn to goop or anything. Best to slow down and enjoy it.
What a trail. The rain and dark only made it more fun / challenging.
We rode a soaking mile or two into Williams and ponied up a few bucks for a motel room and delivered pizzas. As the rain continued we were glad to have a roof over head.
It rained at night and even in the morning. We left town on forest roads where Chad could do his best “Tour Divide” impression. Shout out to our TD buddies!
Rejoining the “Pines to Mines” route, we hopped onto singletrack along the rim of Sycamore Canyon Wilderness.
It was surprisingly techy / slow. All good fun.
Lee just can’t take anymore of this darn sweet singletrack.
Classic MC macro shot.
View from our lunch stop along the rim.
A 3X Lenz Leviathan ride. Definitely a choice bike for this ride. Though I would have loved to be on the Behemoth, too…
More Sycamore goodness.
A few hours of pleasant dirt roads took us closer to the San Francisco Peaks
photo by Chad Brown
And finally, back to Flagstaff just as a storm pounded the city — refreshing, as was the trip in general. Linking all this quality singletrack in a not-too-heinous loop was very satisfying. Then there’s the exploration, the discovery and of course the company. Hard to imagine better people to ride with, and the humor and laughs were off the chart.
216 miles, 24,000′ elevation gain, 4 days. Look for this loop as a new race this fall!
When I did the Grand Loop in ’07 it was a completely consuming affair. Everything about it was so new, so foreign, so promising, so freightening…I was green to multi-day self-supported racing (still am, really). Having that first one in the books removed much of the unknown about the event this time.
By far, Grand Loop ’09 was all about the internal struggle of multi-day racing. I knew that at the start, yet still got more than I expected in that department!
I had goals and expectations. First and foremost was simply to finish on the SS. The second was to do it faster than I did the first time around and set a new record mark for the route. Little did I know that Jefe would be hitting the route with similar aspirations putting in a record ride on his SS… The more time I spend on a SS the more I realize that, especially for longer events, they can be faster even though they seem to be such a disadvantage at times. Goal #2 was tied in with this theory.
All shiny and new for the start. I got as much on the bike (and not on my back) as possible. This turned out to be a great strategy for the most part as pack weight never turned into a sore back – a concern with all the standing required. As for the gear, I stressed over that a lot…of course…and had pretty much settled on a 33.22 (29er). The day before the start I felt so friggin good I changed and went with a 33.21. The nice thing about leaving the start is you don’t have to think about gear choice anymore. Ride, eat, sleep if ya gotta, repeat. Ah, the simple life.
This is the year for everyone to do the “race” on their own terms. Scott and Chad did the route backwards (actually a consistent theme for Scott this year), while others started at various times. I chose to start at Westwater. It was closer to home, it would split the desert section of the KT – and since it was cooler in general an early morning start meant starting without being sleep deprived, something all but Jefe, Jim and Matt took advantage of. The conditions this year were anything but traditional.
I was moving faster this year than in ’07 – by a lot most of the time. It’s hard to wrap my head around, actually. Cool temps, big wheels, experience, I just don’t really know. After the ’07 ride I knew it could be done faster cause I stopped a lot to make coffee…but when I was riding I was riding fast, or so I thought. Doing the mulit-rider playback analysis in topofusion with the ’07 and ’09 files is eye-popping. If it wasn’t muddy I was just faster this year.
I tossed on 2.35 rampages front and rear with the idea that going with super low pressure in the rear would maintain traction up sandy climbs. This worked great and I only walked in 2 short steep bits on the shandies, and very little on the way to N Beaver. I hit the Paradox (from Dewey) about 1 hour 50 min faster than in ’07! I didn’t know at the time, only after the topofusion analysis.
This view from Yellow Jacket on the KT always gets a wow.
What remains of Dewey.
Looking over to the Unc from the Shandies.
You know where this is! Weather started brilliant but quickly deteriorated. Cool temps were great – but came with lots of moisture. It was a mixed bag for sure.
Sure enough, high in the La Sals the storms hit in earnest. Fast riding turned to unrideable muck. So much for that shiny new bike. Suddenly those 2.35 rampages with minimal clearance became a liability. Ugh.
The only way to get through this area was meadow hopping. Lots of boulders and sagebrush to dodge, I look up and OMG there are two cyclists coming towards me doing the same!! No way, it couldn’t be…sure enough, Hollywood and Mr. Topofusion were doing the same, looking rather soggy too! It was surreal to be surrounded by my own breathing and thoughts for several hours and then run into a pair doing the same. Chad and I had a moment up there, and I gotta say he looked fresh and froggy. Lookout, this new kid on the block is on the rise!
Working through those meadows took forever. There was one last big nasty muddy climb, more meadow hopping, before things improved. Several hours later I ran into Marshal out on his birthday ride. He seemed unfazed by the weather and fully prepared. In fact I was doing a lot of walking where it looked like he was riding mud. He’s got muck super powers 😉
We rode together a little, shared a few tales. Then he says “well looks like no records this year eh?” That was a big blow. It was on my mind, but I wasn’t willing to face that. The muck event took a lot out of me, I can’t lie, and this was a low point of the ride. Shortly thereafter, I couldn’t figure out a turn and lost another 15 minutes – GPS track and all. Meh.
Some time later rolling through the Paradox valley I was becoming aware of some voice inside that was telling me not to be discouraged, some underlying optimism that a good ride was still to be had. The phone at the Bedrock store was out of service – another big blow (hey I ain’t single these days!) – but that just served as a launch pad to attack this route with everything. I was starting to feel a little crazy and wanting to get jiggy with it. So, I unleashed my secret weapon: Java juice and m&ms. Stoveless this time, the caffeine fix came from these little packets of heaven. Better than GU hands down! Chasing copious amounts of M&Ms, well that was the kick the turbo needed. Bedrock to Pinto Mesa took all of 6 hours, the hardest section of the Paradox, in the witching hours. It was such a blast. Lot’s of hike a bike, at times run a bike – that Java Juice is strong stuff and at times I had to conciously pull in the reigns. 3:40 AM just below Pinto it was time for a couple hours shuteye, the first thus far. I’d been pushing for about 22 hours at this point.
That meant Glencoe Bench for the sunrise! A gorgeous spot, surely made all the better by sleep deprivation and exhaustion. You can barely make out the La Sals in this pic. Yep, this route covers some ground.
Up, up, up. Houser road was pretty tough above 9k on the SS and I did a fair bit of hoofing. Yet, the TF comparison still says faster than ’07. I’m tossing all my gears away, they don’t do any good anyway!
The prize for the last 60 miles of climbing? Nearly unrideable singletrack – downed trees, snow cover – the upper Tab is simply not ready. I had twinges of guilt riding as it was rideable but muddy, knowing we were not doing the trail any good.
Snow and trees notwithstanding, it didn’t take very long. It seemed long…but the file says otherwise. The infamous Roubideaux was next, 16 drainage crossings, much of the ups are hikes, all rubbly, all drop dead gorgeous and teeming with critters of all kinds. I took a nap under a tree during a shower, but other than that it flowed by magically. Much easier than I recalled! The only issue was that my chain was developing a sqeek – my lube escaped from the pack about 120 miles ago, doh!
That is the last pic I snapped. The camera was bugging me and I was hammering. It almost didn’t make the trip.
Heading up Love Mesa it looked like I’d hit the top in daylight. Never having seen the view from up there I was motivated to do so, and when it started to look tight I ramped it up some more, and really hammered the final 45 minutes or so. And didn’t eat…and just missed the sunset at the top. Dang it. It was cold at the top, and I was pretty much bonked with mostly downhill gravel road for the next few hours. Shit. Same thing that forced me to stop last time.
I put on warm gear I brought specifically for this section, knowing this could happen. I was certainly warm, sweating even, but I was toast. Dominguez was the goal but the few hills before the drop in were killing me. The legs were done, and when that happens on a SS there is only one thing to do. Walk. It was agonizingly slow, I was pissed at how inefficient this was…the eyes couldn’t focus right and I was starting to halucinate…and finally about midnight pulled the bivvy out. 6 hours later I was moving again but the damage was done. Too tired to get much of anything down the hatch, I woke still pretty bonked out. A good long while rehydrating and fueling at Dominguez helped but it sure felt like I had slipped into survival mode.
The rest of the day was all about walking as little as possible. I knew it would hurt but would be faster to keep riding. I came this year to go fast and I gave it what was left. Not much, but the Whitewater to LL section was still under 3.5 hours, and the No Mas climb faster than ’07 when I swear I flew up that thing.
But wait – there is more! Traditional GL racers are done at the LL trailhead, but since I started in Westwater, I got to ride pavement out to Fruita, interstate to Loma, then 40 ish miles of the Kokopelli that I hadn’t yet done. That meant the Salt Creek hike a bike was coming soon. Right about here is when I paused to reconsider the (lack of)wisdom of my start point.
To prepare, I took advantage of the McDonalds passing in Fruita. $10 of garbage down the hatch, I (thought I) was fueled and ready. Trouble is, McDs is nothing like I’d been eating for the last 4 months or so and it tried to escape all the way to WW. Sore tired legs and bad gut notwithstanding, I knew where I was time-wise – roughly 7 hours ahead of record pace – and just had to get’r done. The pressure was off and I fully enjoyed the cruise to WW.
An amazing thing happens when you ride your bike for days on end with minimal sleep. You become one with that machine, the bars, fork, wheels all an extension of your body. Bike handling becomes so extraordinarily crisp it is almost like an out of body experience. I loved the techy singletrack leading to Salt Creek. Anything that didn’t require a lot of power, that is 😉 There are long sections between Rabbit Valley and Bitter Creek with tons of flow, real ripping double track and those were a blast. The desert was cool this afternoon/evening, and just before WW I actually had to put on my arm warmers. Go figure!
Right as I rolled up to the railroad overpass near WW – the start and finish of my loop – an Amtrak train sped over, full of onlookers, all cheering my finish. At least that’s what my addled mind told me. This can be a lonely sport – solo starts, solo finishes – but meeting up with other riders on route and the Amtrak cheering section were certain highlights 😉
The GPS file tells me these times: 2 days, 12 hours 44 min for the traditional (bedrock) route. For the complete loop (inluding the typically untimed section from the Tab TH to Loma) it was 2 days 15 hours 39 min. That’s about 6.5 hours faster than the ’07 record ride and this year’s conditions were questionable at best. And SS – guess what I think about that??
The event this year saw lots of action. There were so many tire tracks out there I couldn’t keep them all straight! Monday morning I got online in Fruita and saw that Jefe was about to finish and he was hauling the mail, due to finish well under the previous record. Instead of heading home, I drove back to GJ and the Tab TH to meet him – Cat Morrison and Zack were already there and Jefe was onroute to eating a whole chicken and then some…simply awesome to chat with the 3 of them in the perfect temps of the midday desert. He put in a phenomenal ride, also on a SS! His energy and enthusiasm for the experience was contagious, I swear he did not just finish the GL 😉
As for my recovery…I was completely shelled post event. After finishing I headed straight for Fruita, the super 8 was calling loudly and the WW mosquitoes were way too hungry. The mirror there told the story of my race. I did not see a 44 year old dude I knew 3 days ago, what I saw was an ageless dude with not enough layers to hide a single piece of muscle fiber or vein. Indeed when I got home the tanita told me bodyfat was at 2.4%. It is rising quickly but that pace I don’t think was sustainable for much longer. It really makes me think about strategies for longer events like CTR…
I’d be remiss if I didn’t show some appreciation here. Mike Curiak has long provided the inspiration to do this sort of event, in fact this exact event. On top of that, he has built bulletproof wheels on which to do them, and even helped me quickly acquire the Lenz Milk Money (which he had a large role in designing) which turned out to be the ideal bike for this difficult route. Scott Morris’ Topofusion and bikepacking.net have become enormous contributions to the endurance racing scene. Saving the best for last, Lynda is an inspiration on many levels. One is simply to keep up with the gal, the second is sweet things to daydream about on long suffery climbs. The entire endurance MTB crowd is super group of folks I’m happy to consider as family.

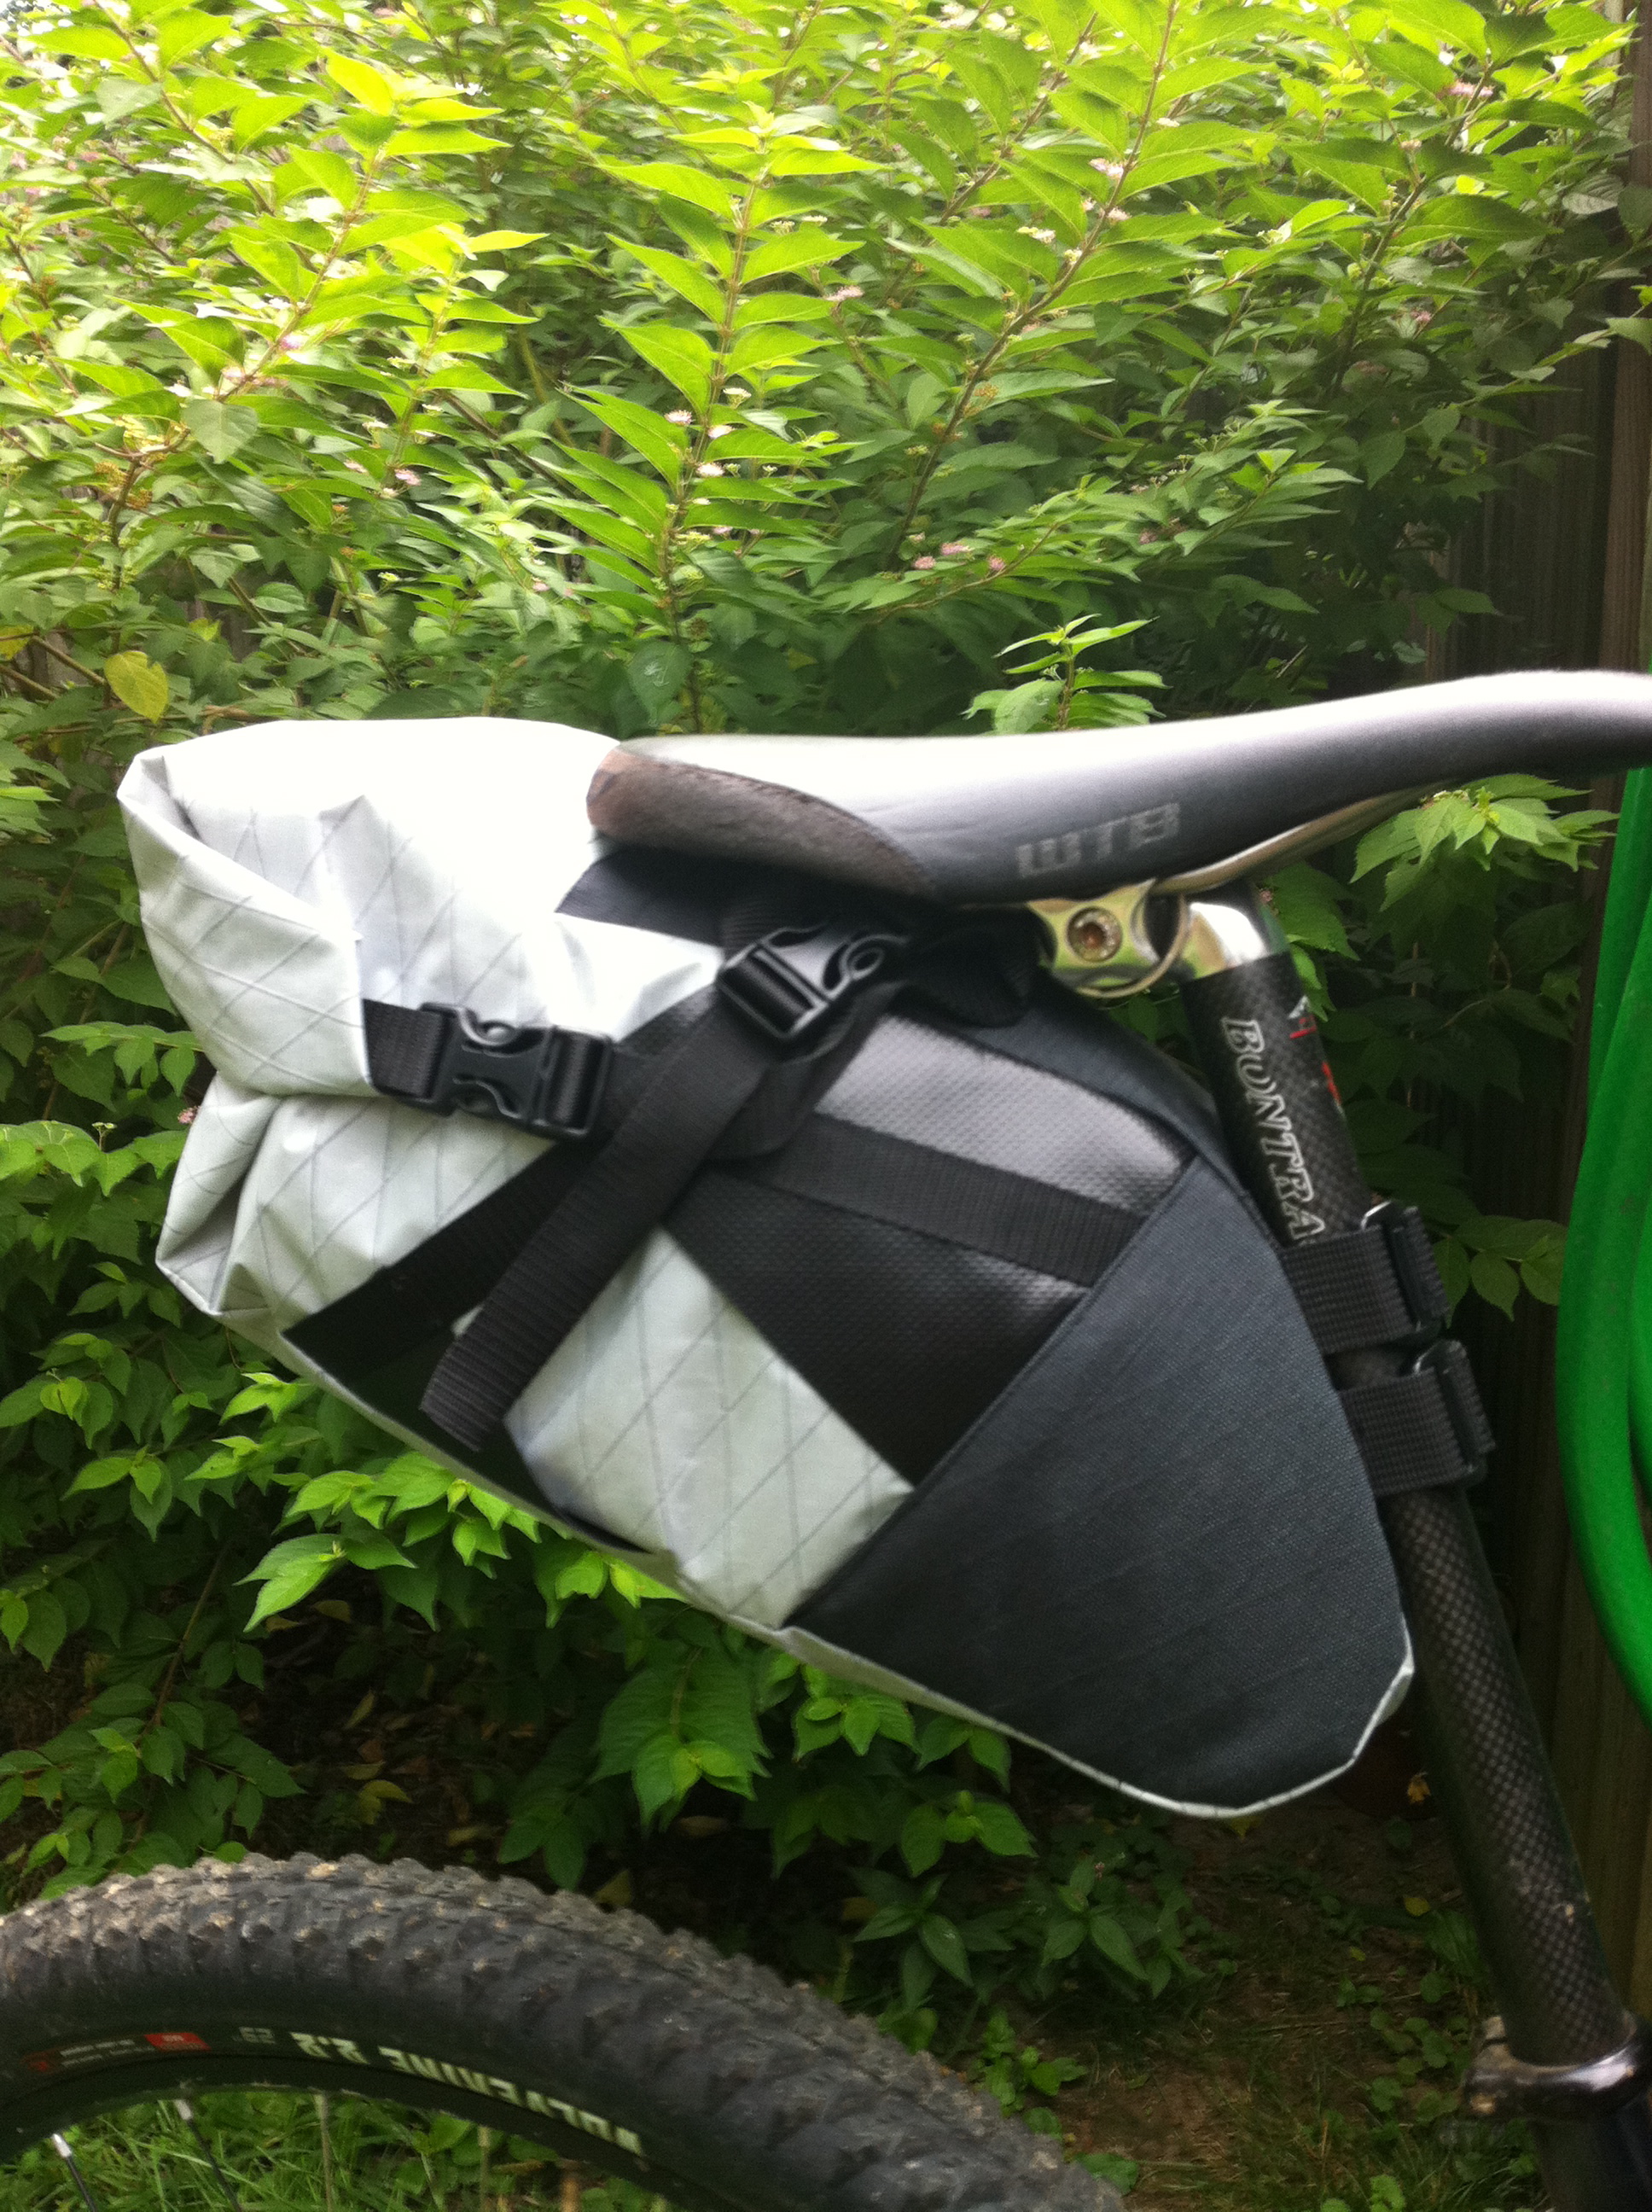
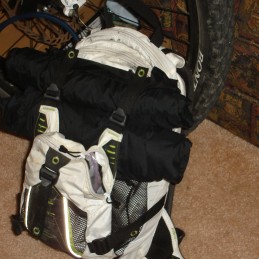
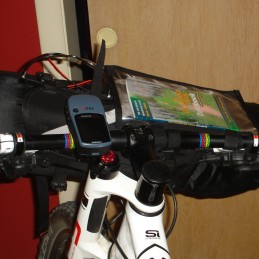
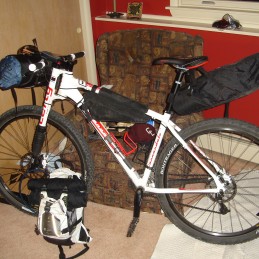
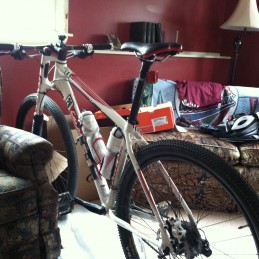
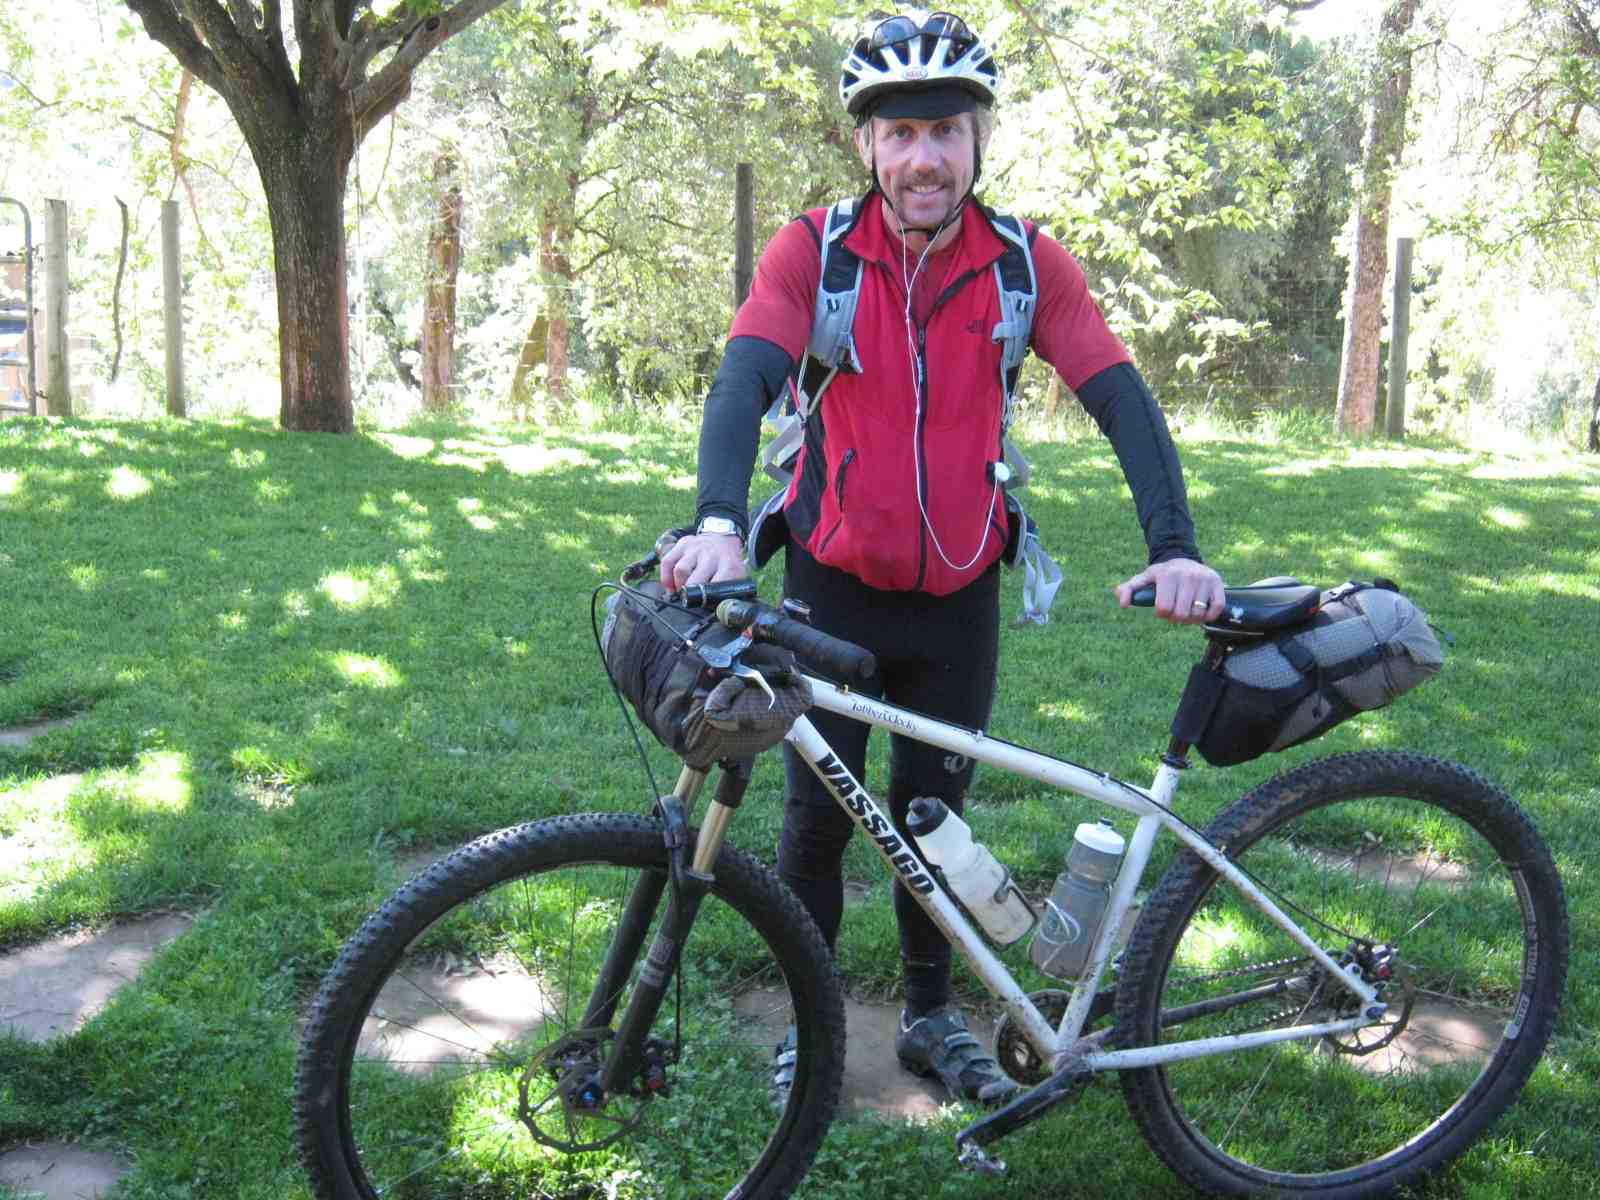
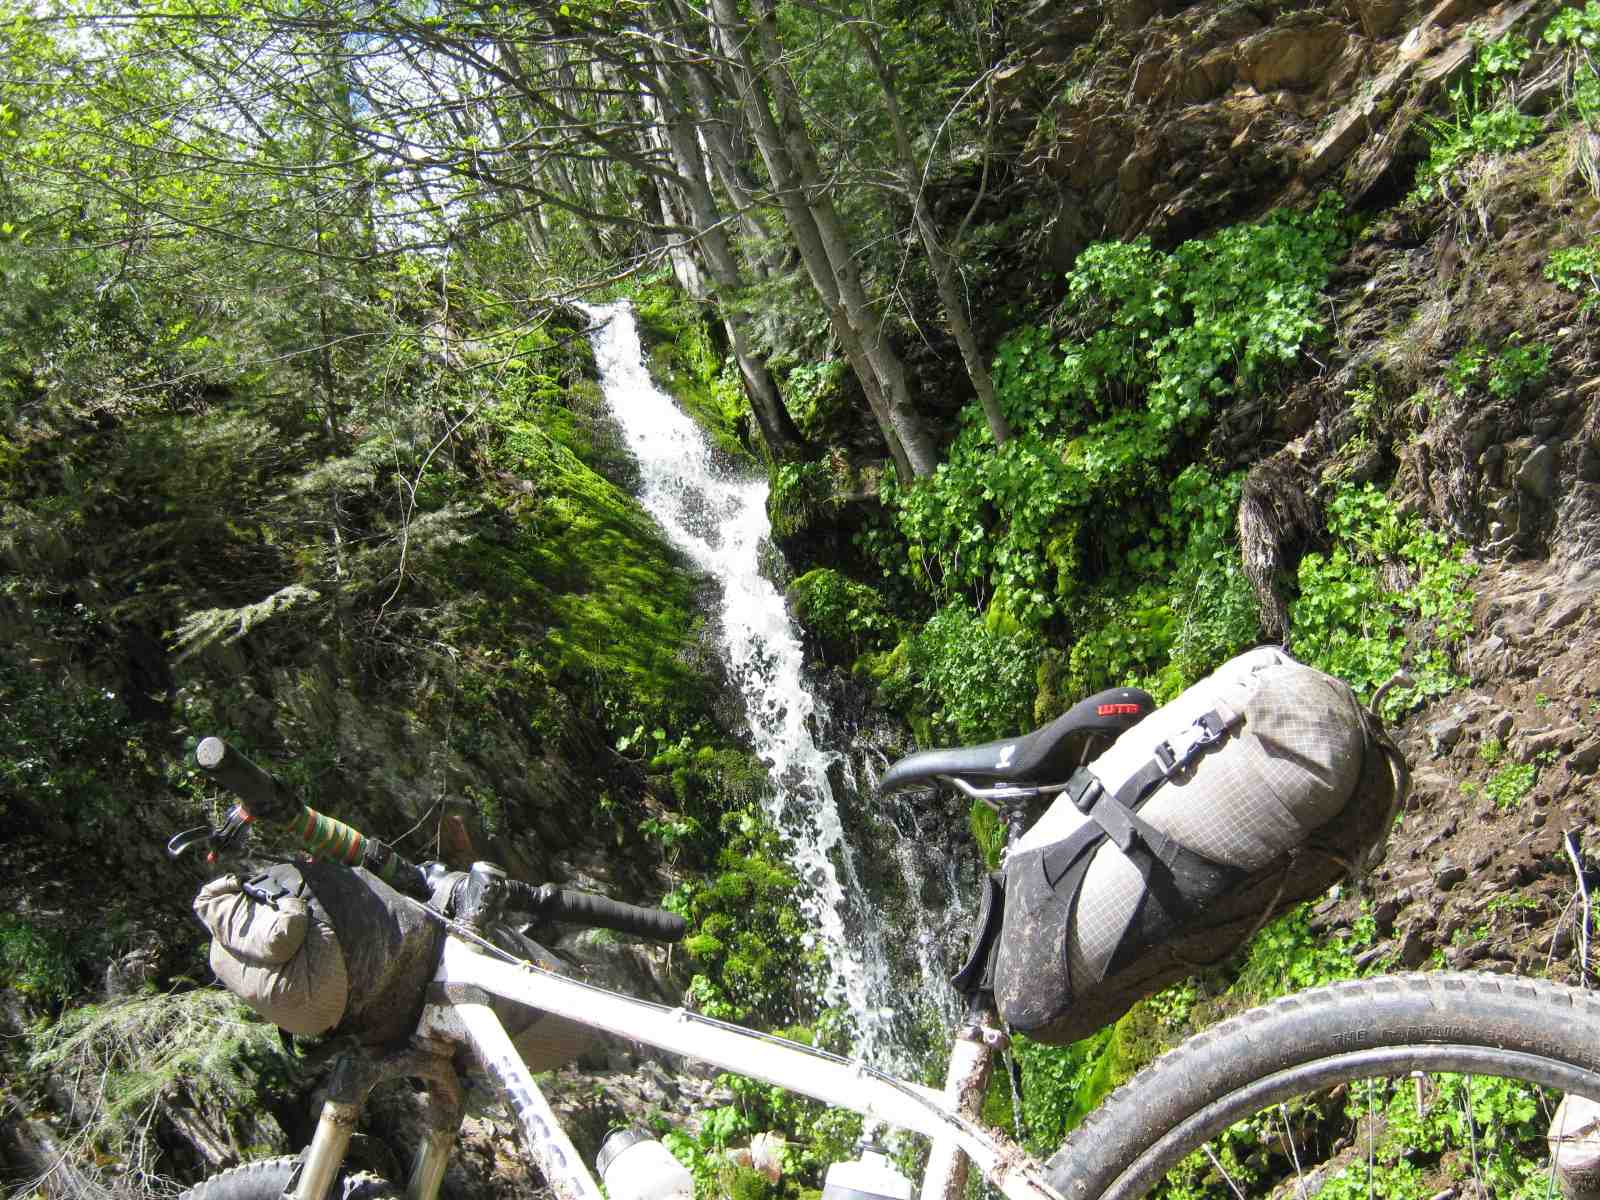
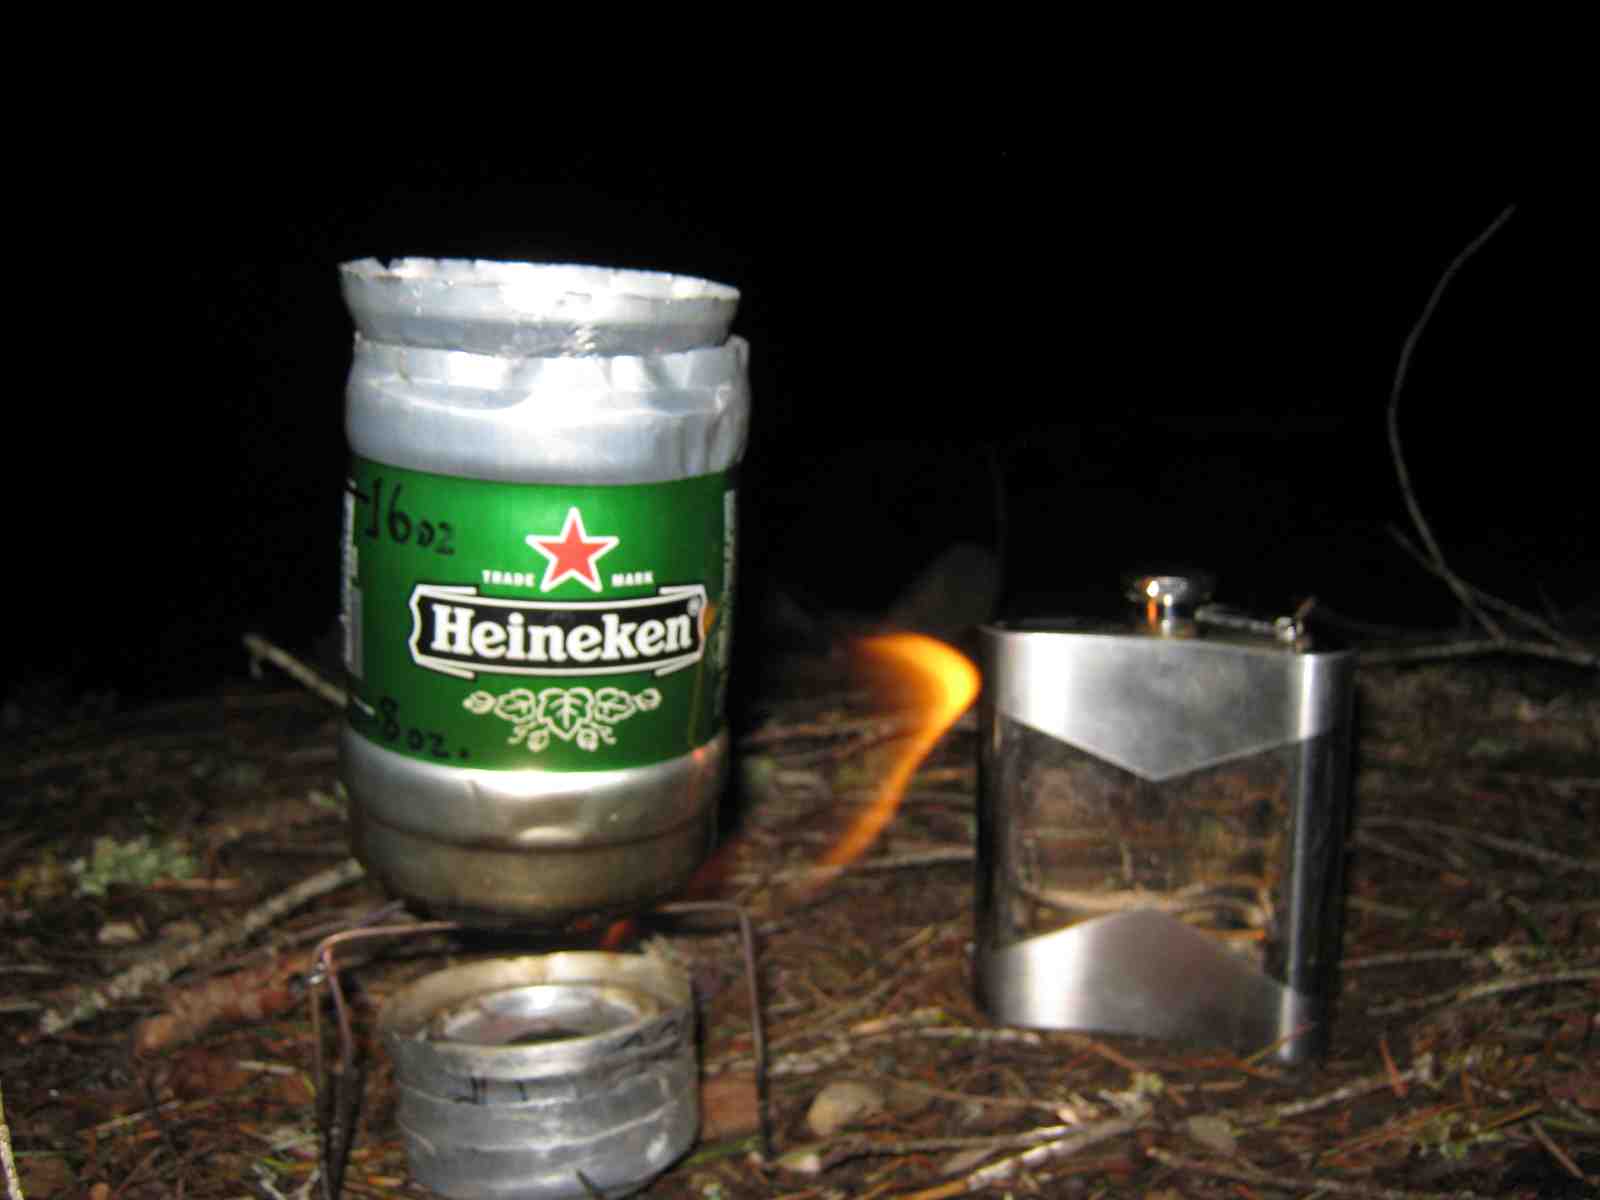
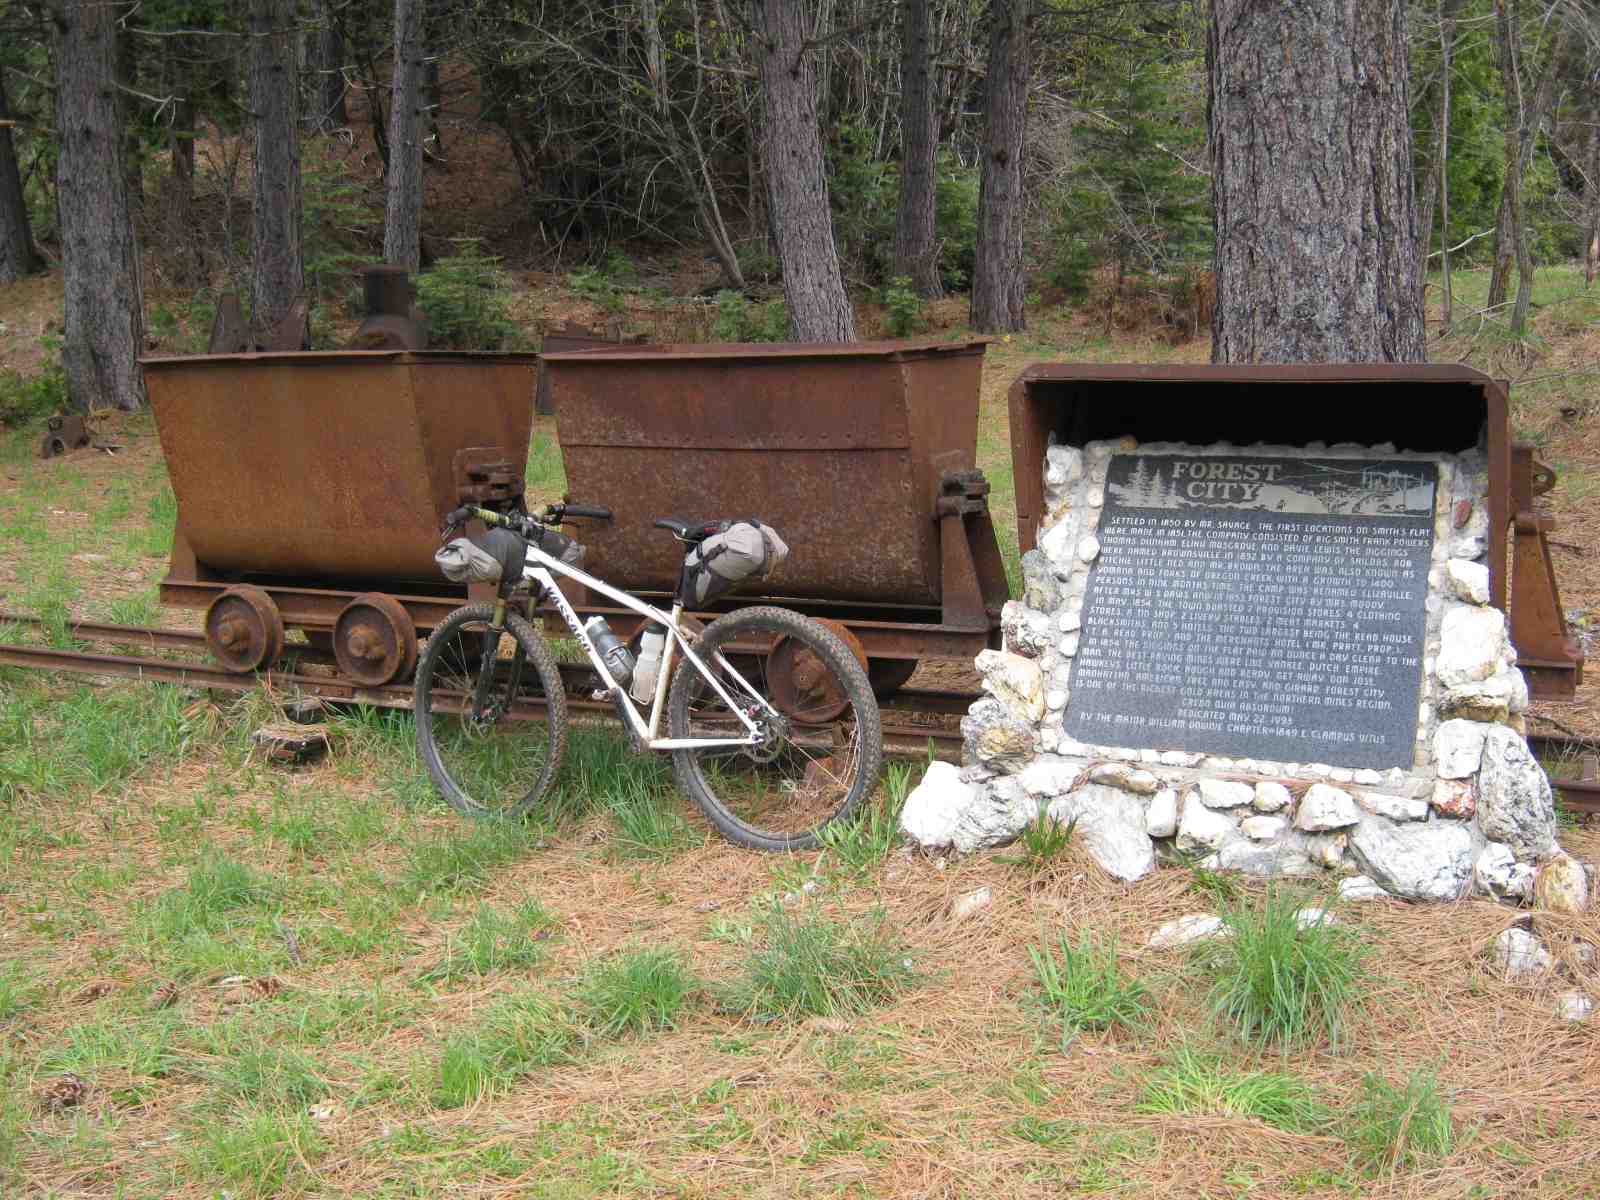
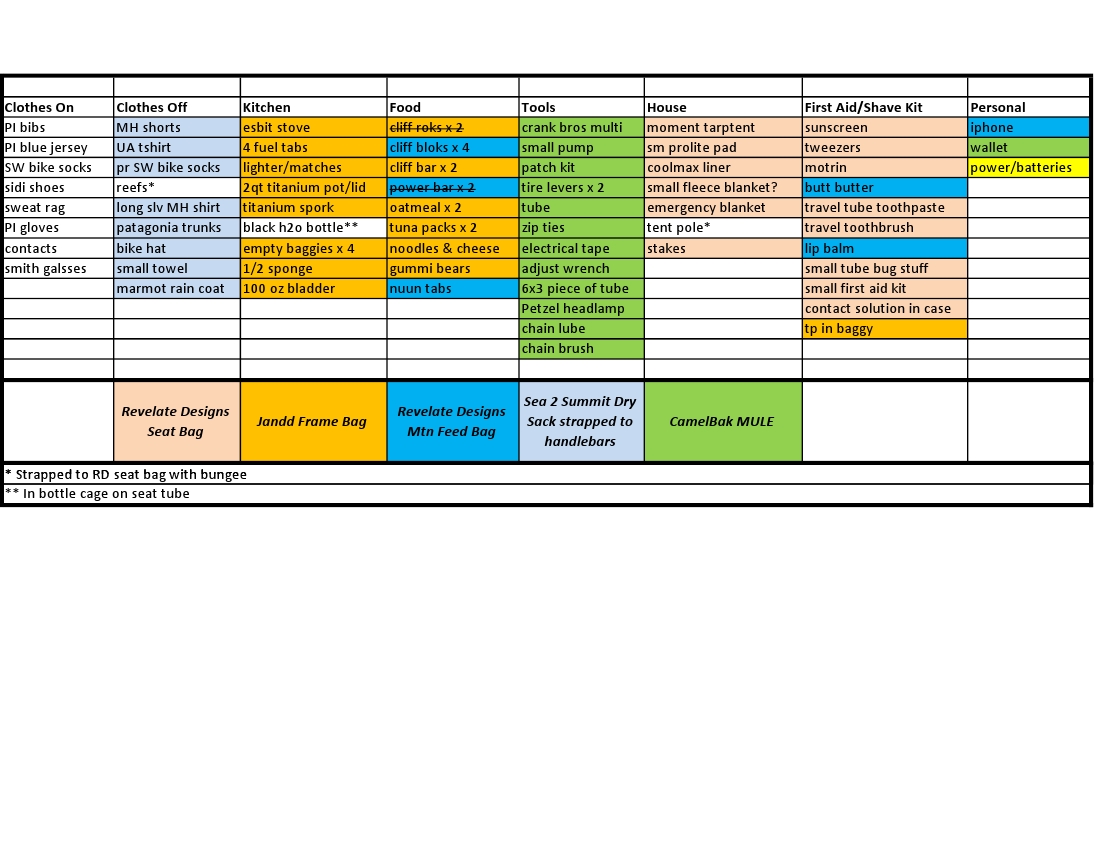
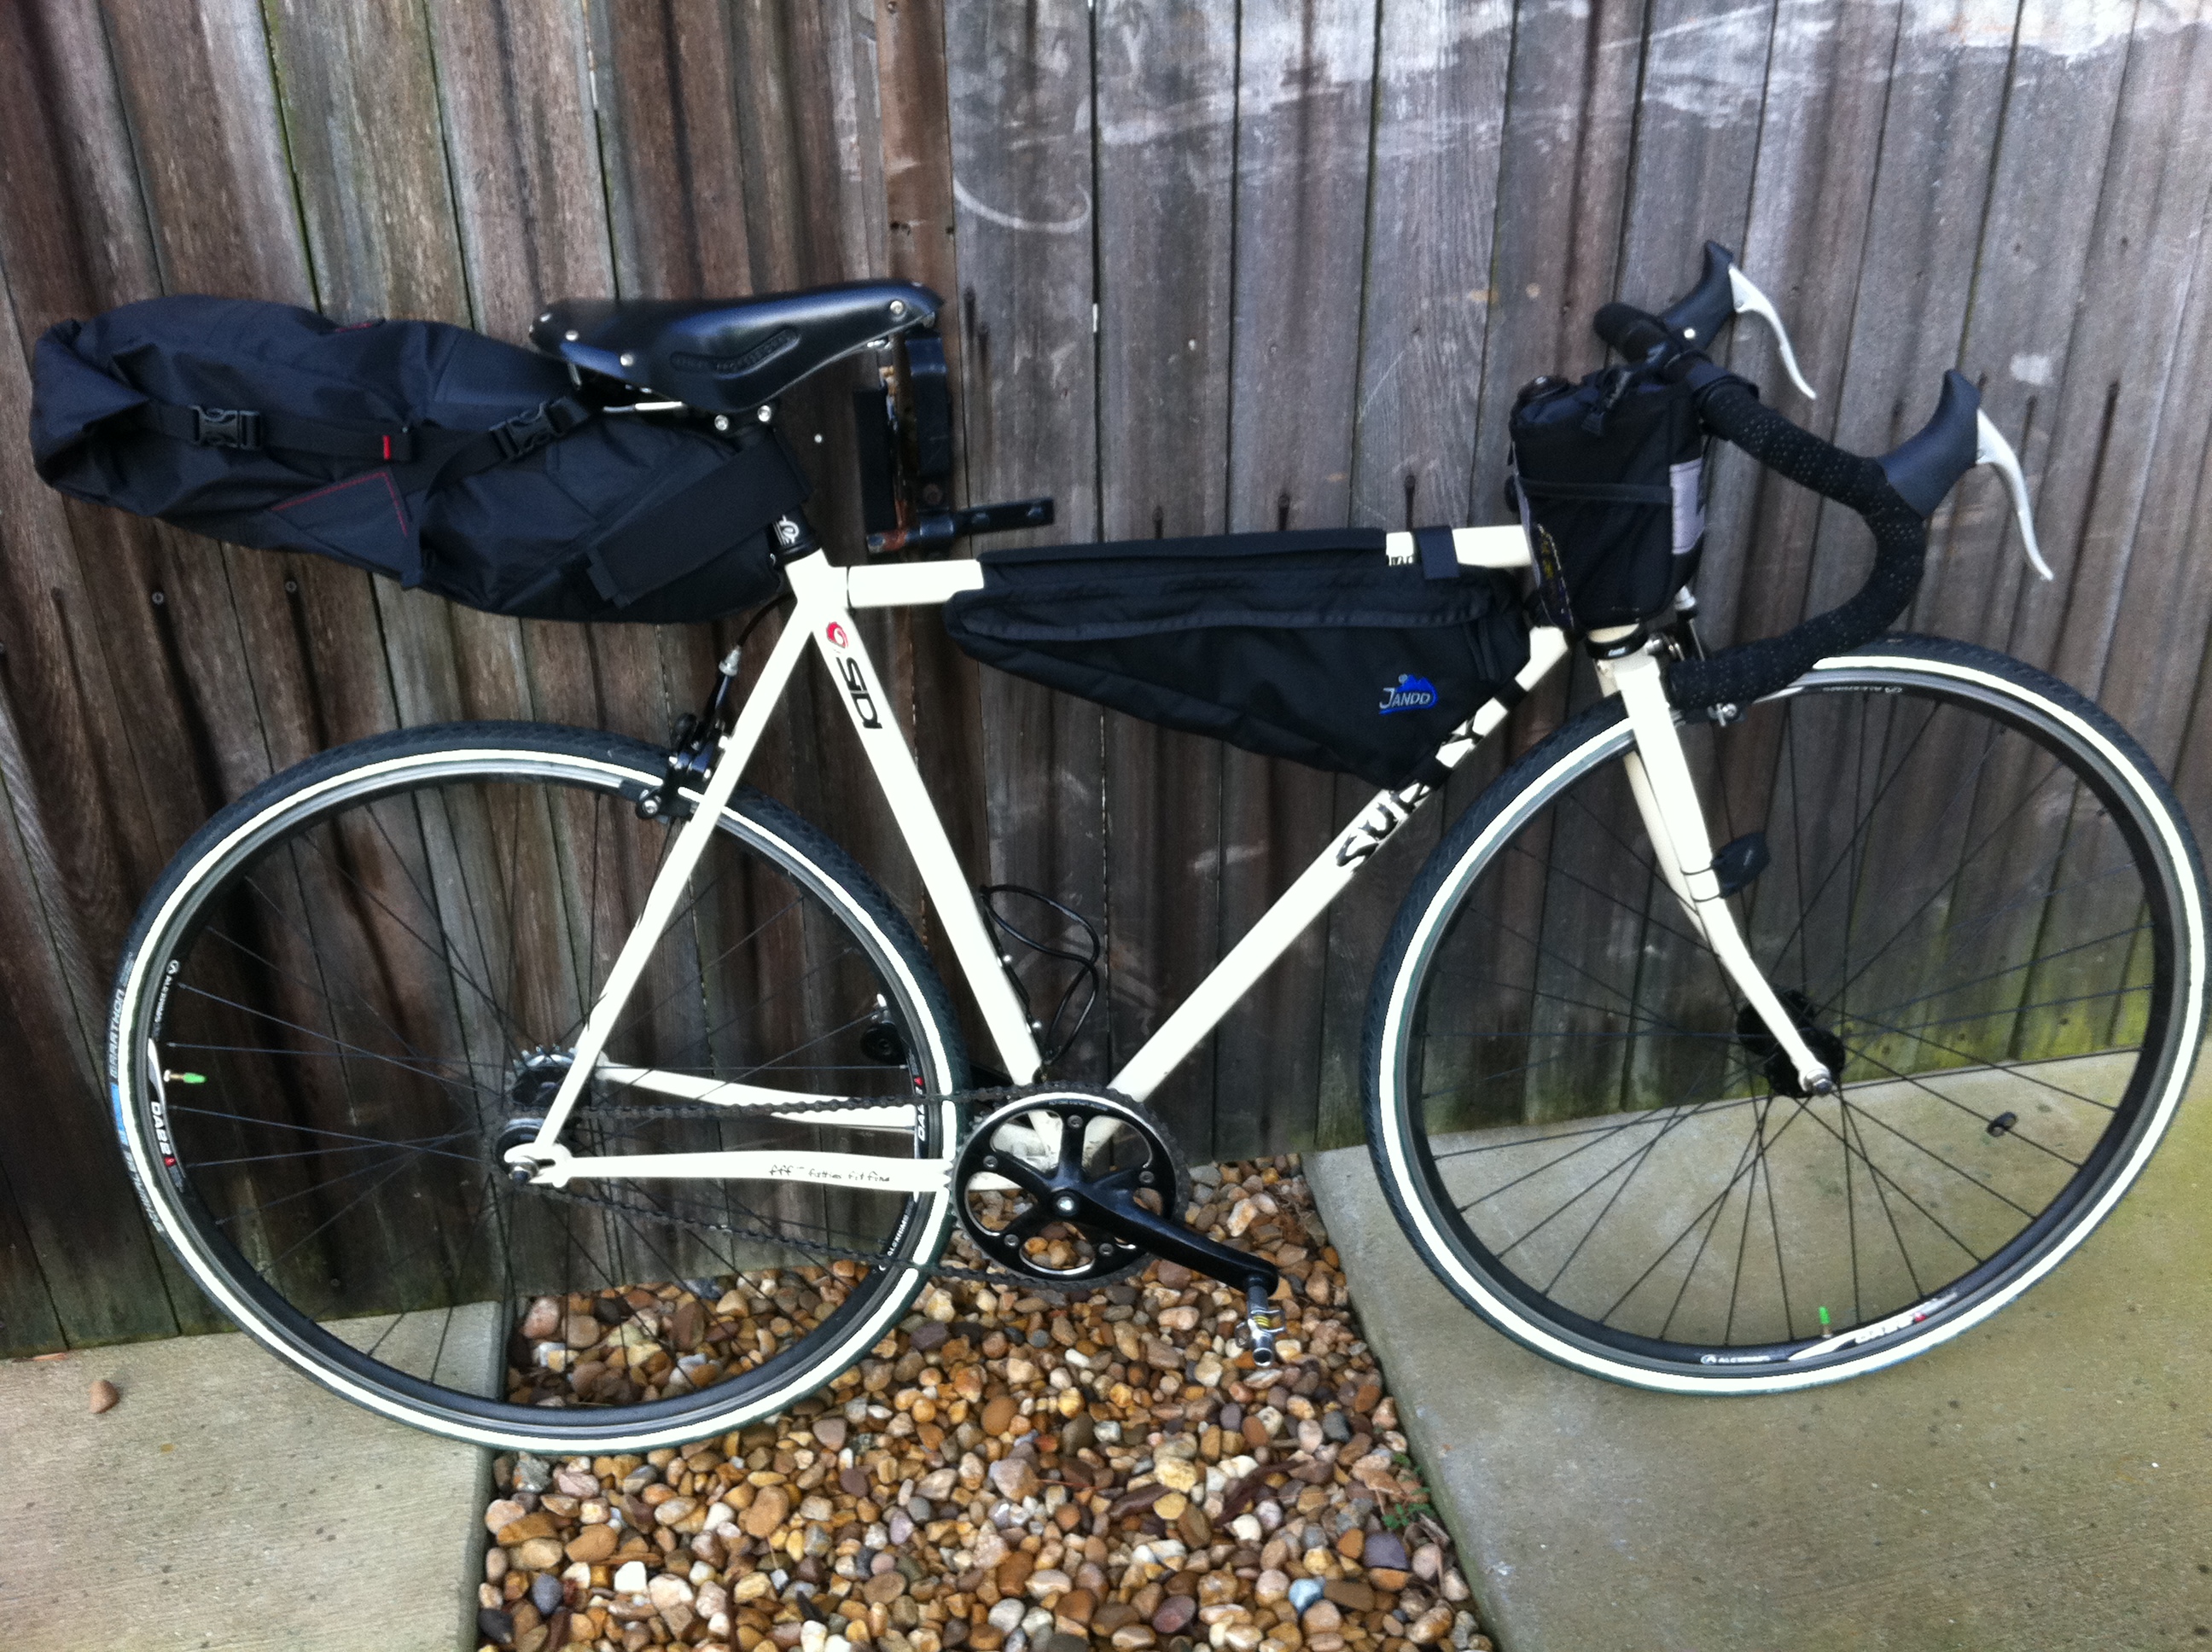

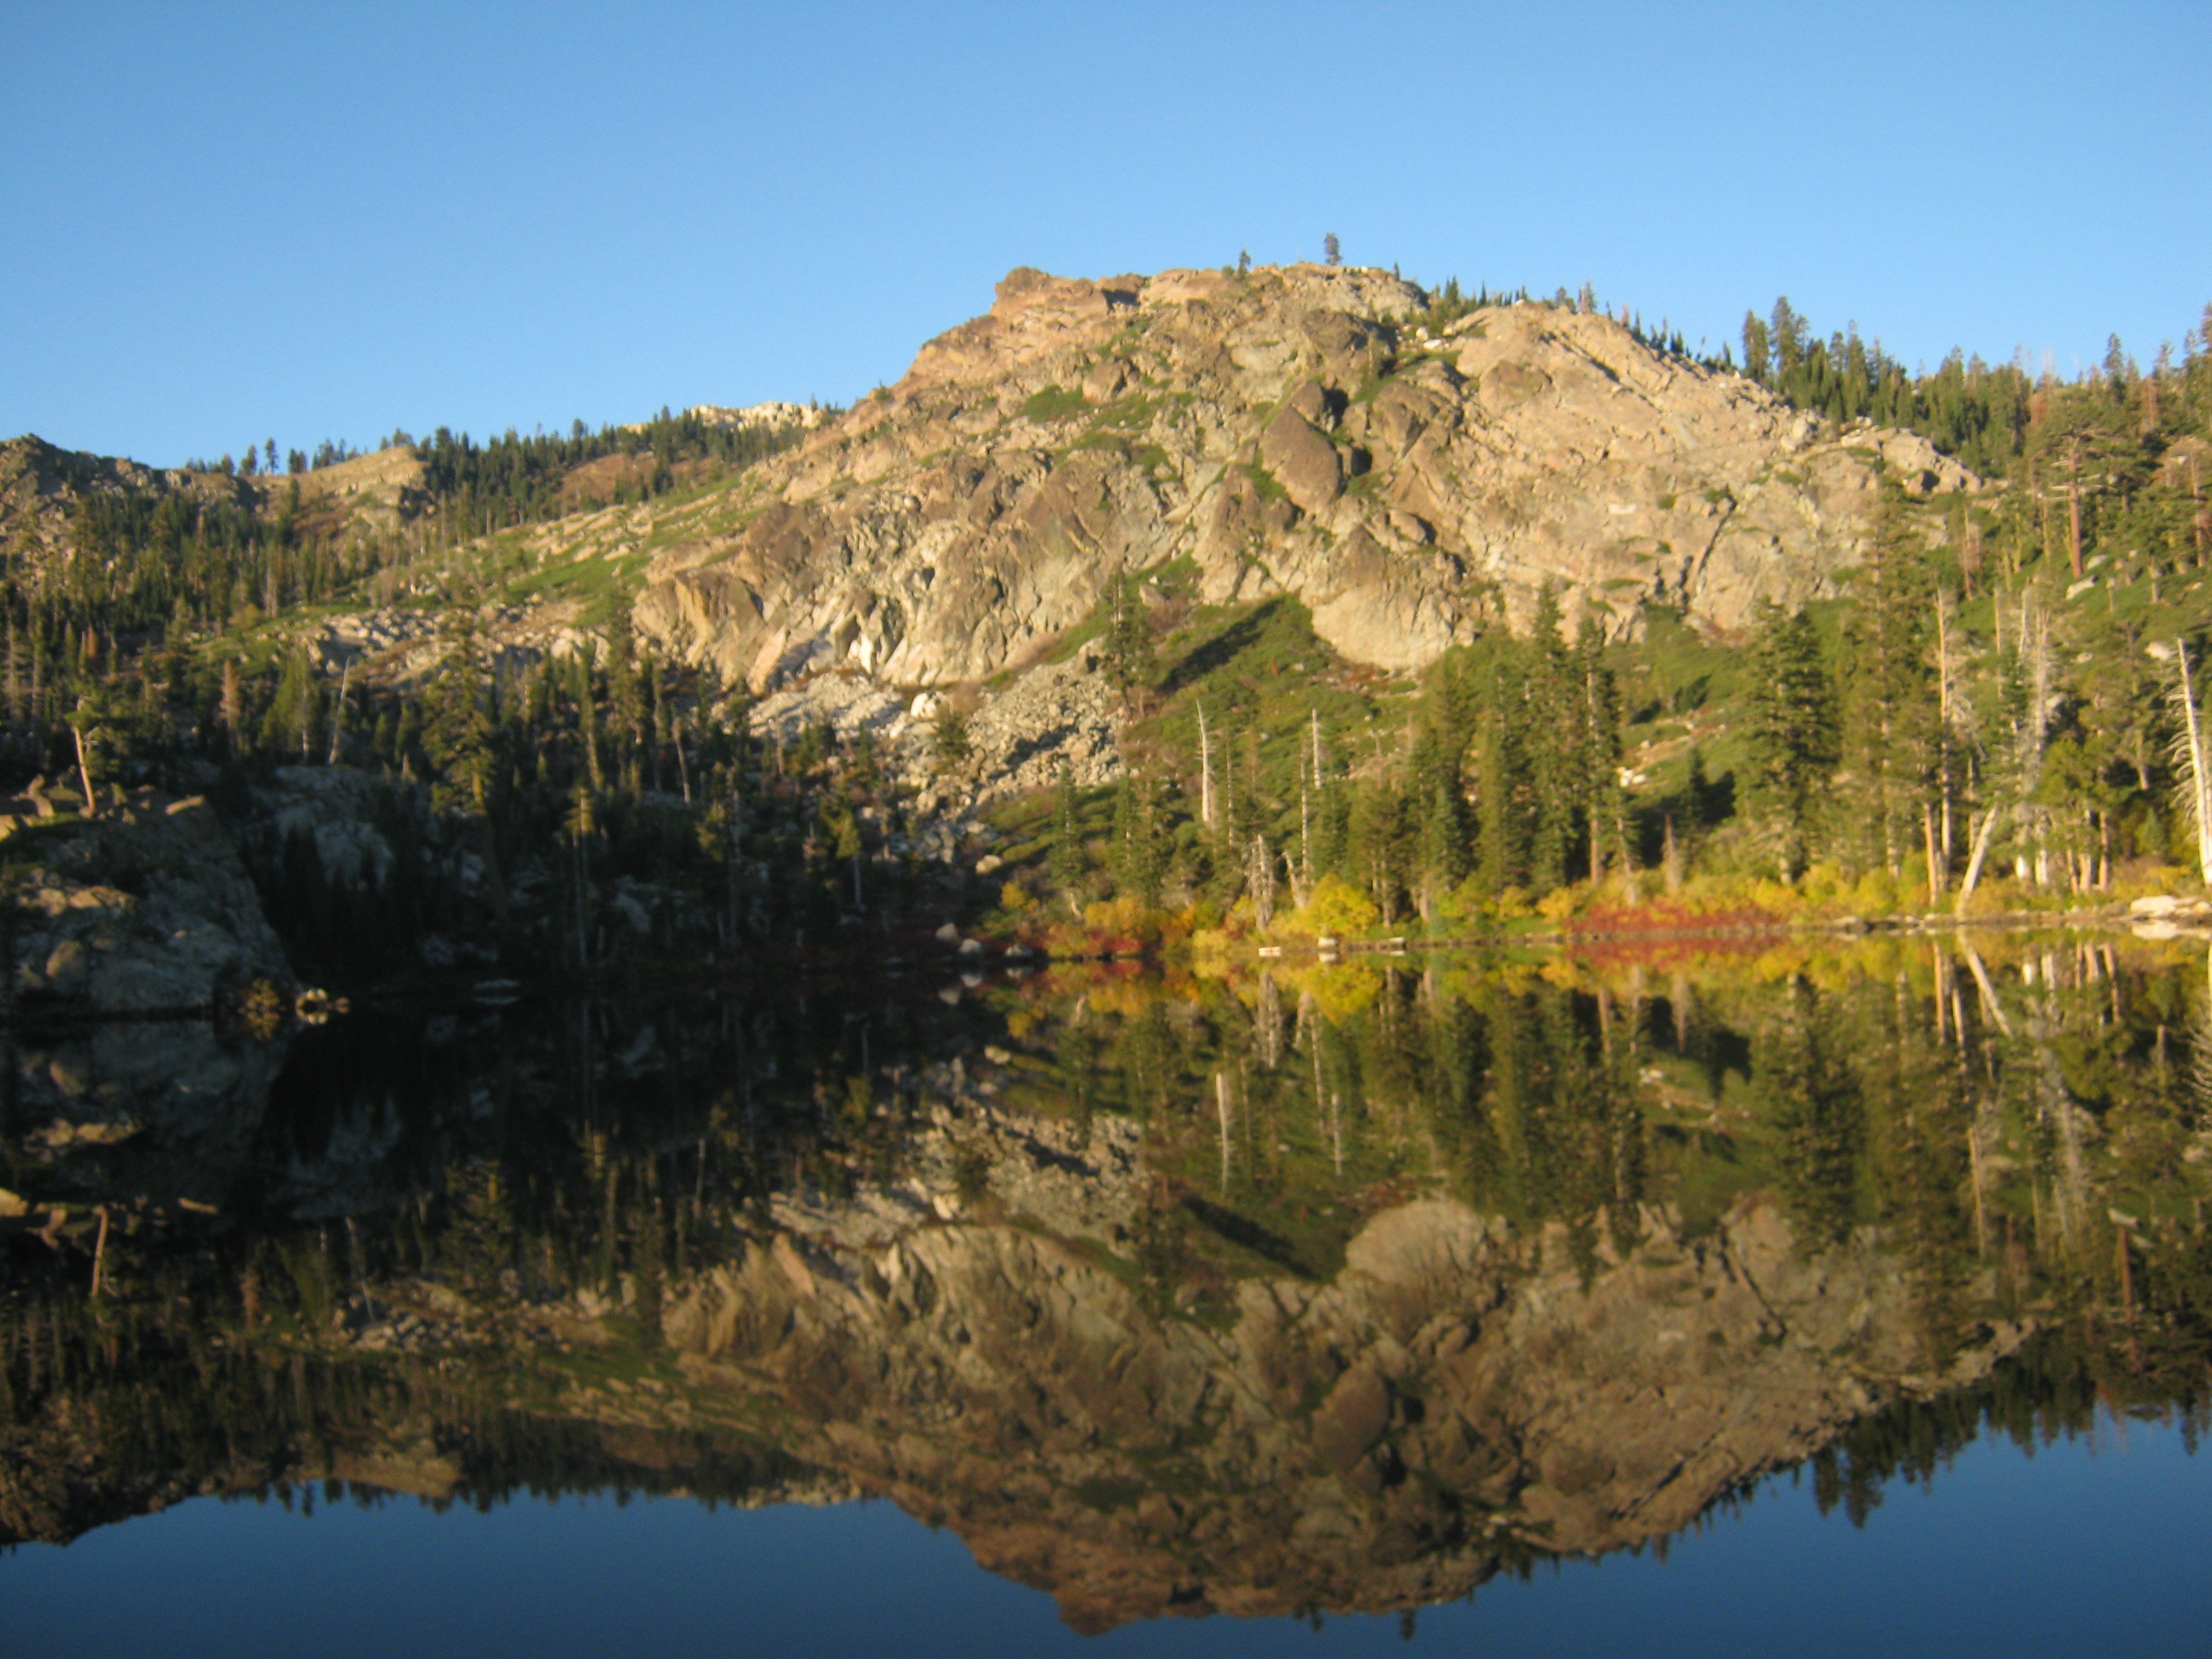
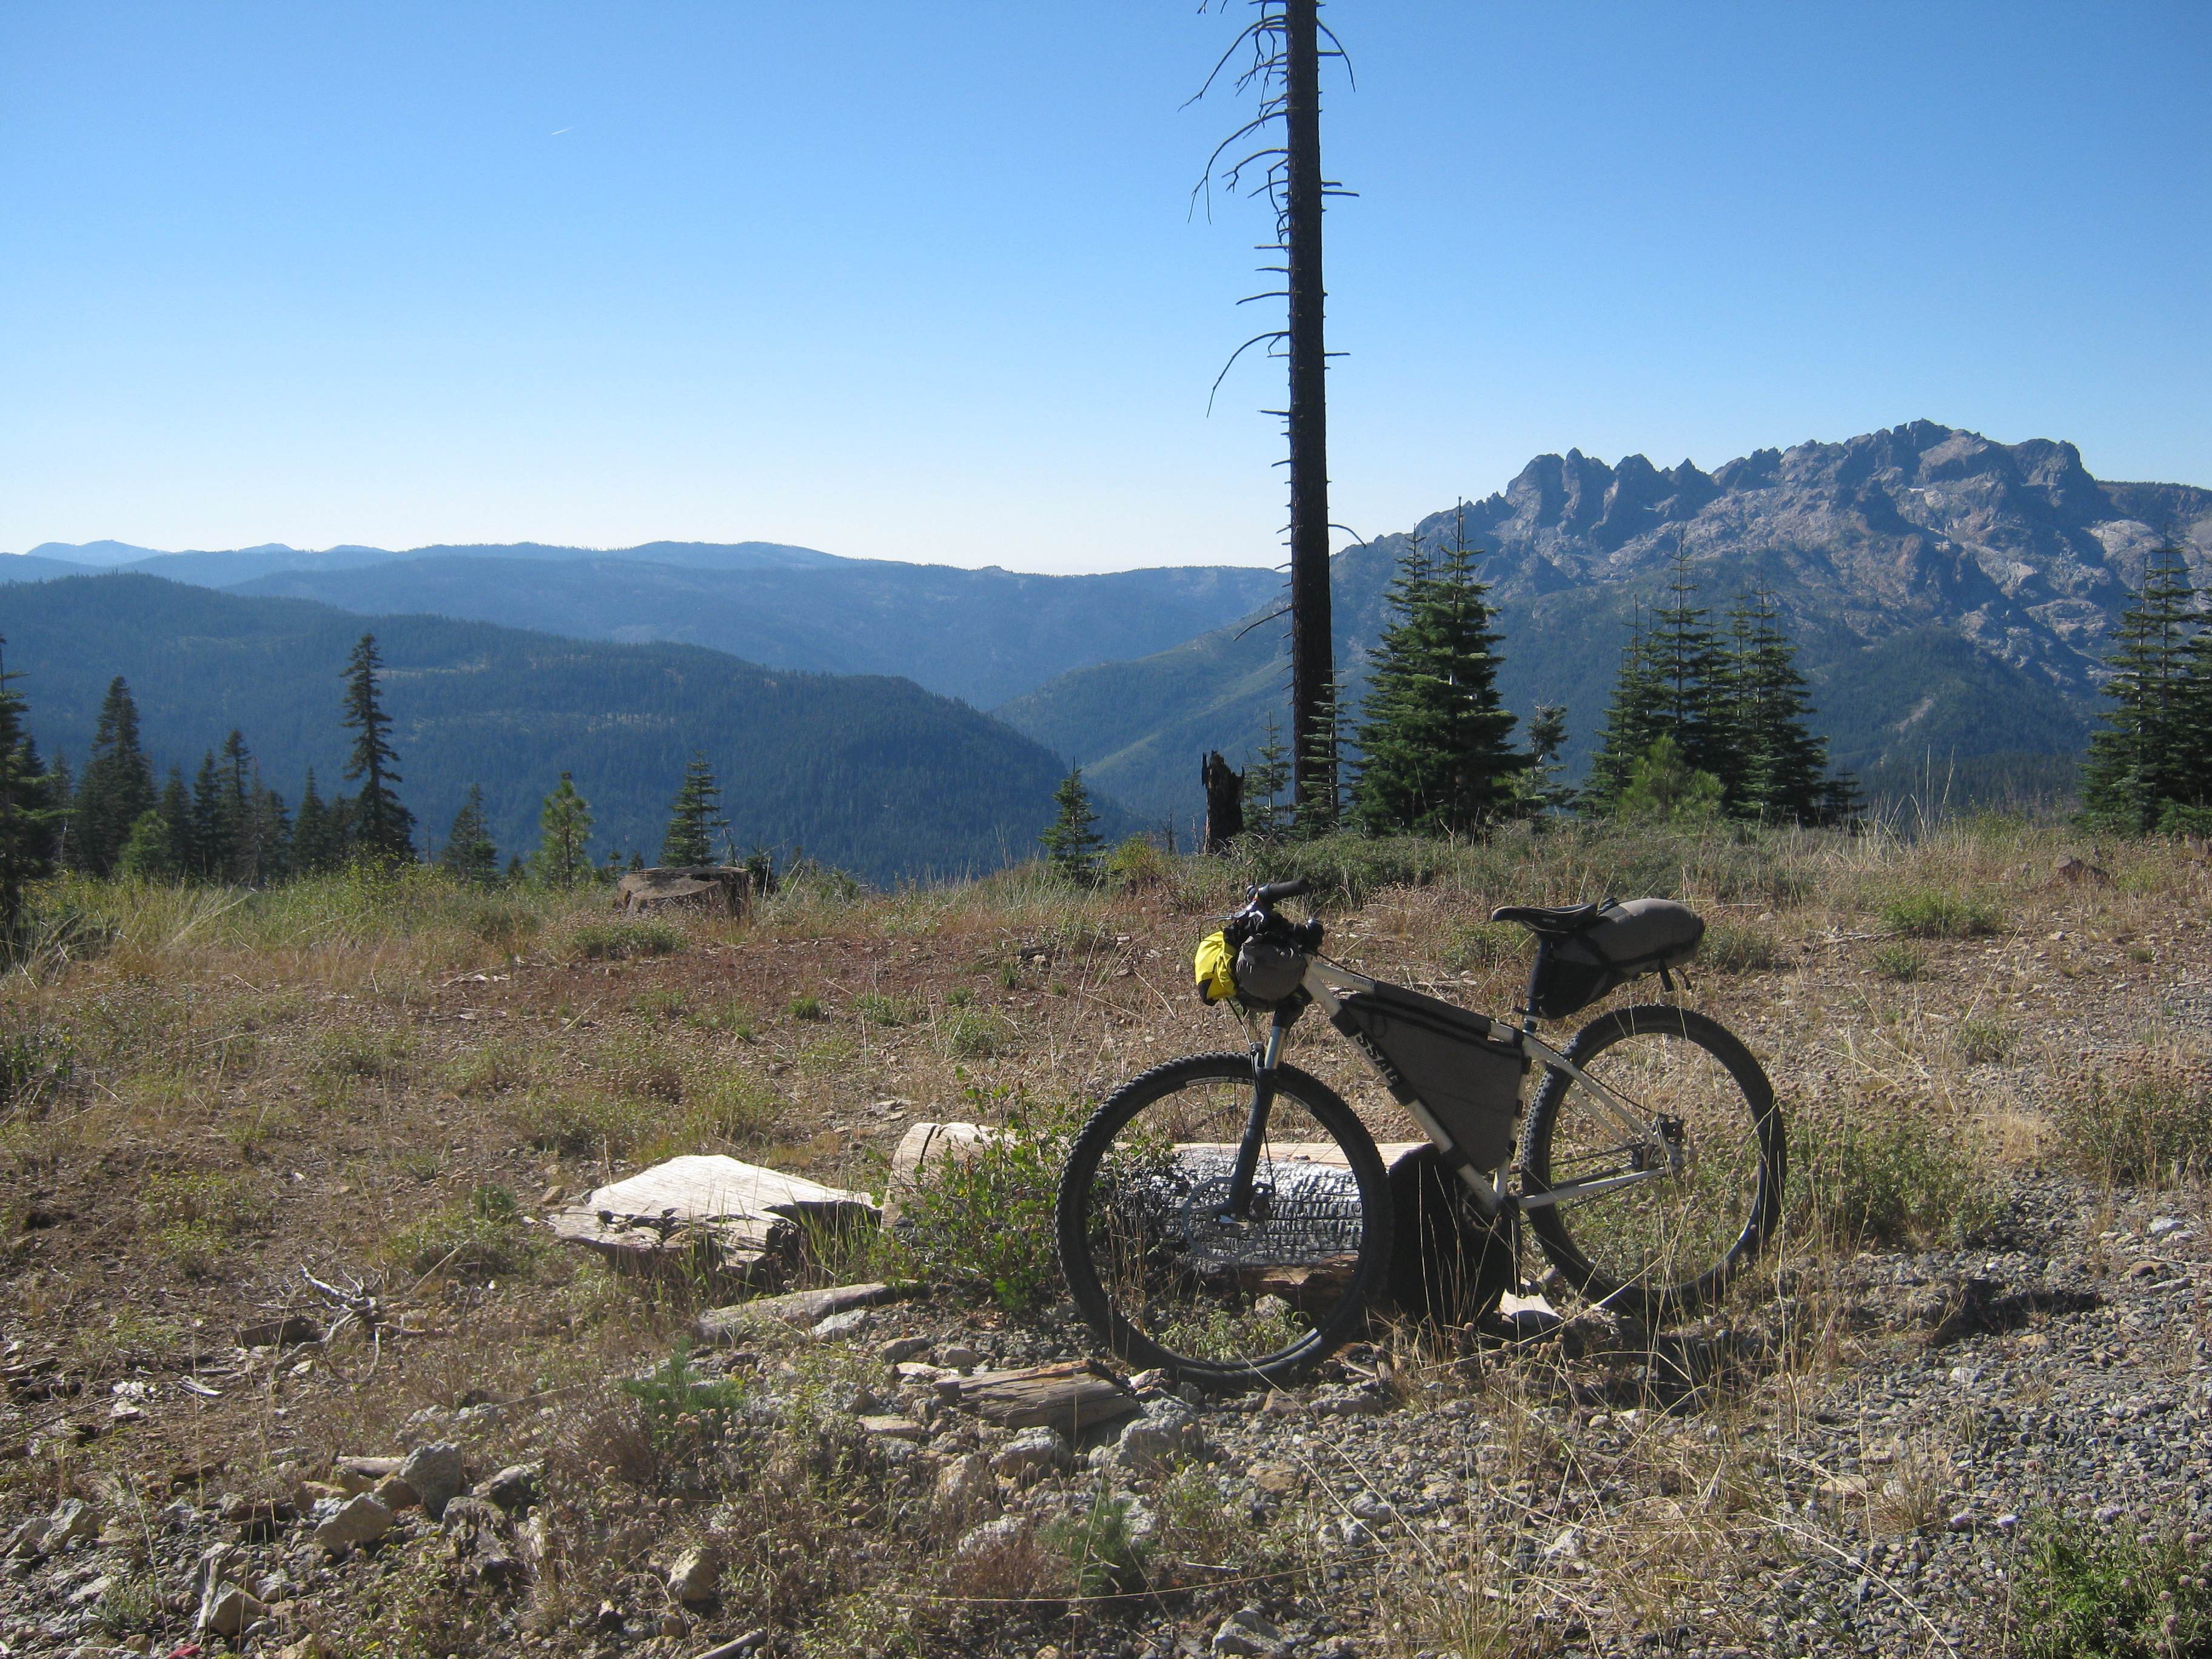
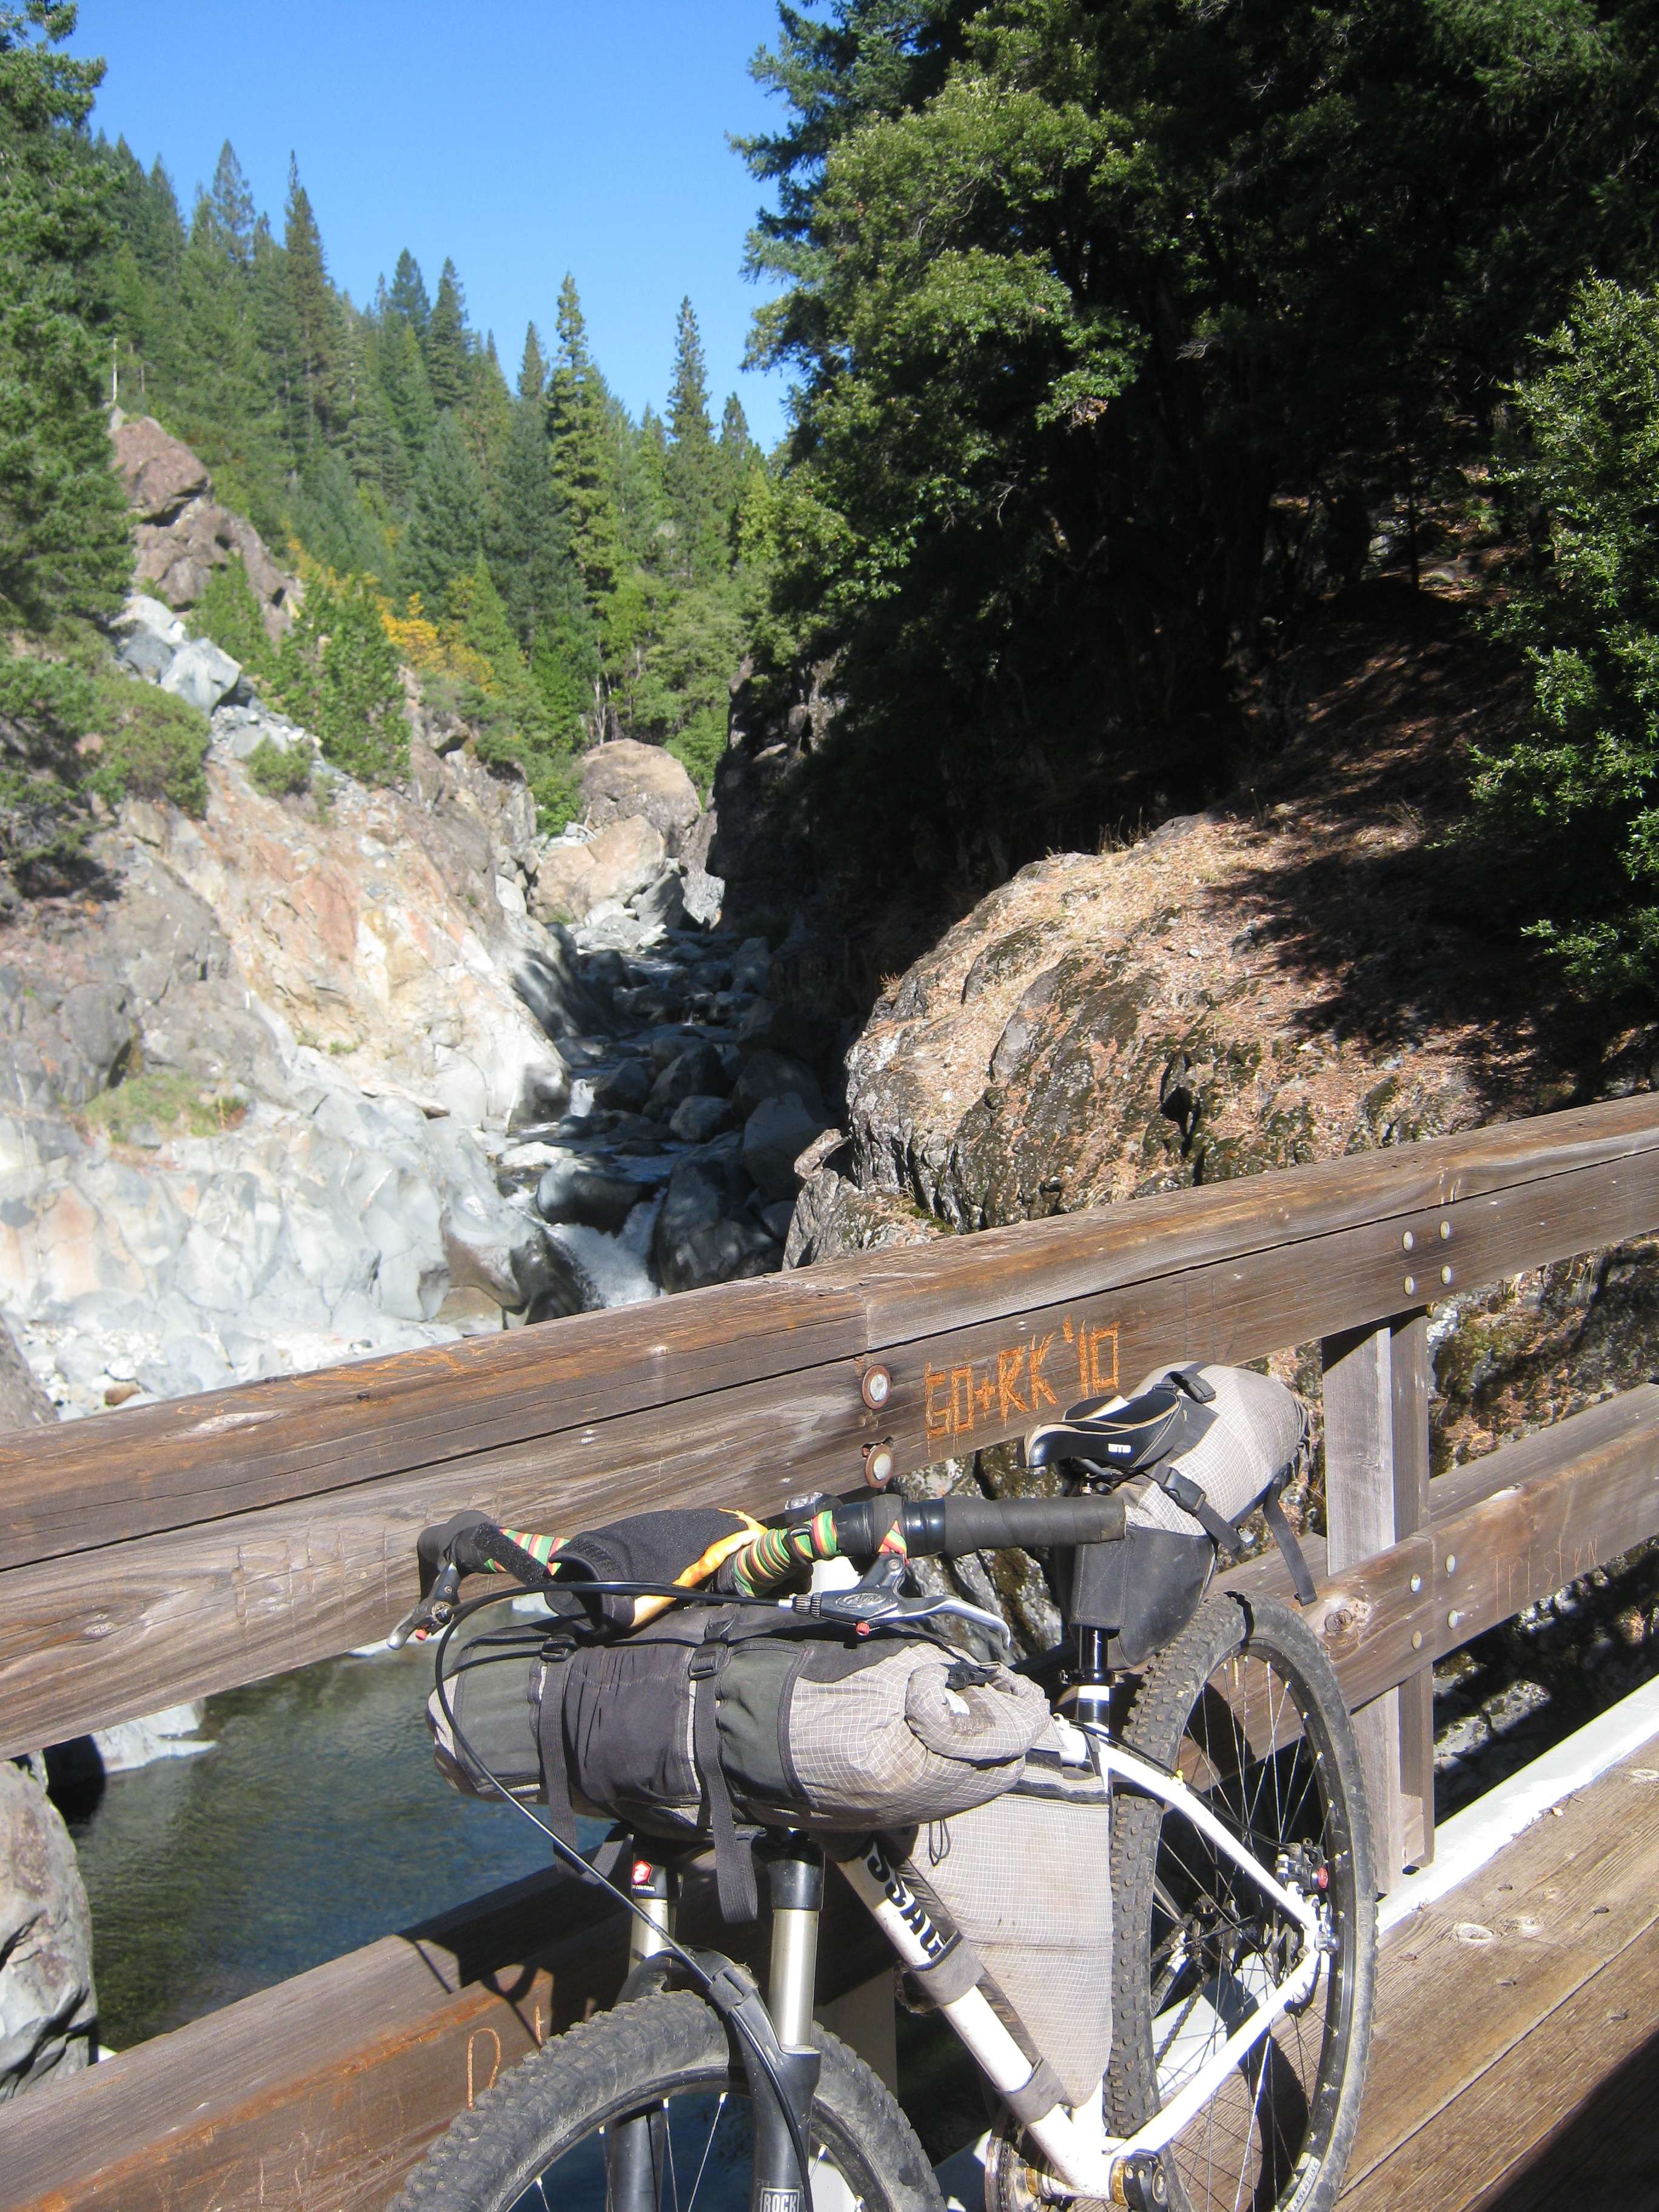
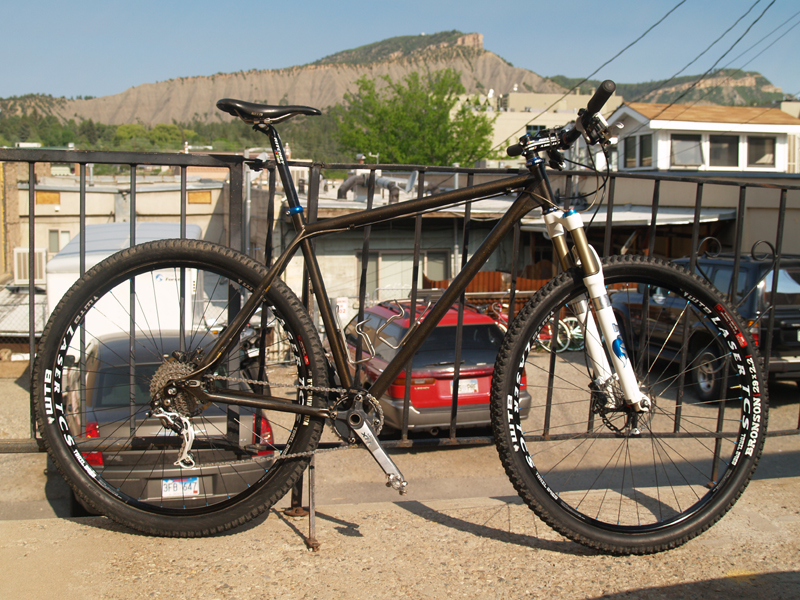
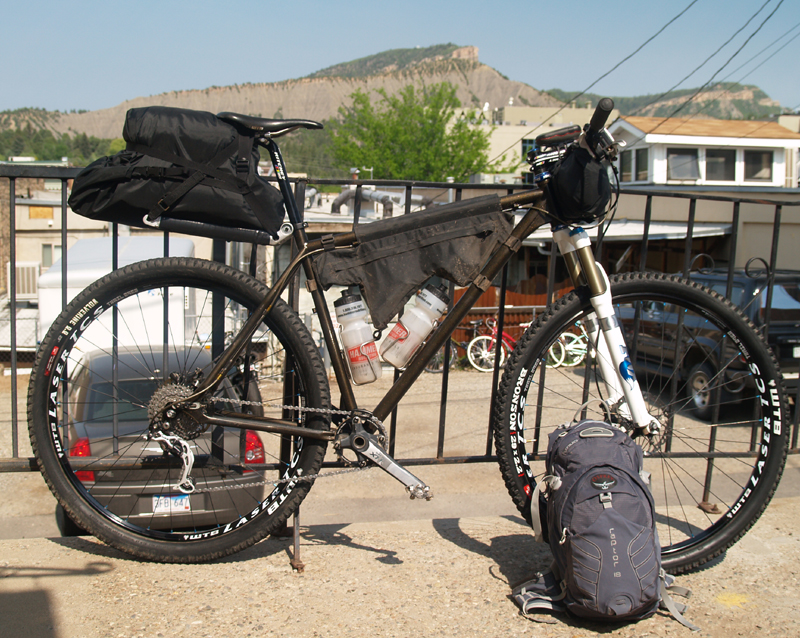
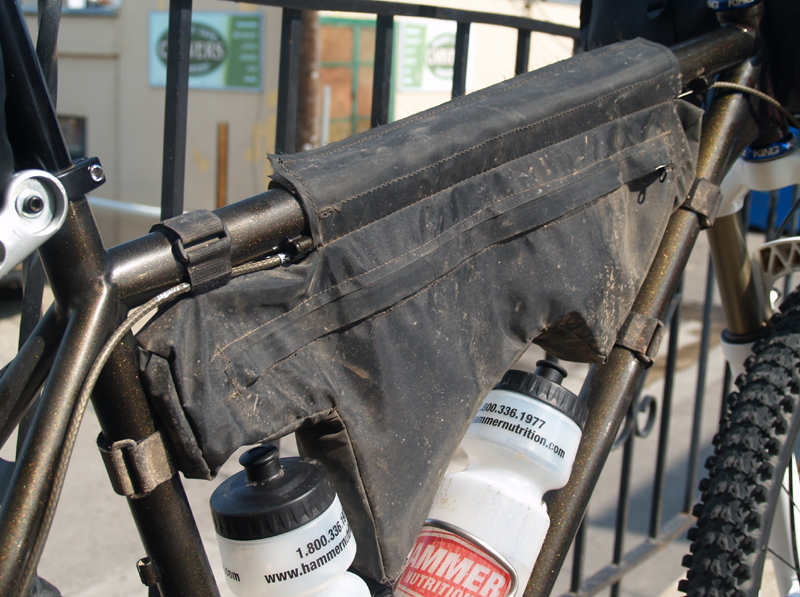
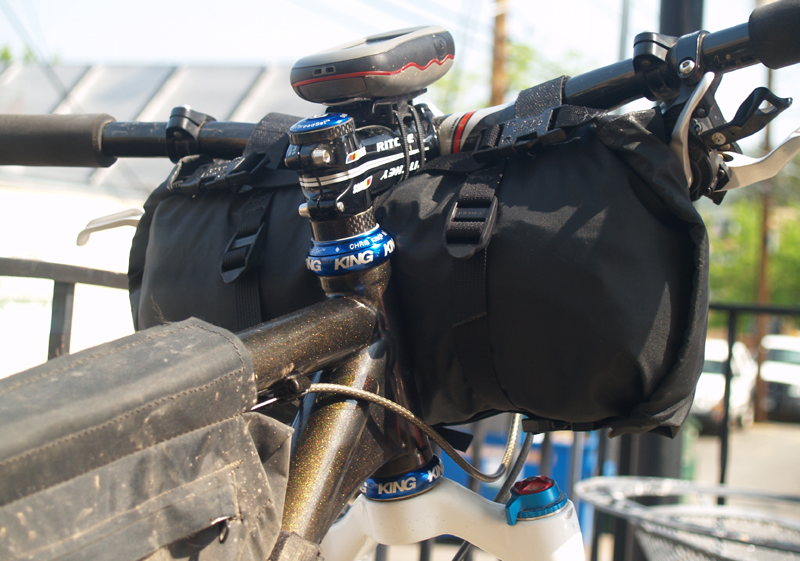
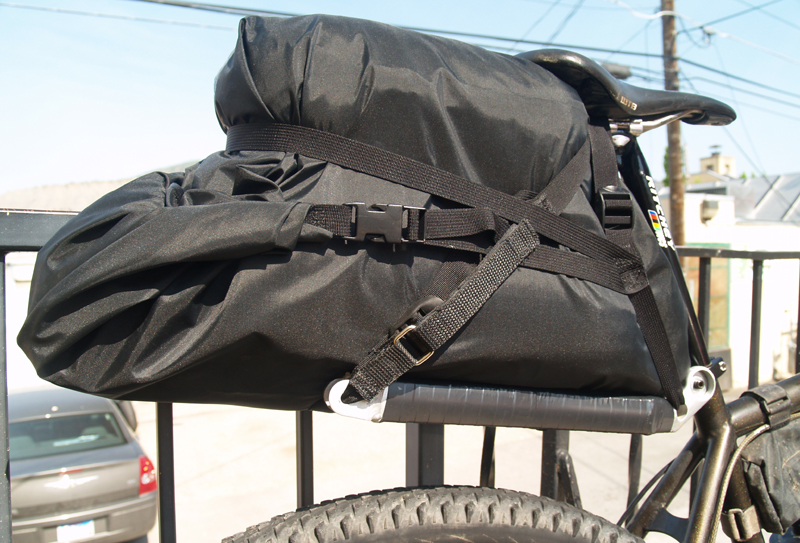
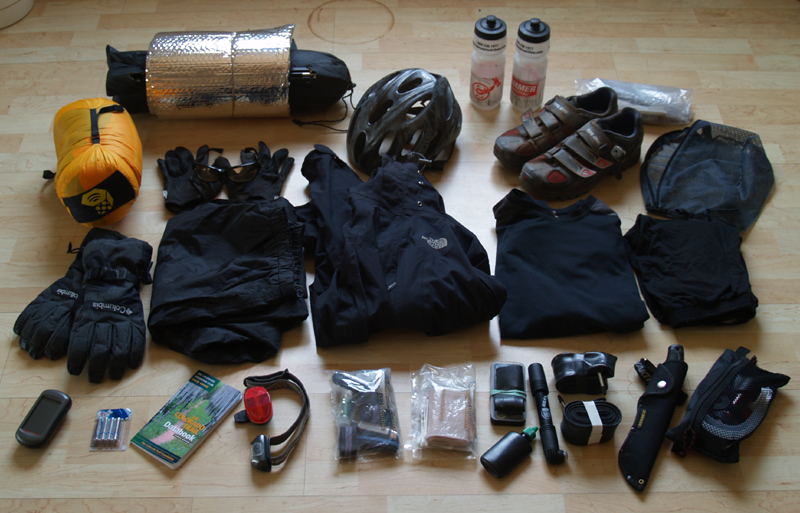
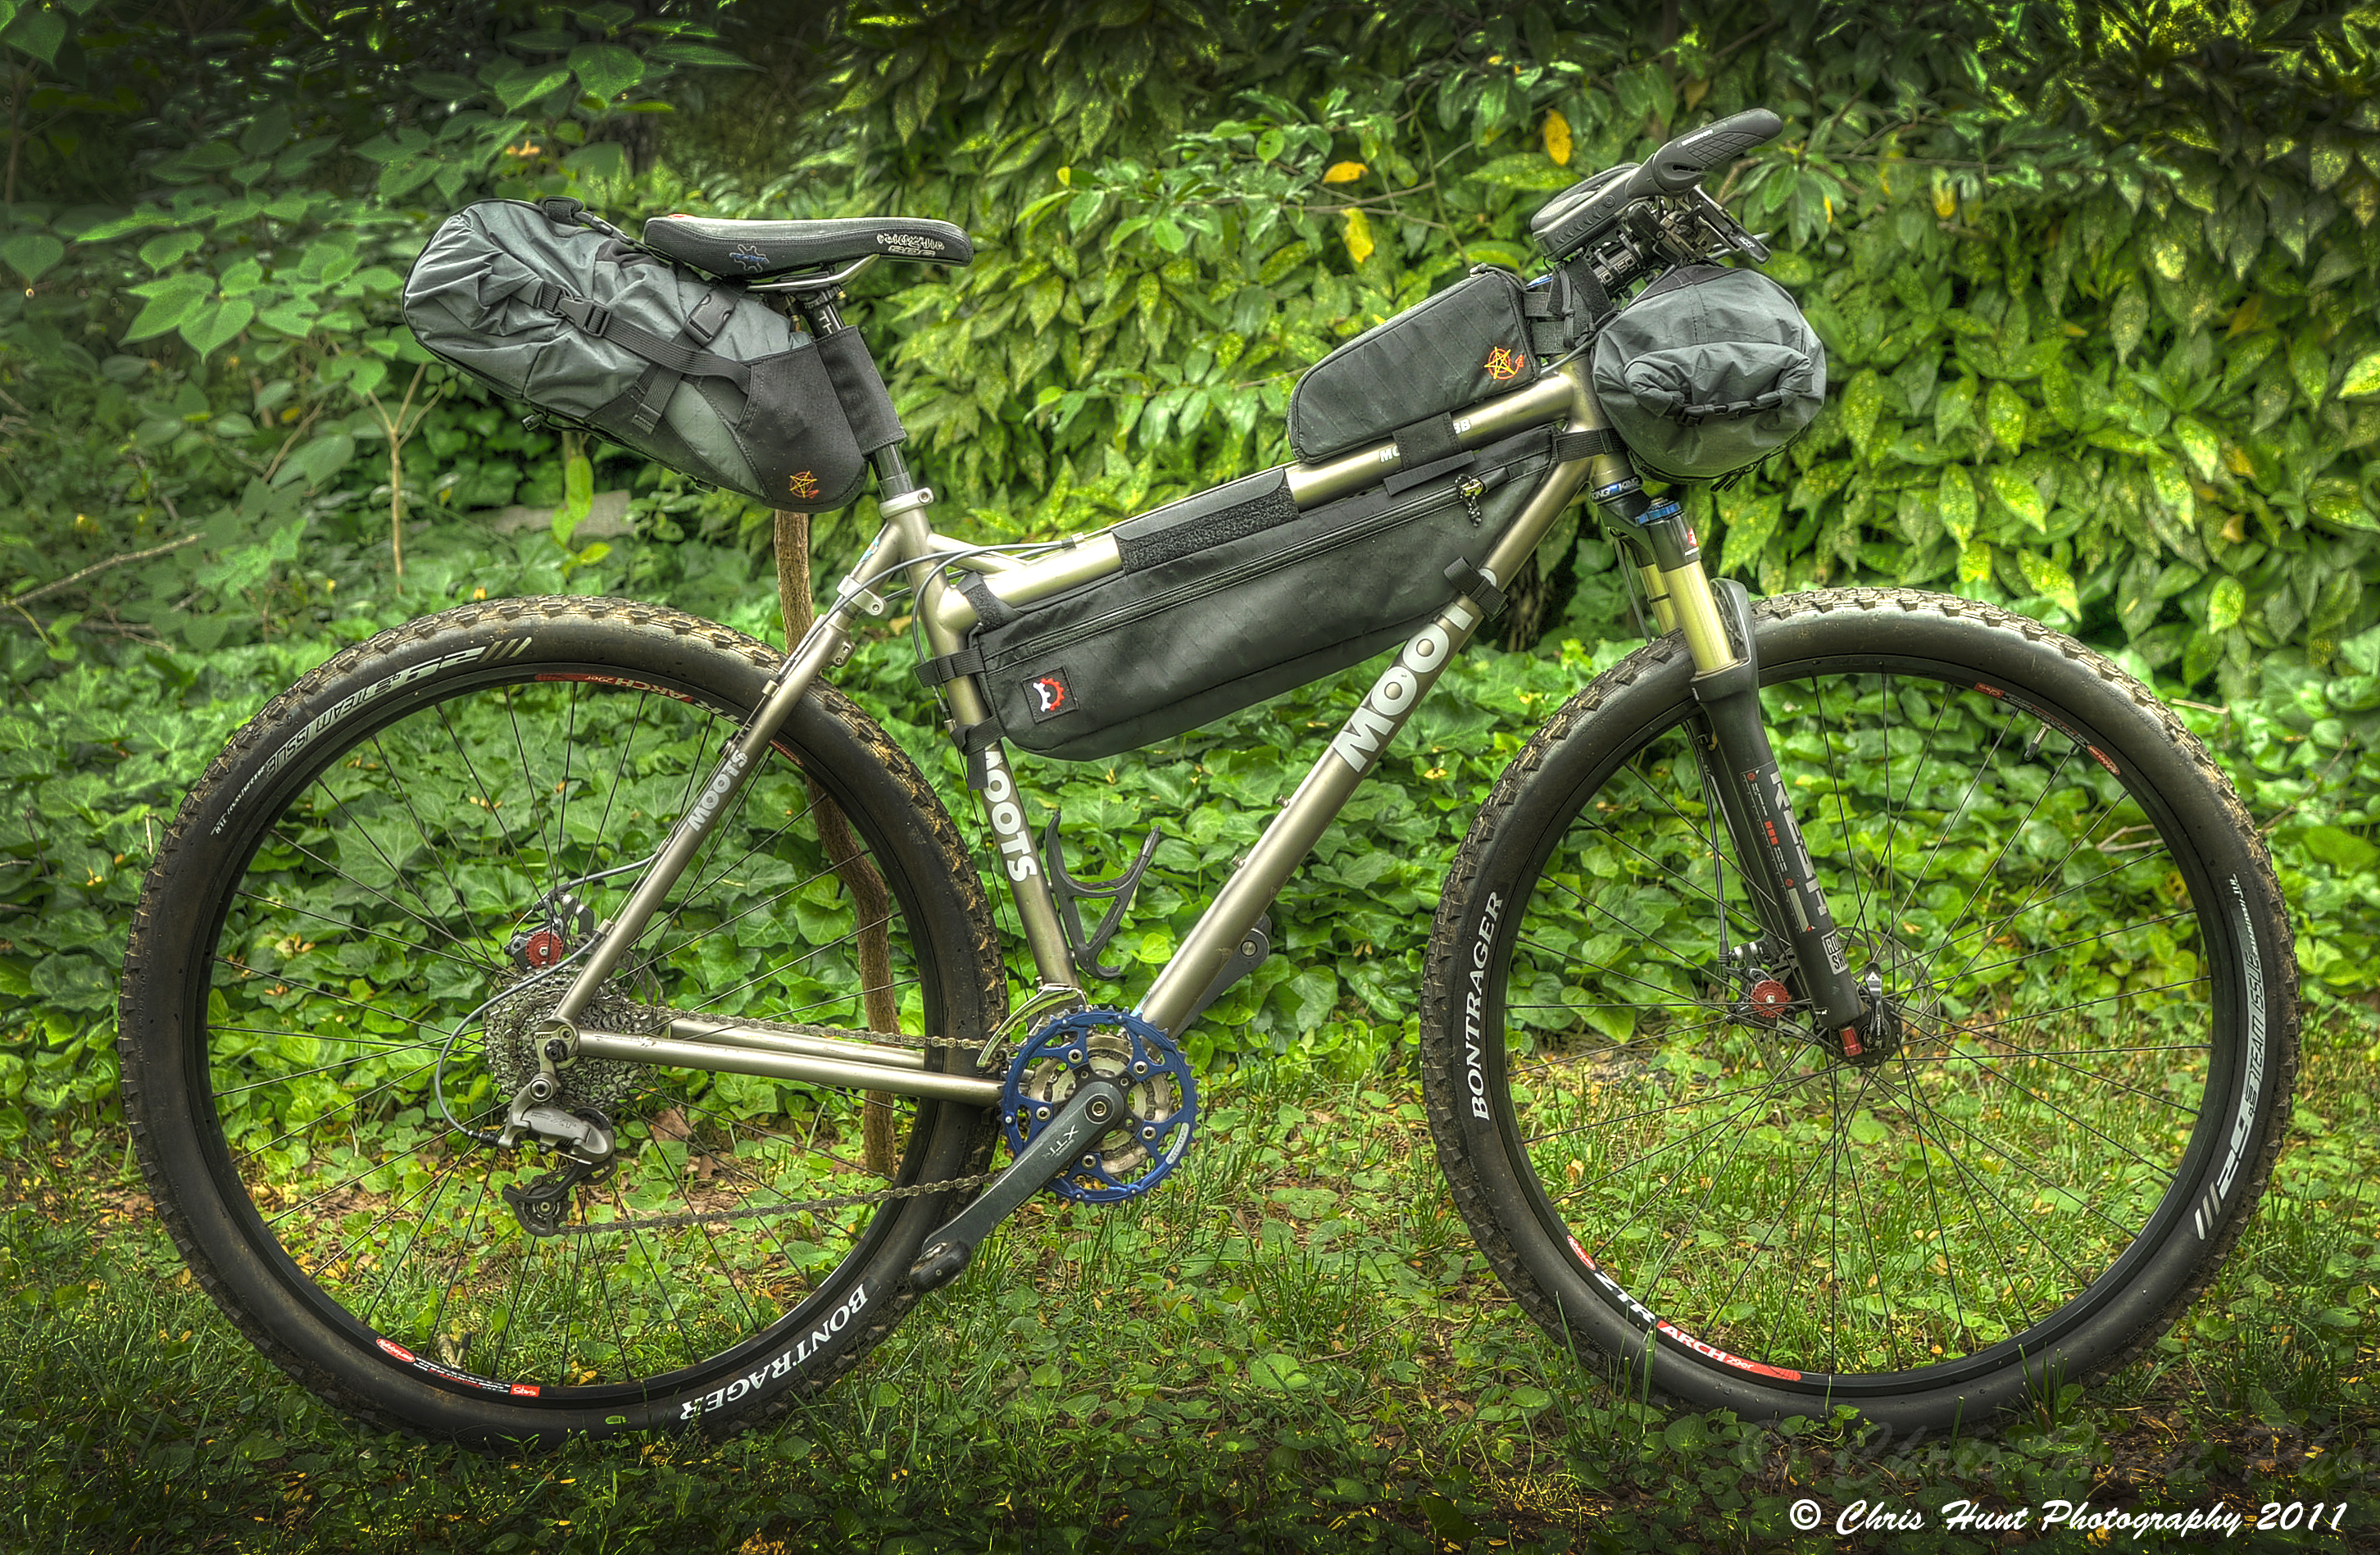

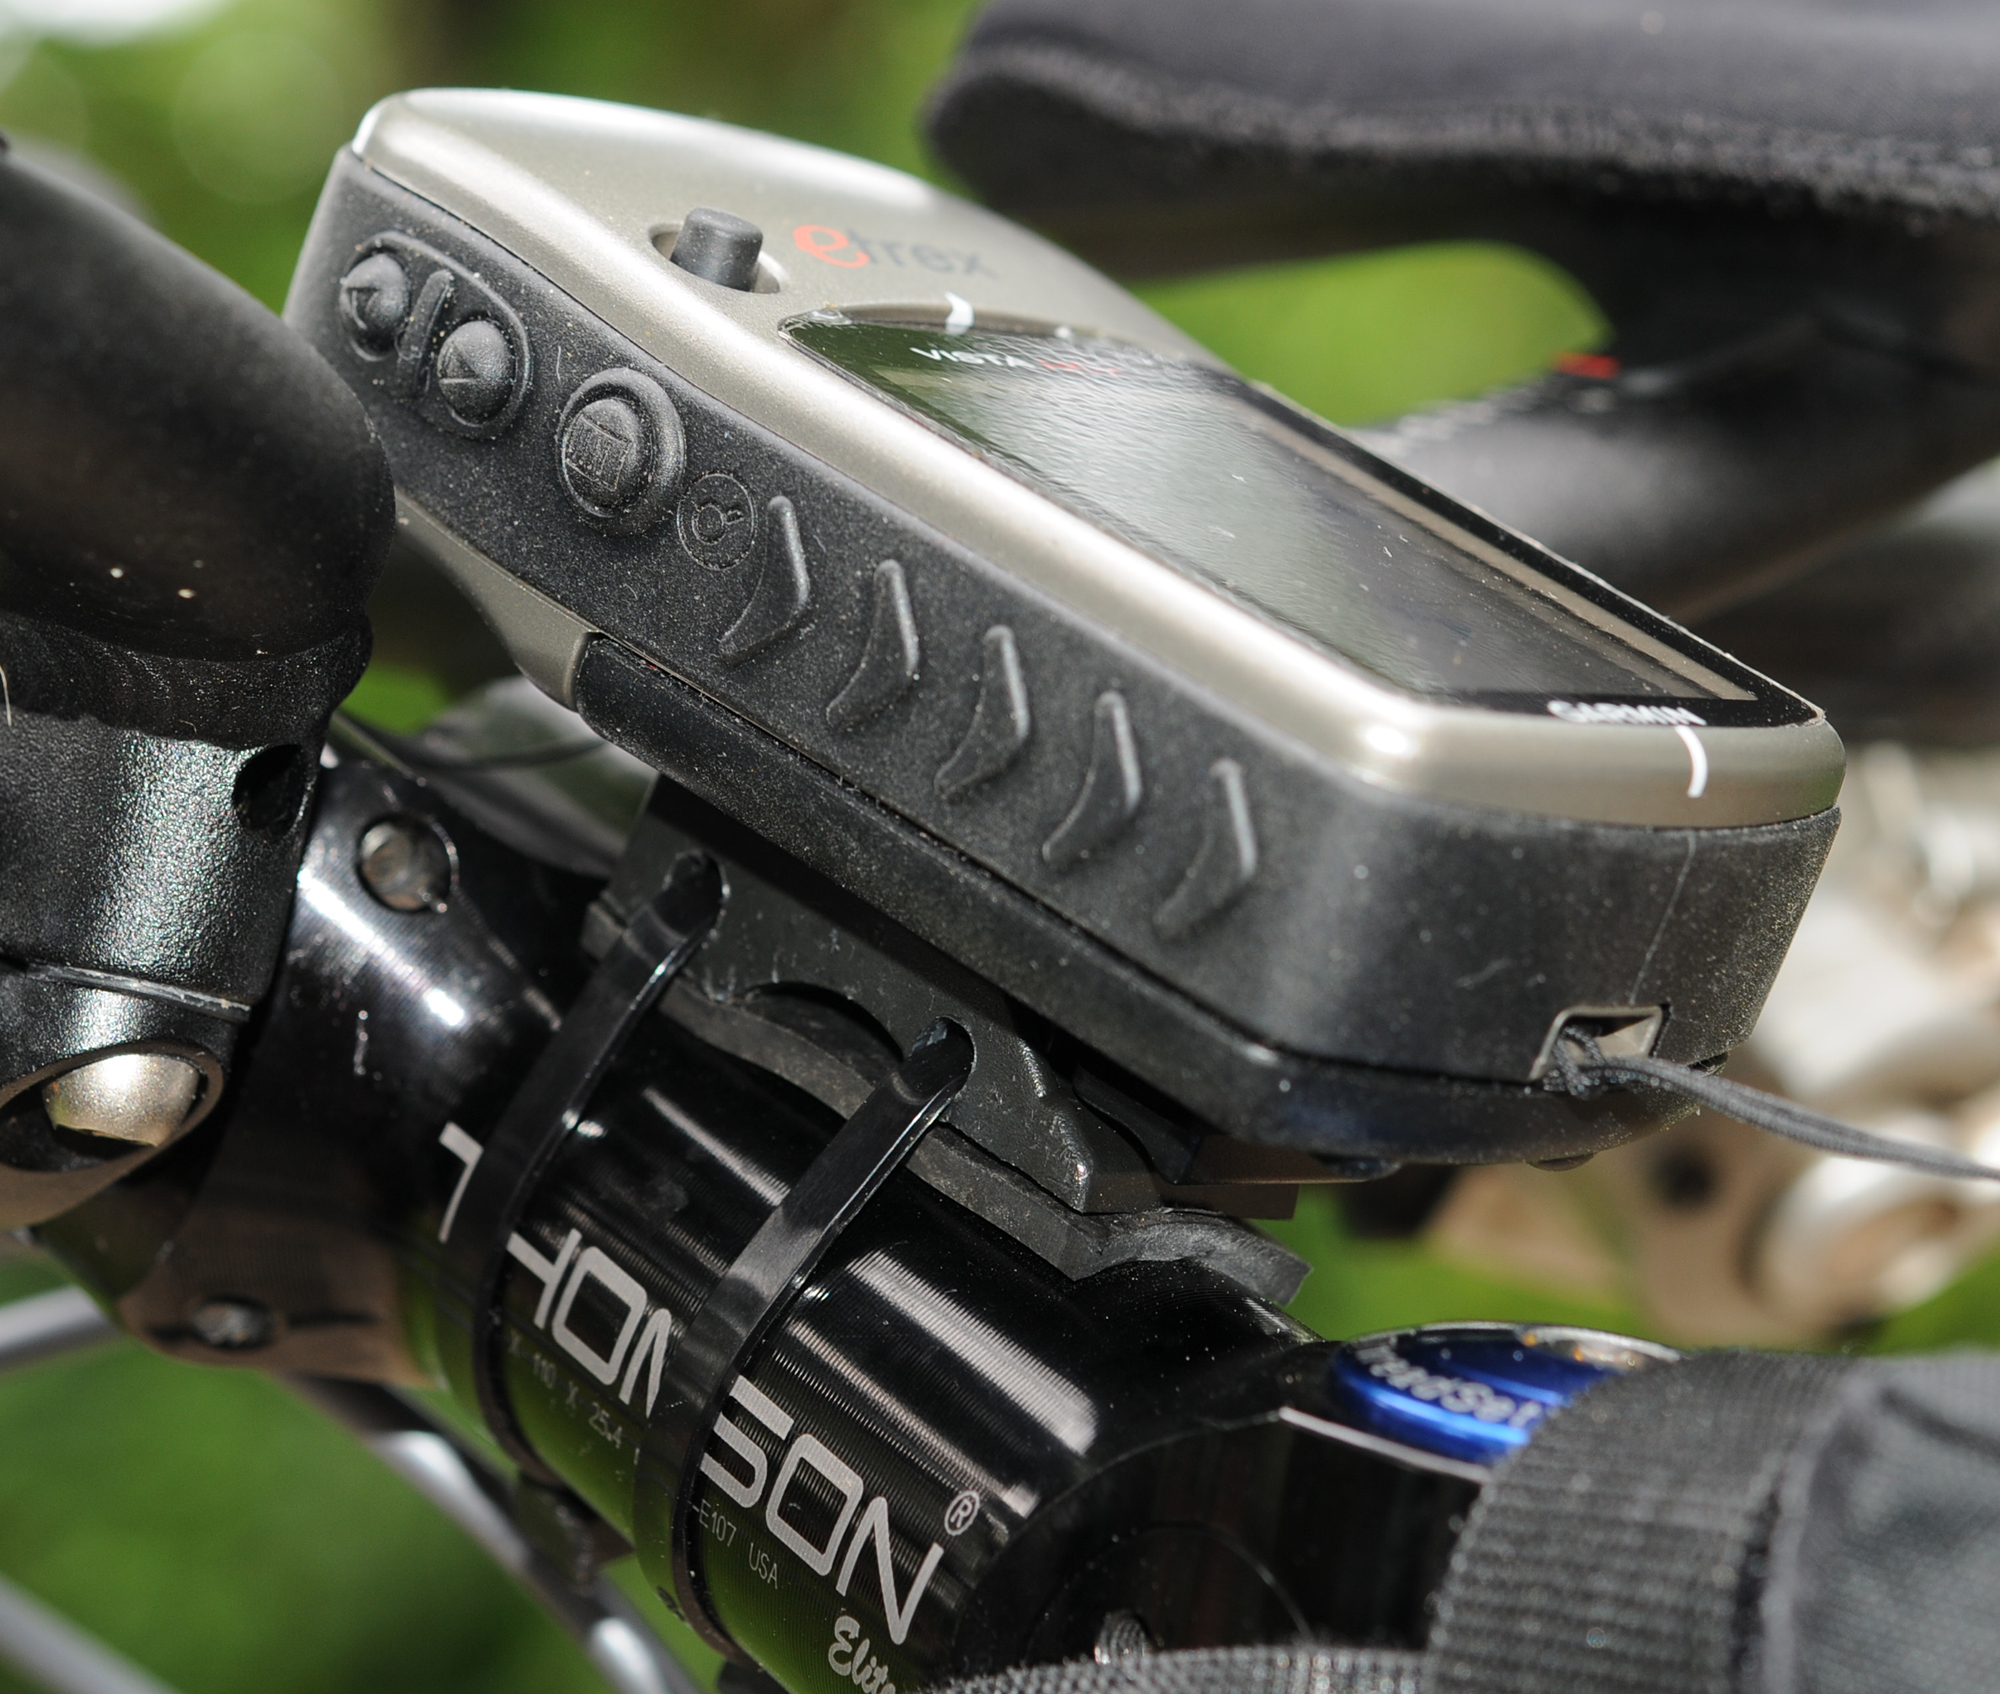


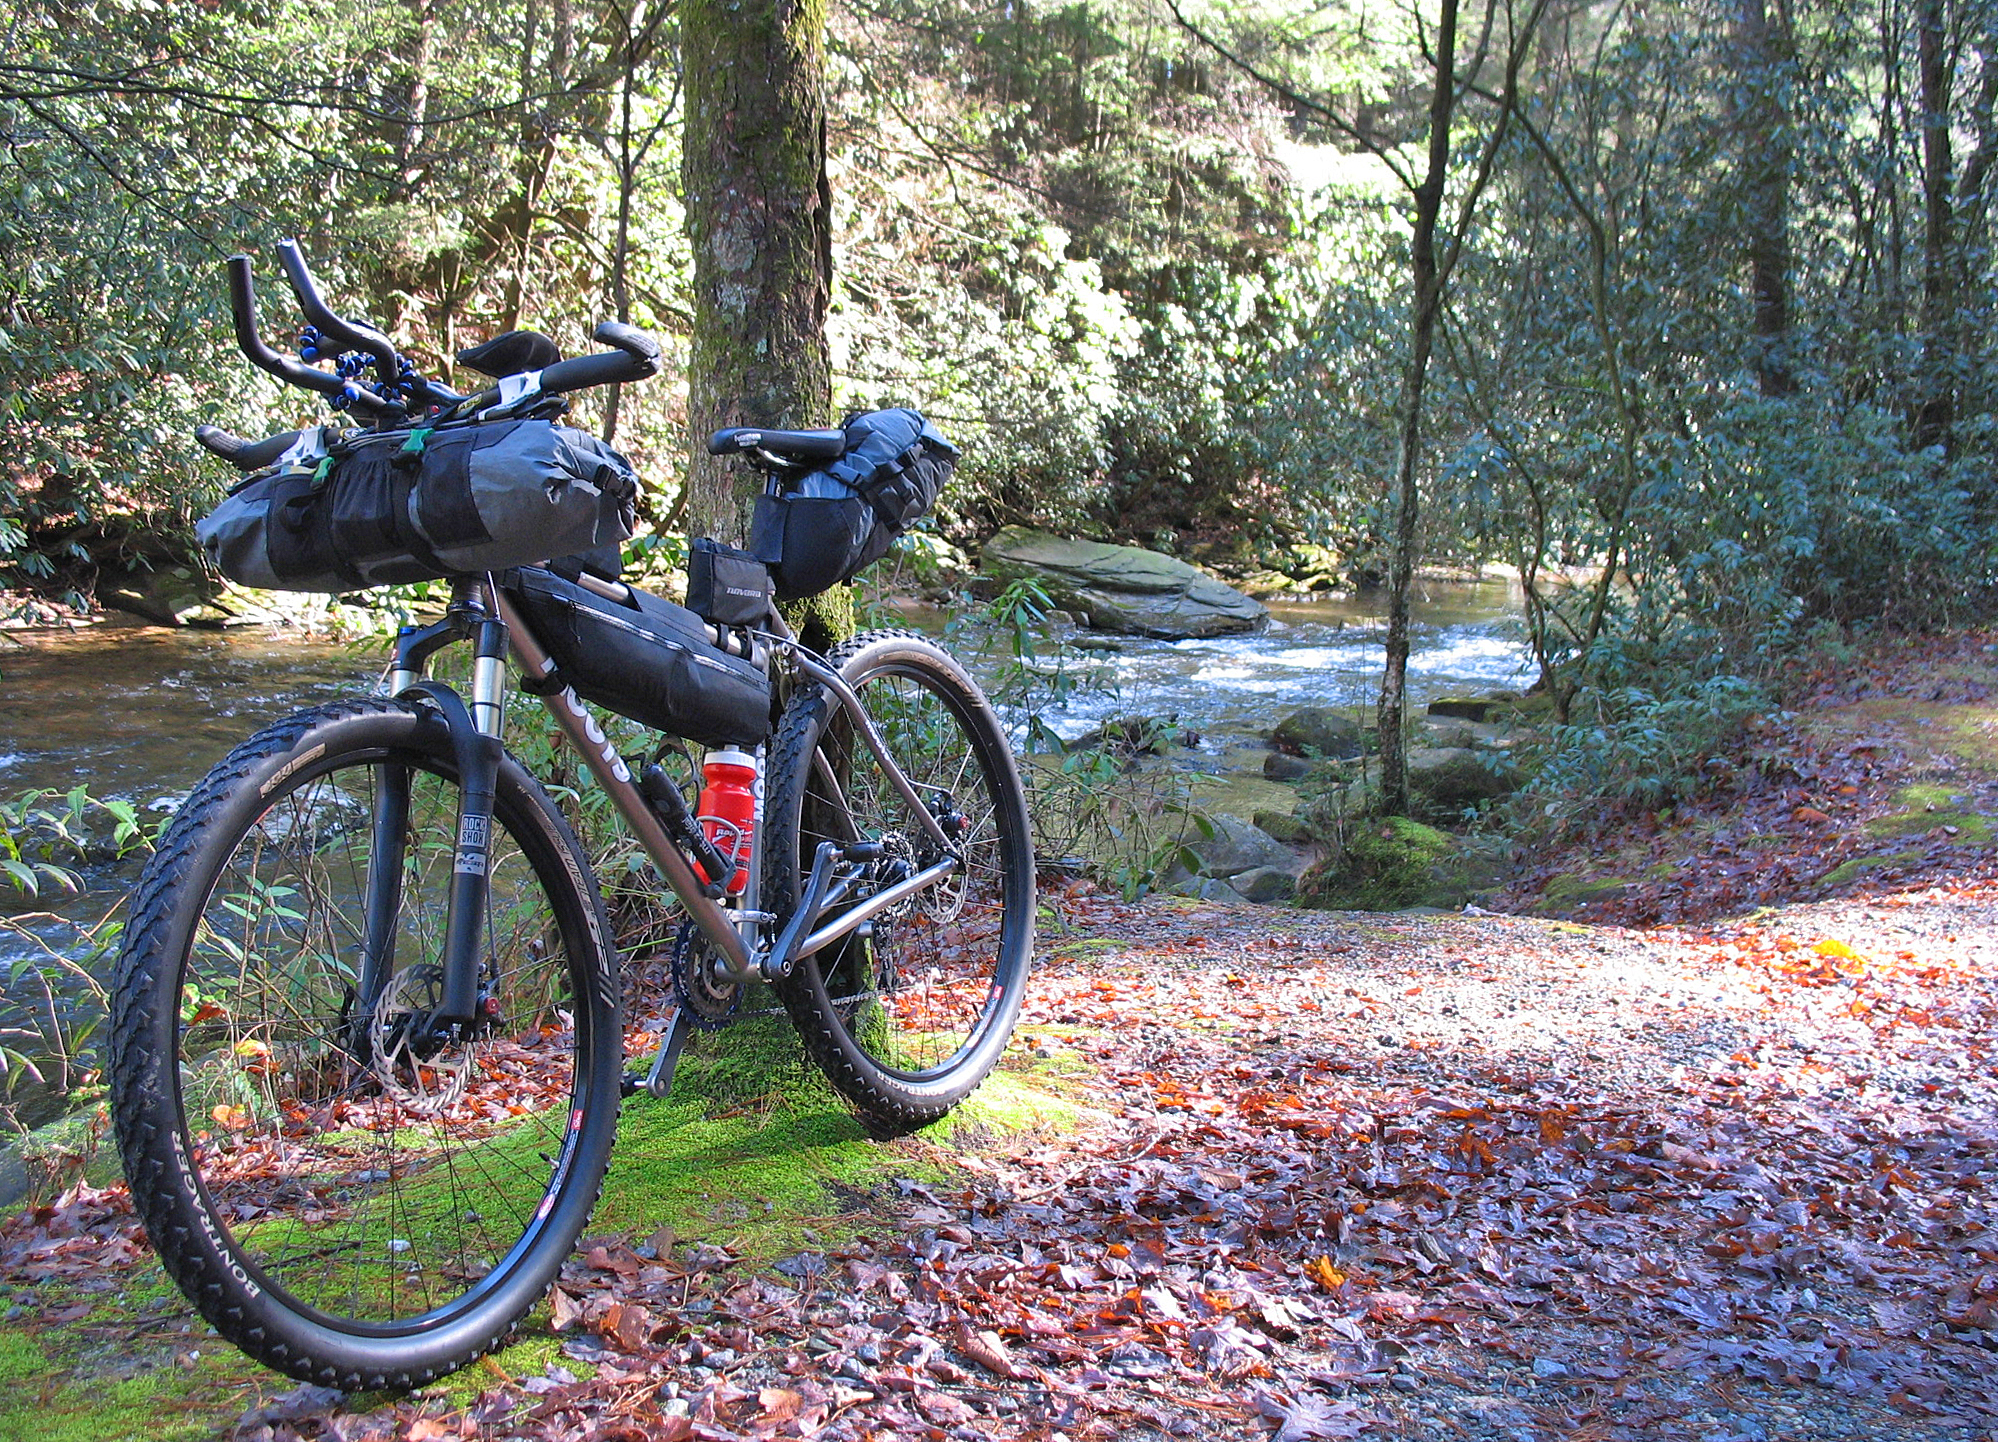
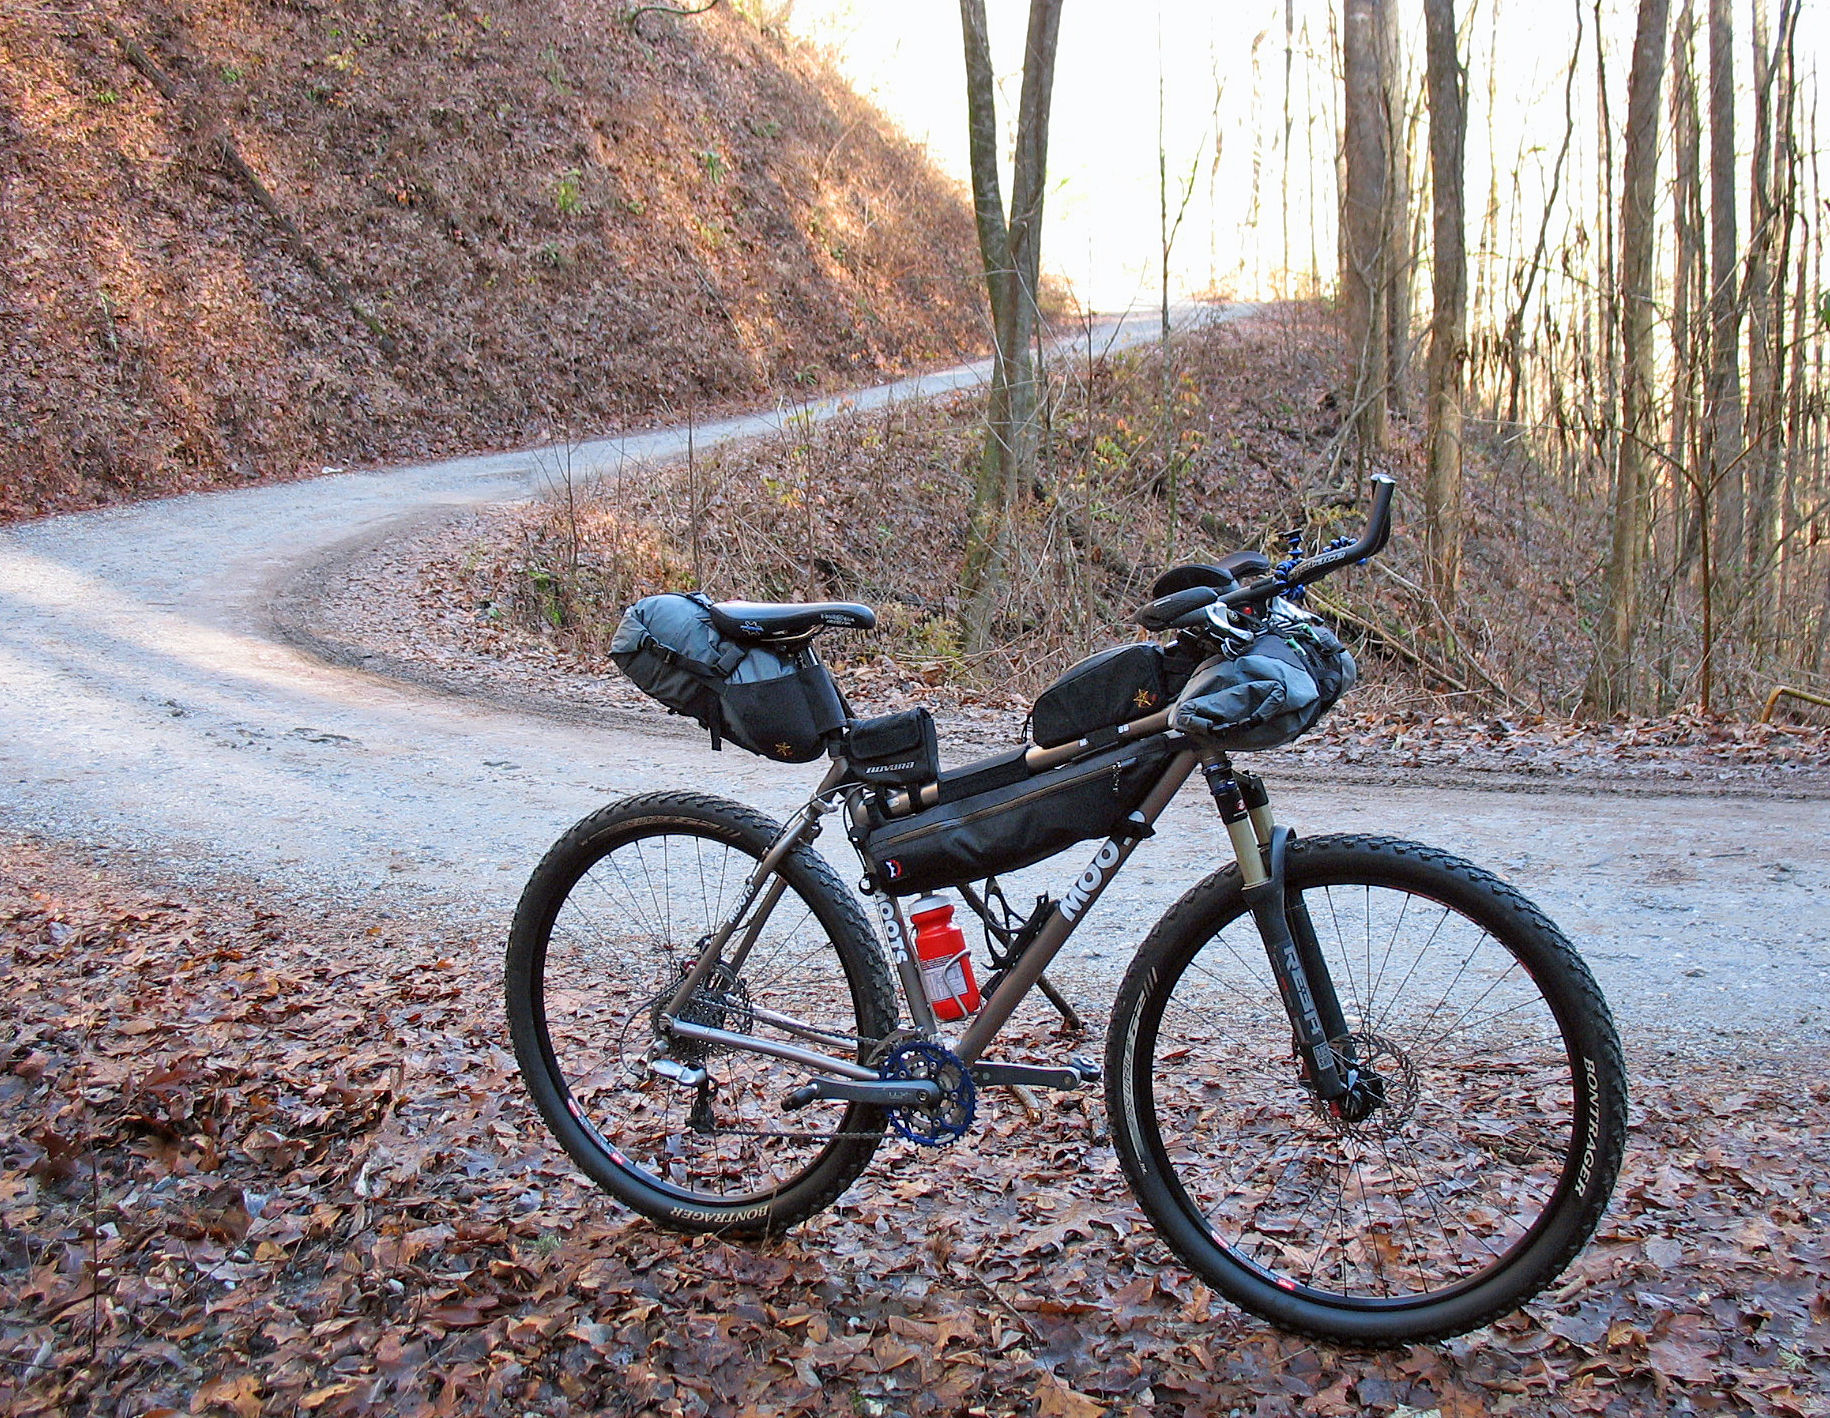
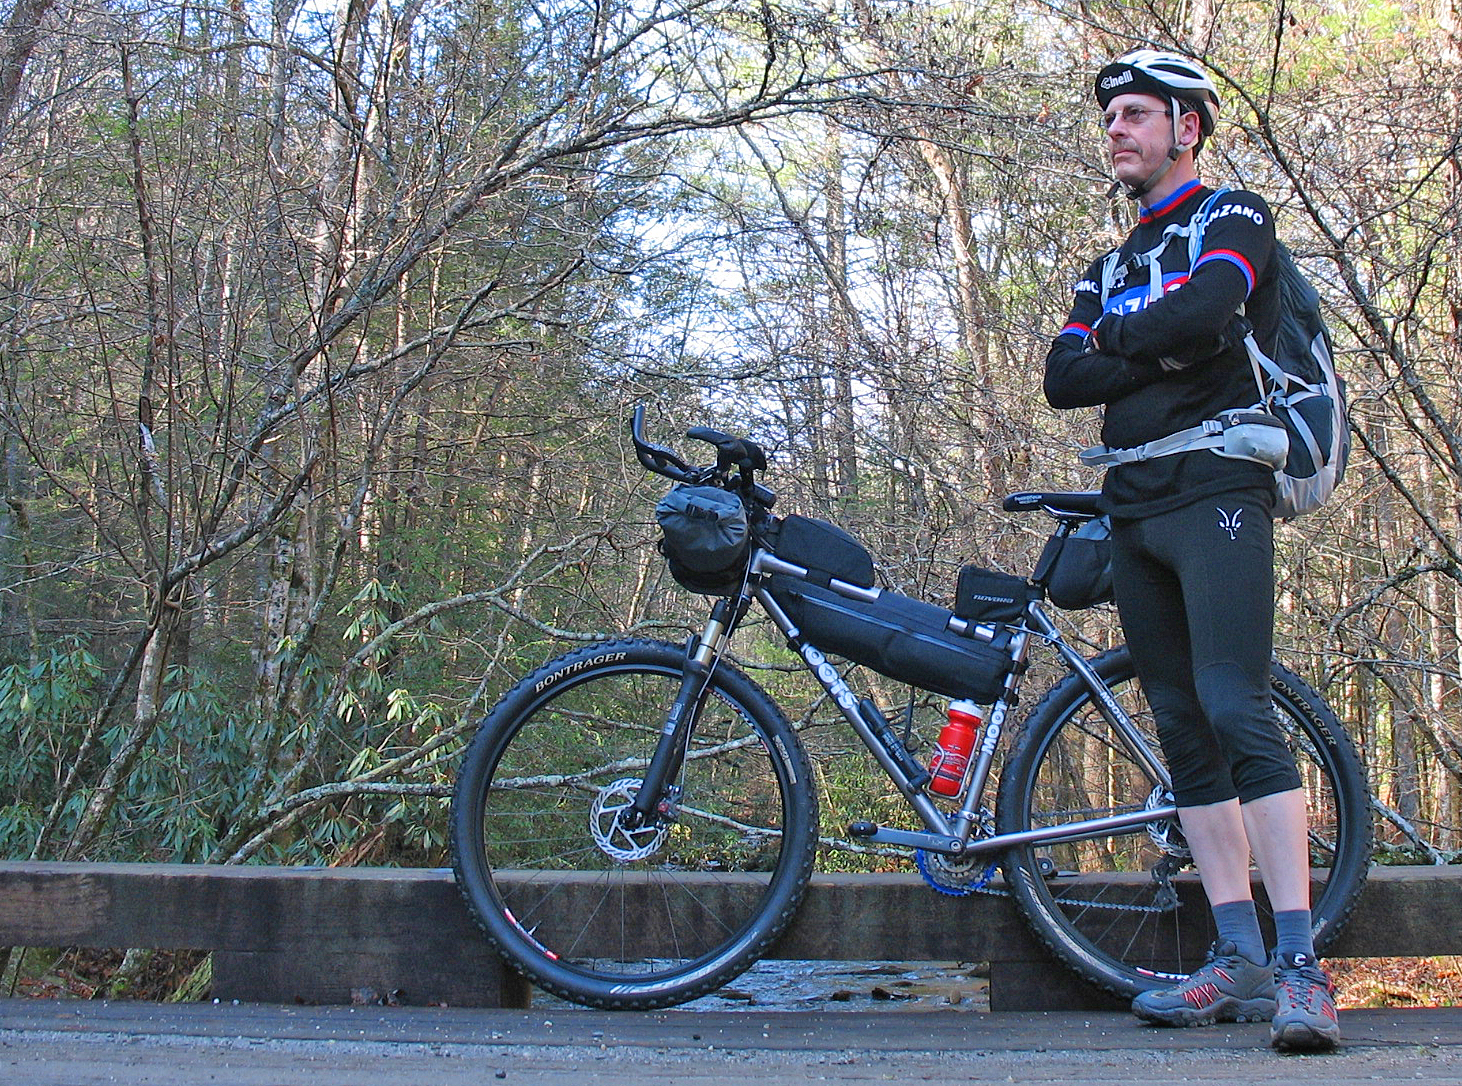
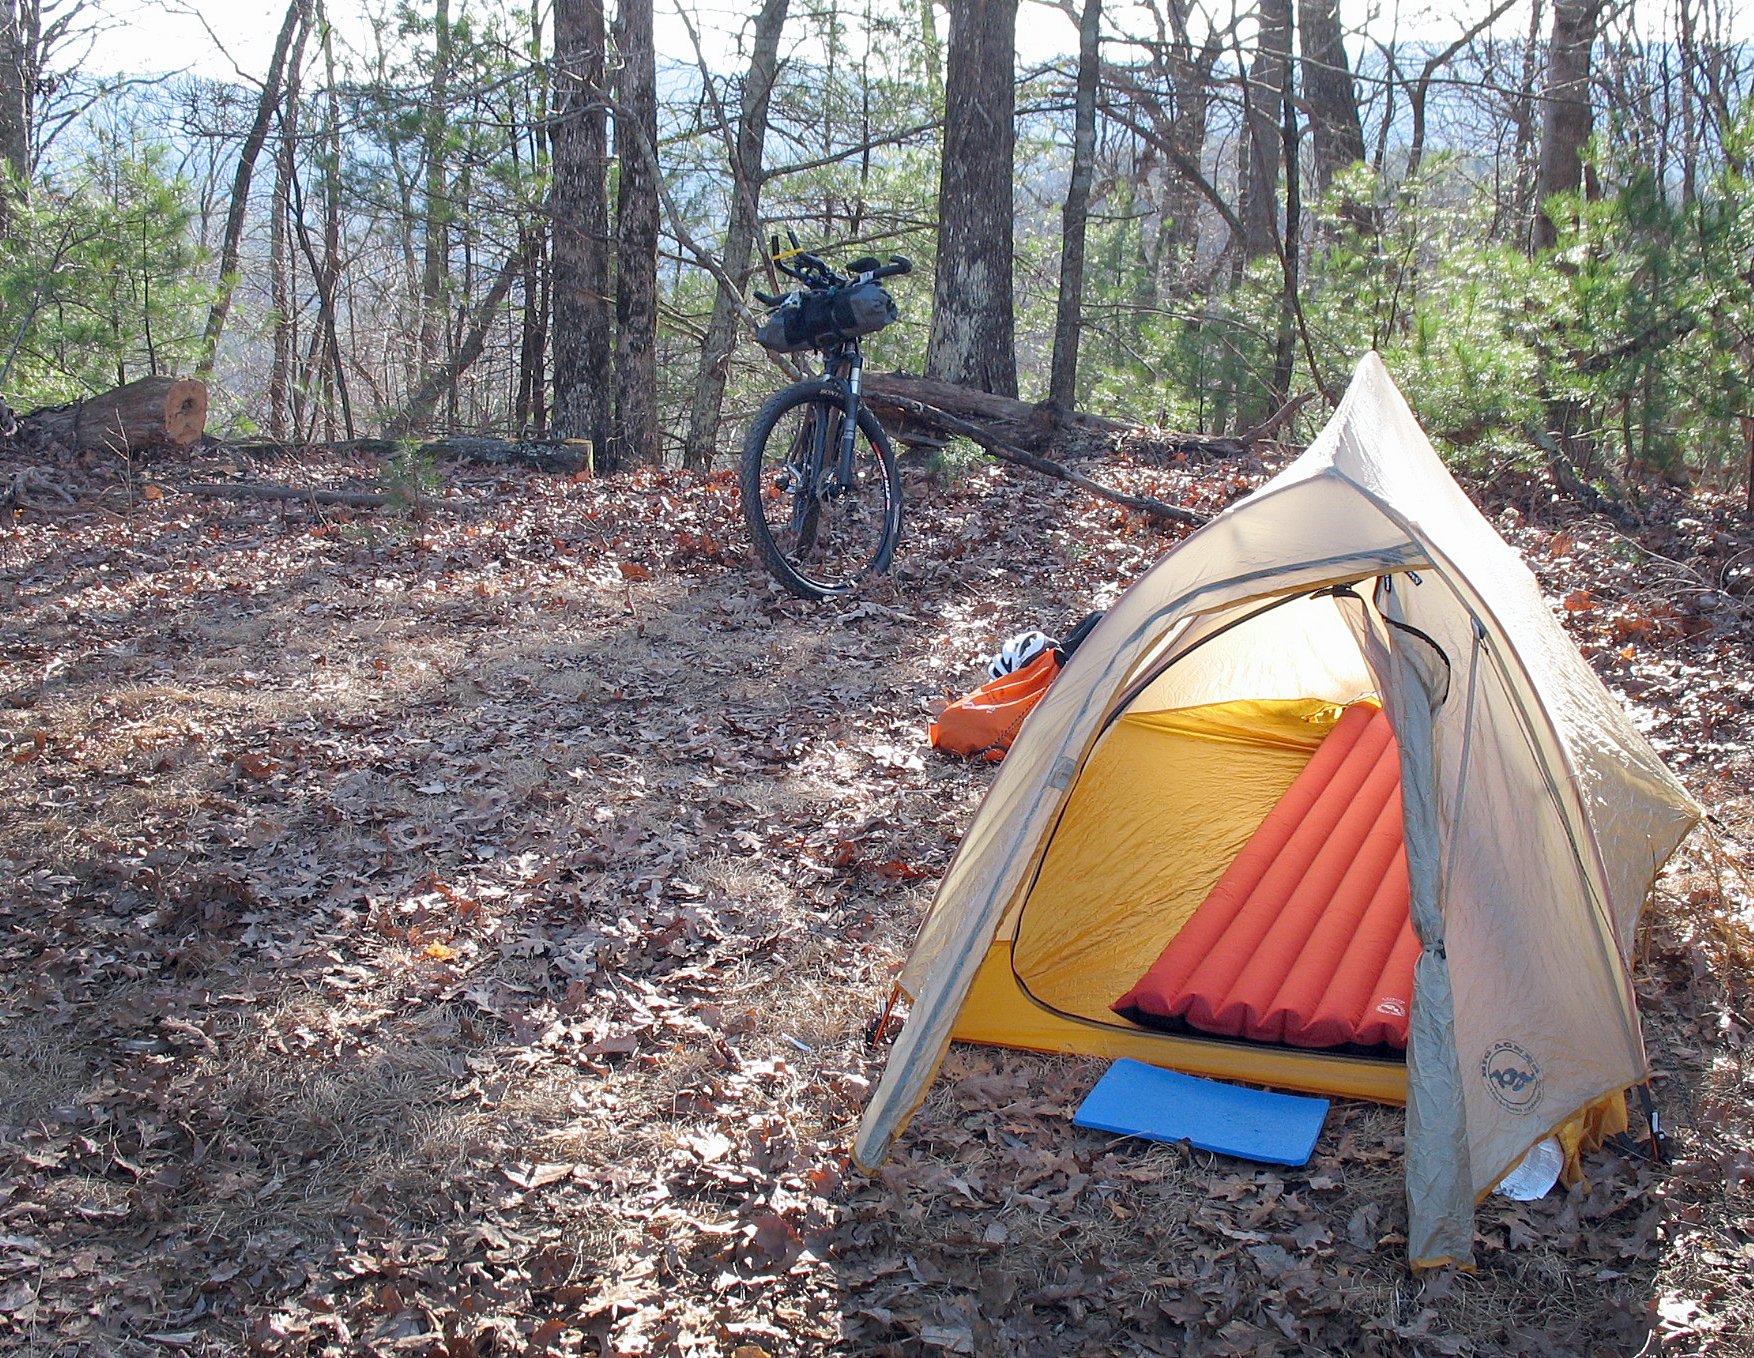
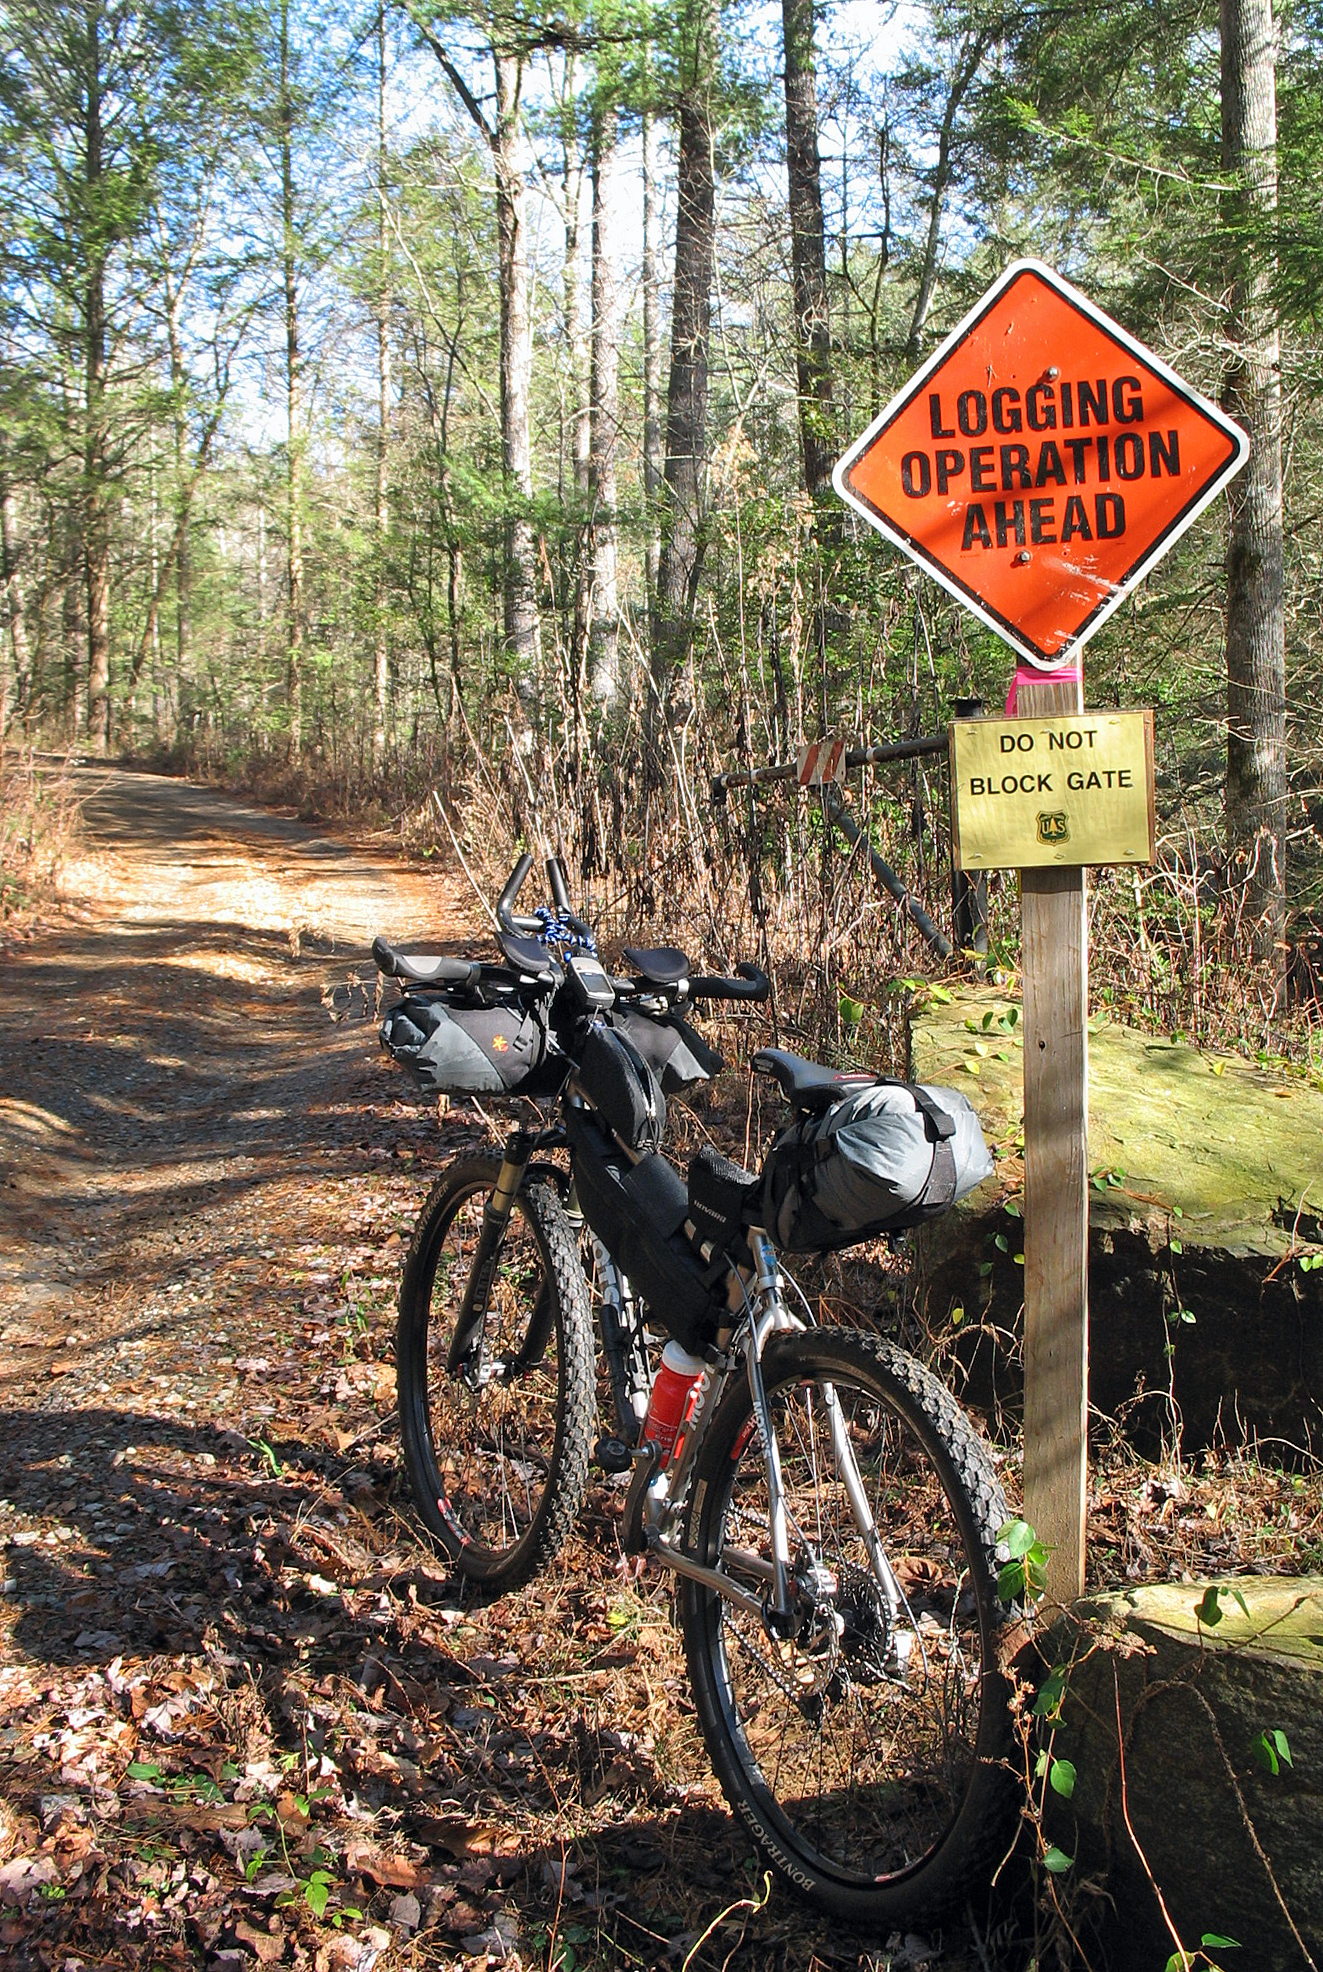


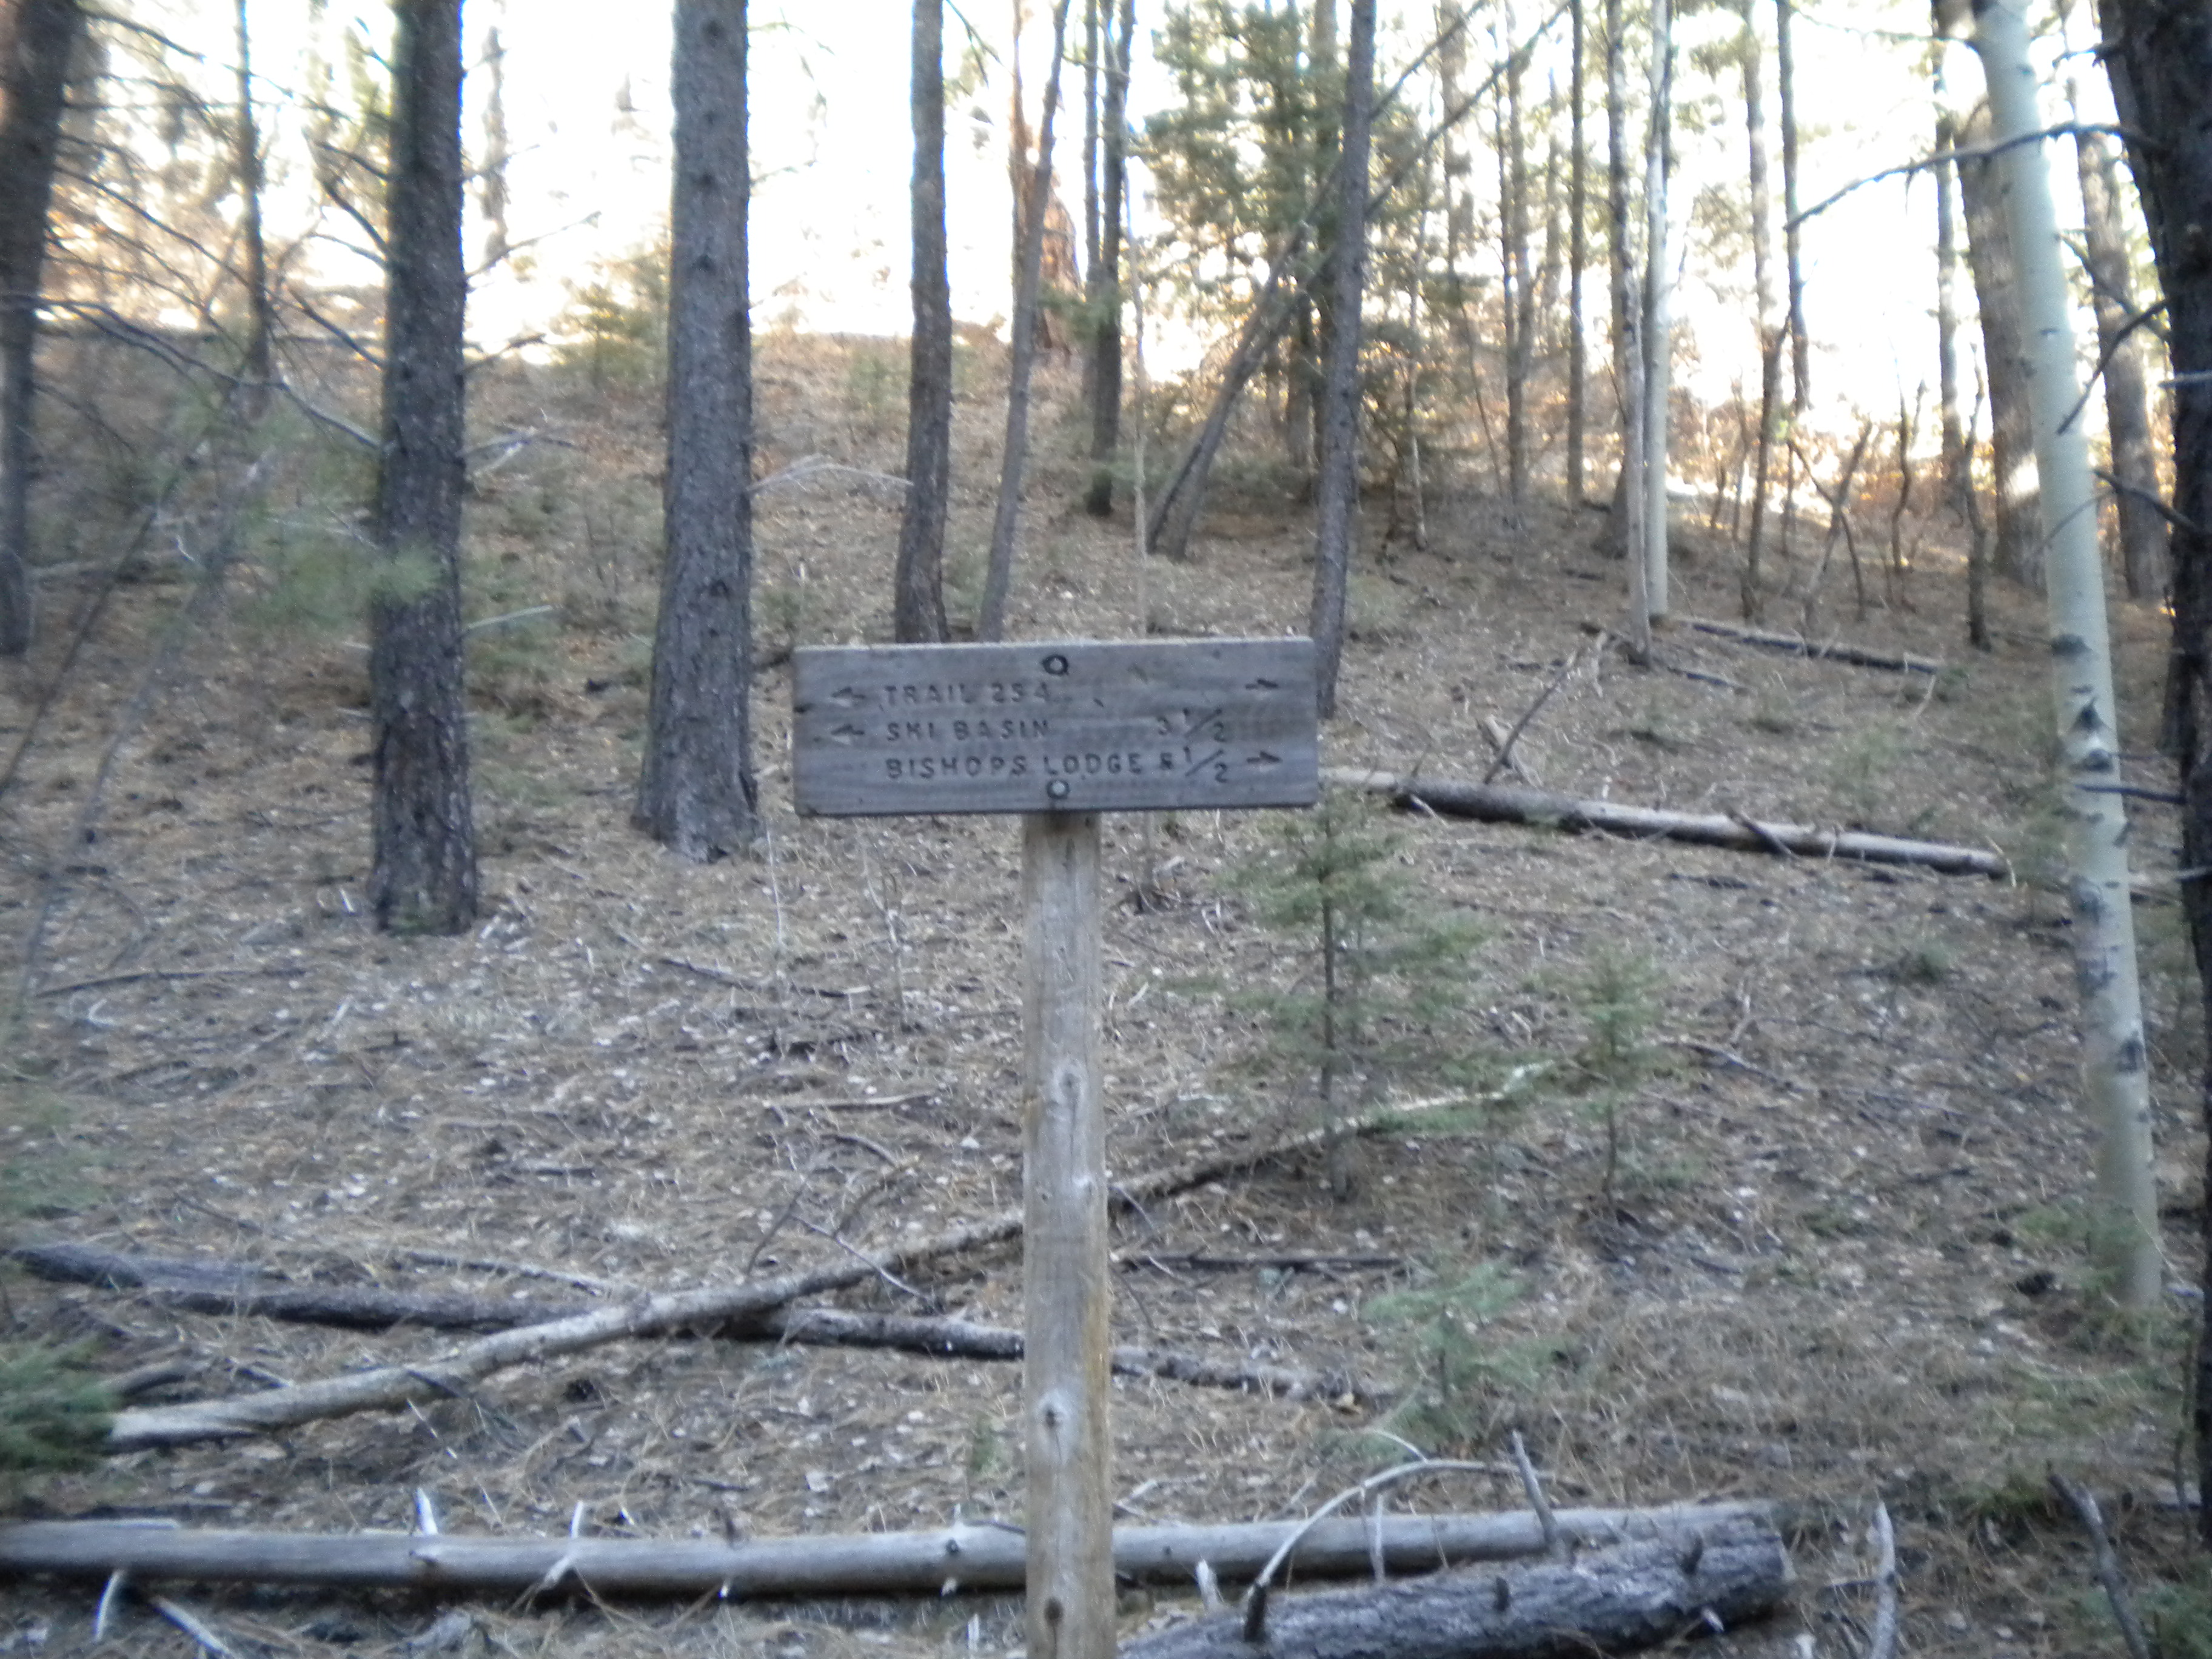

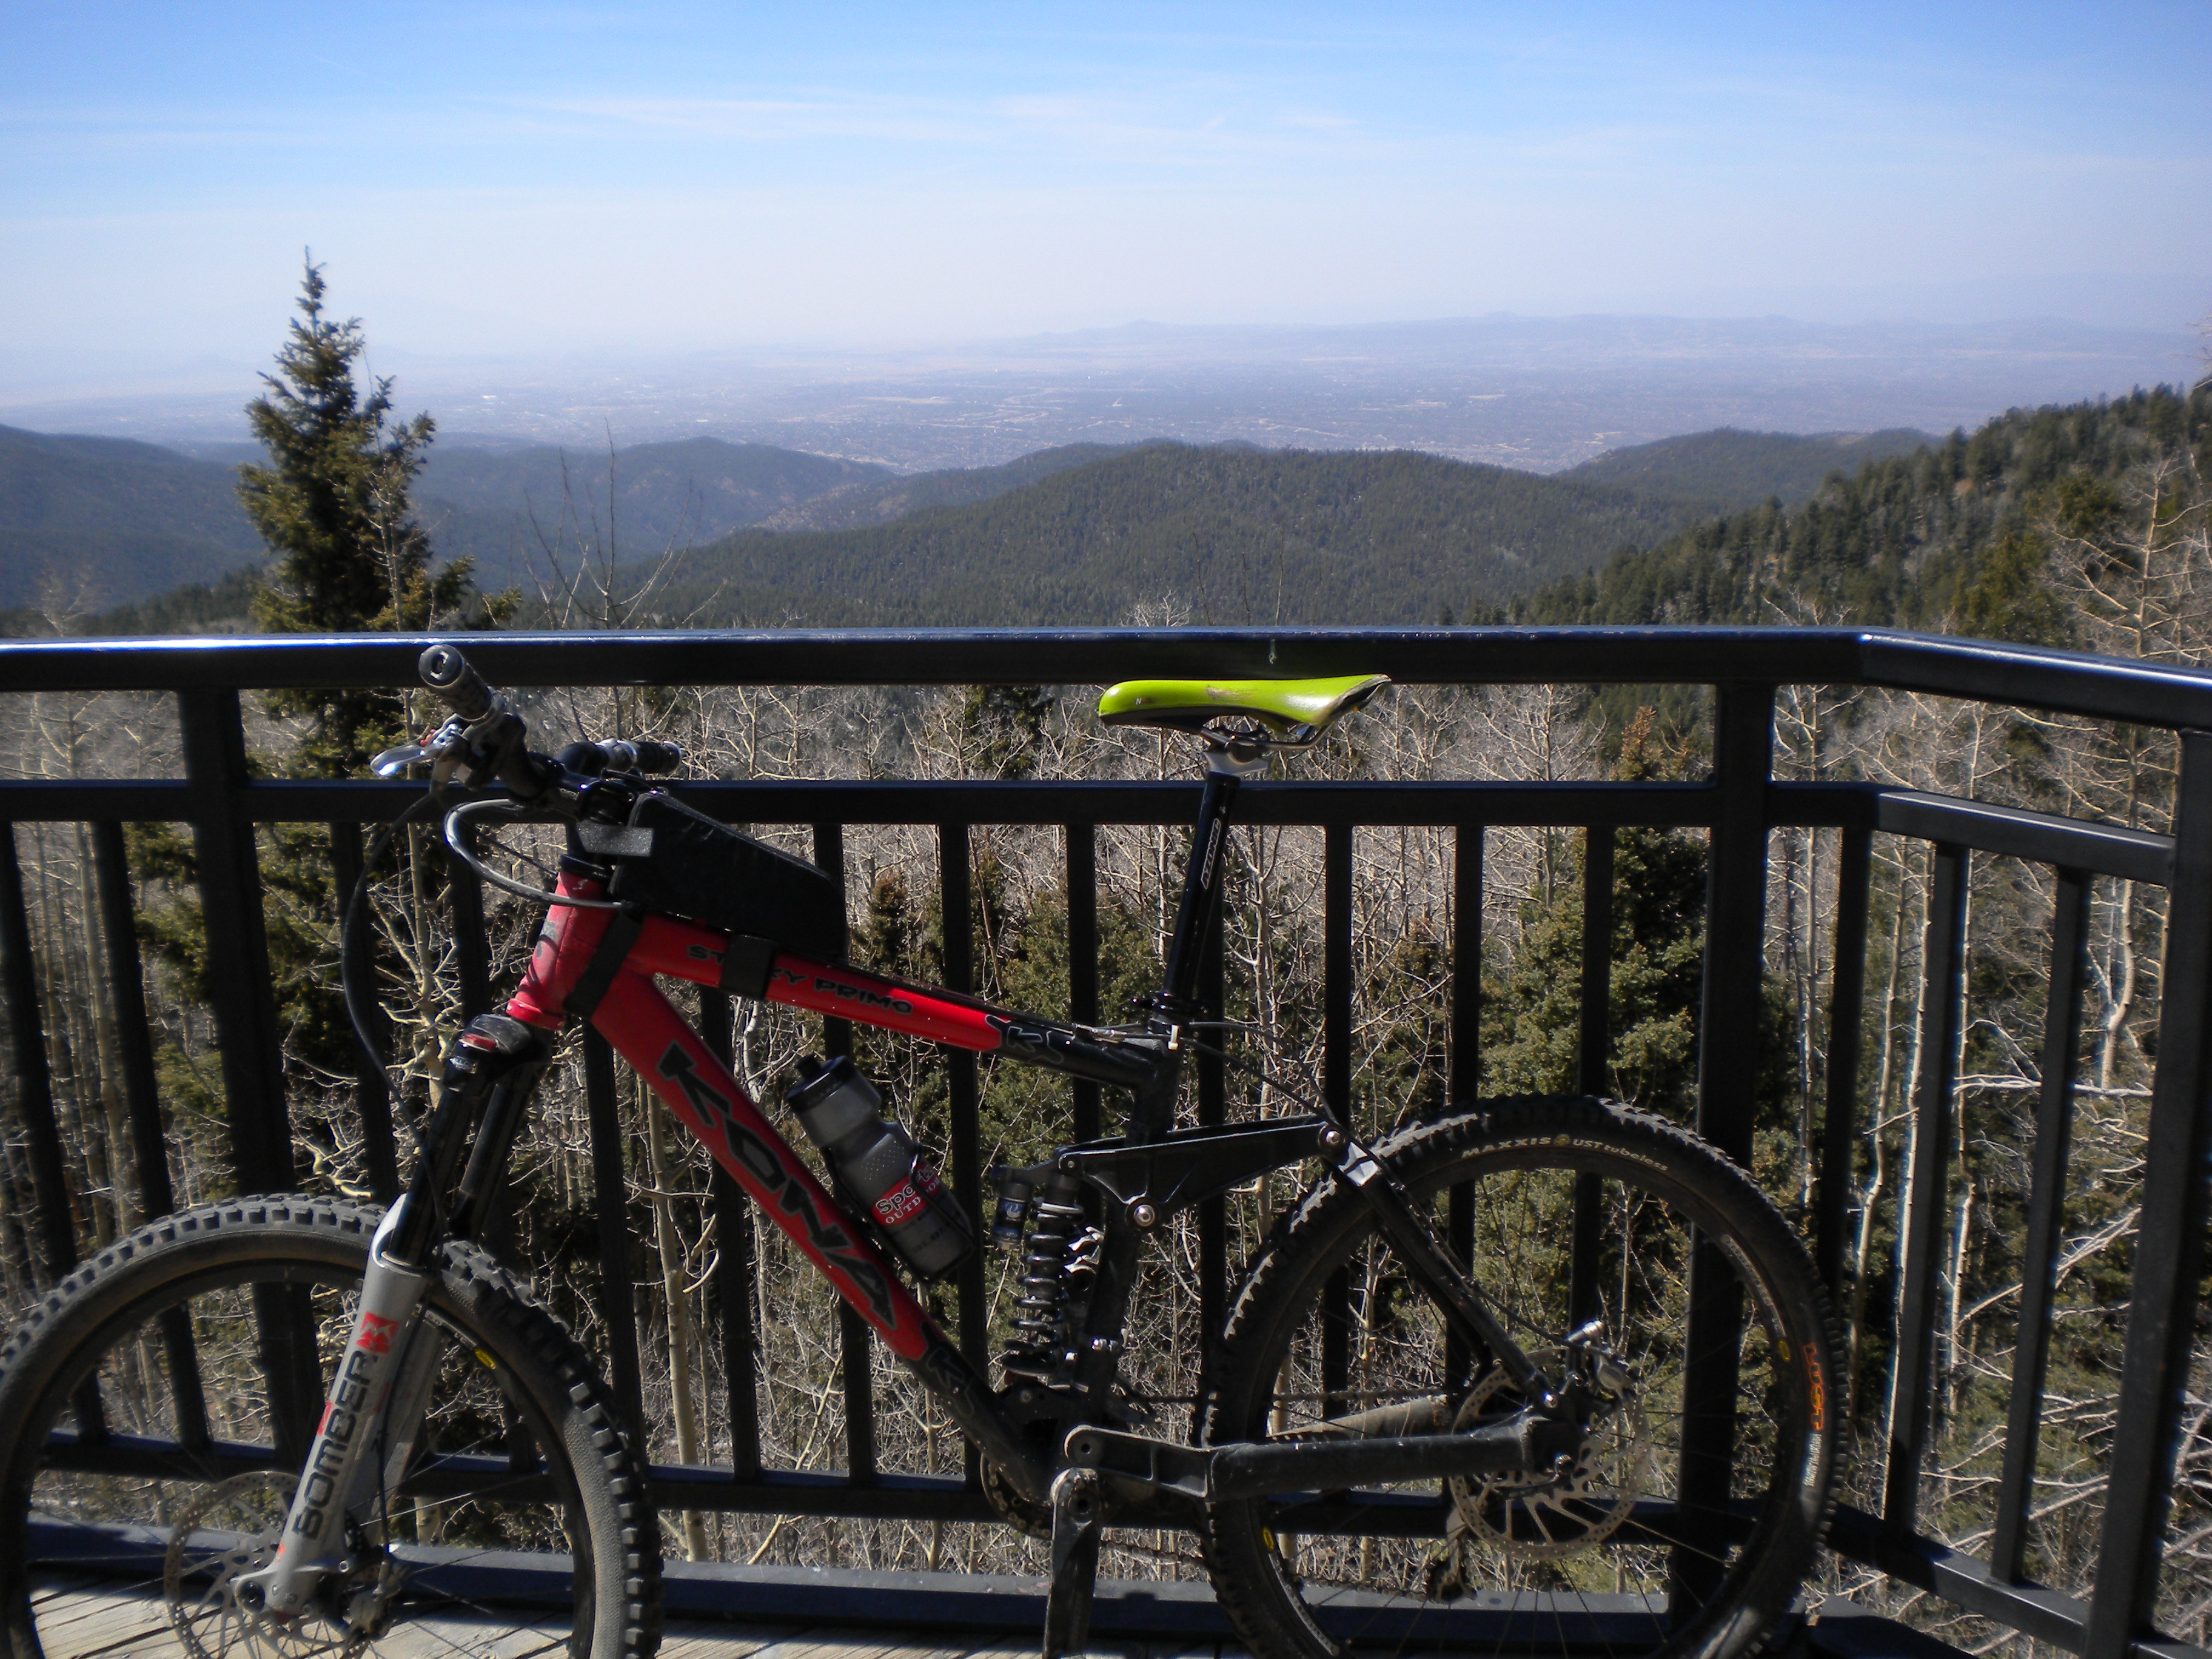
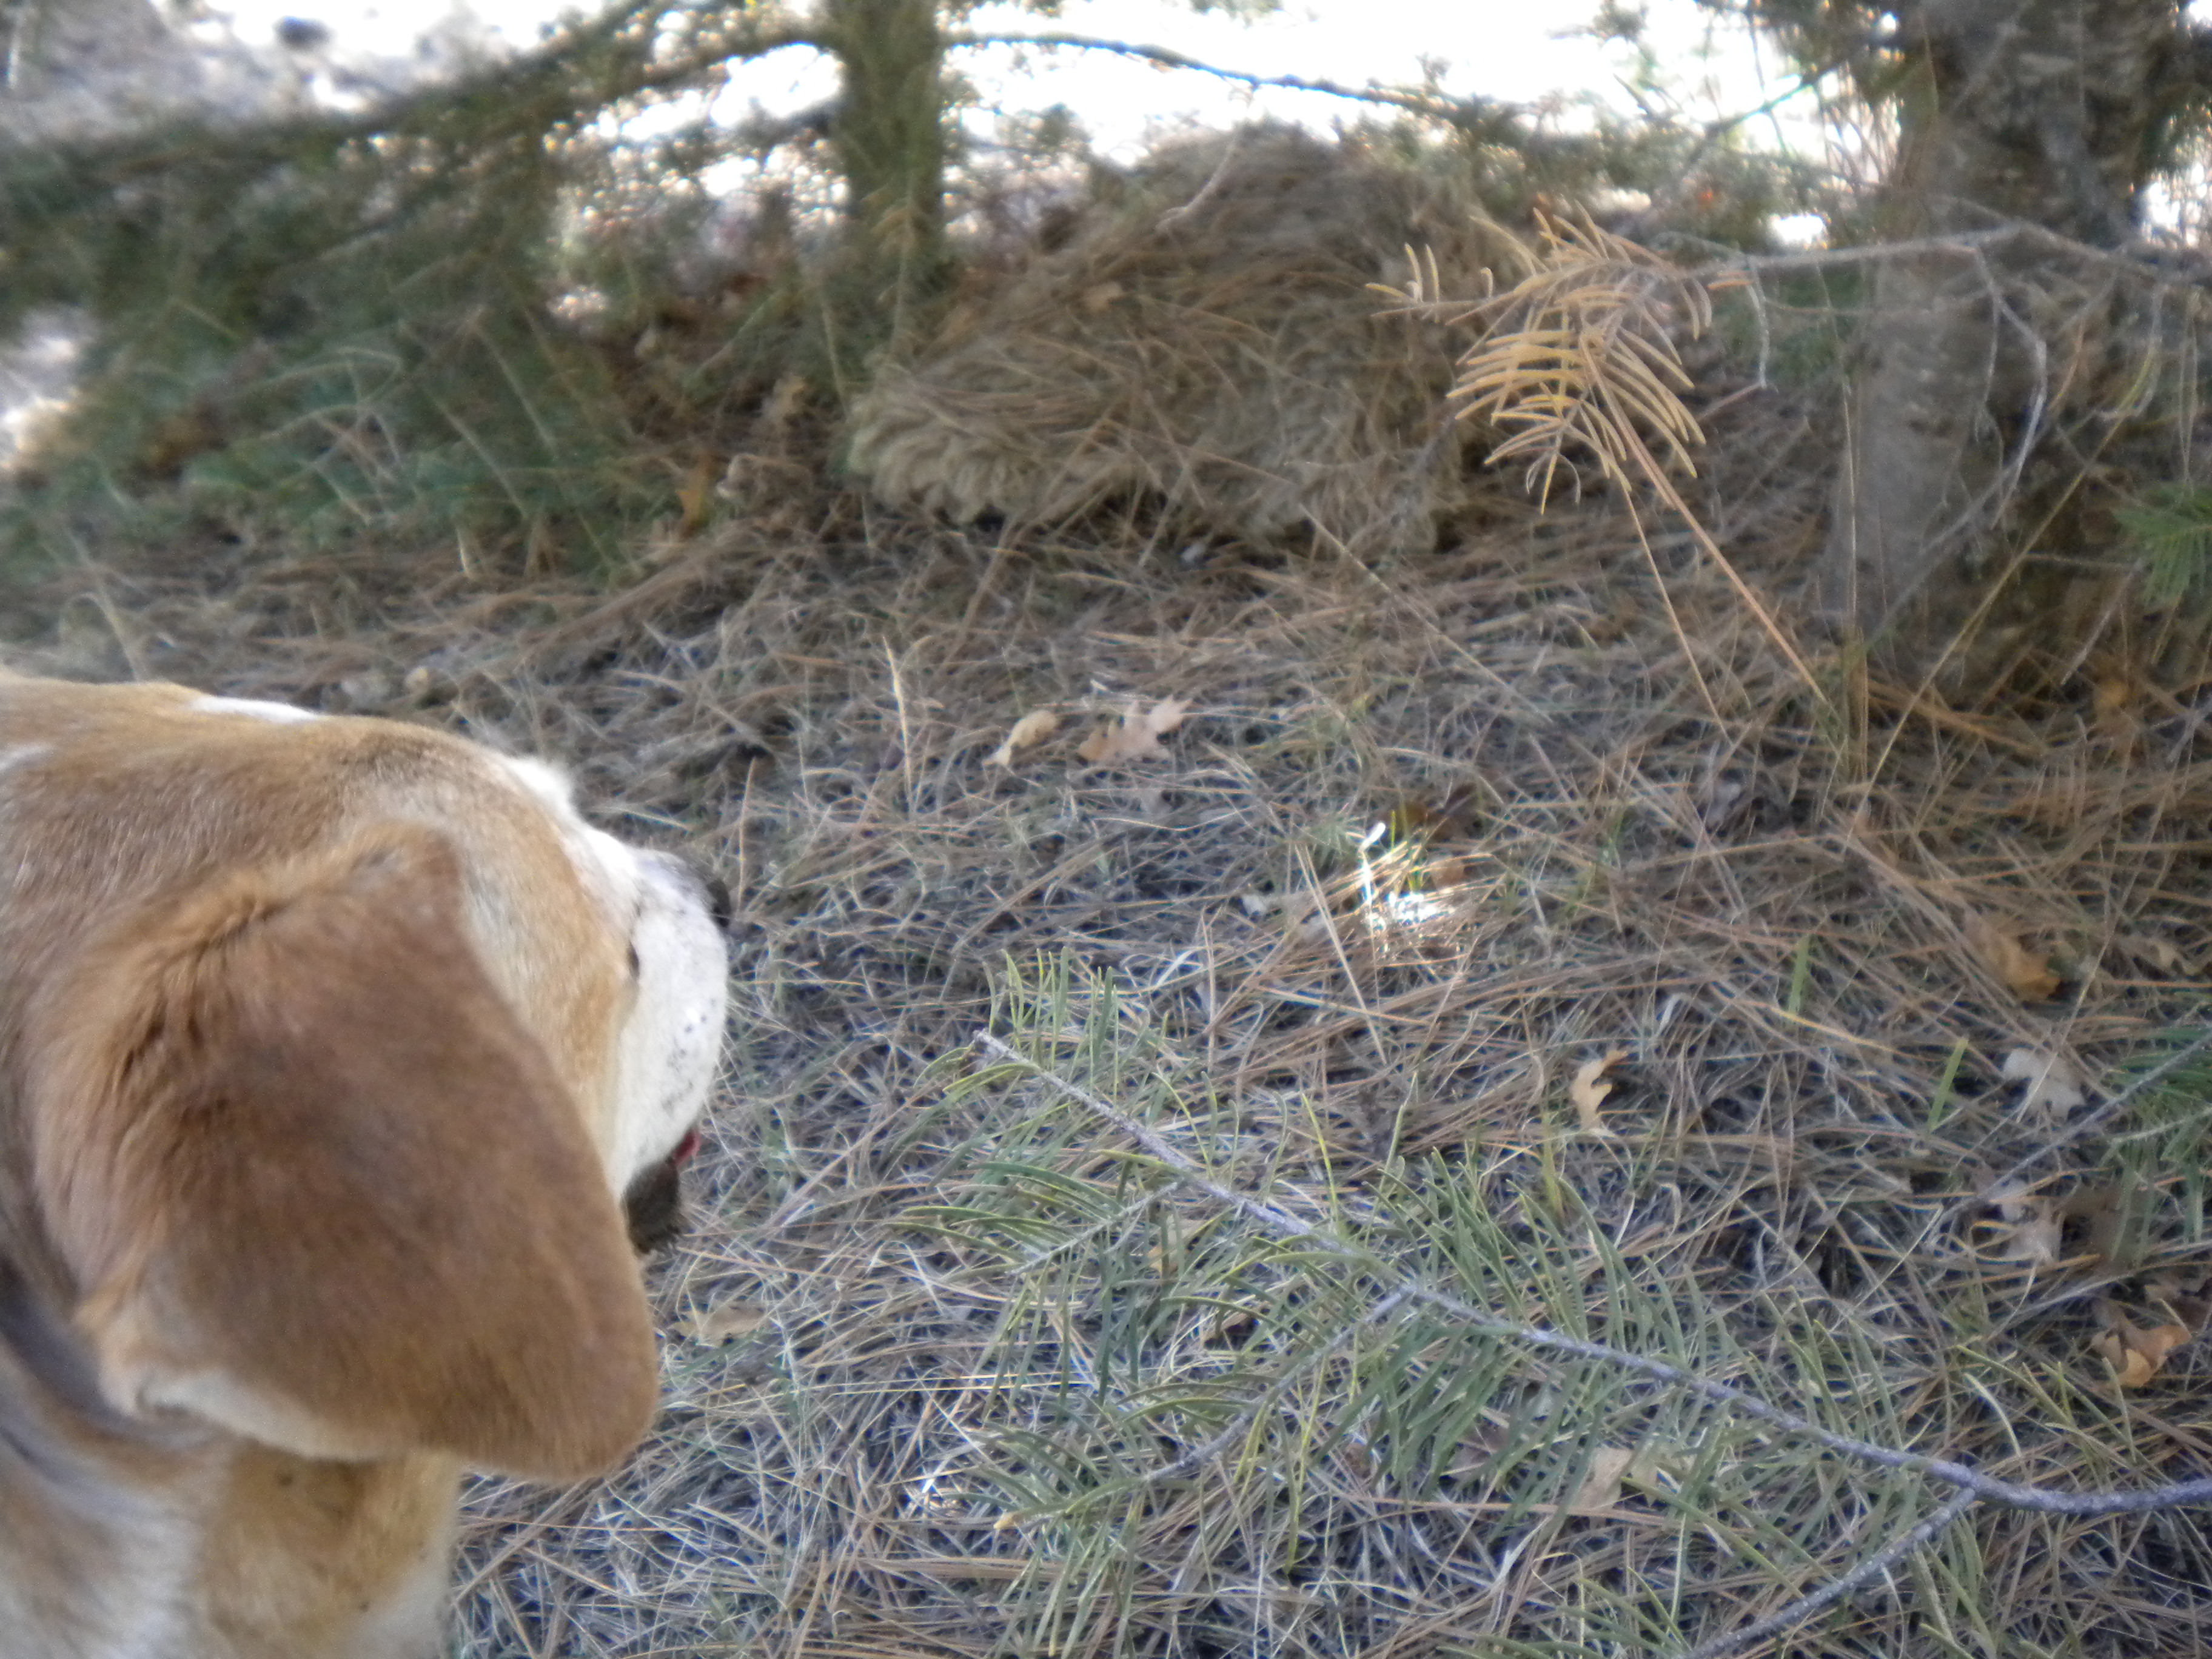
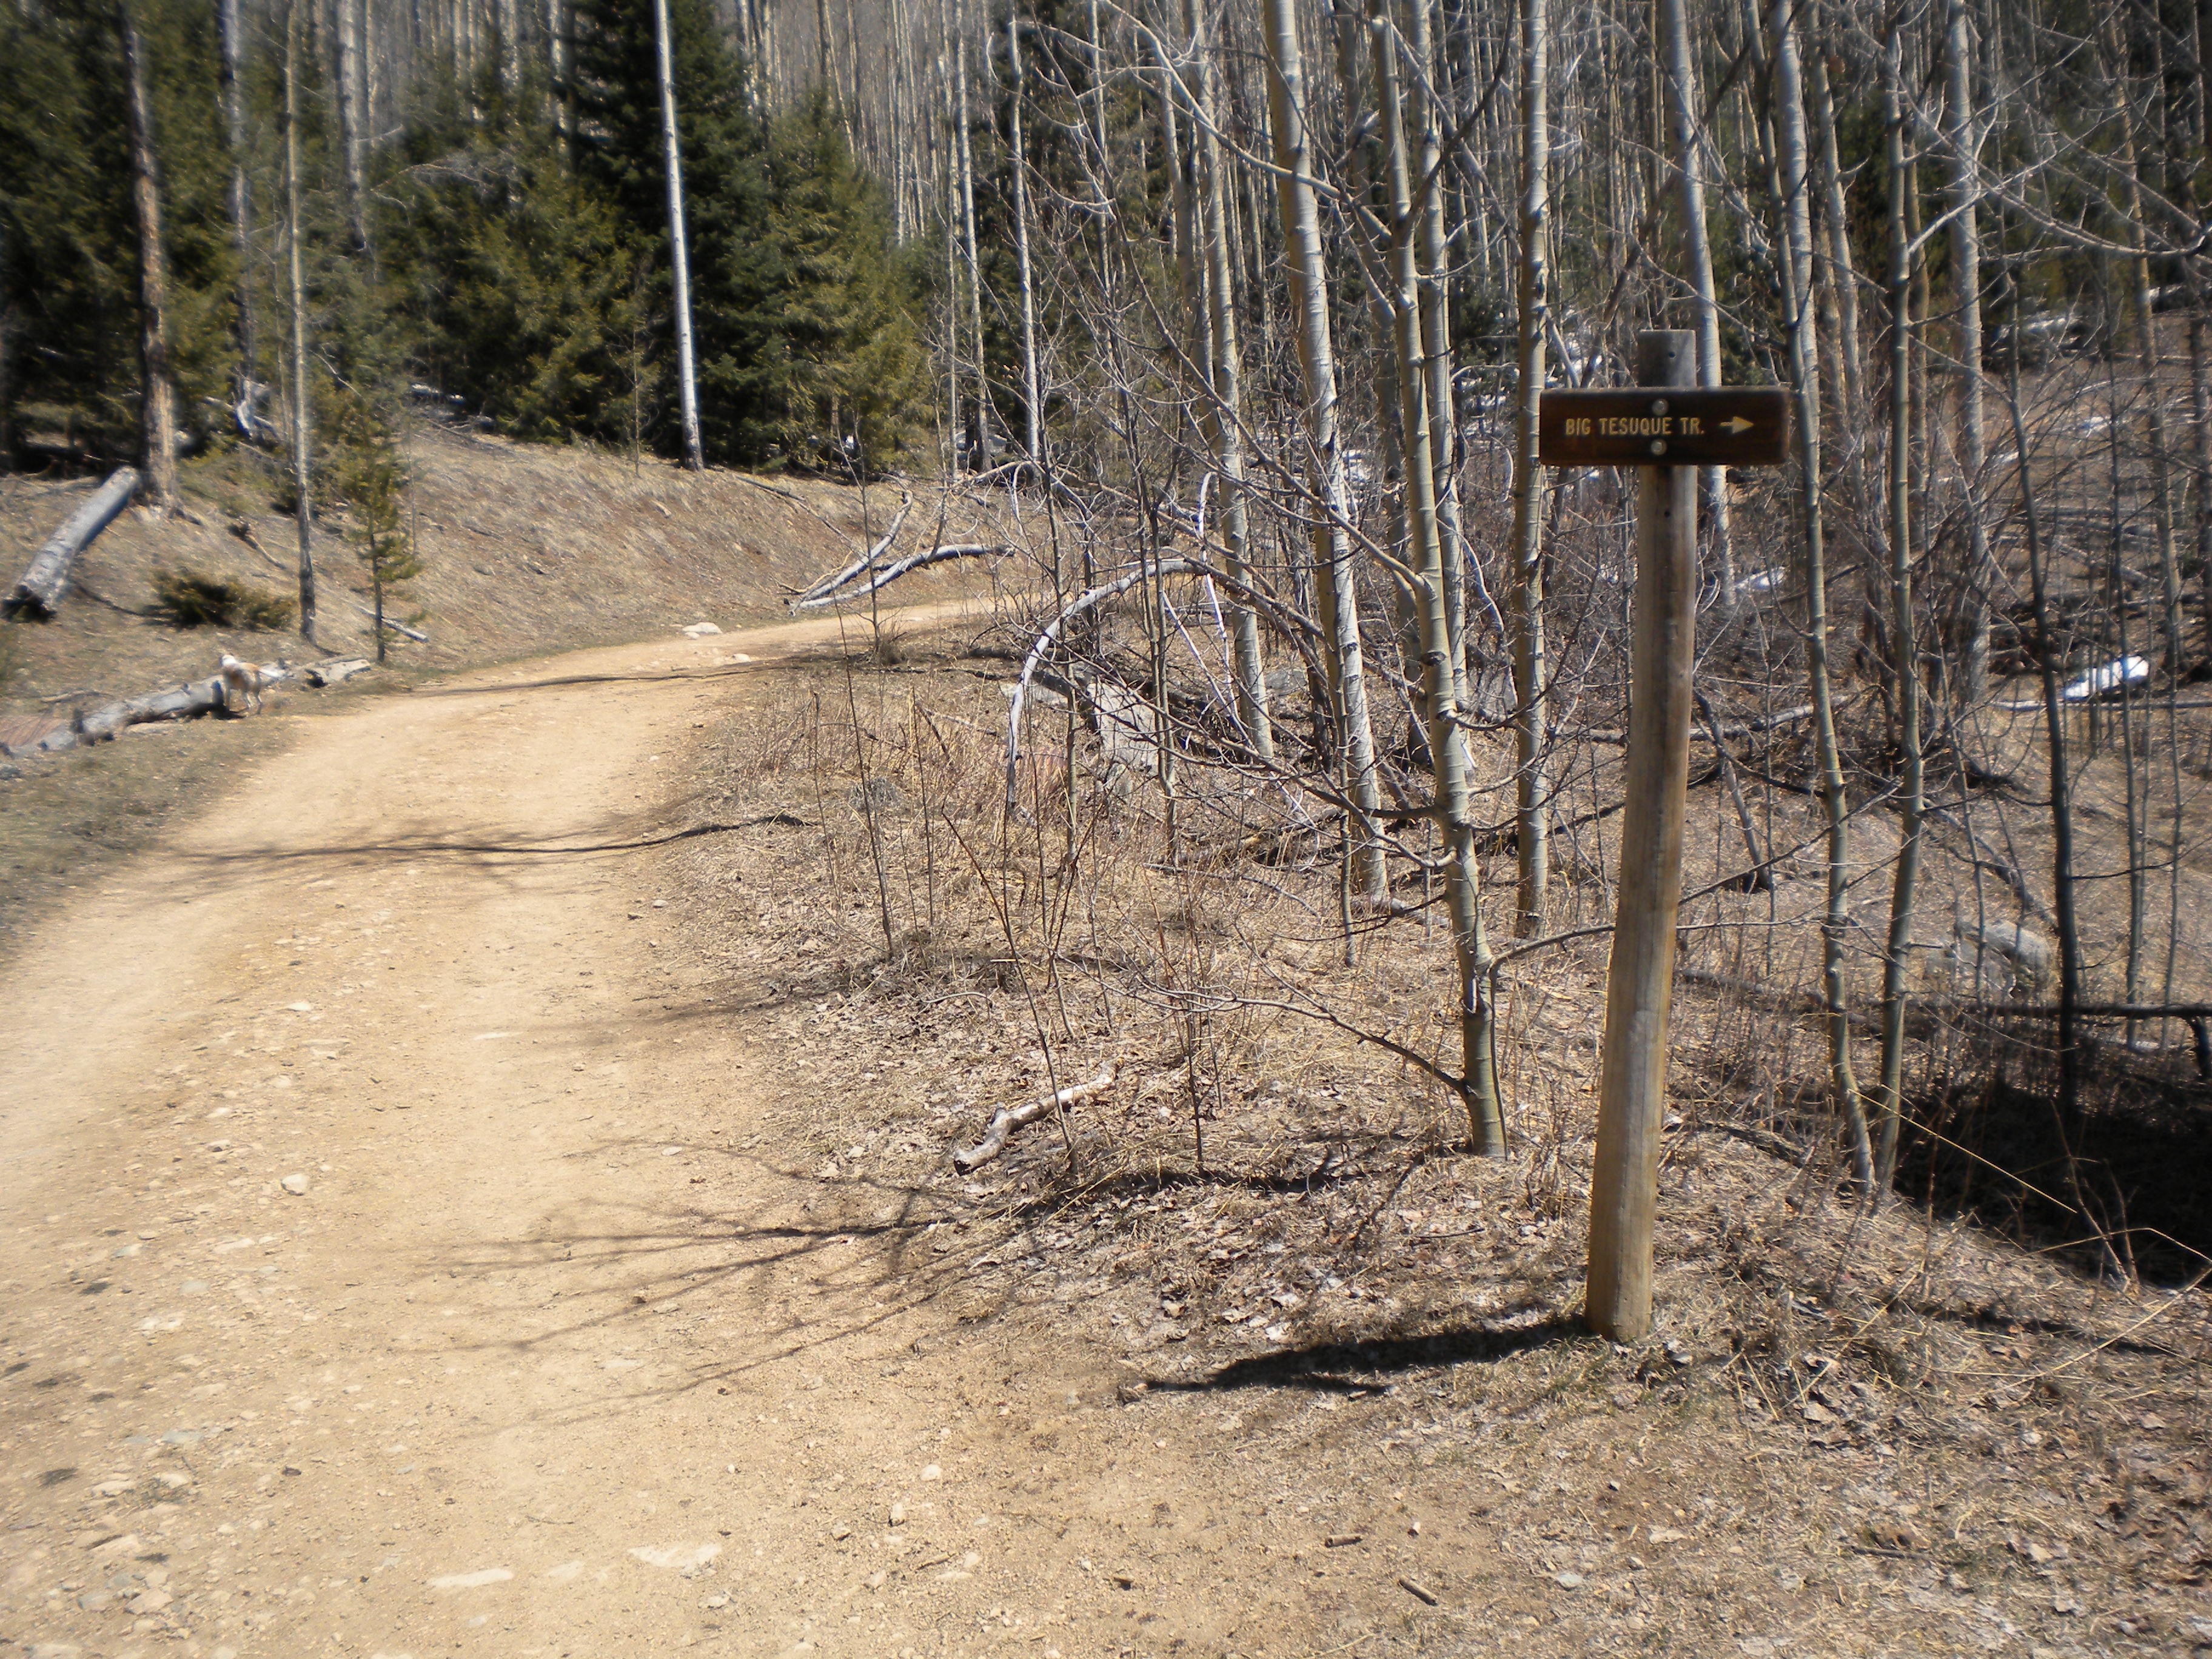
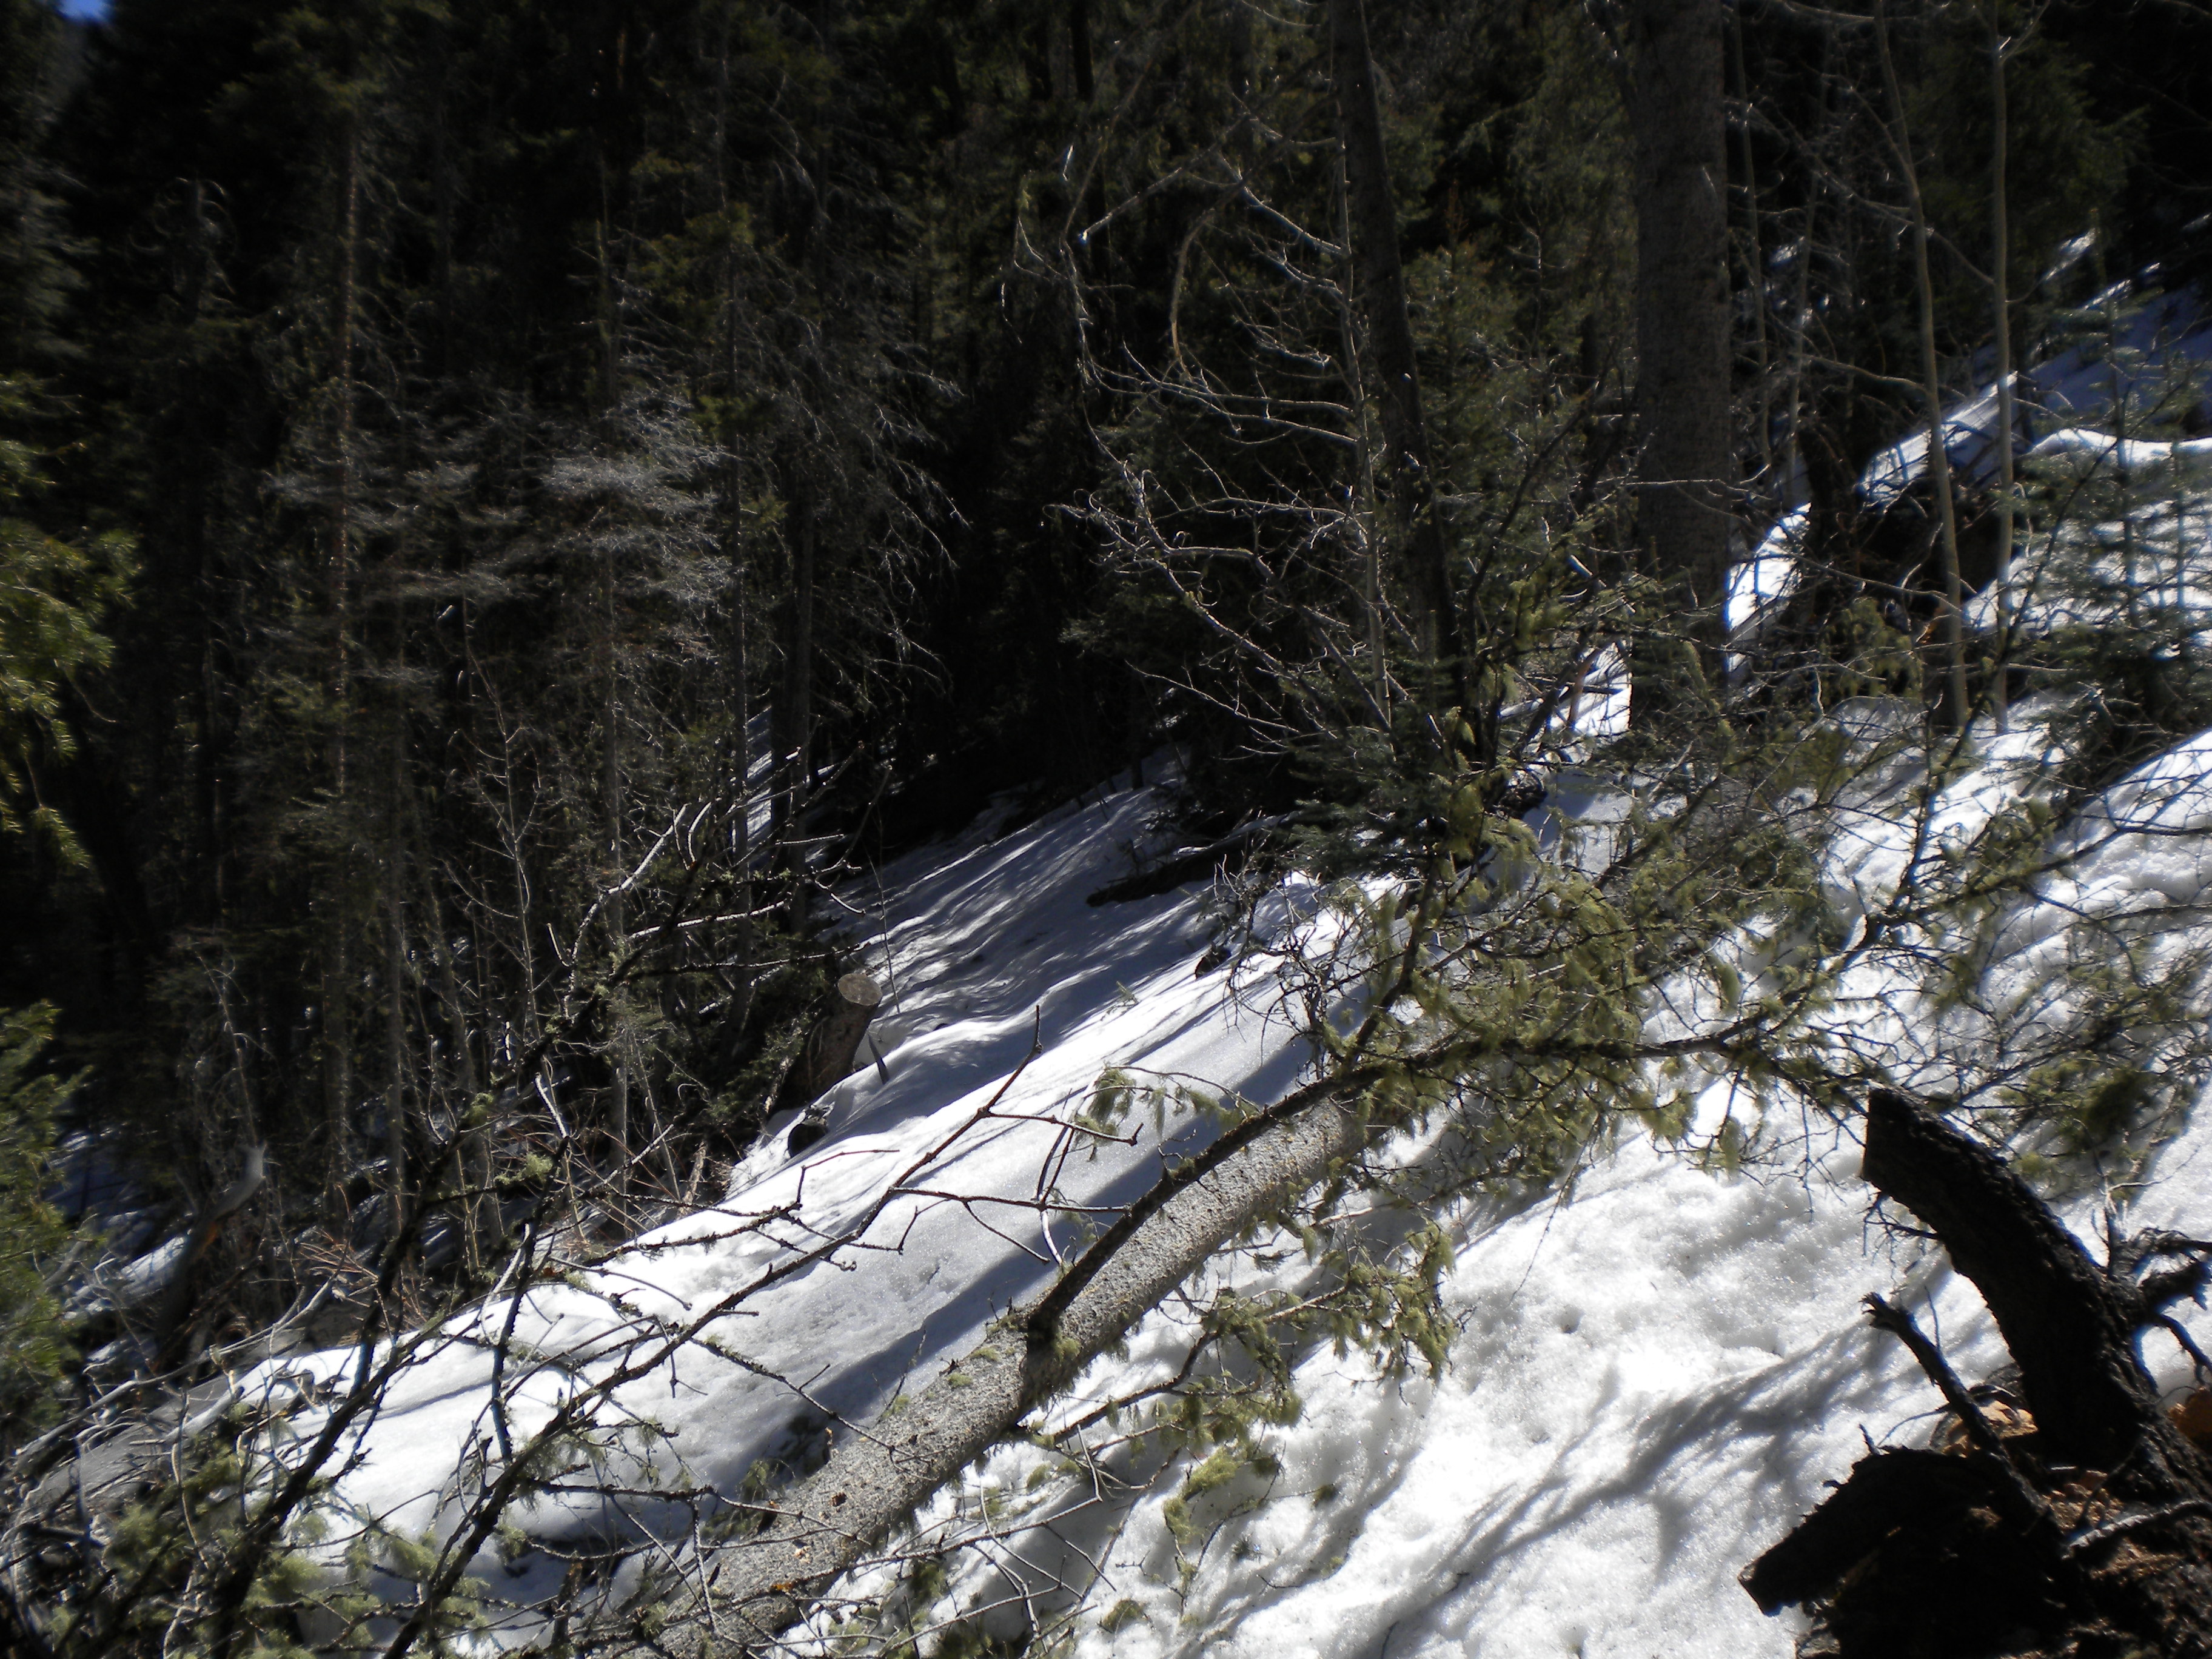
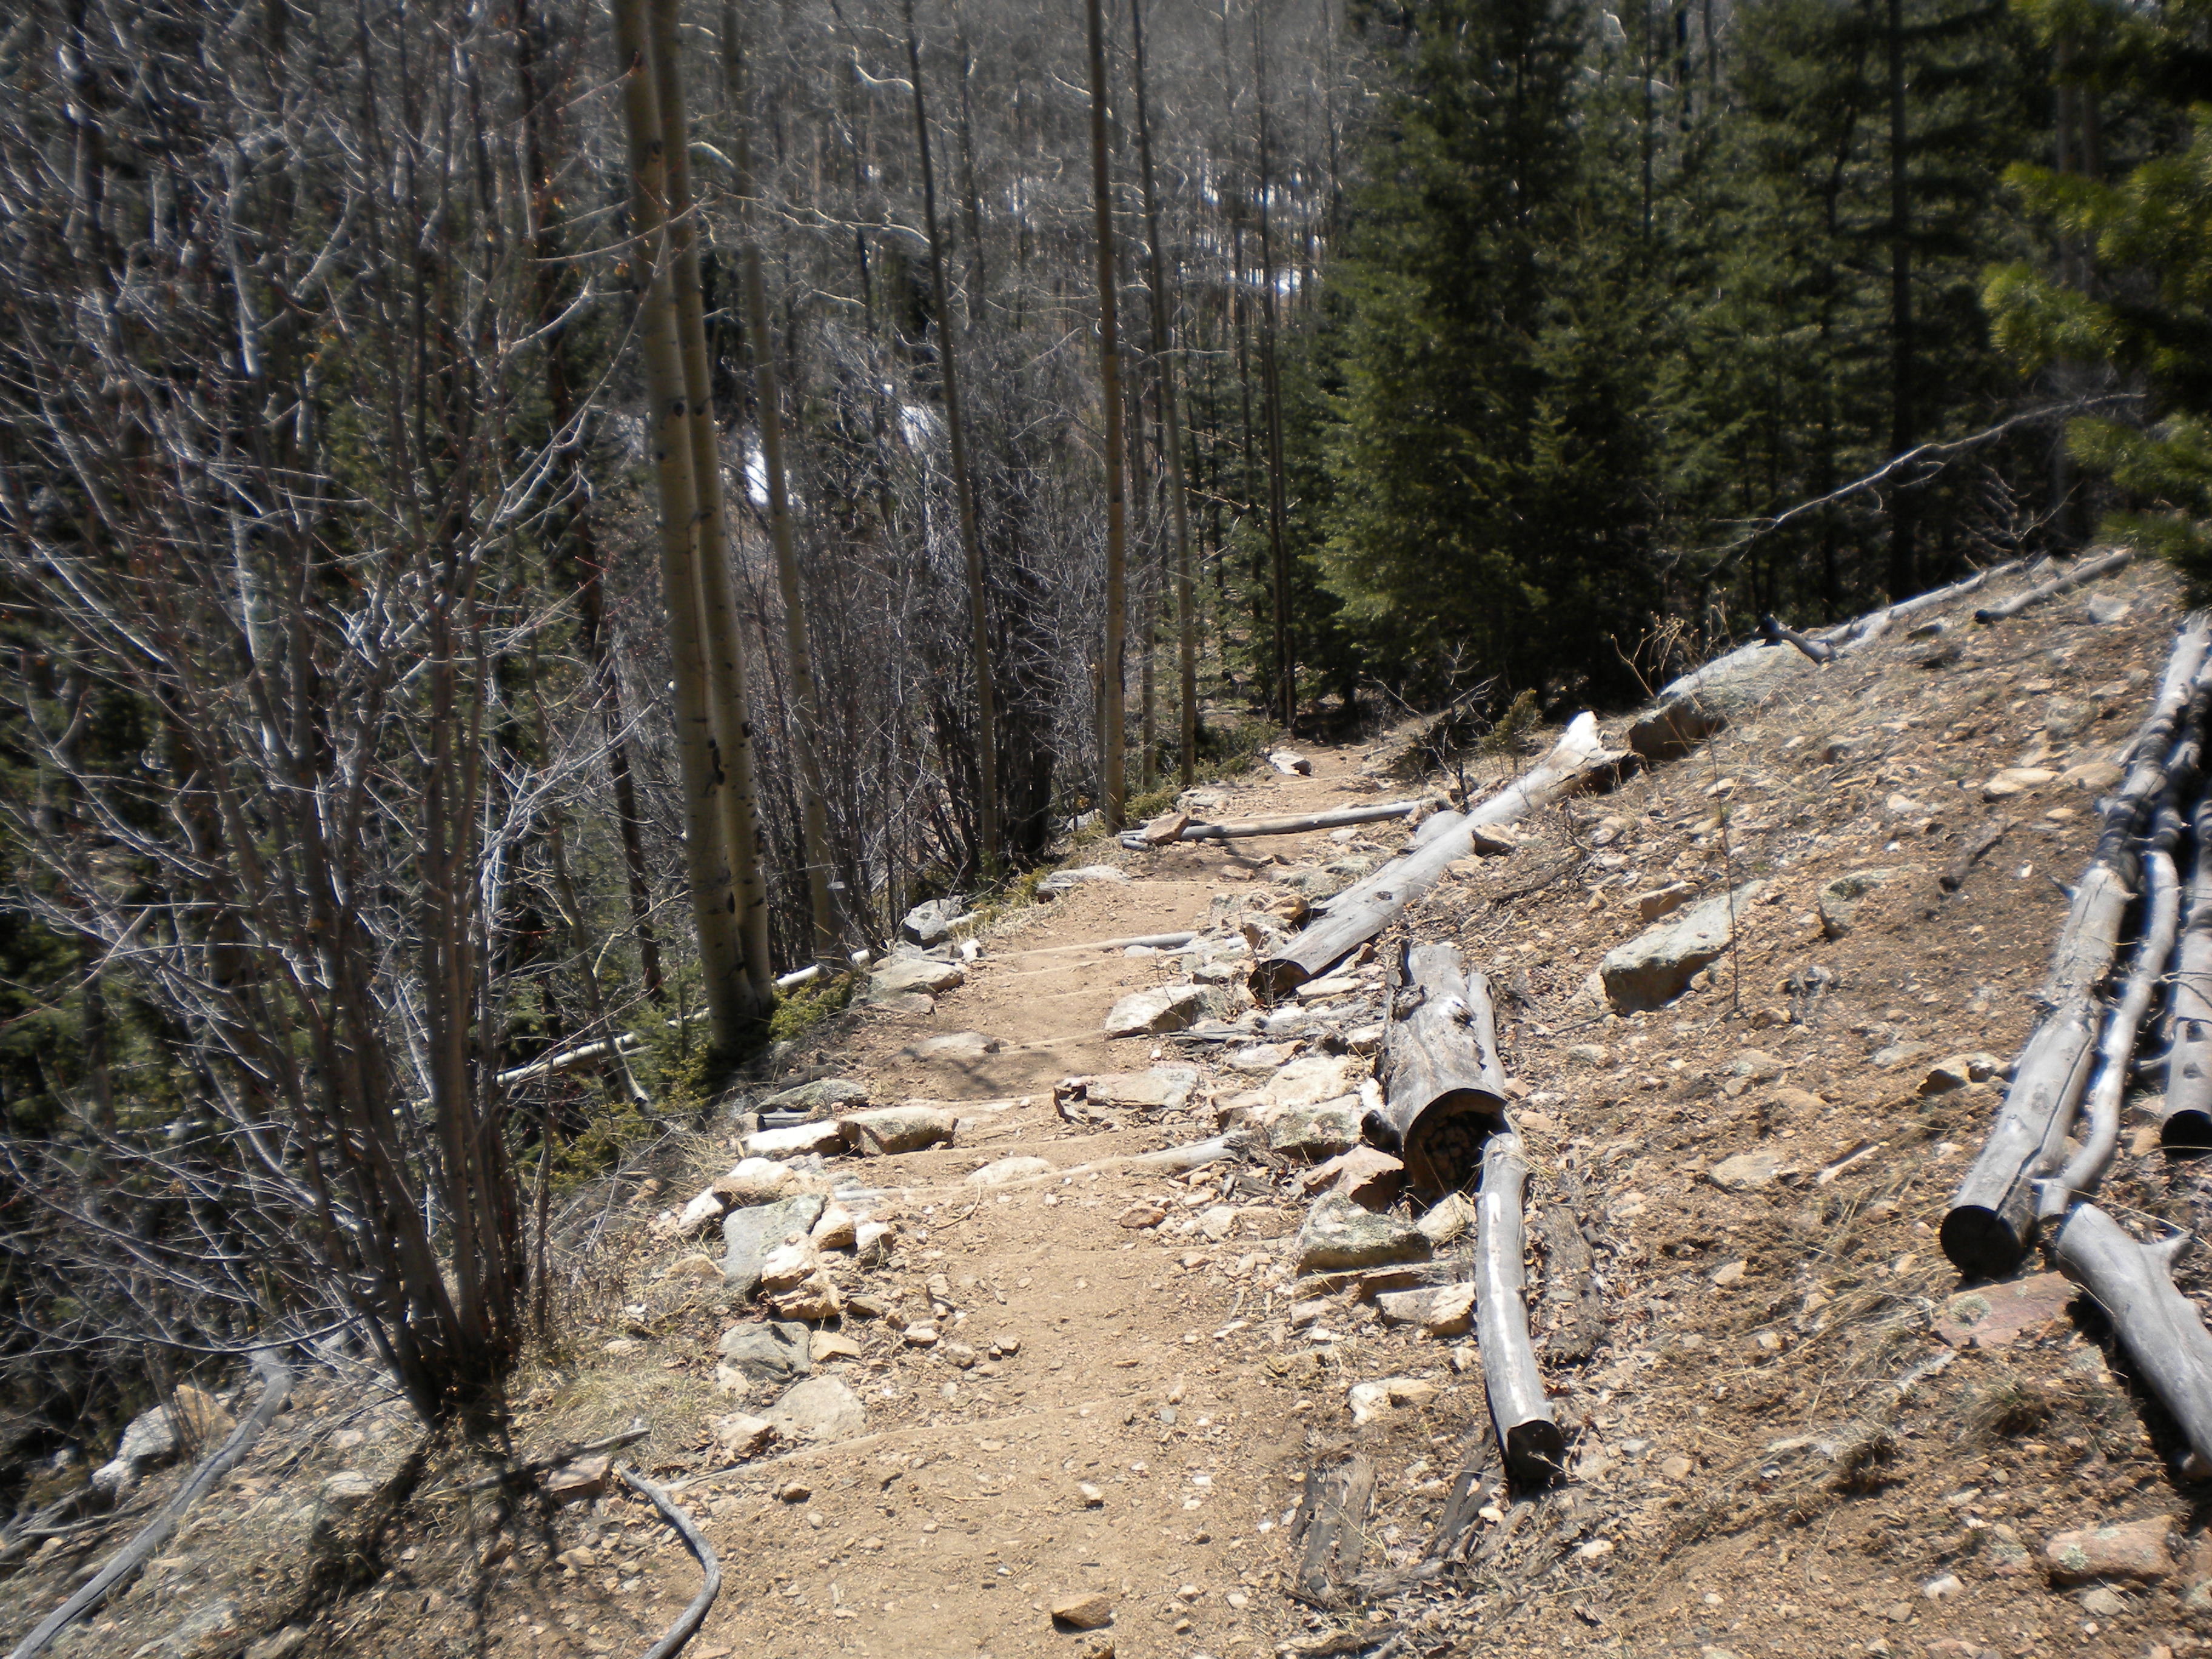
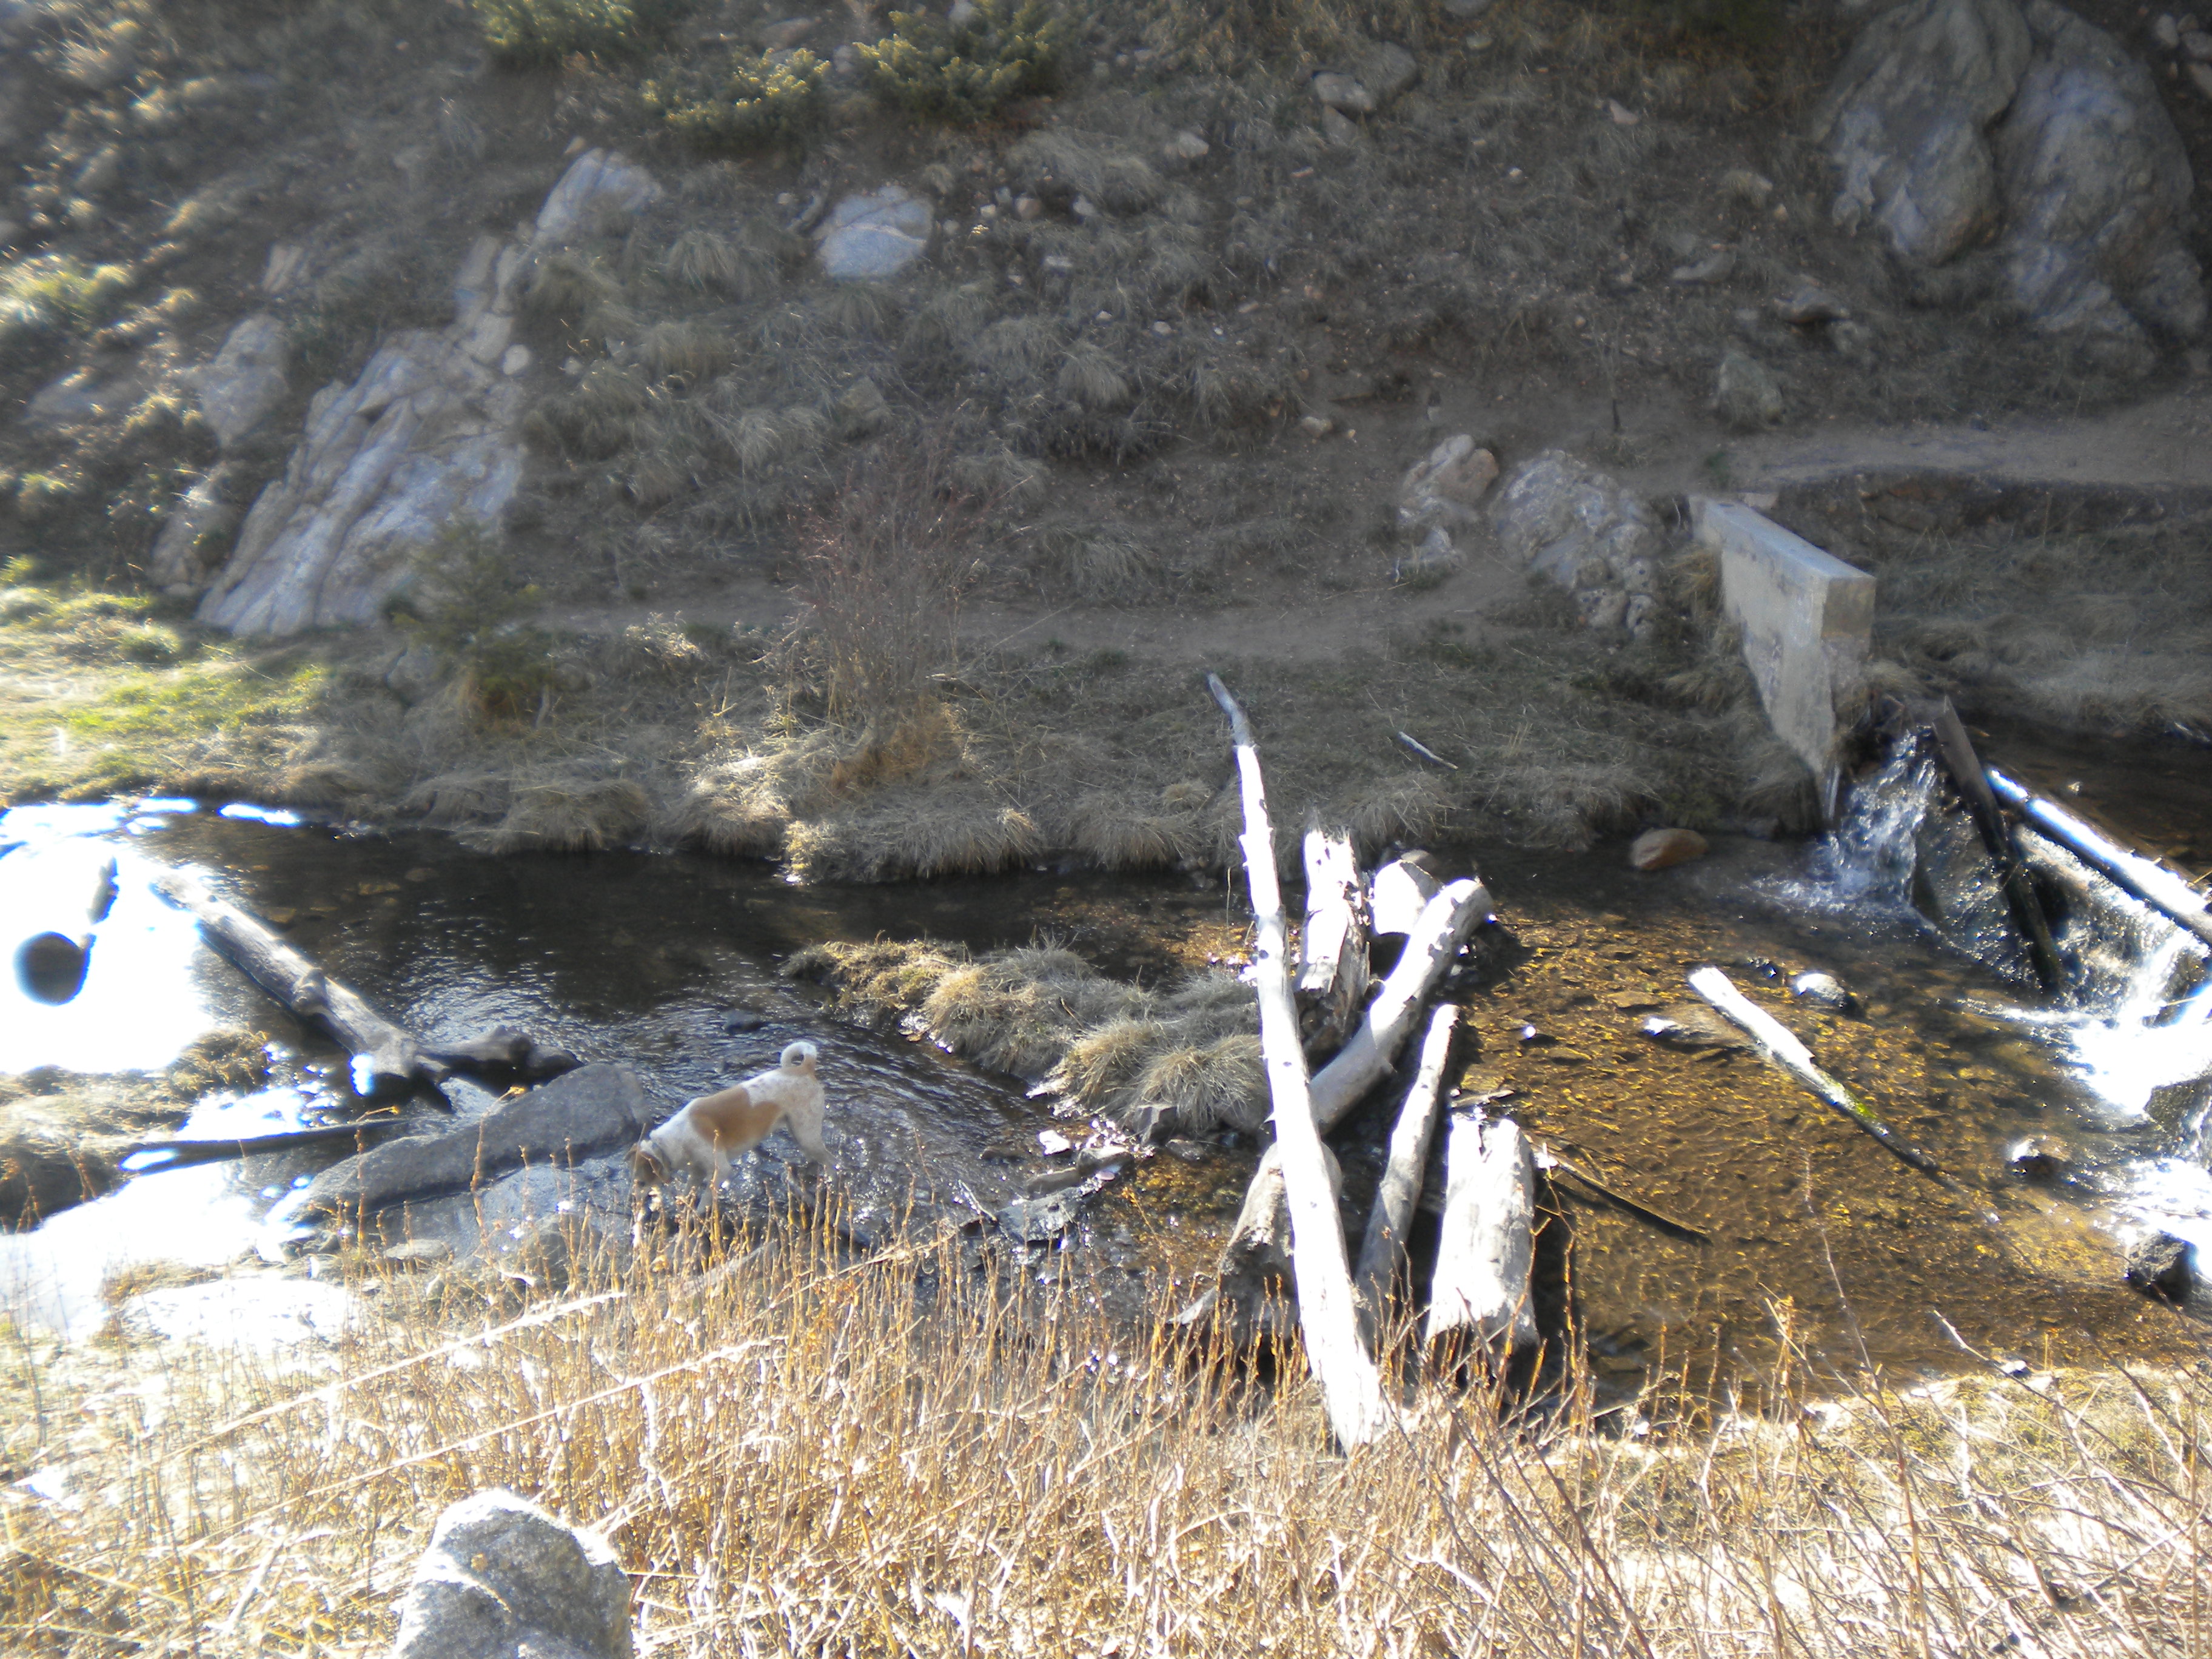

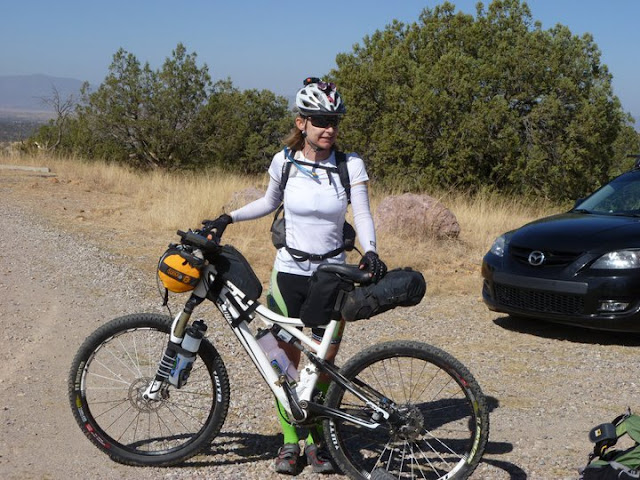
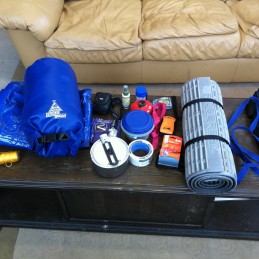
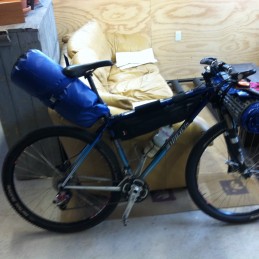
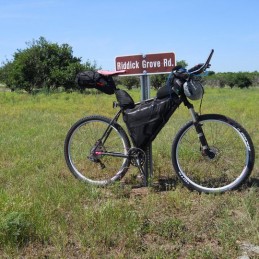

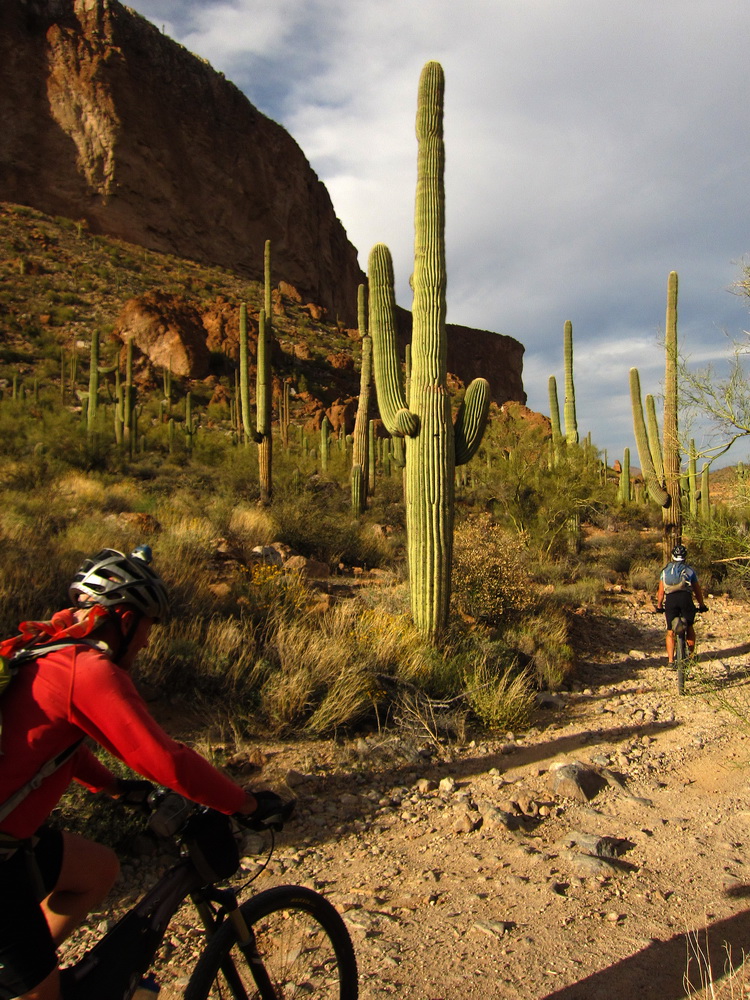
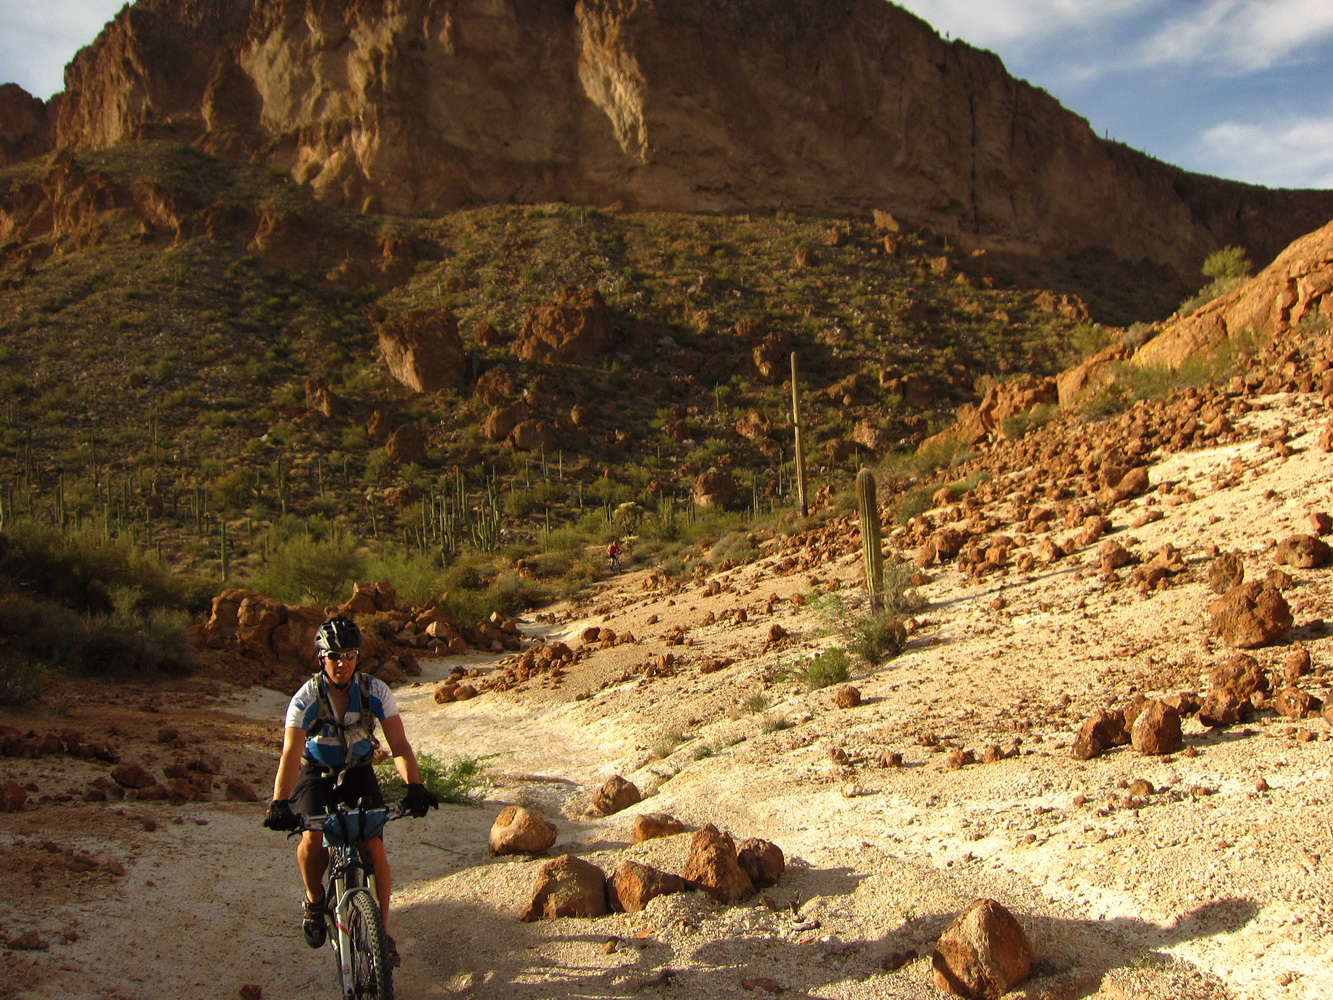


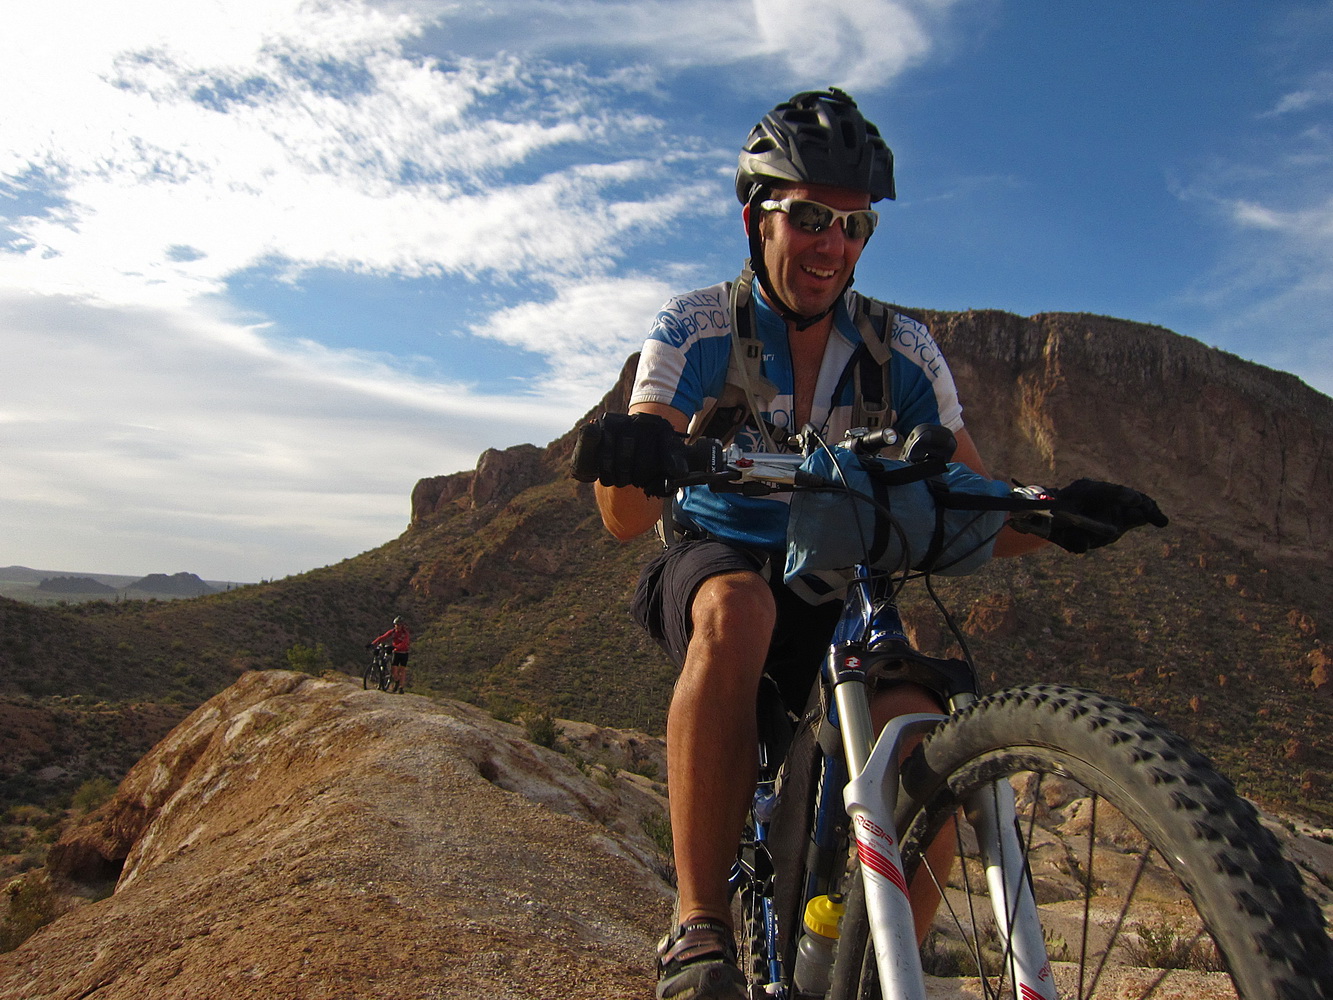

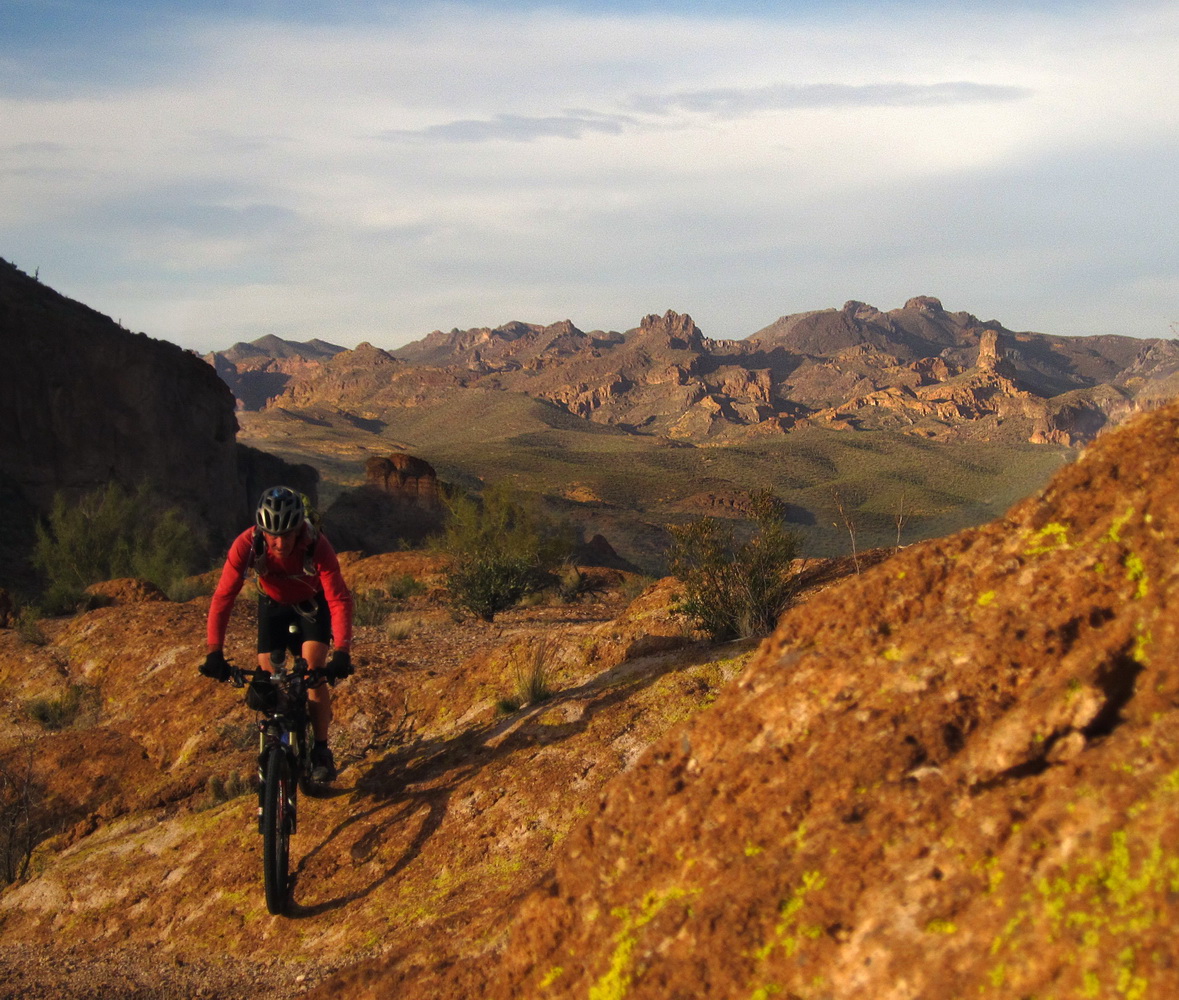
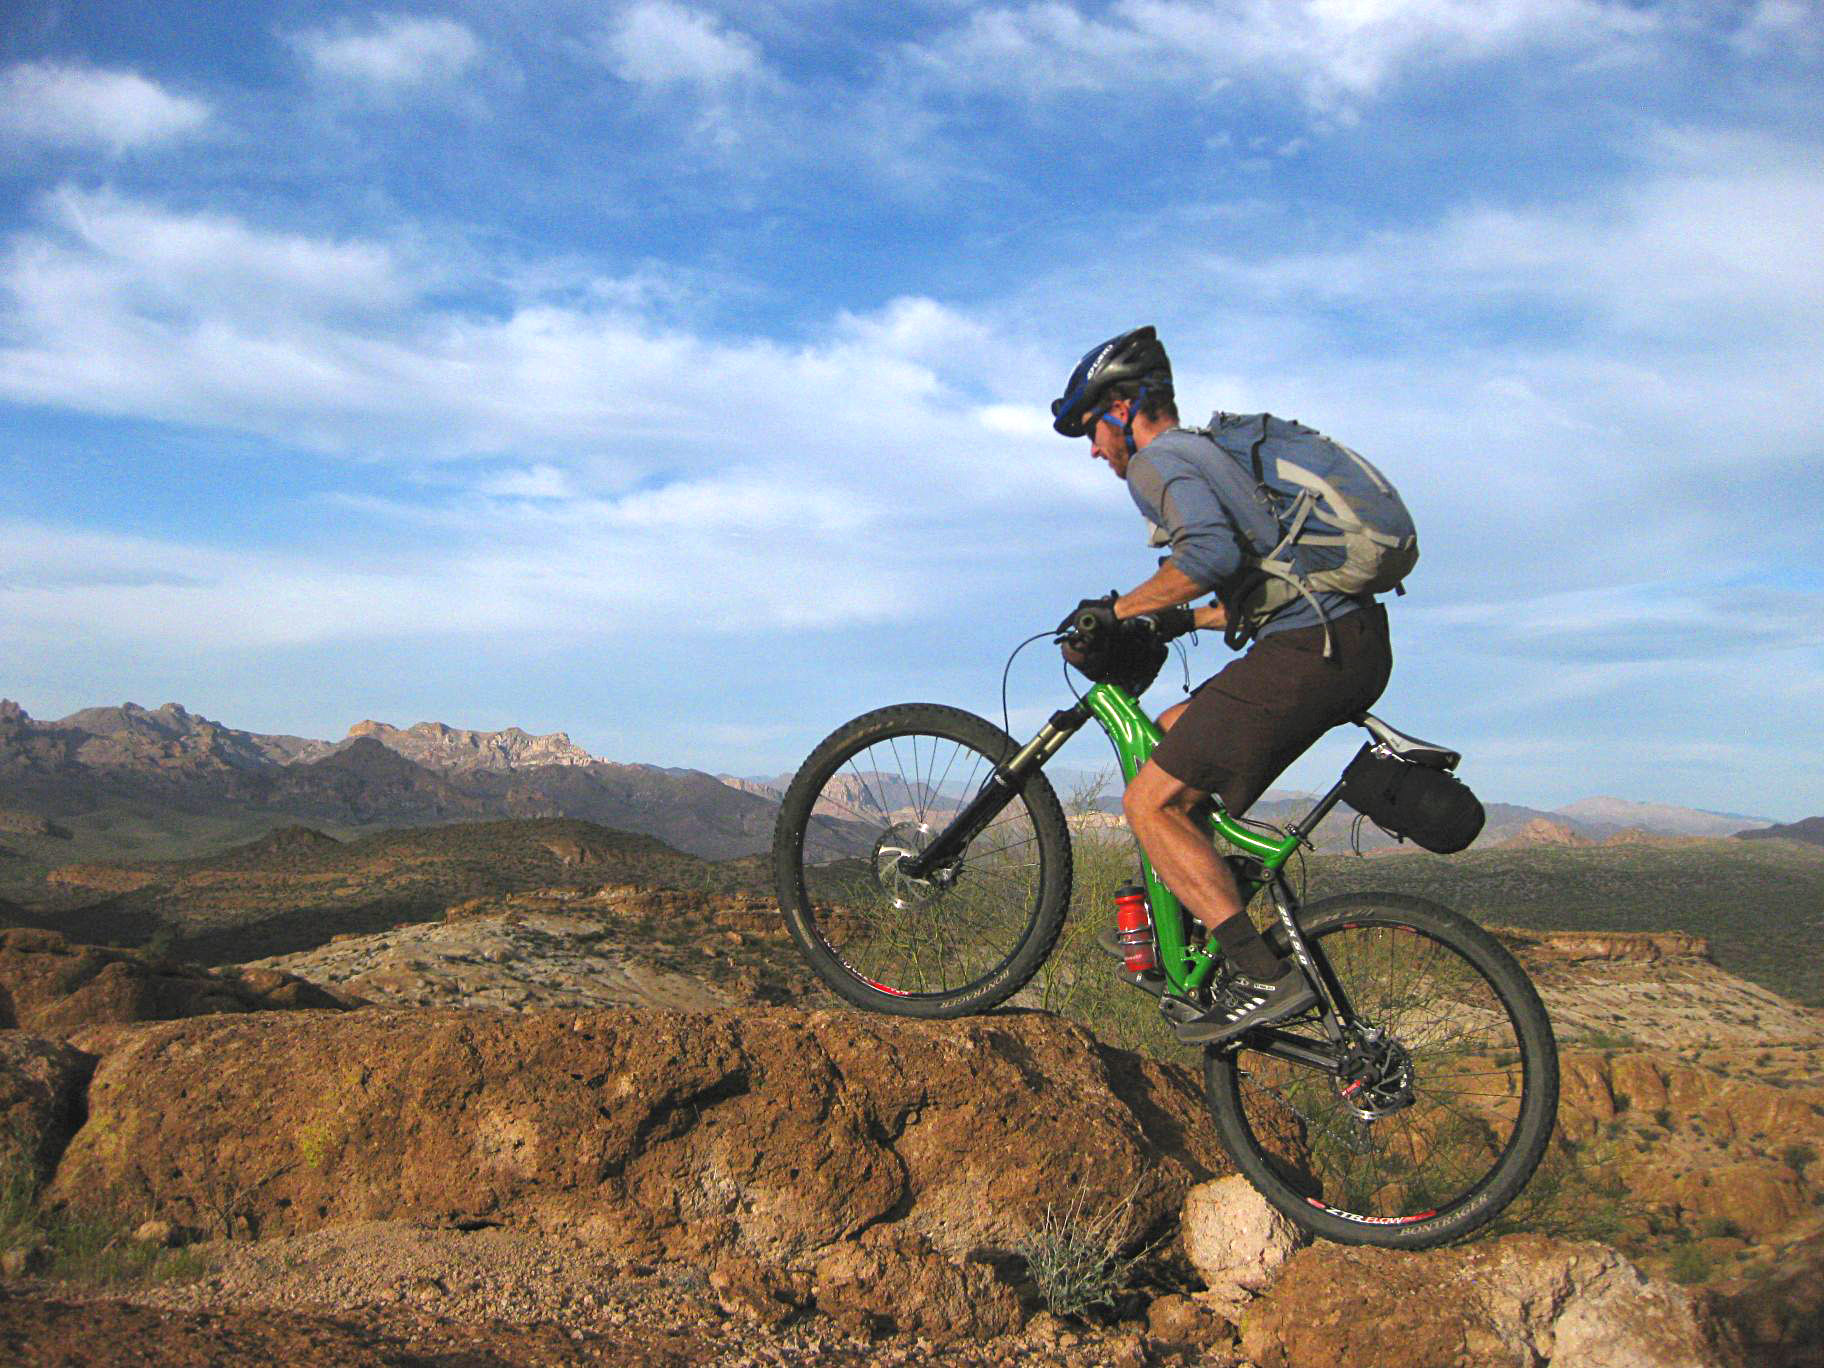
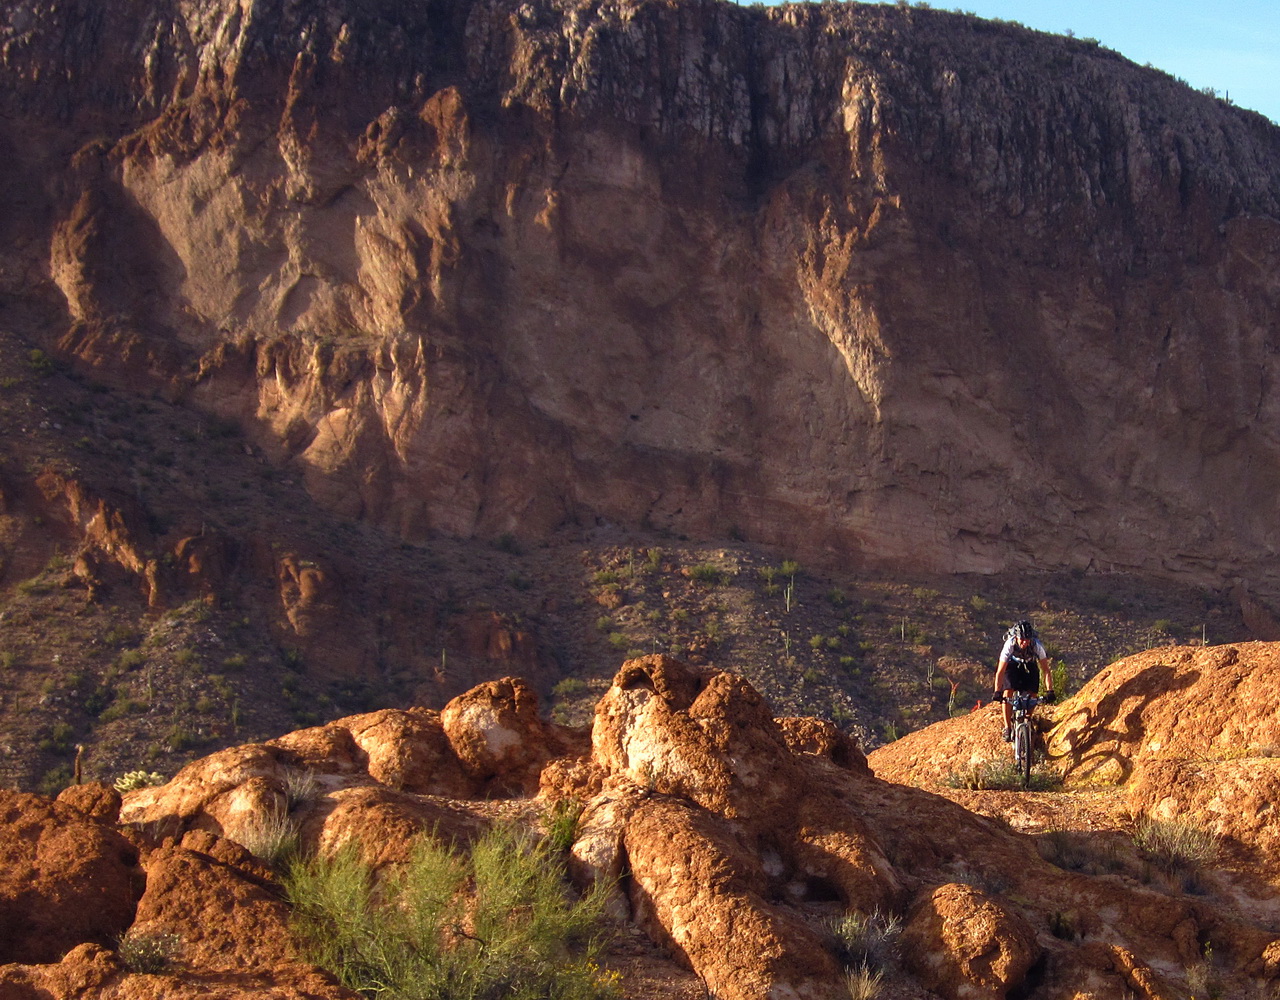
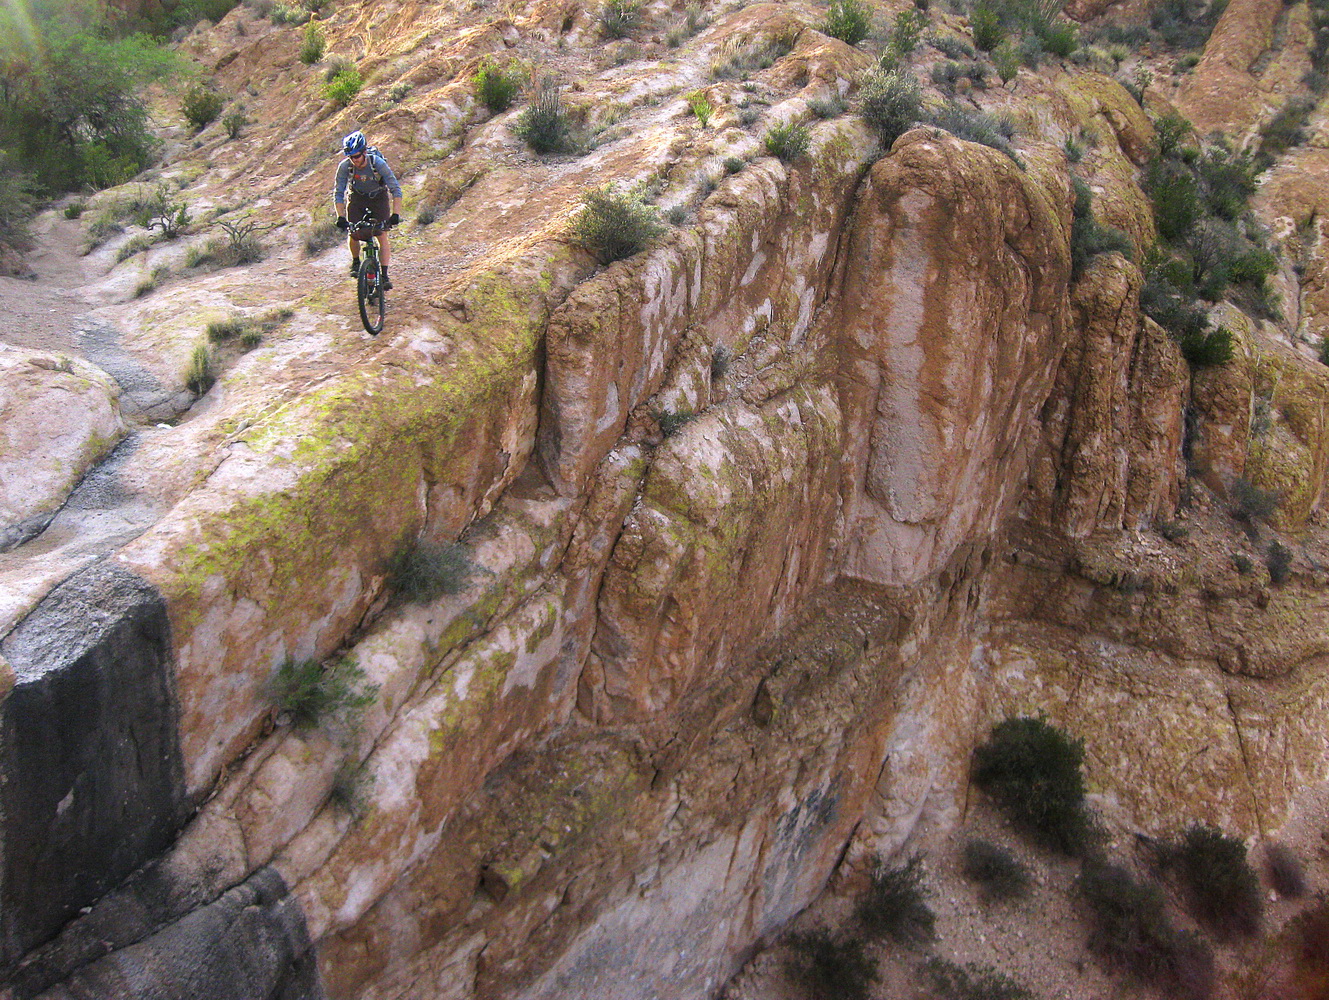
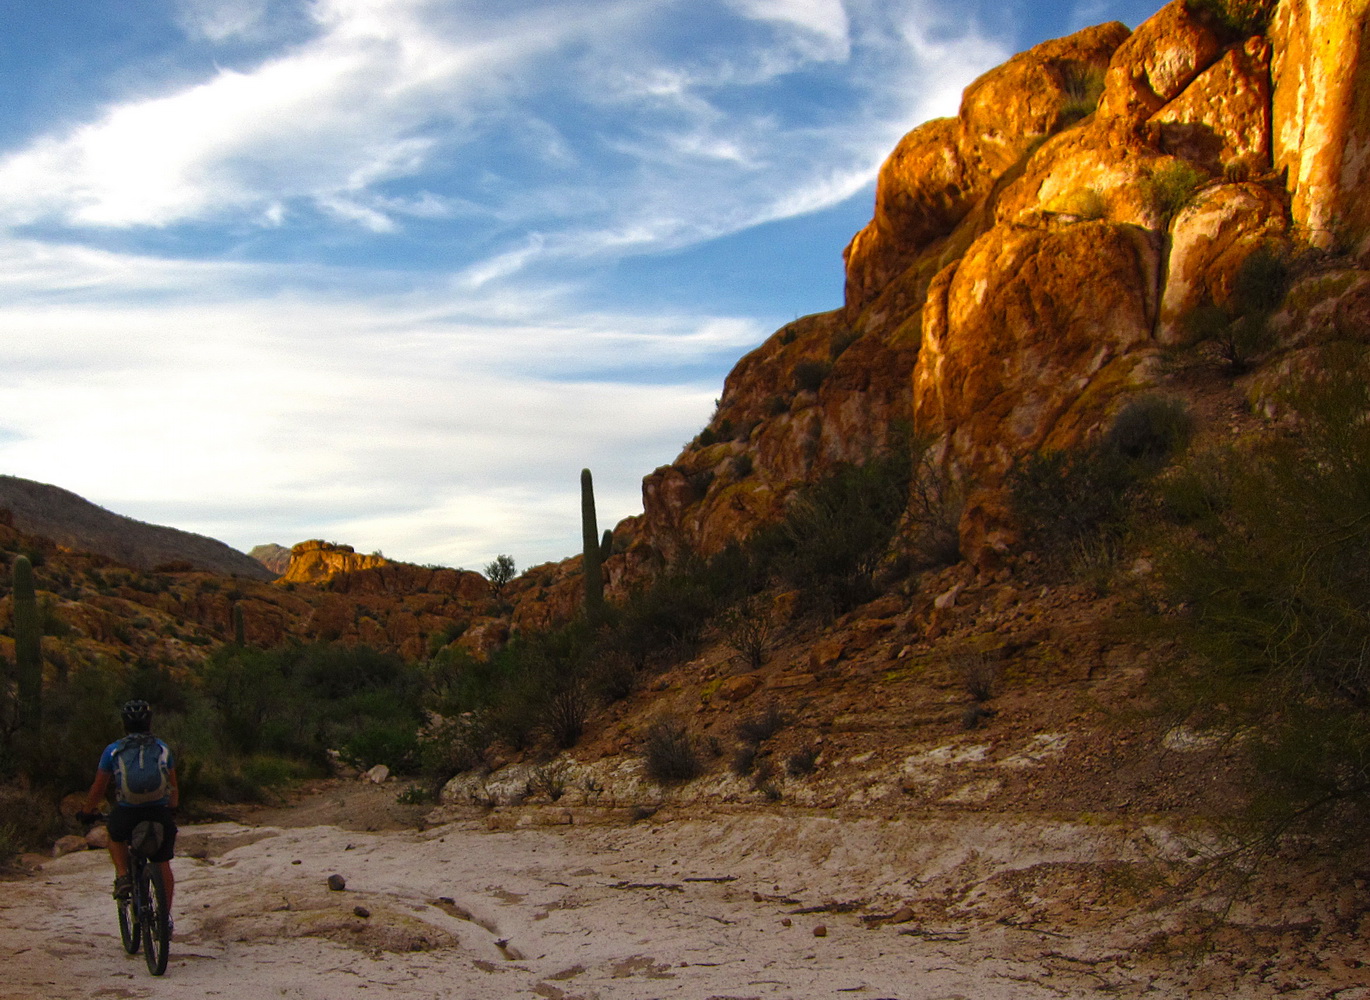

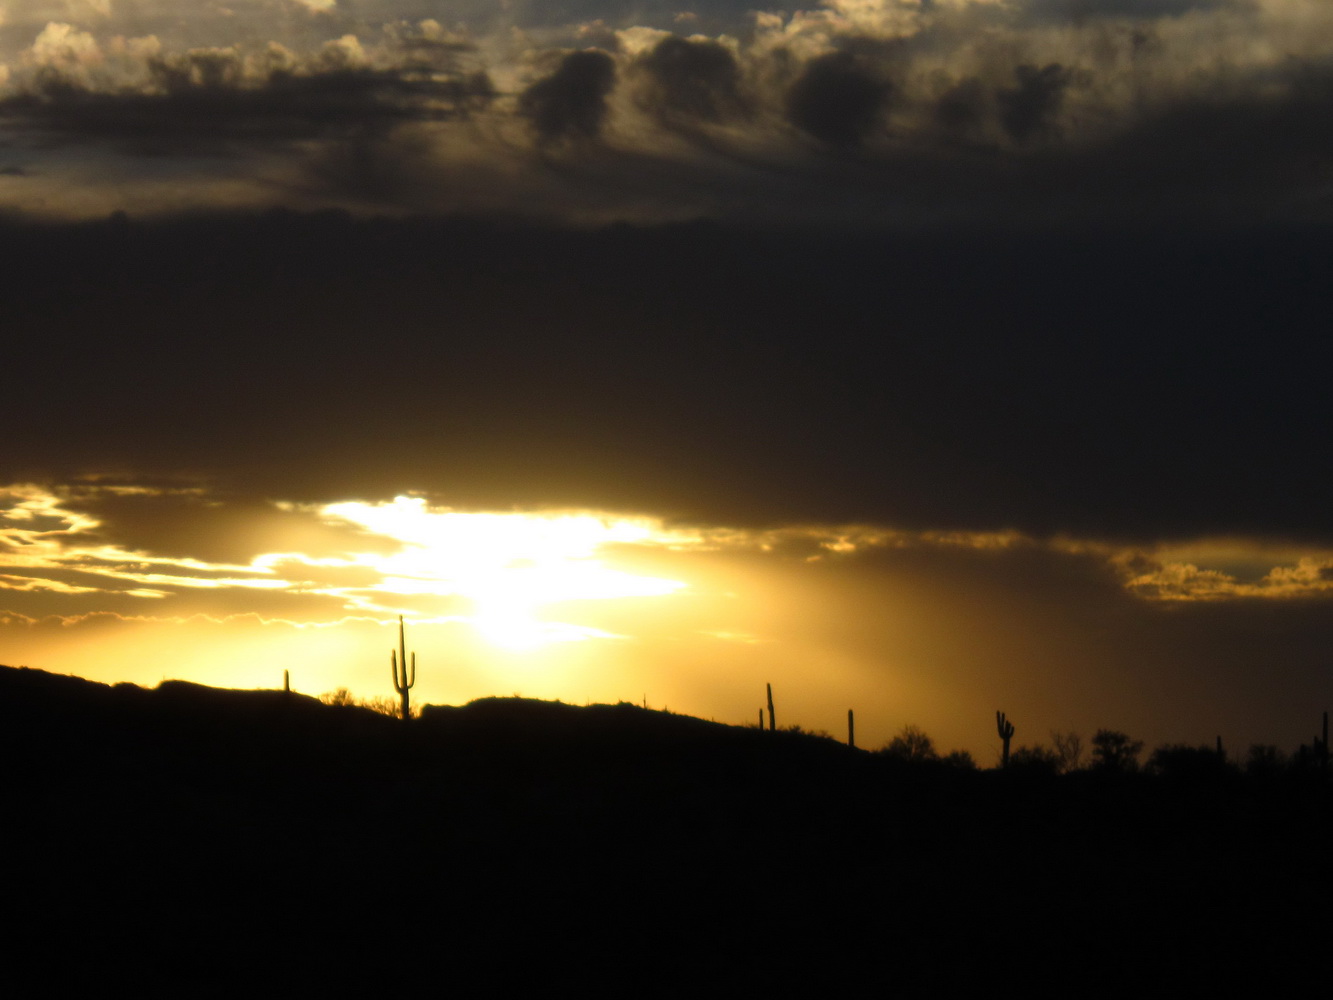
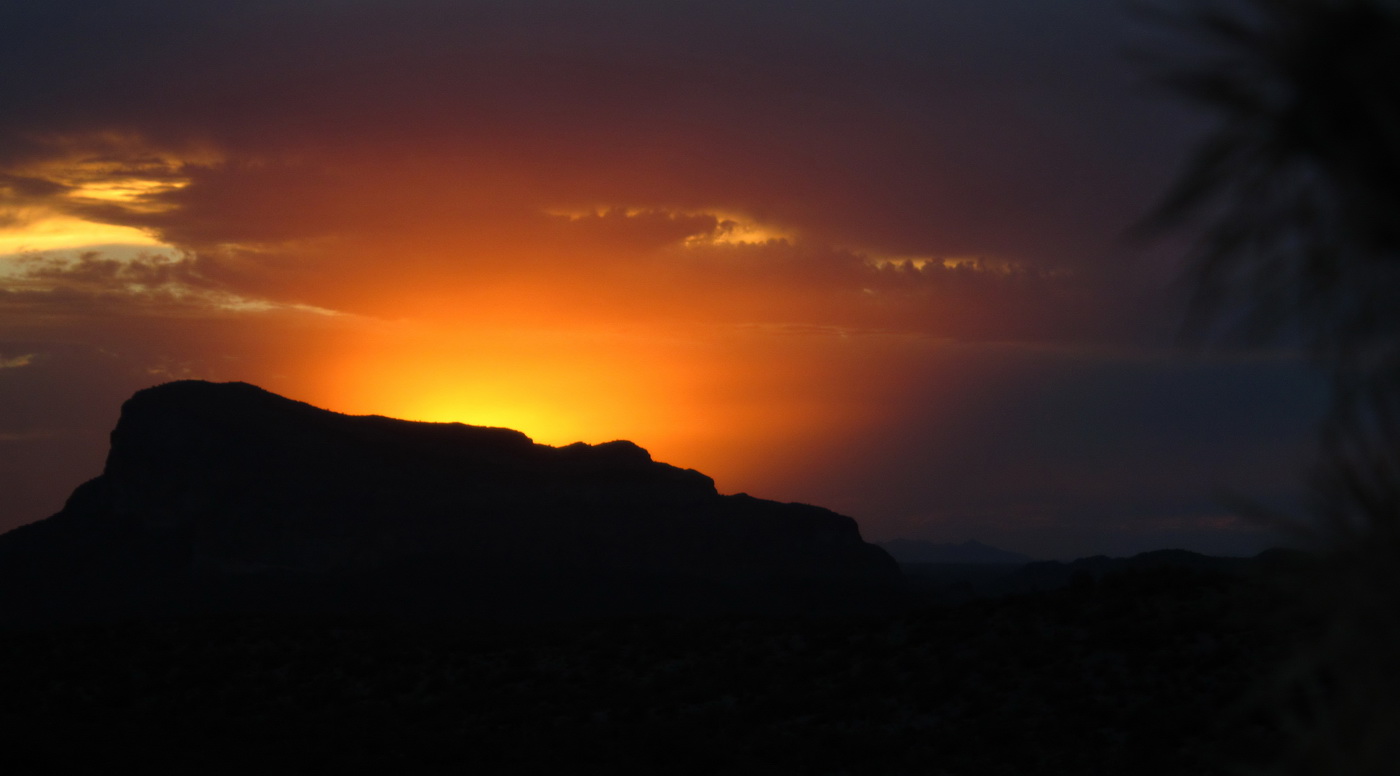

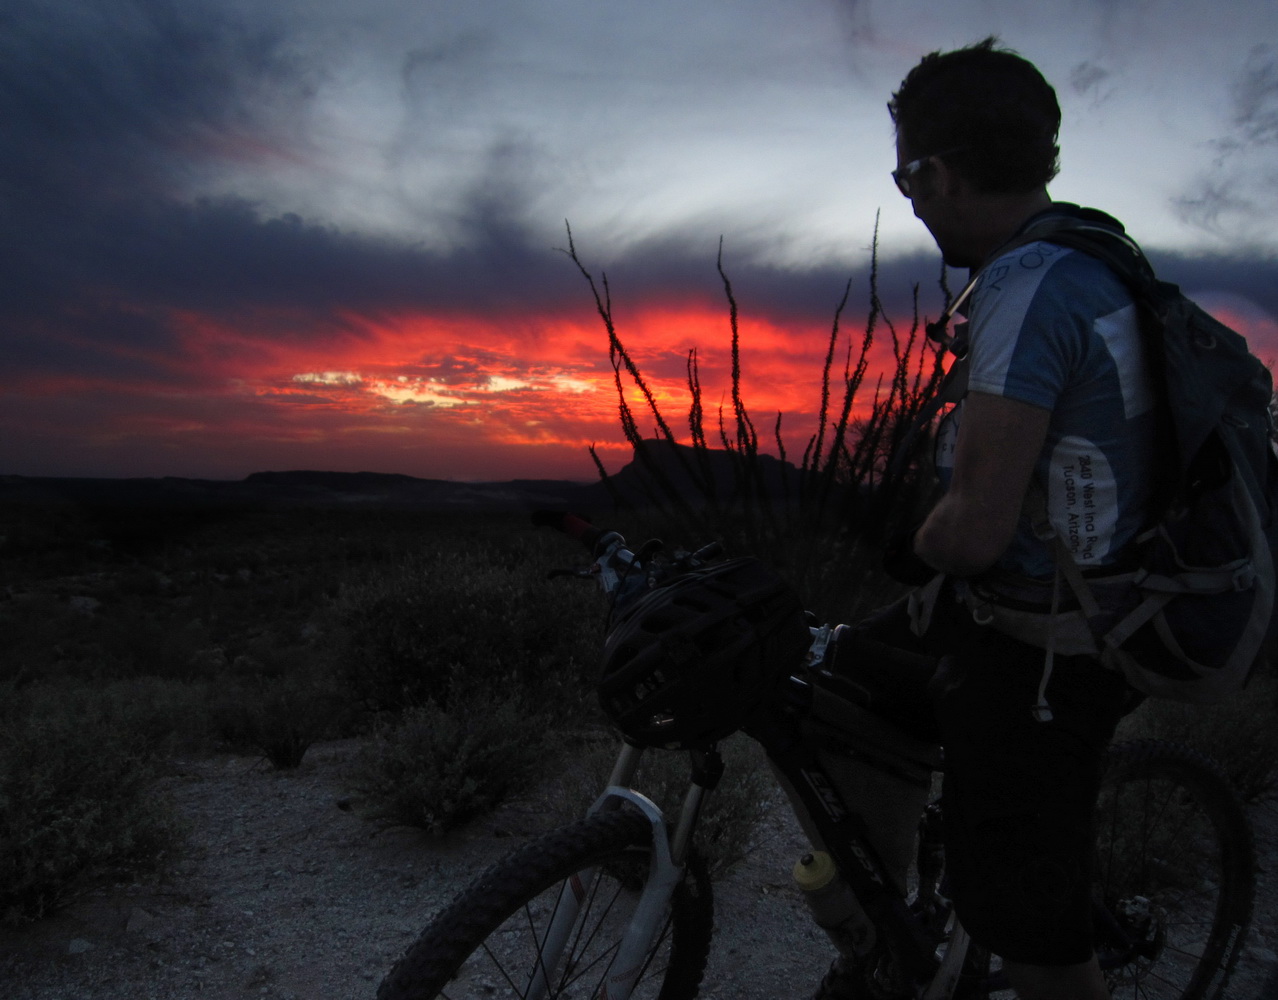
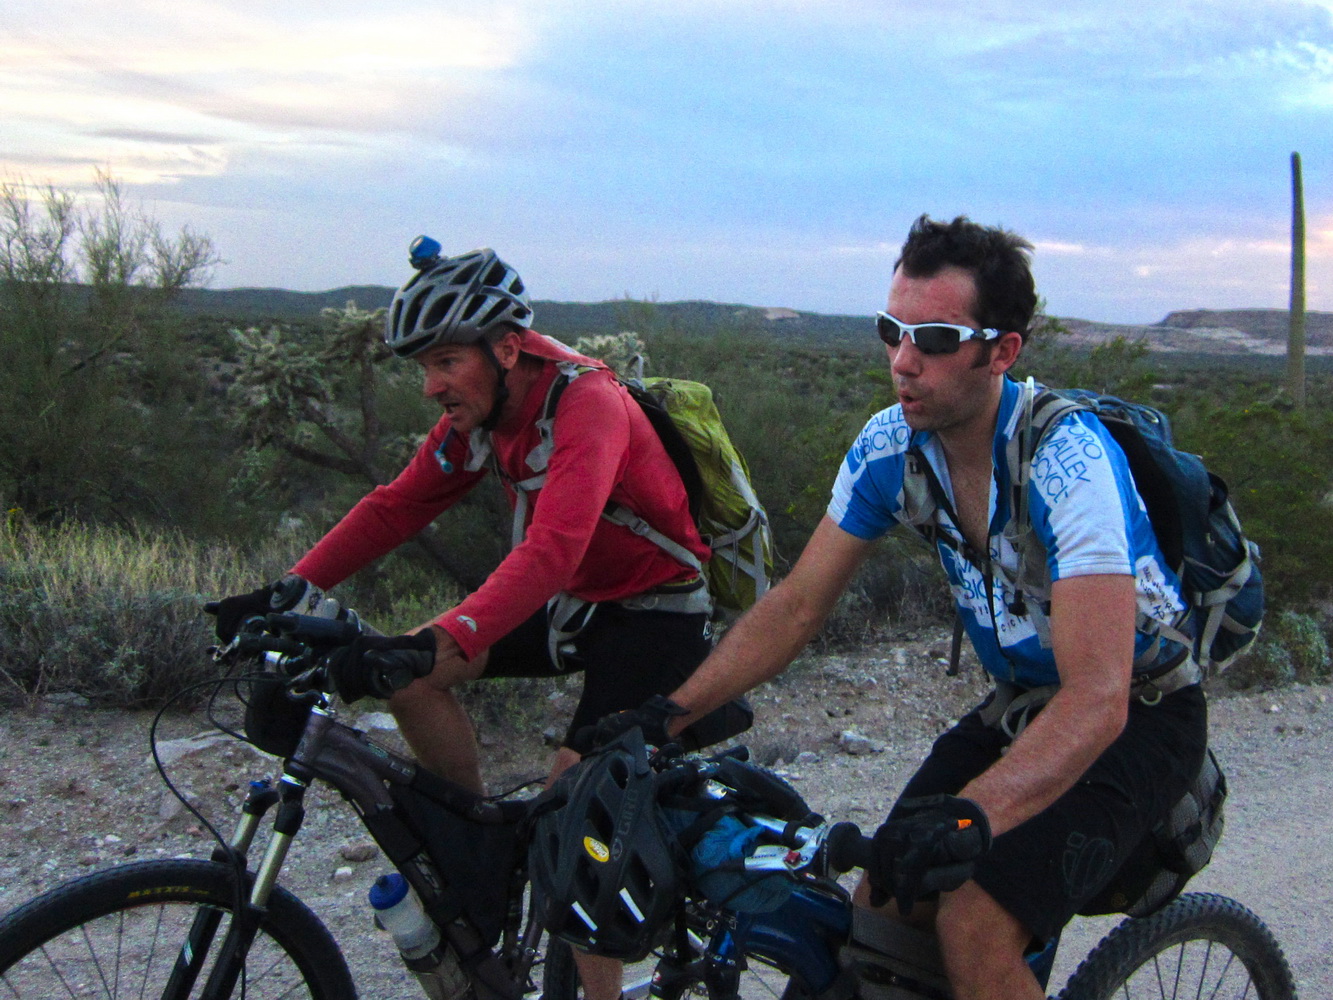
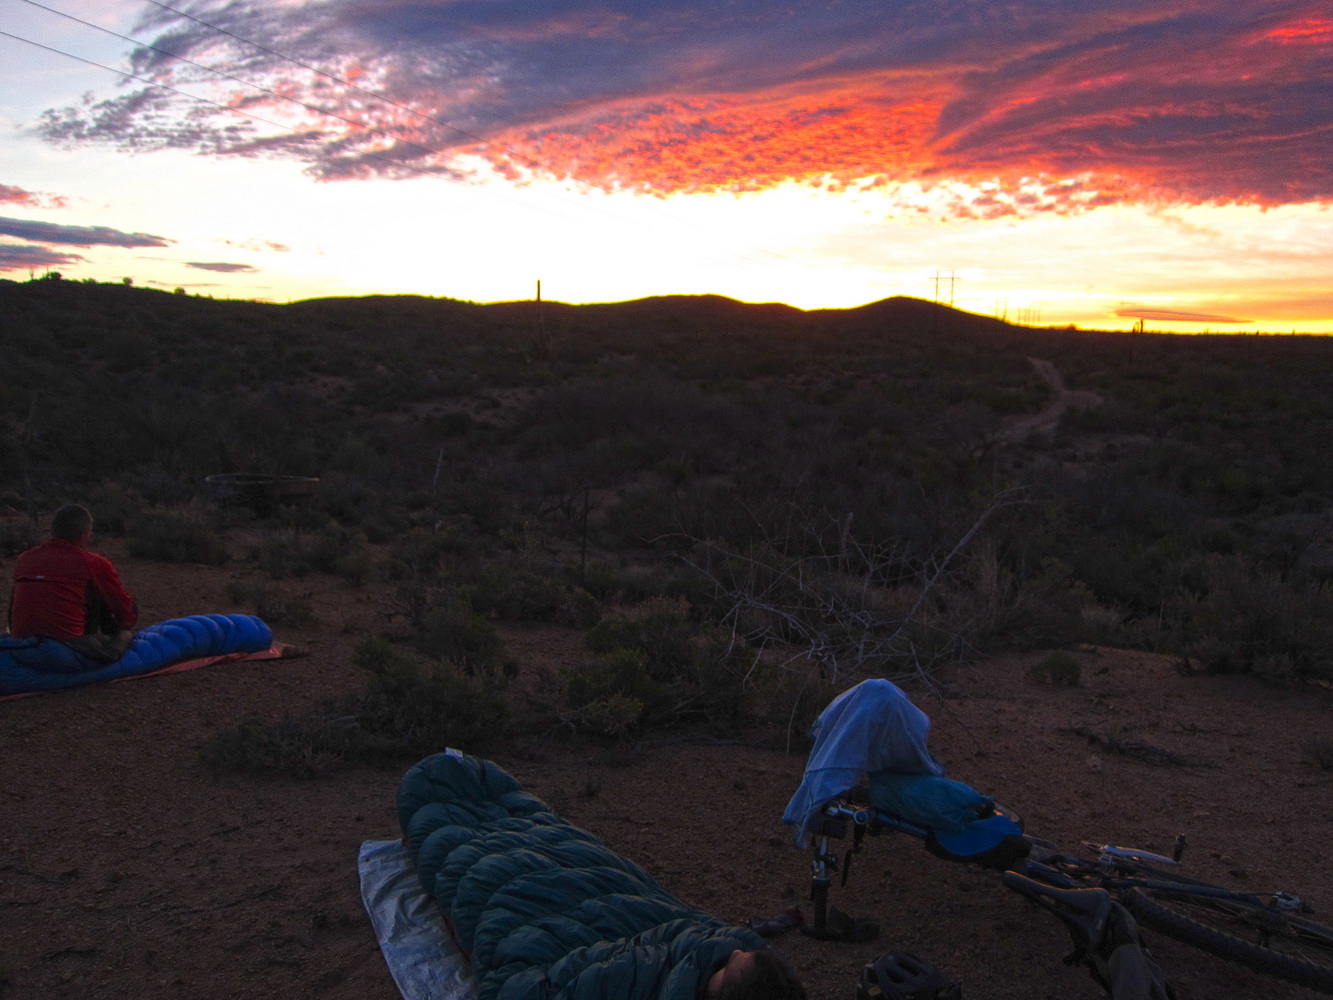
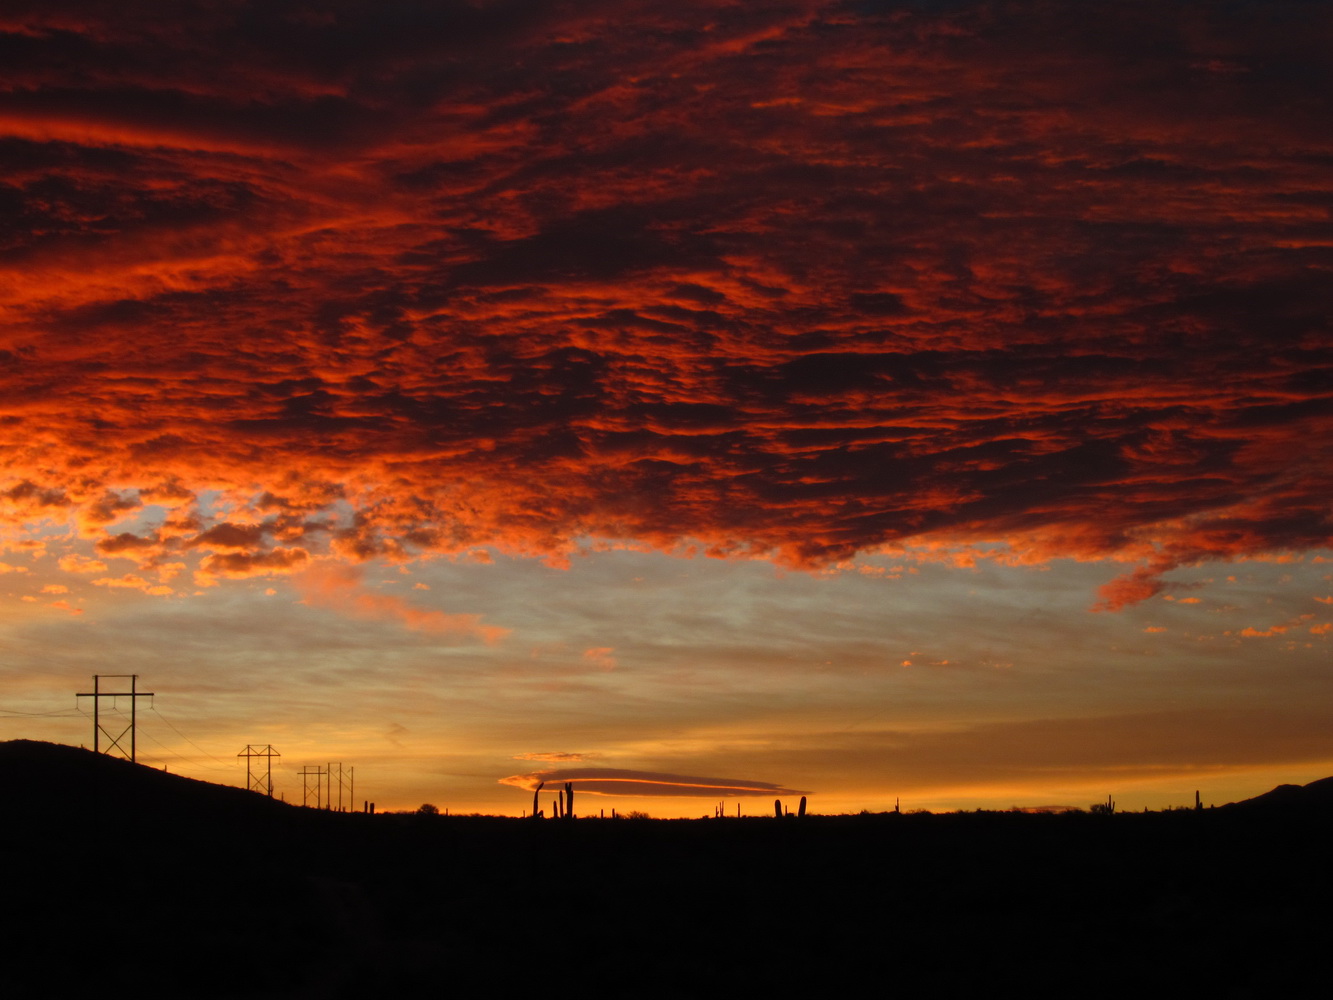
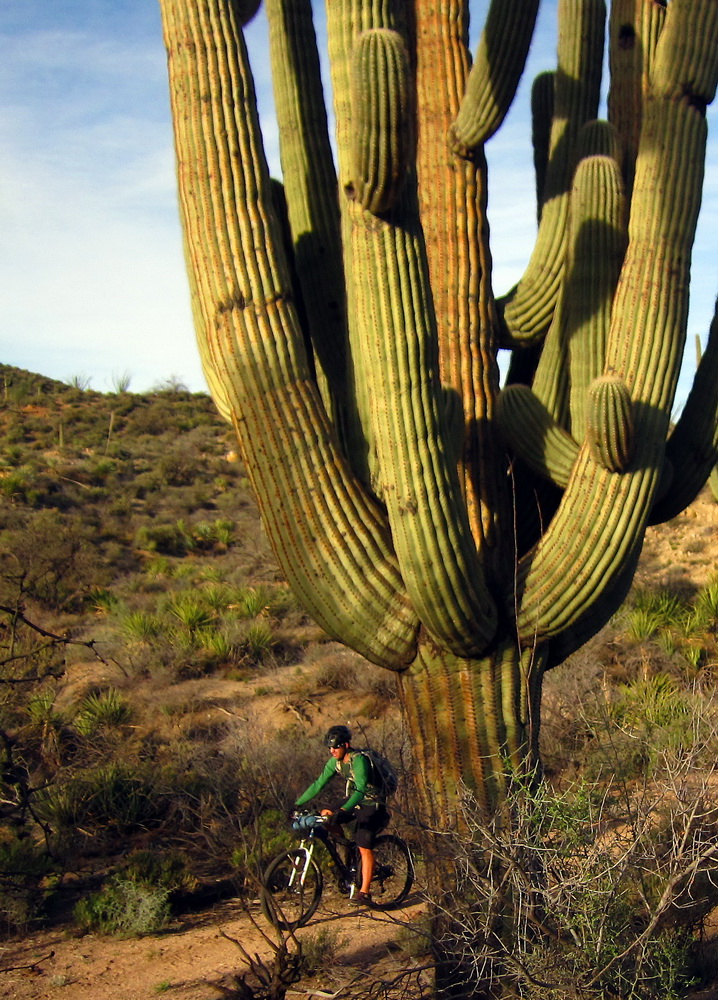
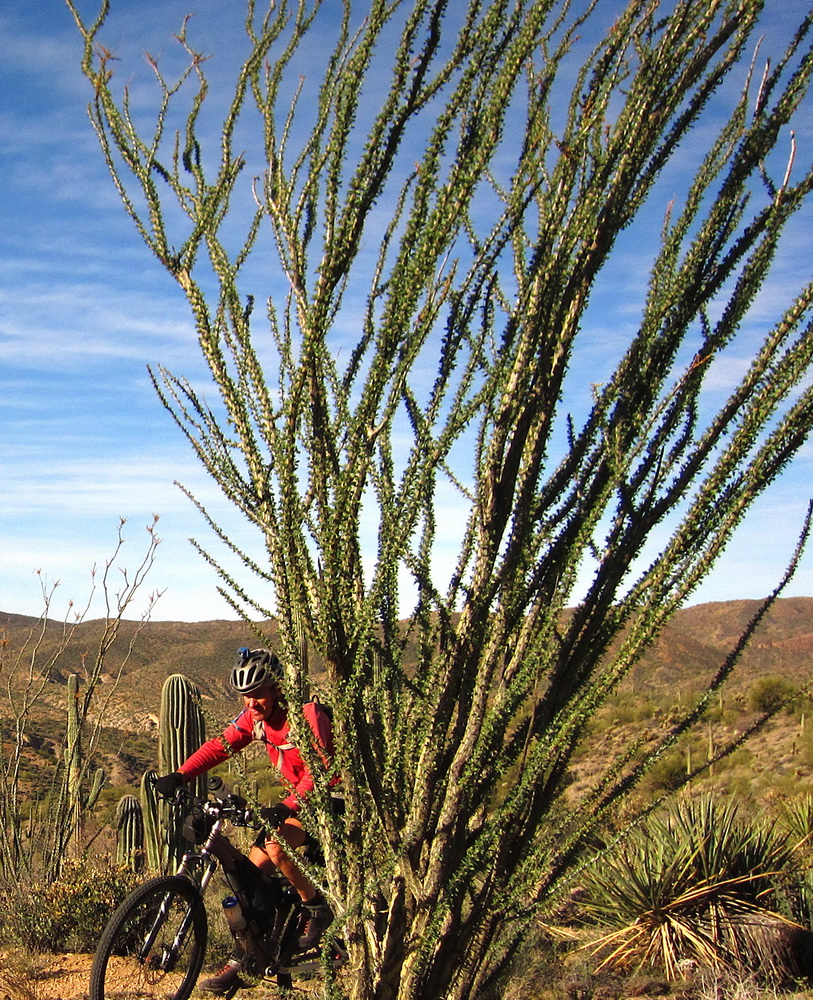

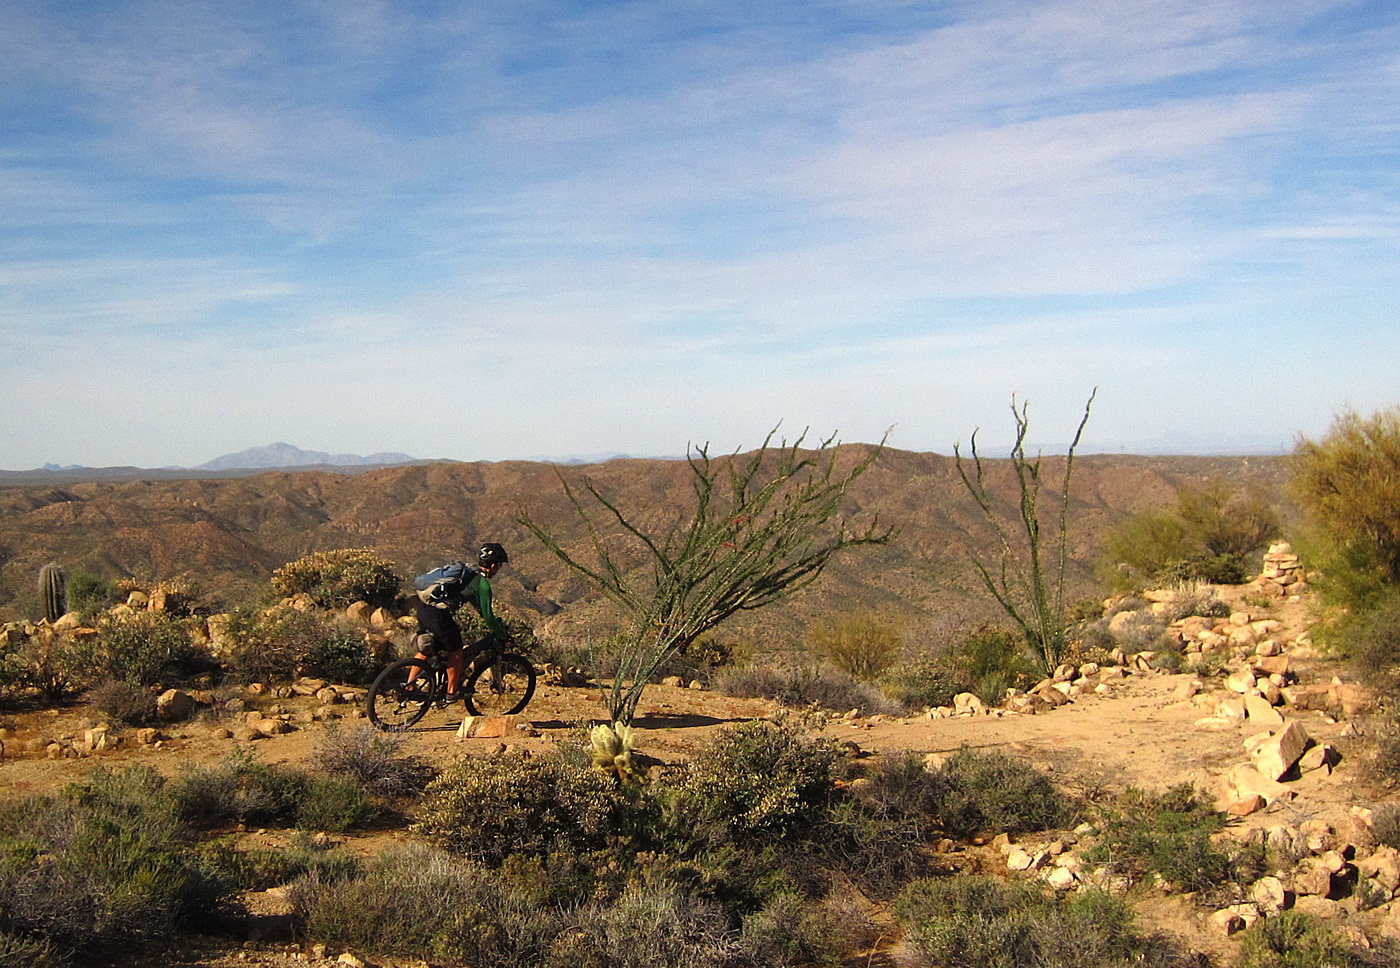

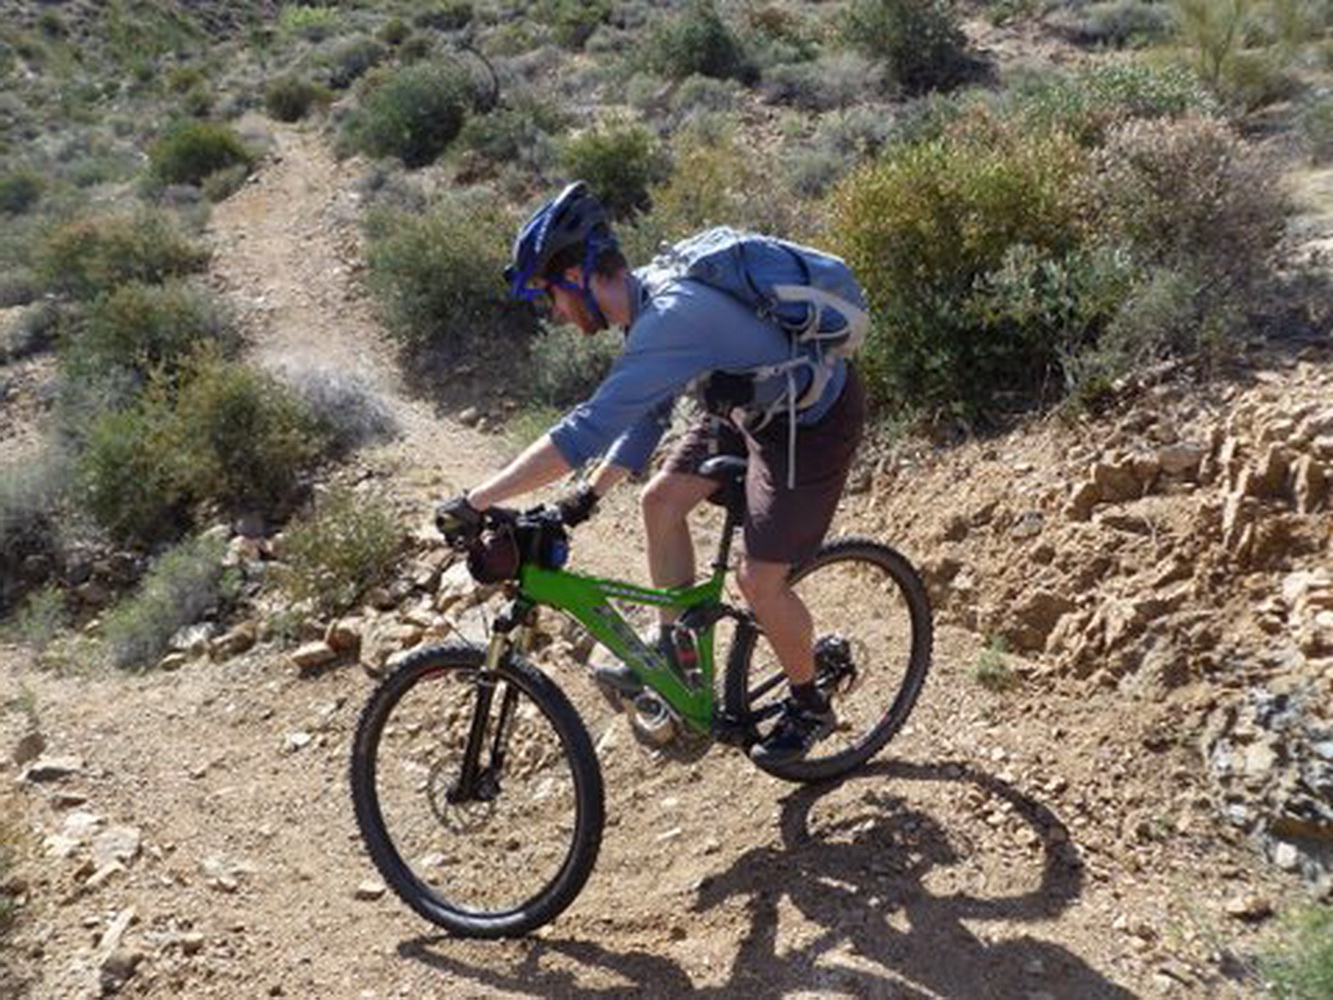
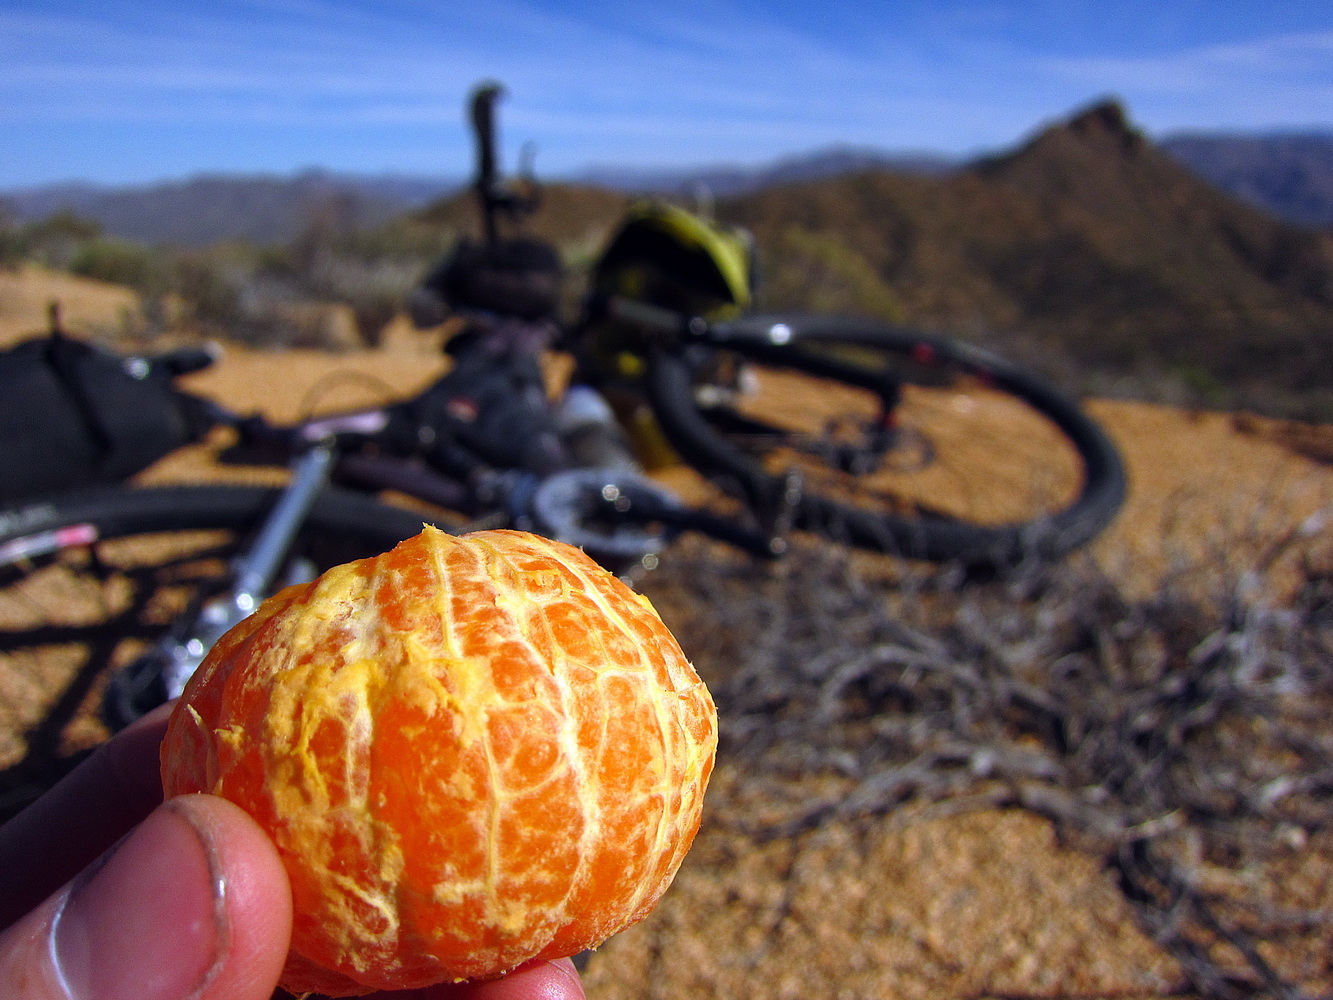
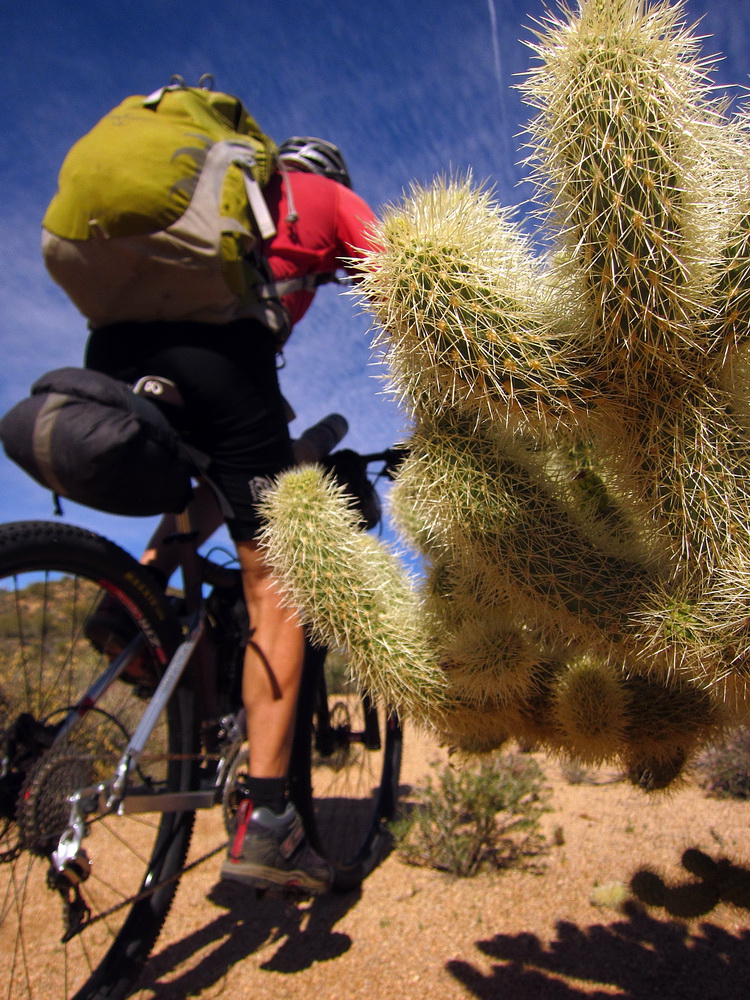
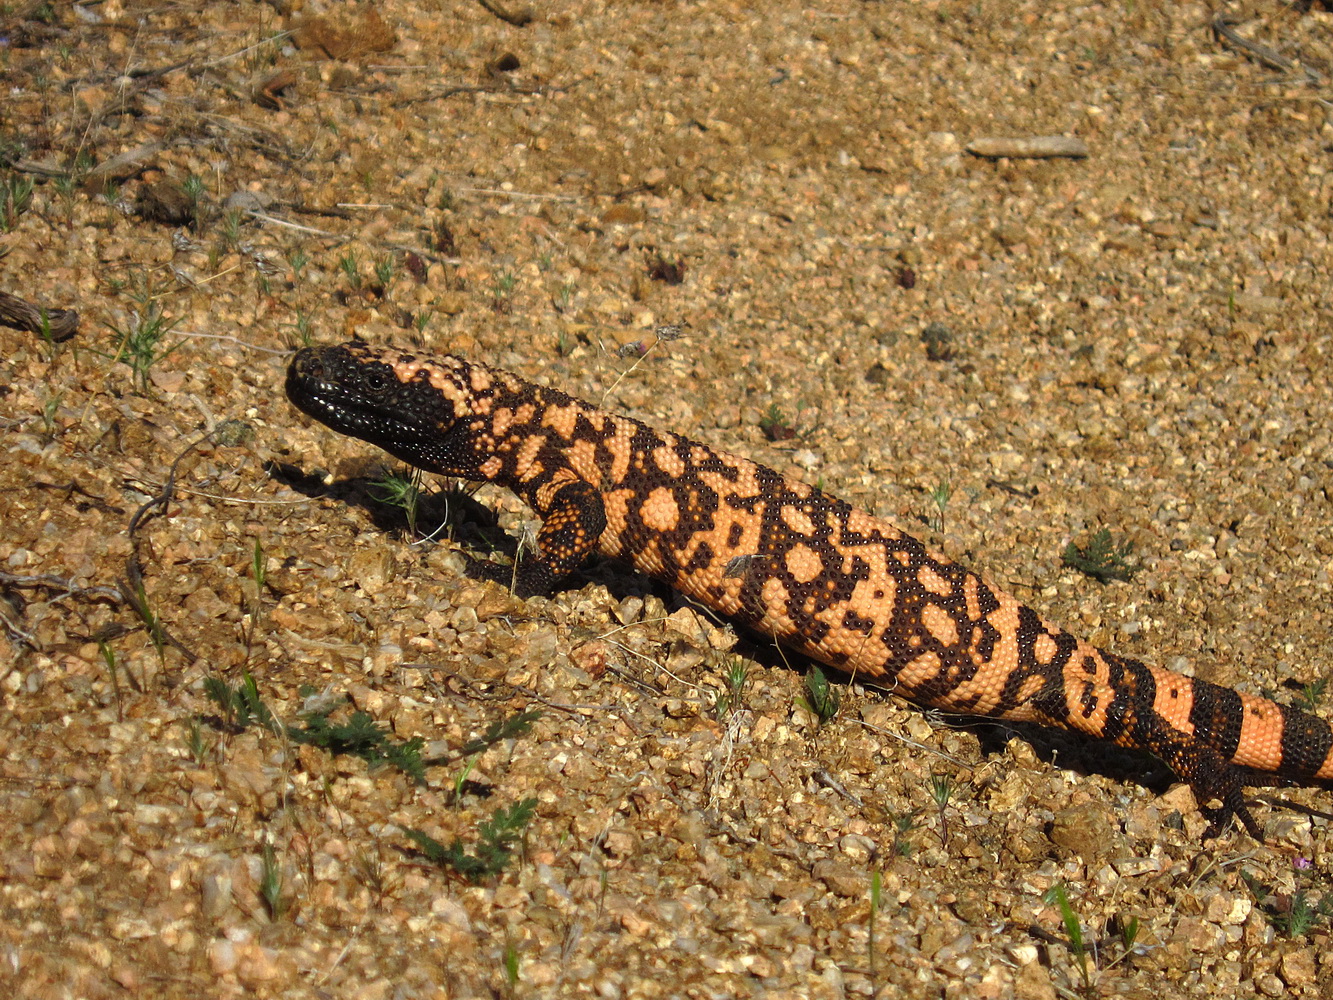

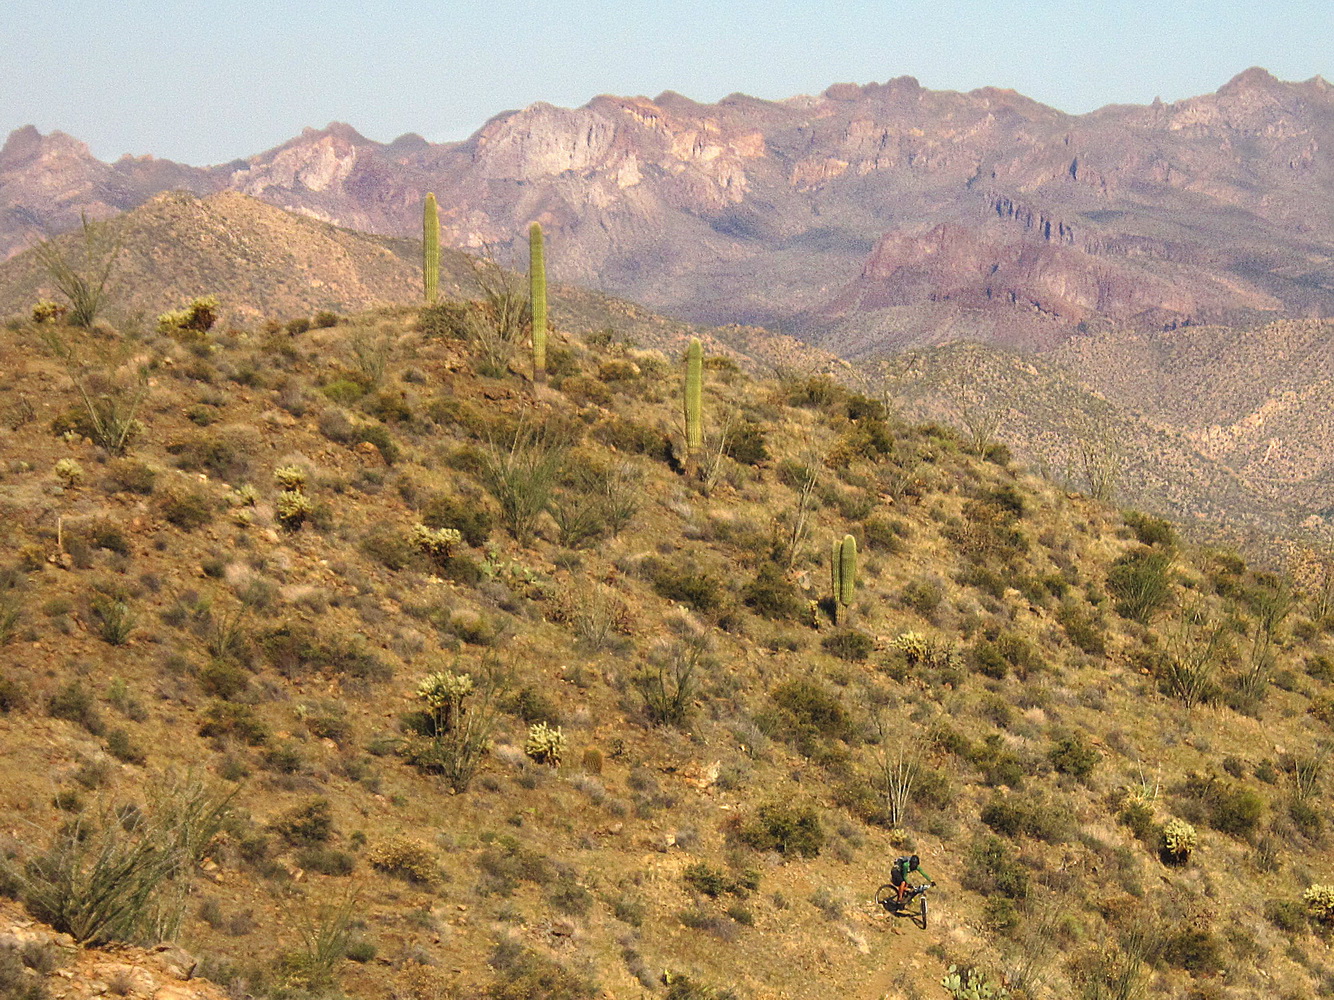

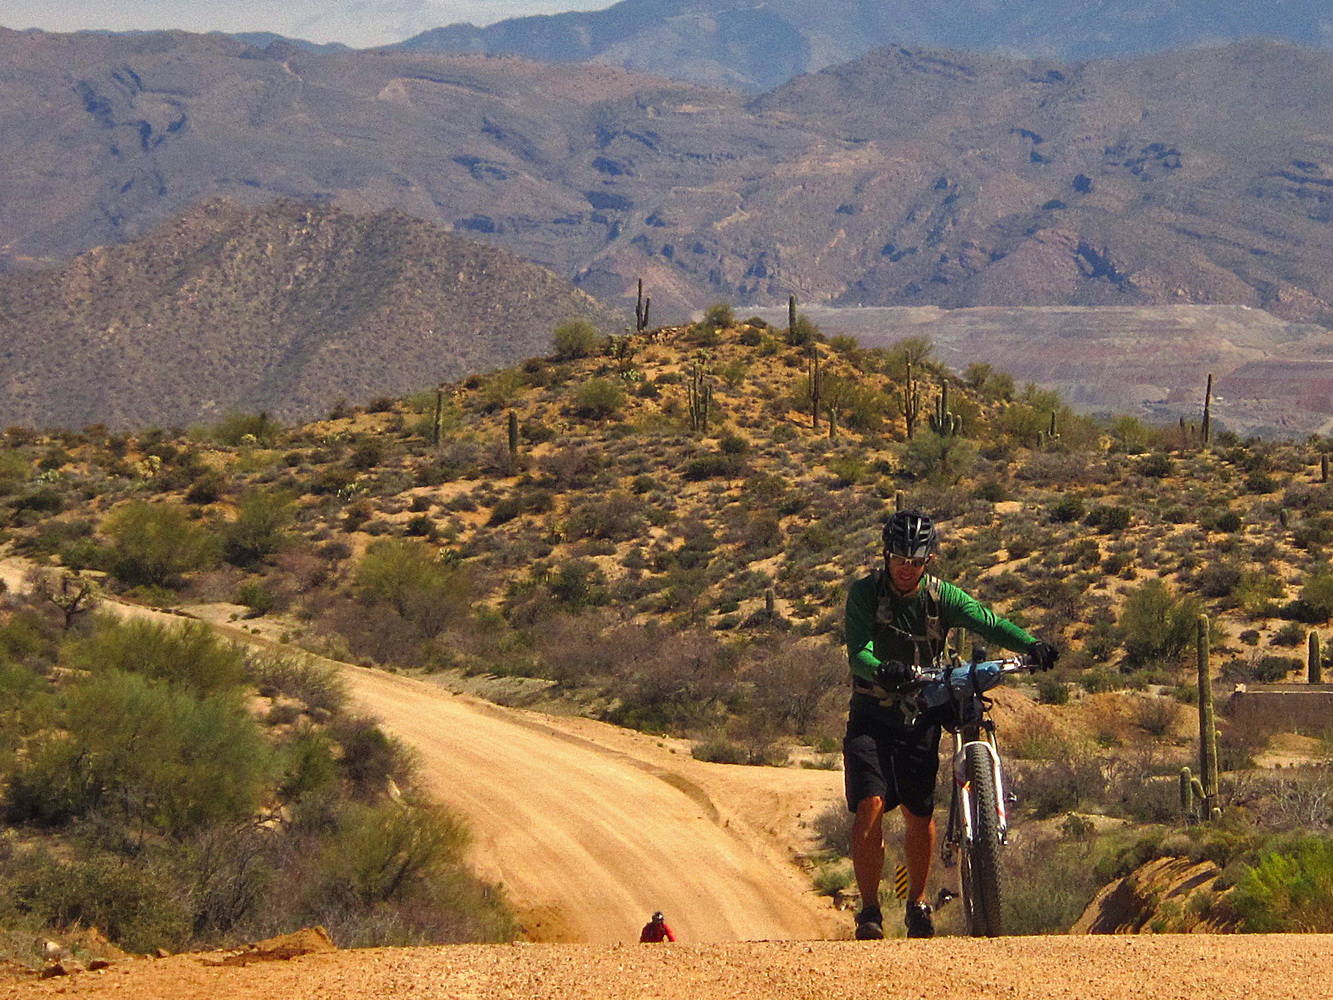
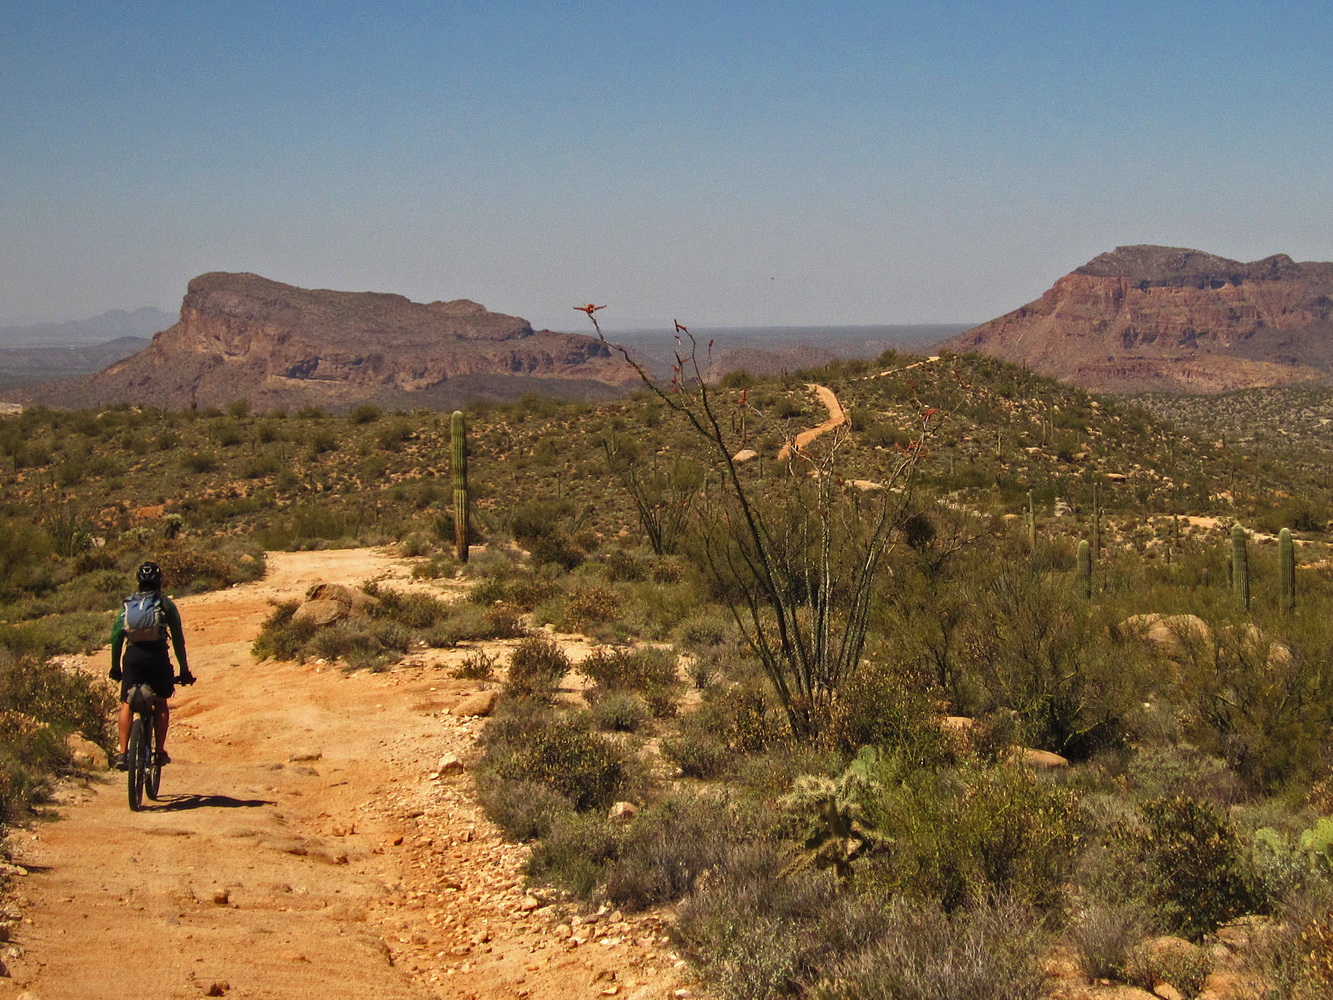
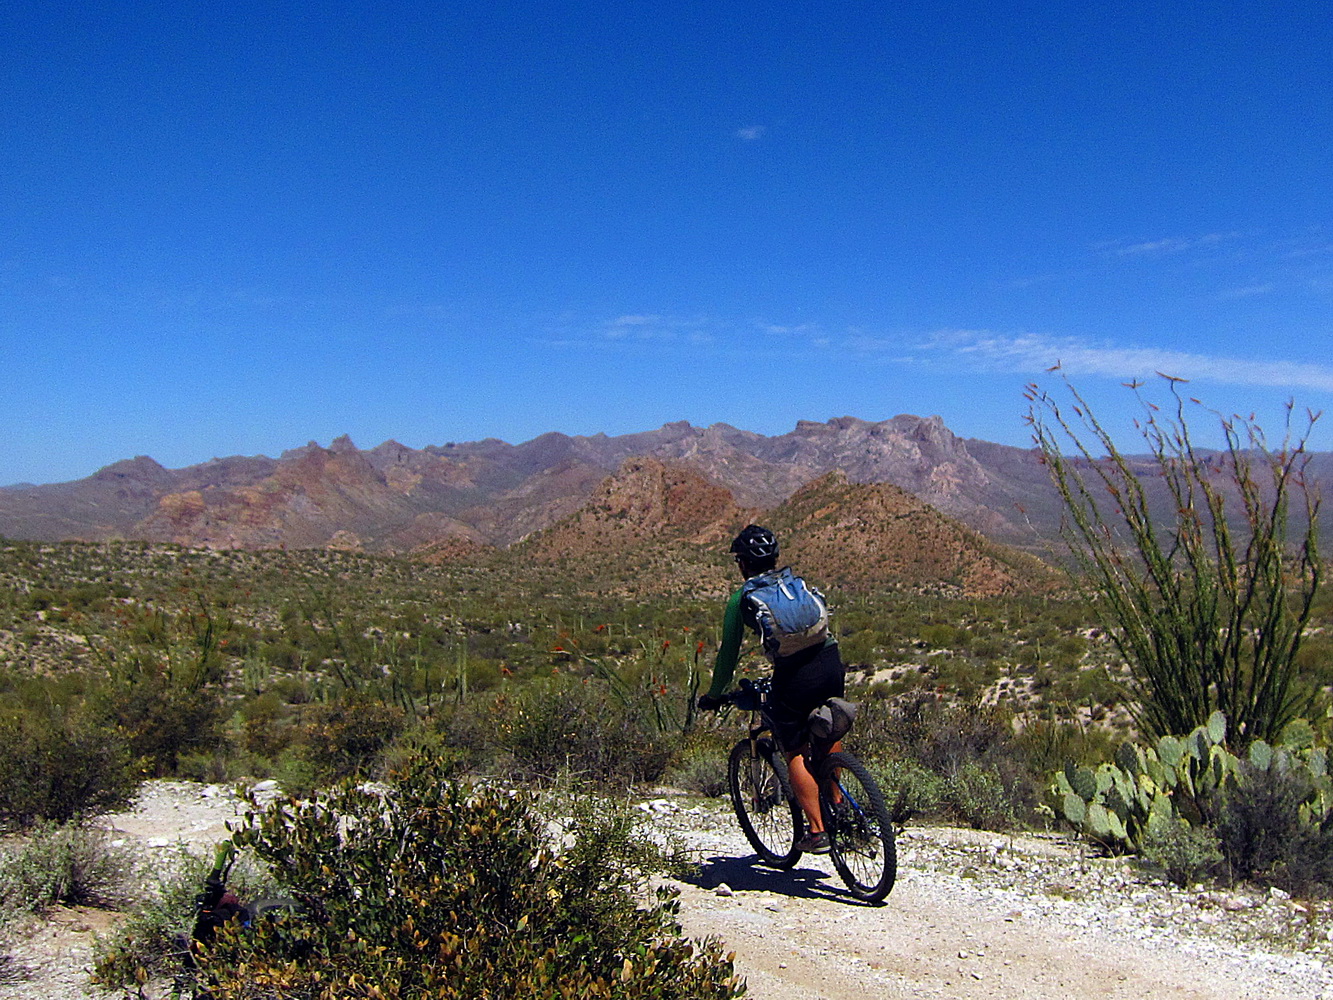
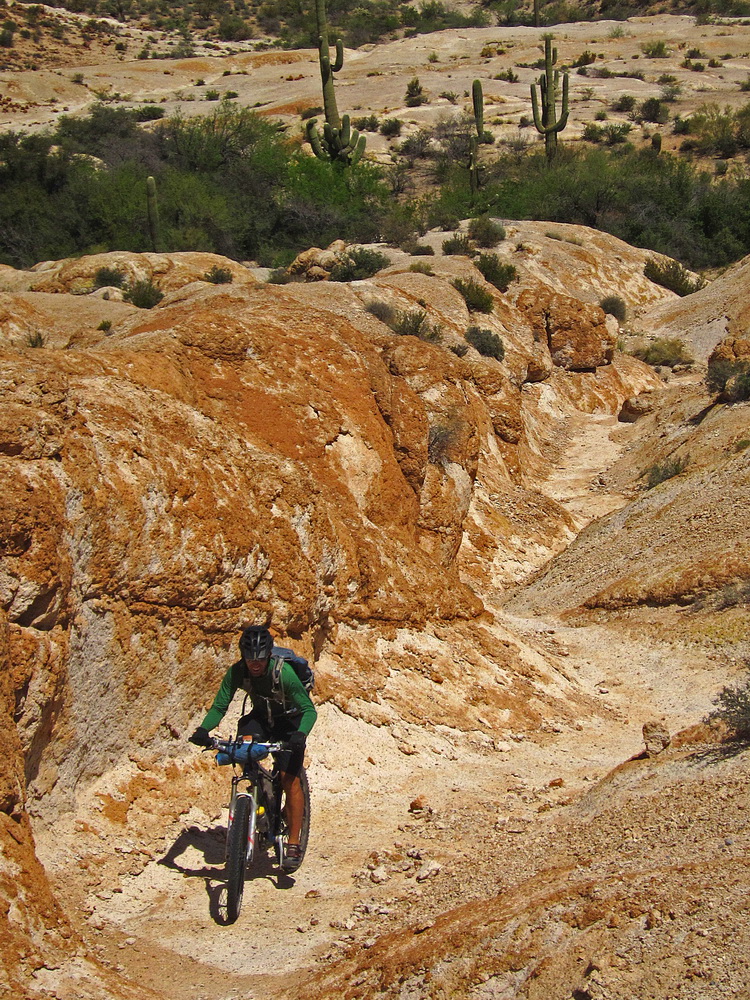

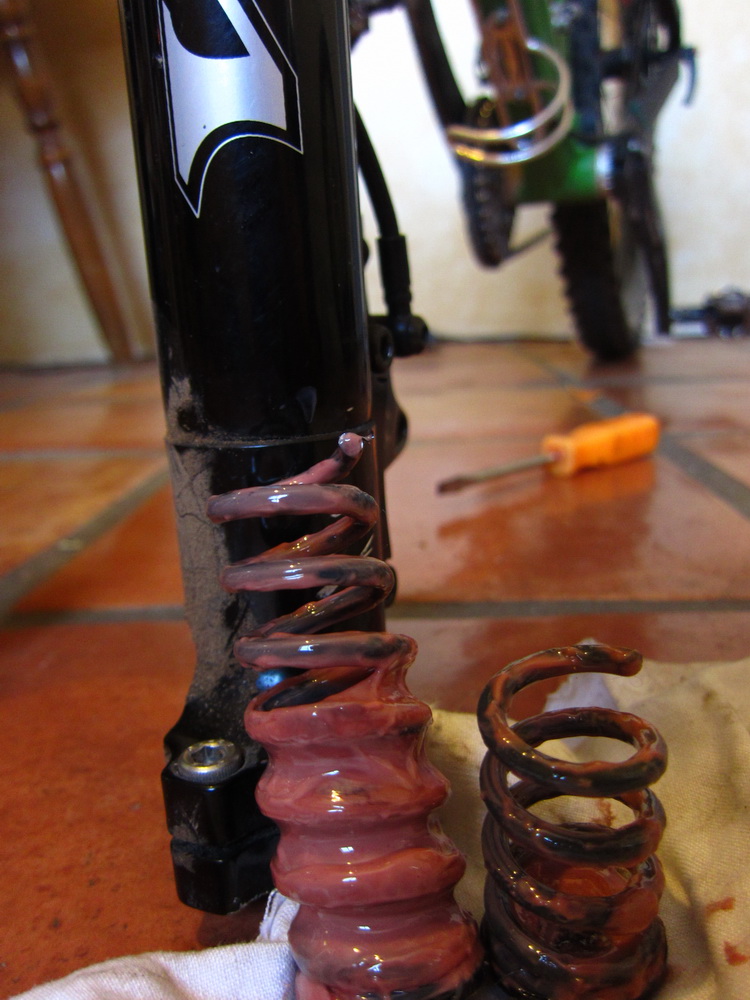
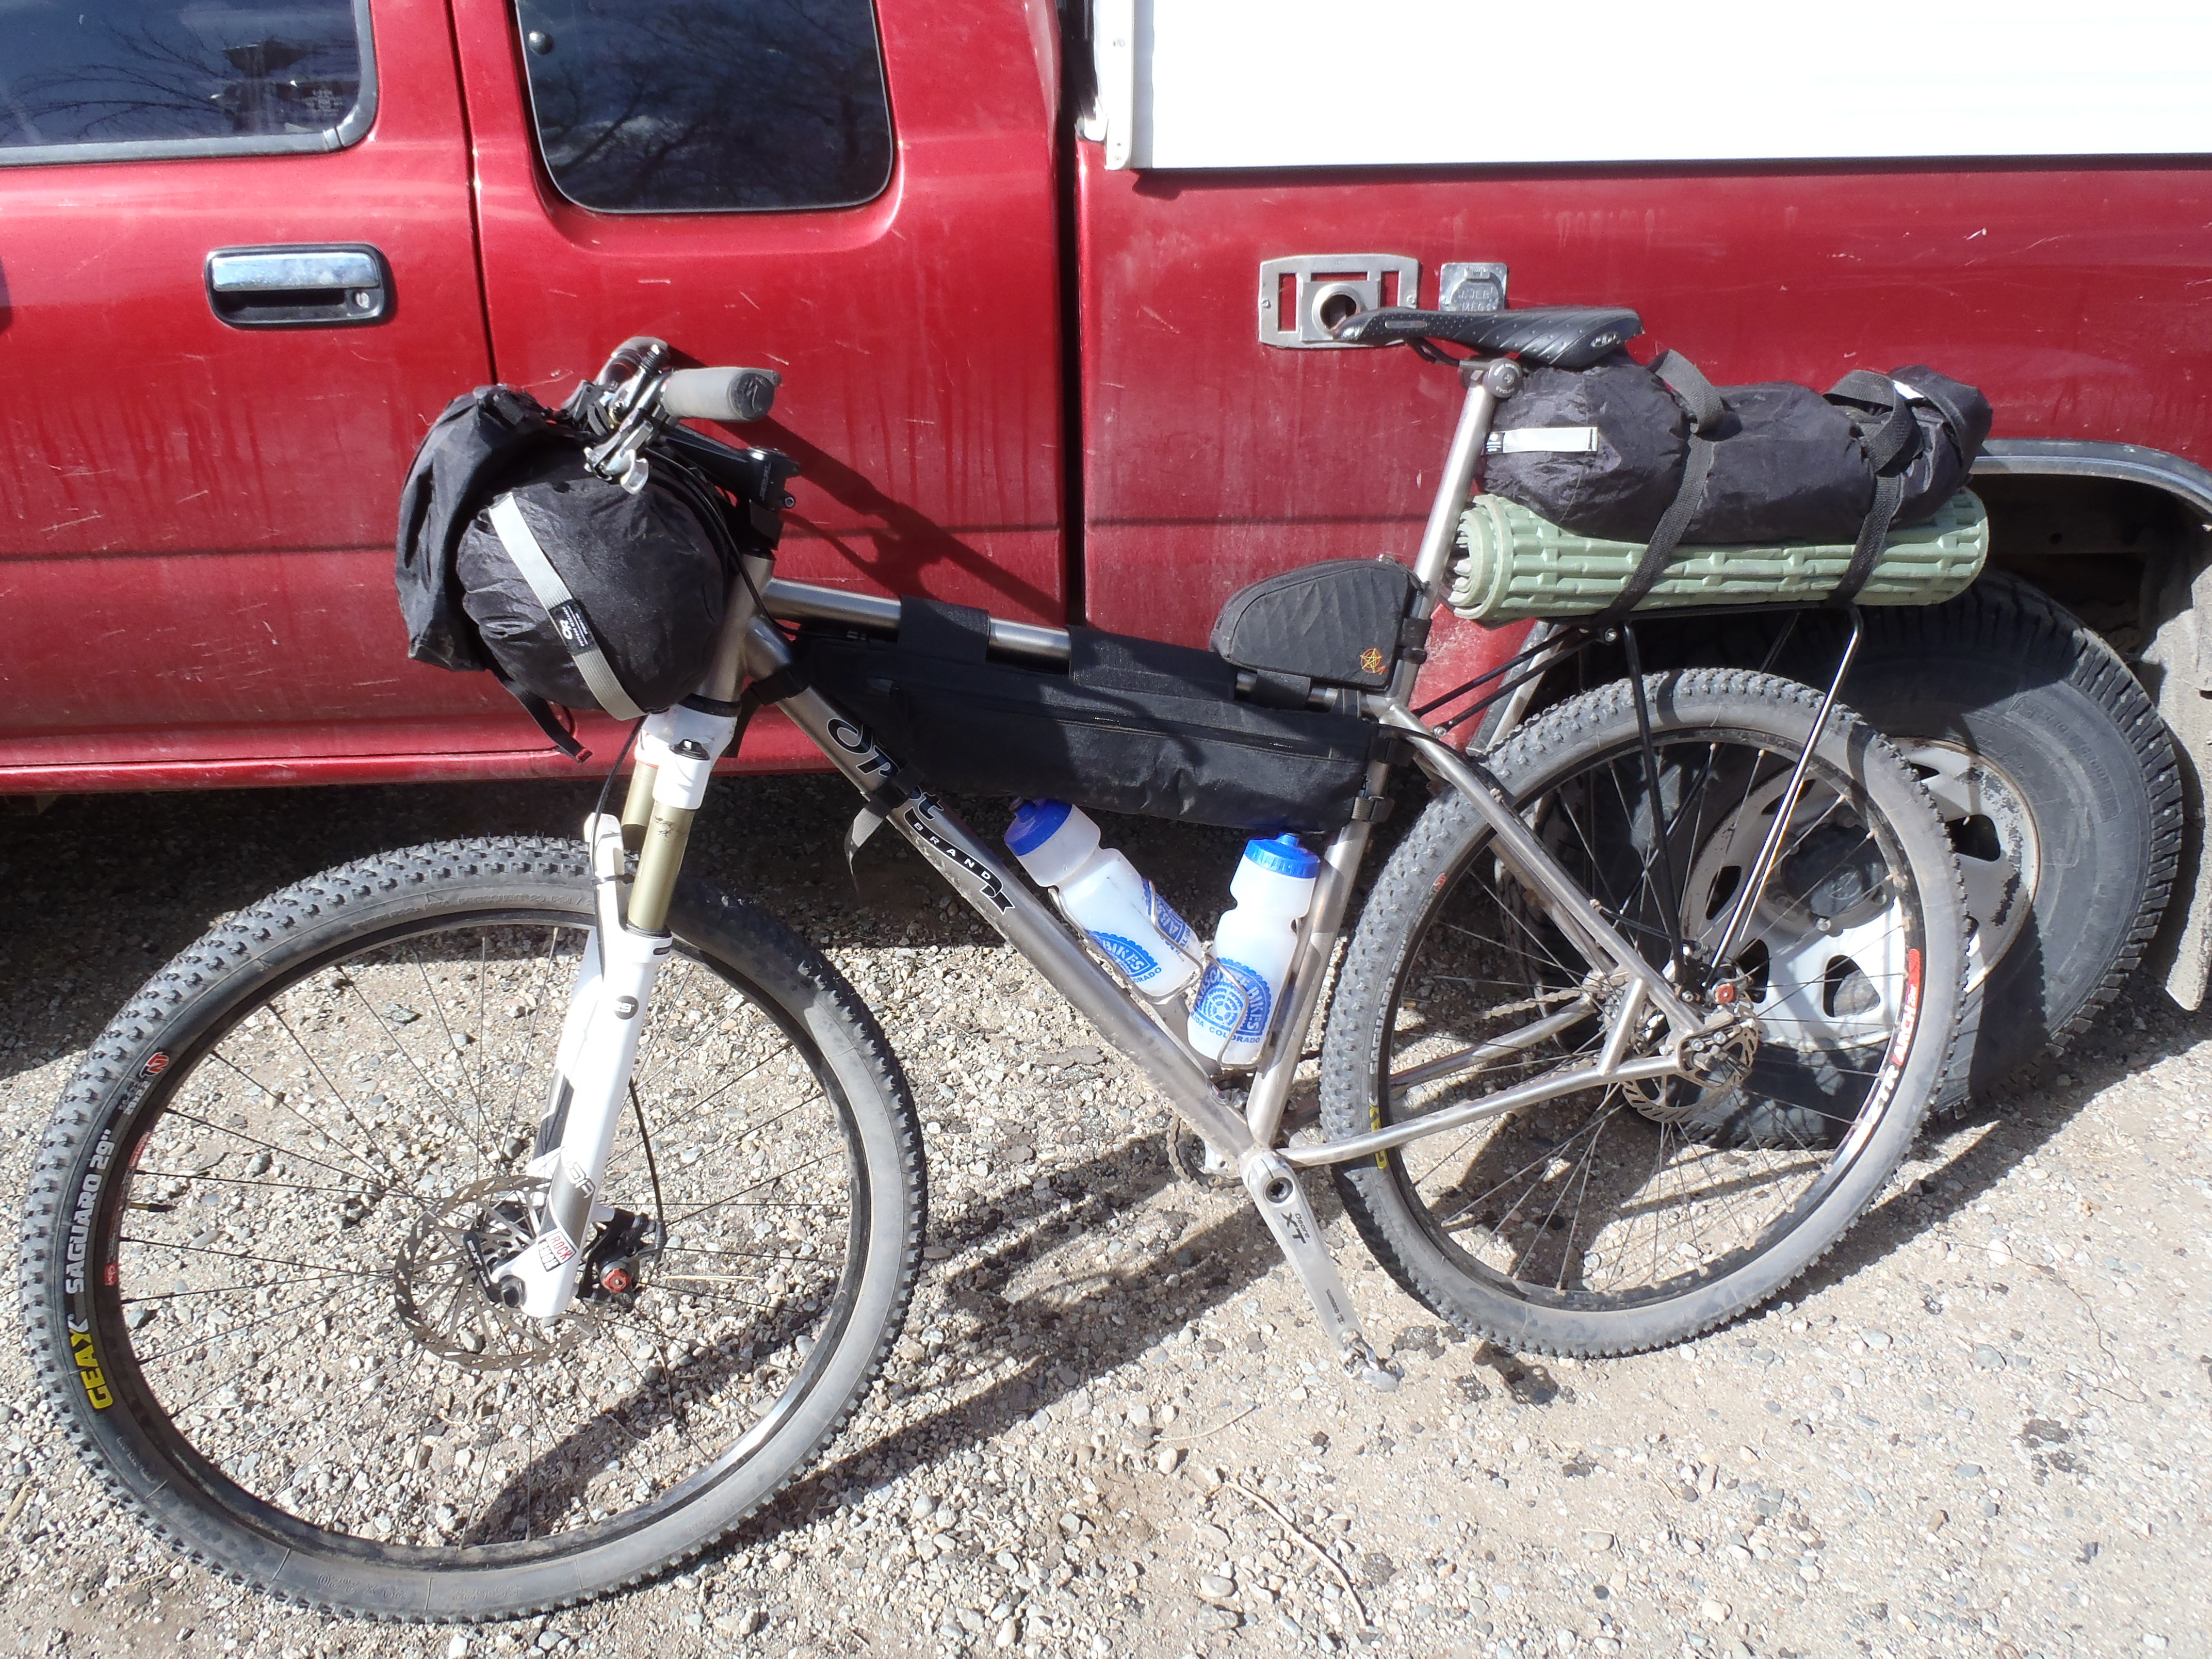

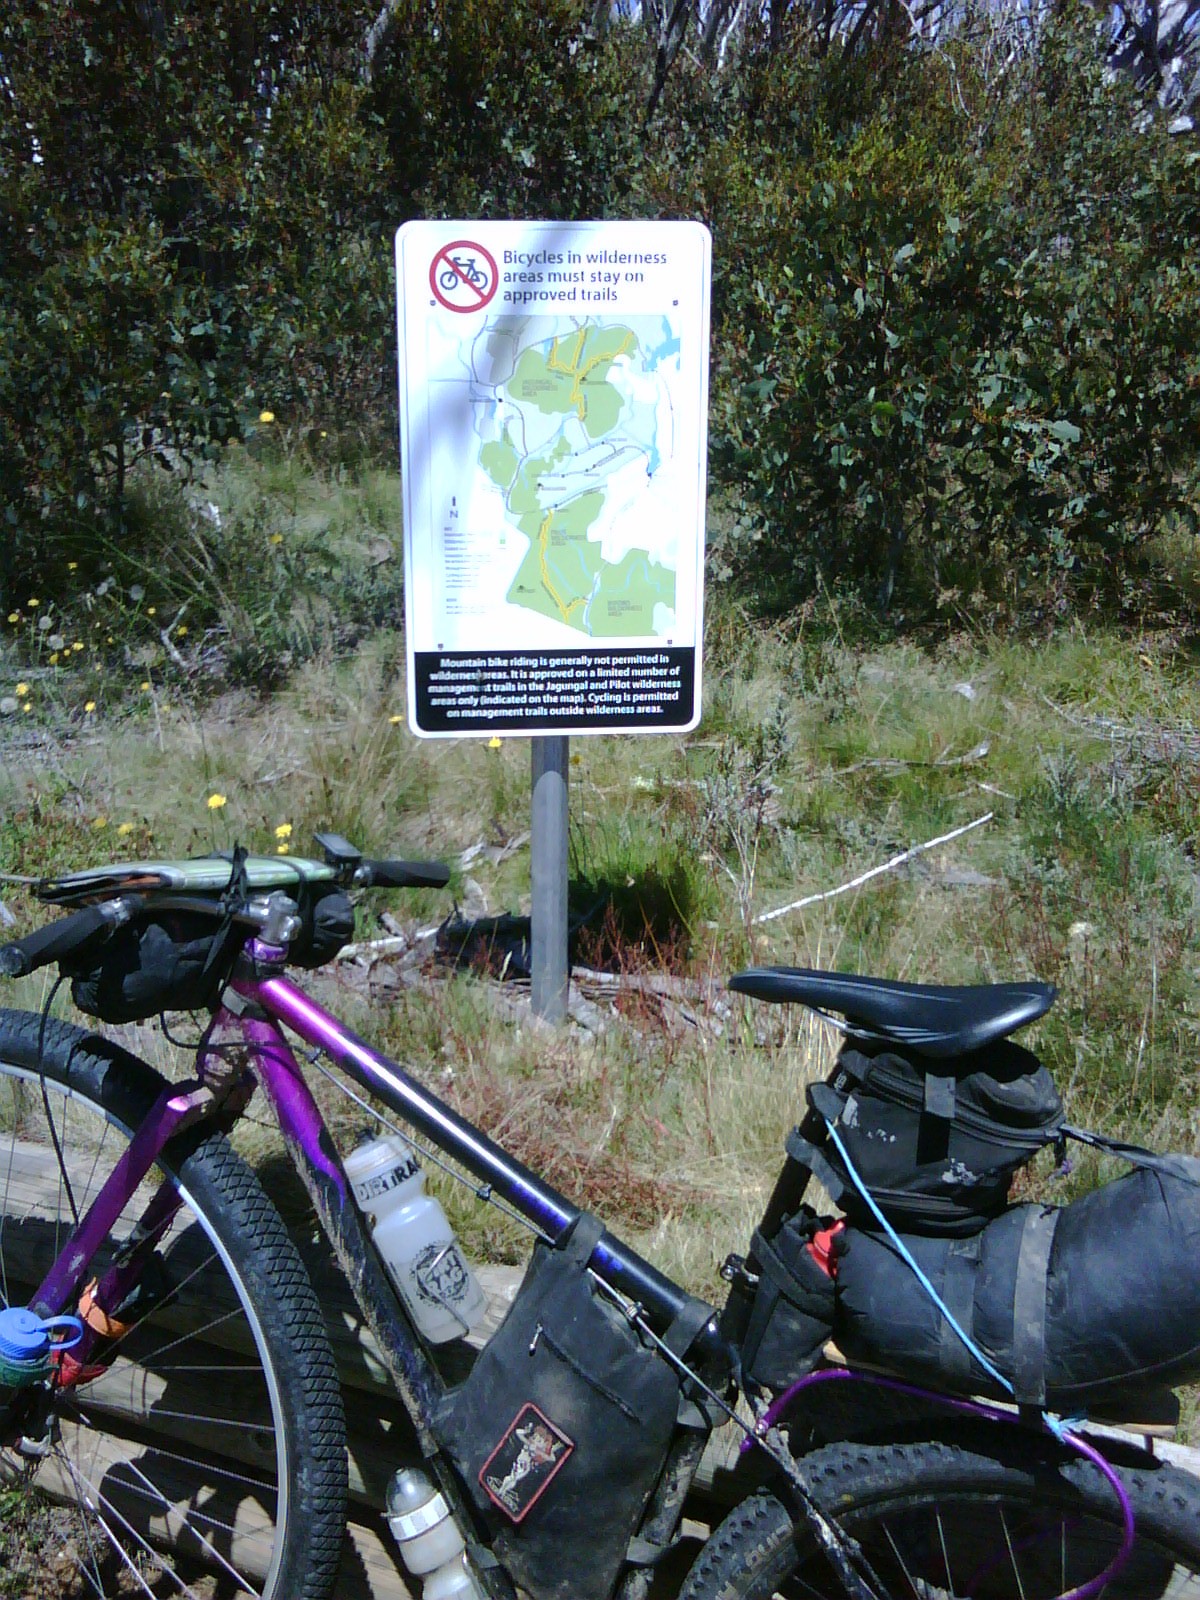

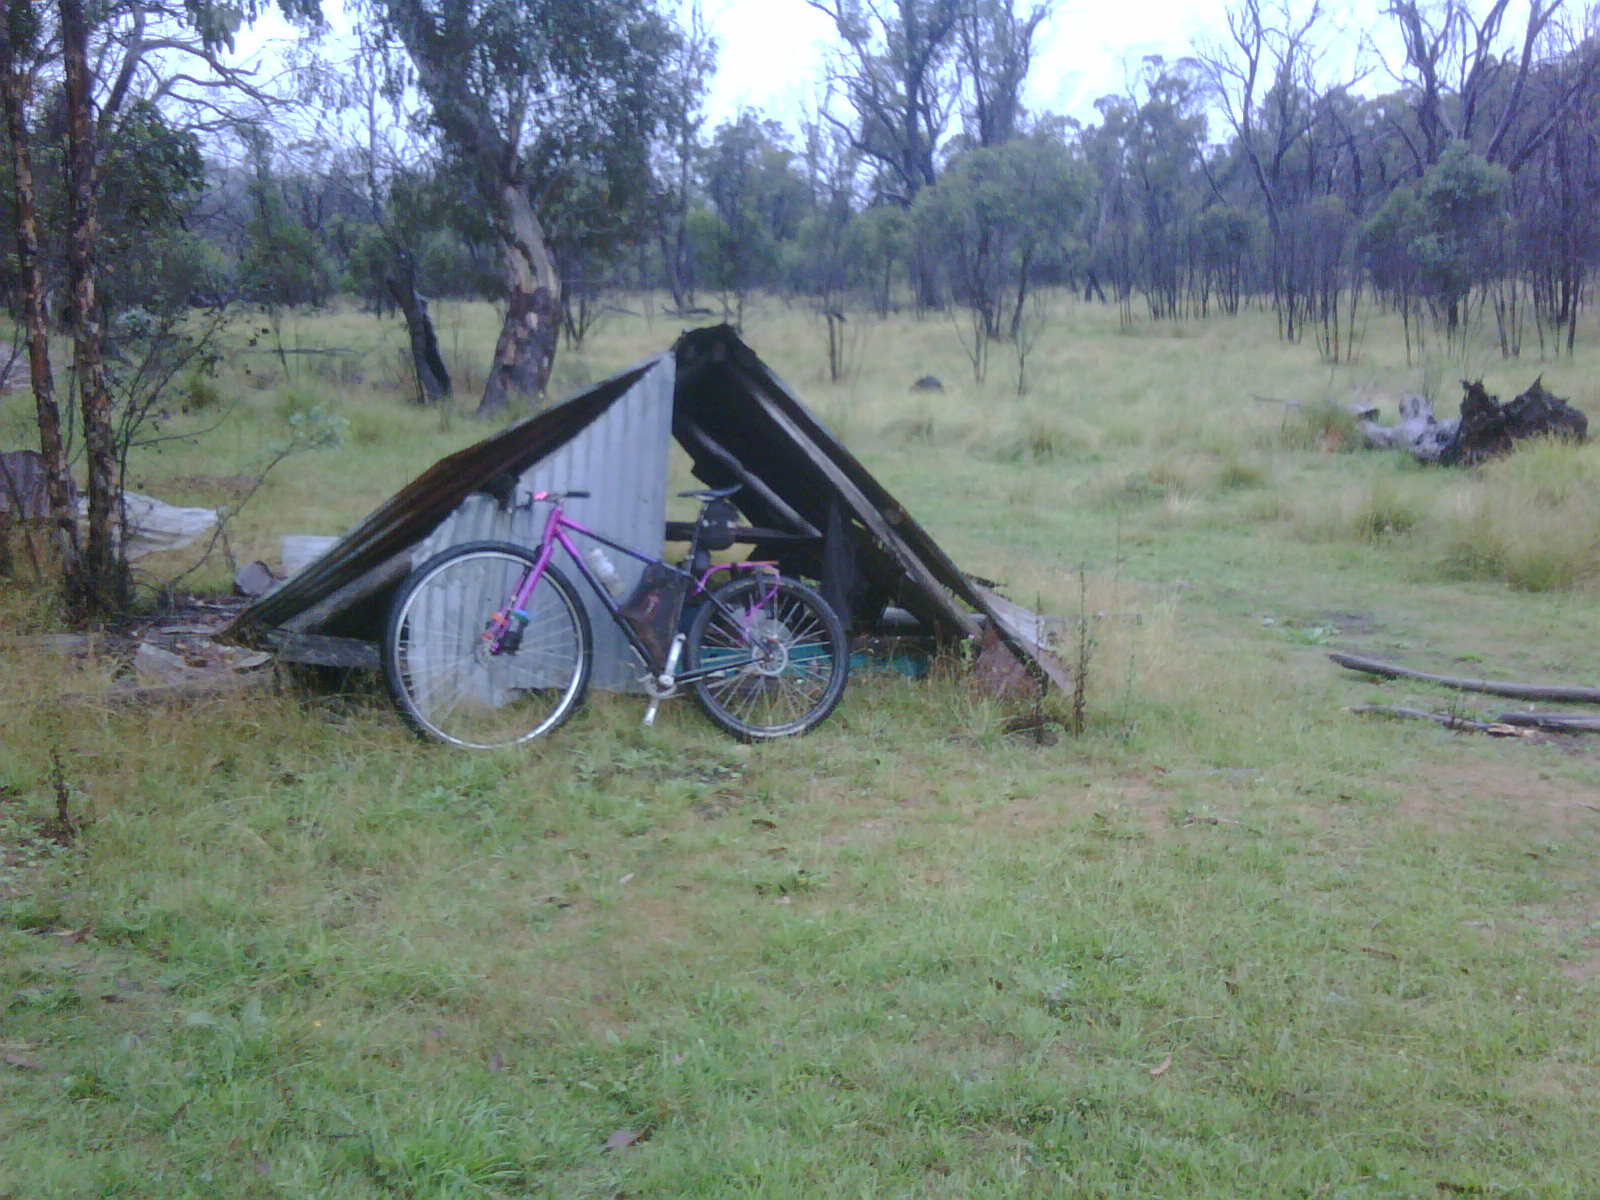
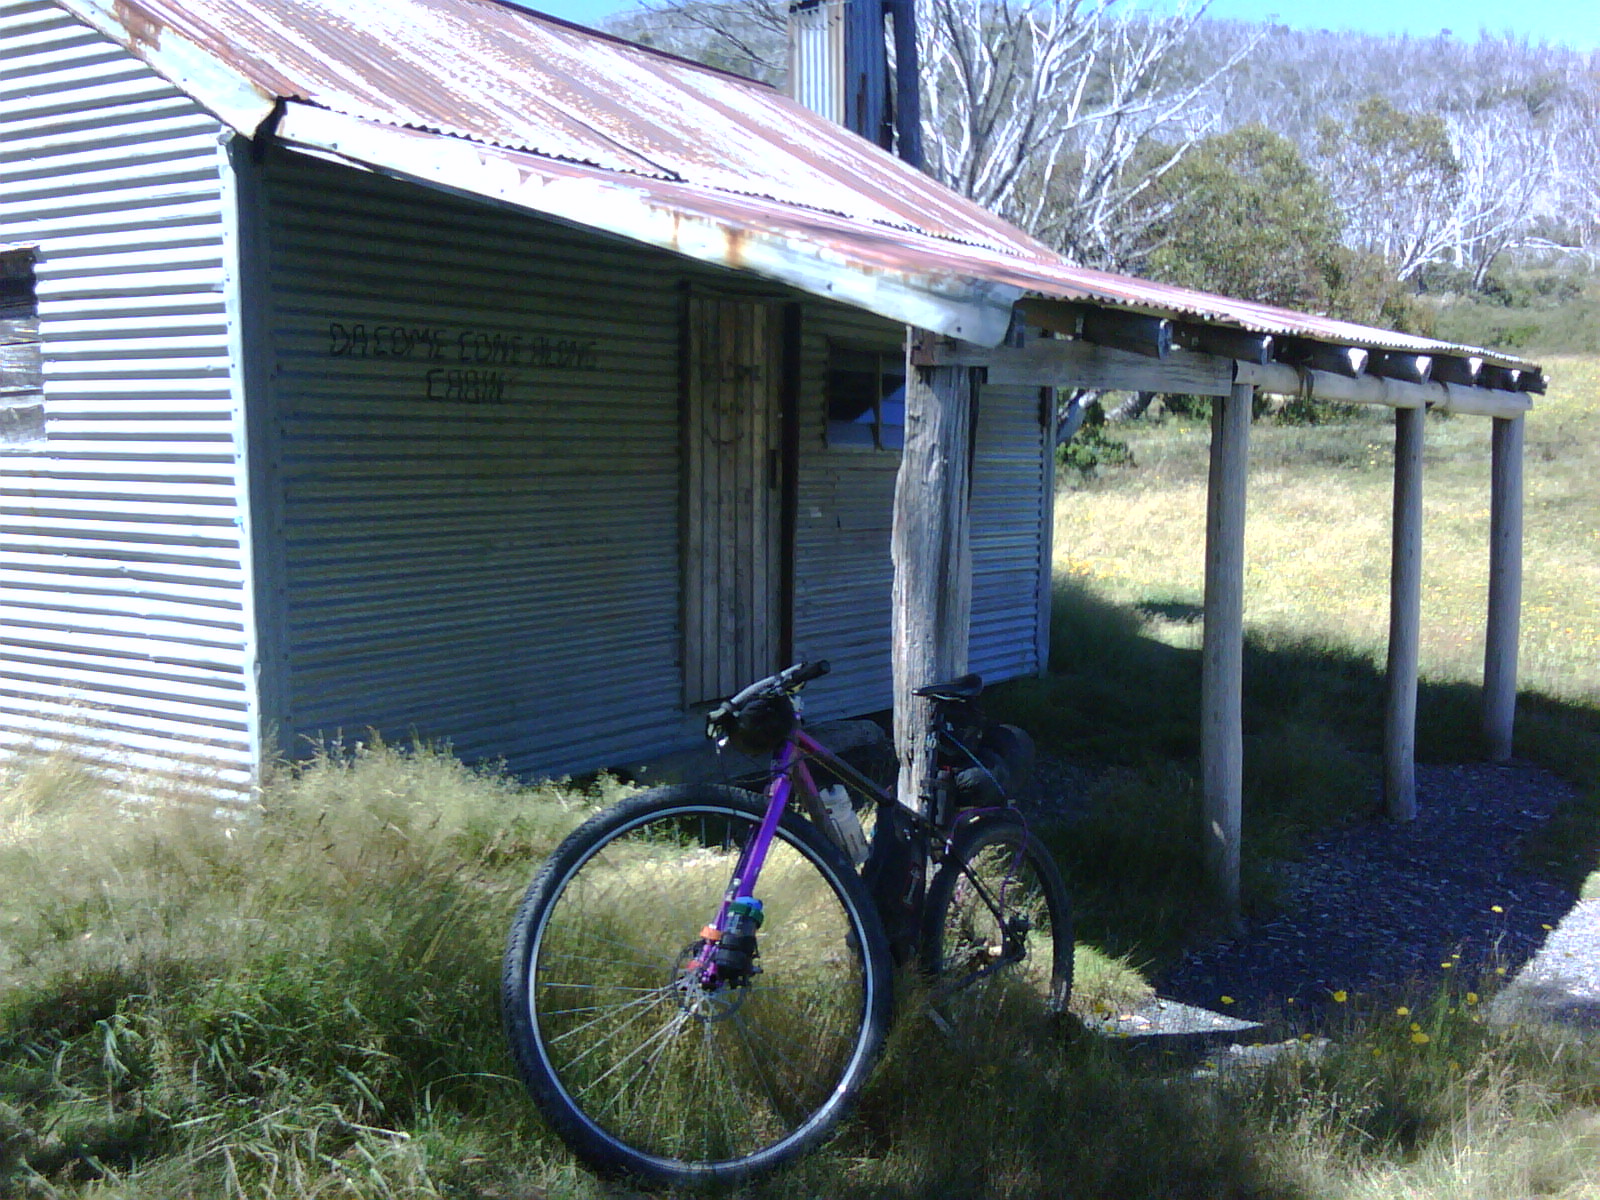
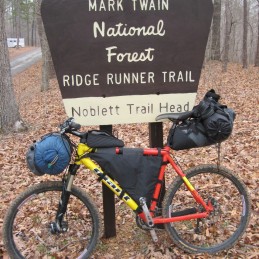
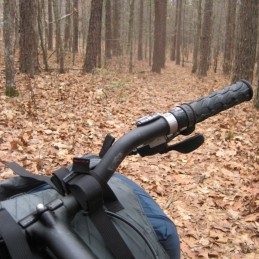
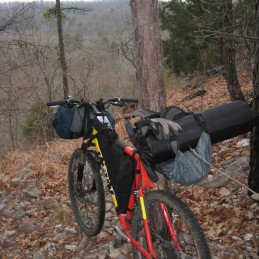
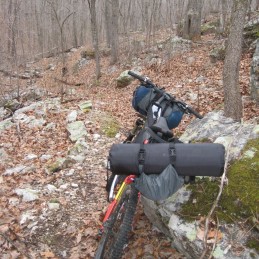


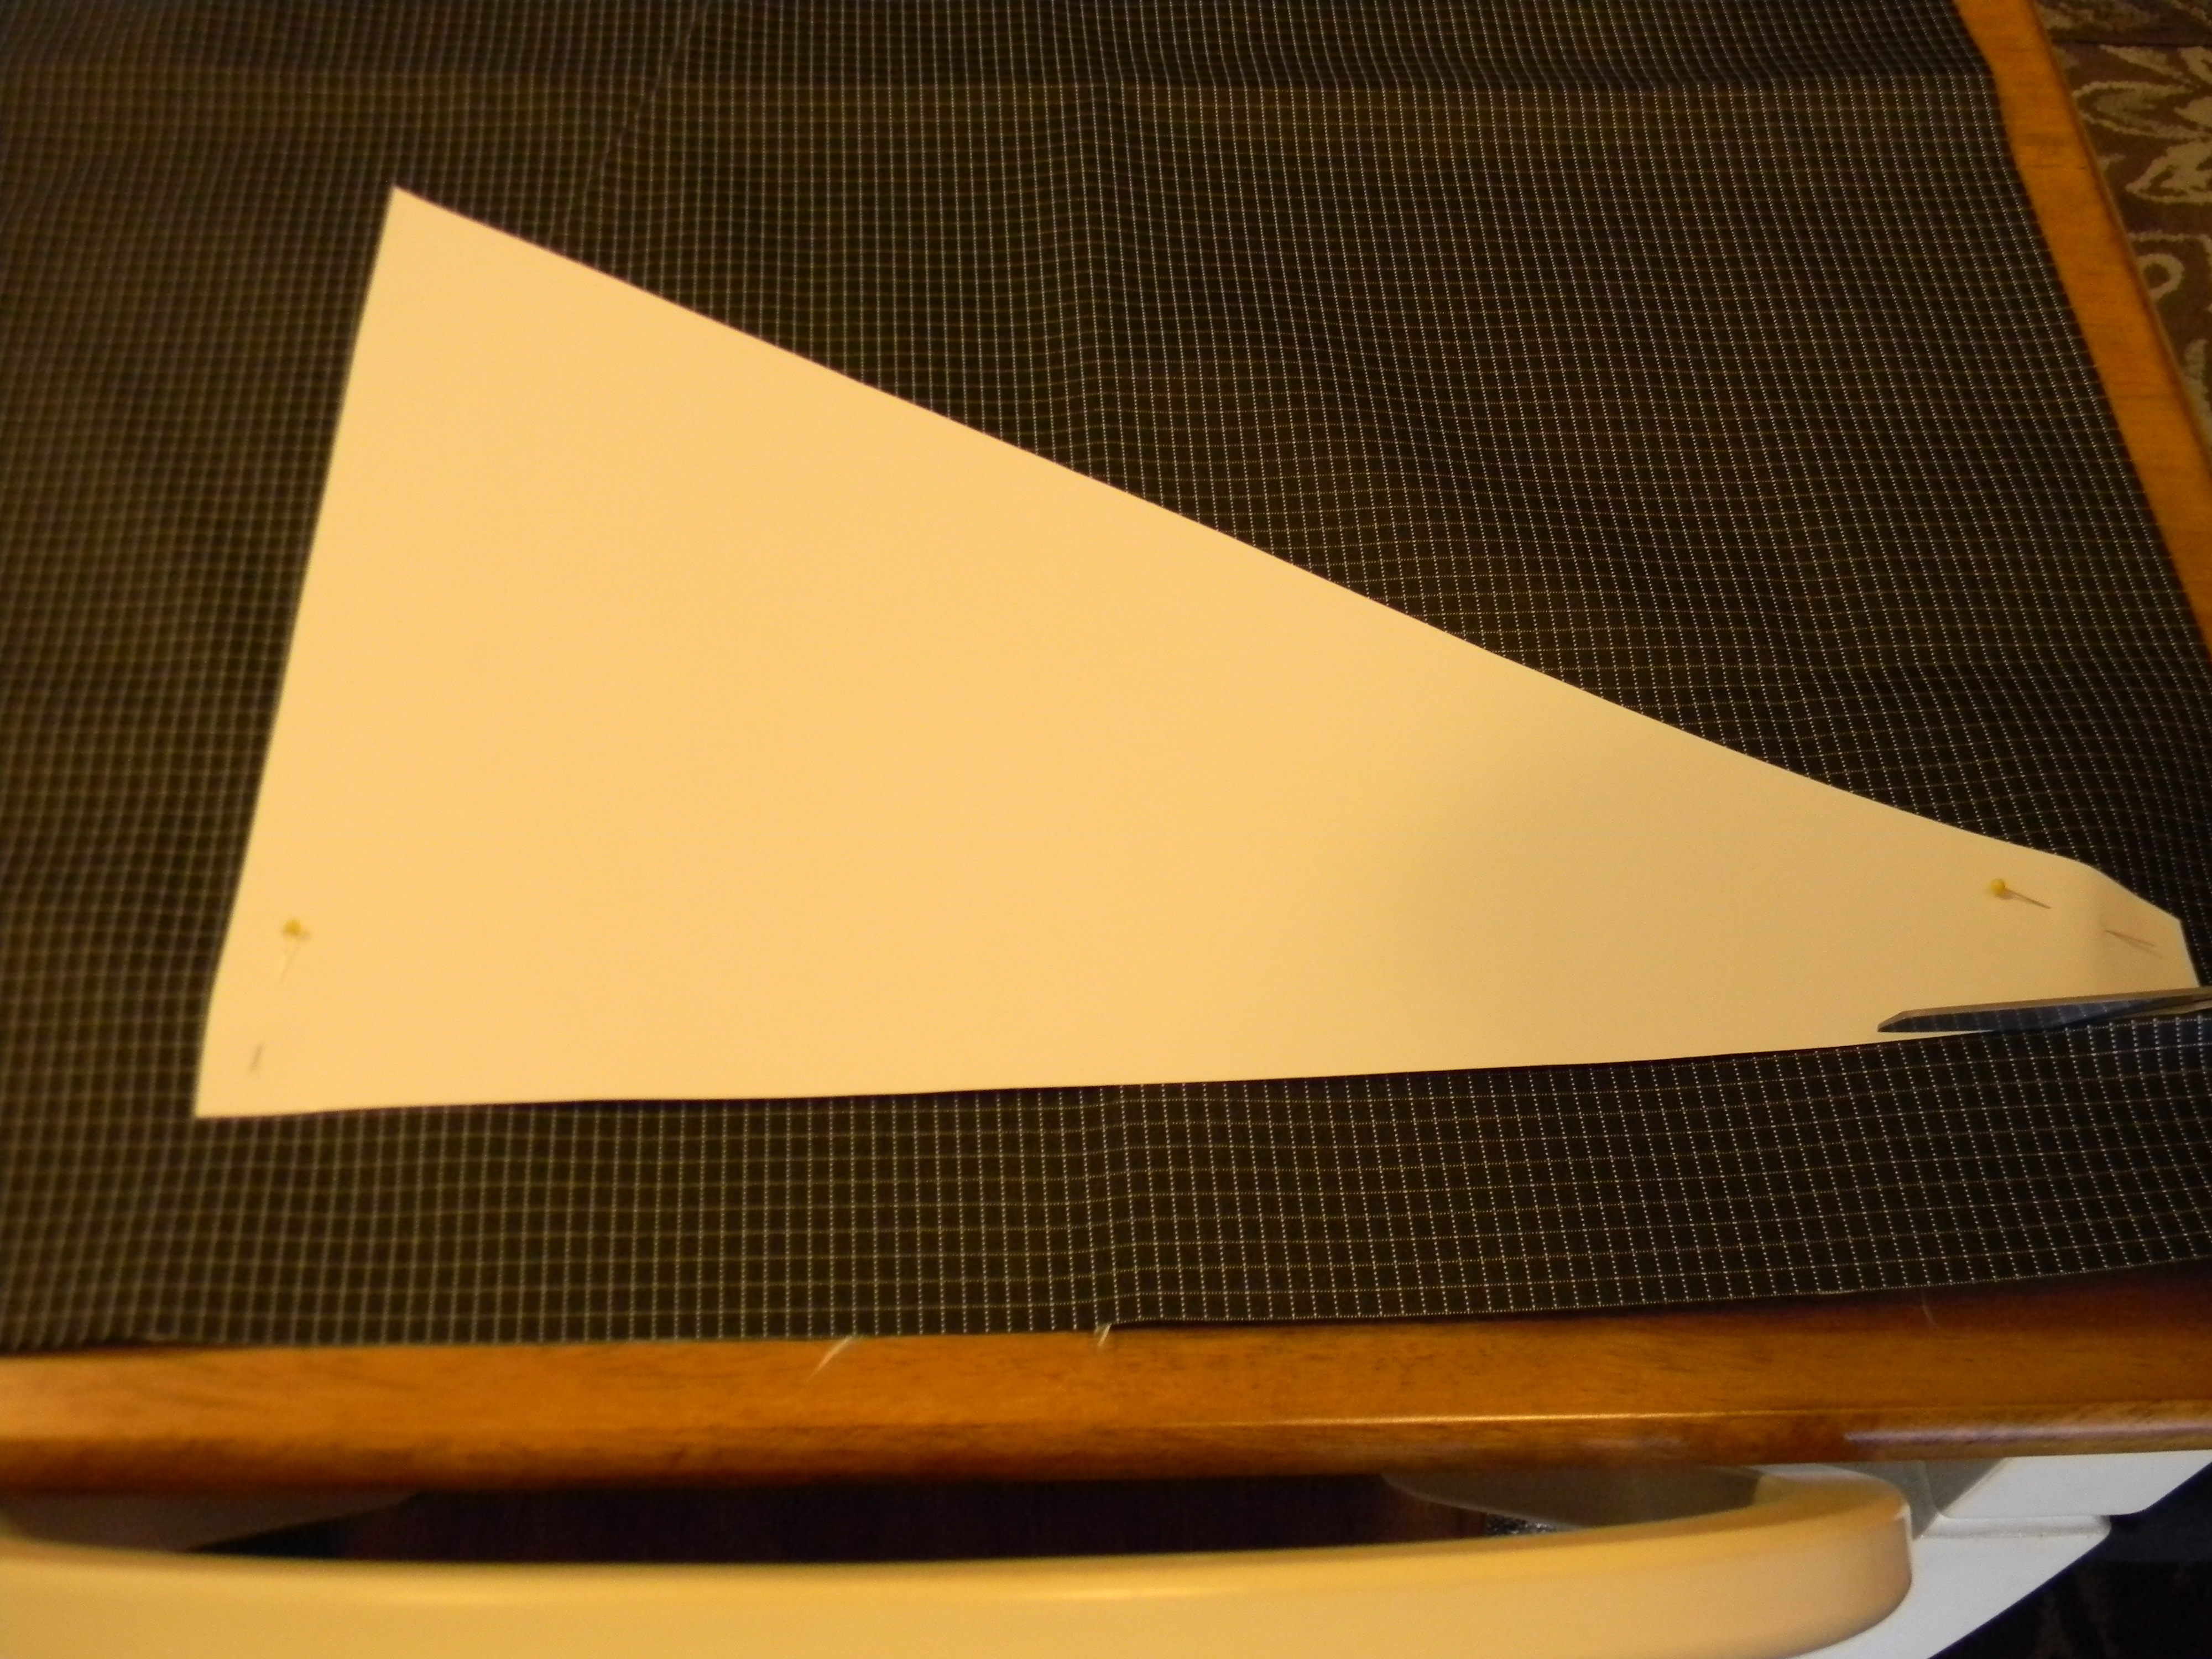
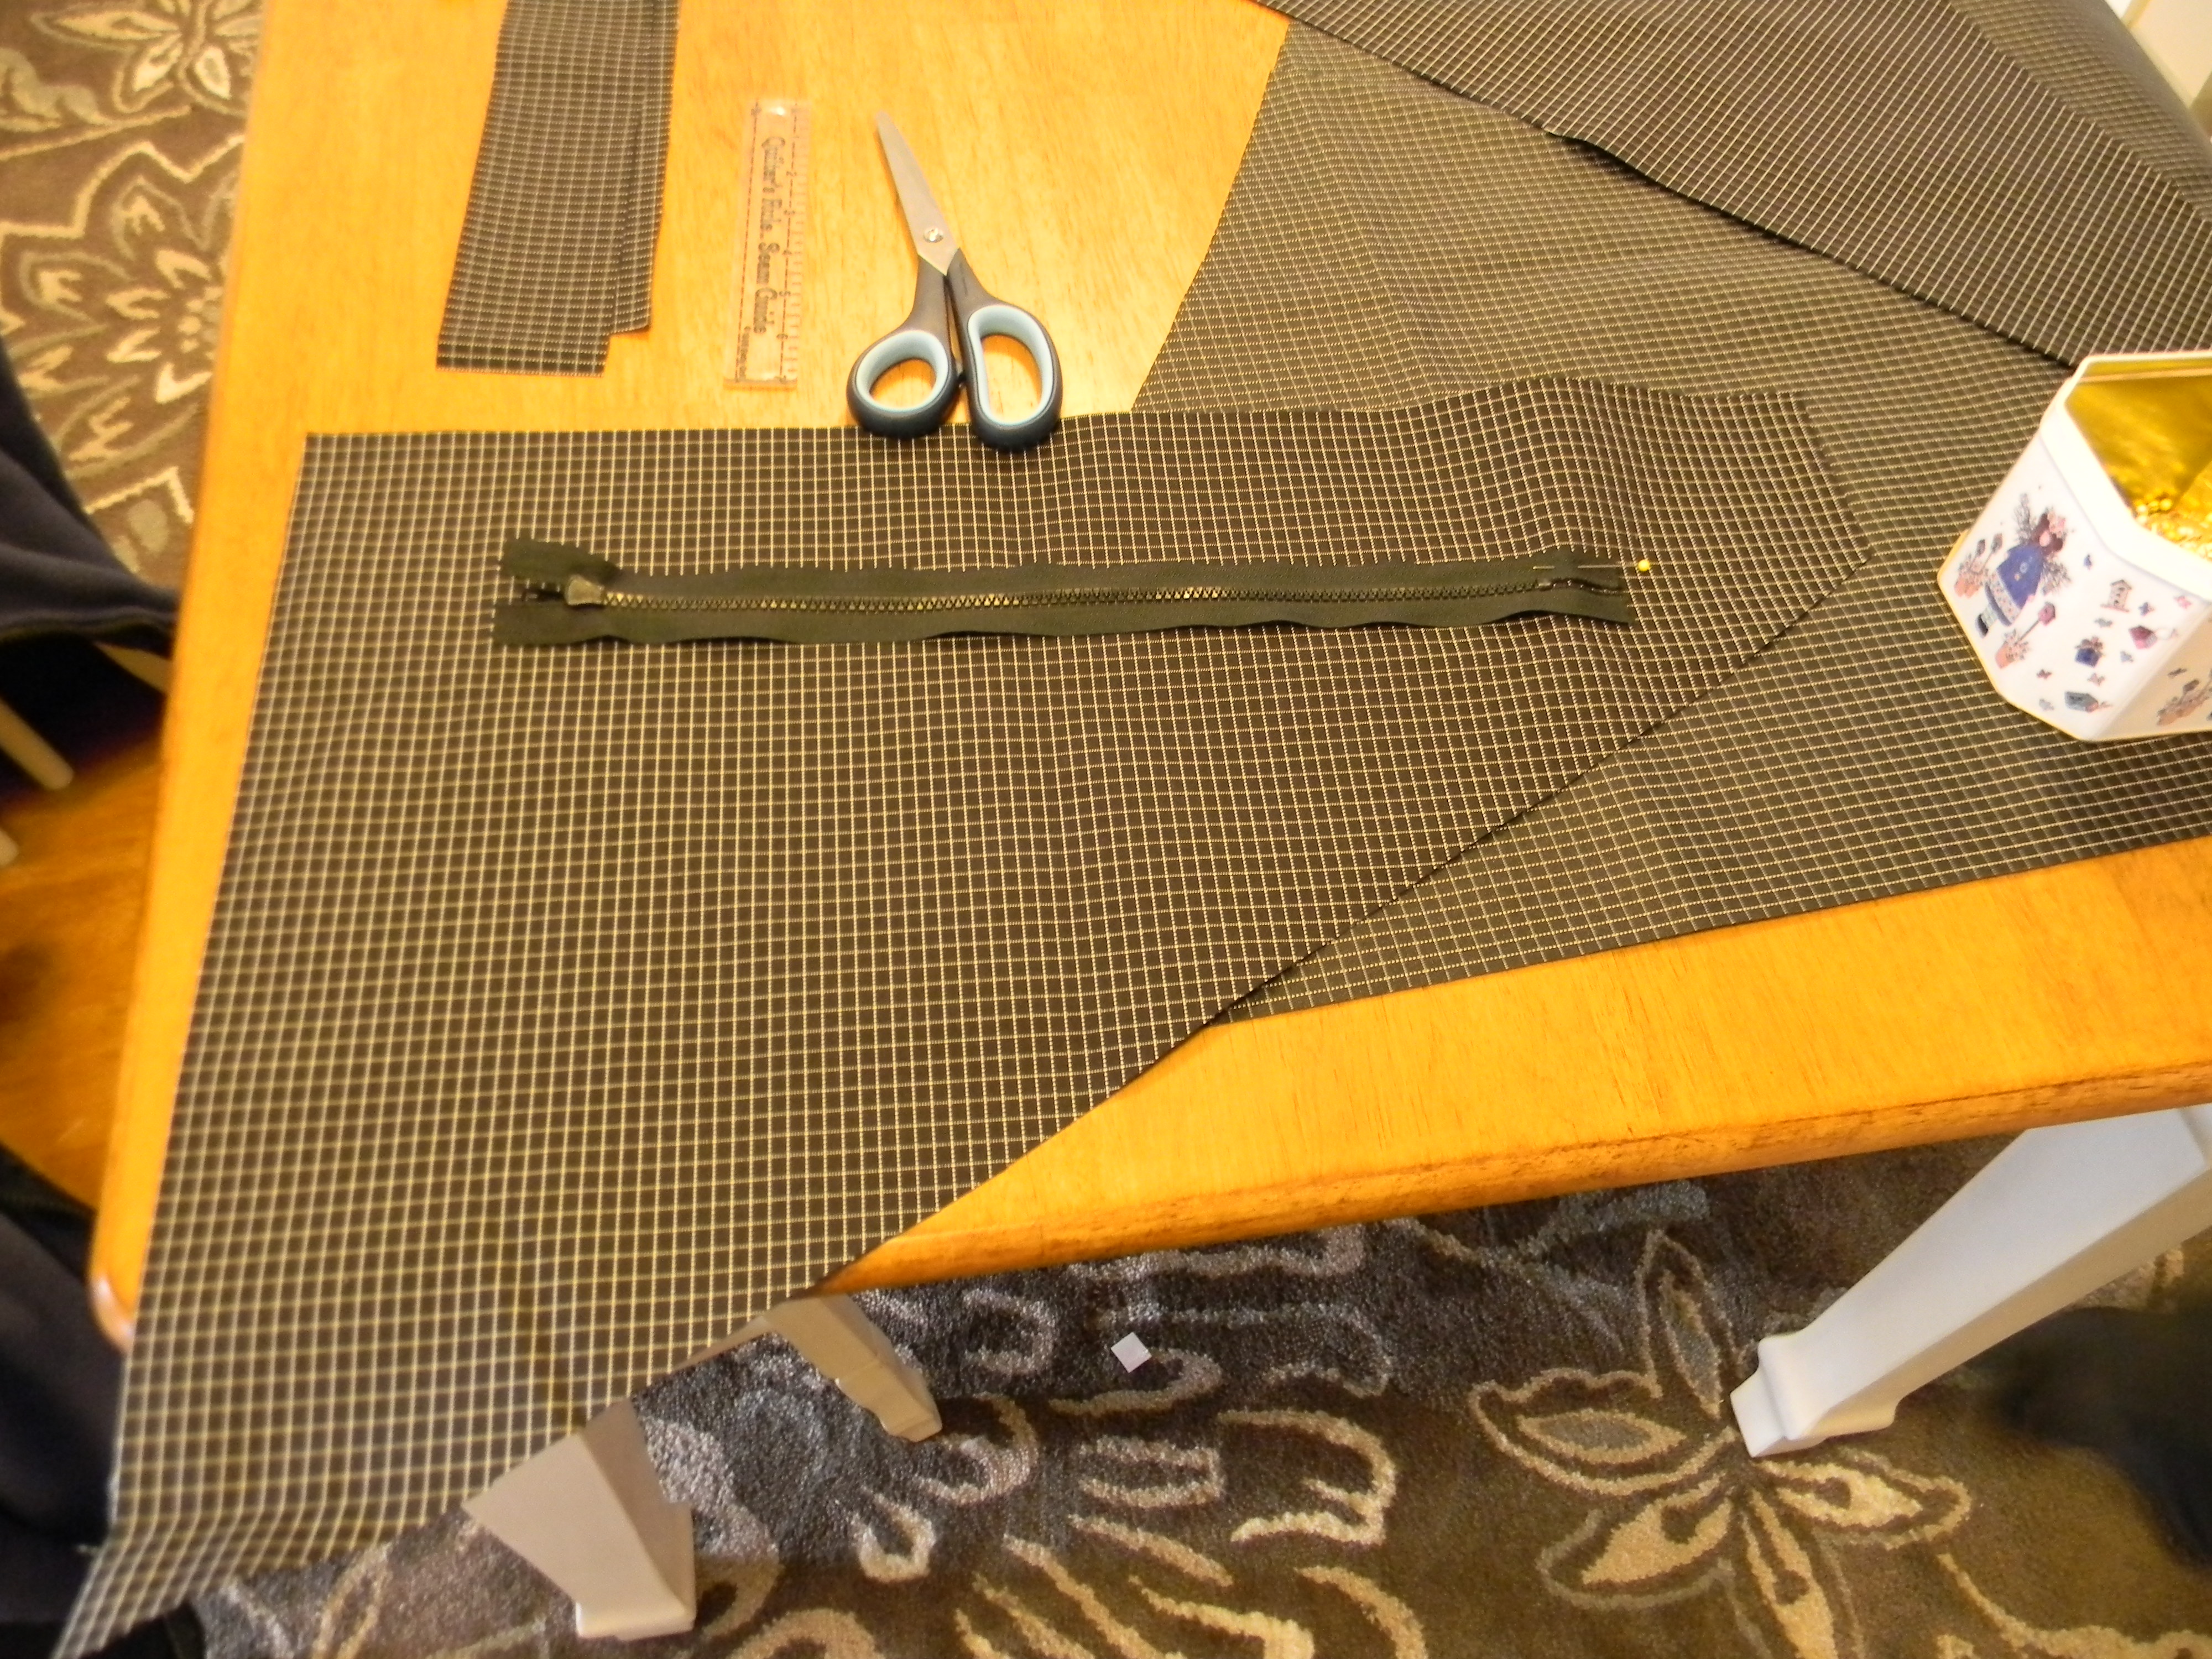
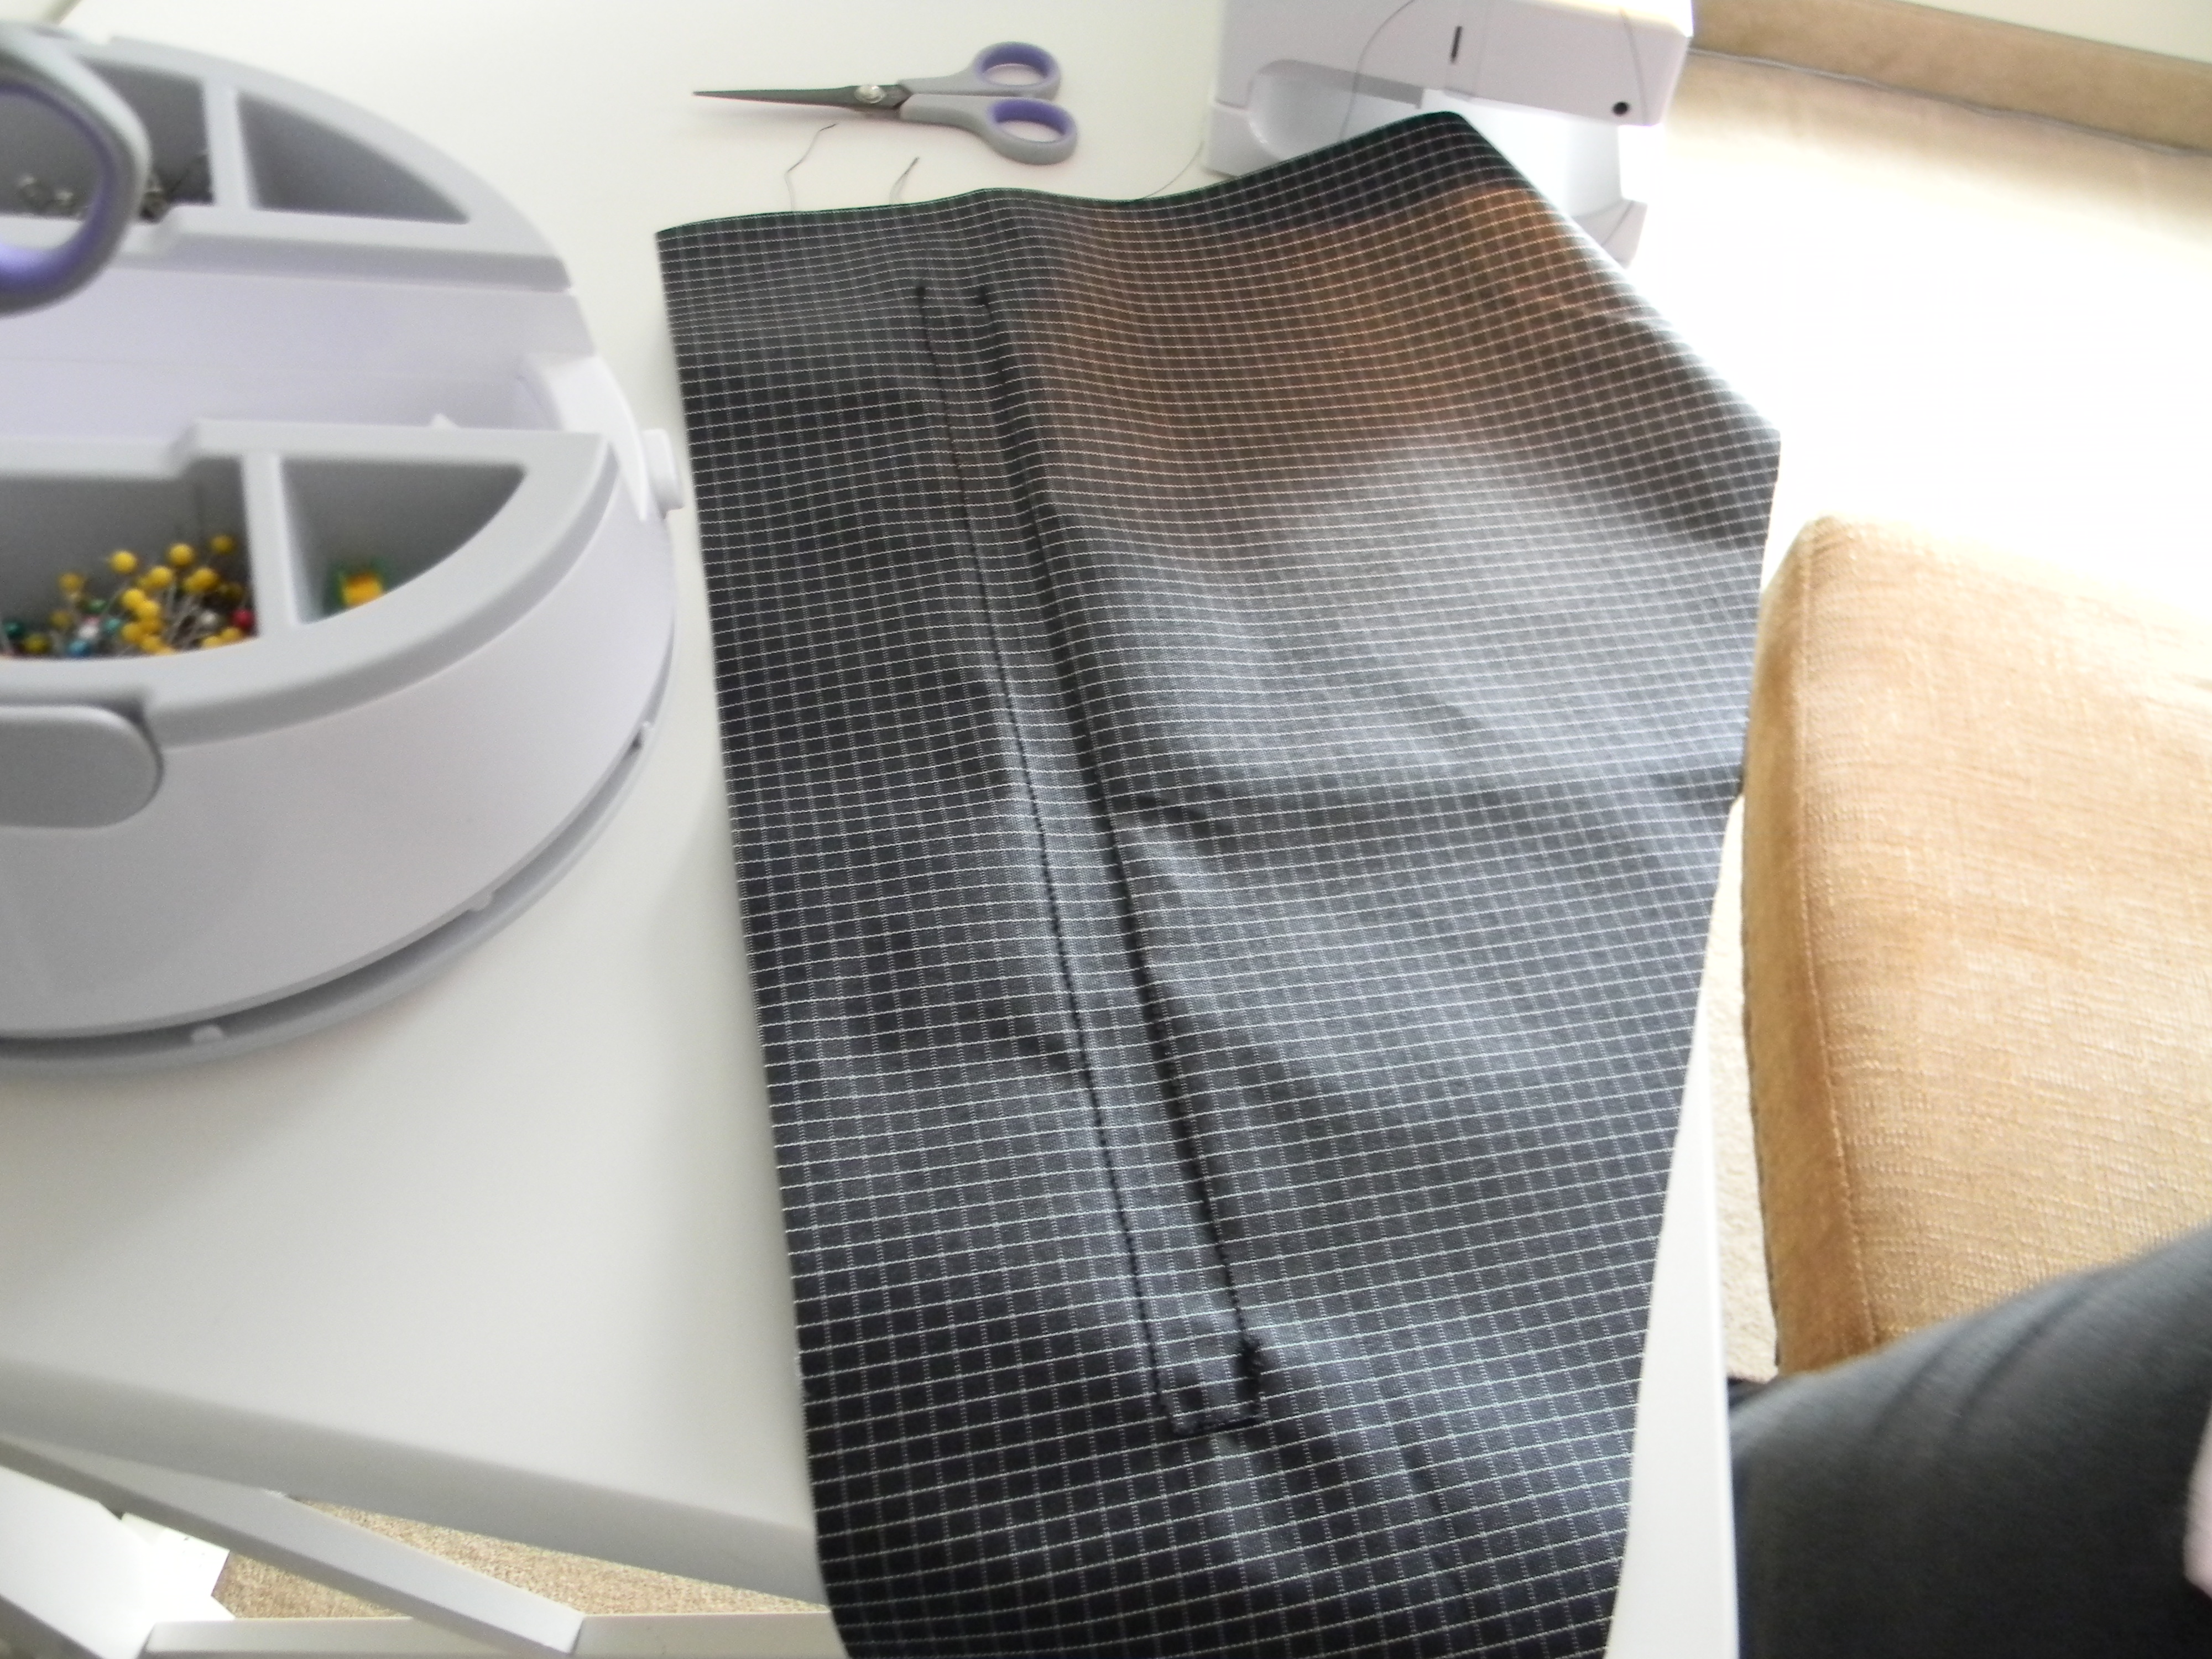
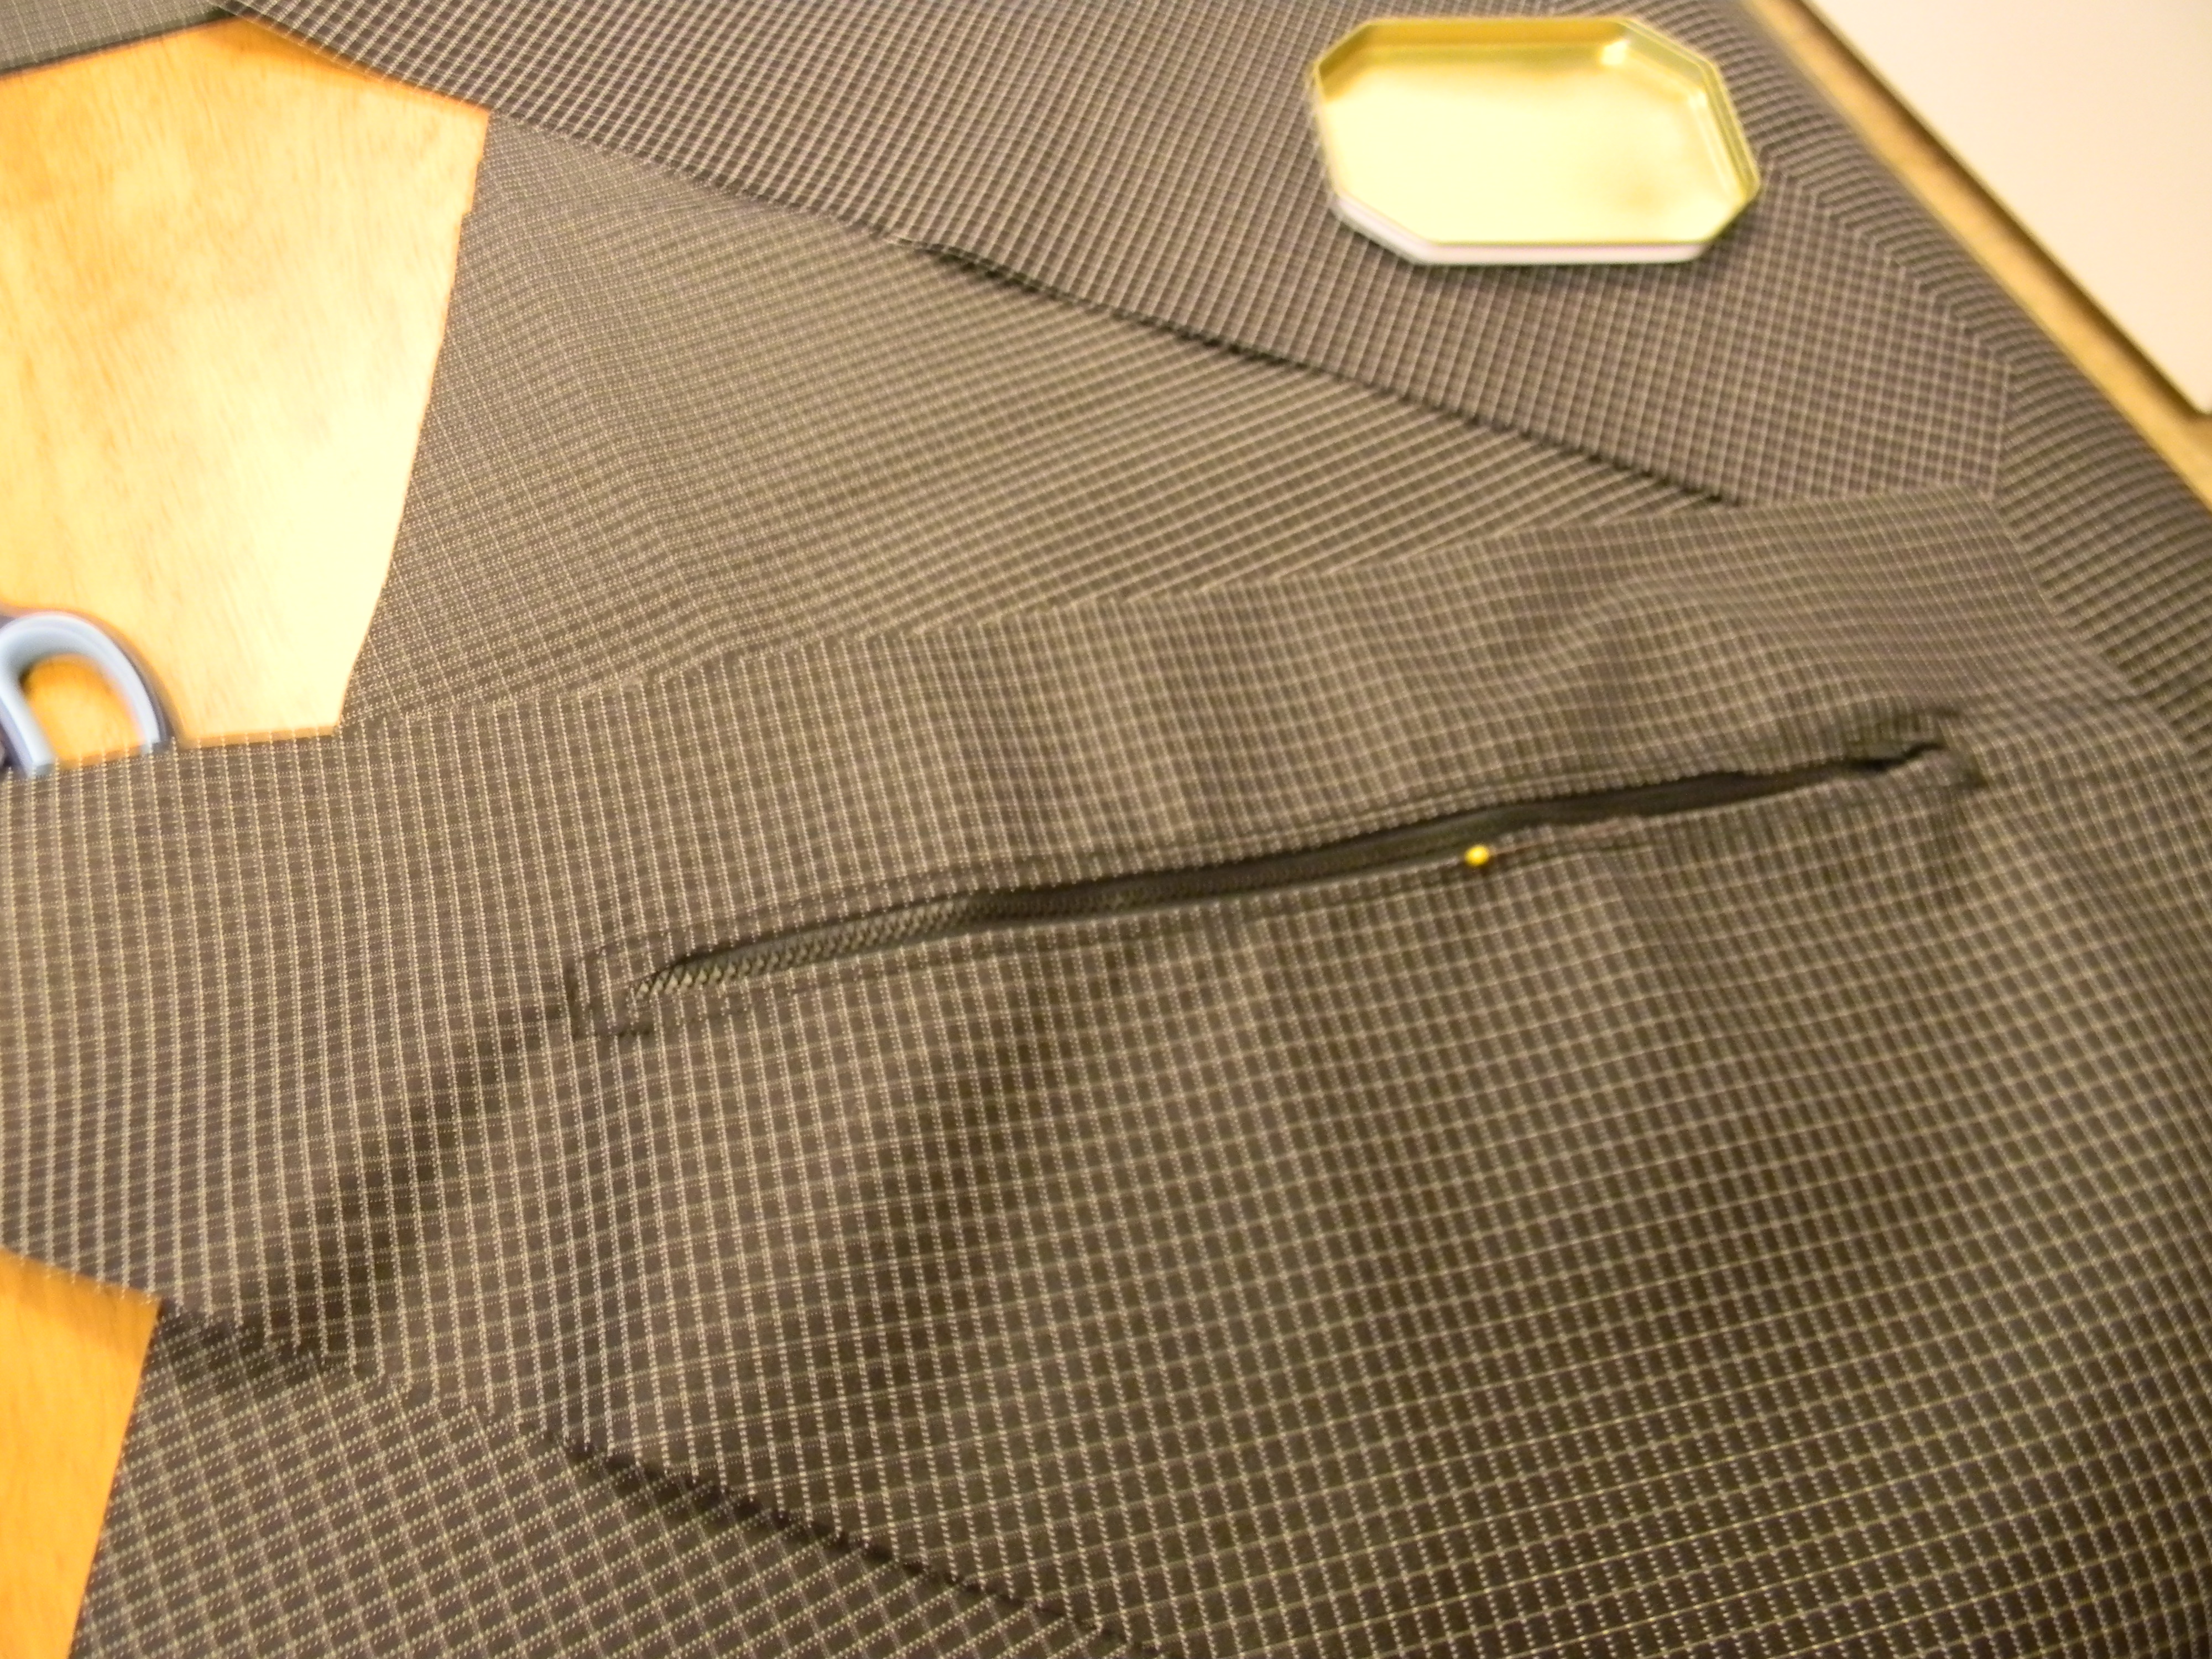
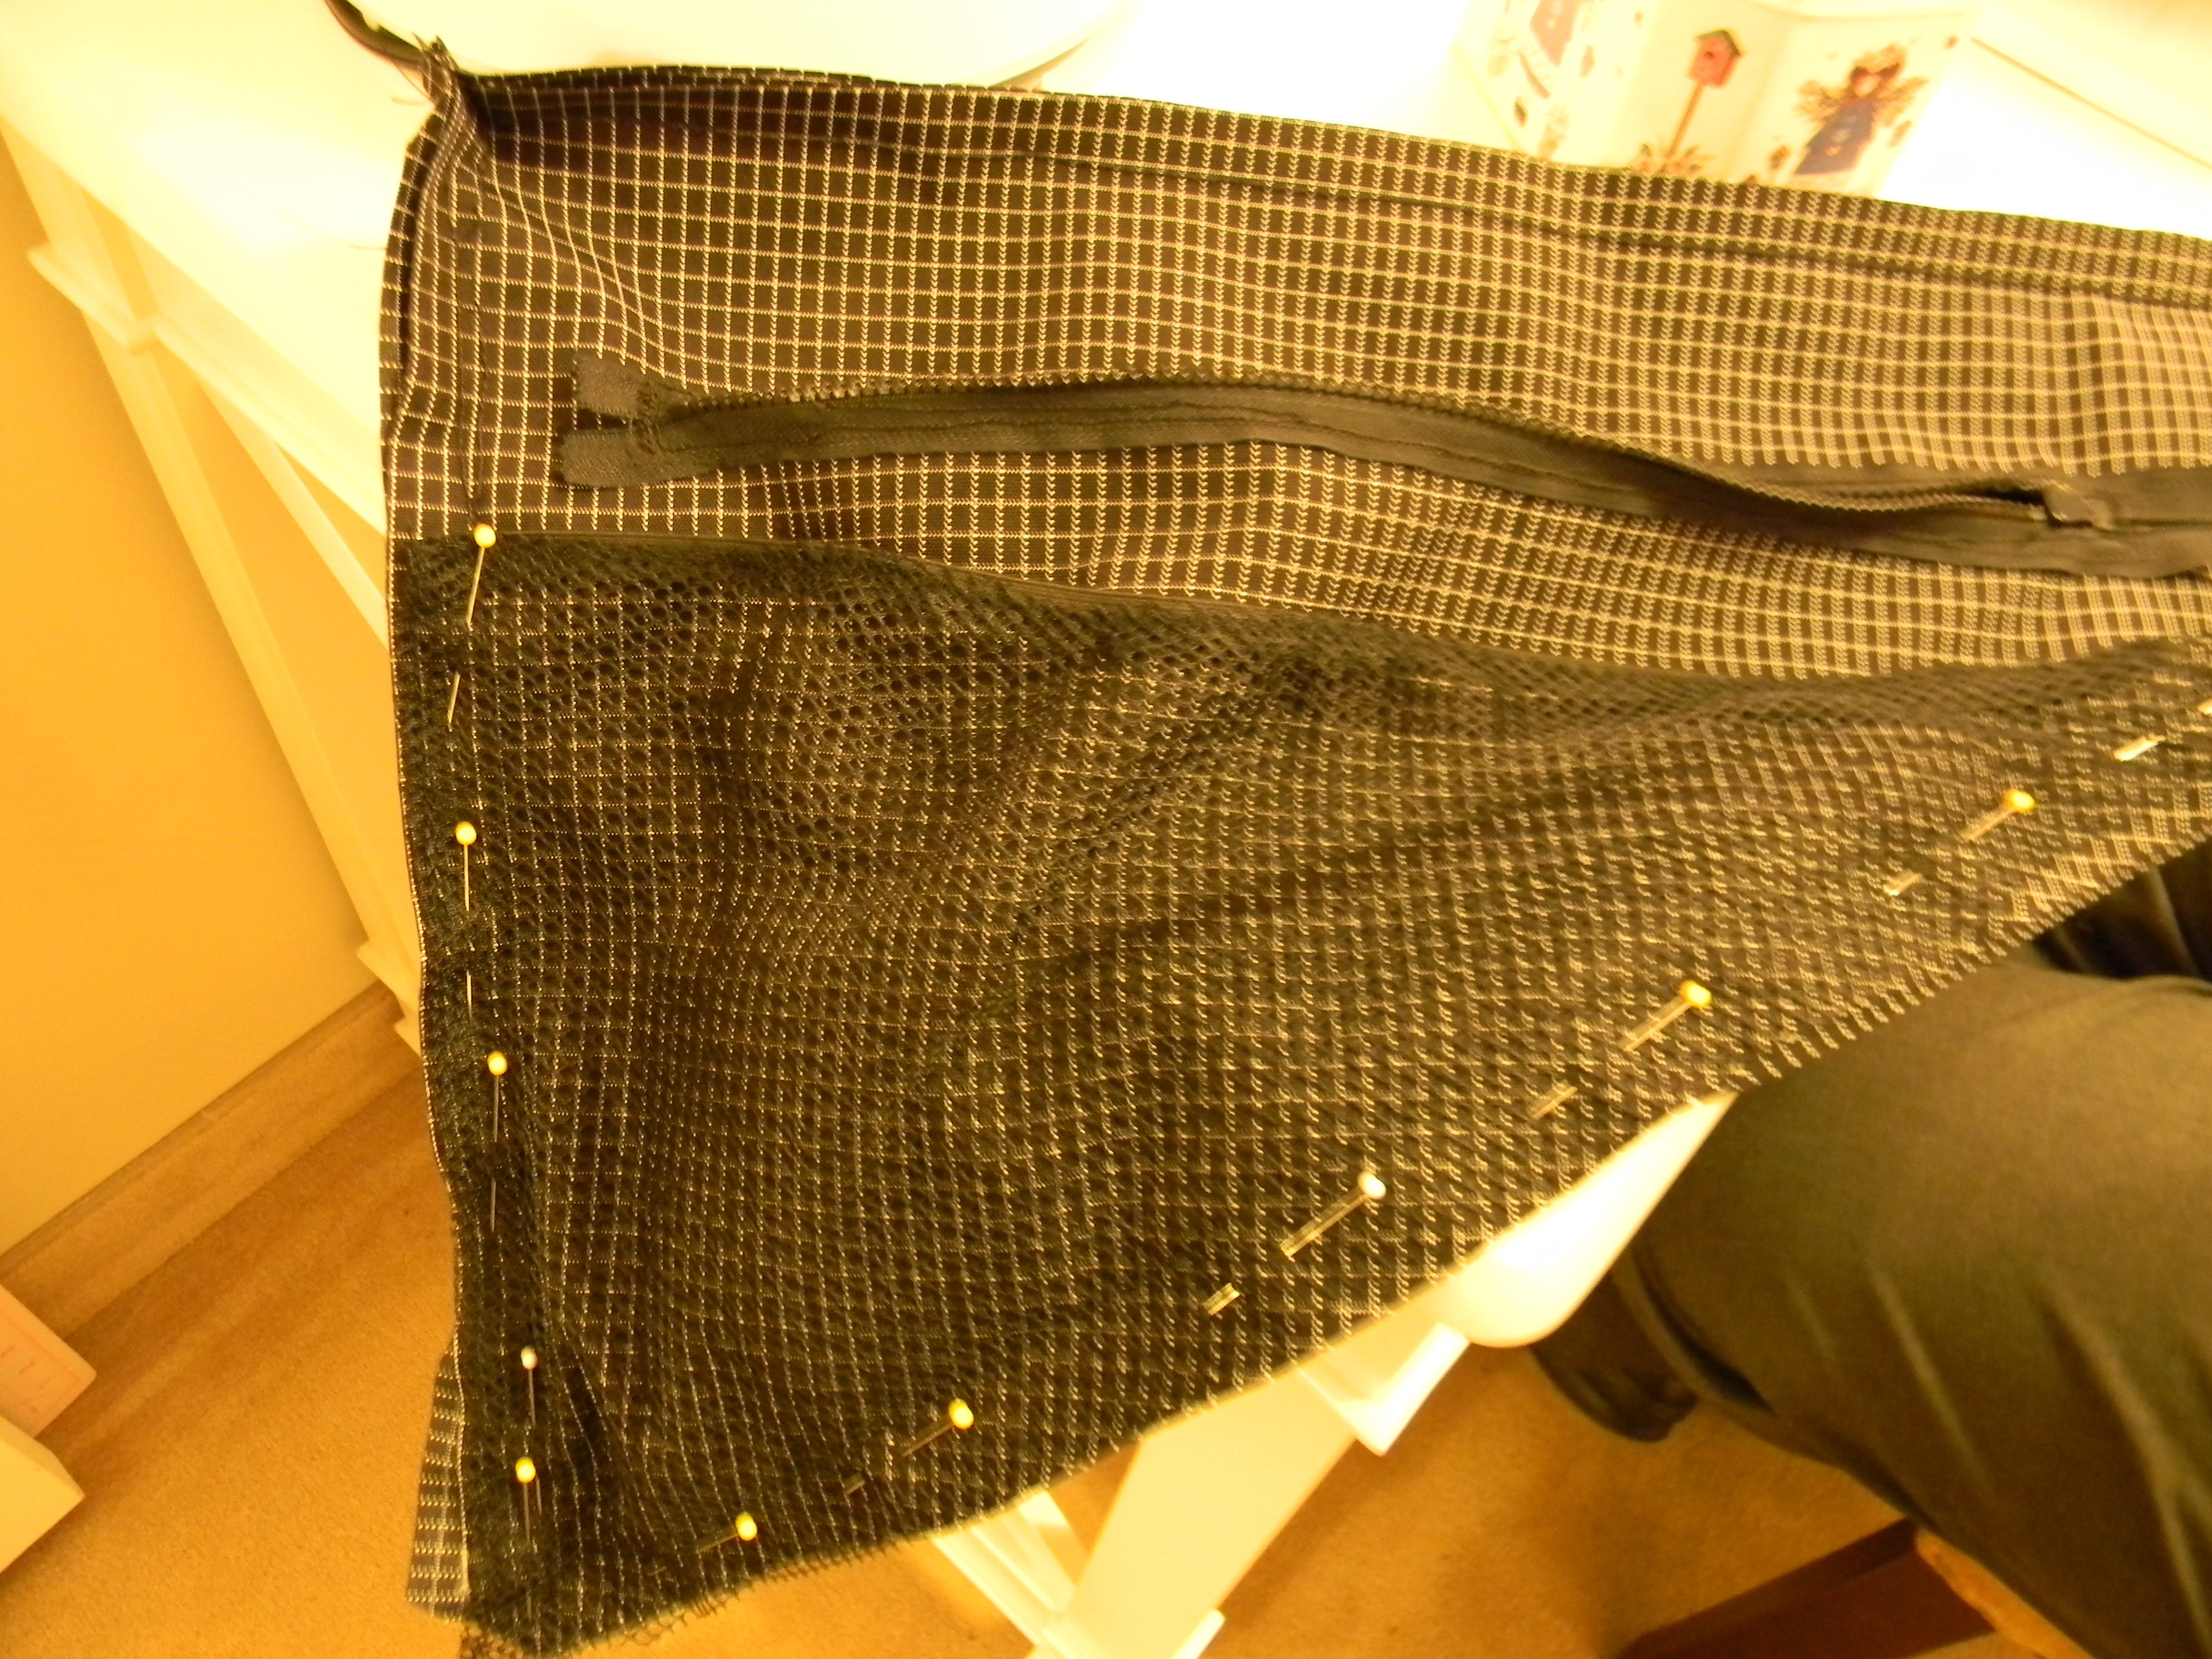
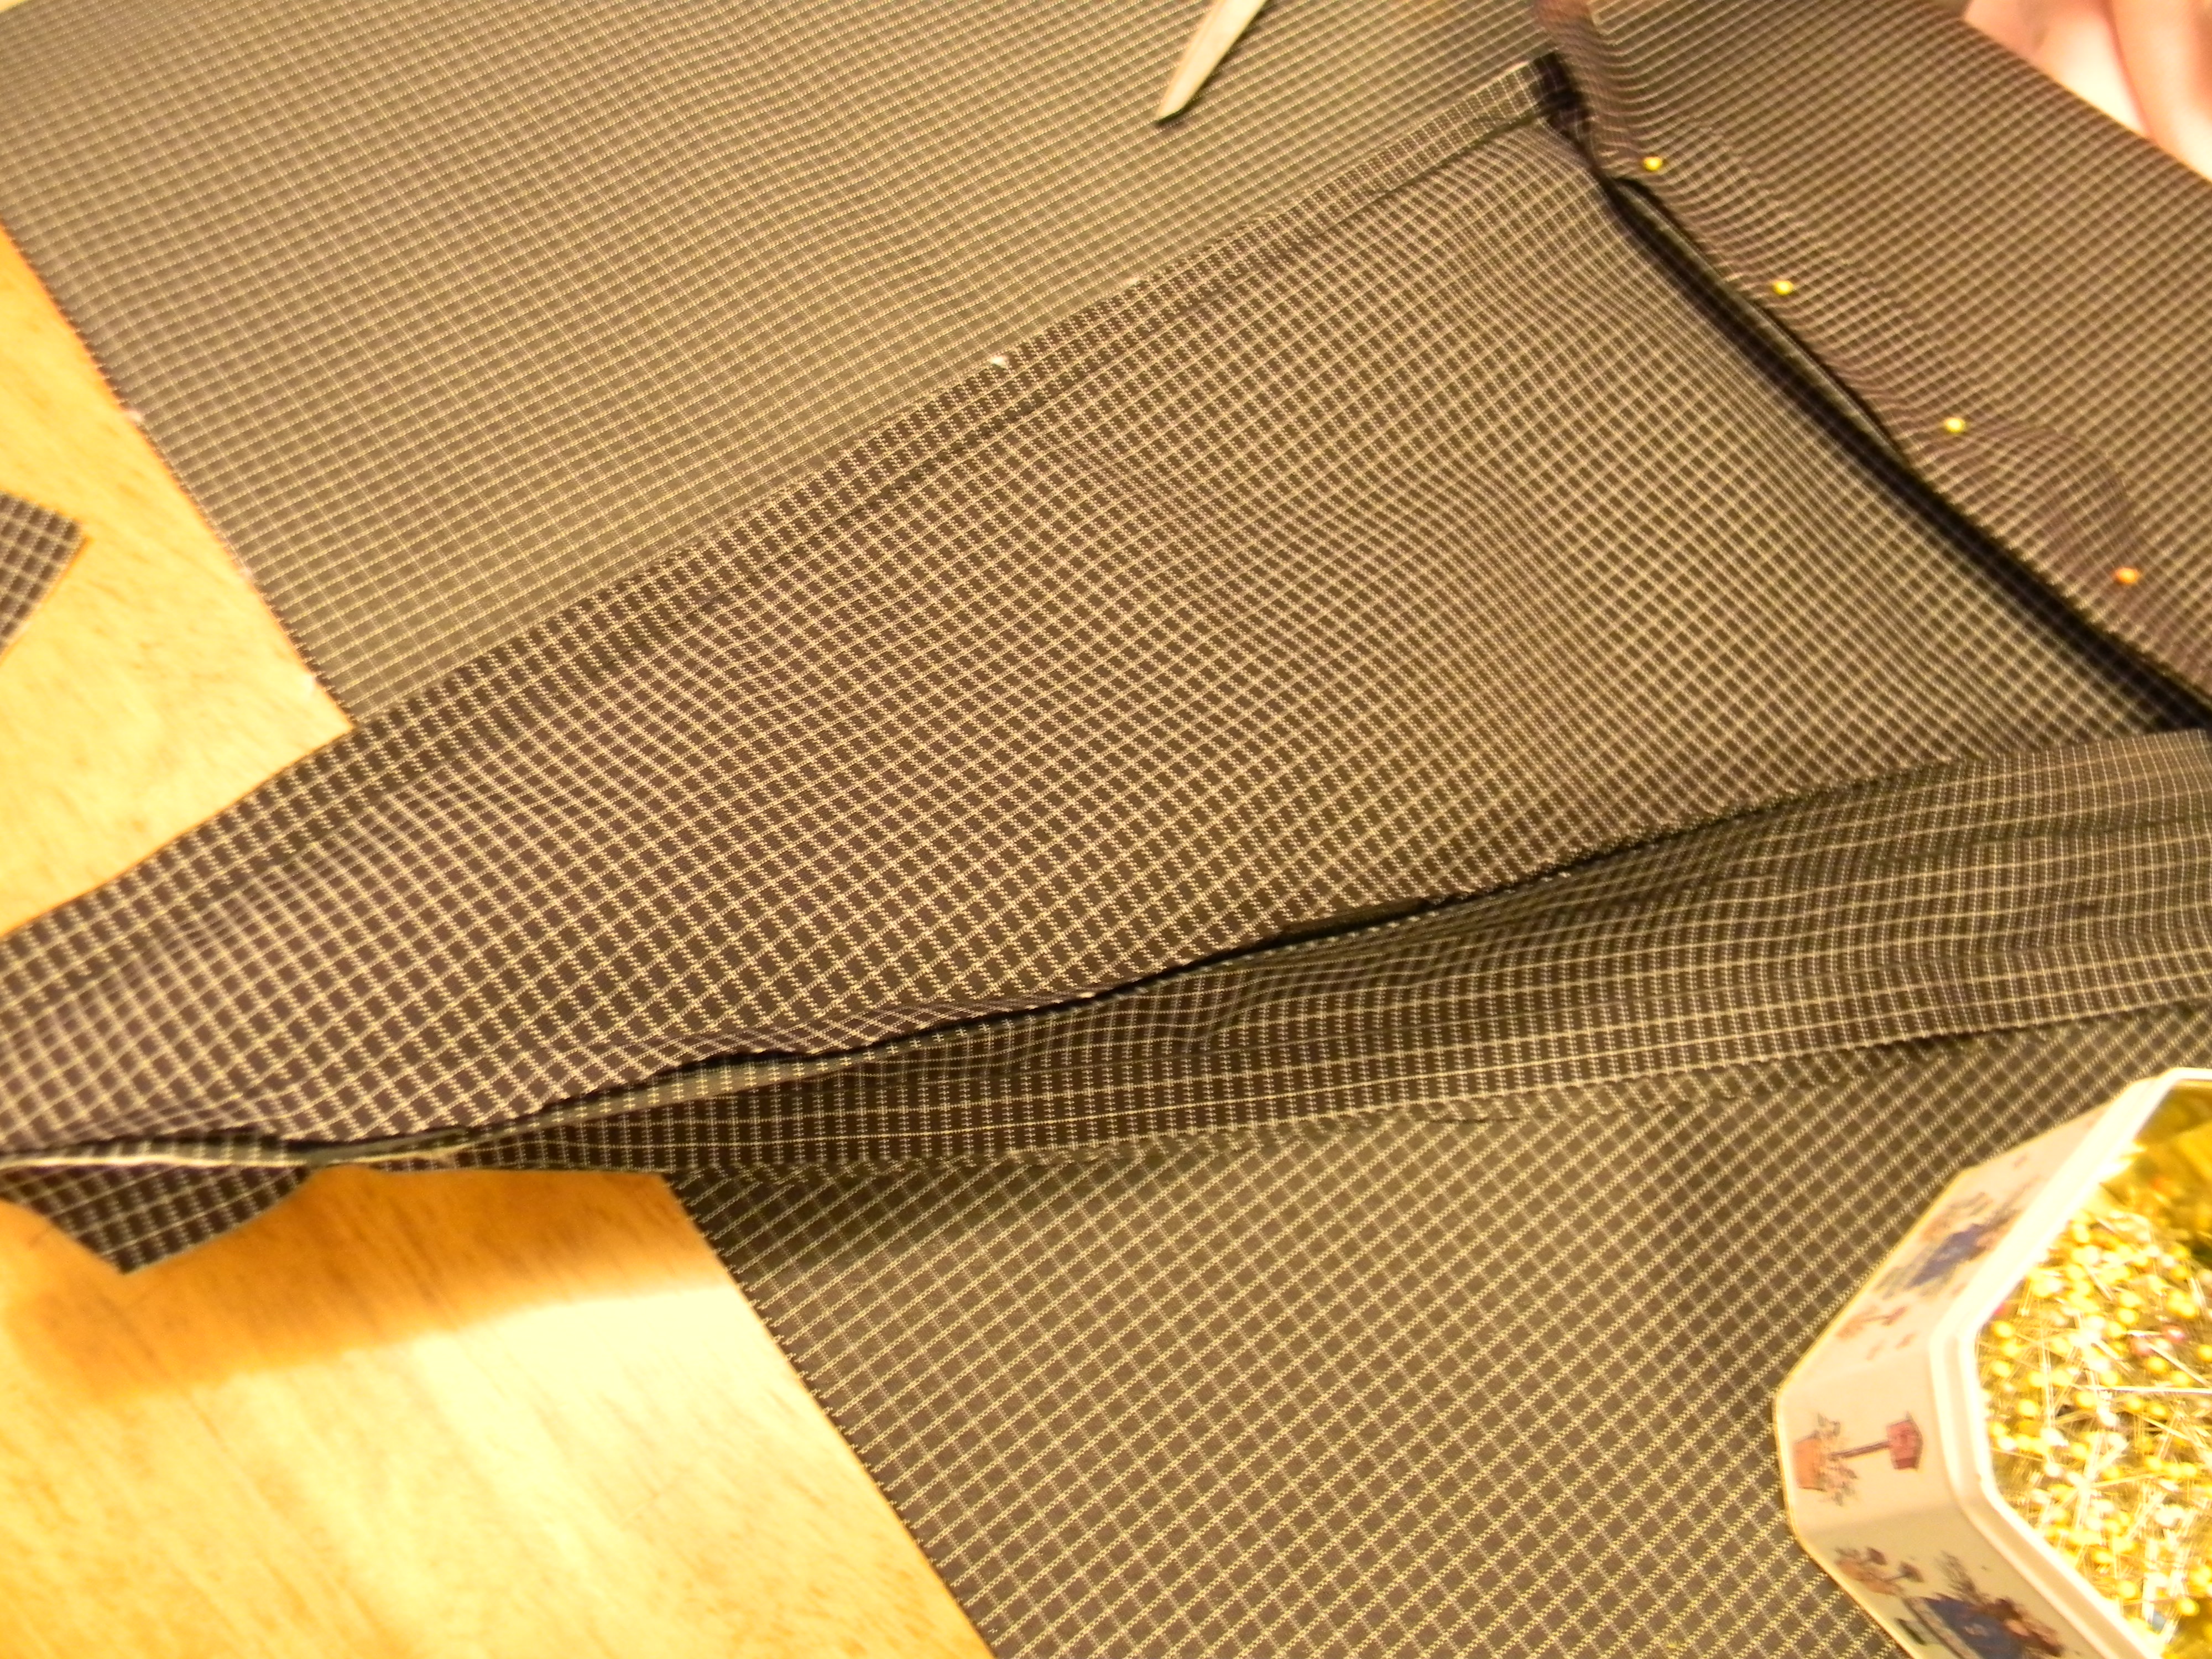
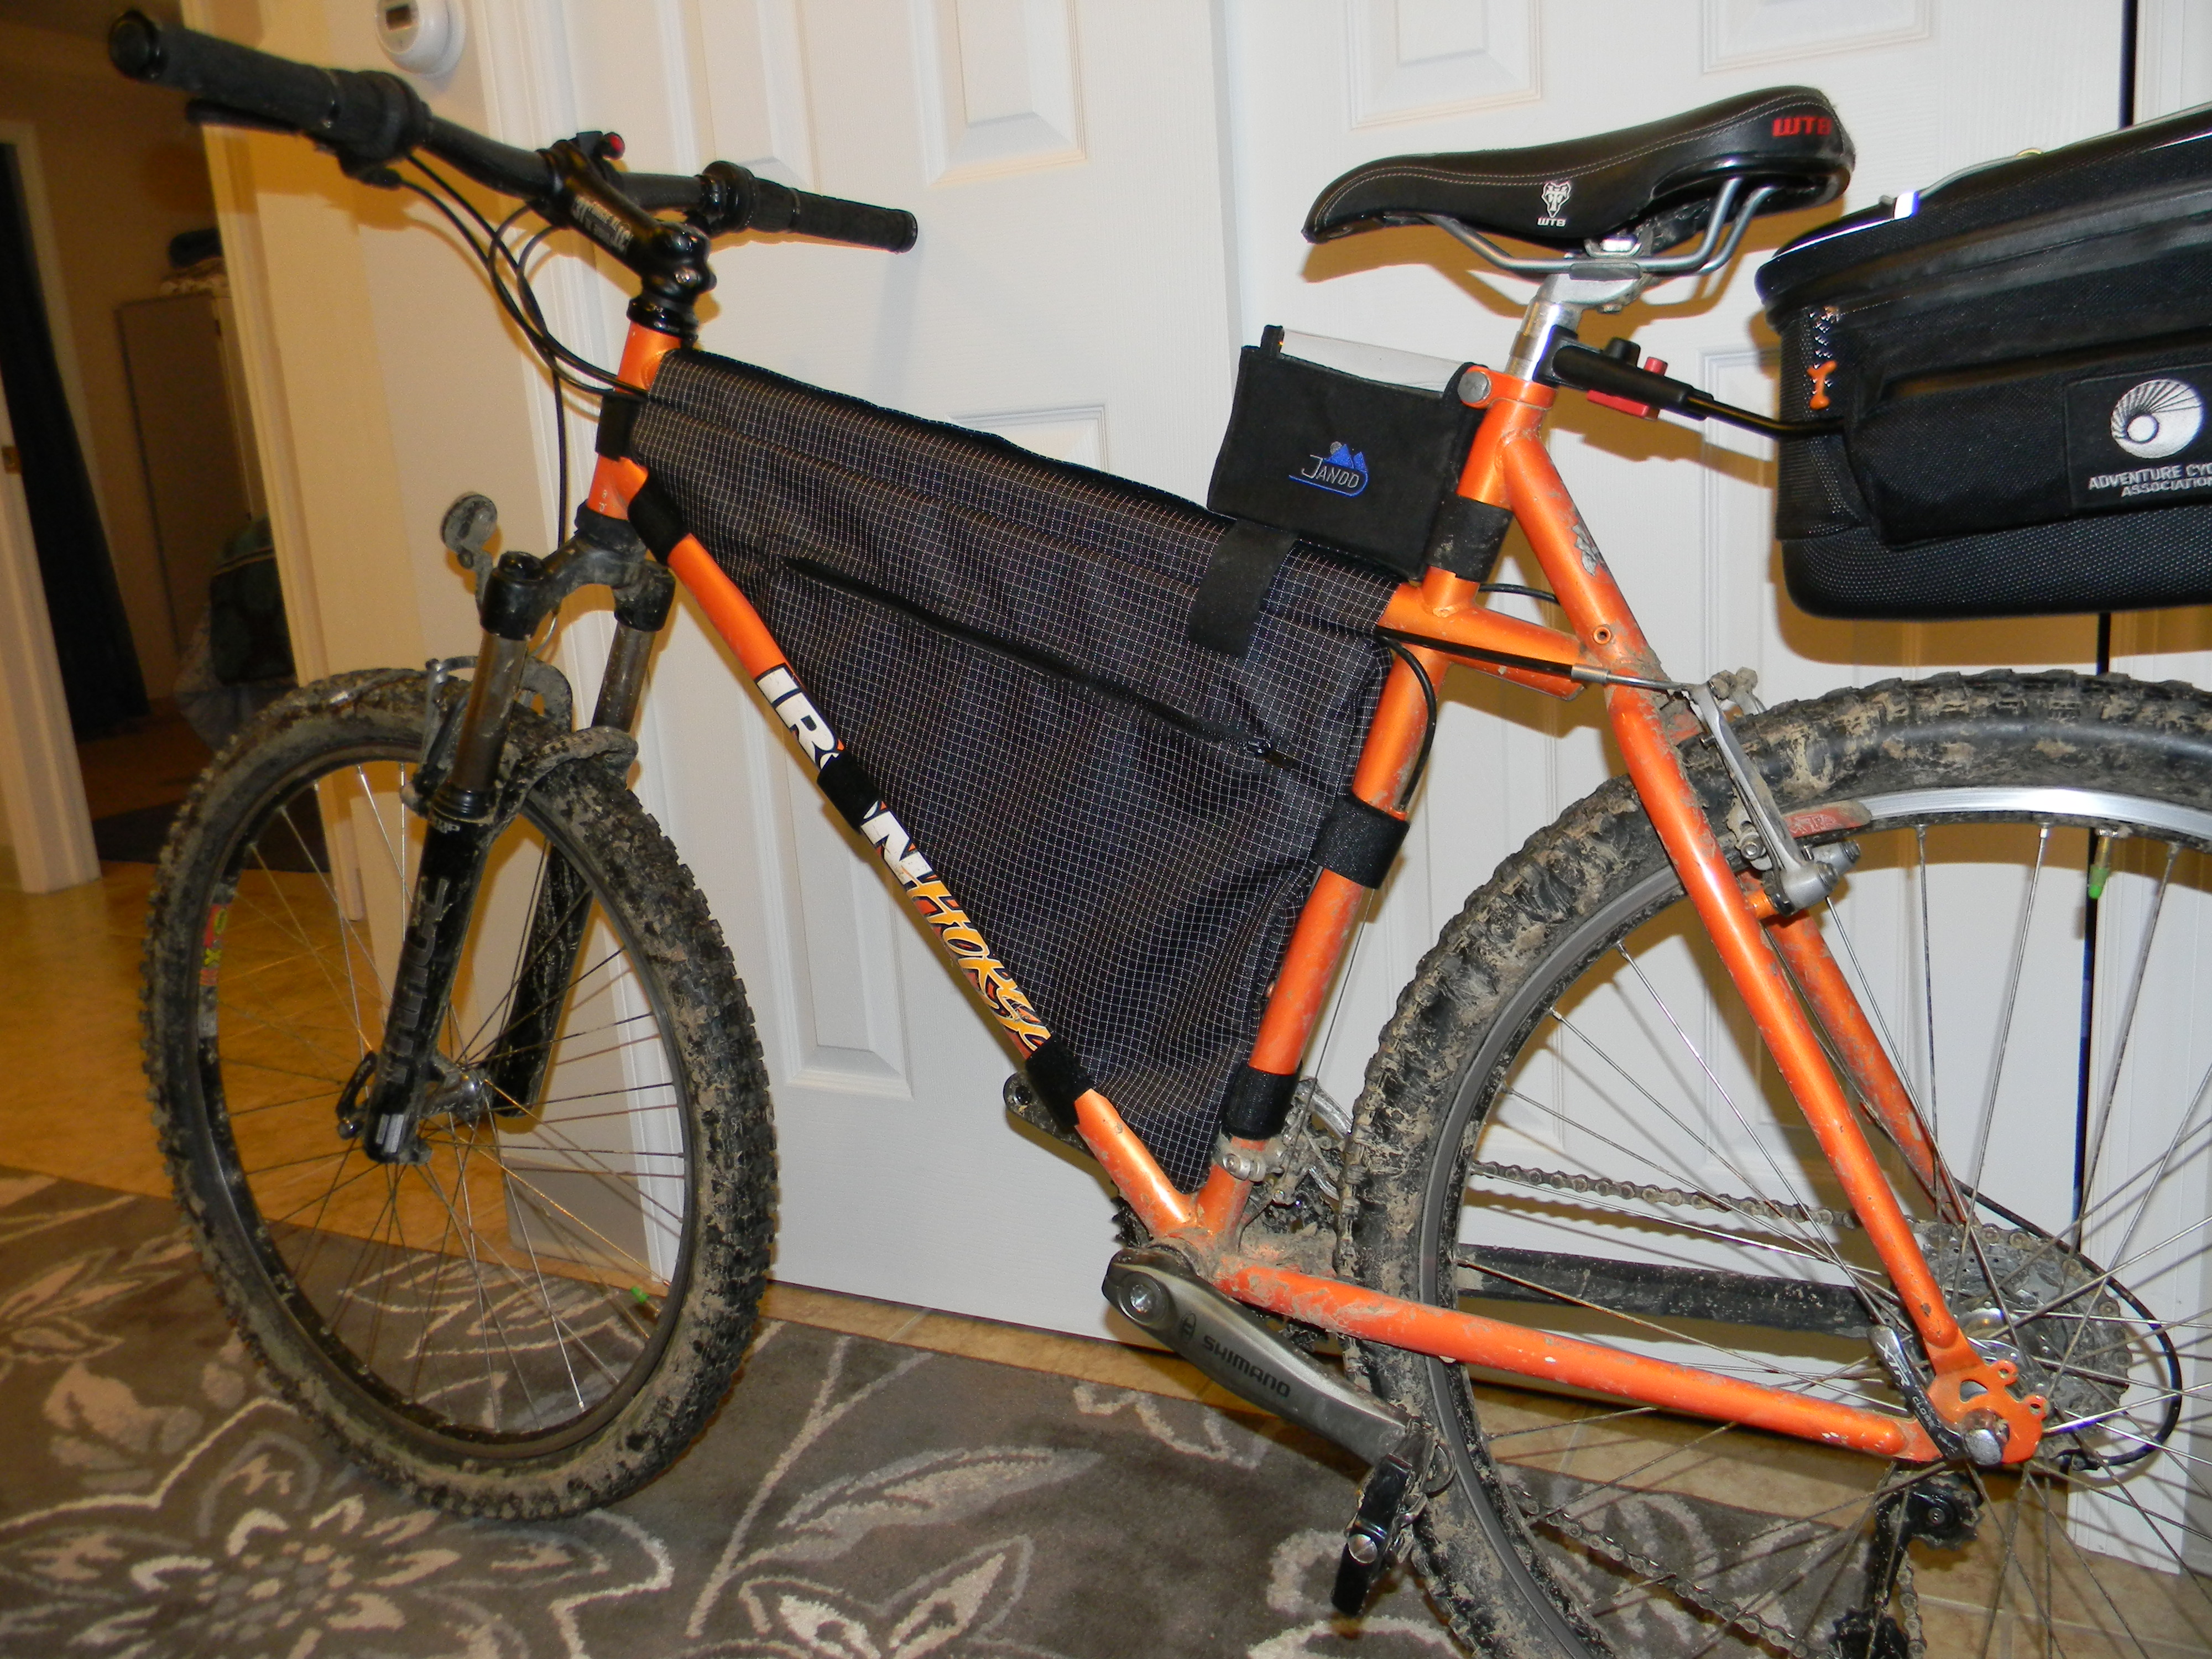
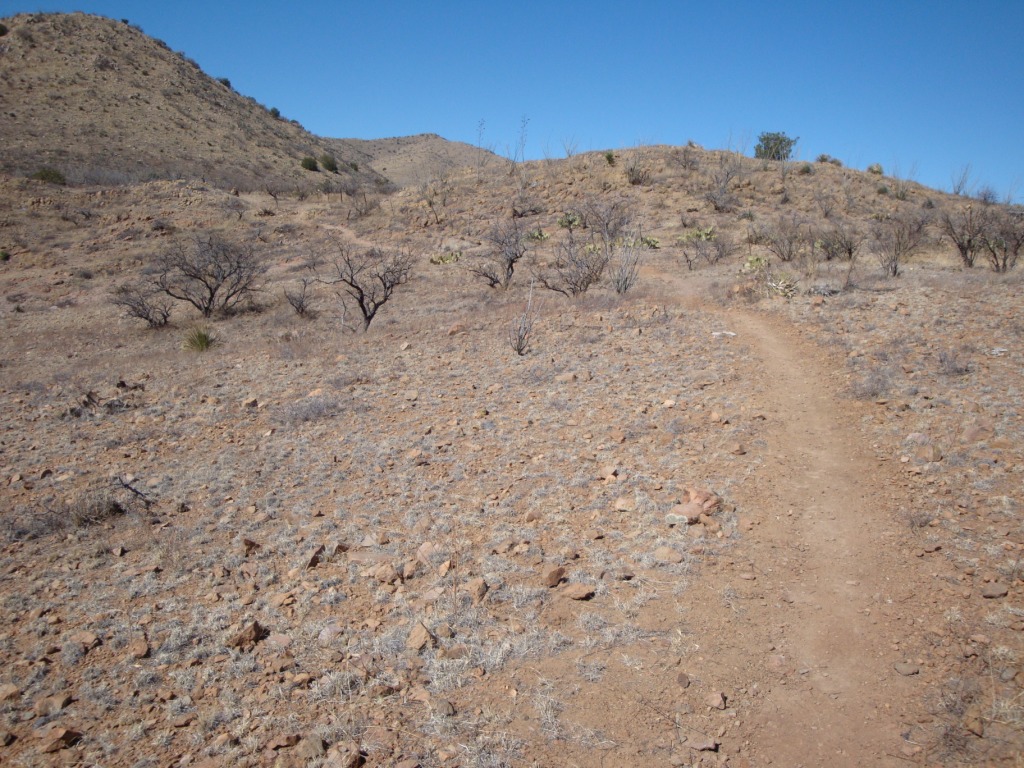
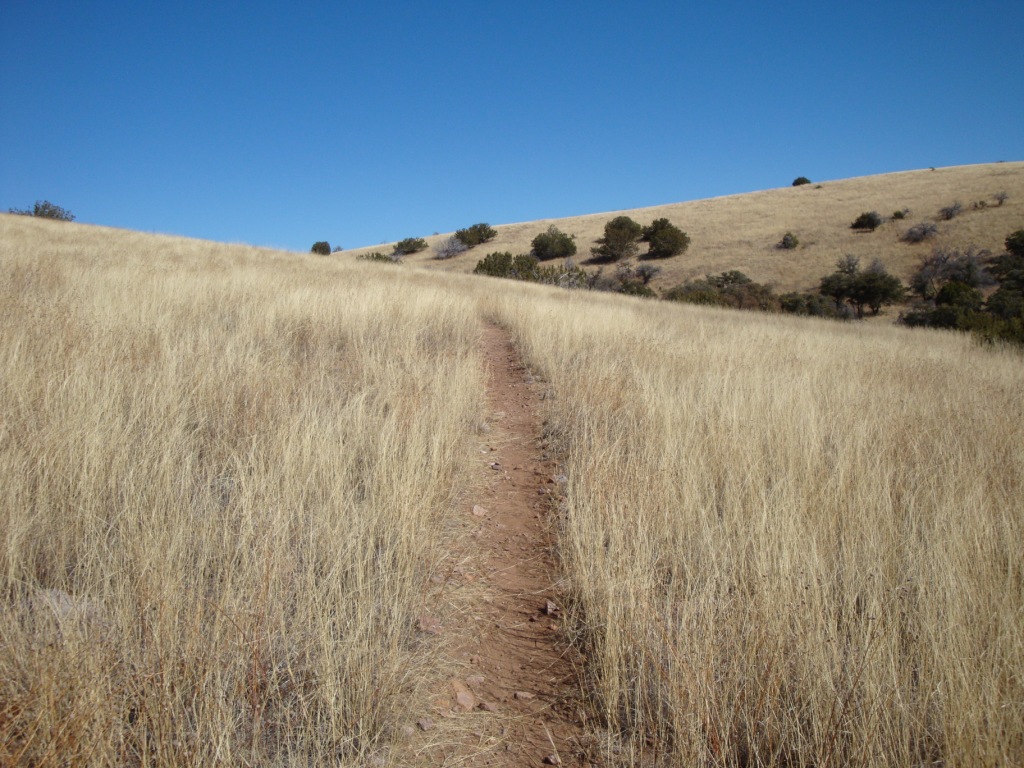
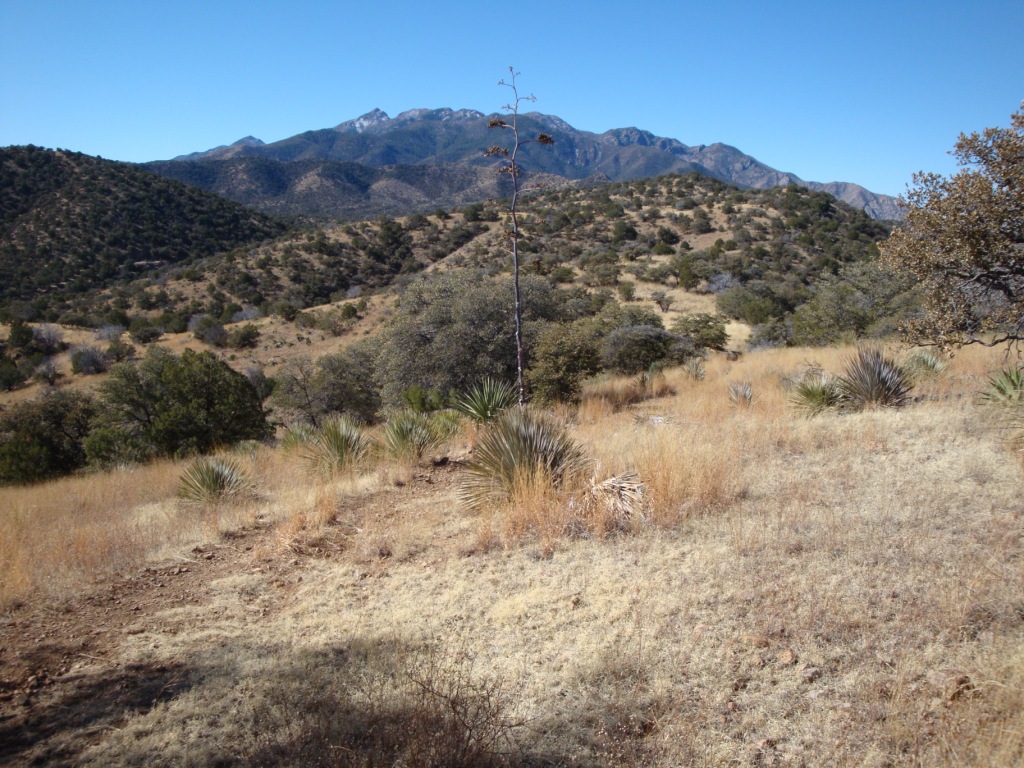
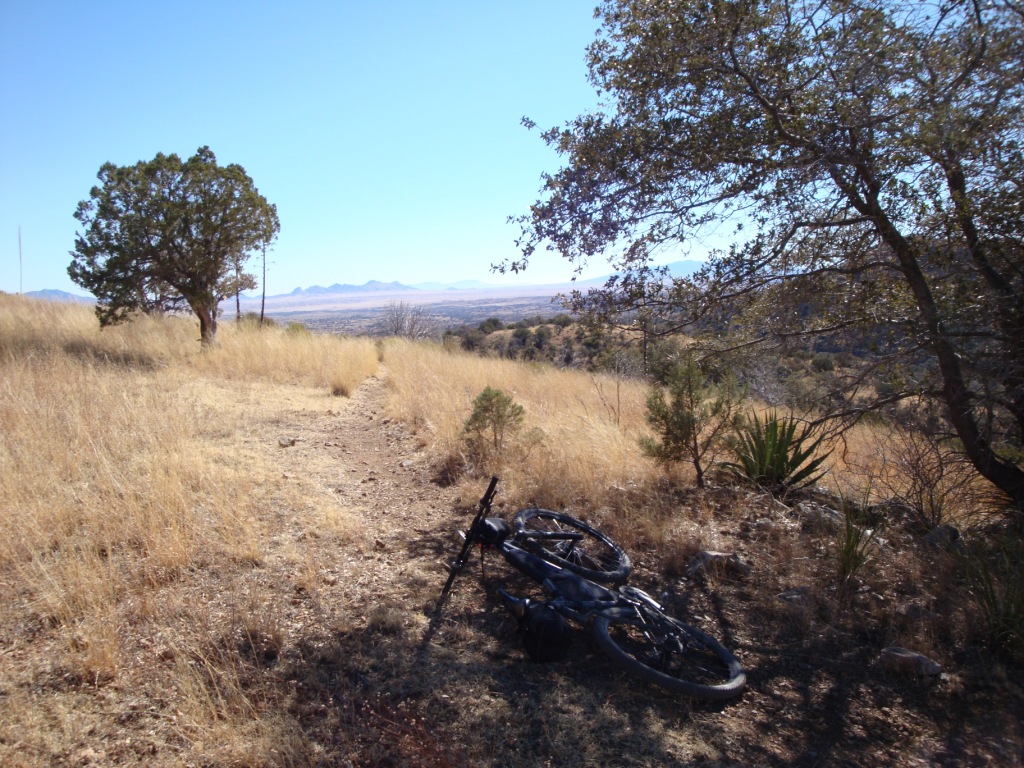

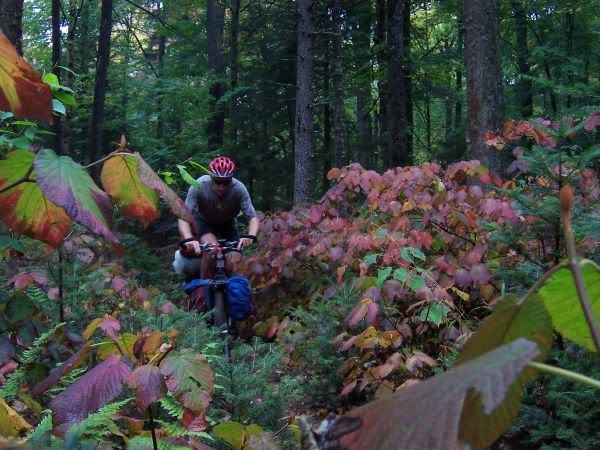

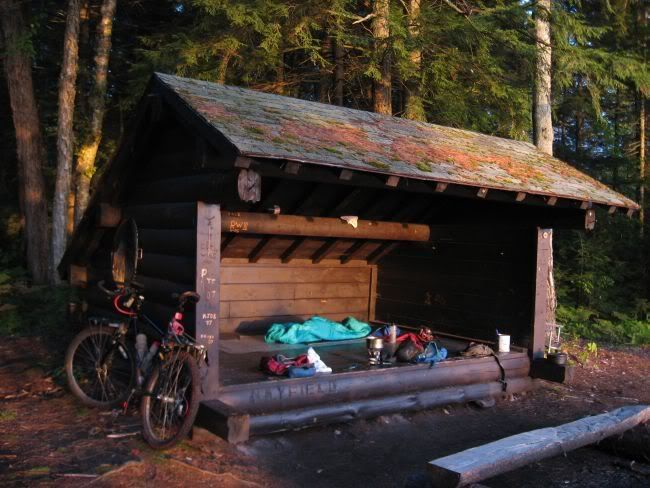
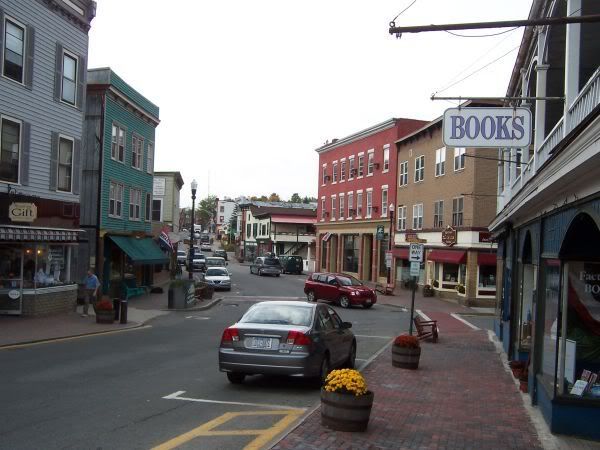
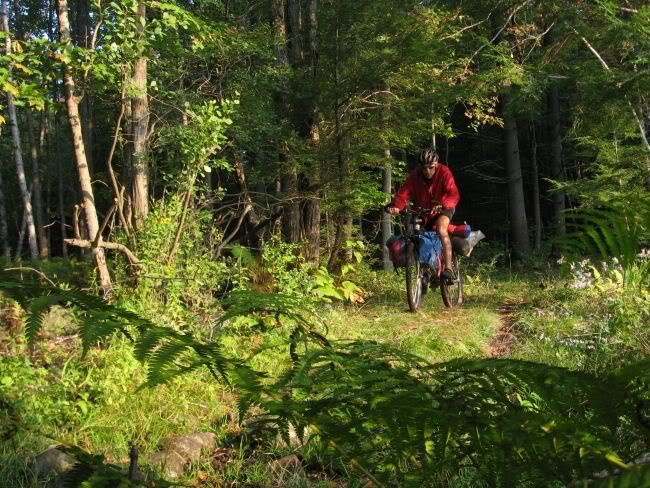
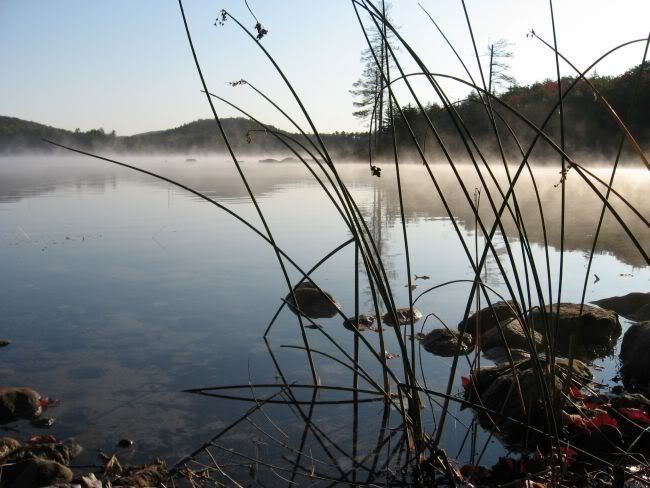
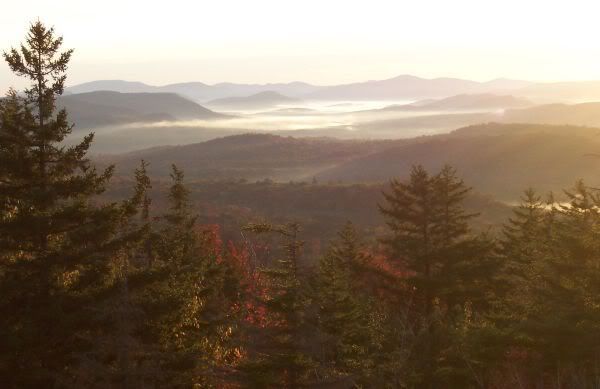
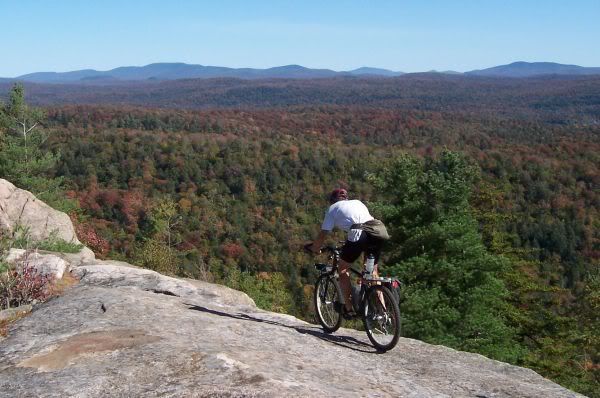
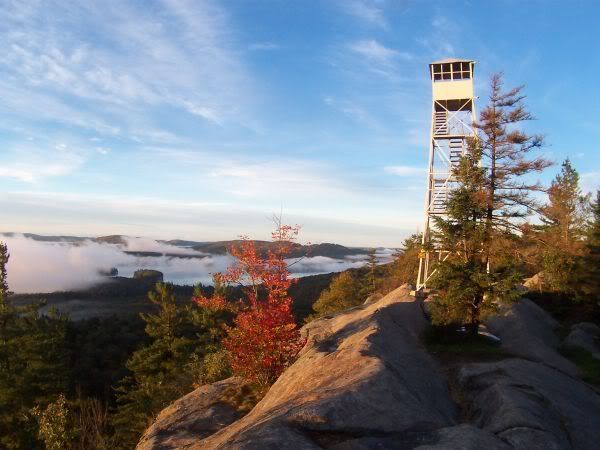
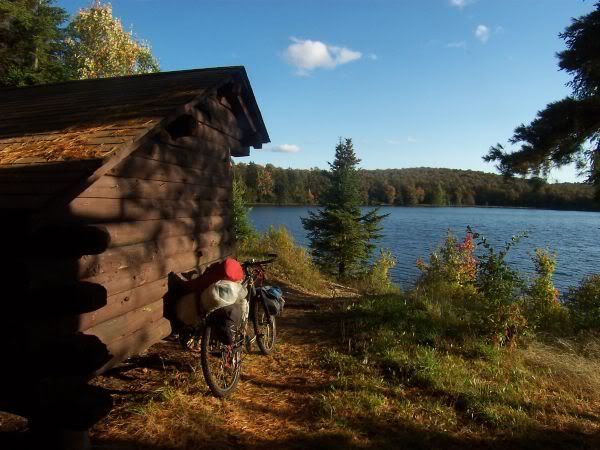
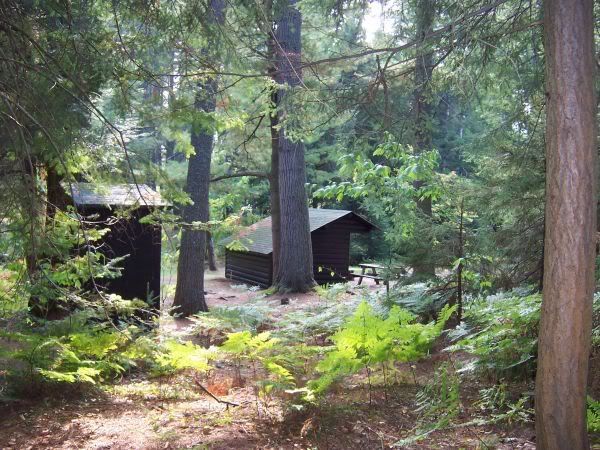
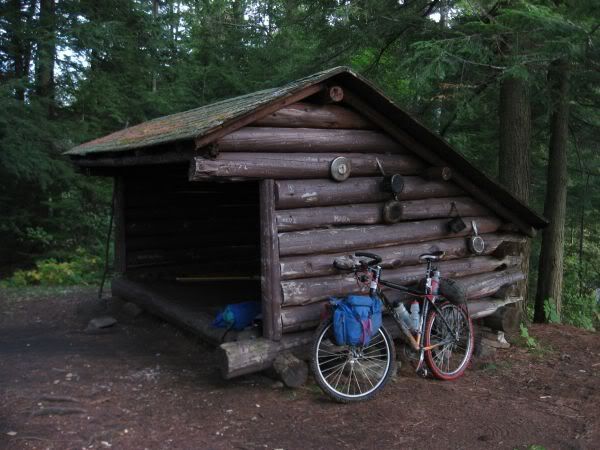
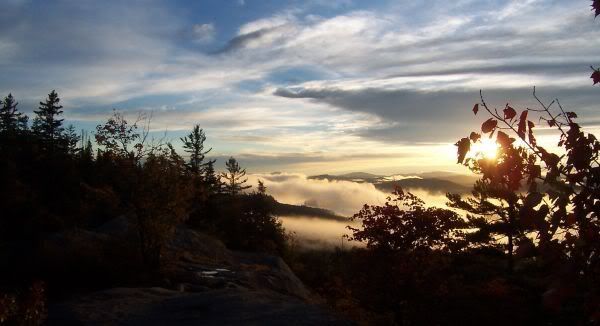
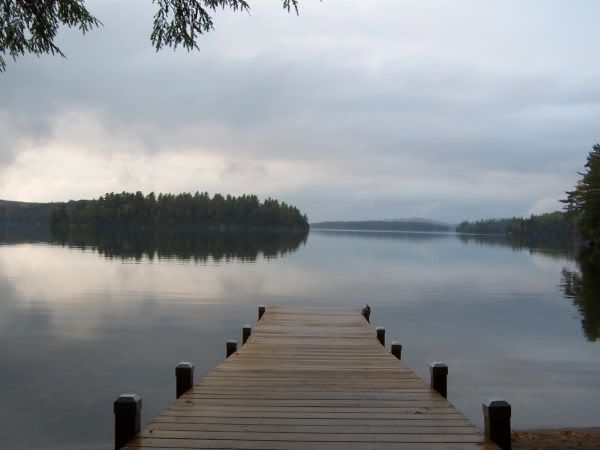
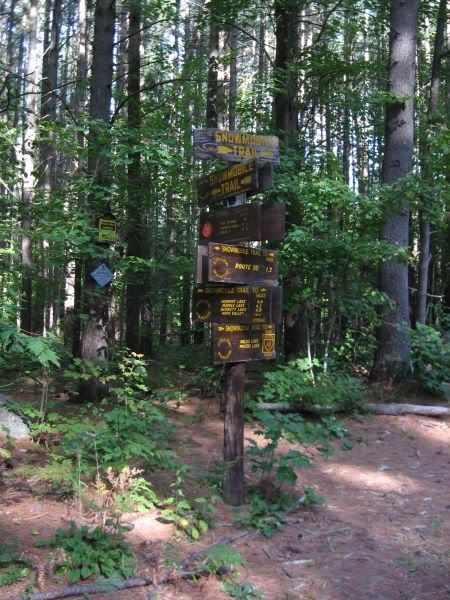
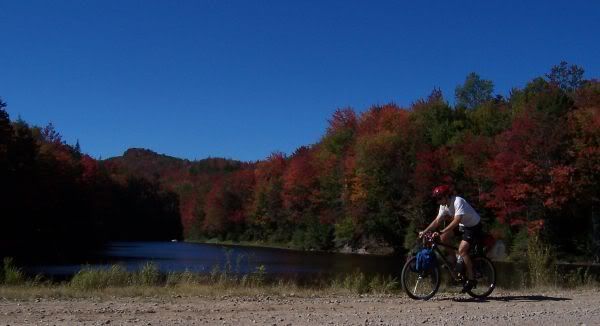
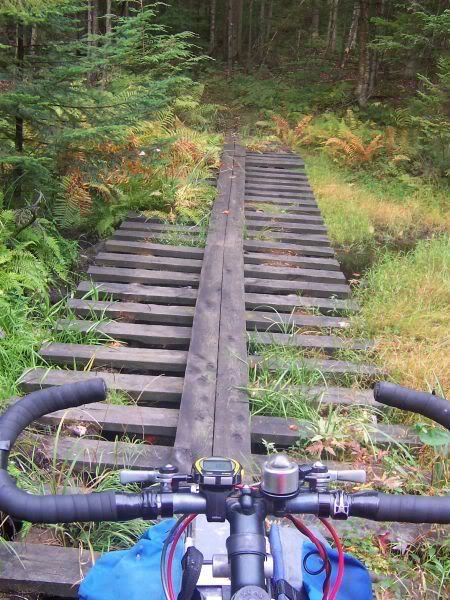
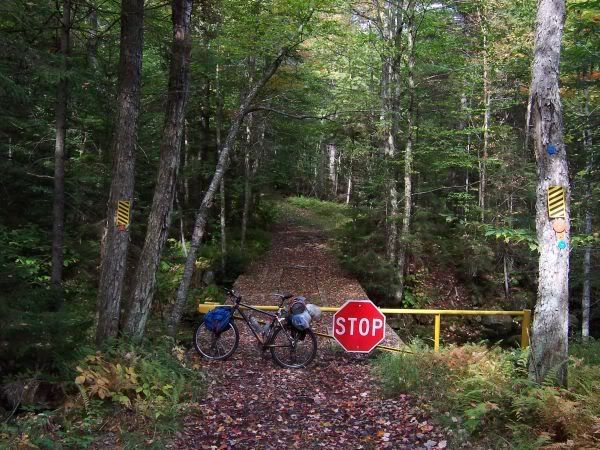
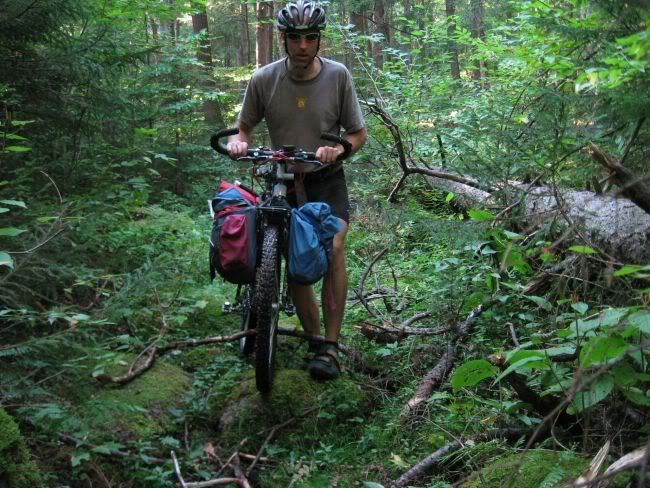 One finds that many snowmobile trails end at waters edge in the spring/summer/fall but would logically continue across ice in the winter.
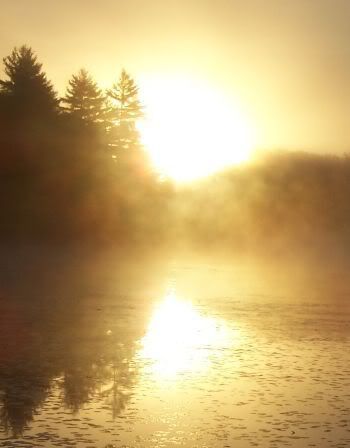
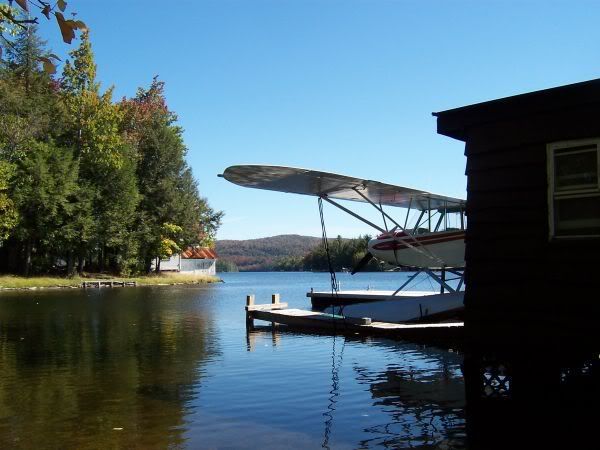
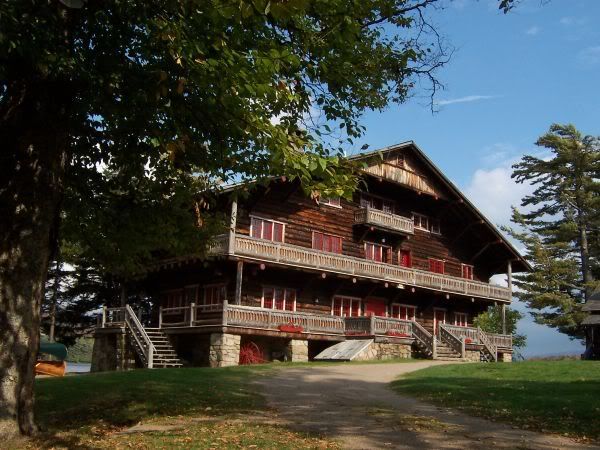
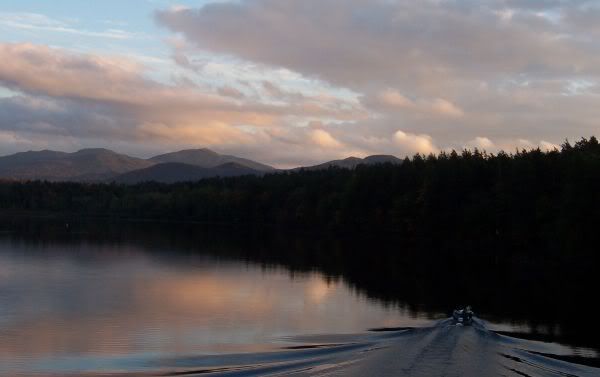
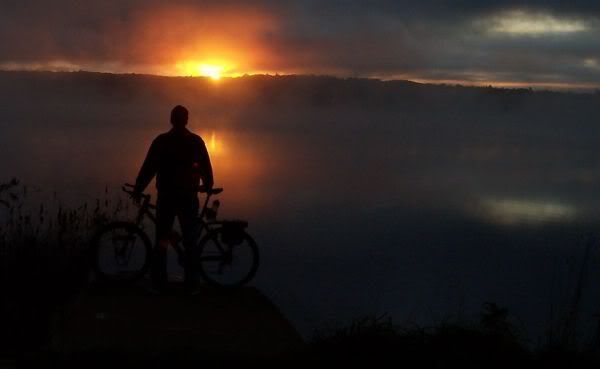
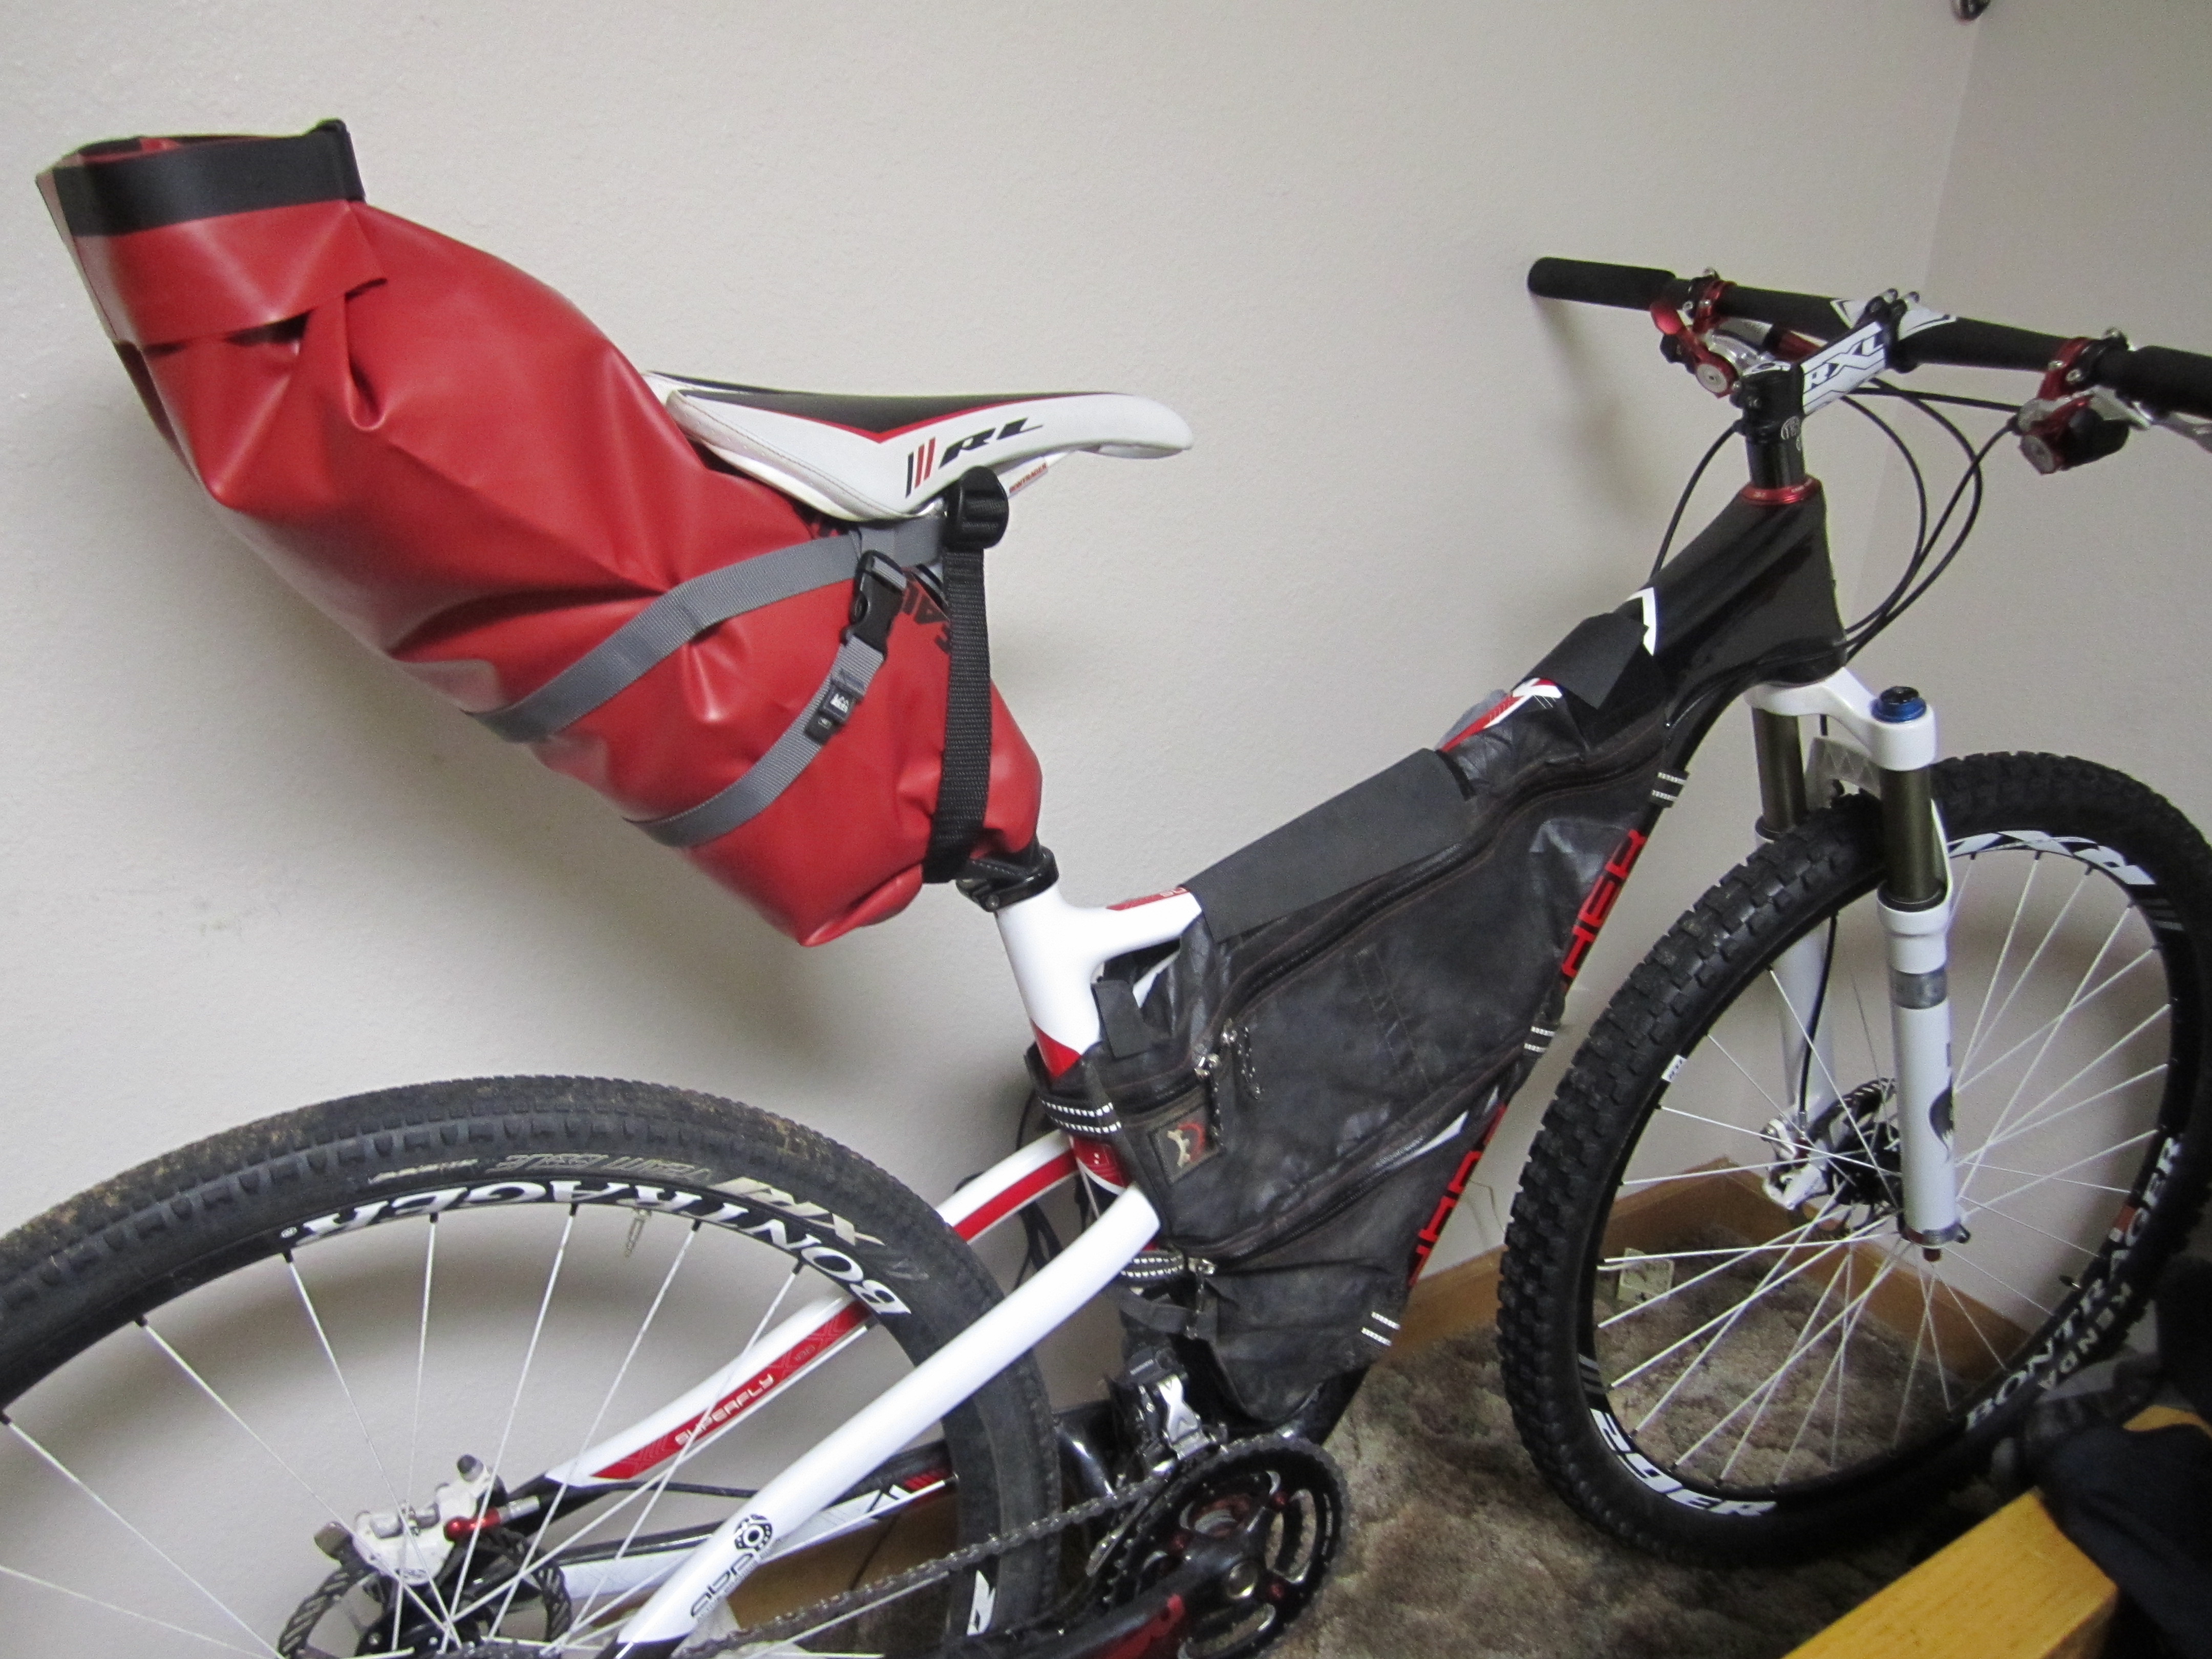
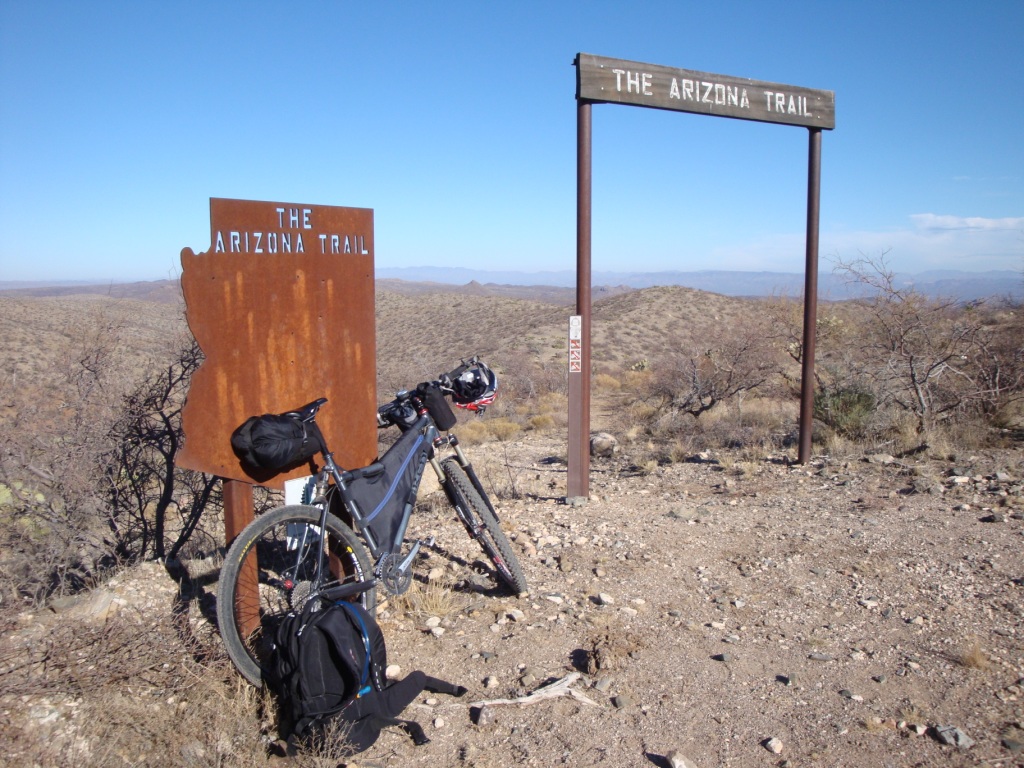
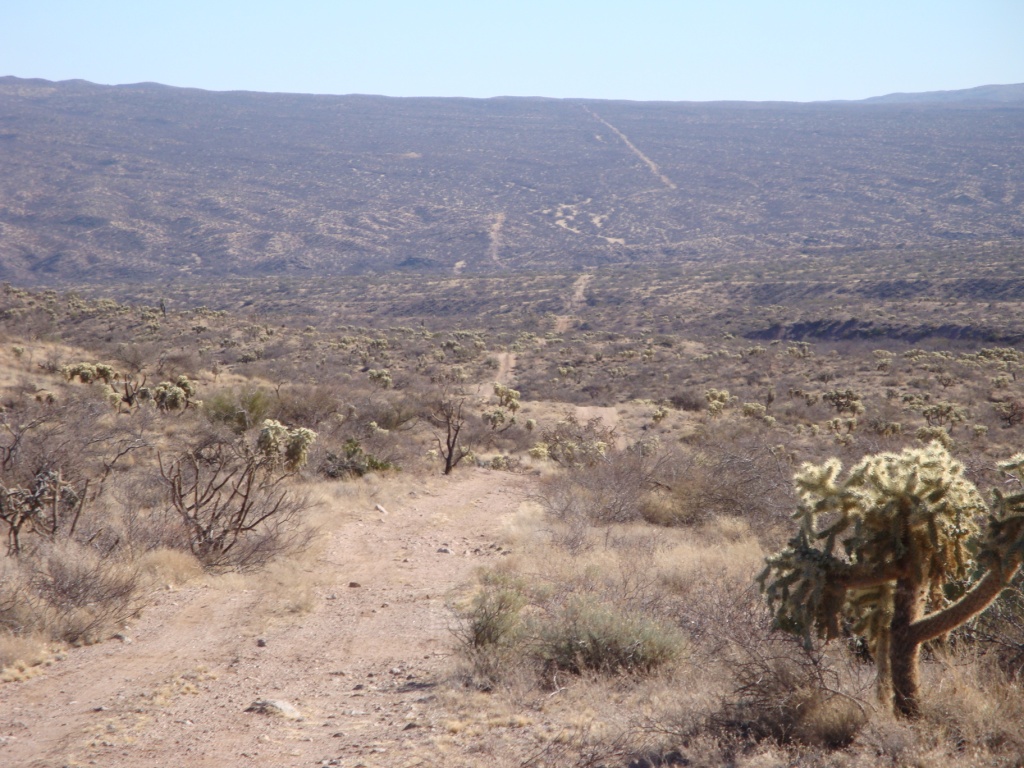
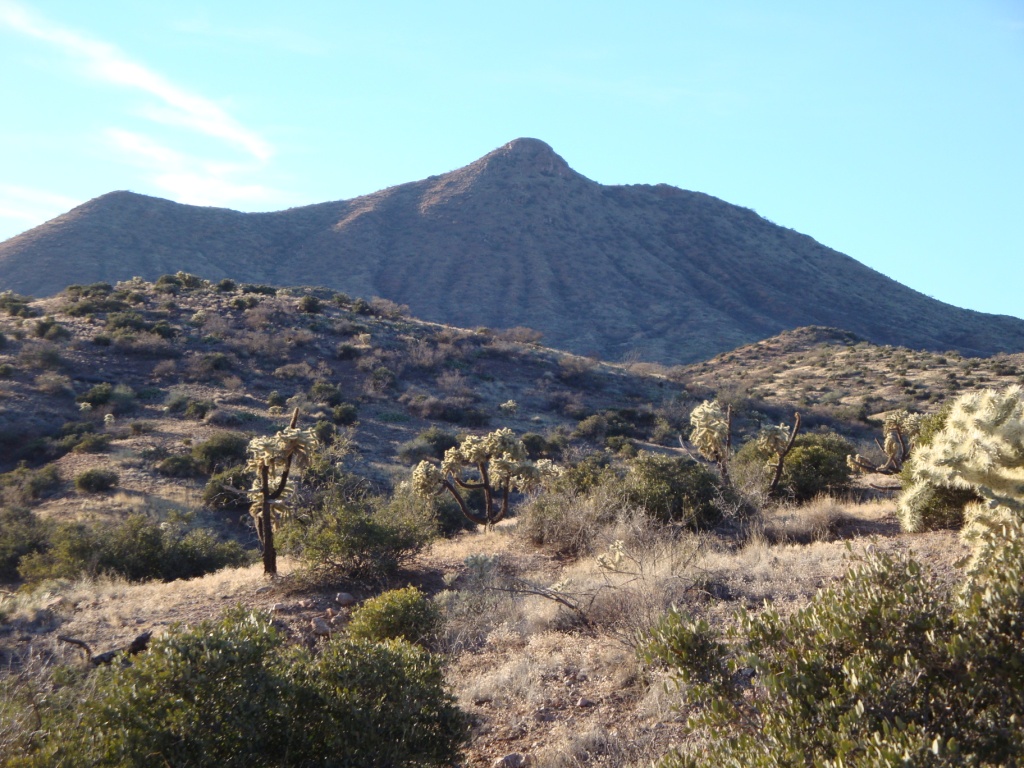
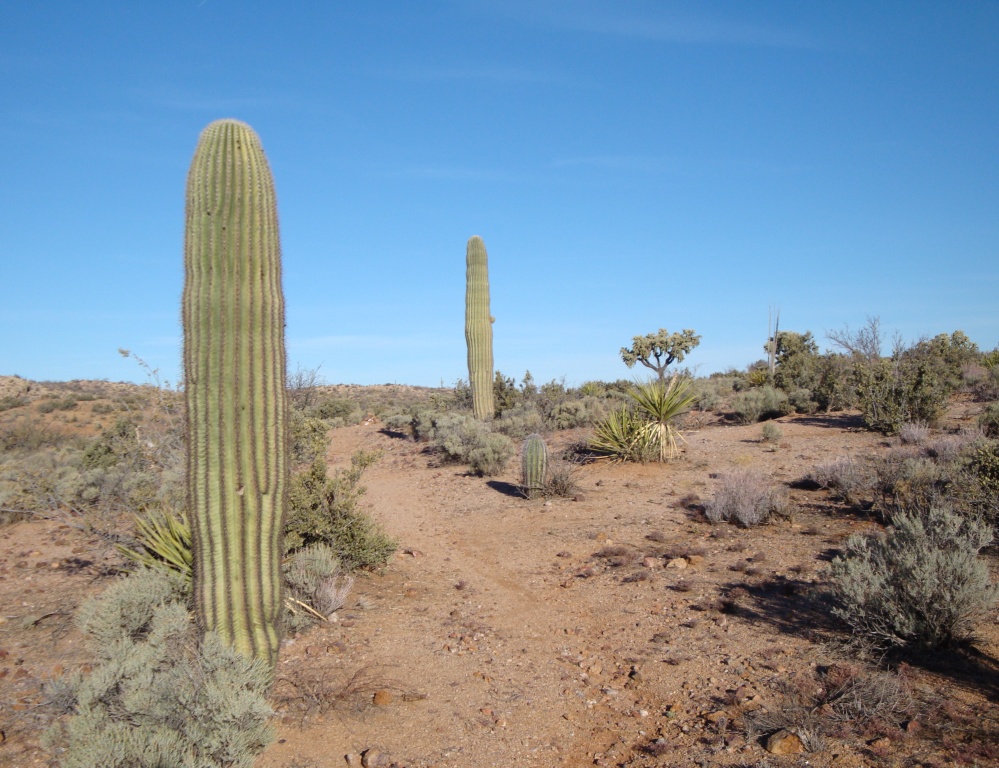
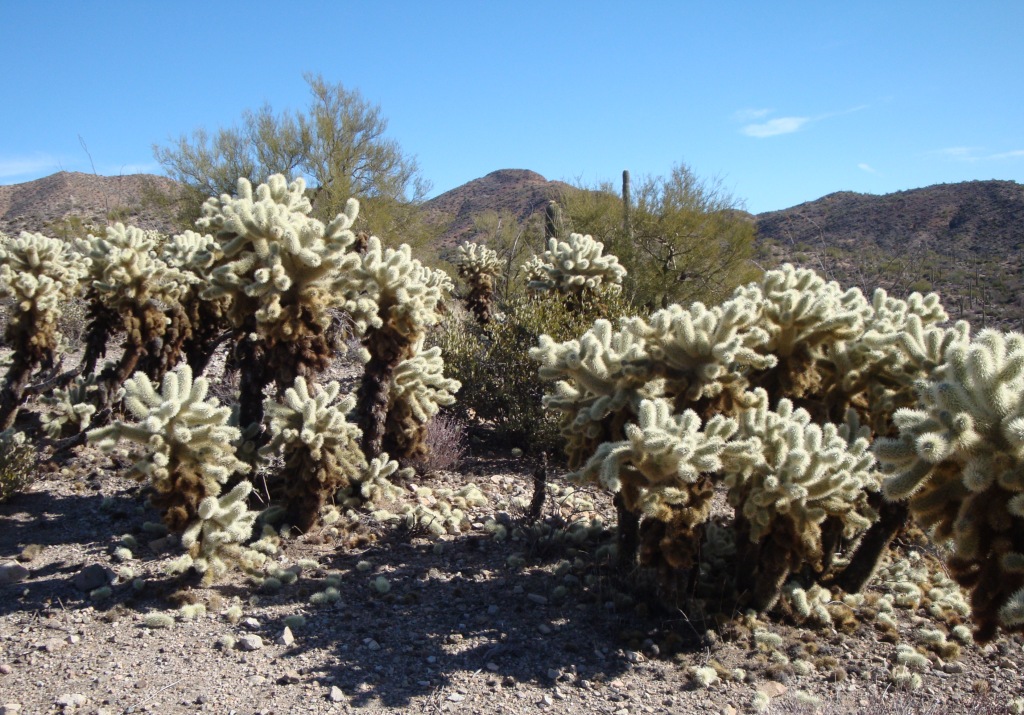
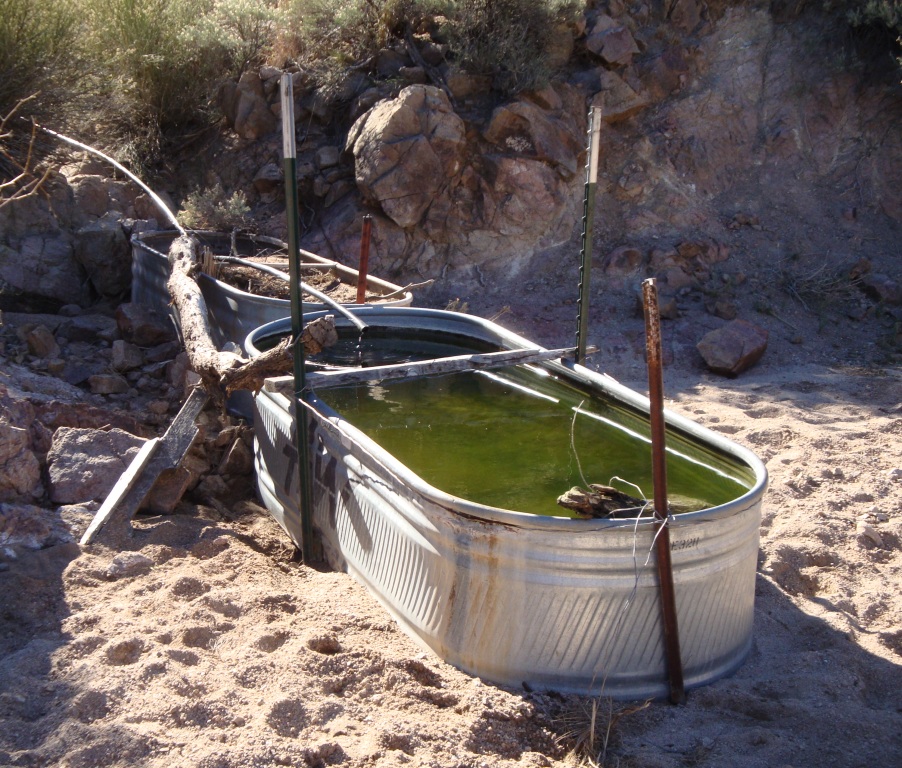
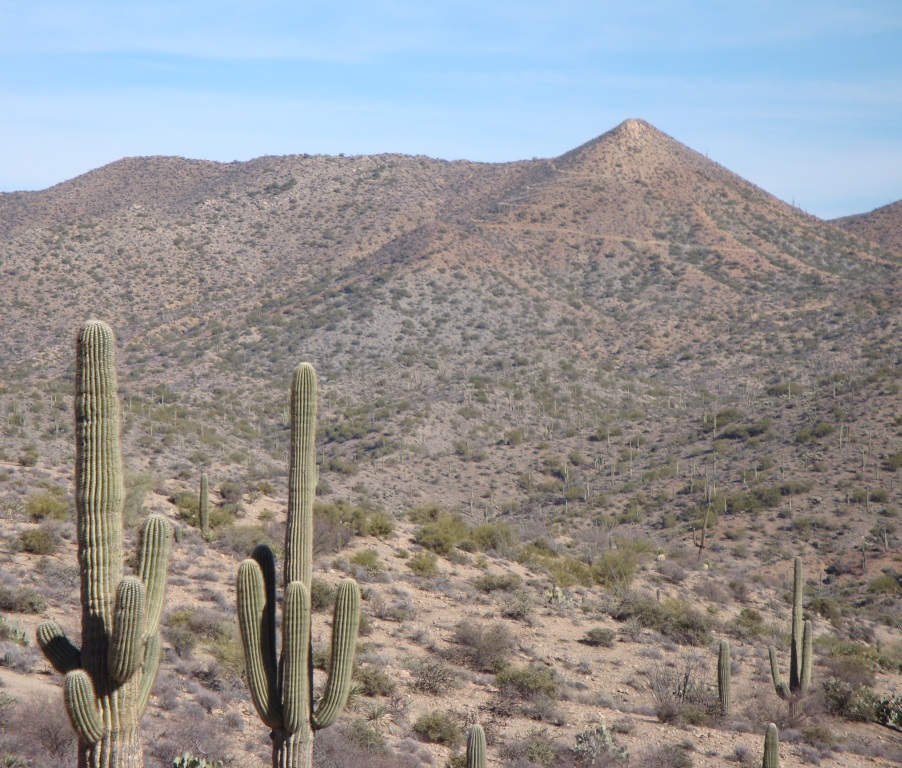
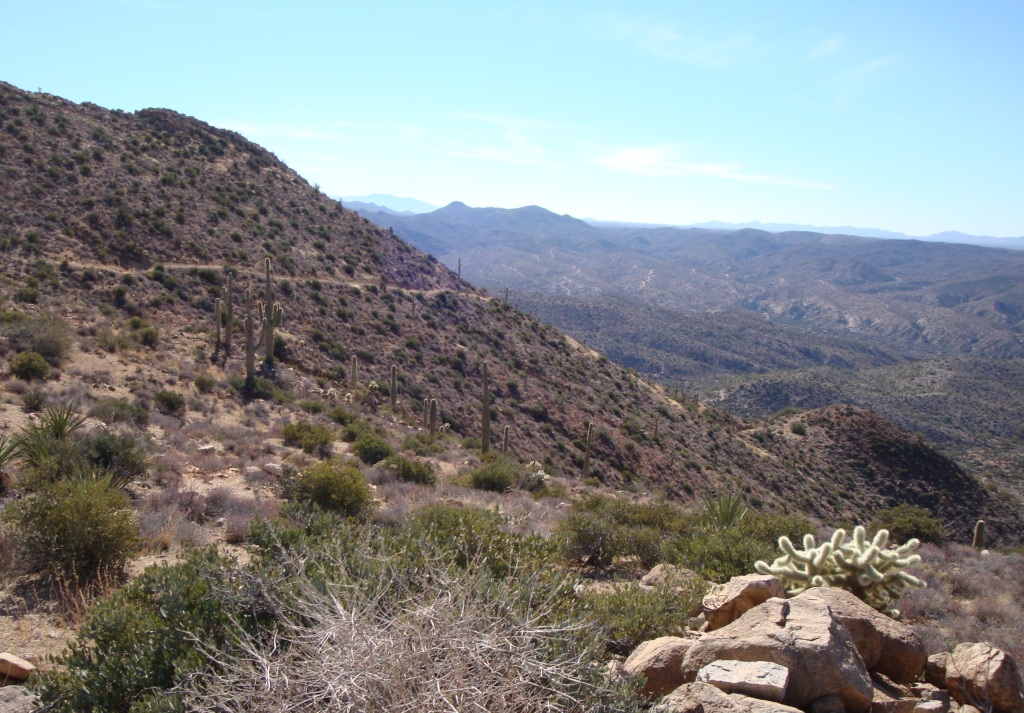
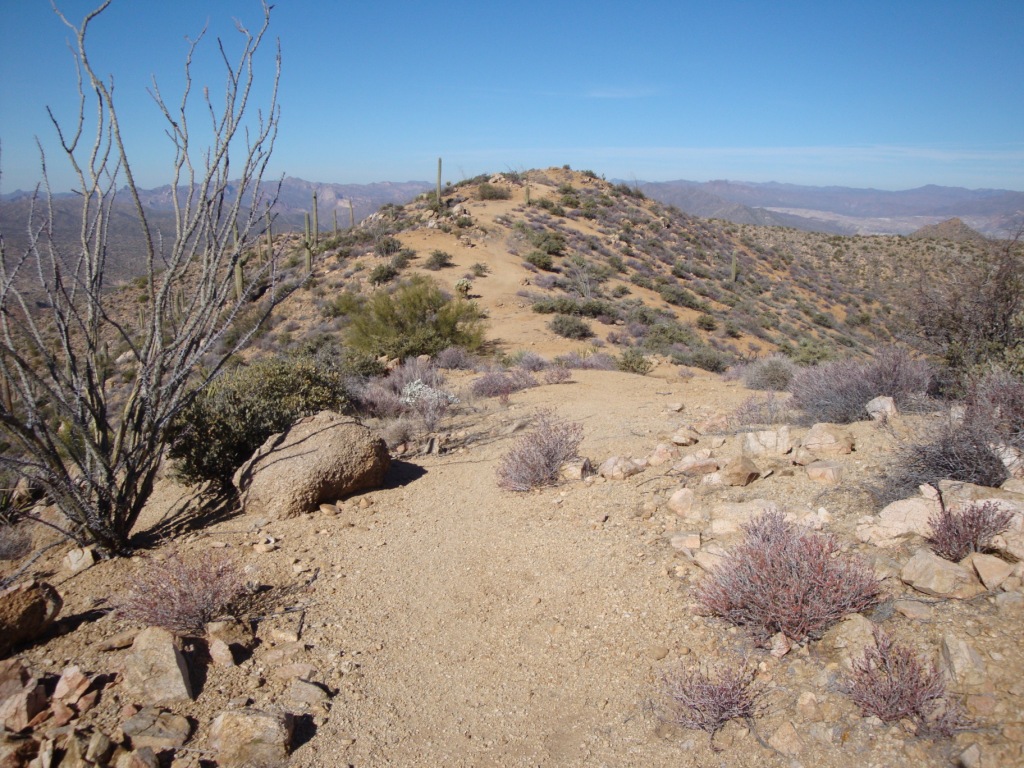
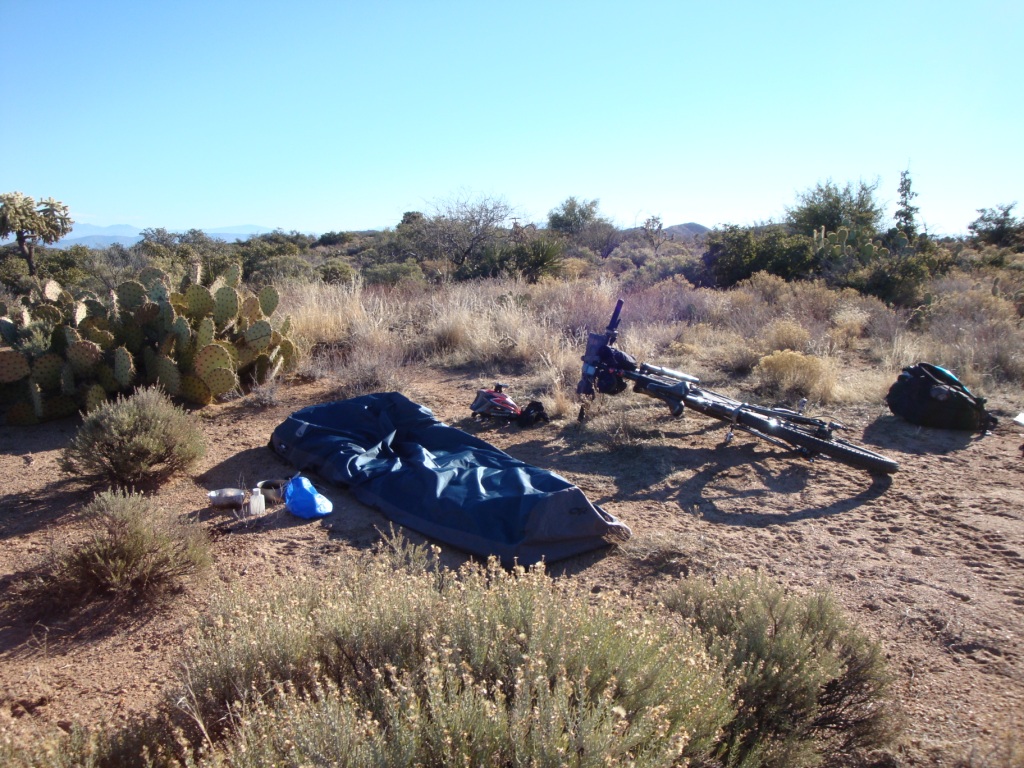
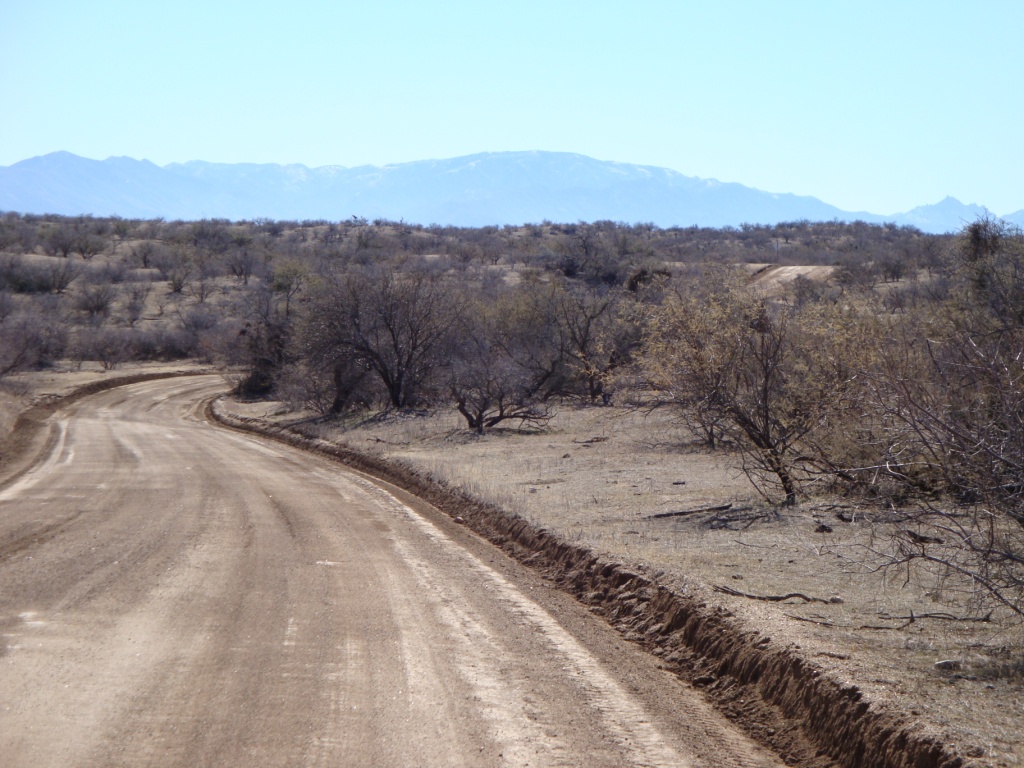
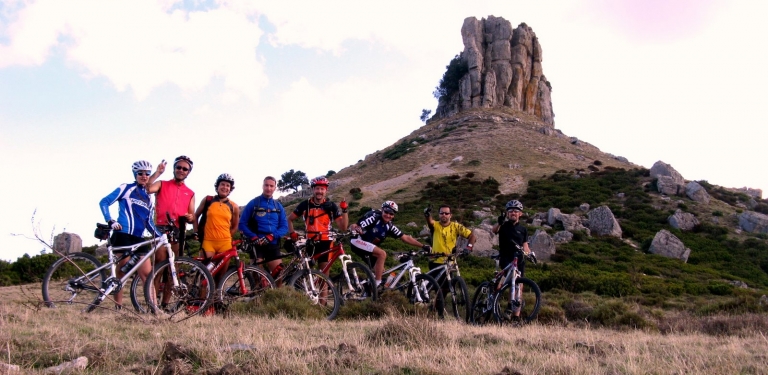
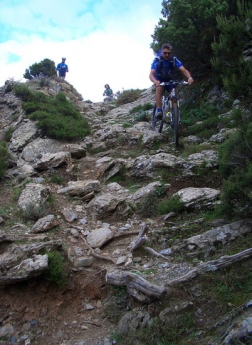
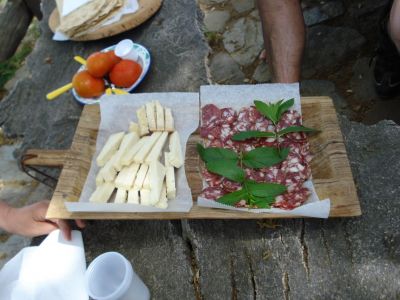
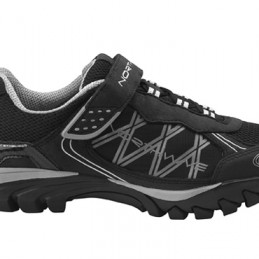
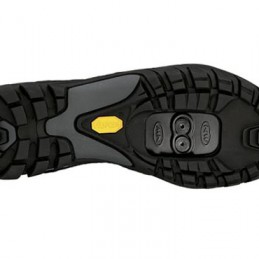


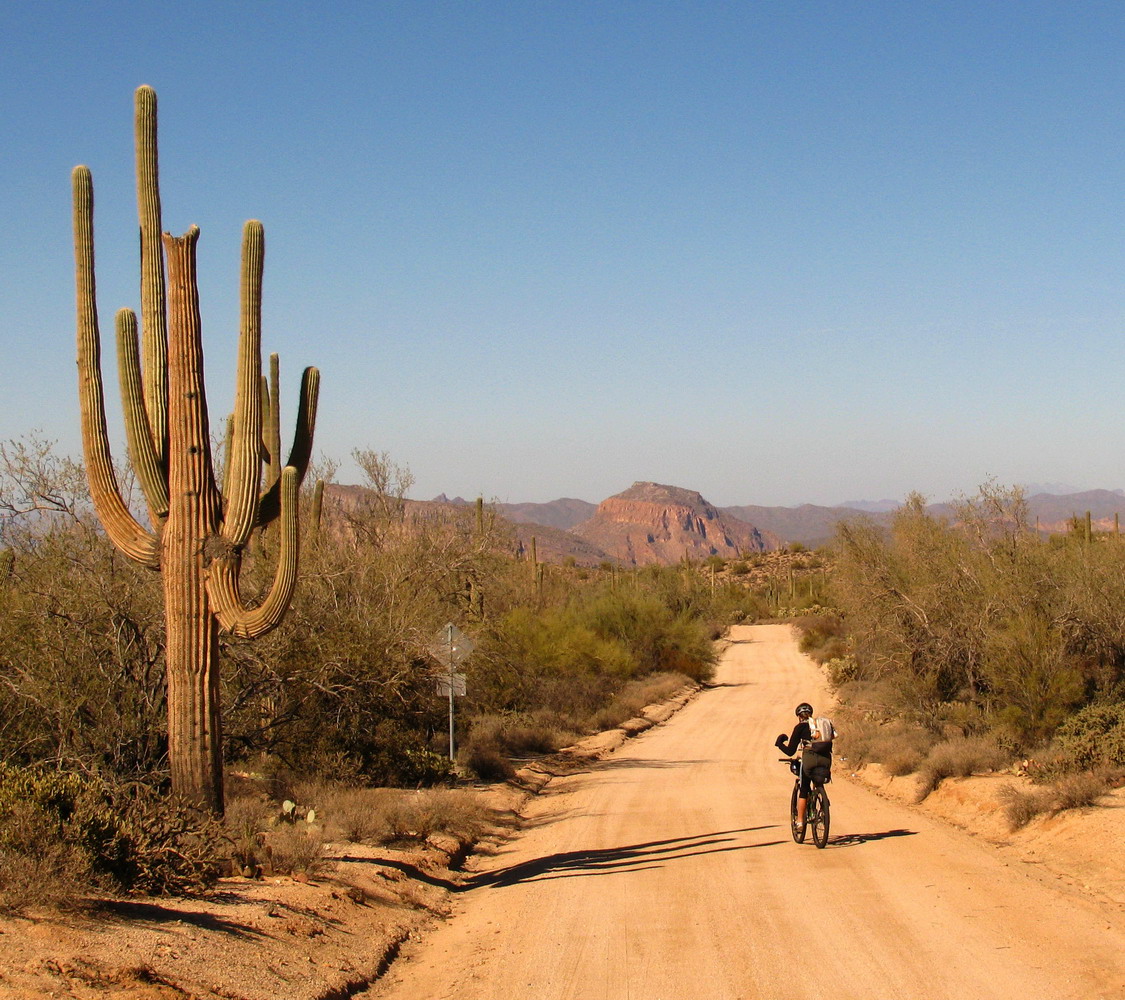
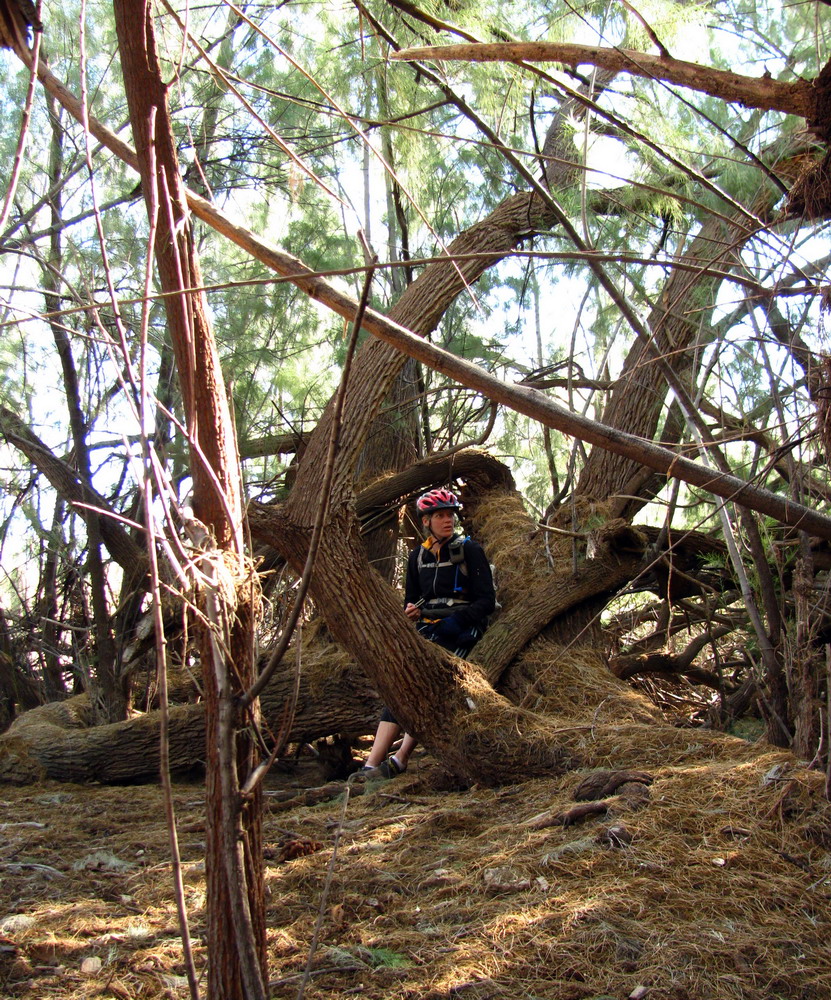
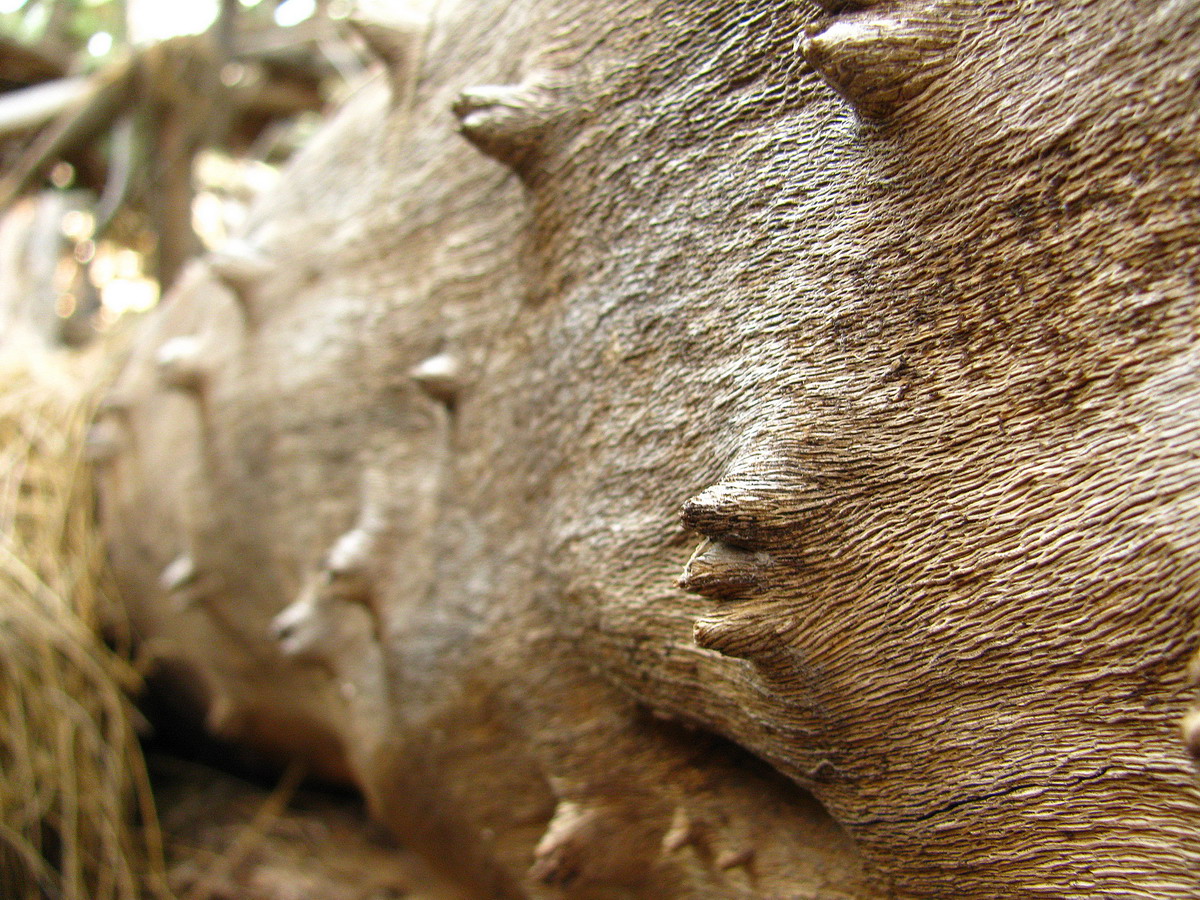
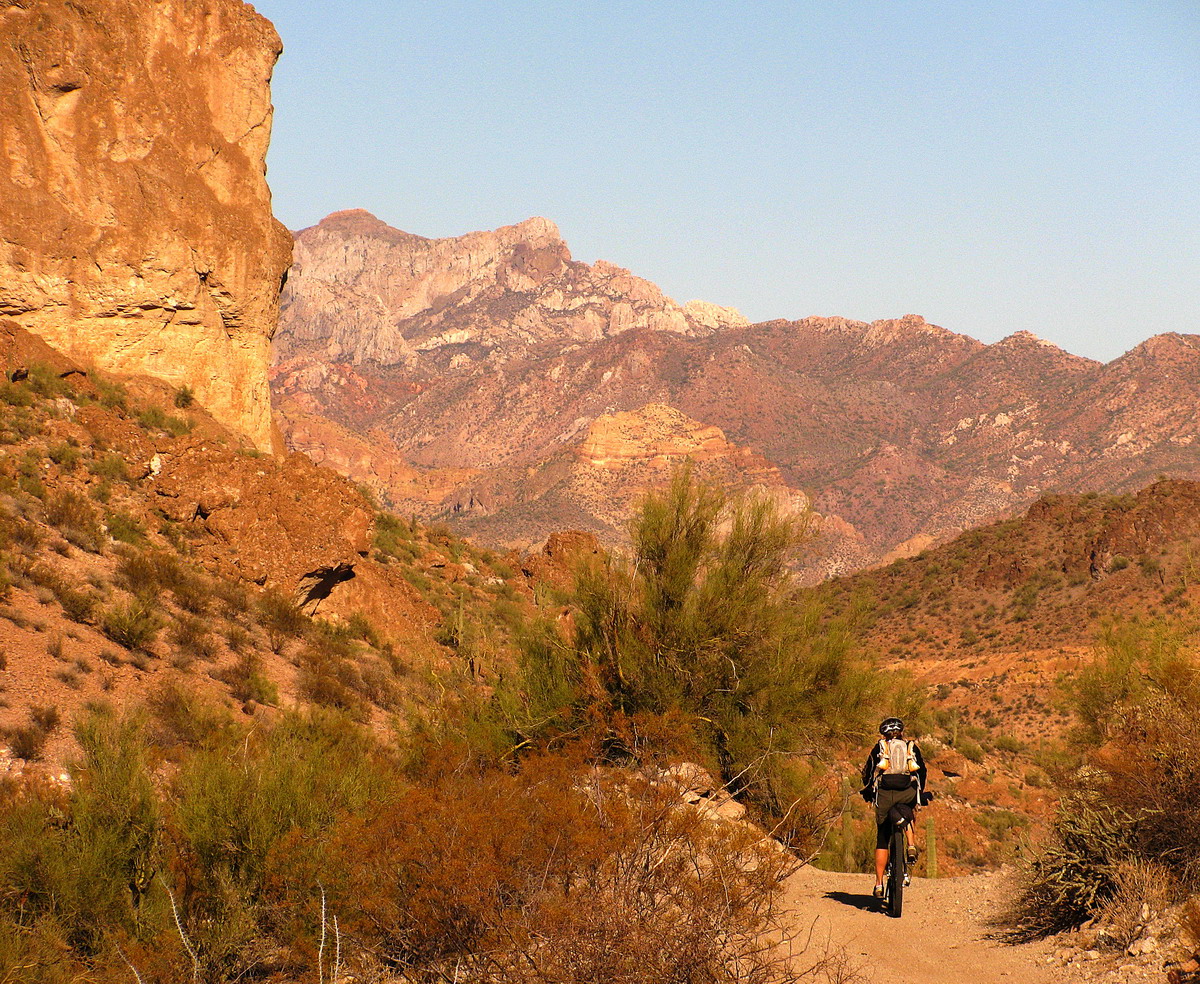
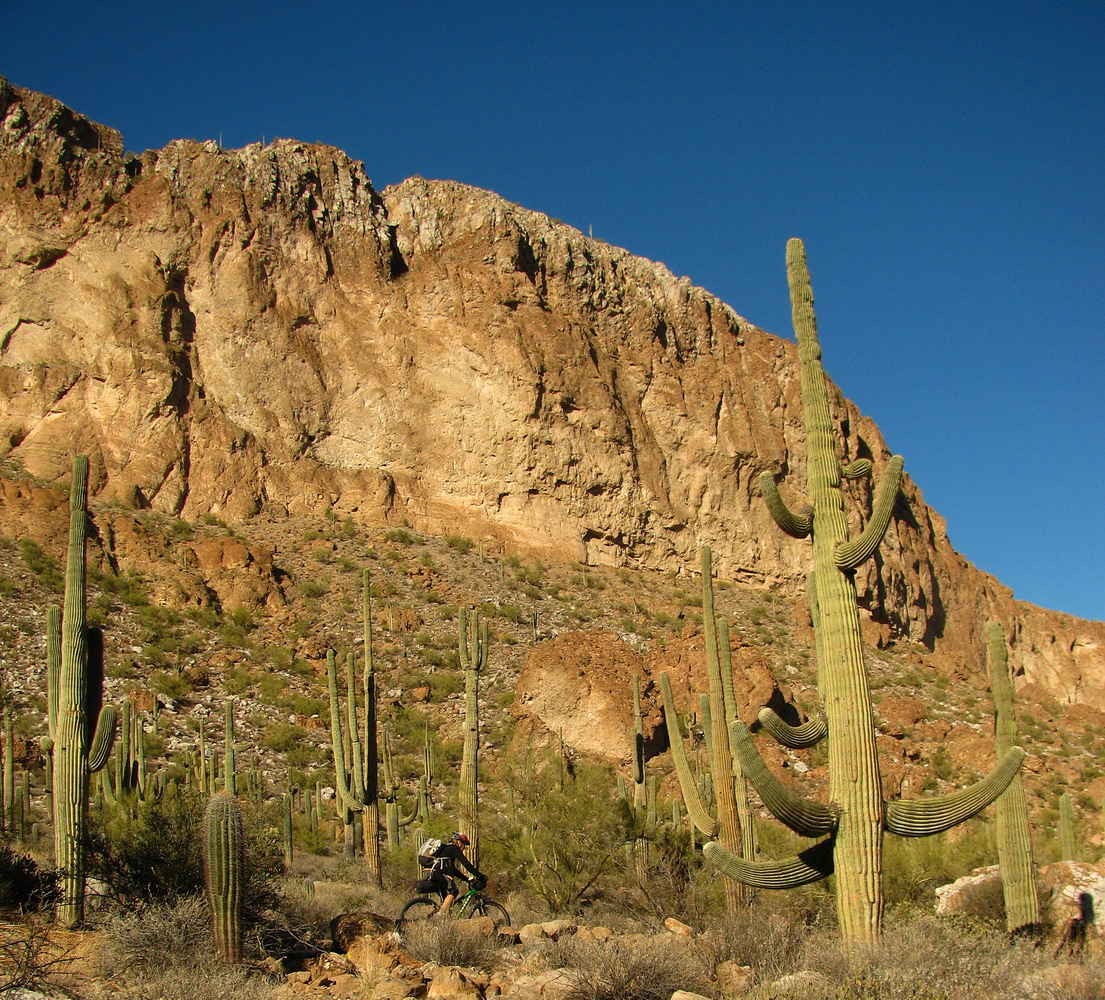
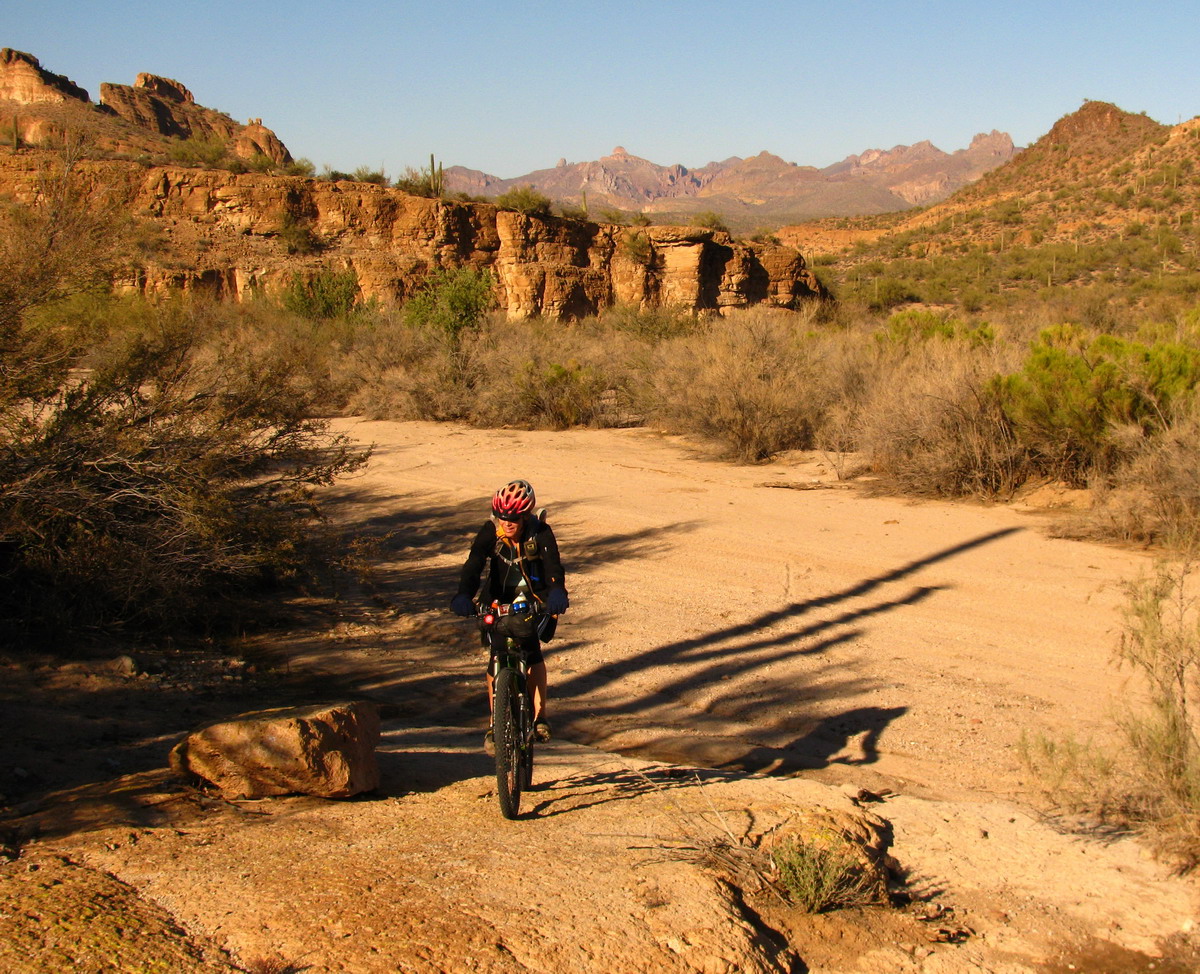
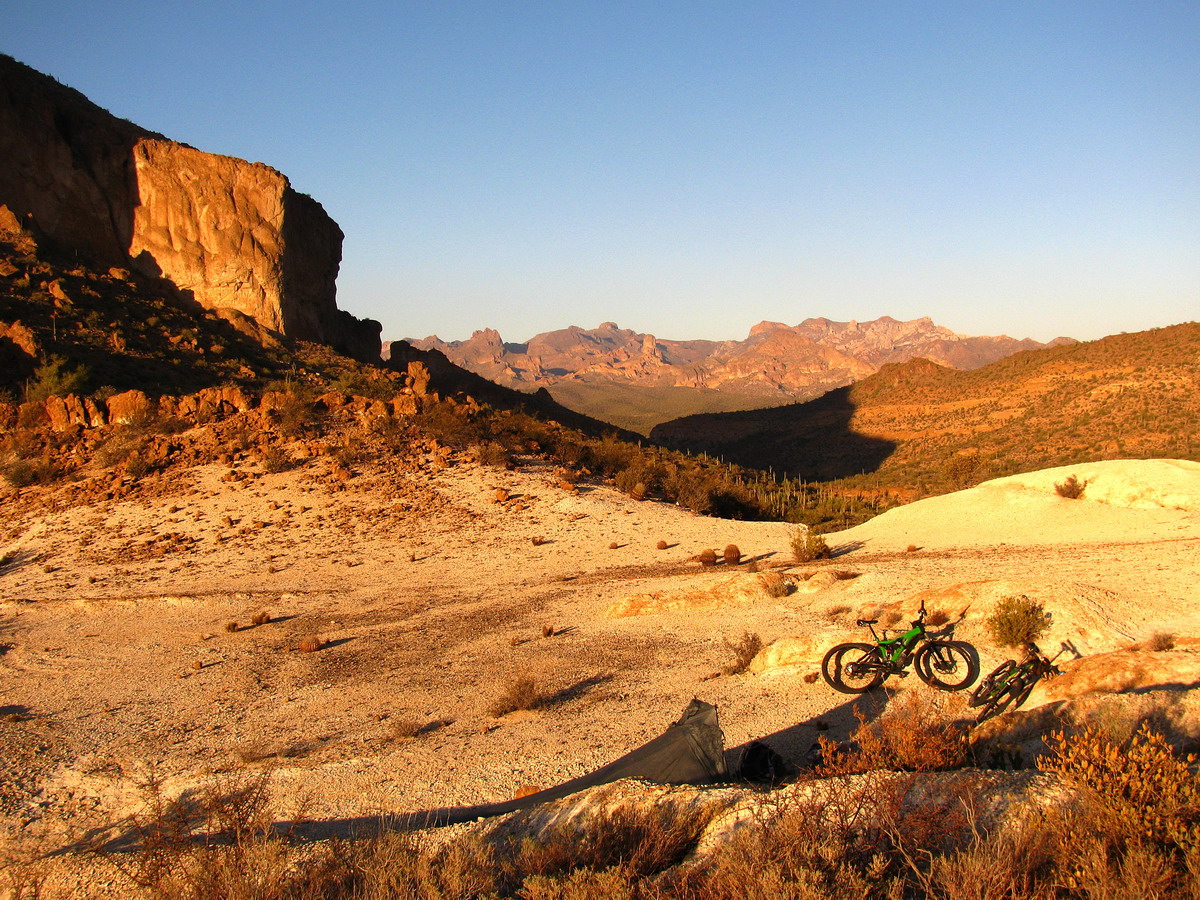
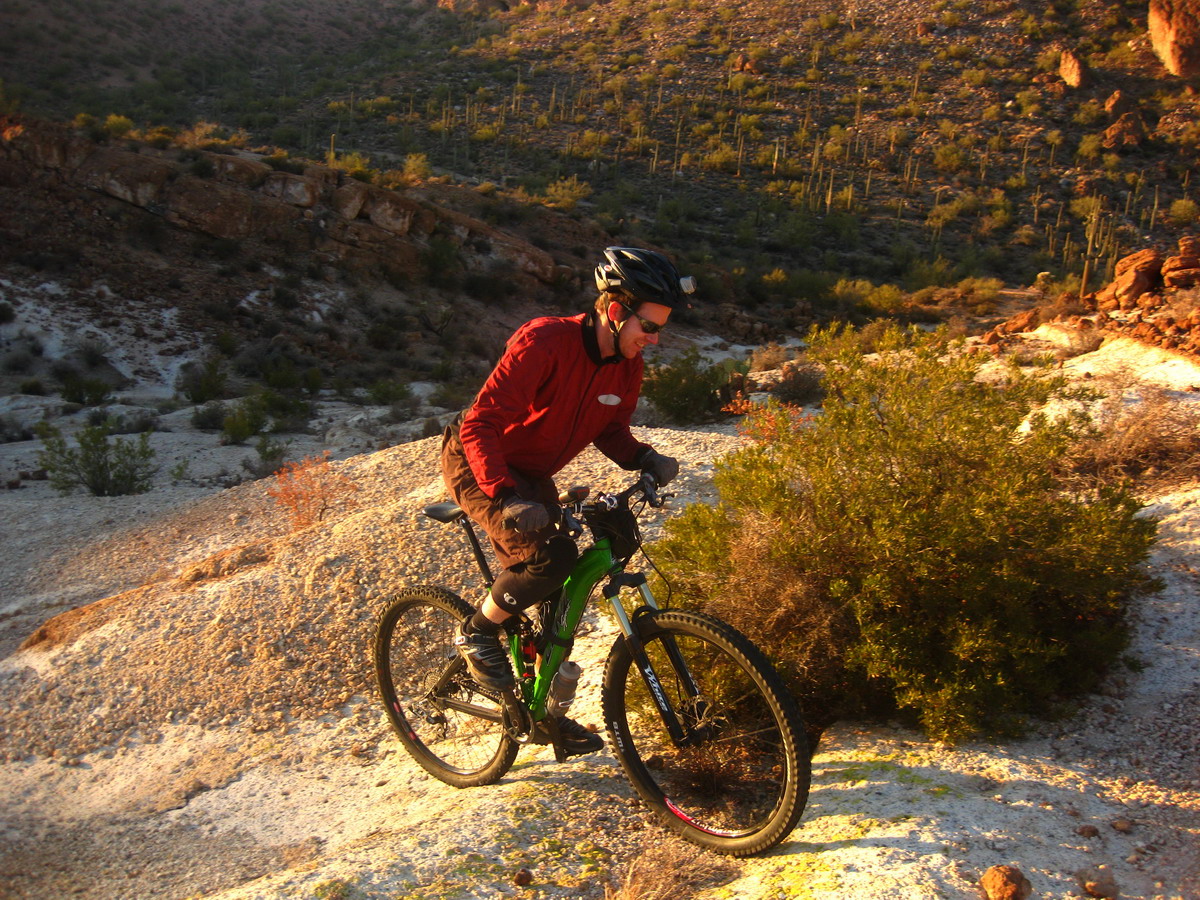

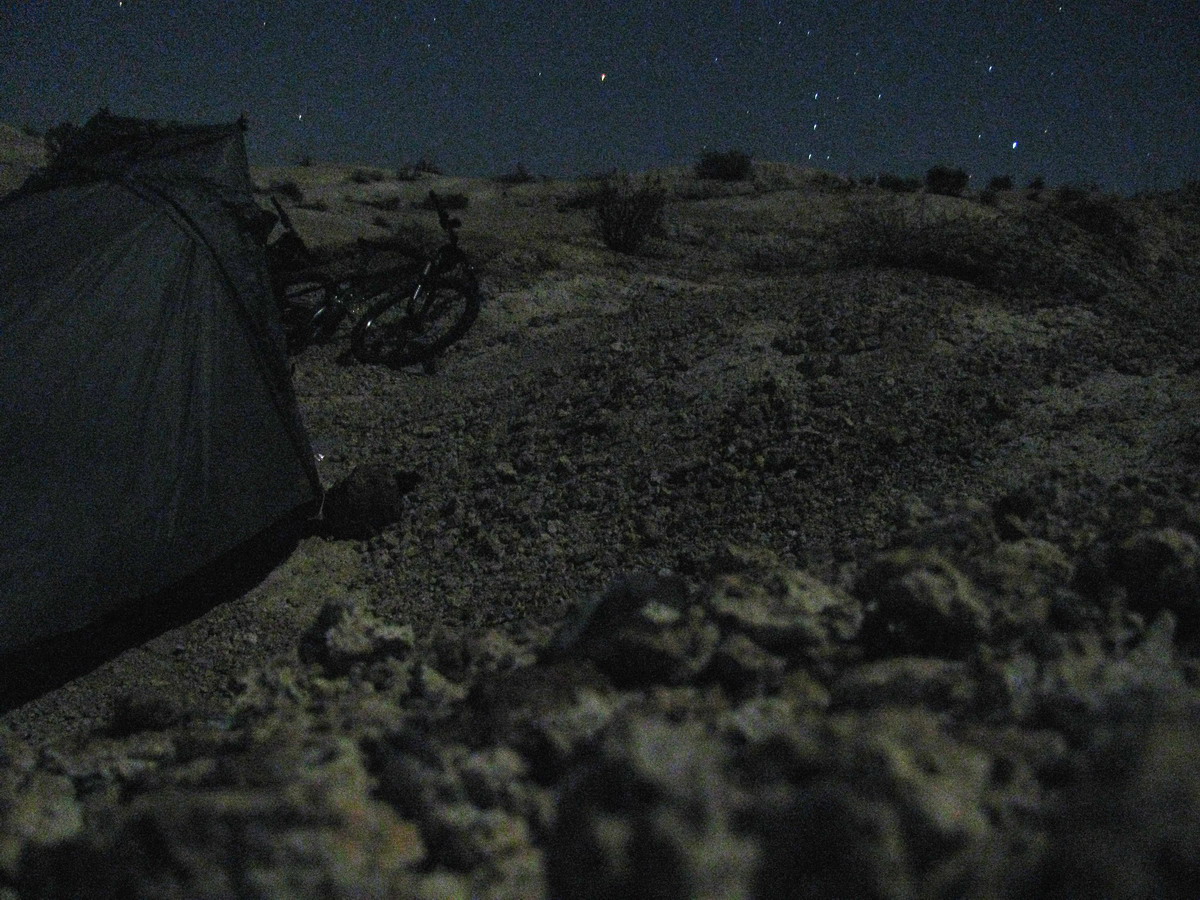

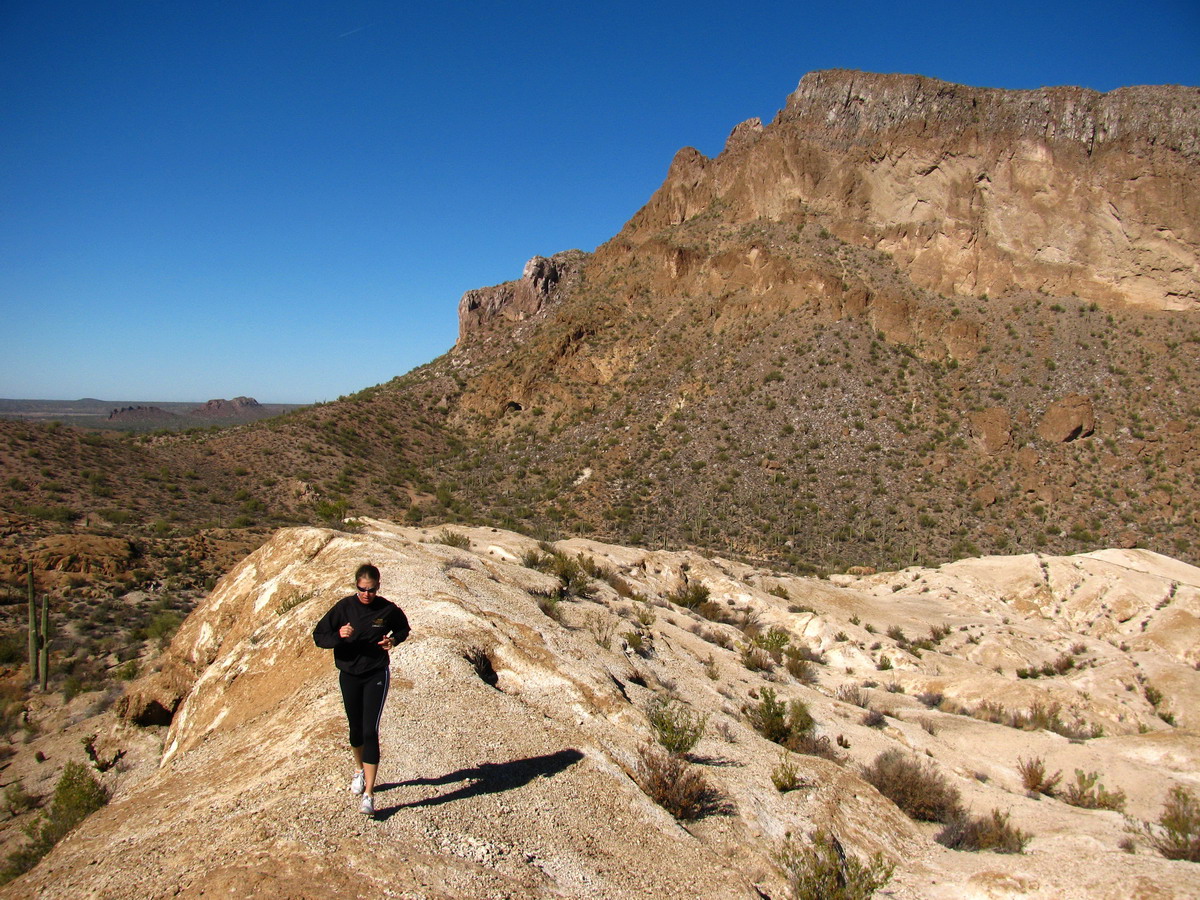
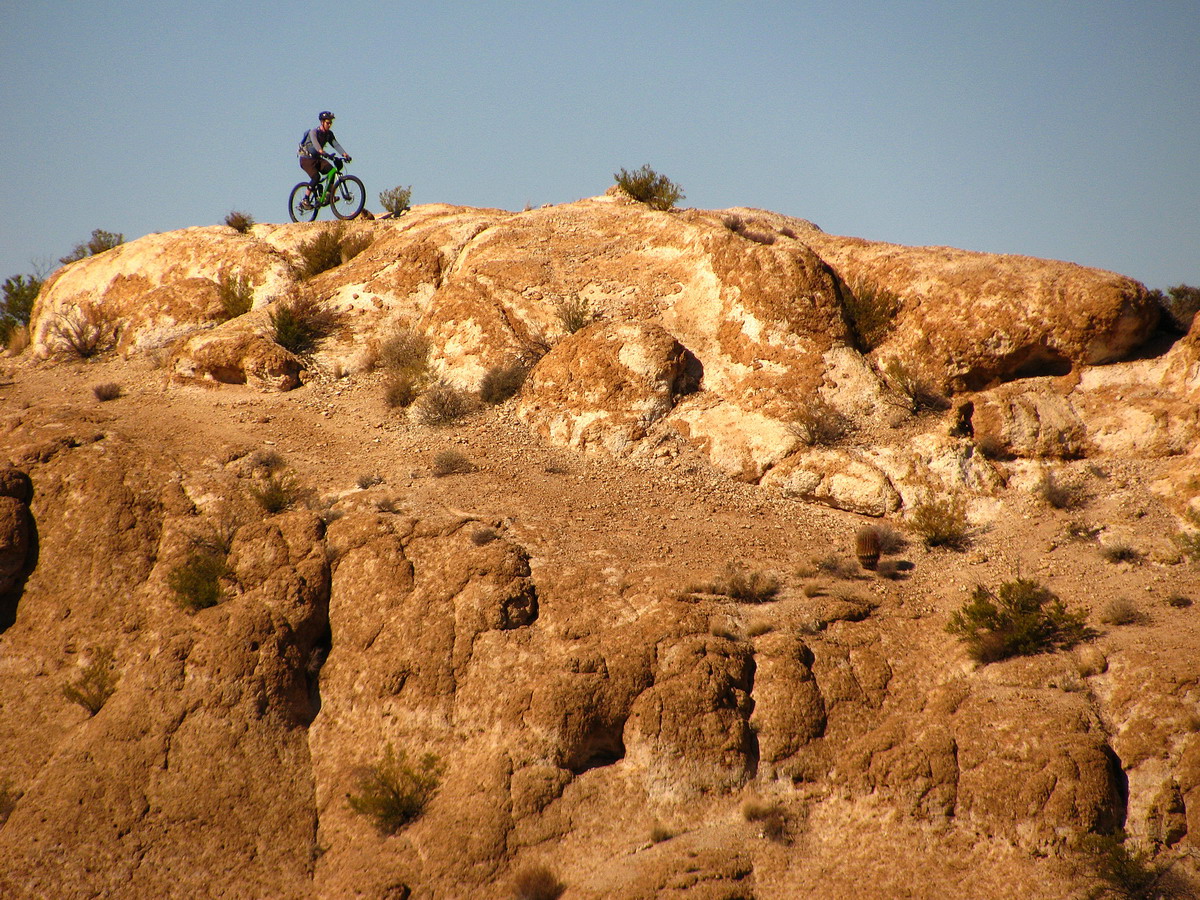
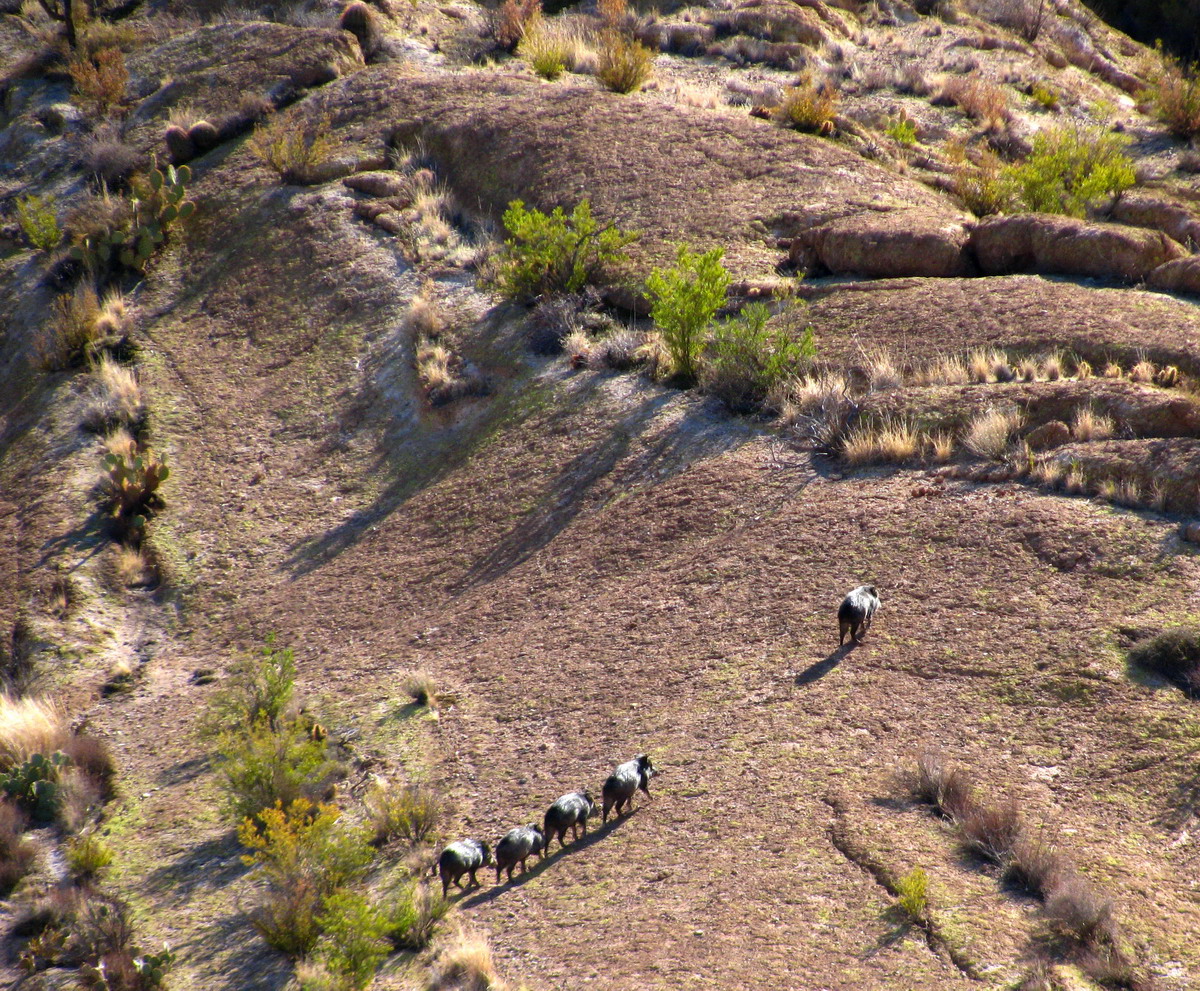

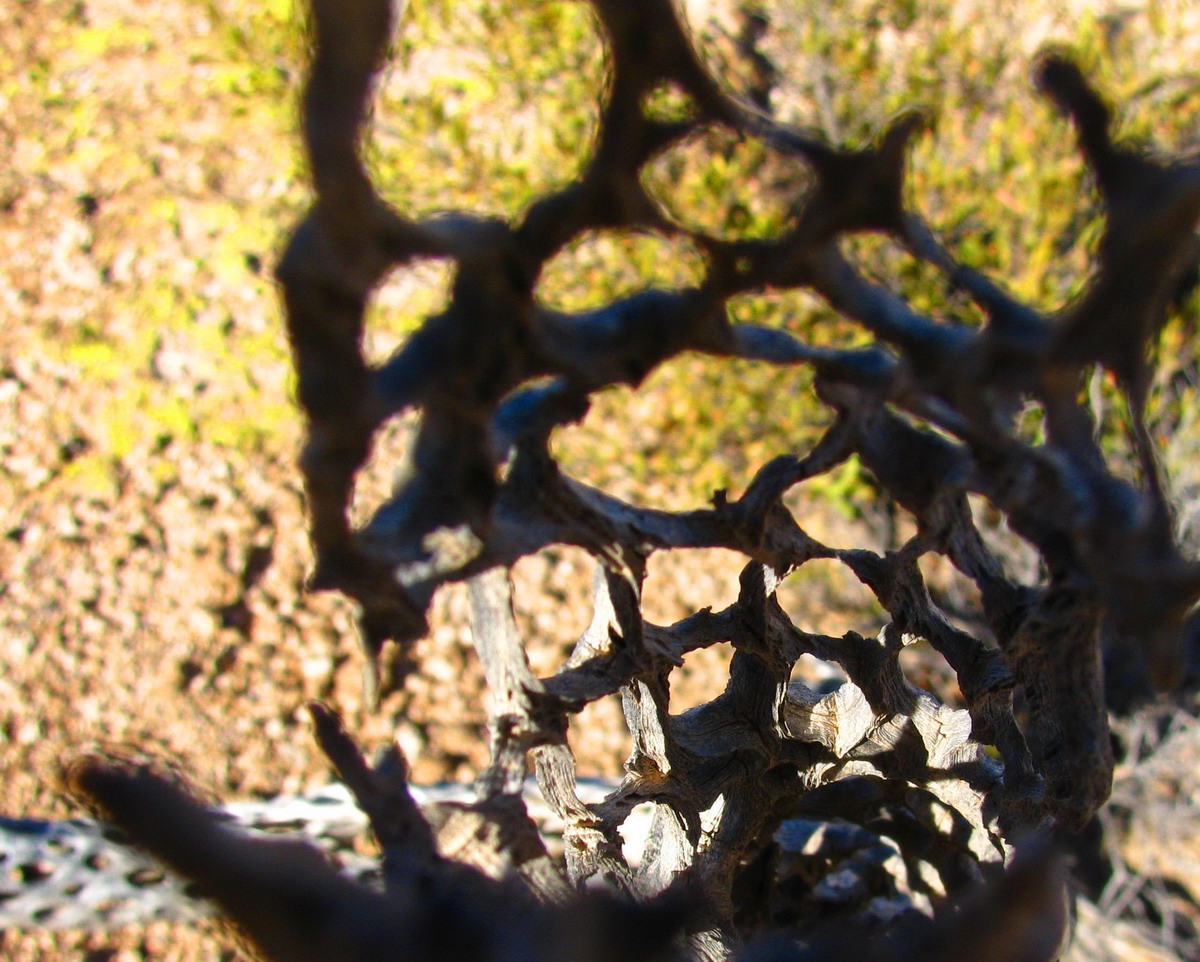

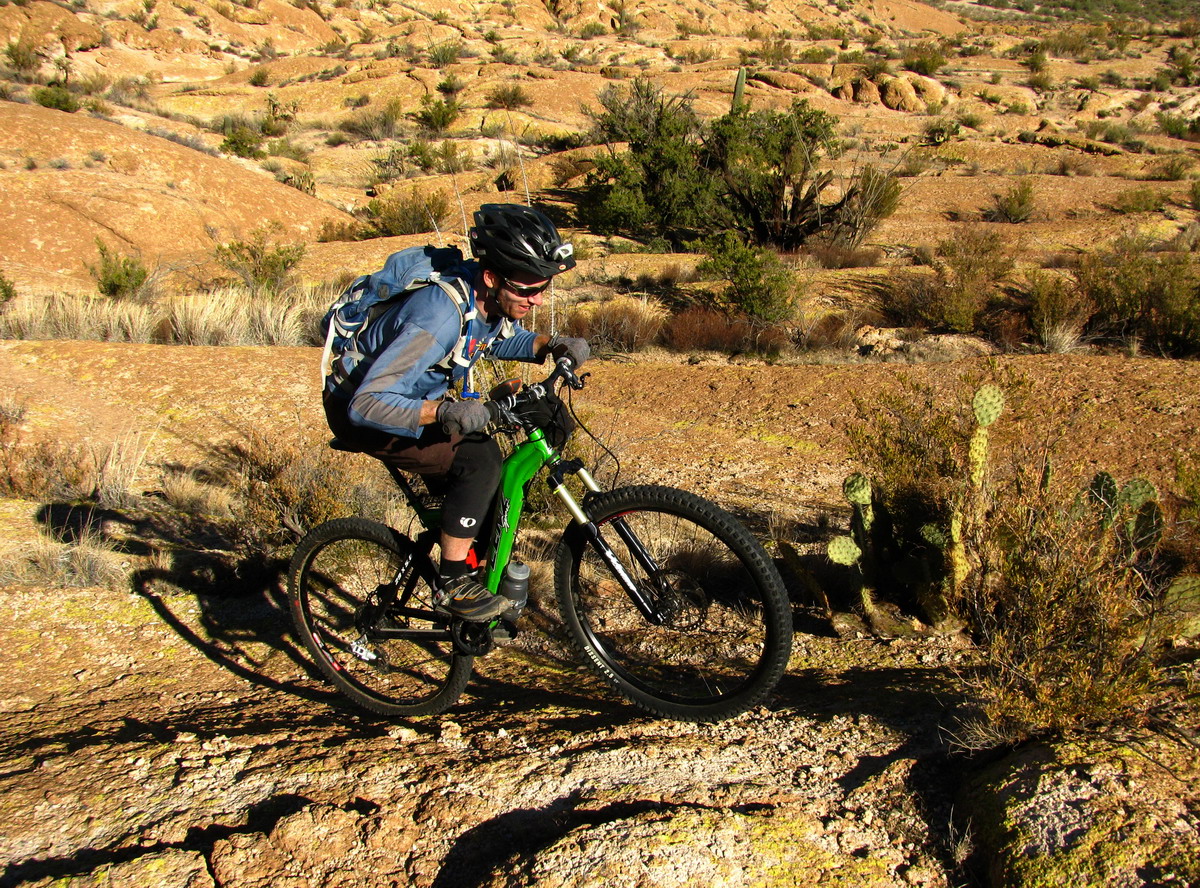

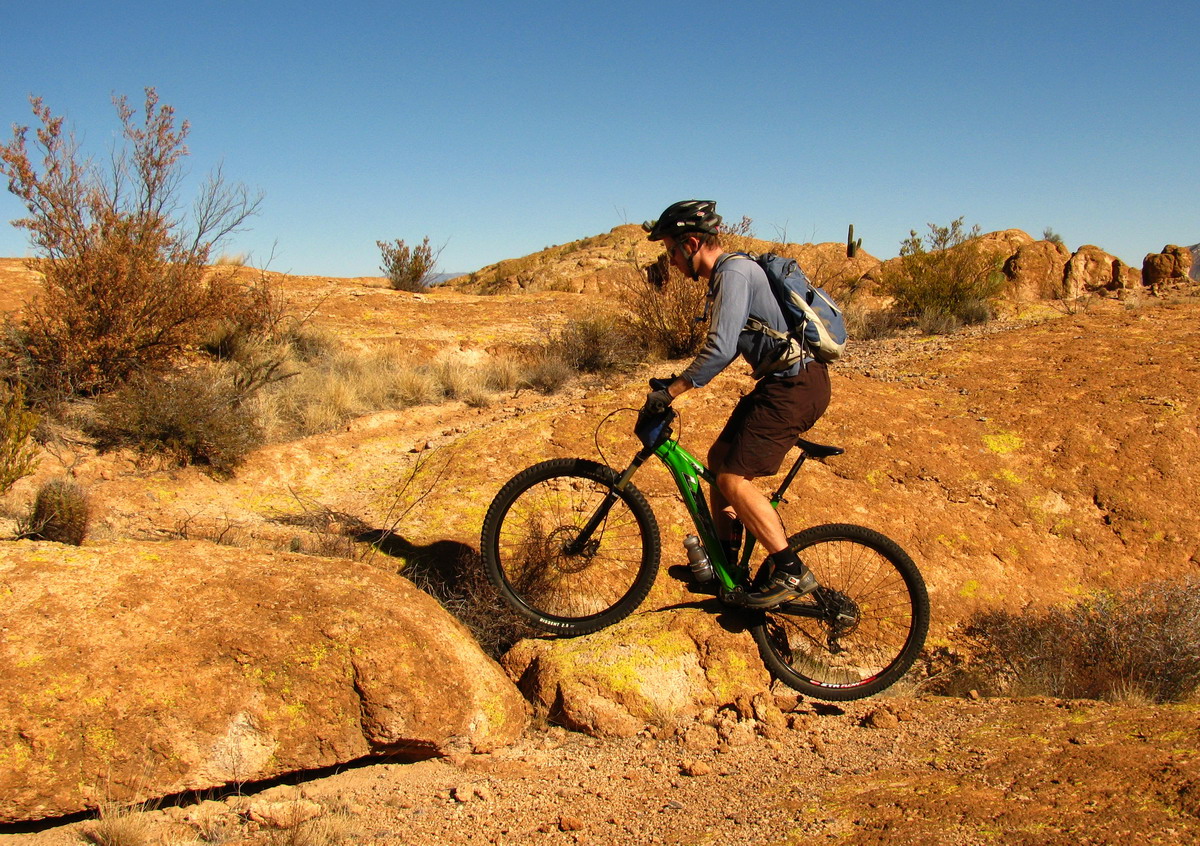
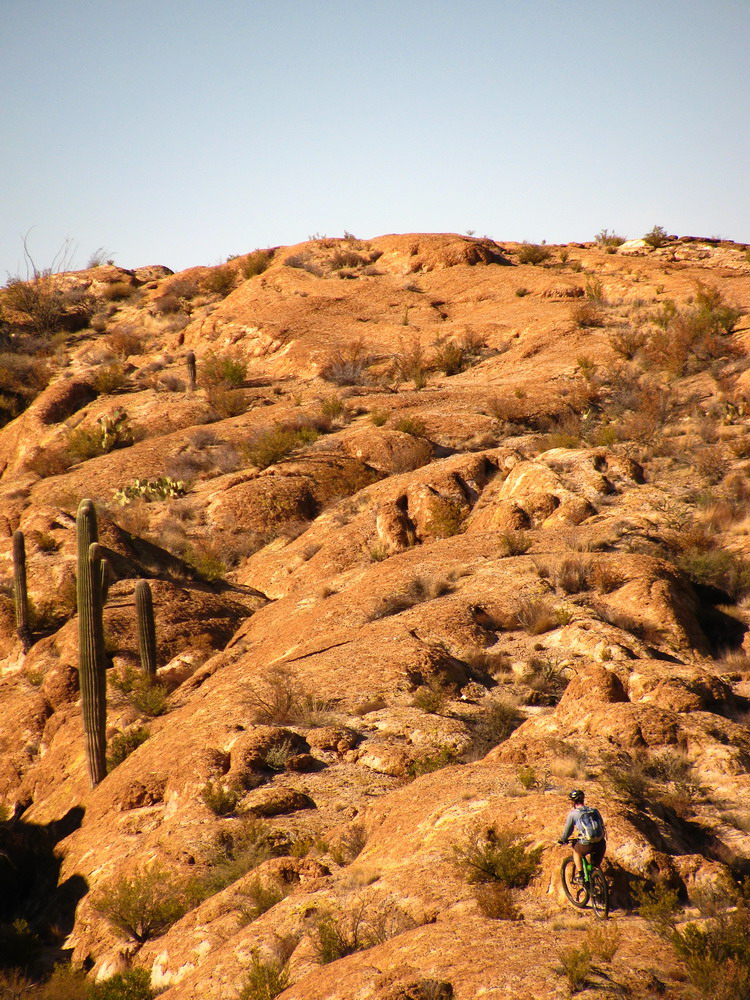
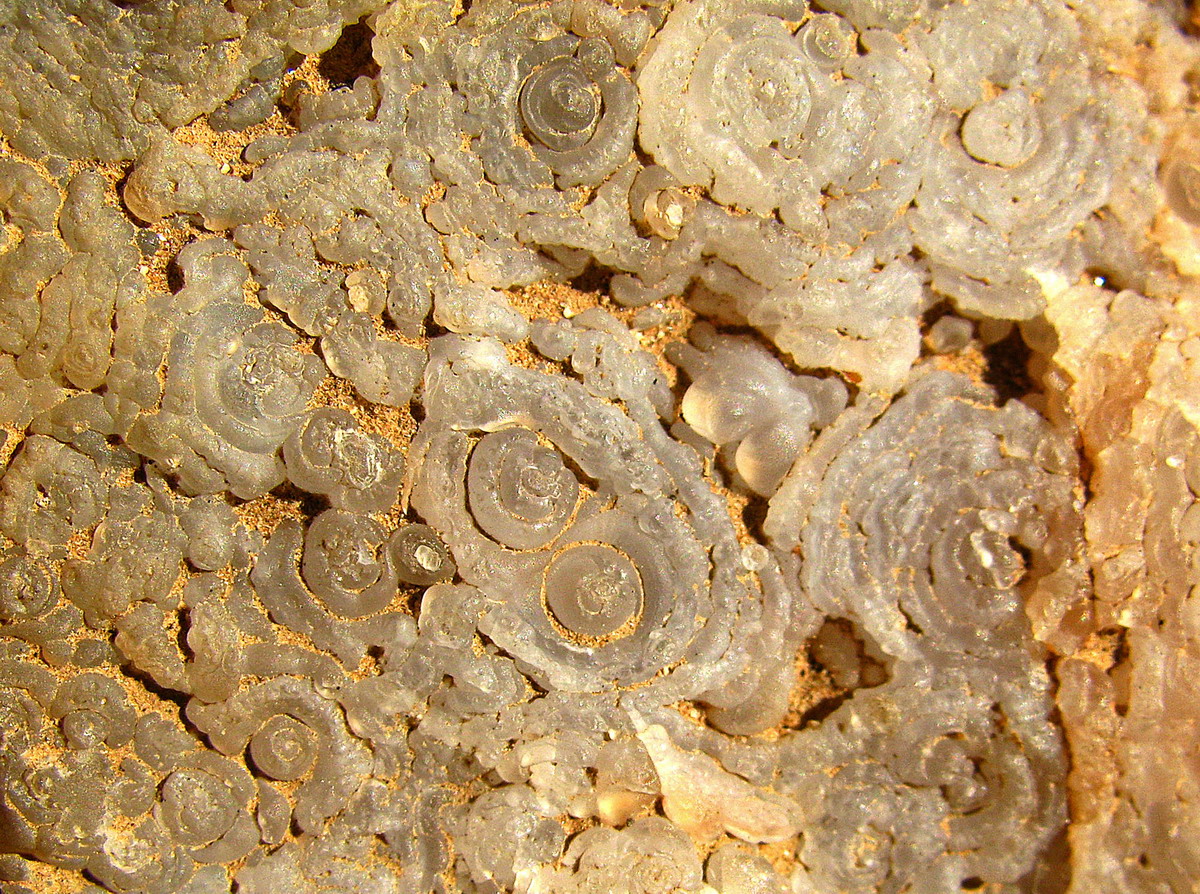

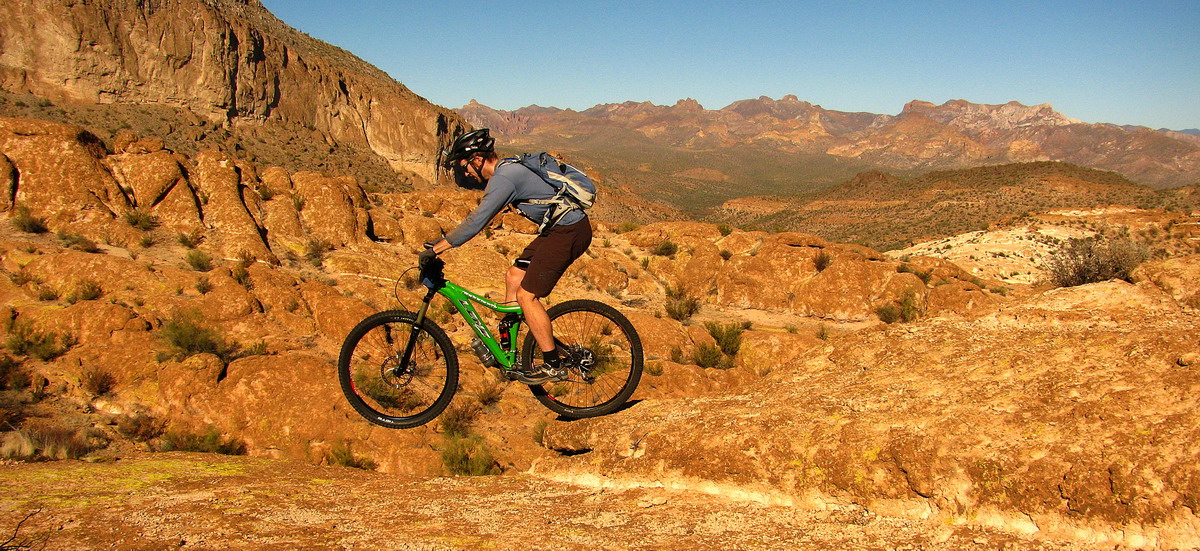
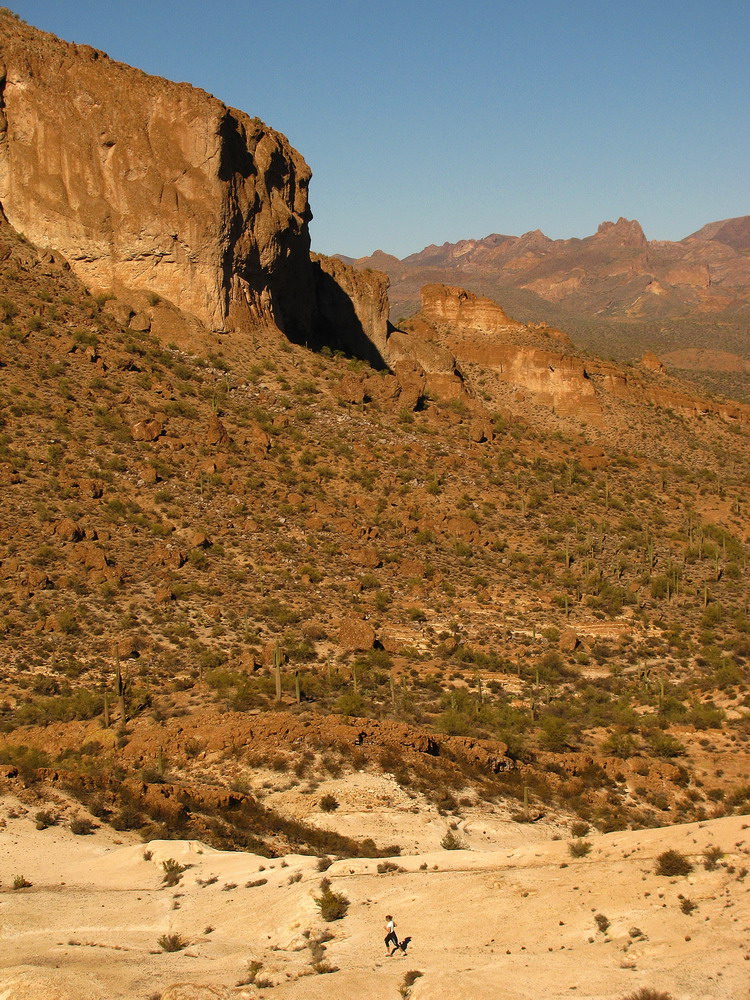
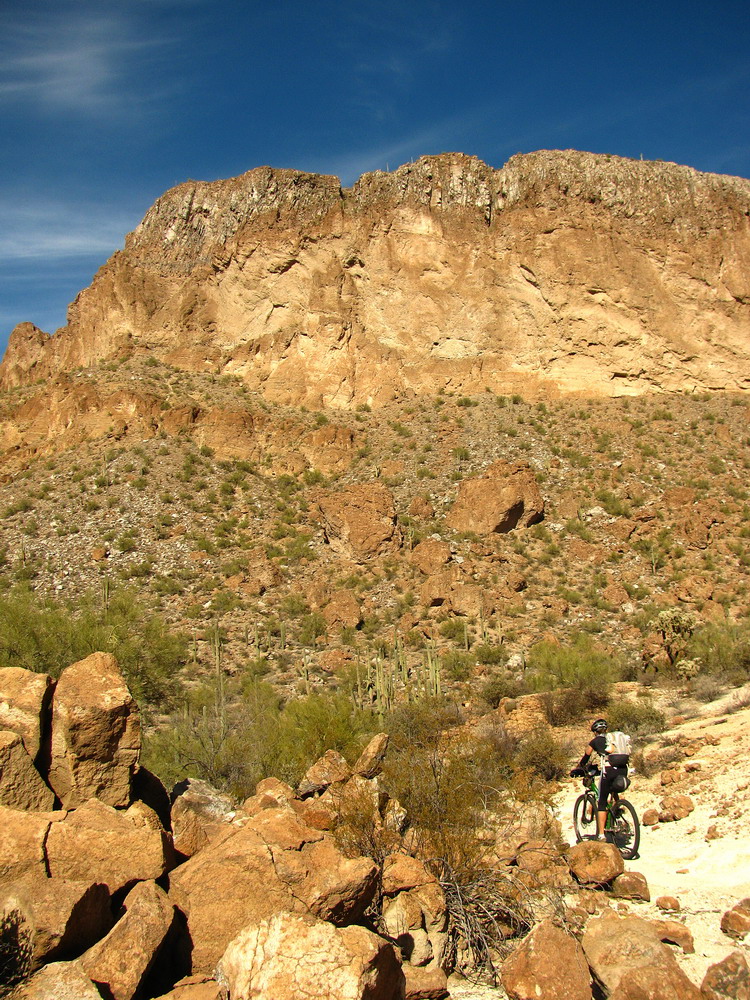
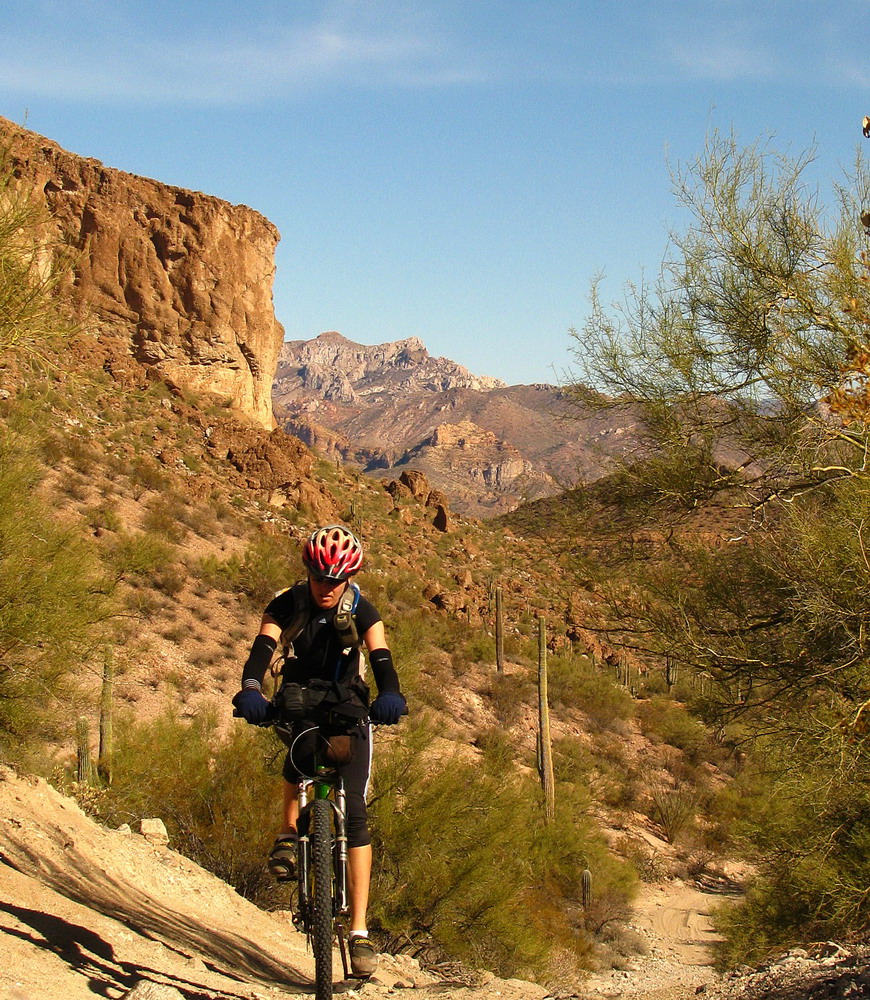

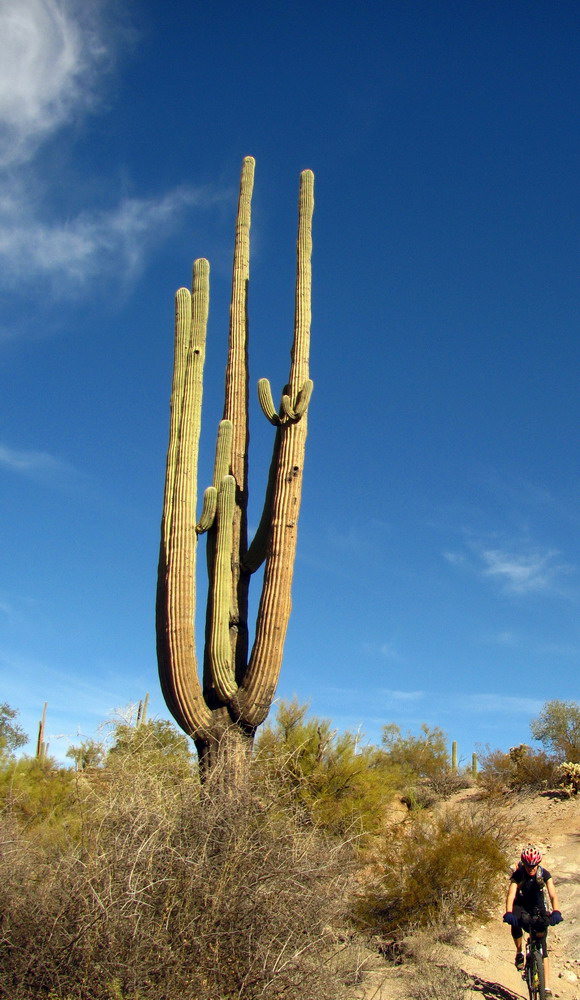
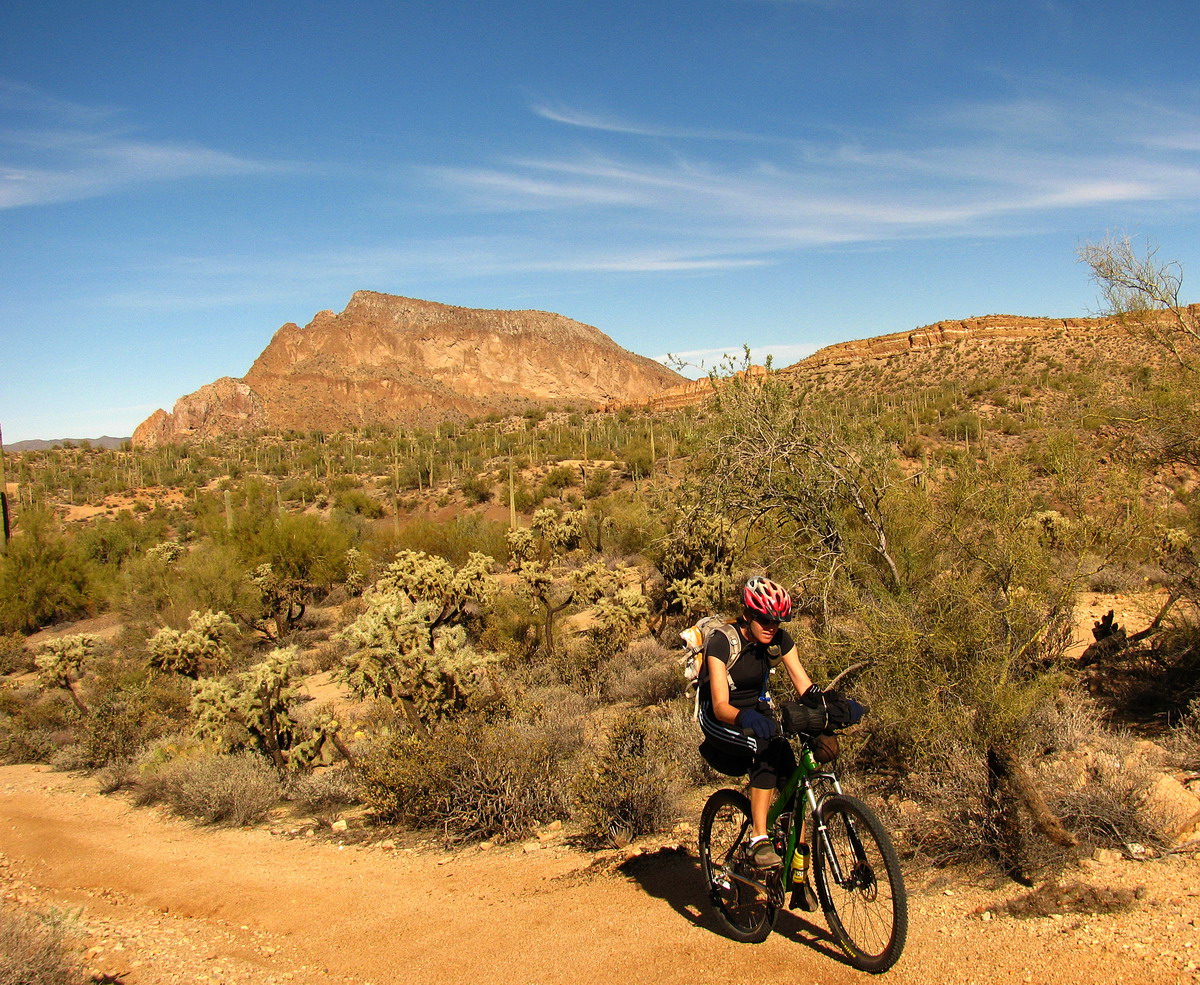
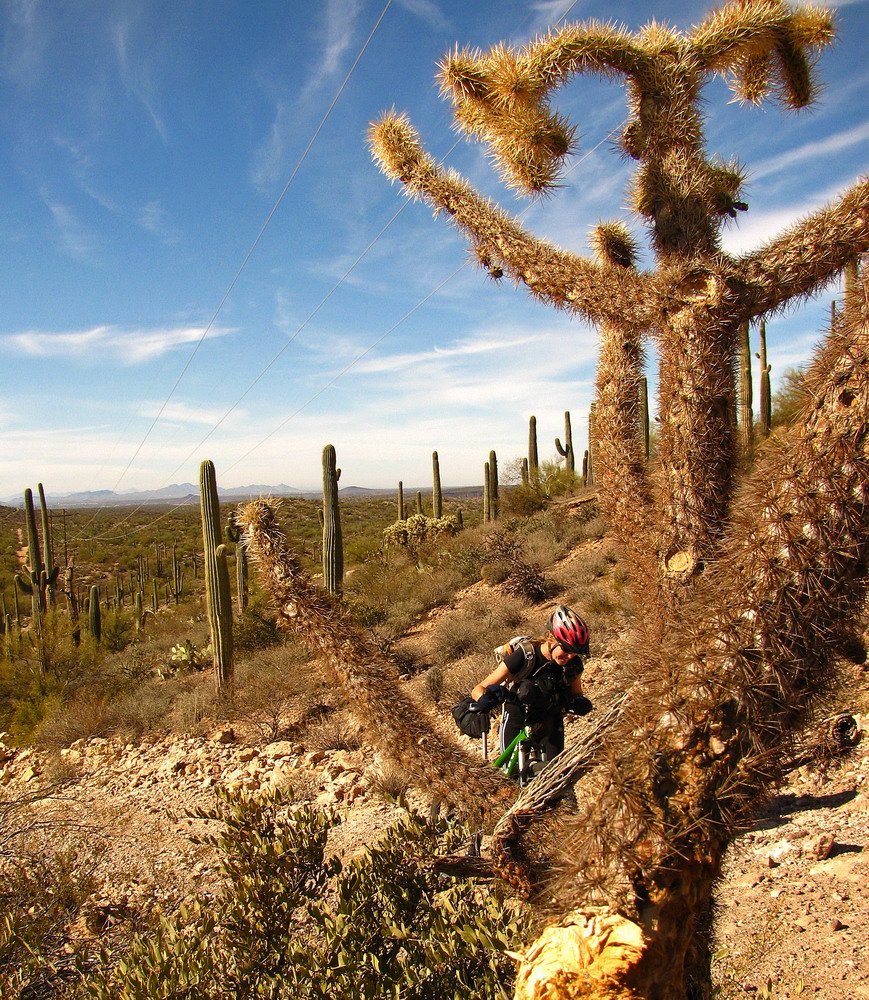
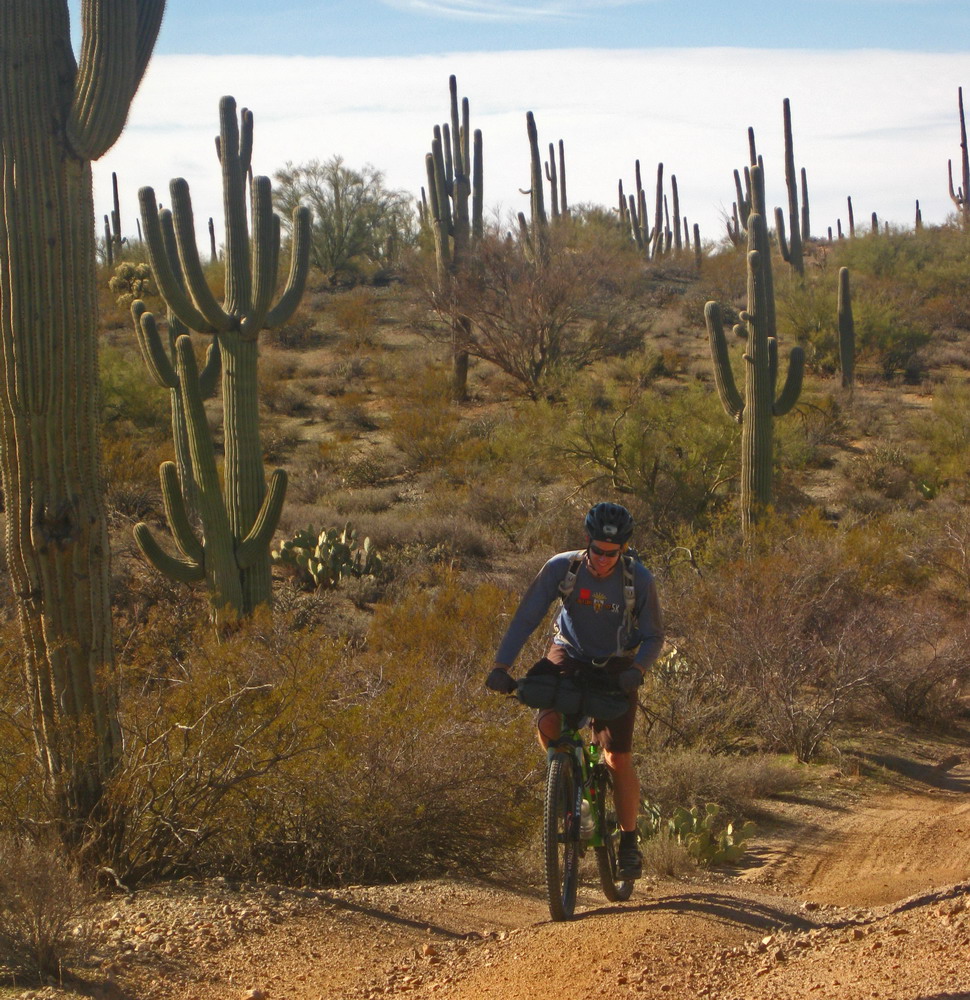
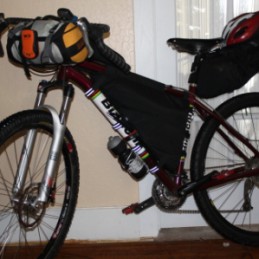
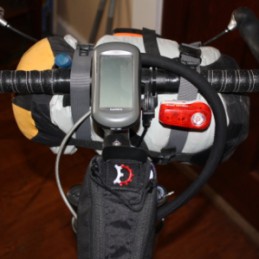
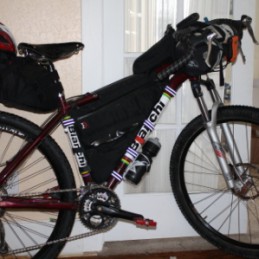


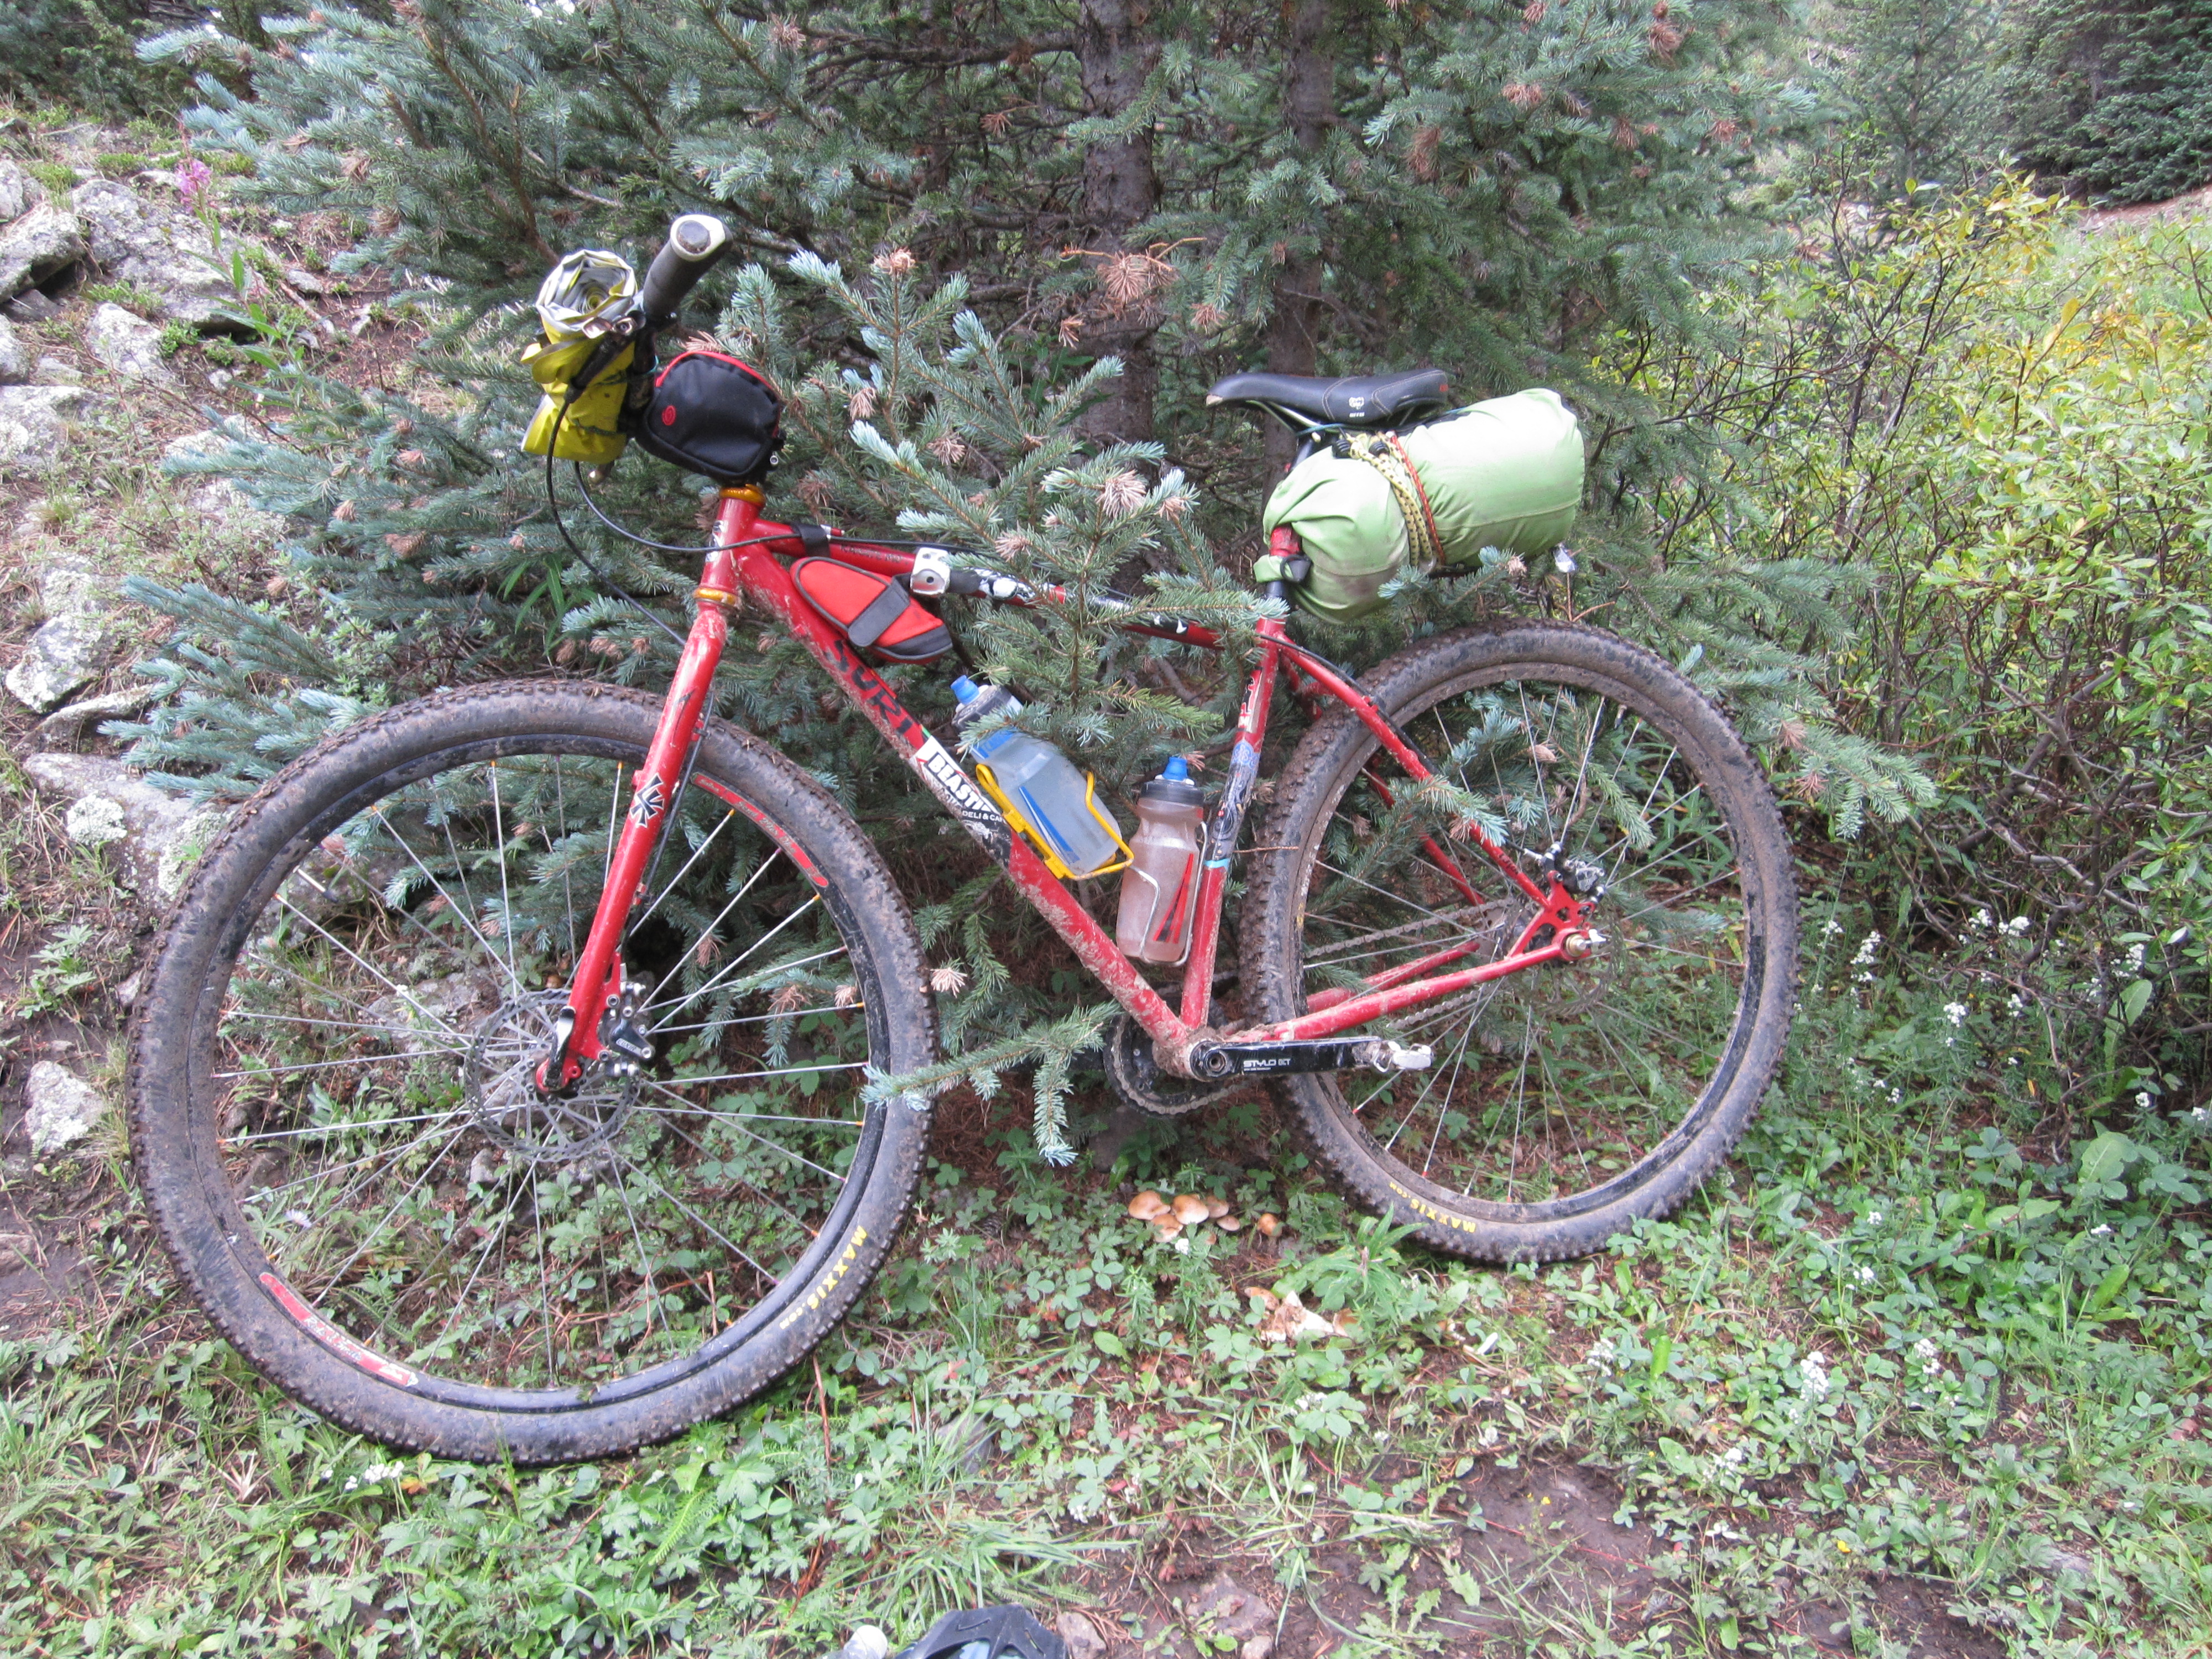


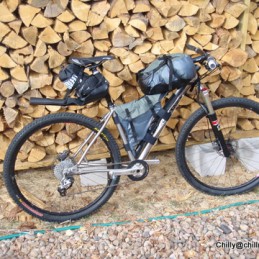
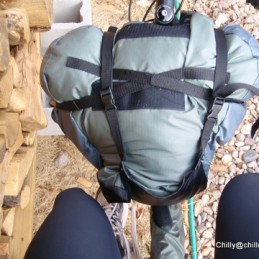
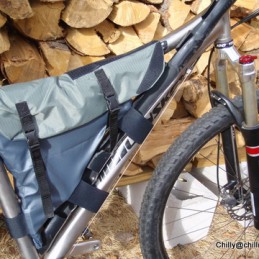
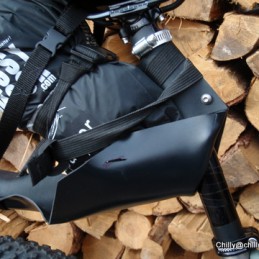
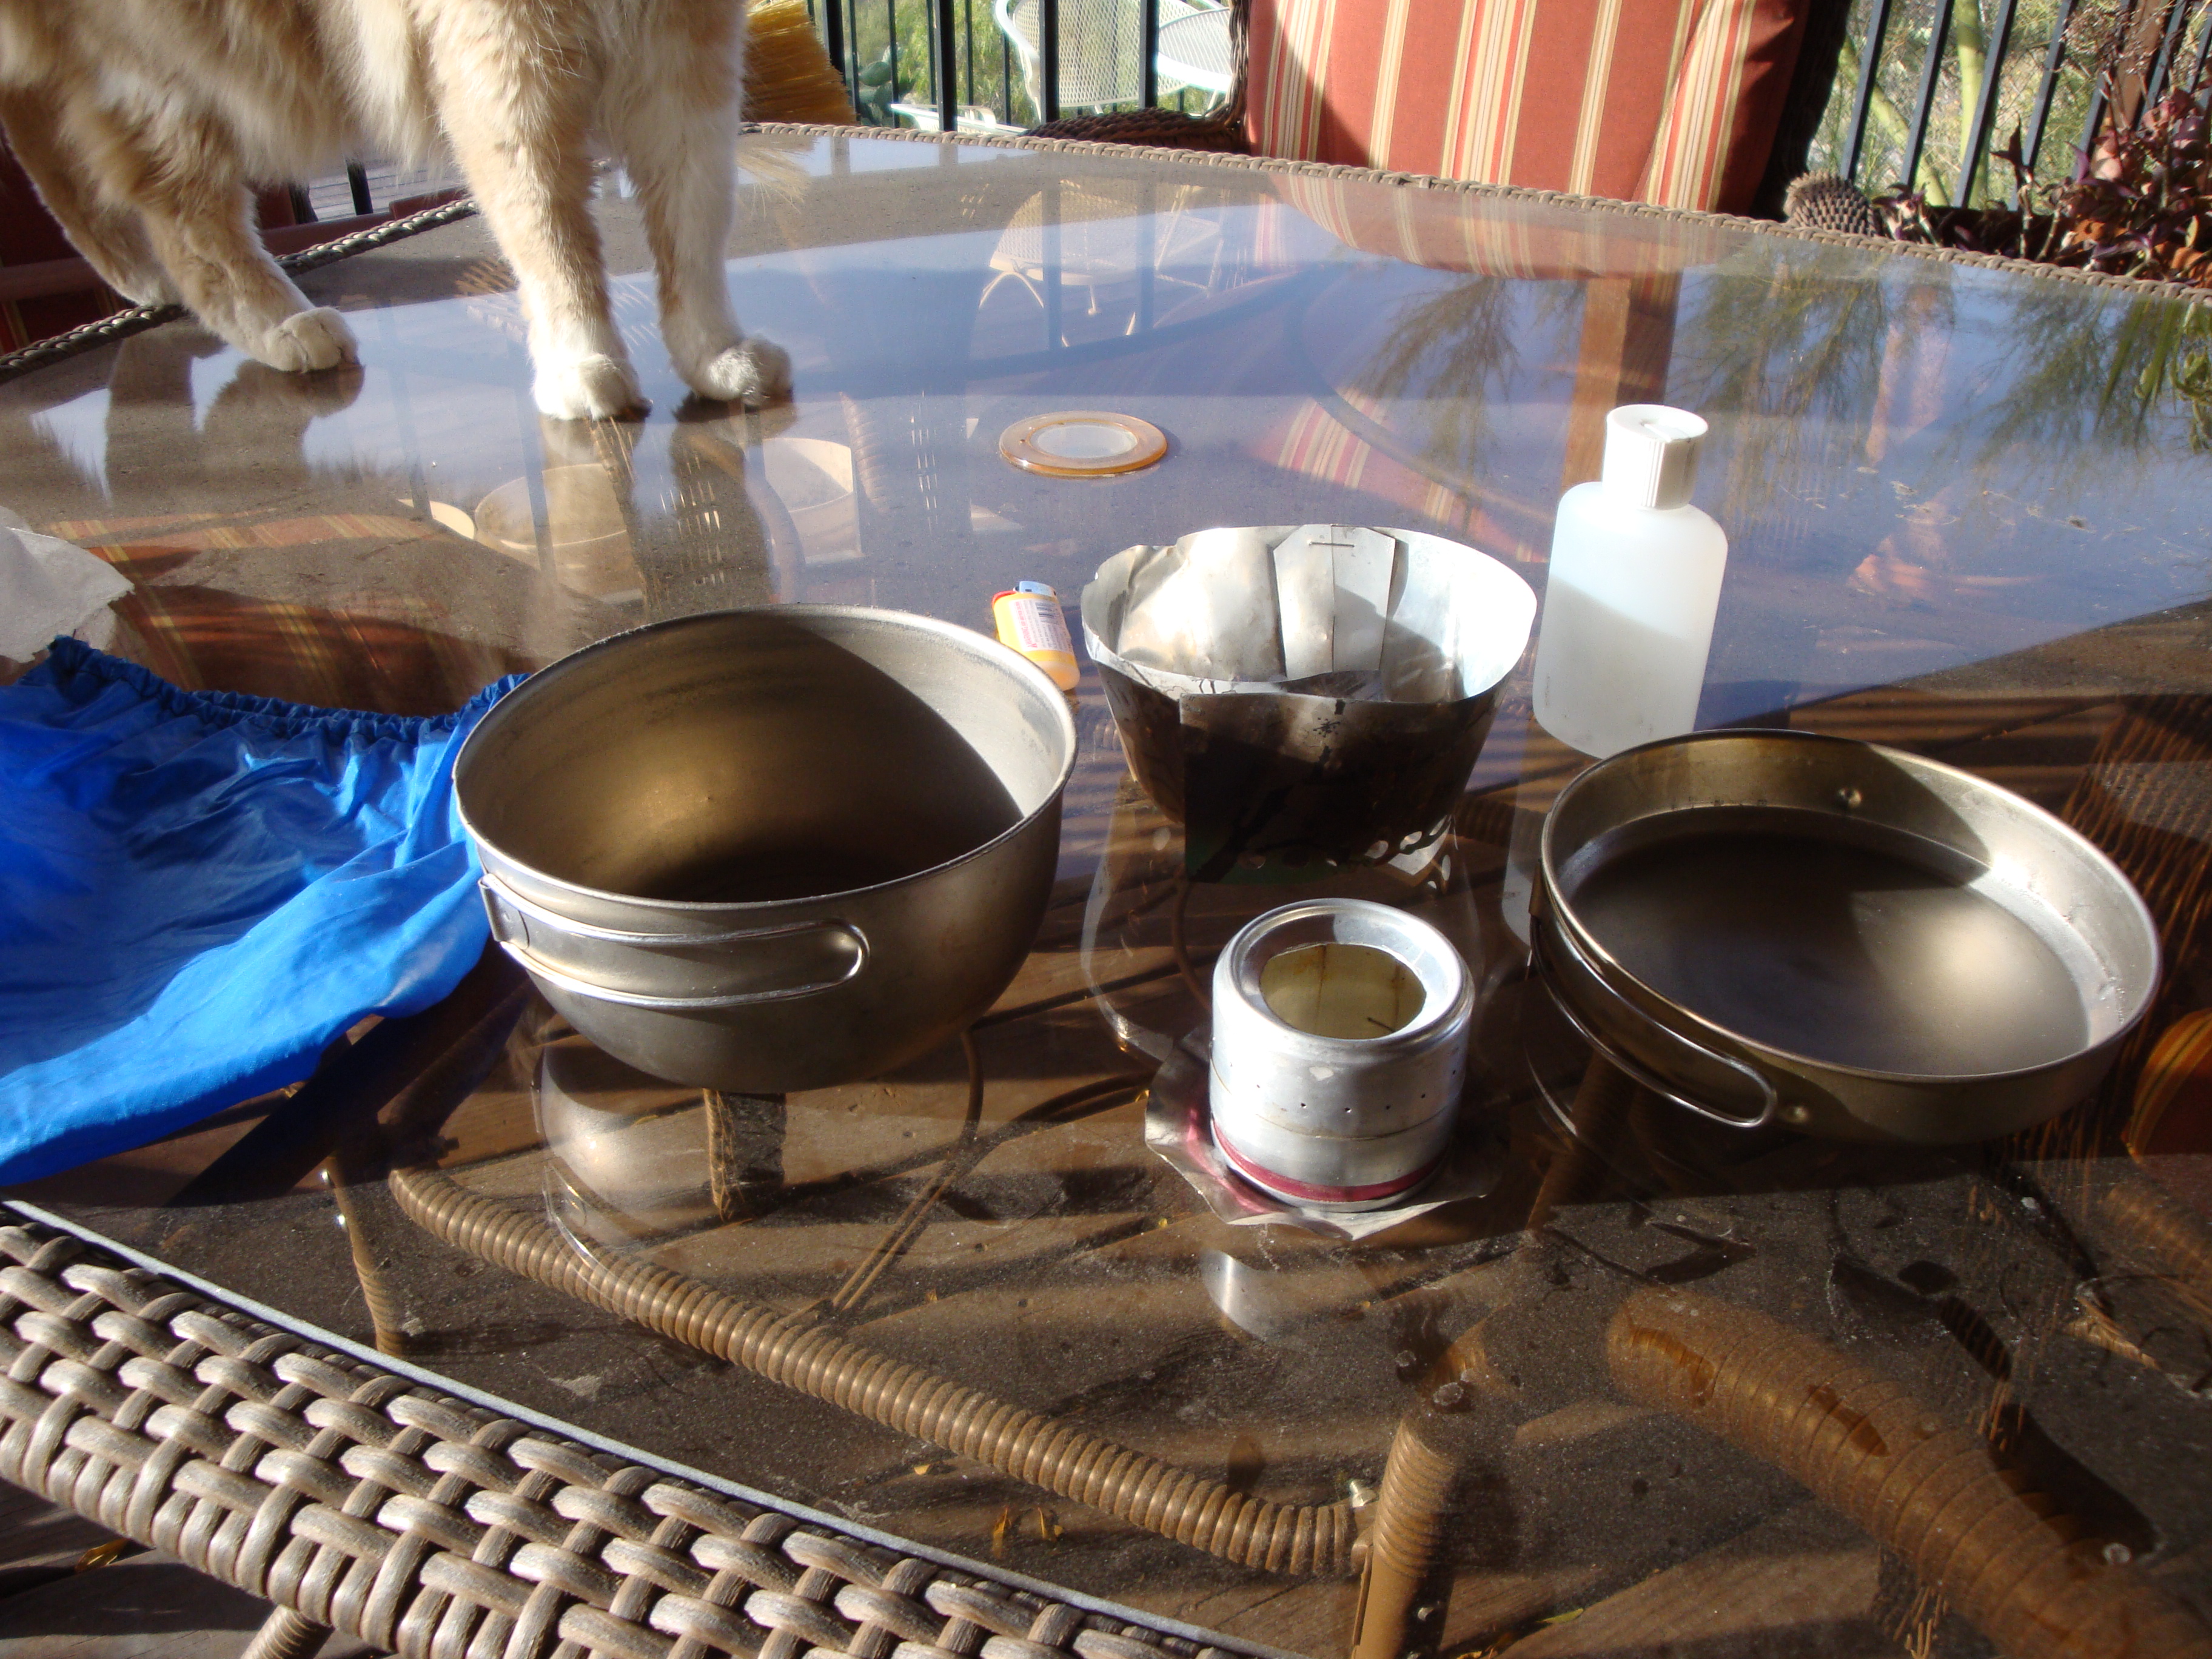
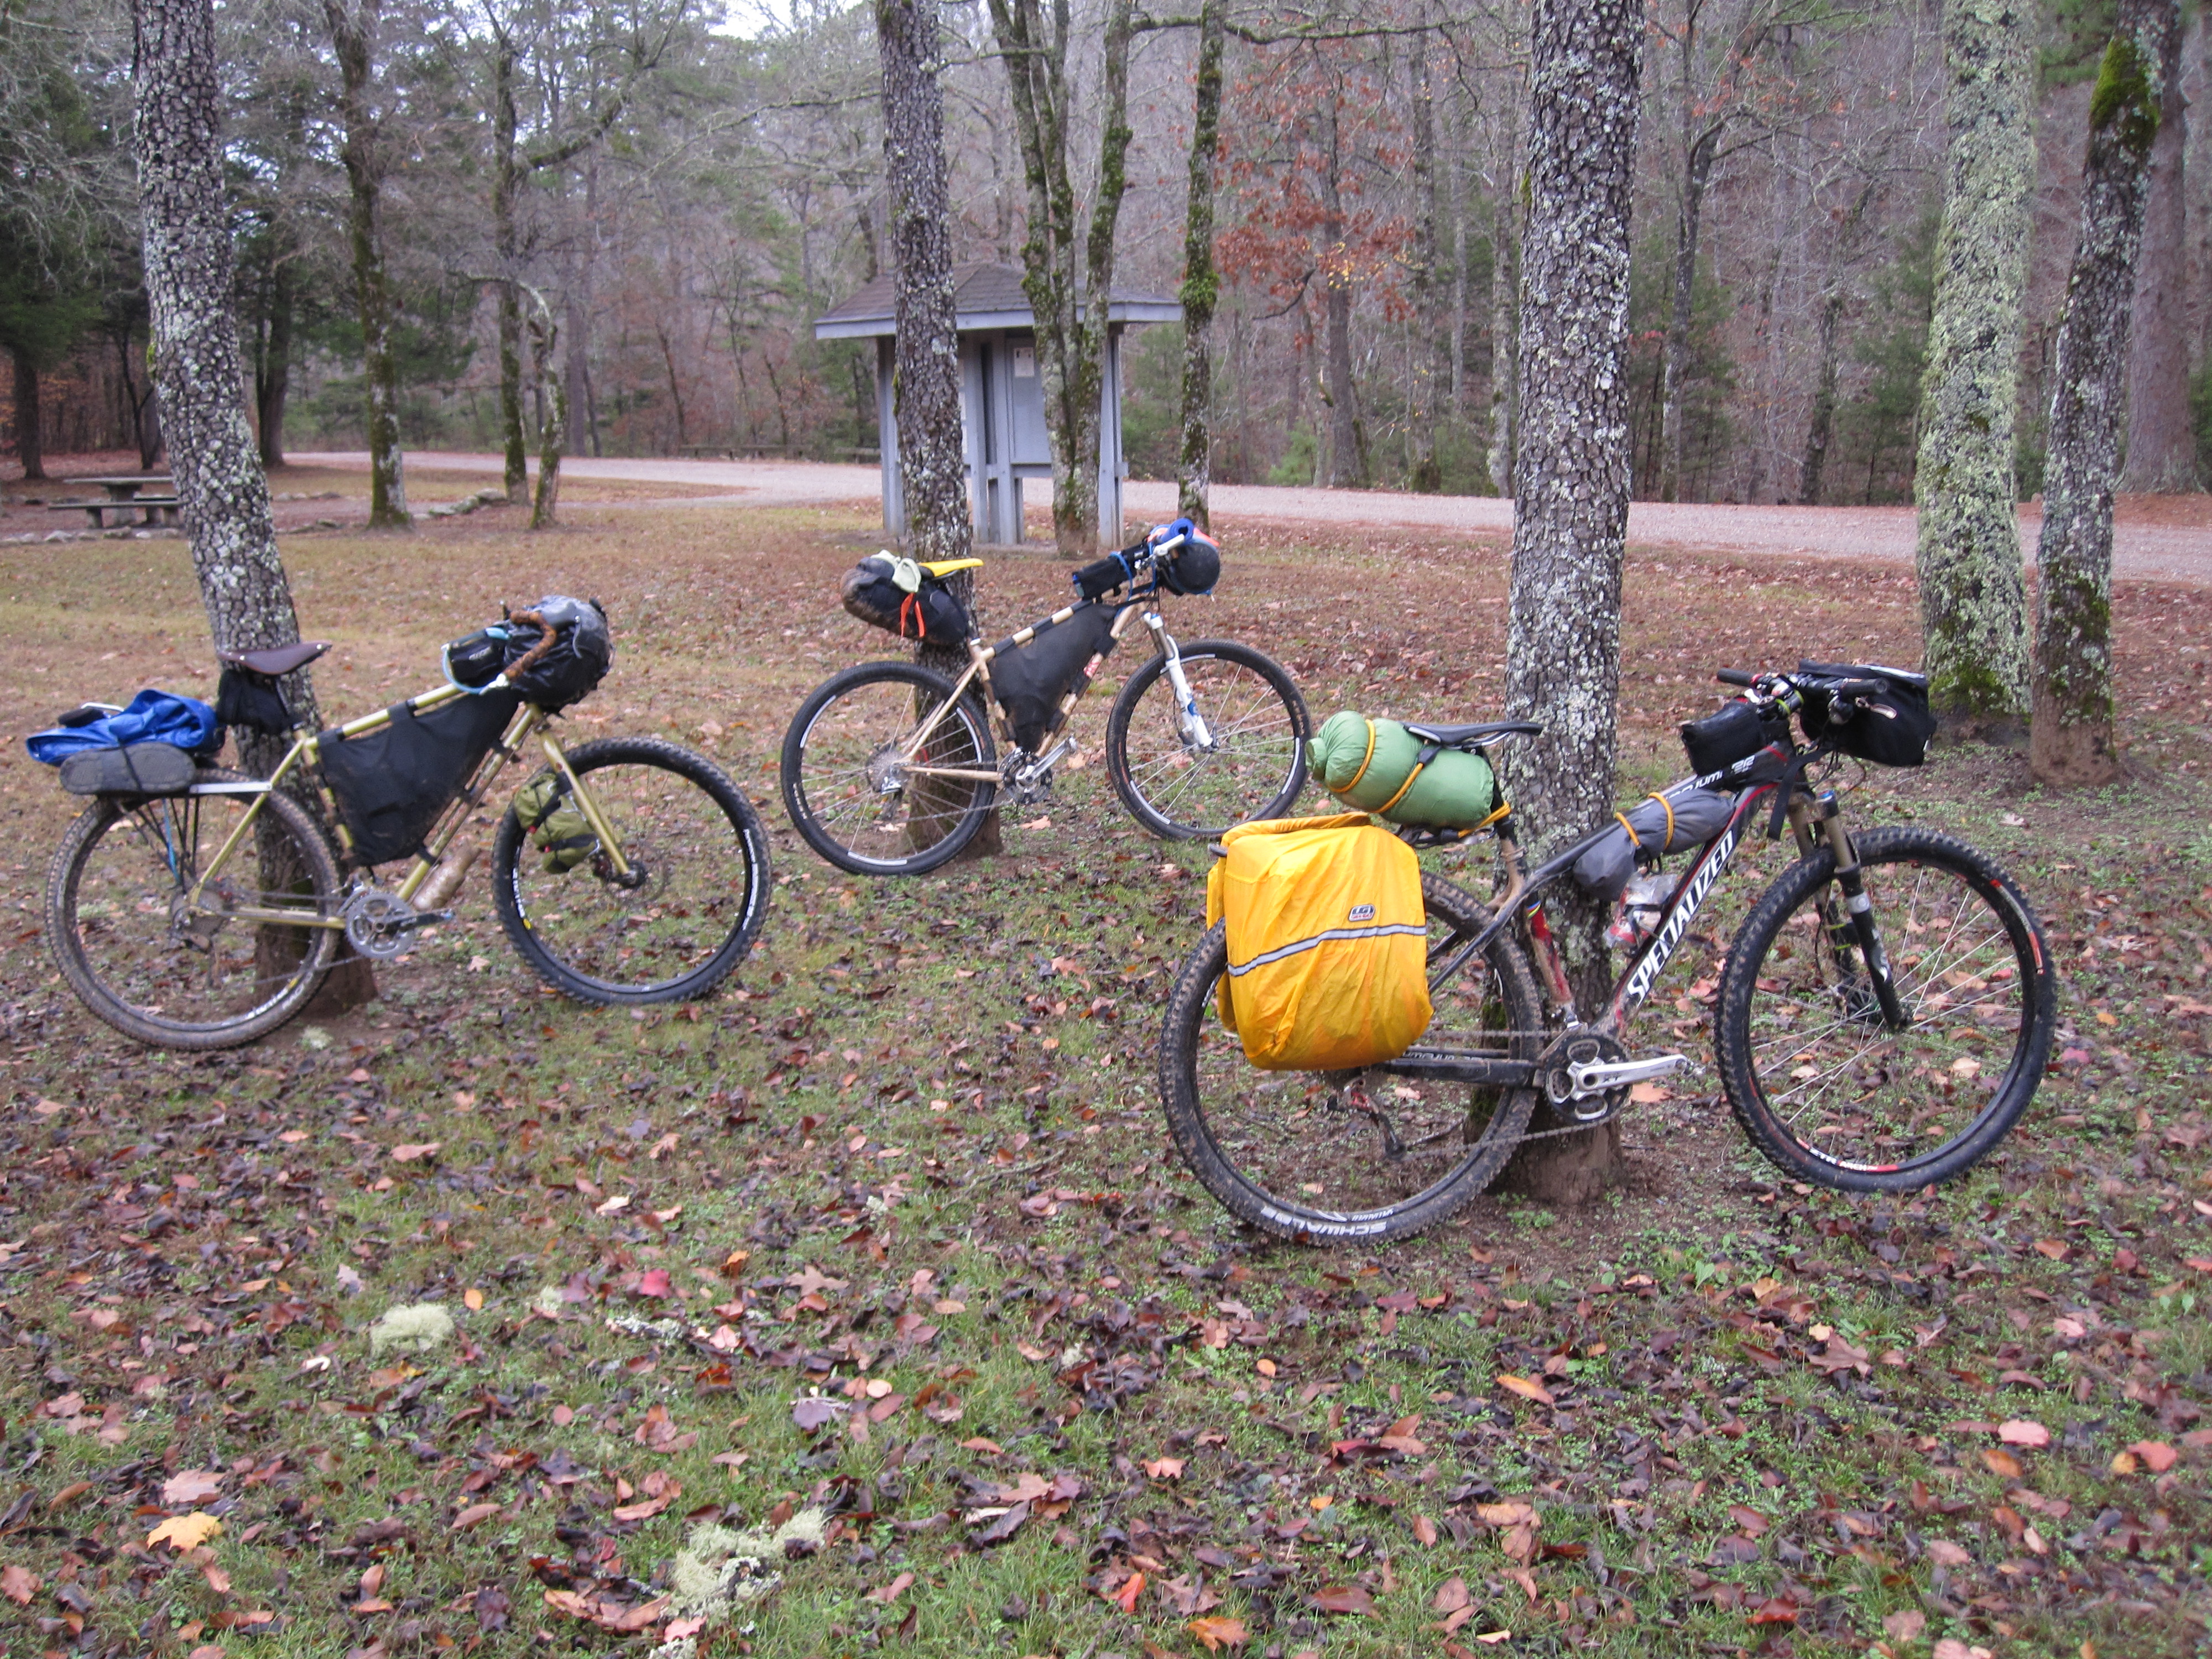
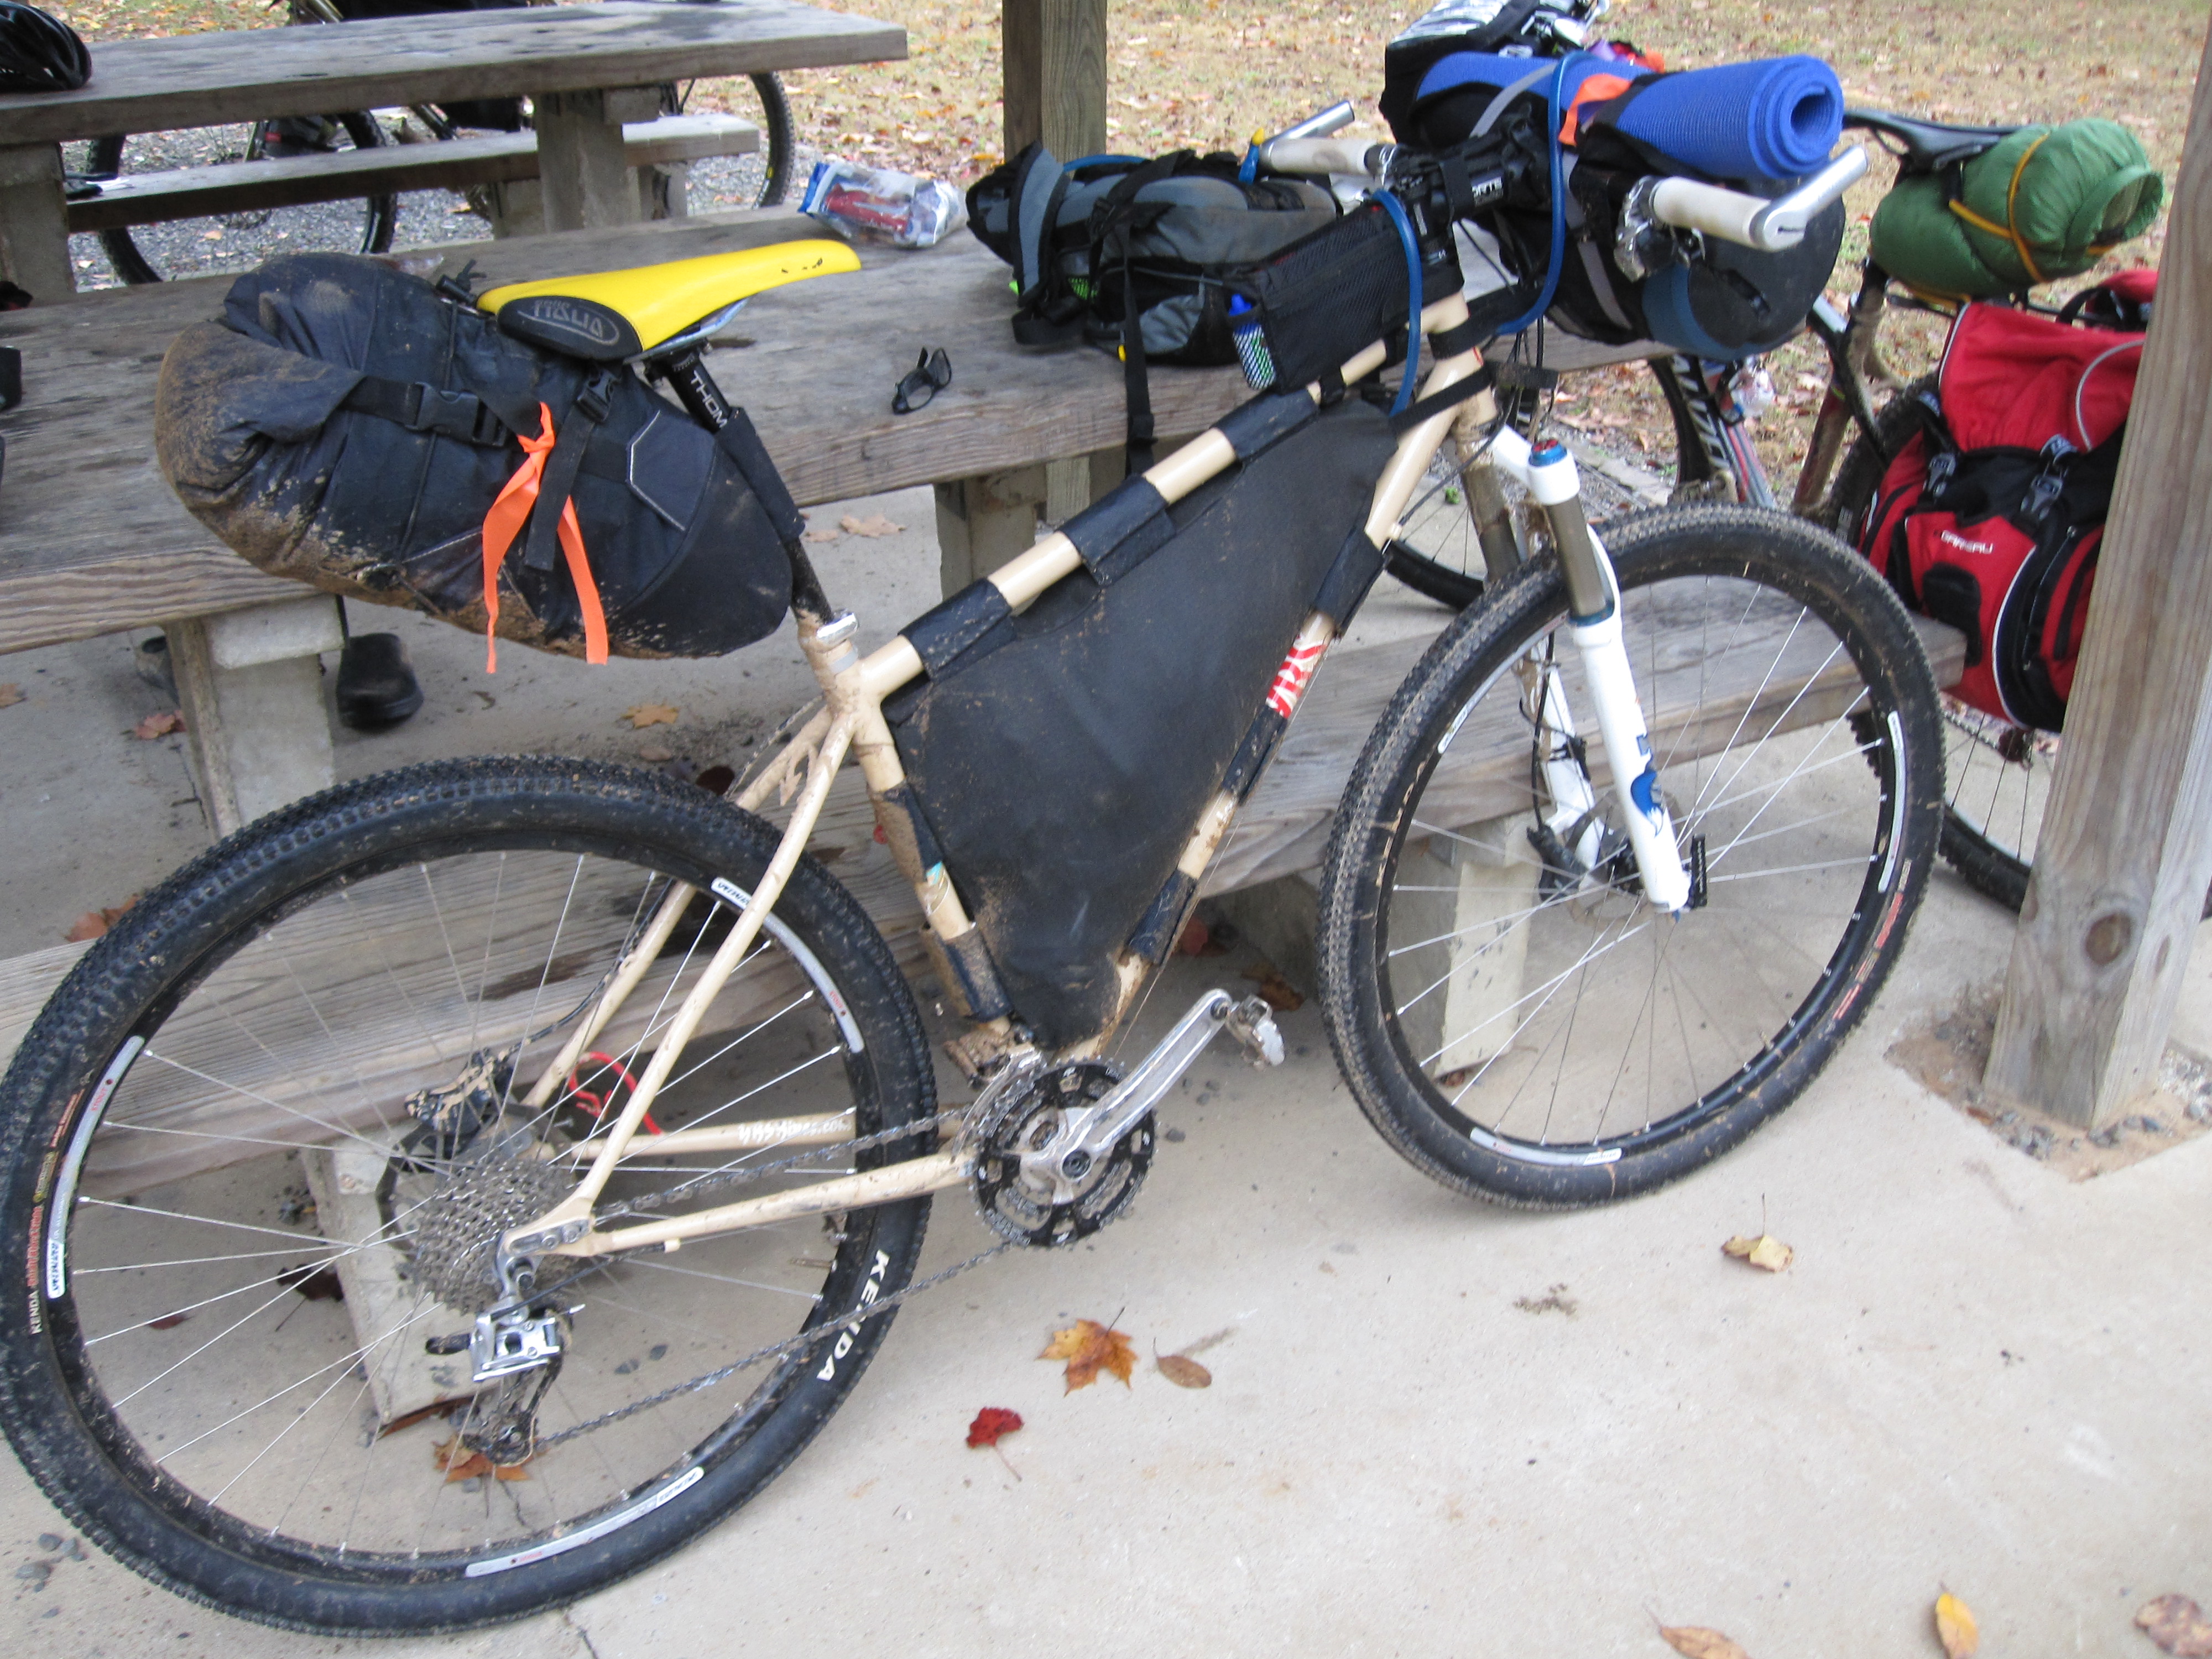
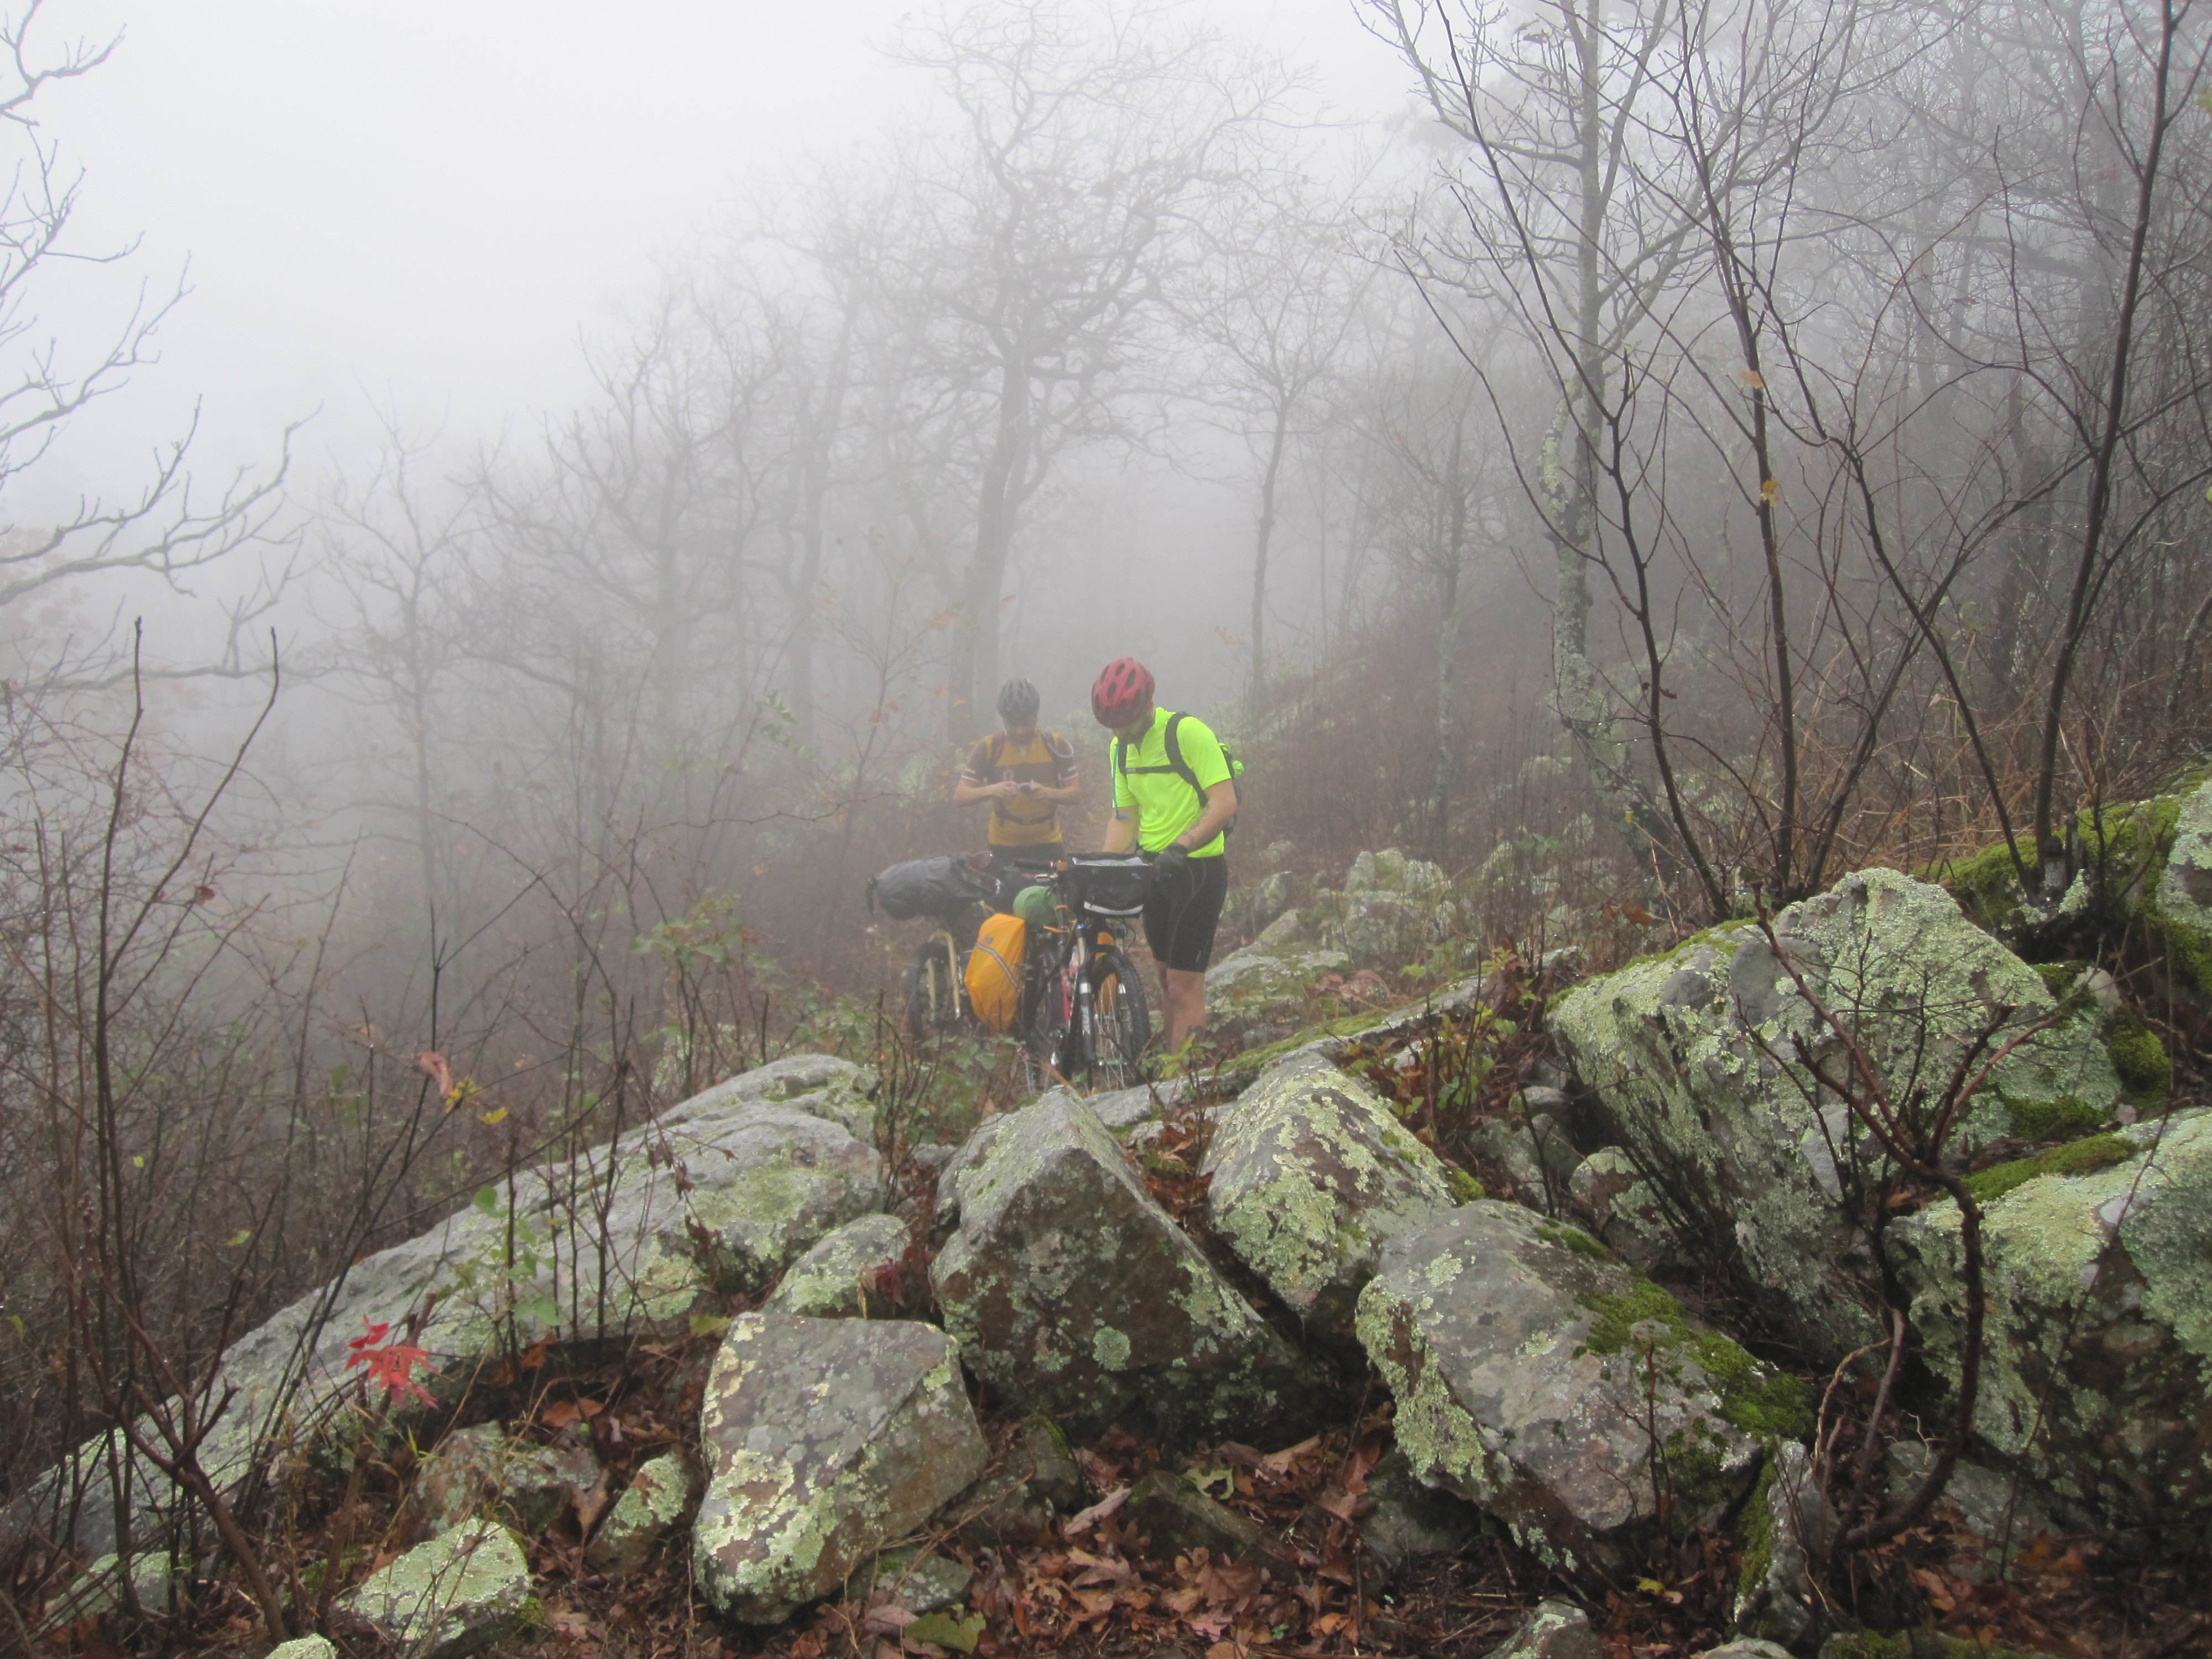
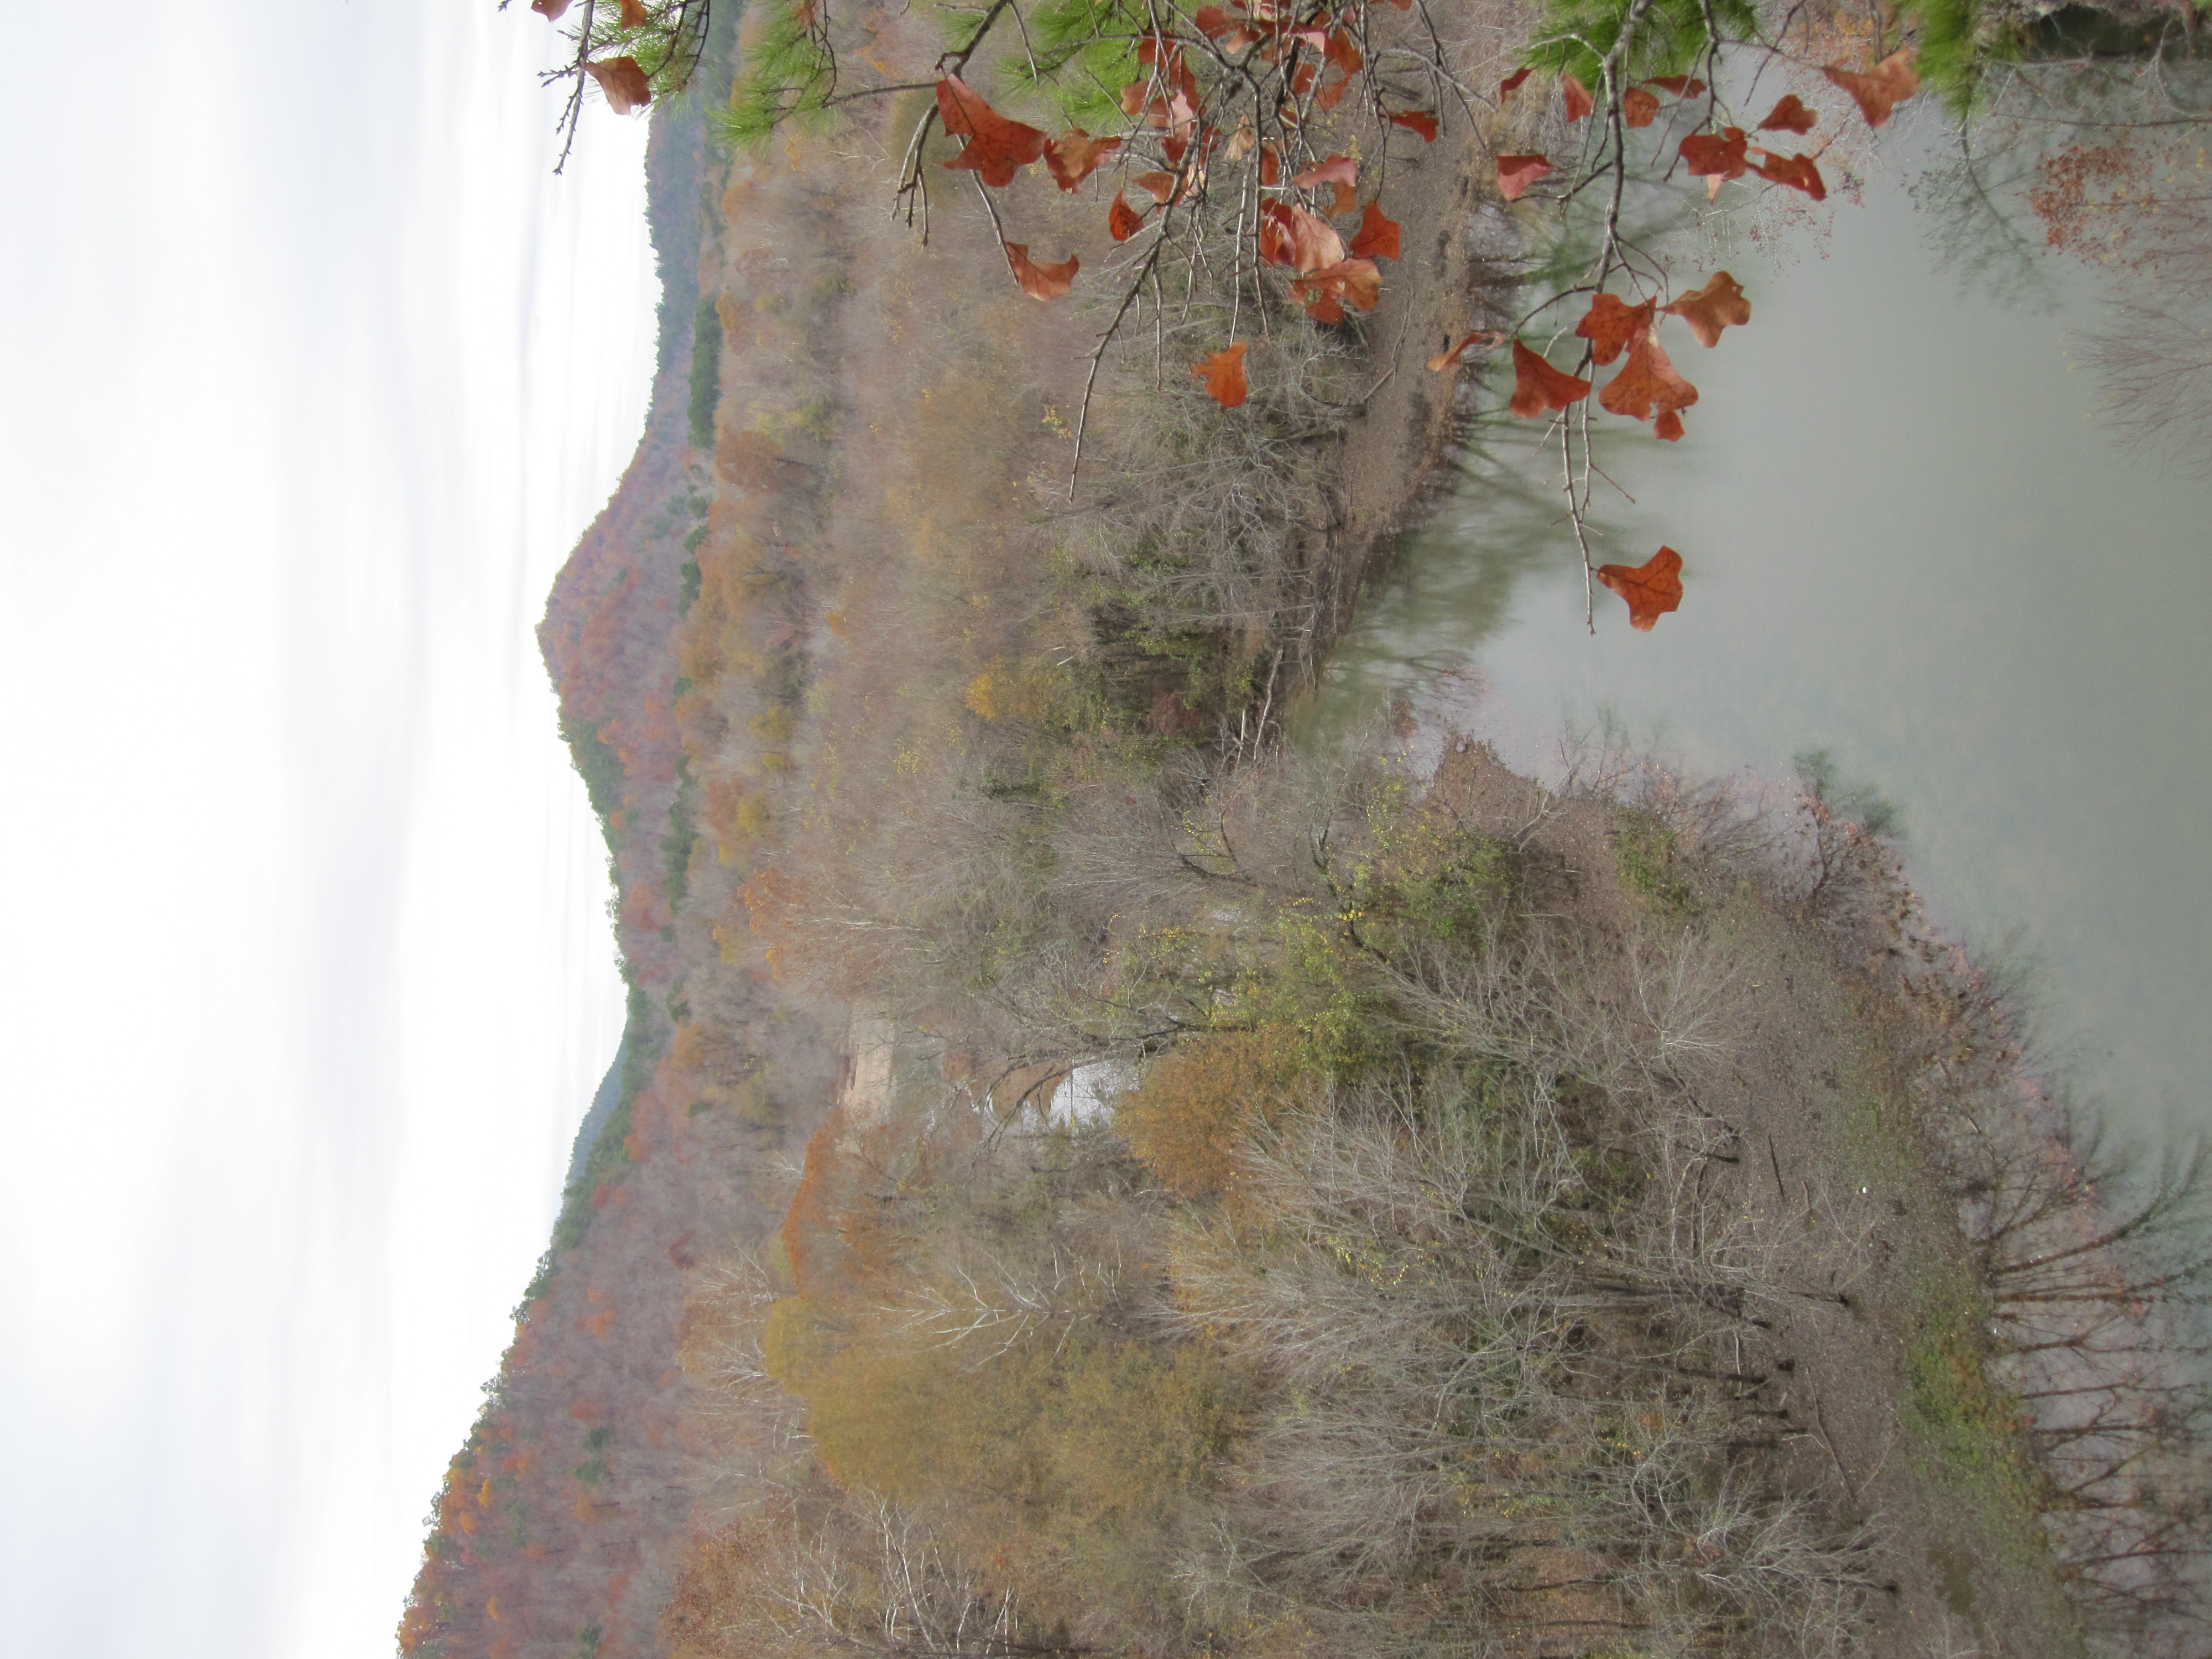
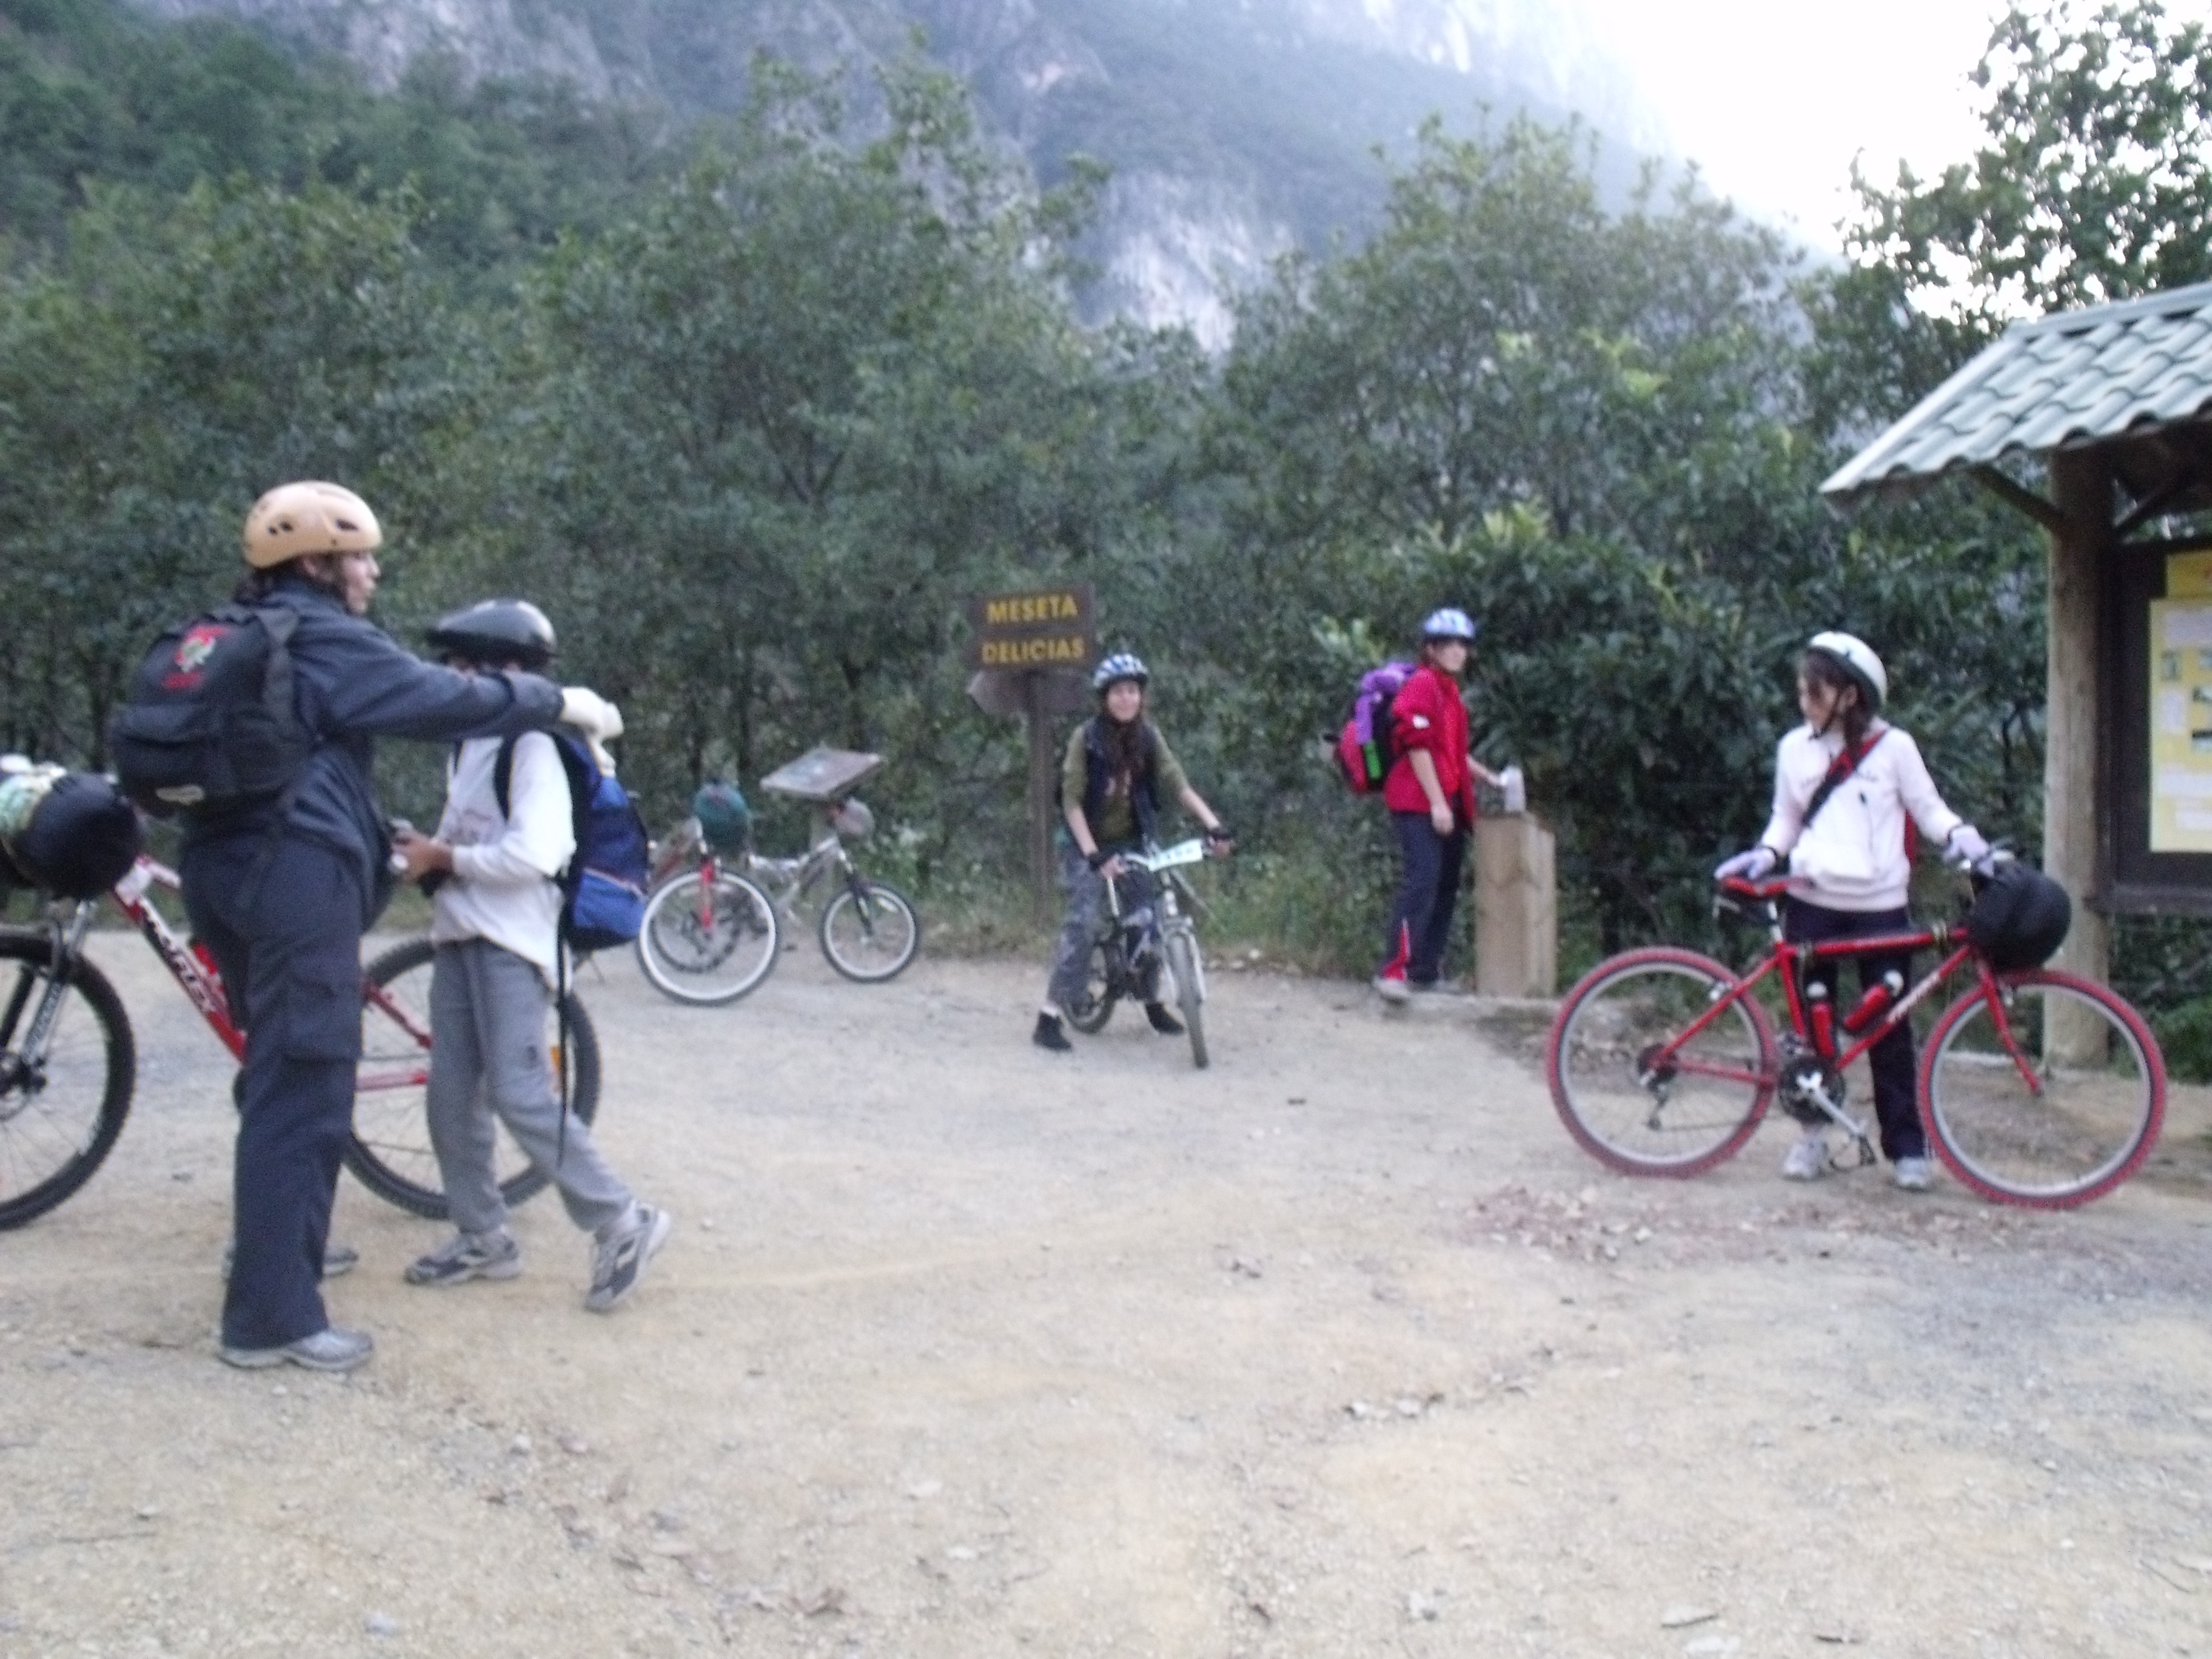
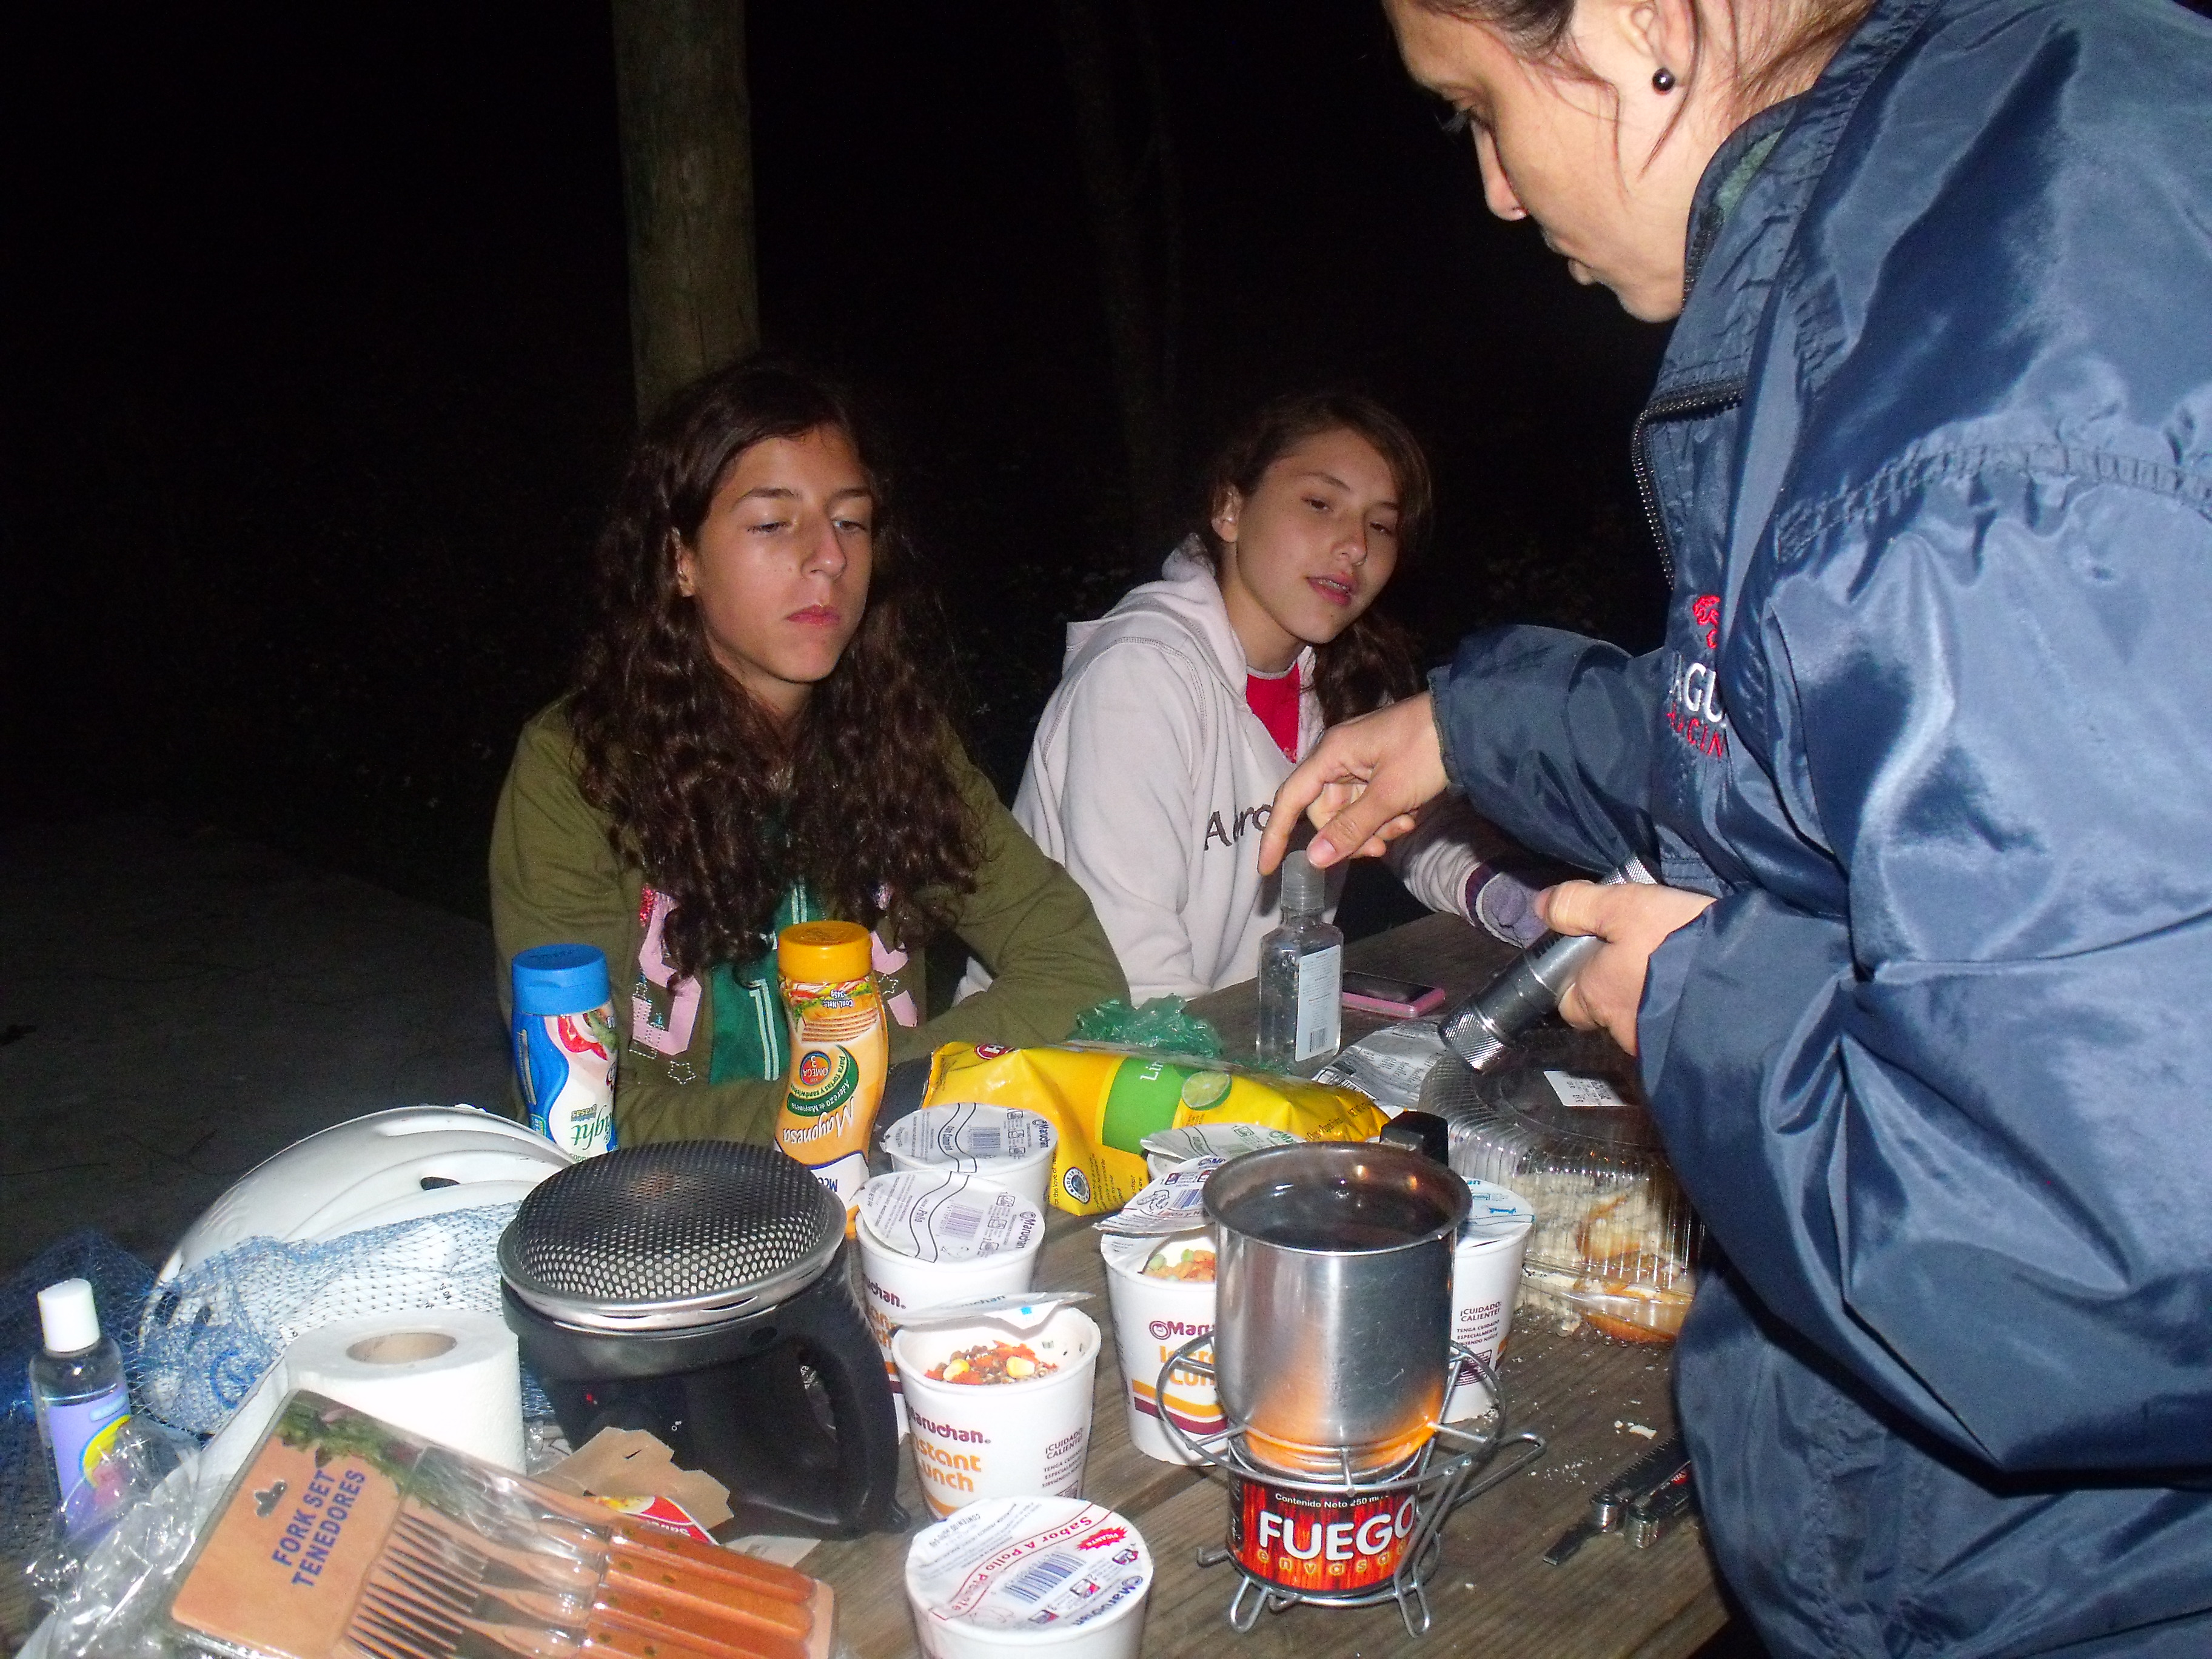

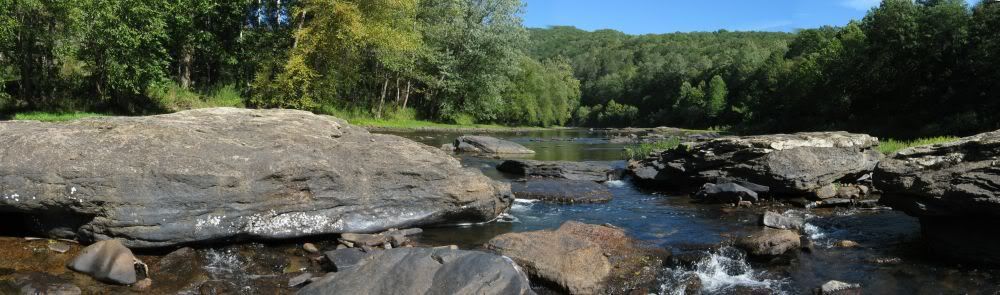
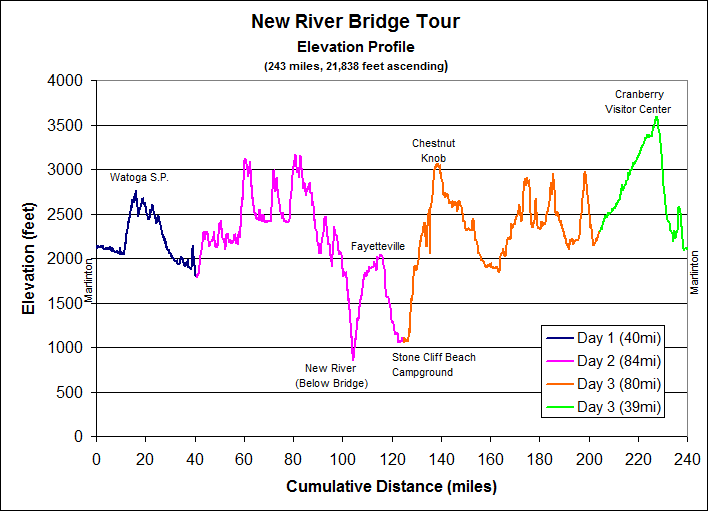
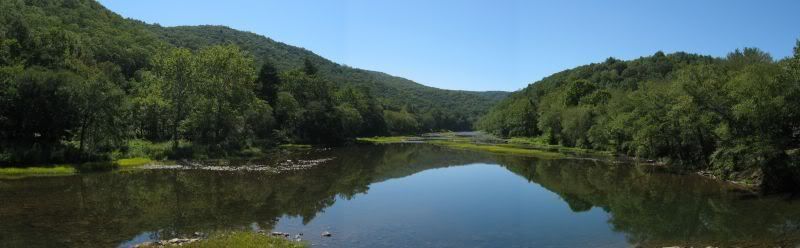
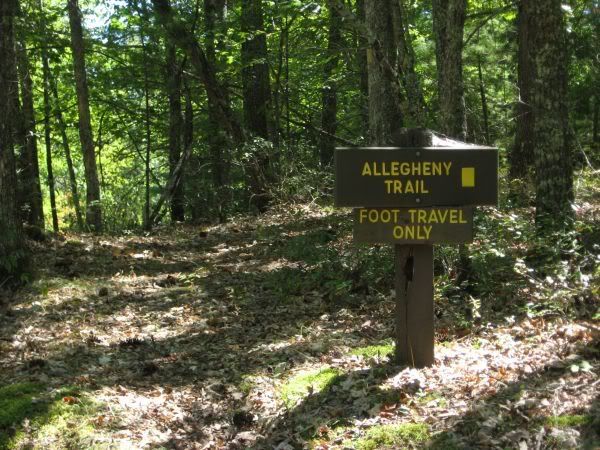
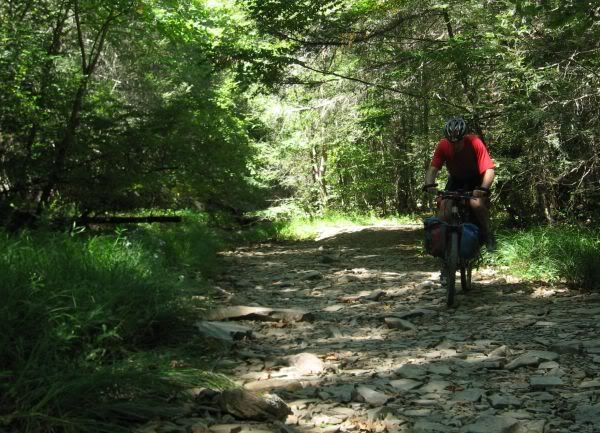
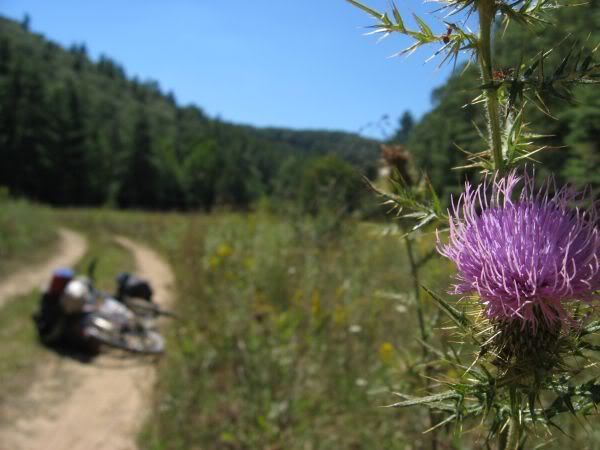
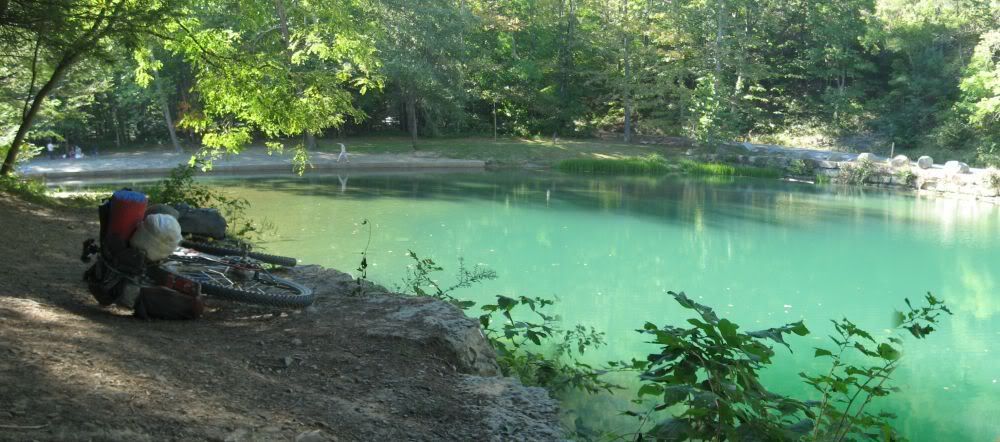
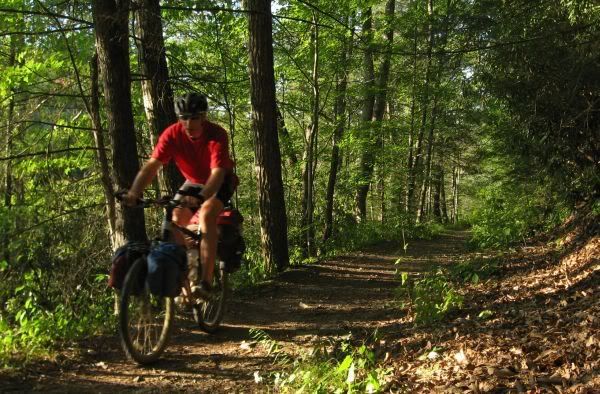
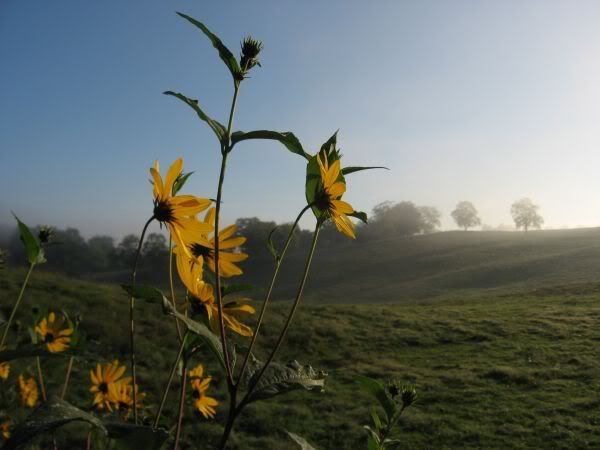
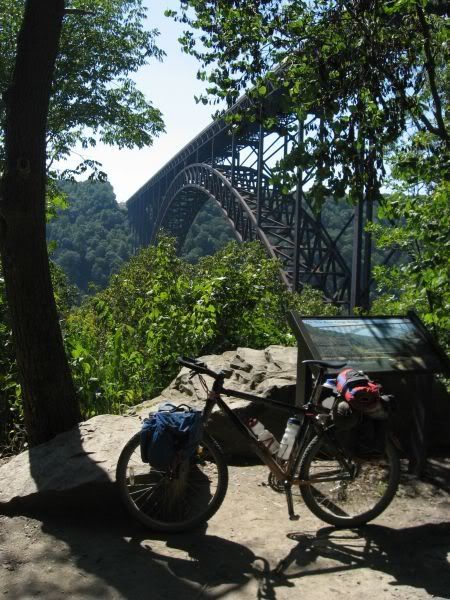
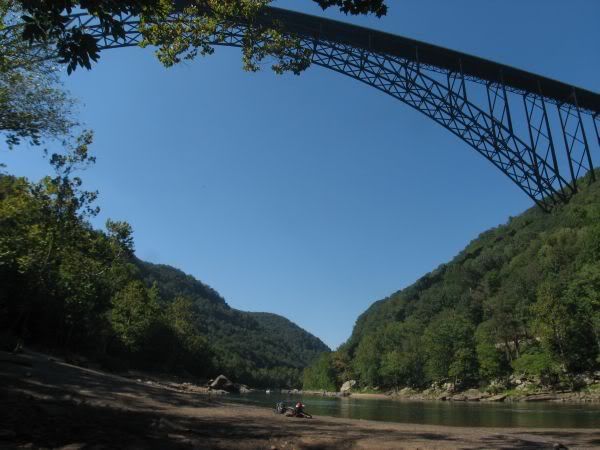
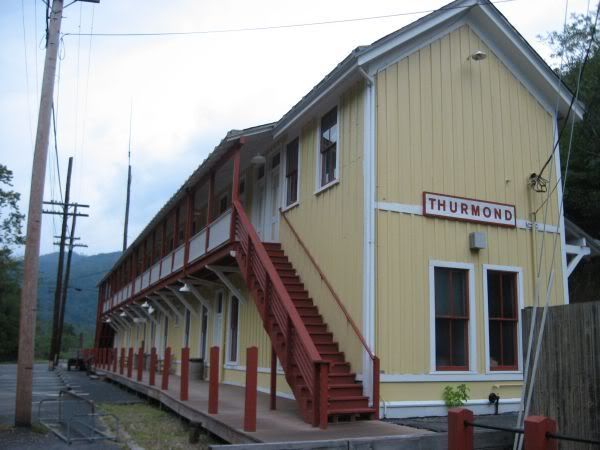
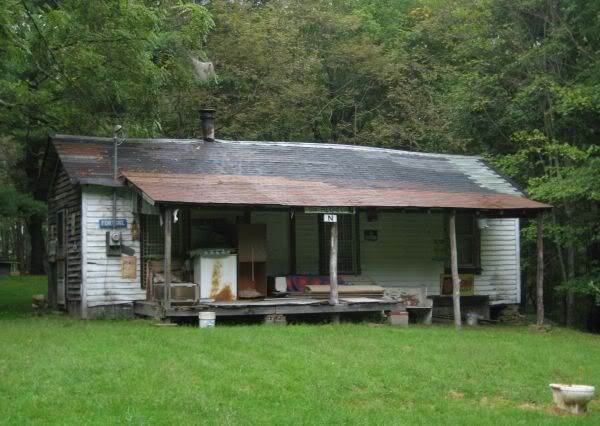
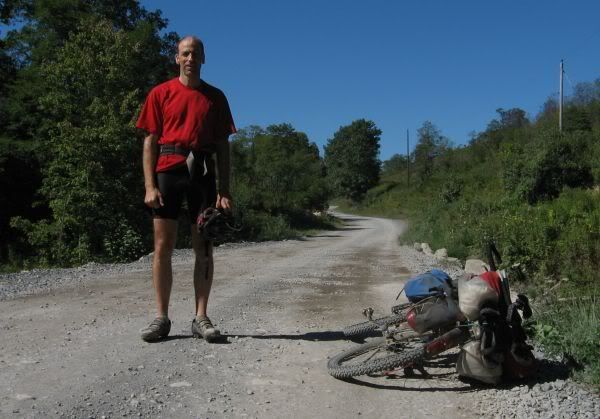
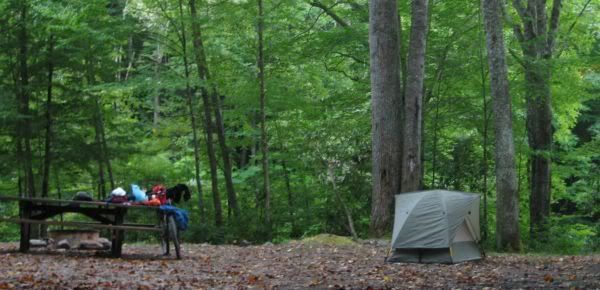
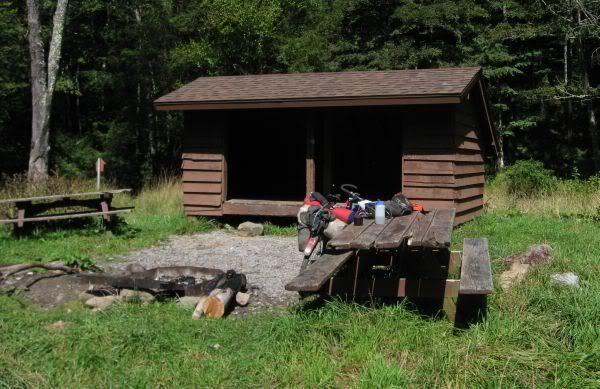

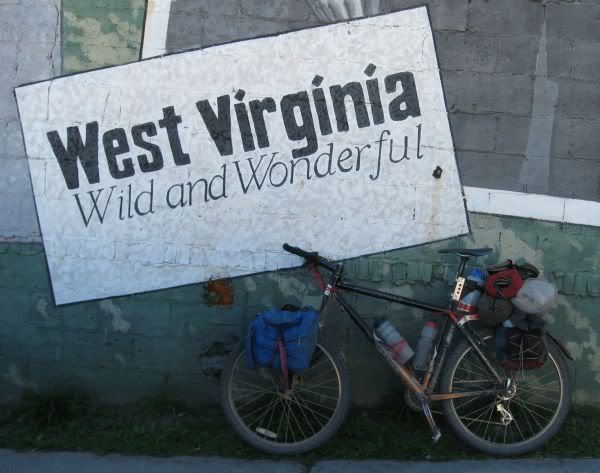

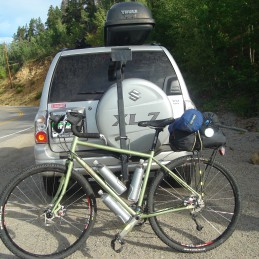

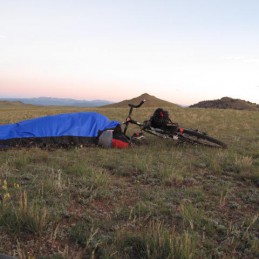
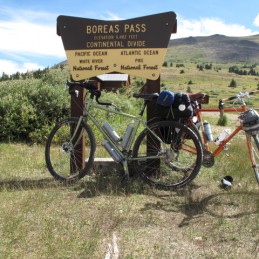


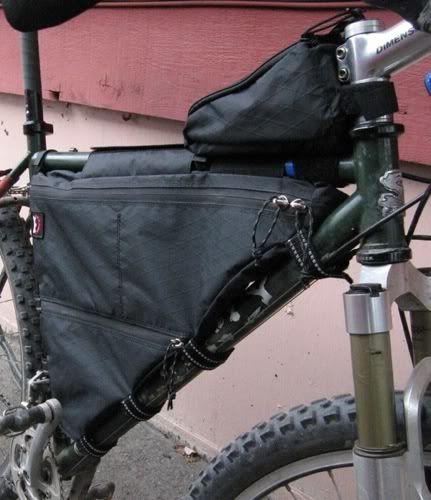
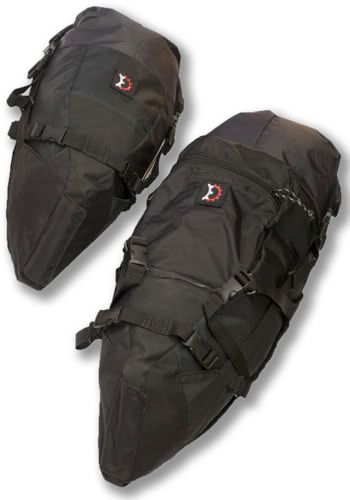
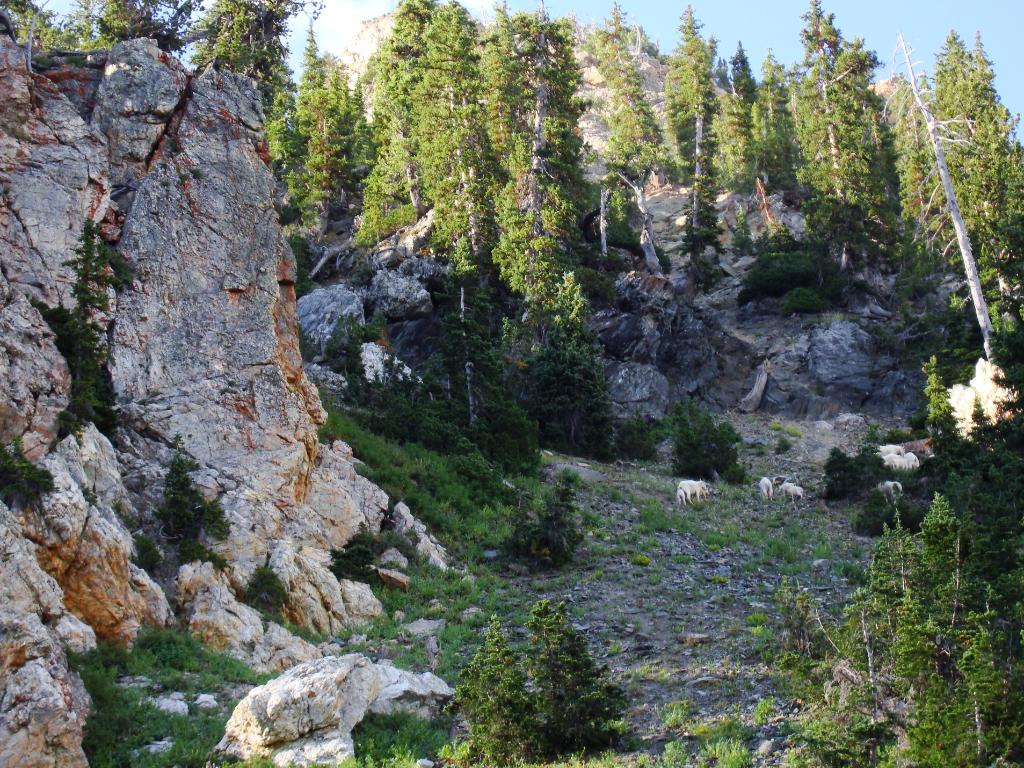
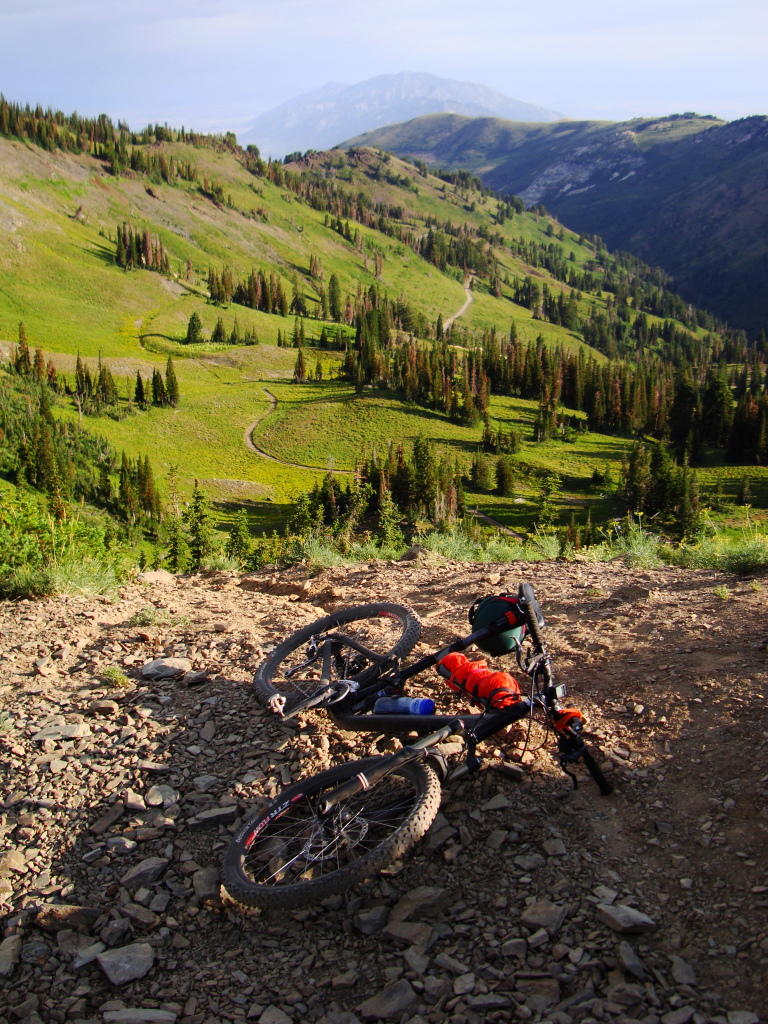
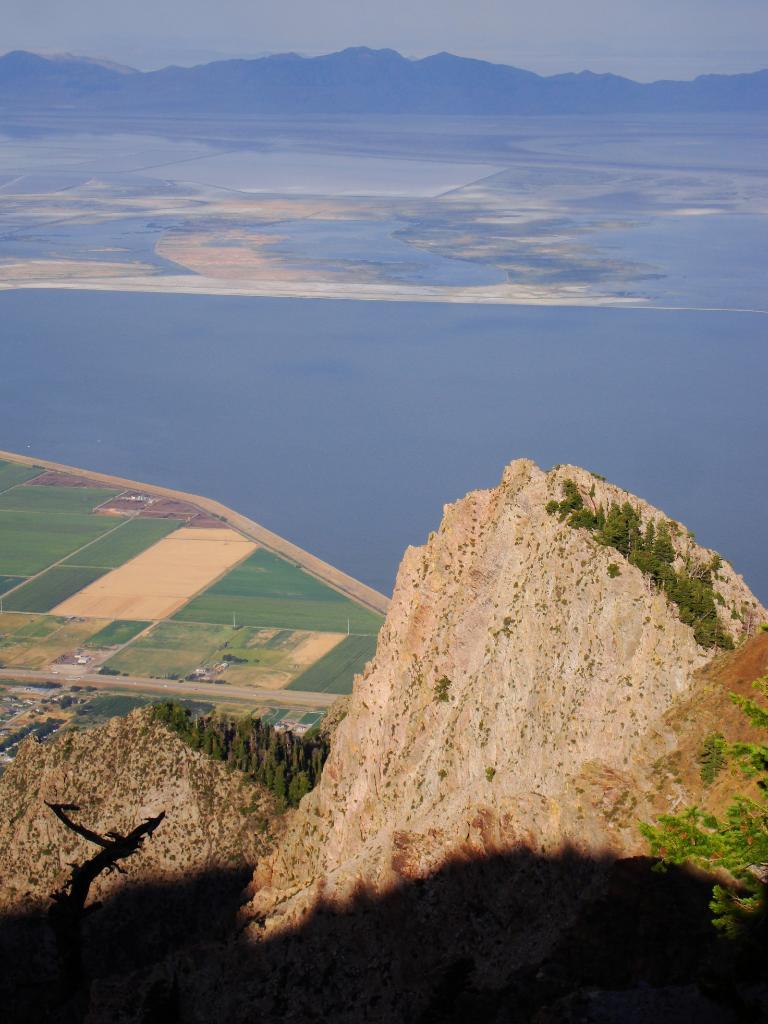

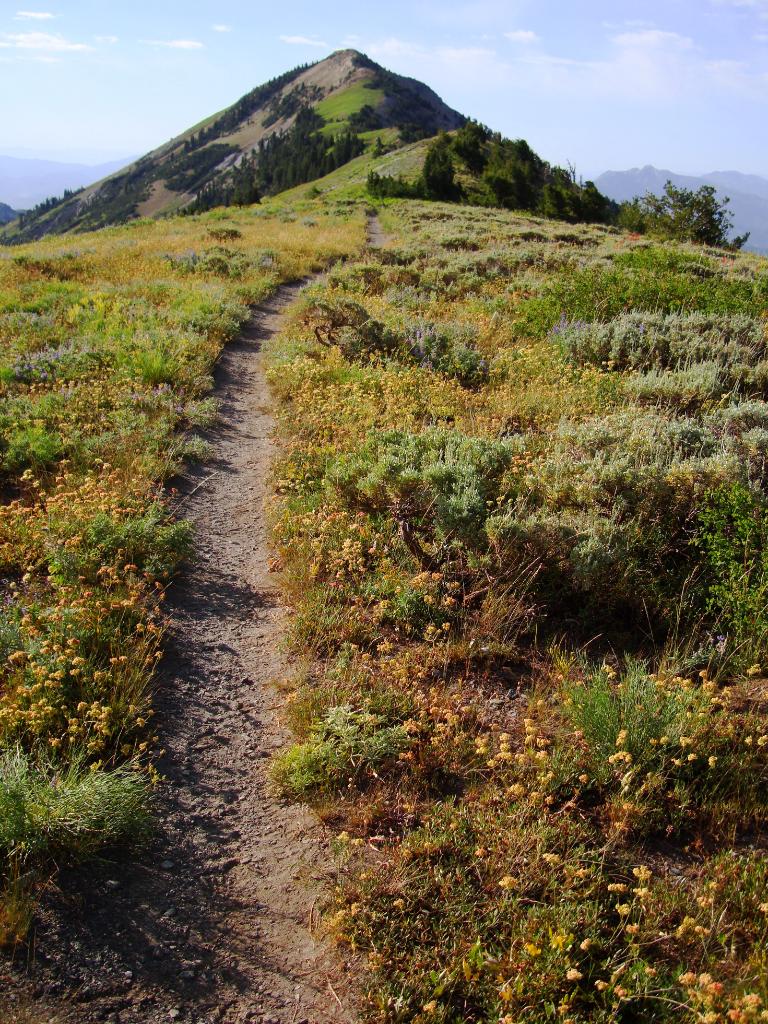
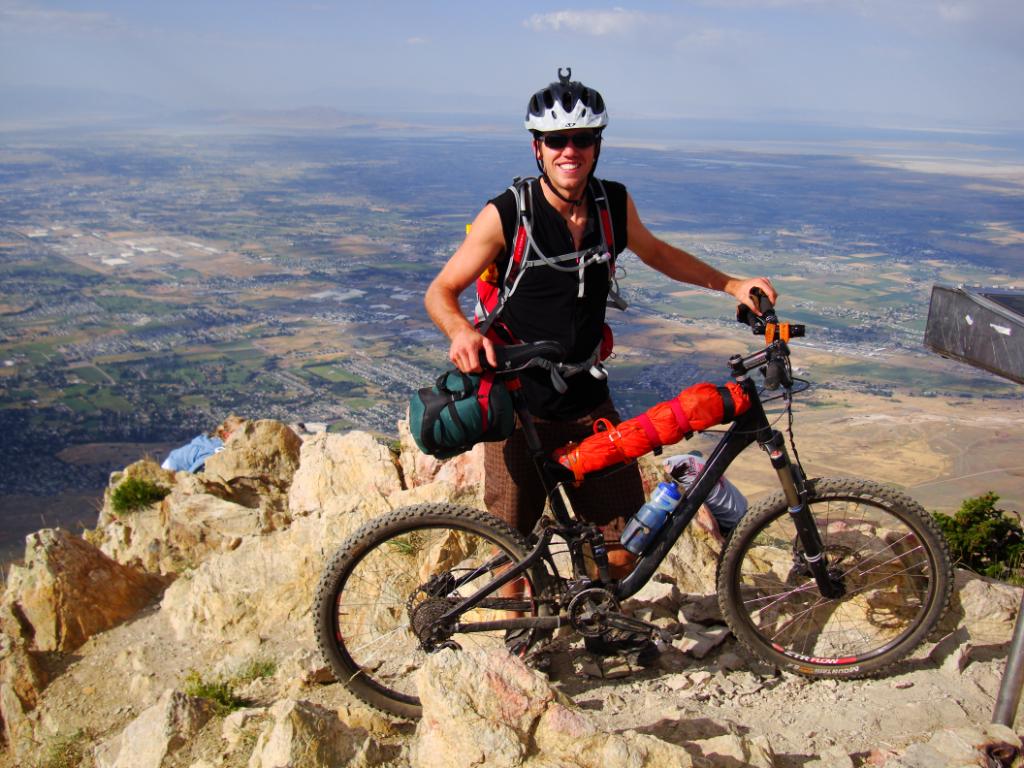

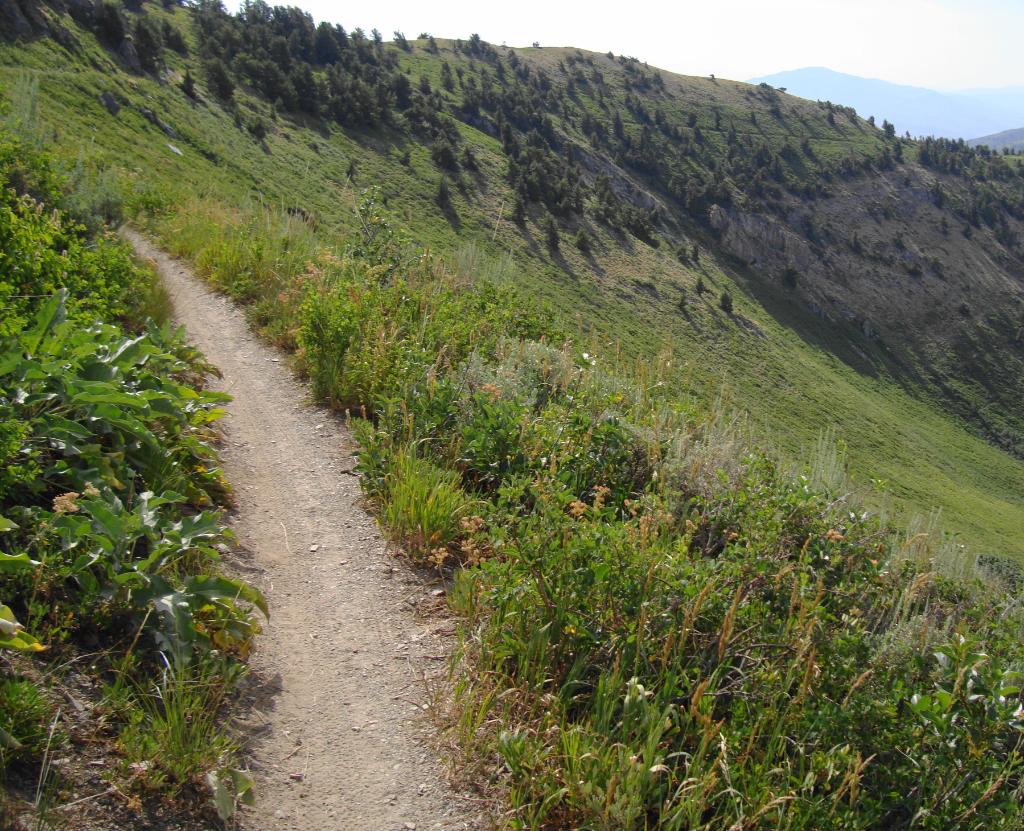
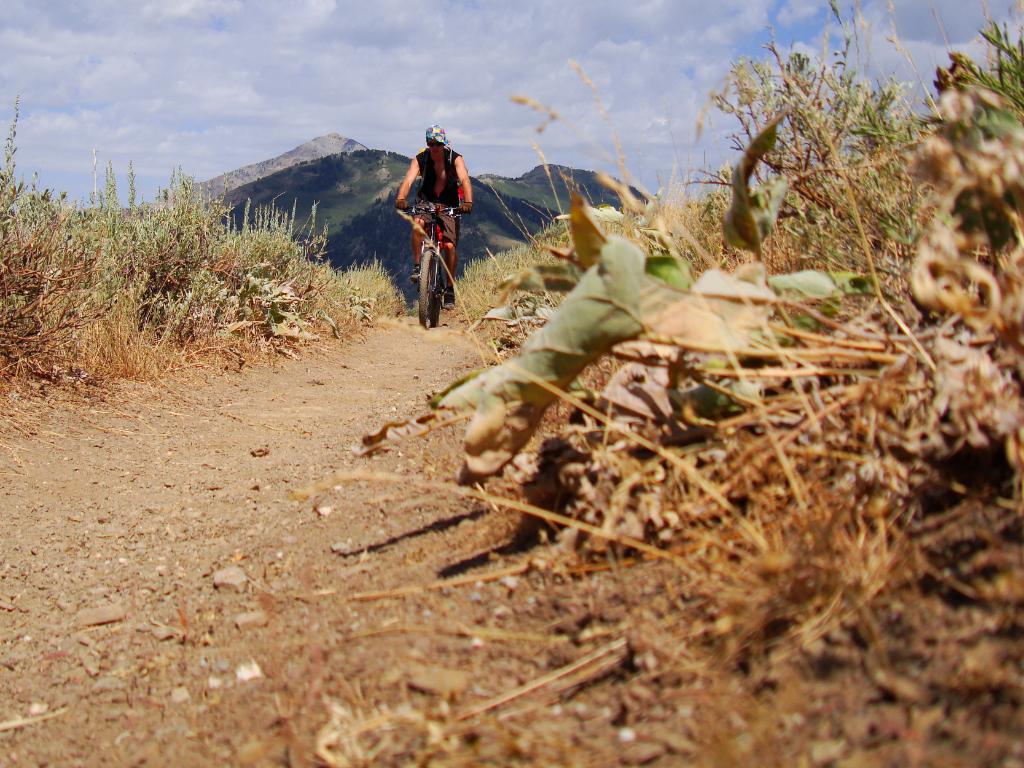
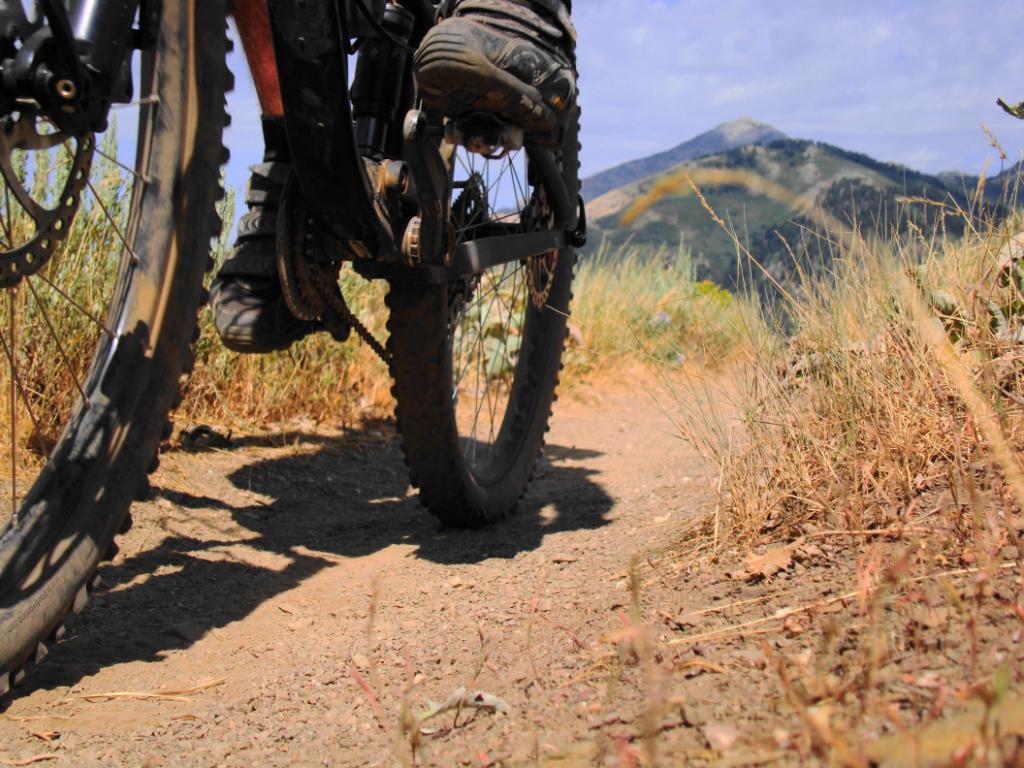
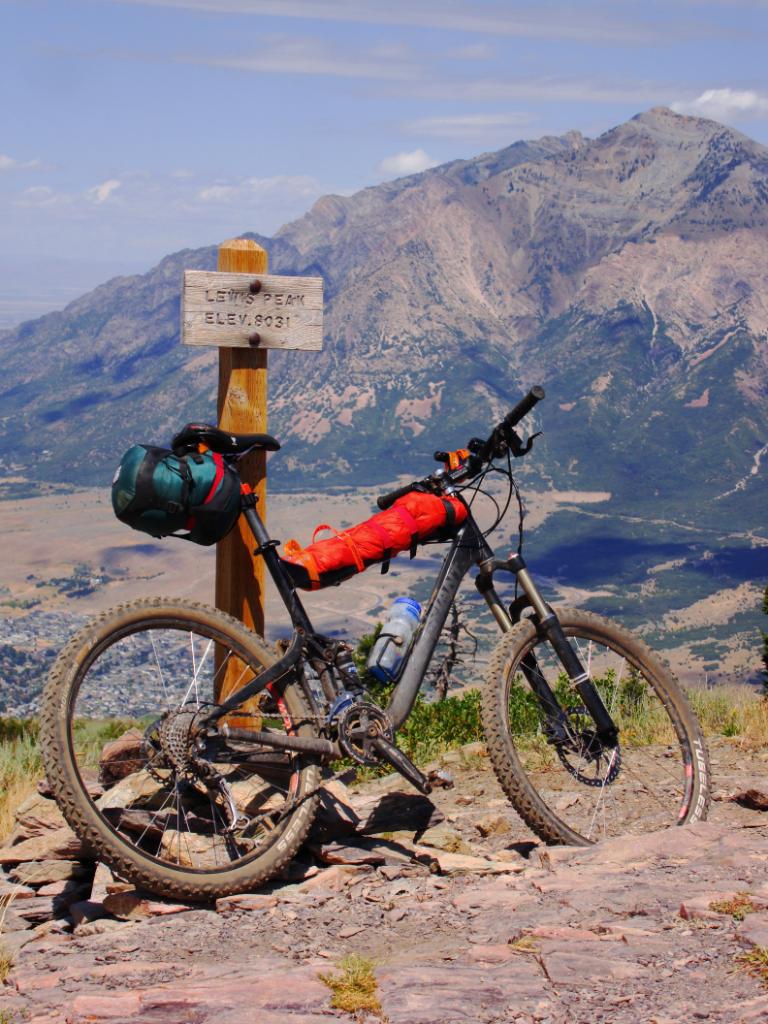
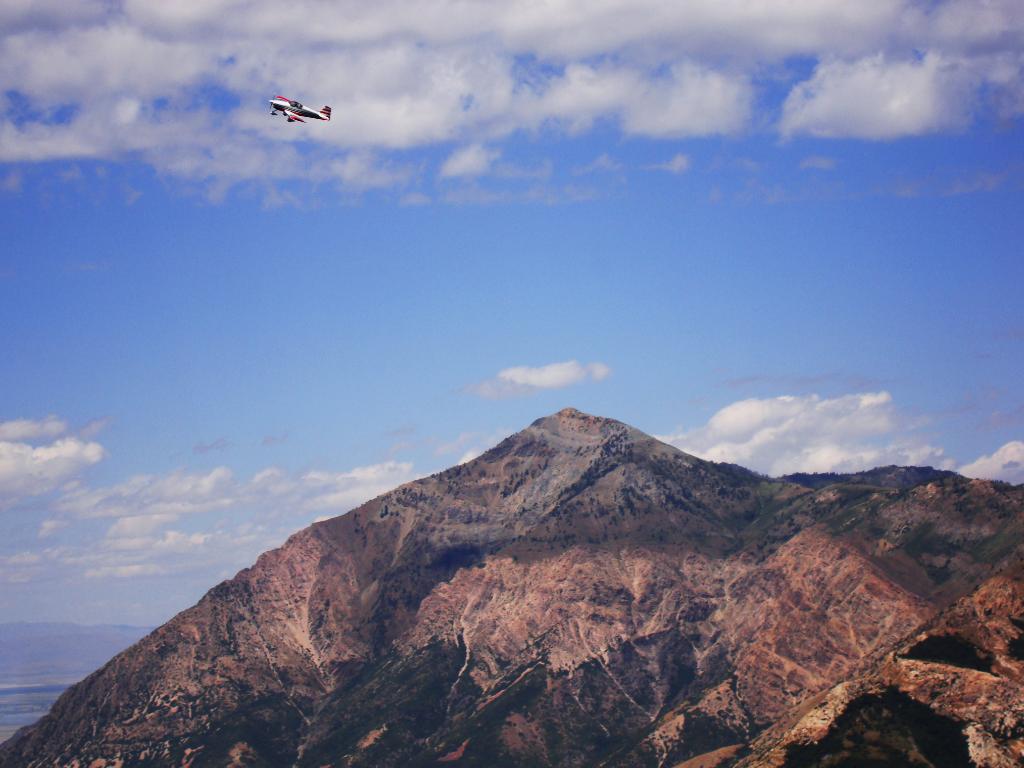
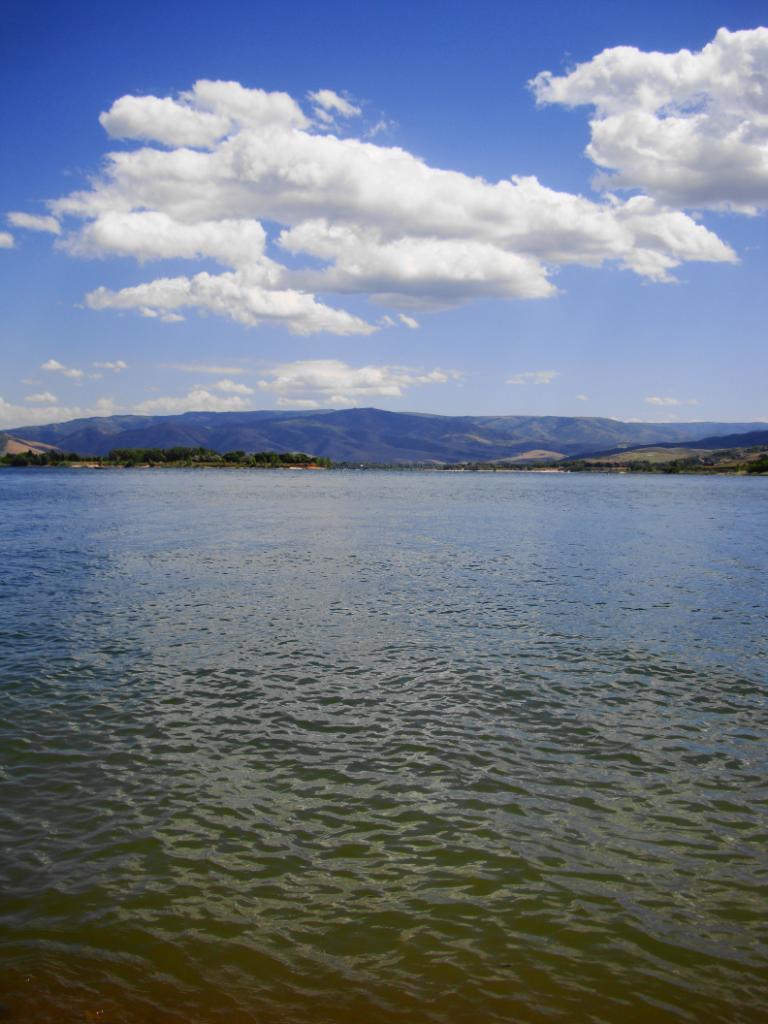


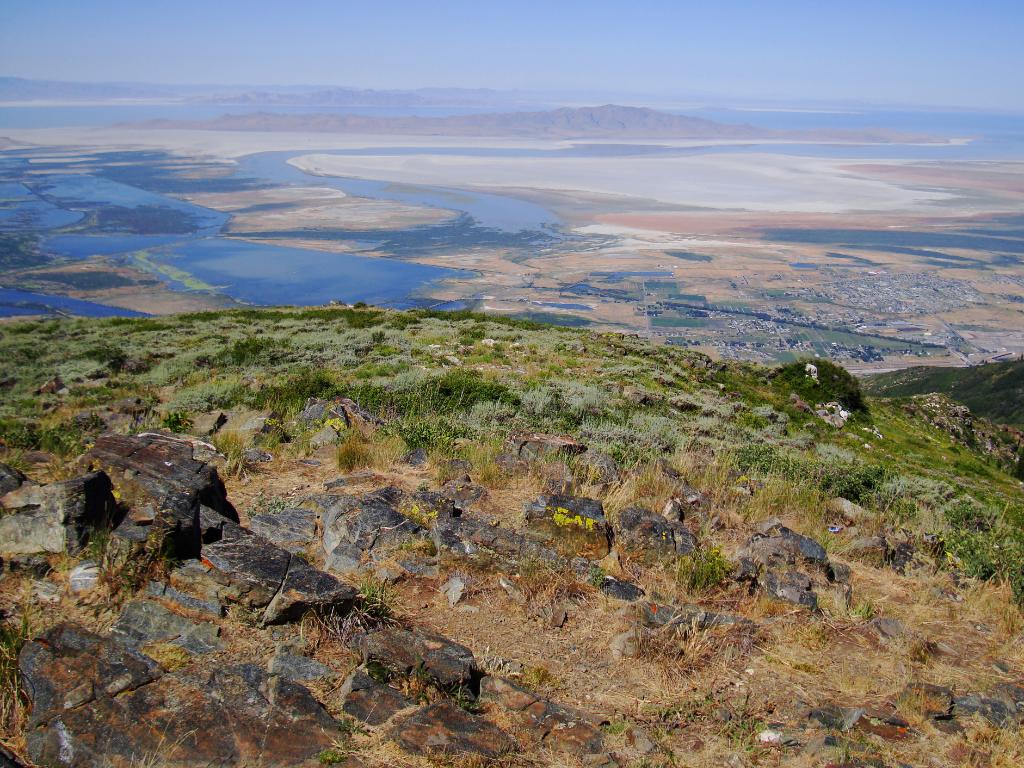
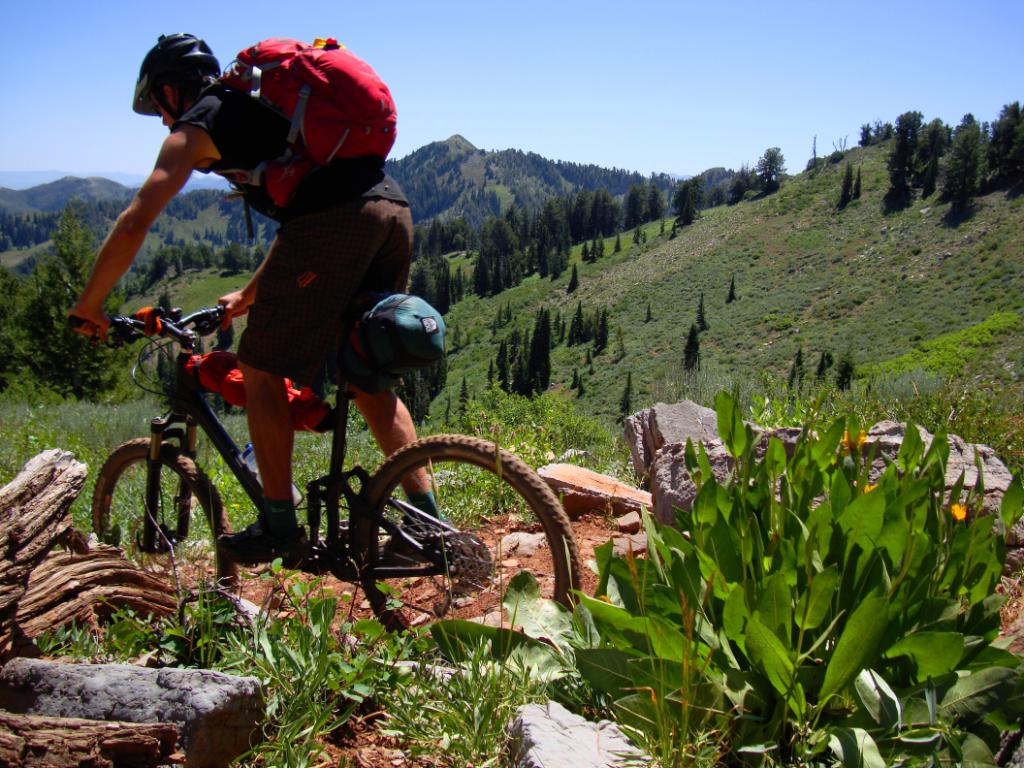


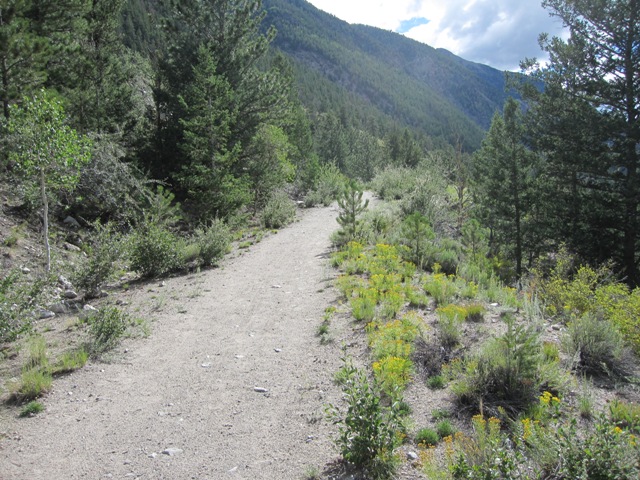

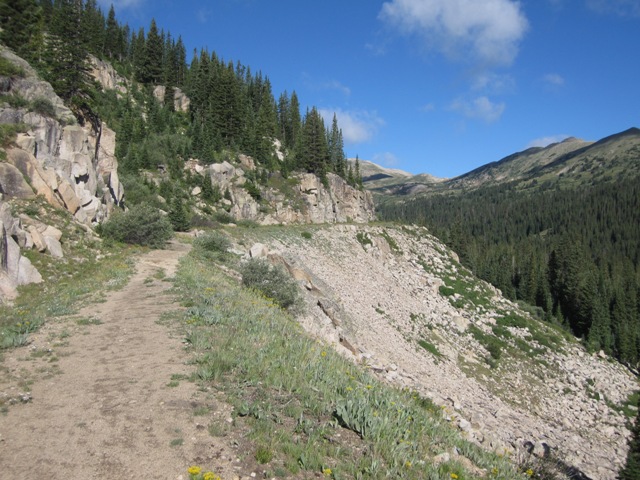
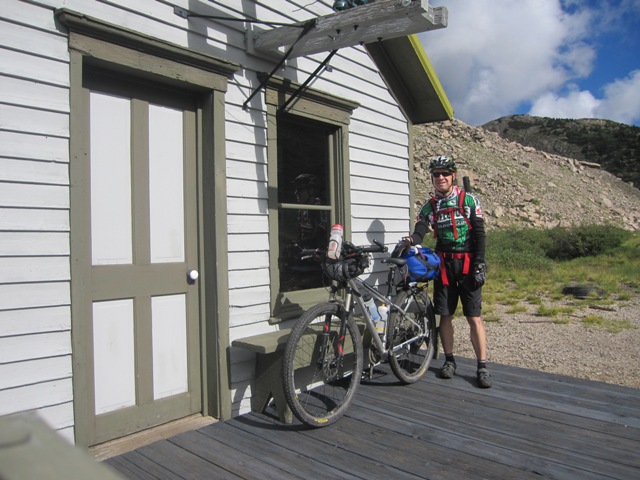
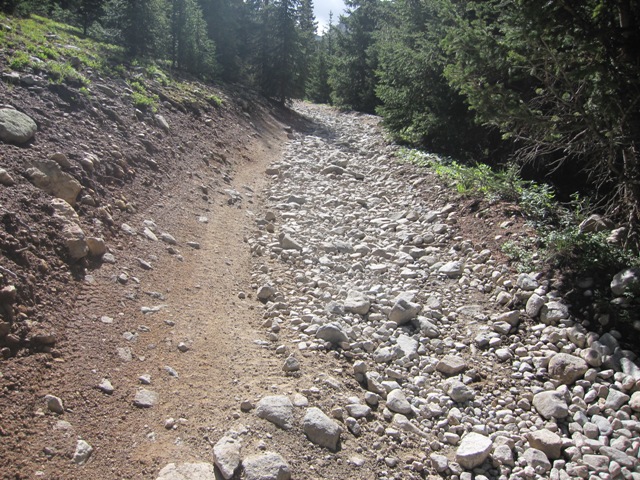
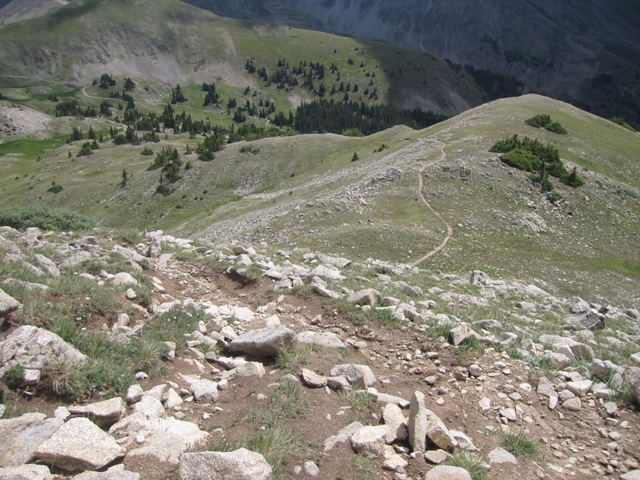
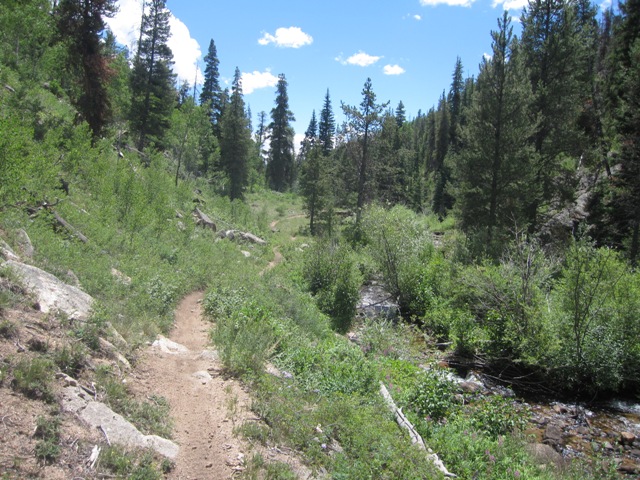
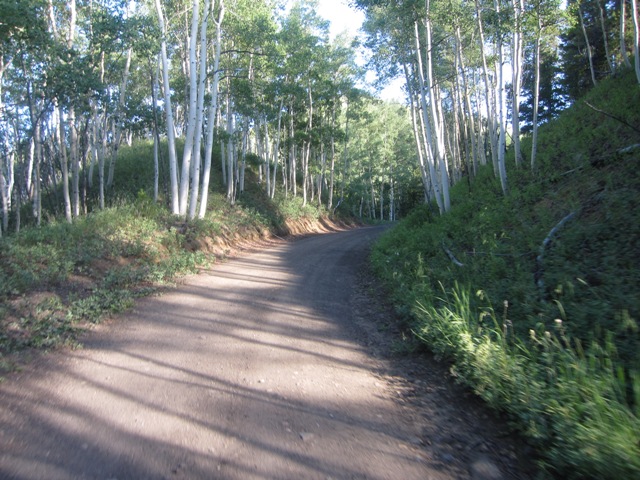
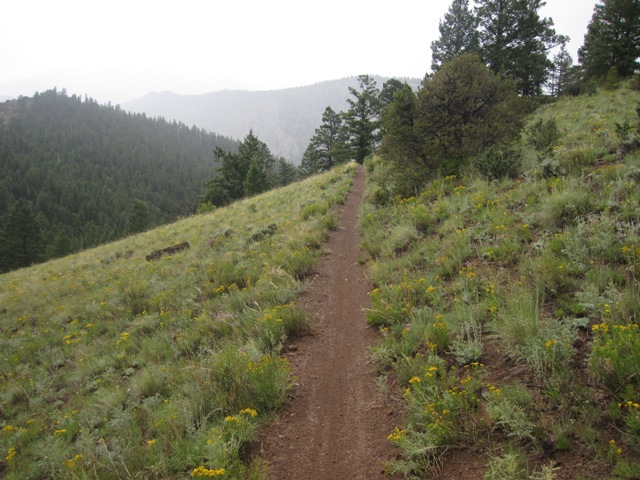
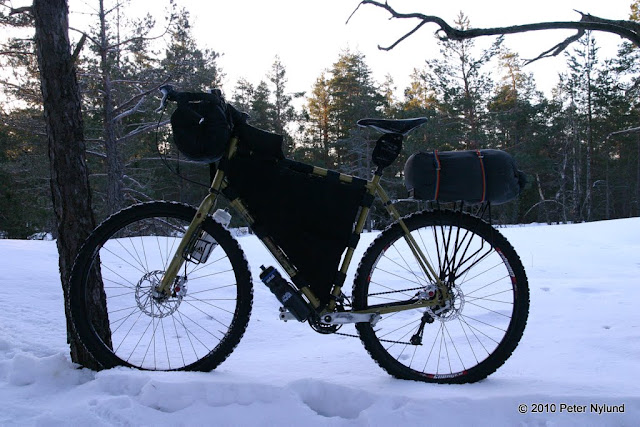
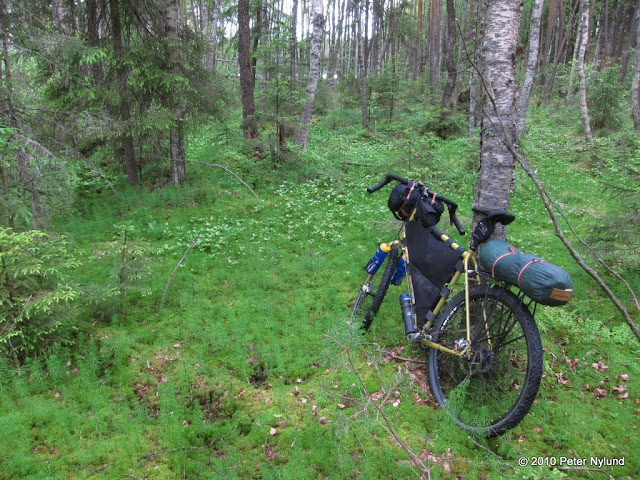
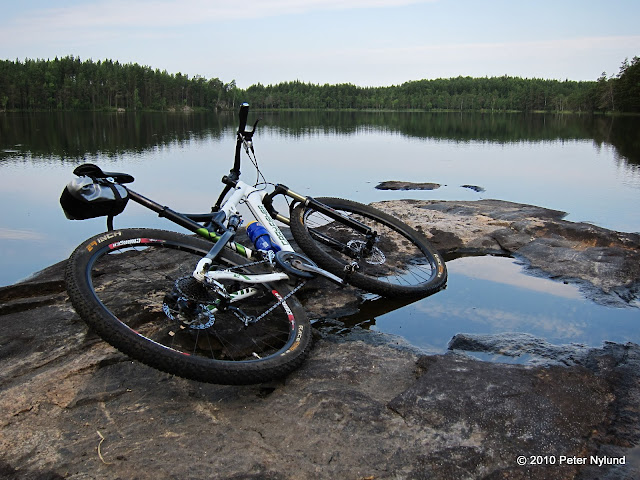


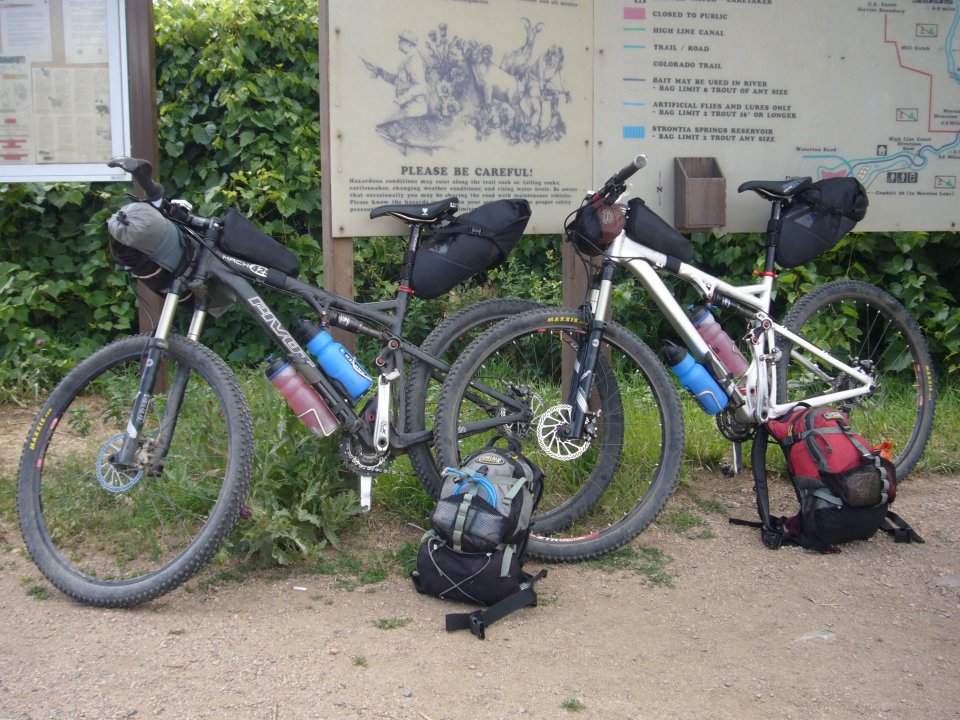

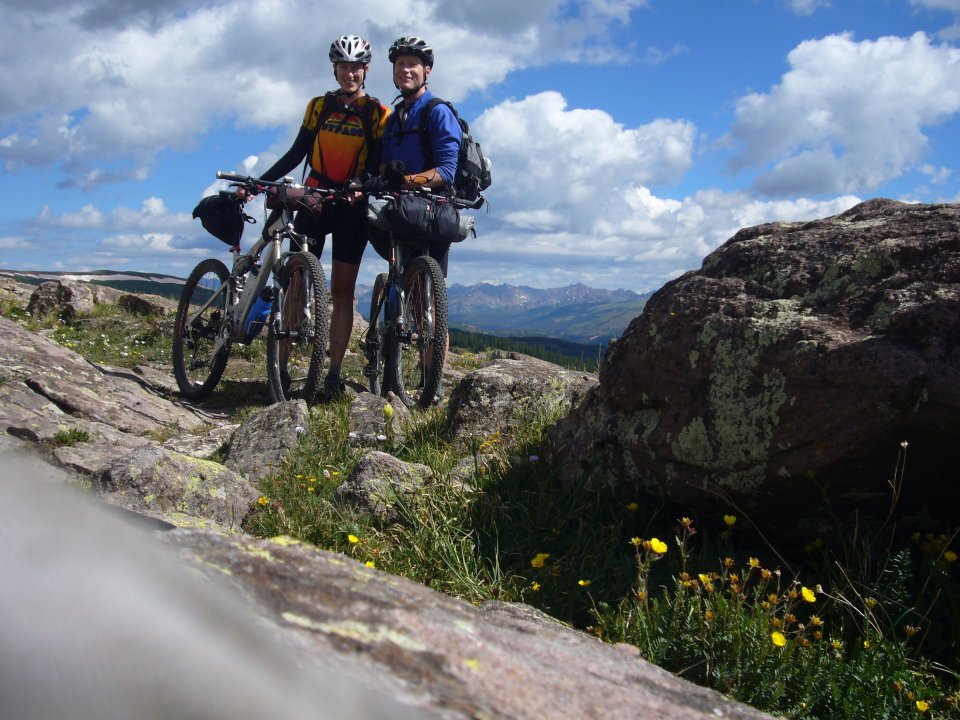
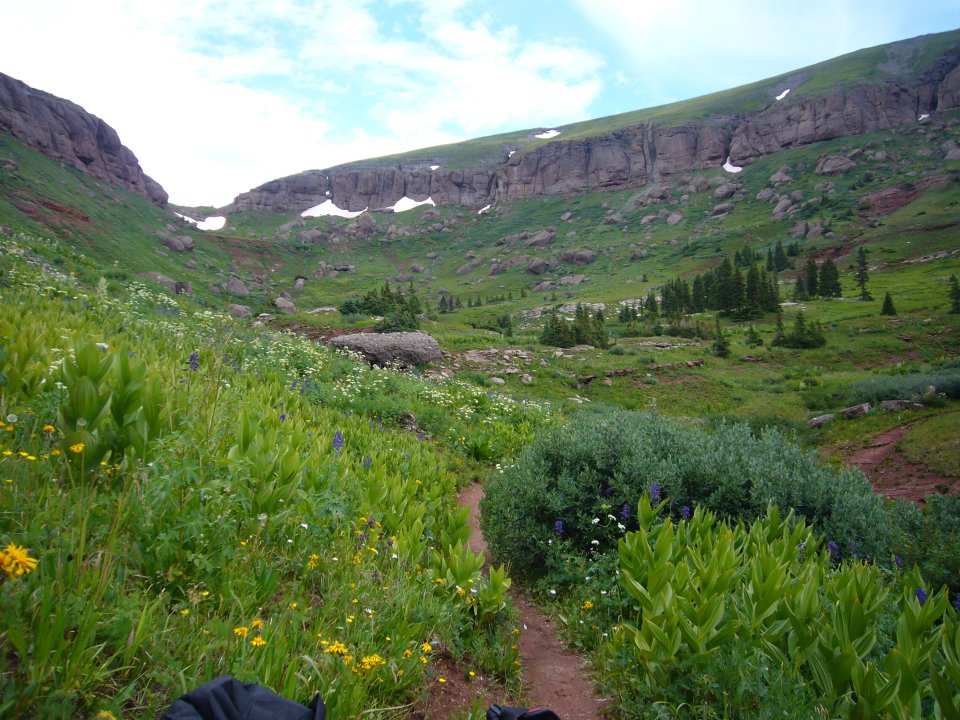
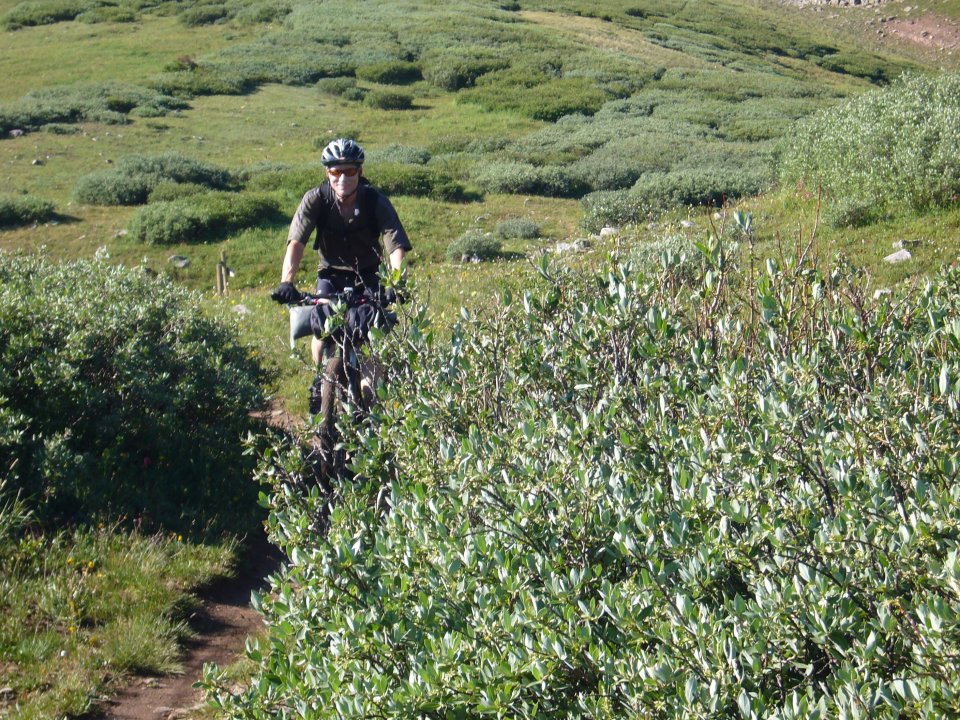
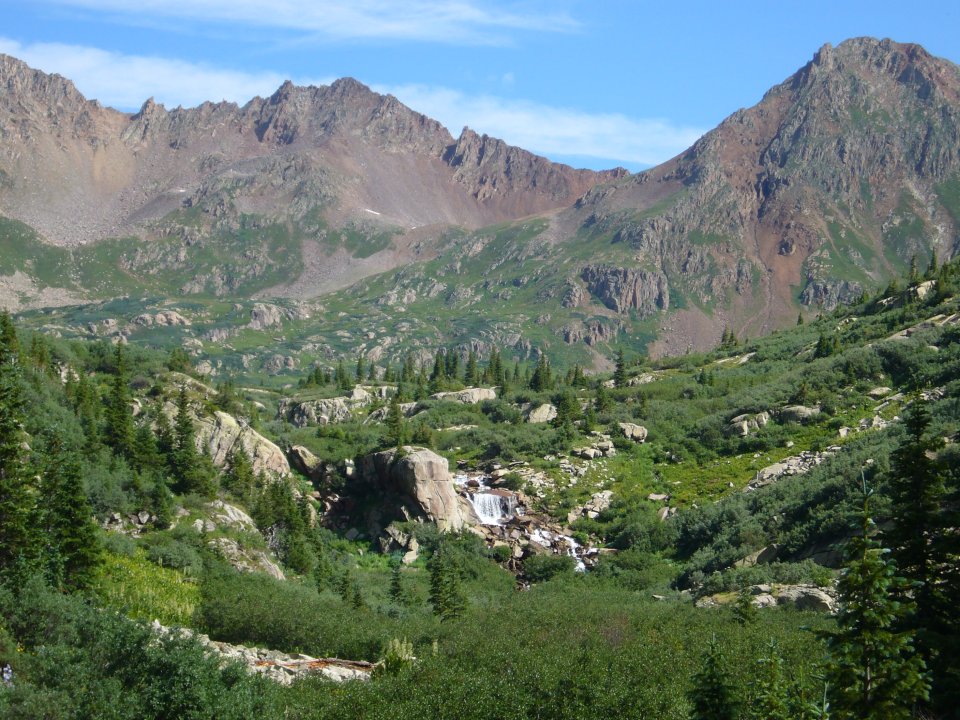

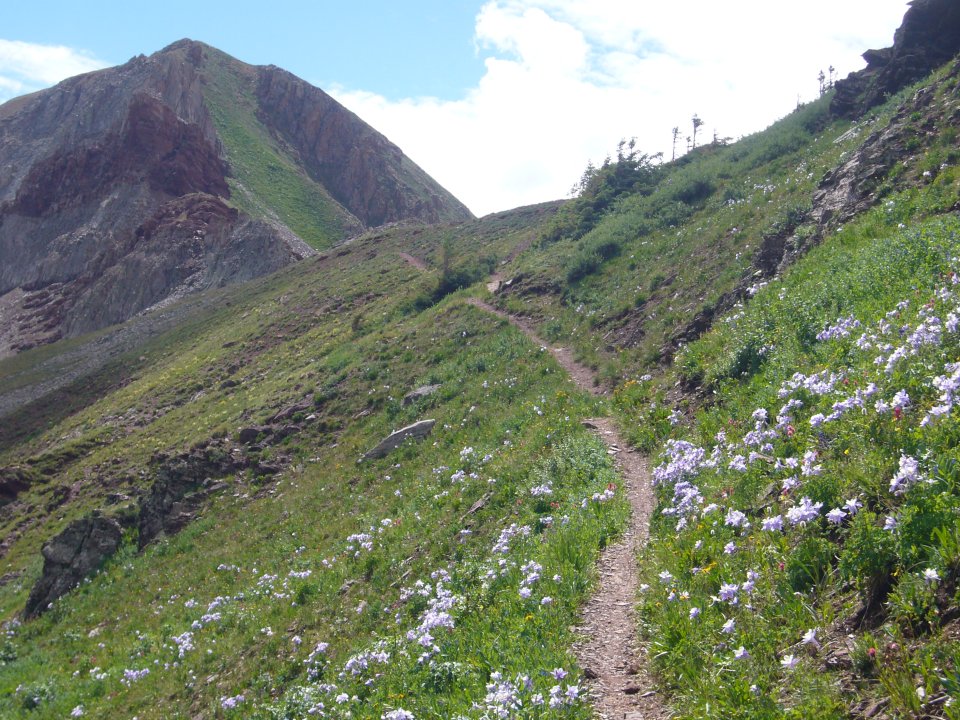
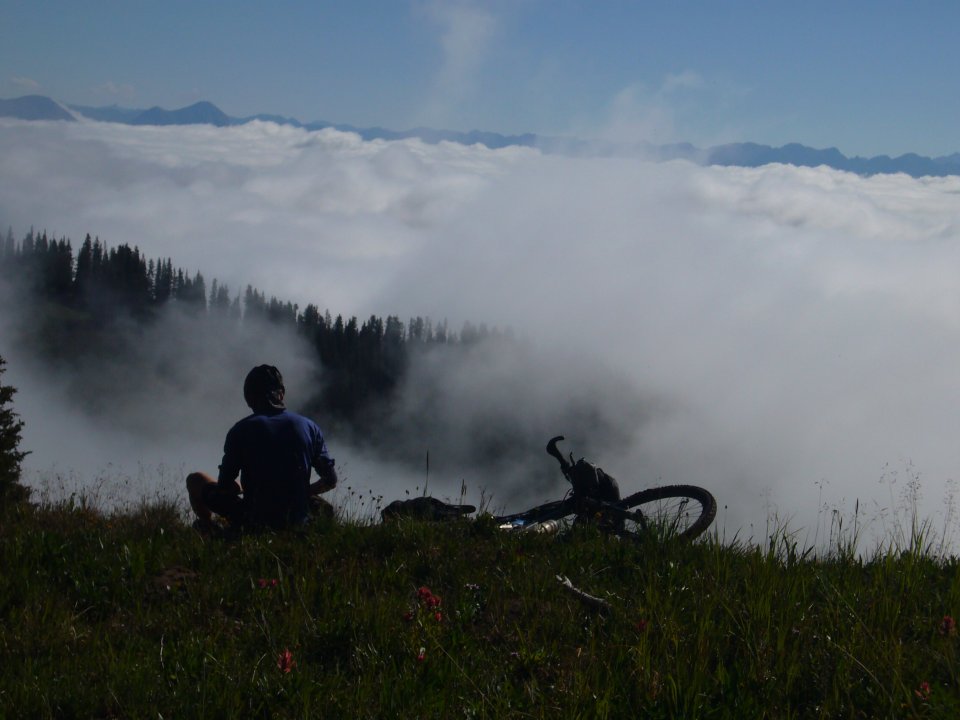
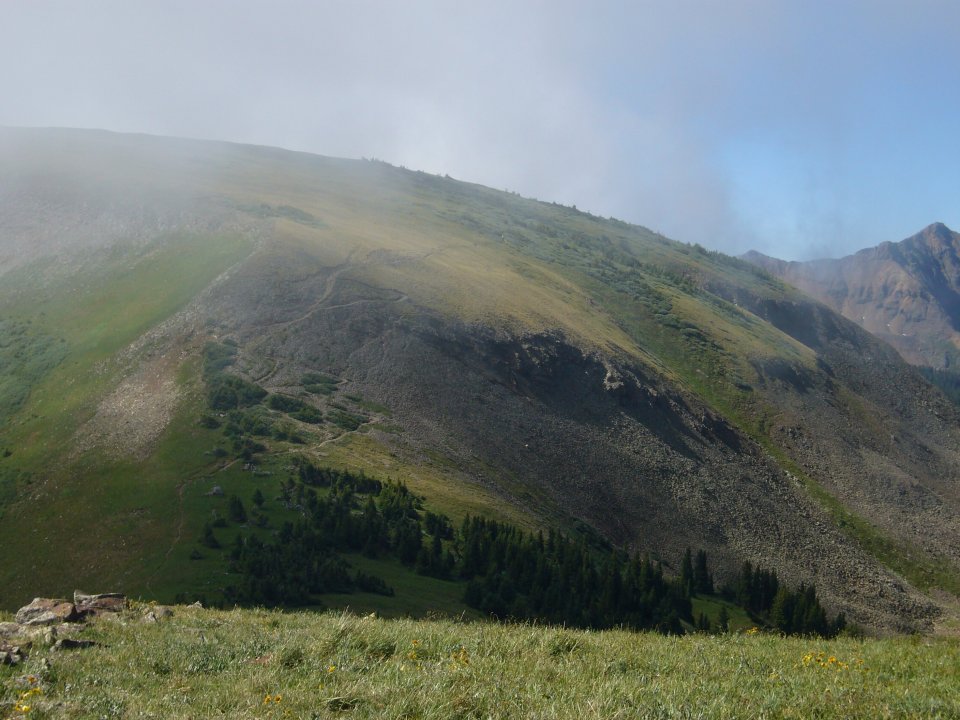
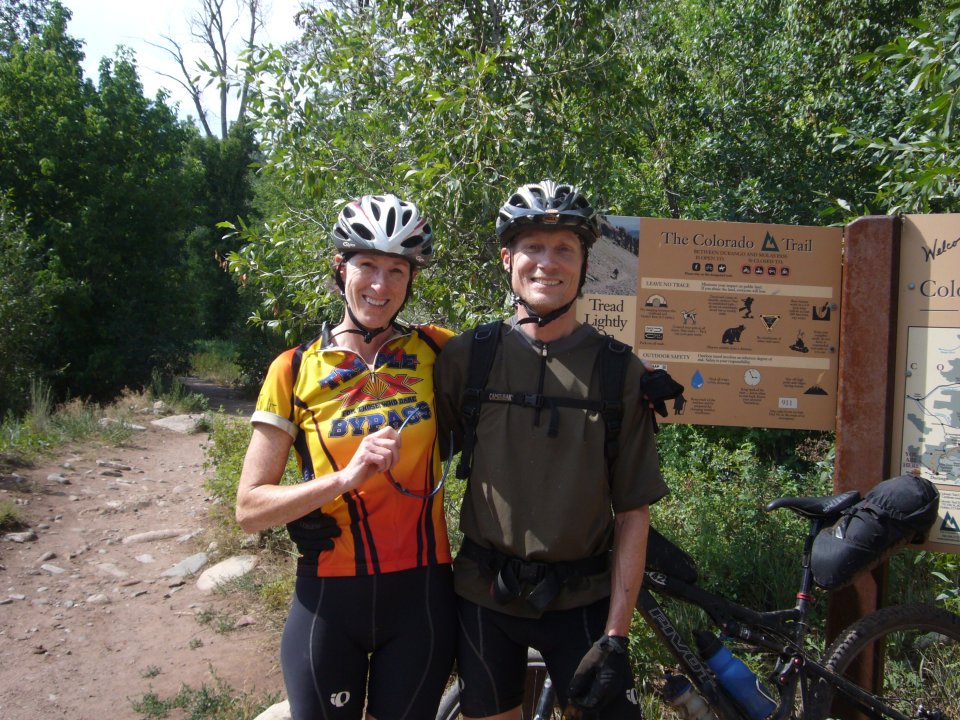
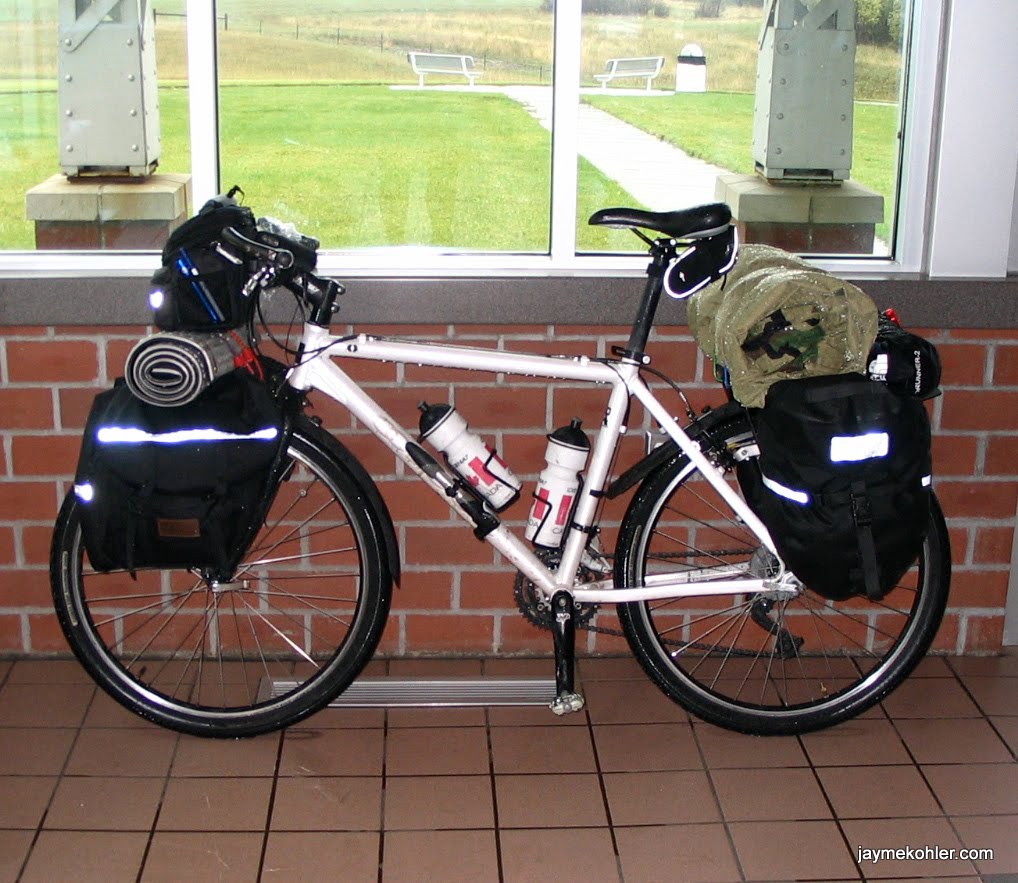
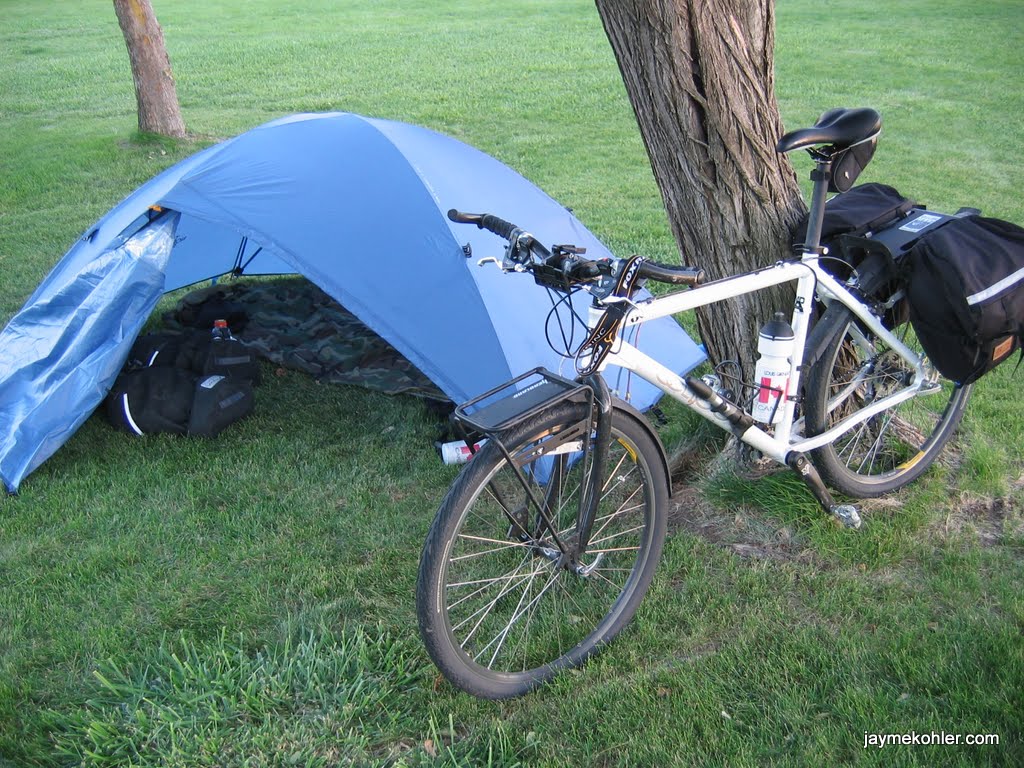
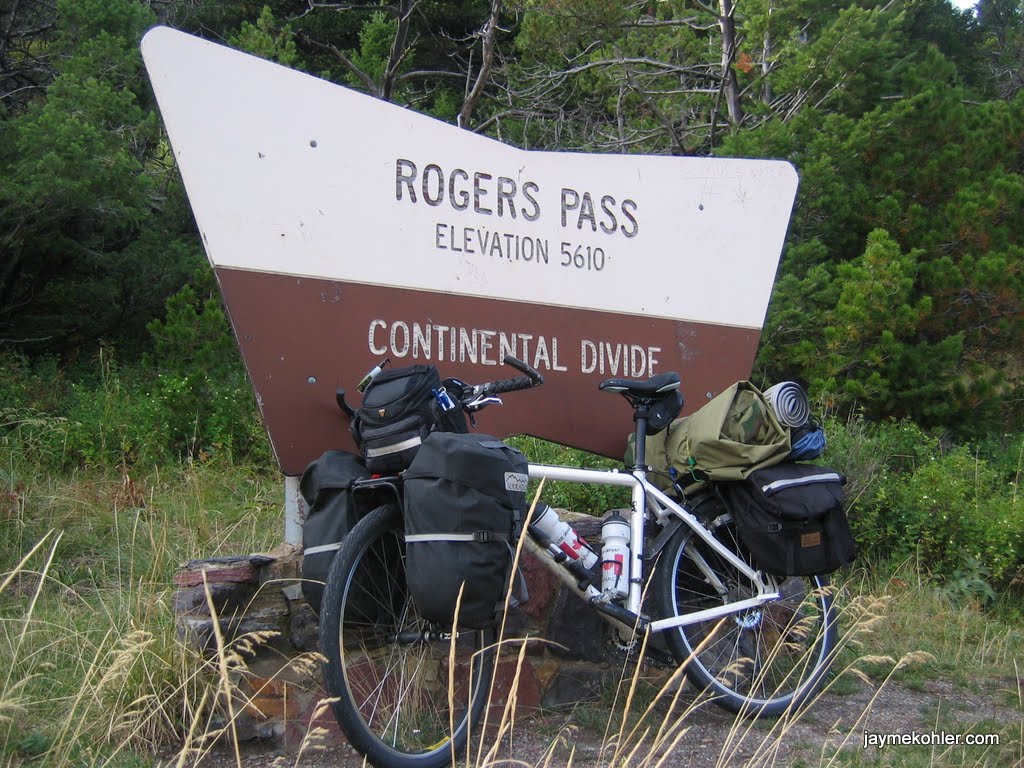
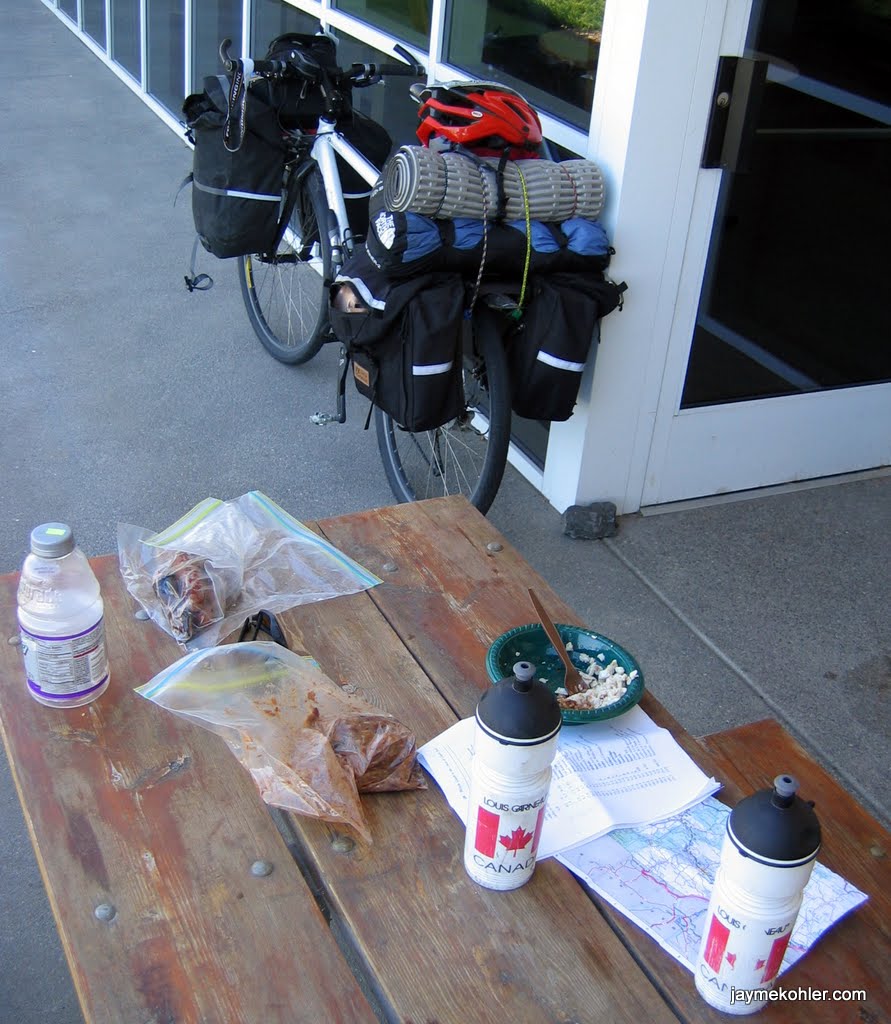
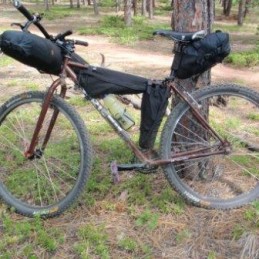

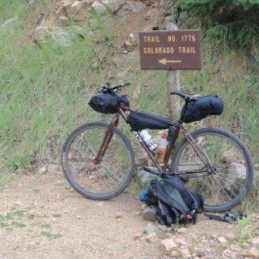


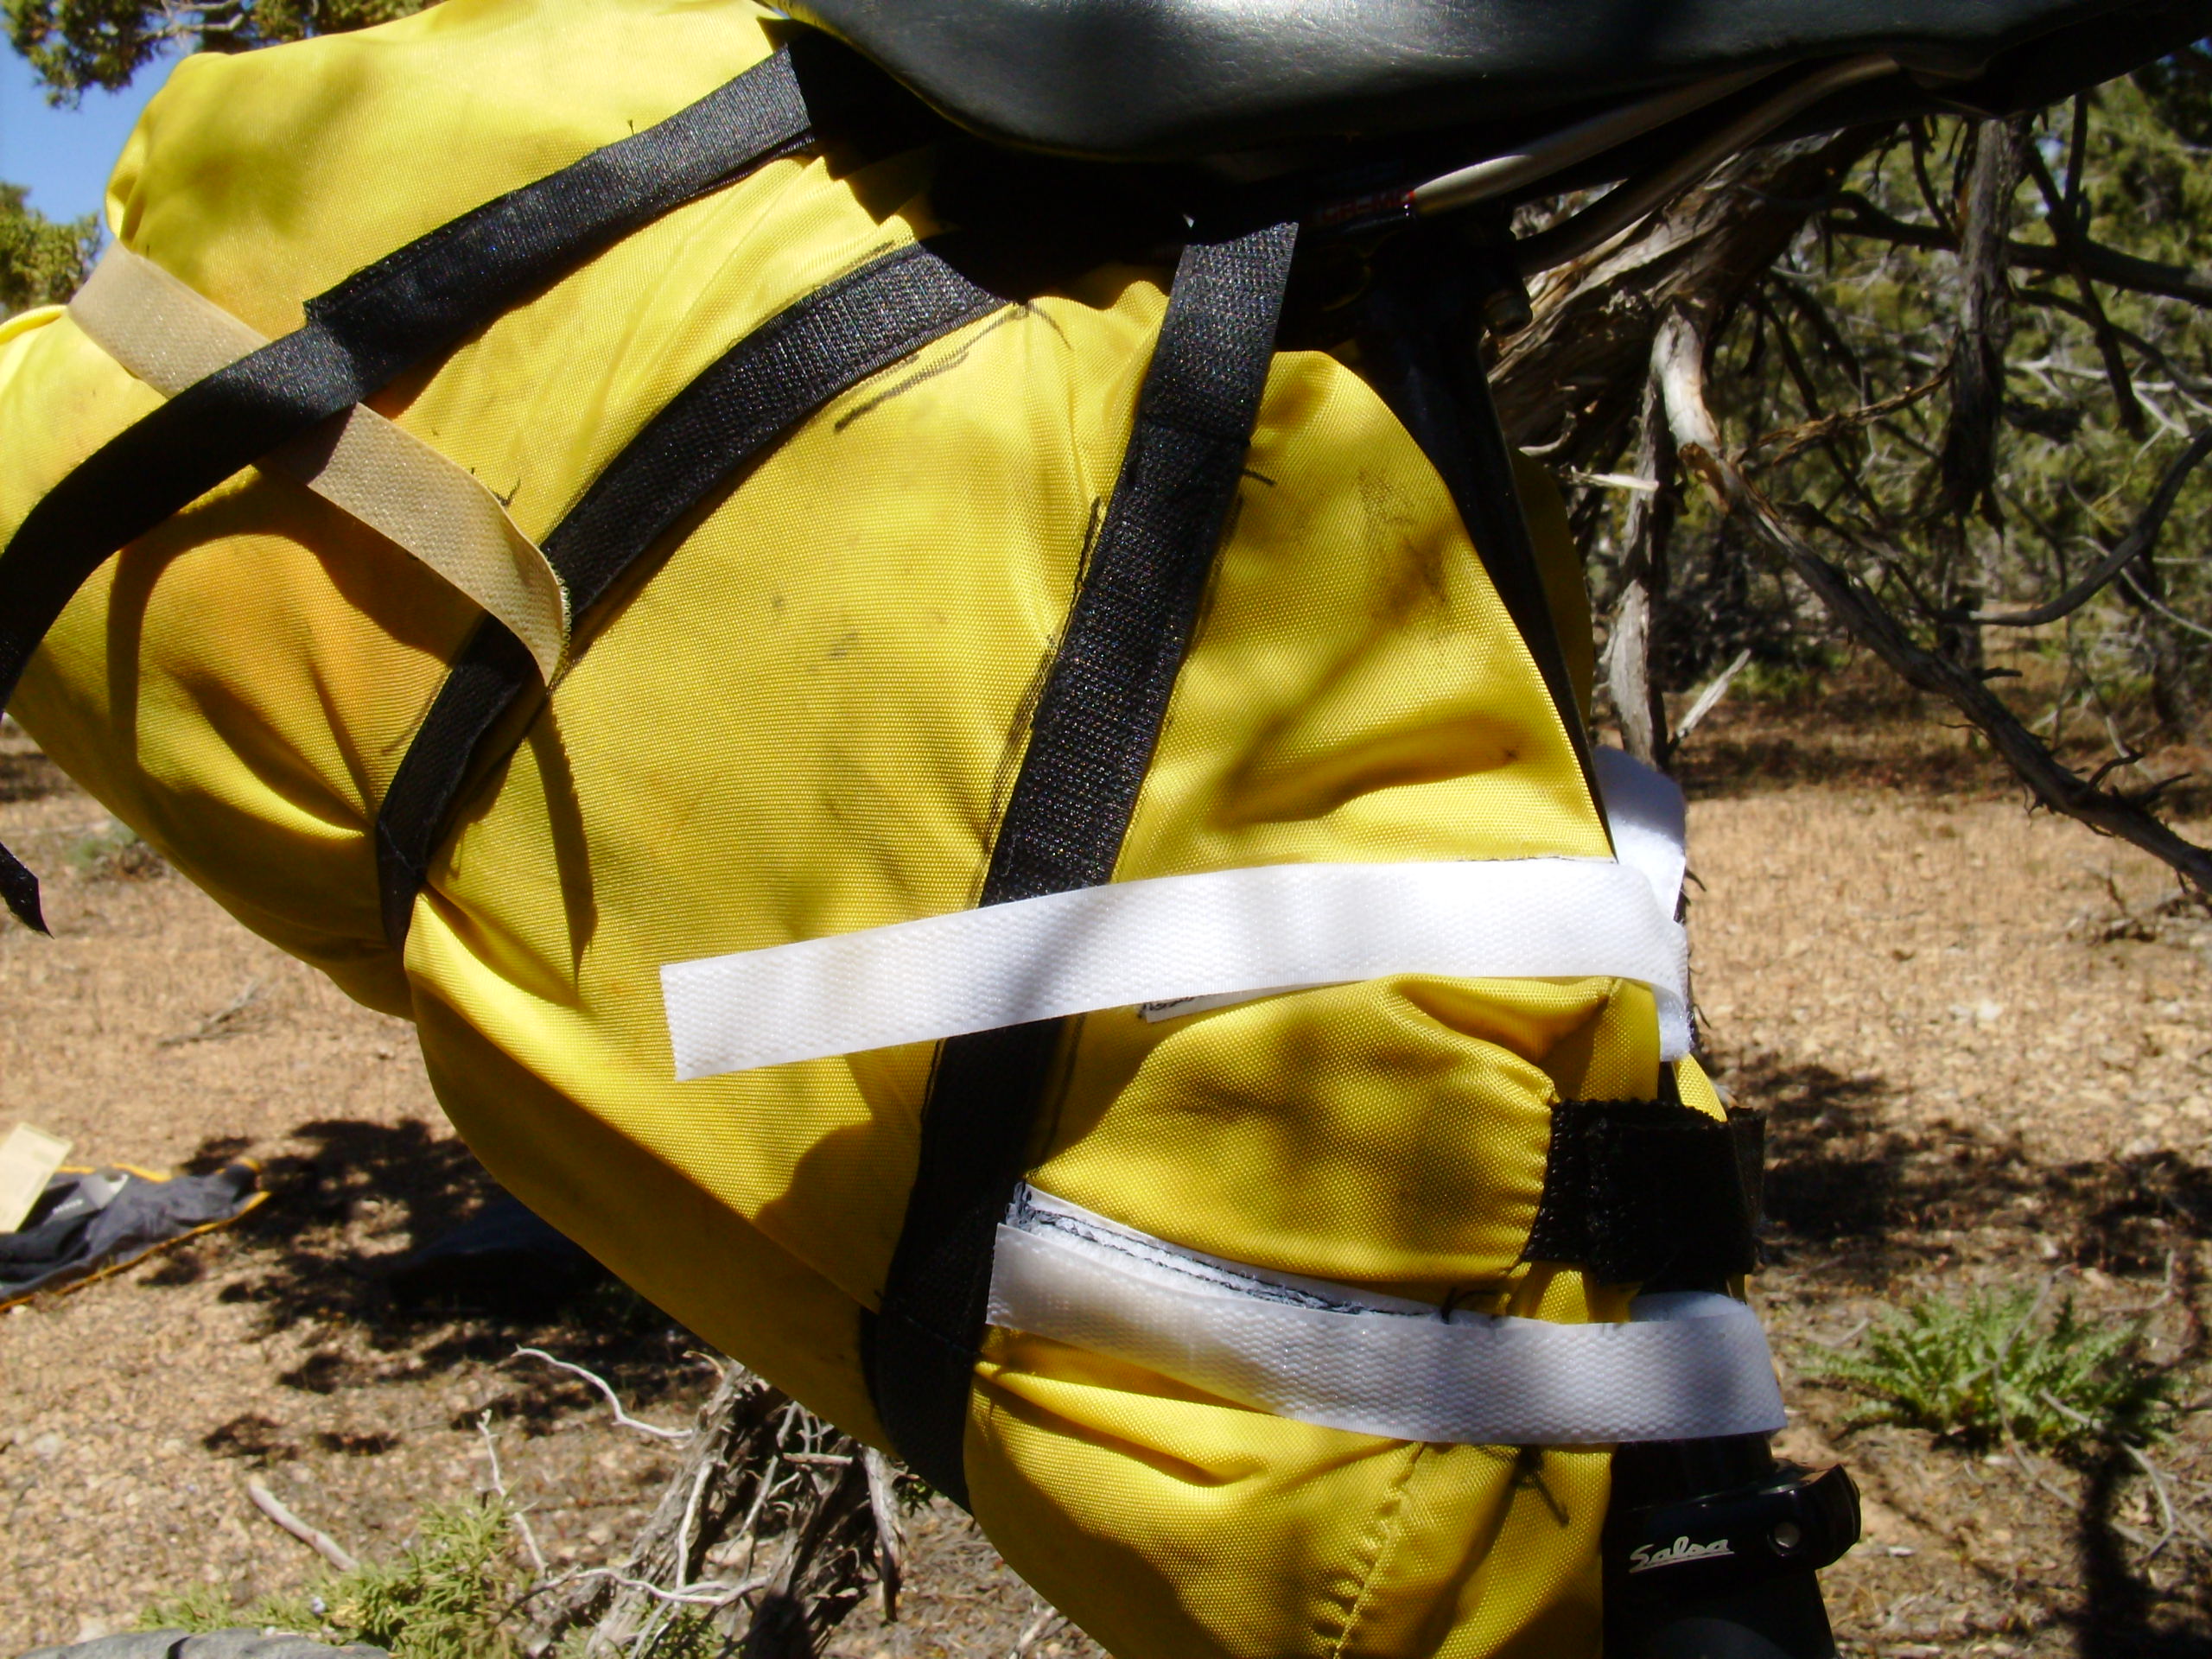
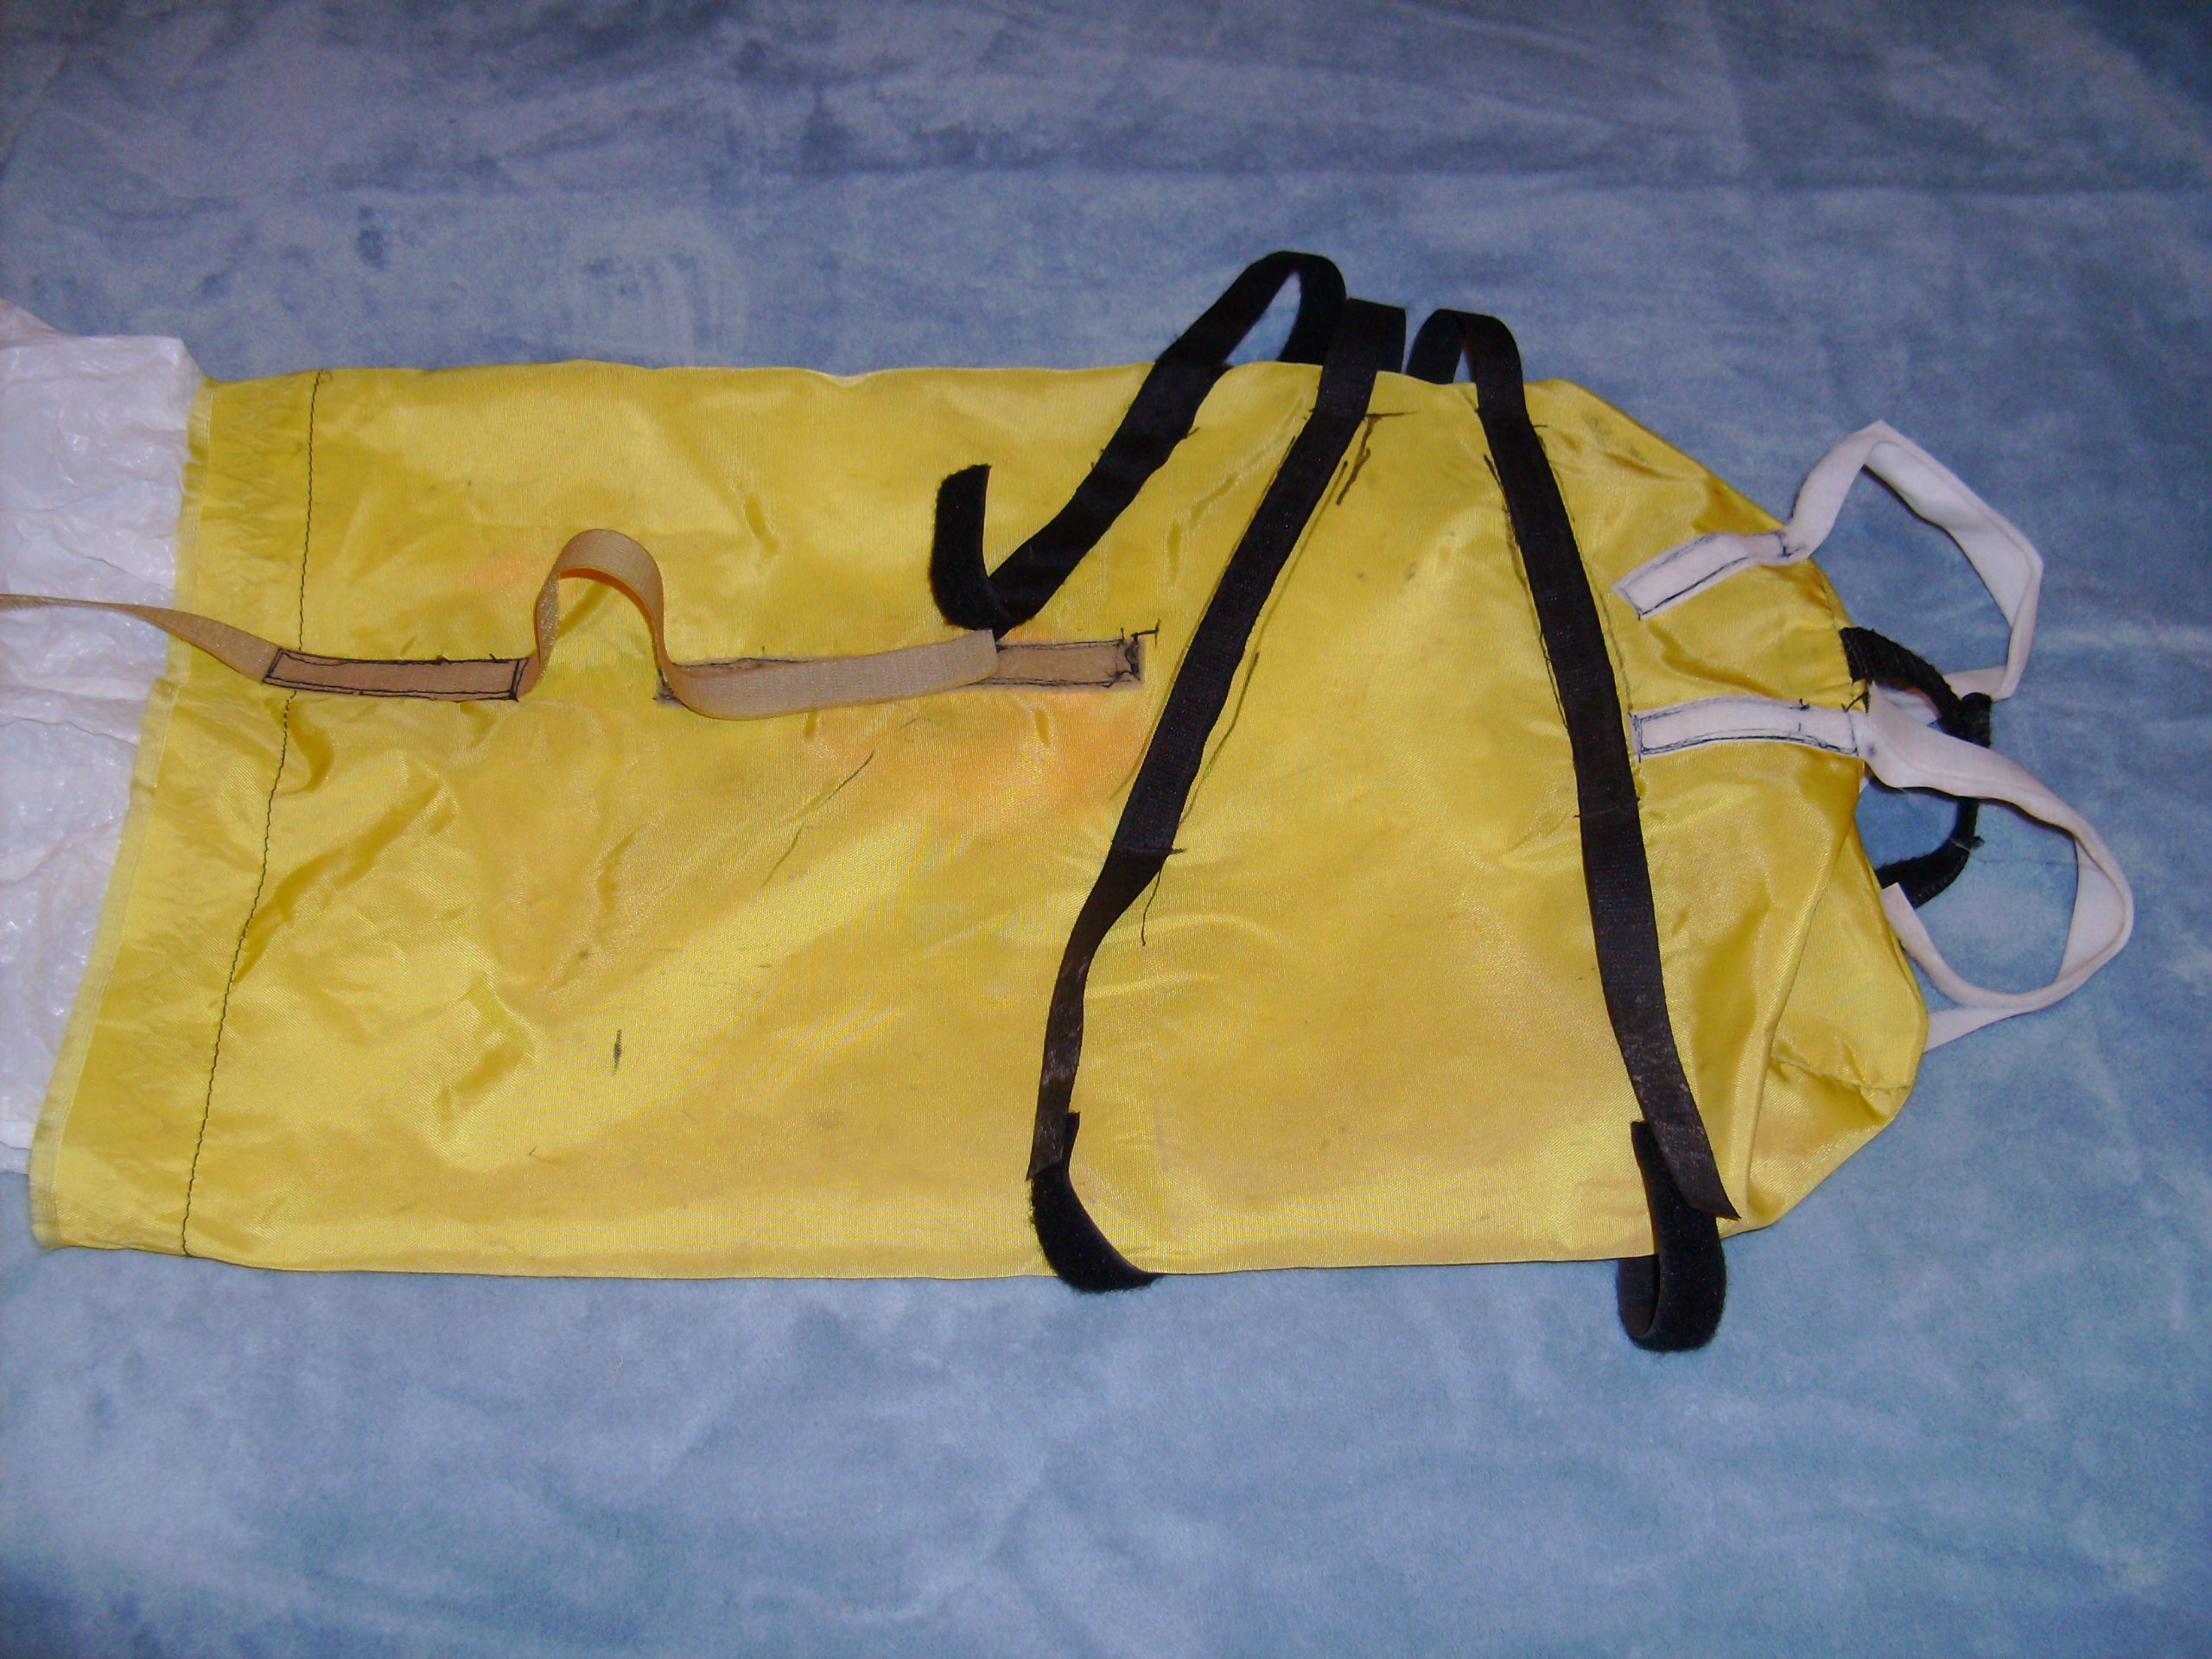
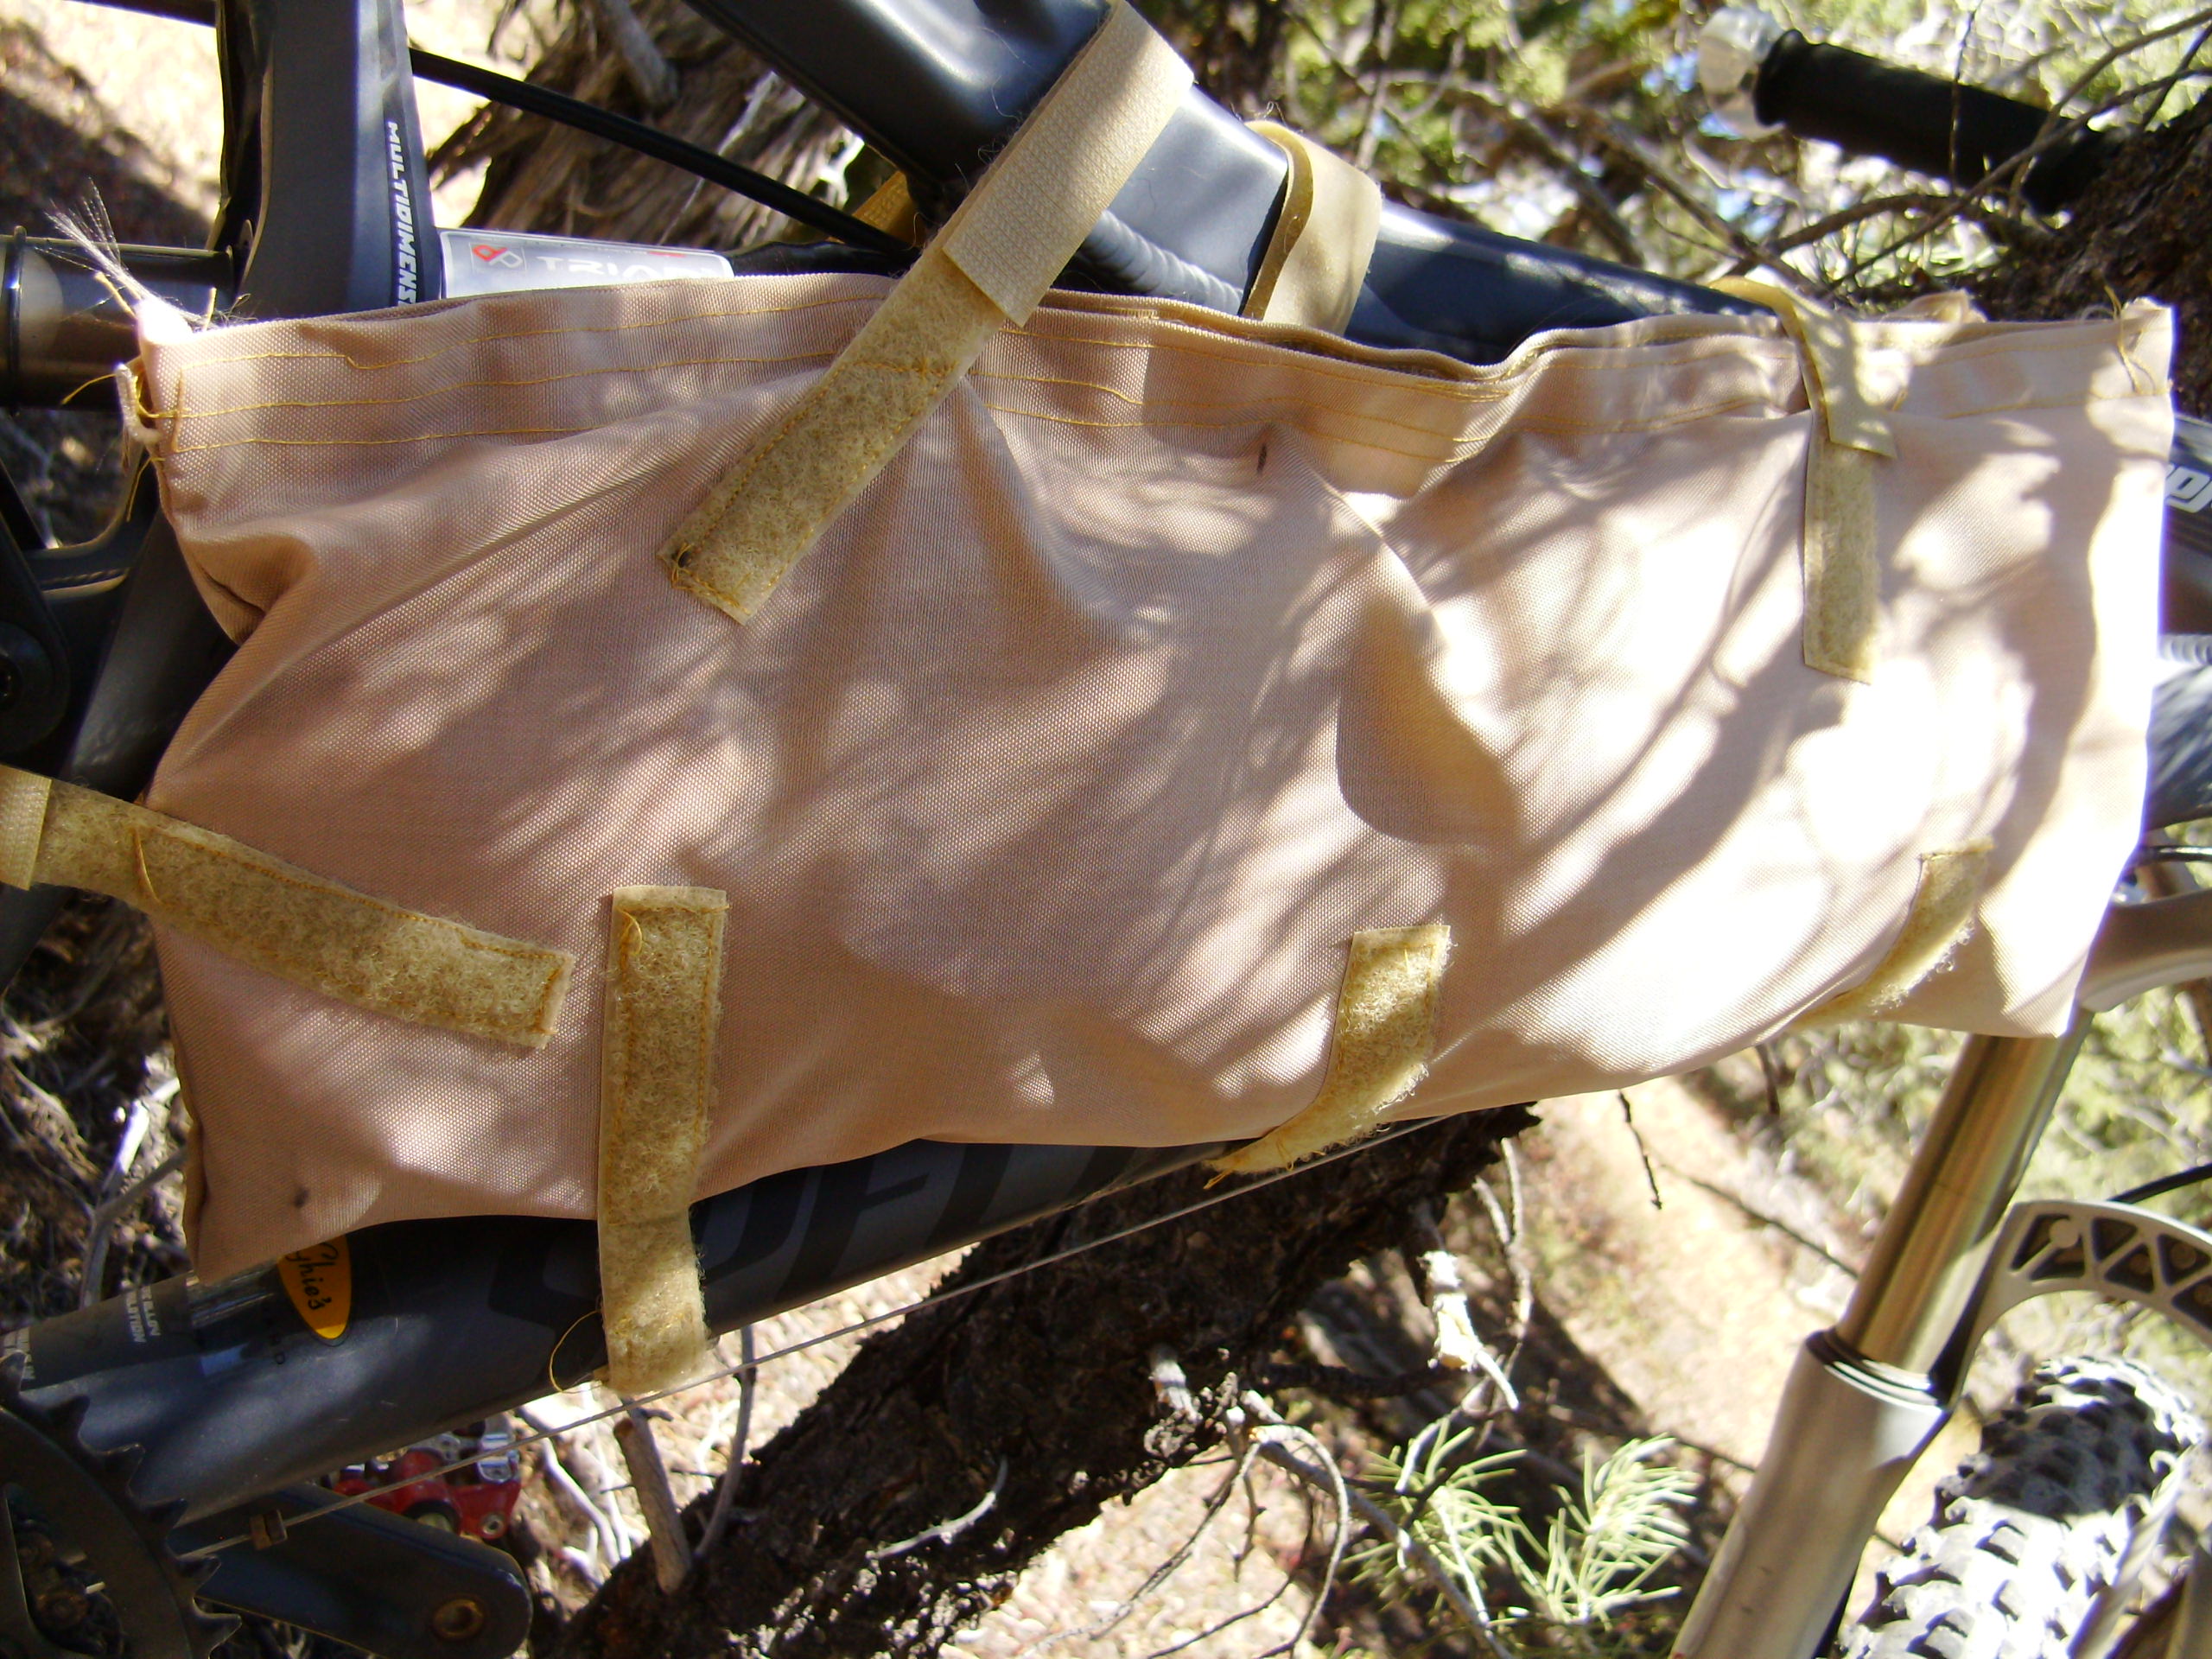
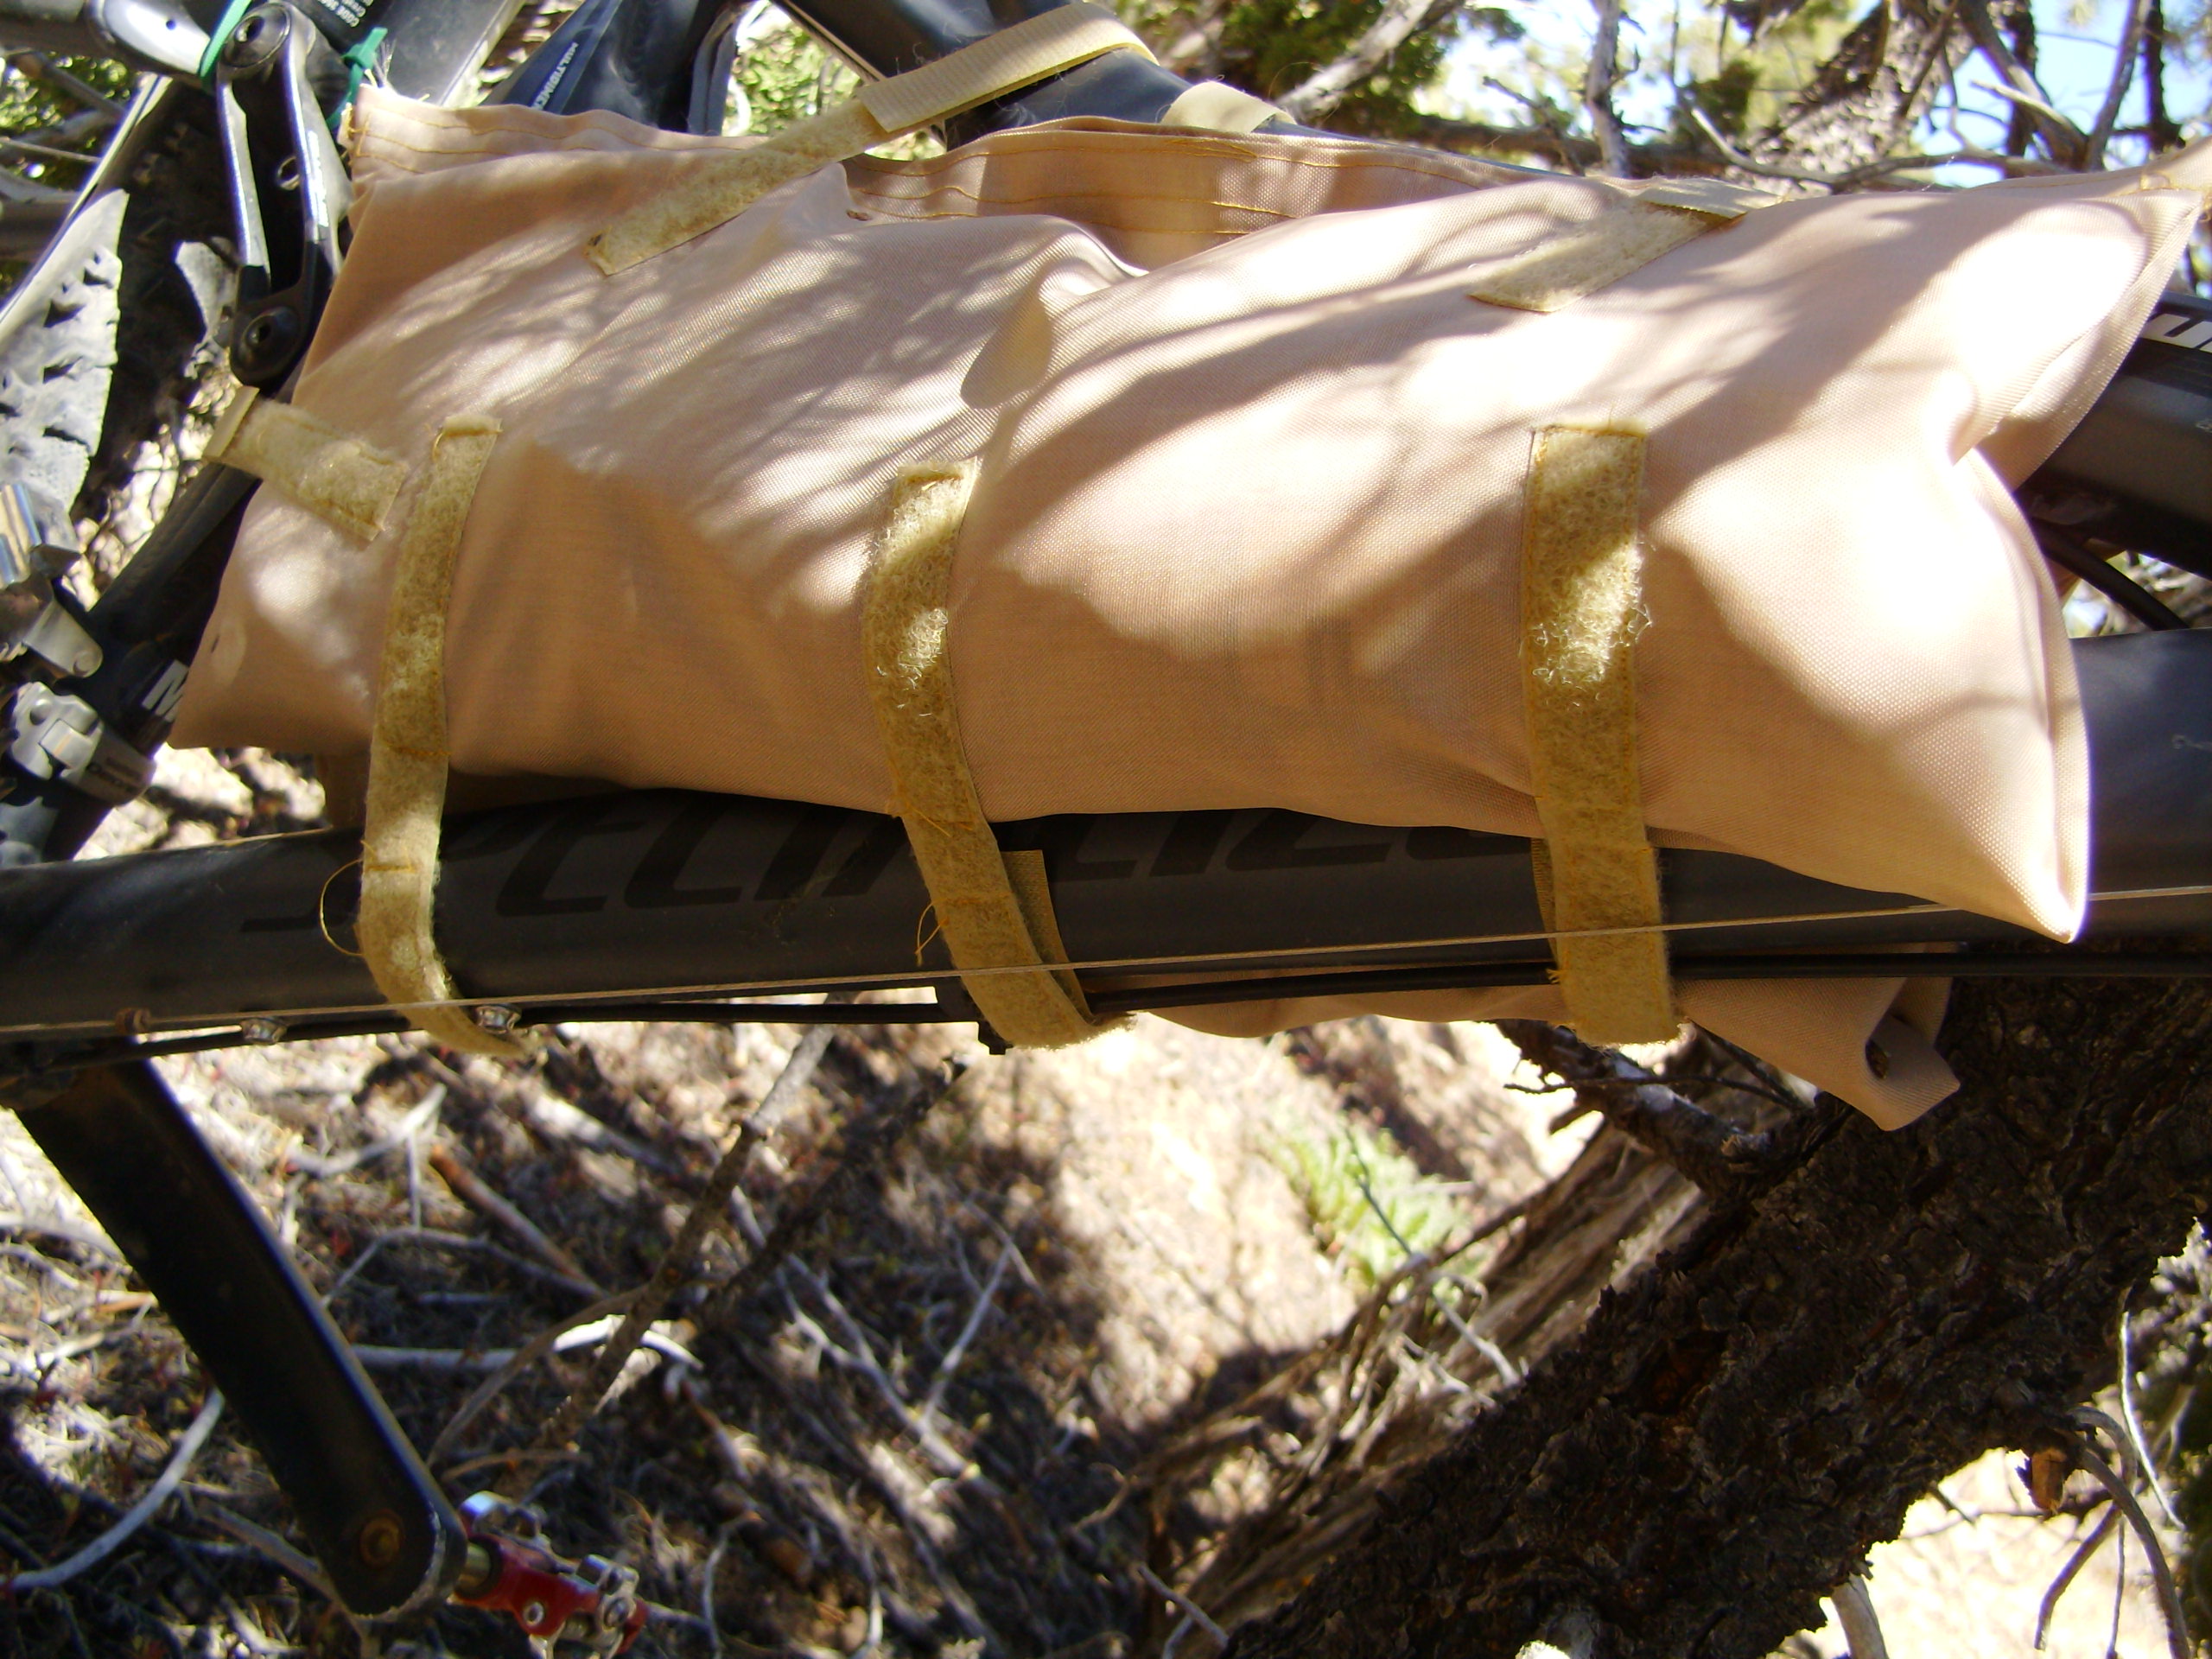
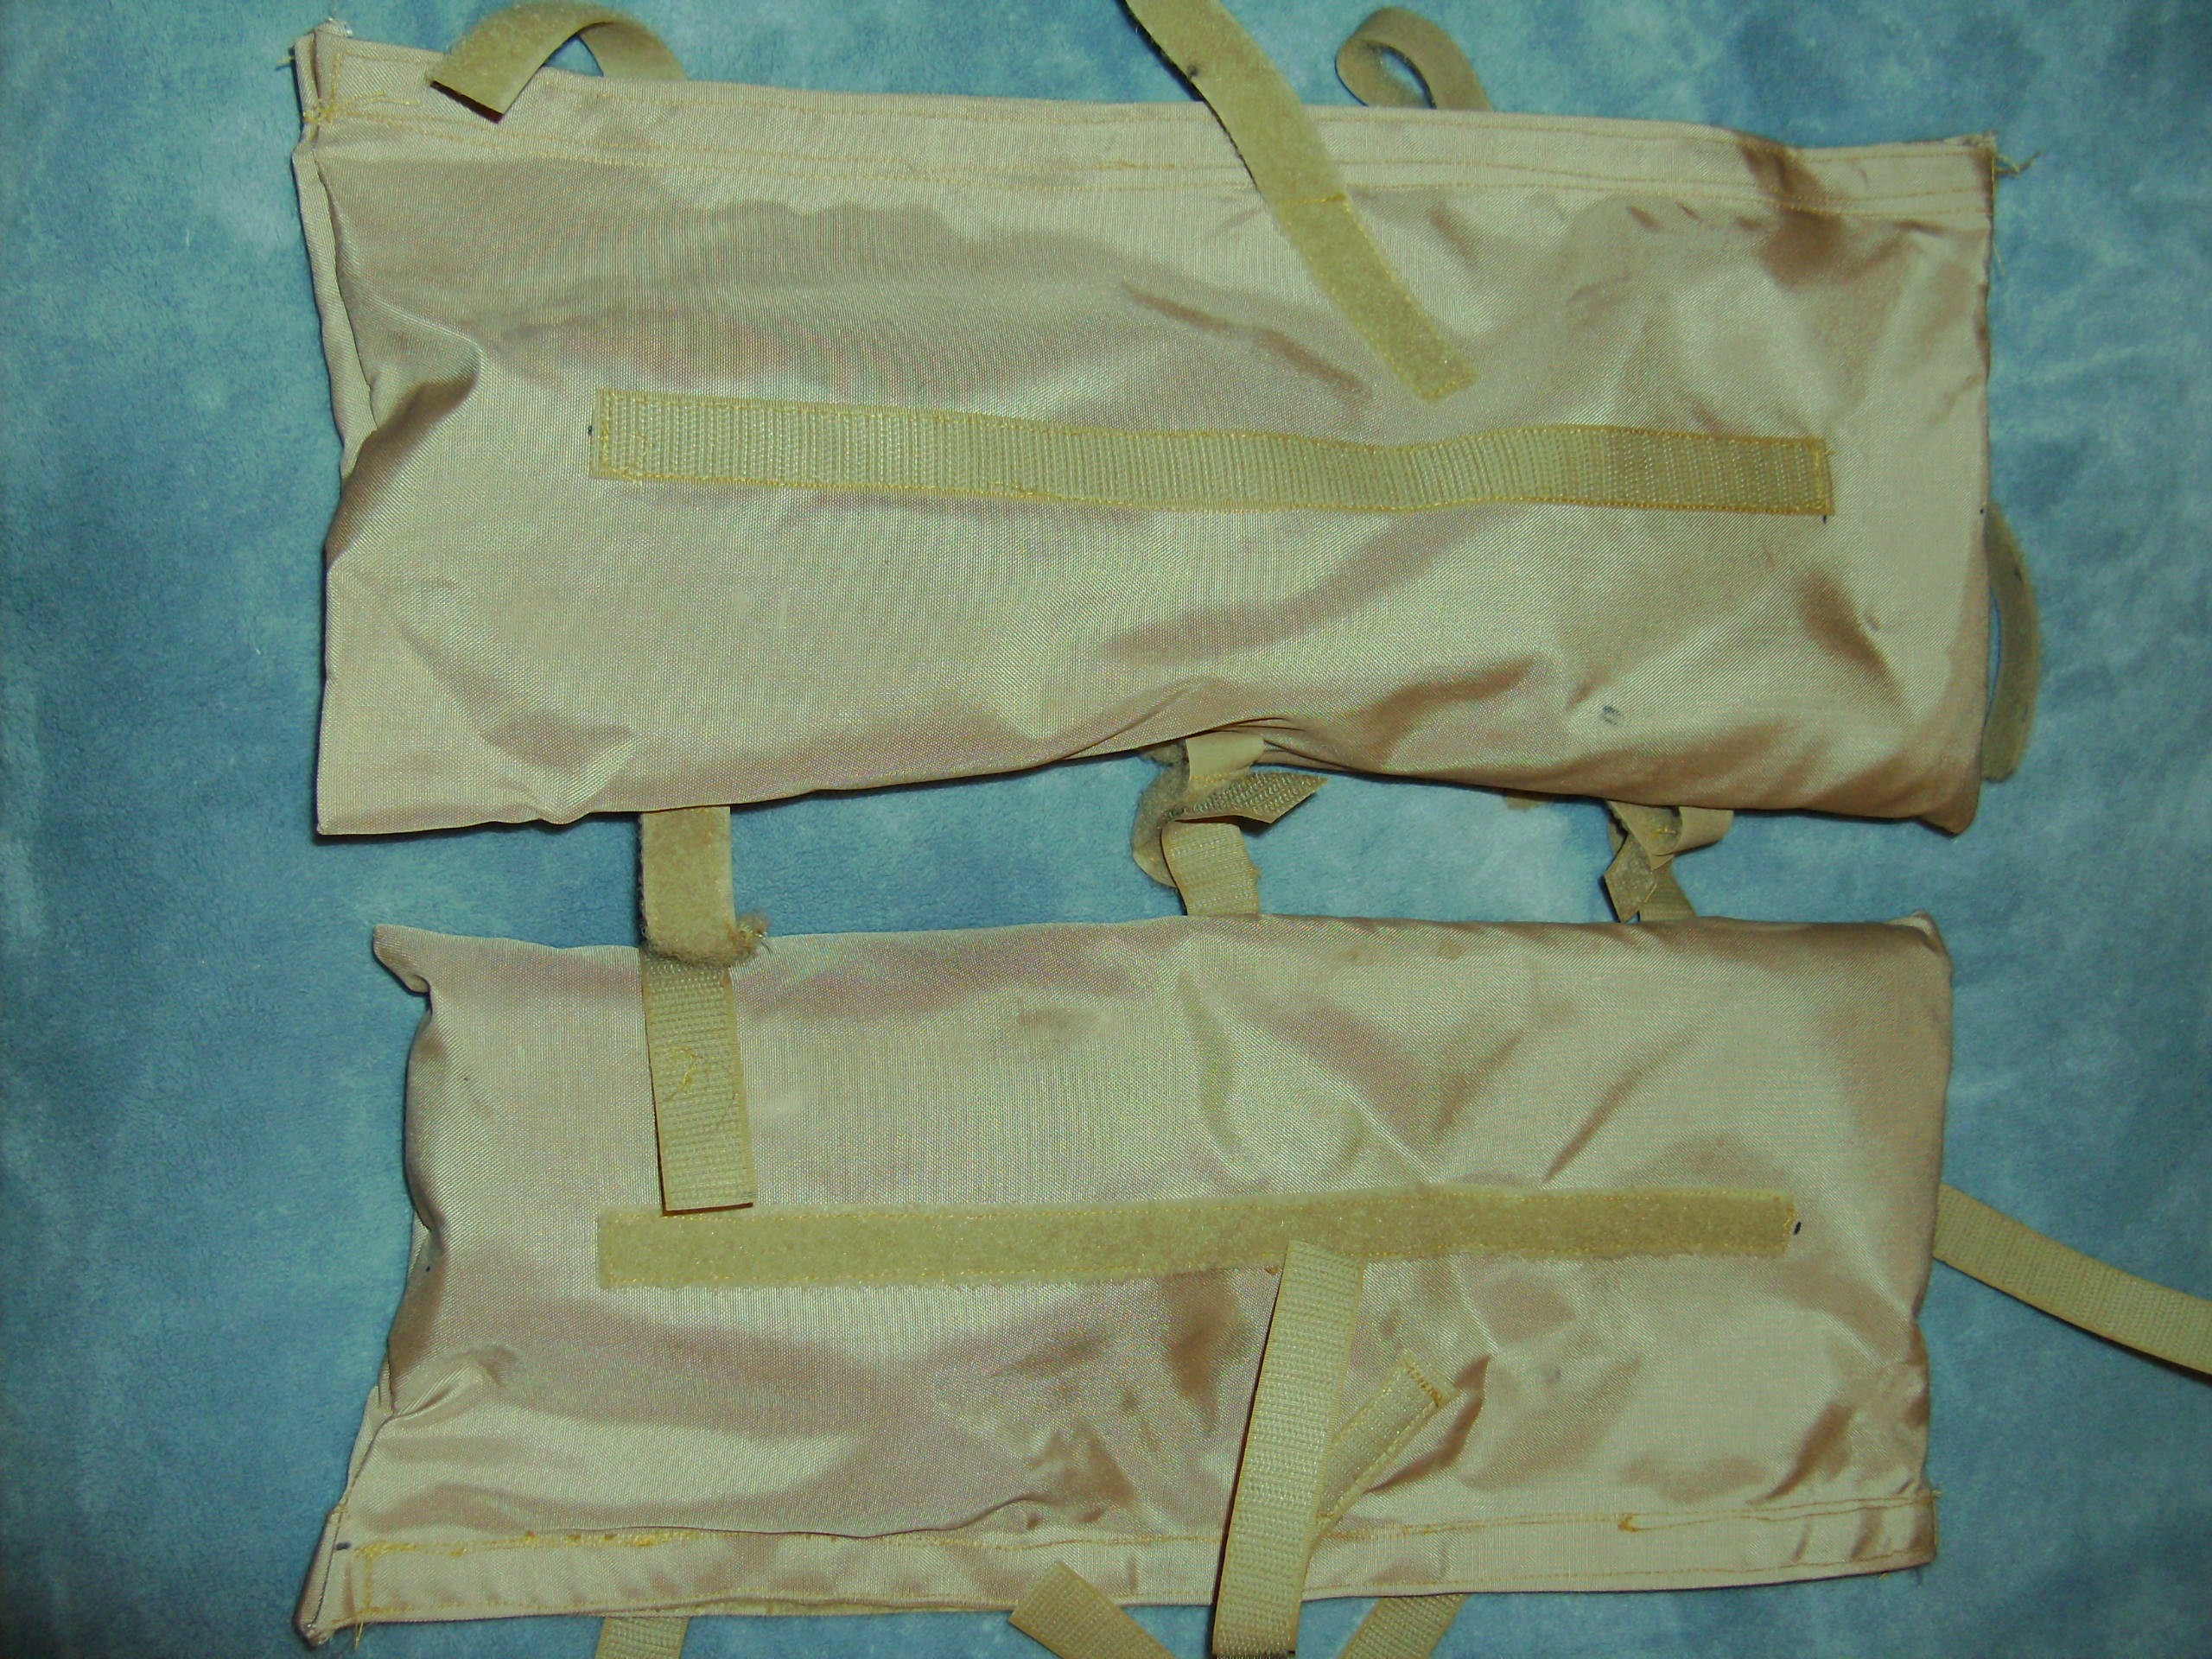
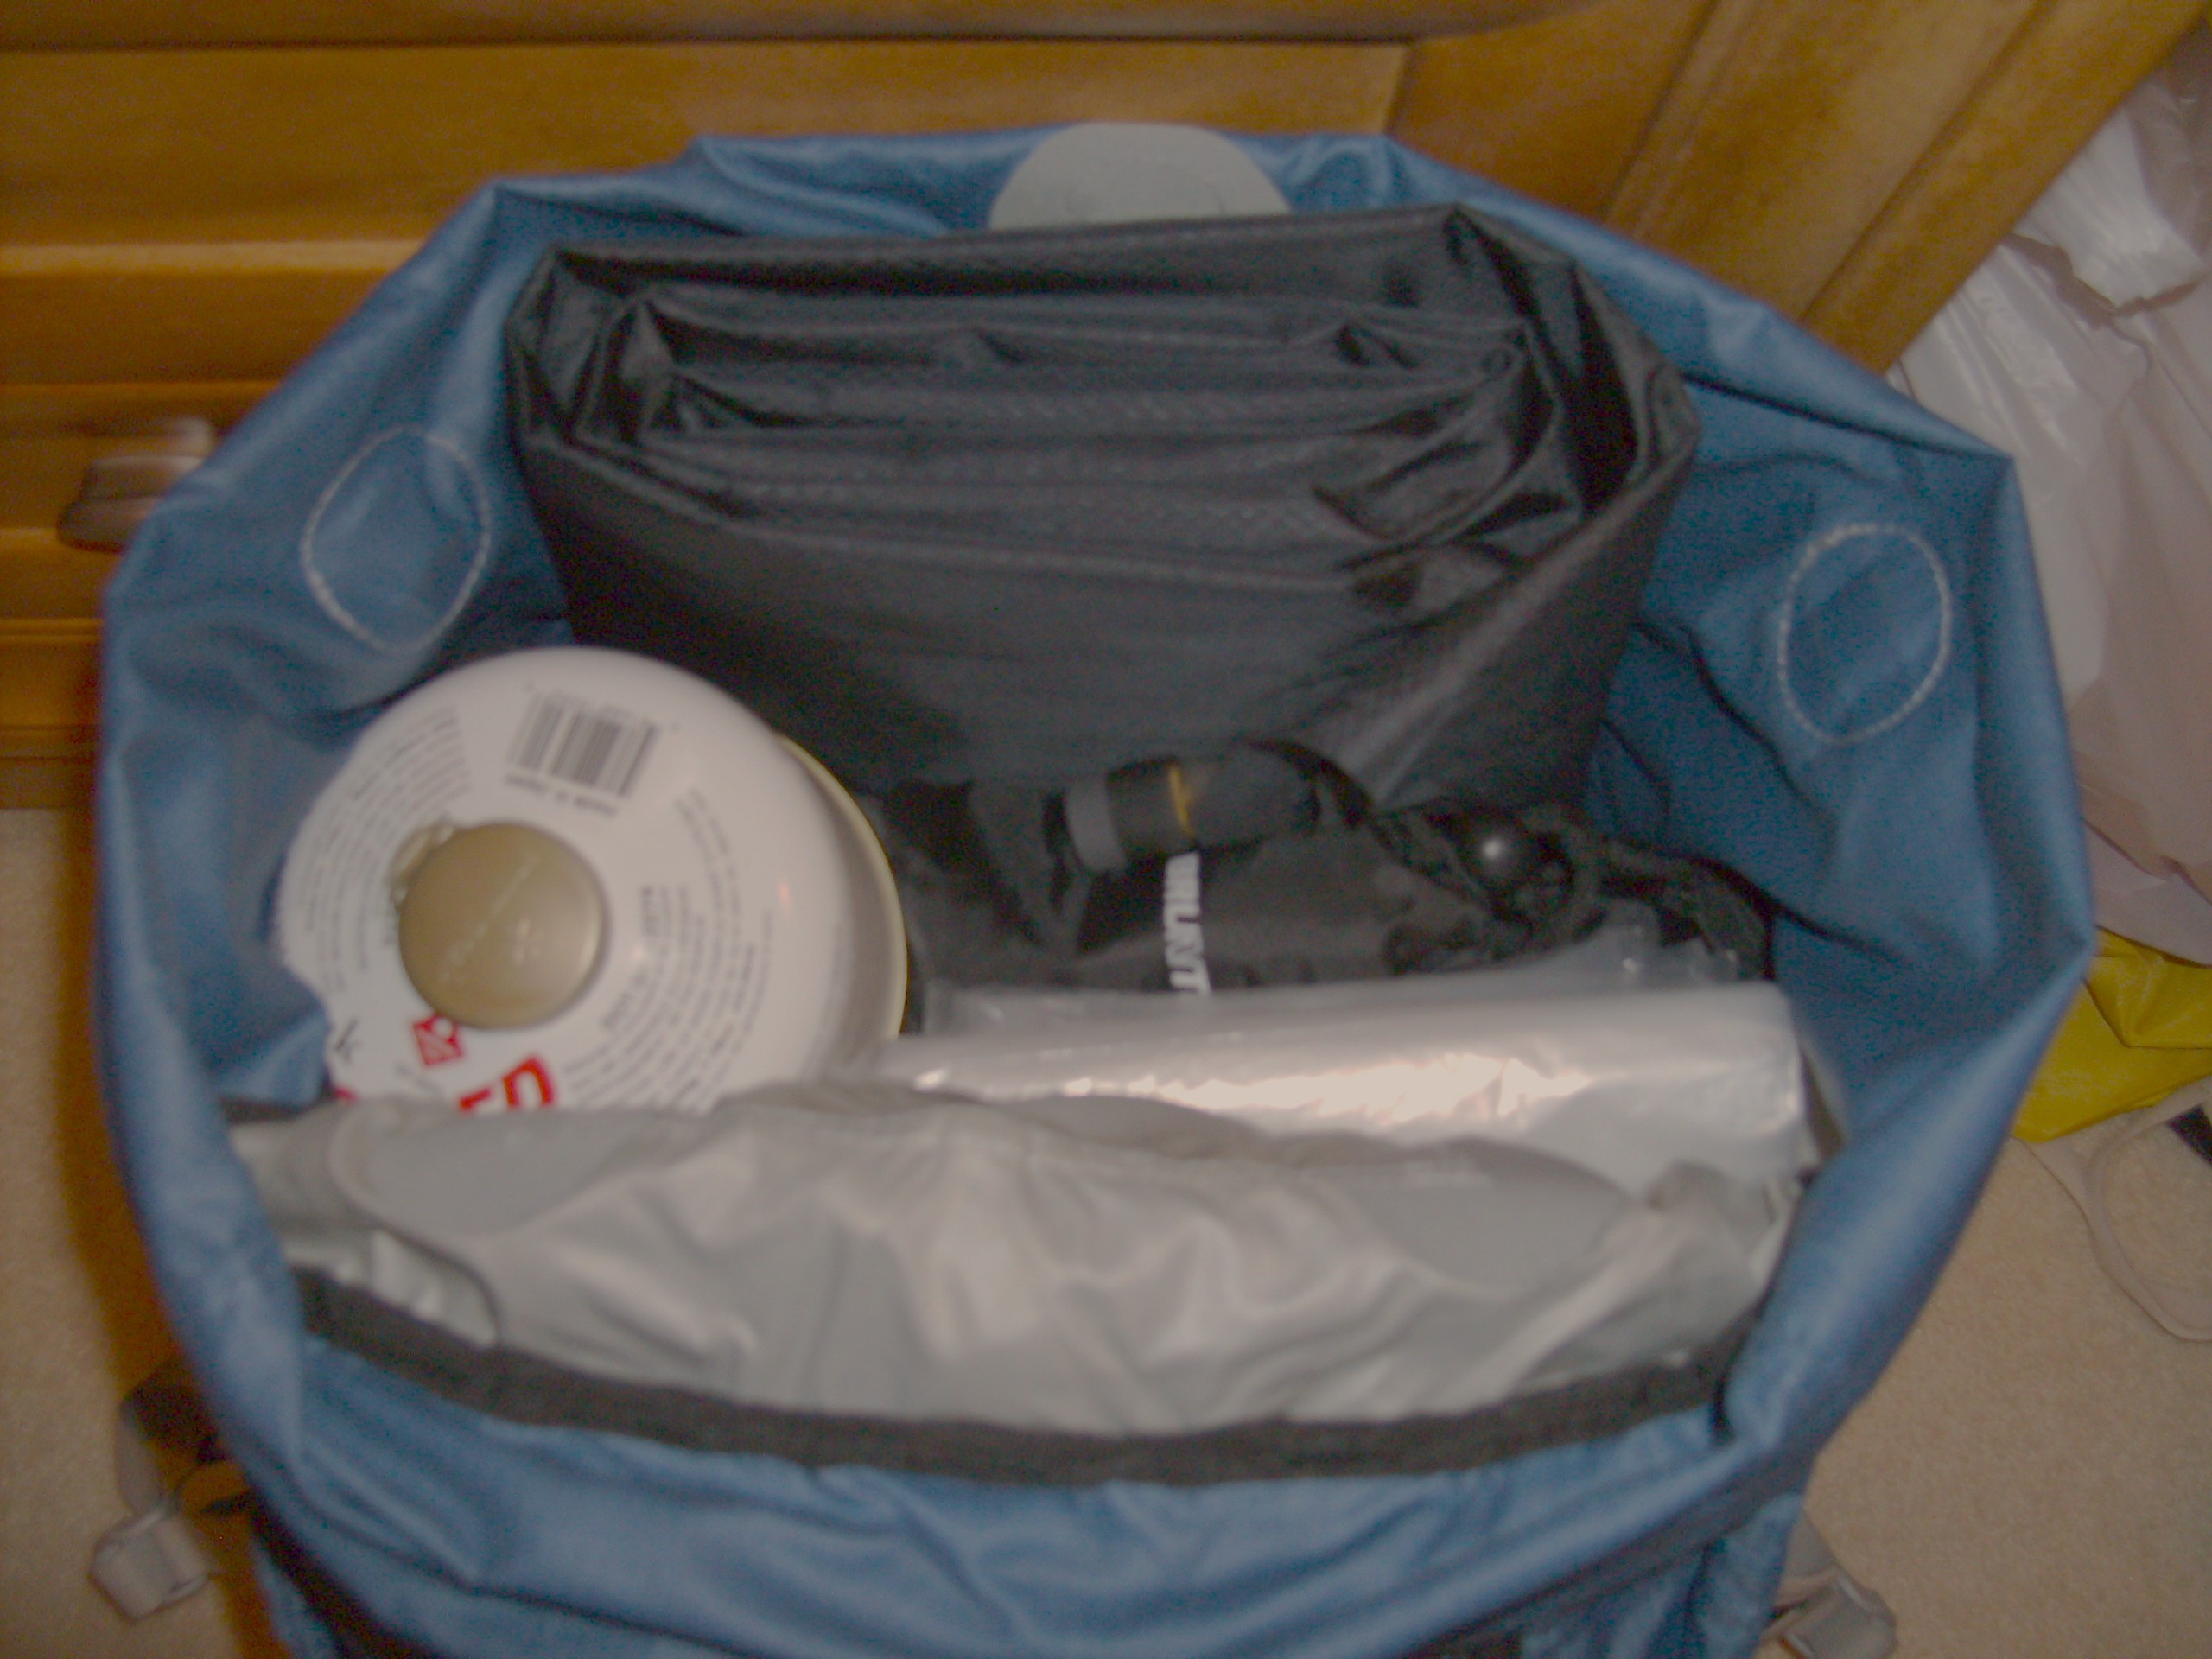
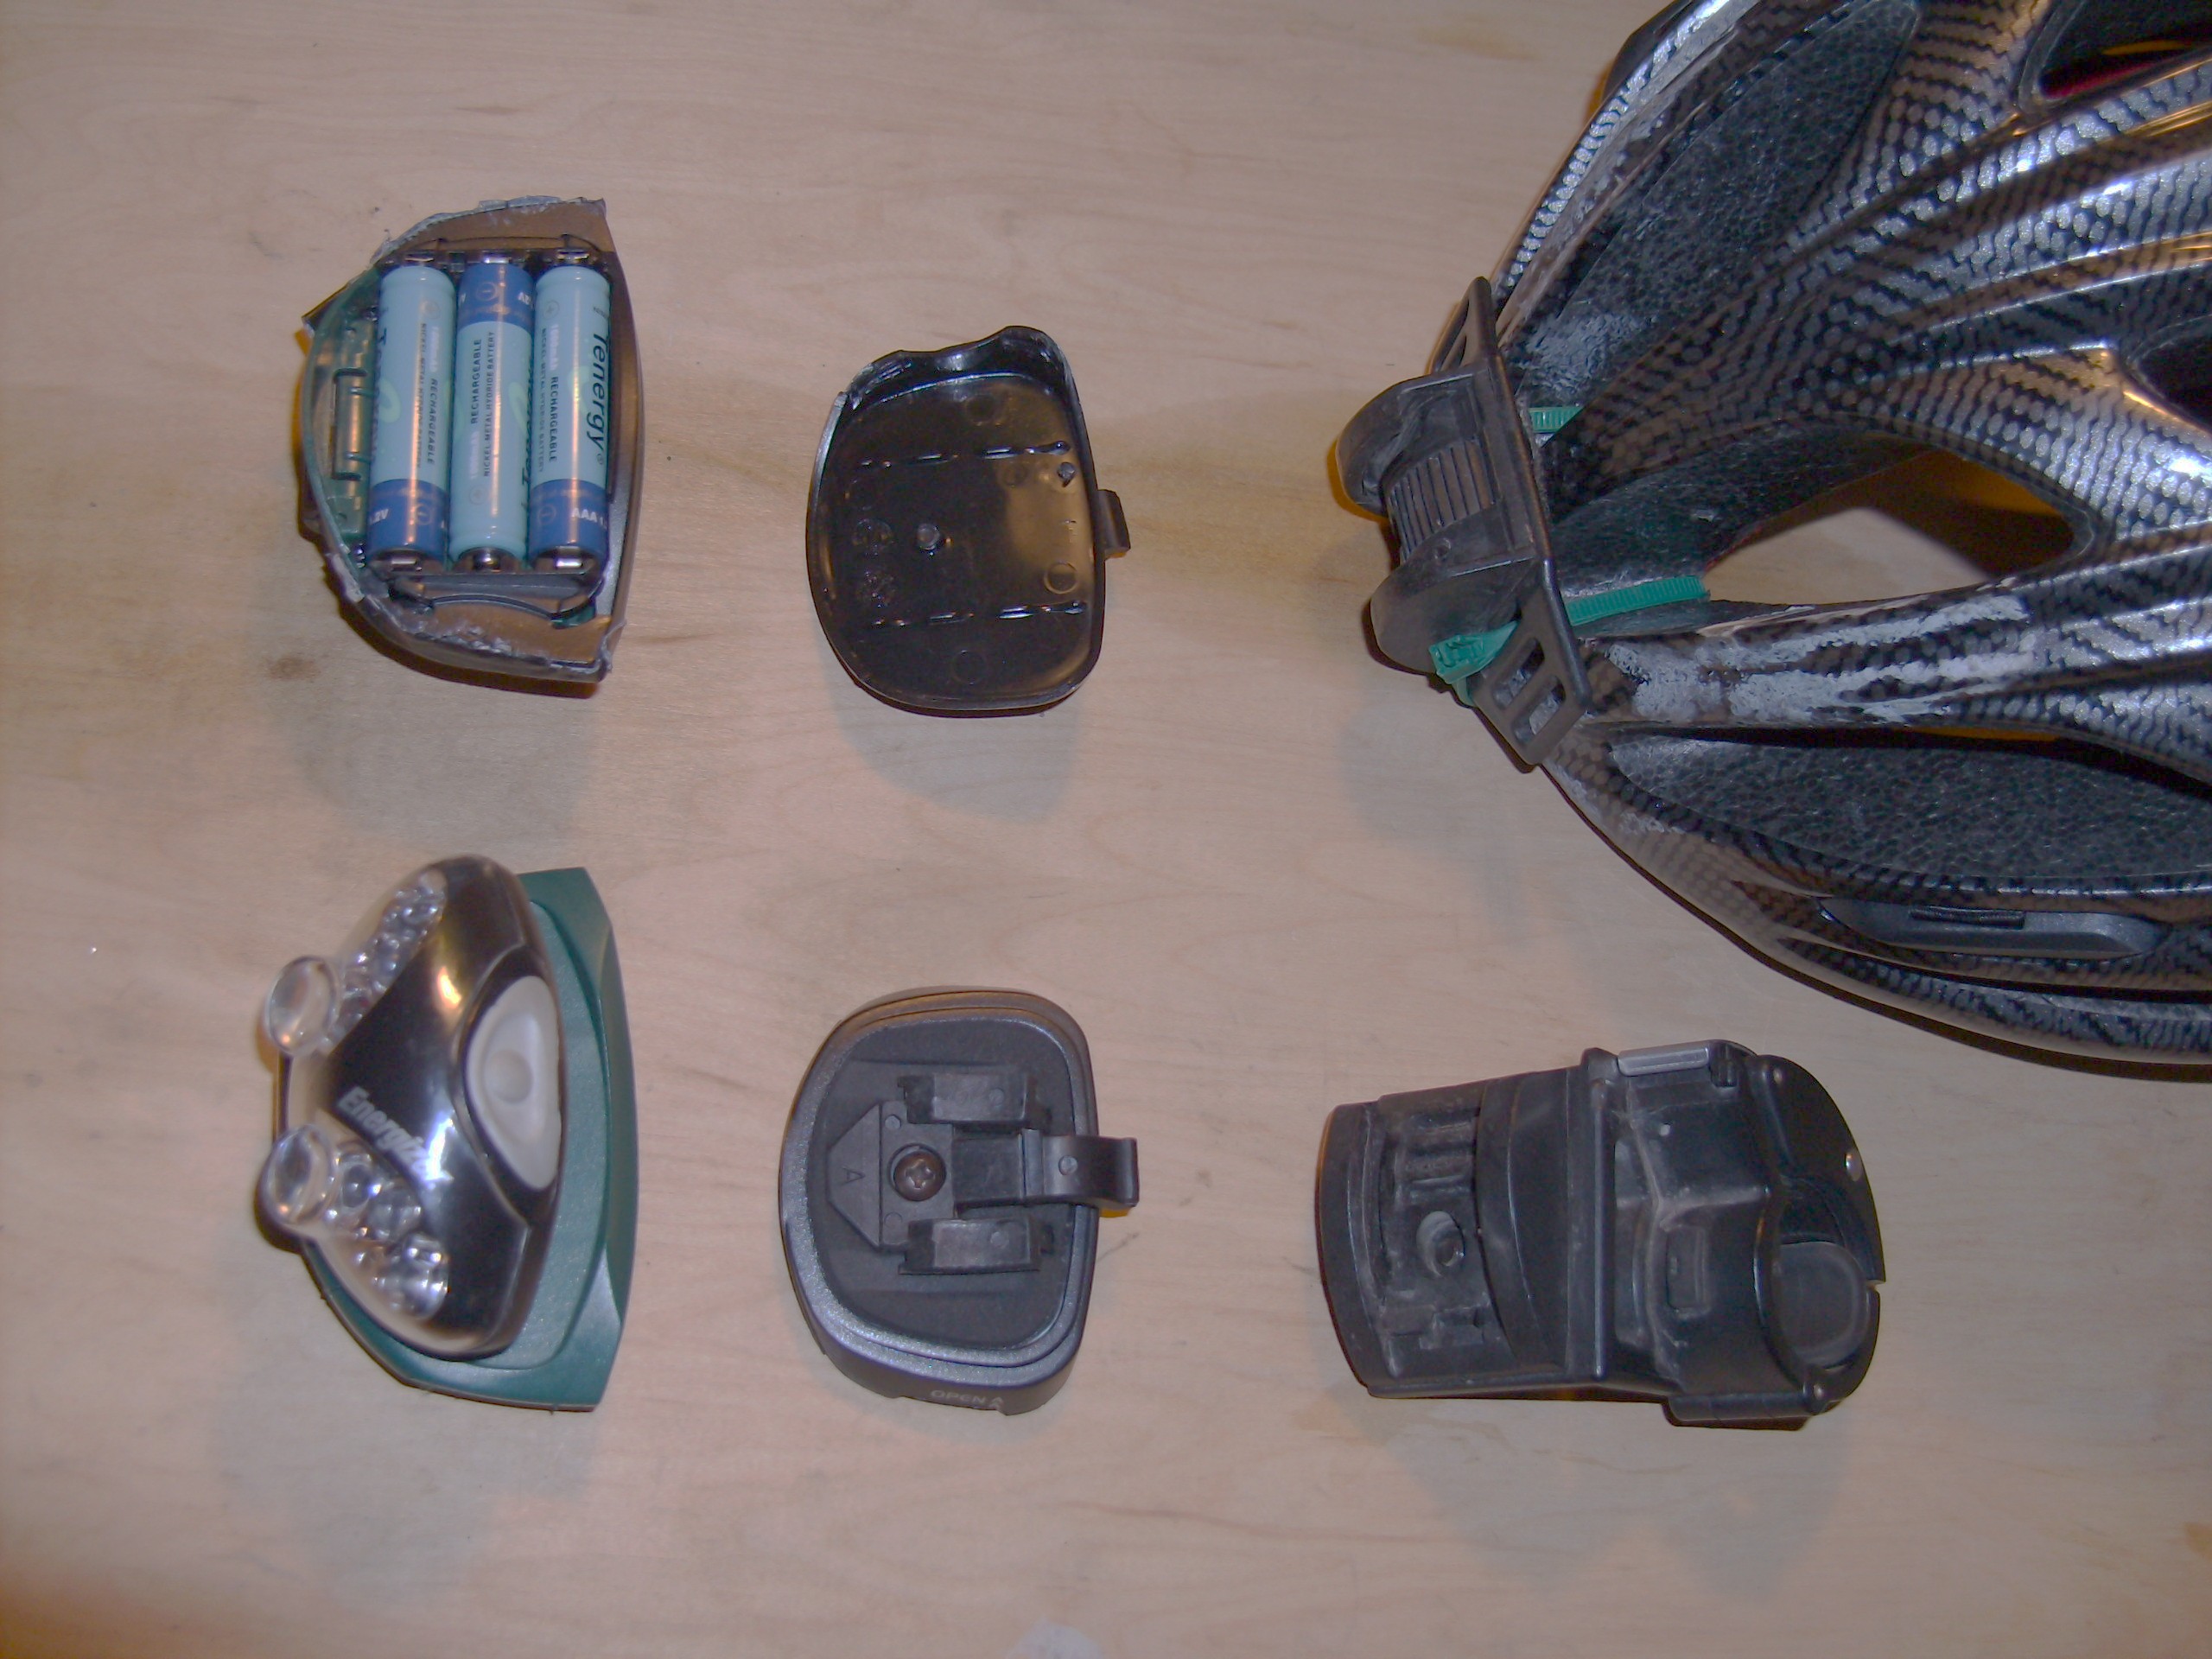
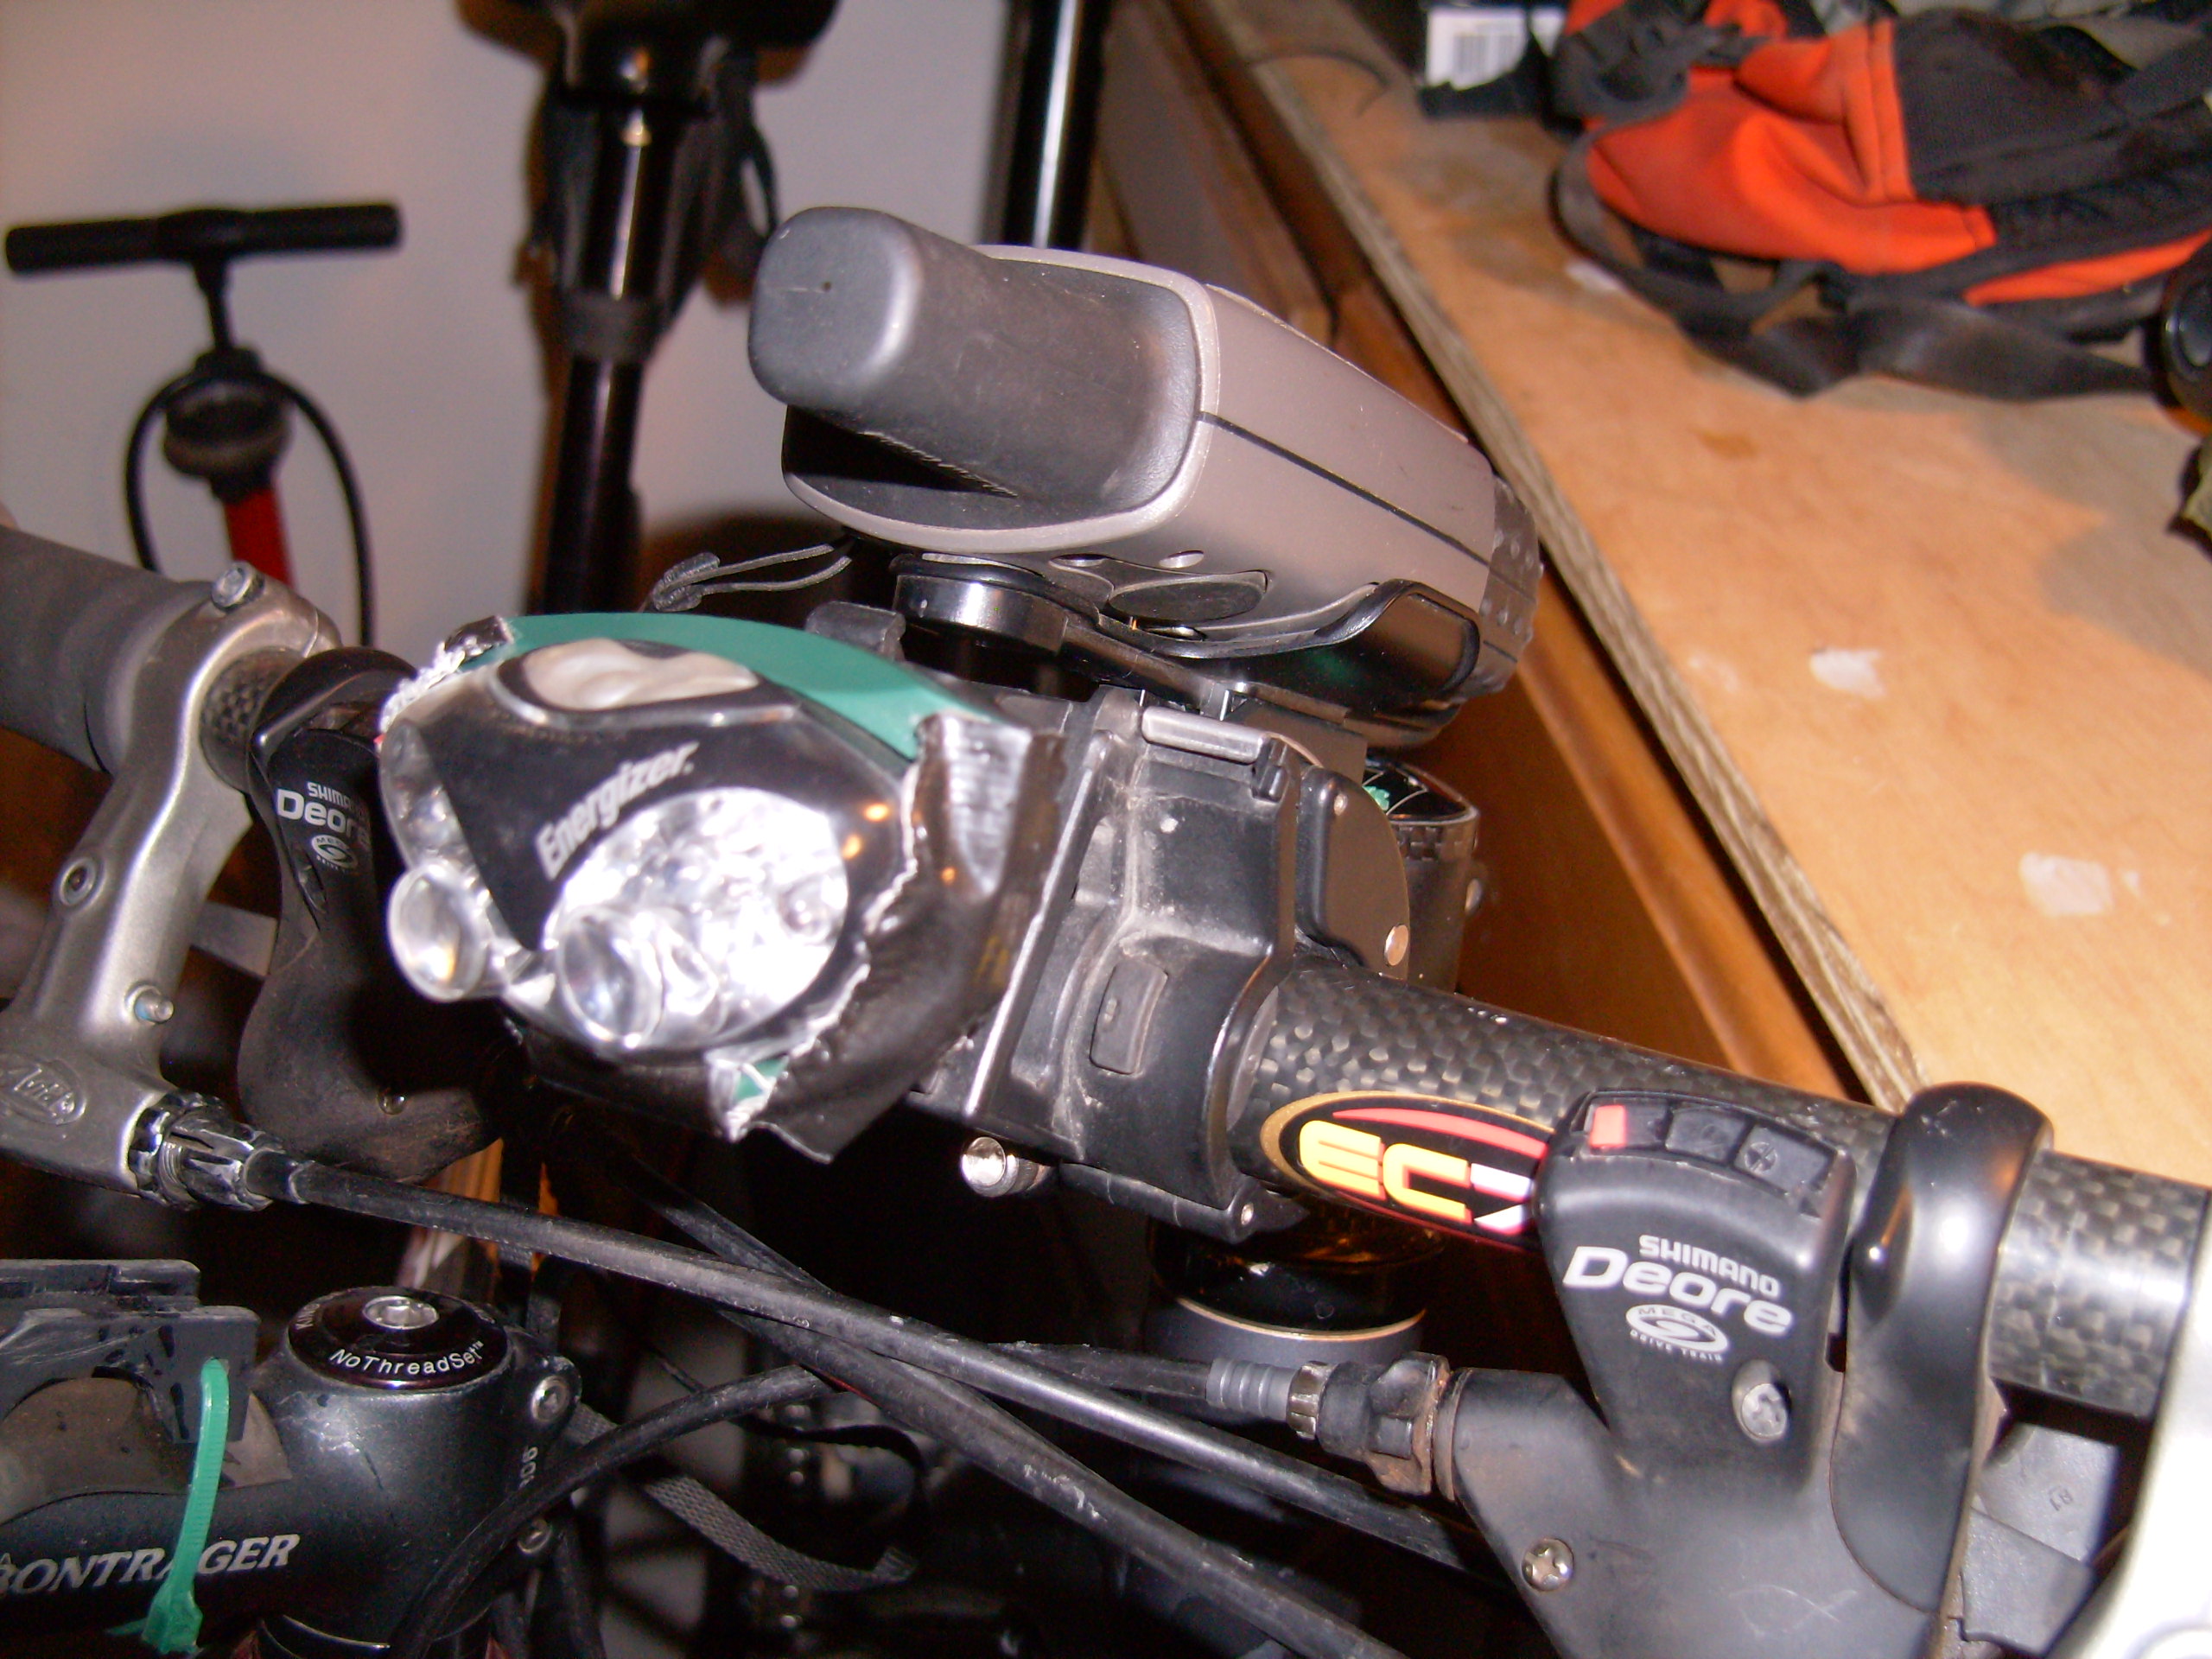
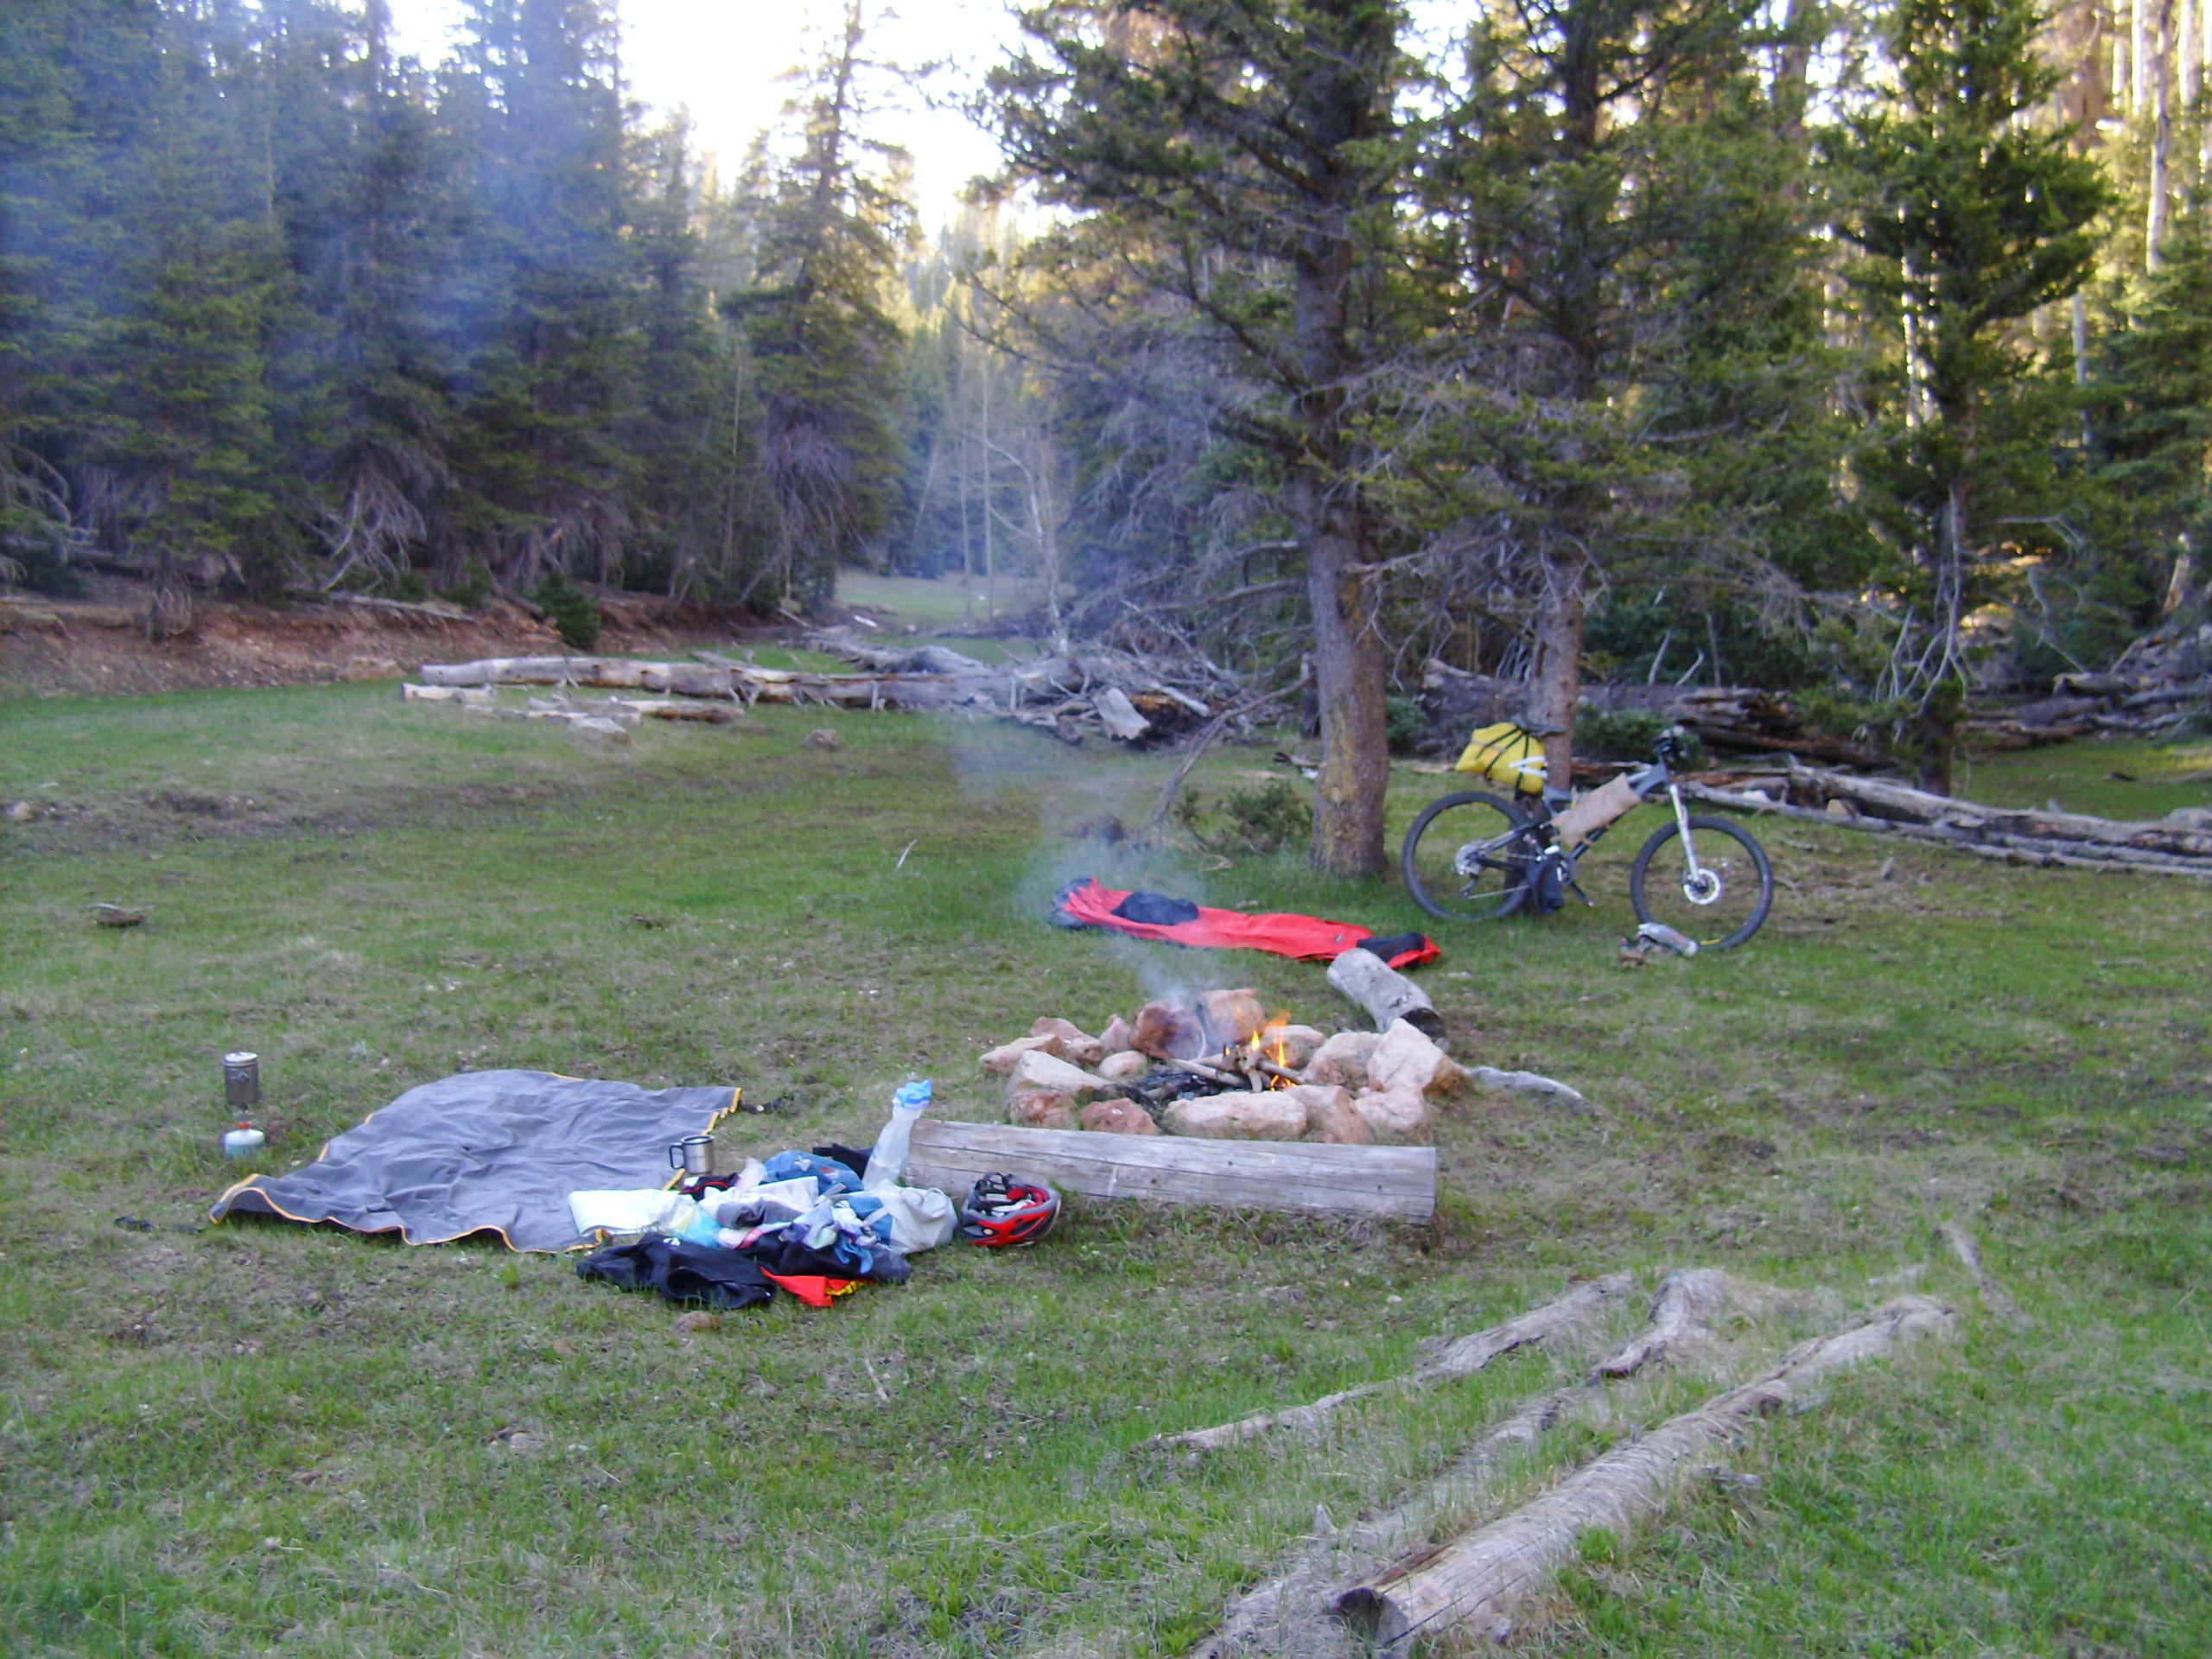
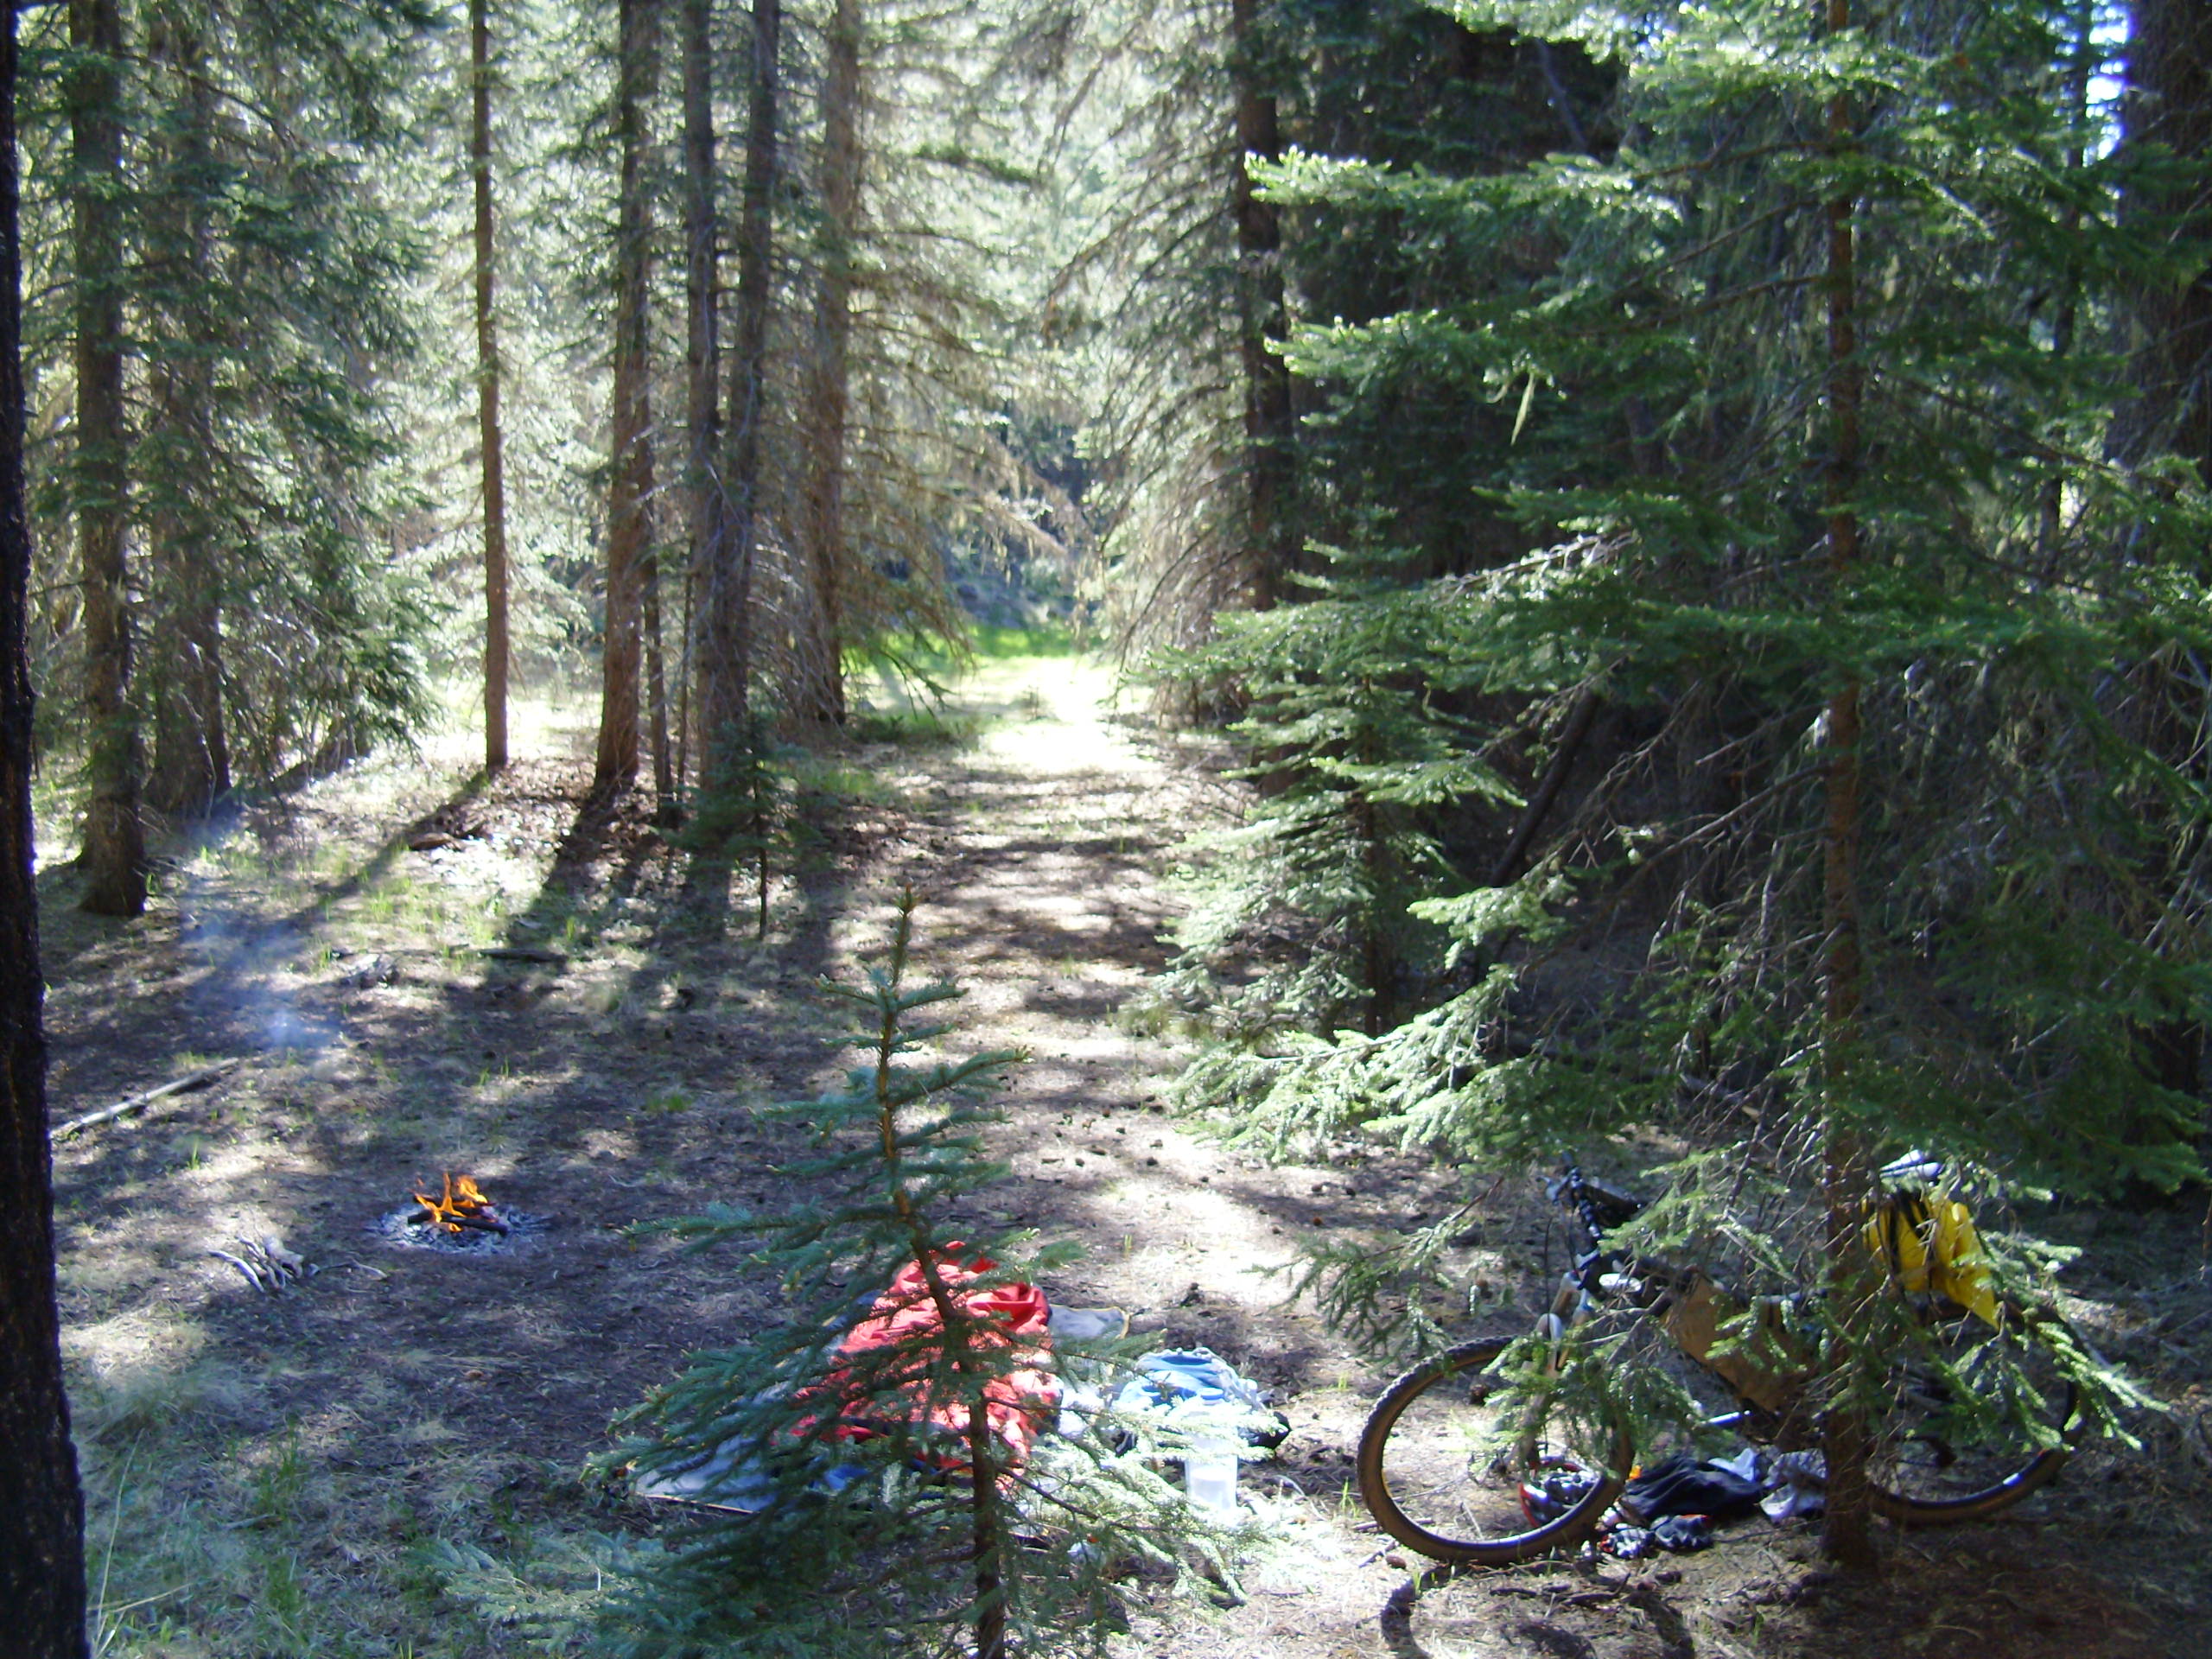
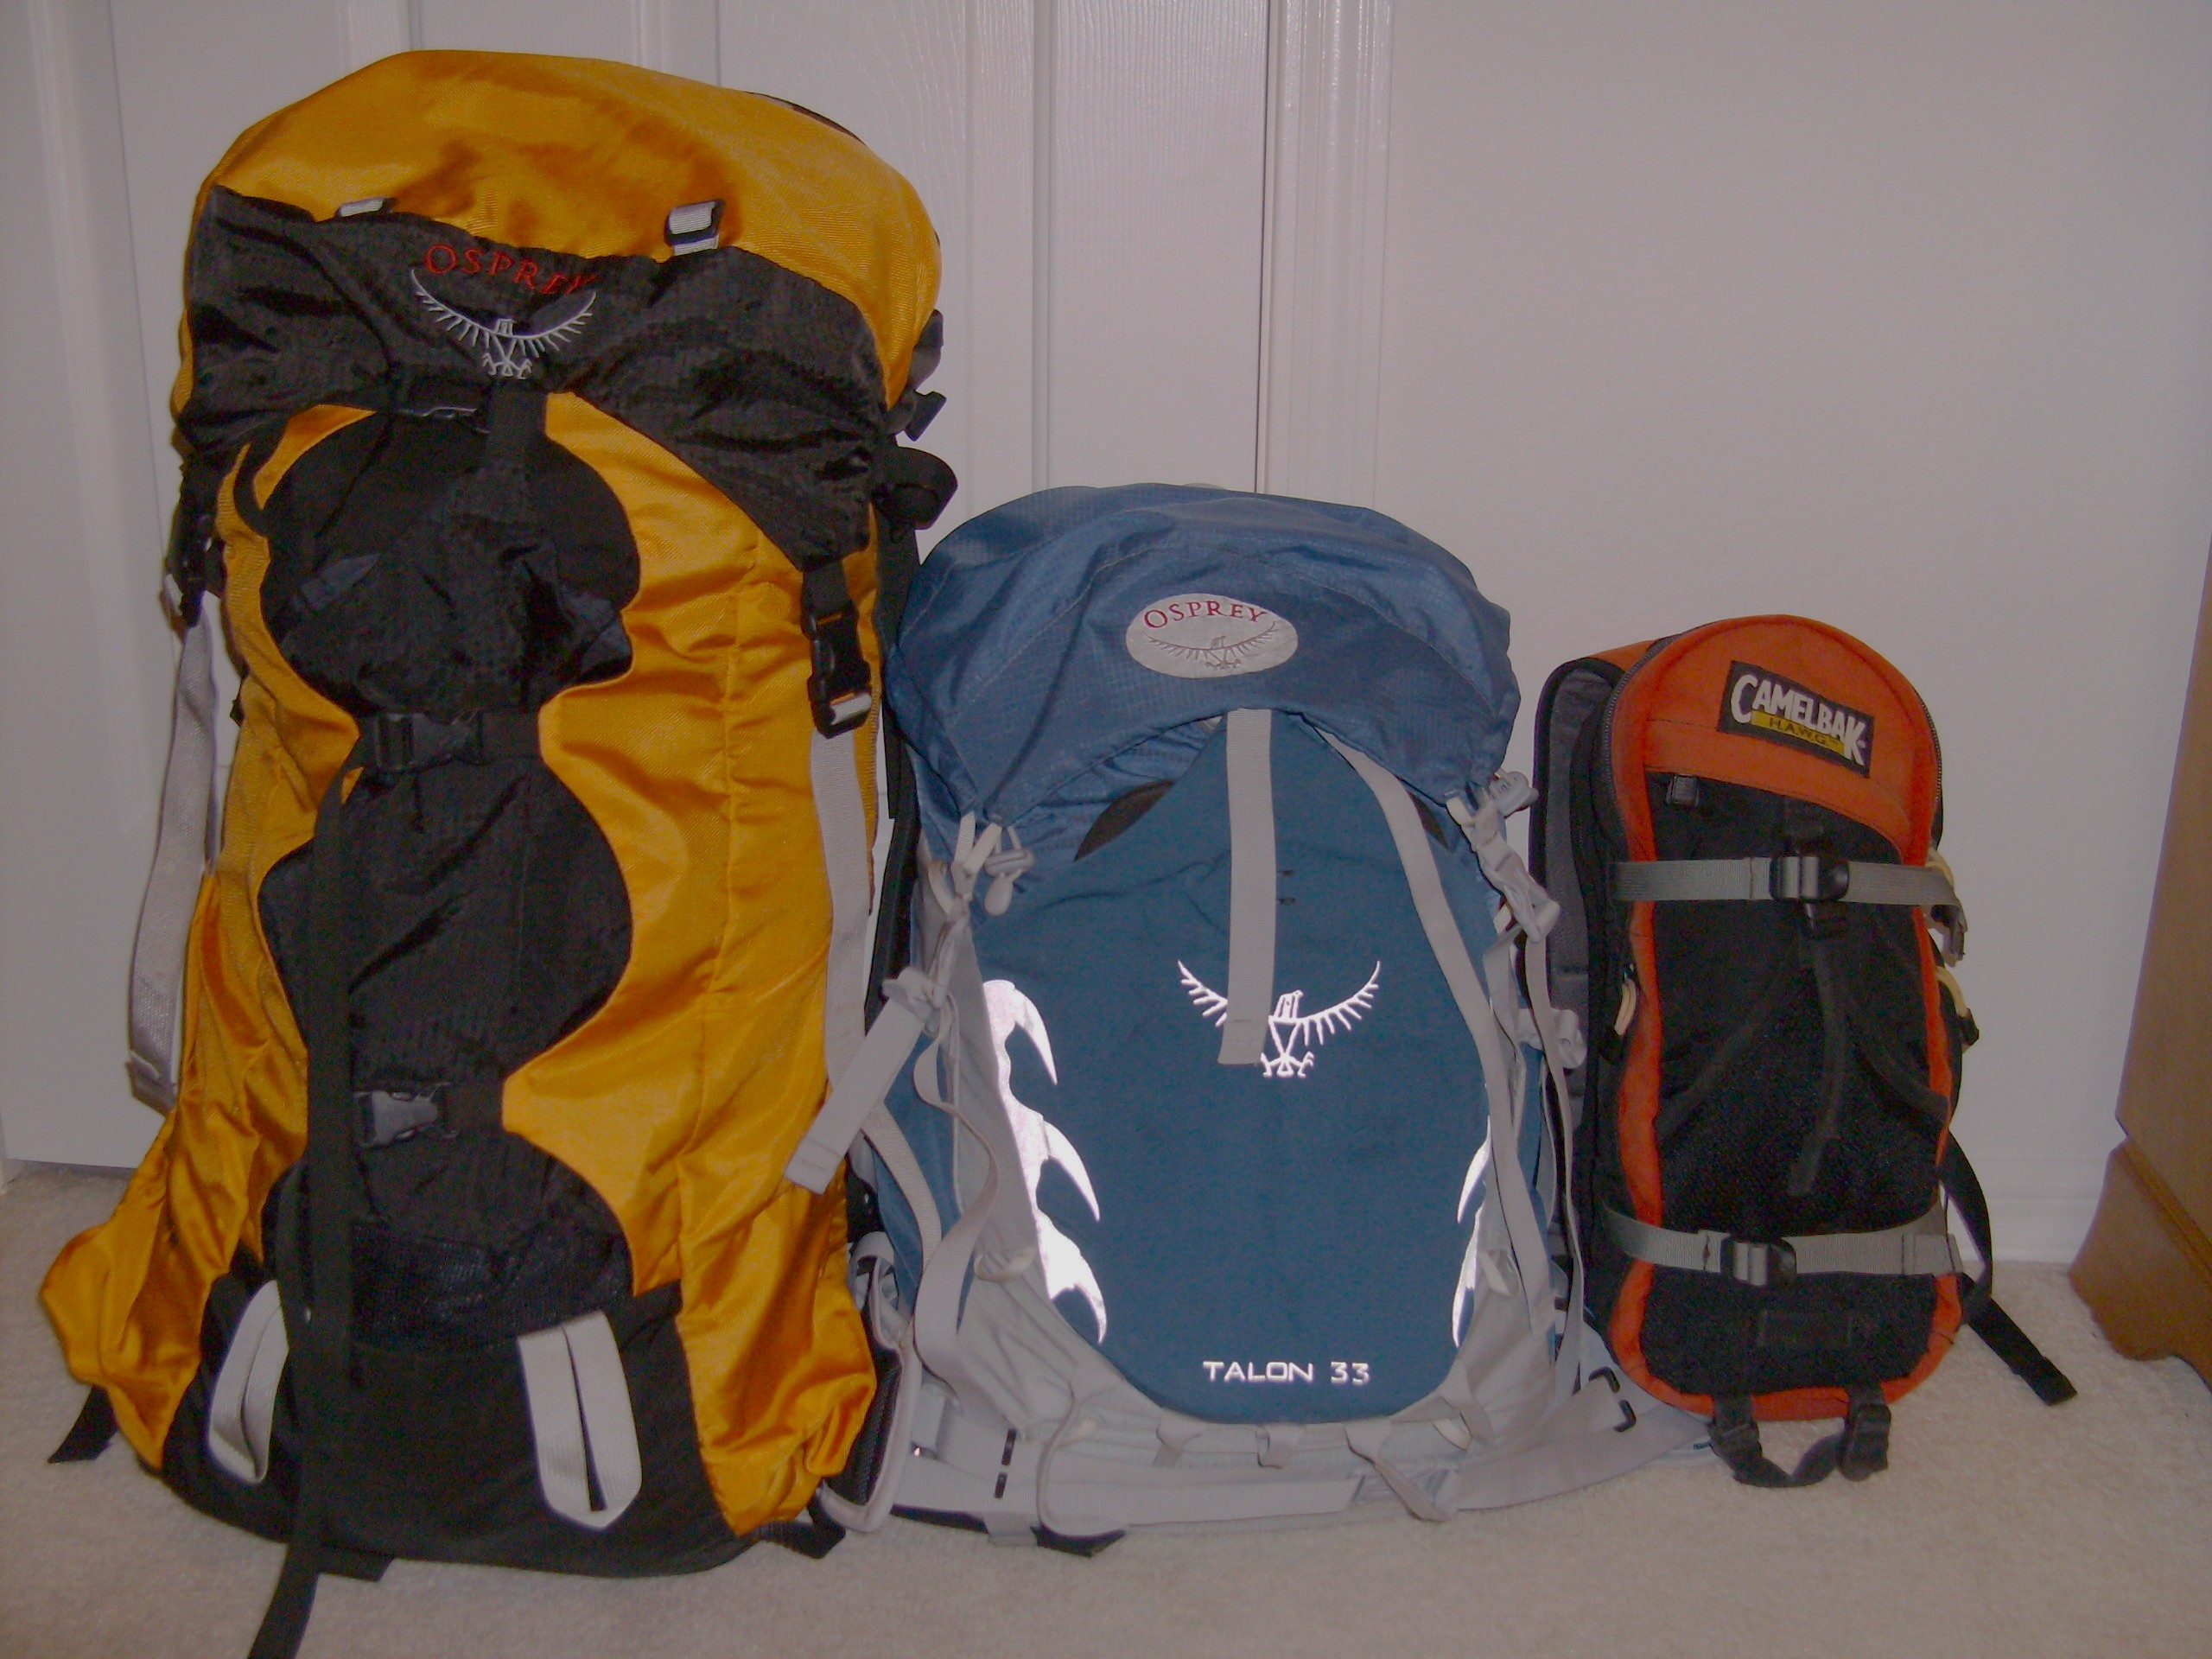
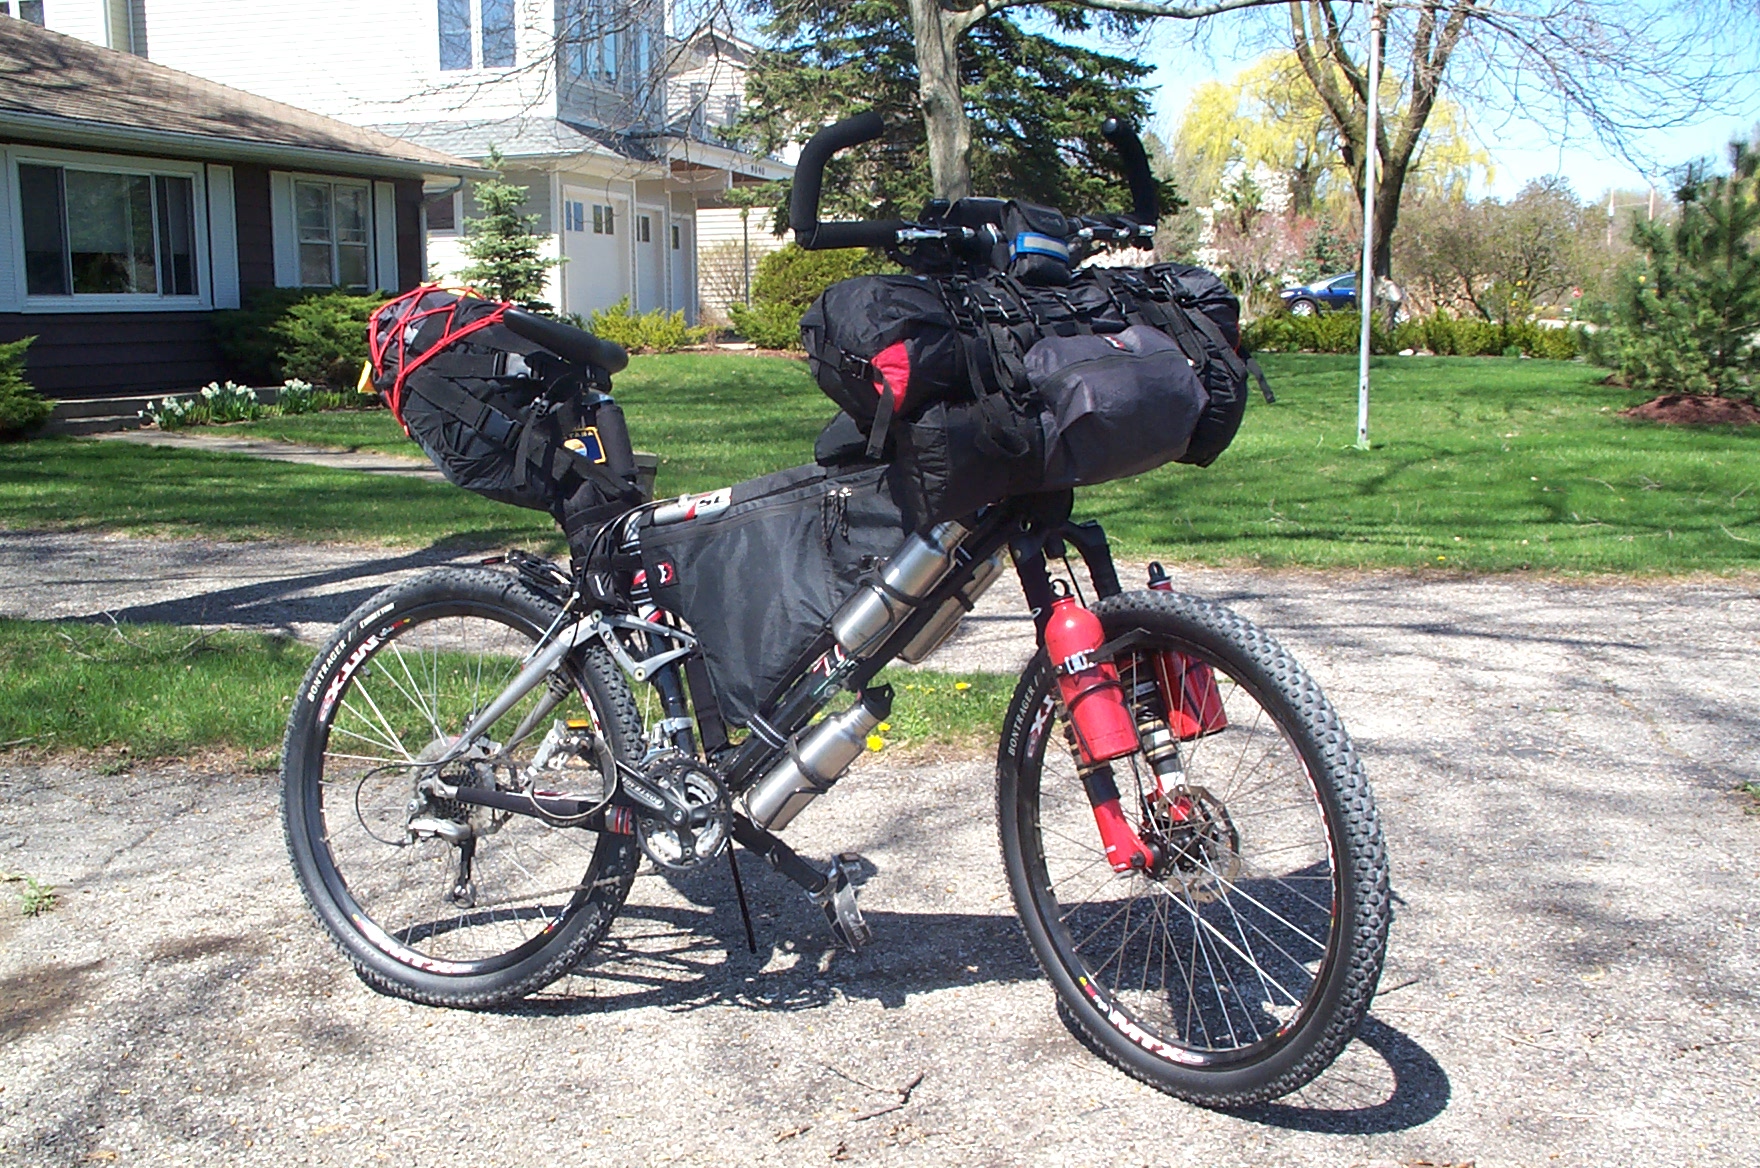
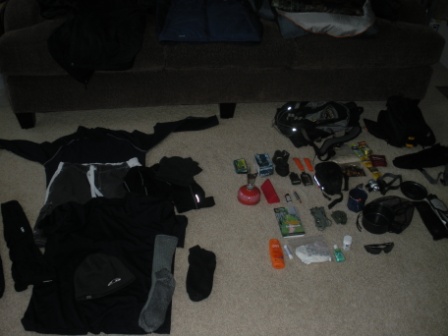
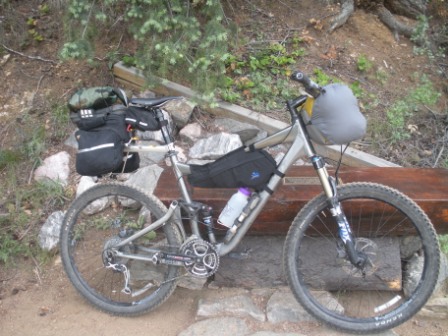
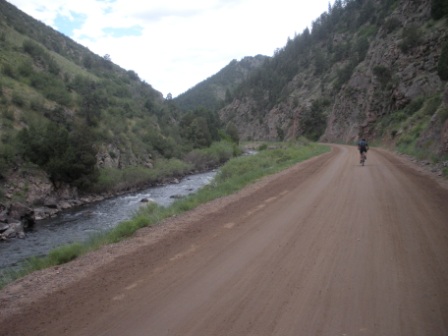
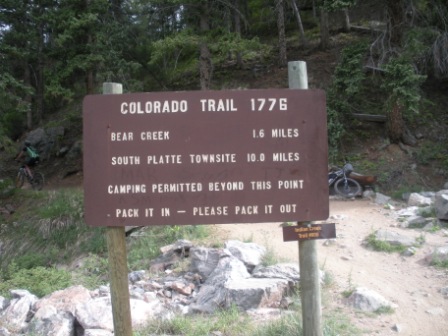
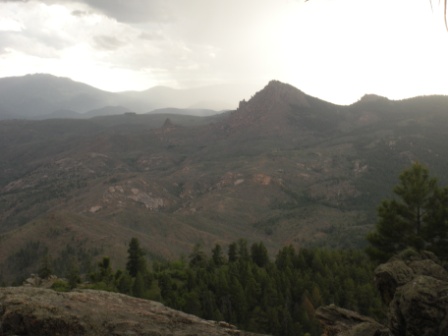
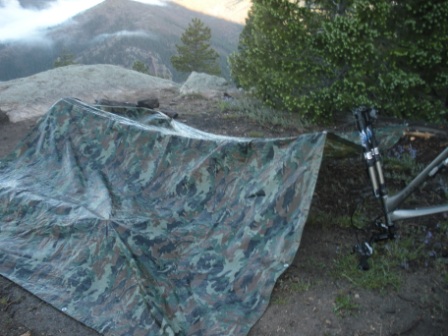
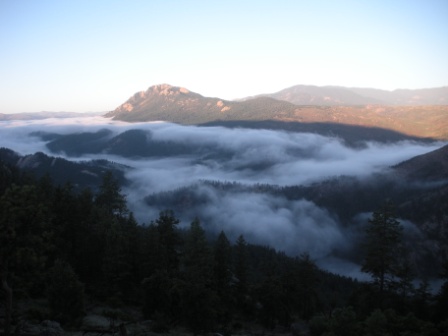
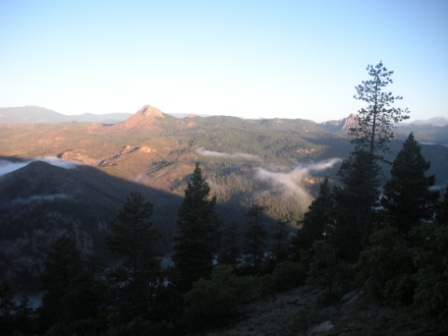
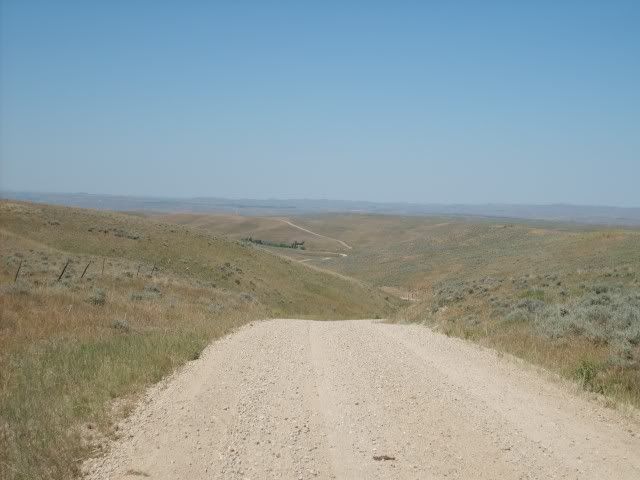
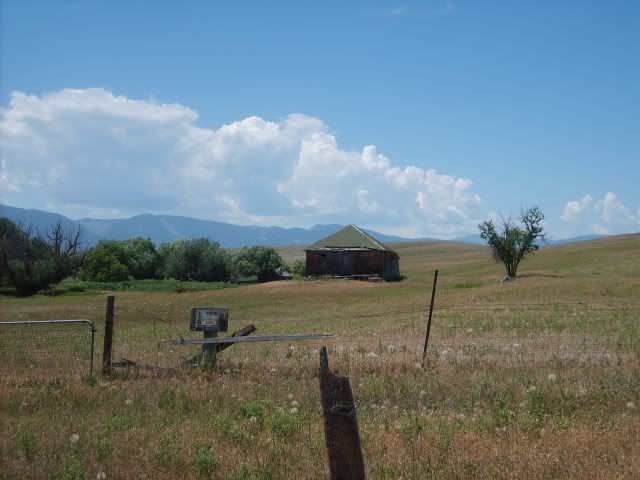
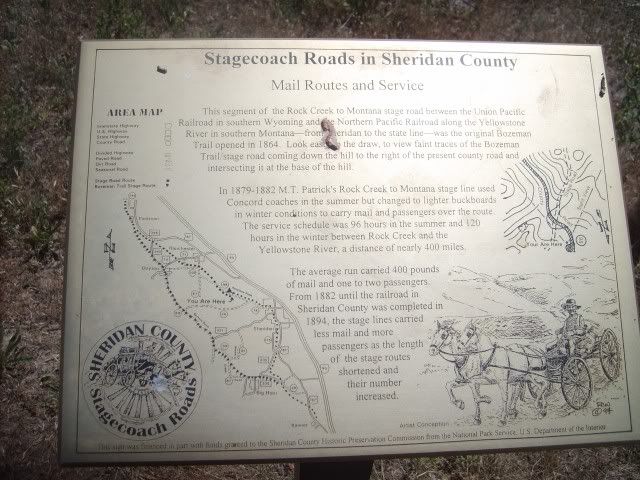
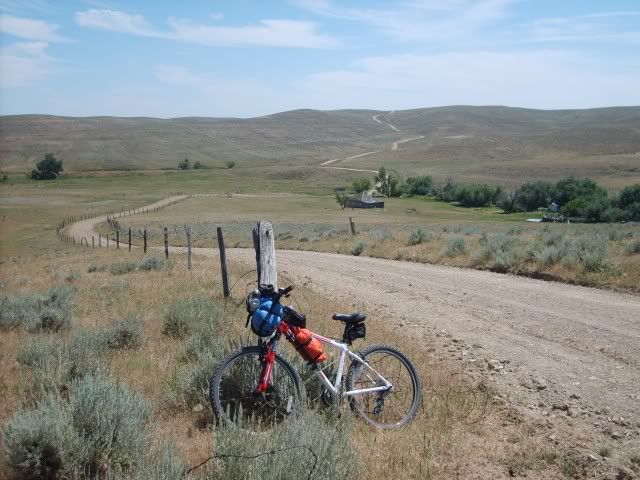
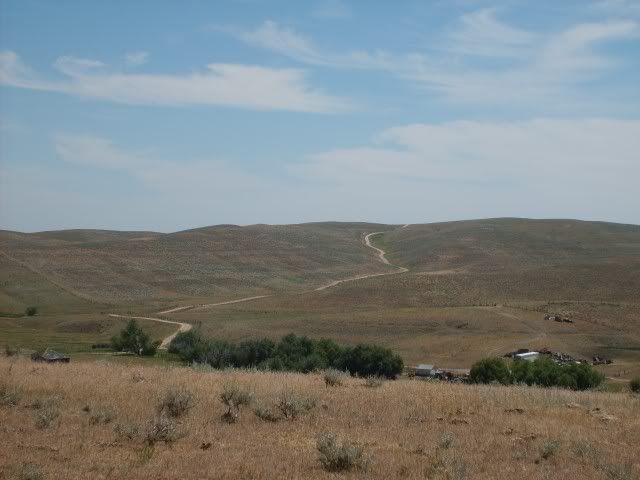
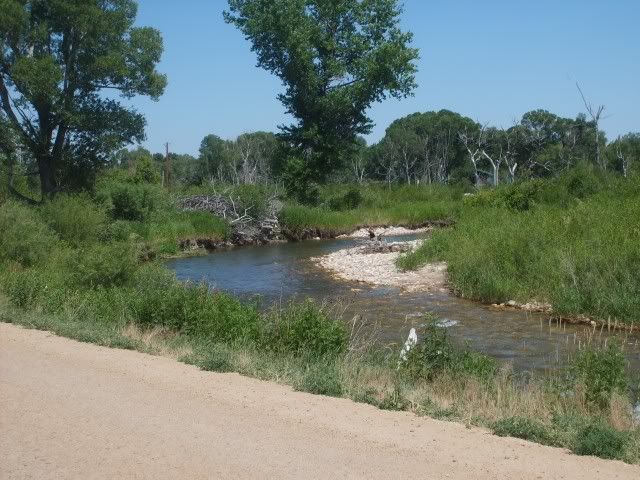
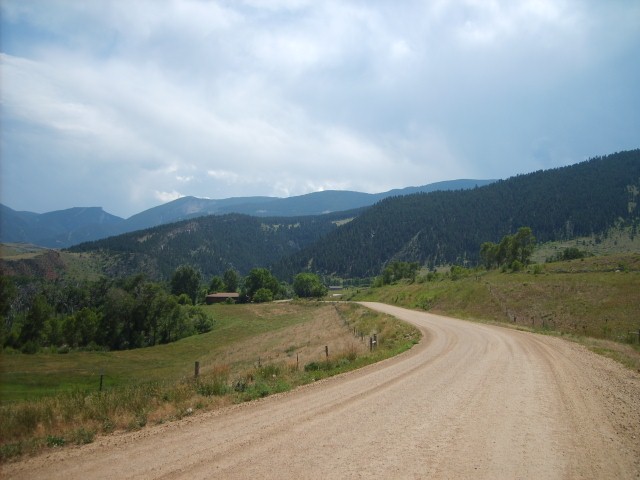
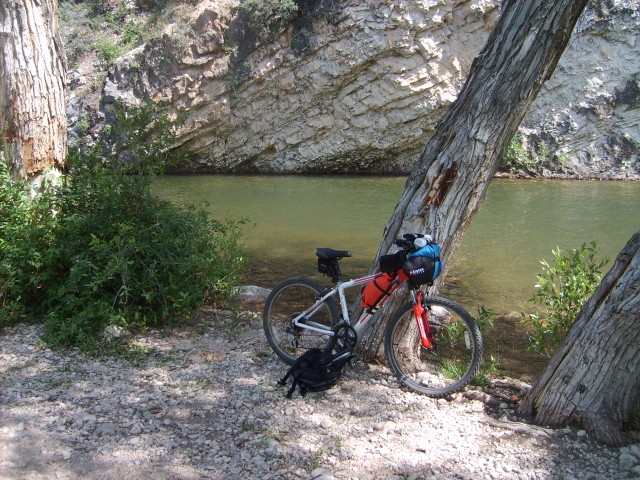
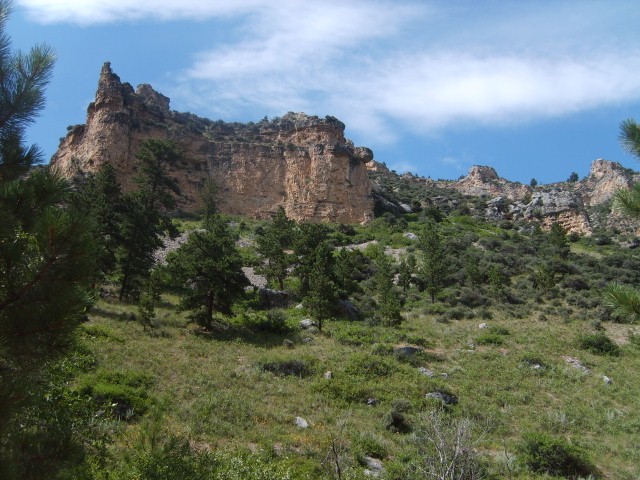

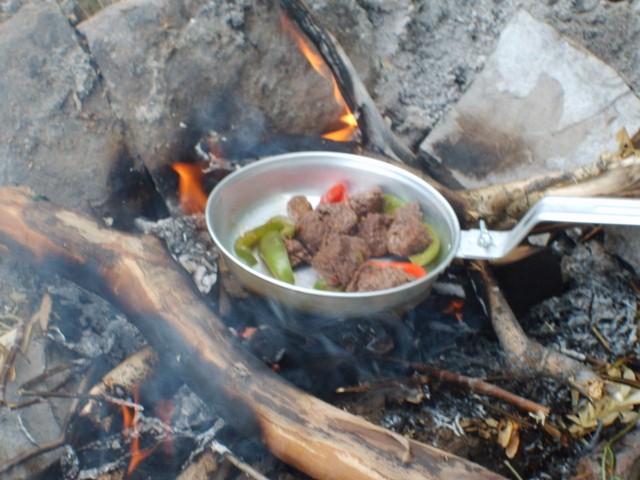
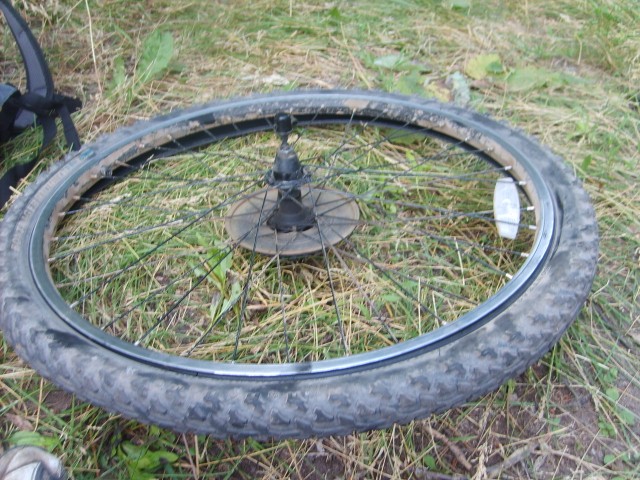
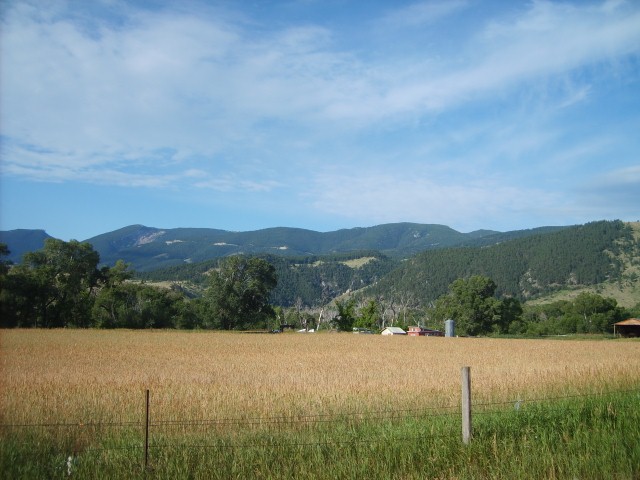
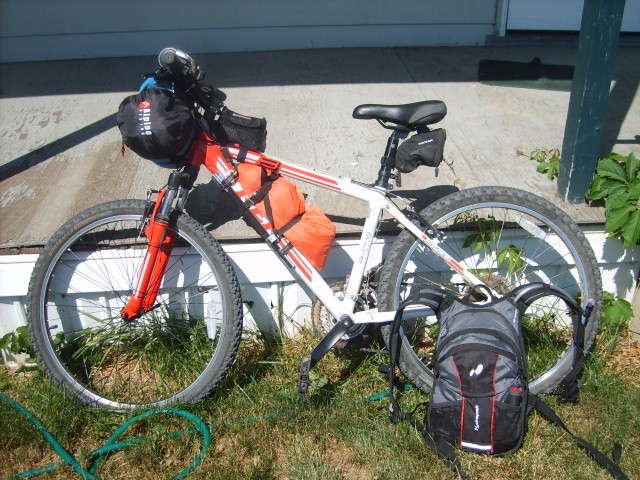
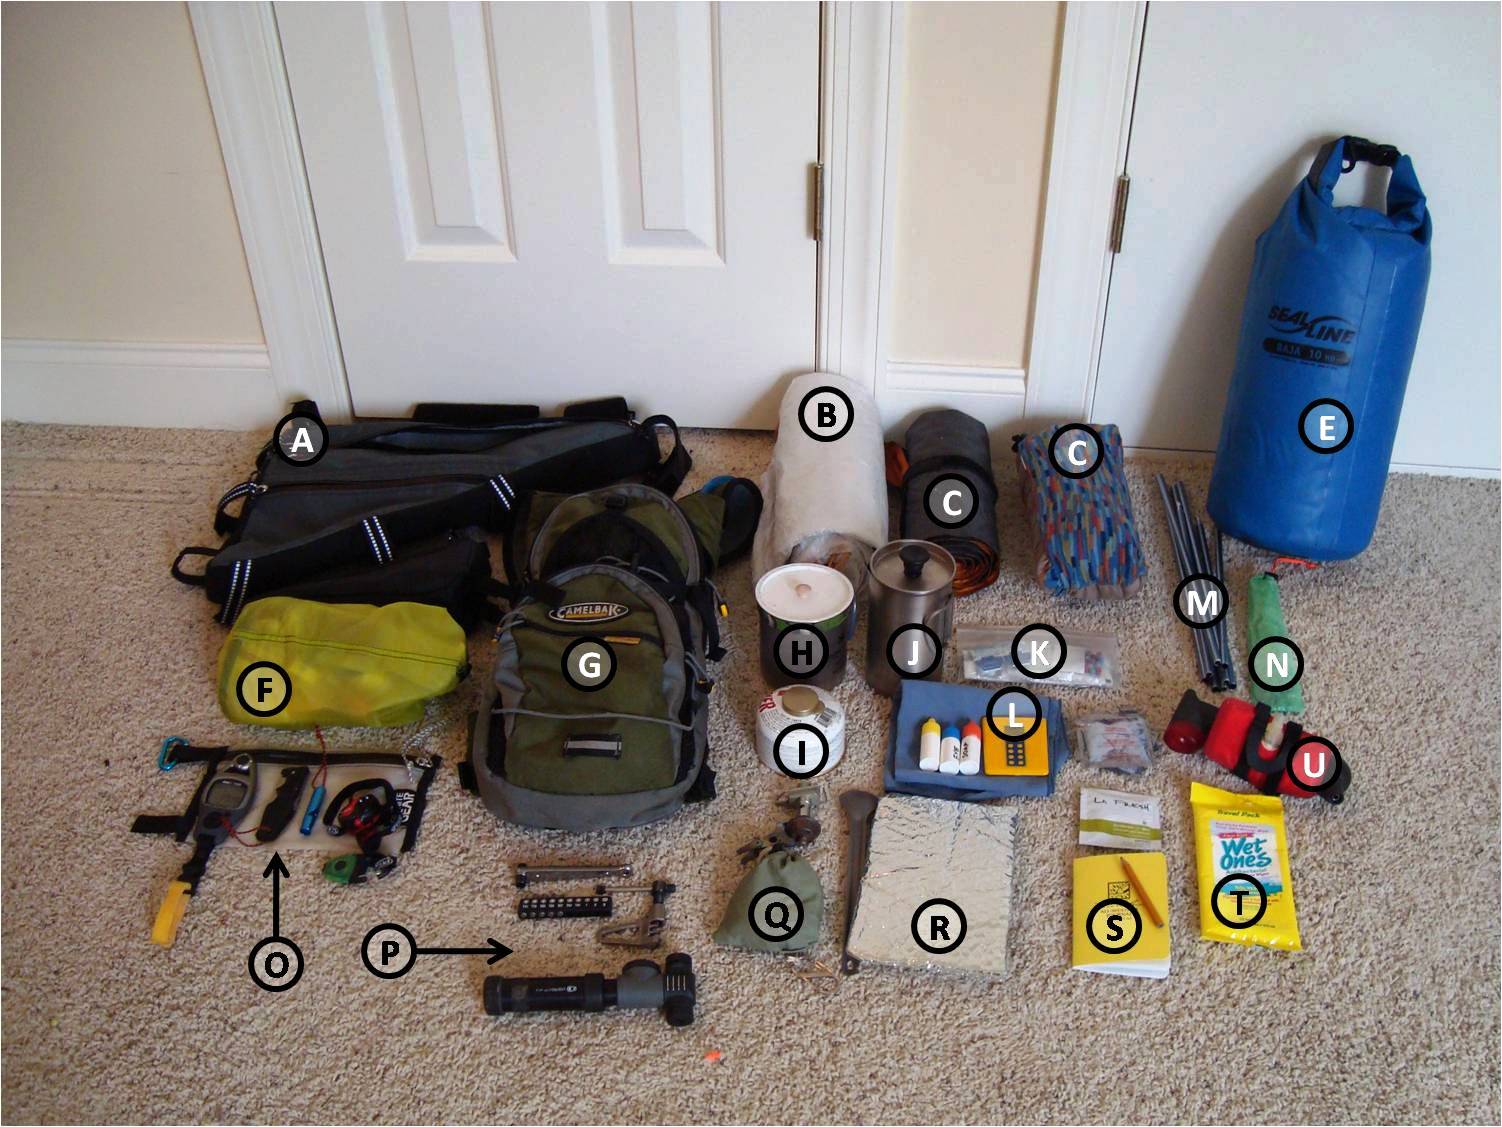
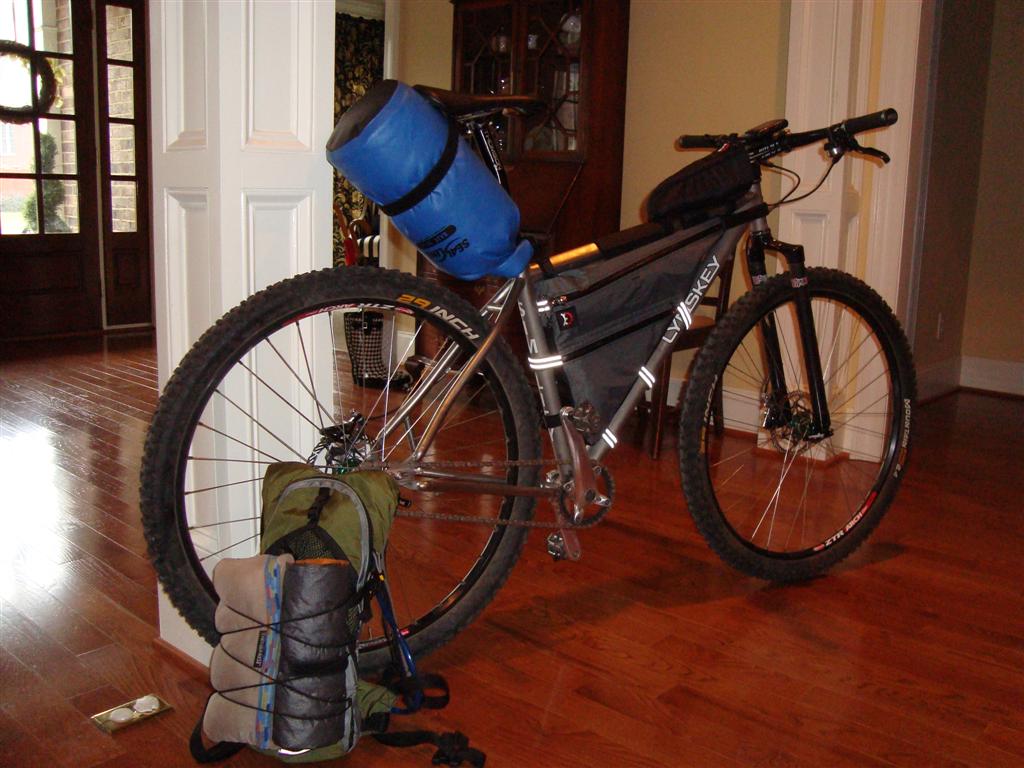
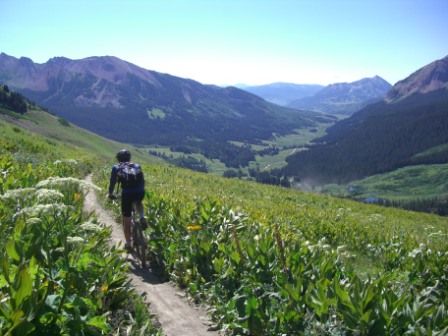
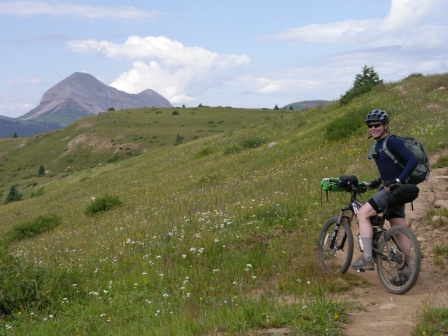

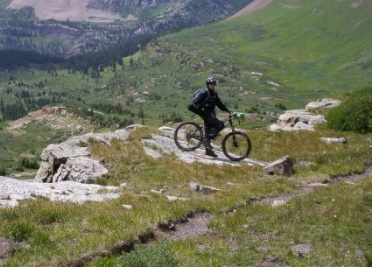
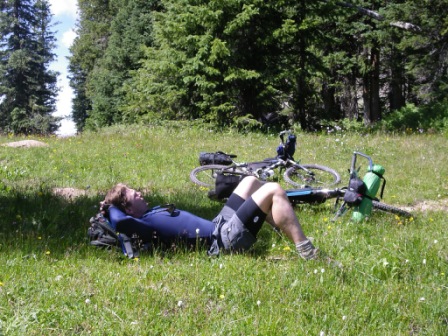
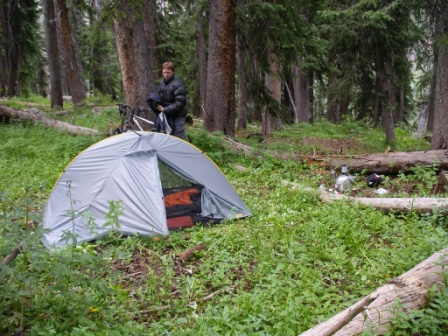
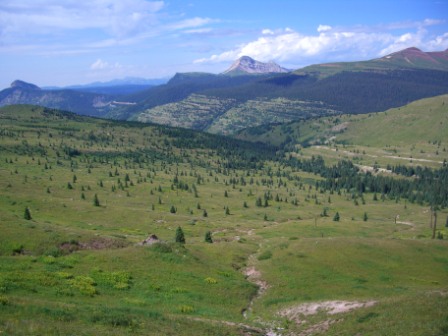
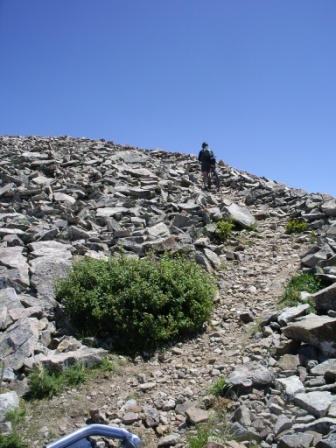
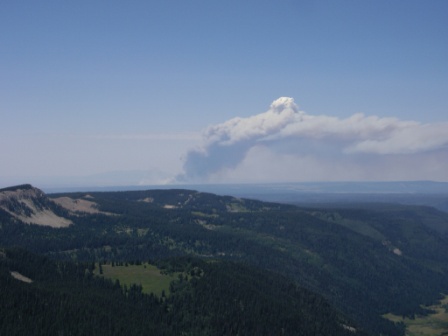


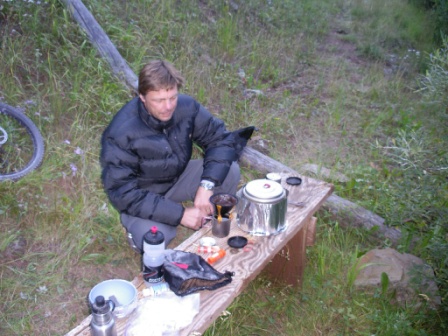
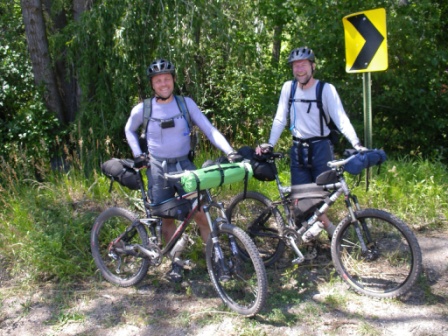


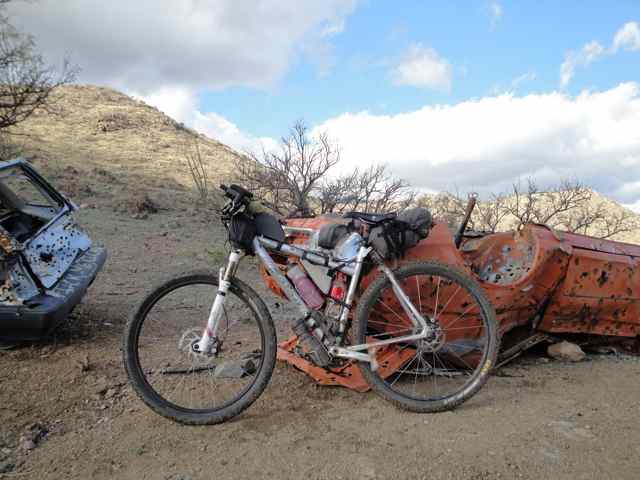
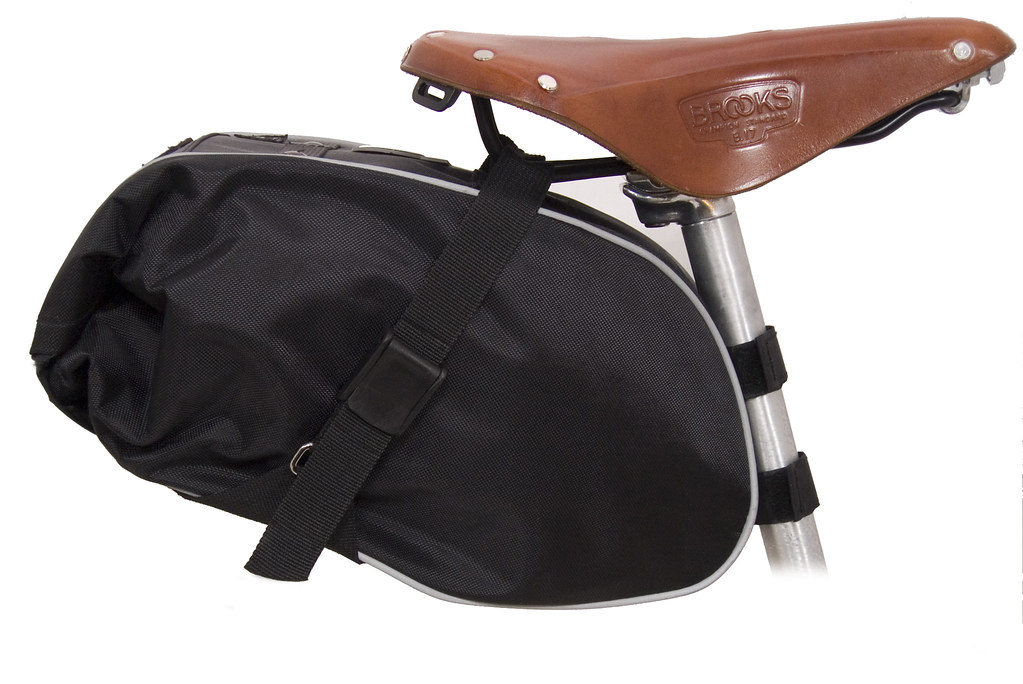
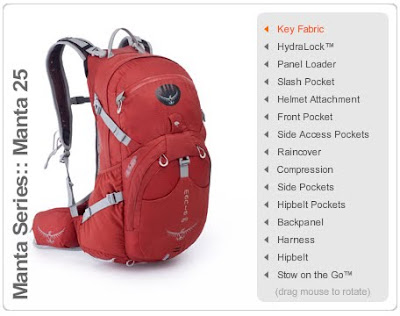
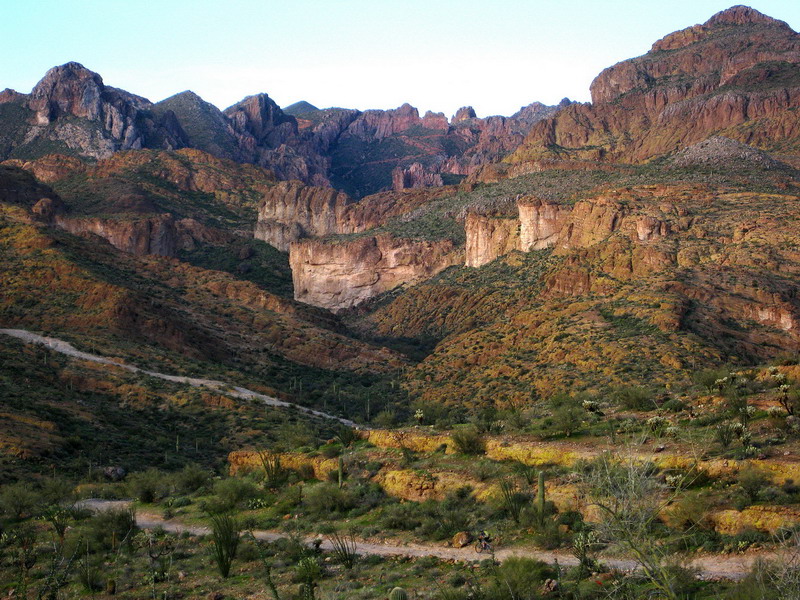
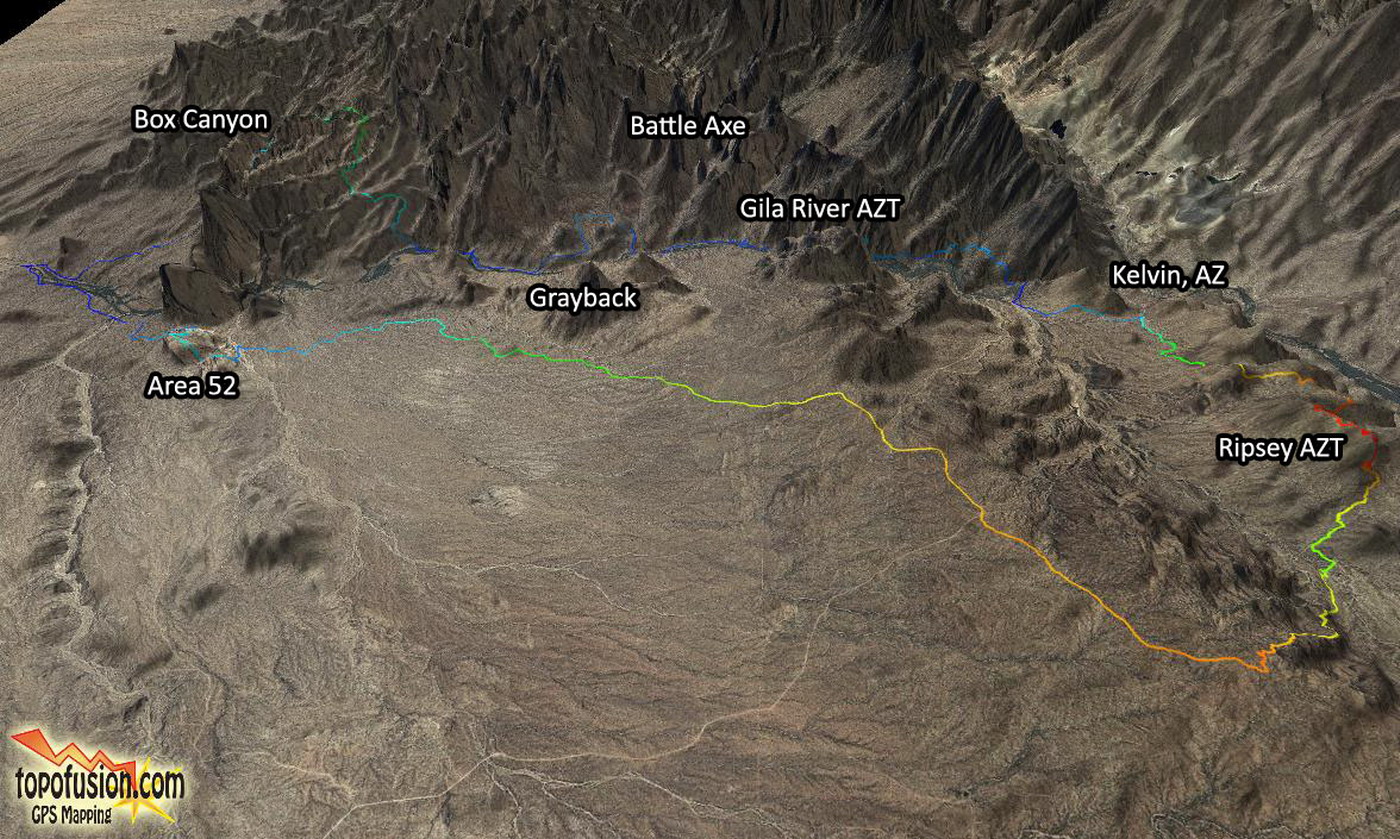
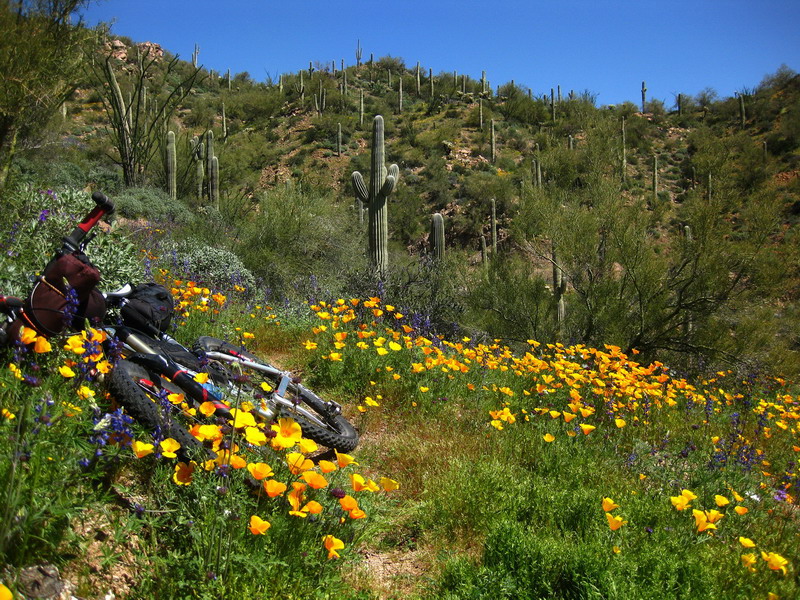
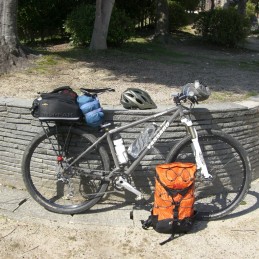
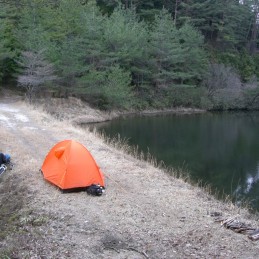
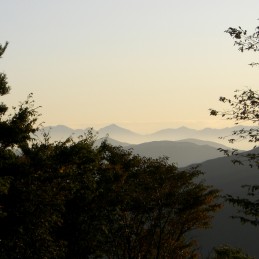

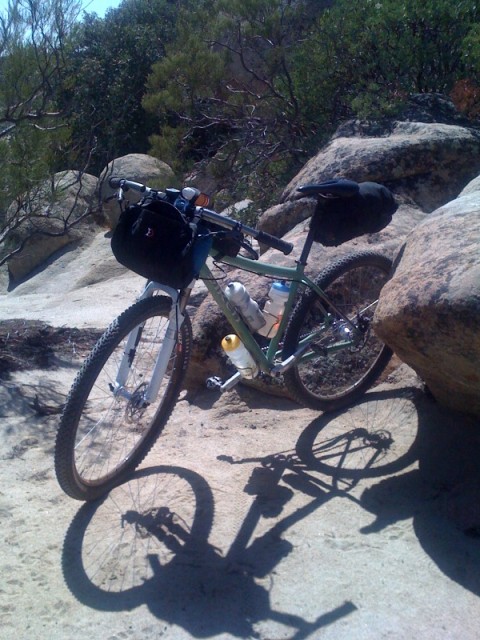
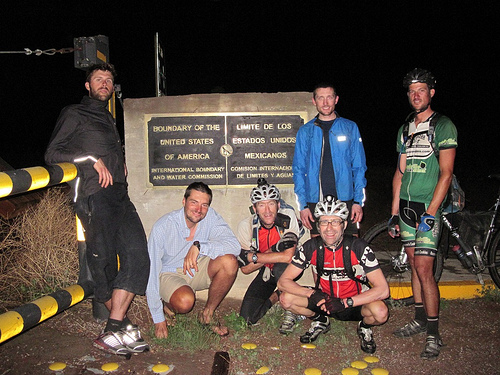
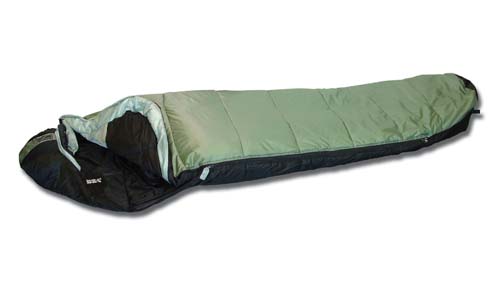 Description
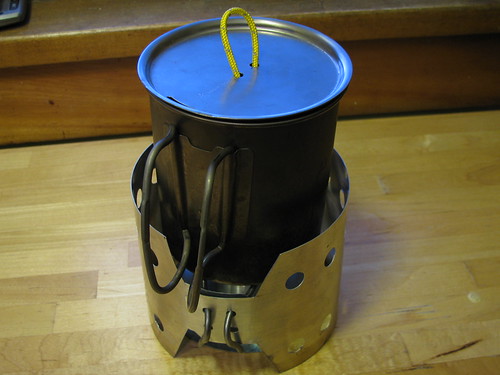

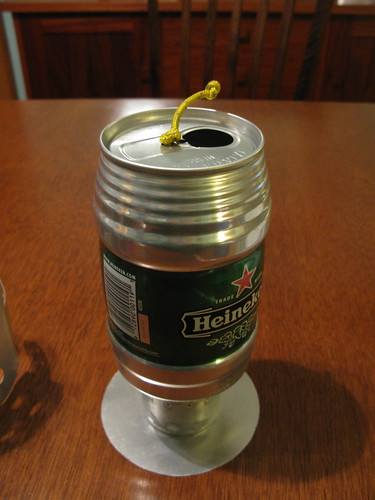

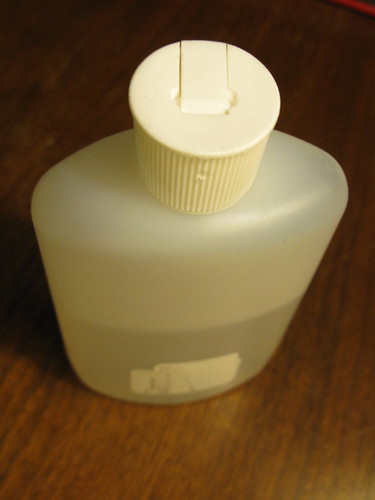


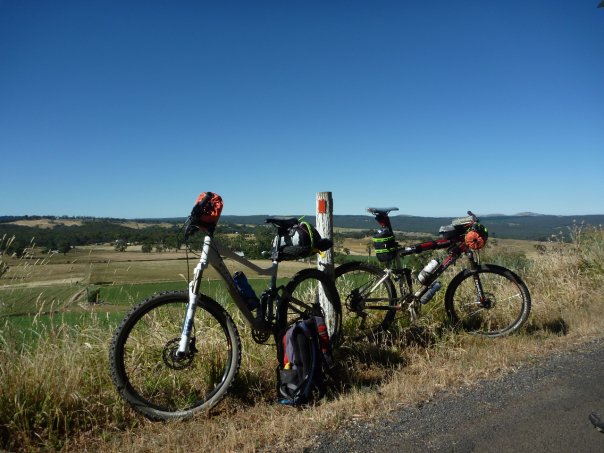

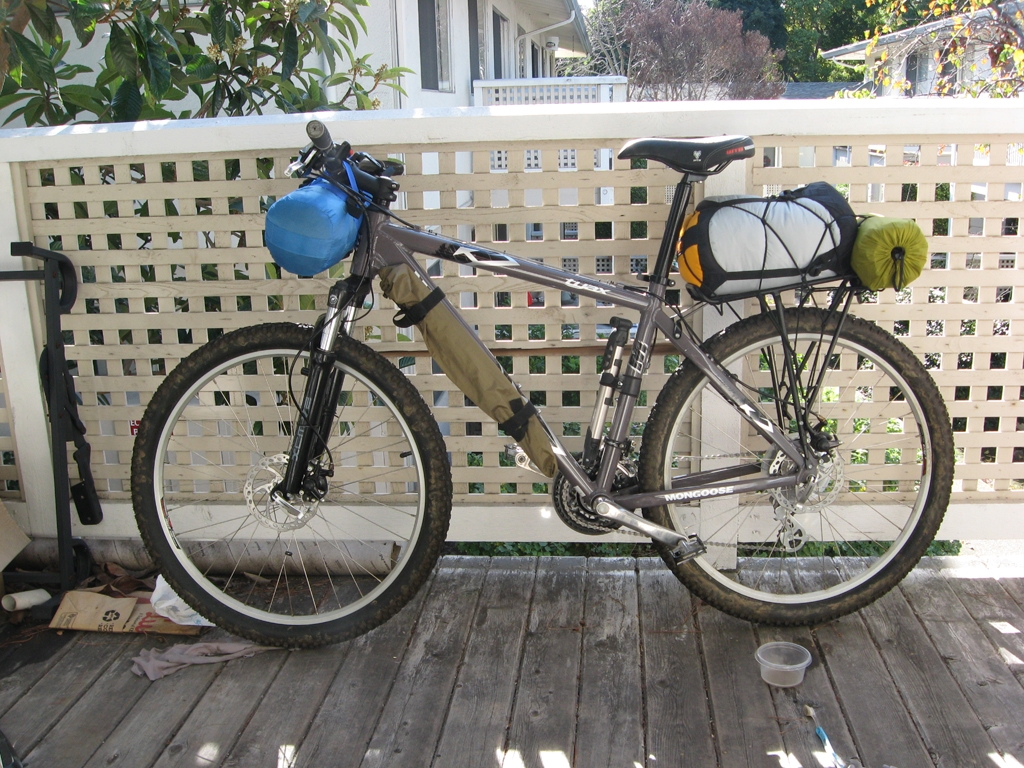
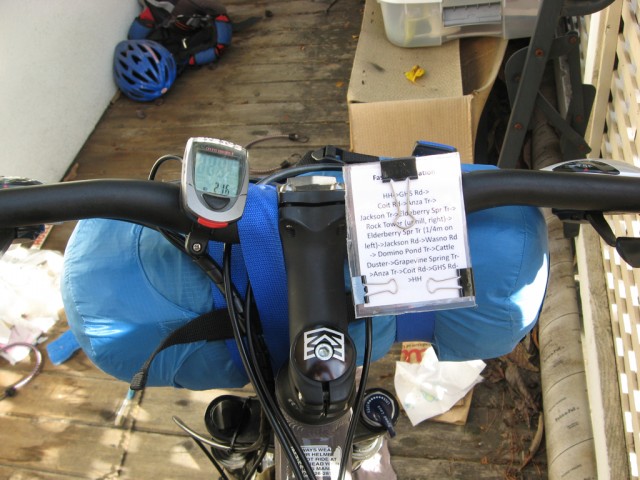
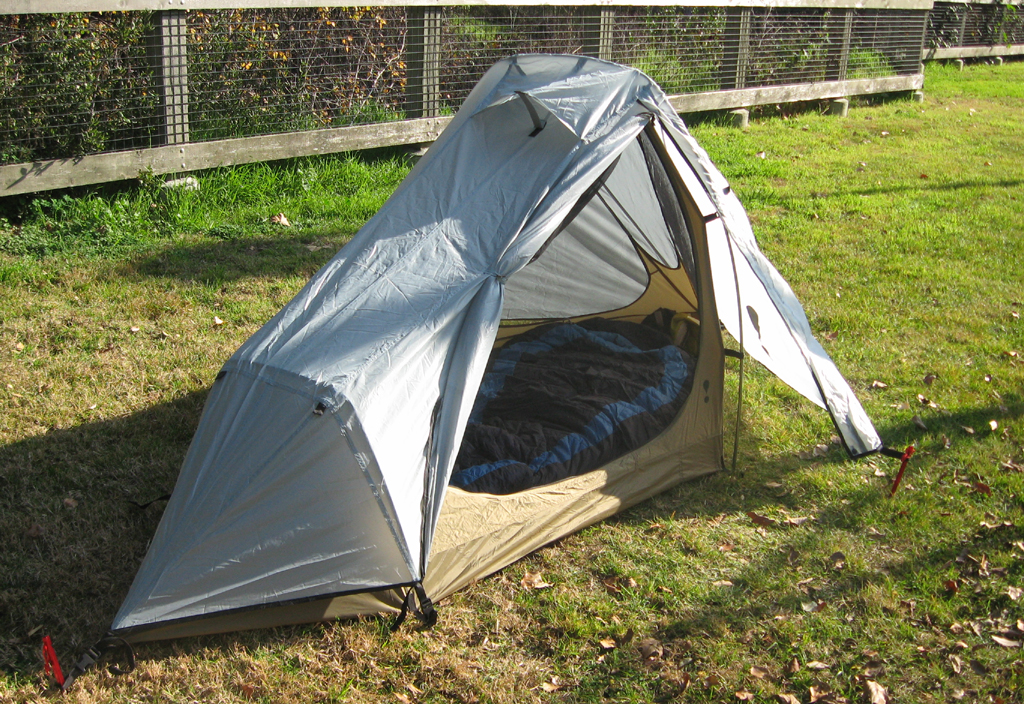
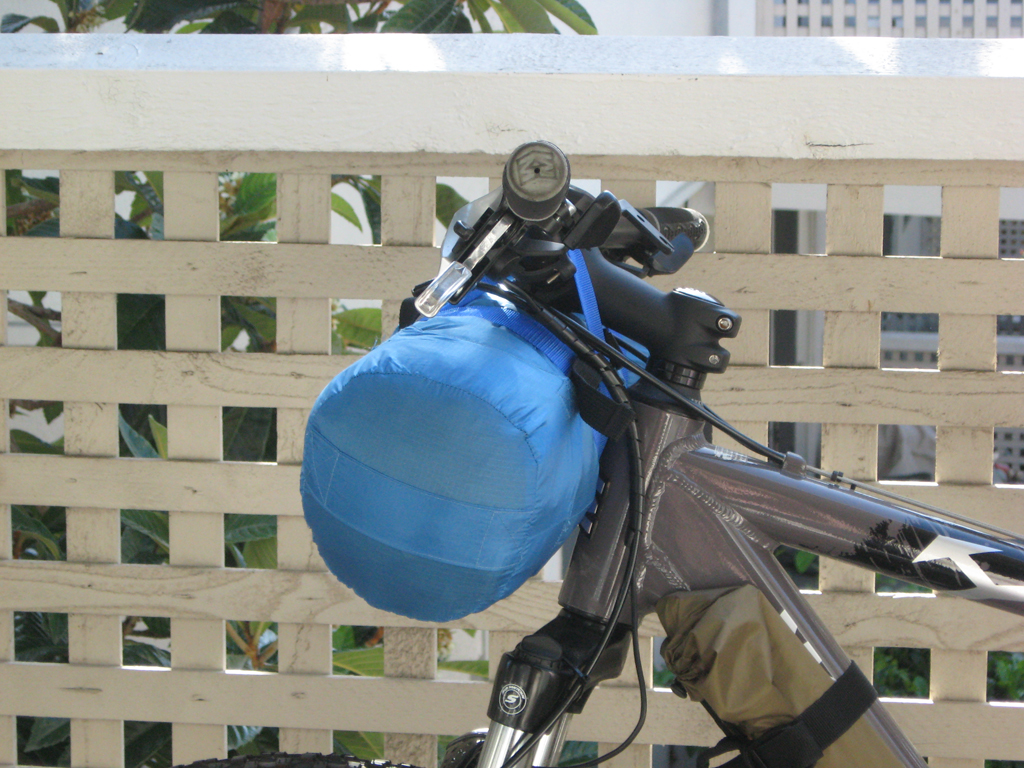
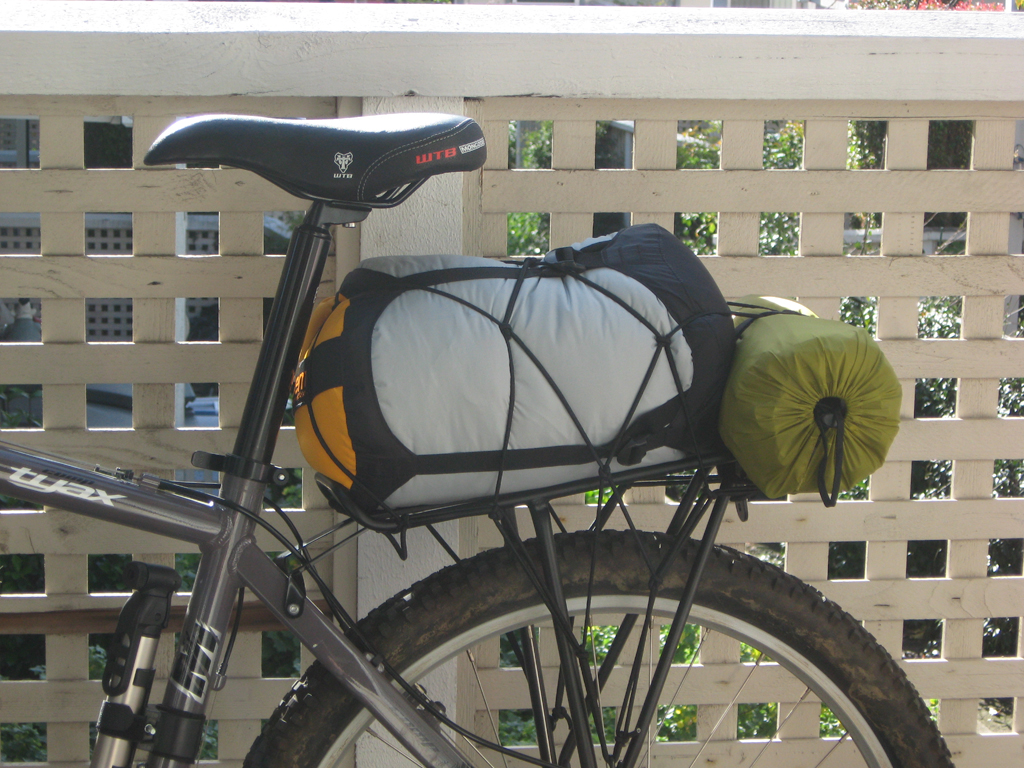
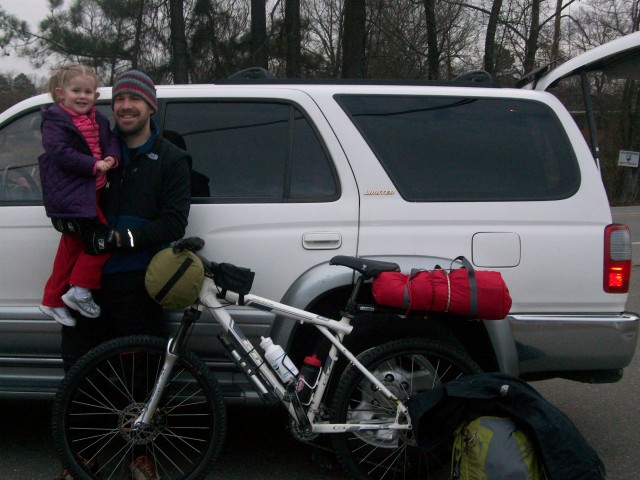
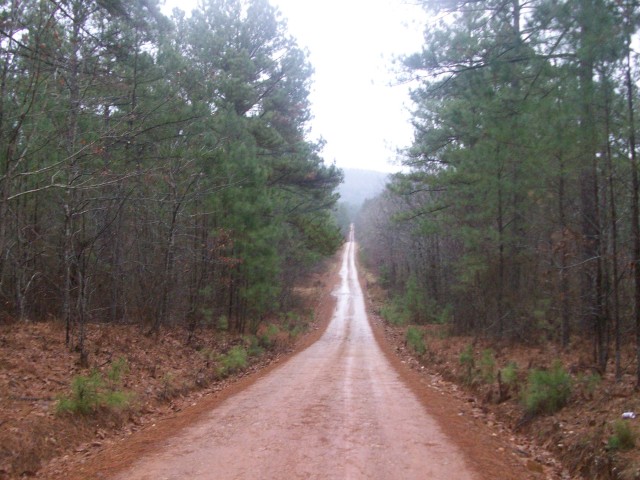
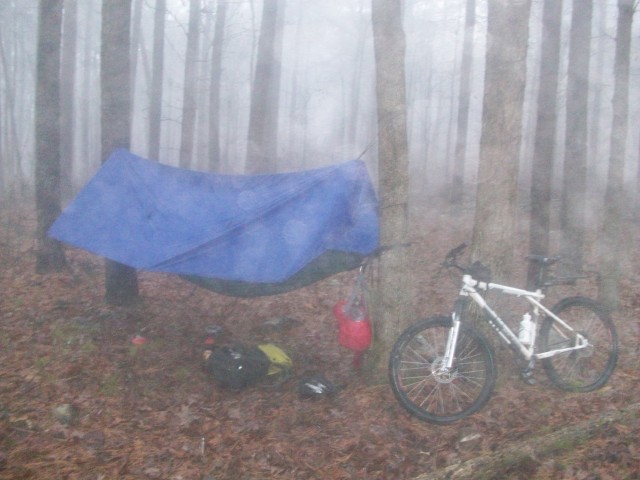
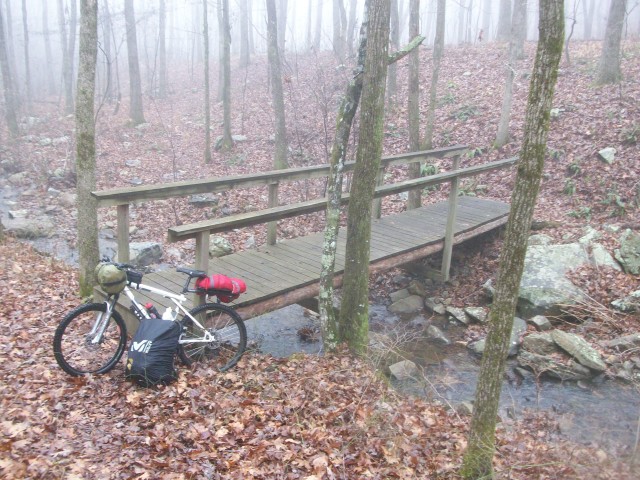
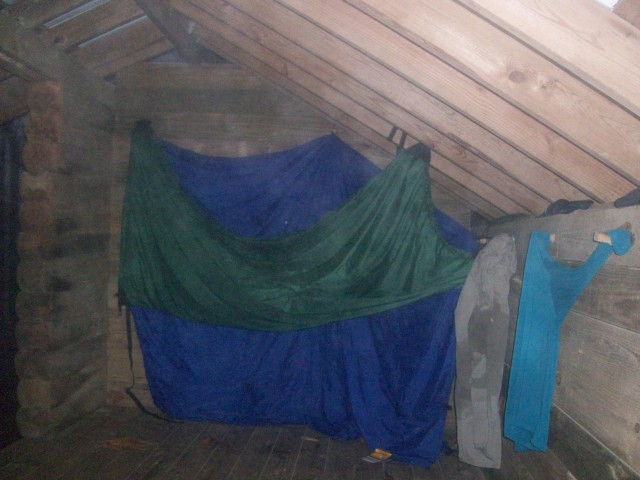
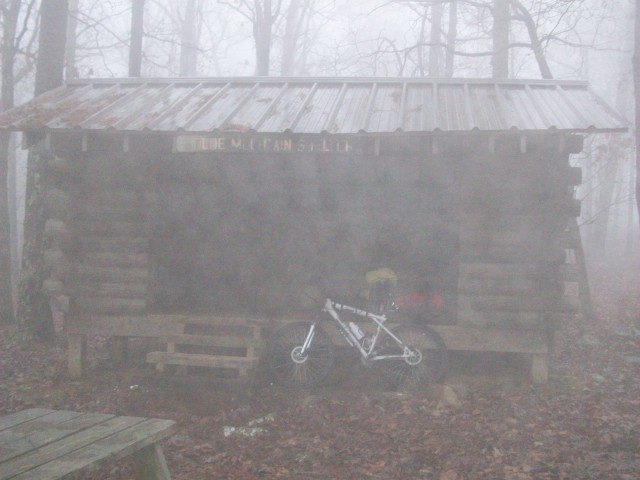
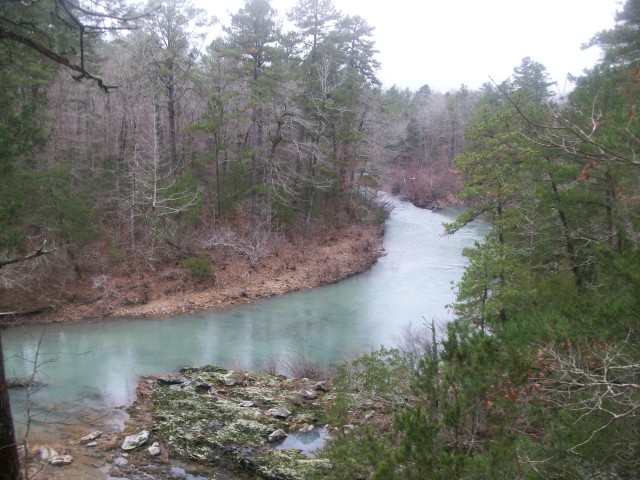
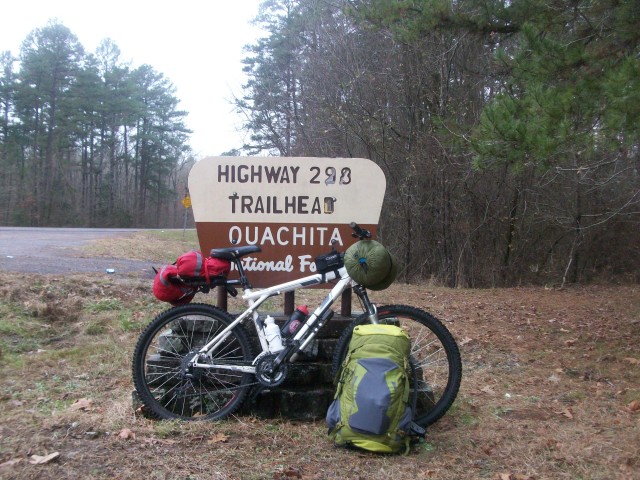
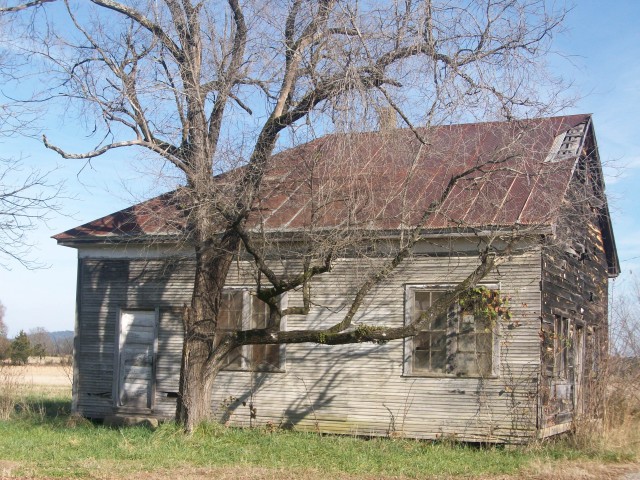
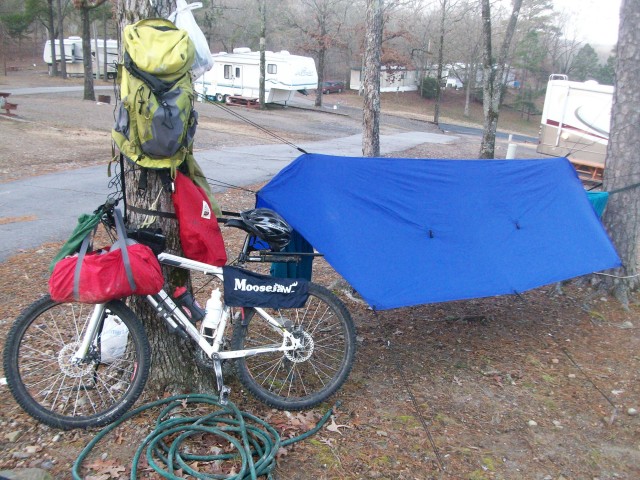
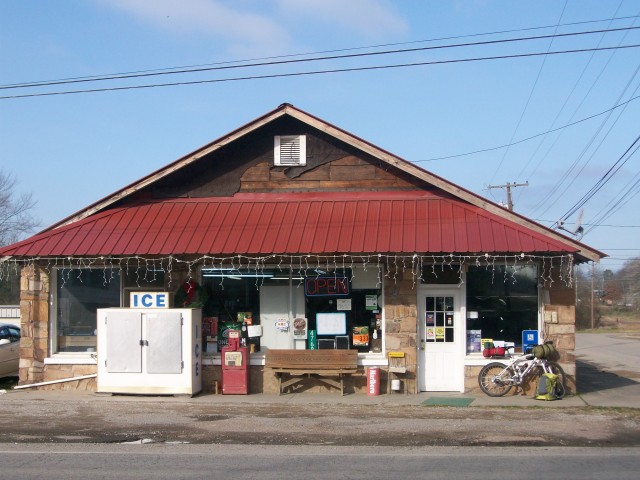
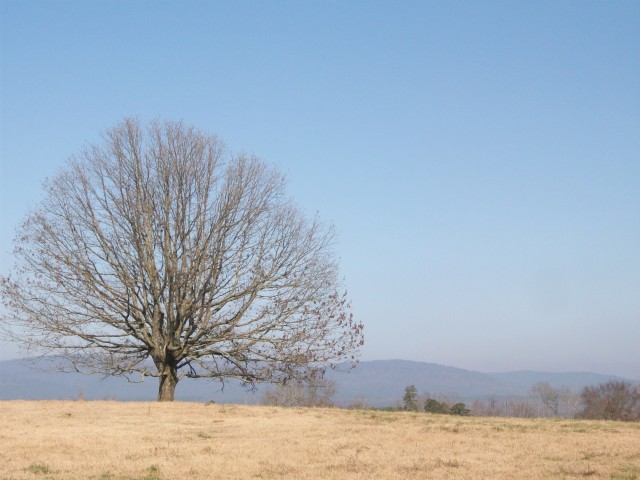
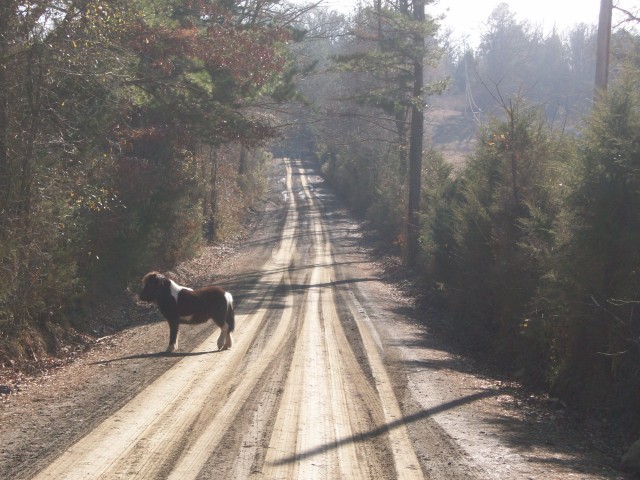
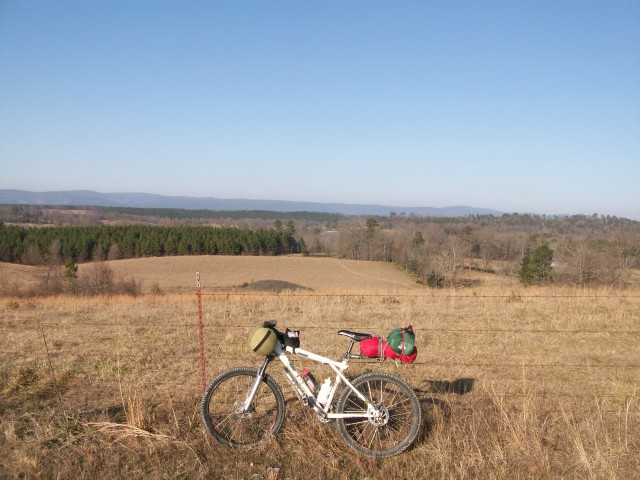
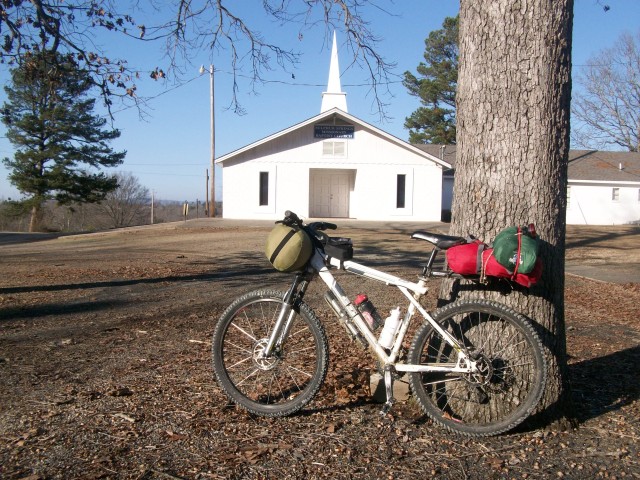
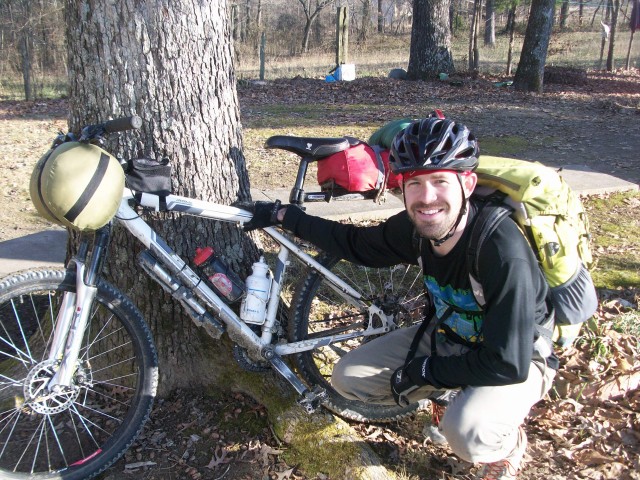
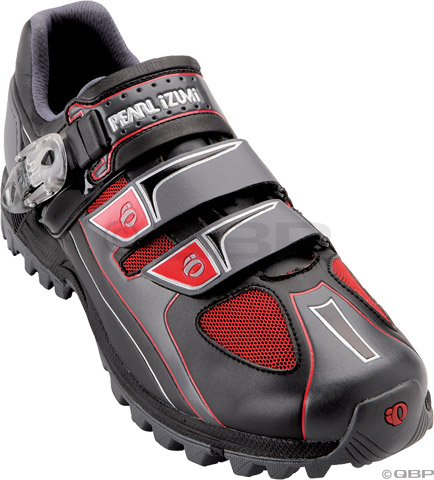
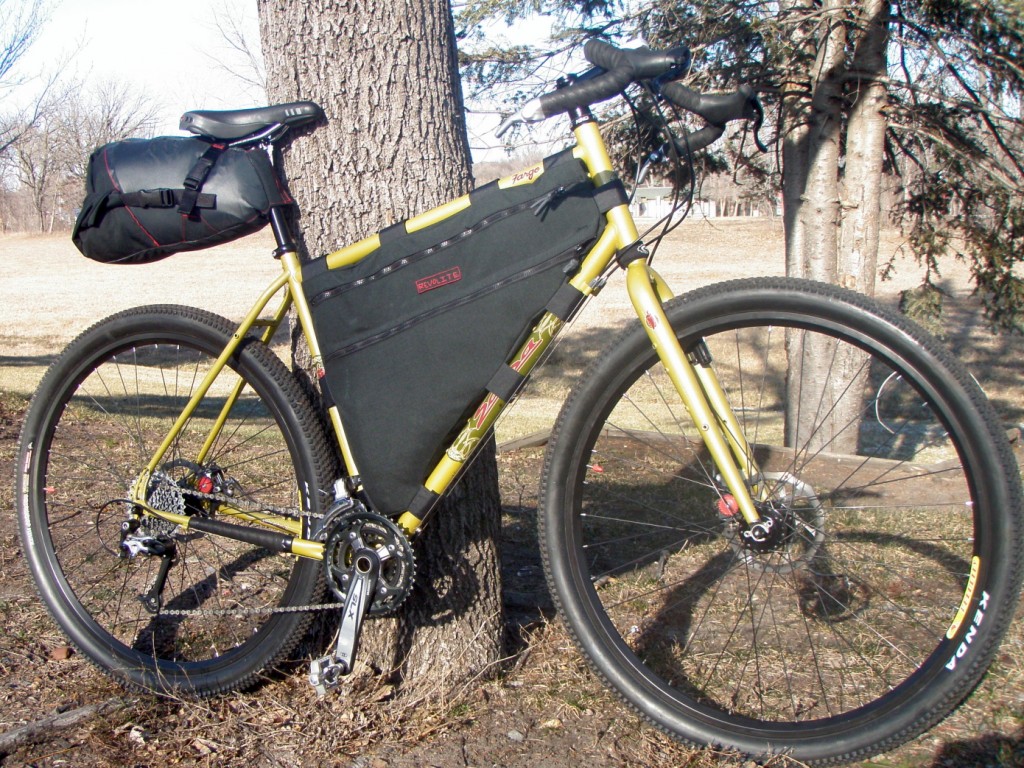


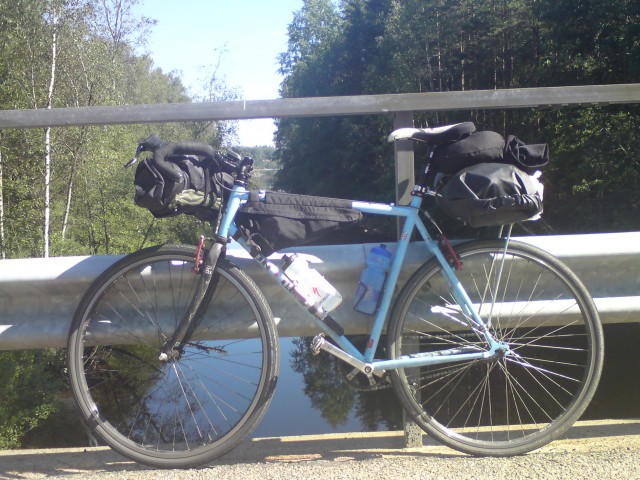

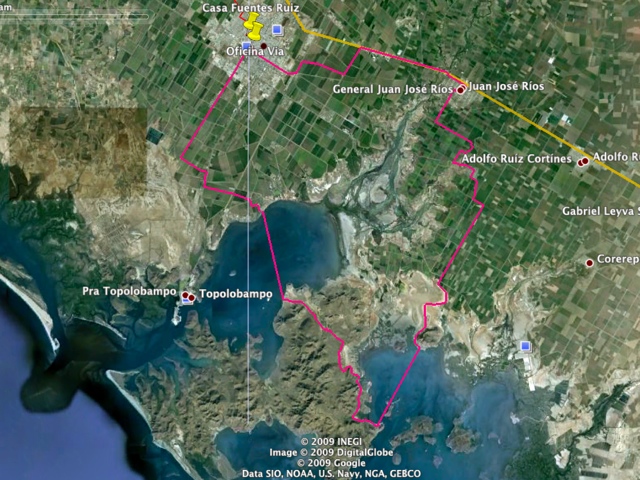
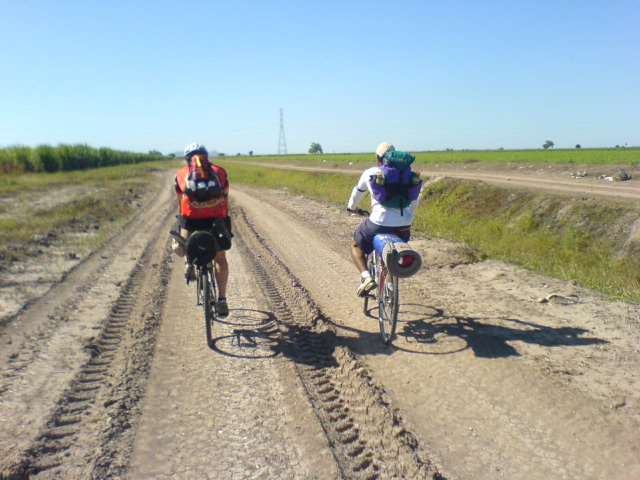
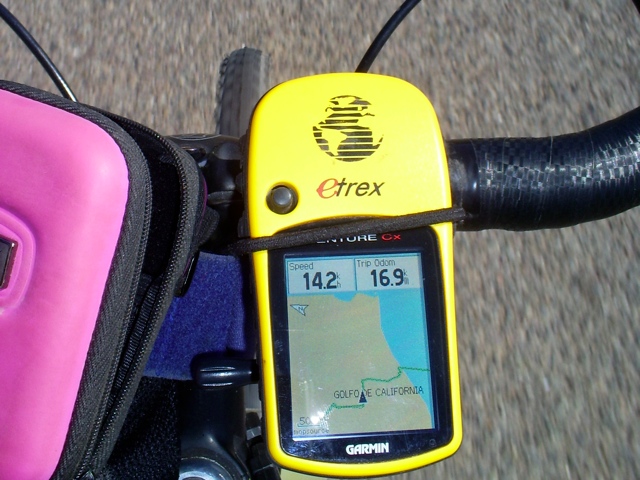
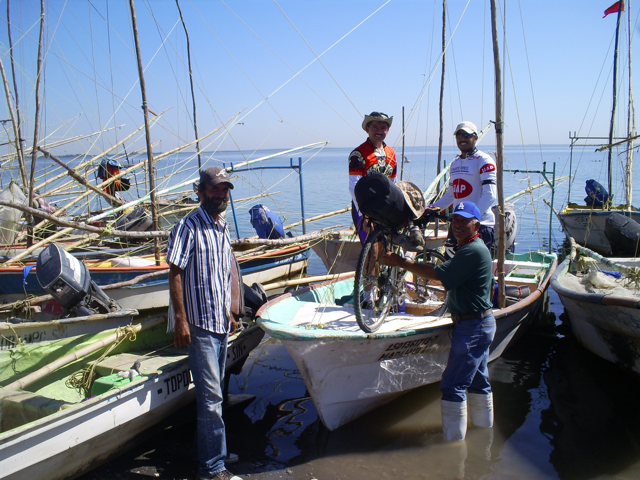
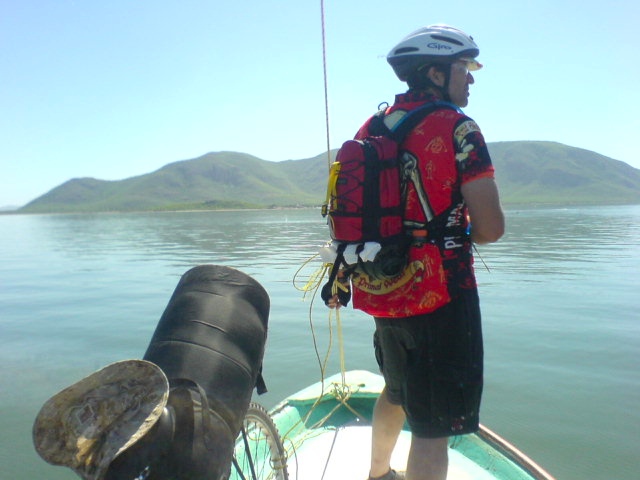
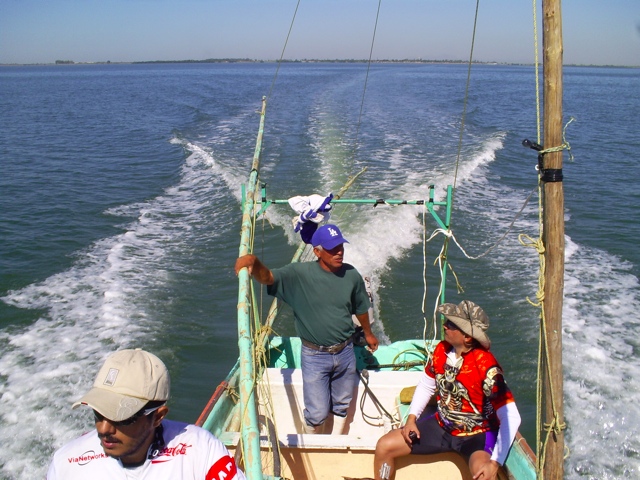
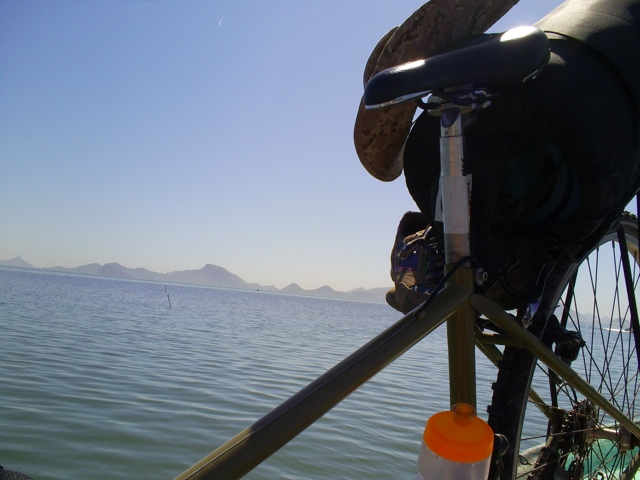
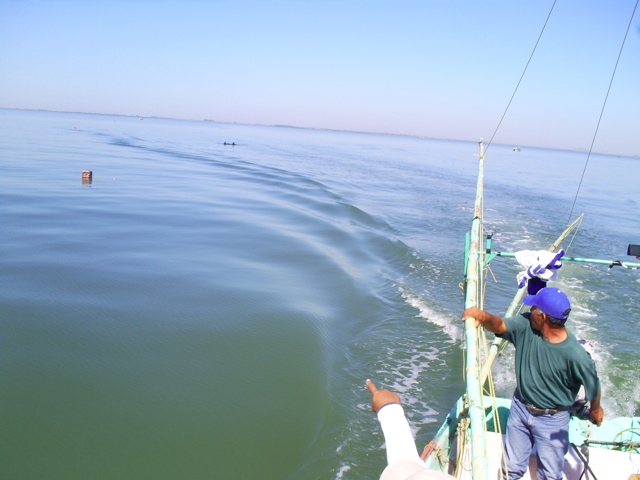
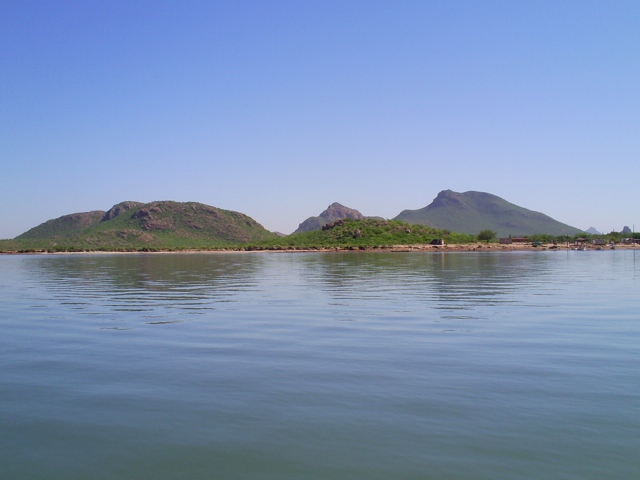
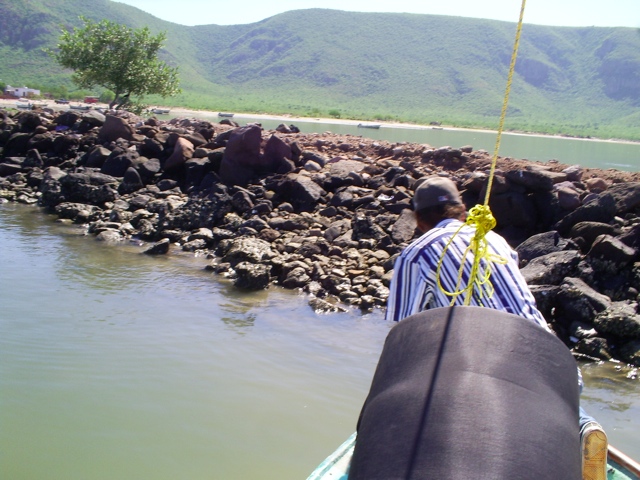
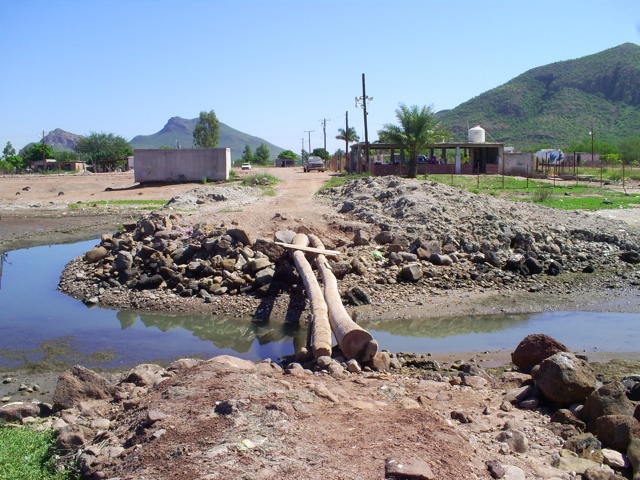
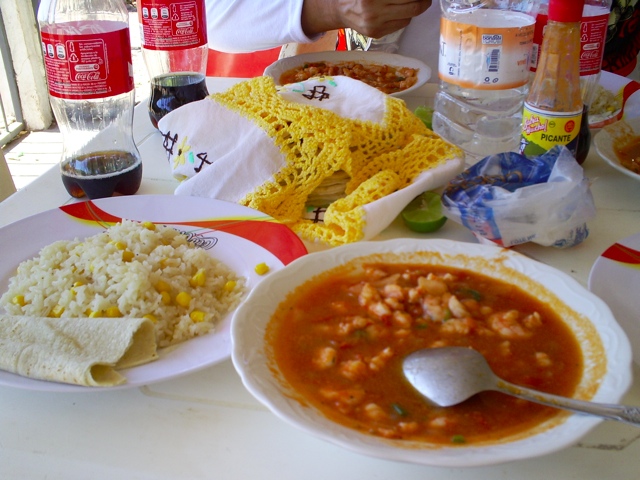
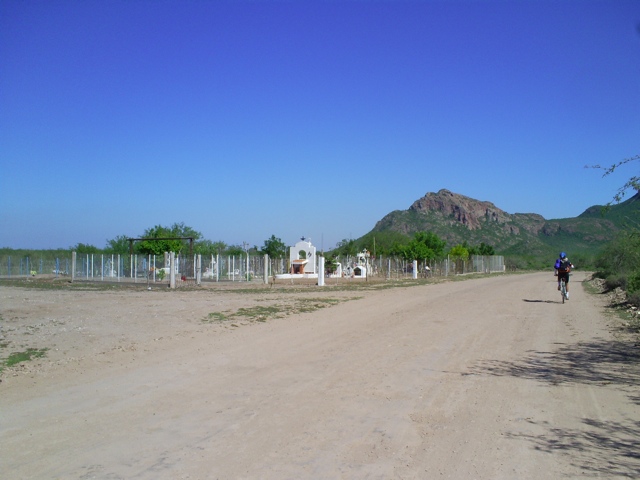
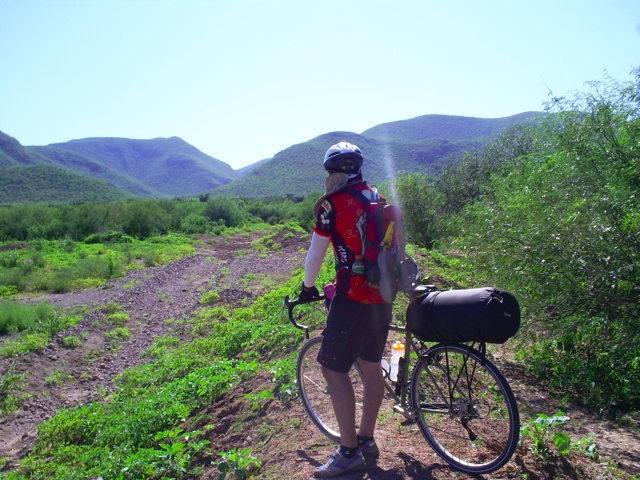
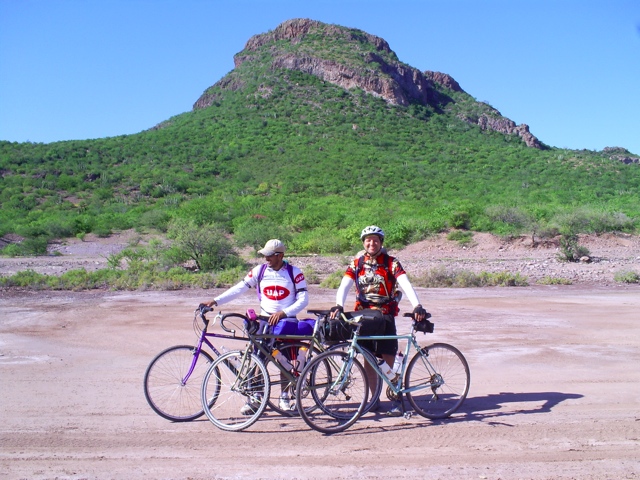
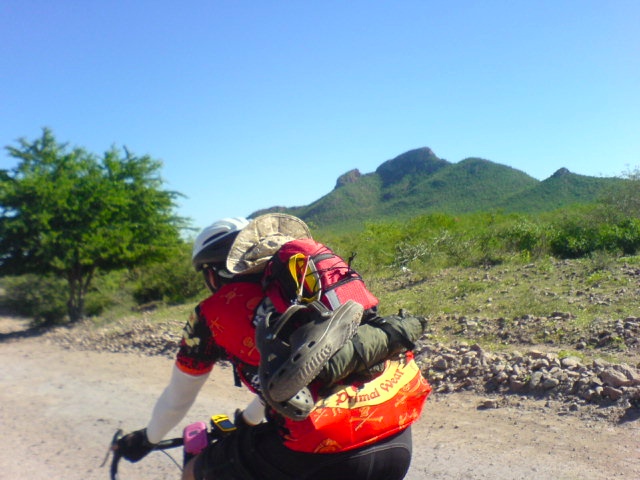
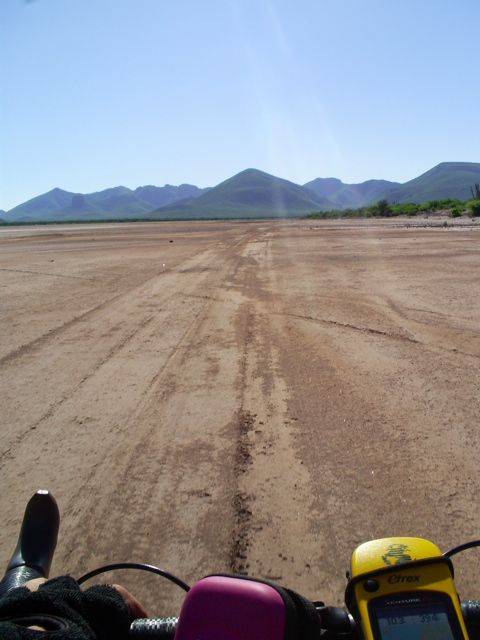
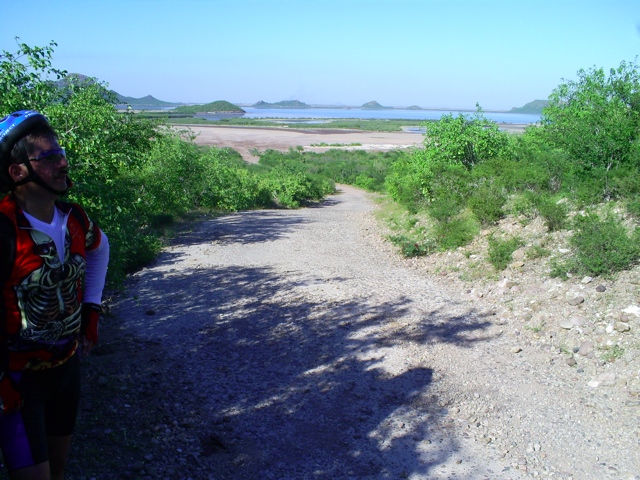
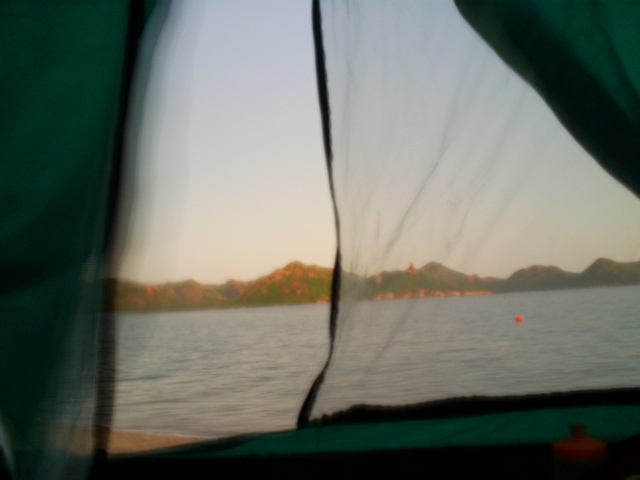
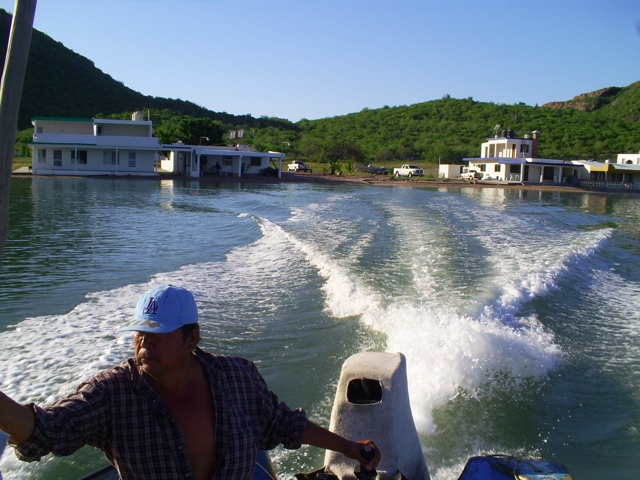
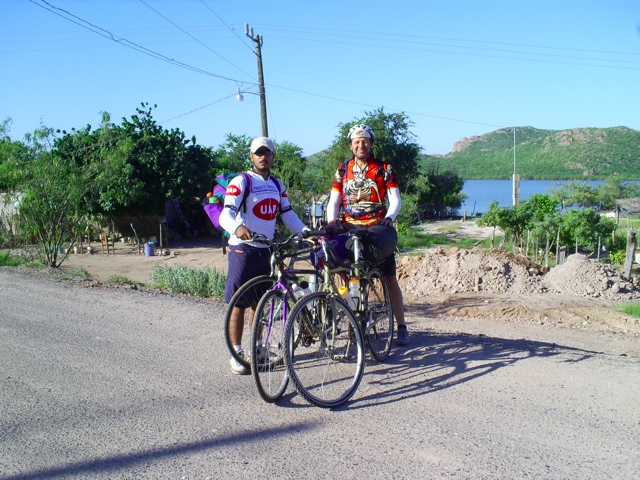
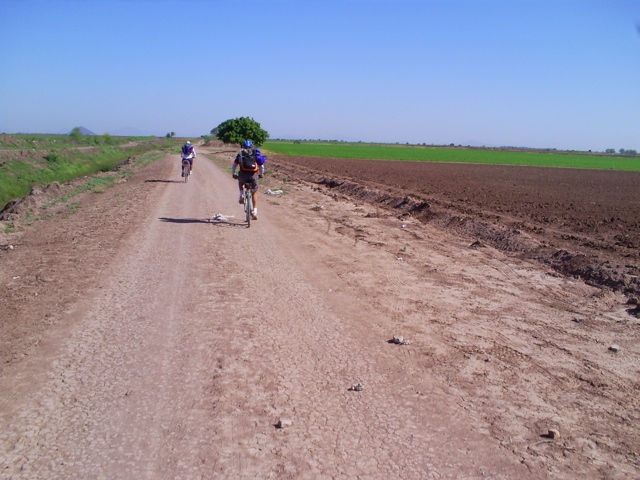
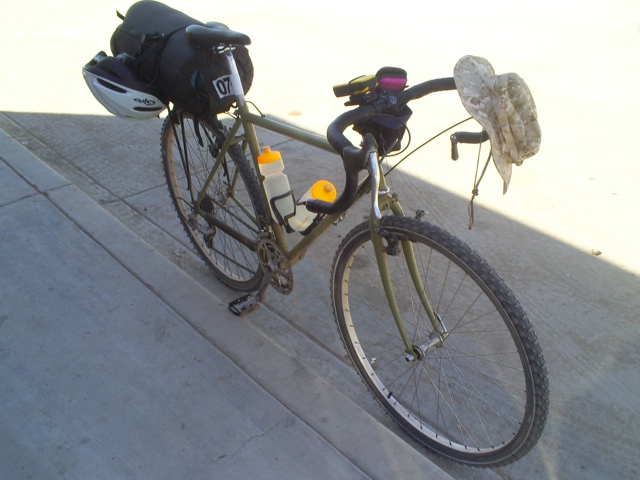
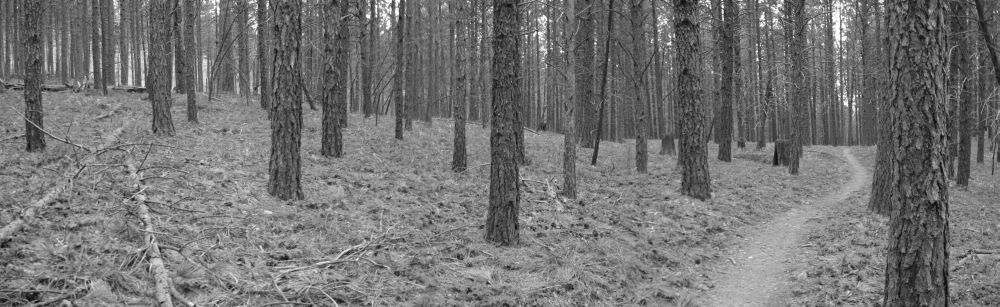
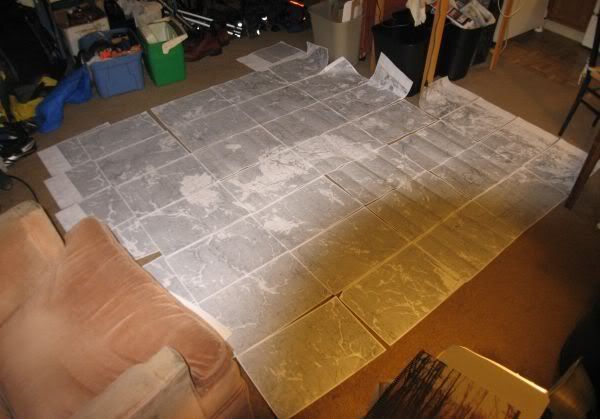
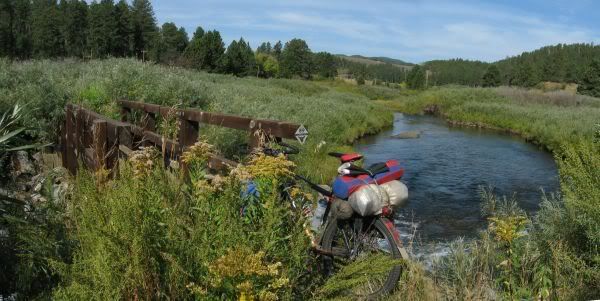
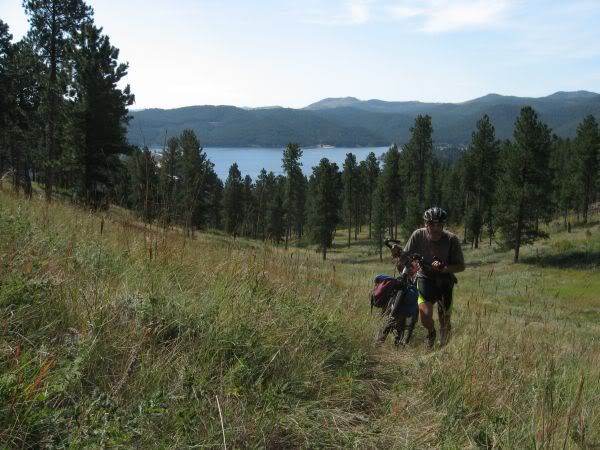
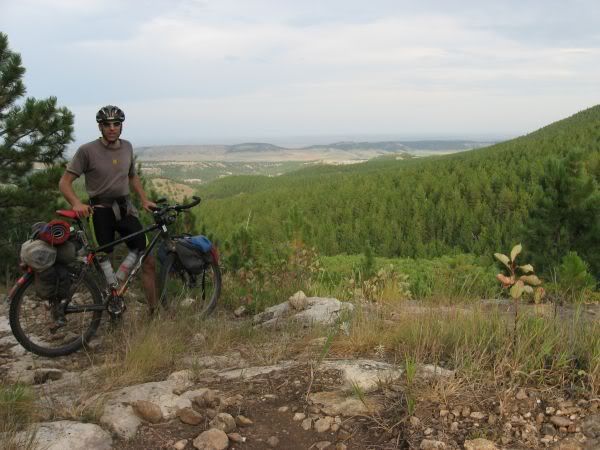
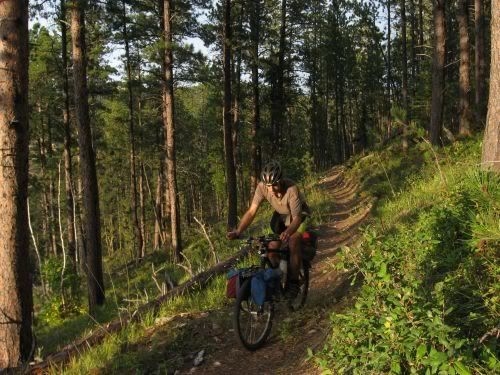
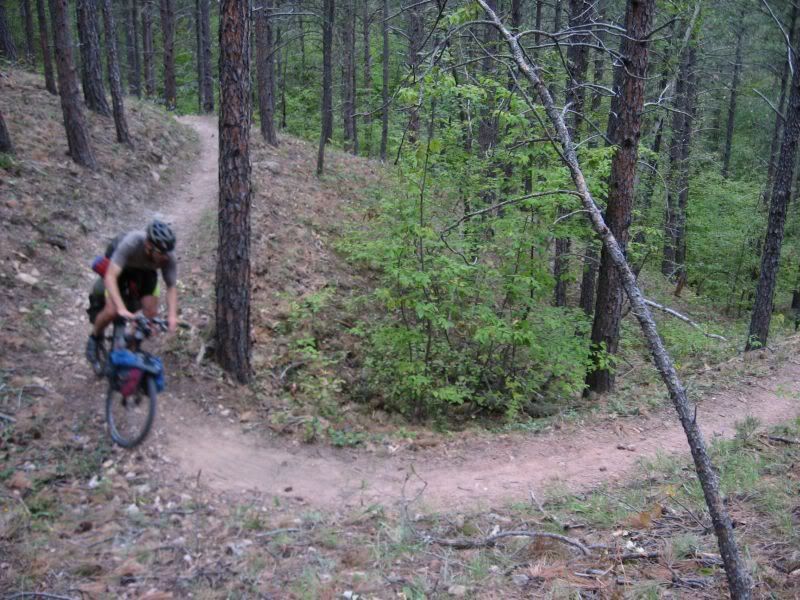
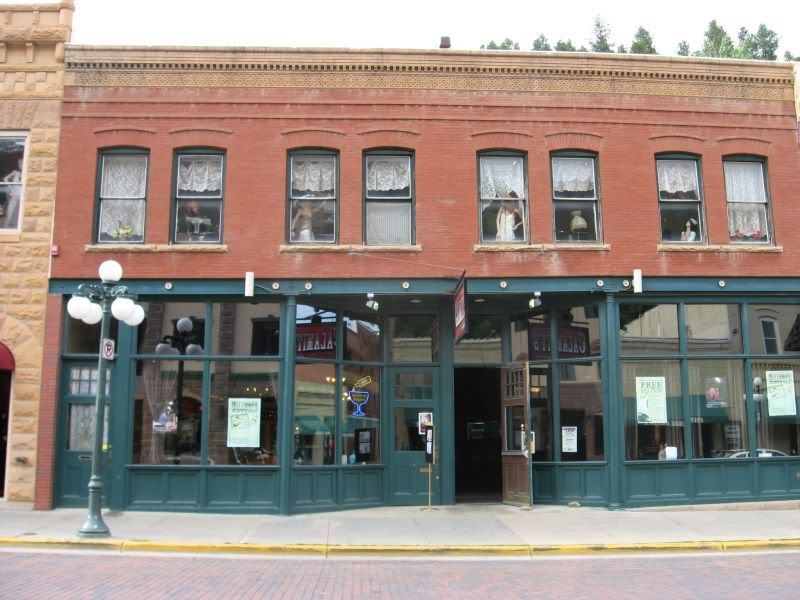
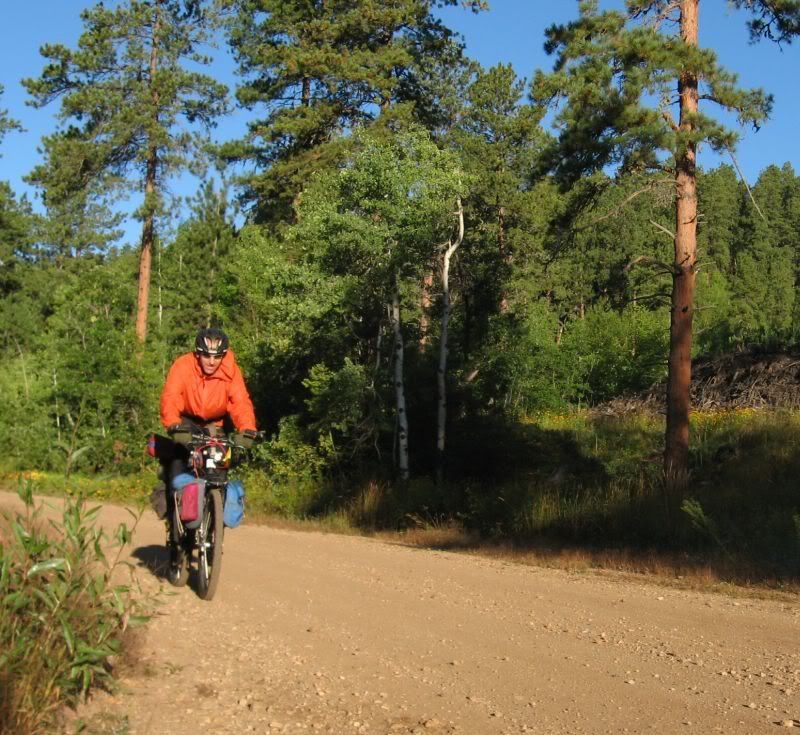
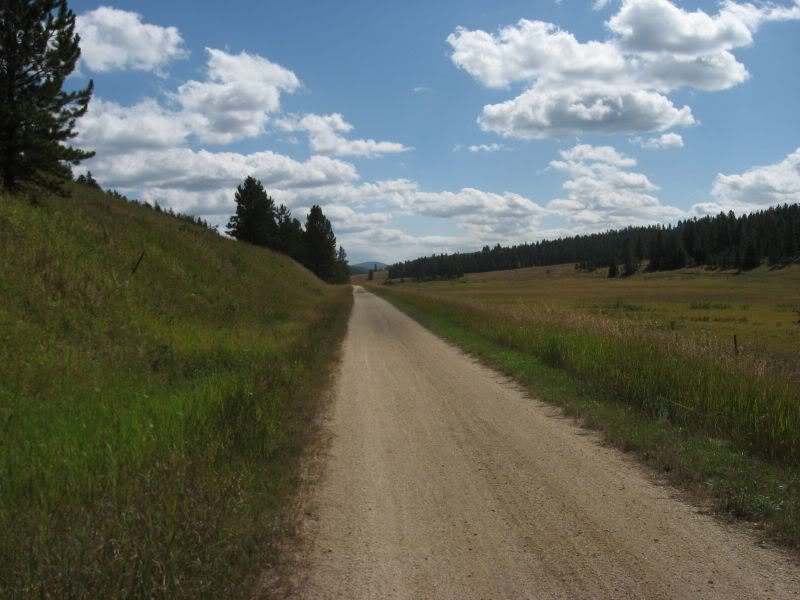
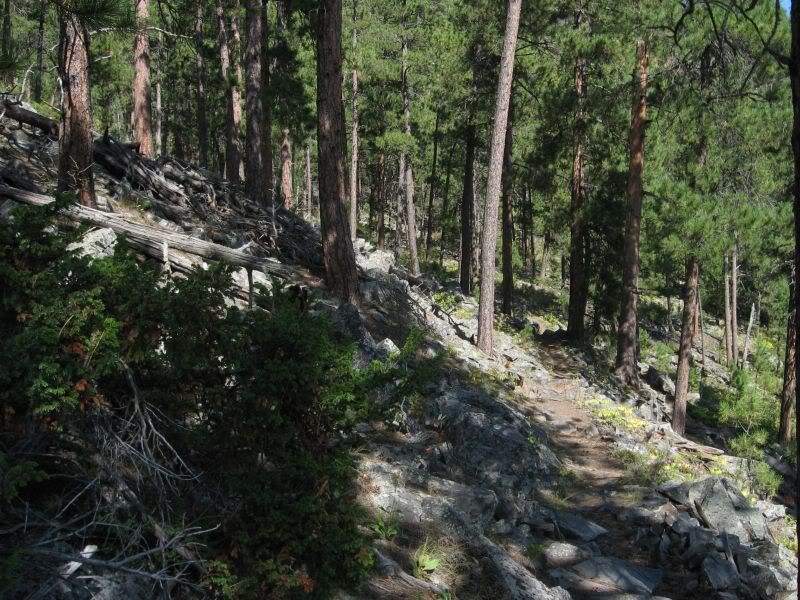
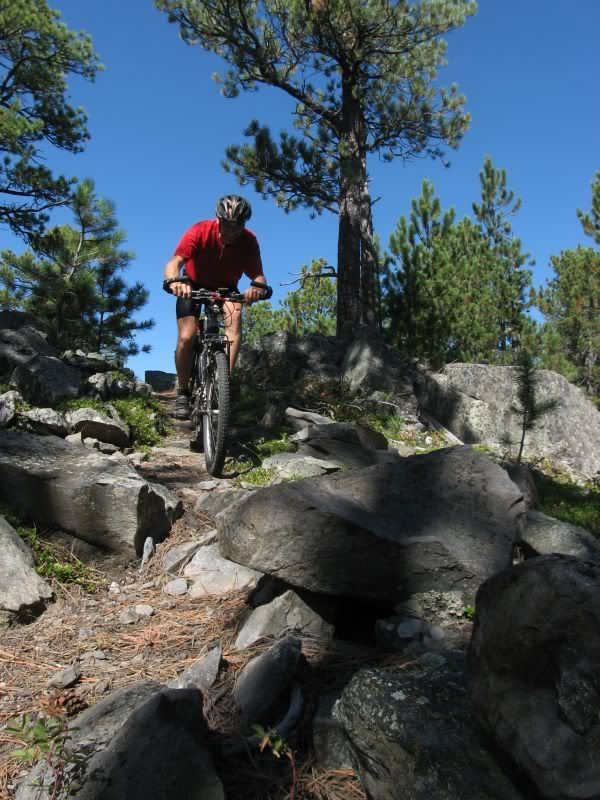
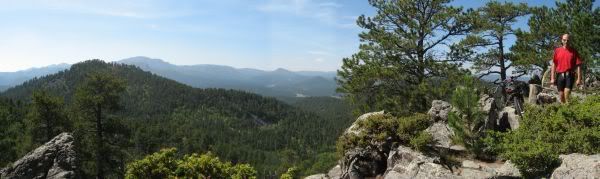
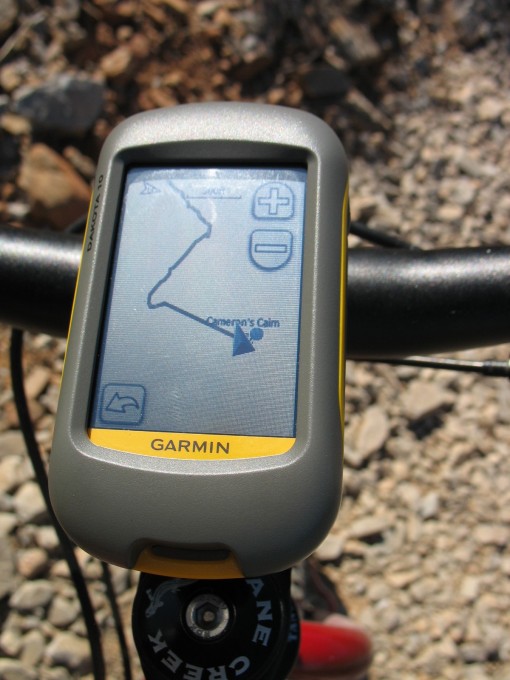
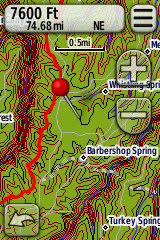

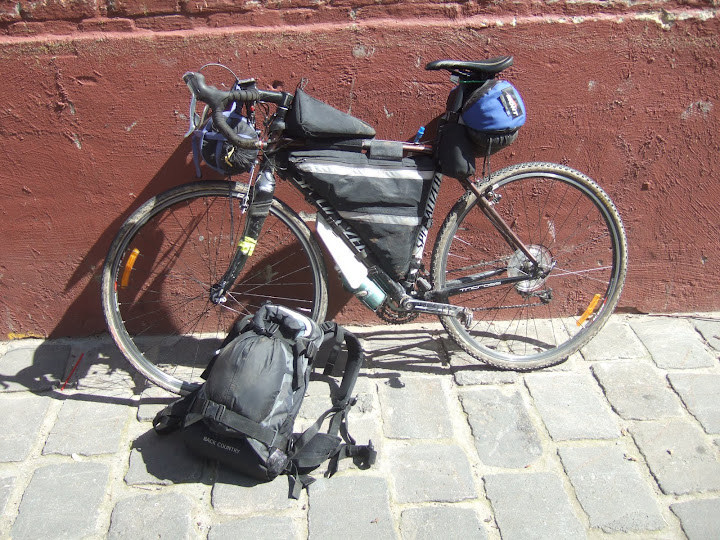

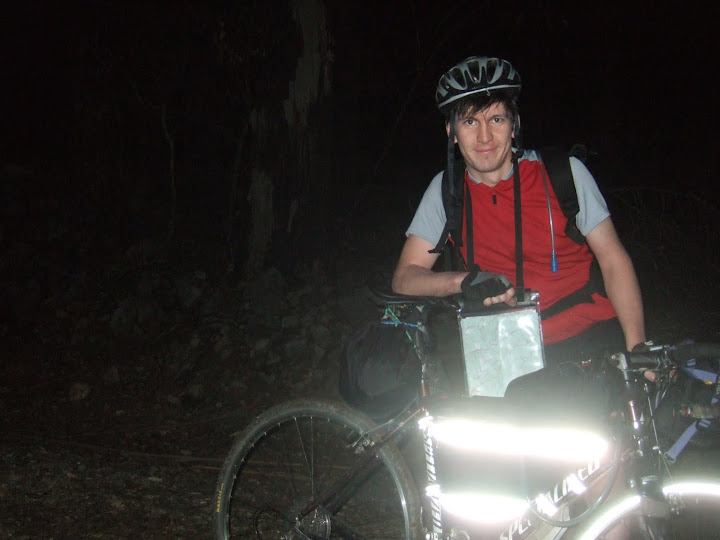
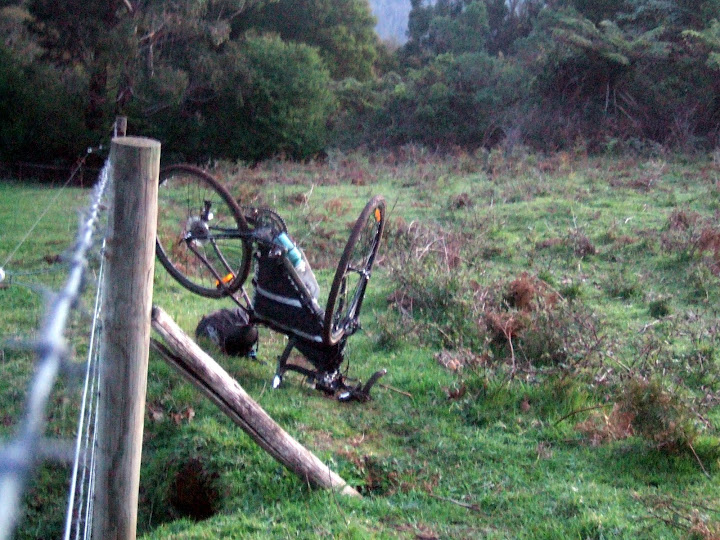


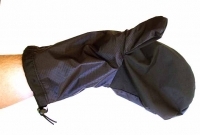
 http://www.backpackinglight.com/cgi-bin/backpackinglight/mld_rain_mitt_review.html
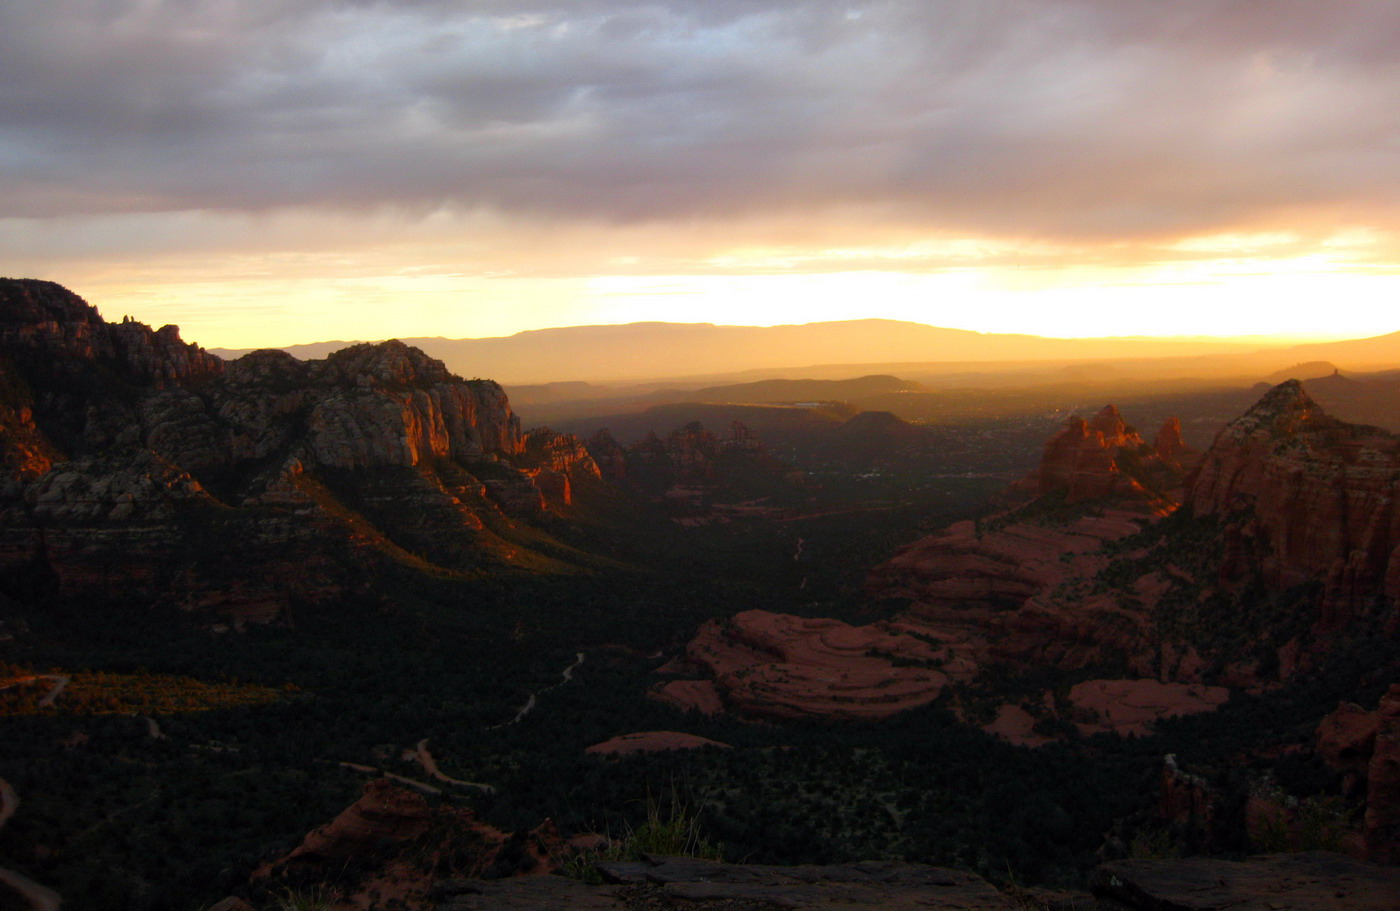
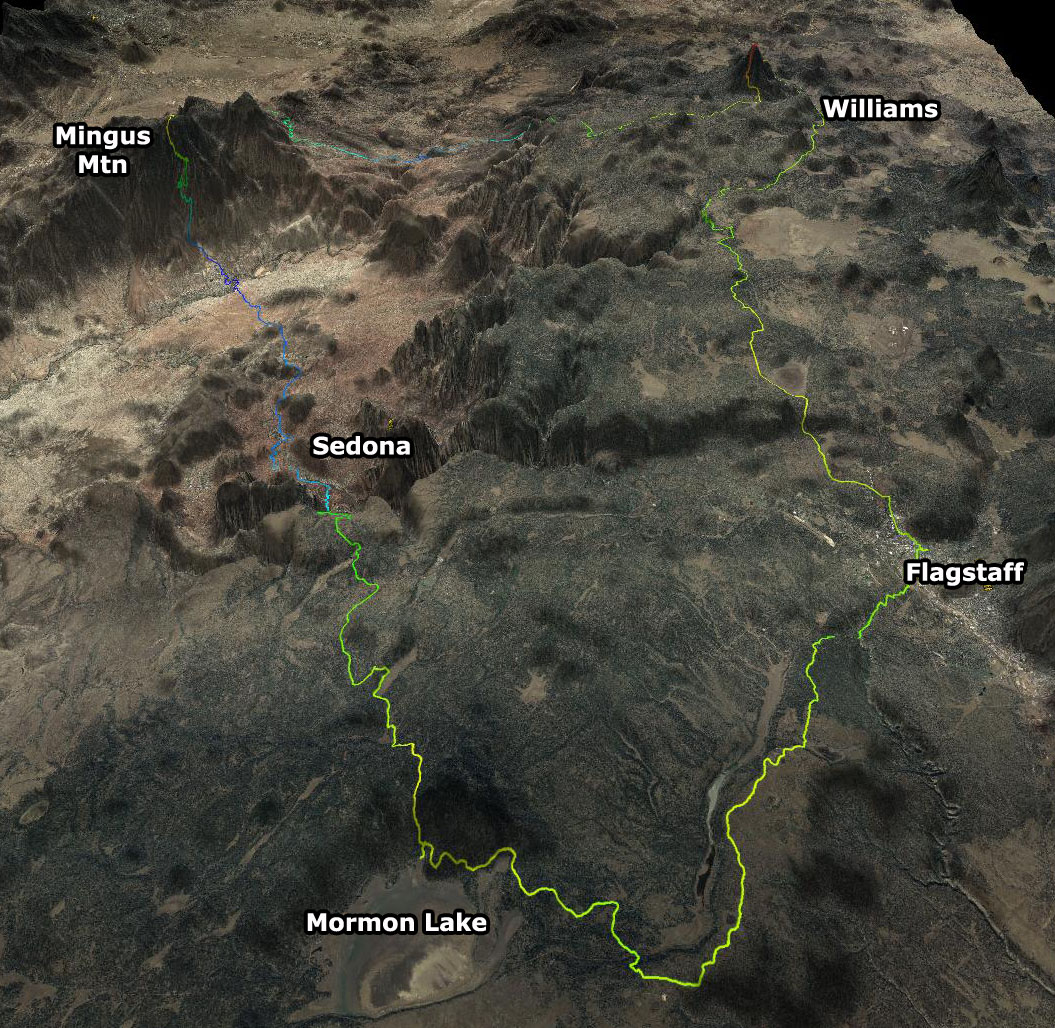
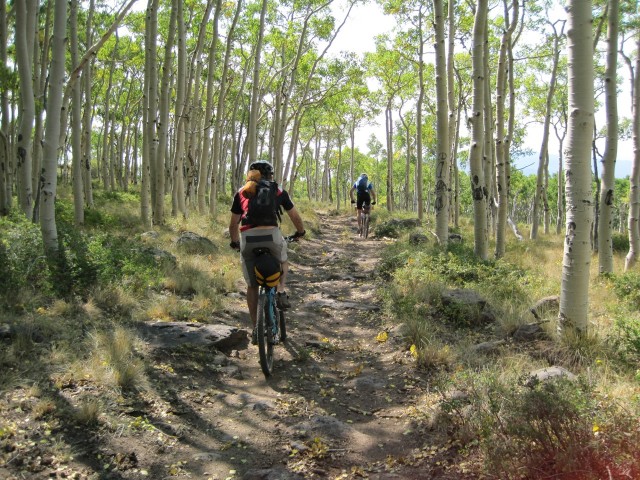
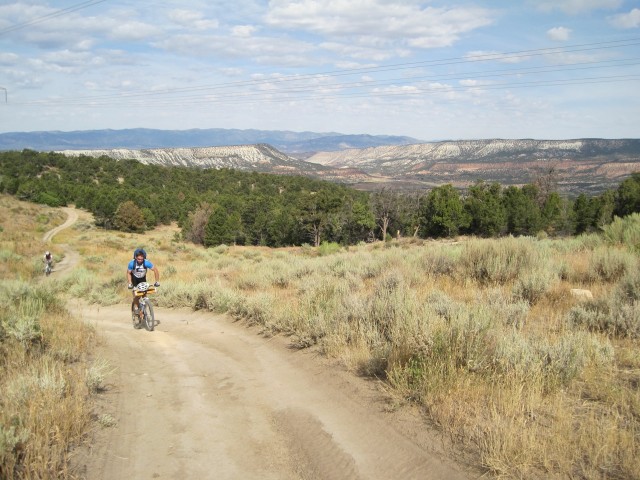
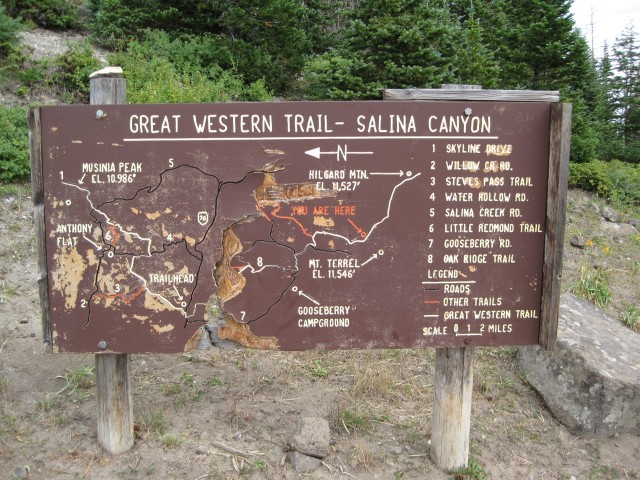
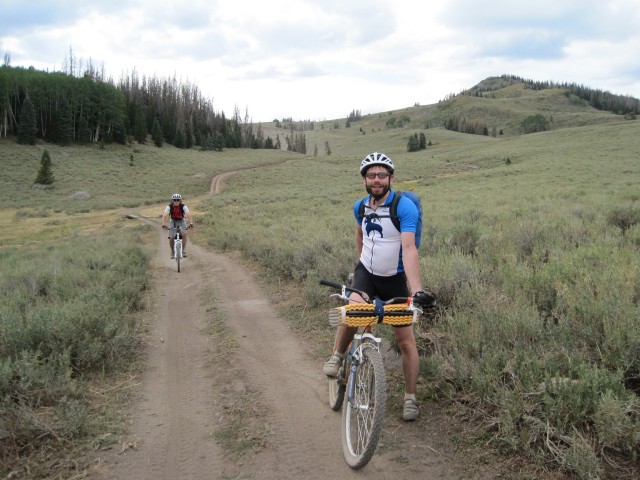
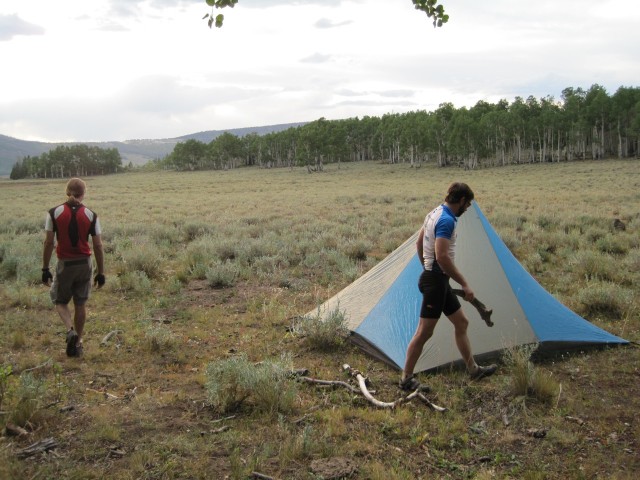
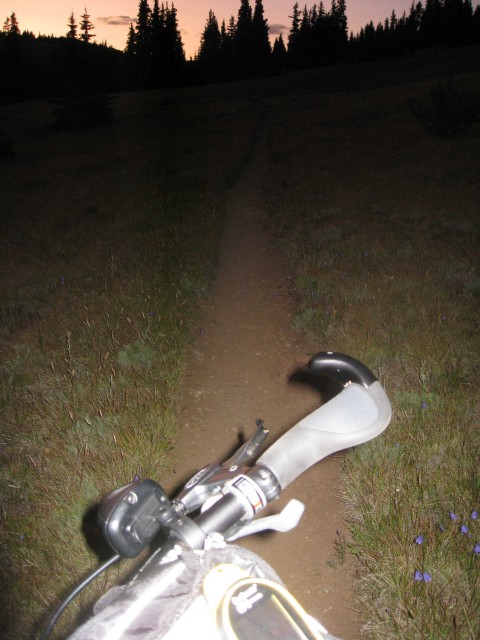
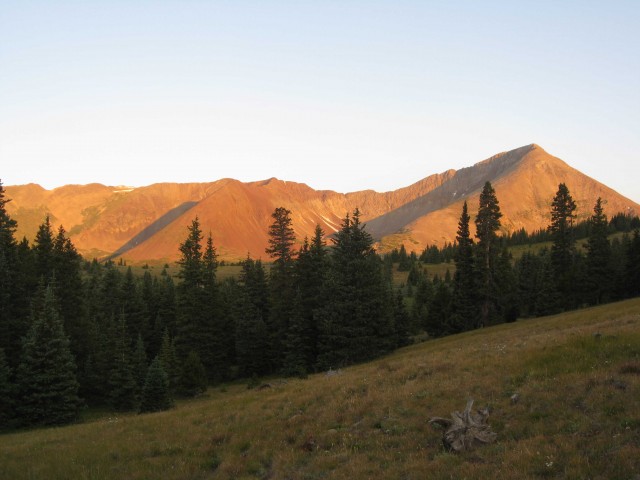
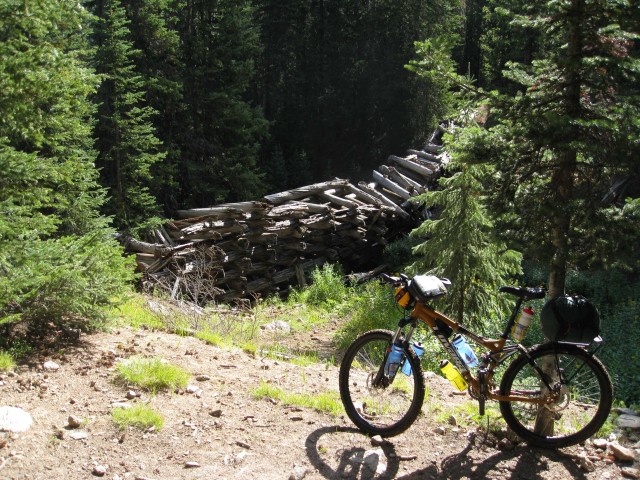
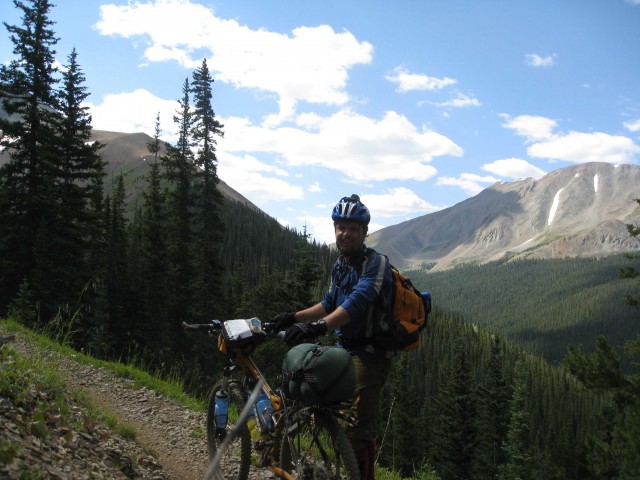
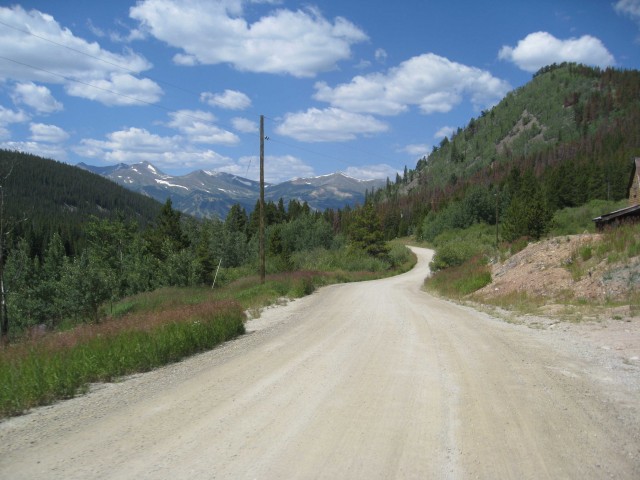
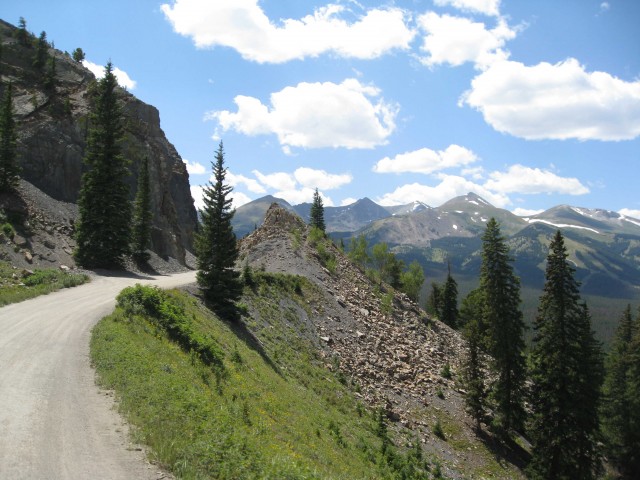
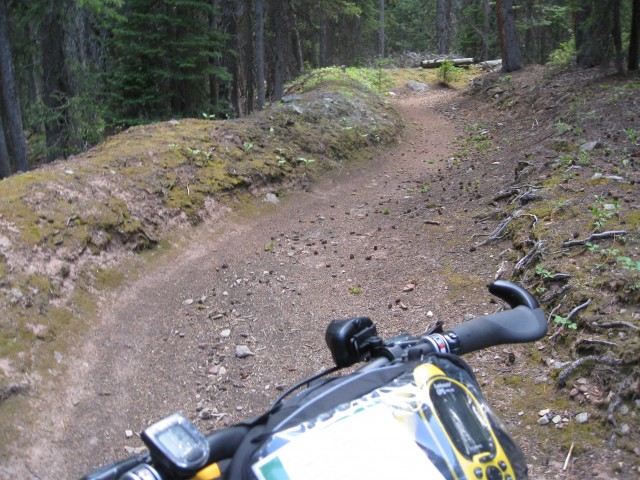
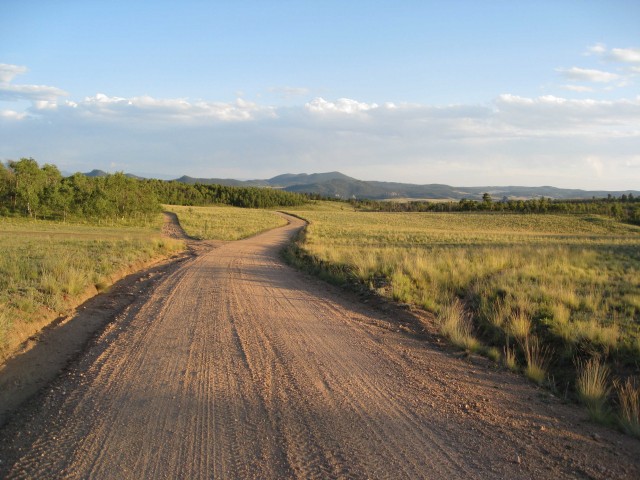
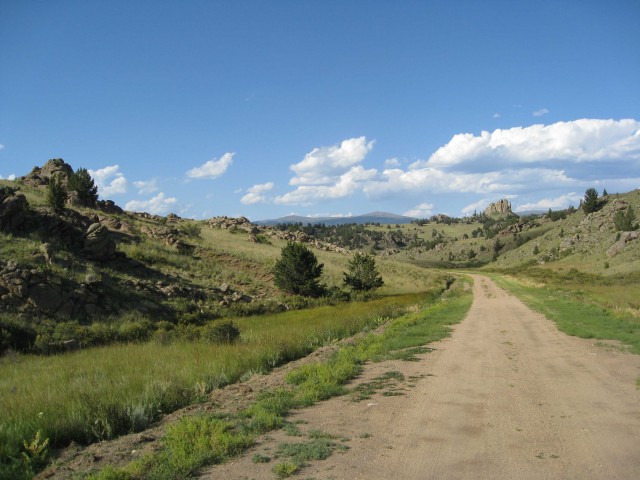
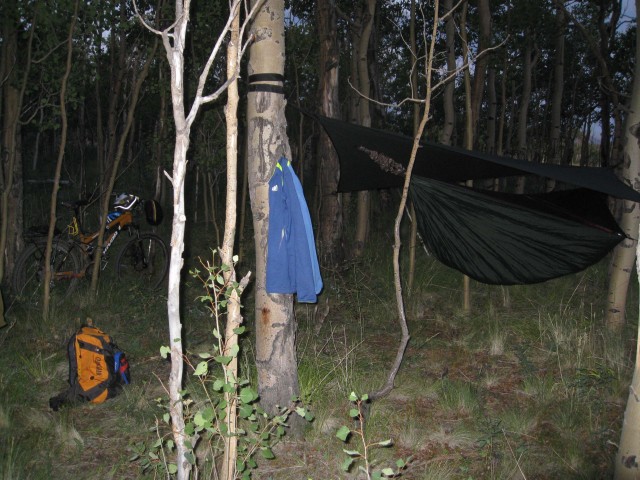
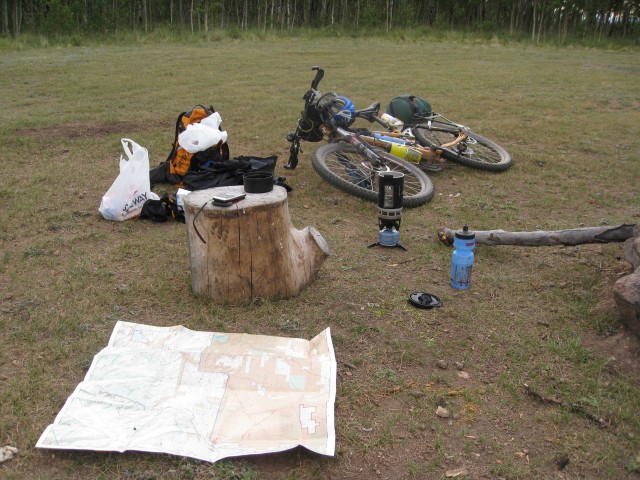
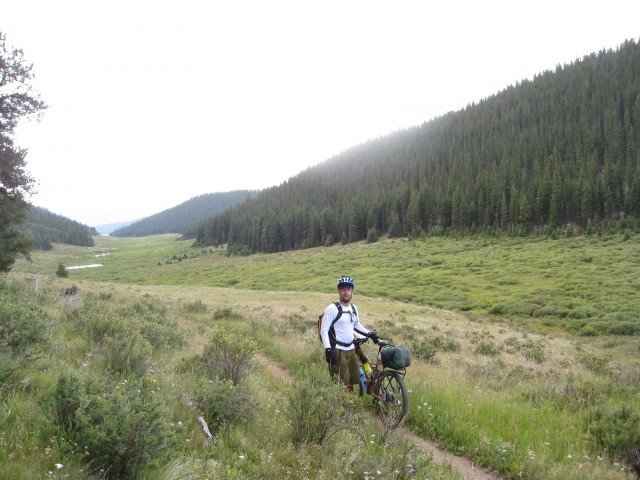
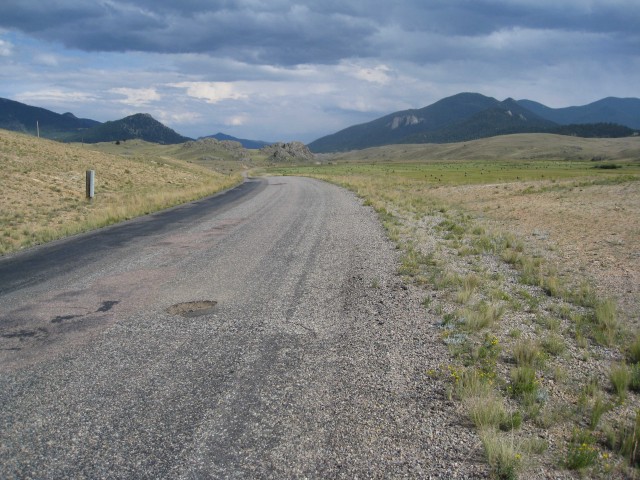
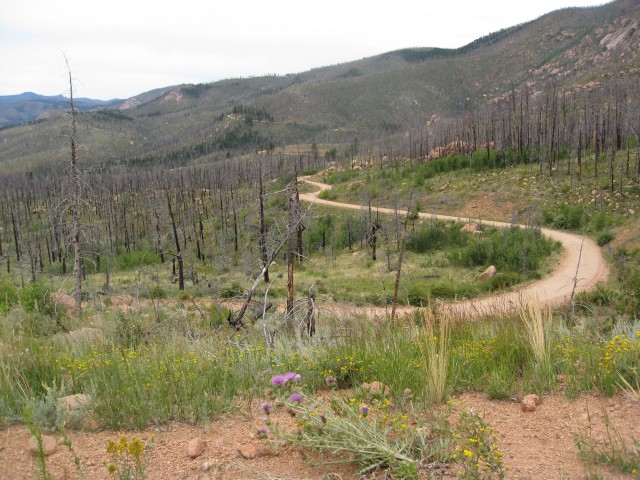
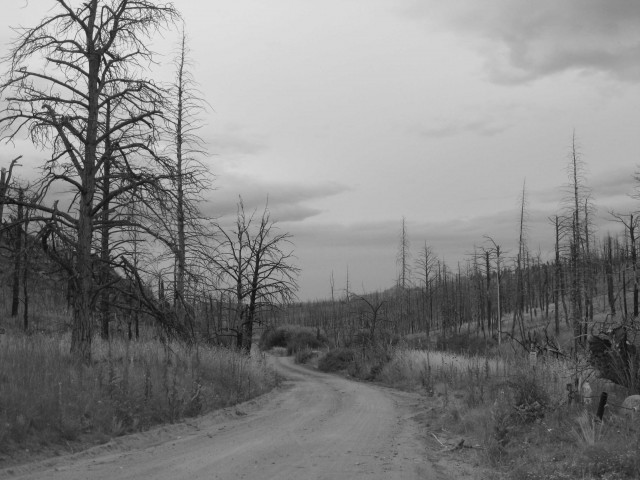
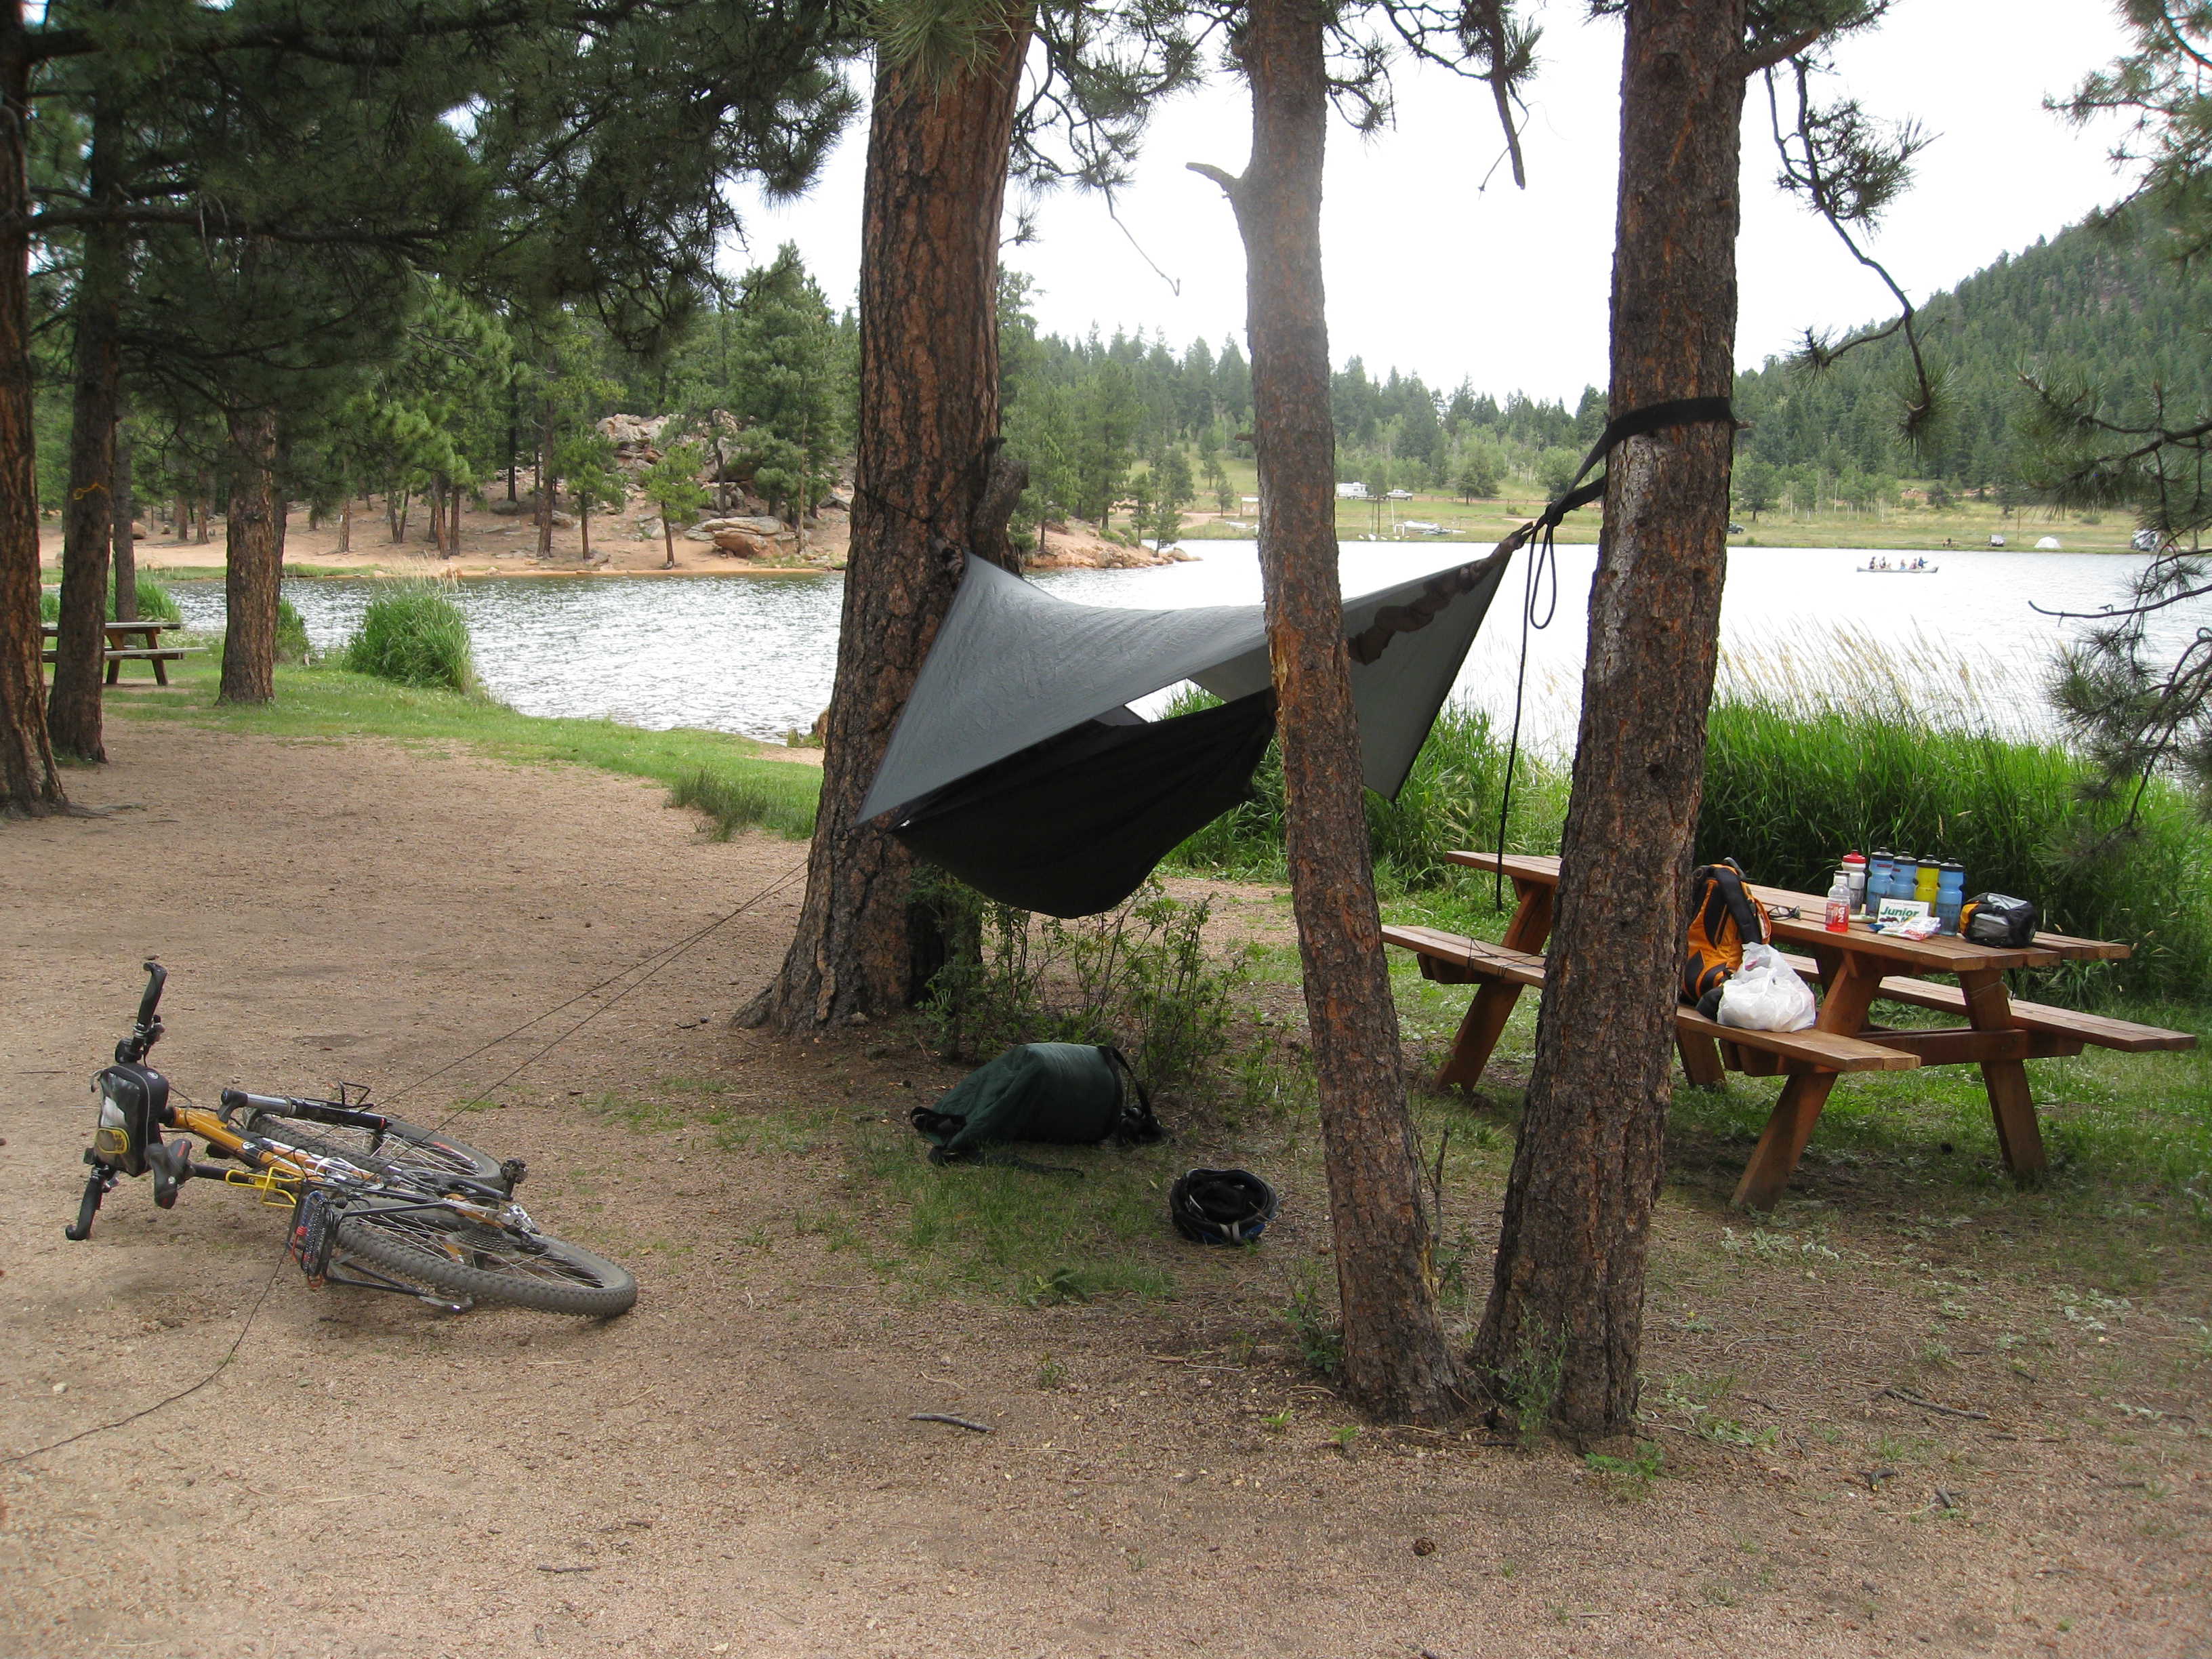
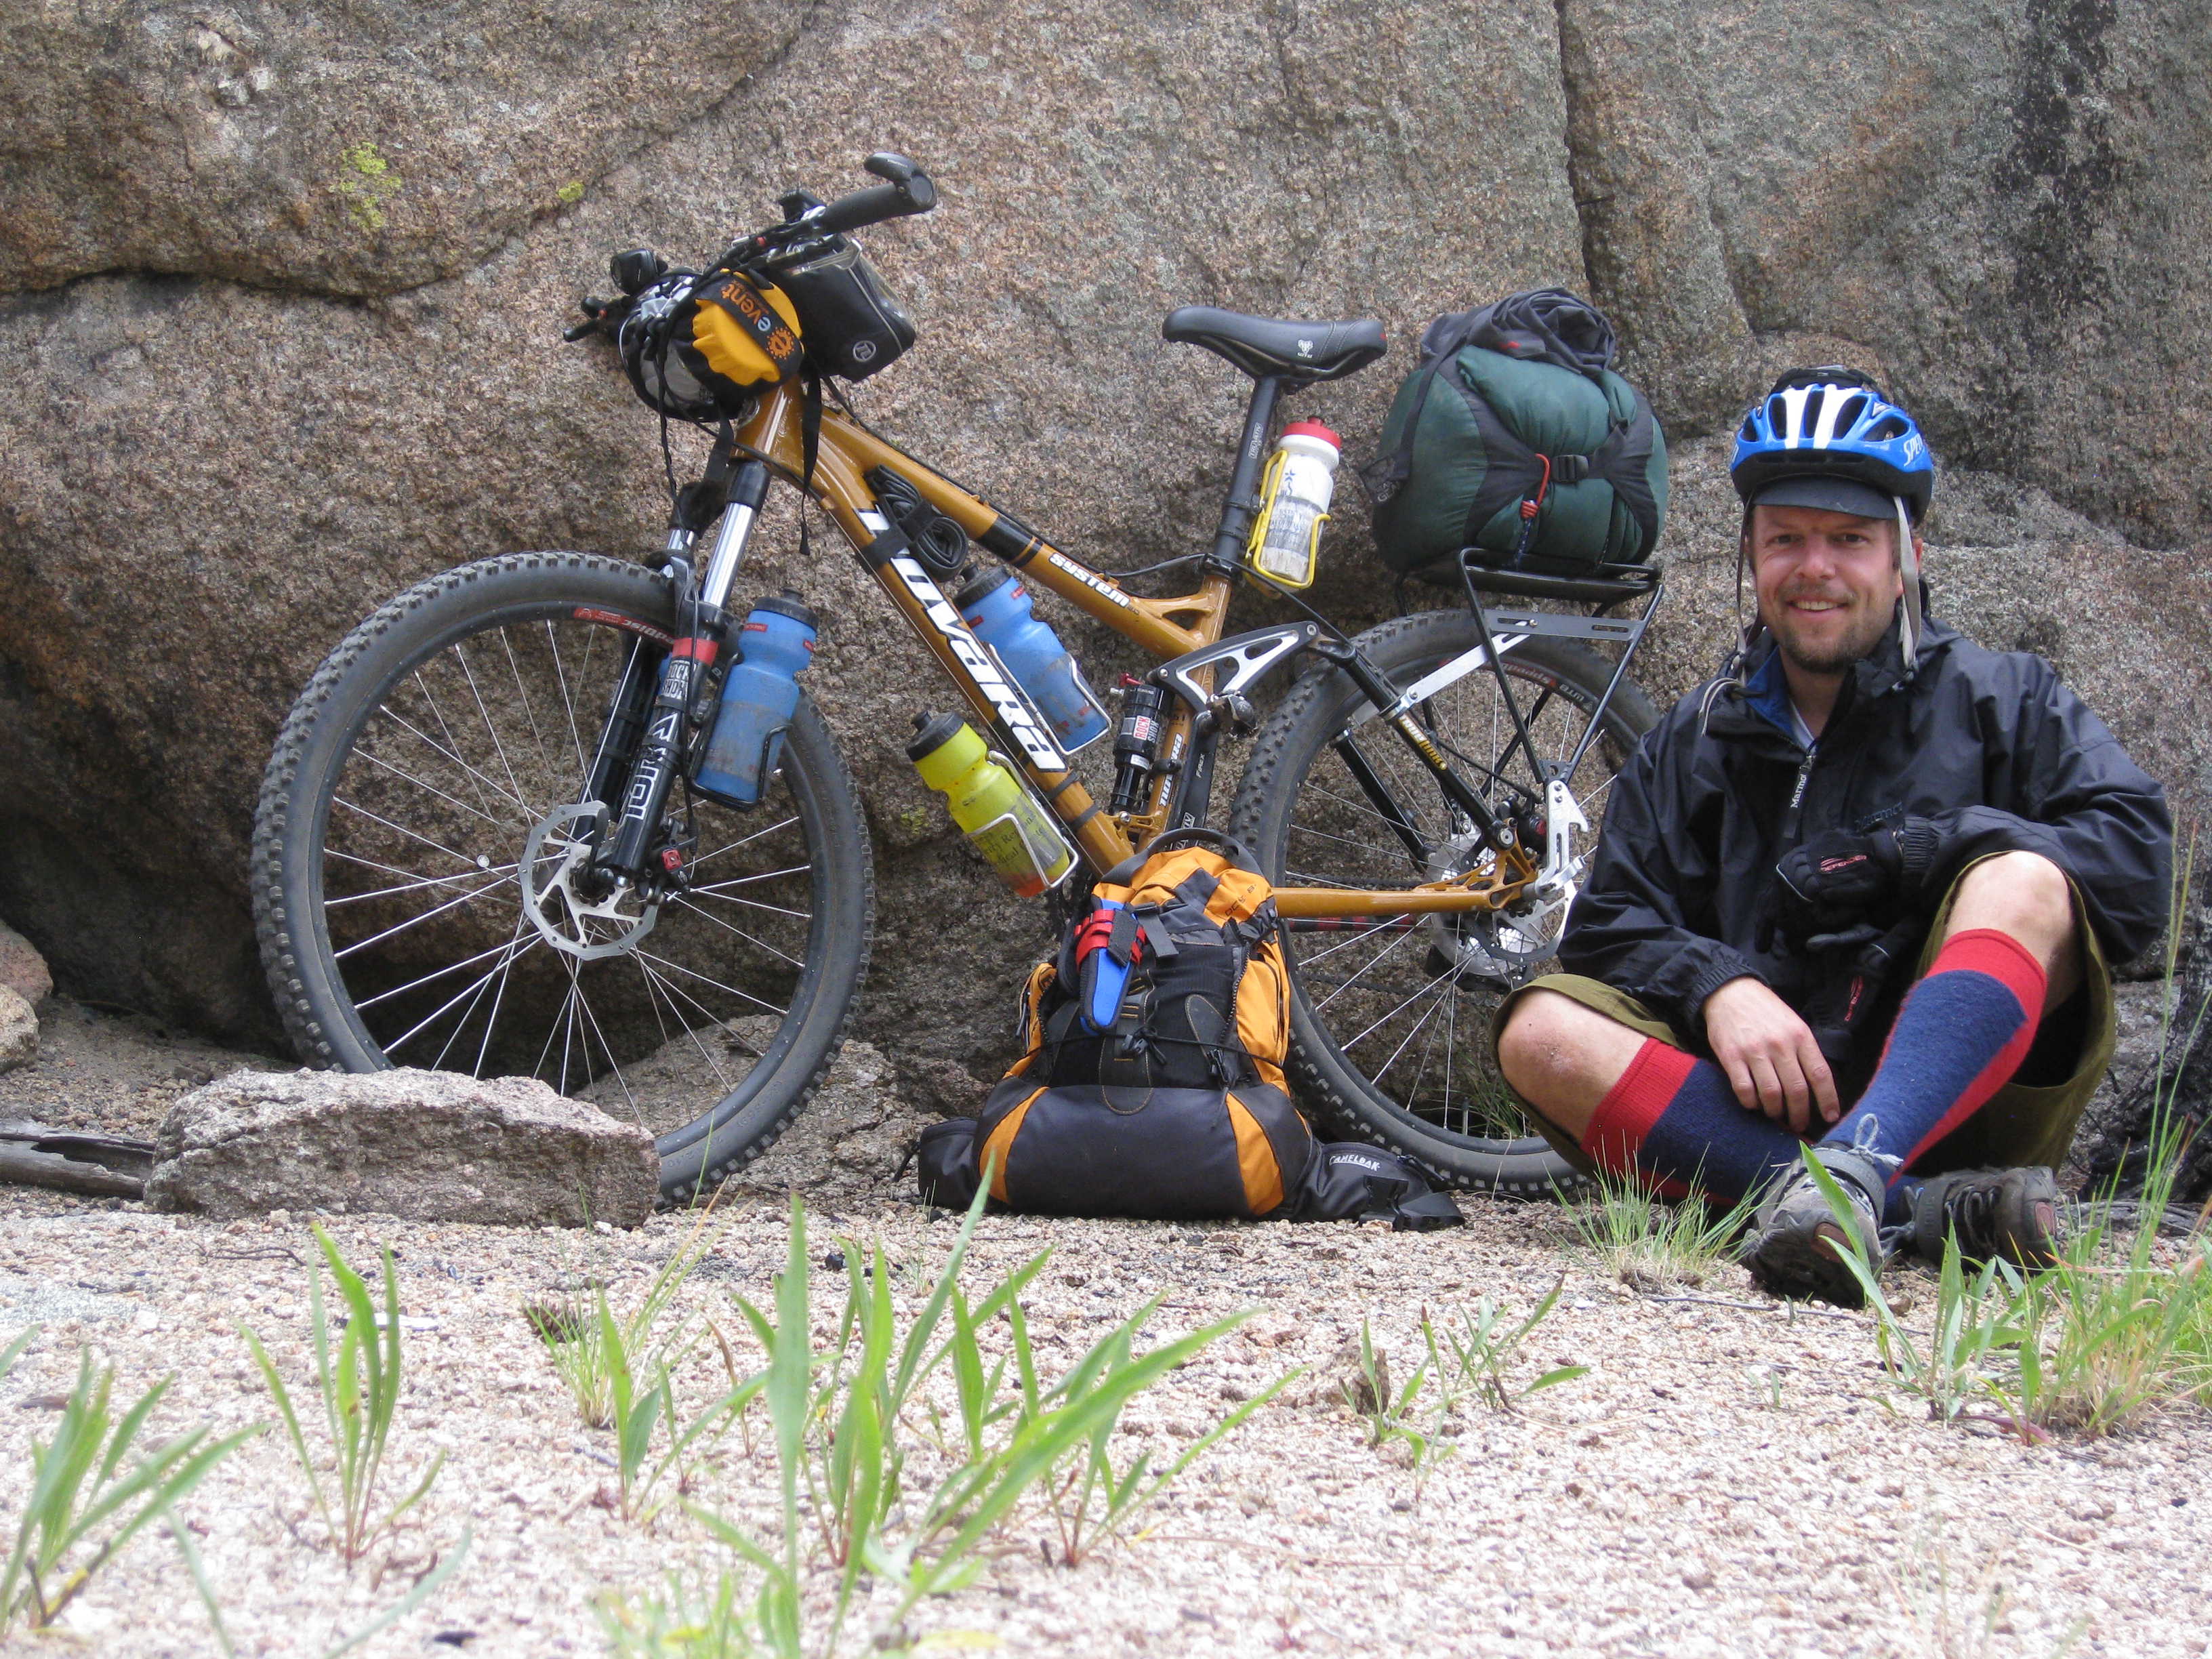
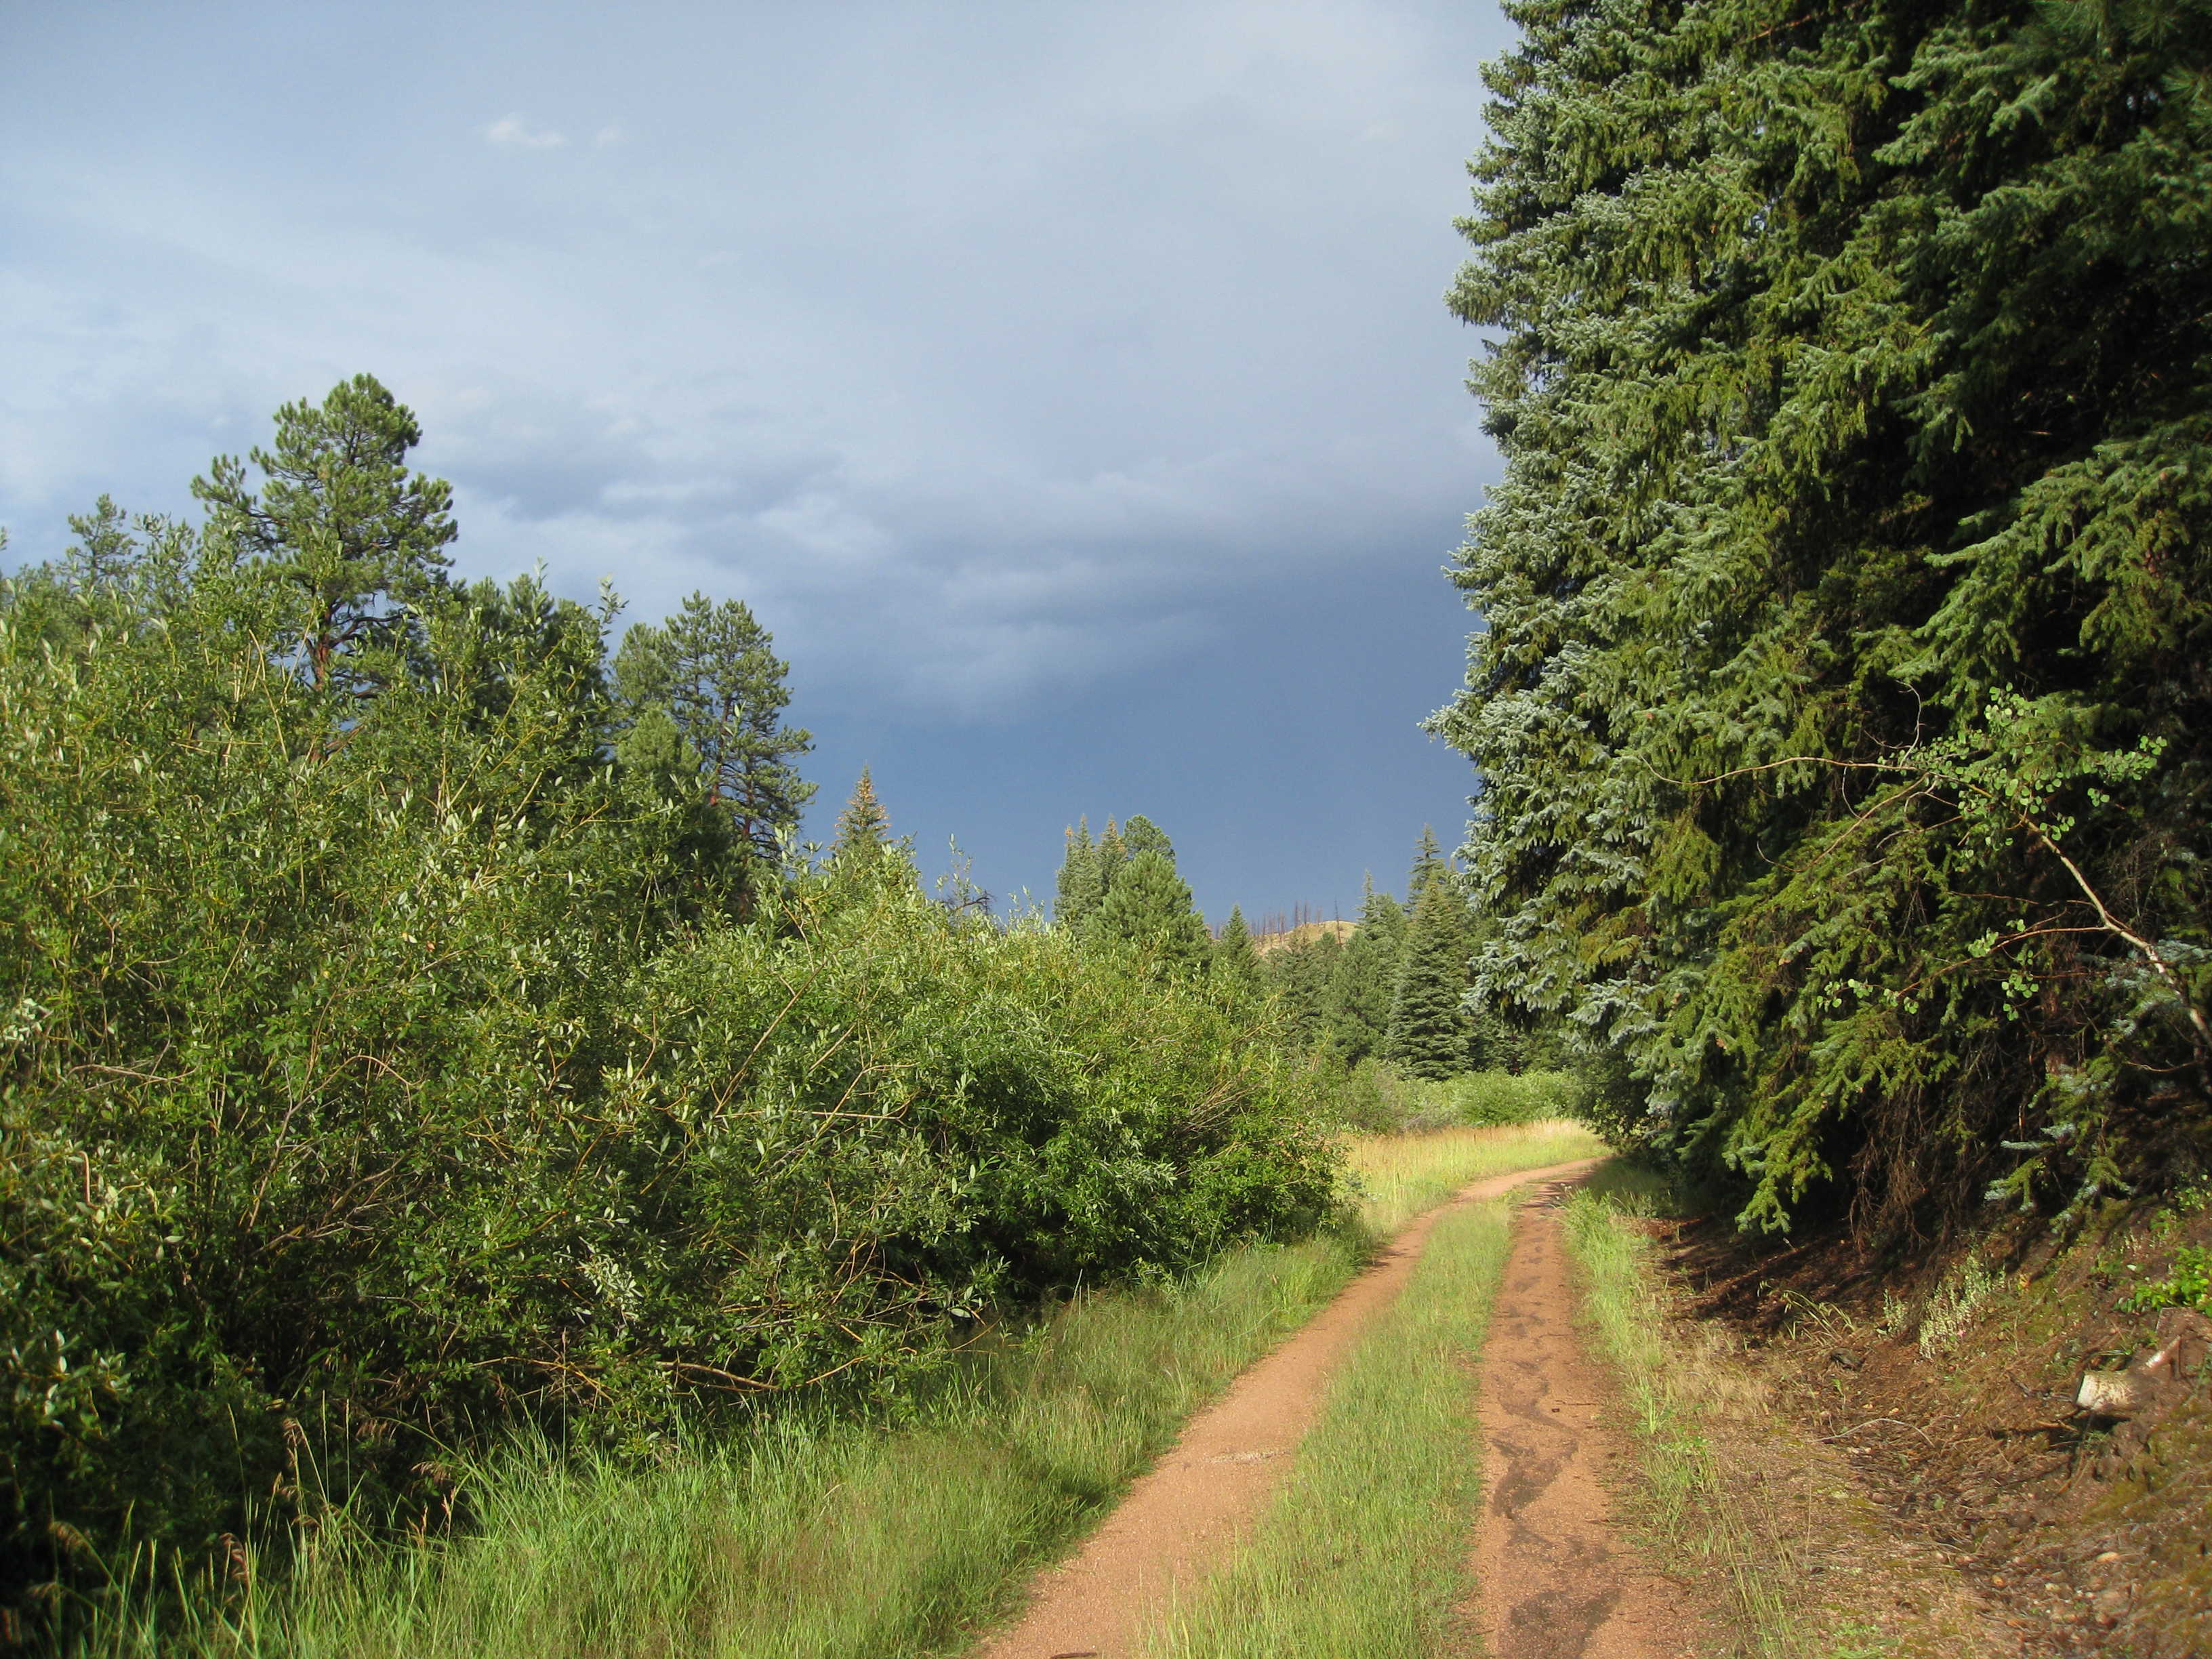
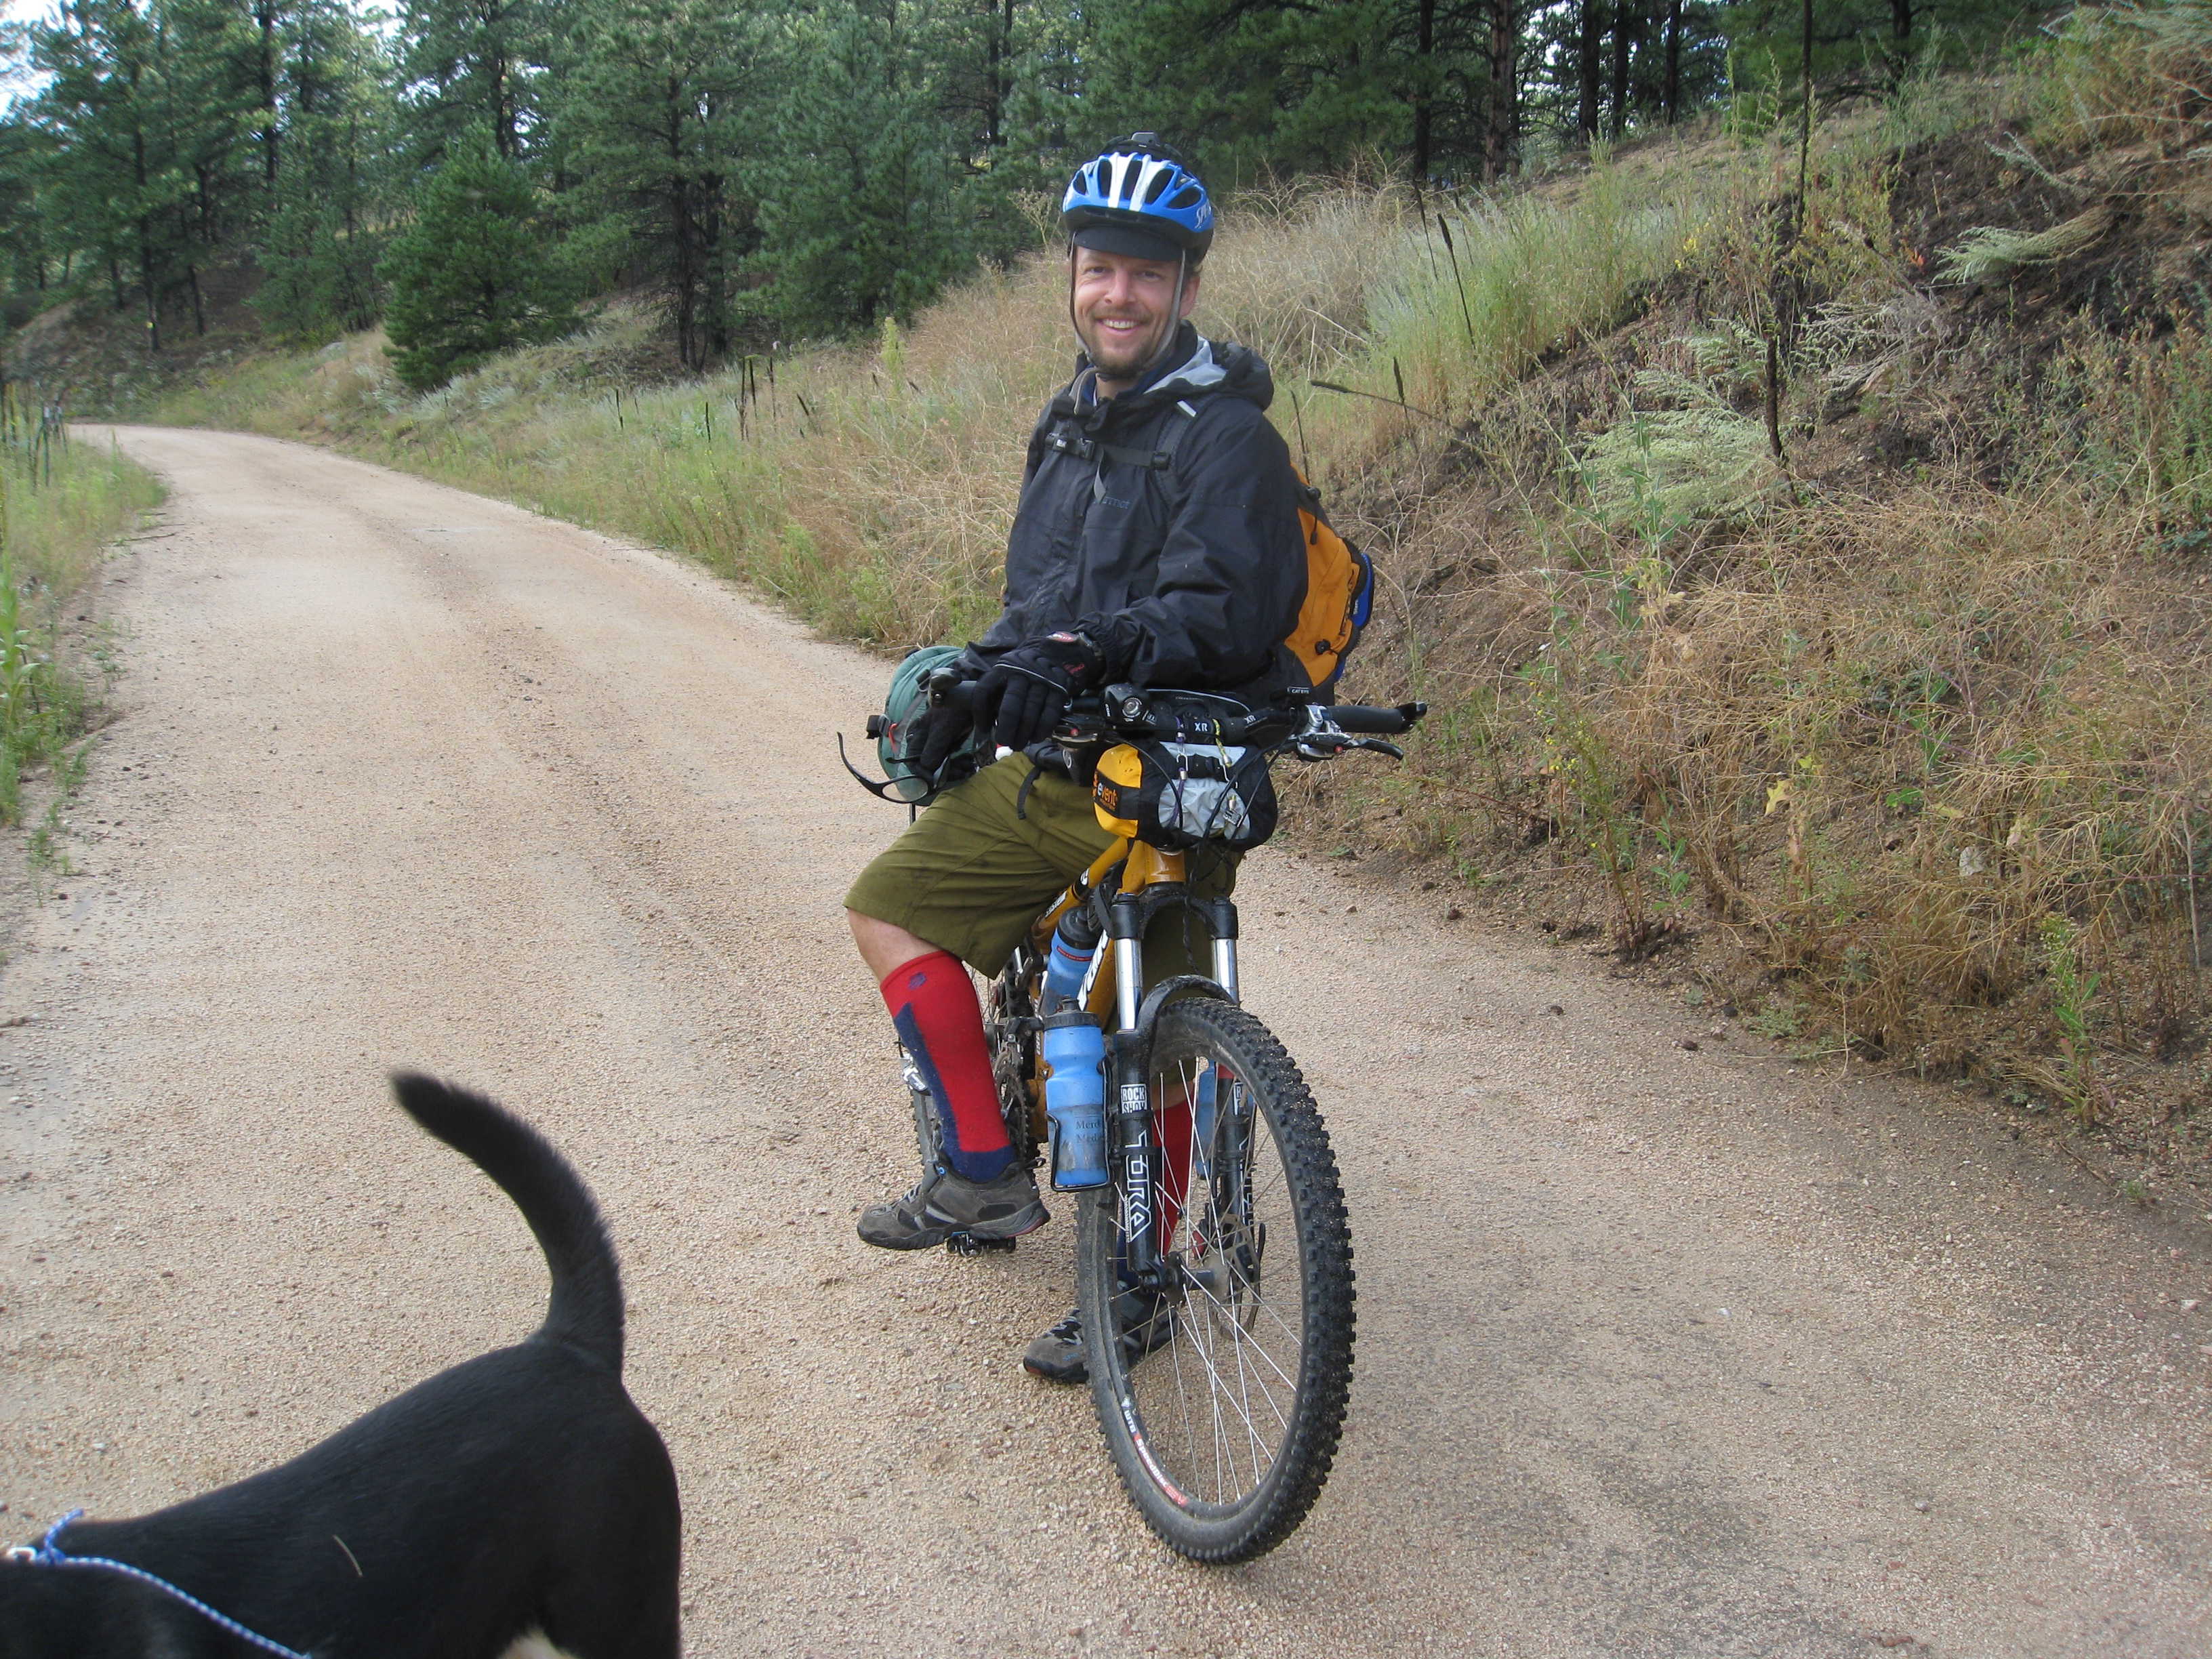


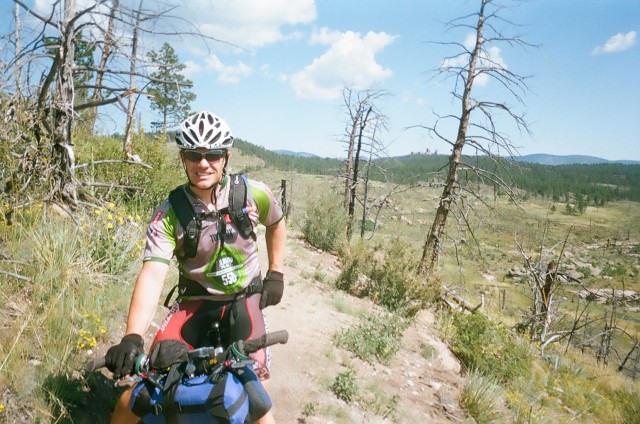

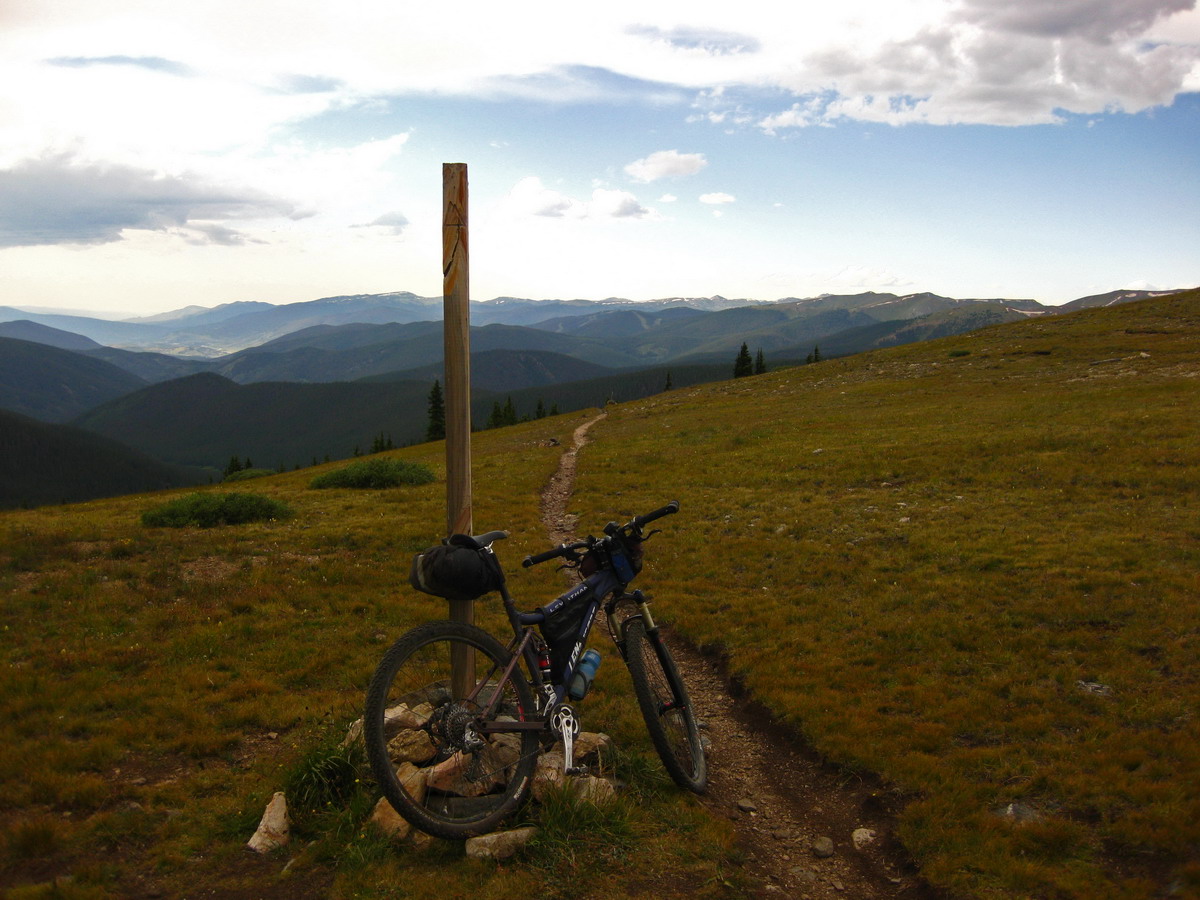

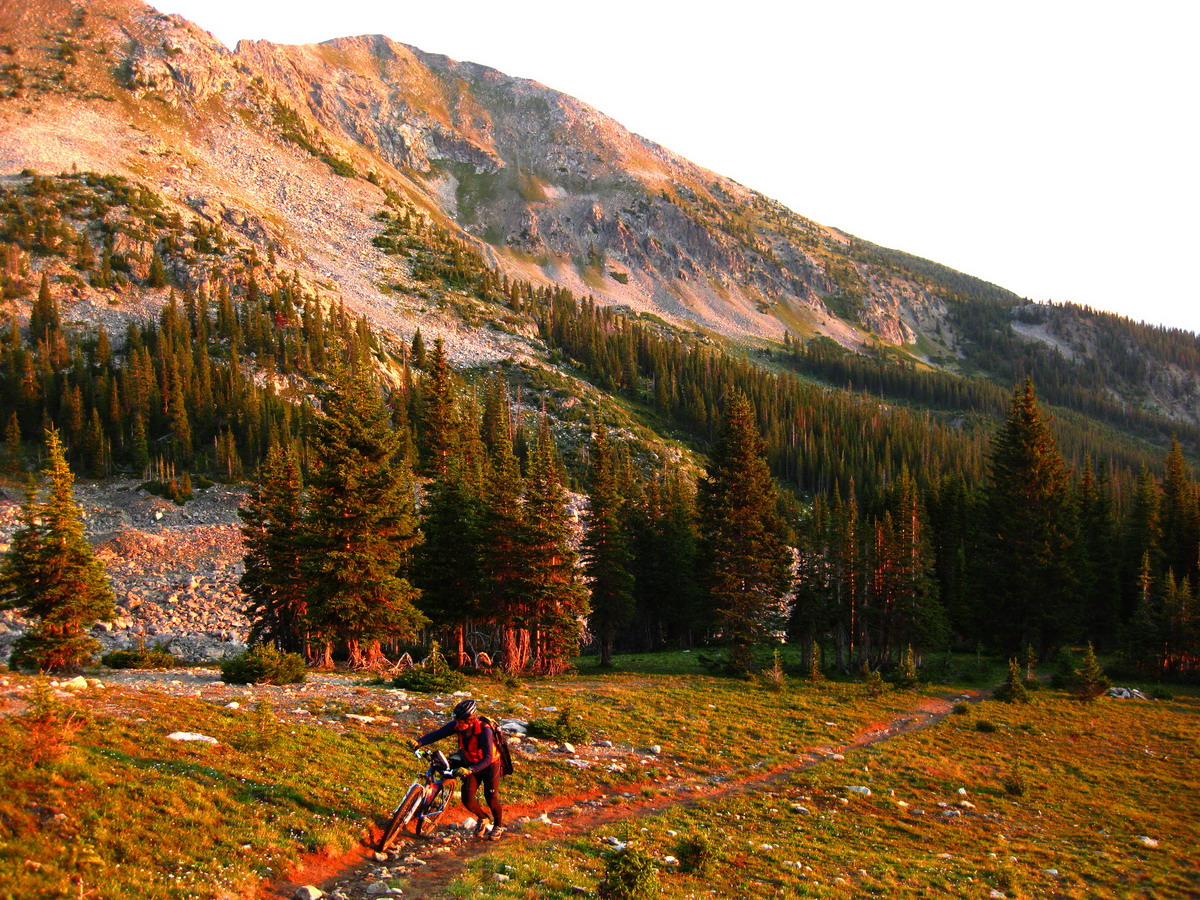
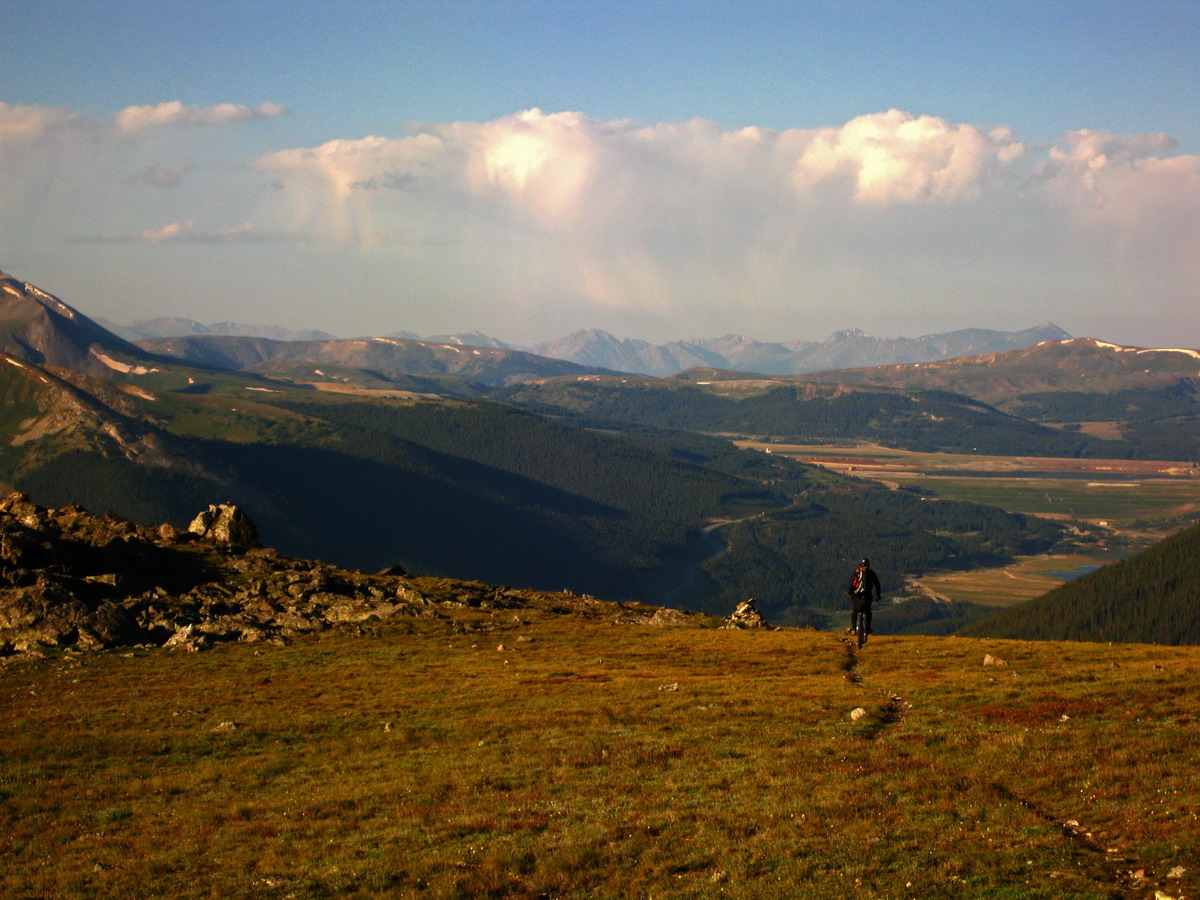
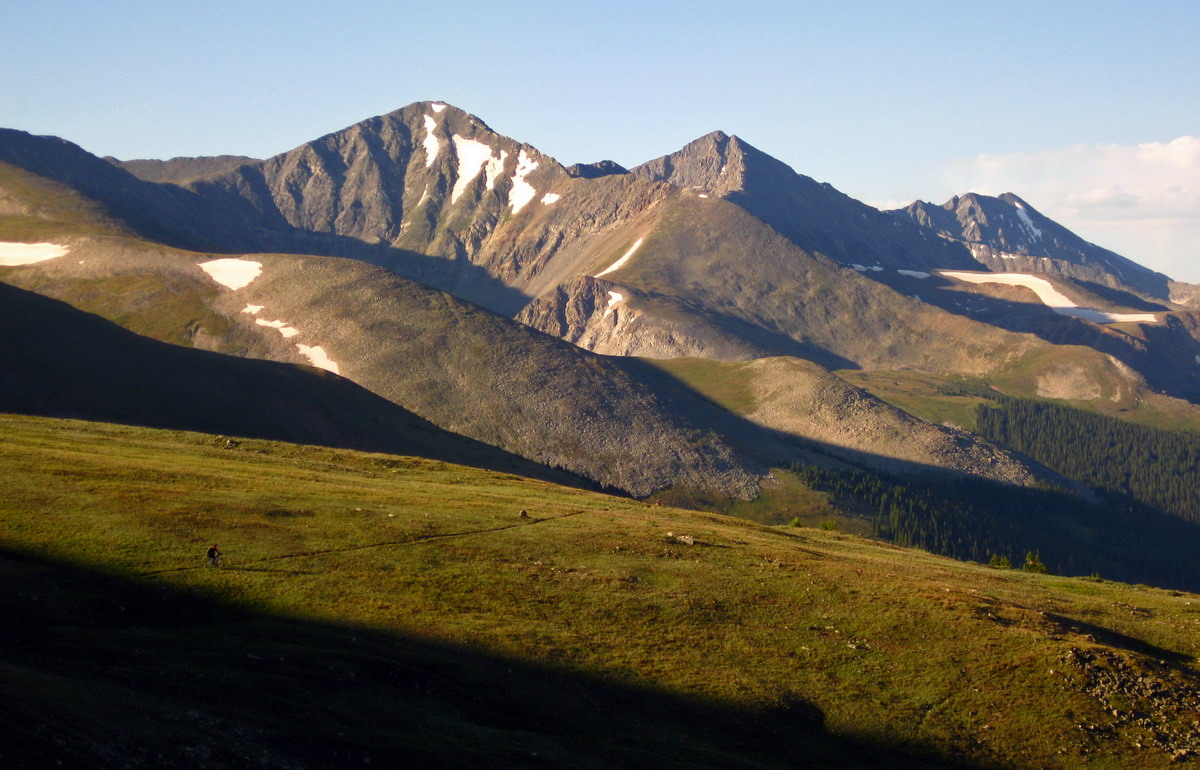
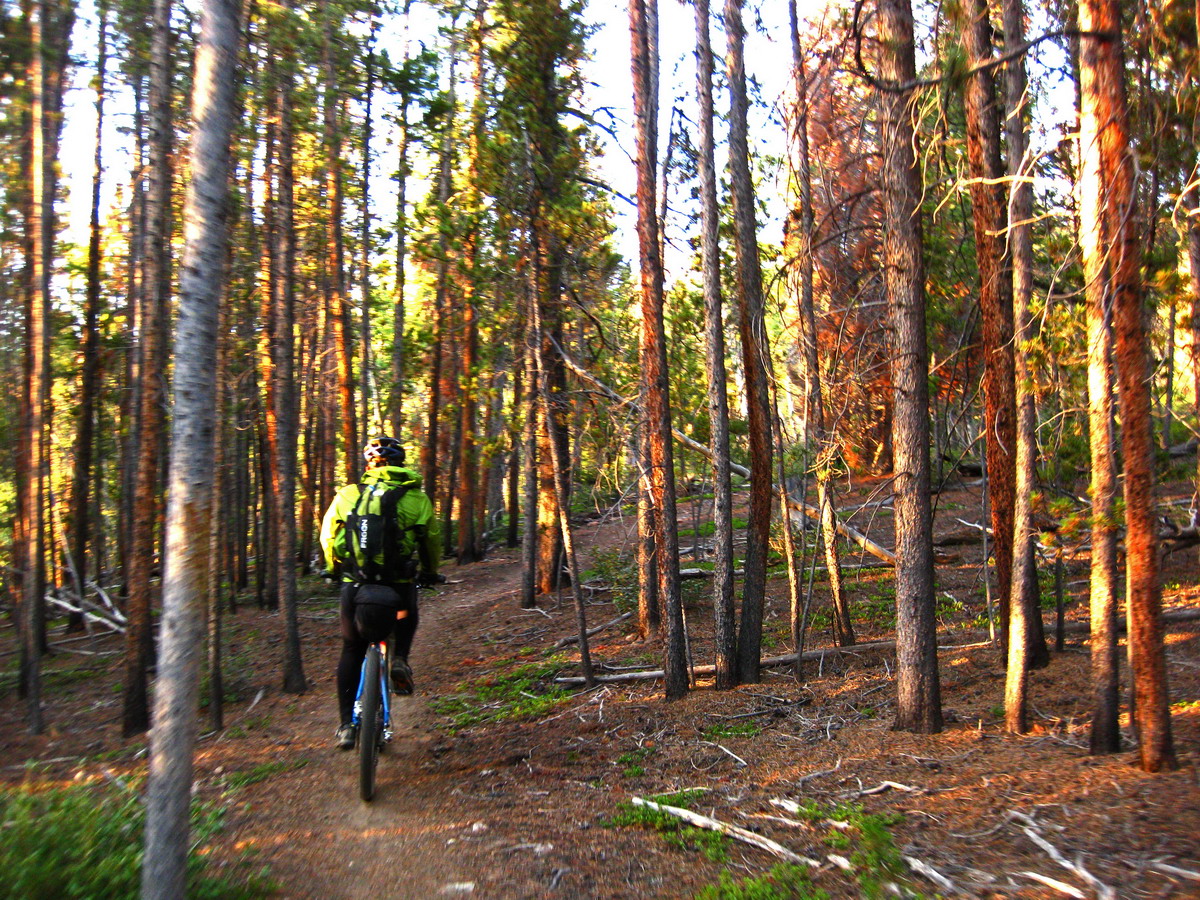

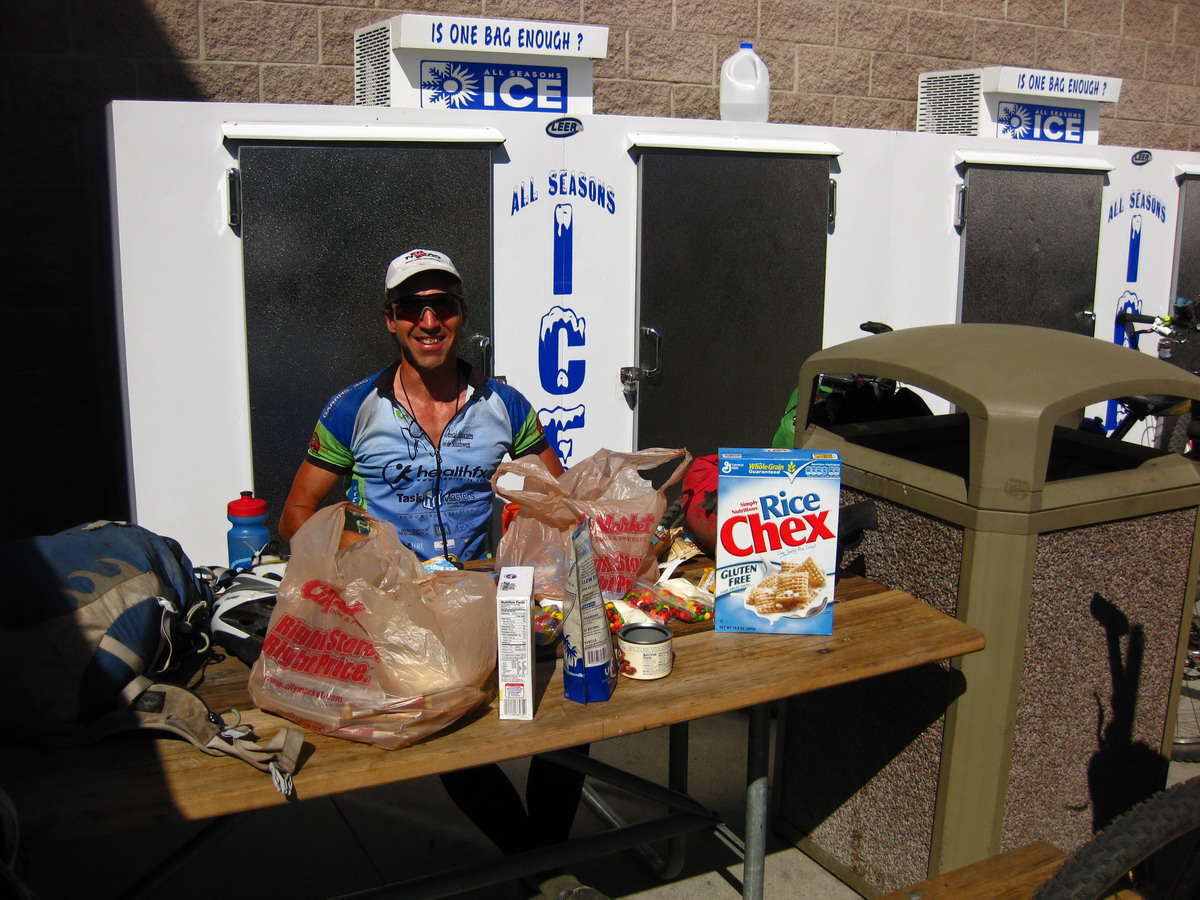

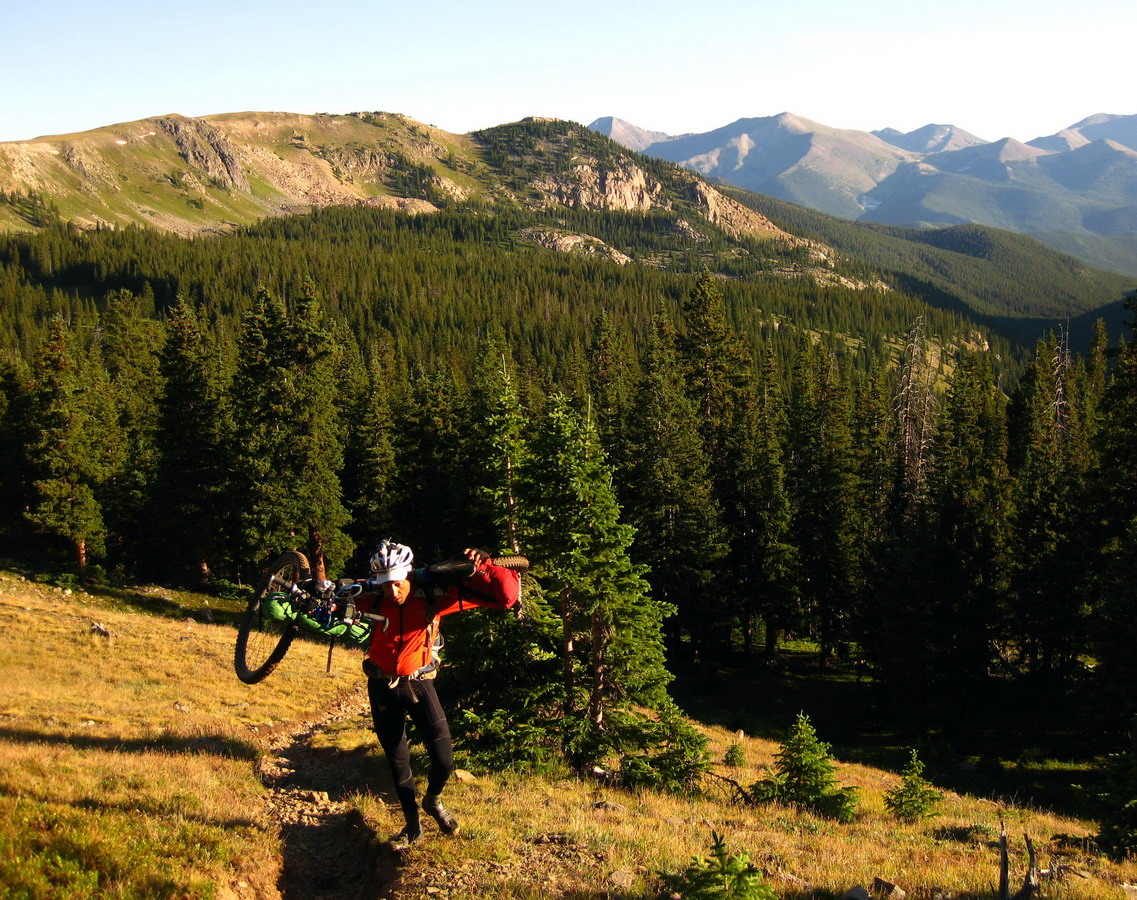
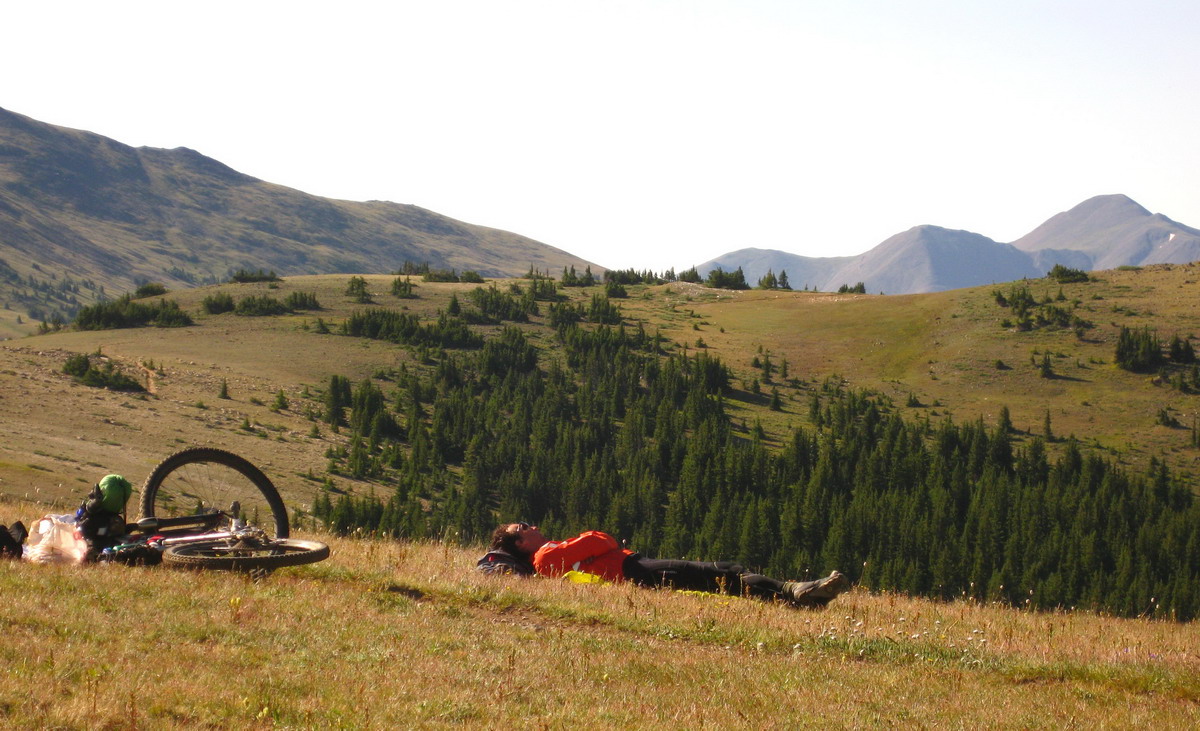
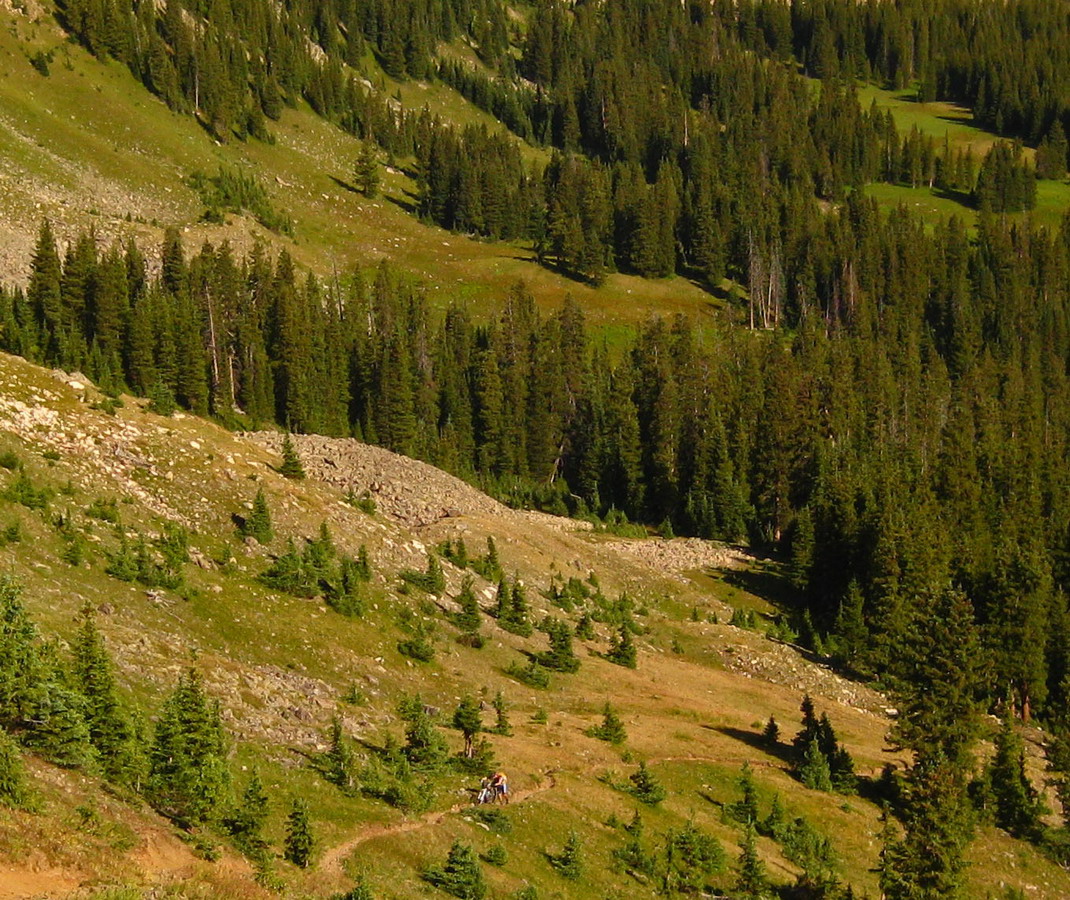
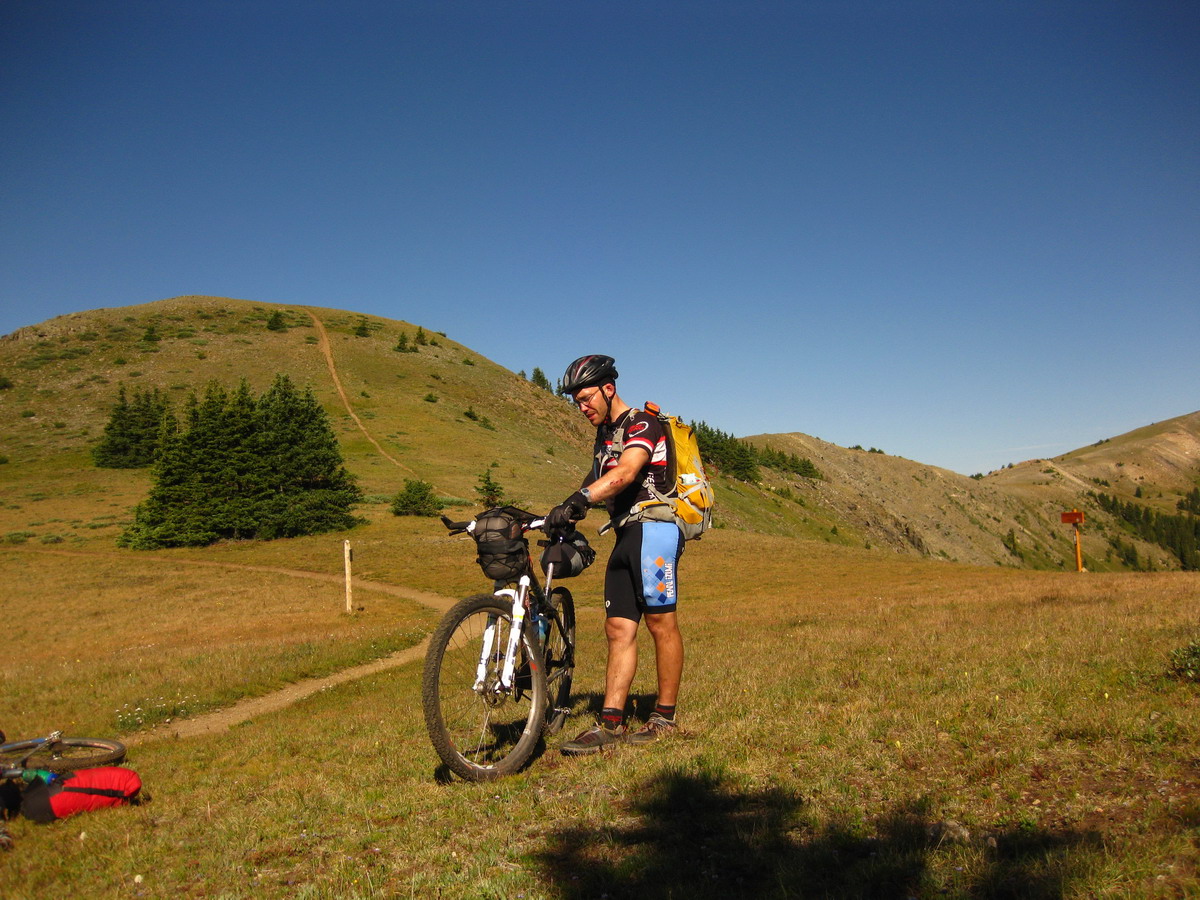
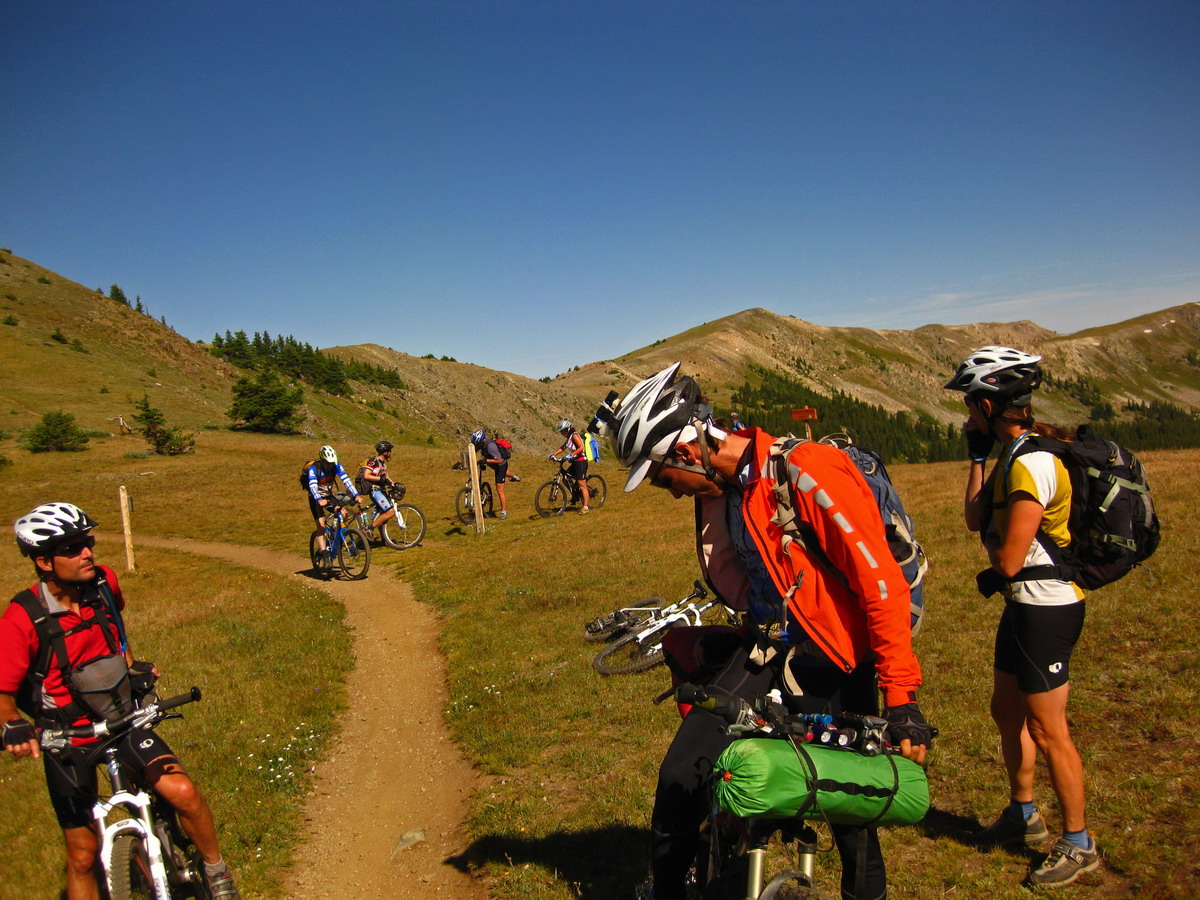
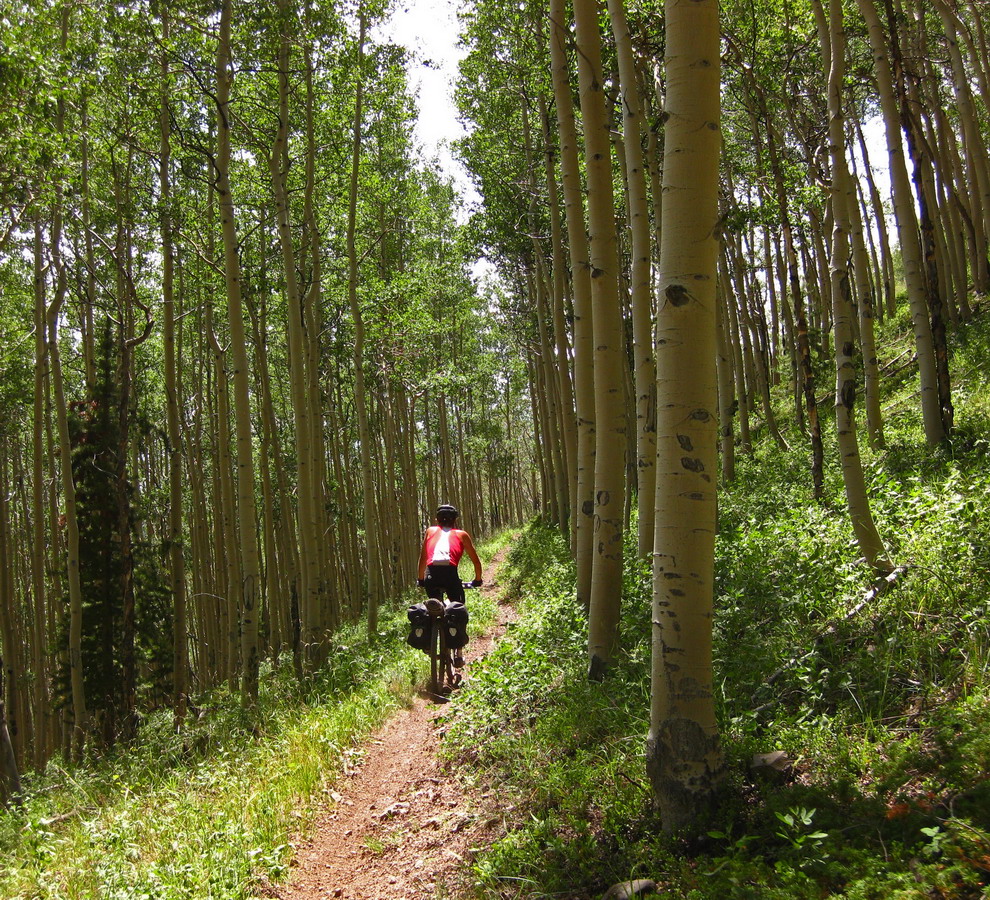
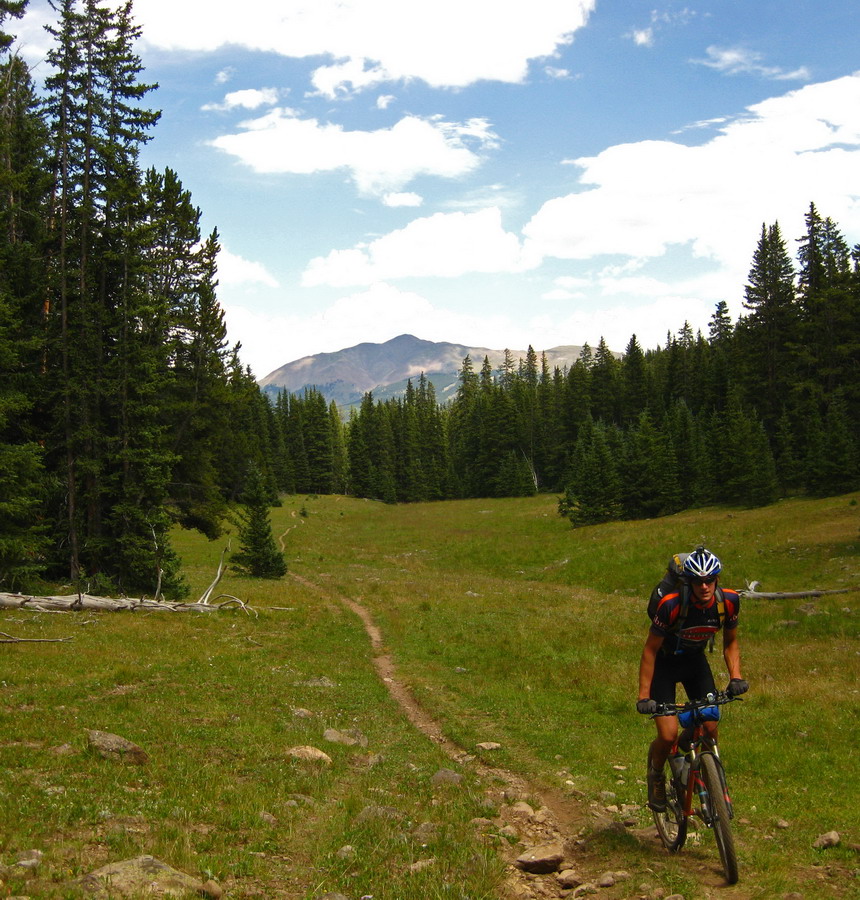

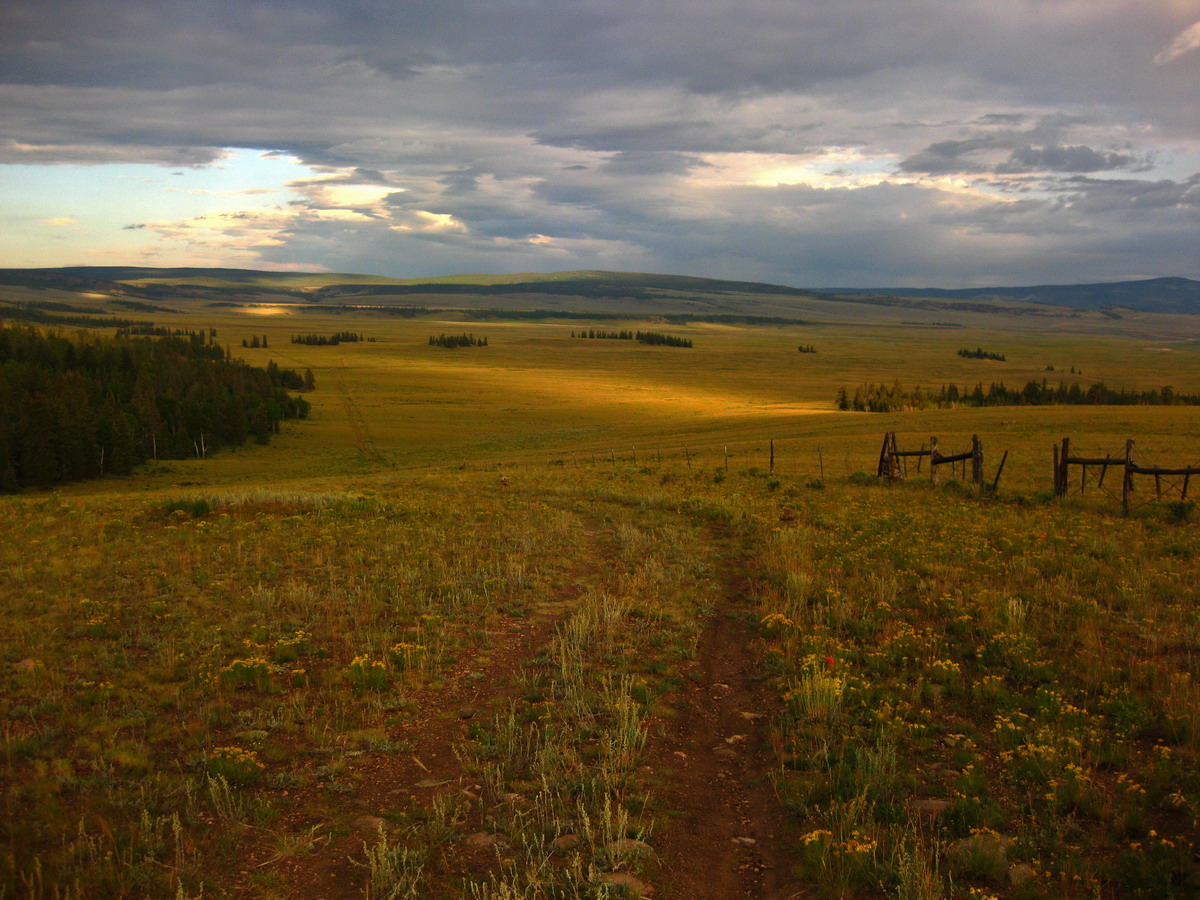
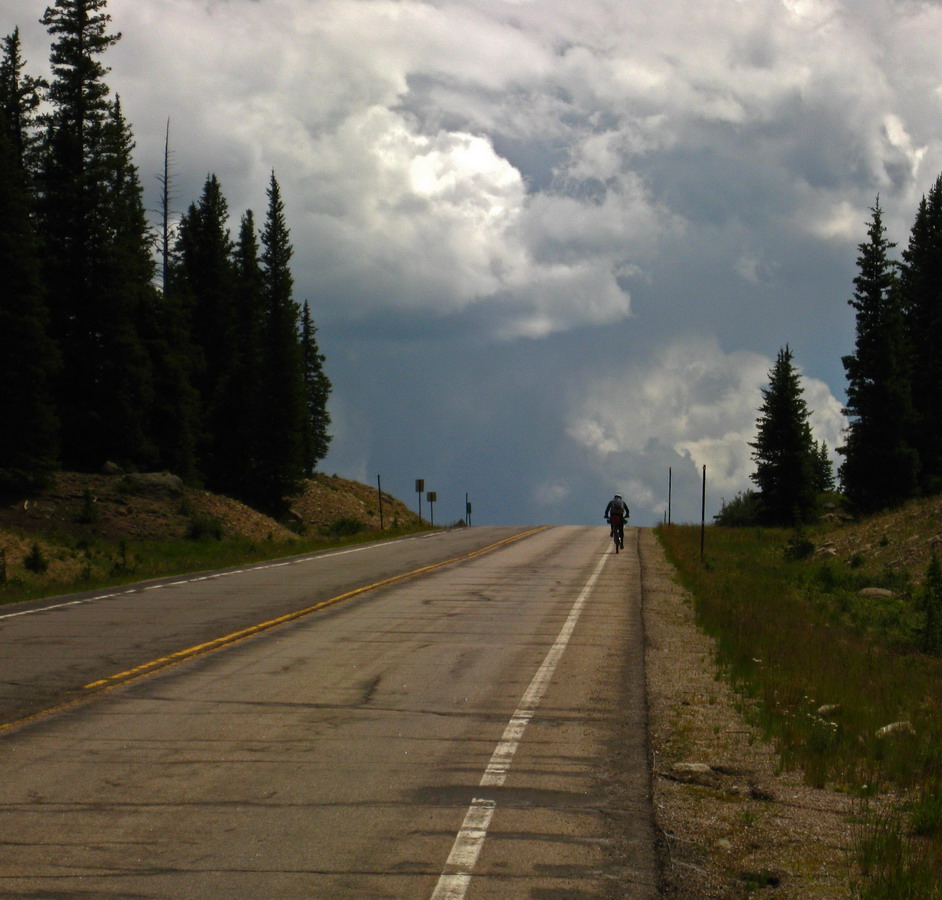

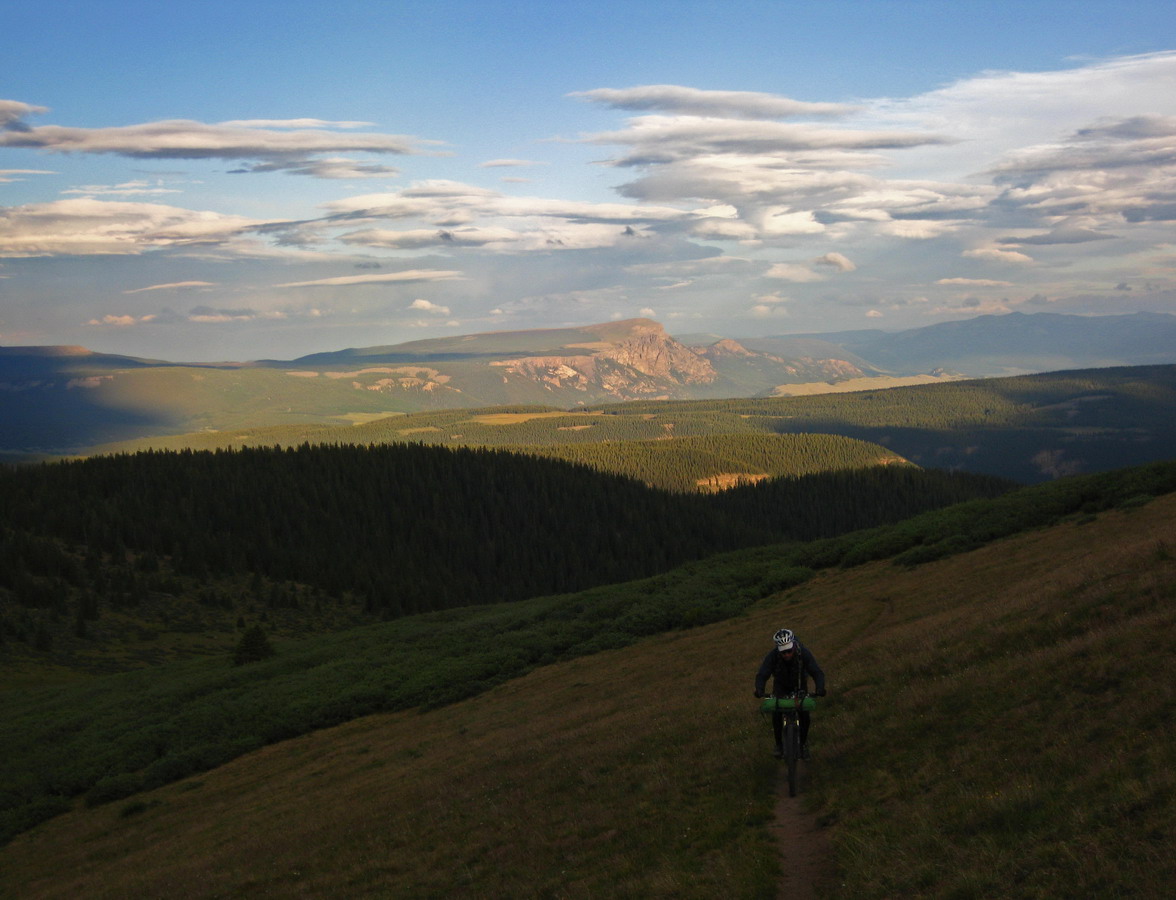
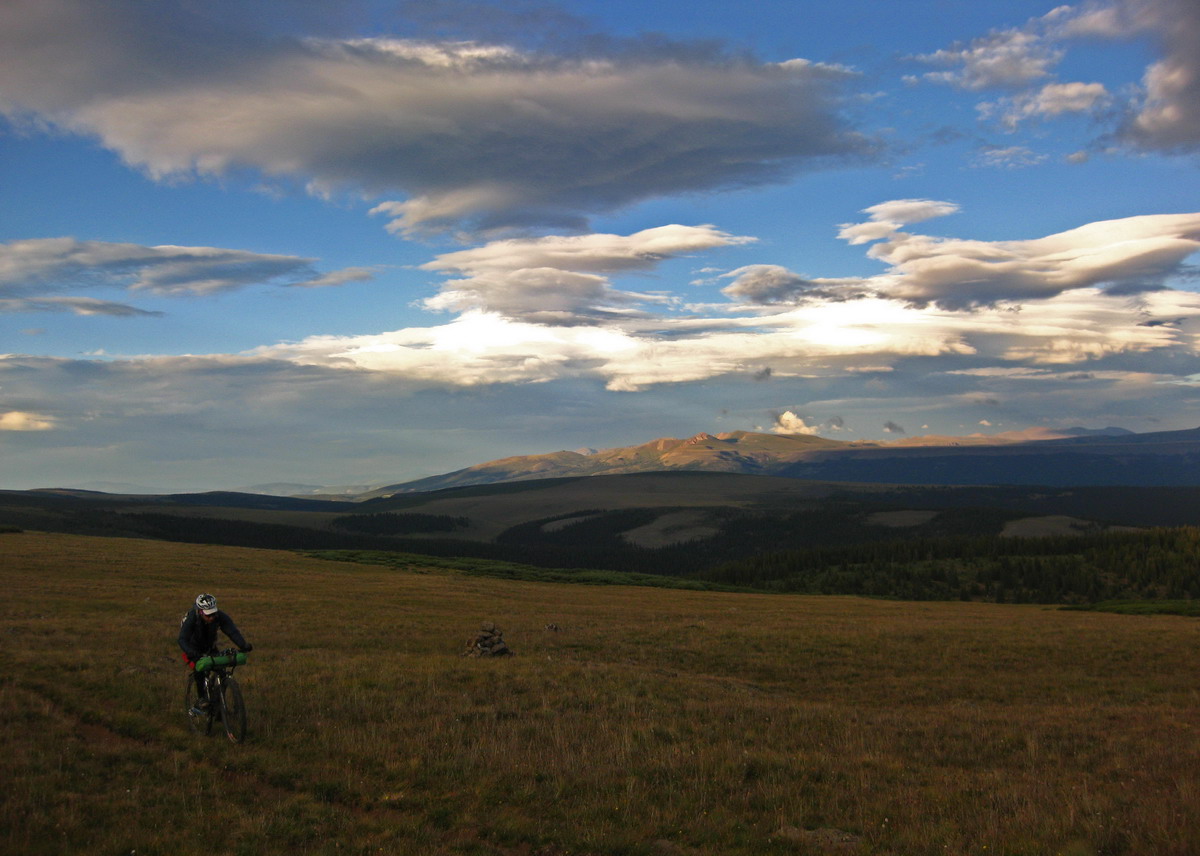
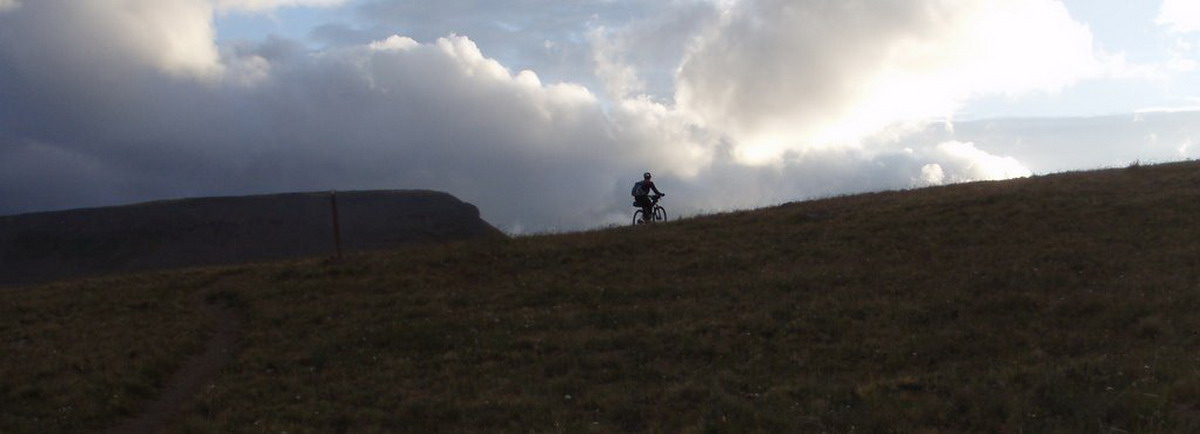

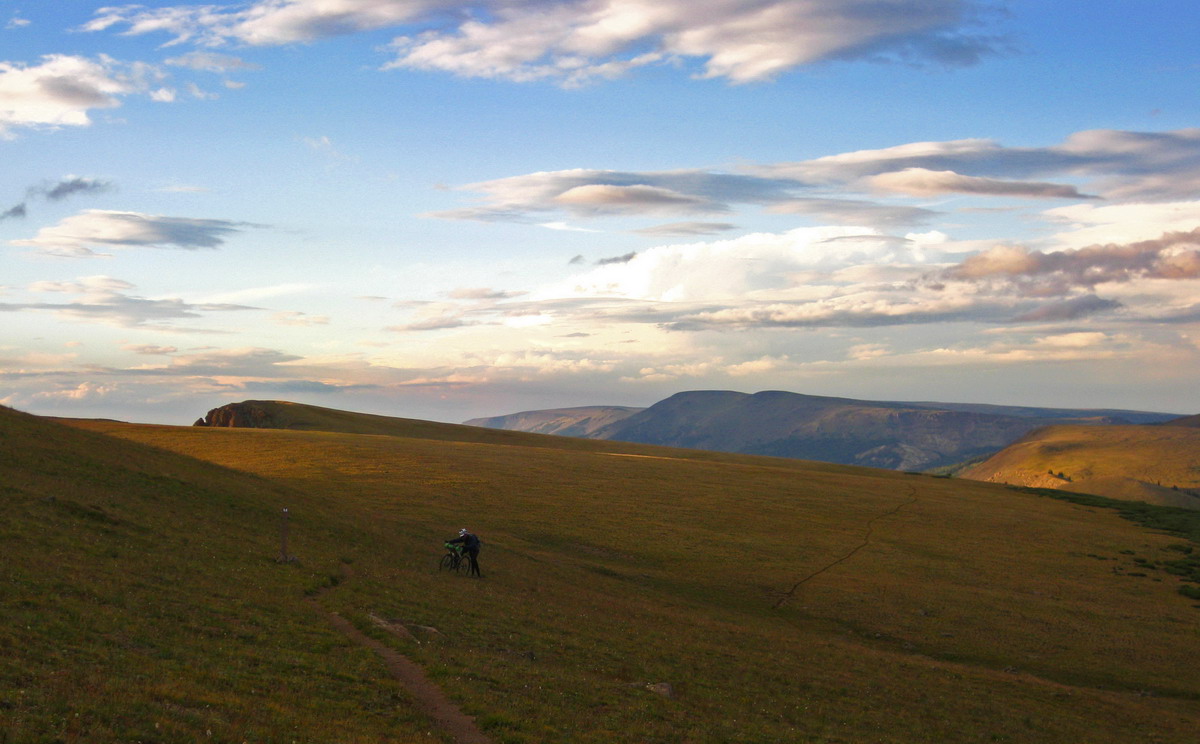
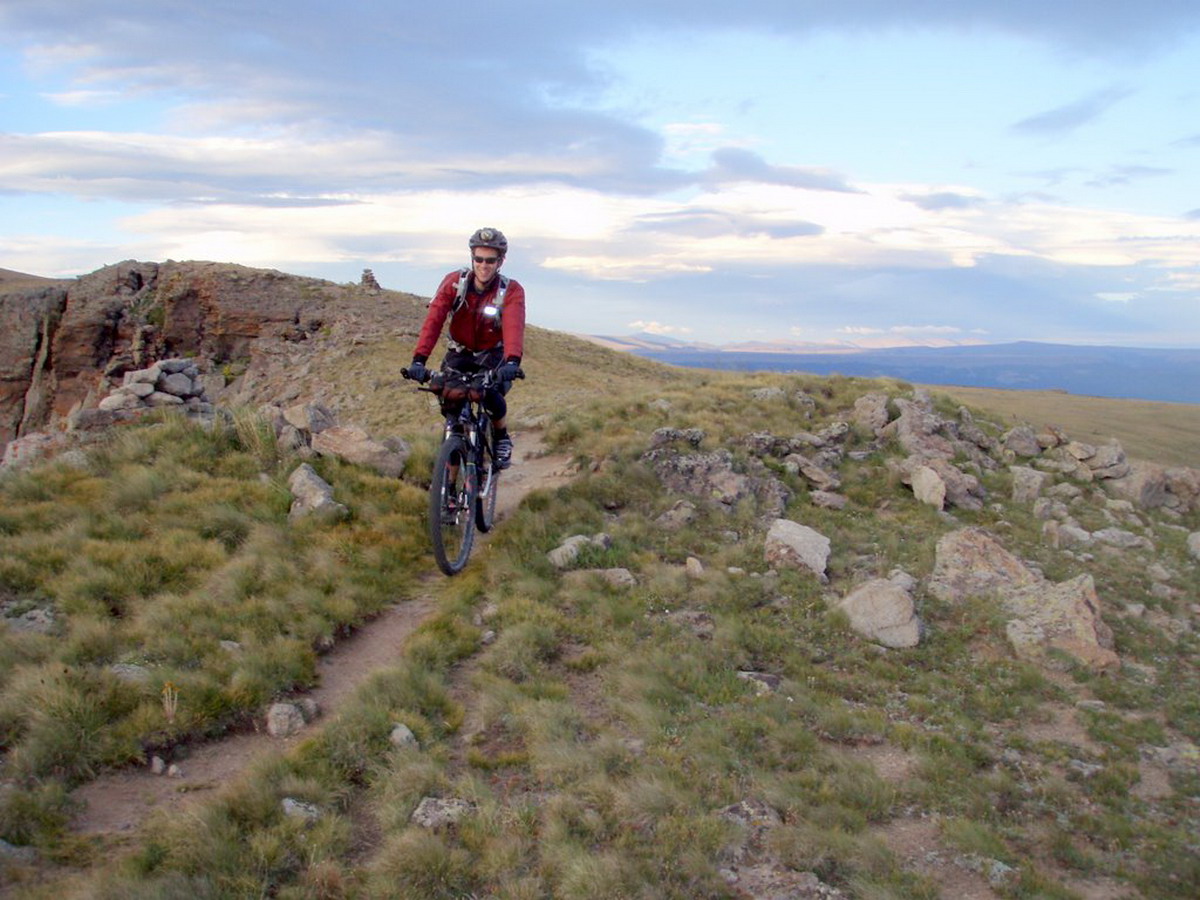
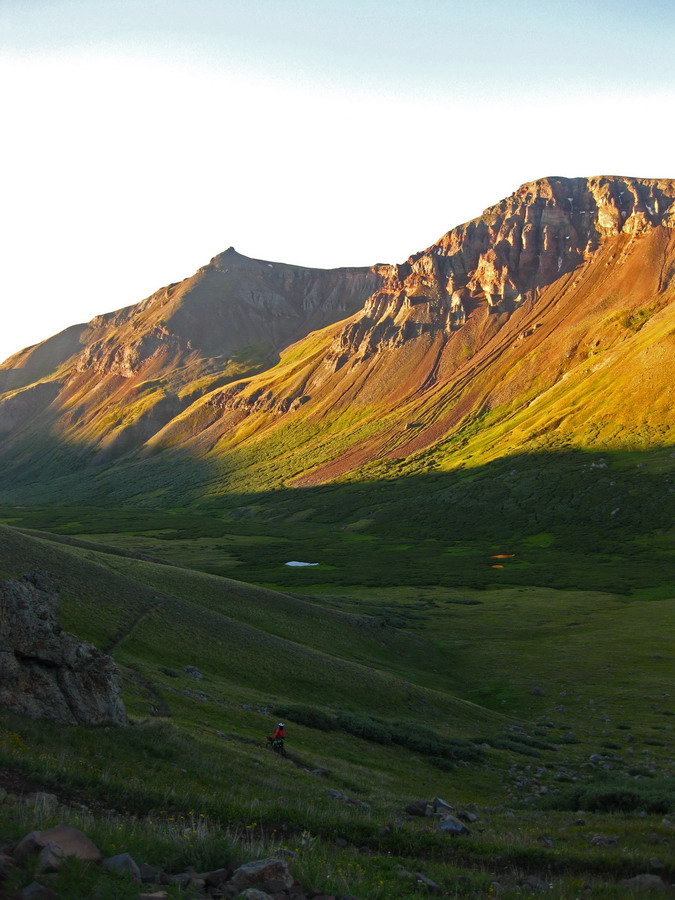
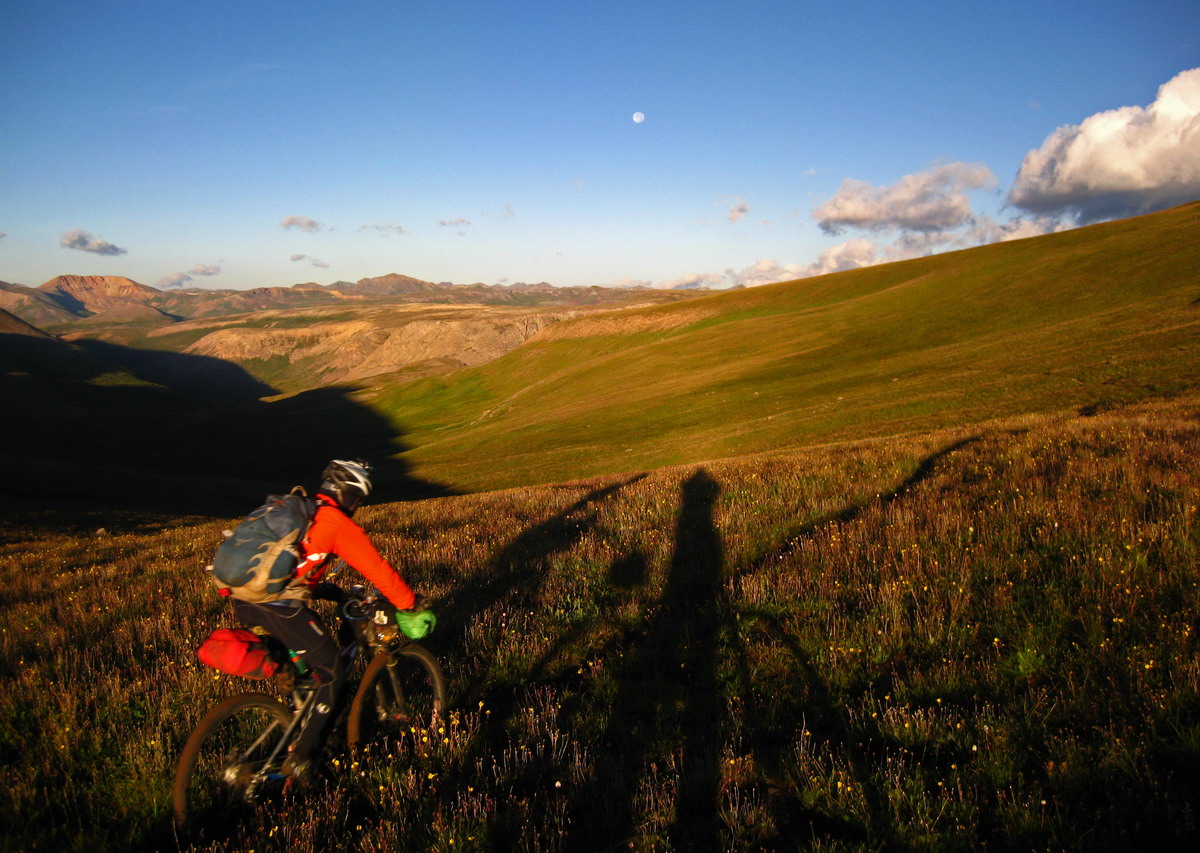
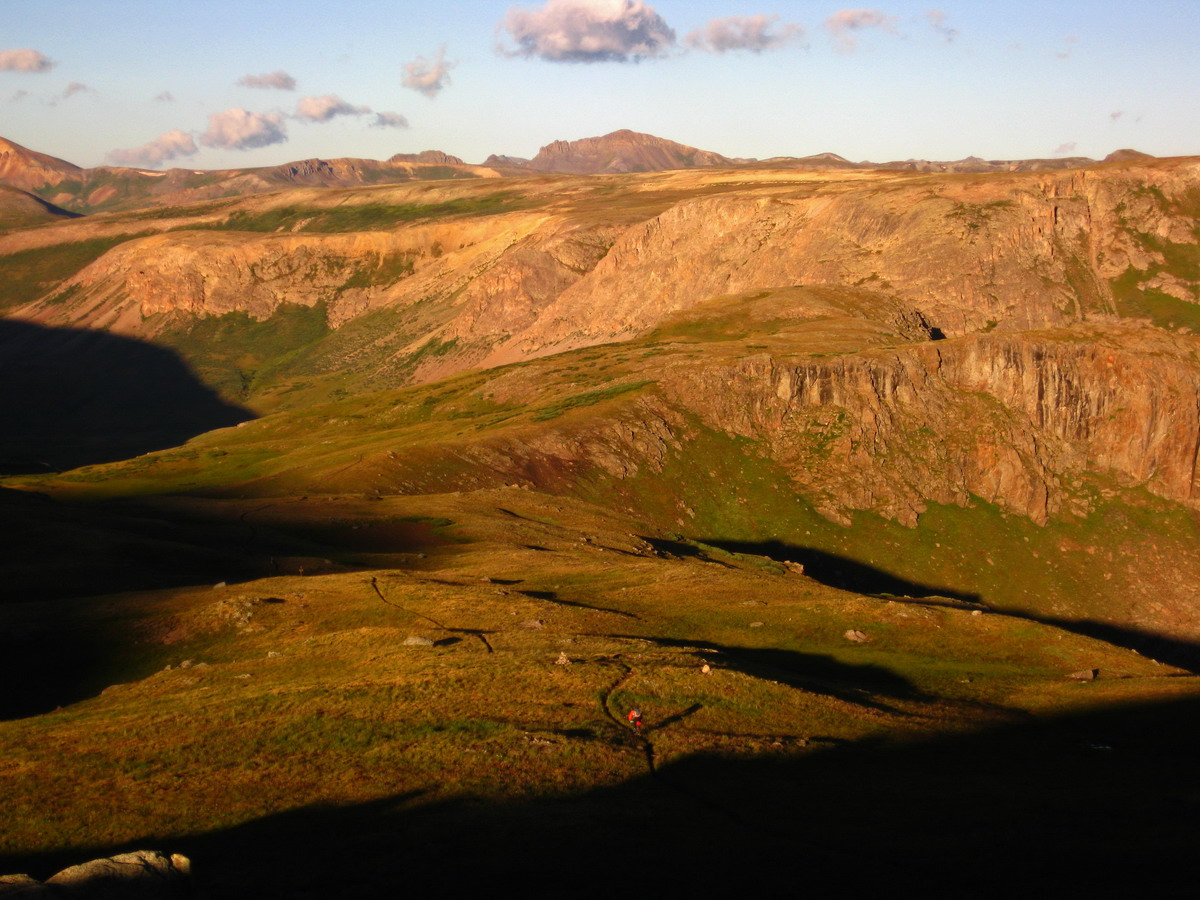


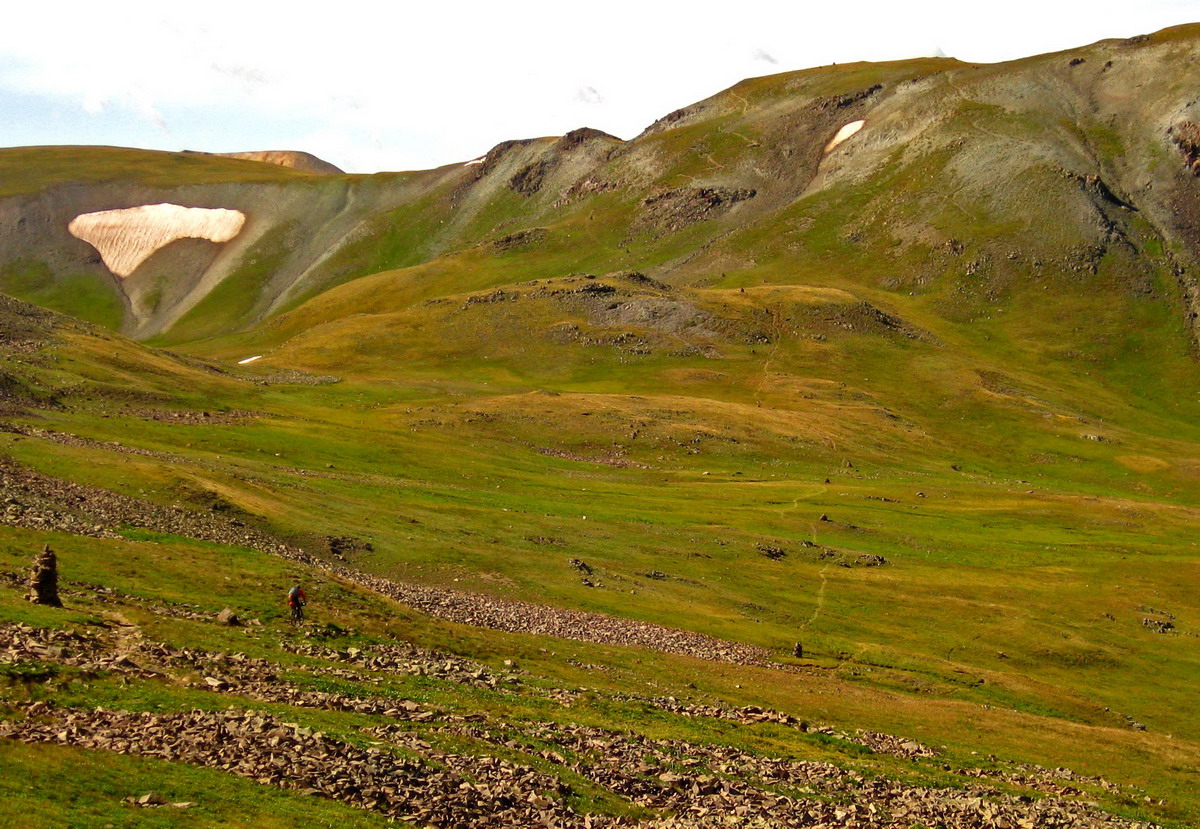

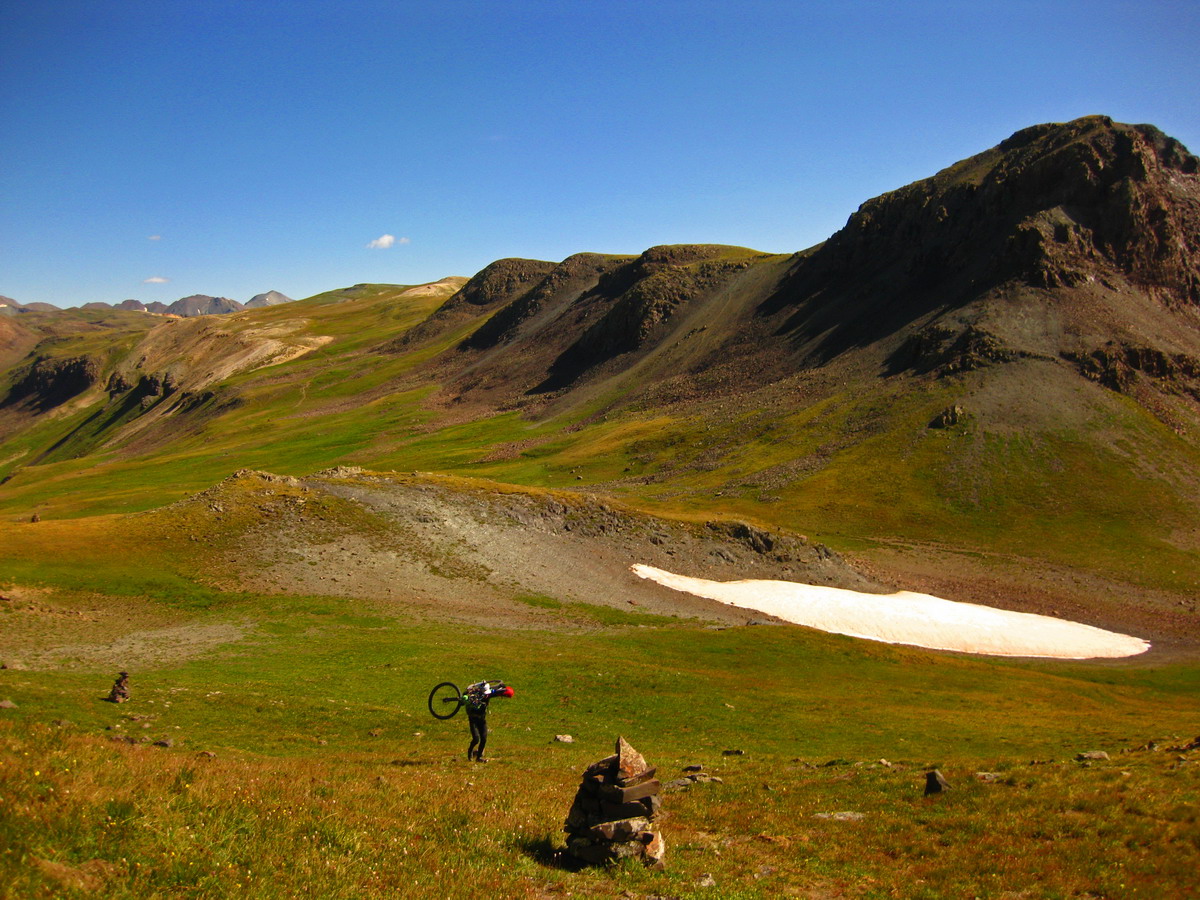

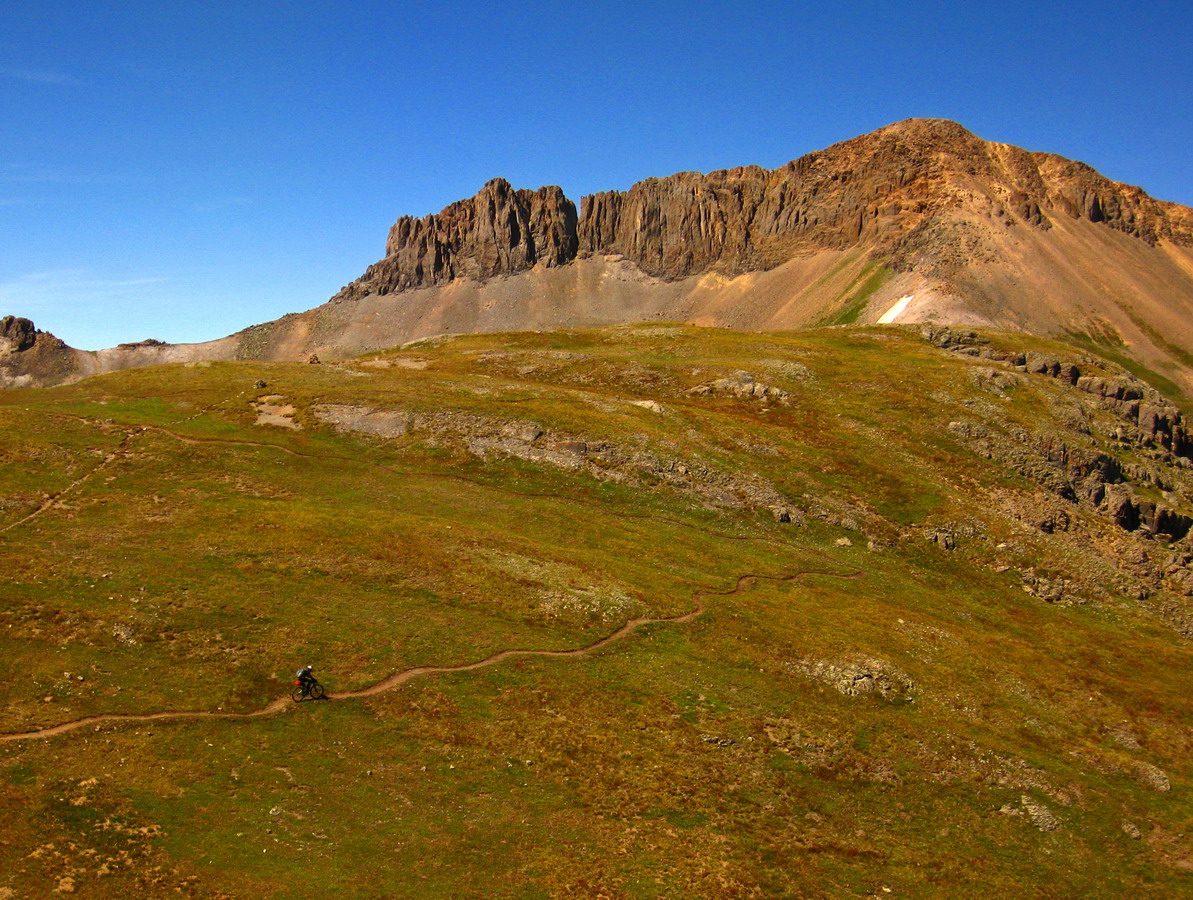
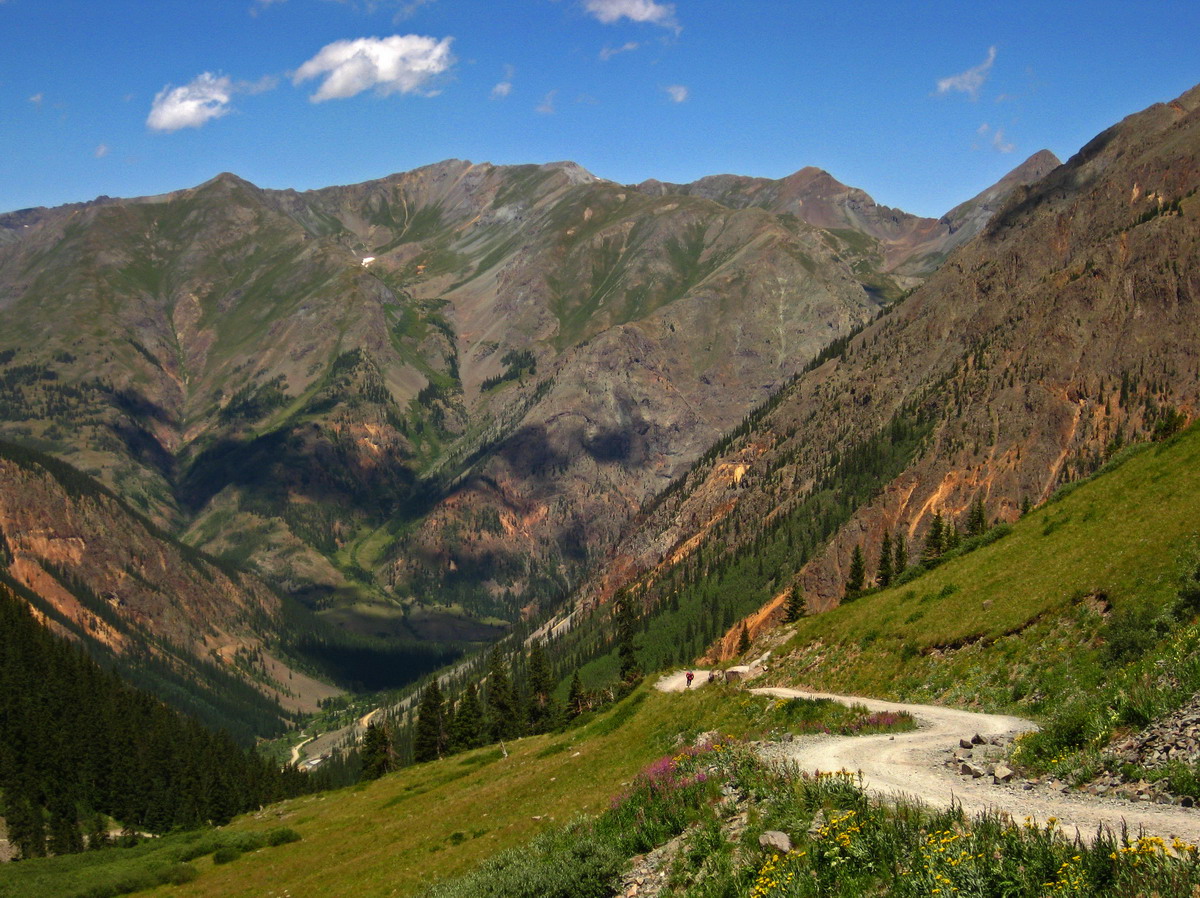

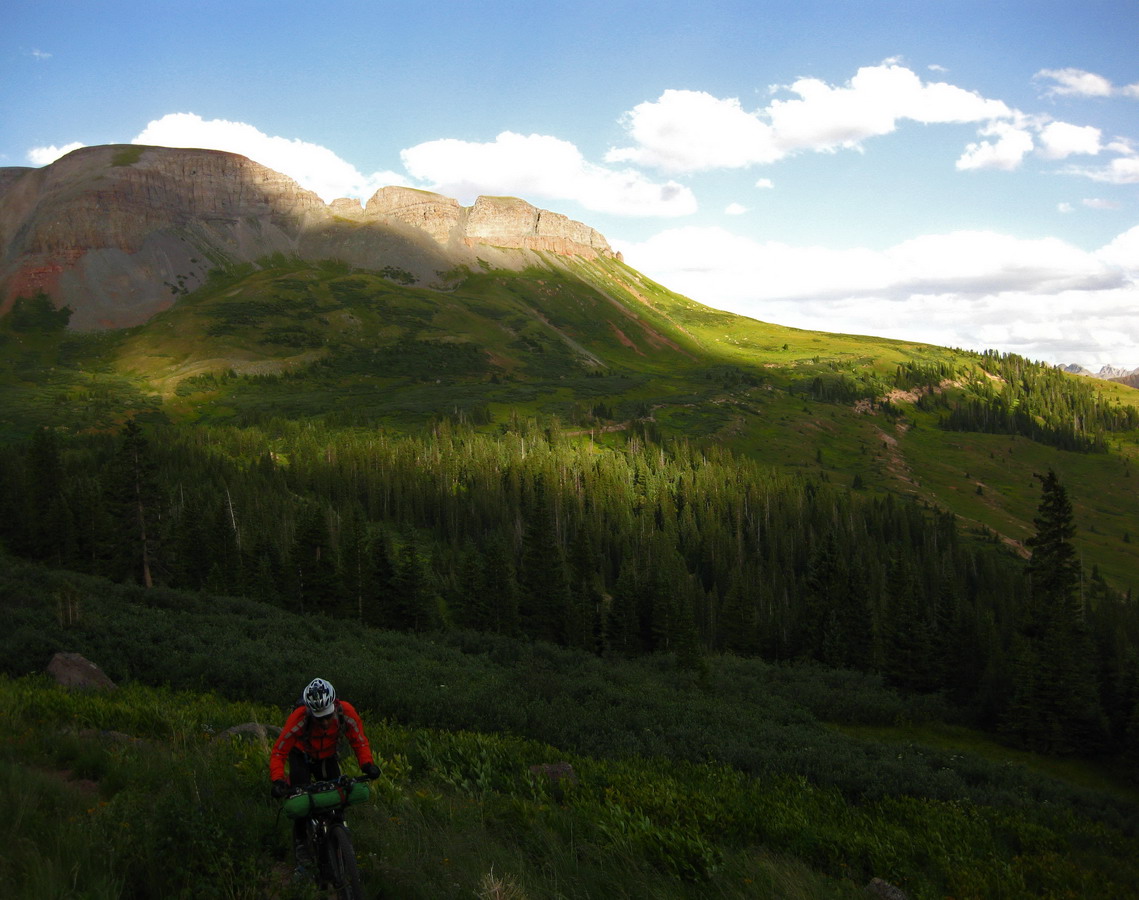

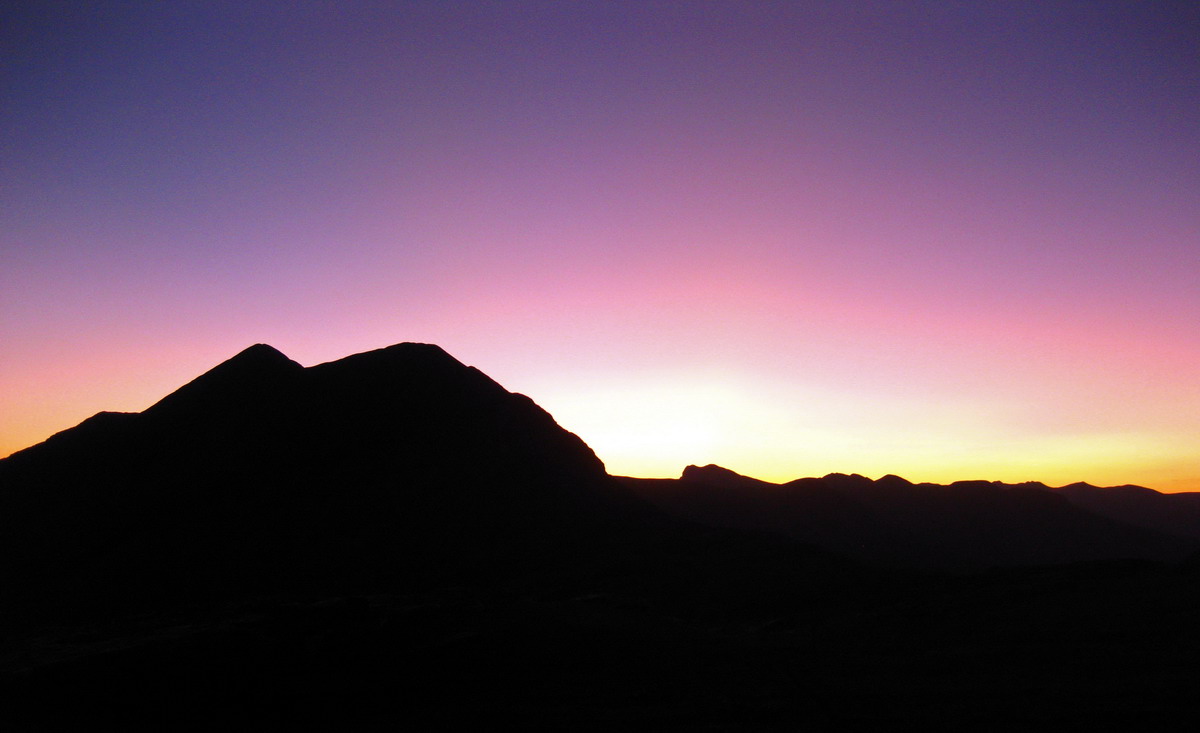
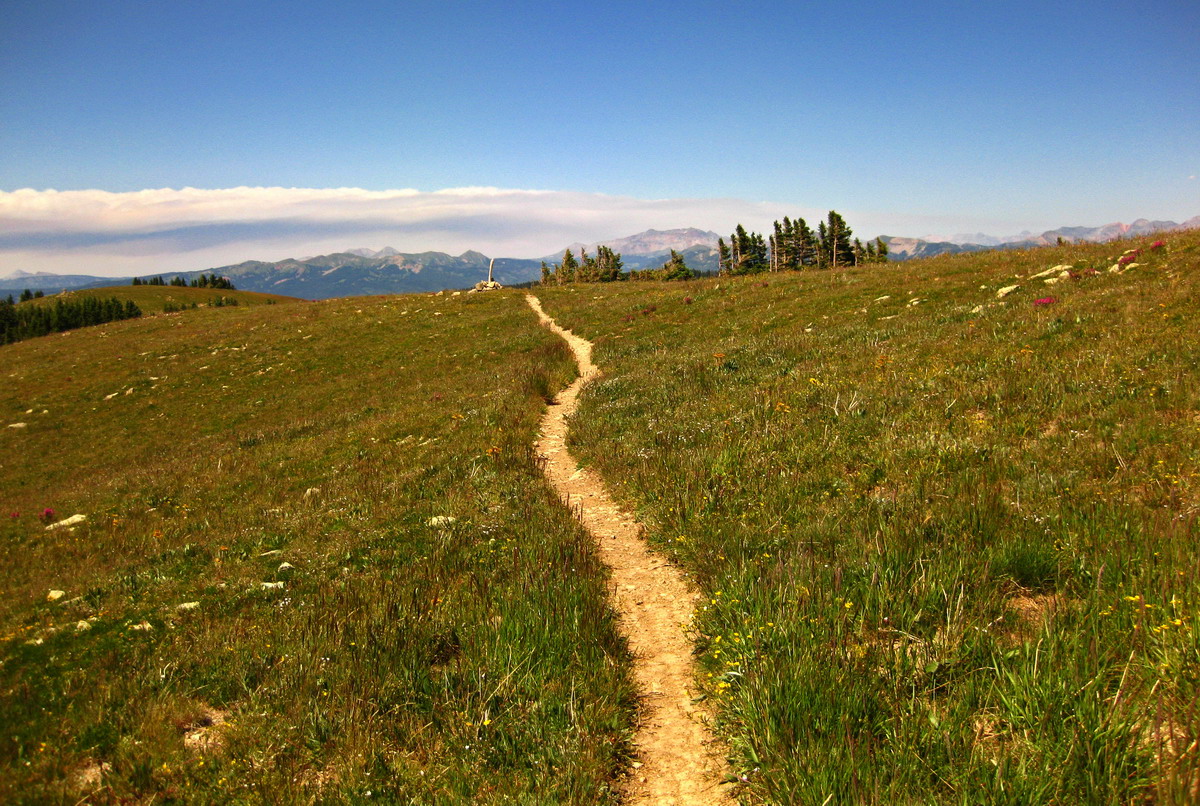
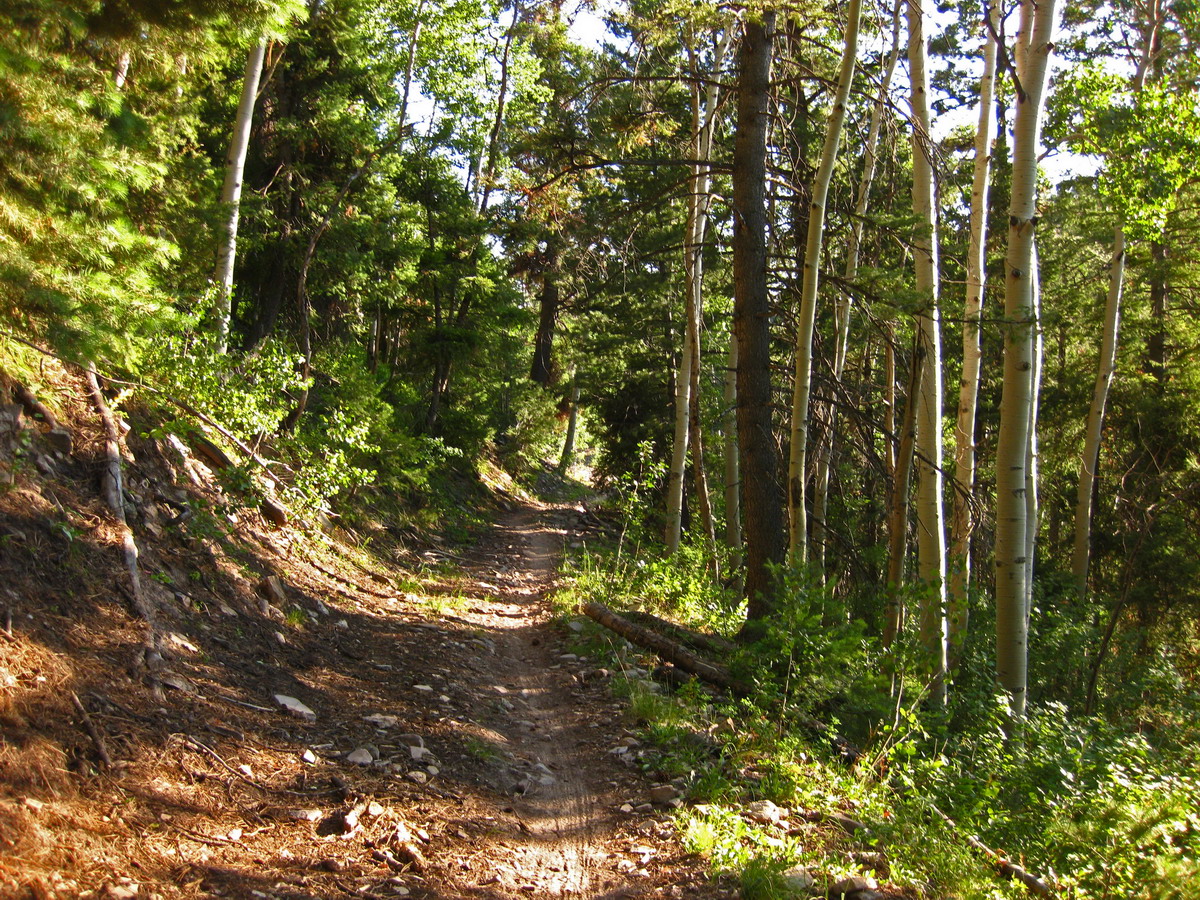

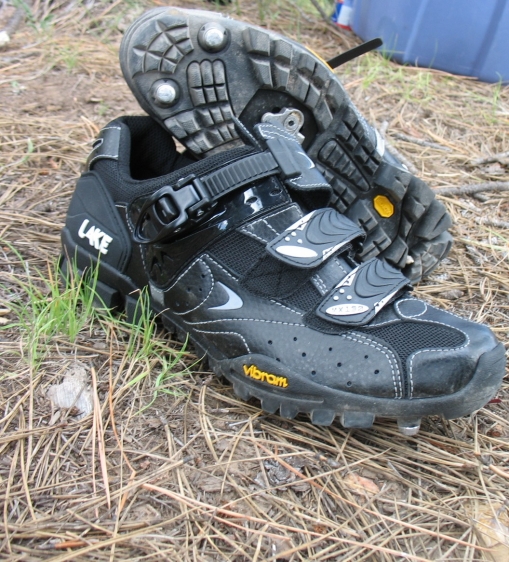


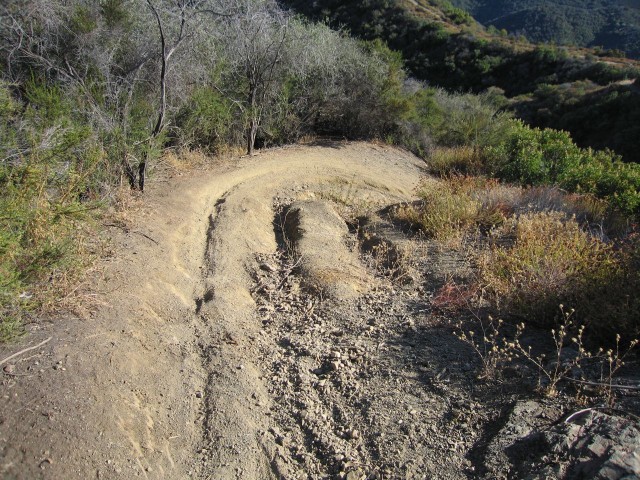


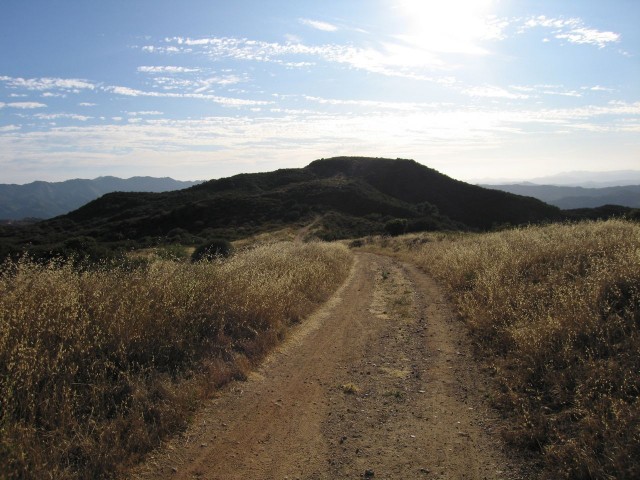

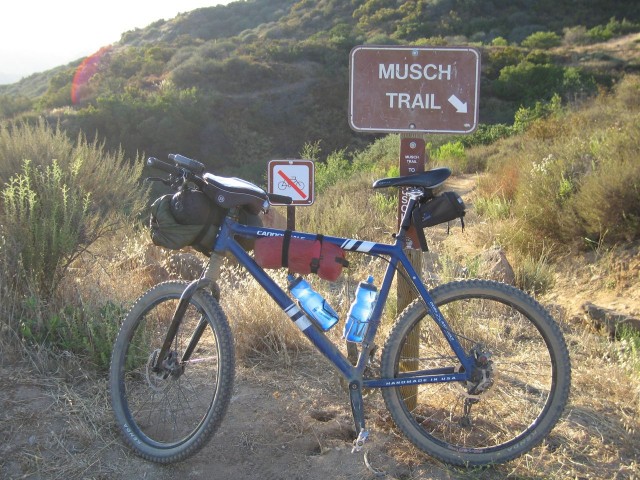


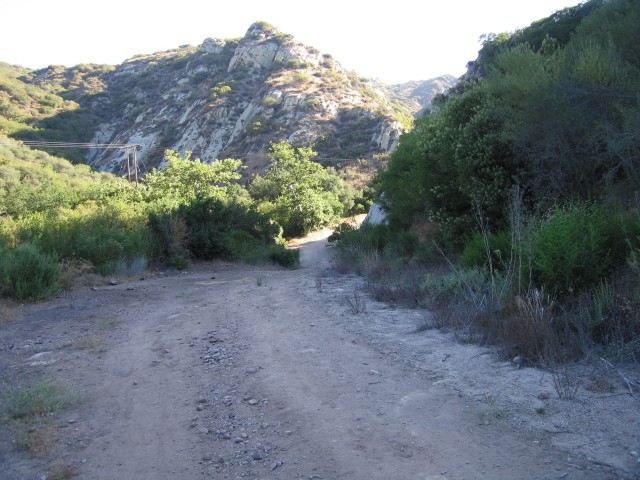

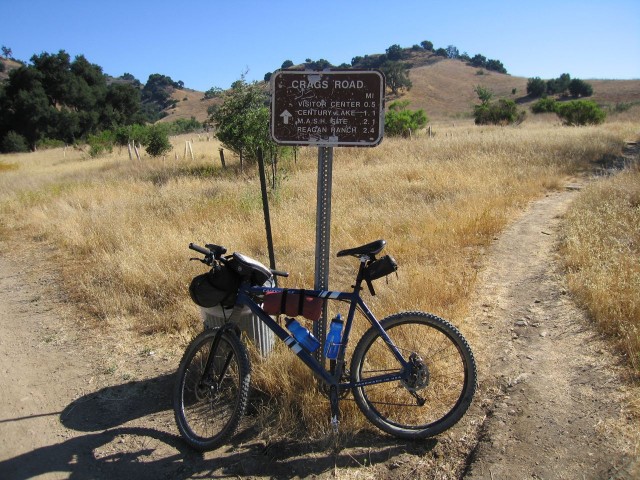
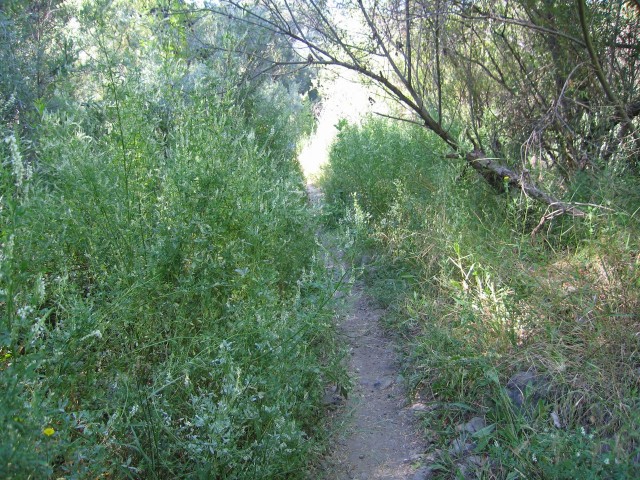
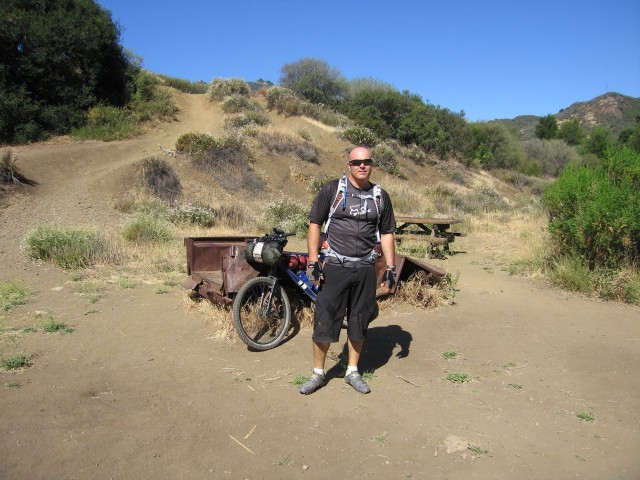
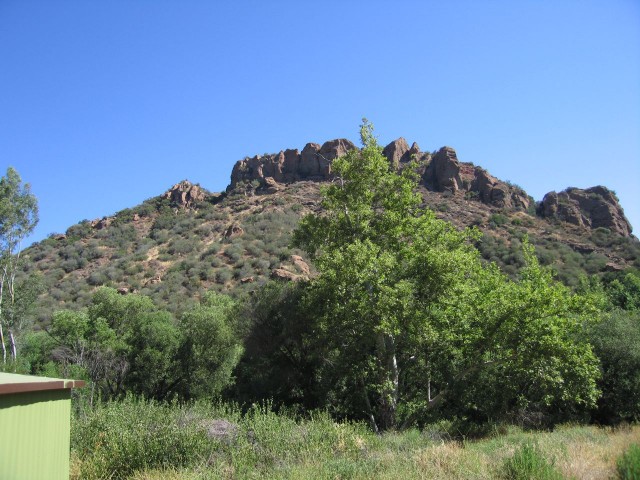

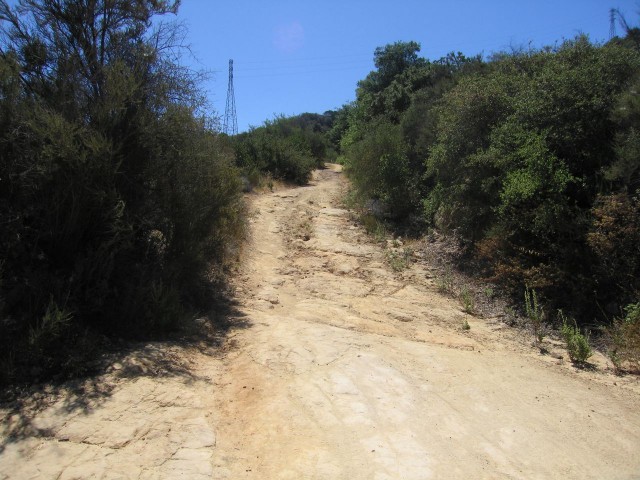

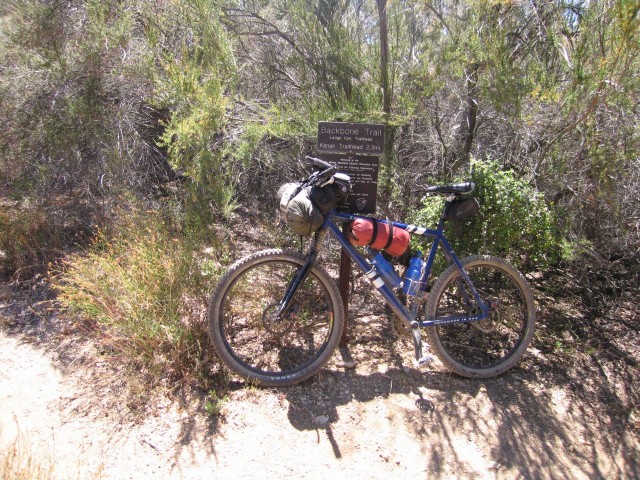
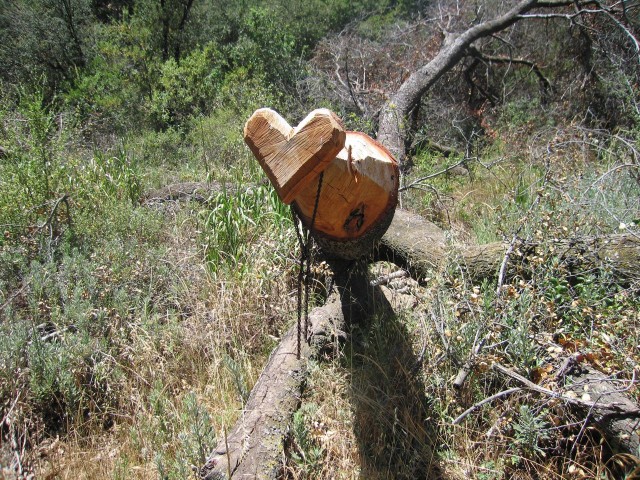


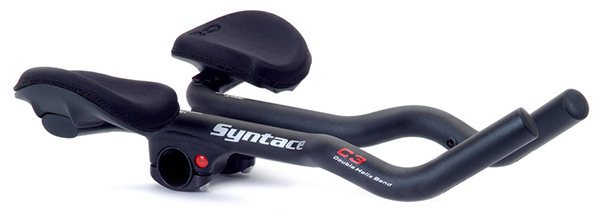
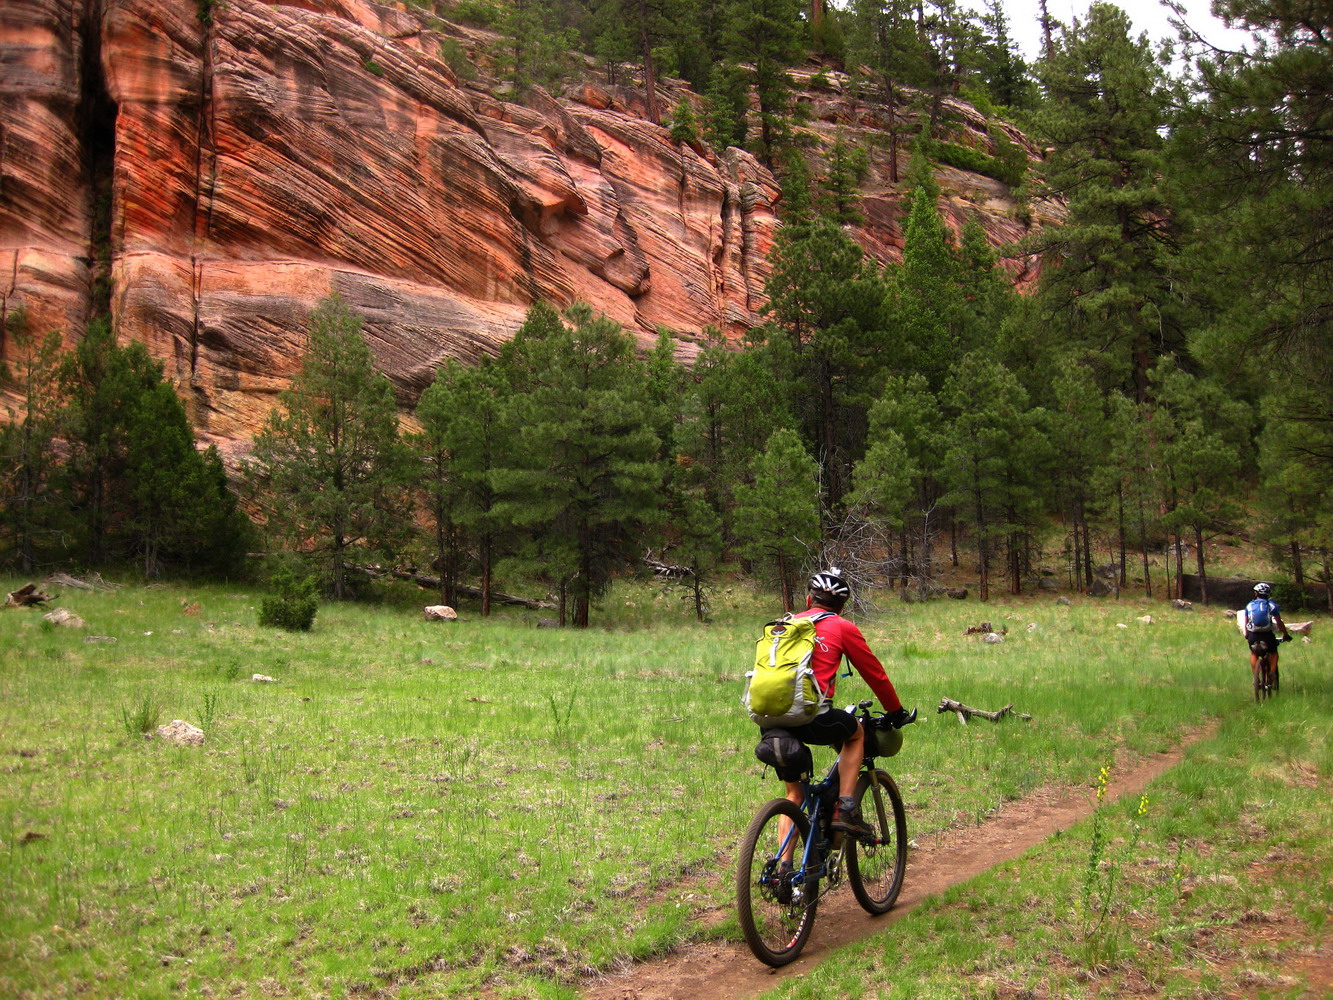
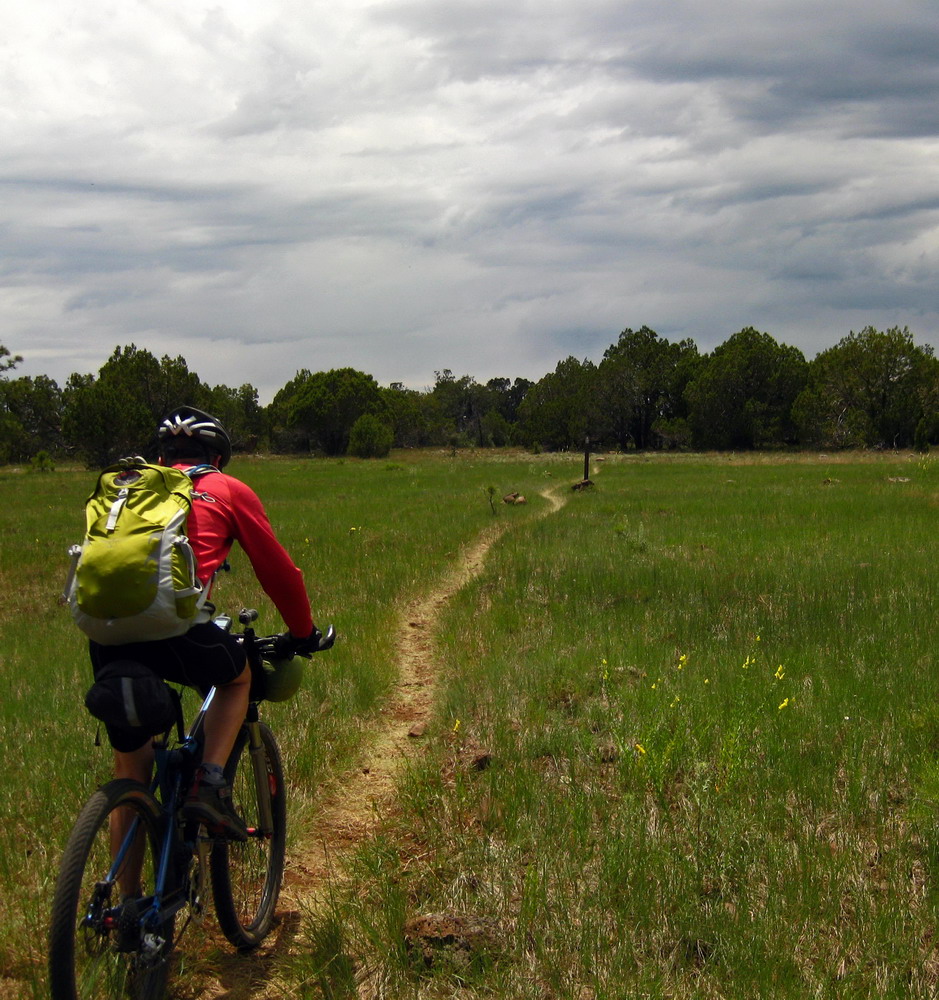
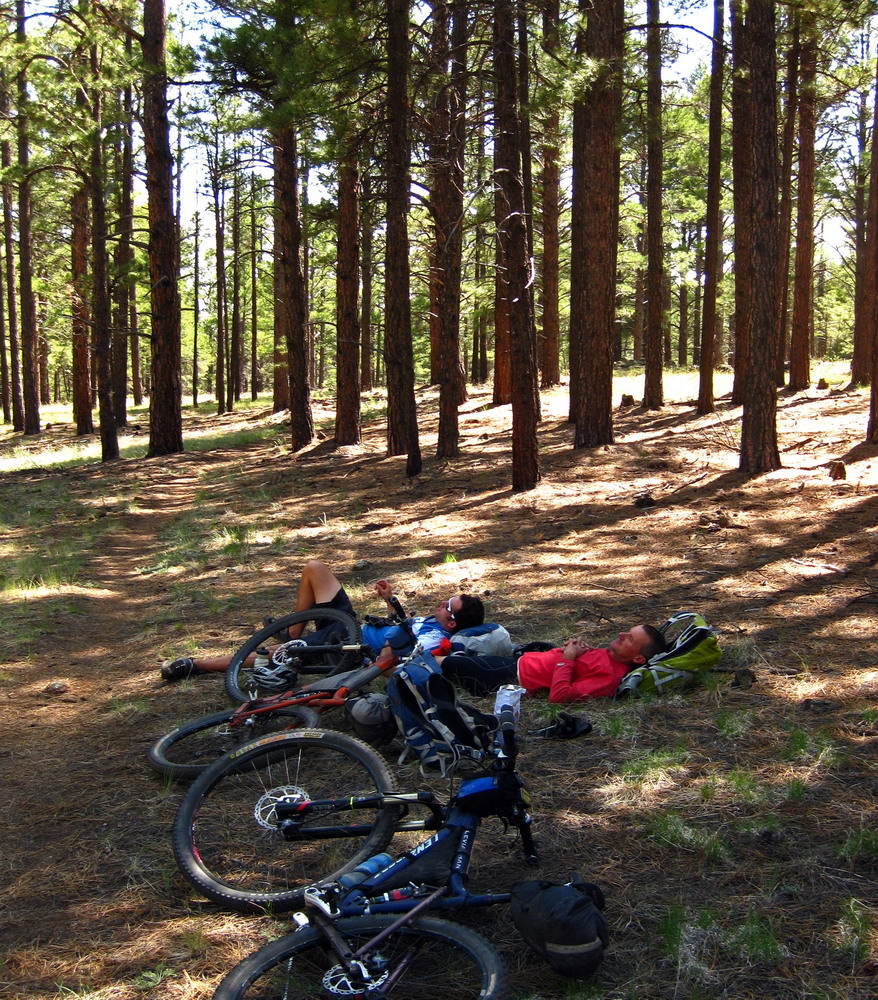

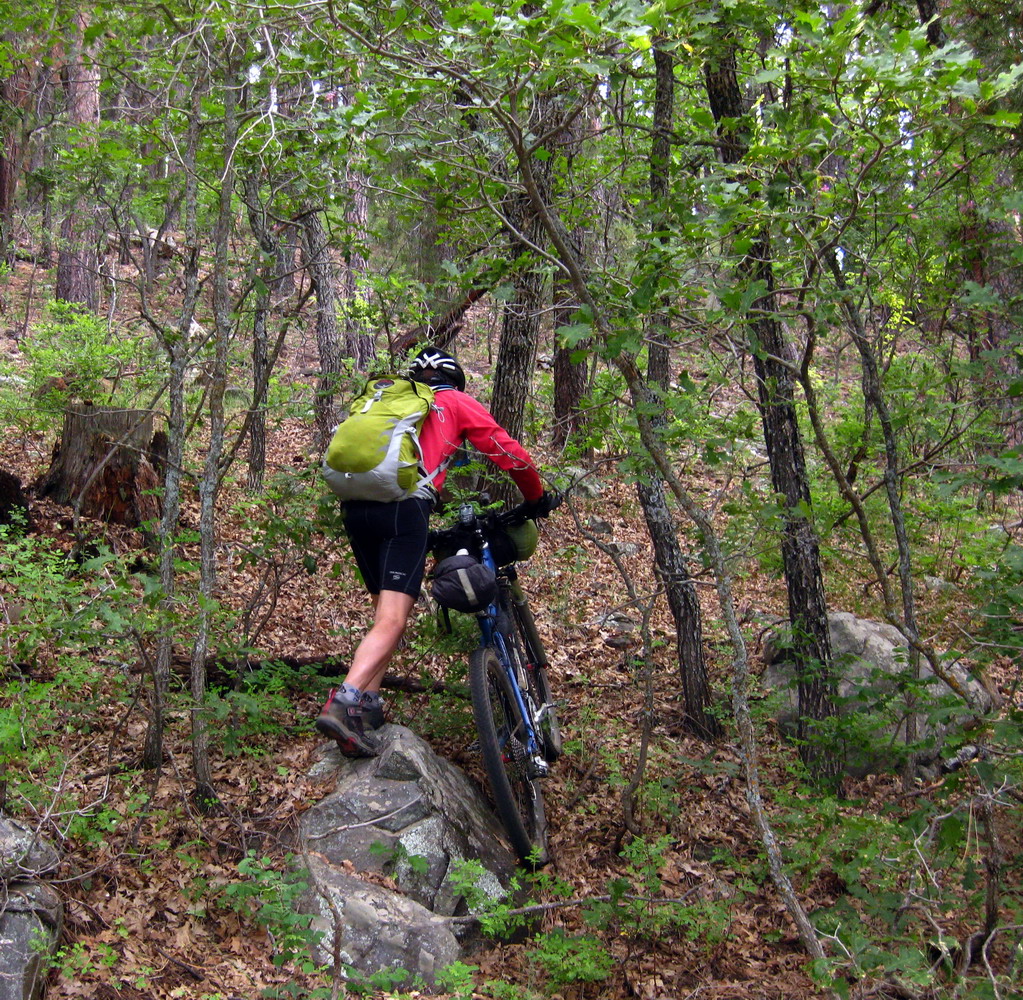
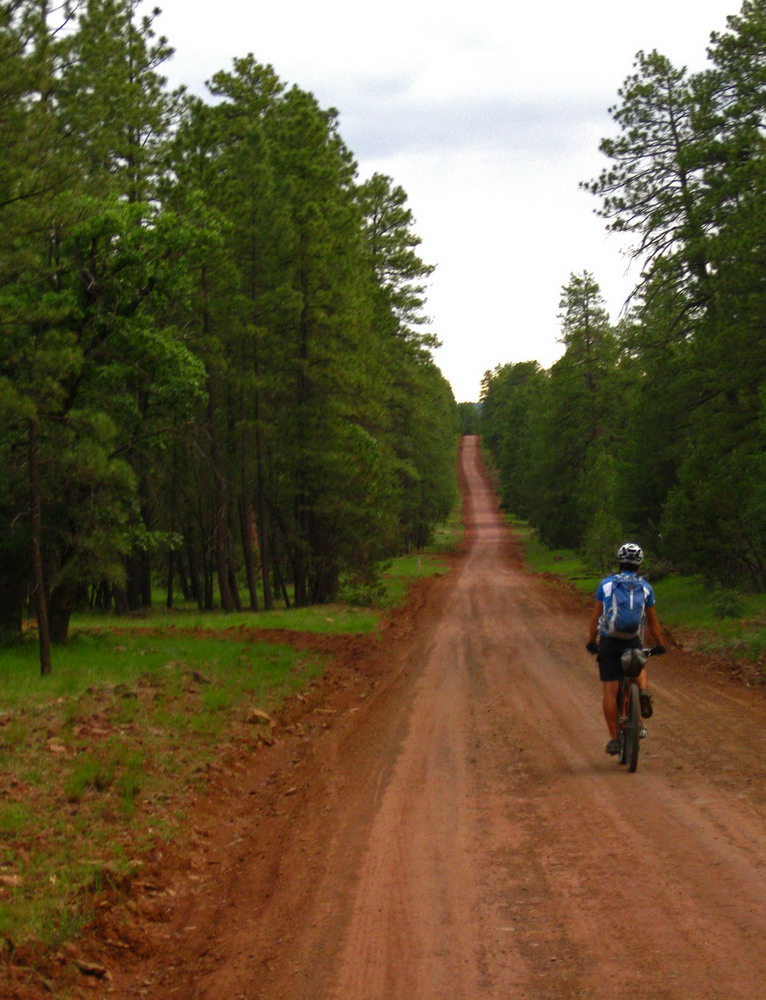
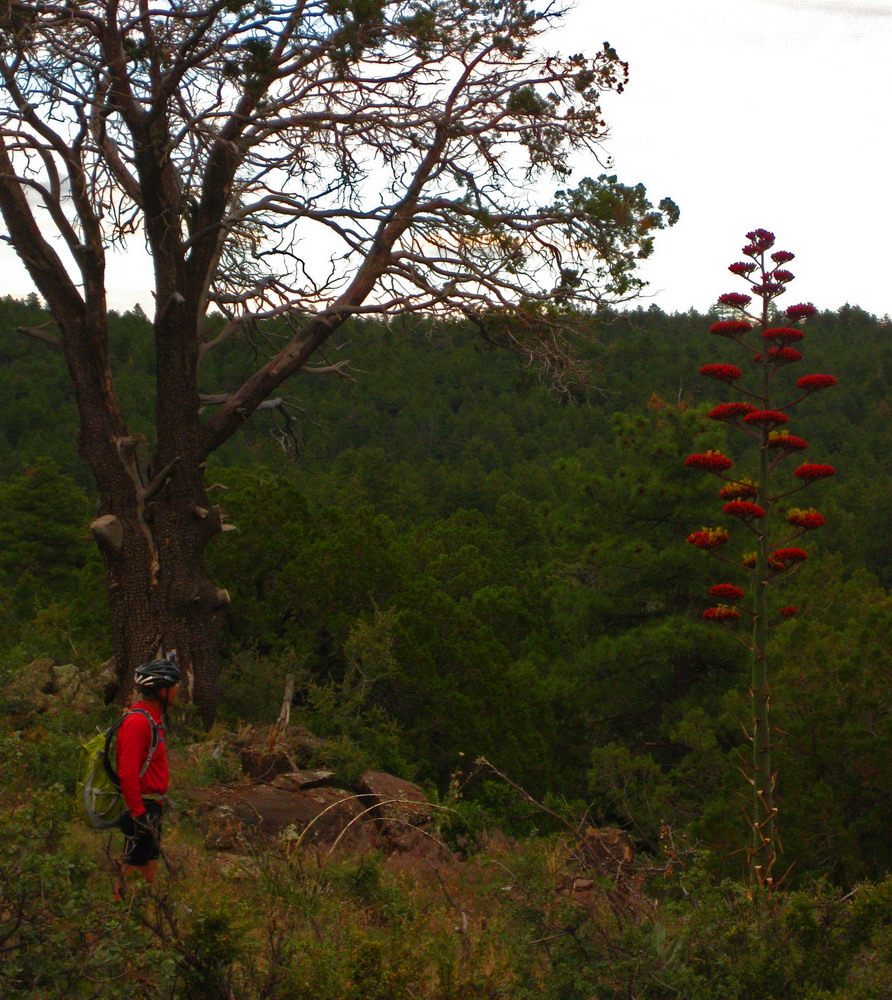
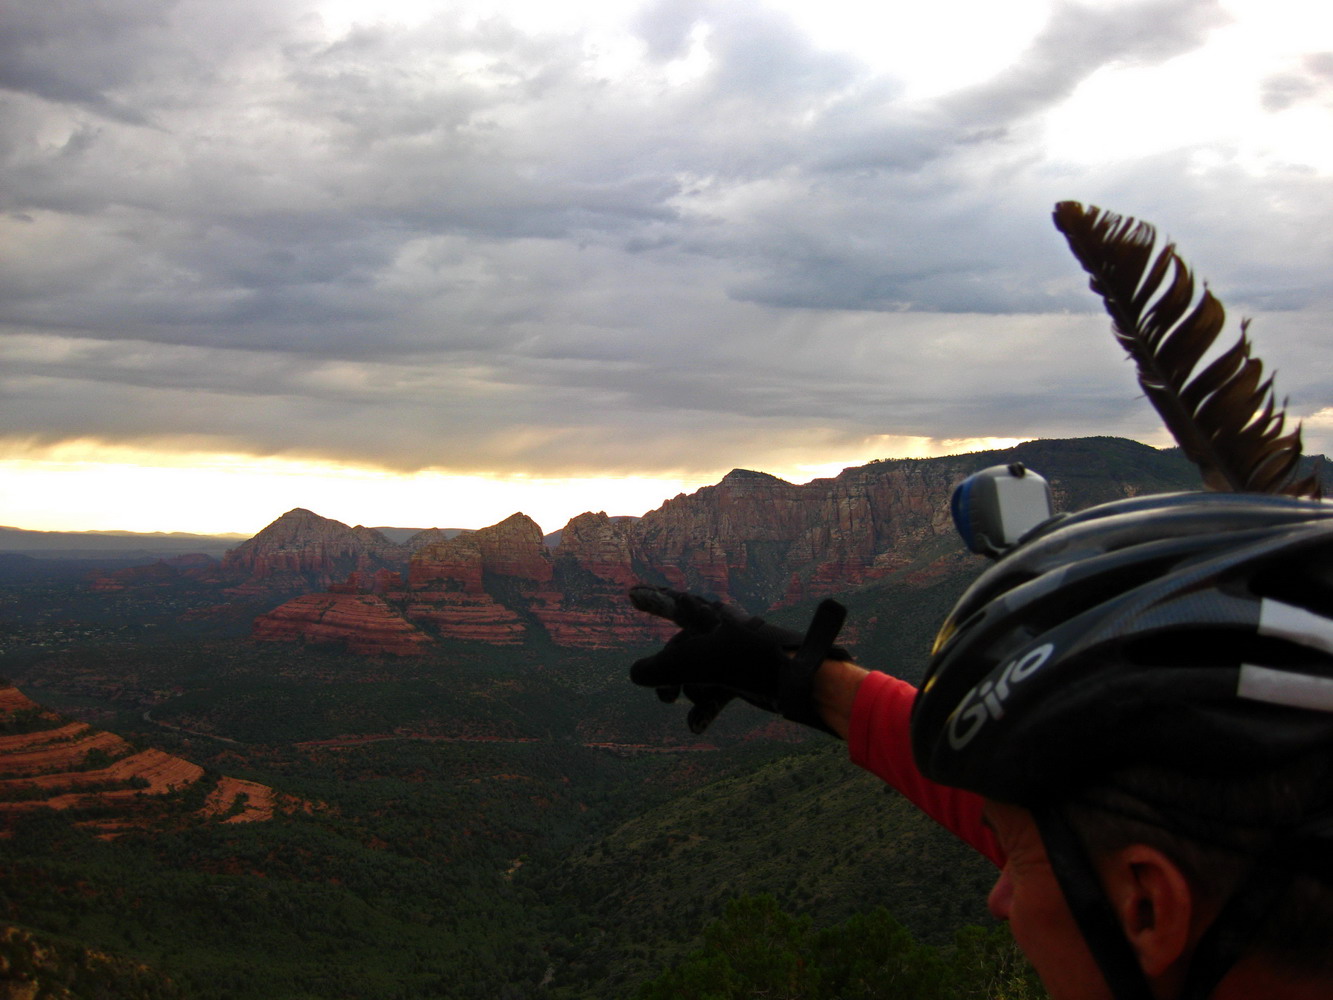
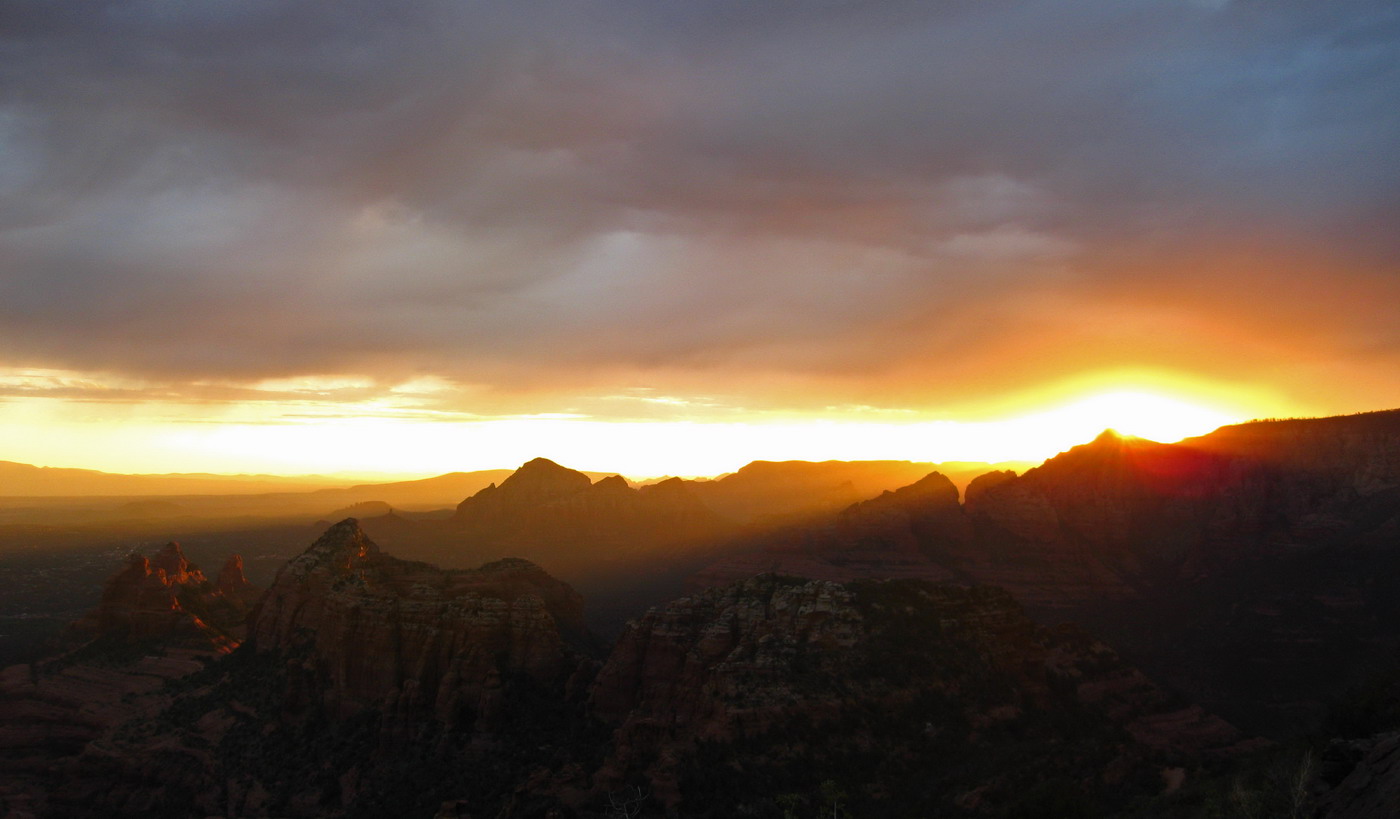

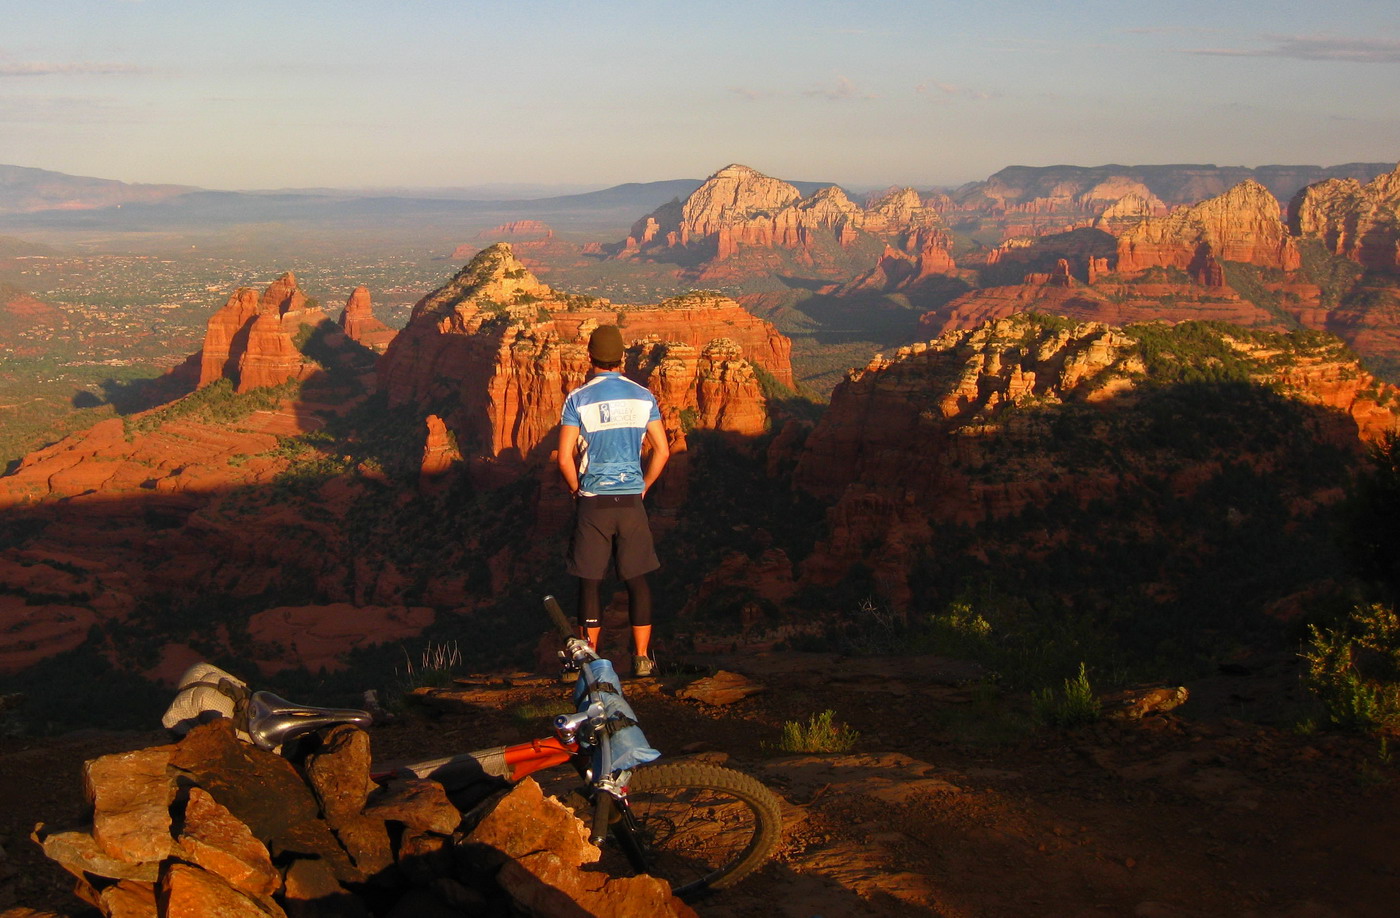

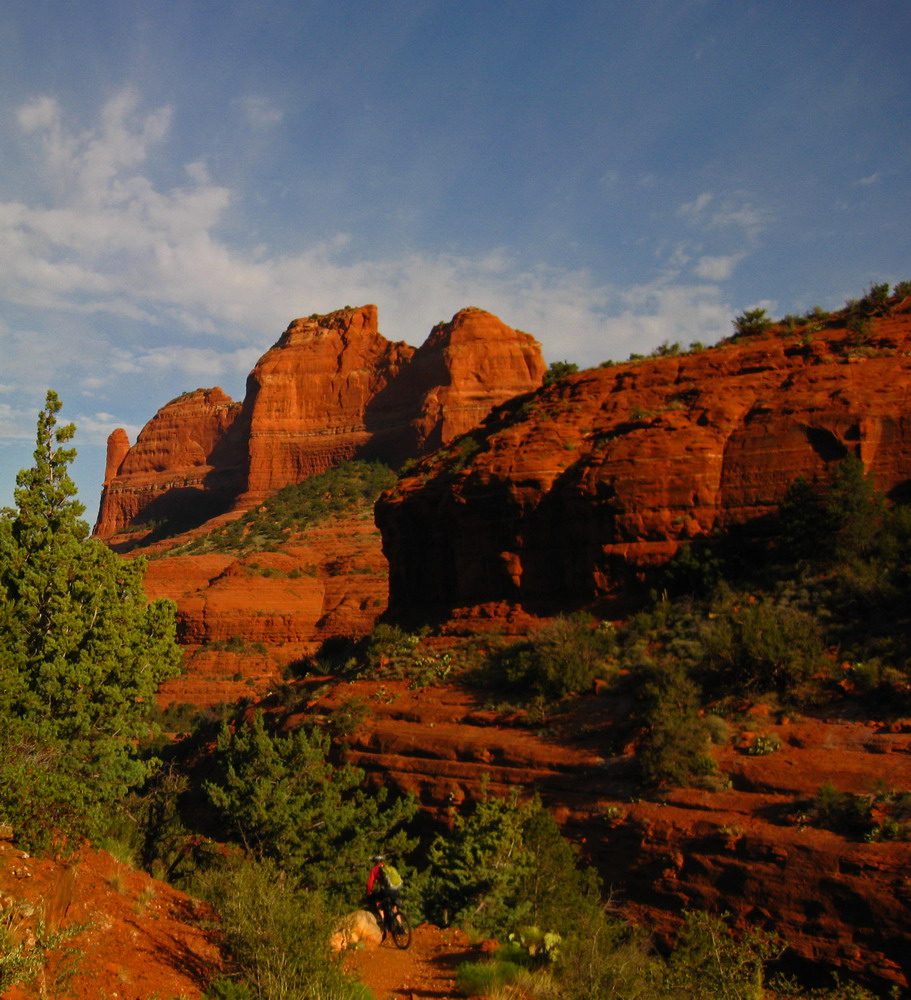
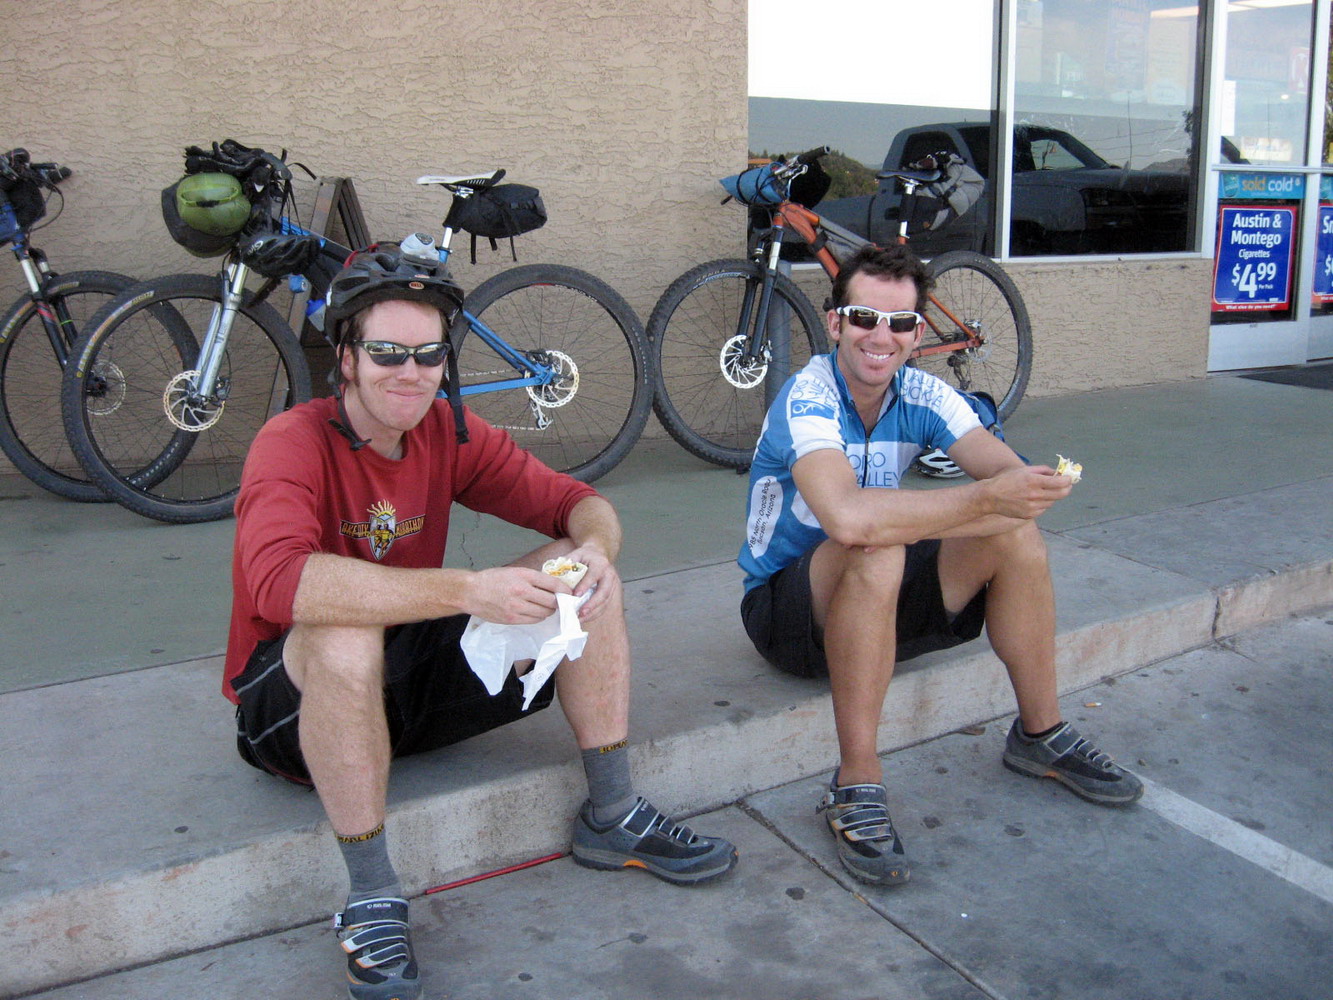
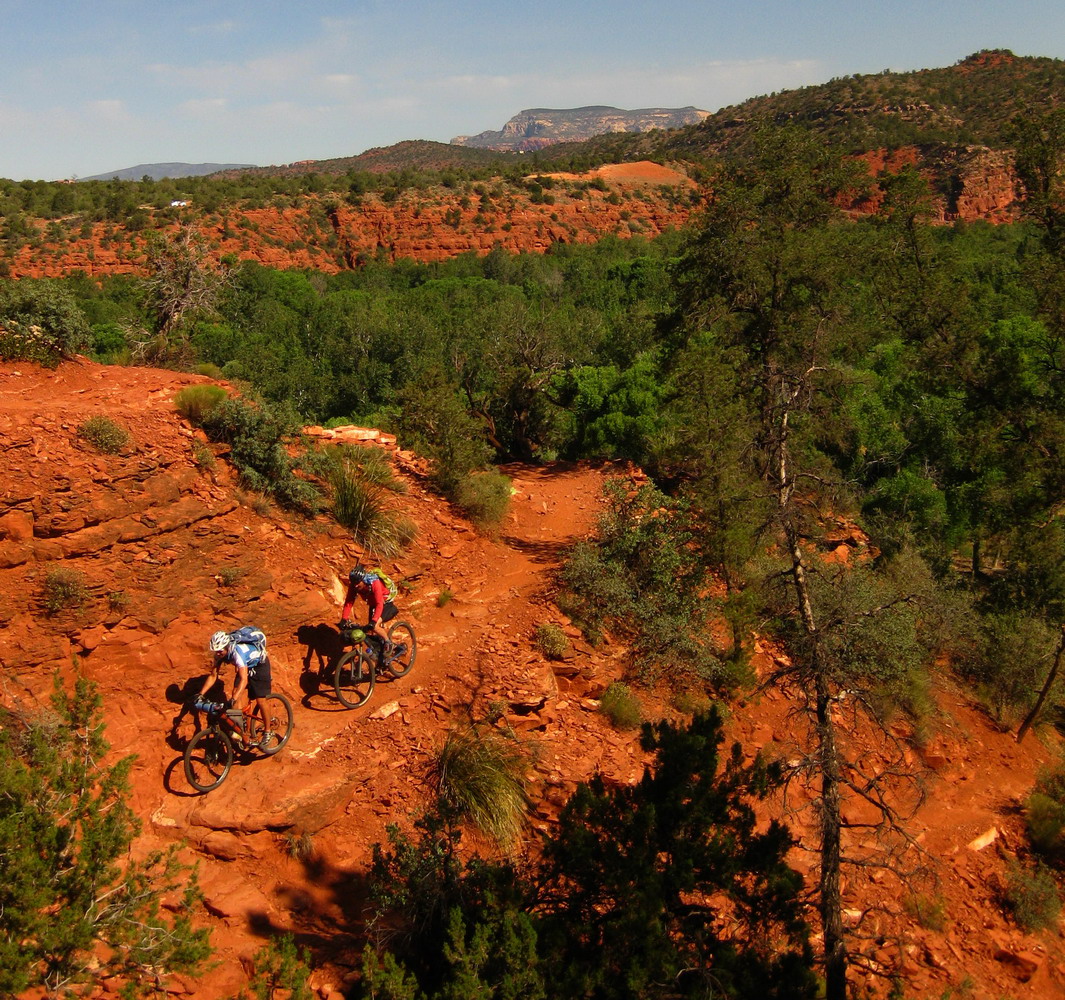
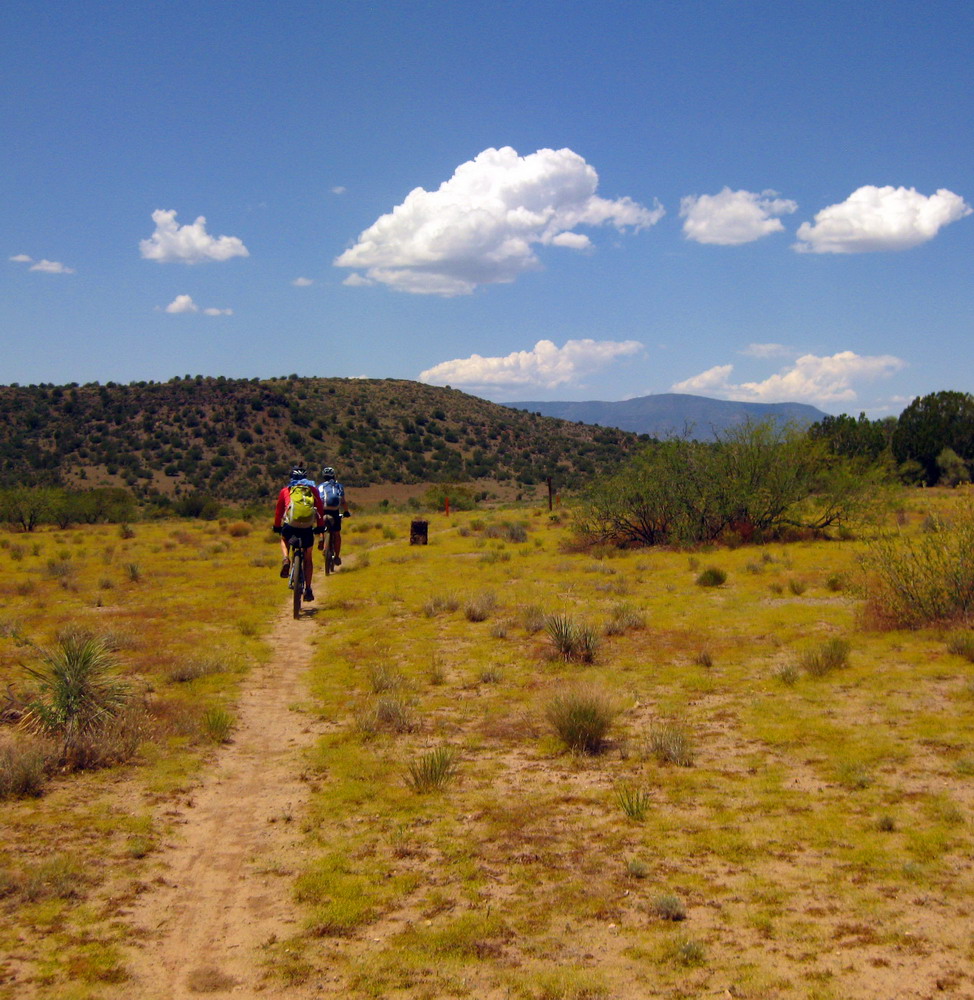
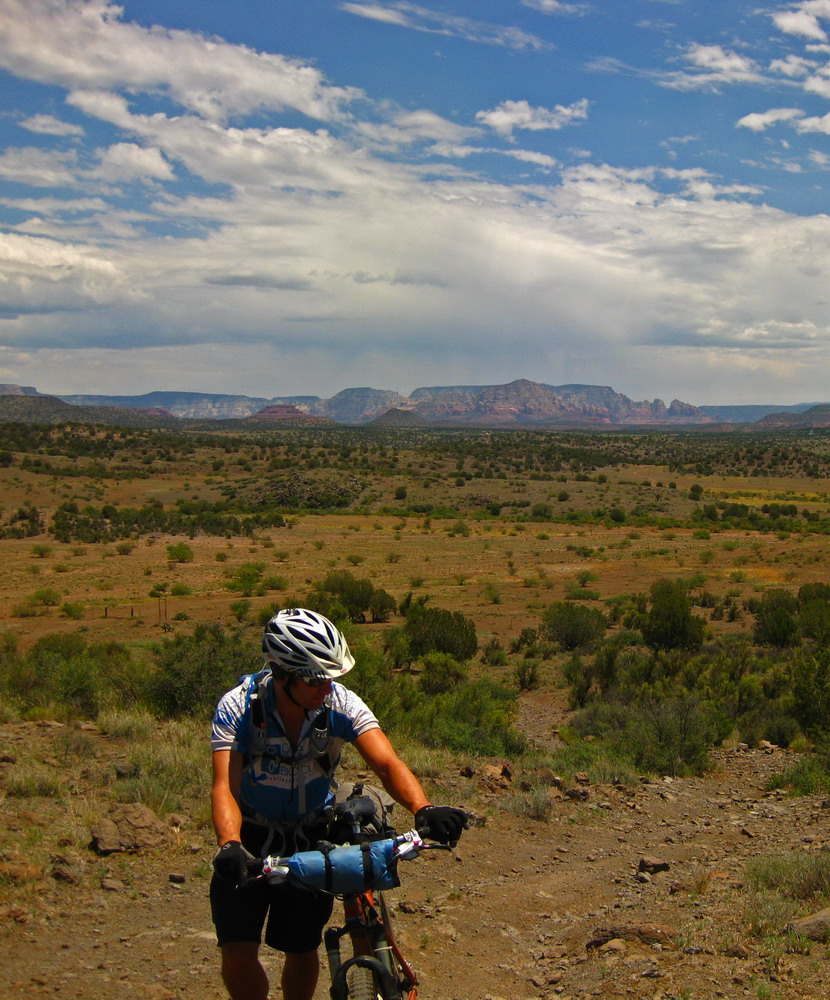
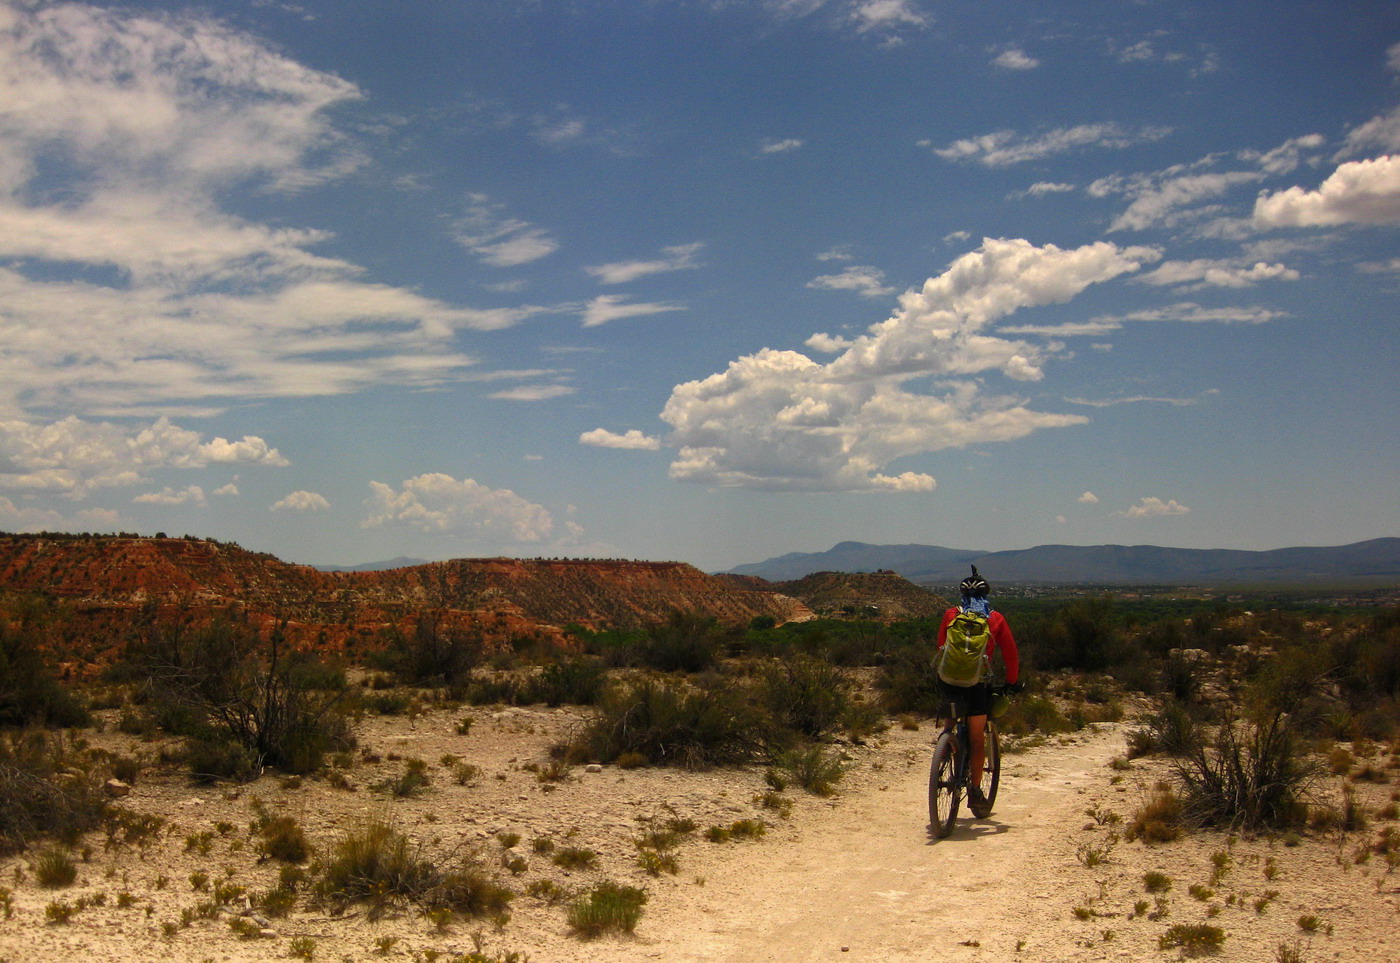

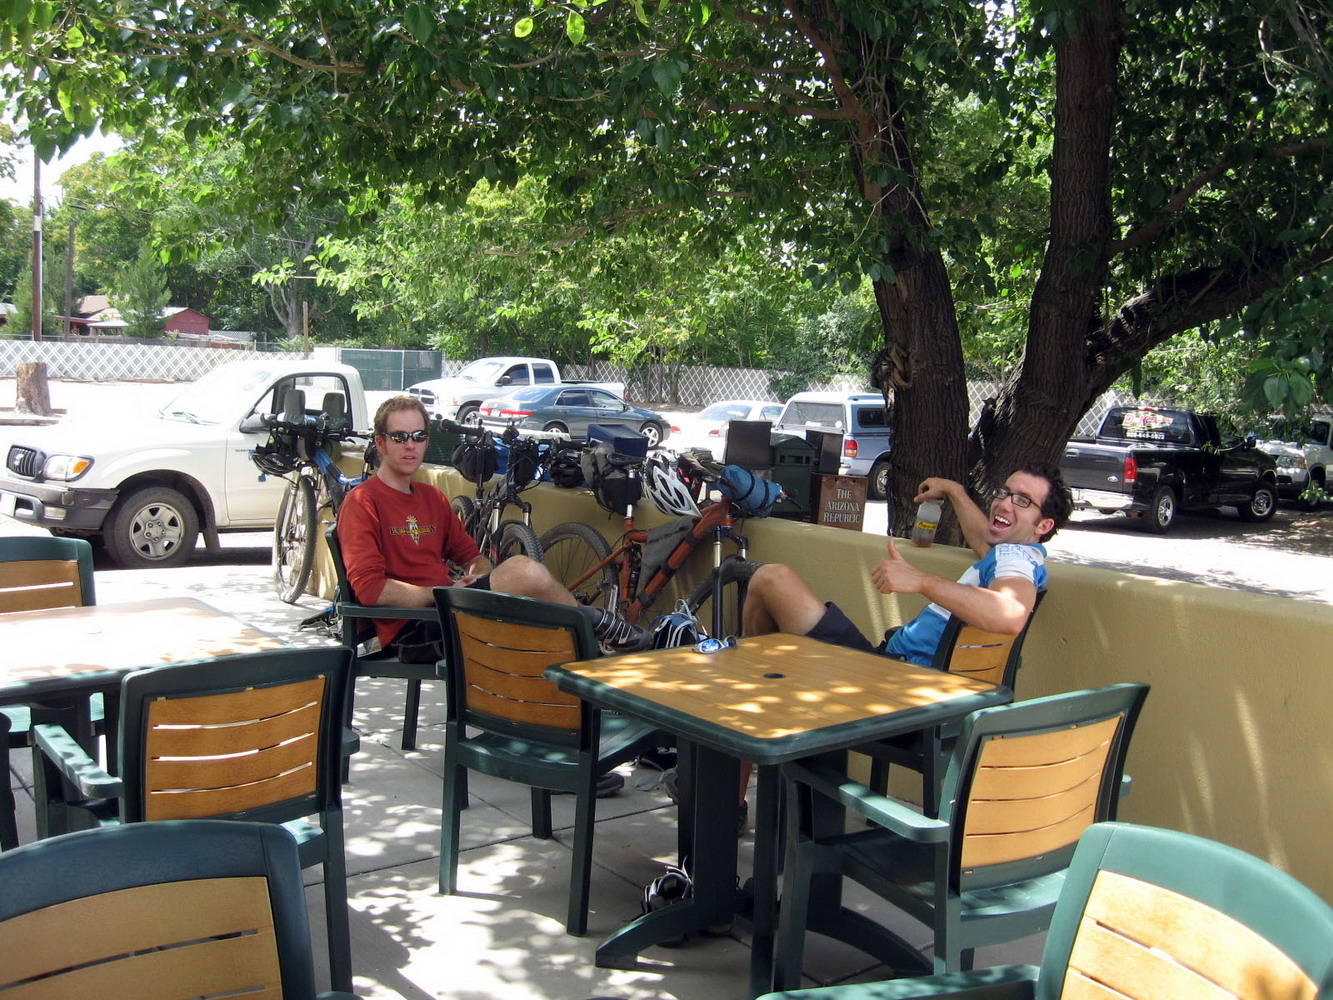

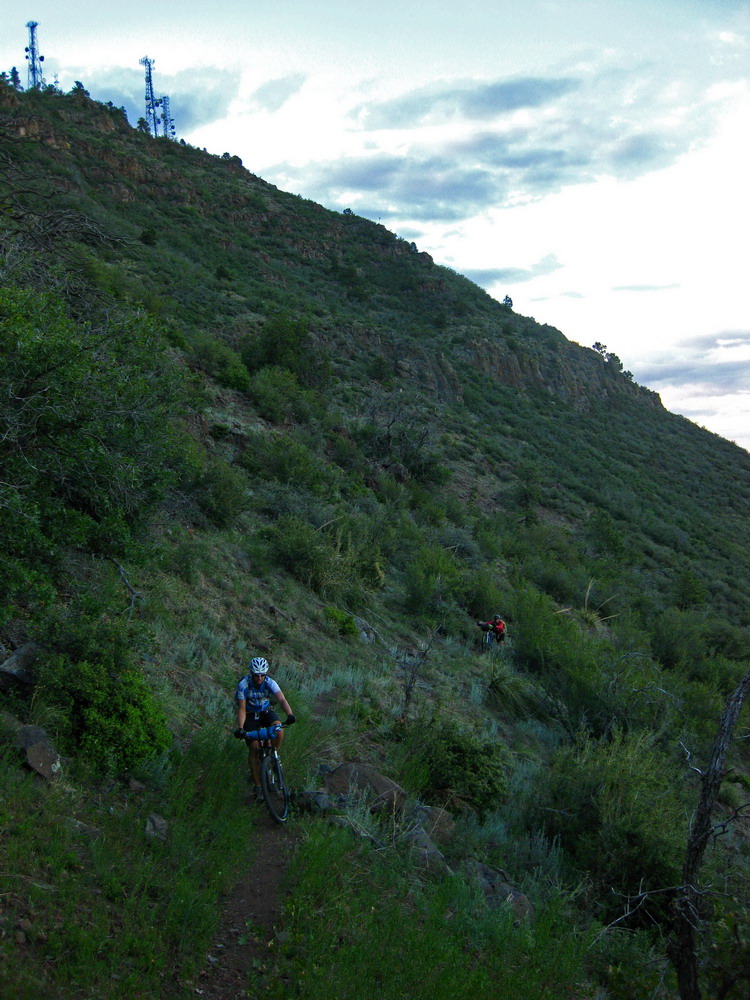
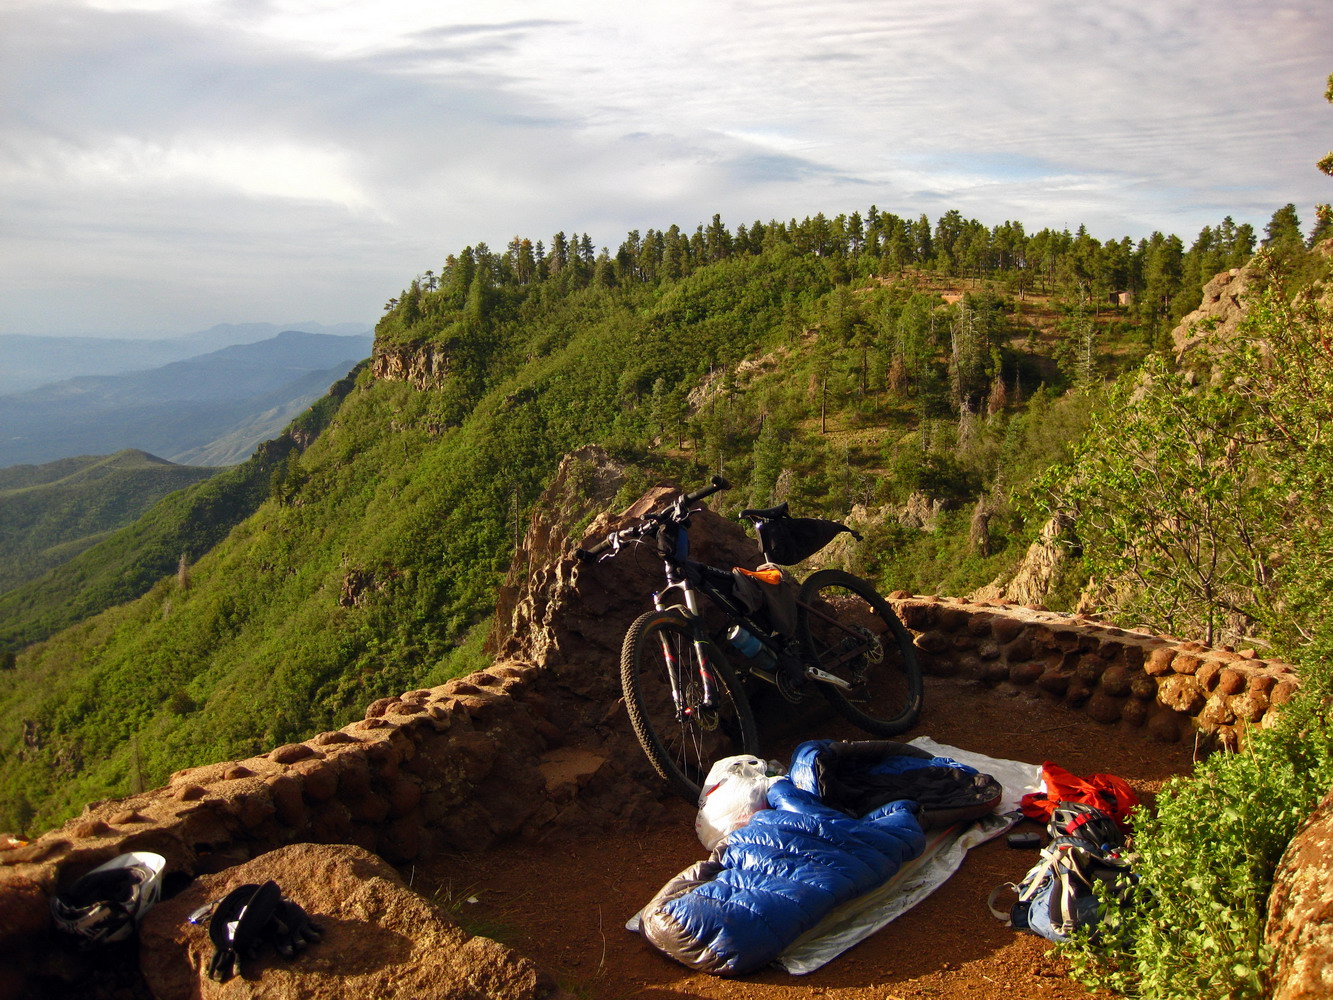
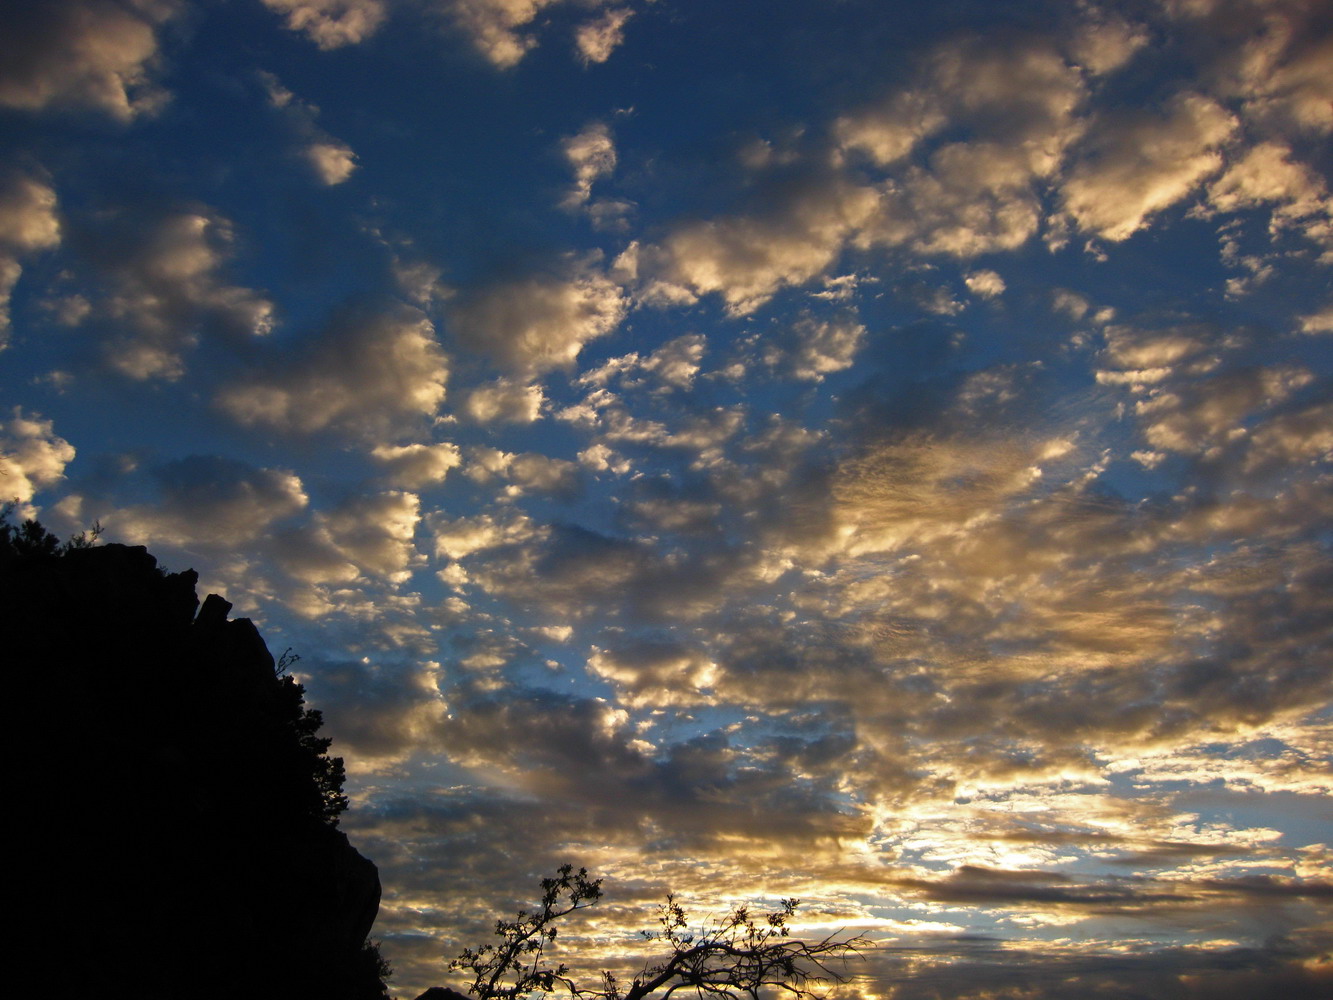

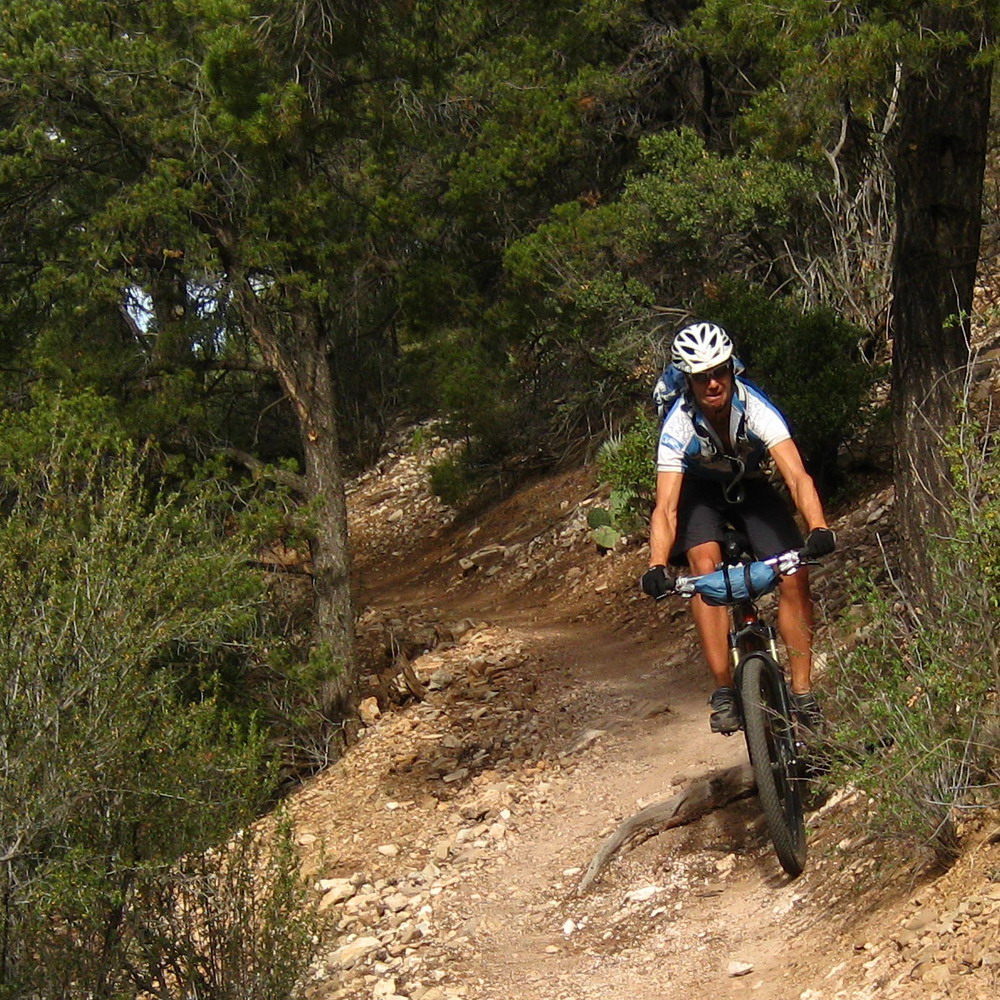


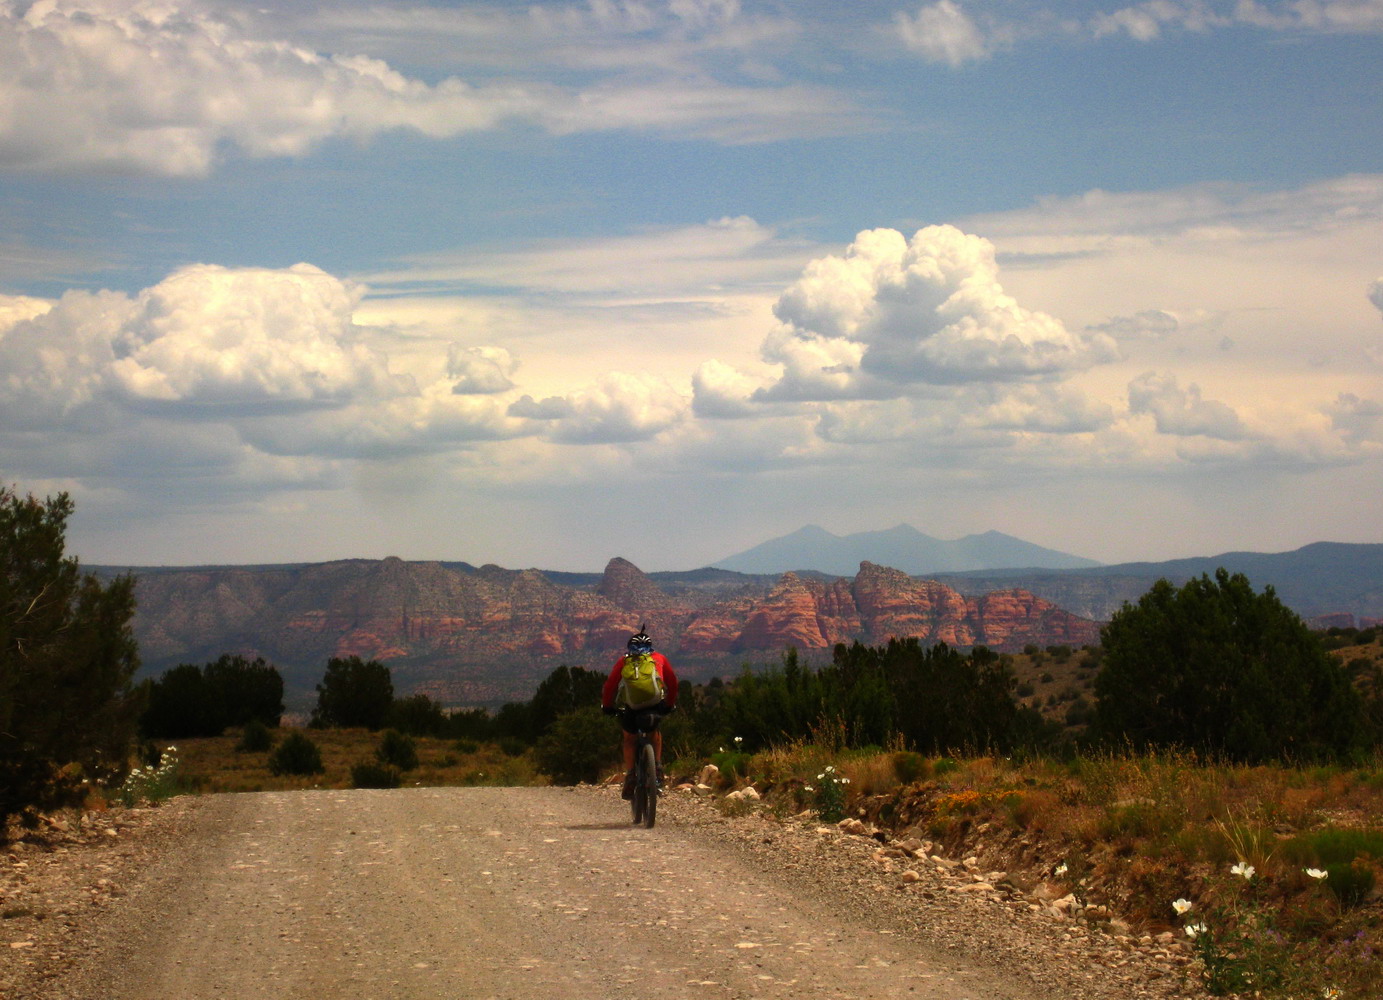
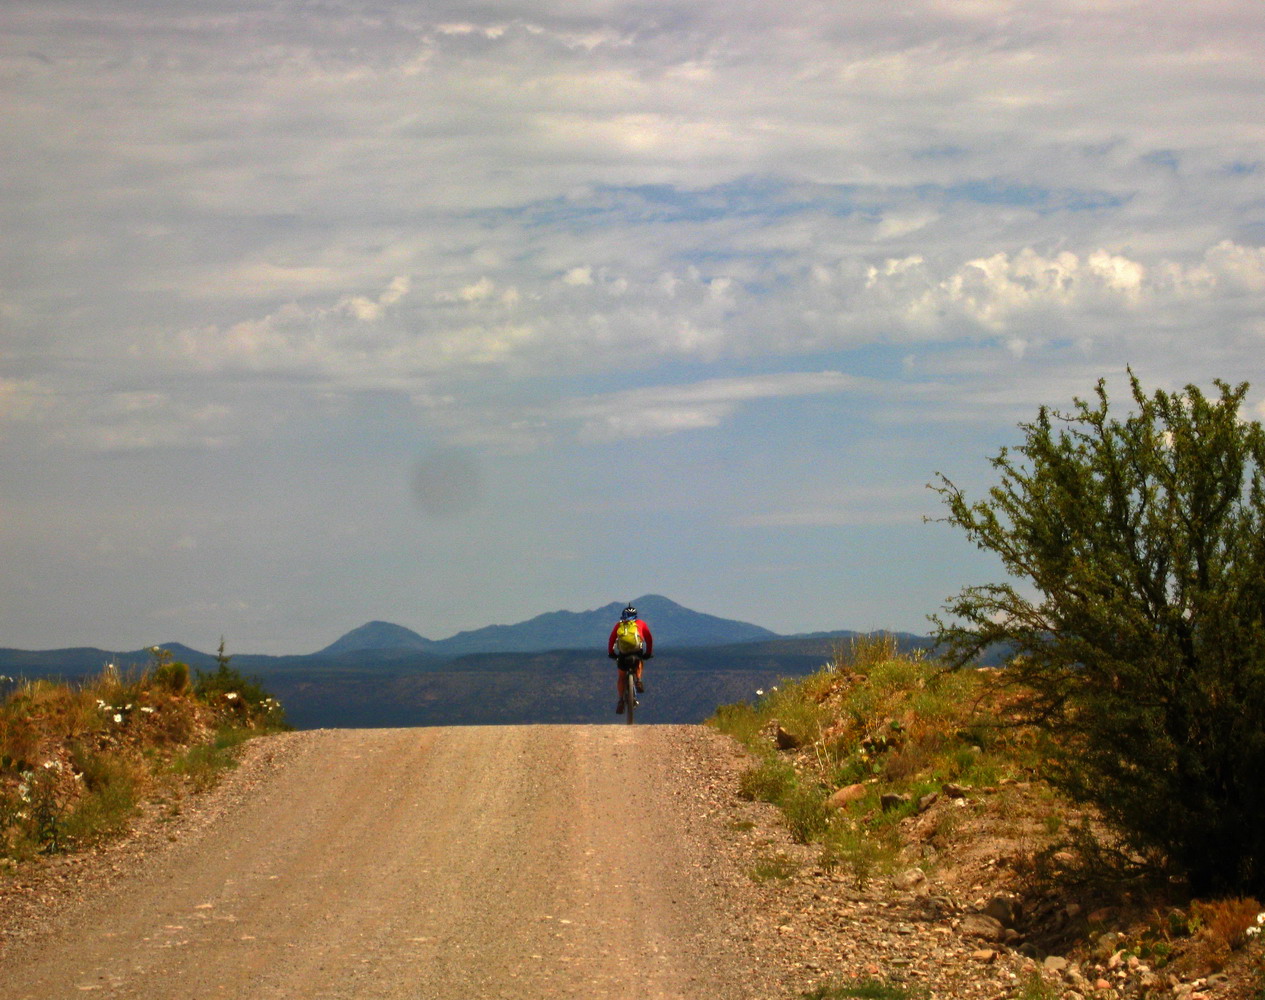
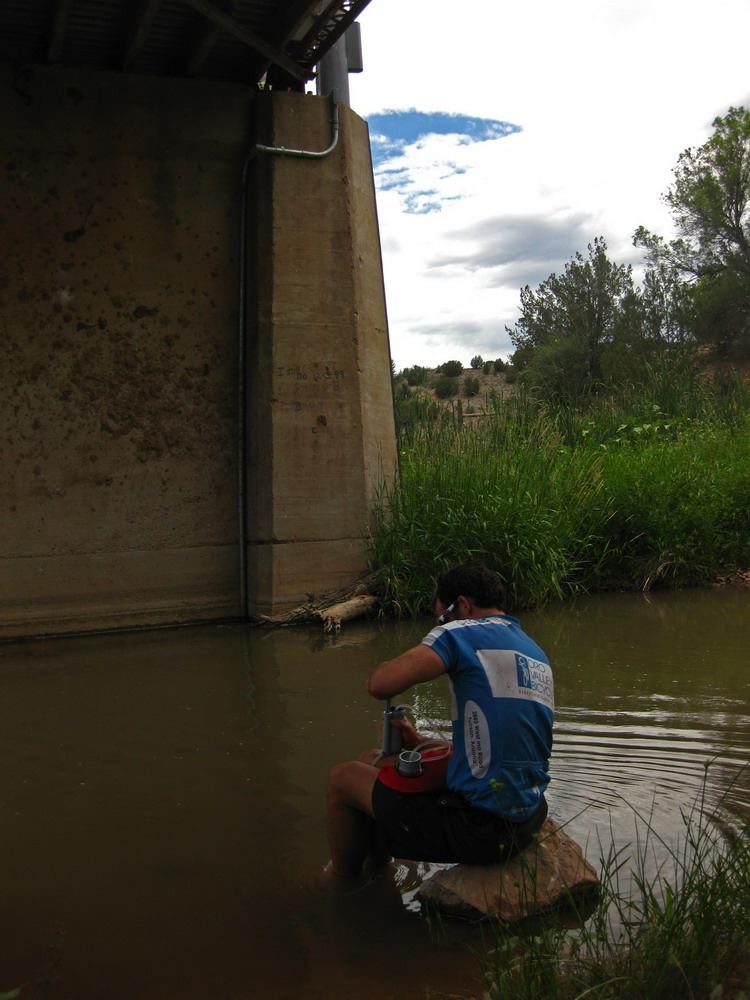

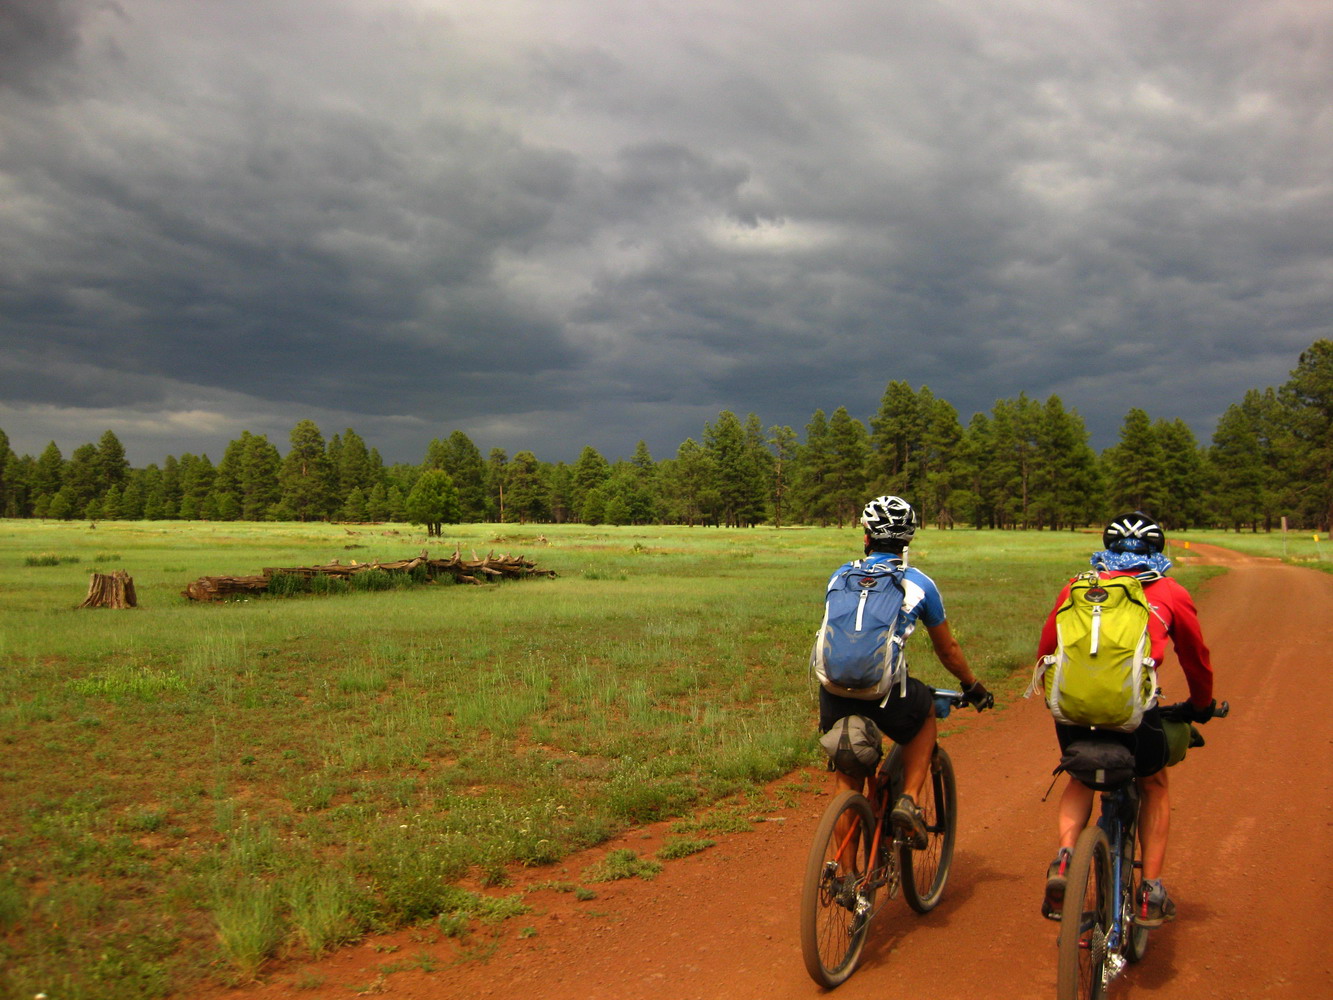
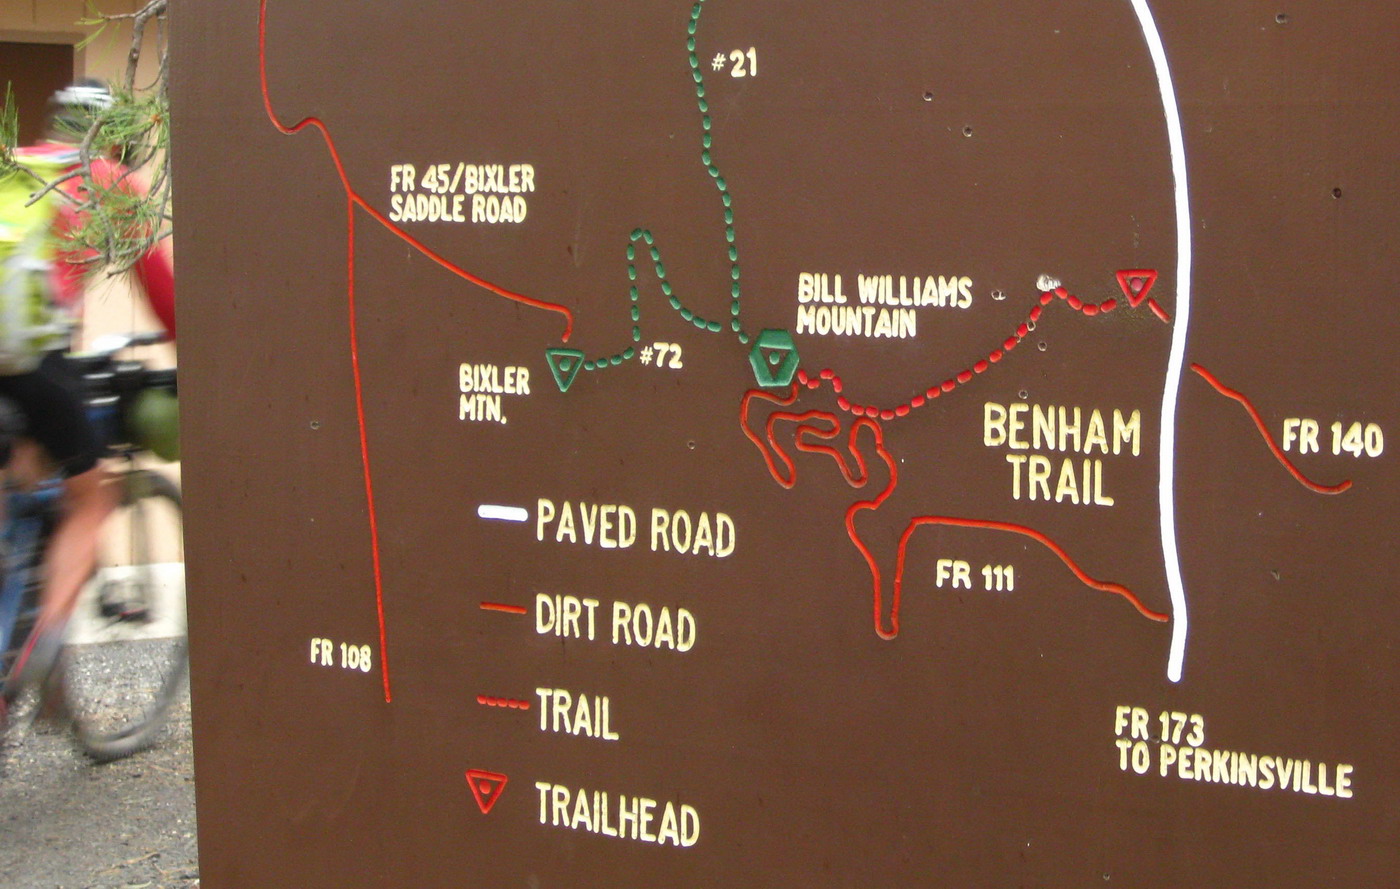


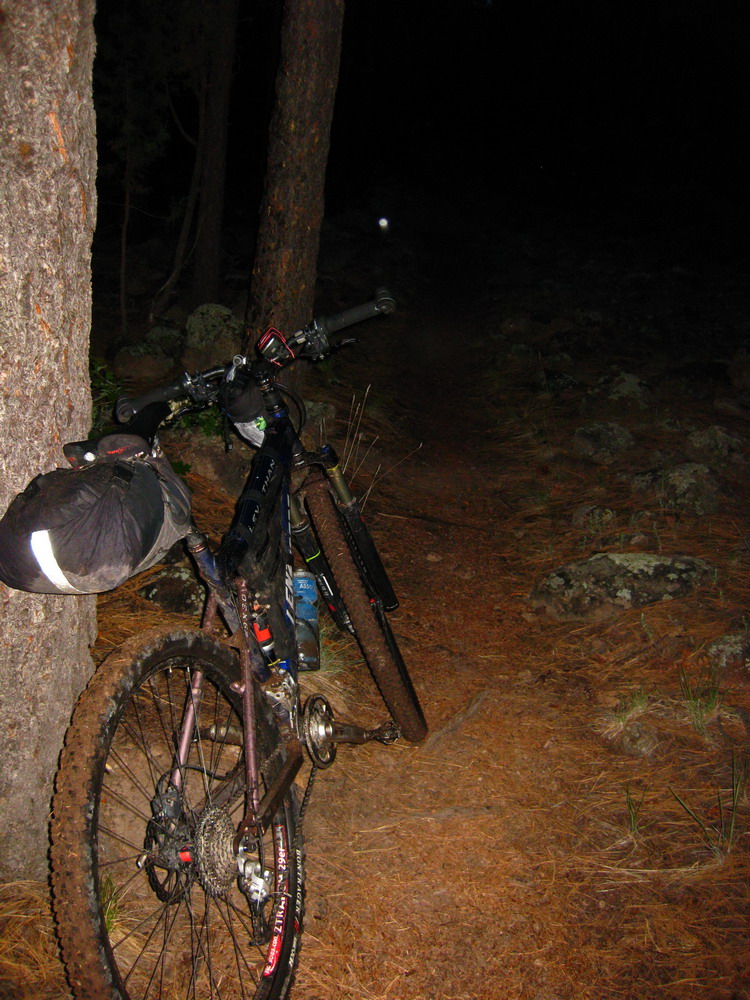
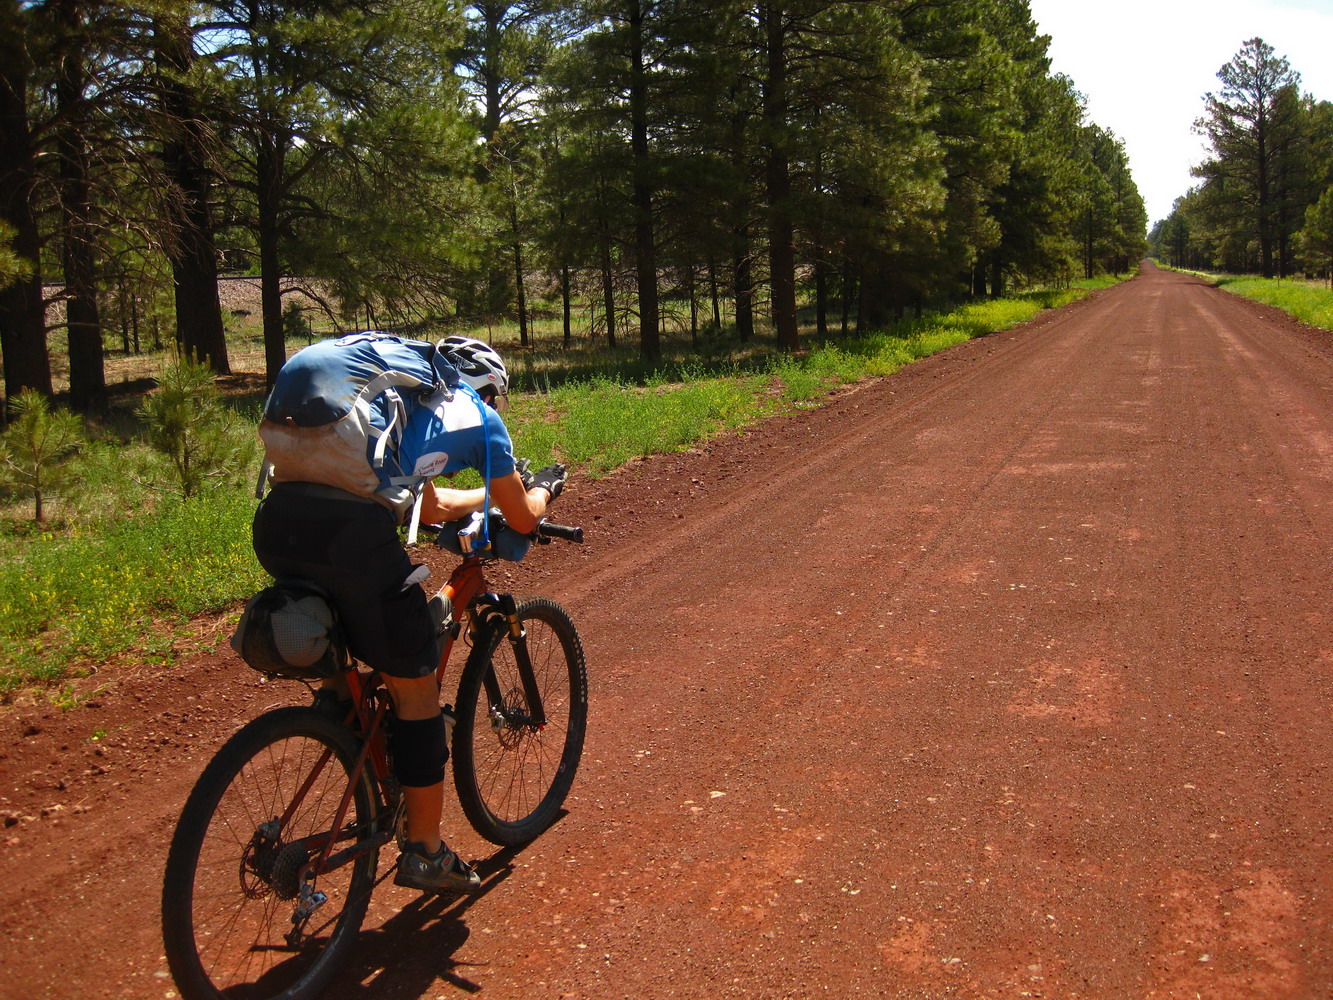
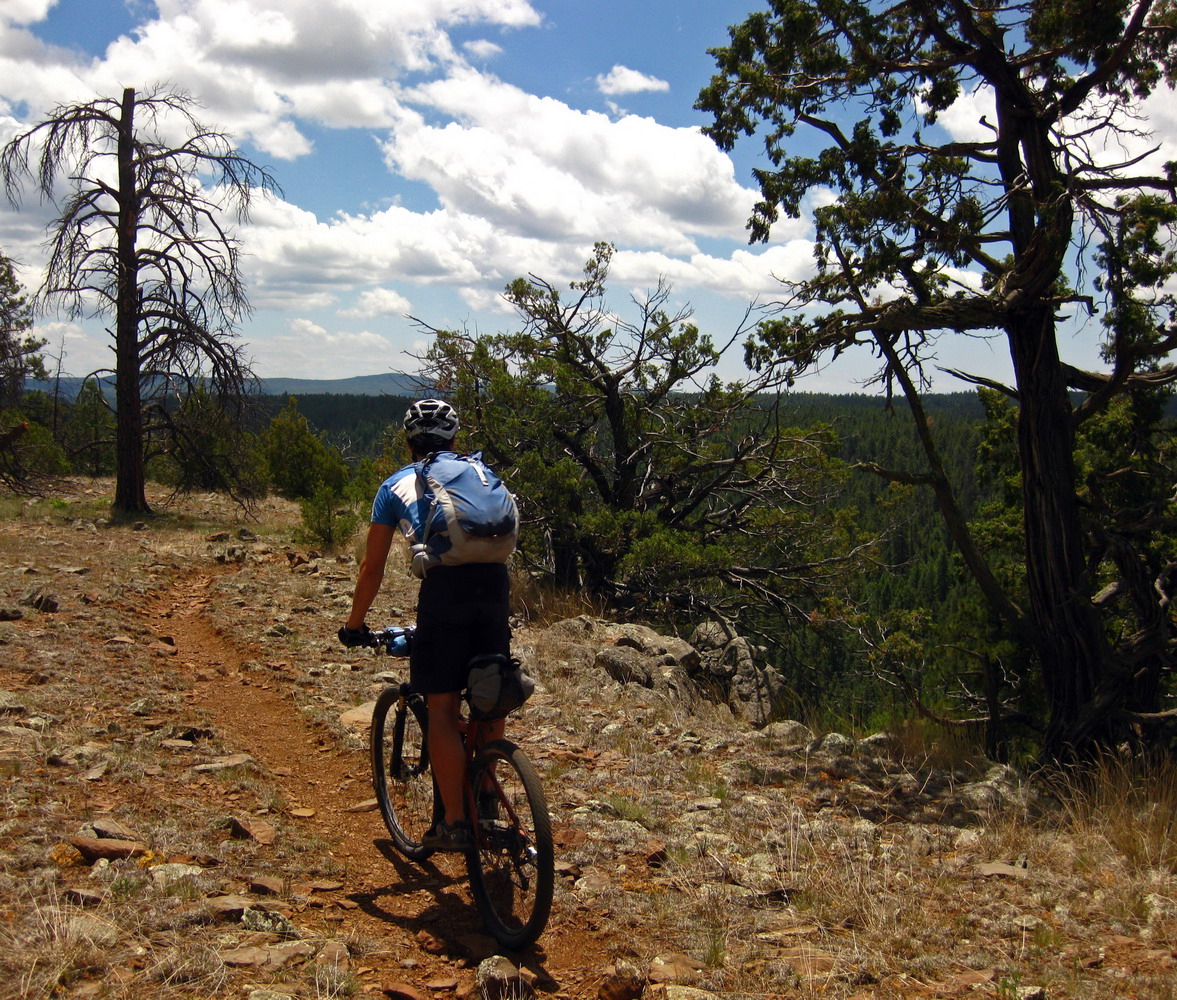
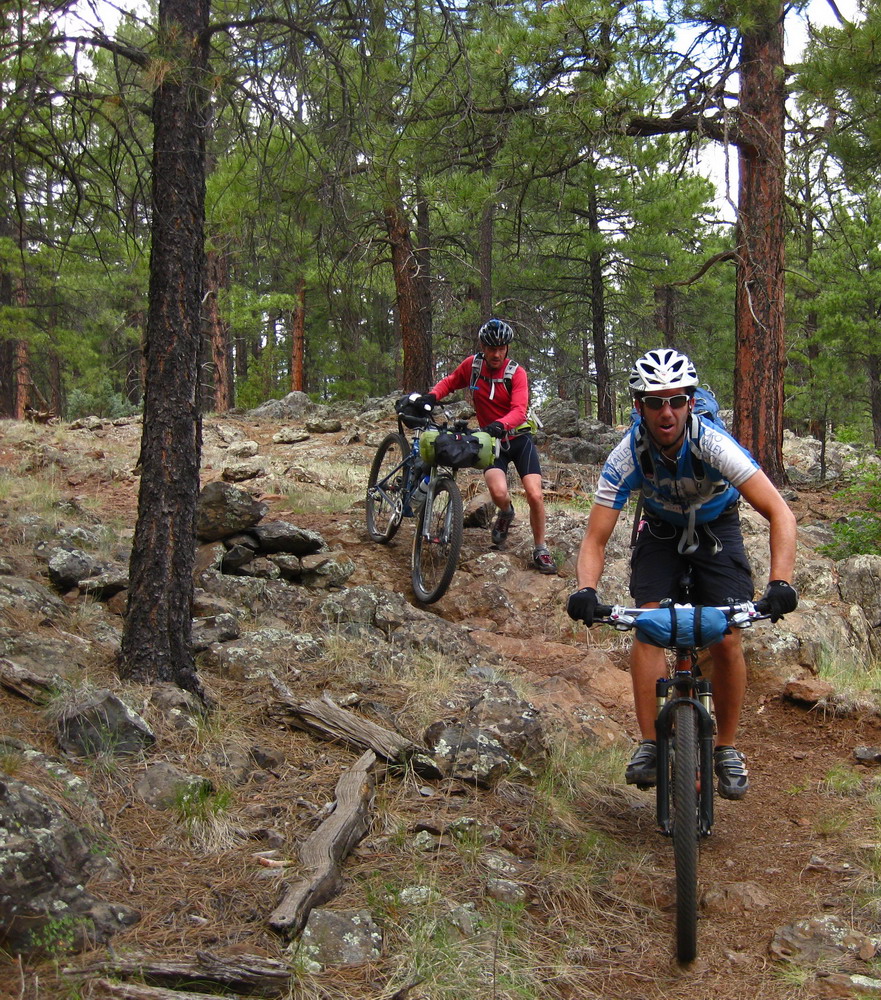

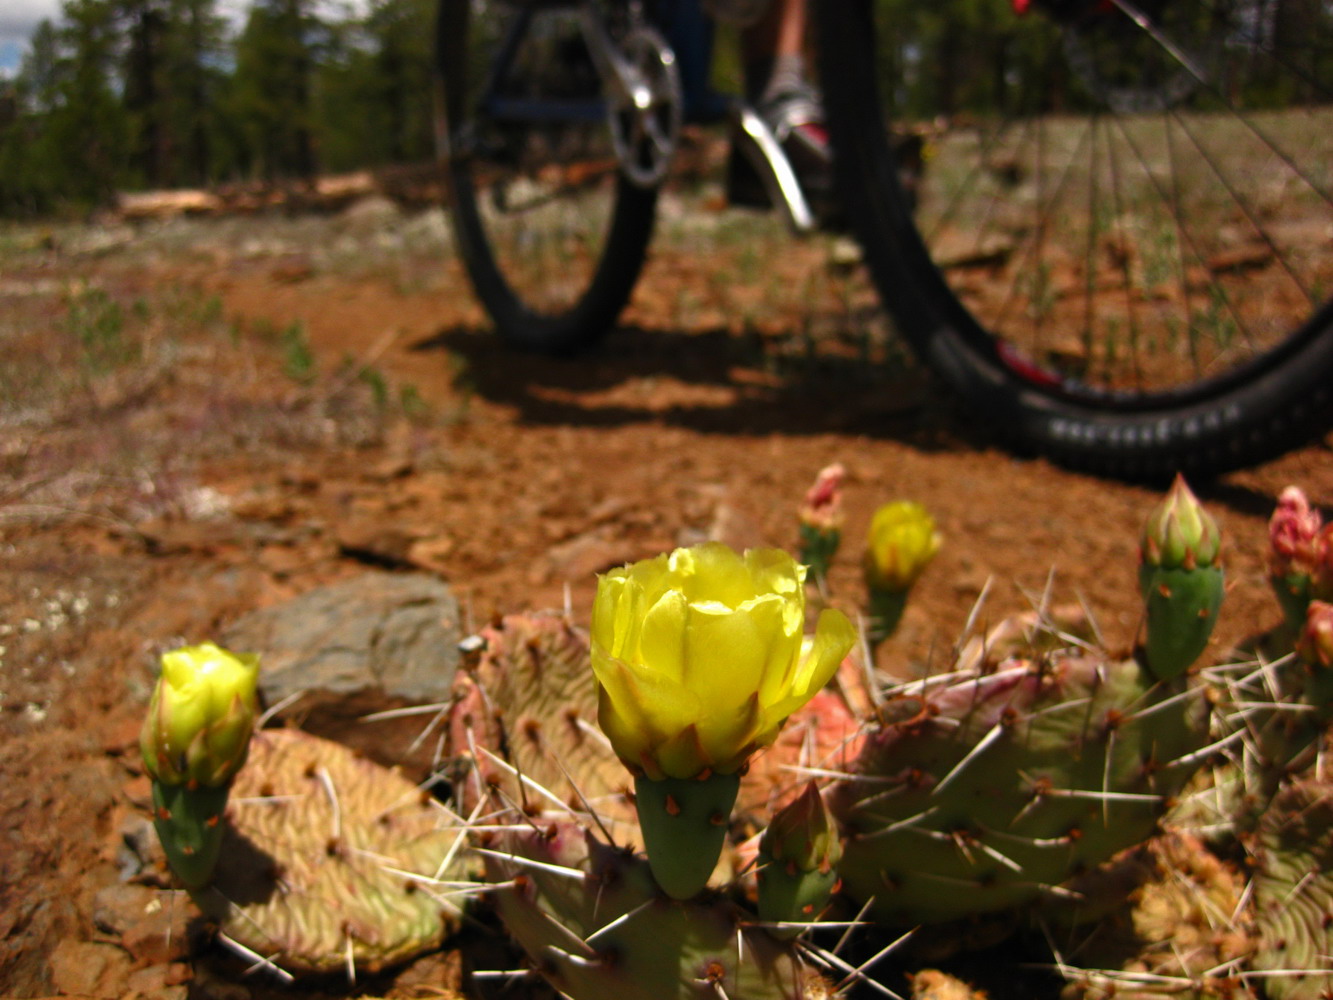

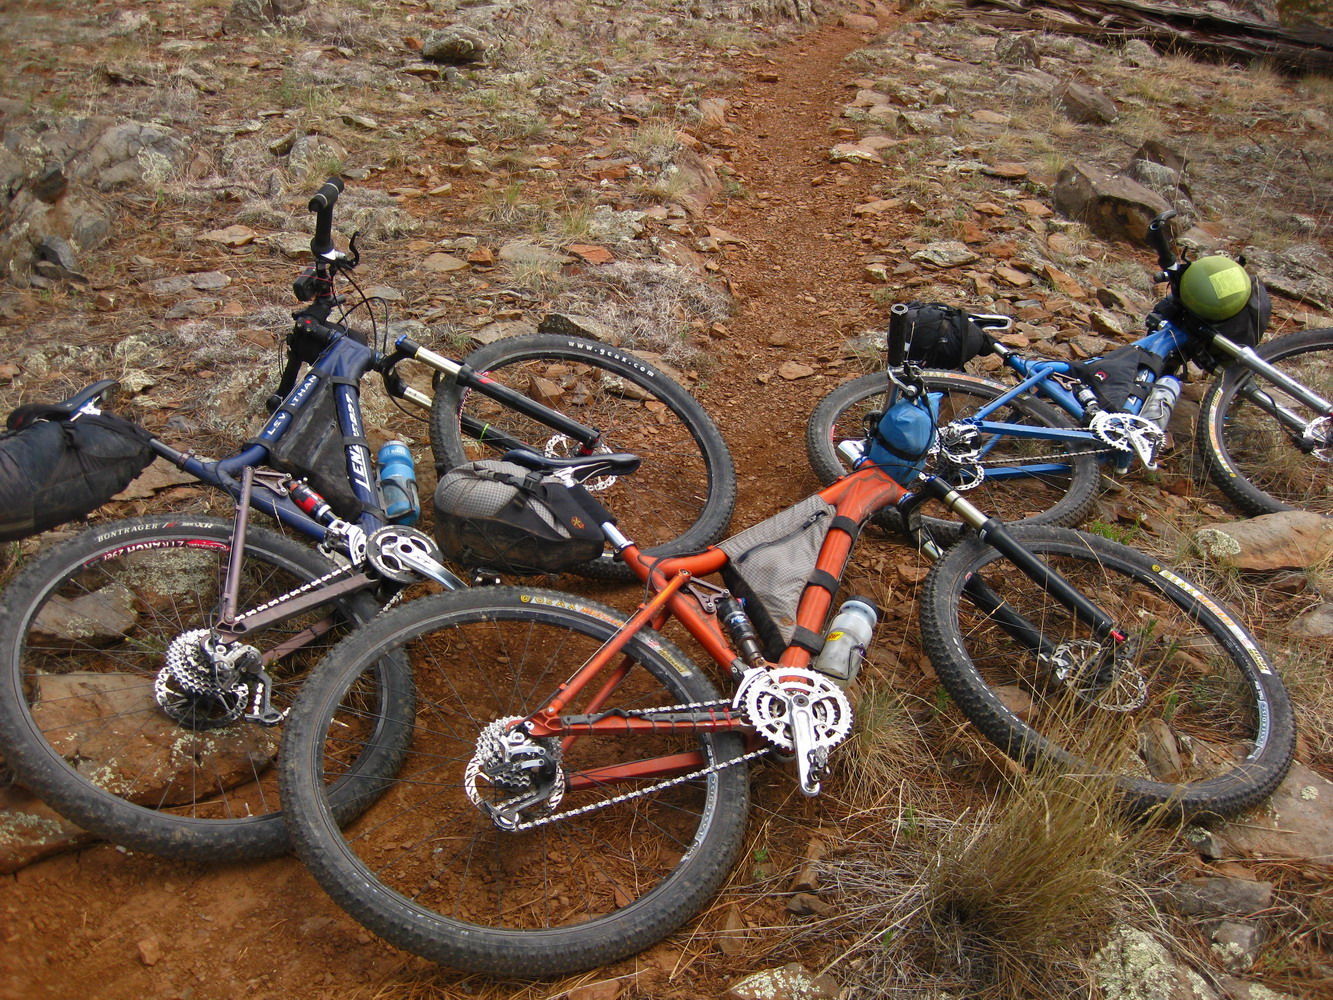
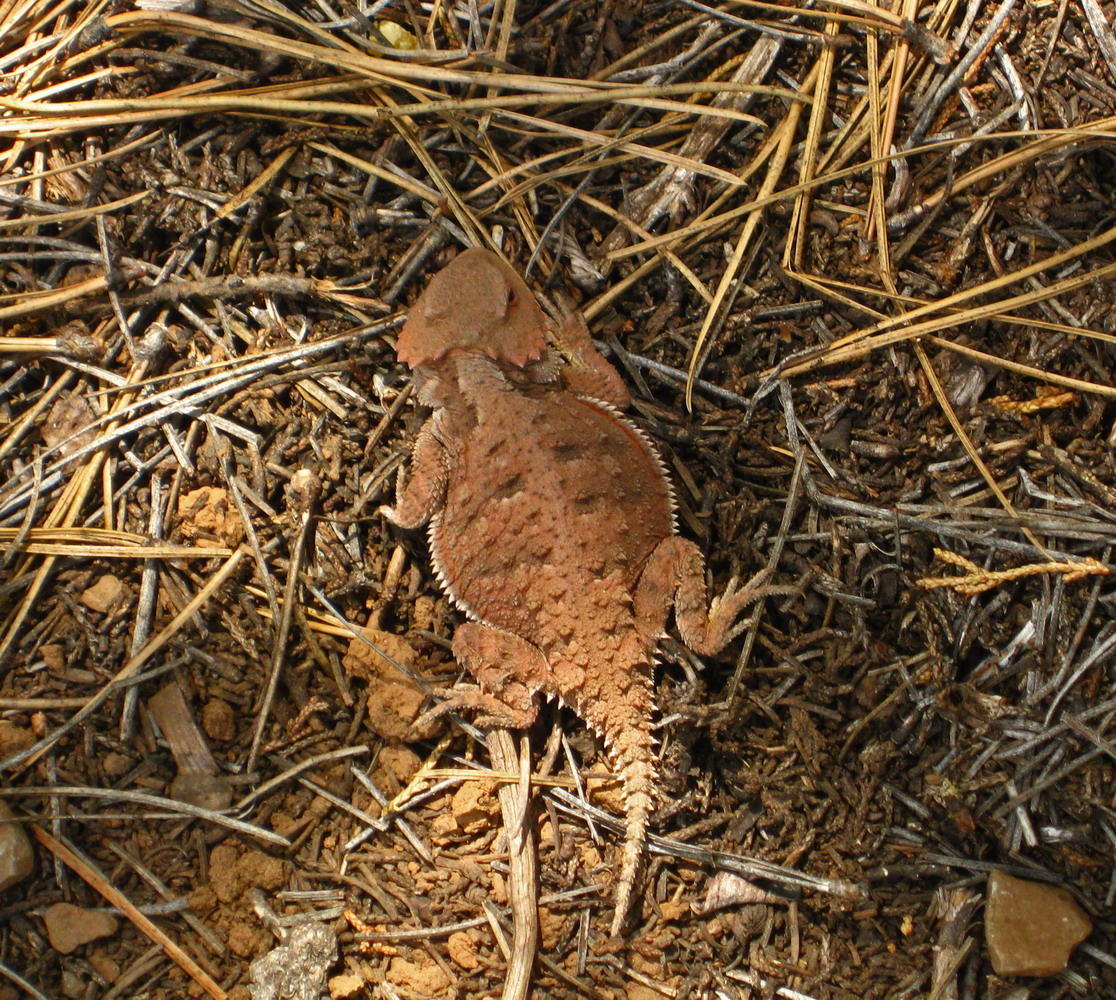
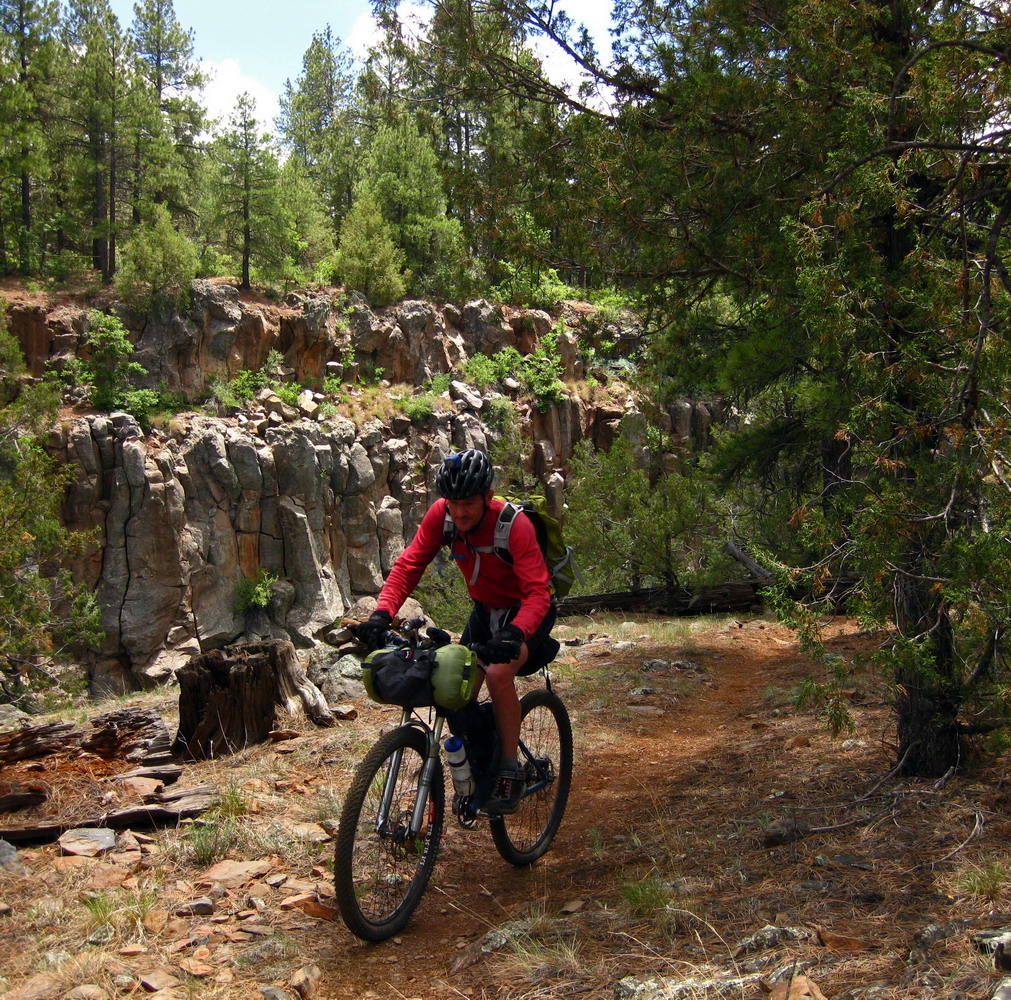

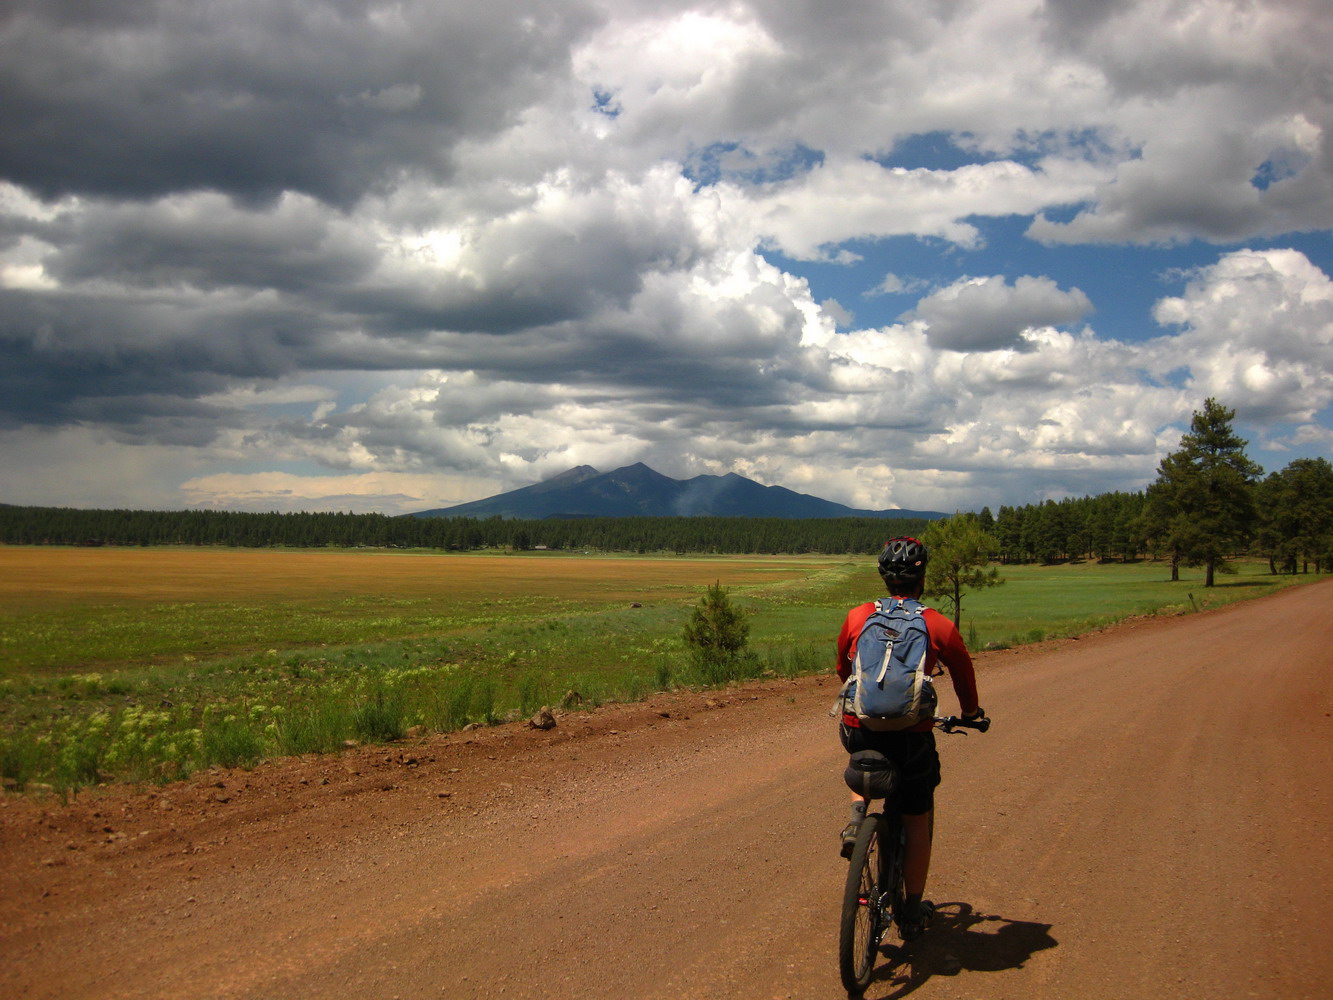

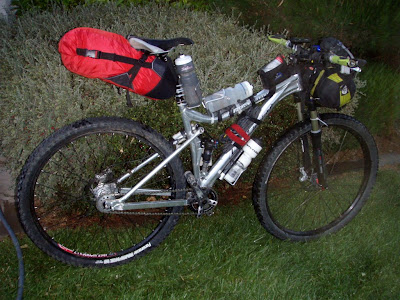
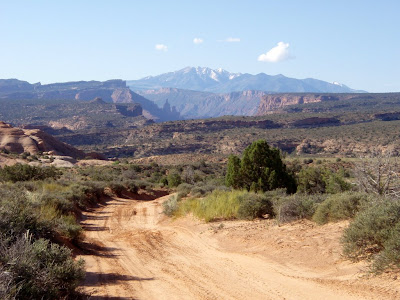
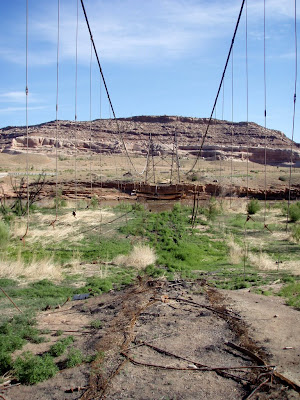
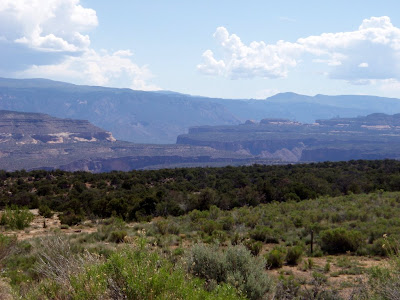
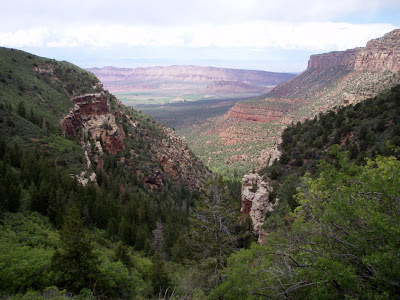
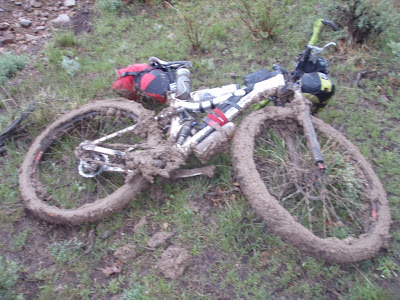
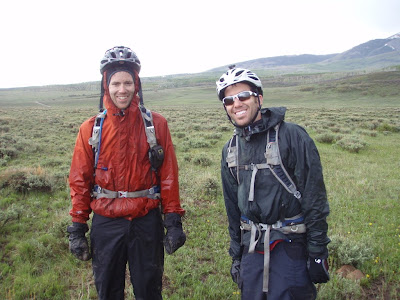
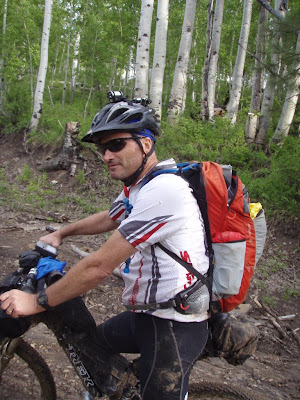
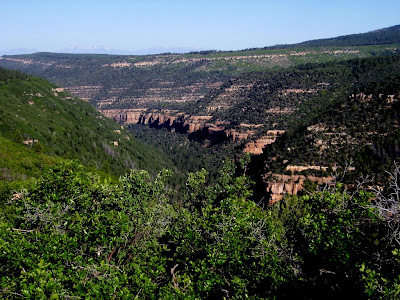
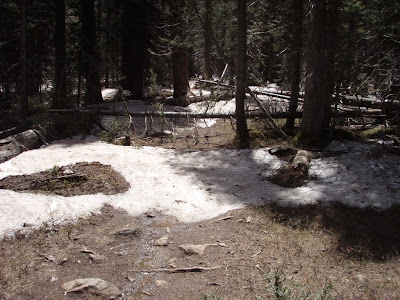
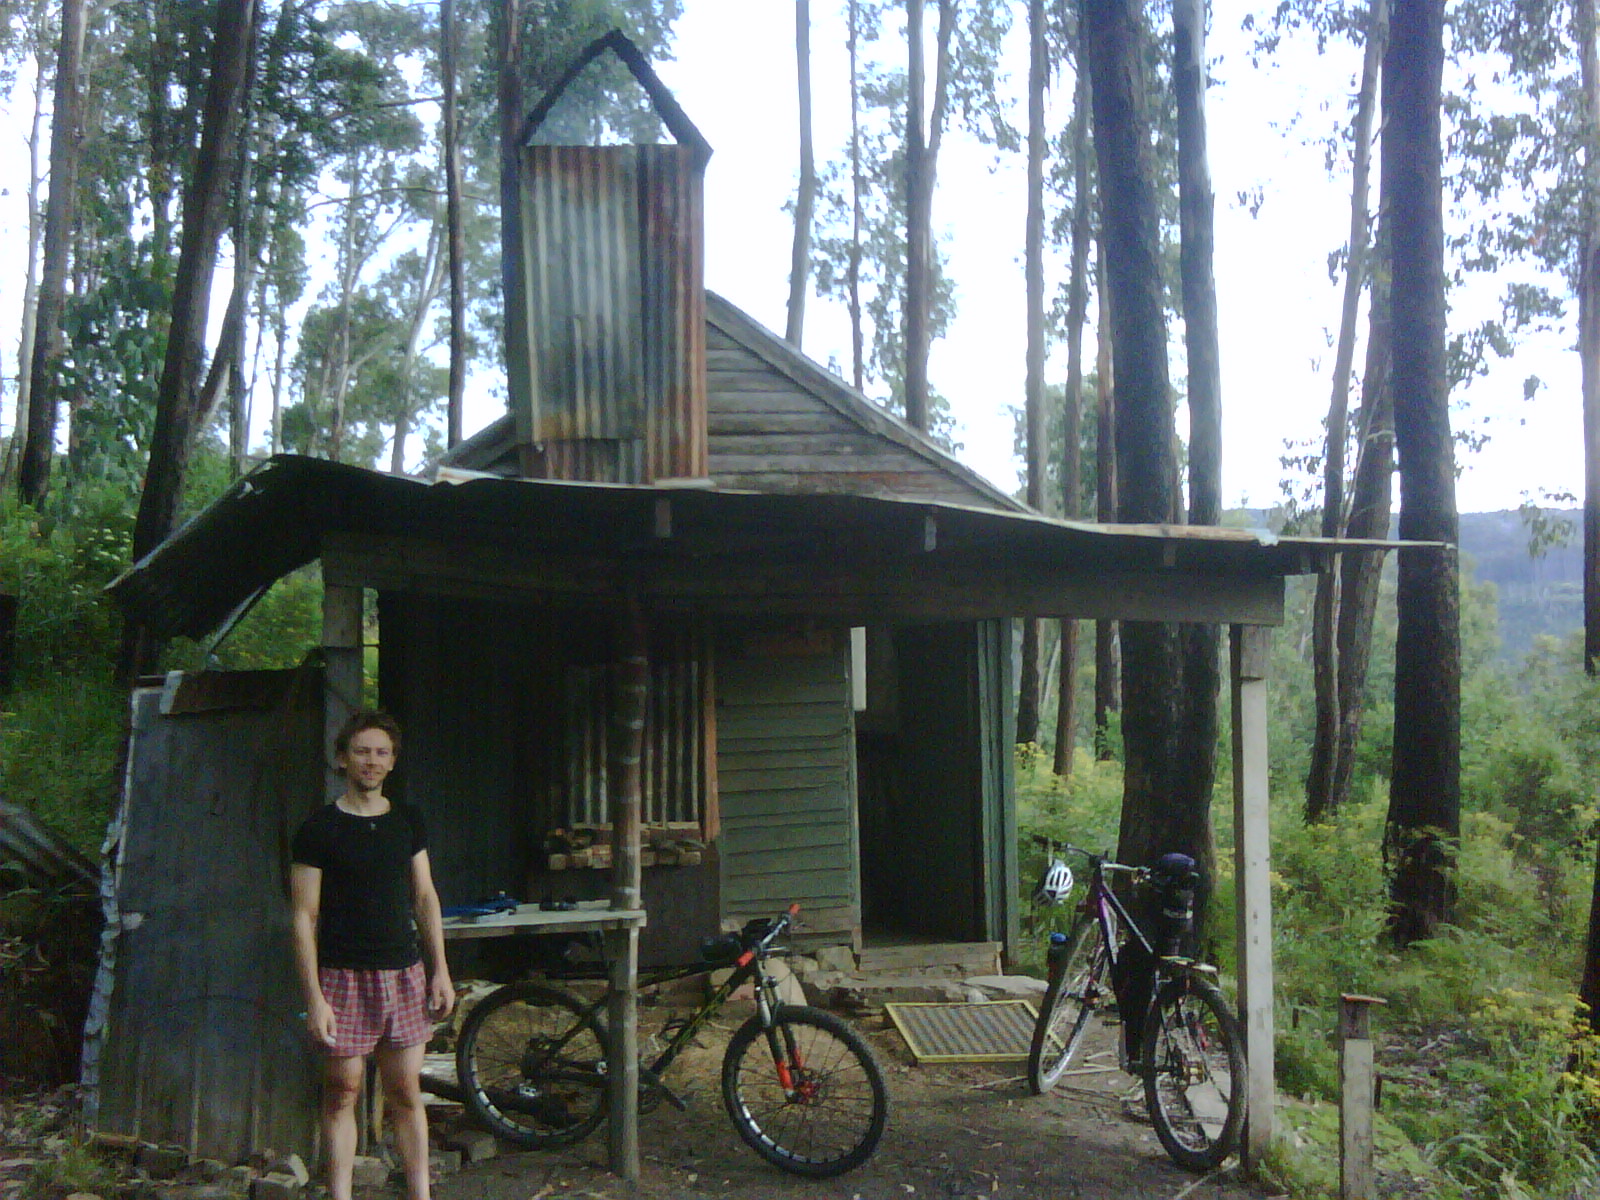