Personal setups, Ultralight / Singletrack » JoeyDurango’s DIY Bikepacking Setup
The bike:
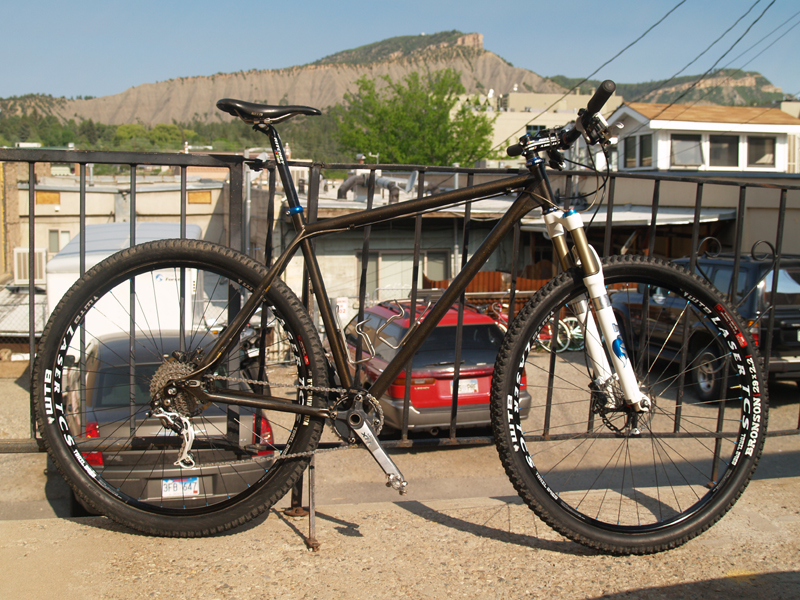
It’s pretty simple. Redline Monocog Flight 29er chromoly frame, which has outlasted multiple friends’ carbon wonder-bikes. Fox F29RLC fork, Shimano XTR/XT/Blackspire 1×9 drivetrain, Paul chainguide with some custom grinder work to make the fit perfect. XT brakes, Ritchey/WTB/Pro/ESI cockpit. I built the DT Swiss/WTB wheelset, and currently am using the WTB Bronson up front and the Wolverine in the rear, set up tubeless. If these continue to work as well as they have been I won’t even switch over to the 29er TCS tires when they are released! Obviously this is a single-speed frame, this is my first year back on gears after three spent riding SS… I have the sliders positioned so that chain tension is perfect in the 2ot, and I have two QuickLinks in the chain so that I can take out a section and create a SS in just a minute if disaster strikes the shifty bits. Overall I love the ride this bike offers, even though the frame is sub-$500. Good on ya, Redline! If I “upgrade”, it will only be to a custom-built steel or ti frame, likely with the same geometry as my Monocog. So far, no reason to do so…
Loaded with homemade bags (don’t laugh):
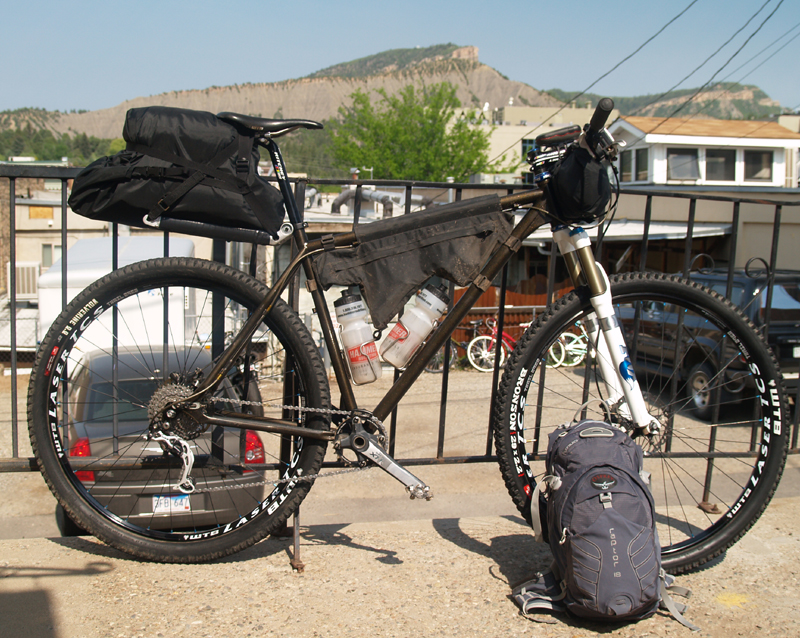
For my back I’m using Osprey’s Raptor 18, from their Hydraulics lineup. So far I love it, although I had to trim and sew all the straps (they allowed for much larger folks than I when they designed this thing). All three bags on my bike are handmade using an old cantankerous Japanese sewing machine I got at a yard sale. My friend Doom (Republic of Doom fame, he makes sweet stuff, check it out) hooked me up with some extra Gore-Tex, and I used it for all the bags. Lightweight and waterproof. The frame bag, muddy from yesterday’s ride on the Hermosa Creek Trail:
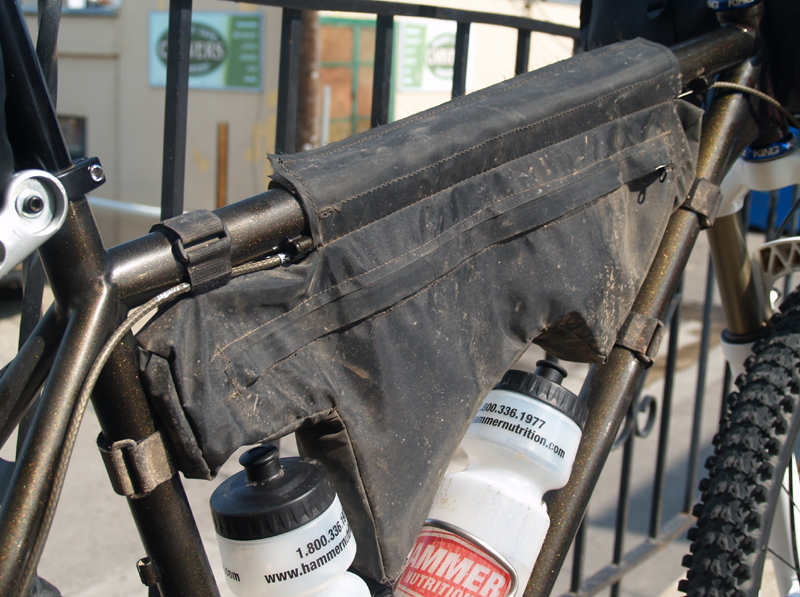
I salvaged all the velcro/strappy bits from various other bags/storage contraptions. It’s got an inner mesh pocket, the whole thing is seam sealed, and I wish I’d made it a little wider. The handlebar bag:
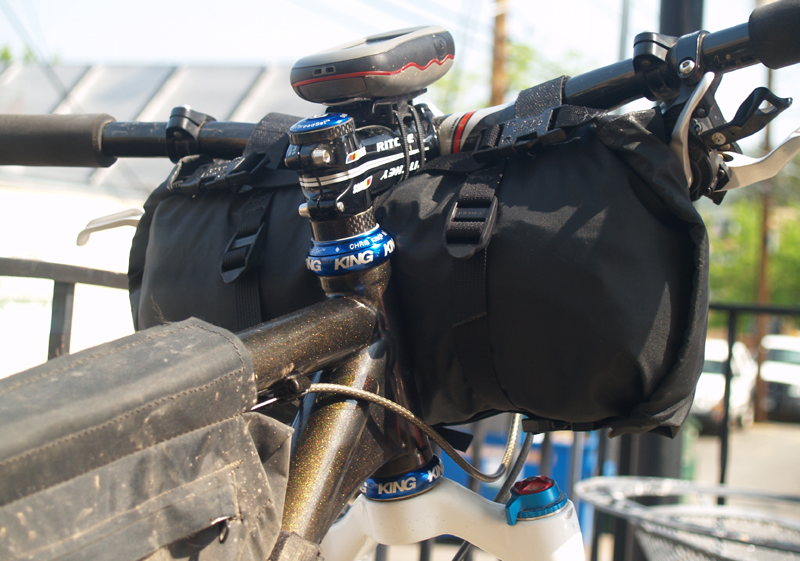
Dual-side roll-down closures a-la CDW, compression straps, and I also wish I’d made this one a little wider. The saddle bag, otherwise known as “what the hell is that?”:
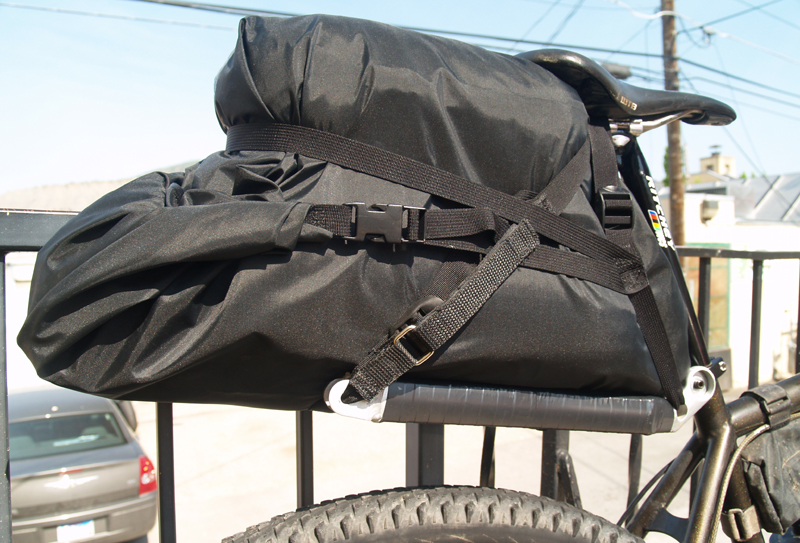
Looks funny but works pretty well. It’s solid. Building on pro_out’s idea posted last year sometime, I decided on half rack/half bag, mostly because a typical saddle bag design is A) too complicated for me to sew with my ancient machine and B) I was trying to fit something almost 20″ long in there, not possible in most saddlebags. I have a Henry Shires TarpTent Moment, and while it’s light, it packs long (the sleeping bag and pad are also in there). I ended up using the bottom half of a very old Specialized FSR swingarm, bolted onto an Axiom Trekker seatpost clamp, which replaces the blue clamp seen in the first photo when the saddlebag is in use. It is tolerably light, very stiff laterally, and pivots up and down easily so the bag can come out. Most the straps in the photo stay with the rack, the bag is just a bag with a roll-top closure that interfaces with the strap system. The bag is seam-sealed. The rear-most strap to the saddle rails has a metal-buckle redundant strap so that all that stress isn’t handled solely by the plastic buckle. The whole thing is way lighter than it looks.
Finally, the gear:
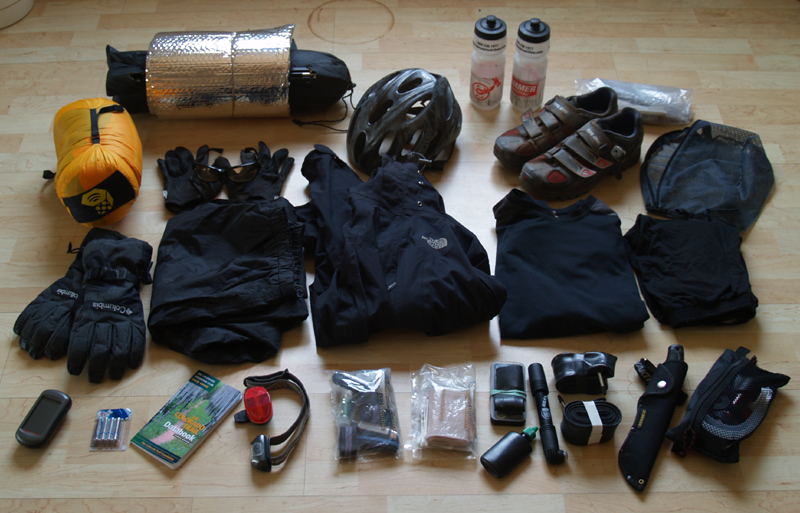
From roughly top left onward: Mountain Hardwear Ultralamina 32* bag, Henry Shires TarpTent Moment with 3/4 length Reflectix insulation (cheap at the hardware store!) for a pad, glasses, gloves, helmet, bottles, Pearl Izumi X-Alp Pro shoes, latrine shovel/TP/sanitizer, mesh bag for extra clothes. Warm/waterproof Columbia gloves I got on sale for colder trips, cheap rain pants with all the exterior pockets cut out, a free North Face Gore-Tex jacket with all the interior pockets cut out, polypro longsleeve, tights for sleeping in colder weather. Garmin Oregon 550t GPS unit (gift, I sure as hell couldn’t afford that), extra lithium batteries, maps if needed (in this case CT databook), headlamp/taillight, bike first aid (assorted bolts, small parts, straps, tape, Kevlar spoke, etc.), human first aid (whatever my girlfriend said I should take – I’m a mechanic, not a doctor), small ratchet/bit set with spoke wrench, chain tool, a bit of Squirt lube in a different bottle, minipump, two tubes, a big knife (I’m from the midwest, sorry), and MSR water filter.
Usually I’ll wear a short sleeve polypro of some sort, Dickies shorts or cutoff capris (no chamois for me, not comfy), and wool socks.
Major thing missing is a light system. Still researching that. AyUp was gung-ho to sponsor our team (Bandwagon), but then flaked out and we never heard from them again despite repeated attempts at contact. Sure not buying one of those, I can only imagine customer service must be flaky as well, too expensive anyway. Maybe something relatively inexpensive, light, and medium-powered like the Cygolite MityCross 400… should get me through and I can carry extra batteries when they only weigh 140g.
Overall I have no solid idea of what this setup weighs. I don’t own a scale. It seems reasonable… under 15-17lbs with food and water? Not a racer’s setup, but I’m more a fan of being out there than anything.
Think that’s it. Thanks for reading. Now go outside!
I really like that 1/2 rack contraption for the seat bag. A friend of mine is small women who rides a 29er… she has issues with a the seat bag rubbing the tire–a setup like that would work great.
Excellent work here. I am constantly amazed by all of you that make your own gear. (Me, I just shell out the dollars.)
On the lights, I have been using the Fenix LD10. It uses 1 AA and runs for a long time on the lowest setting. One brightness setting up works well for actual riding, and lasts for about 4 hours. My other light I got off of Deal Extreme.com and has worked okay over the years. It works better strapped to my helmet but is a bit on the heavy side. It uses rechargeable batteries and the whole setup costs about $65. Let me know if you want the info.
Gabe
Hey, thanks, guys. JHL, you’re right, the seatbag-rubbing-the-tire problem could easily be fixed with a half-rack arrangement, although storage space might then be somewhat limited. At 6’2″, I don’t have those sort of space restrictions in my setup.
Gabe, thanks for the light recommendations. I actually just ordered the CygoLIte Mitycross 400. From what I’ve read, it’s reliable, it has good battery life, and it’s light and relatively inexpensive. I also really like that it’s made in the USA. It may be a little on the dim side. We’ll see how it does and I’ll post a review.
Hey Joey nice setup good to see your setup, I havent seen you in about a year hope everything is going really good for you. Last time I rode with you was the crest on monarch. Me and Jason did the kokopelli self supported again. It was super fun probably one of the best times I have had on a bike this year. I hope to see you at the CTR, I am trying to get ready for it i just hope i can make it.
Hey Mike! Good to hear from you! Hoping to see you – and myself – at the CTR as well. I’m not 100% sure yet, we’ll see how the next couple big events go. In any case, I’d be hoping just to make it as well!
The KT sounds pretty cool. Some friends from Durango just did it as well.
Keep it real, see you out there somewhere or another! Tell Jason I say howdy.
Hey Joey! Congrats on rockin’ the CTR this year! I was browsing setups and ran into yours. Badass that you made all your stuff. I am always impressed not seeing the SAME purchased frame bag and seat bag on every bike.
I just moved to Durango about a month ago and one of the new kids on Bandwagon Racing.Would love to put a face with the name I have heard a lot about, so hit me back at allthingsepic@gmail.com and if you get bored and want to check out my attempts to play bike racer check out allthingsepicwithjill.blogspot.com.
Joey D’
Nice setup. Midwest you say? Where? I’m a flatlander from Springfield, MO. I have the ocassional lump in the road to train on, but am always trying to find hills and/or good training rides. Any secrets on training for the CTR? I will be riding it July 30 of this year.
And I love the KNIFE. Good stuff. I ordered a small dive knife that I have mounted to my pack strap.
Hey HH,
I live in Durango and have been in Colorado for seven years, but I hail originally from near Louisville, KY. CTR training tips? Hmm. Spend some time at altitude before attempting the beast, for one – and I mean at least a couple weeks, not a few days. Other than that, just ride your arse off (a turn of phrase which can become uncomfortably literal at times if you’re riding enough). Ride your bike all loaded up frequently. And don’t forget to get accustomed to hiking in your riding shoes… good luck and maybe I’ll see you out there, if I can close the shop for a week in mid-summer!
Thanks for the tips. I will be there late July a few days before the race start. I’m finishing, not winning. 🙂 And I only got my wife’s blessing for a few days pre-race for acclimation. I’m just stoked to ride this BEAST.
Joey, How did the 1×9 set up perform for the CTR or other rides? I ride ss but I’m thinking of building up a spare frame as a 1×9 for bikepacking and I don’t want to get to far away from the simplicity of a ss.
RollingStone, as a single-speeder myself, I was looking for the same thing you are – a little extra help without much extra complexity. I really liked the 1×9 for the CTR and some other rides/races I did last year. If I’m pedaling in a 3×9 granny gear I can walk faster anyway and break up the monotony of pedaling to boot, which is something you’re trying to do after hours of pedaling. I ran continuous cable housing to the rear derailleur to keep mud and water out and had zero issues the entire race. The other thing I did was to run my SS frame with sliding dropouts and to set the dropouts so that I could run 32×23 (the best cog in my cassette for the application) with no adjustments. I then sized the chain for that SS combo, then added the necessary bit – using two Powerlinks – for the derailleur setup. That way, if something had happened, I could have simply pulled one Powerlink, dropped the bit of chain, and gone SS in less than a minute. Silly simple and it keeps you ready for almost anything. Good luck!