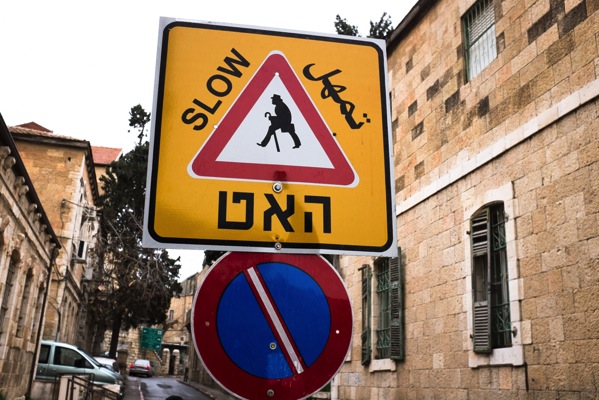
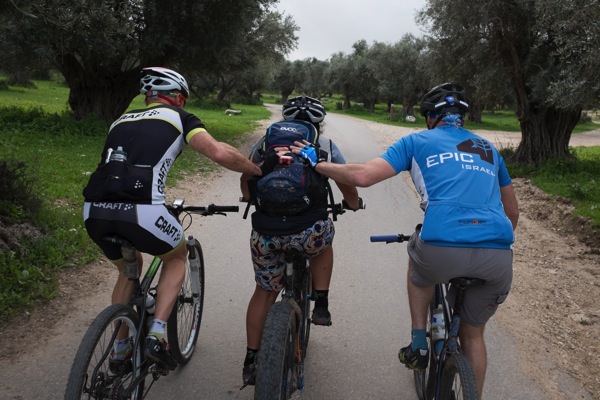
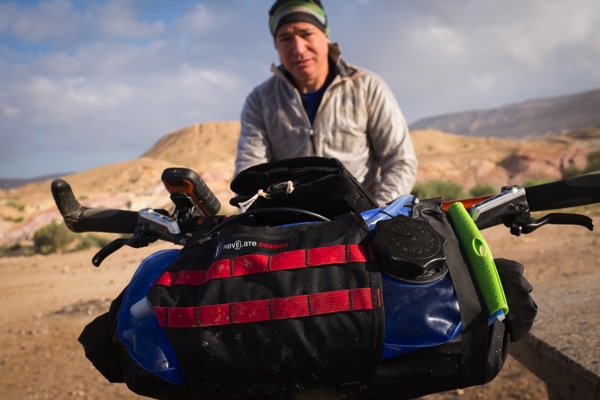
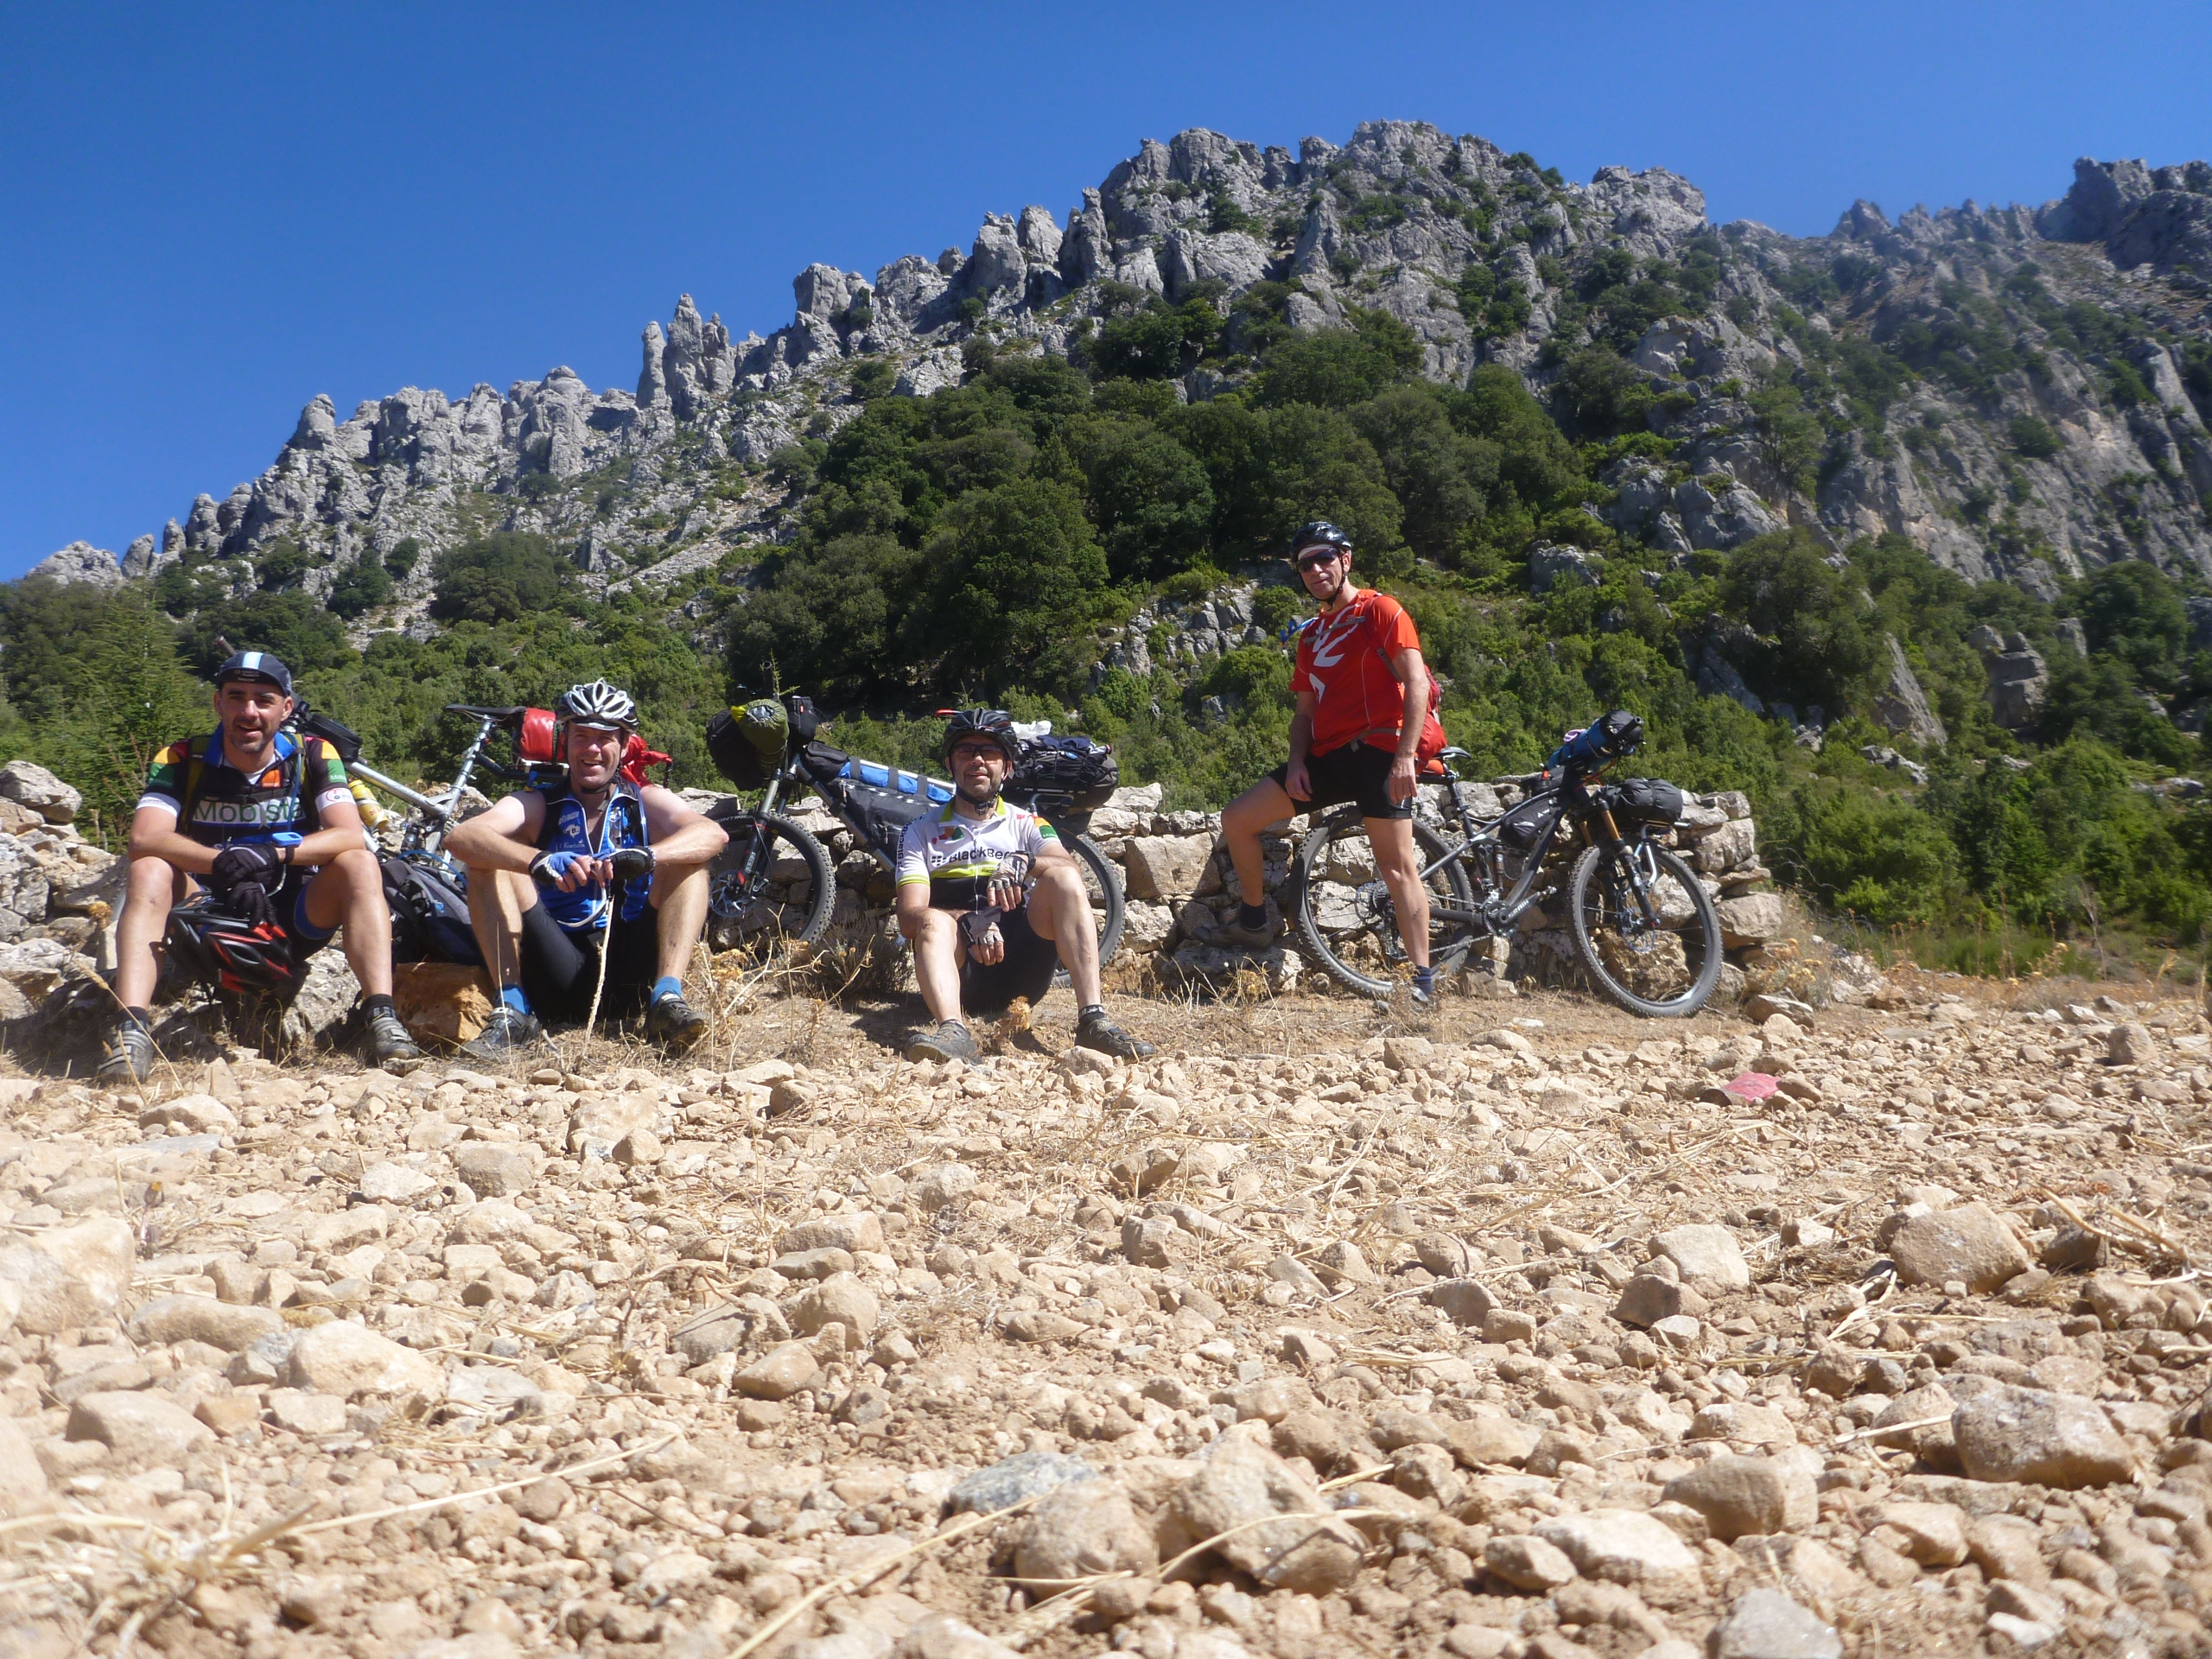
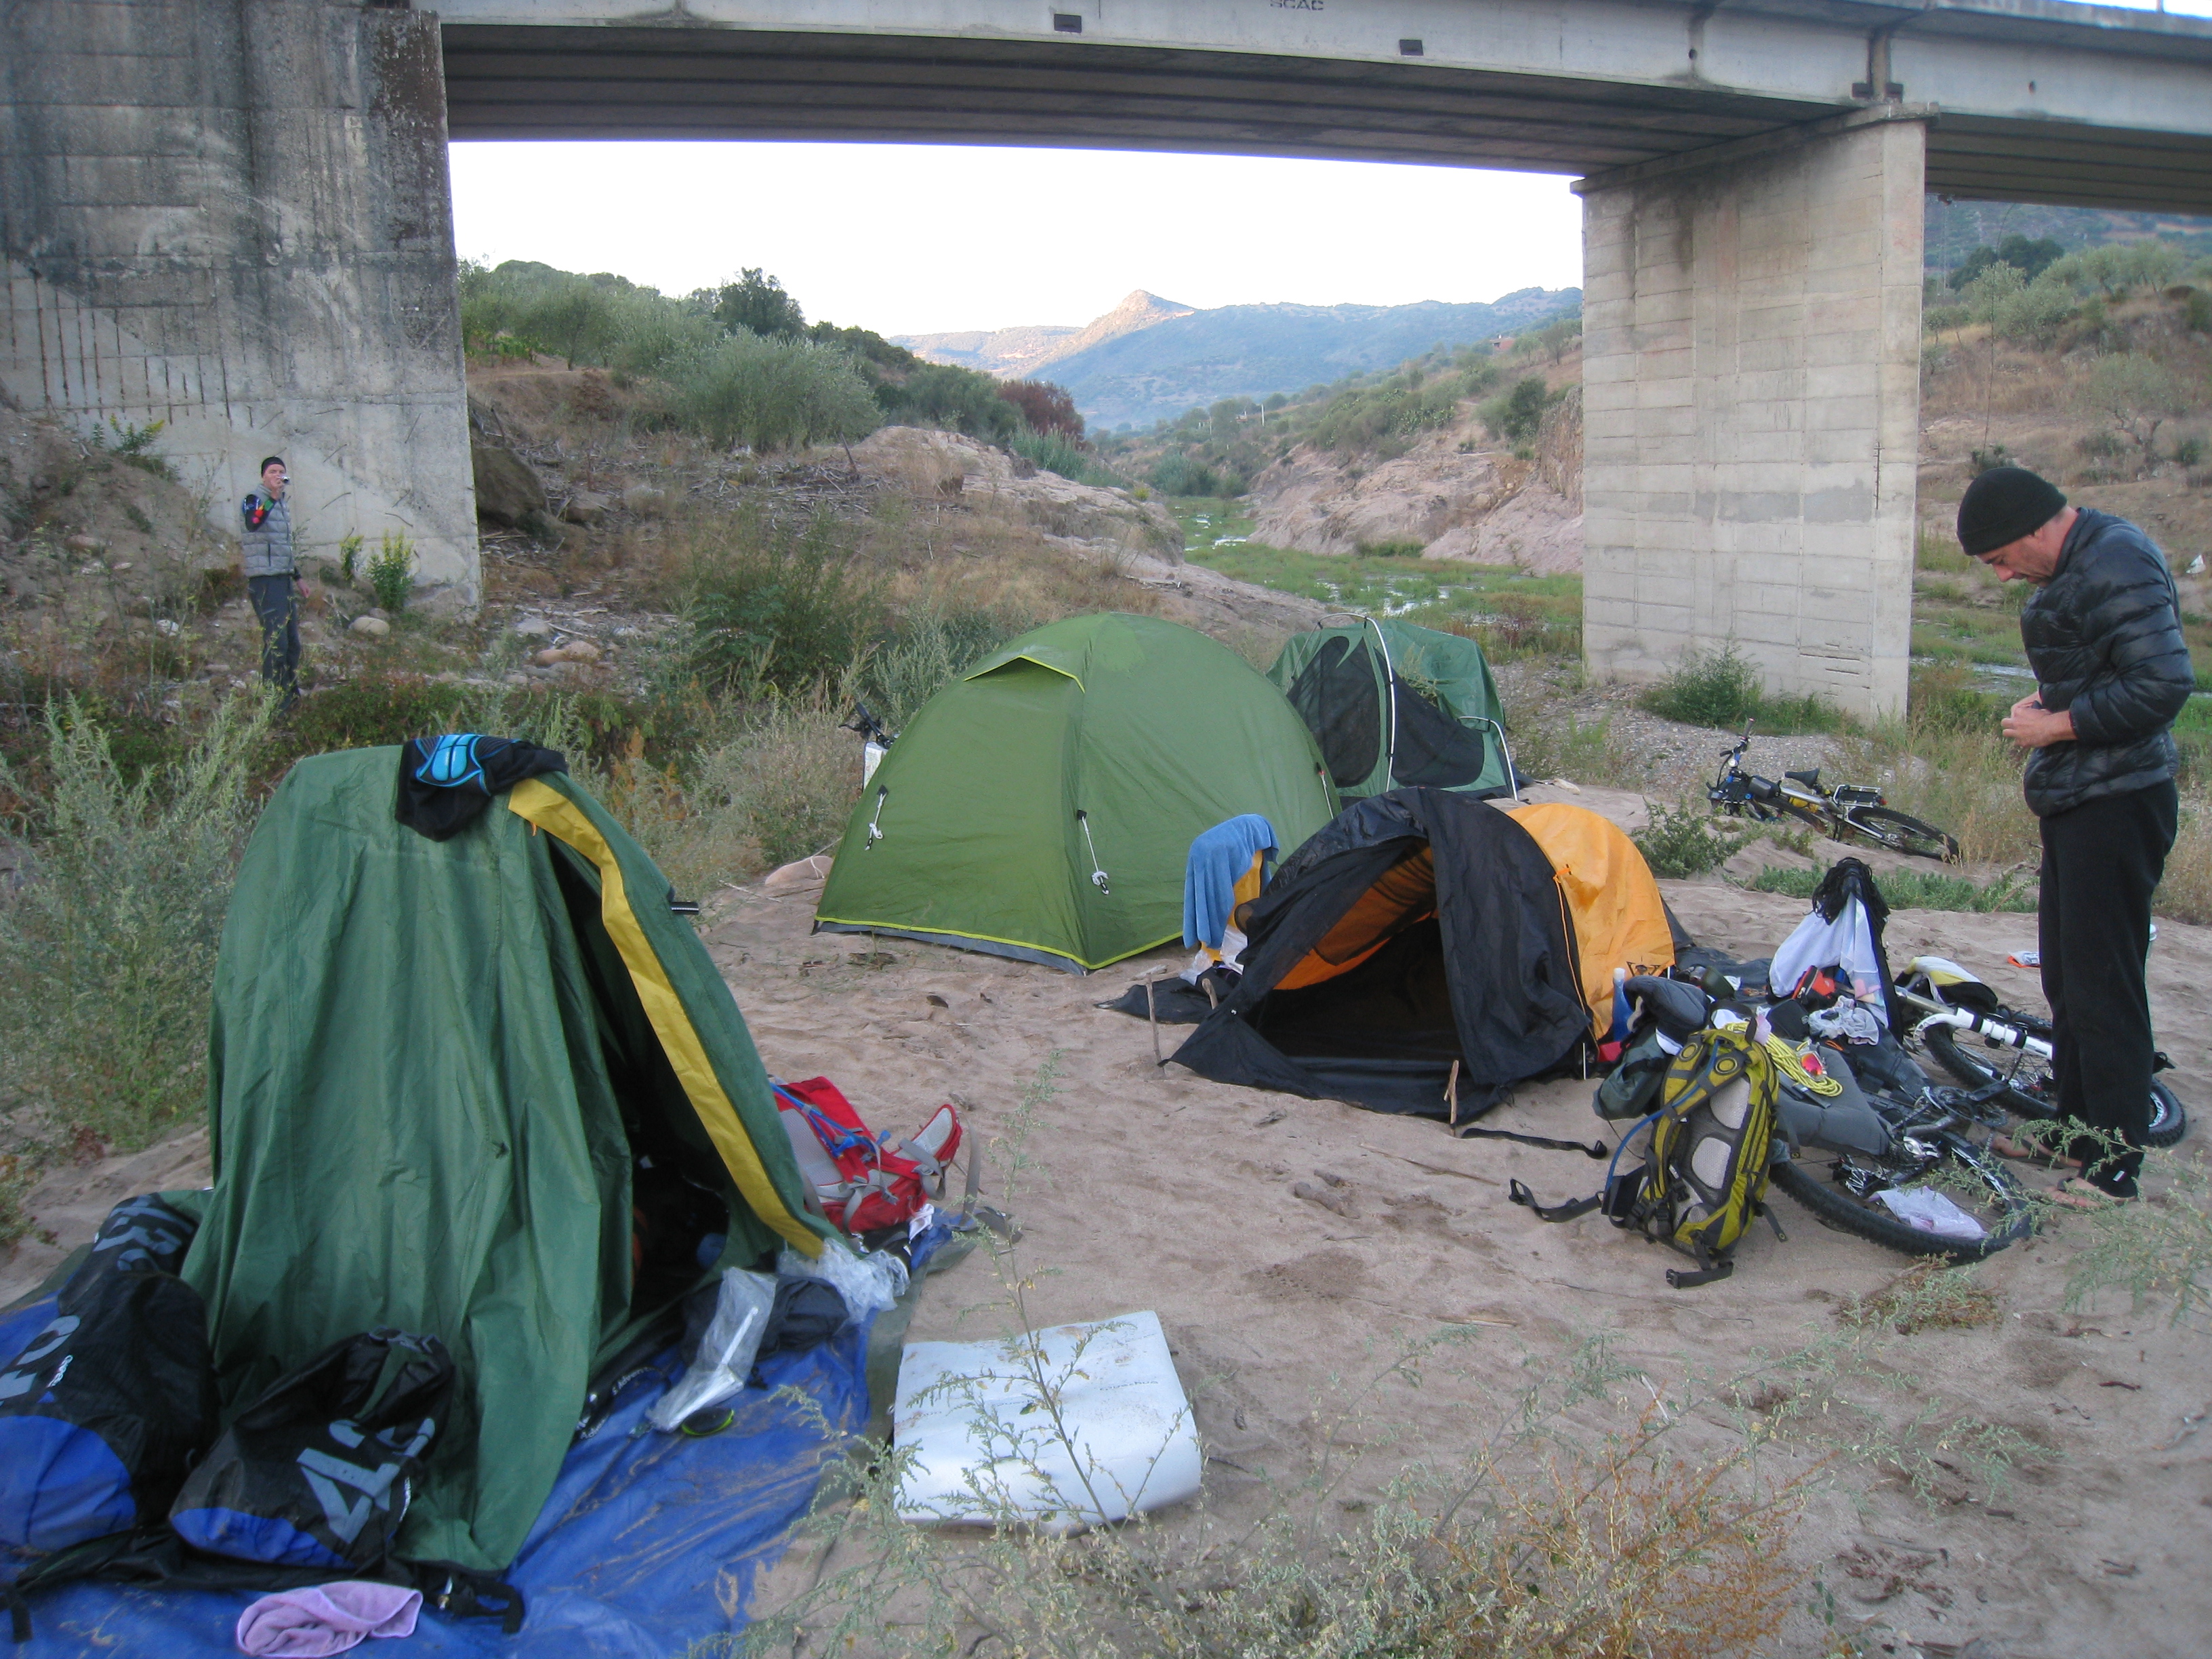
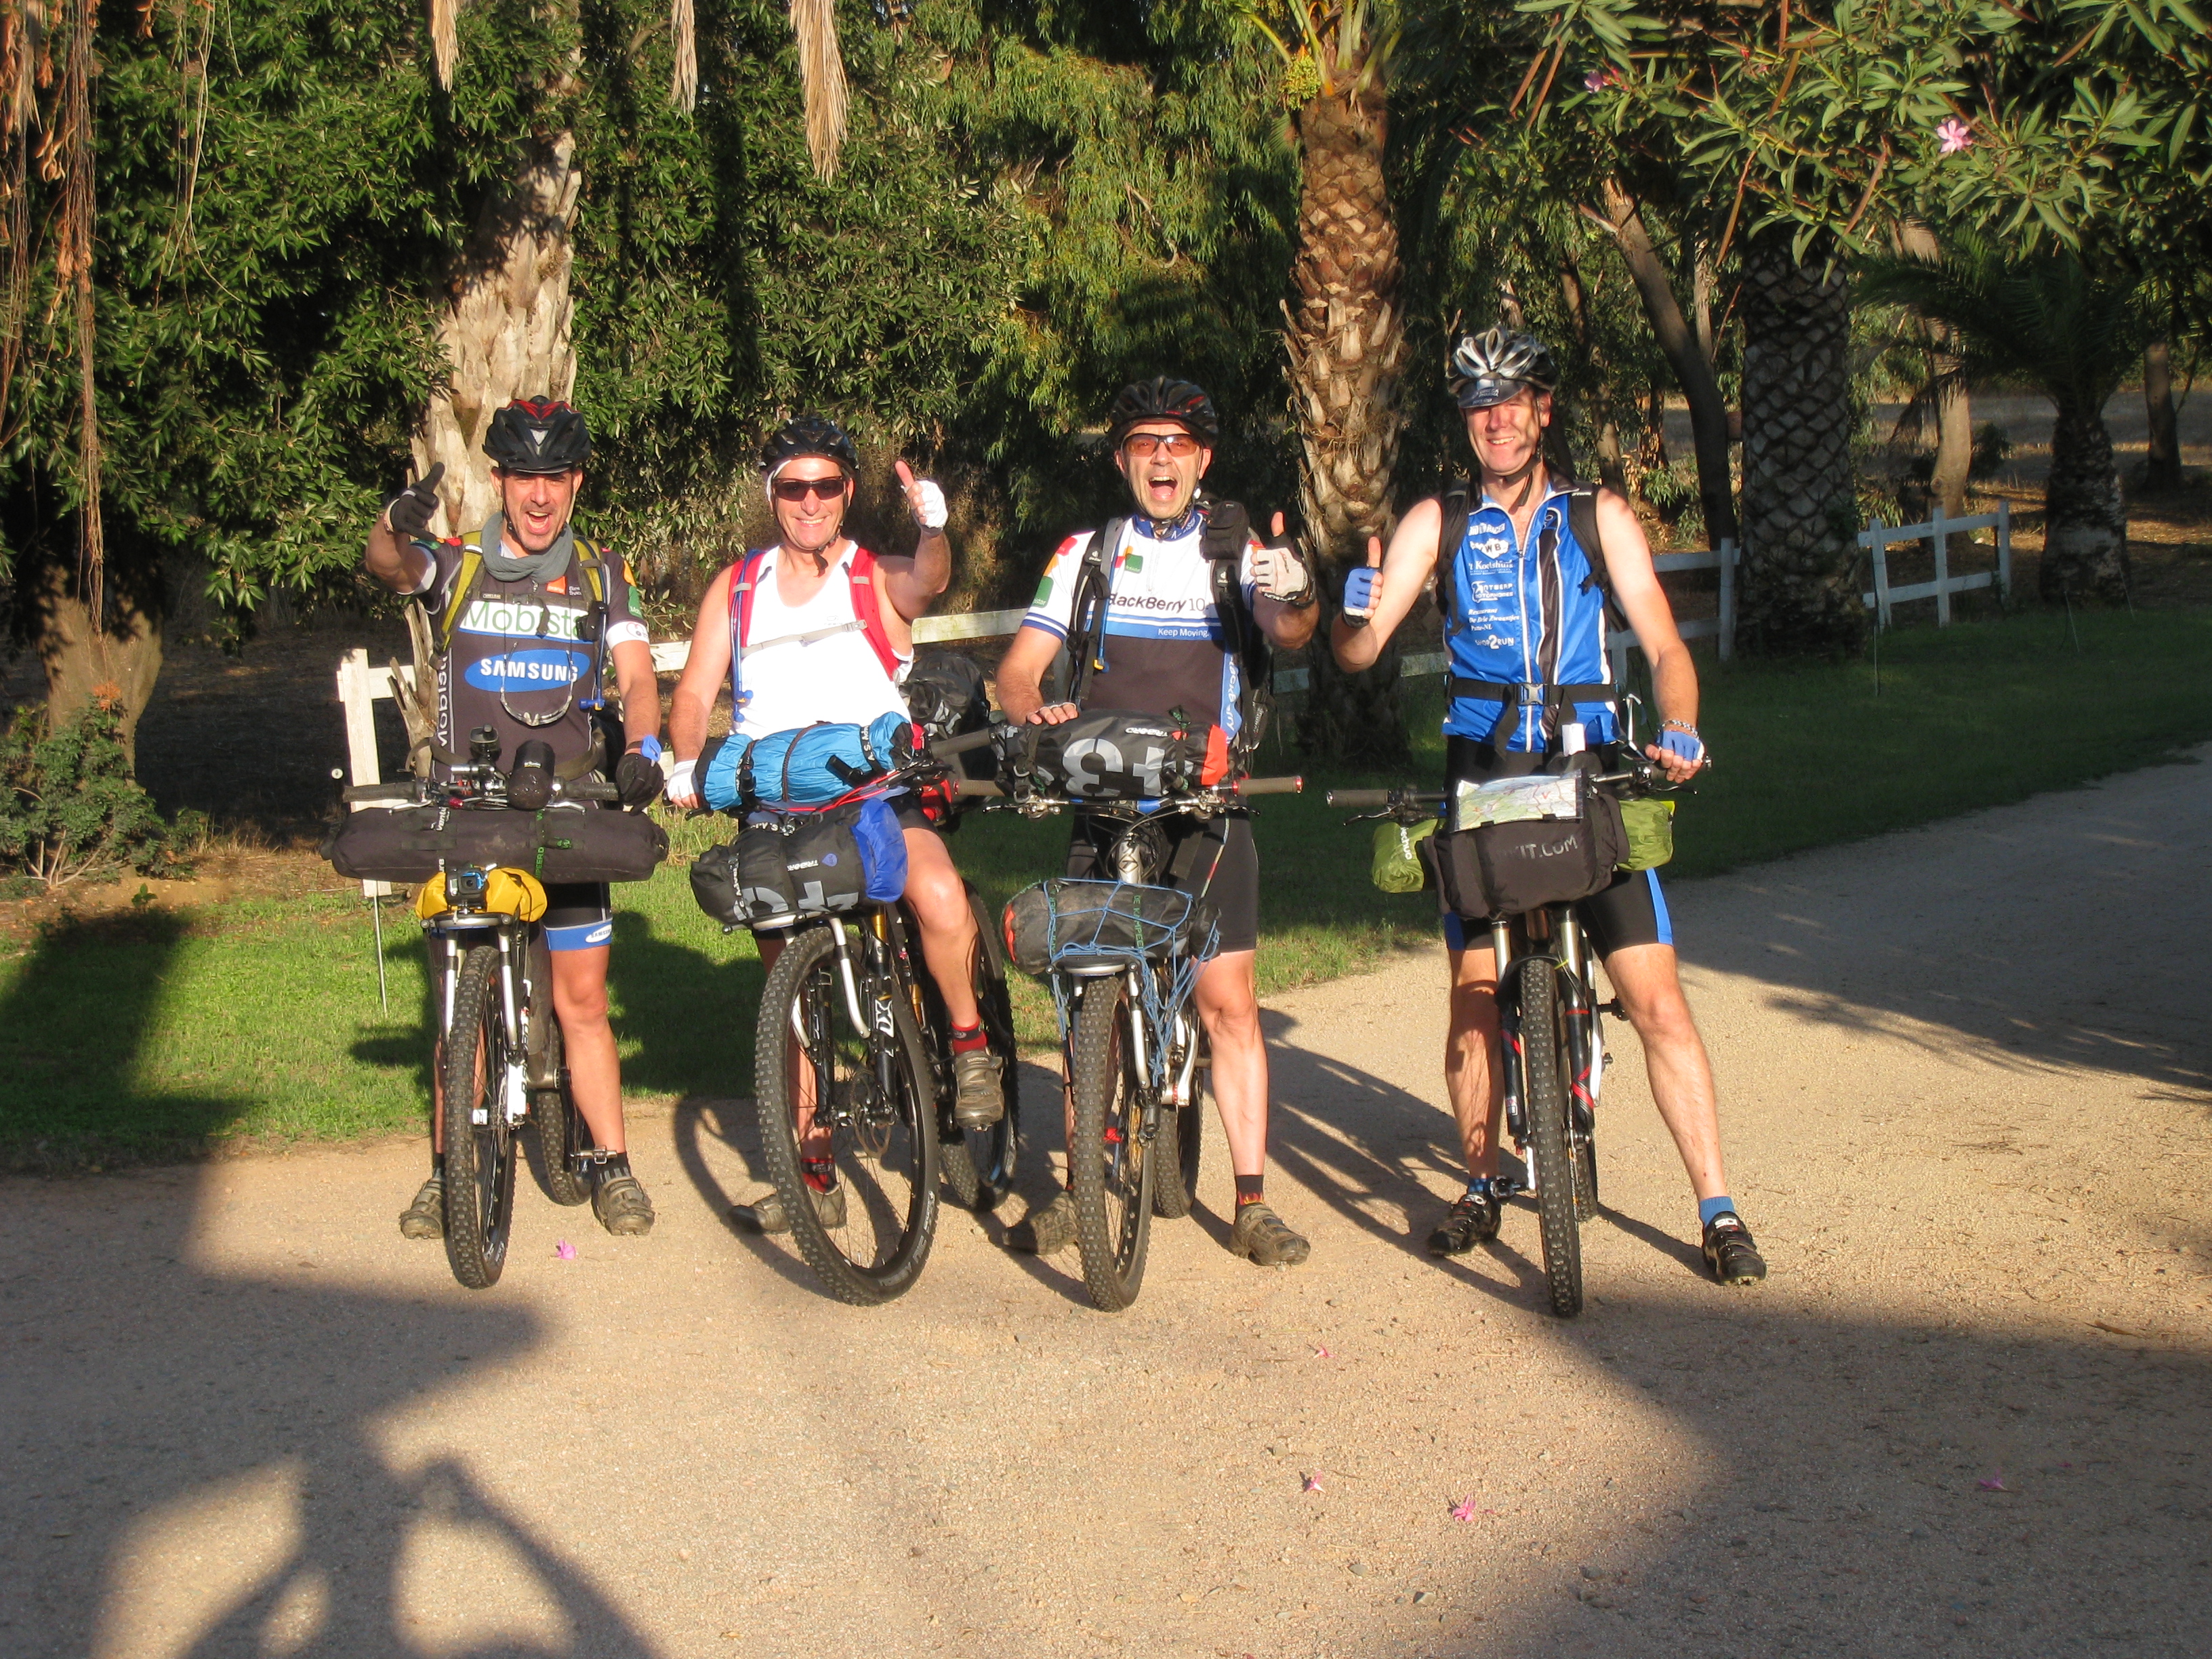
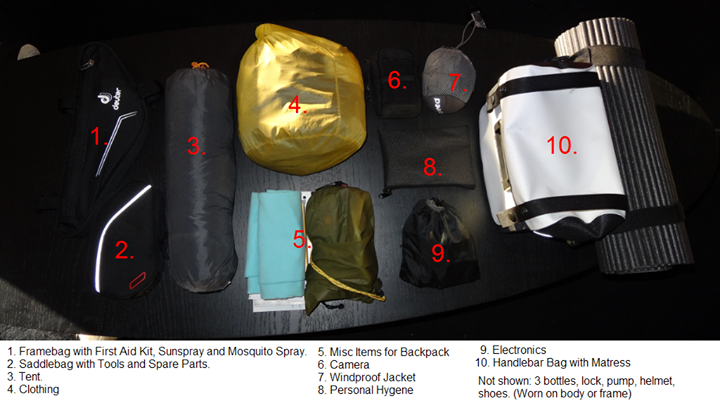
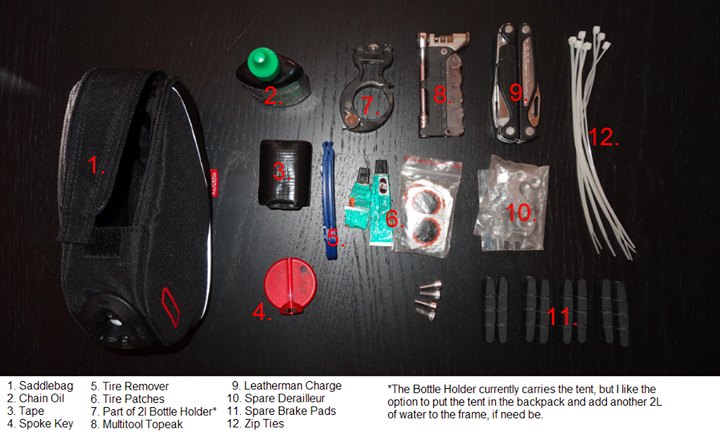
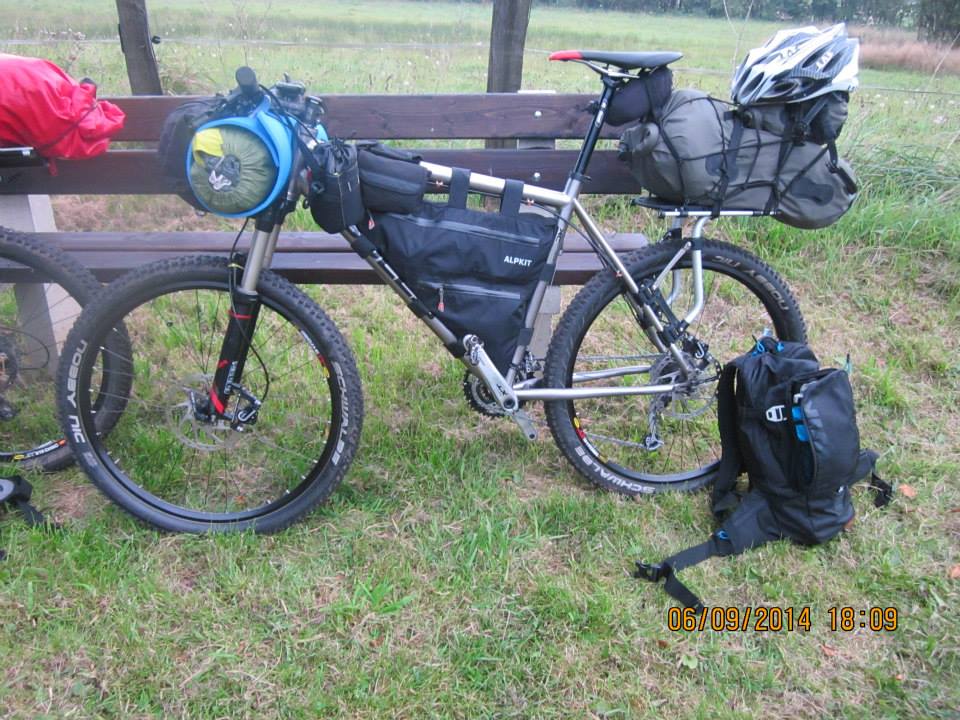
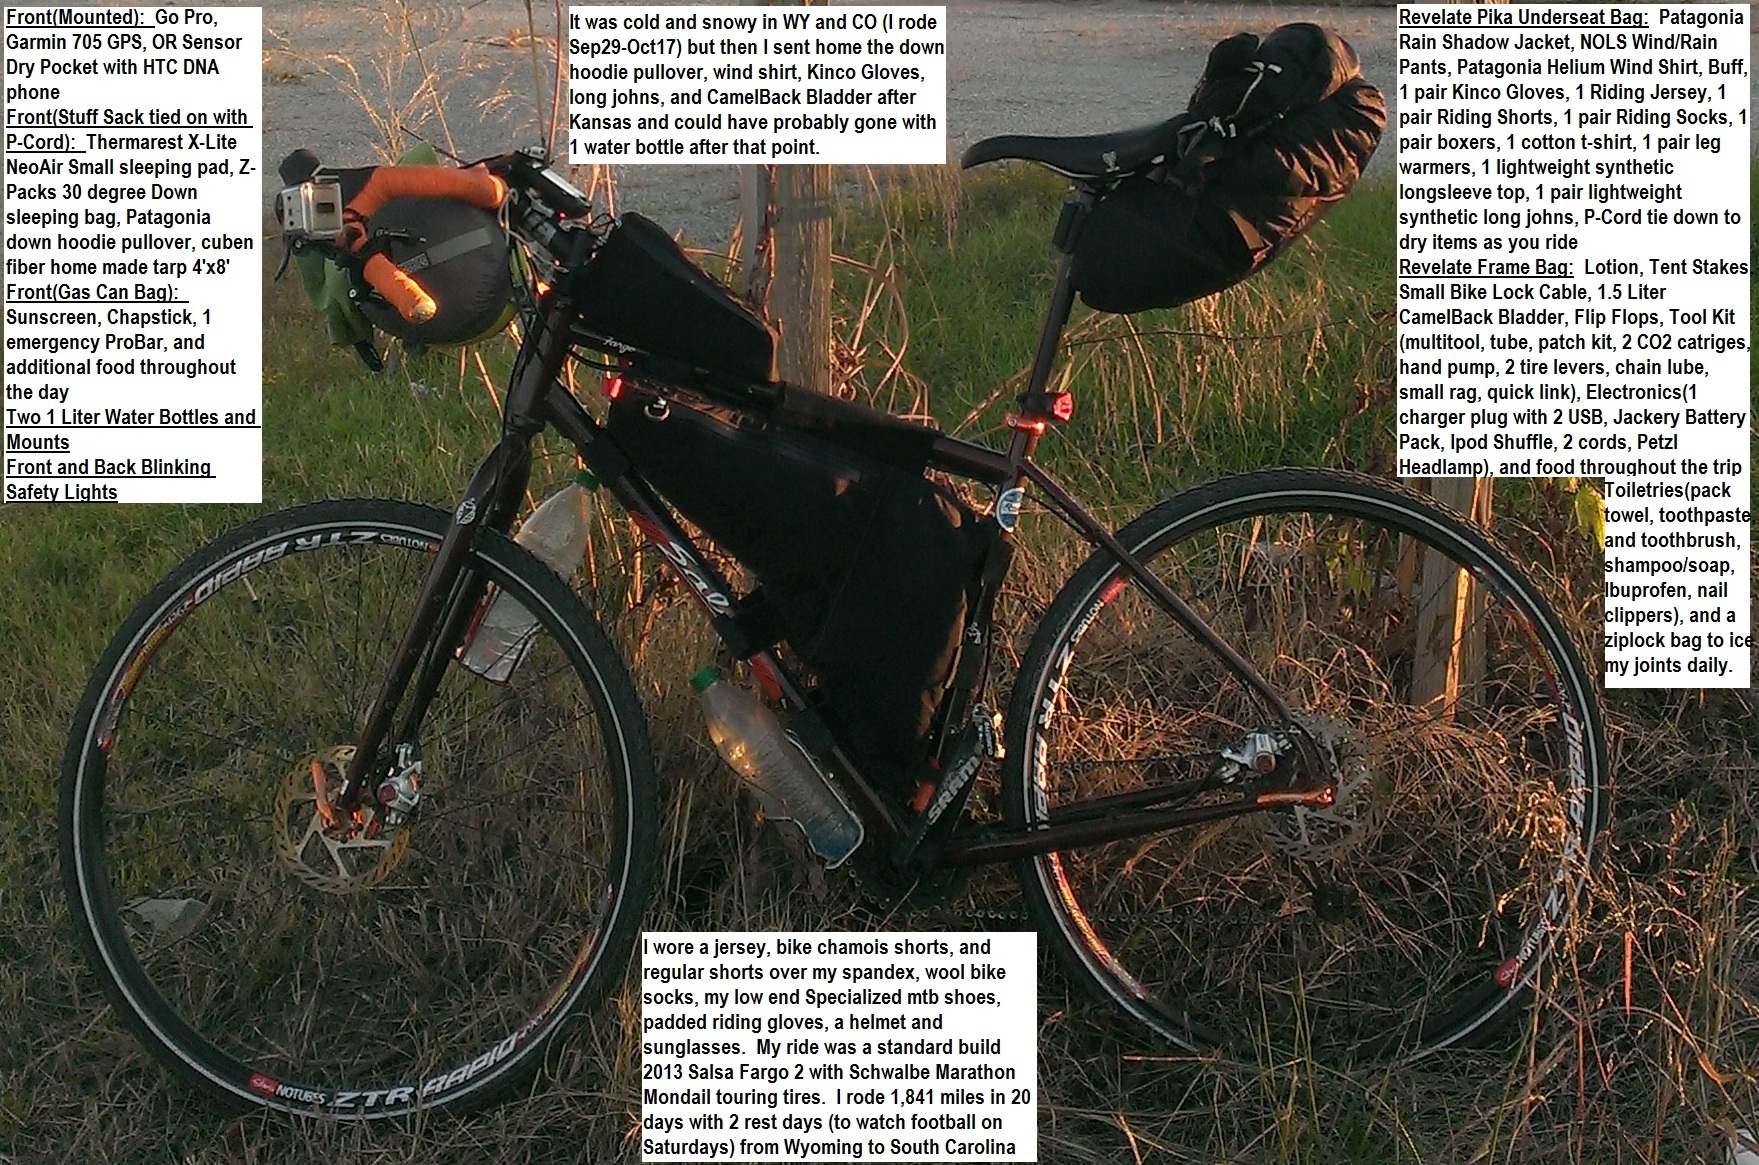
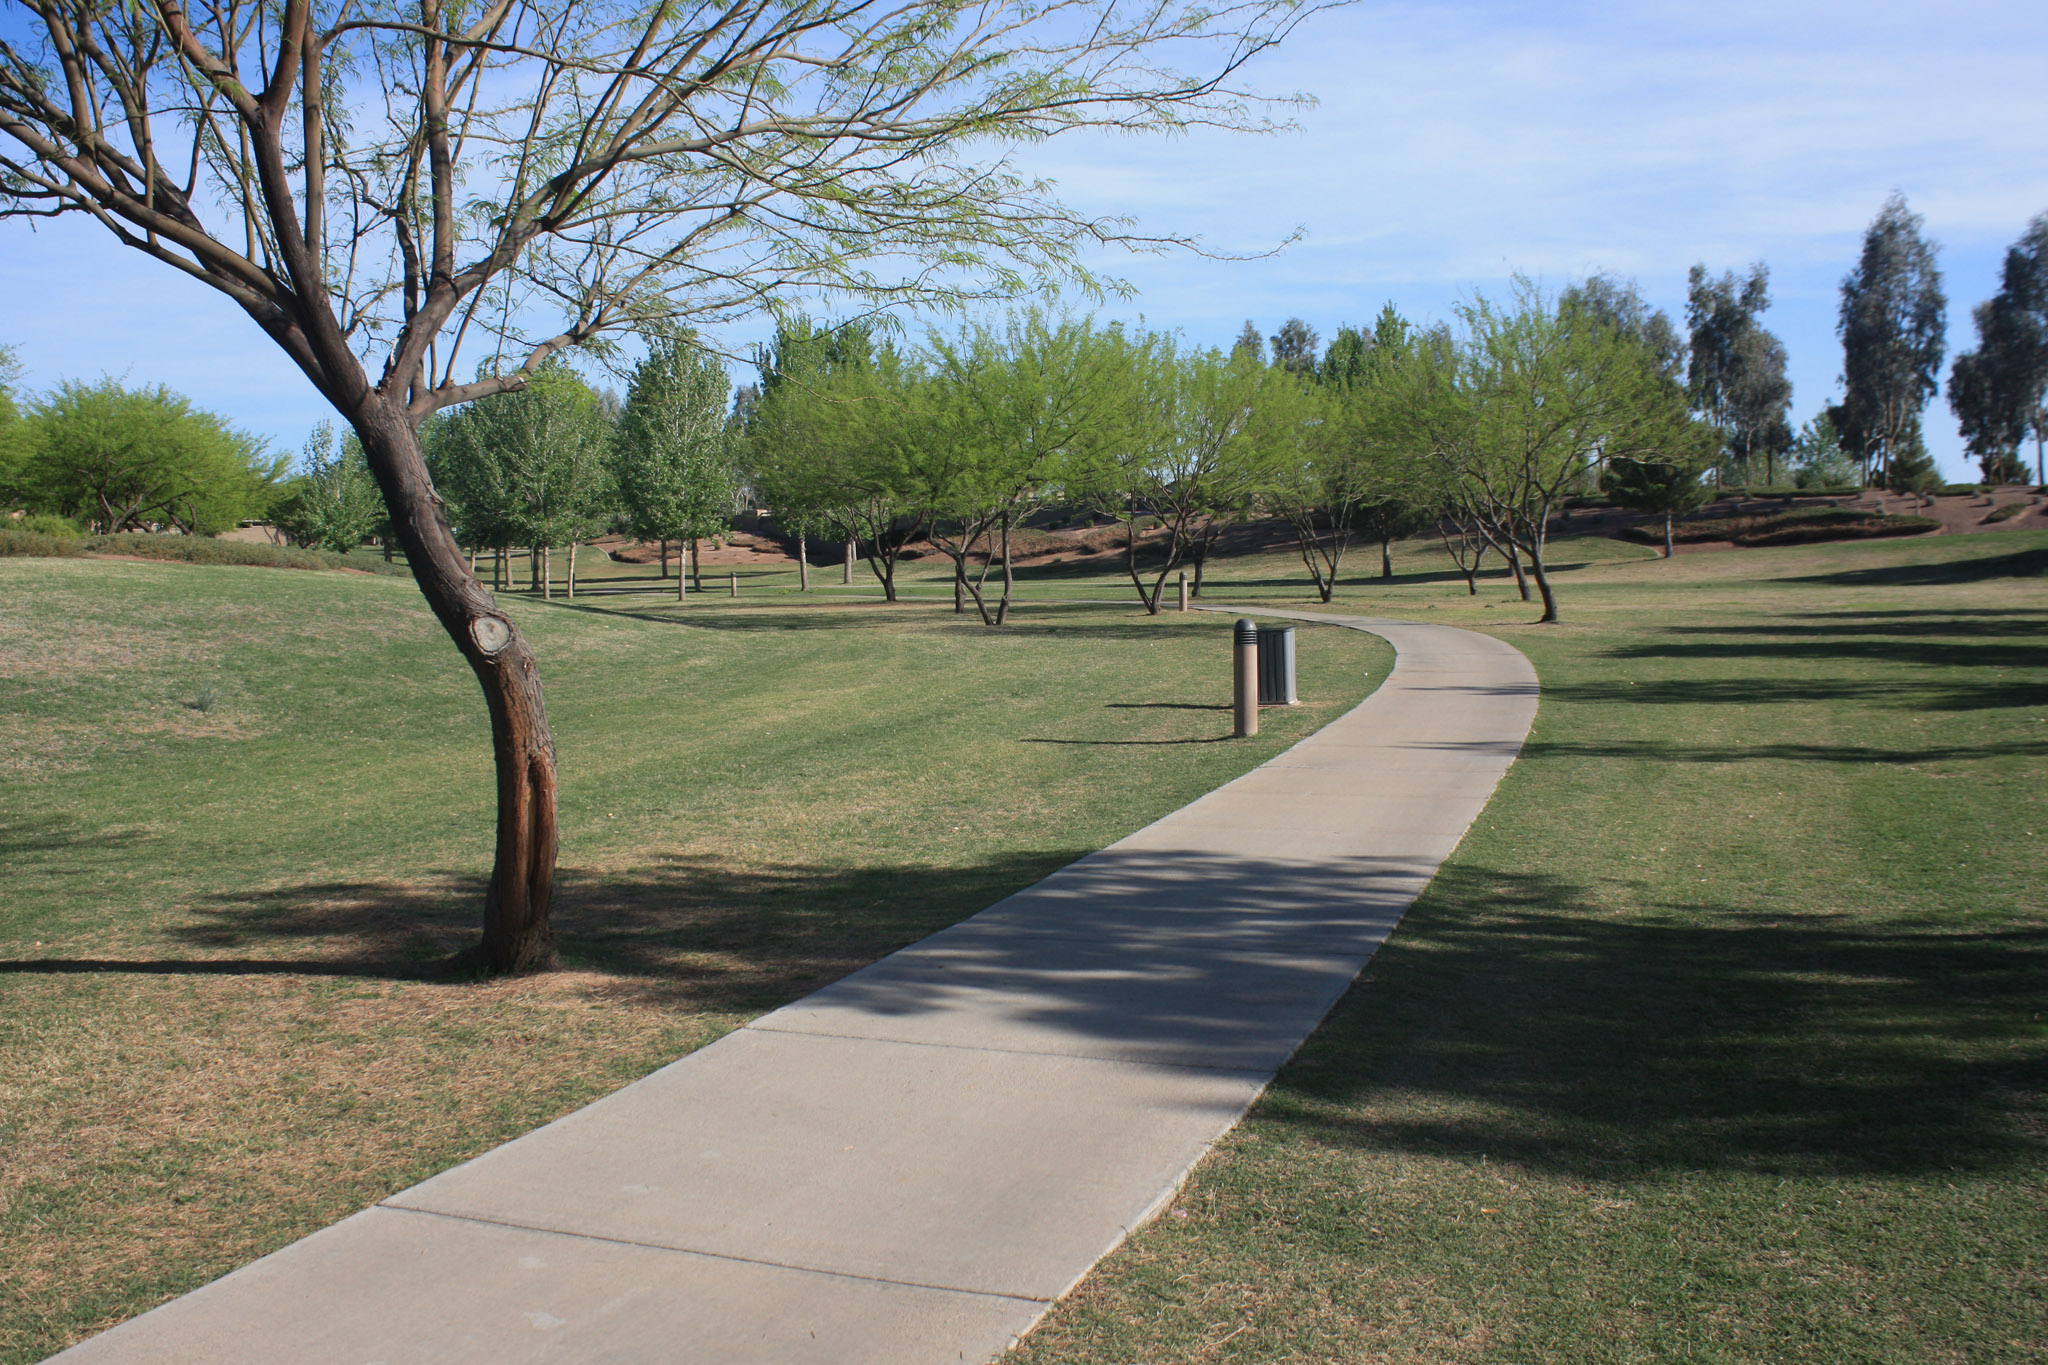
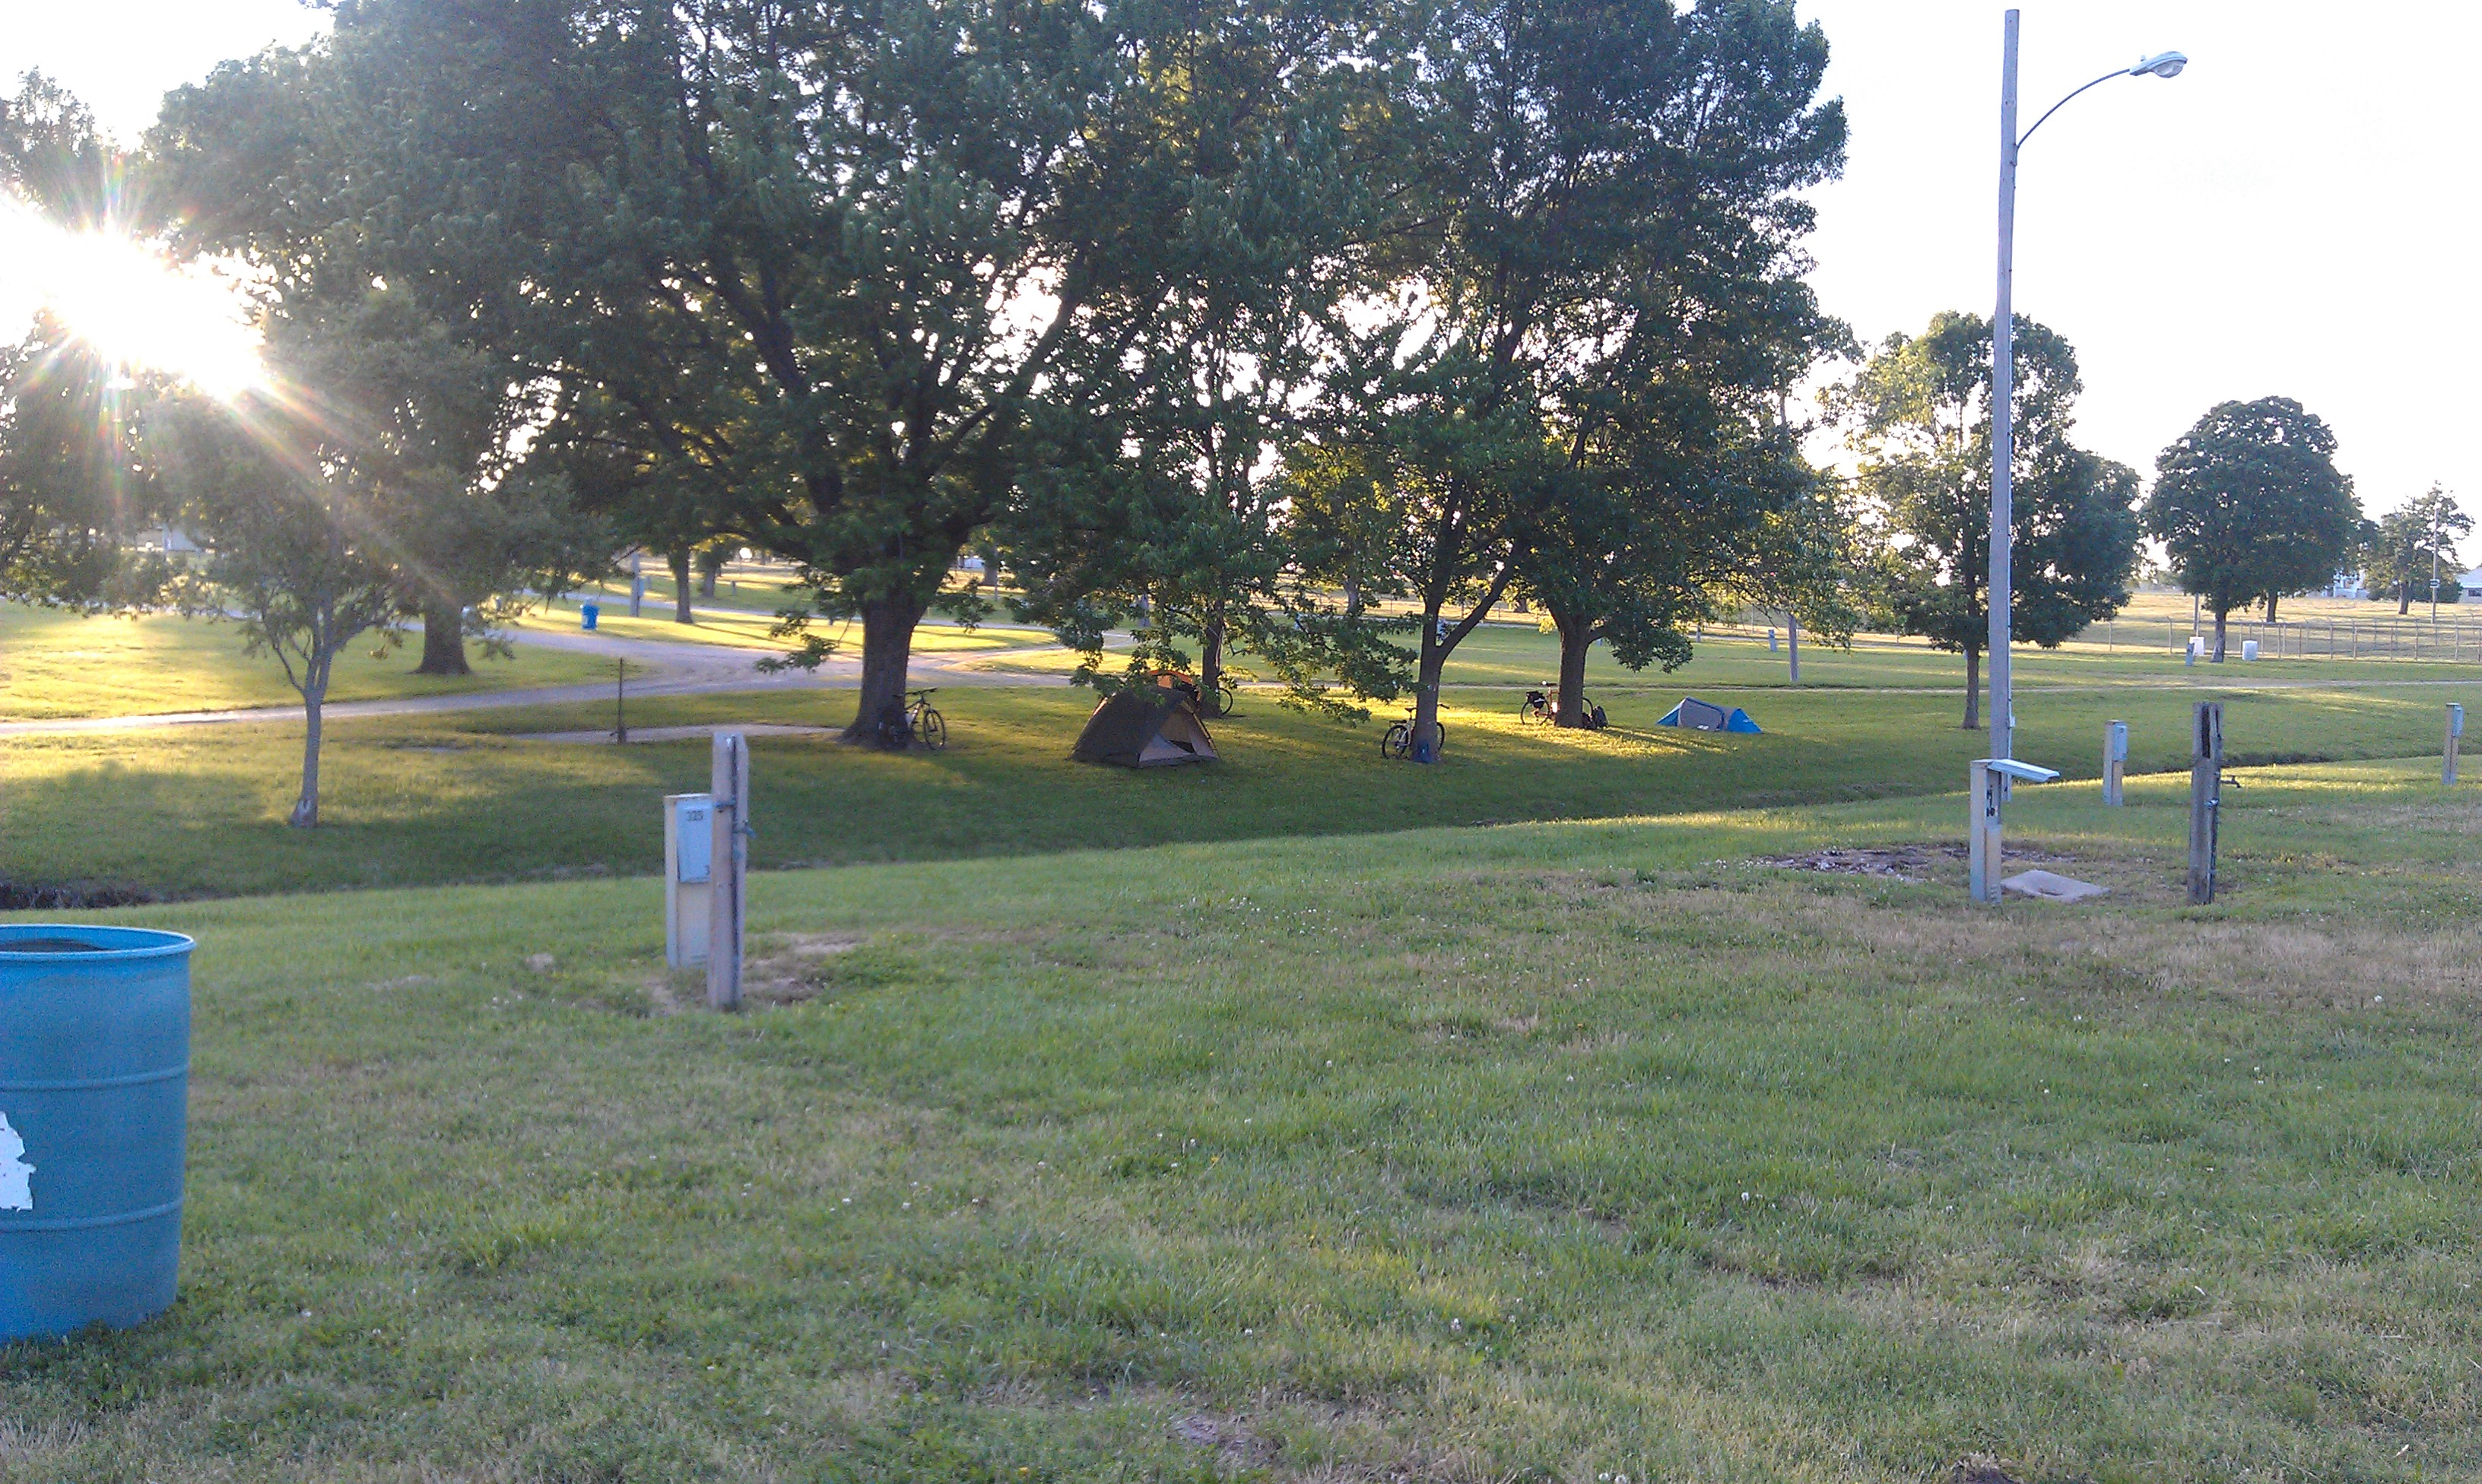
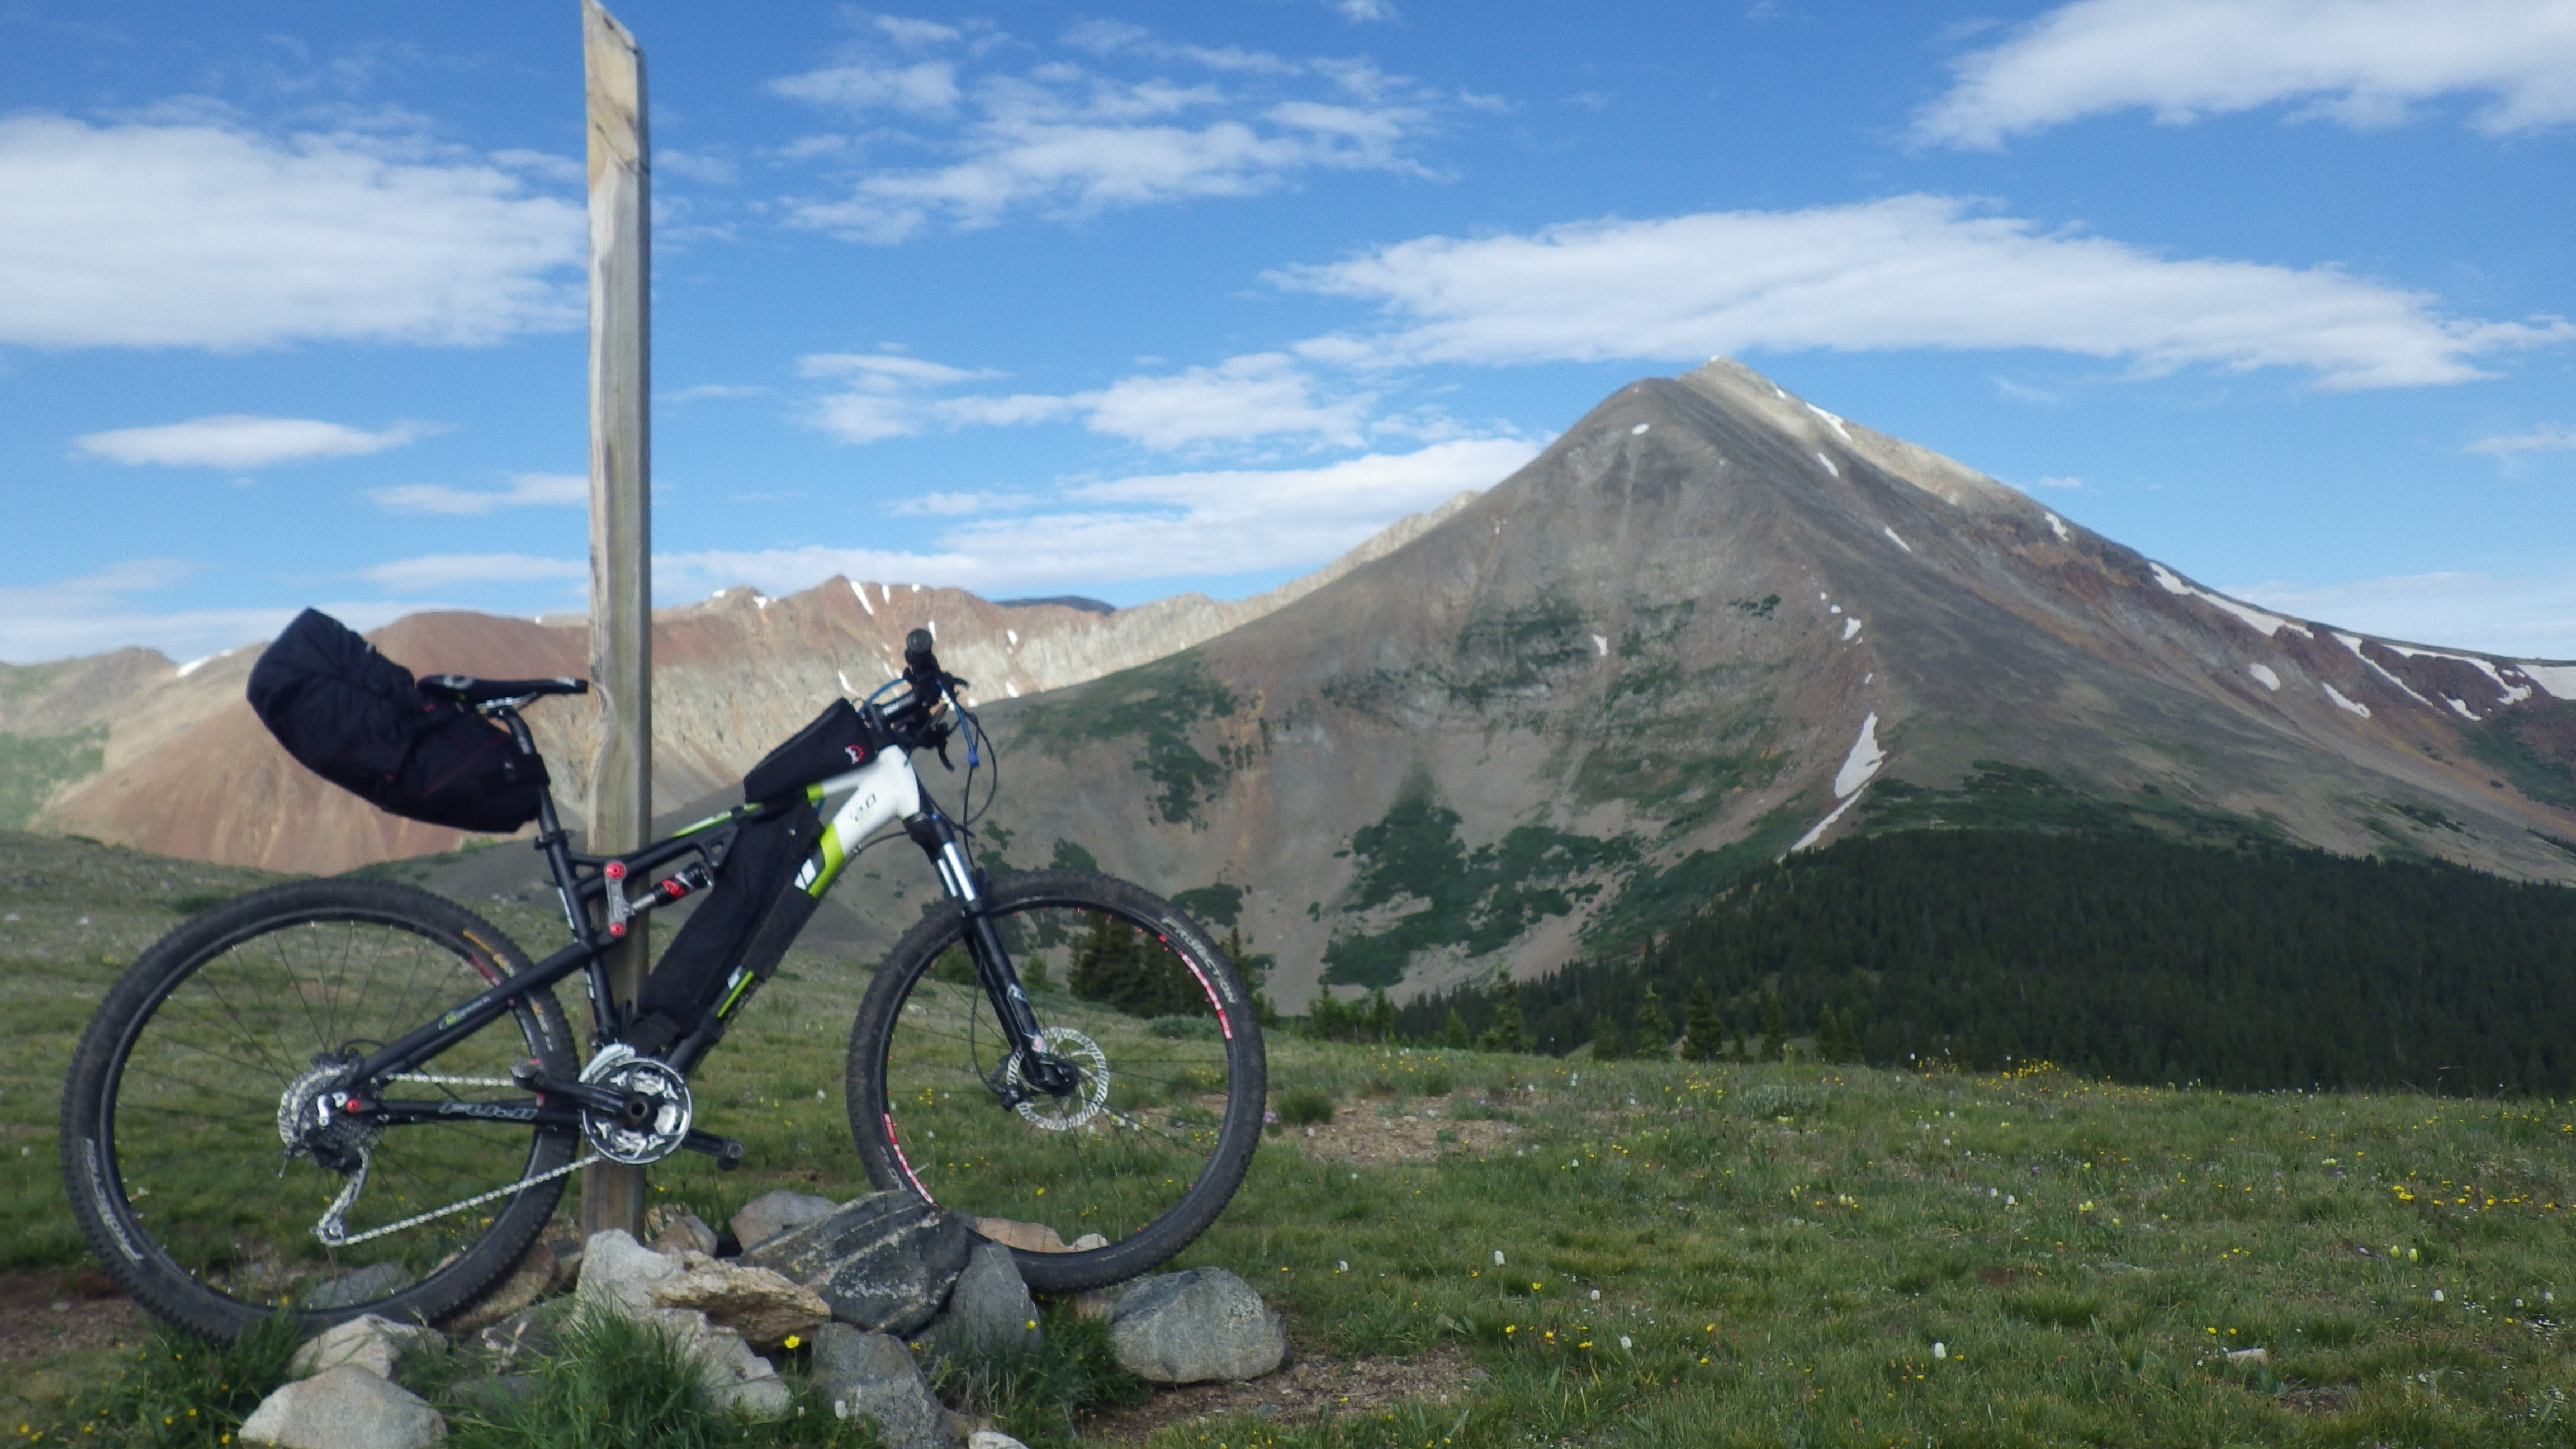
2017 TNGA Report
By: David Fink
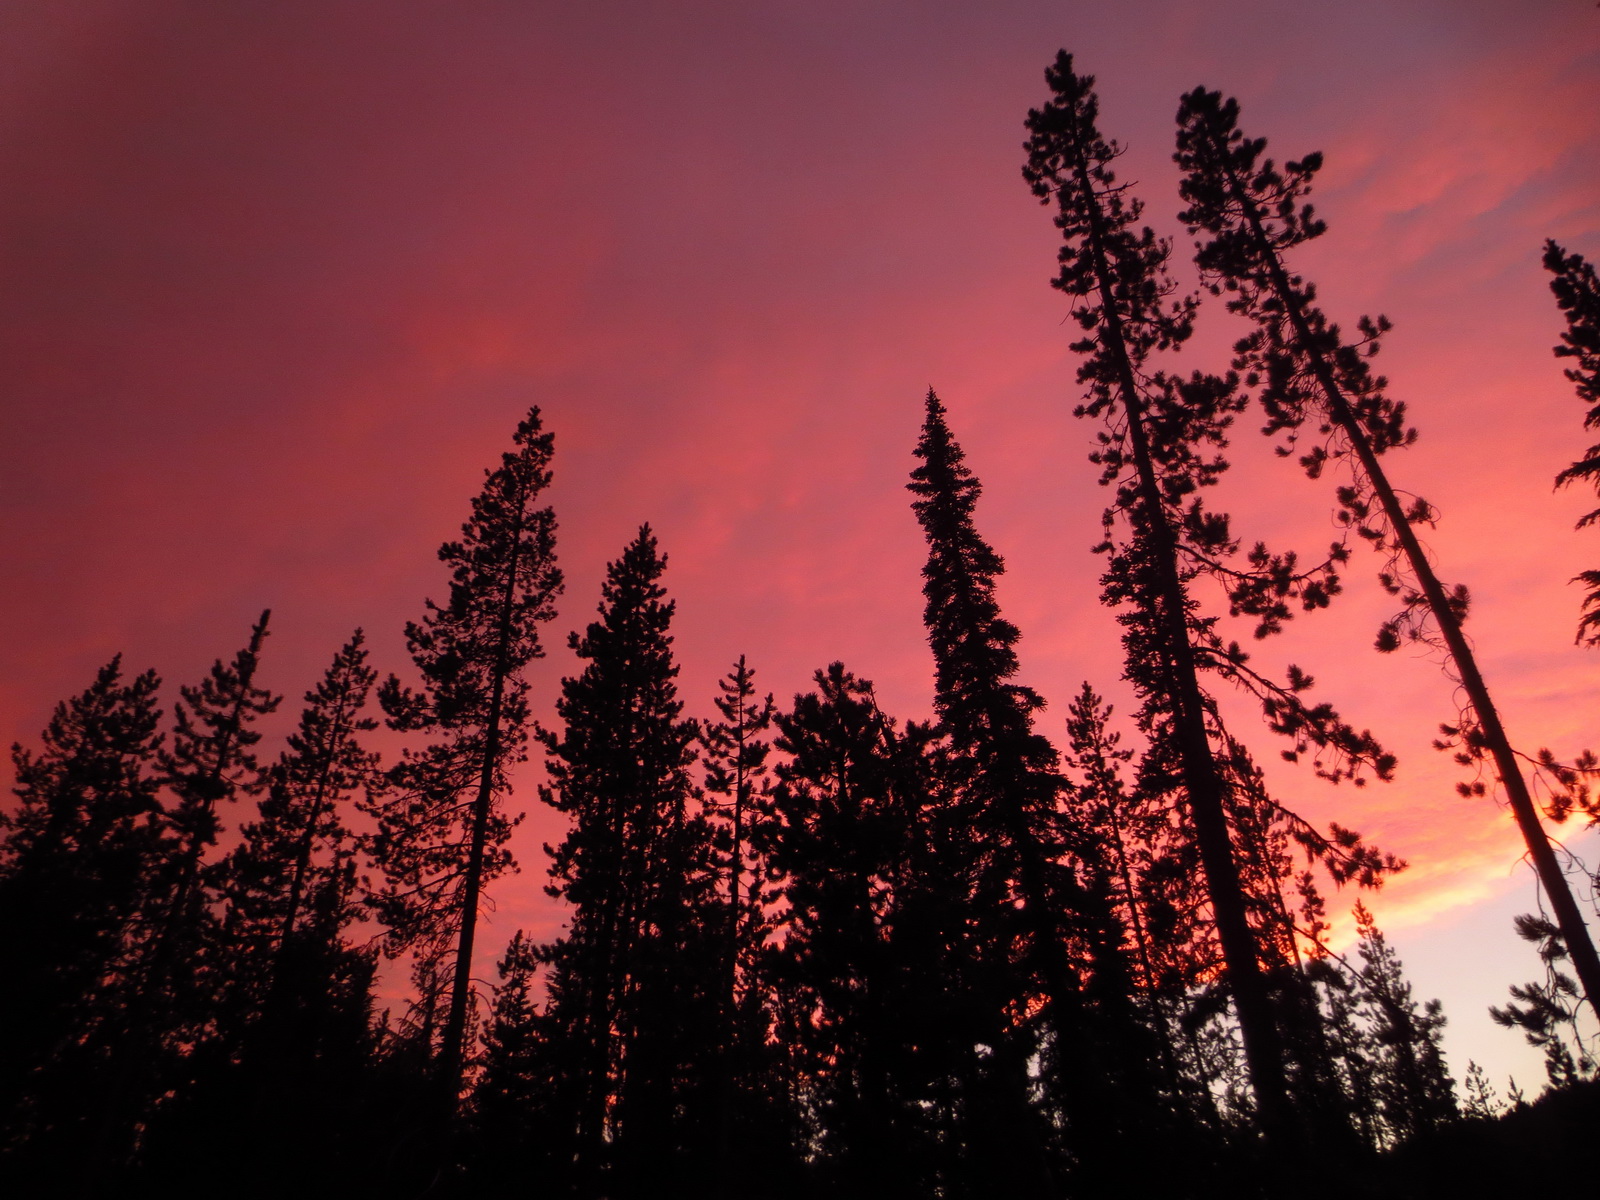
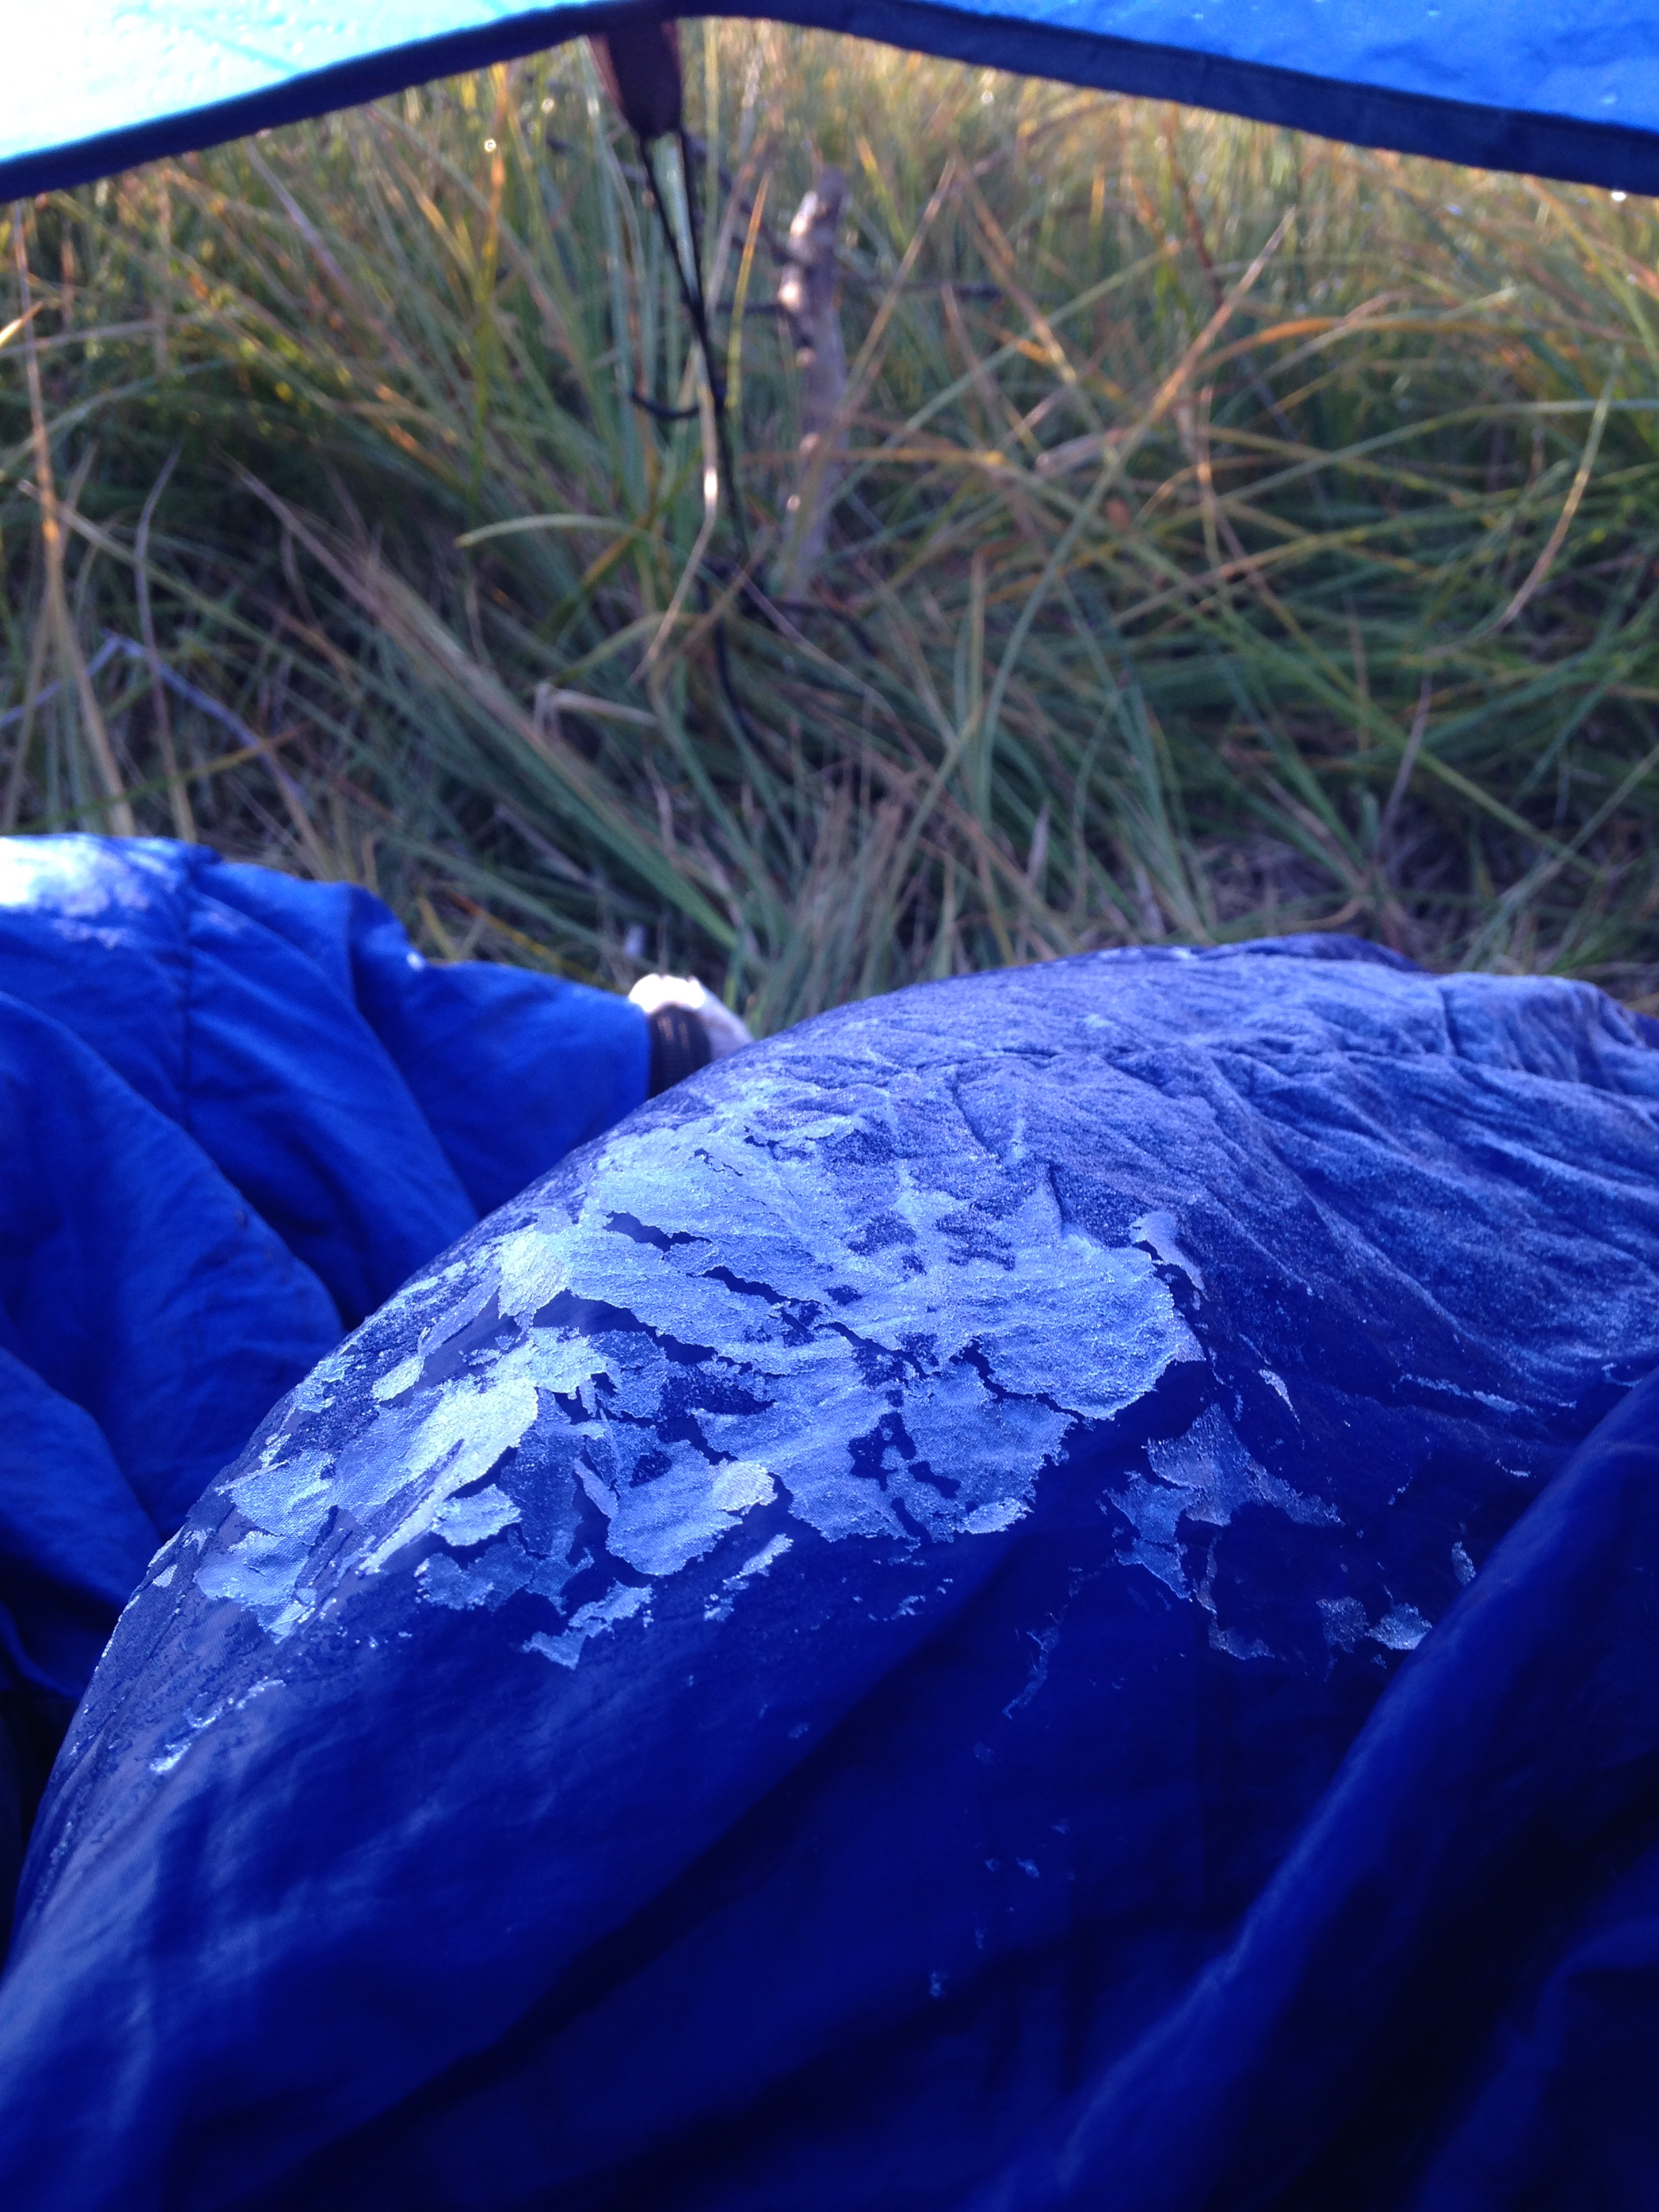
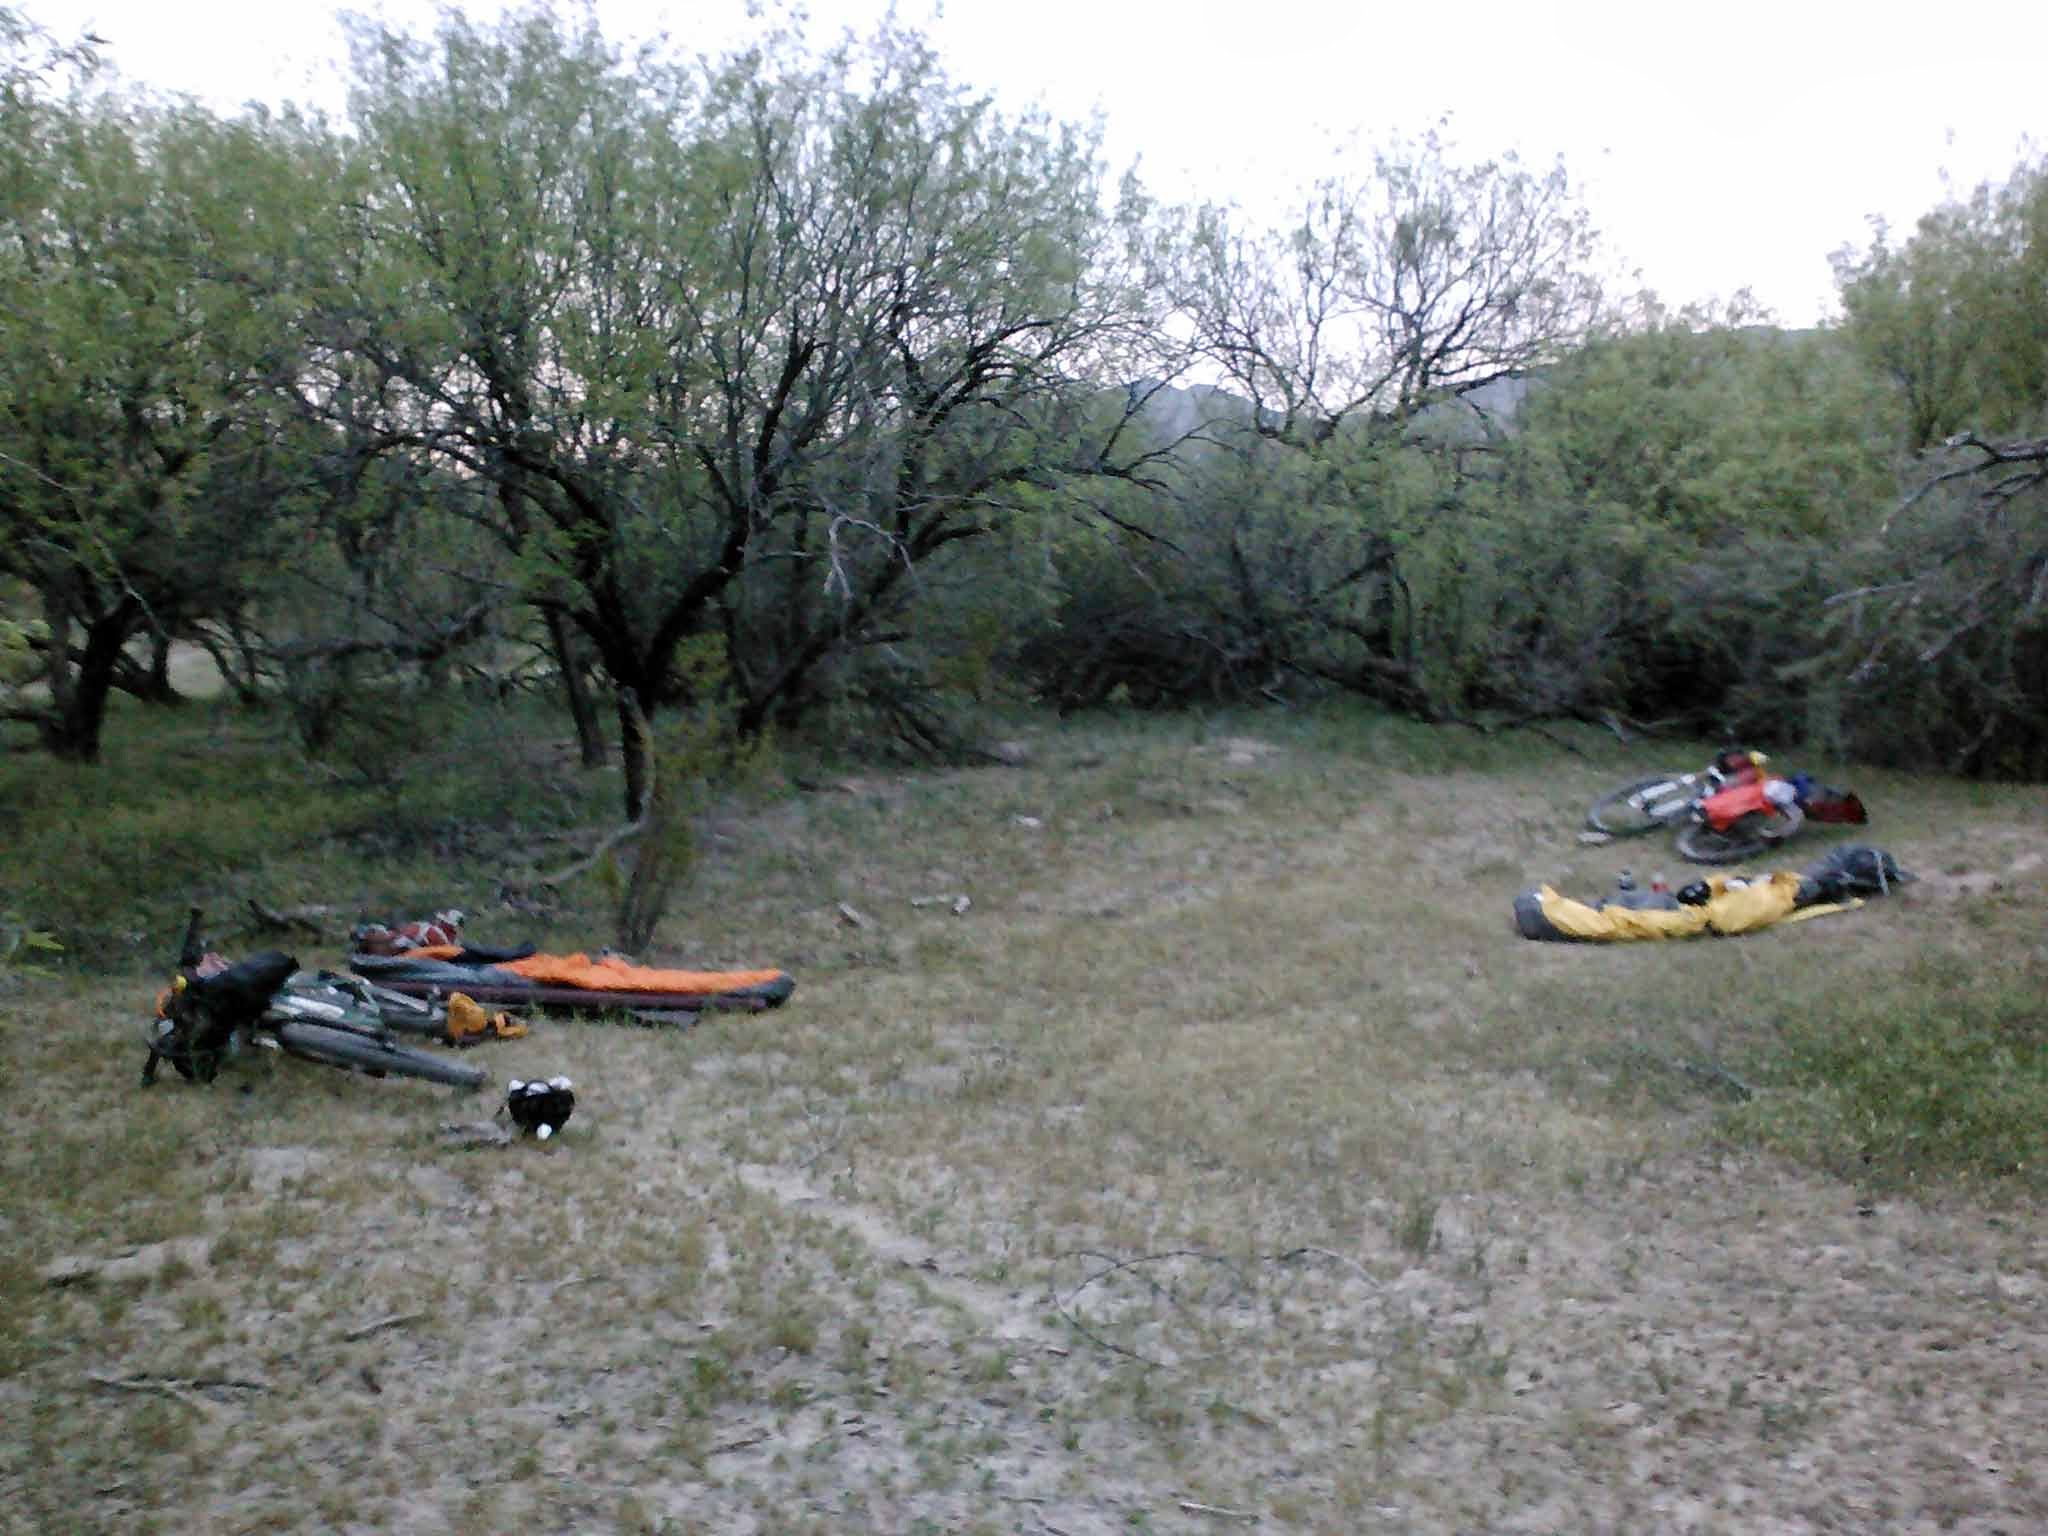
Thursday
8-17-2017
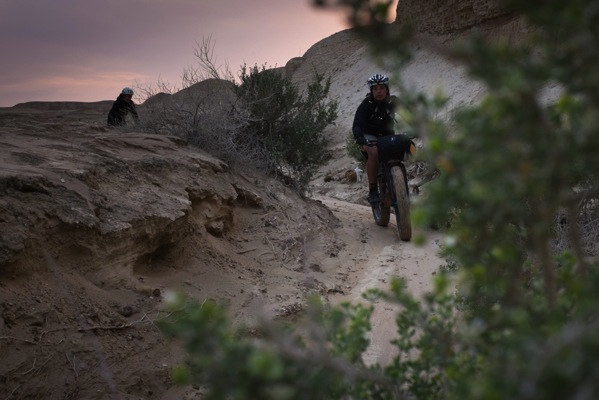
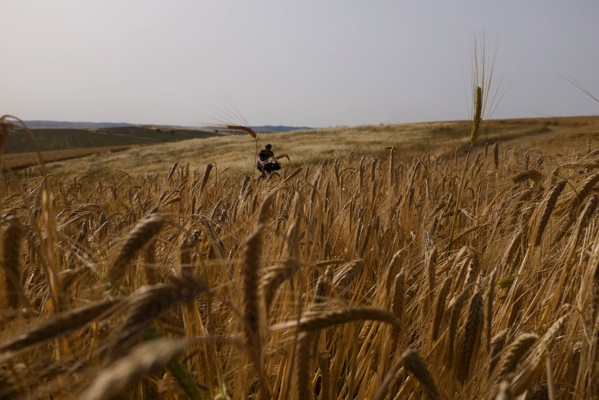
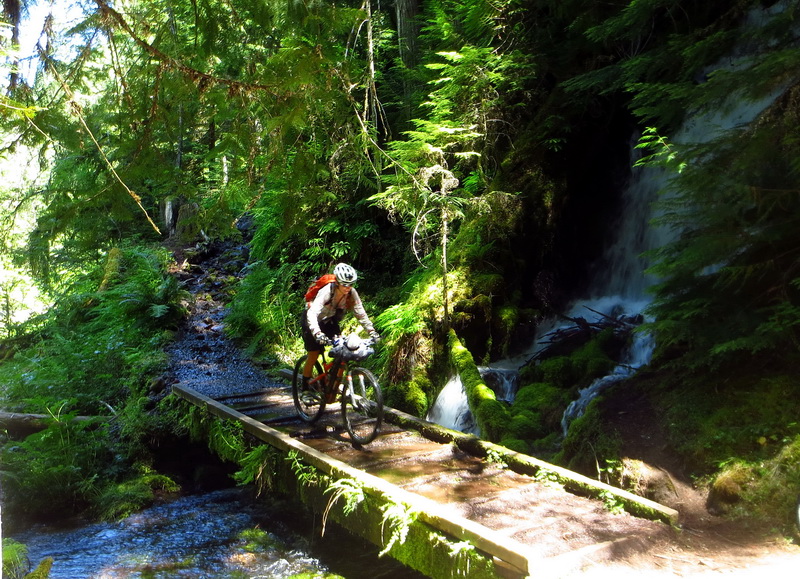
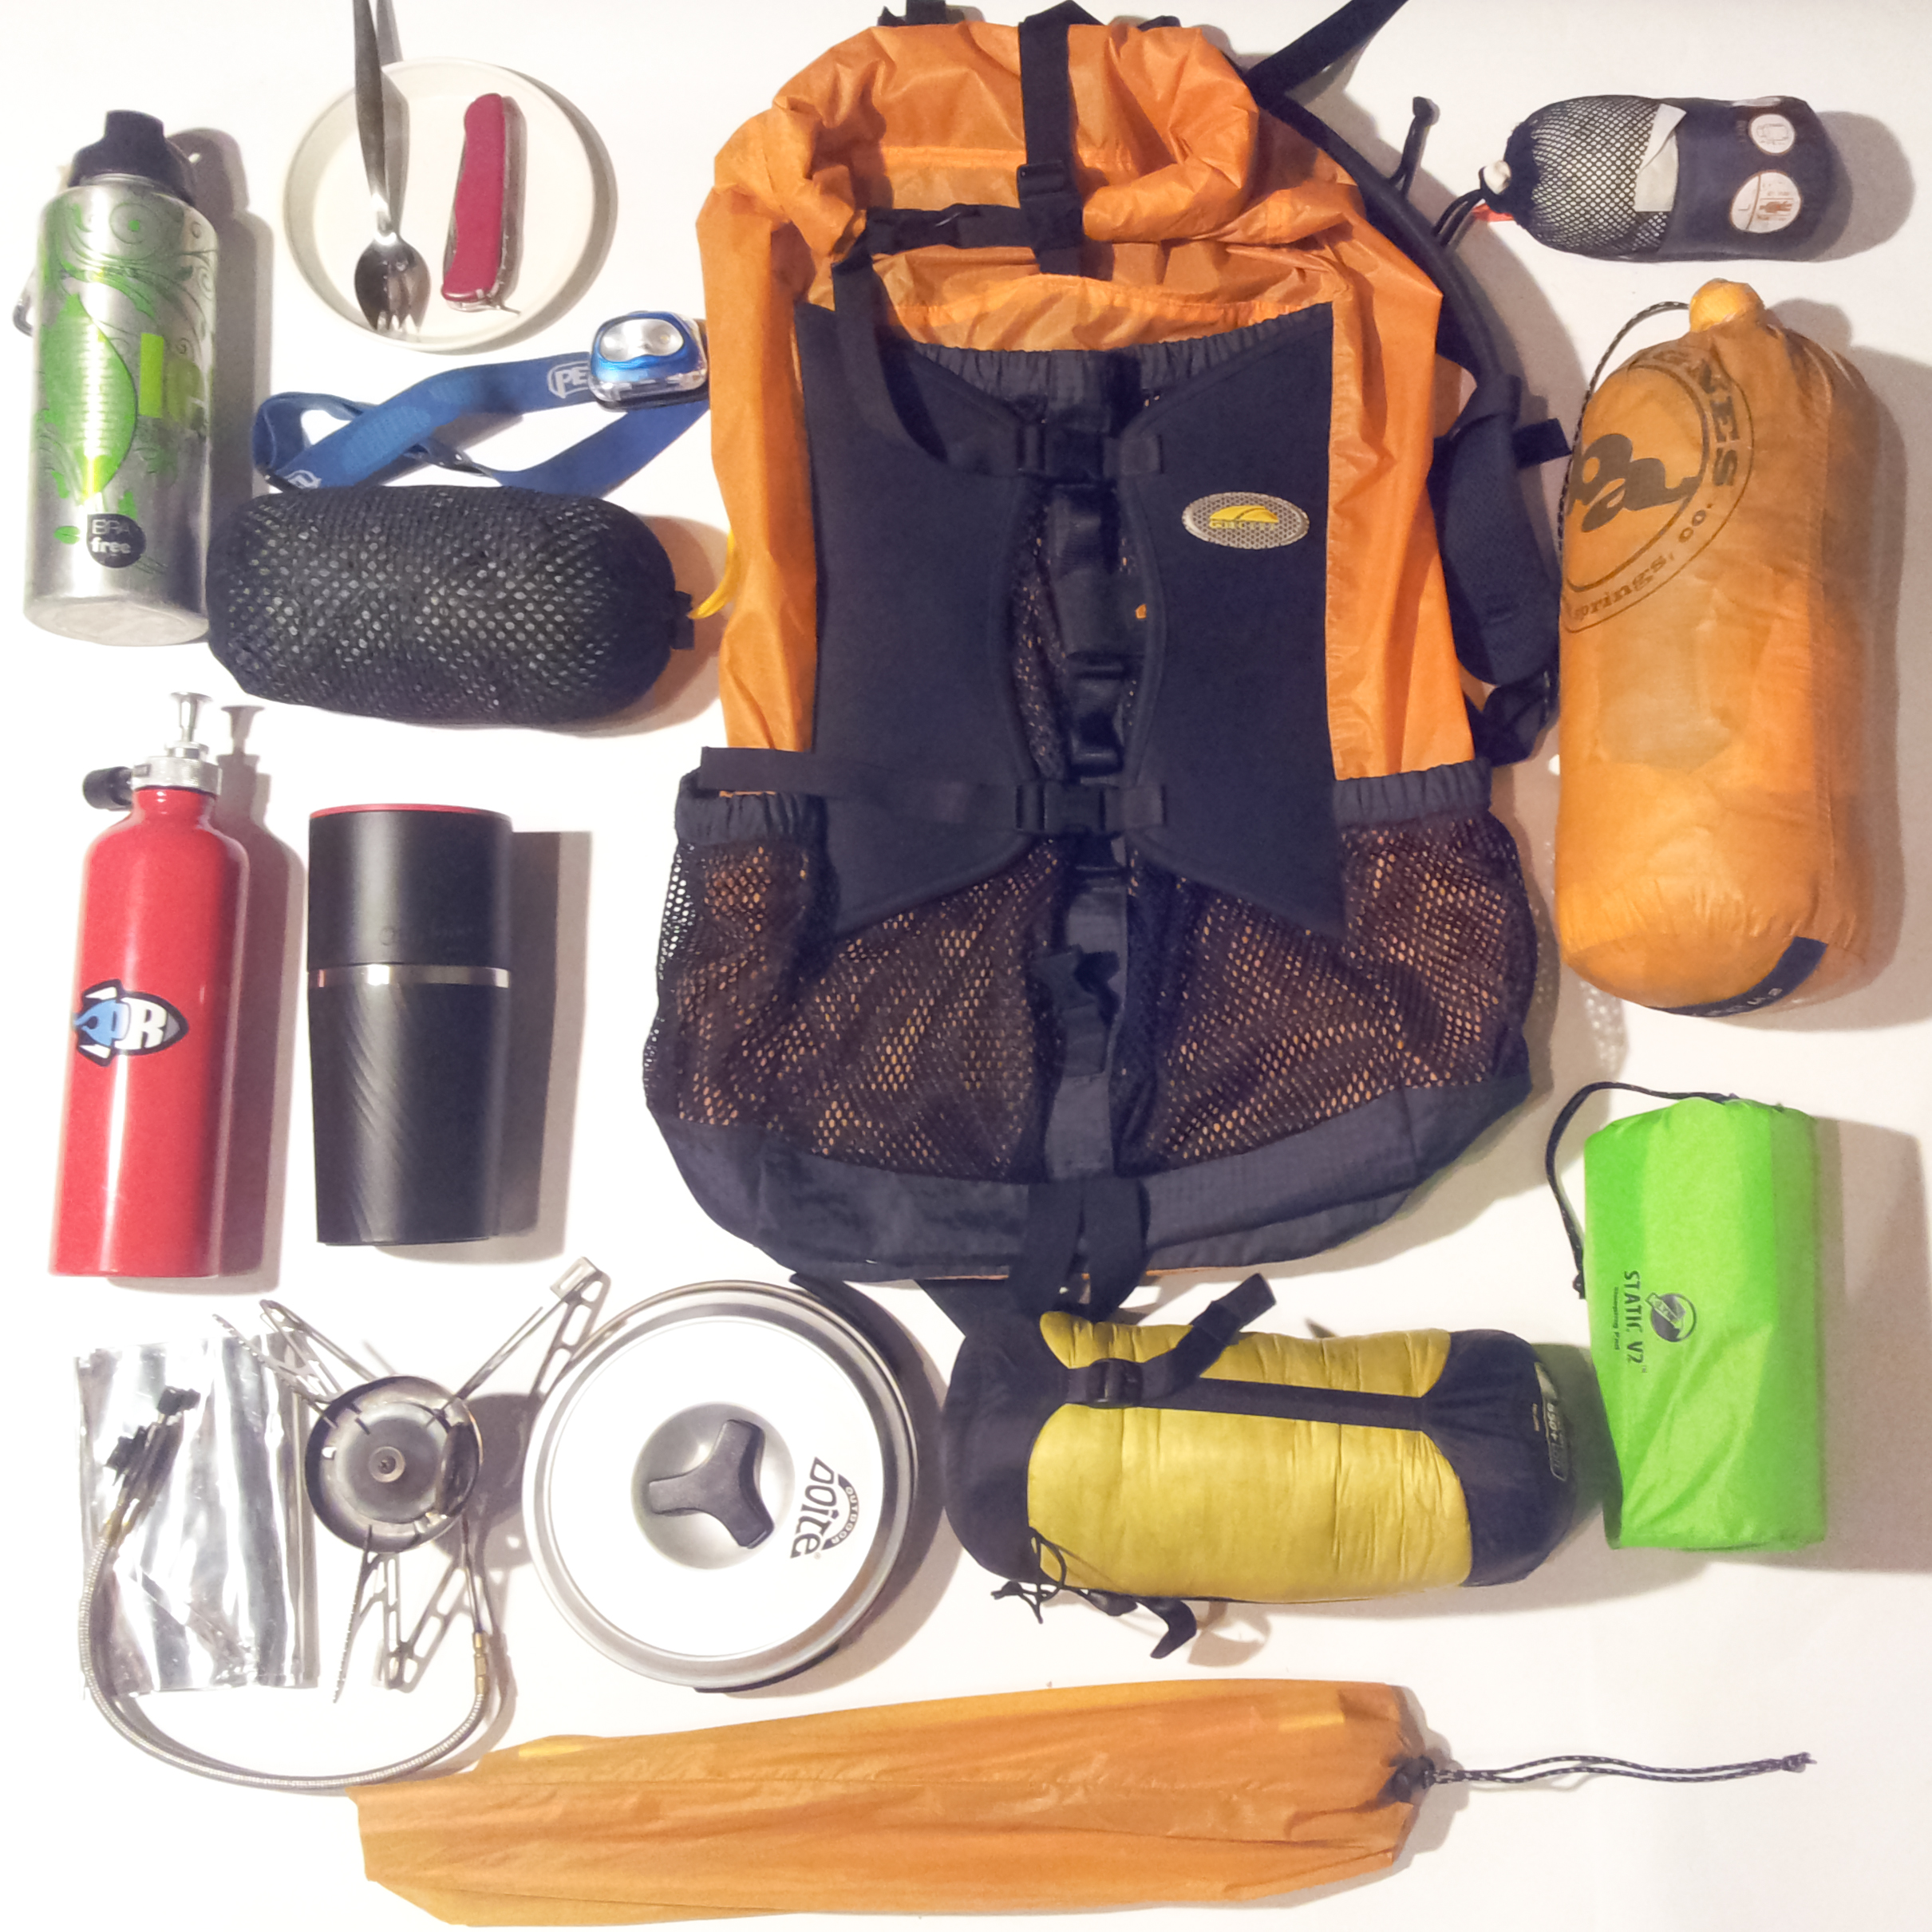
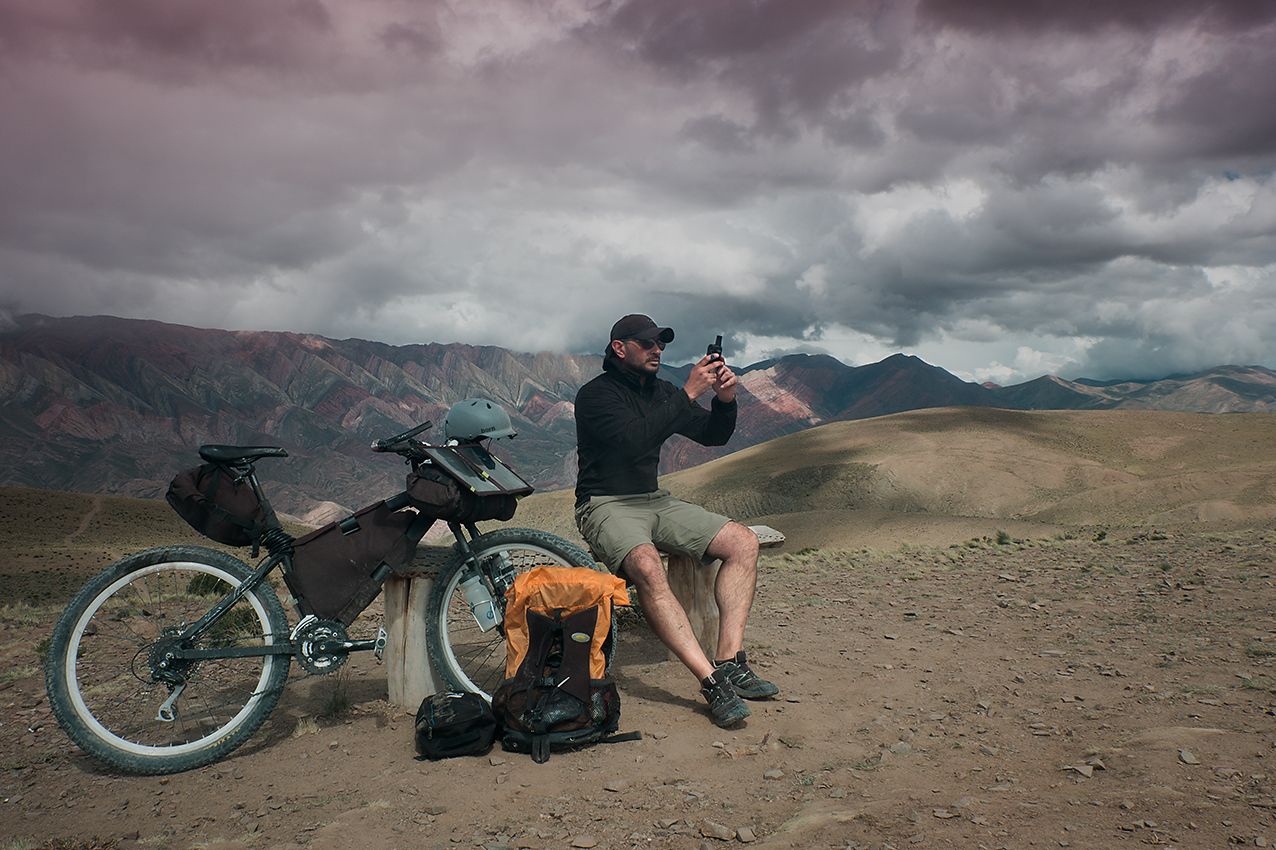
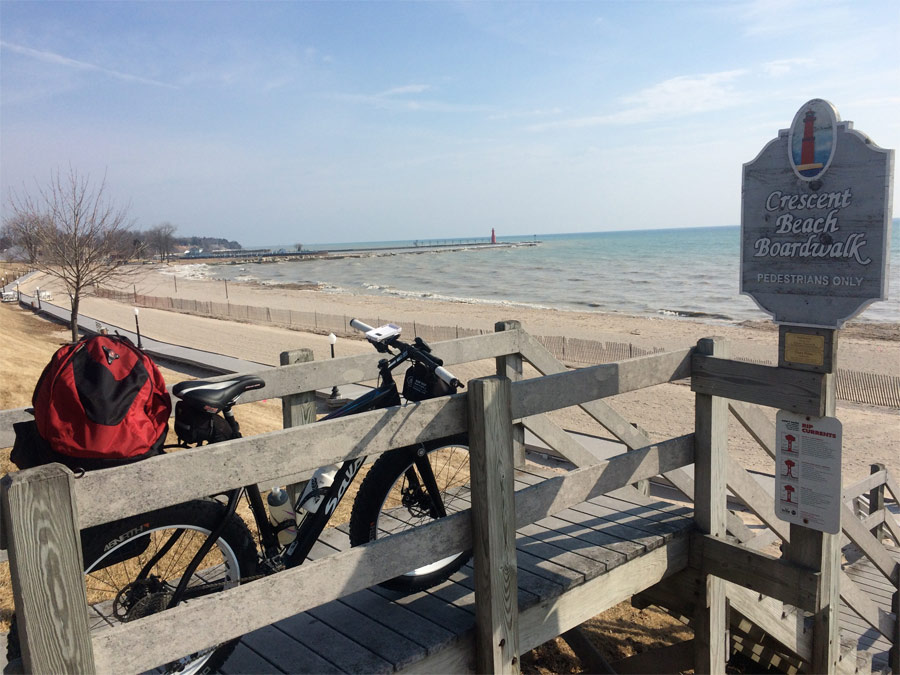
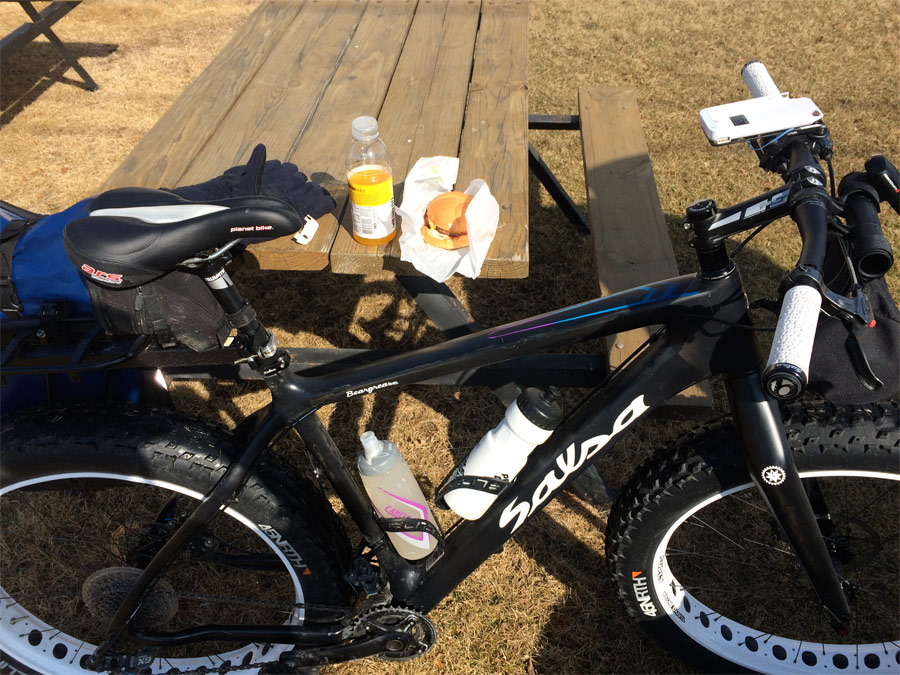
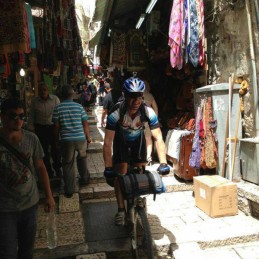
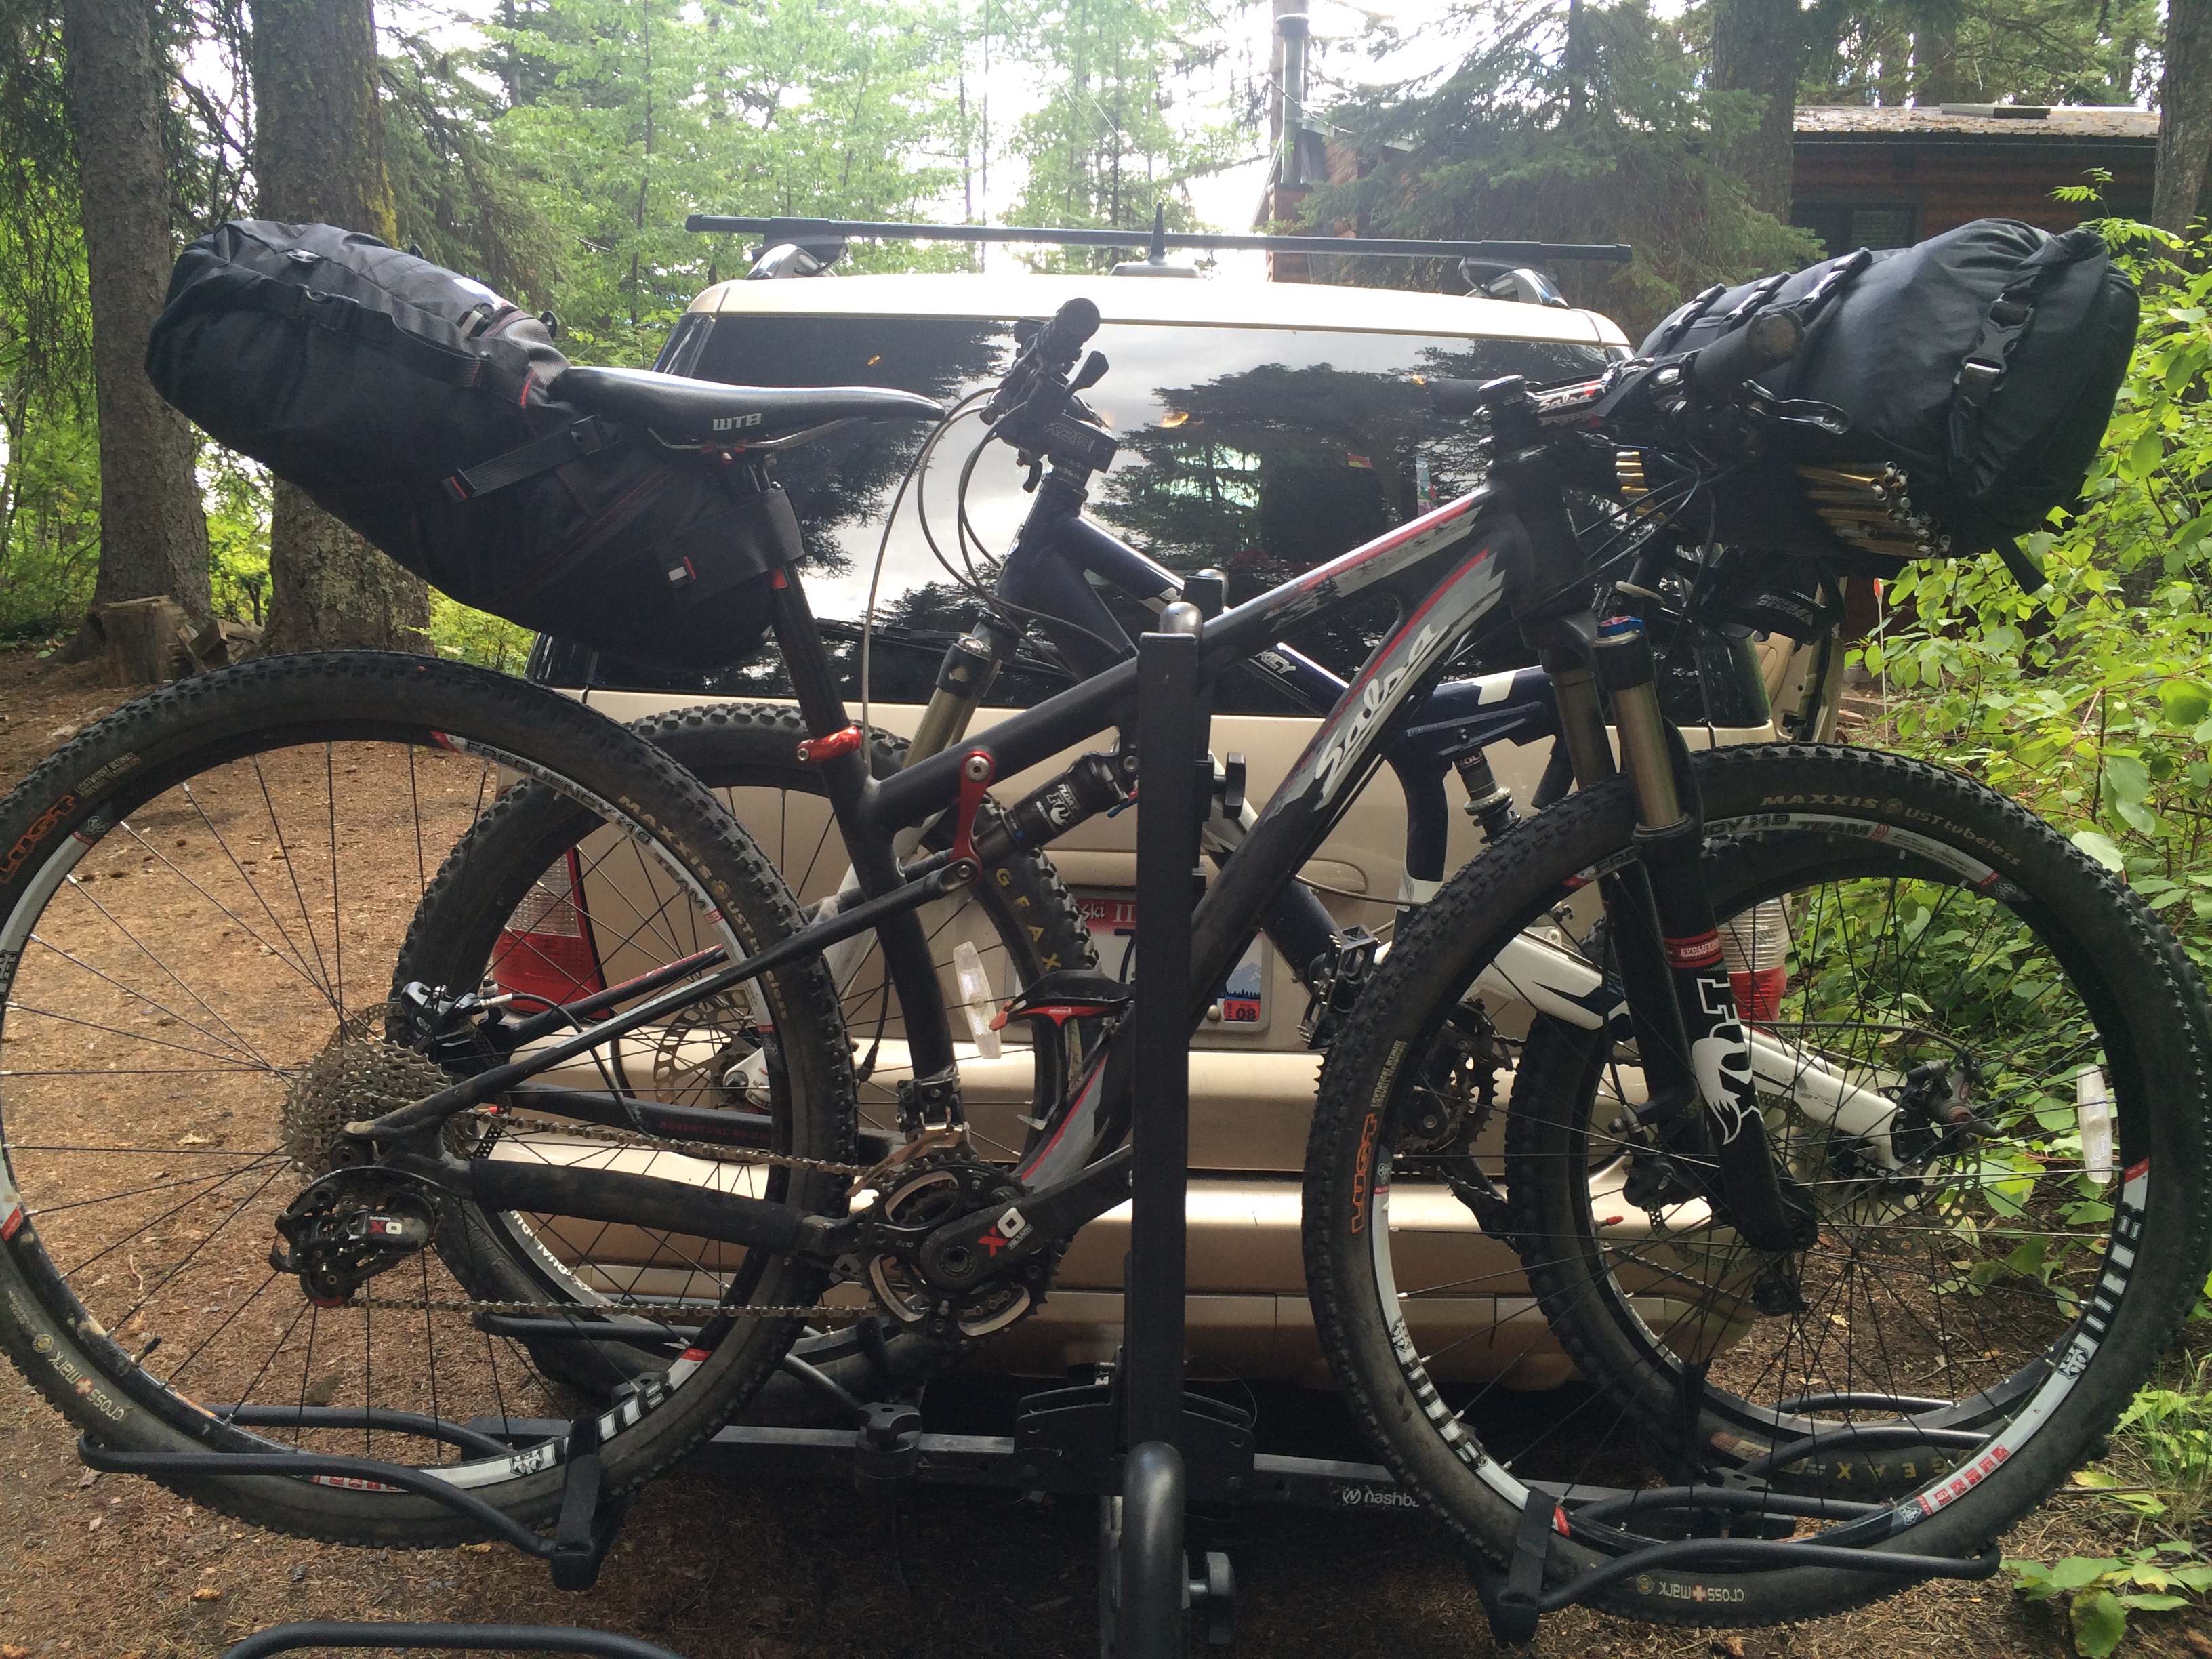
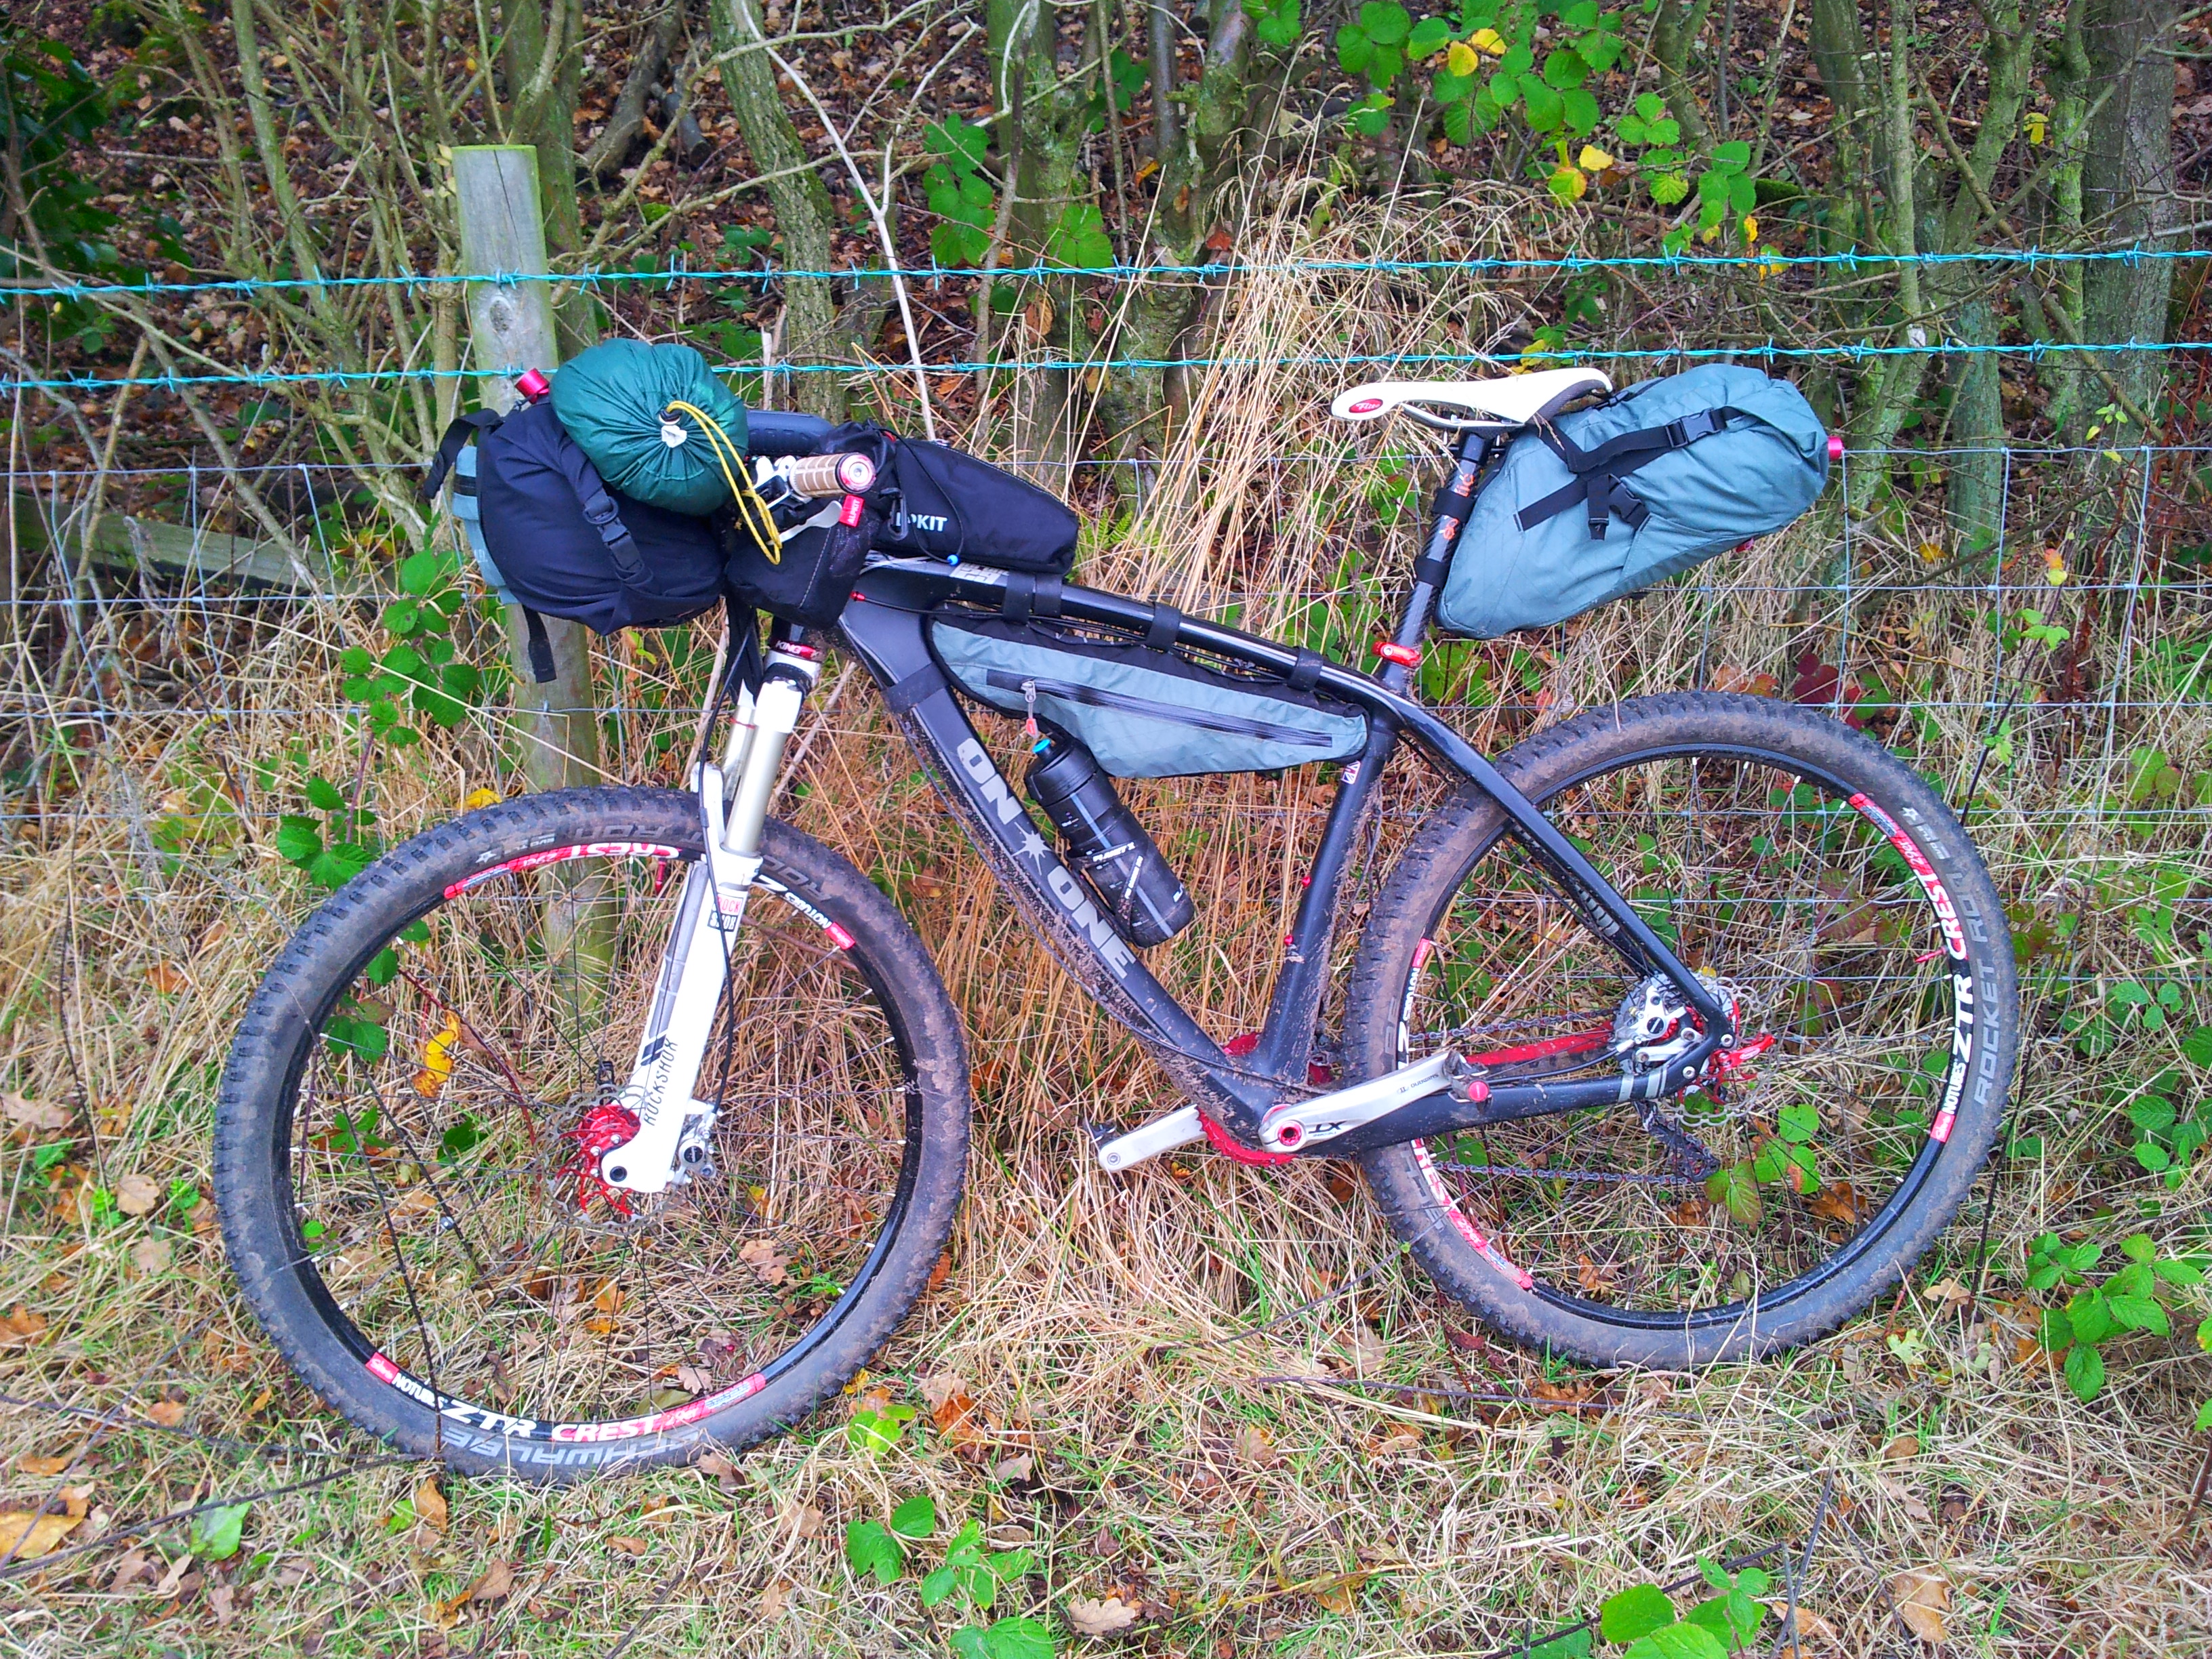
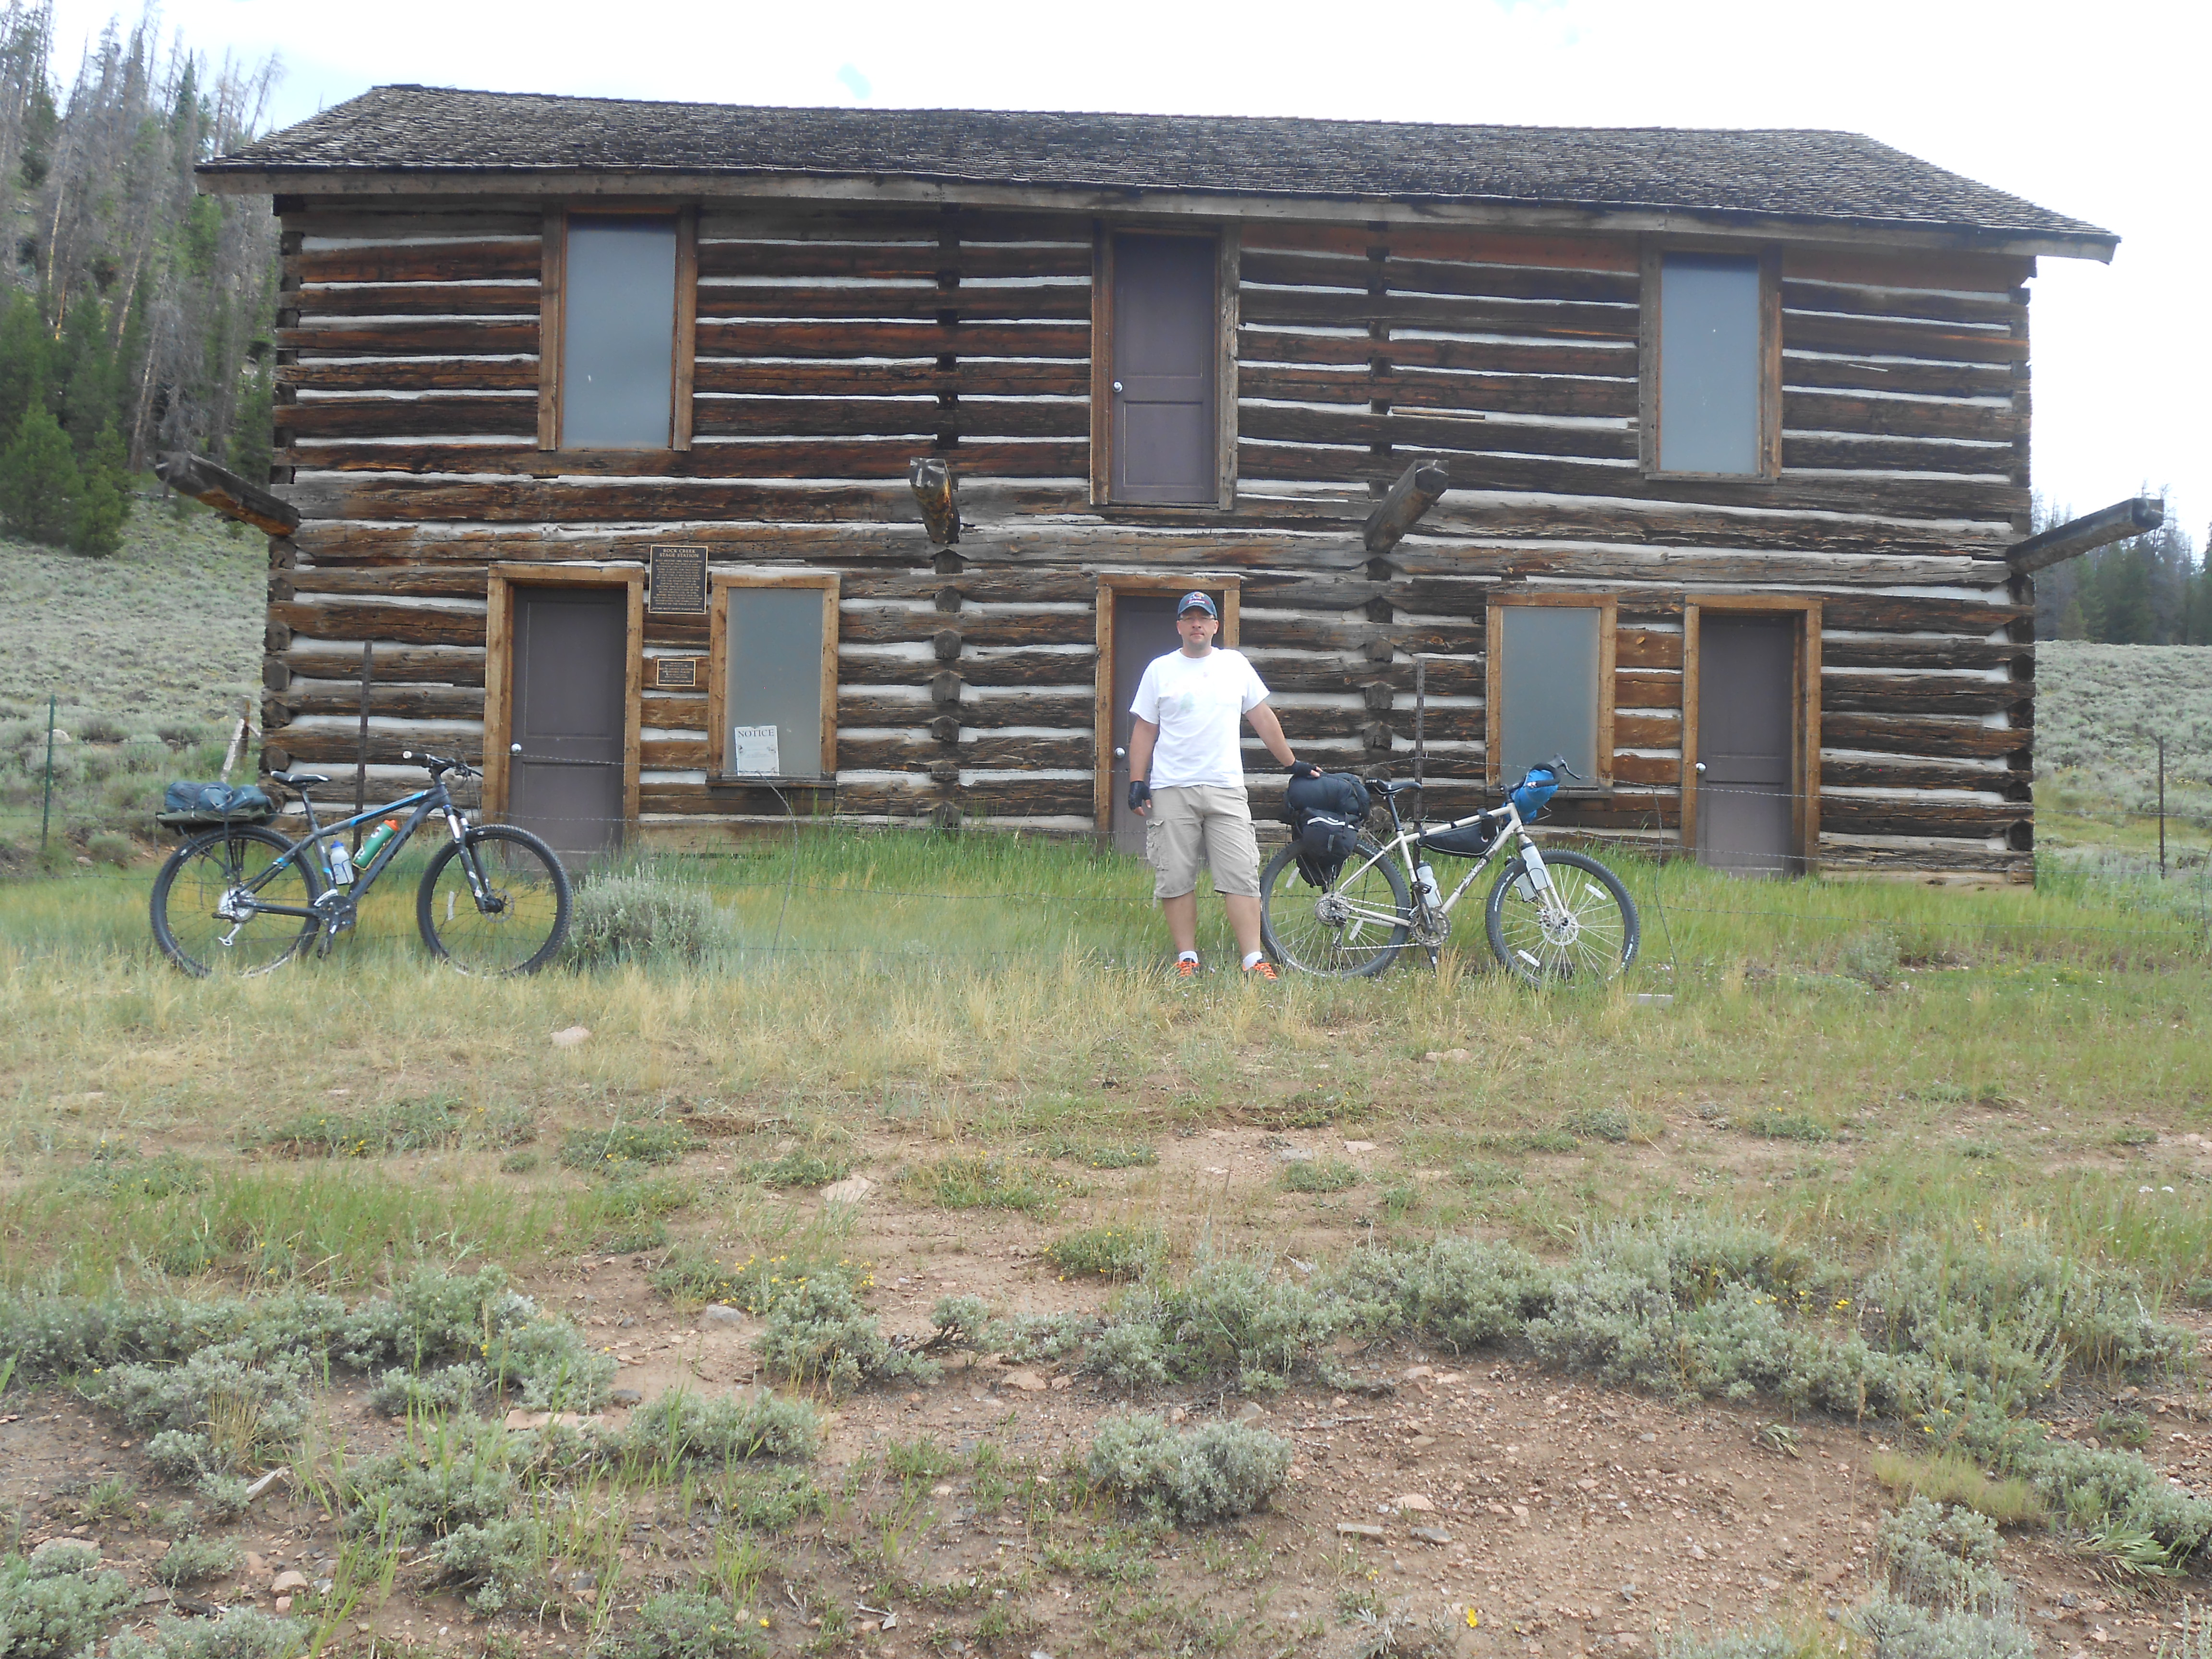
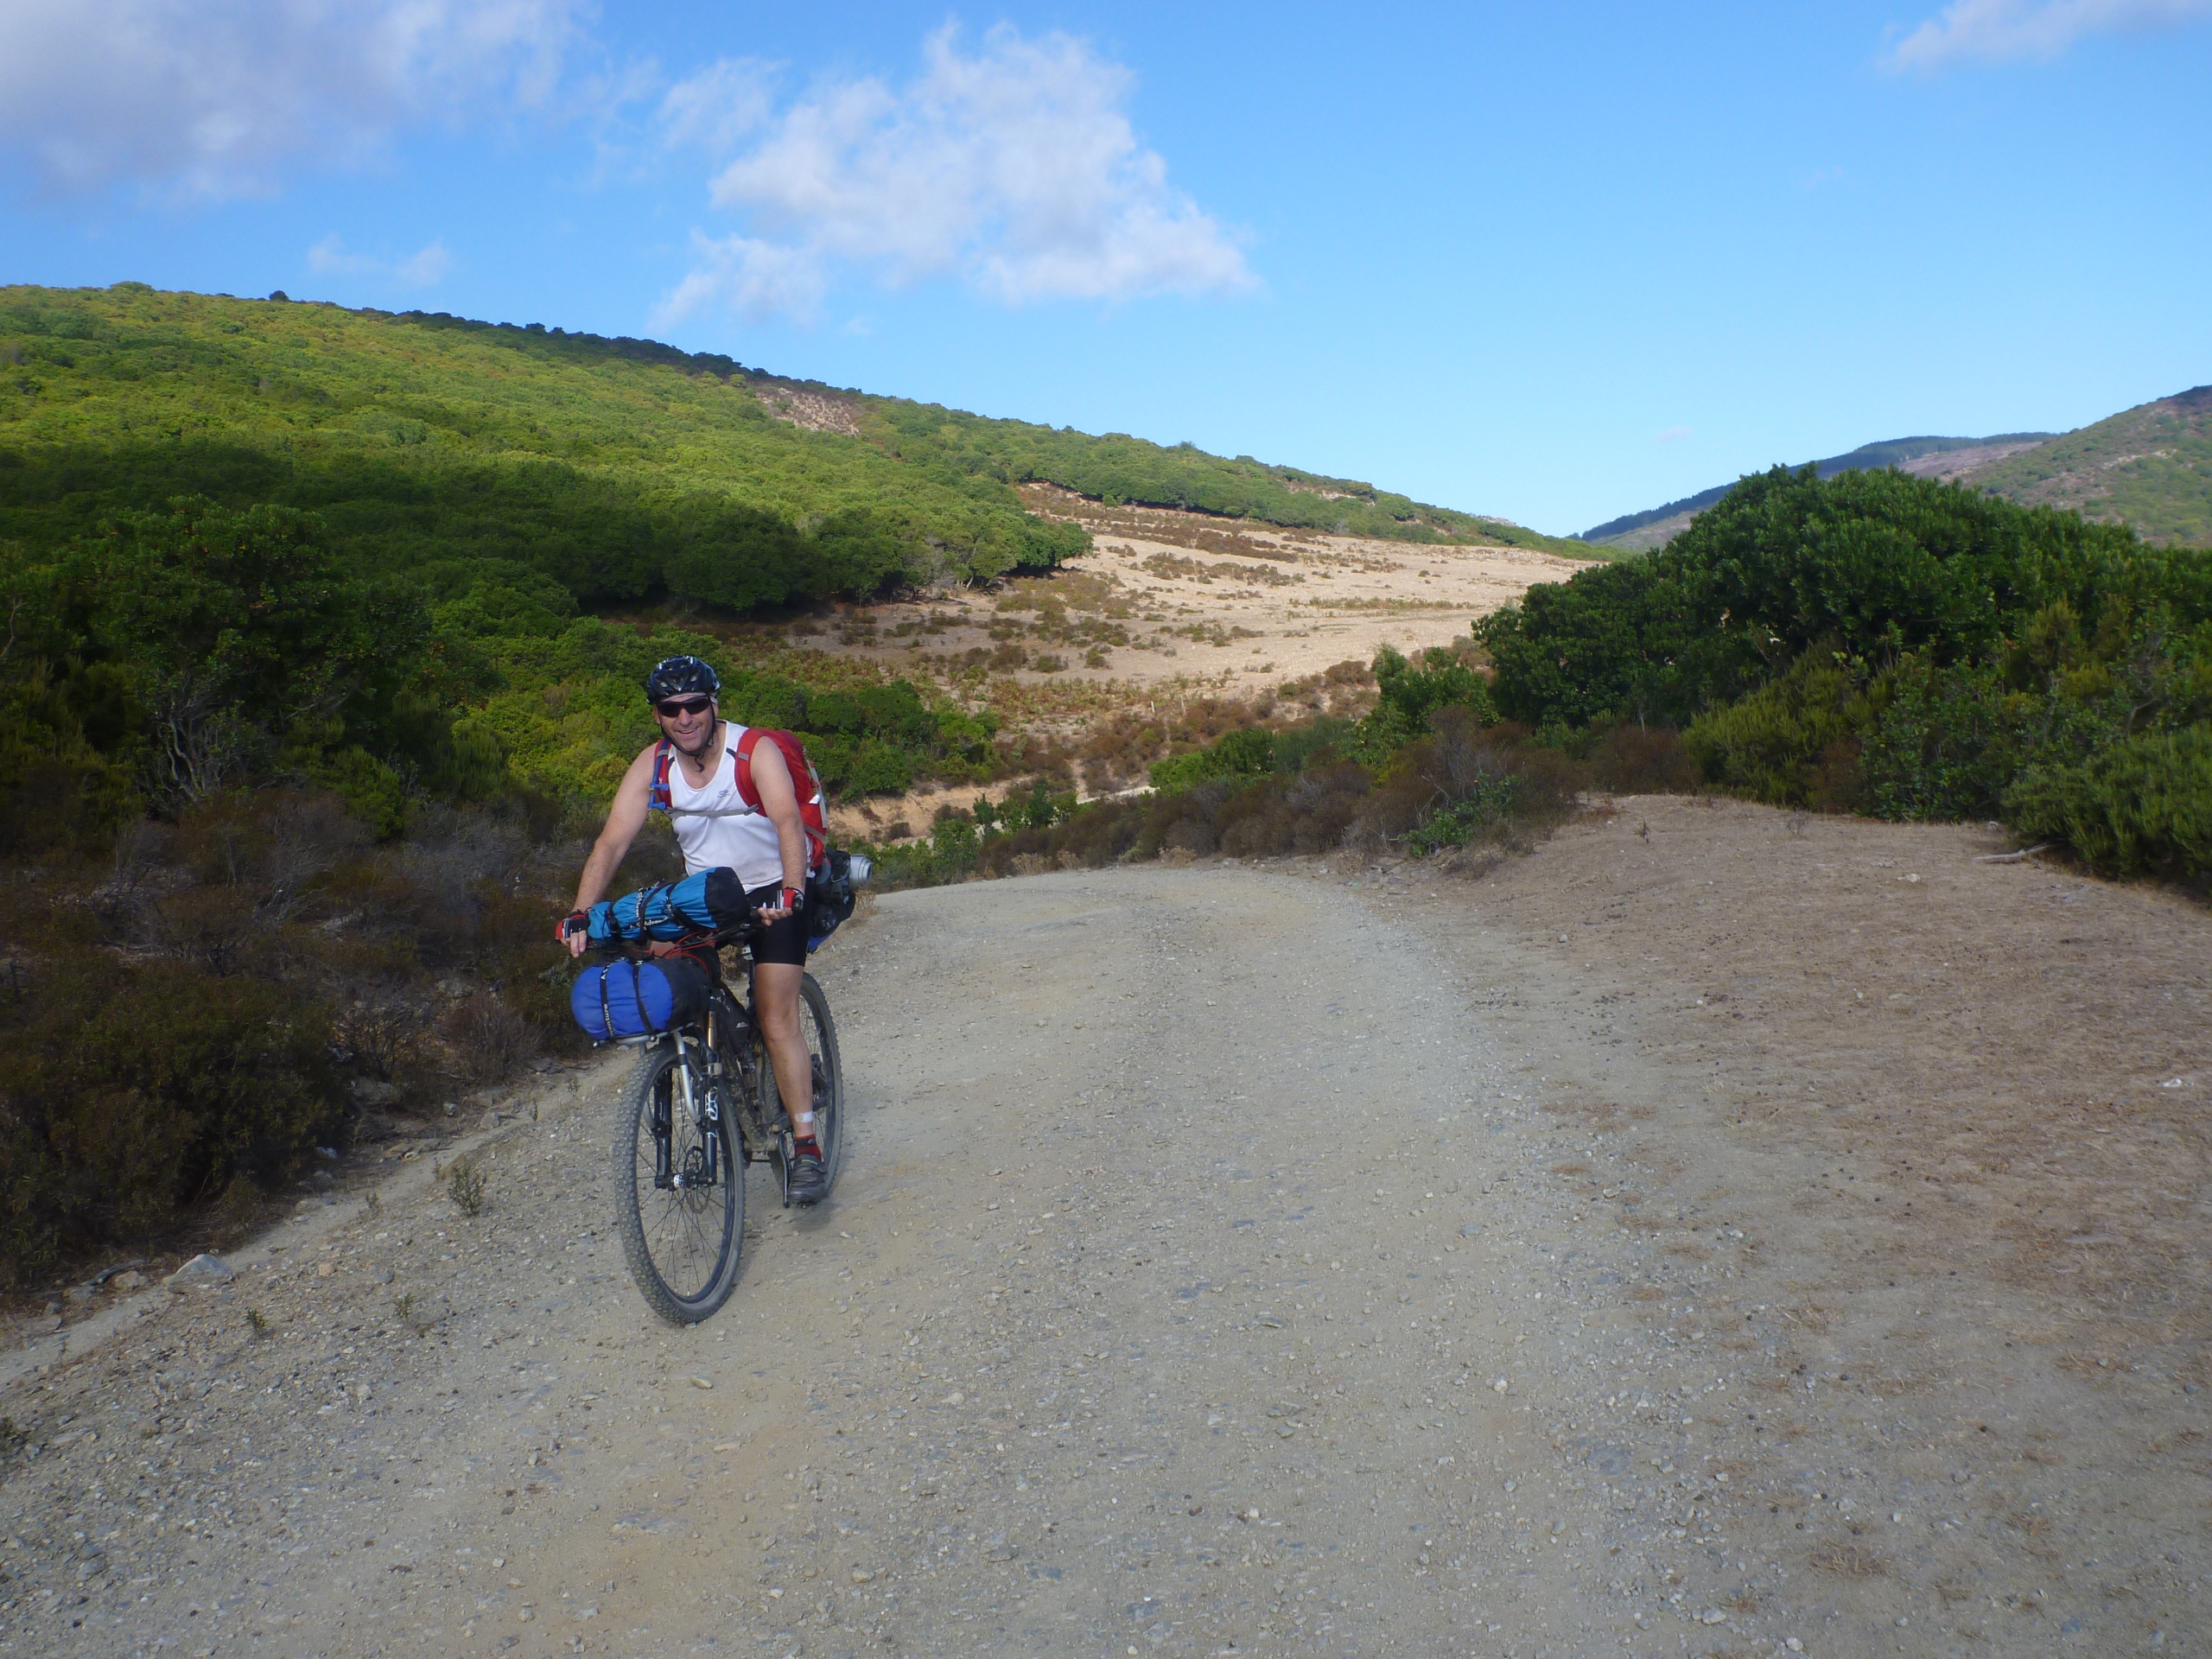
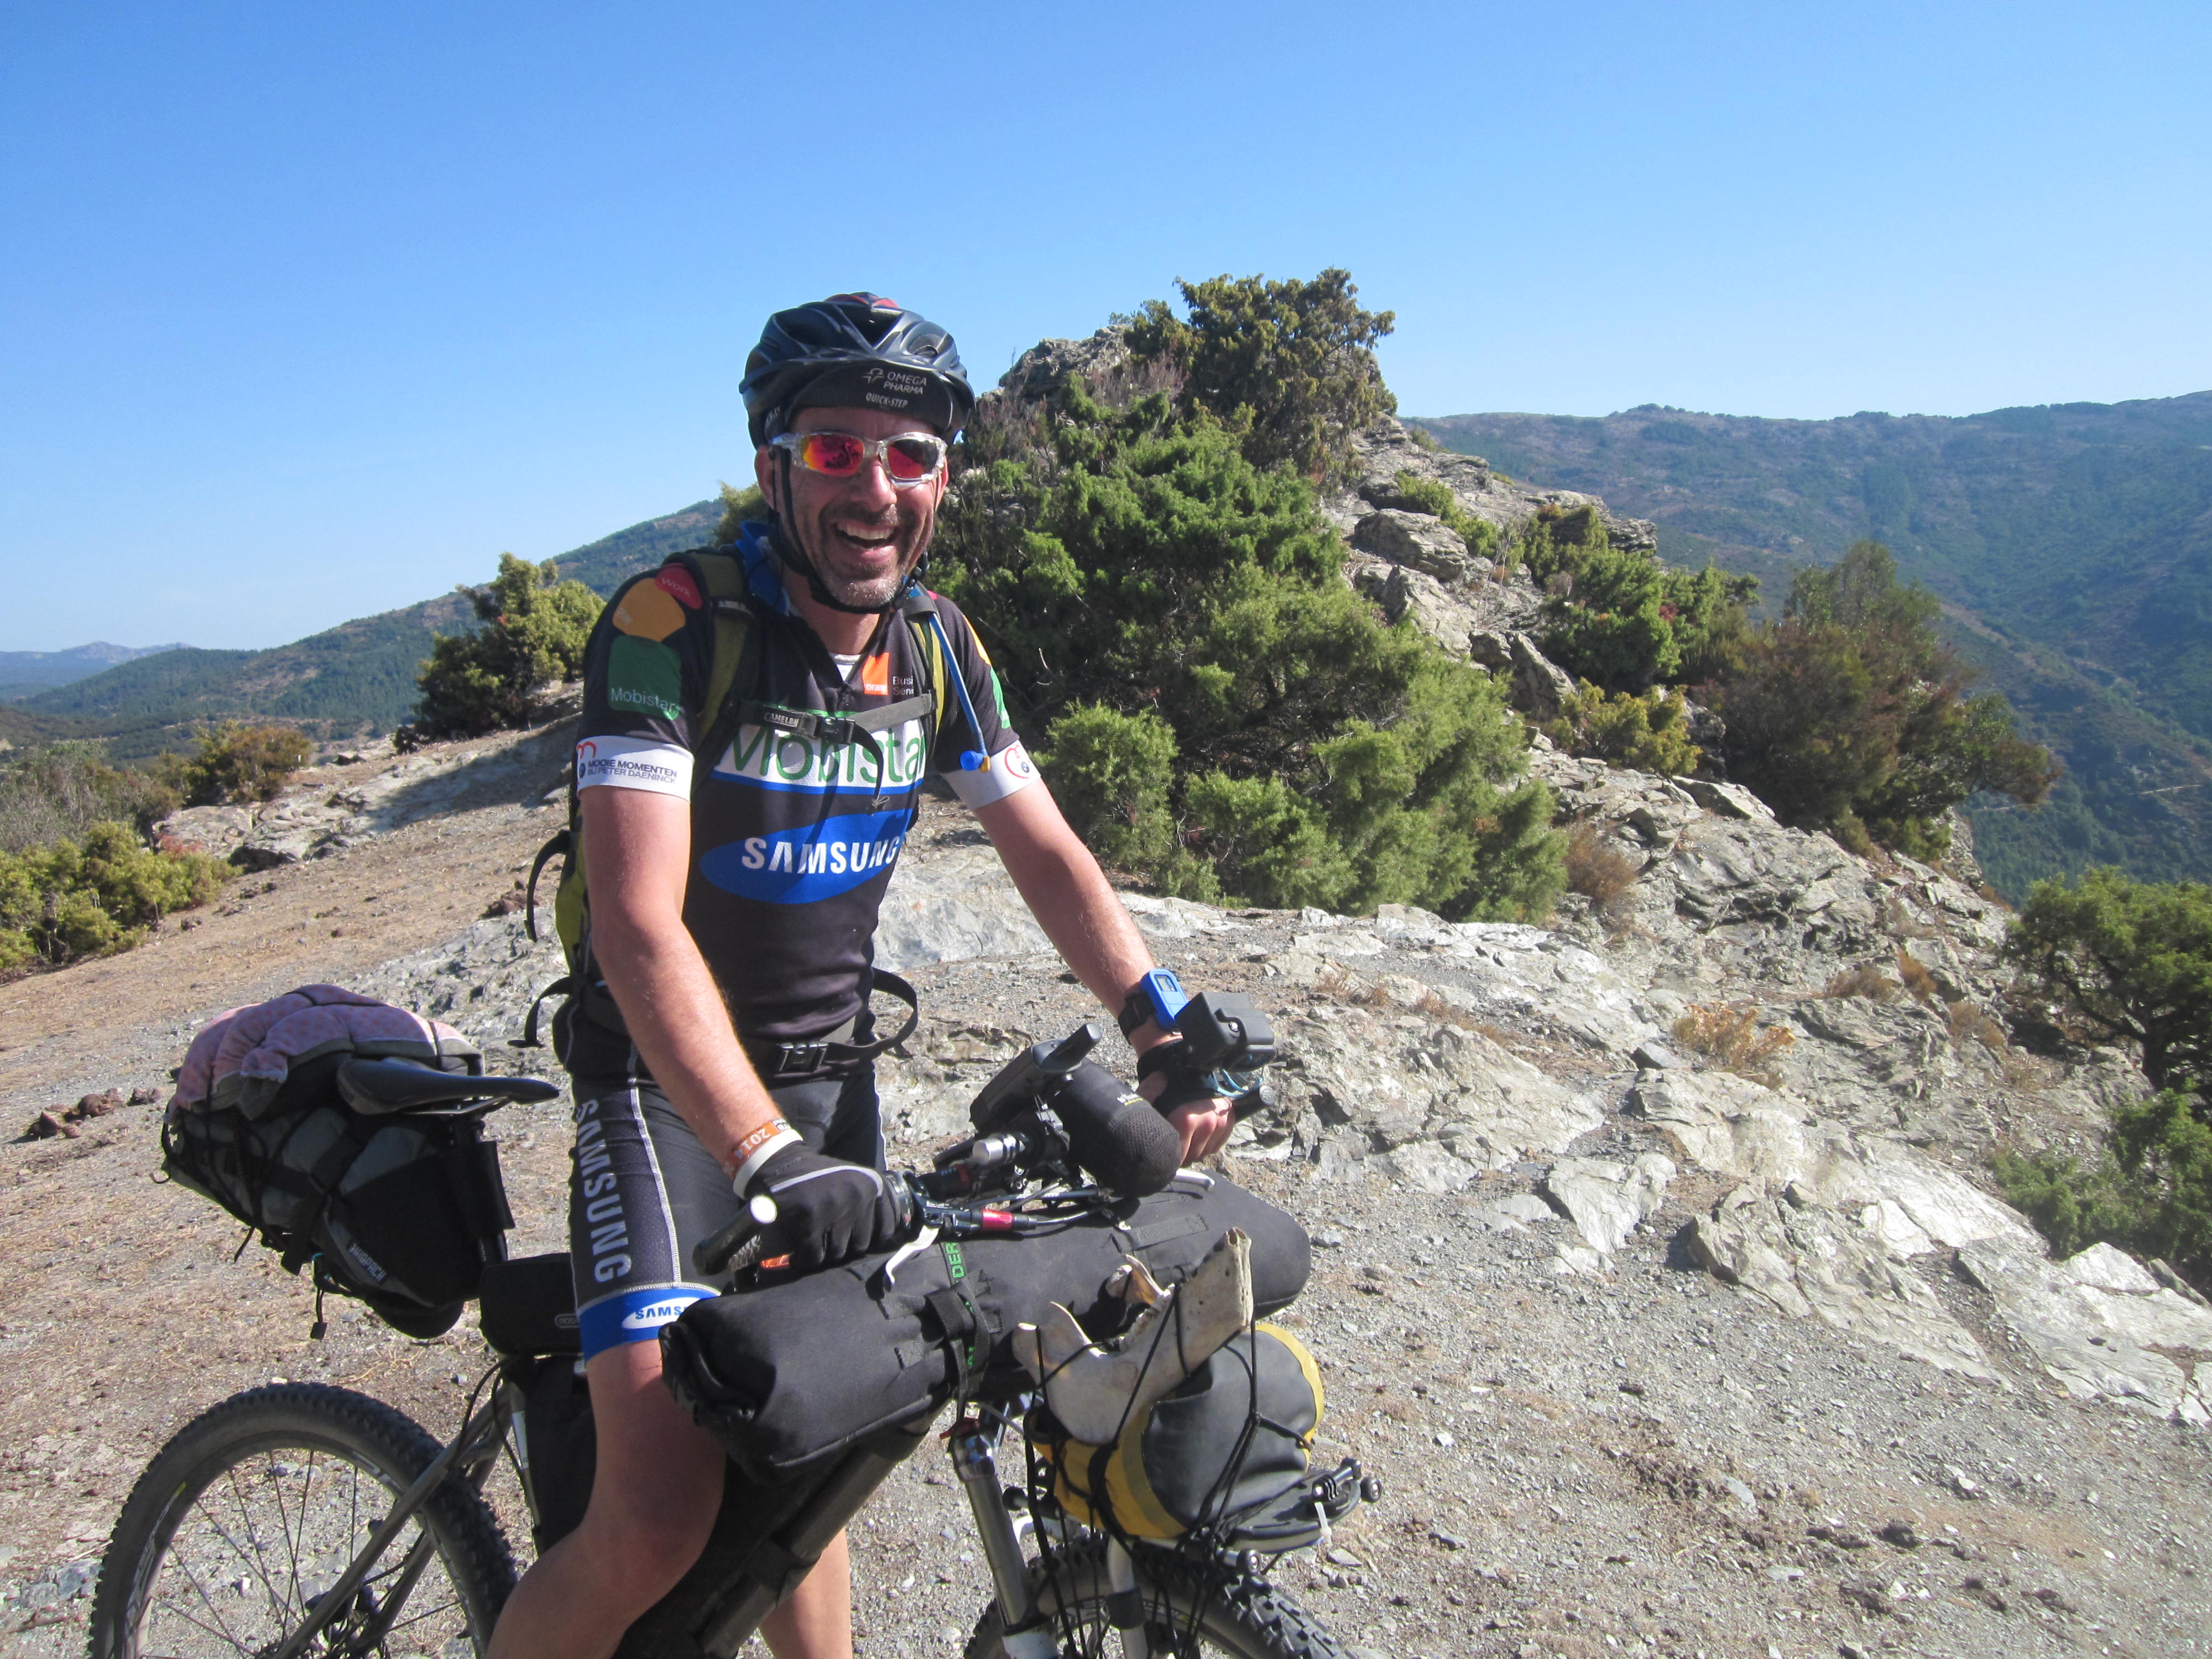
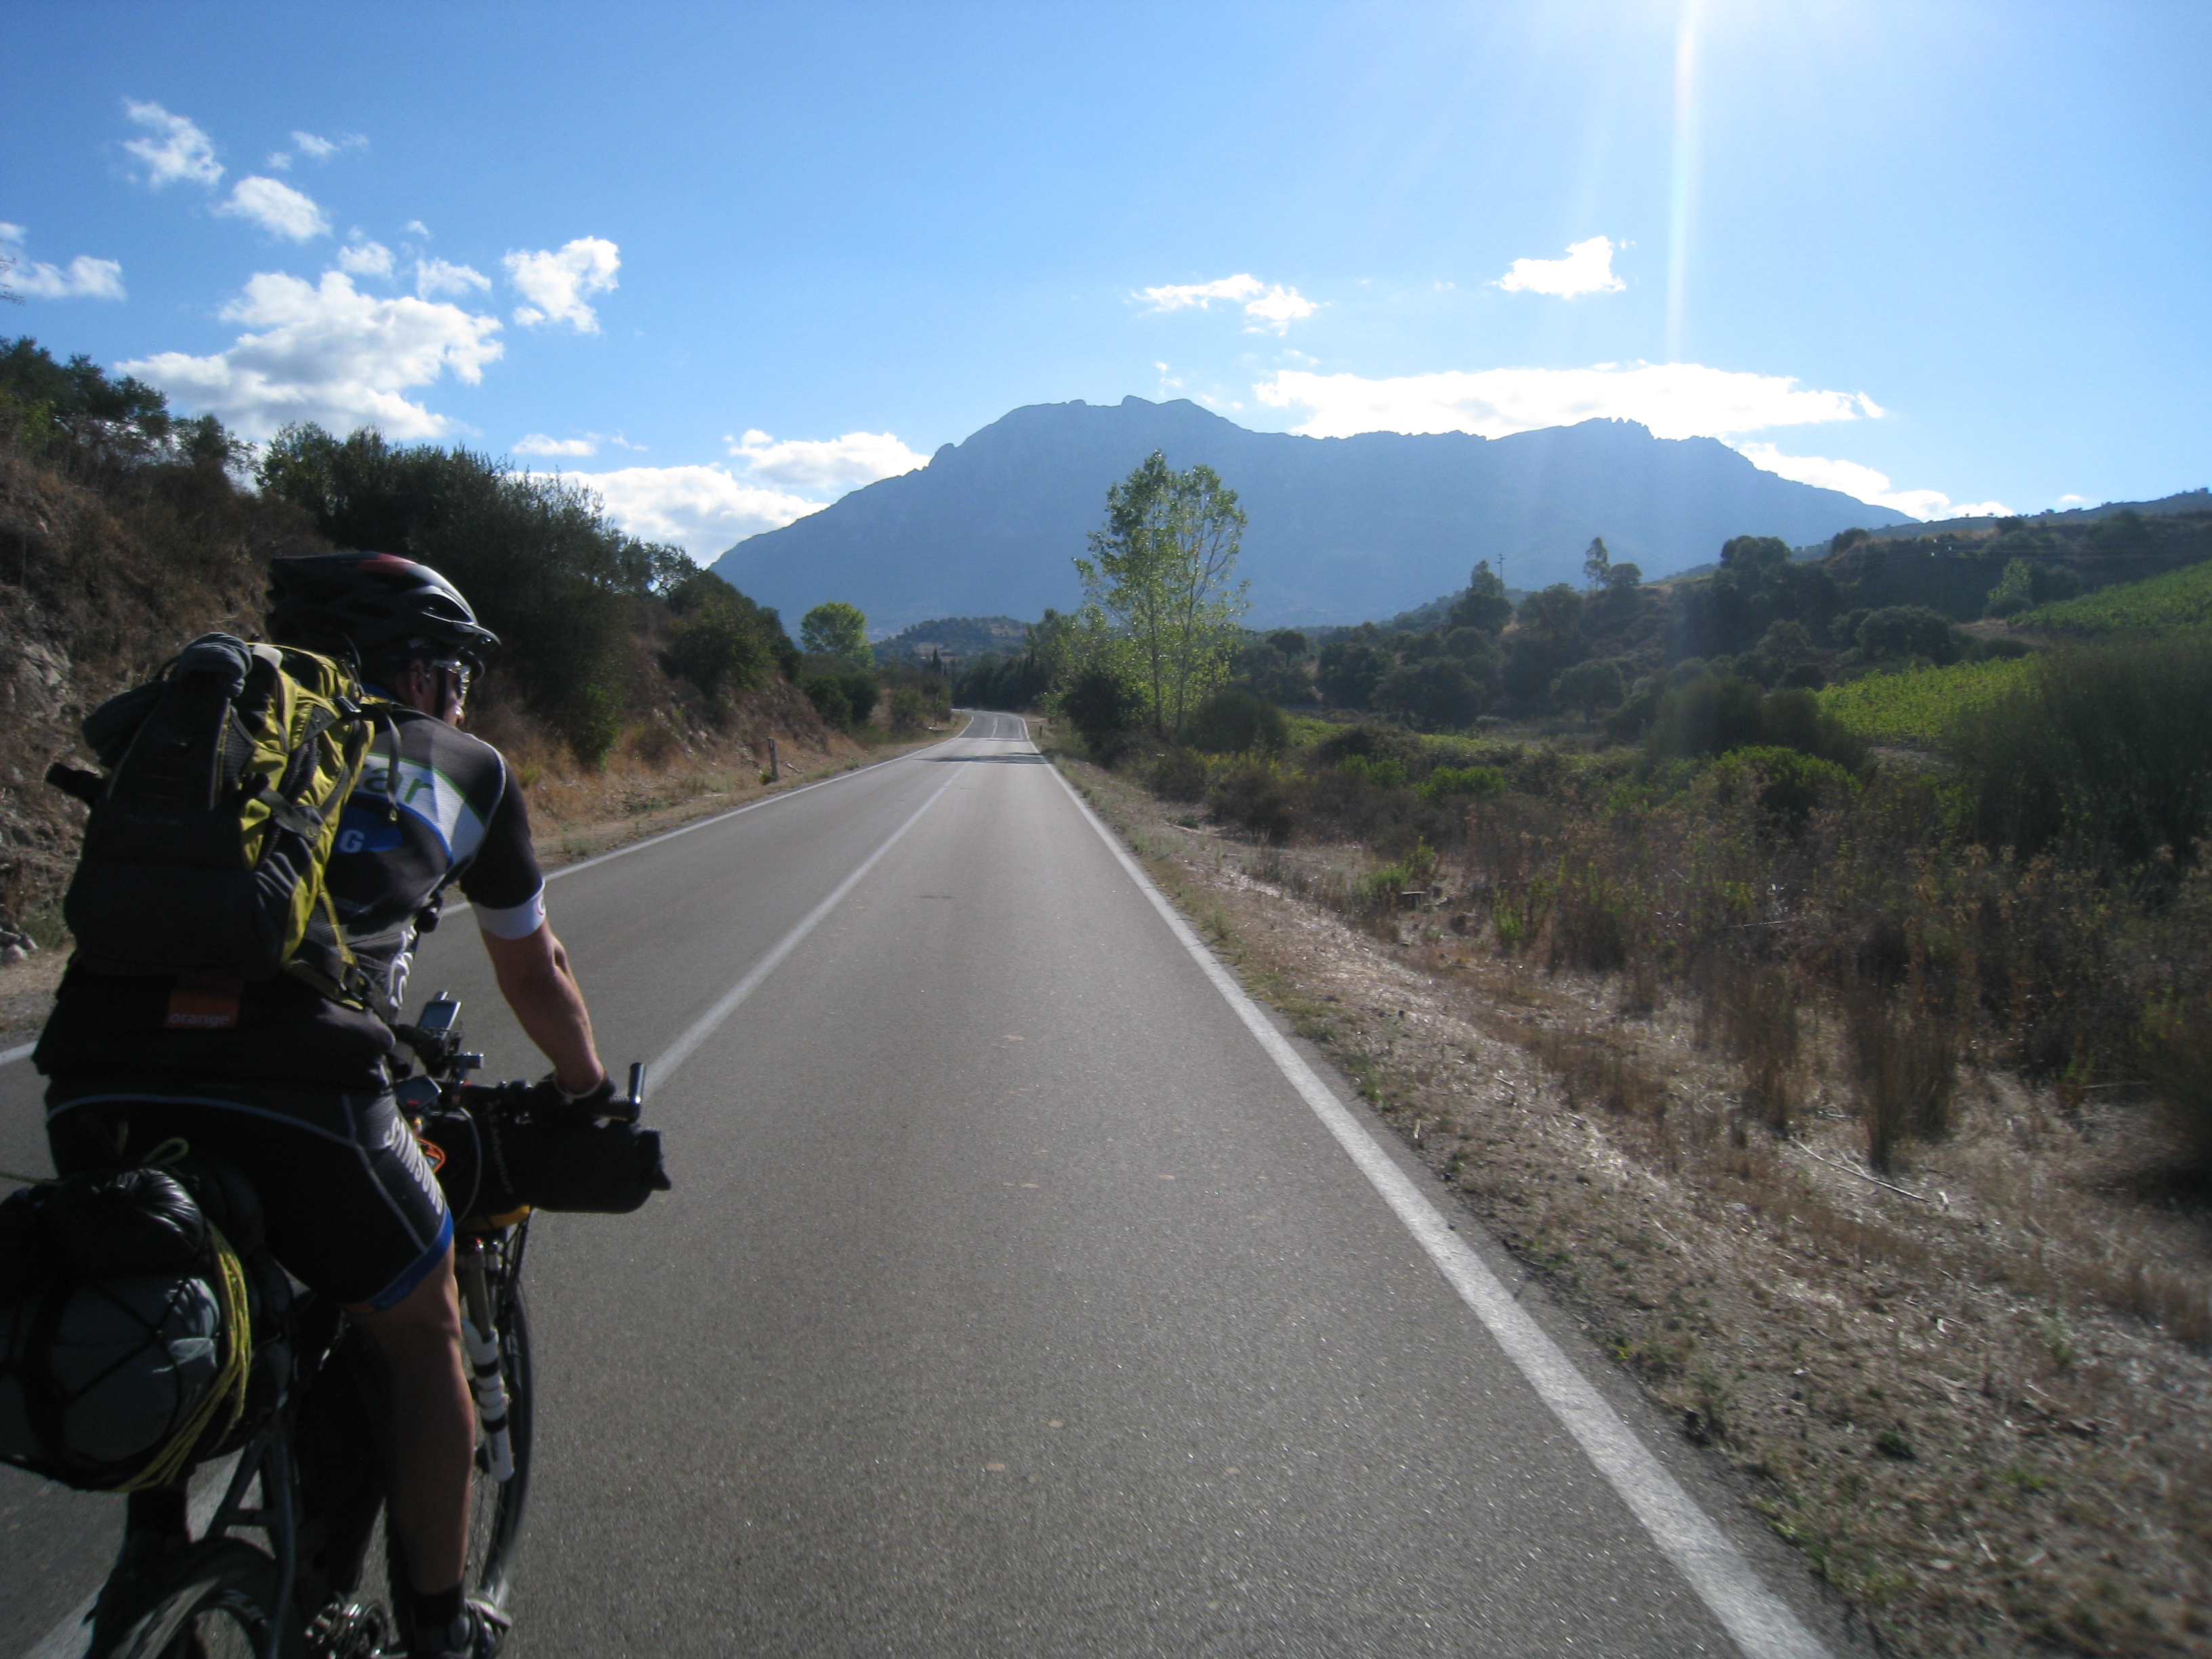
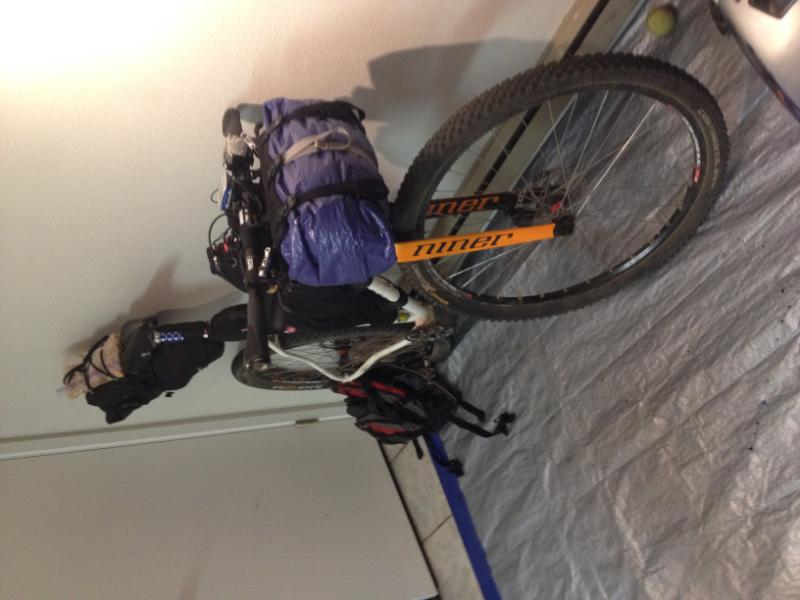
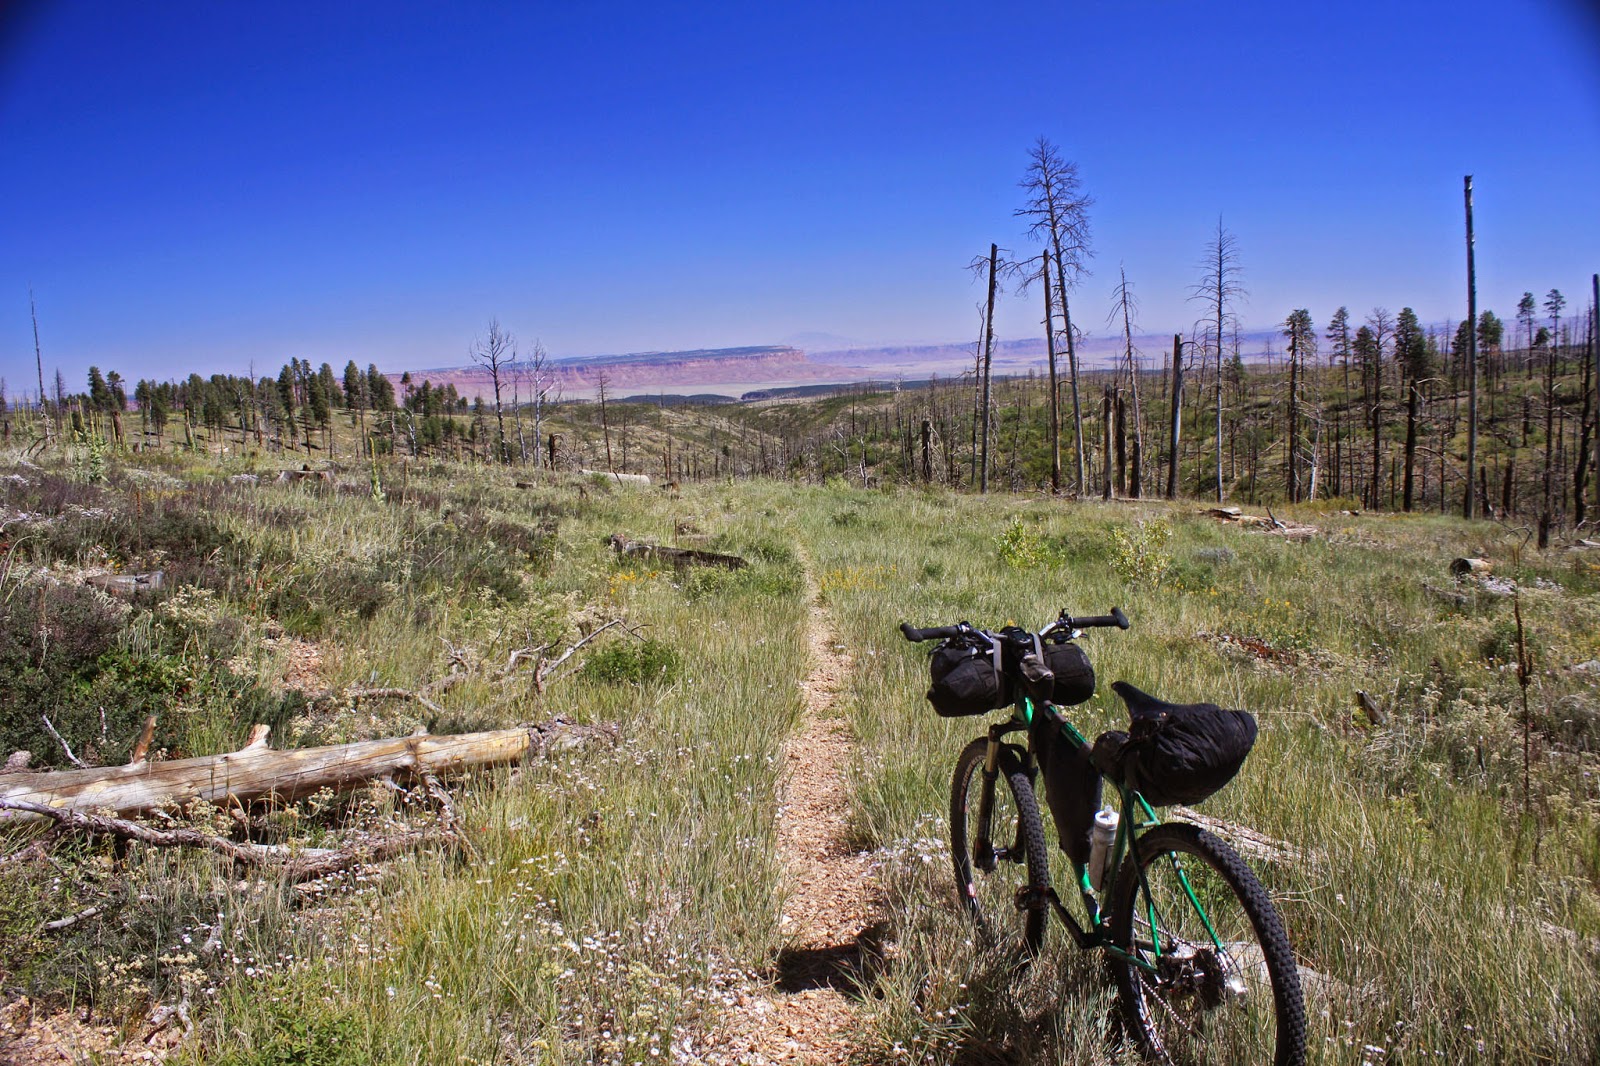
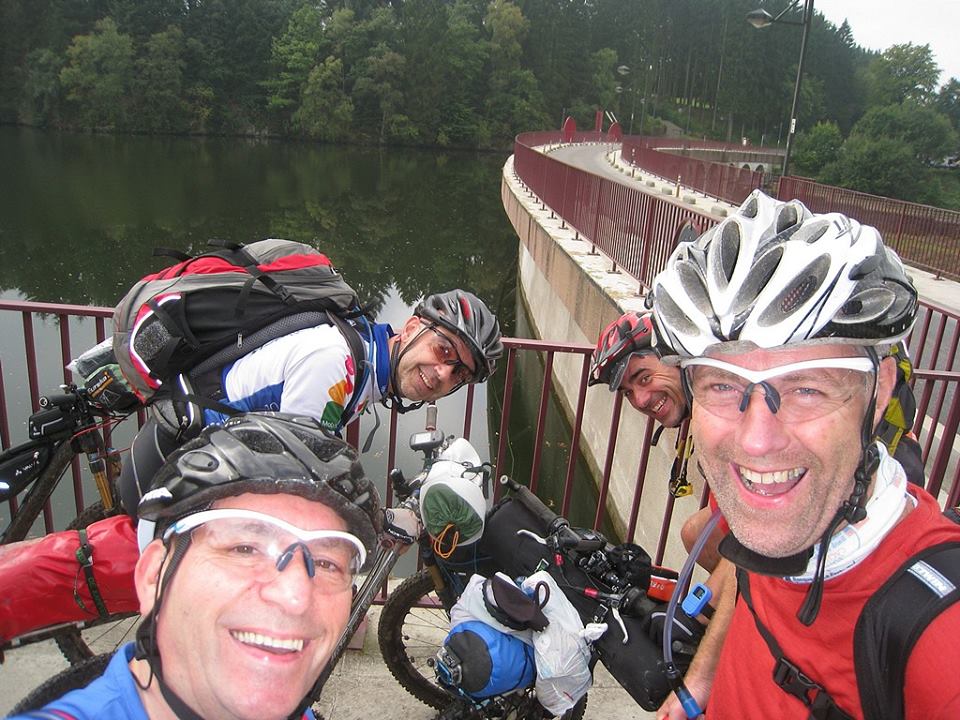
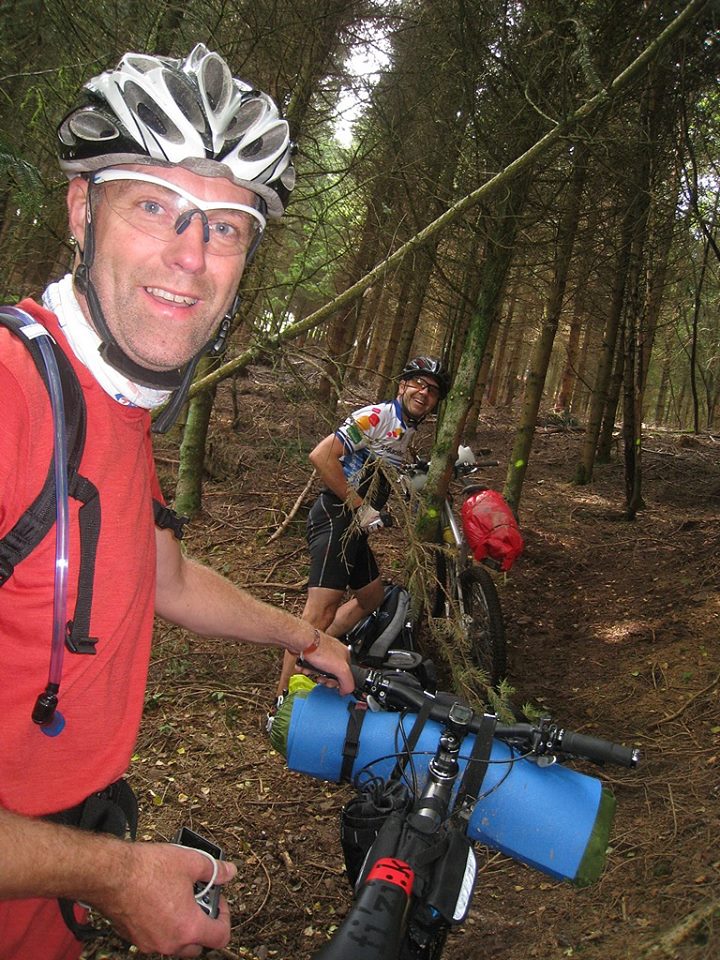
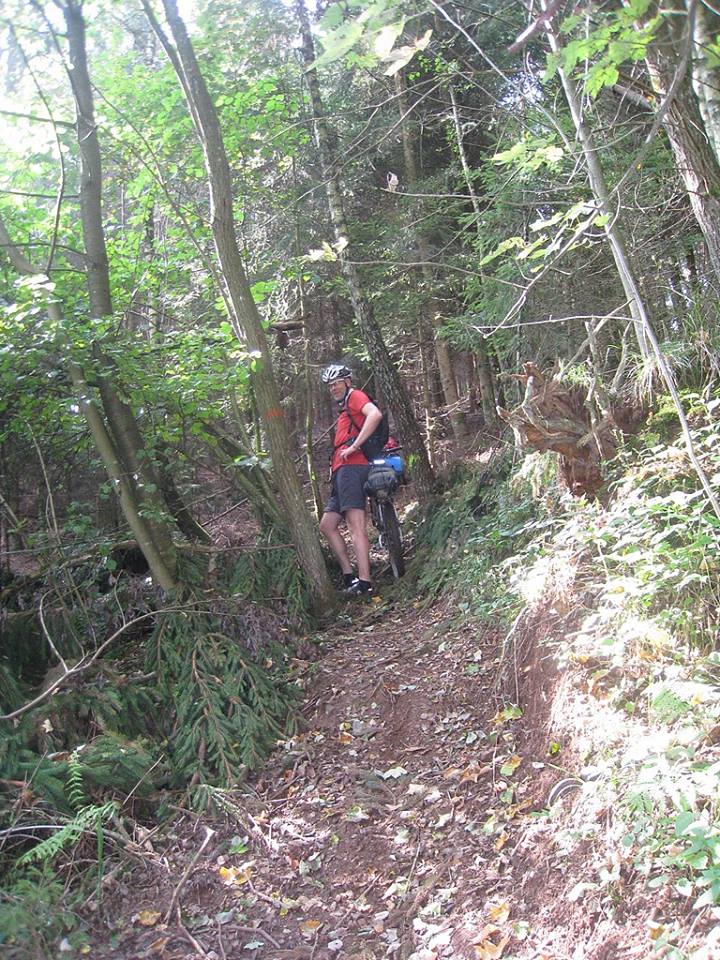
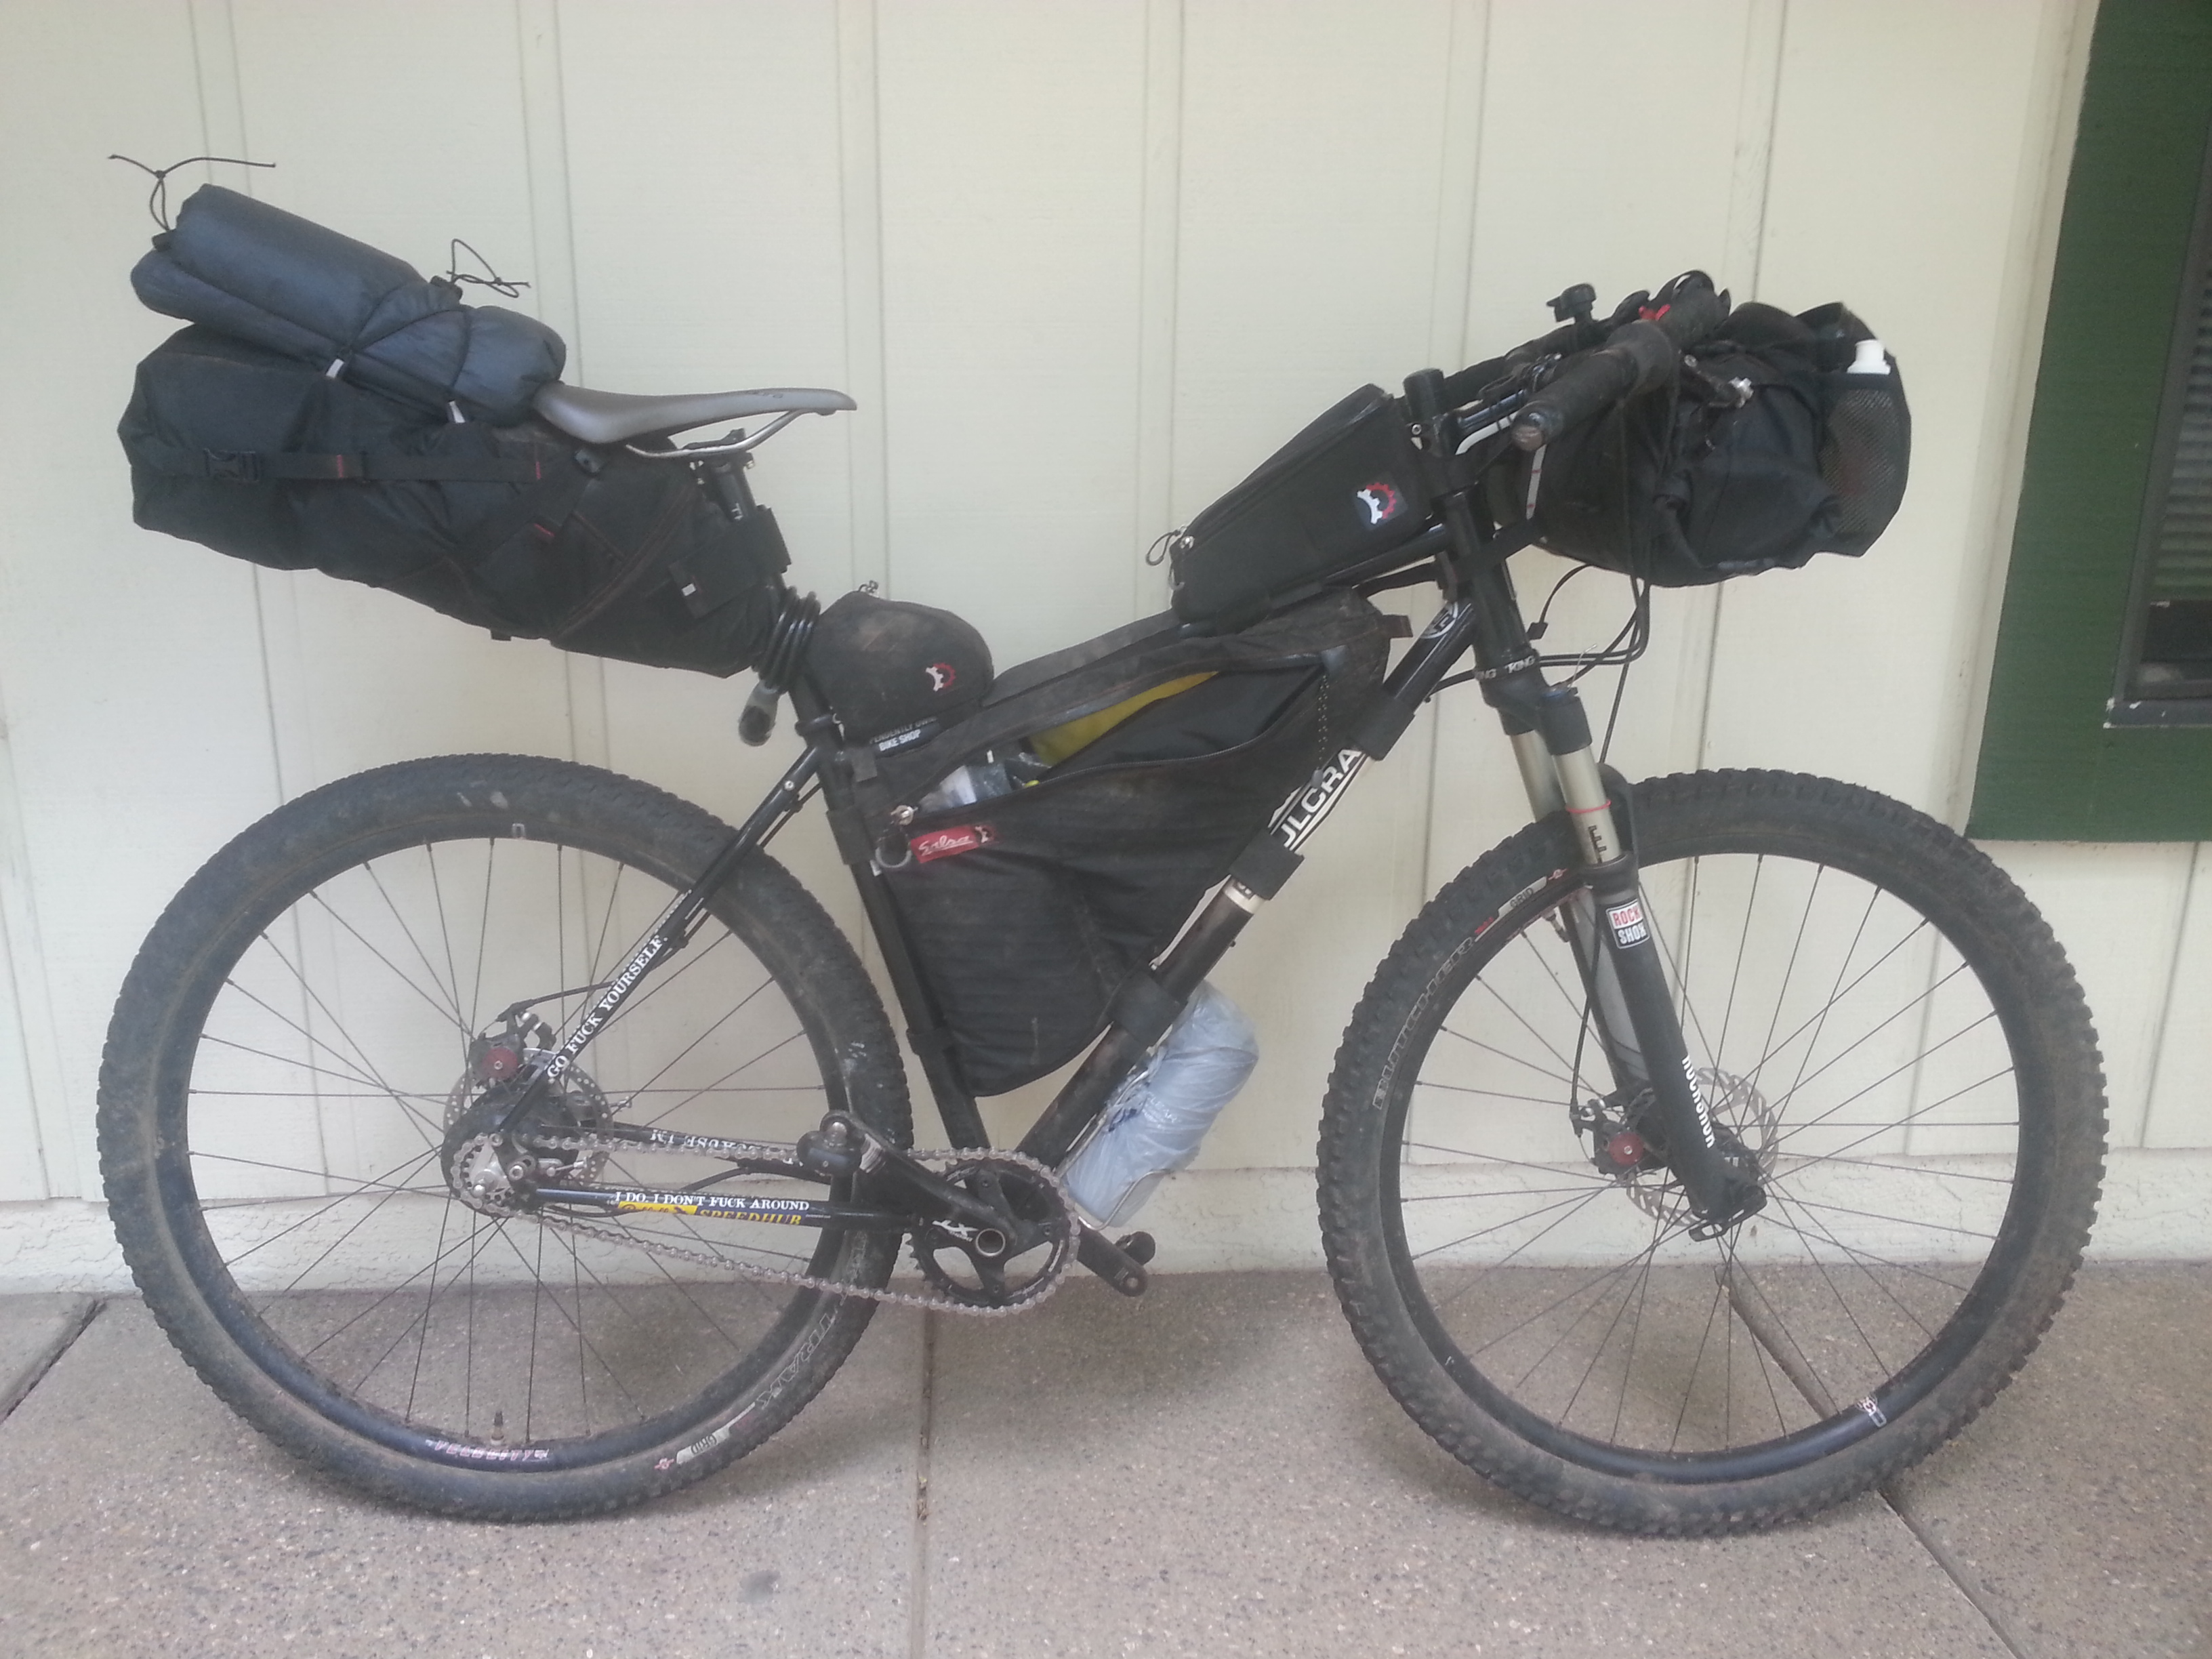
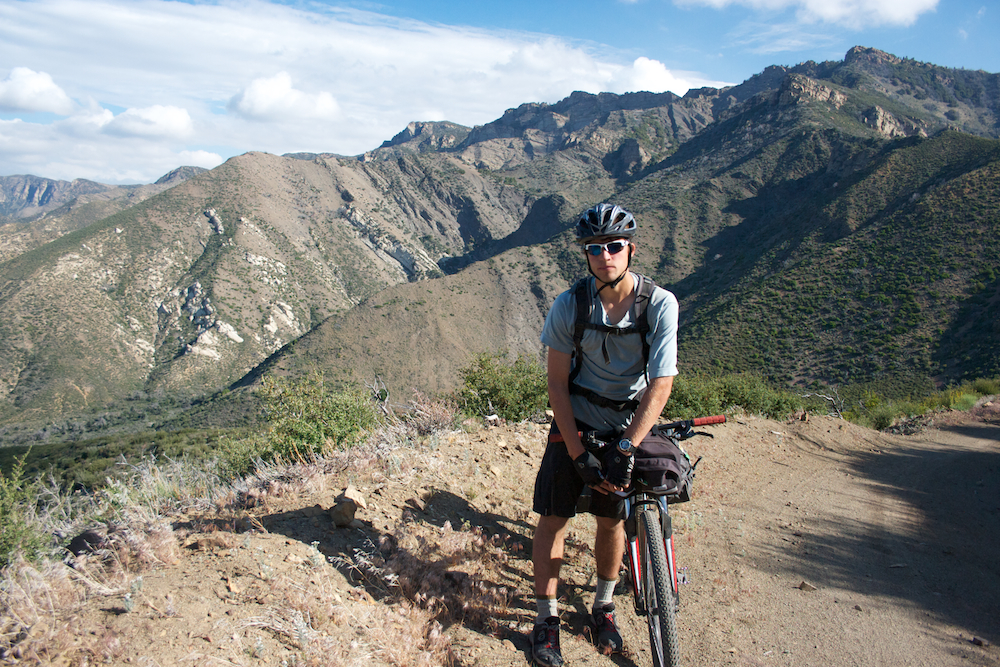
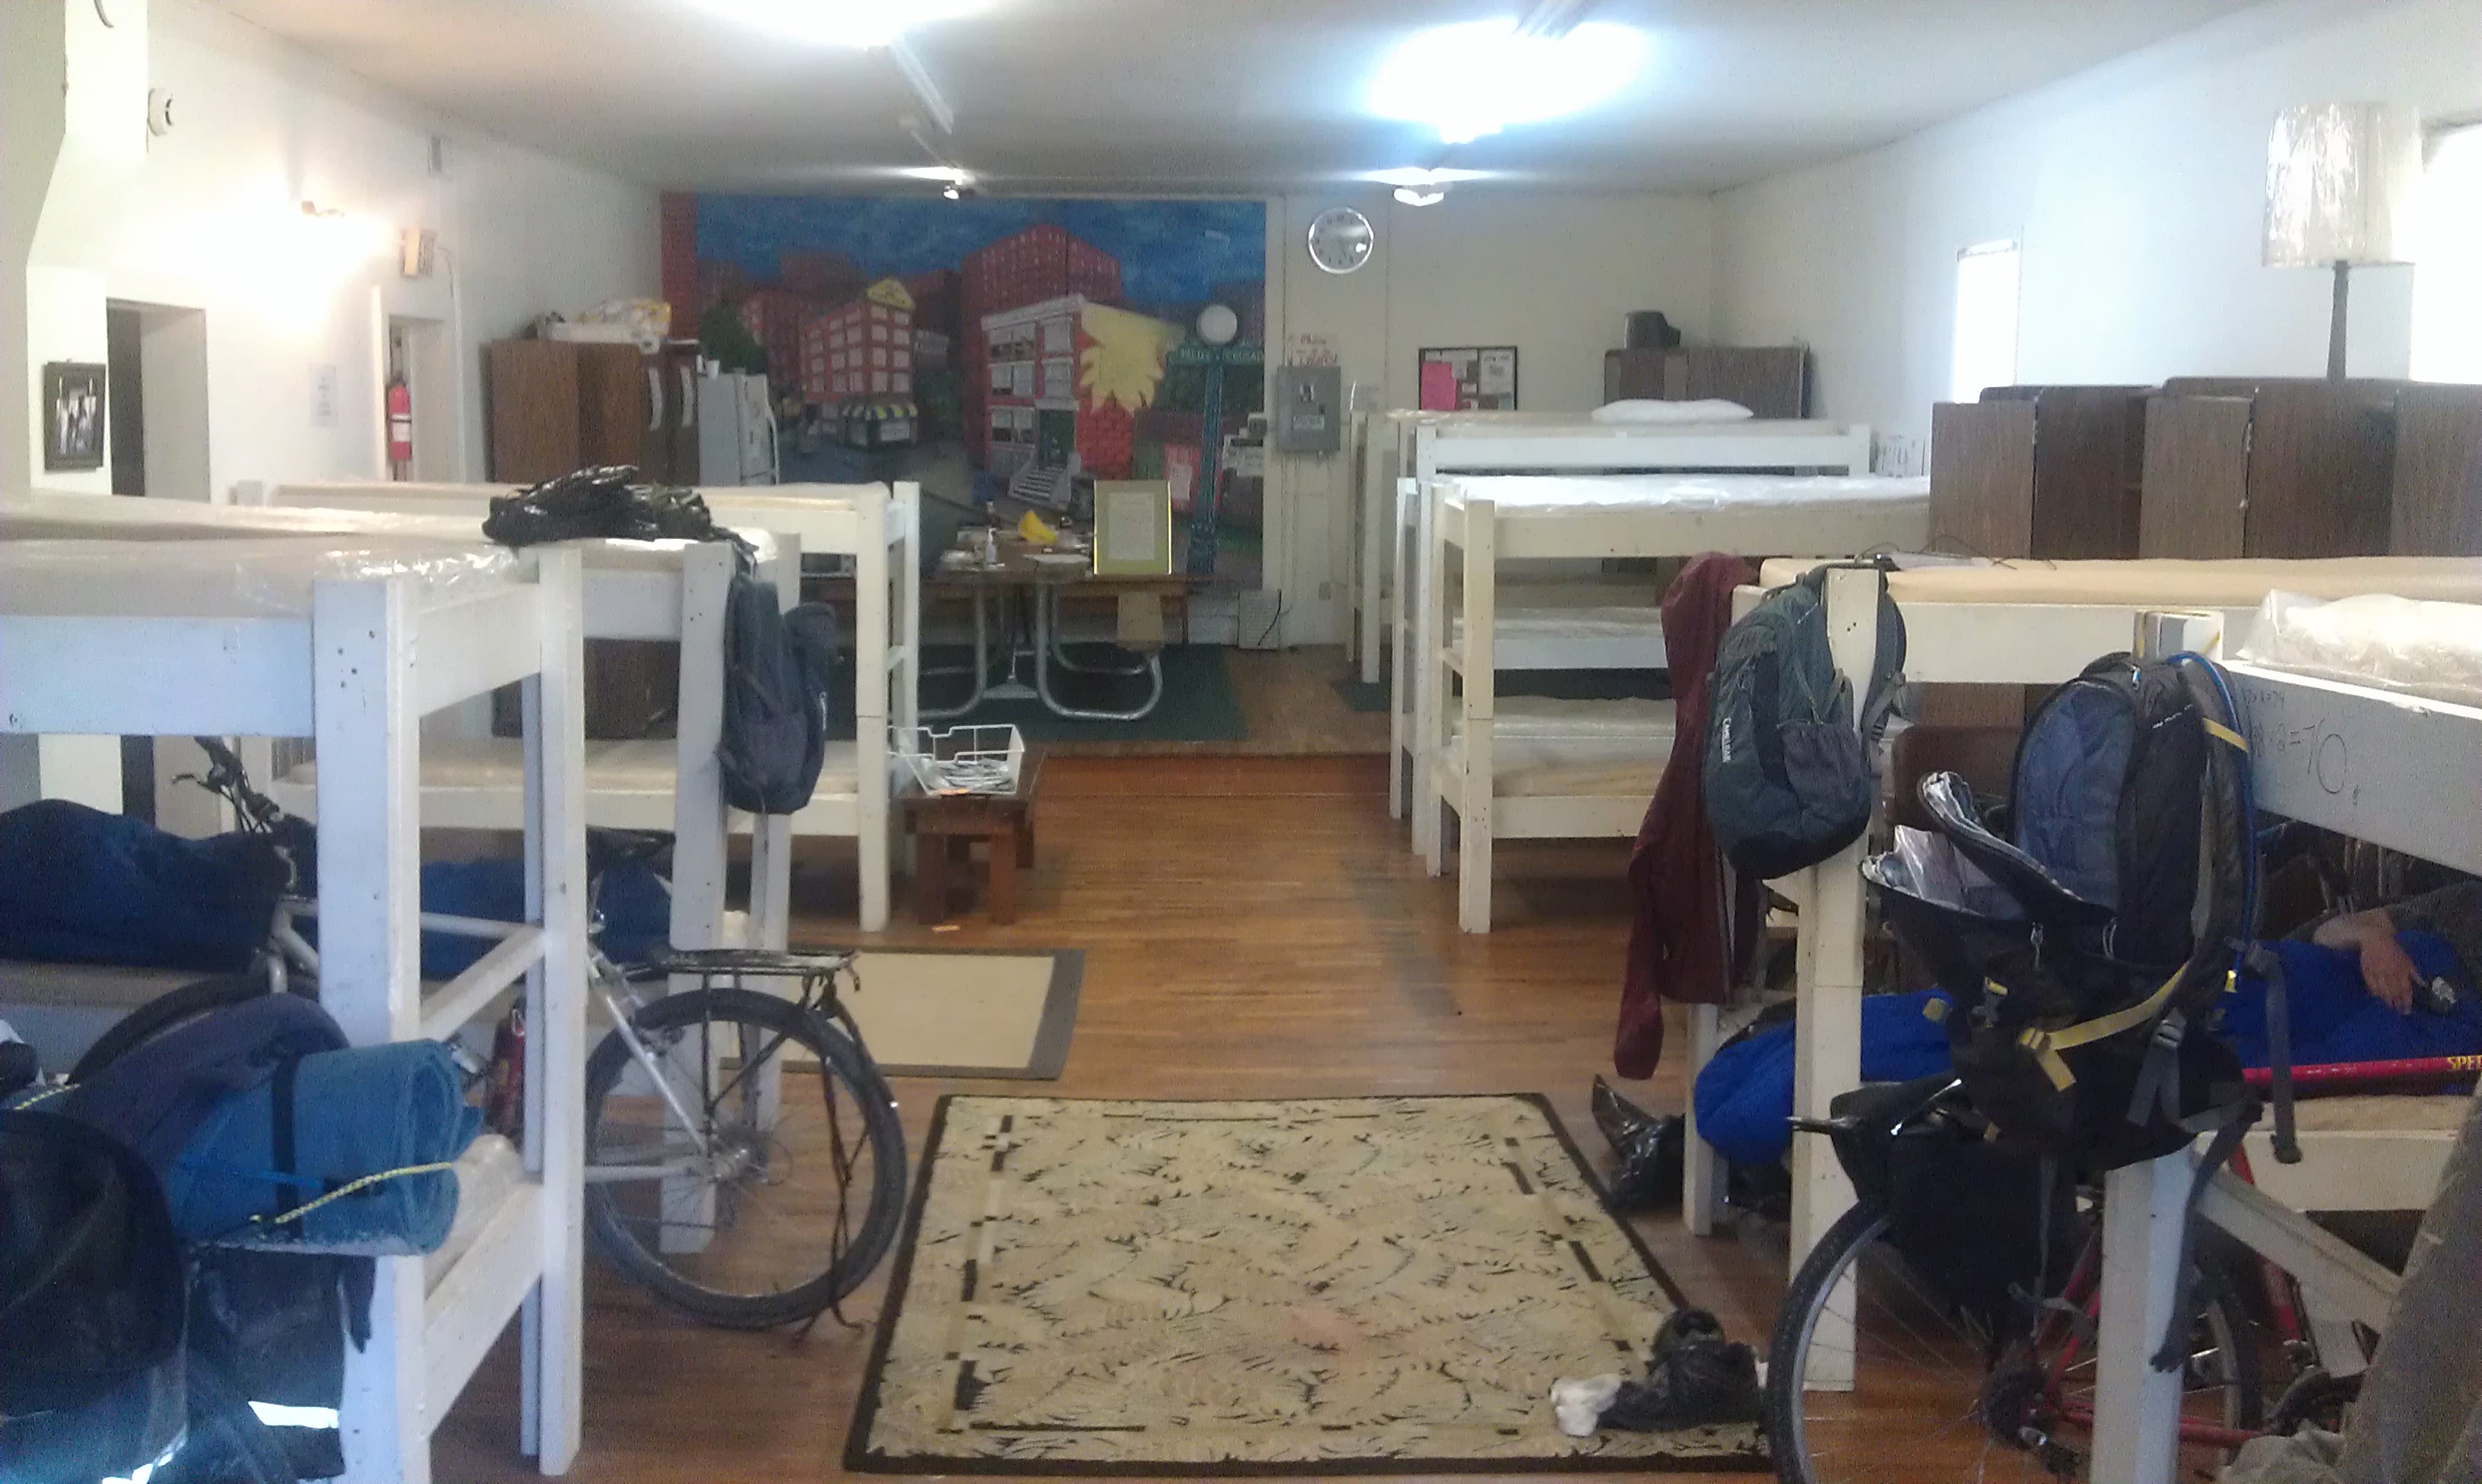
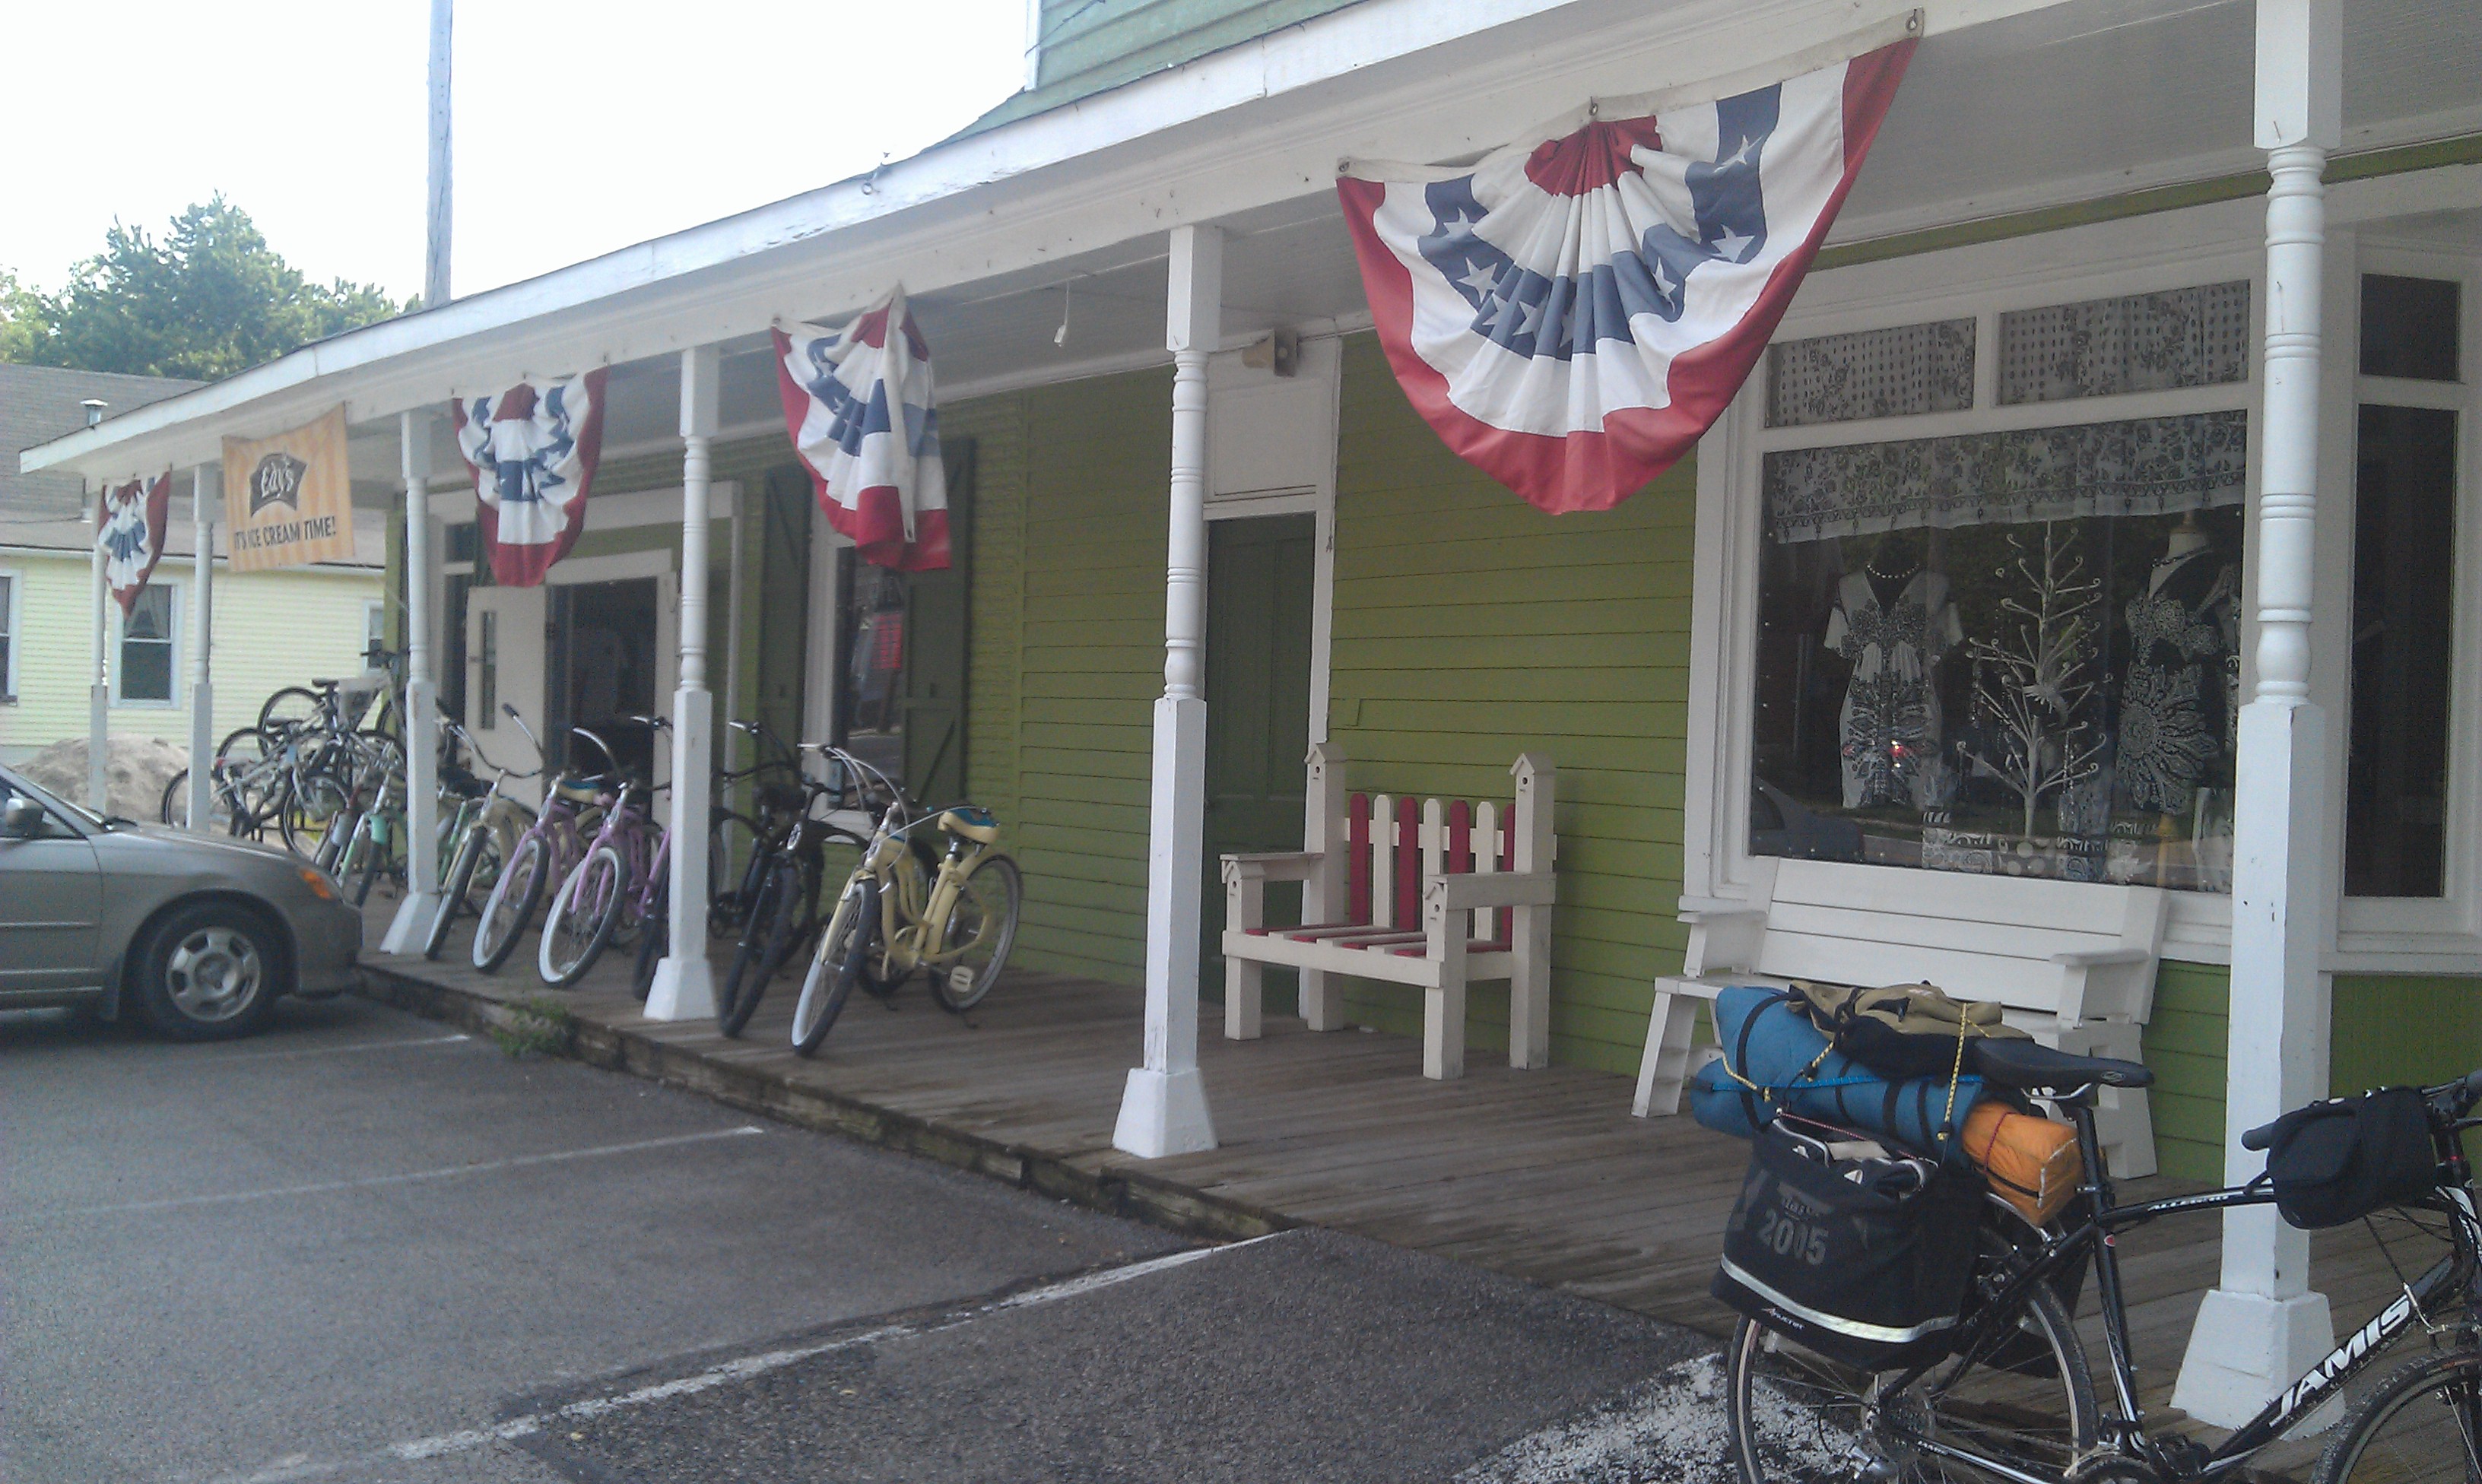
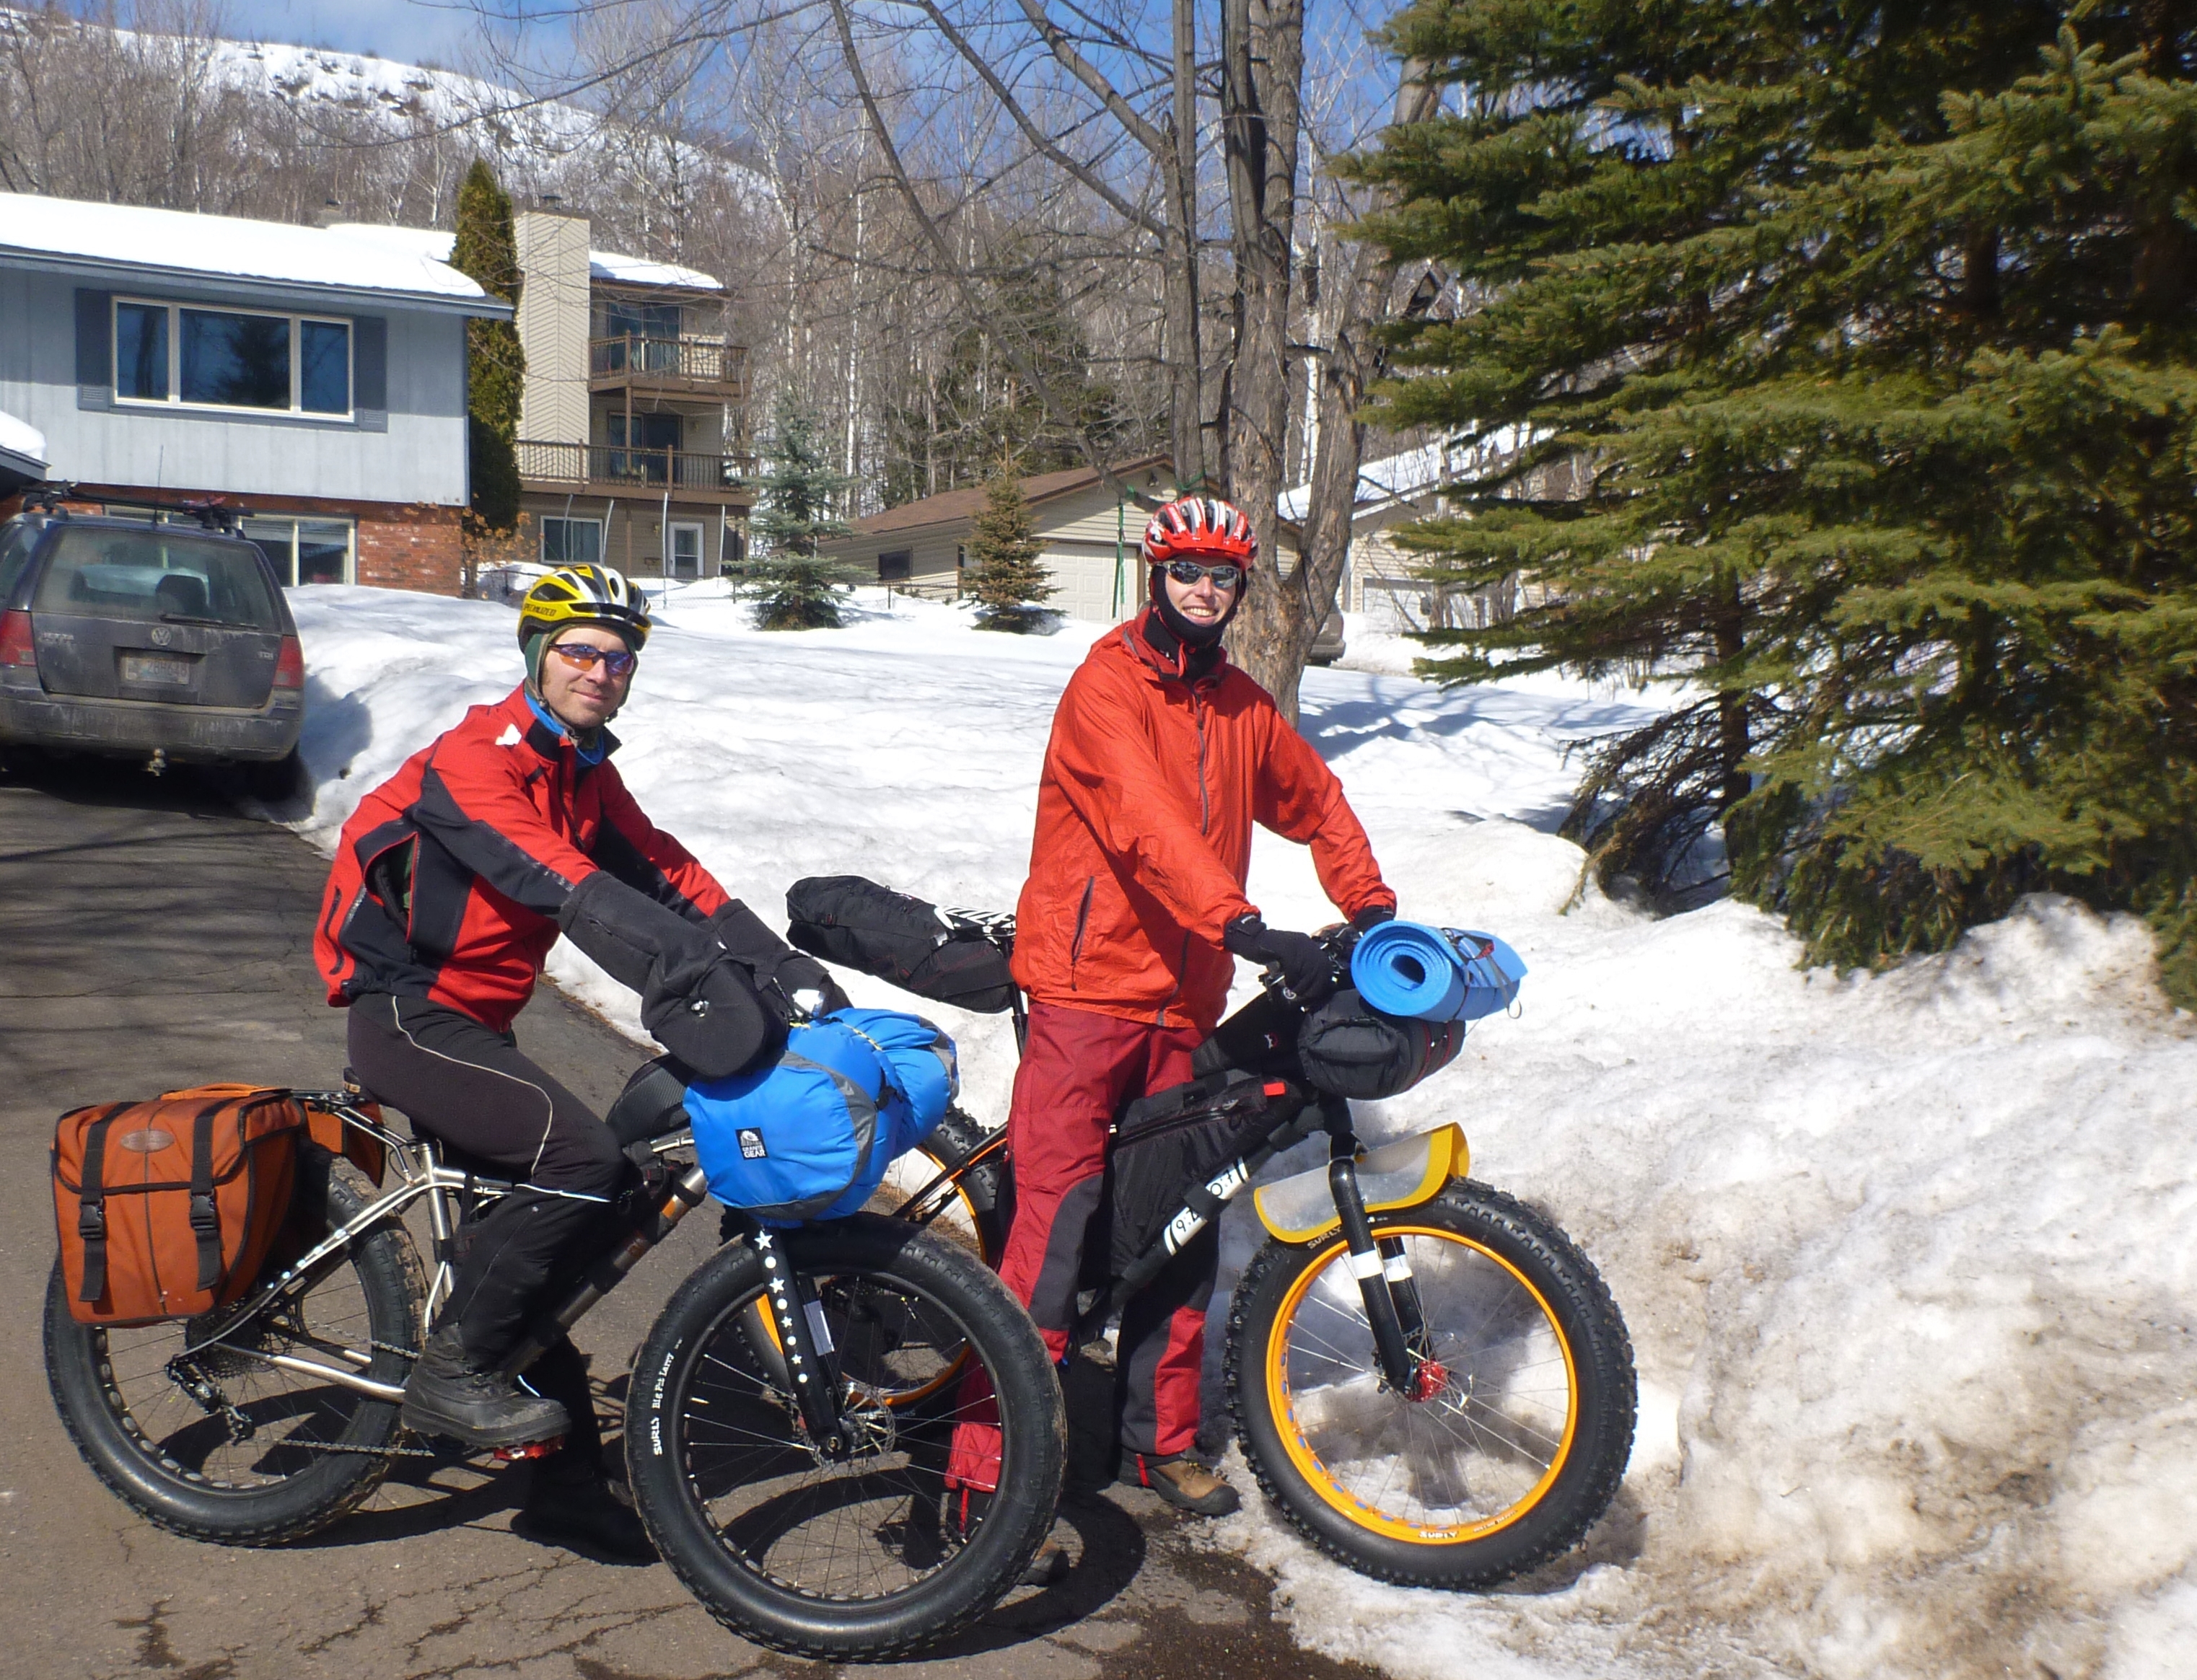
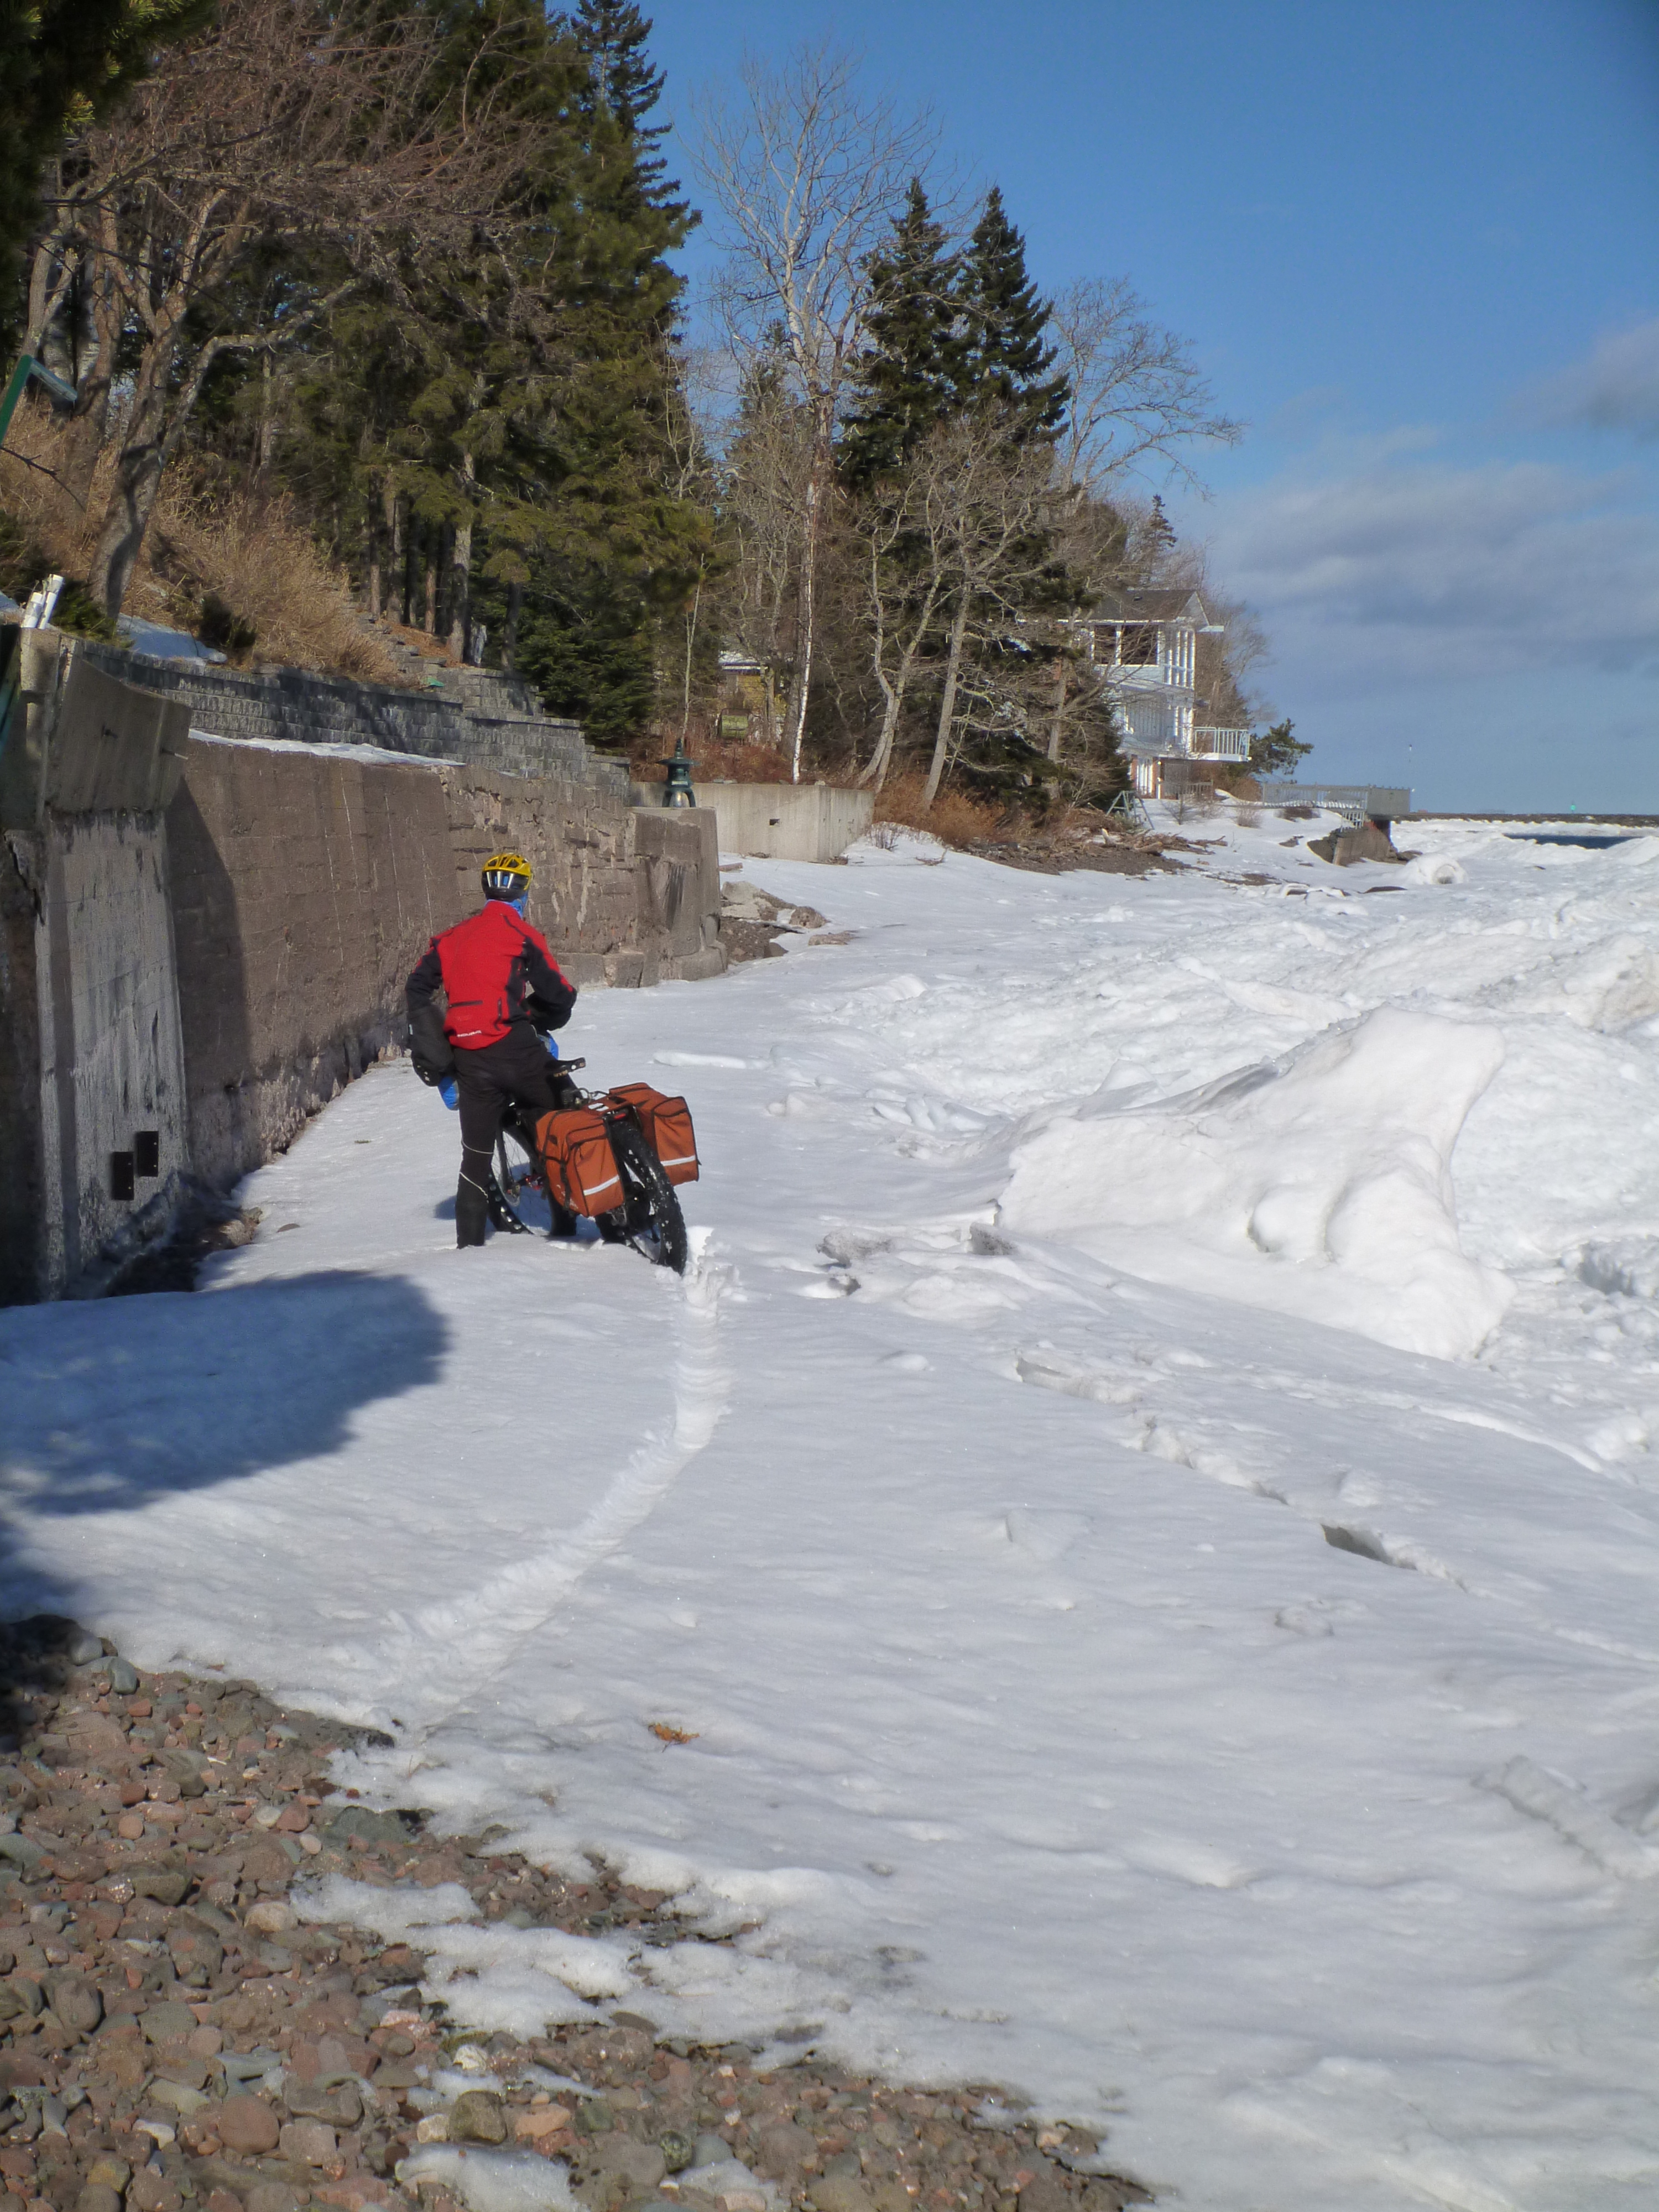
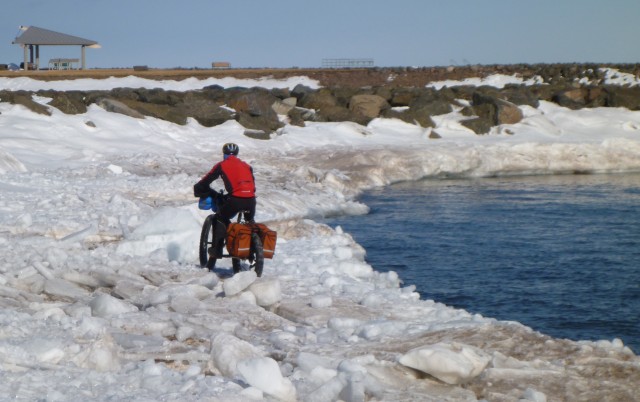
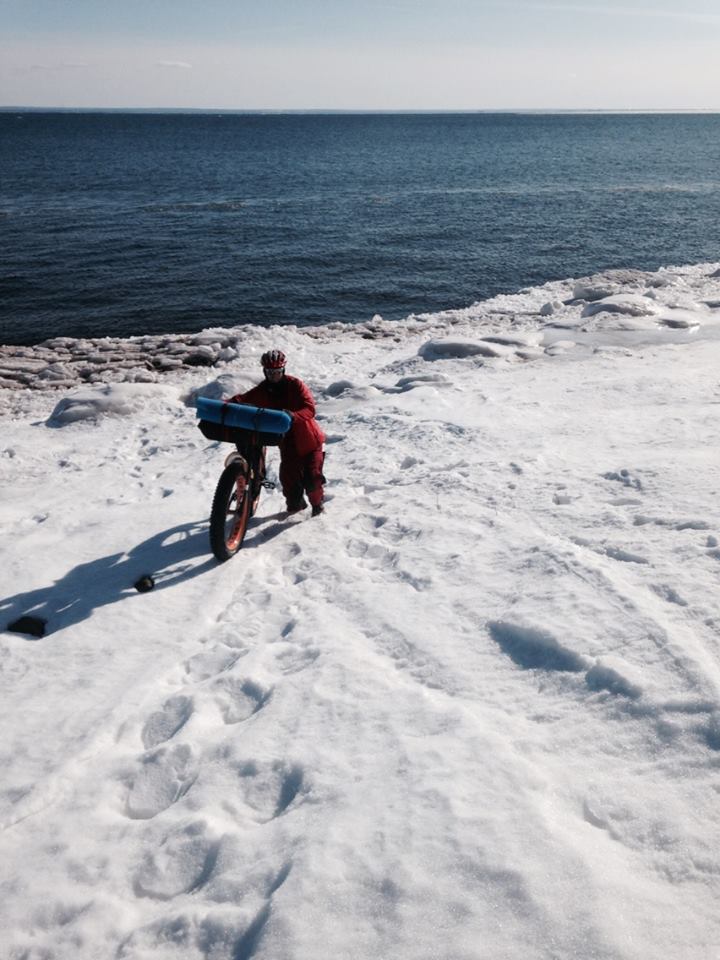
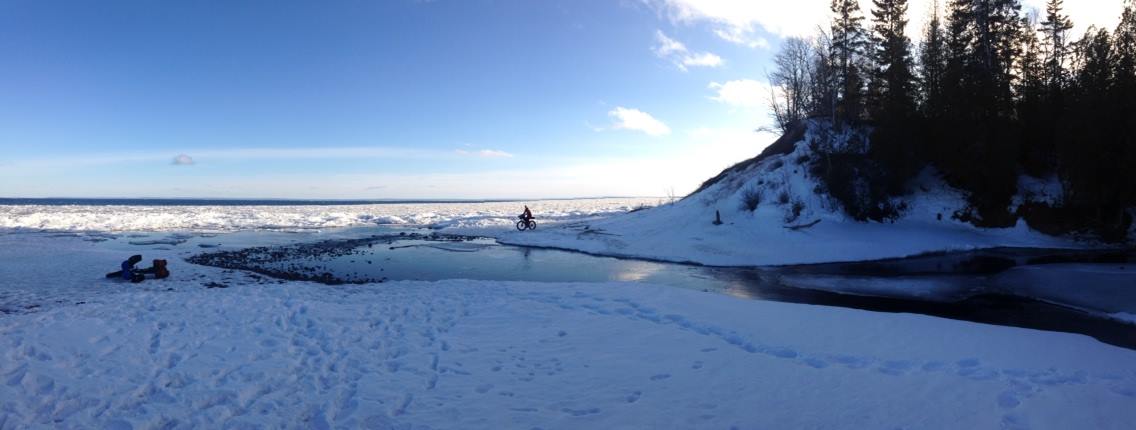
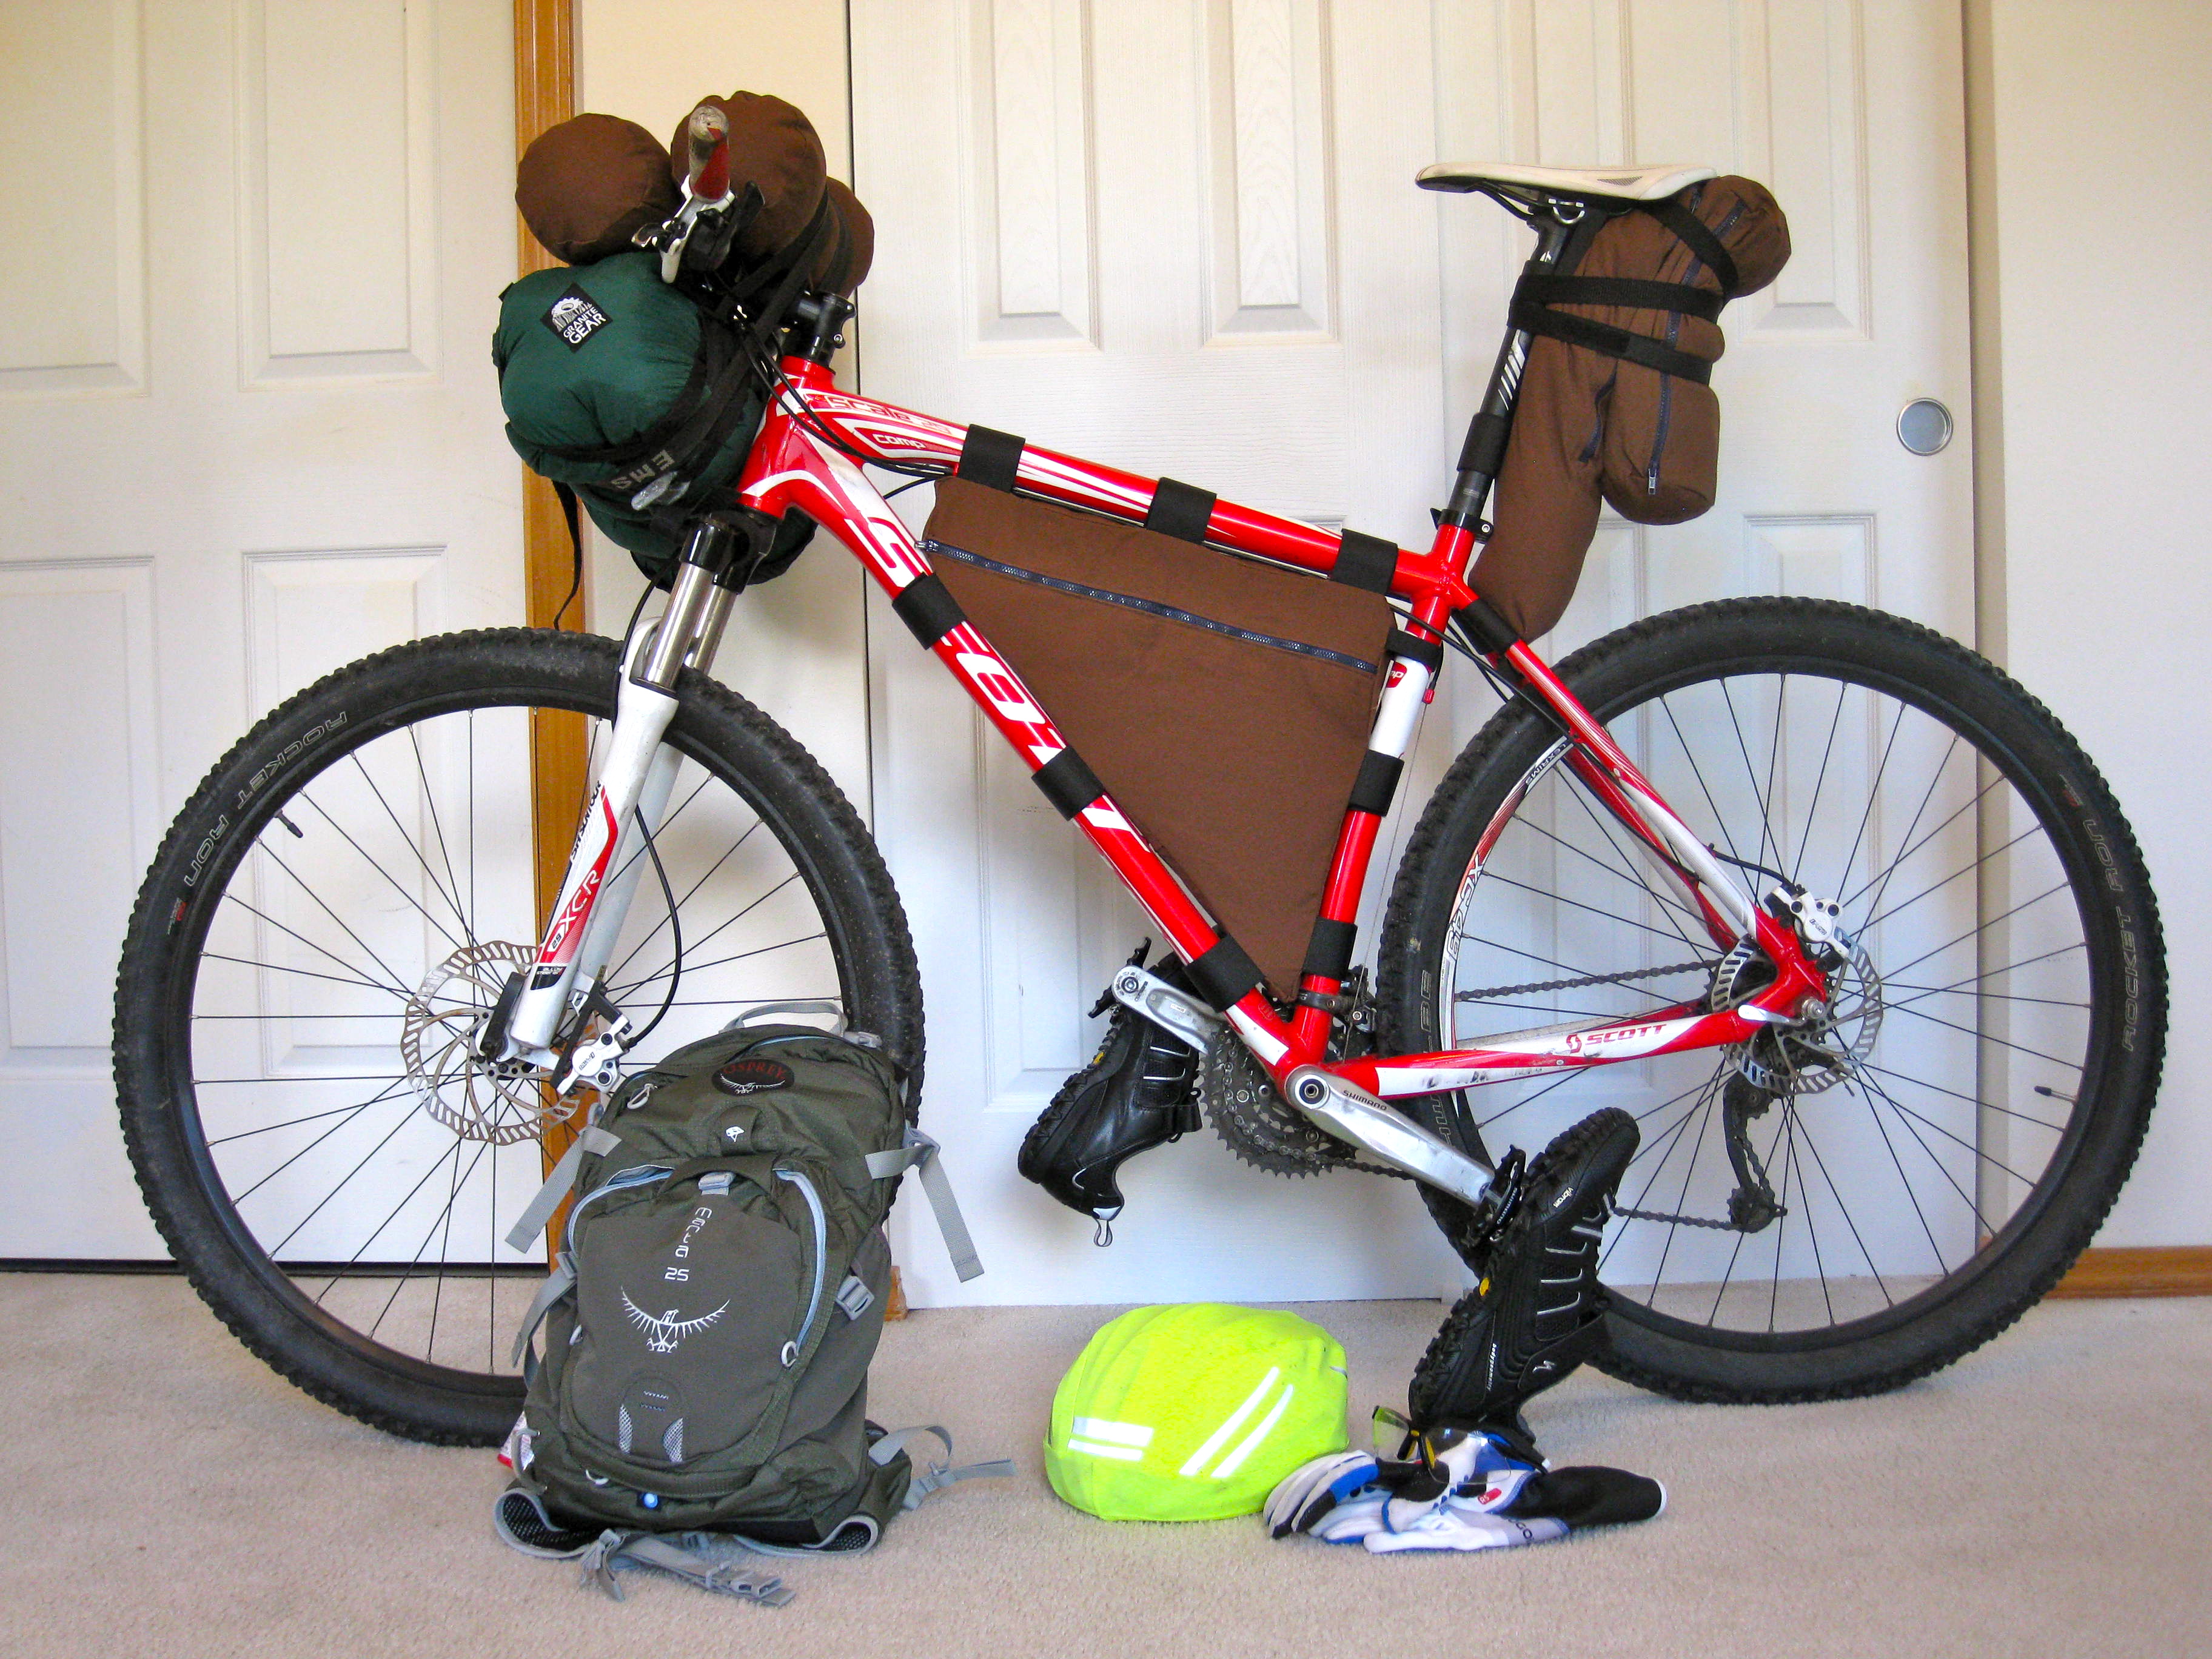
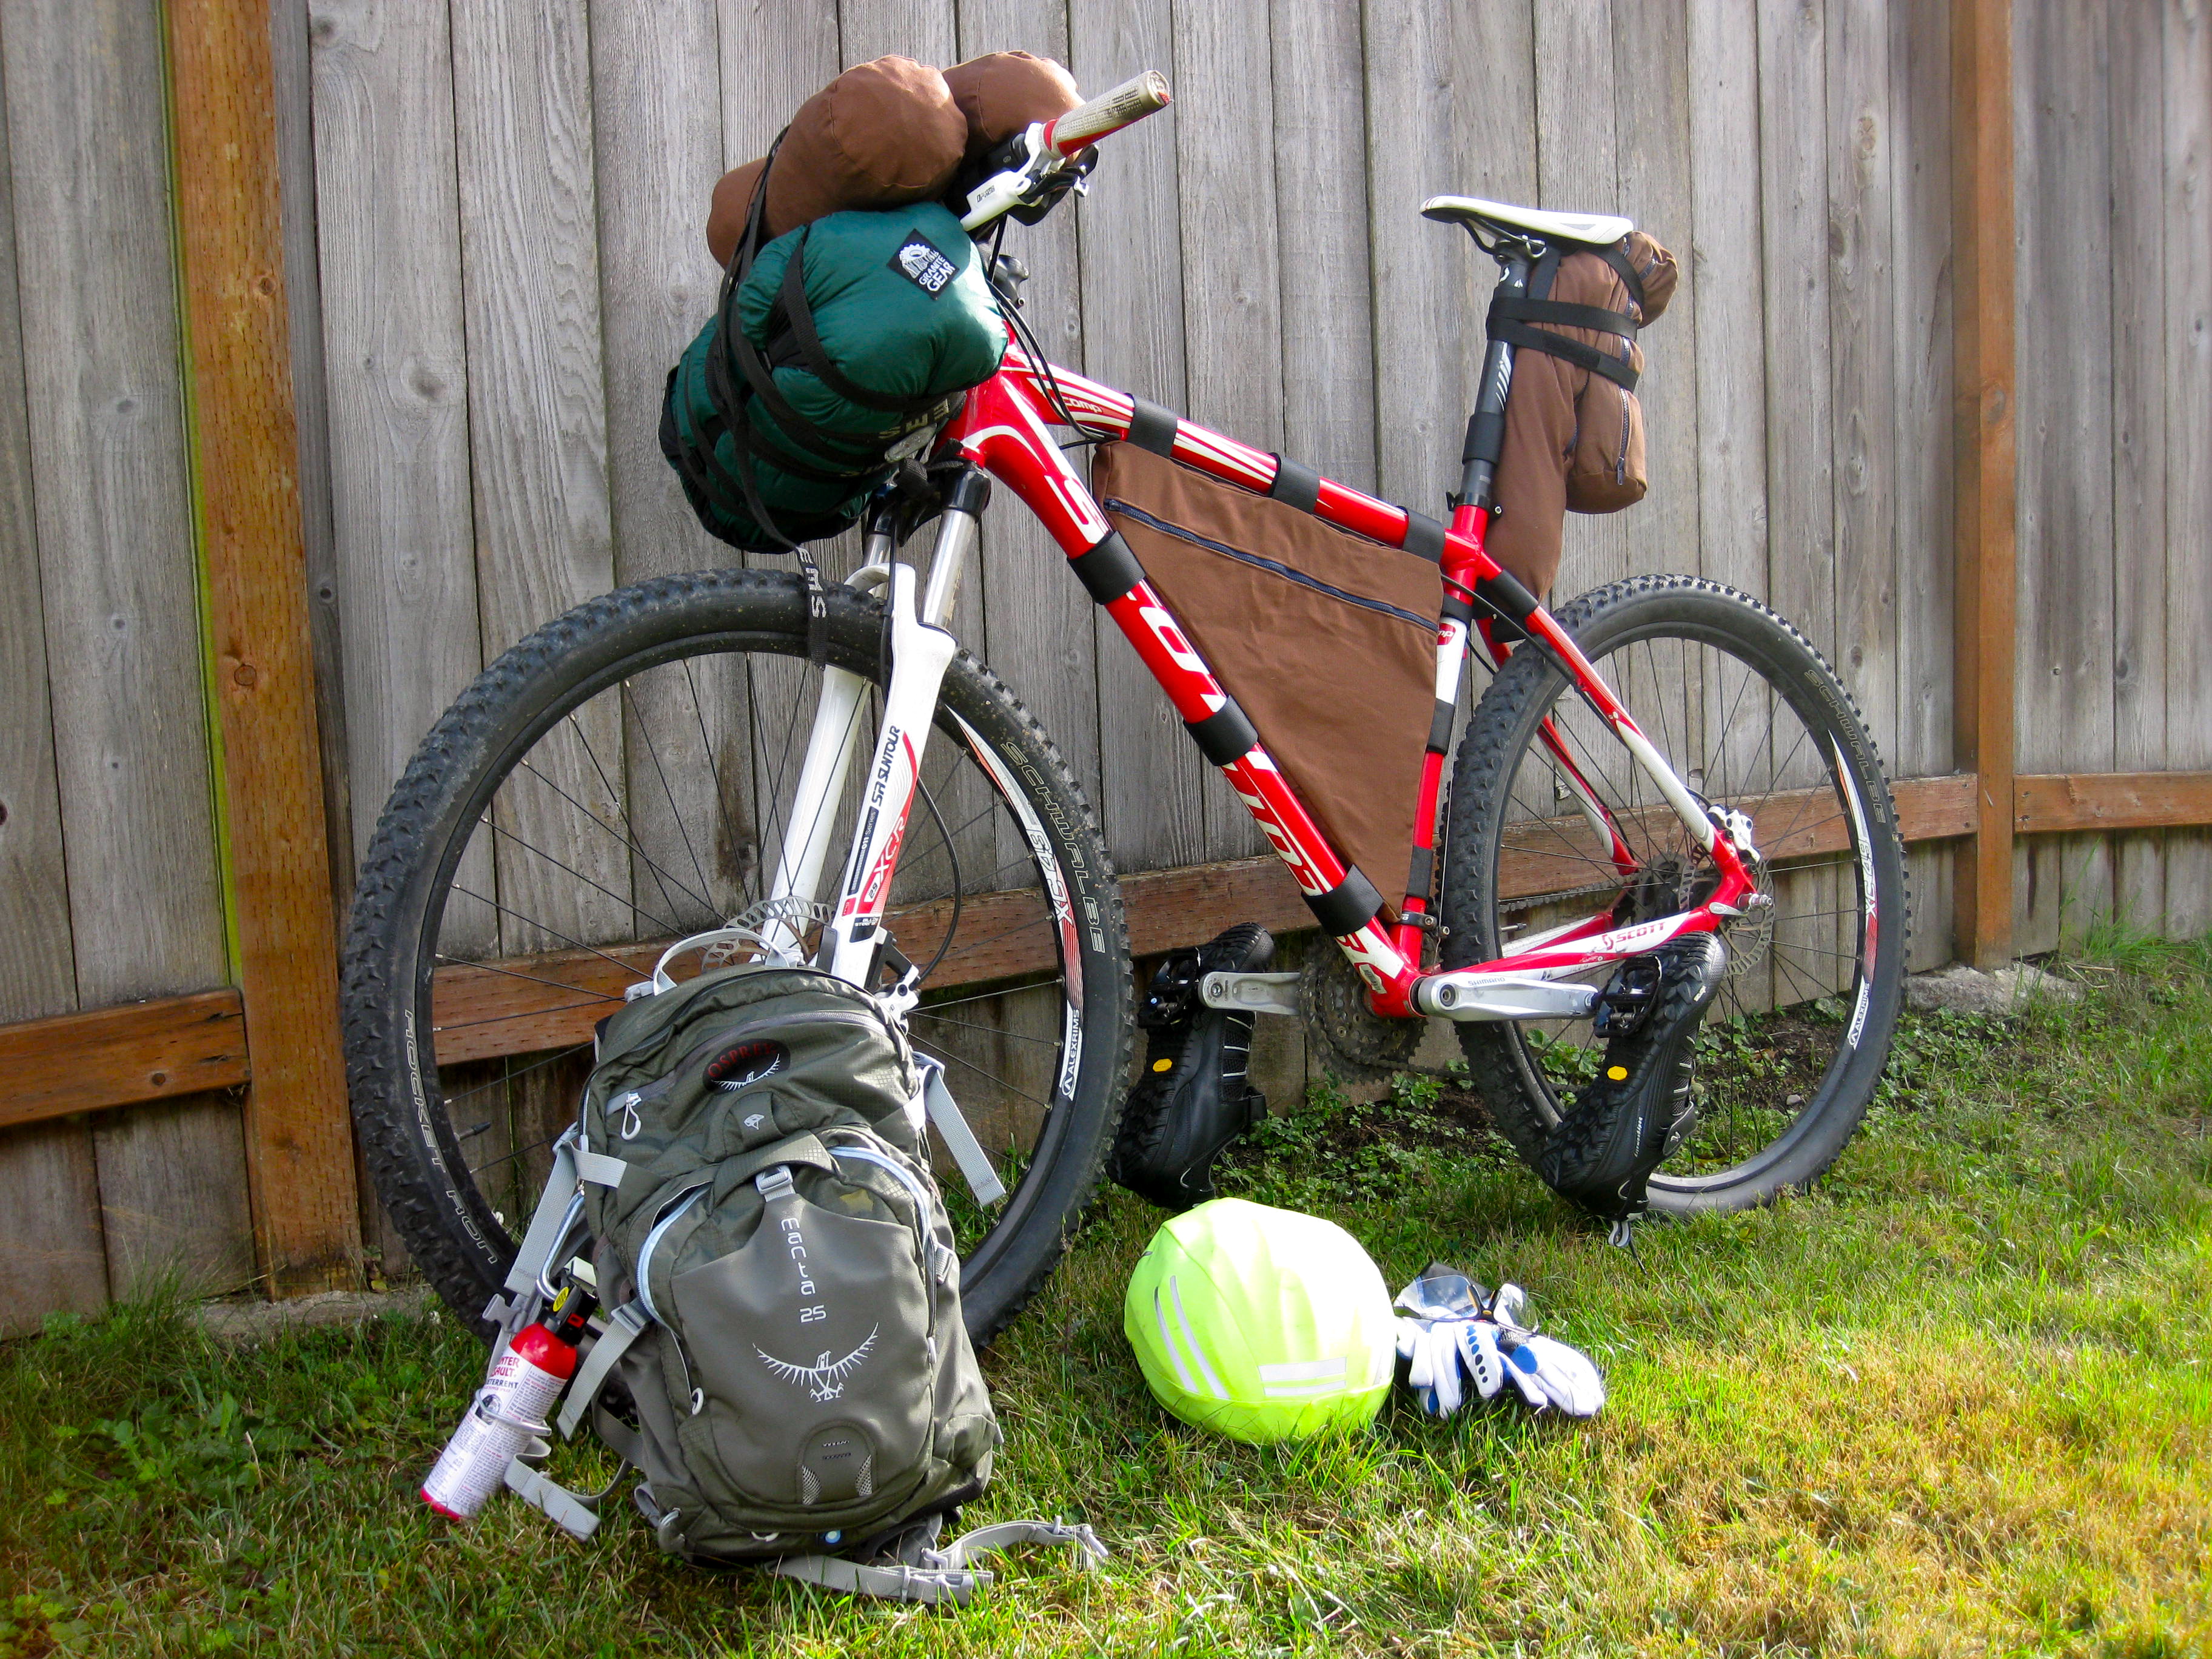
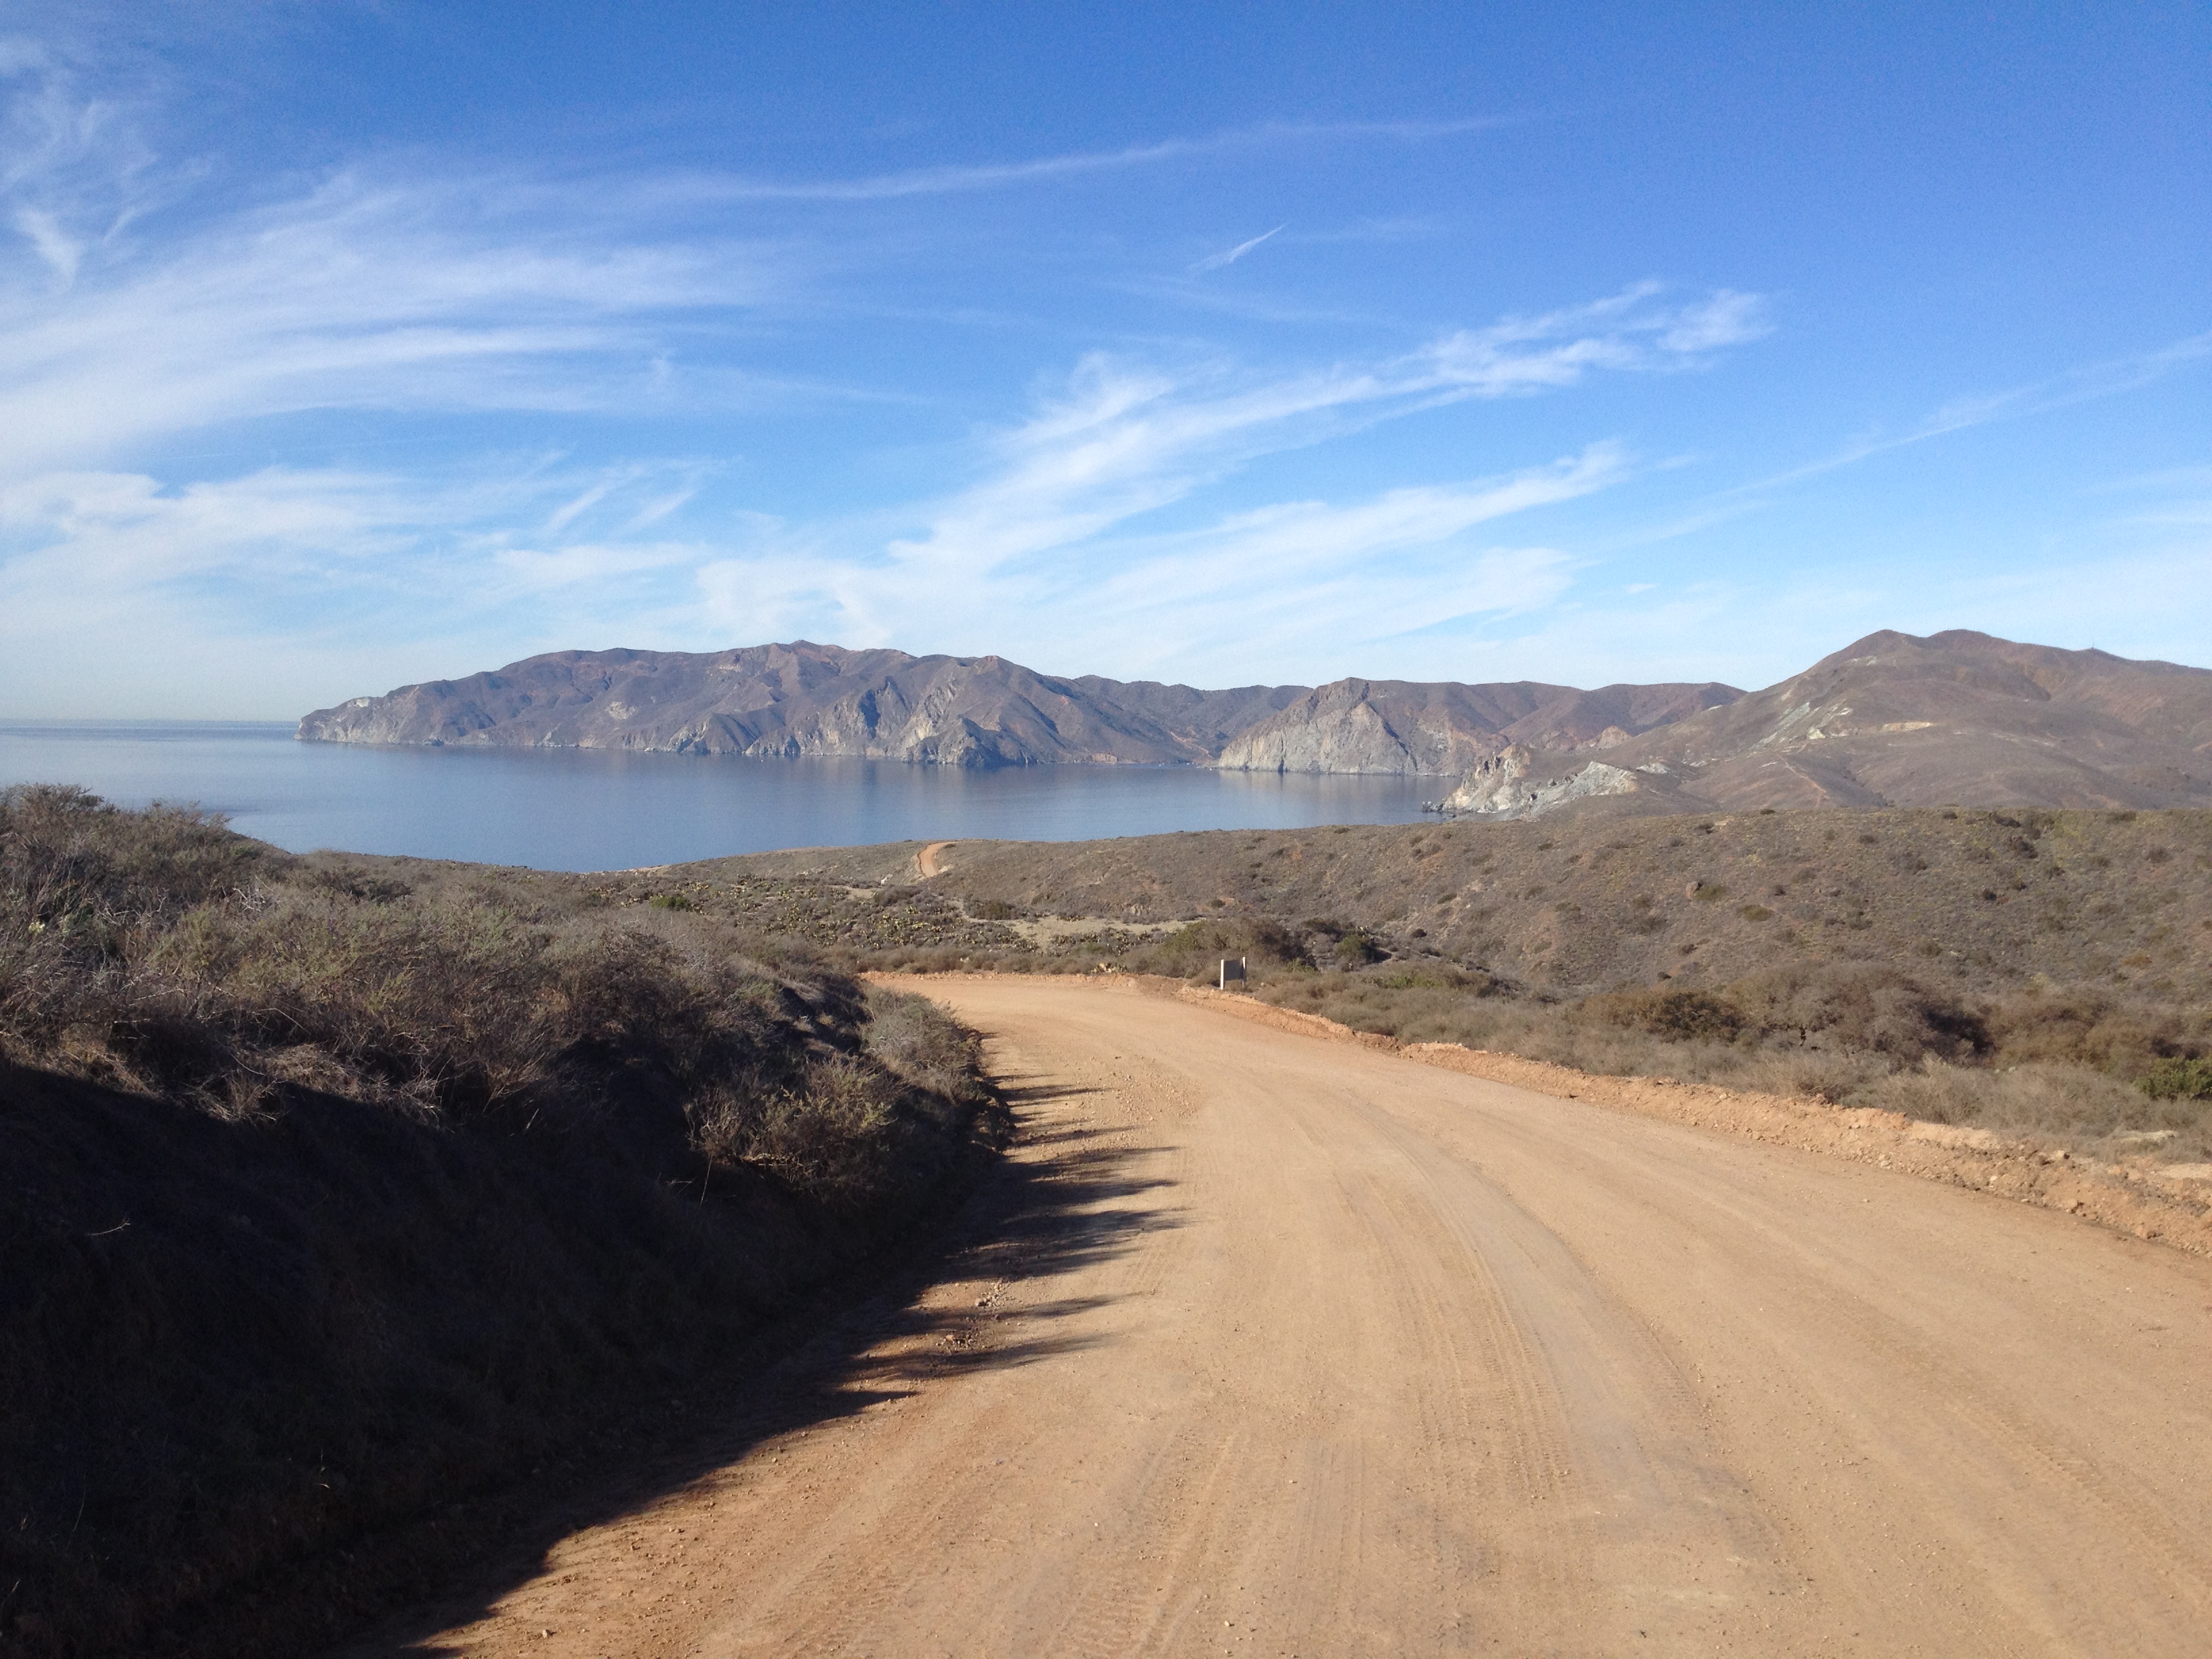
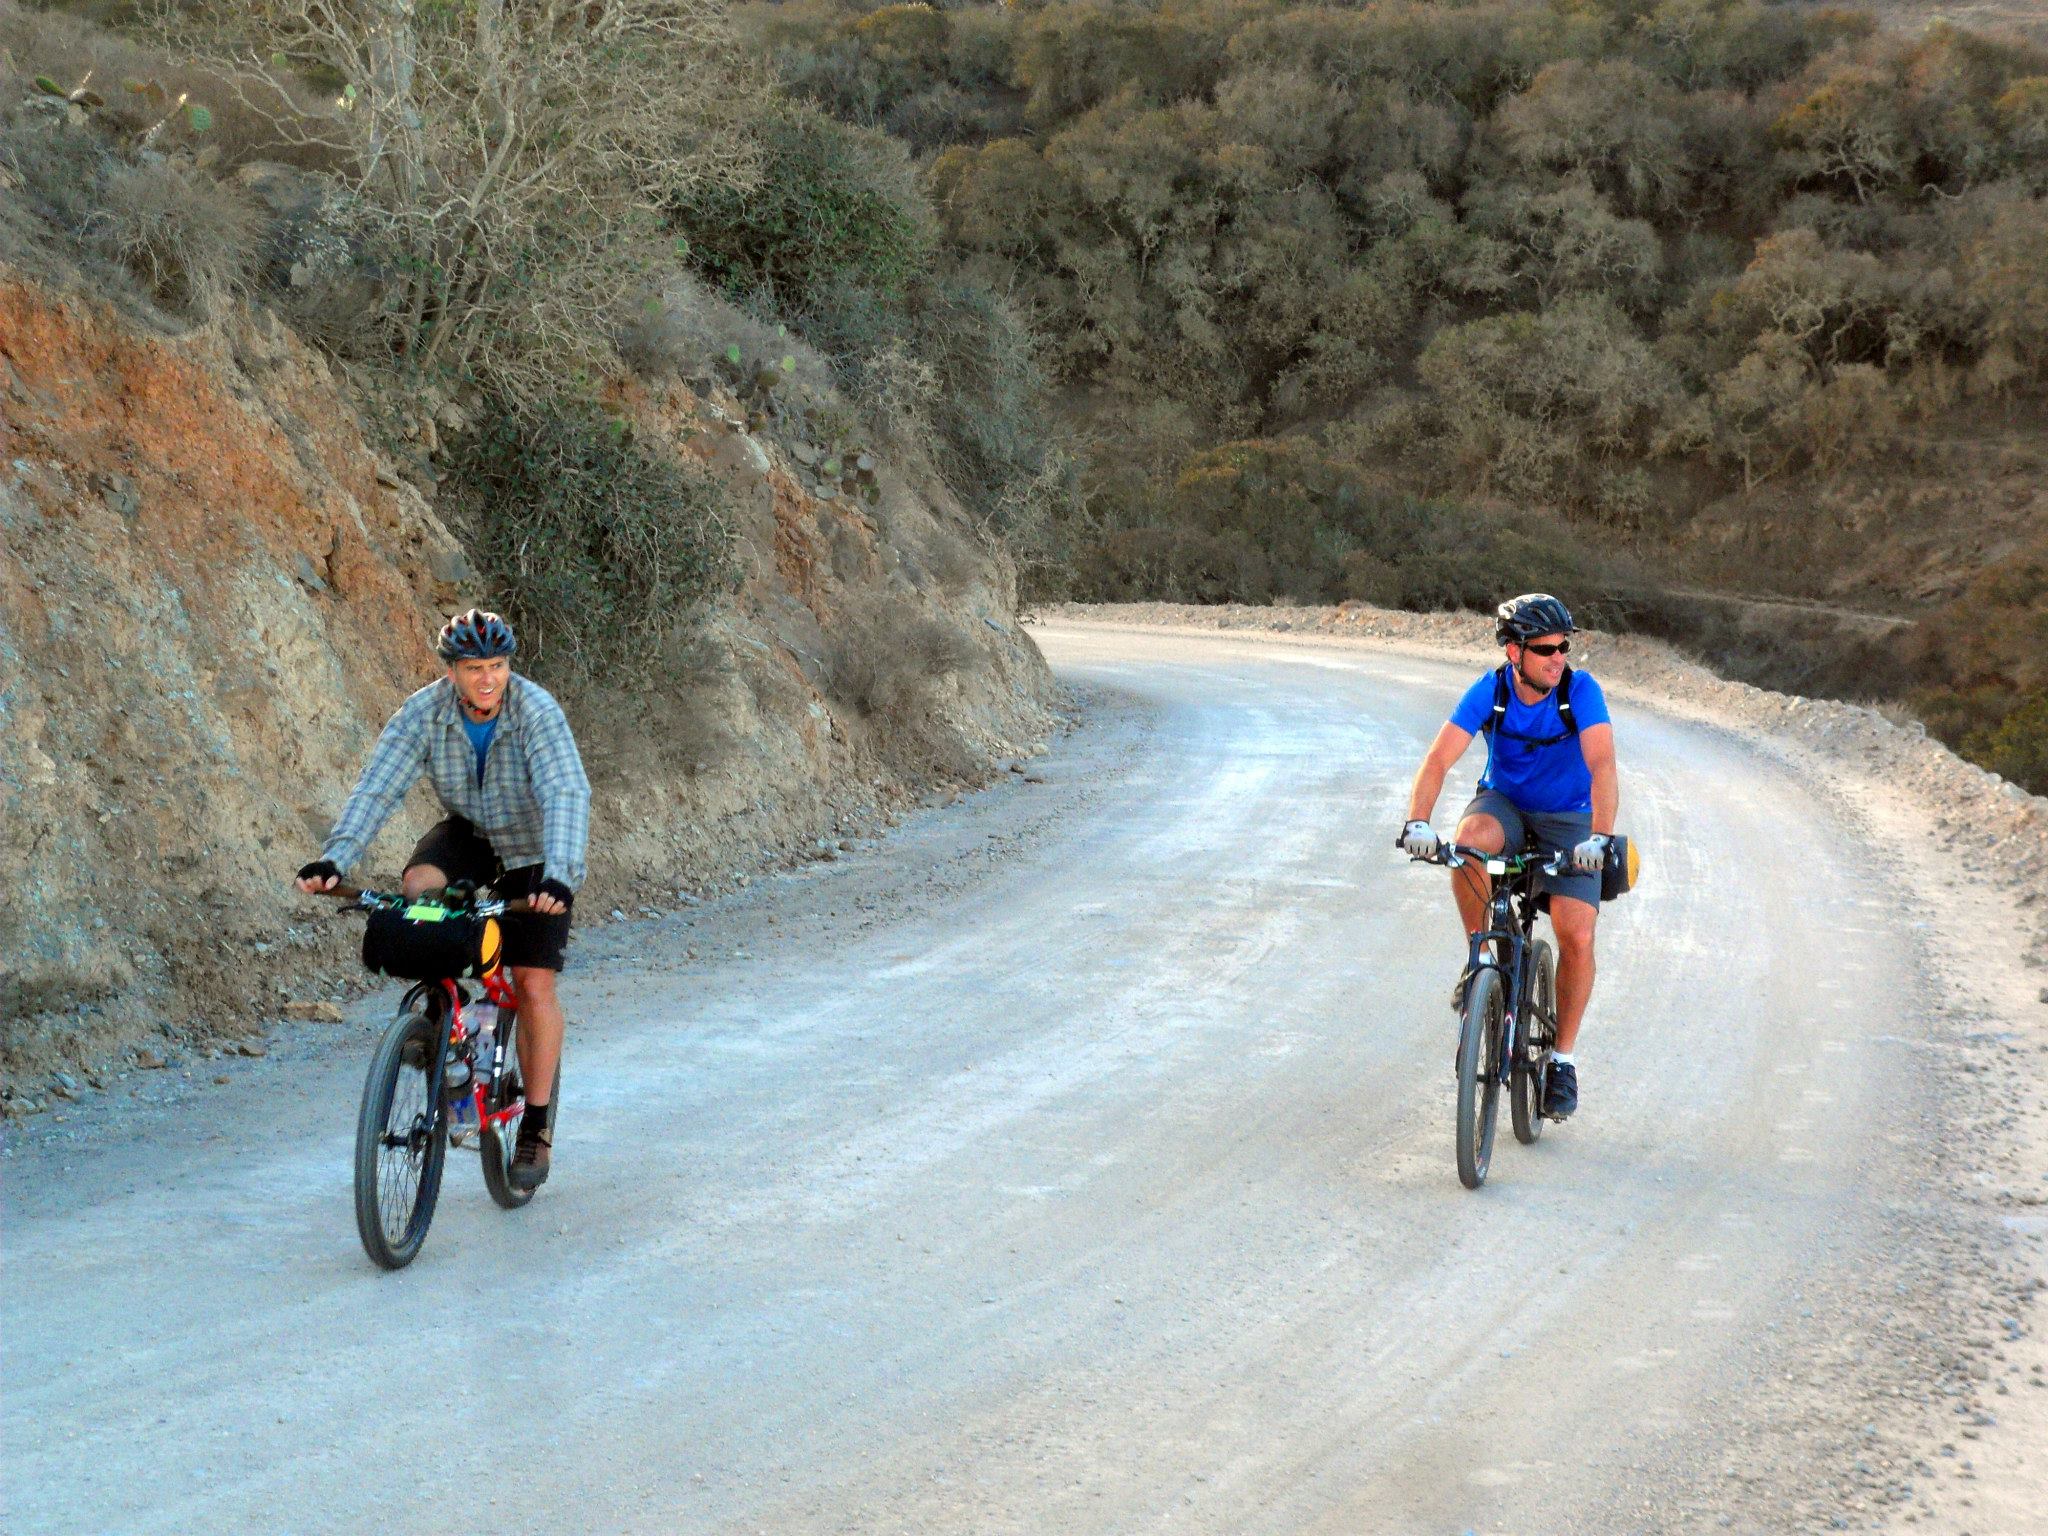
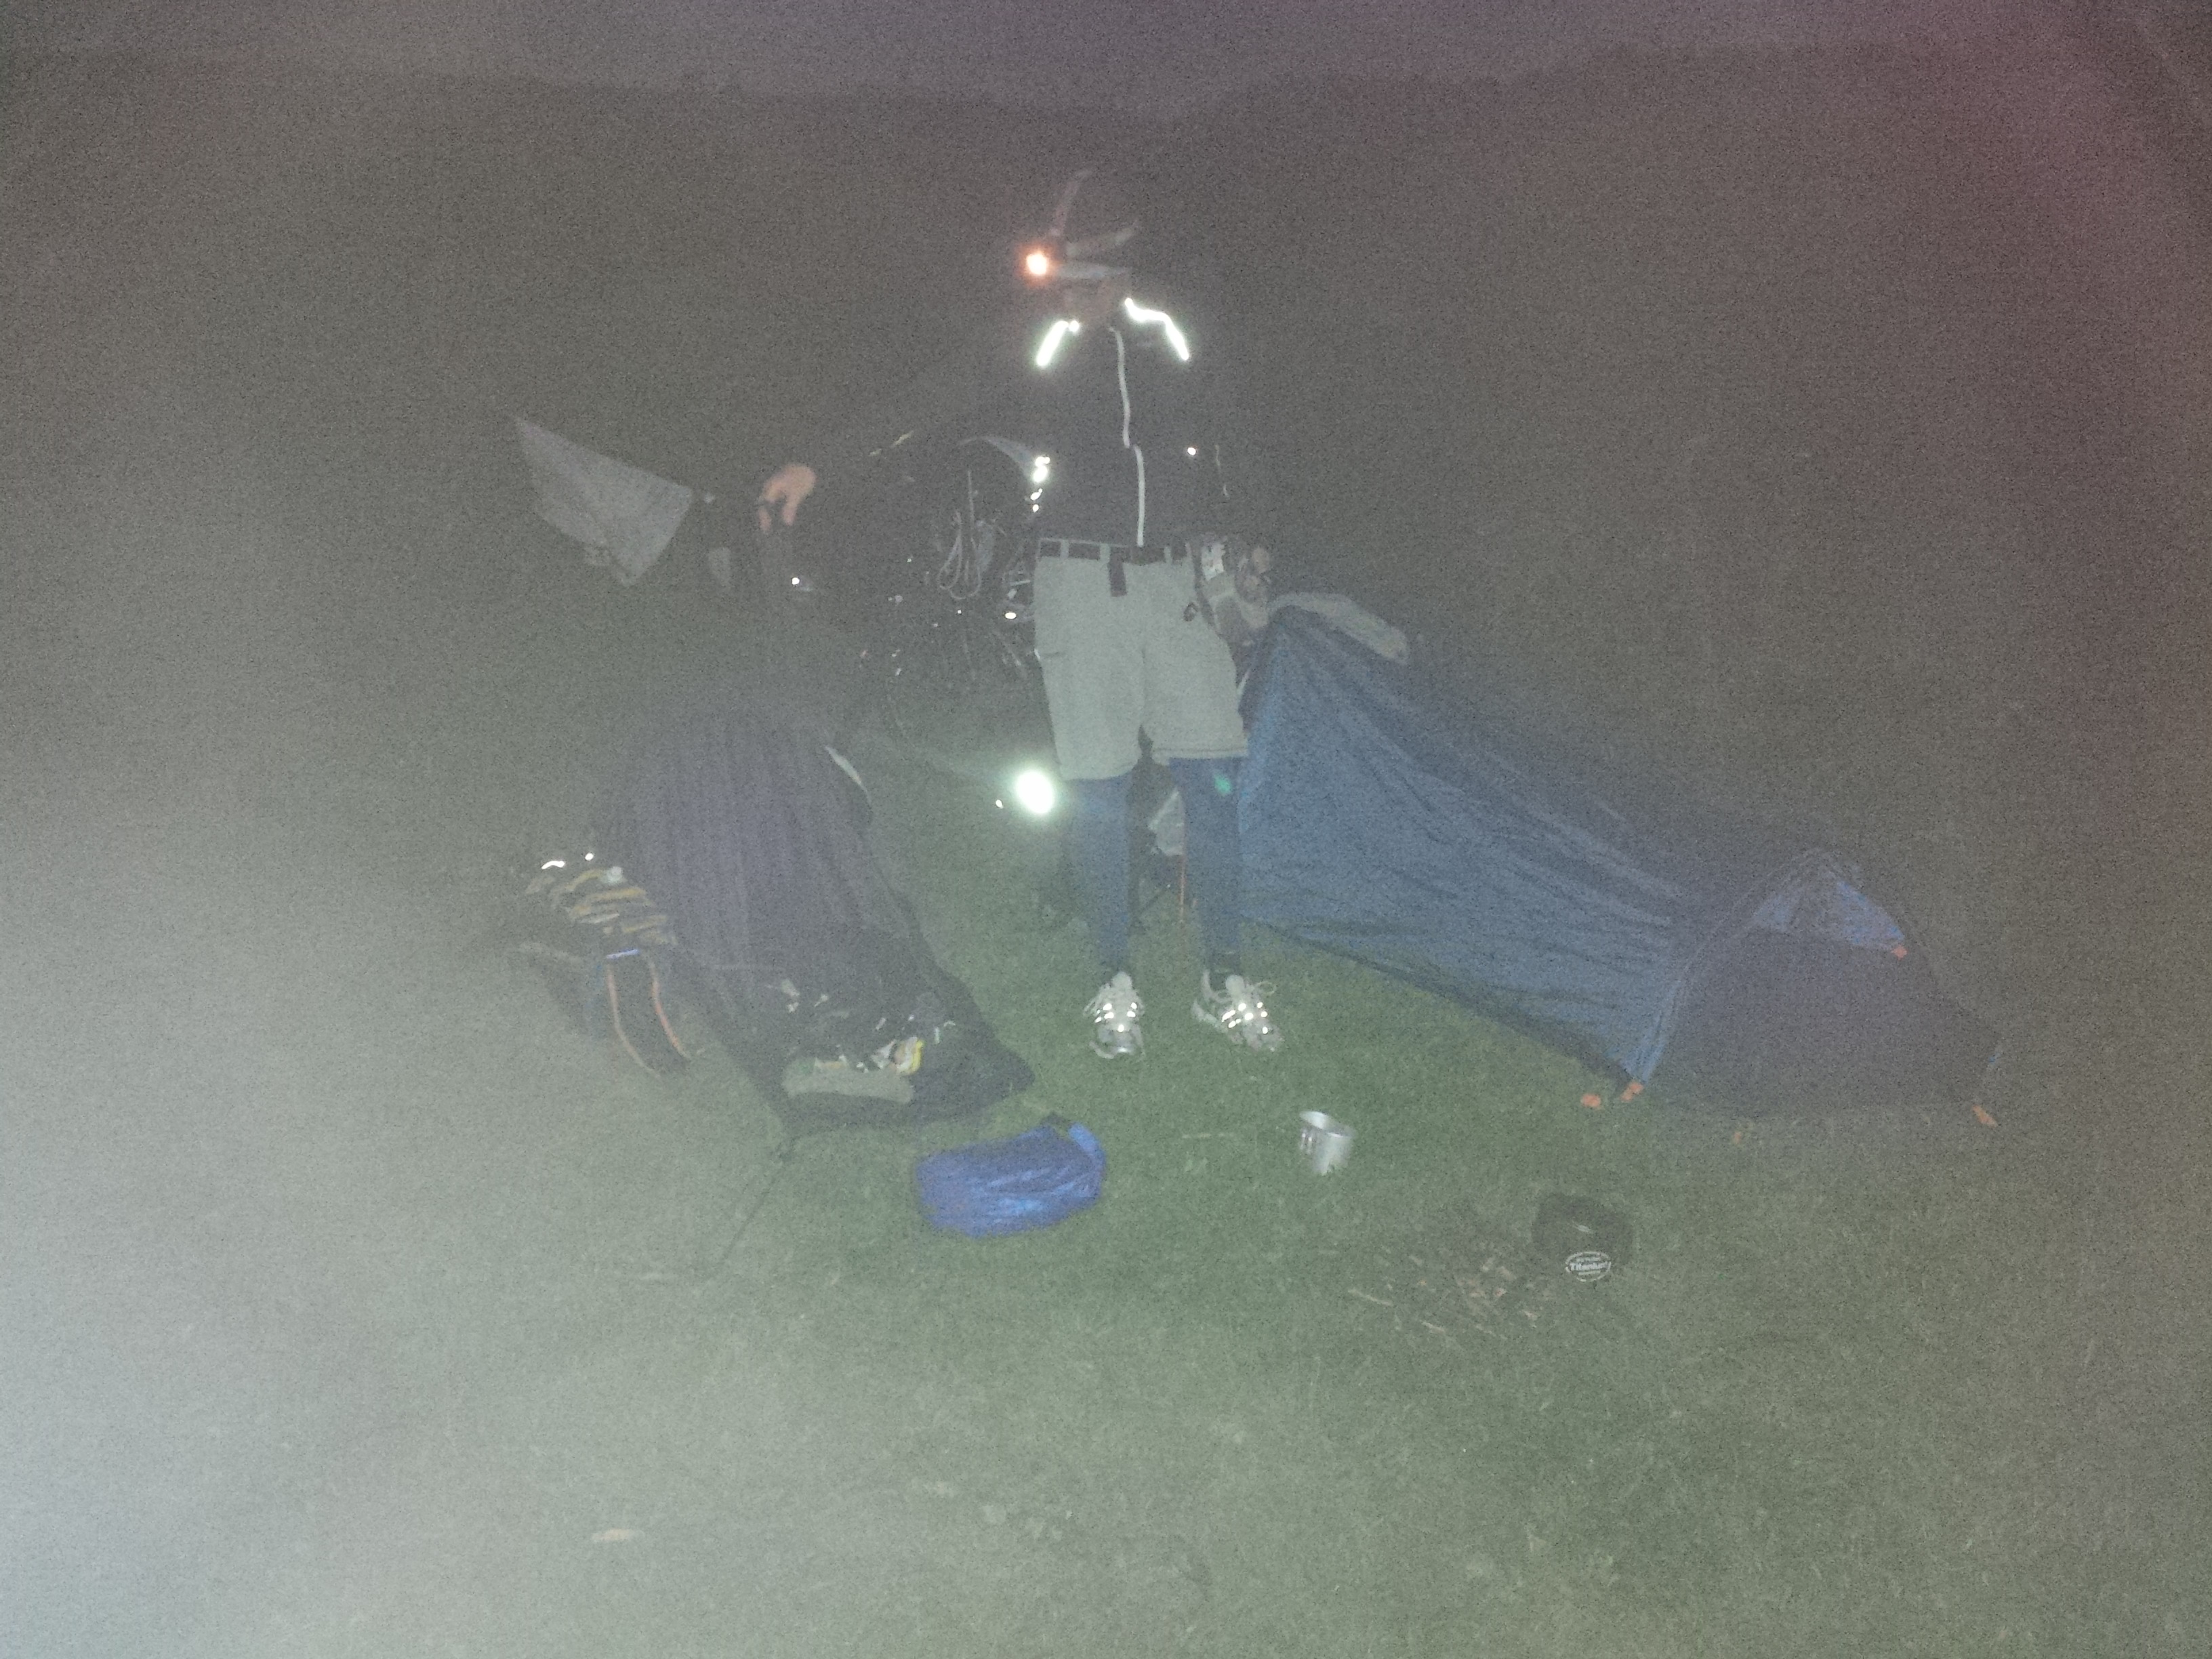
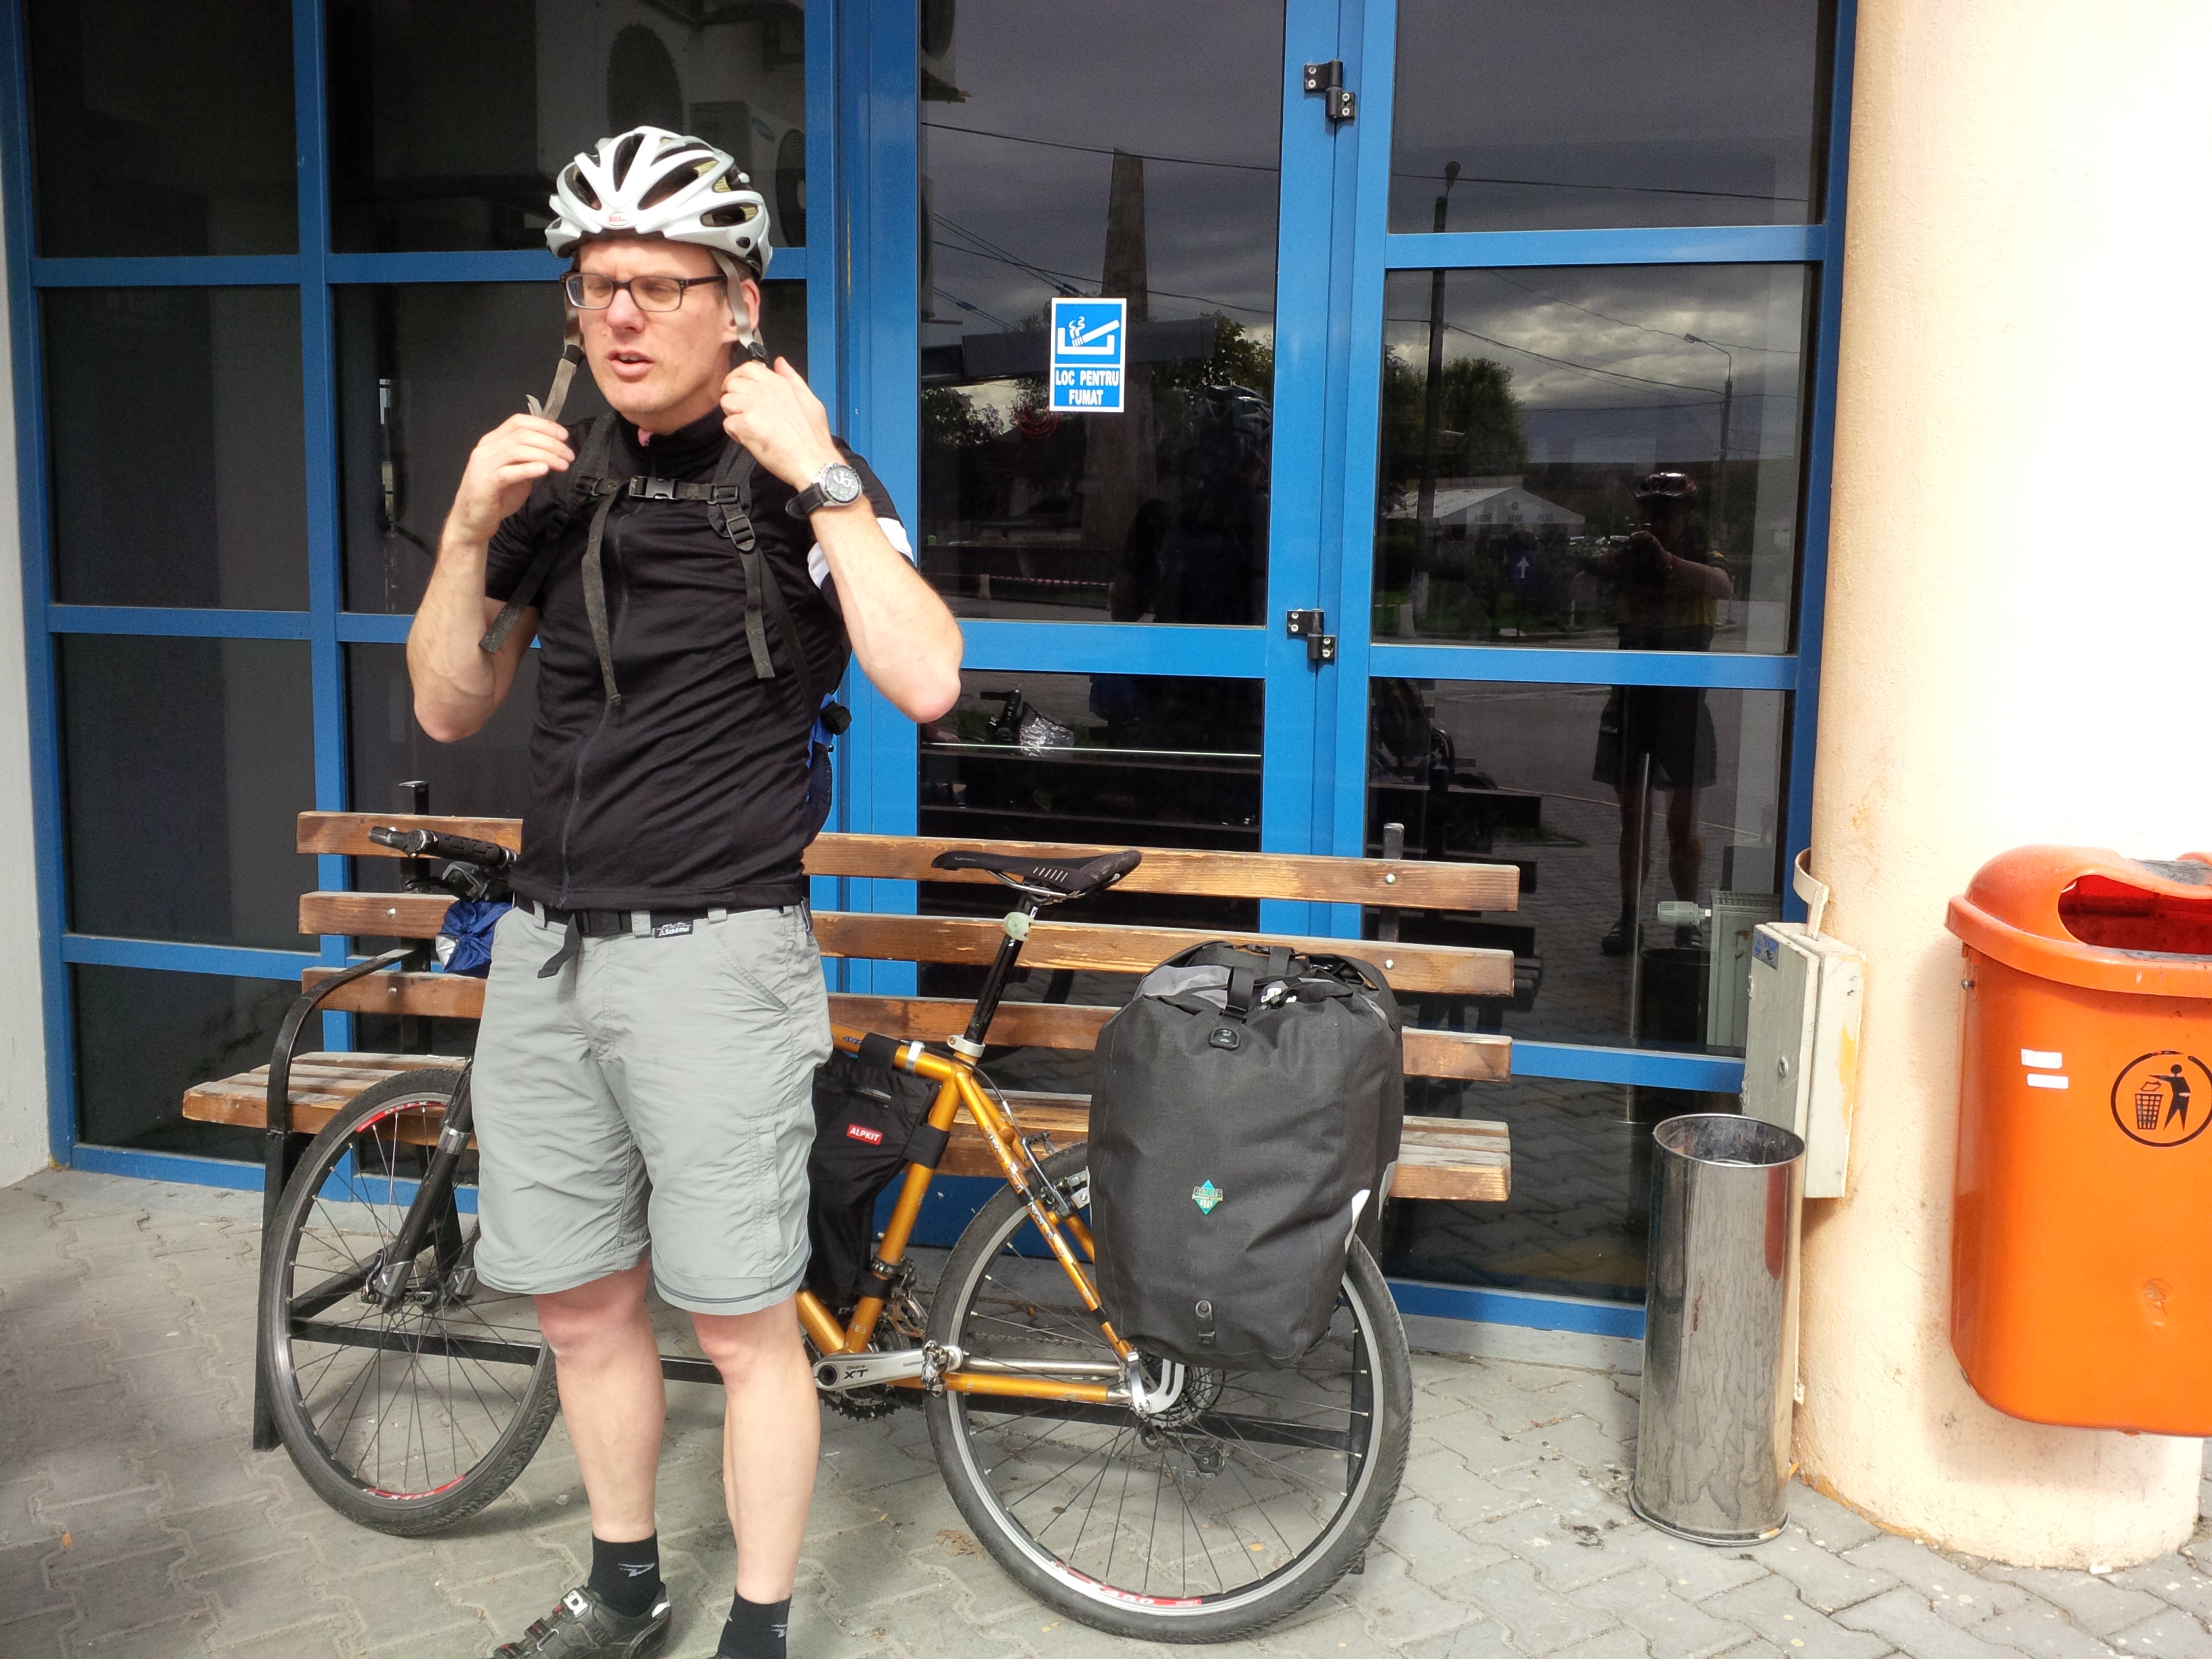
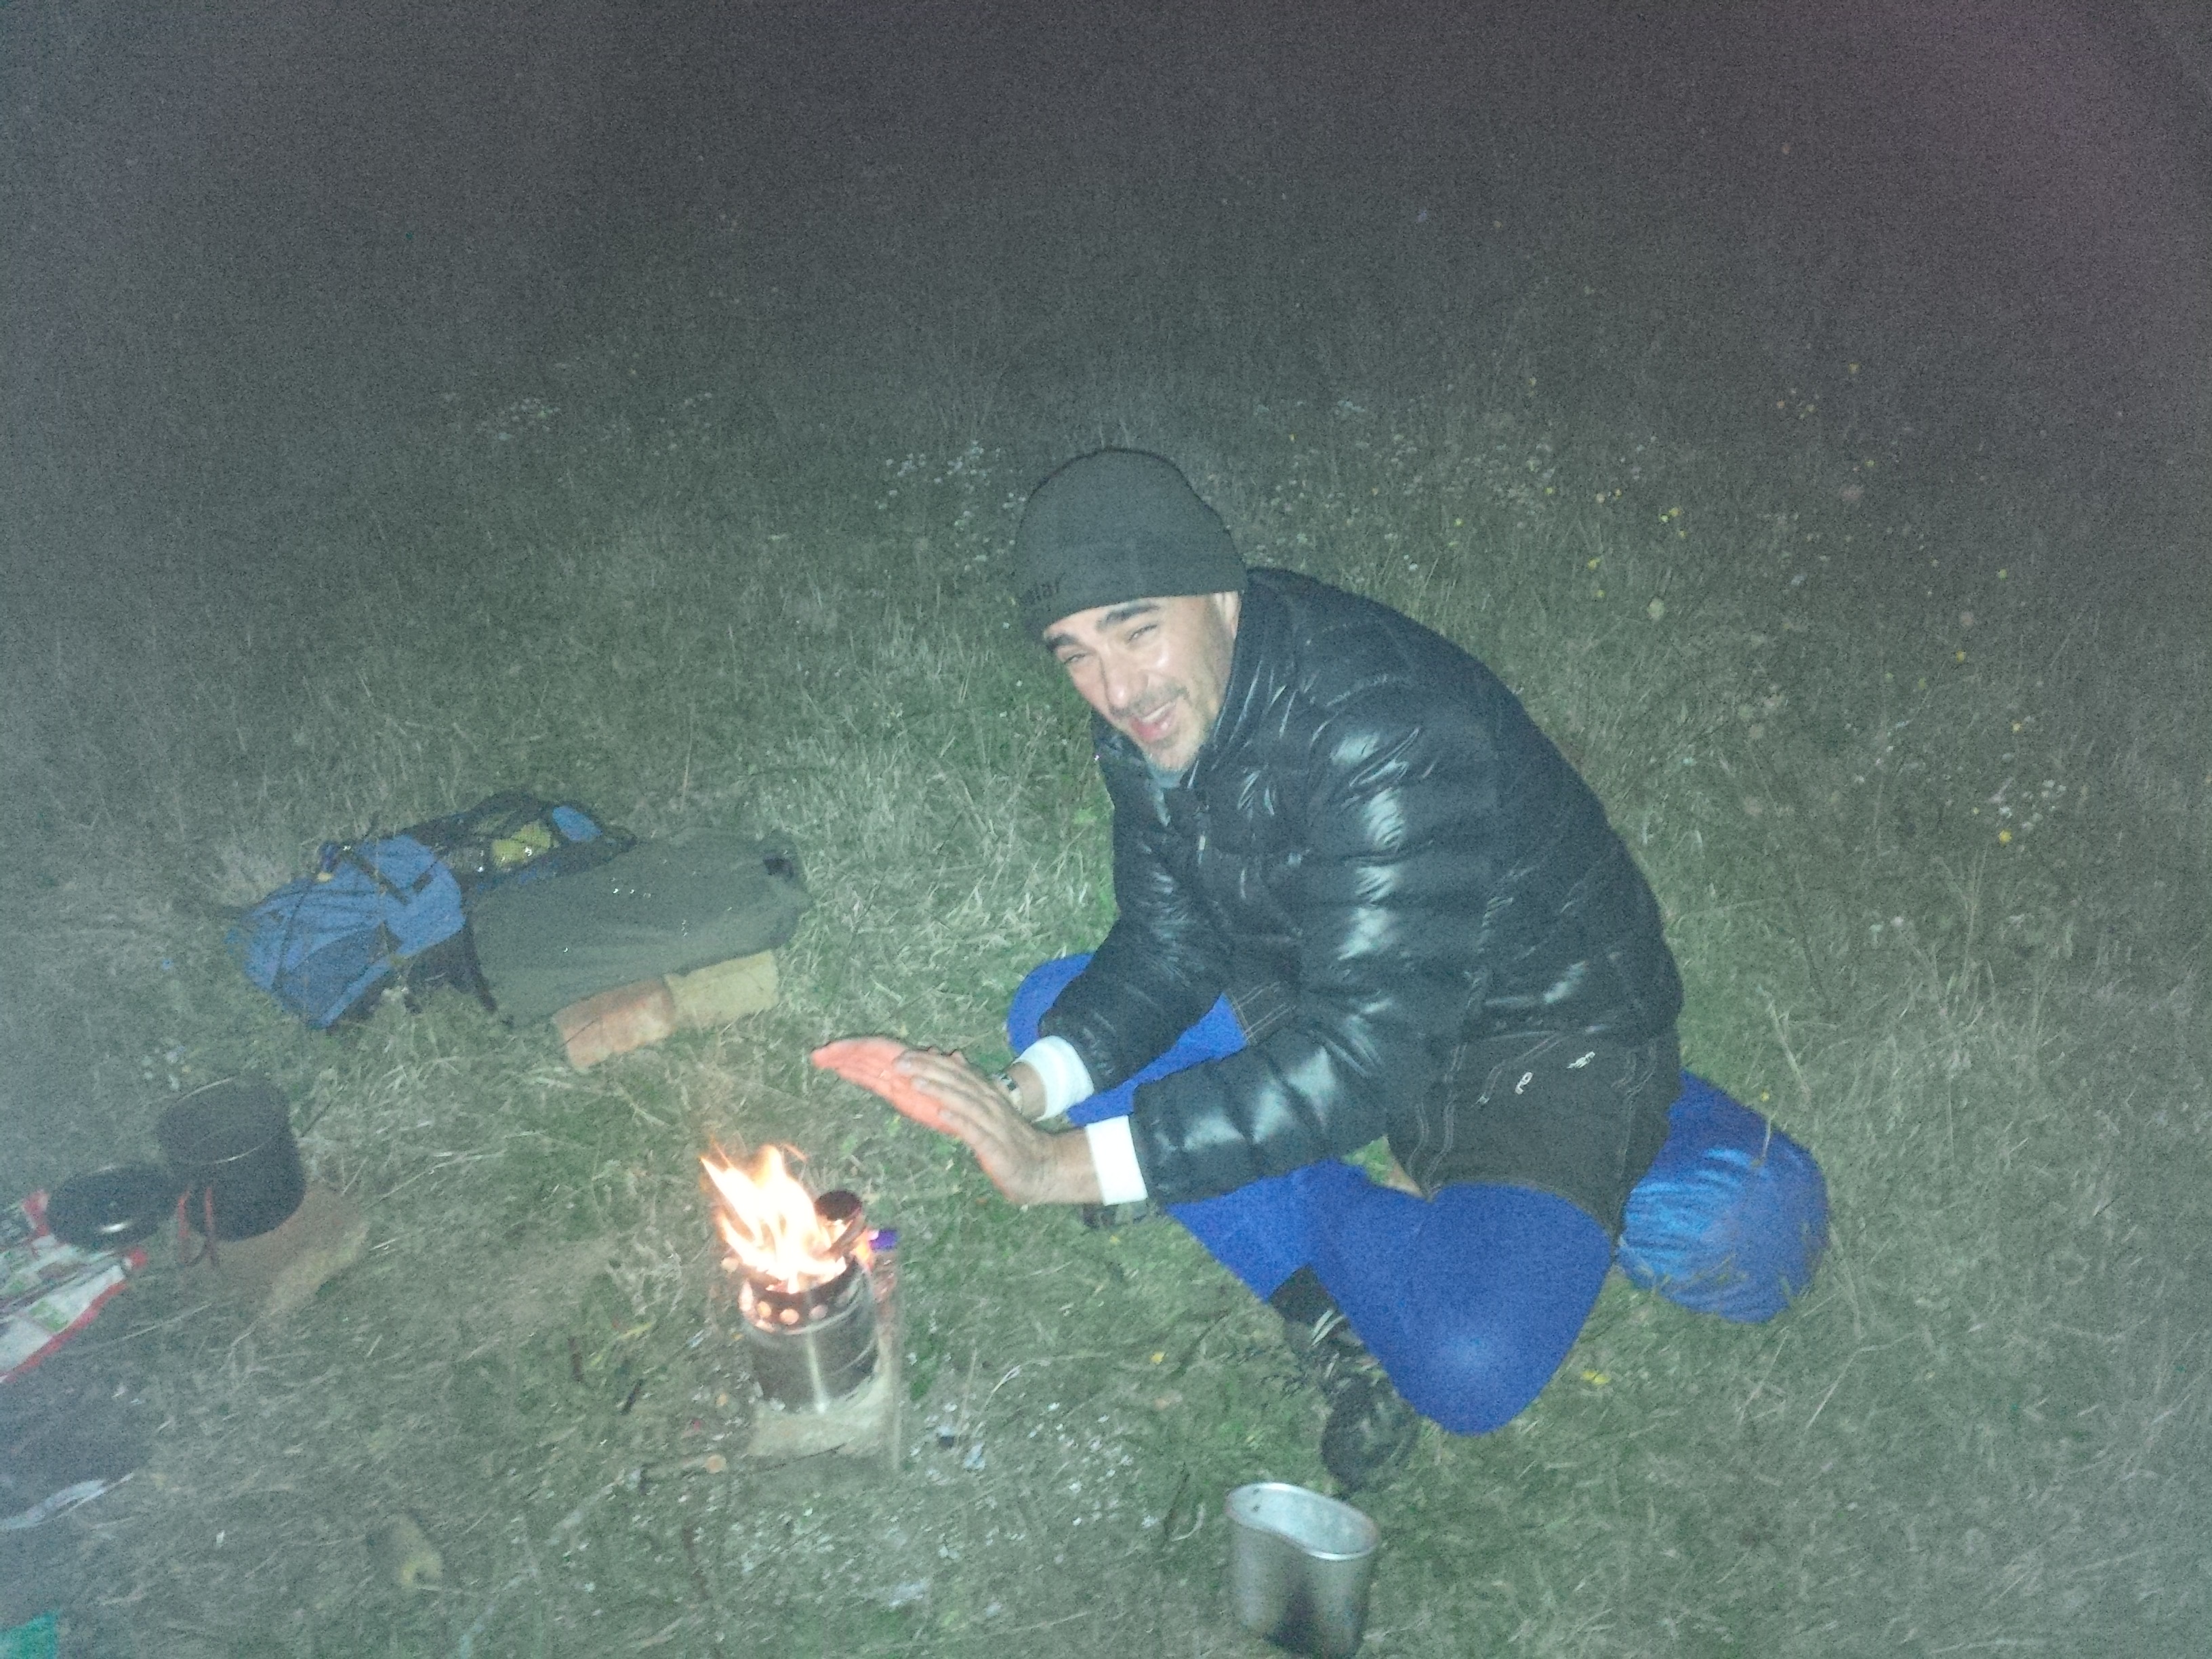
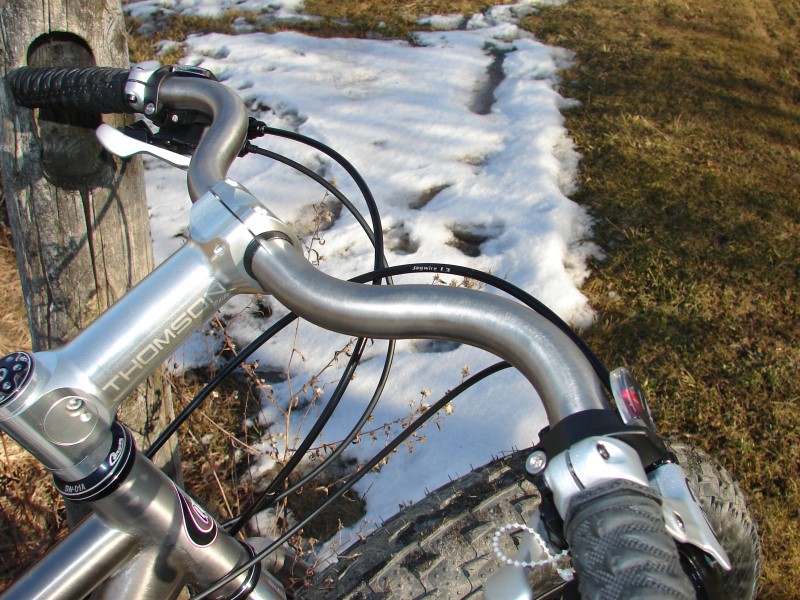
I left my driveway with a mind reeling with gear lists, lists of lists, and months of planning. Was I
forgetting anything? I was leaving for a part of the country I know absolutely nothing about. I was about
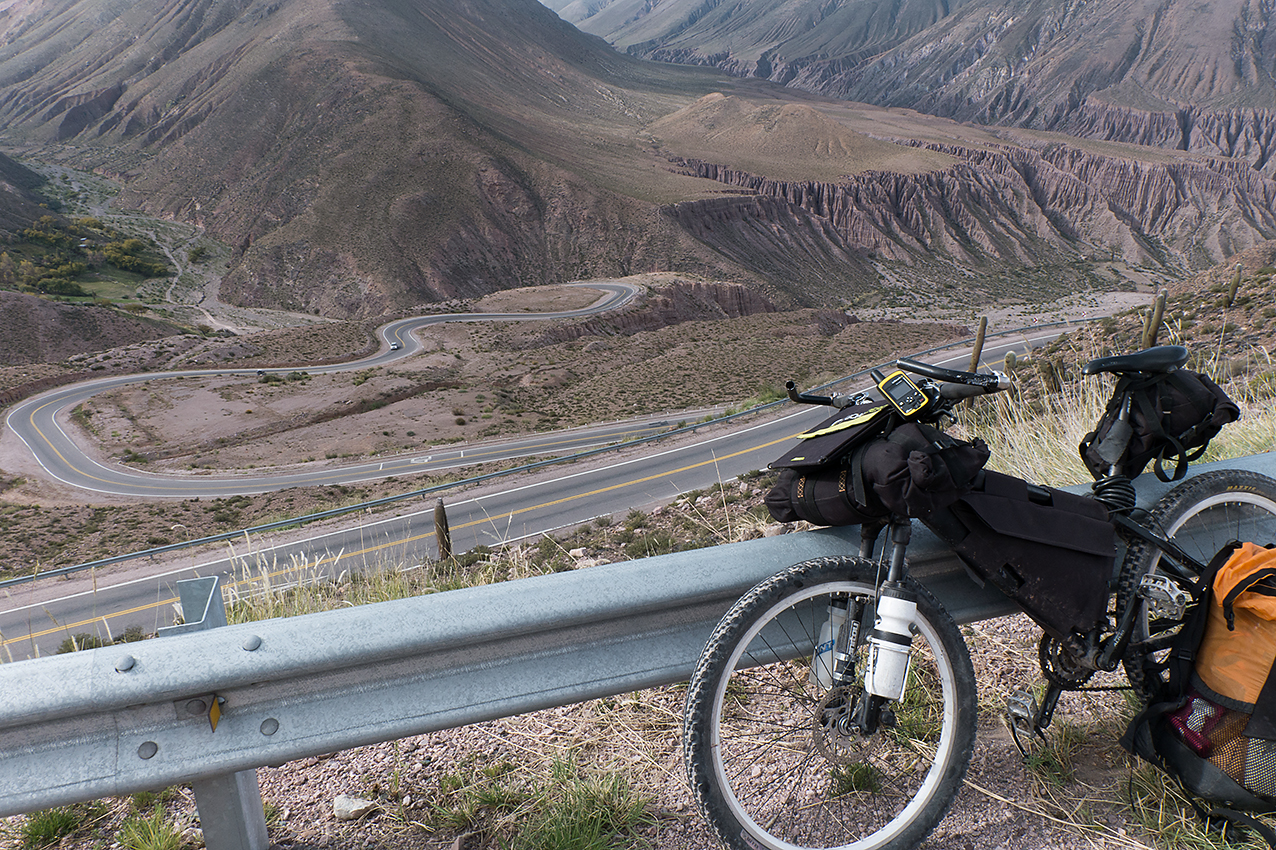
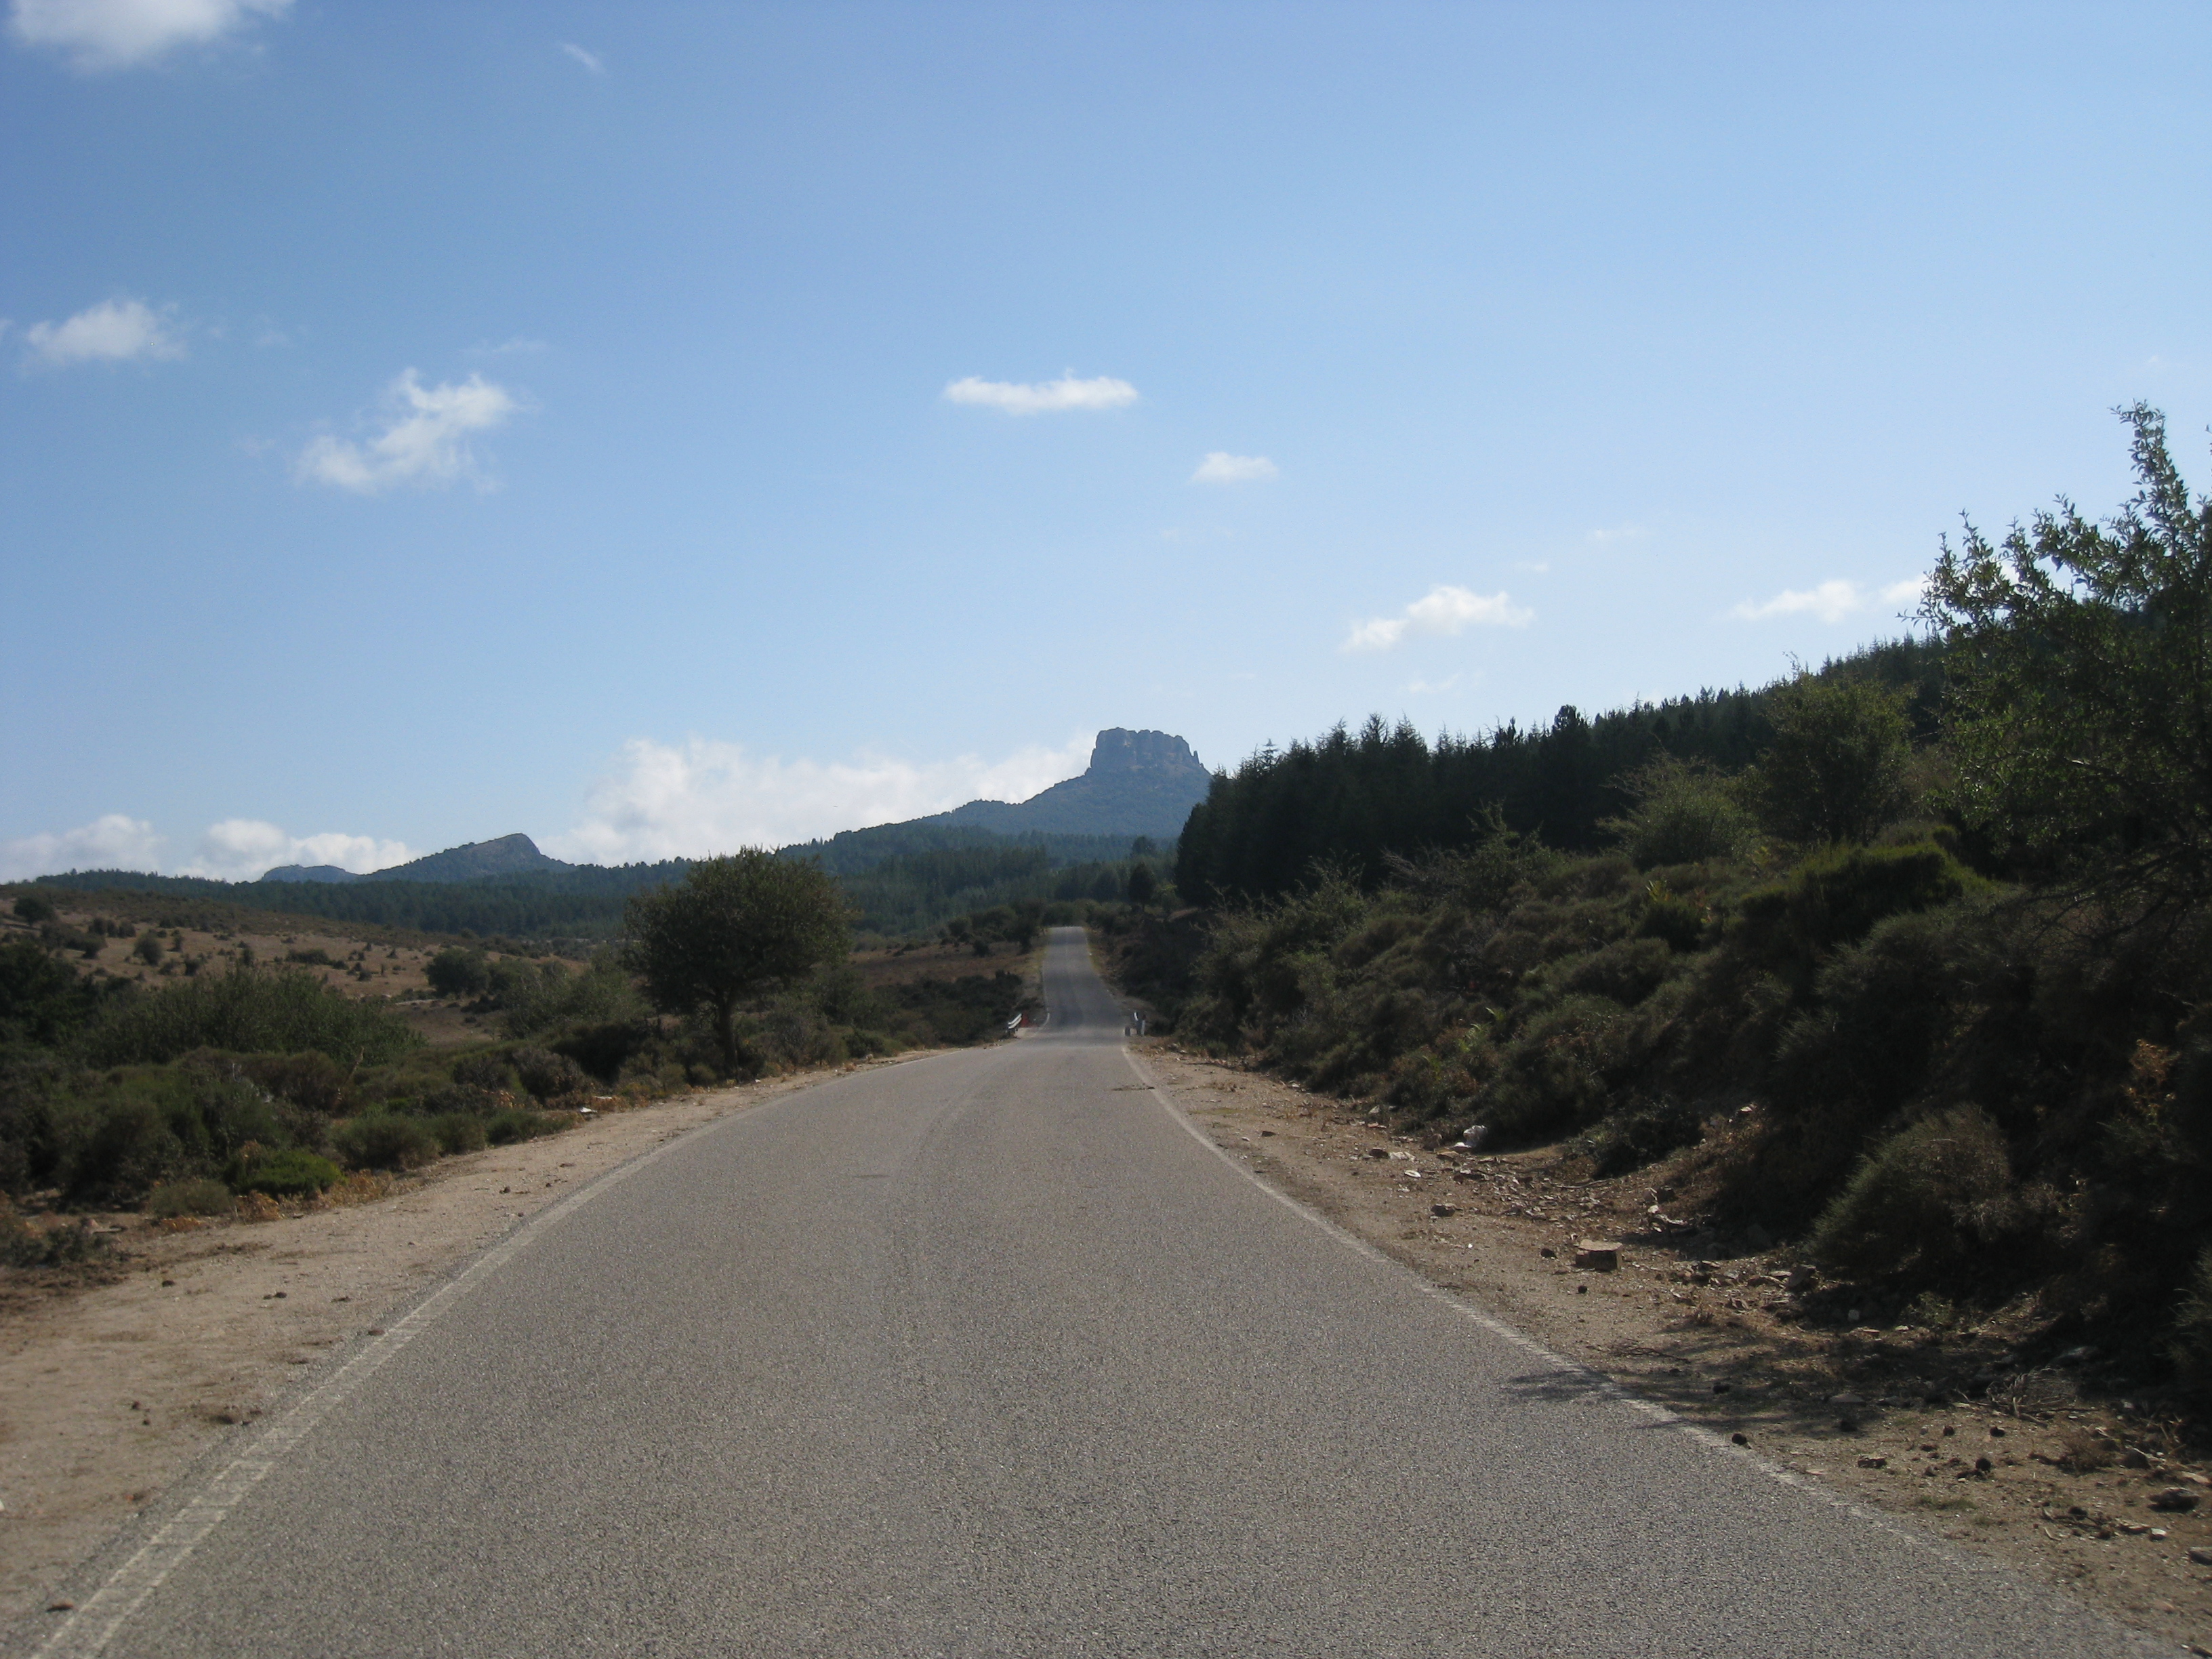
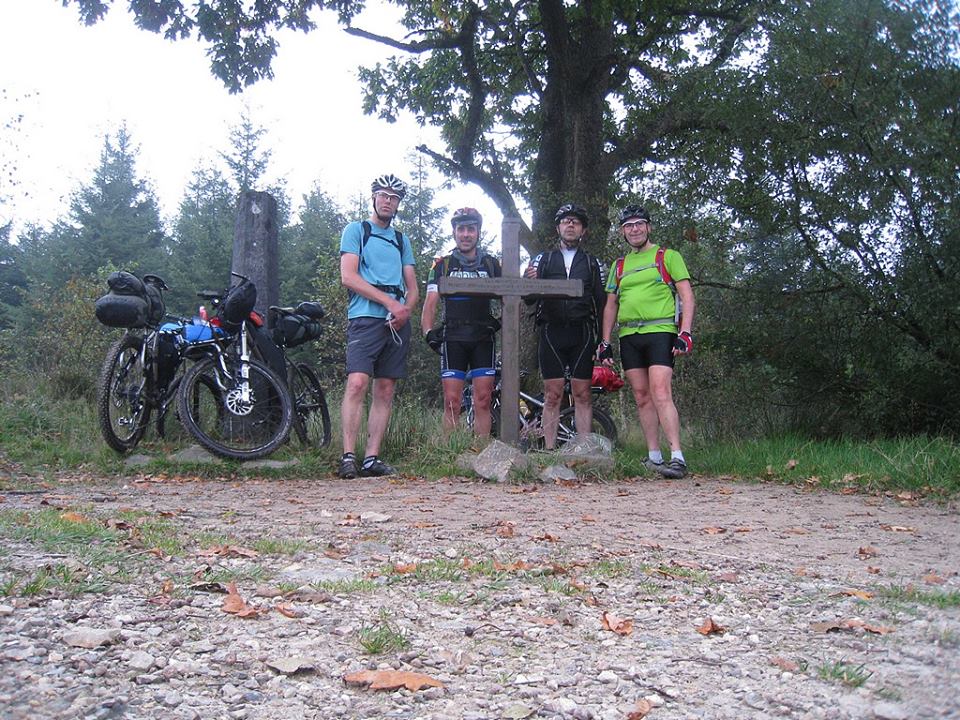
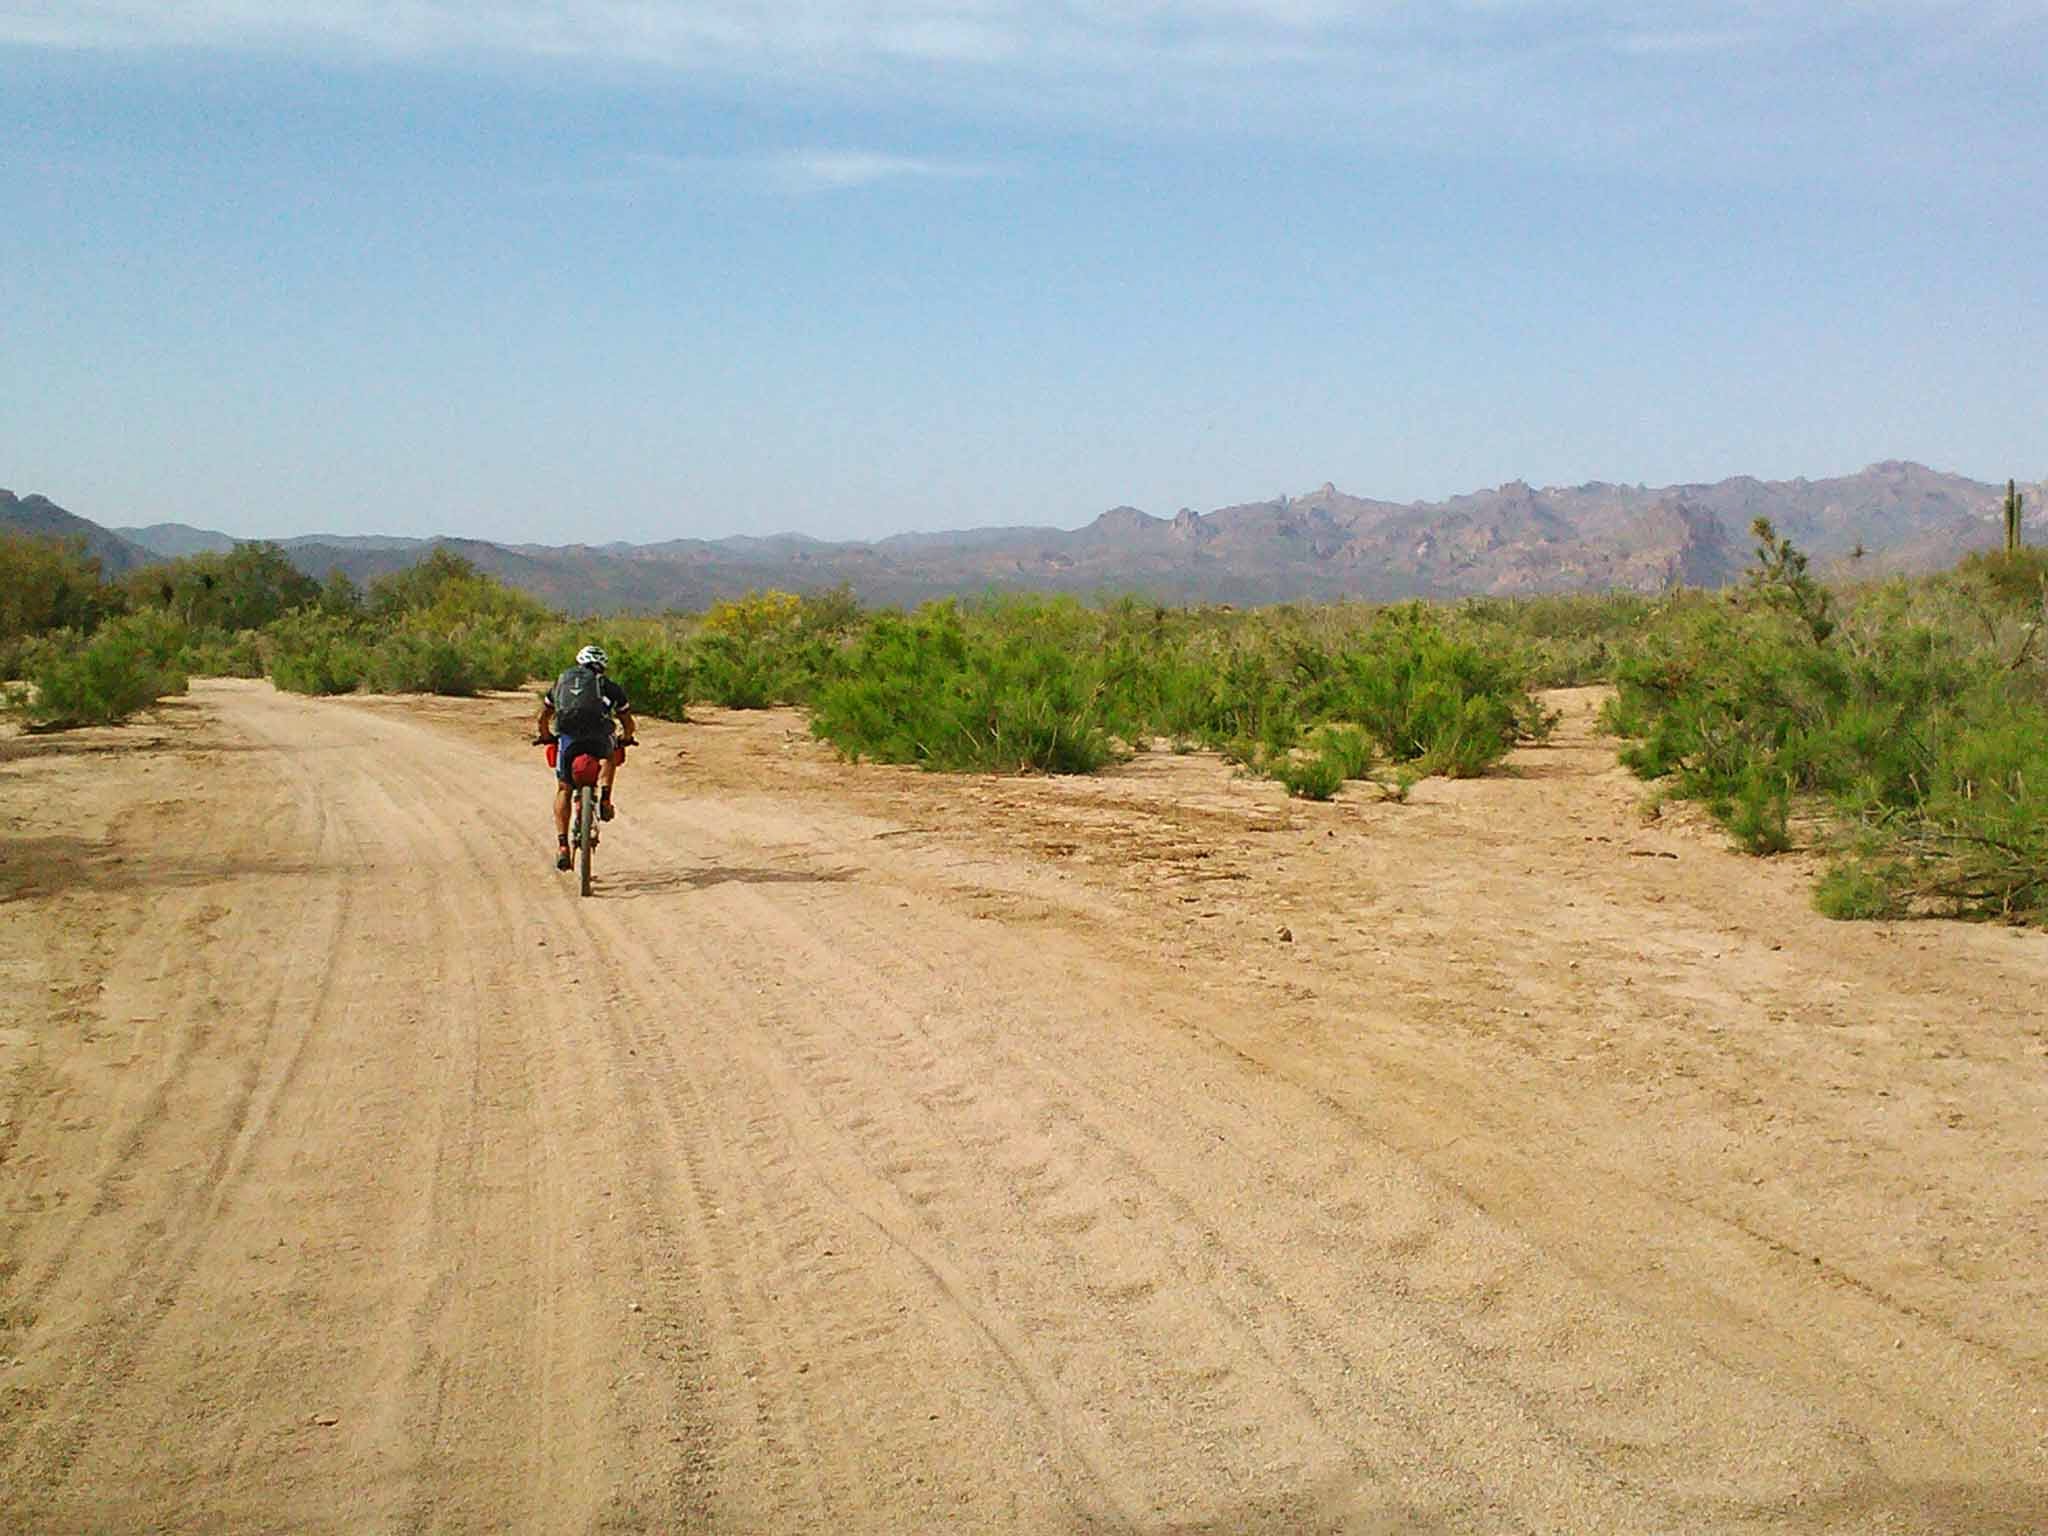
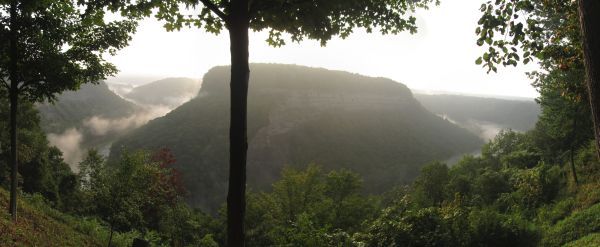
to ride the Trans North Georgia Adventure (TNGA) through the southern Appalachian highlands of
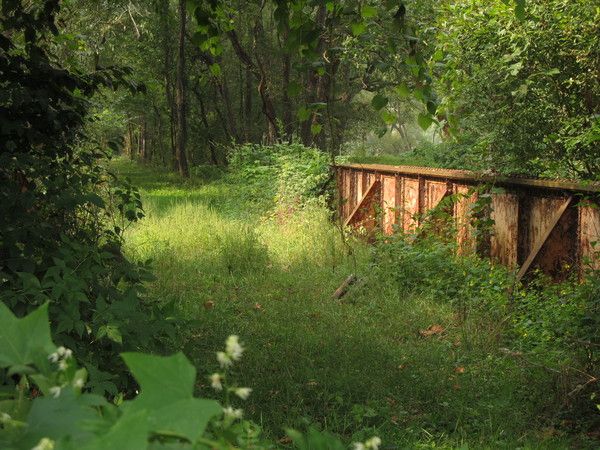
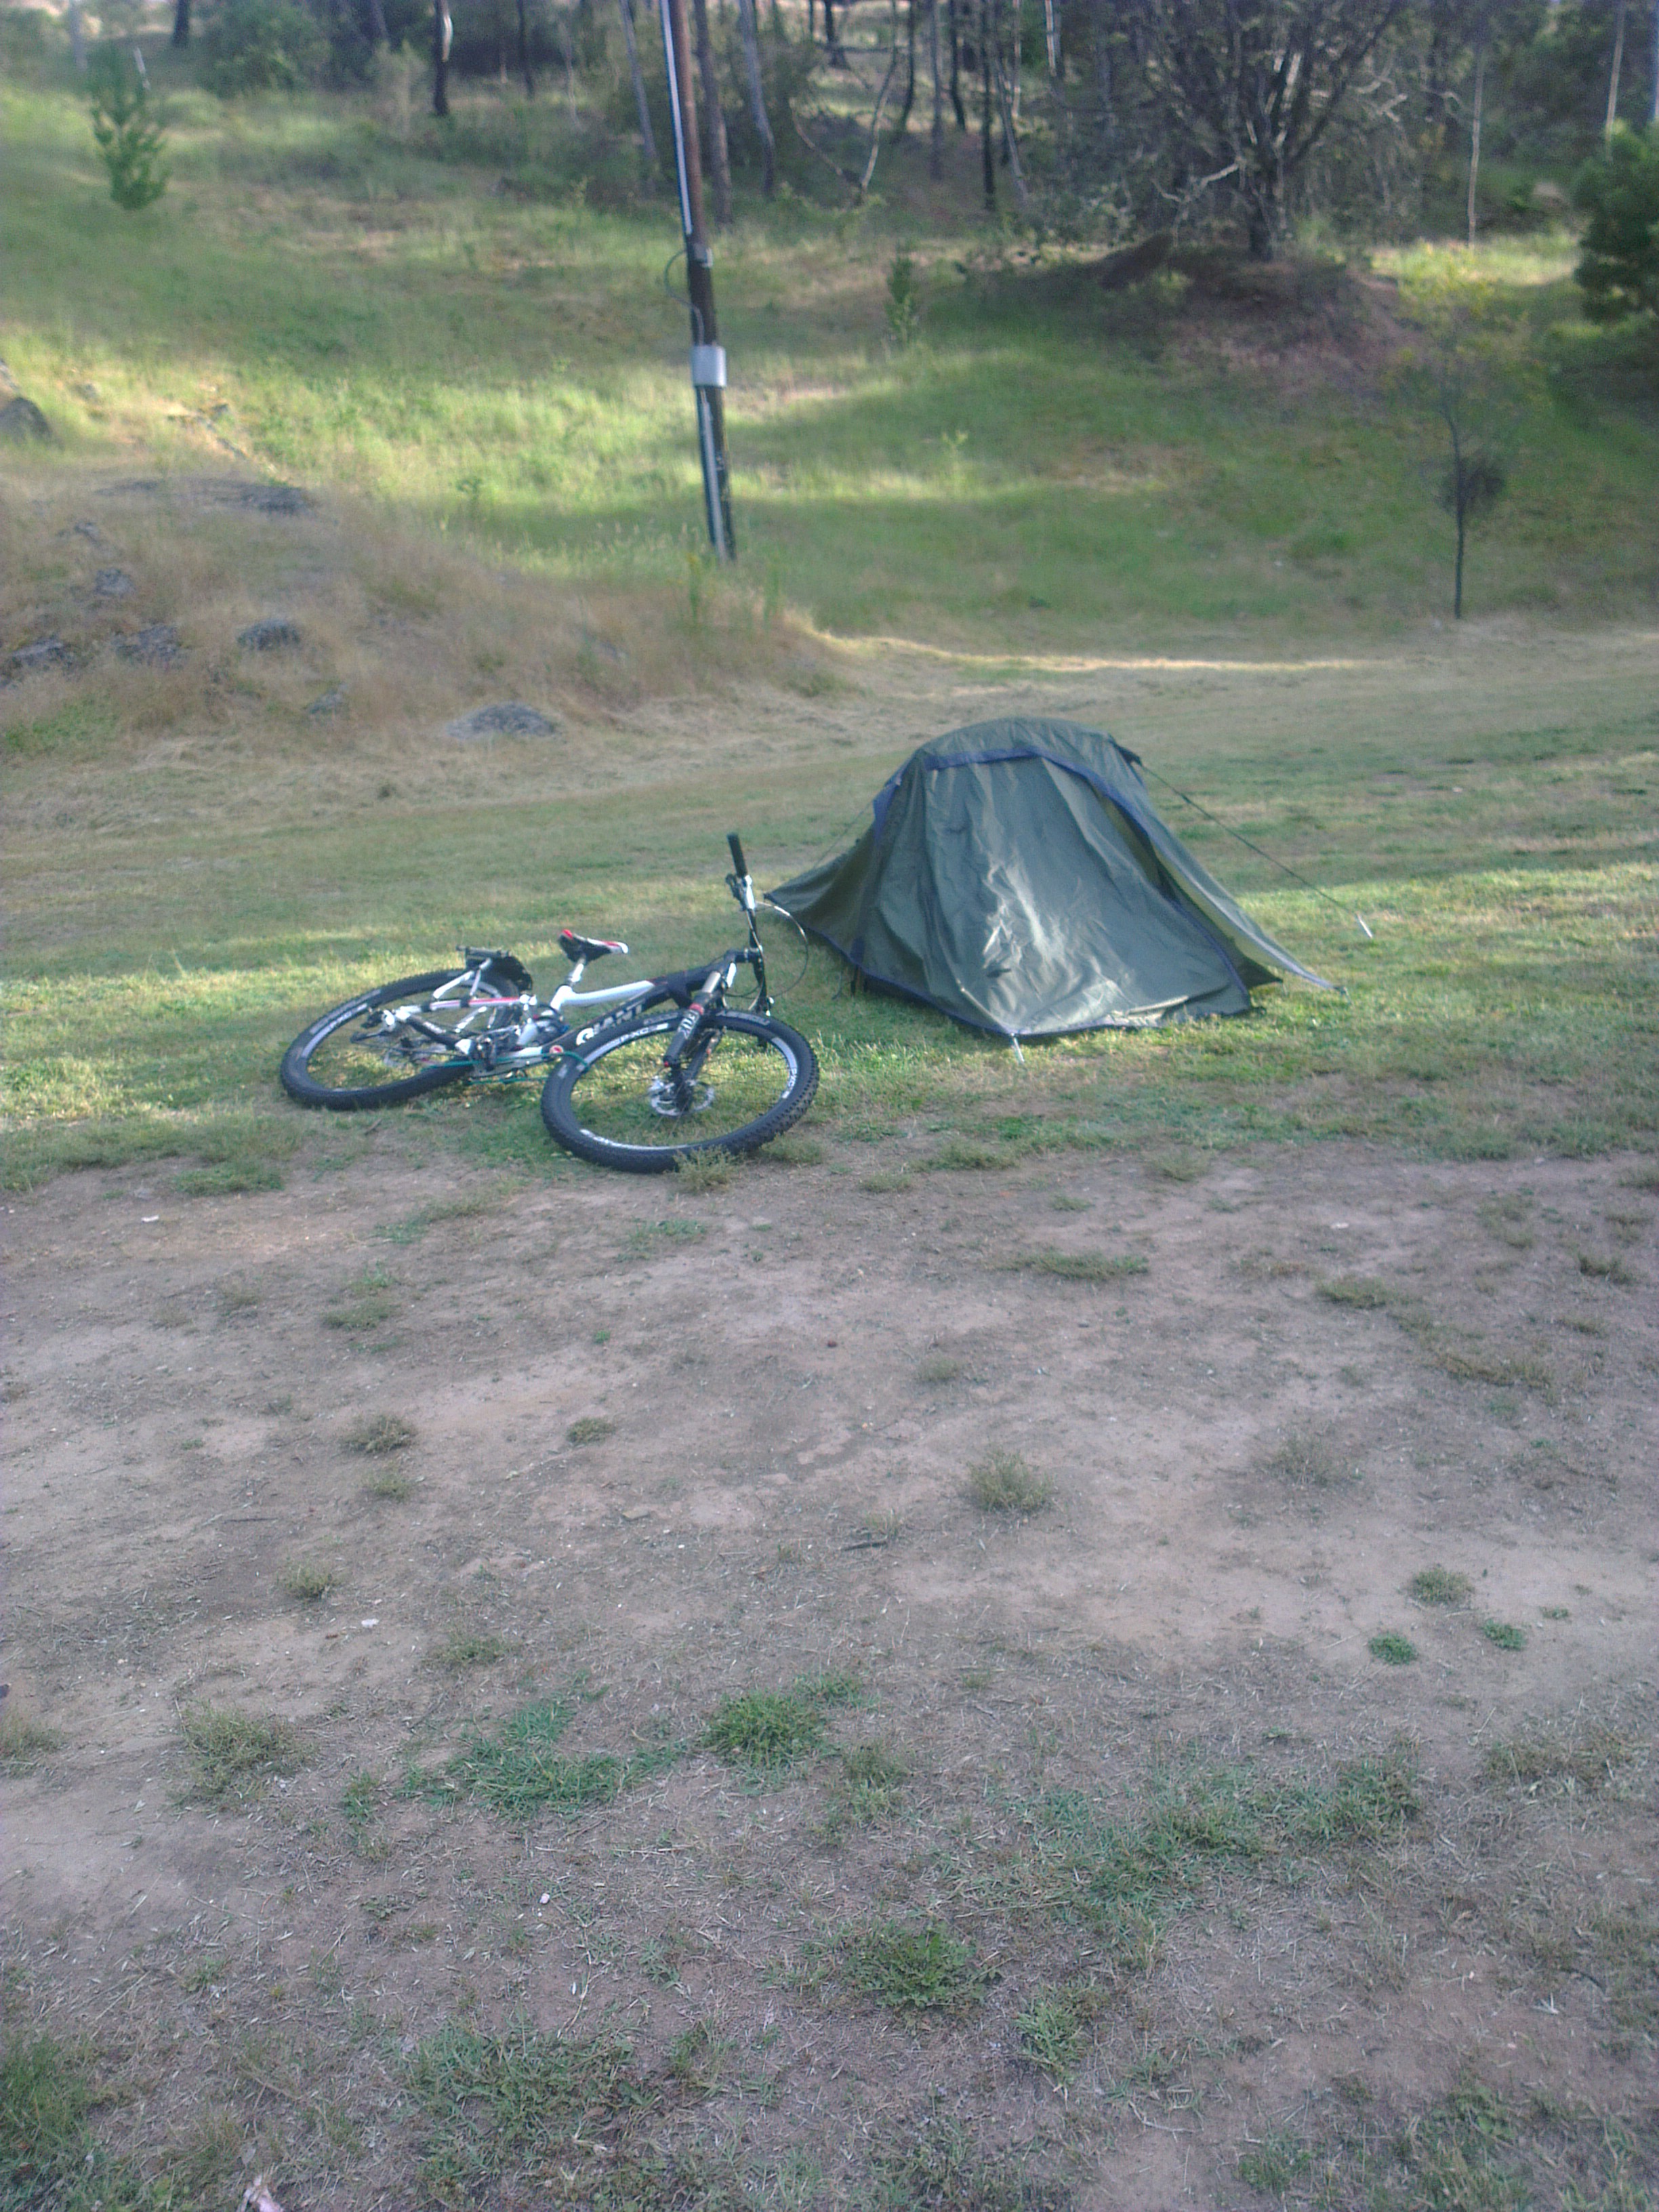
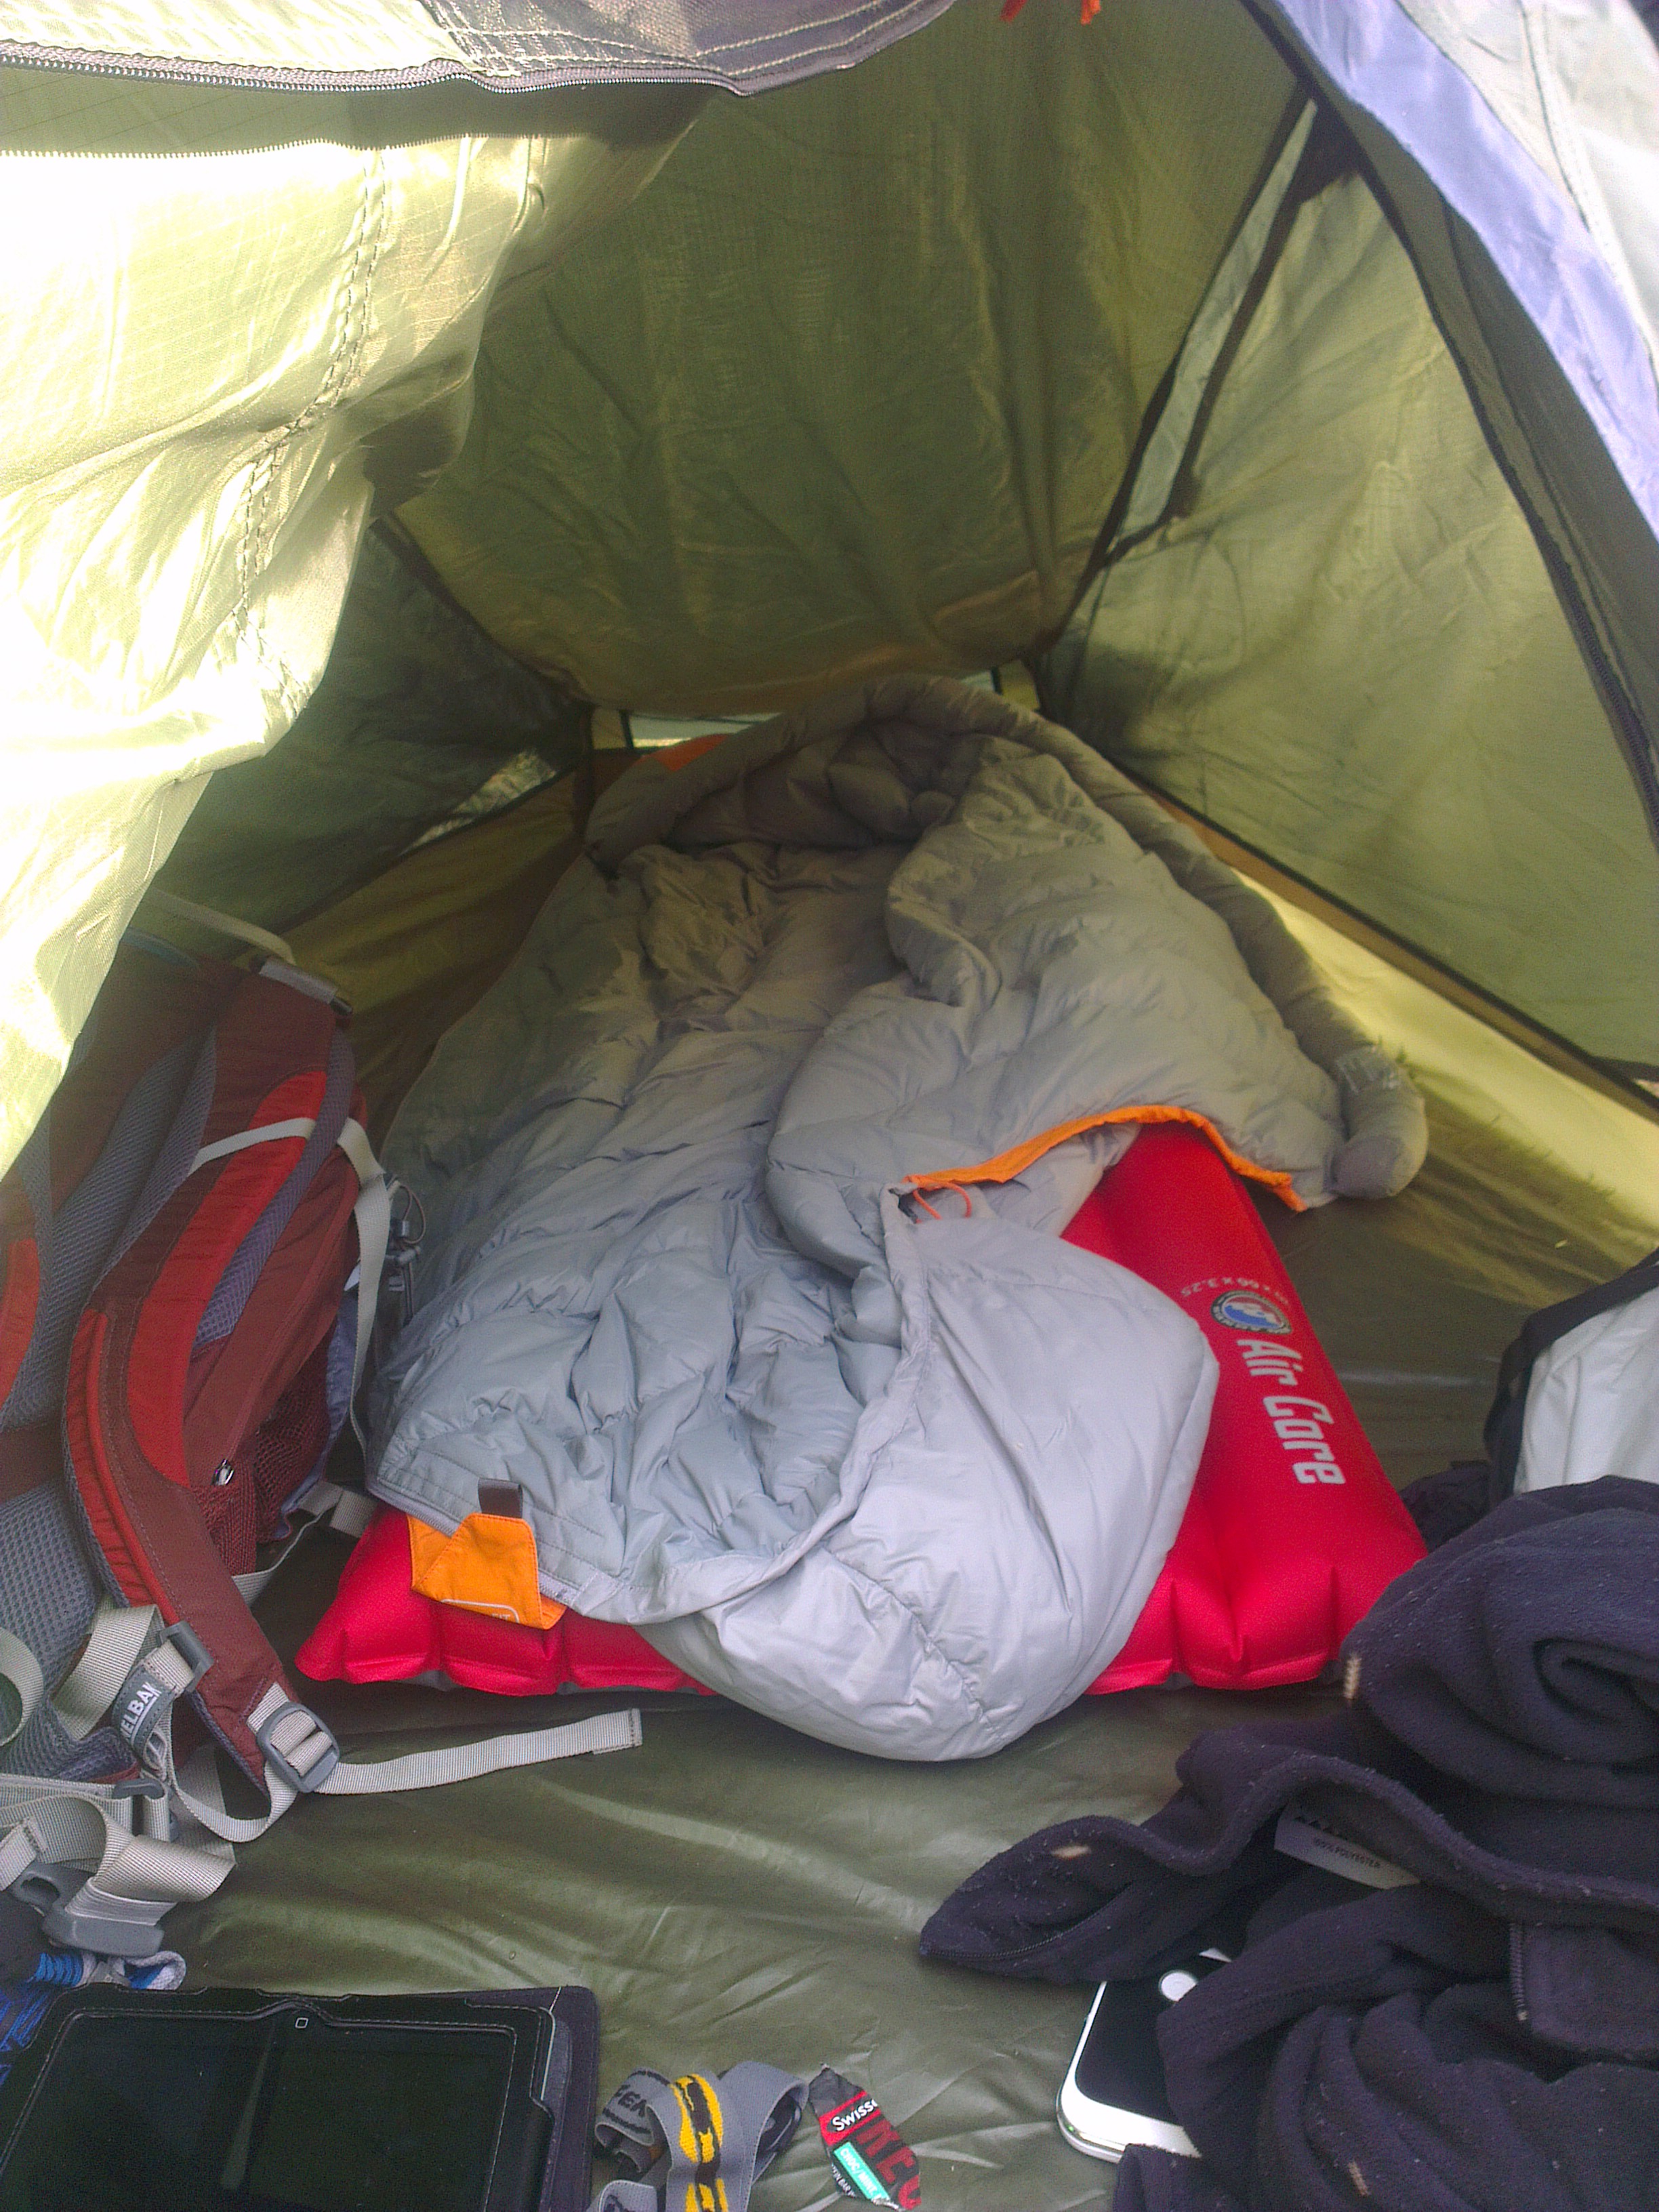
northern Georgia. I had spent the past 2 months gear testing and riding causeways in east central
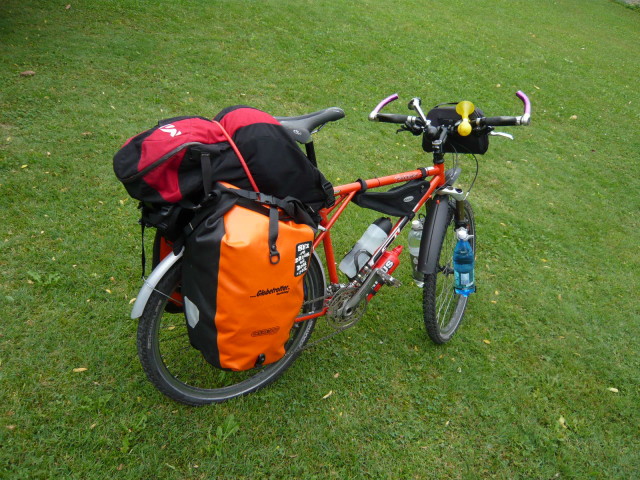
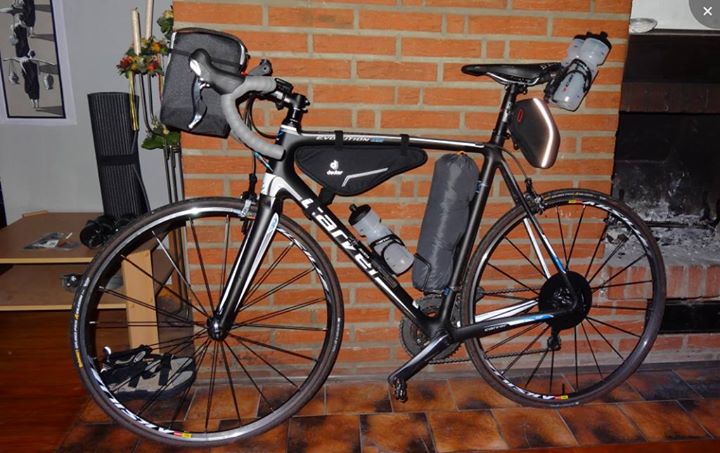
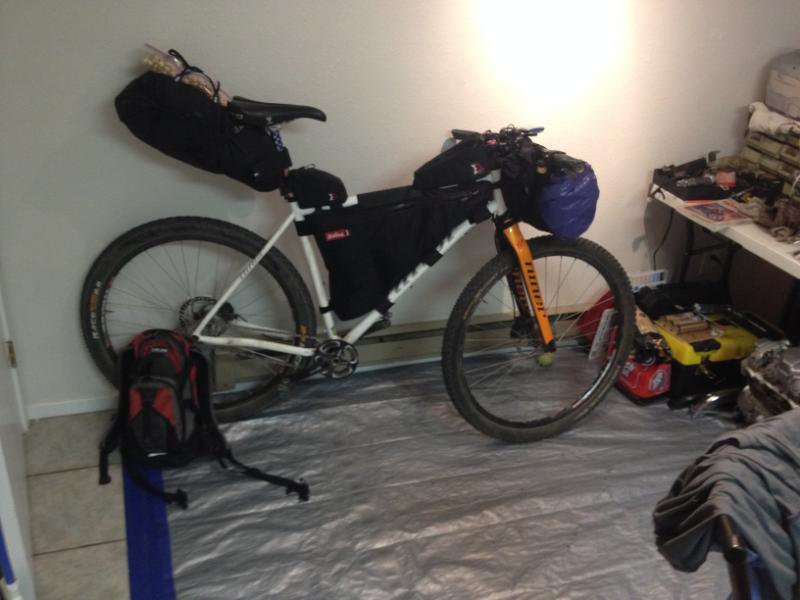
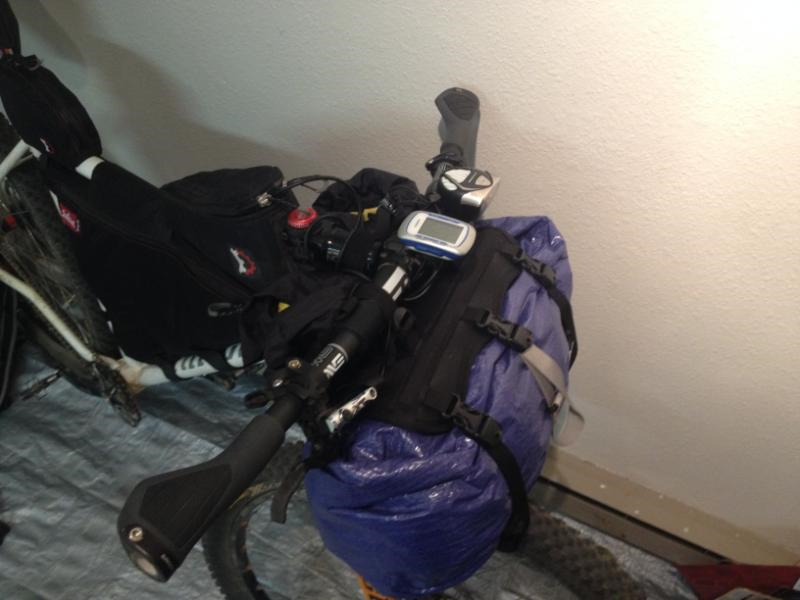
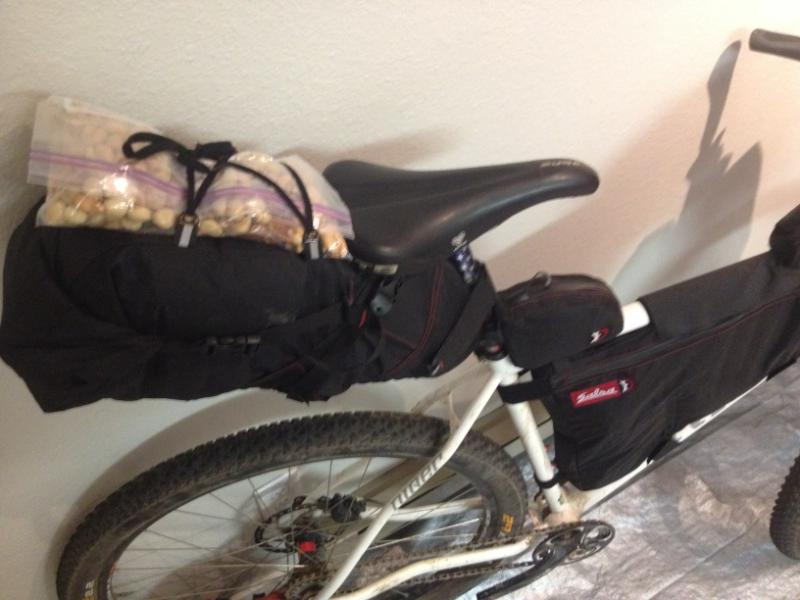
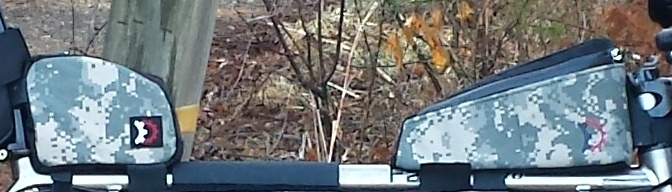
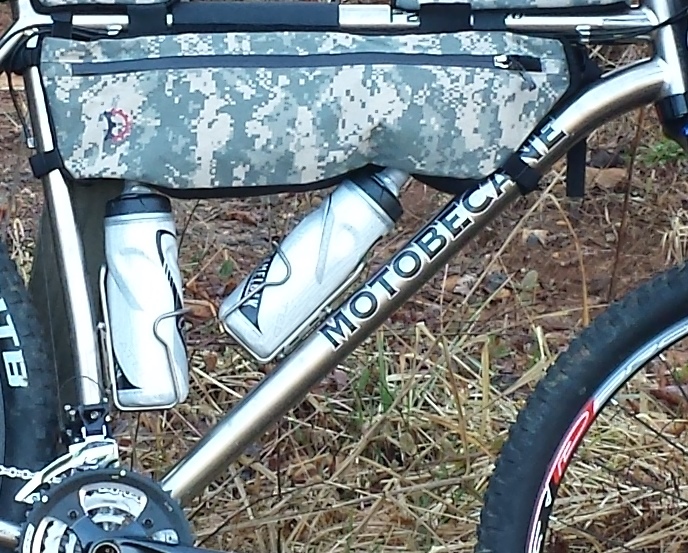
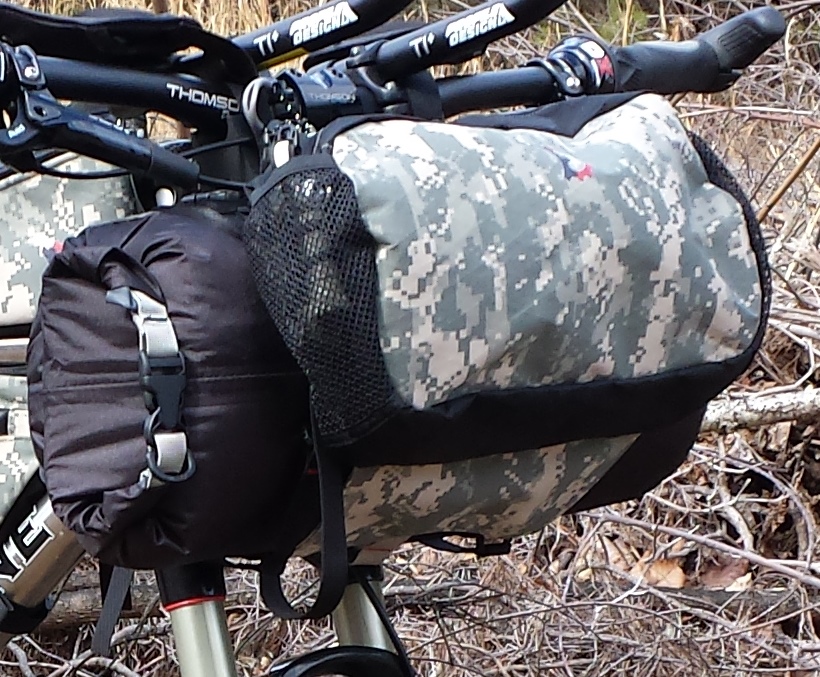
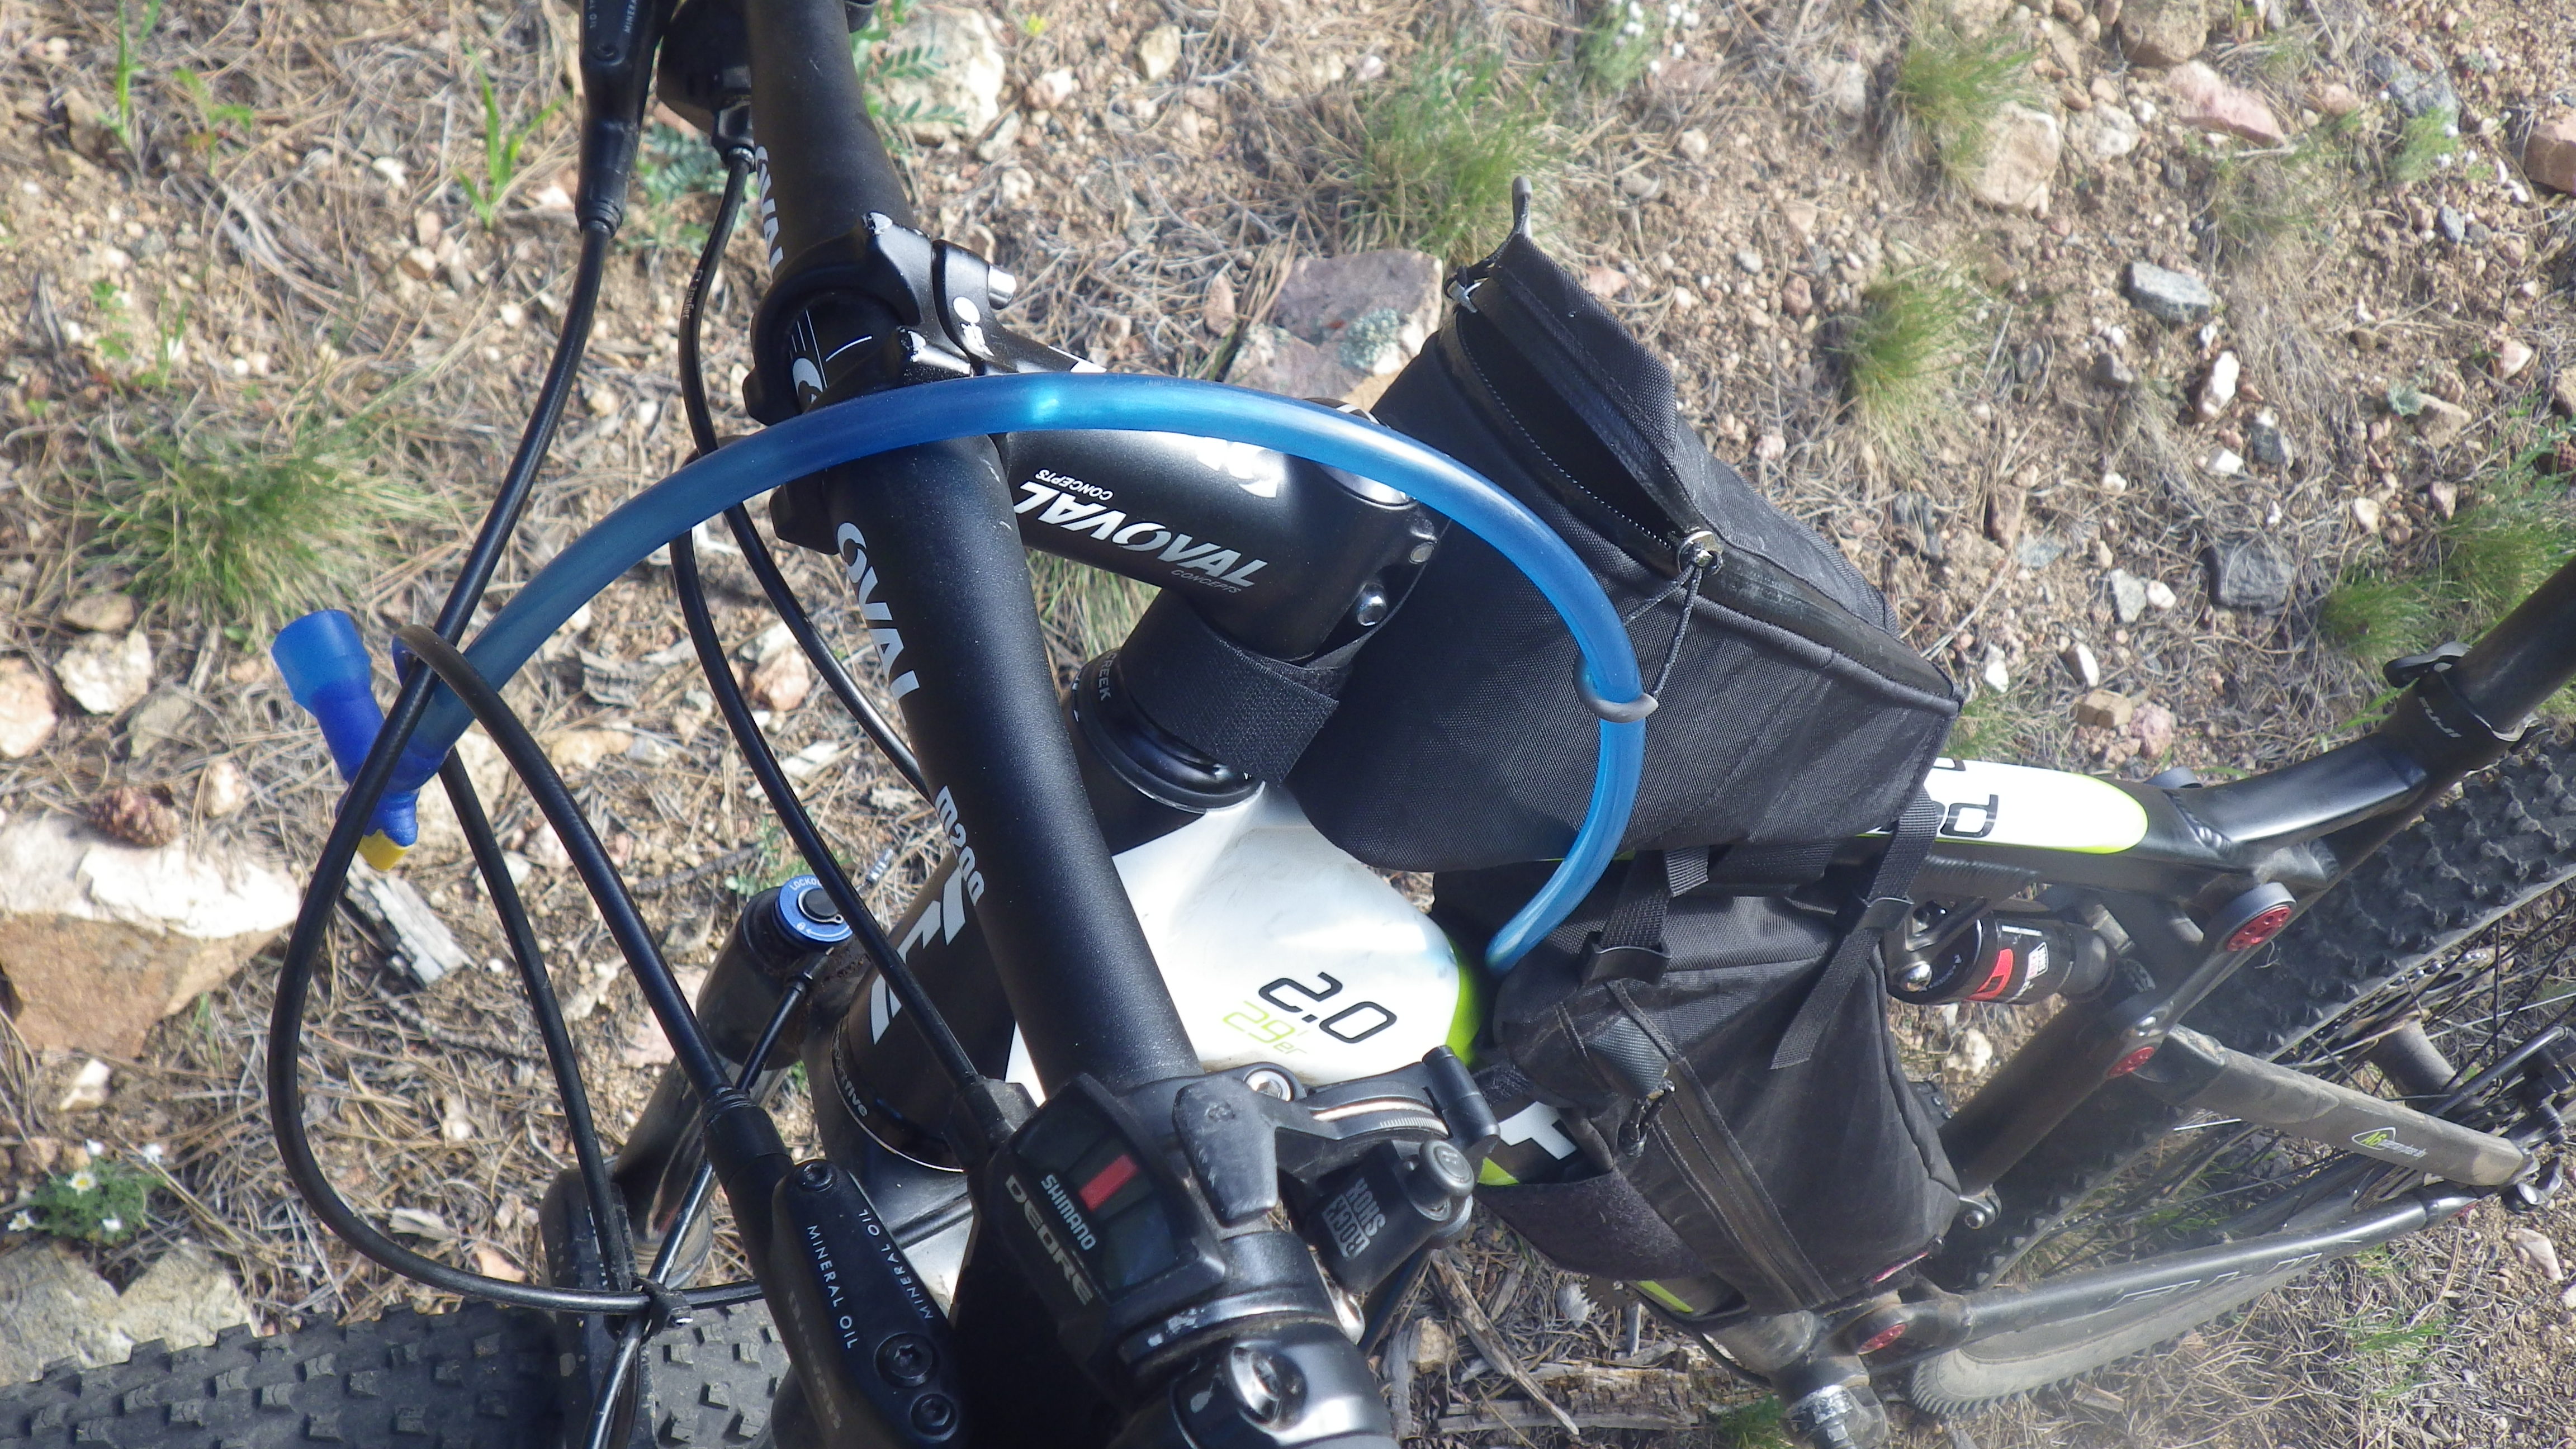
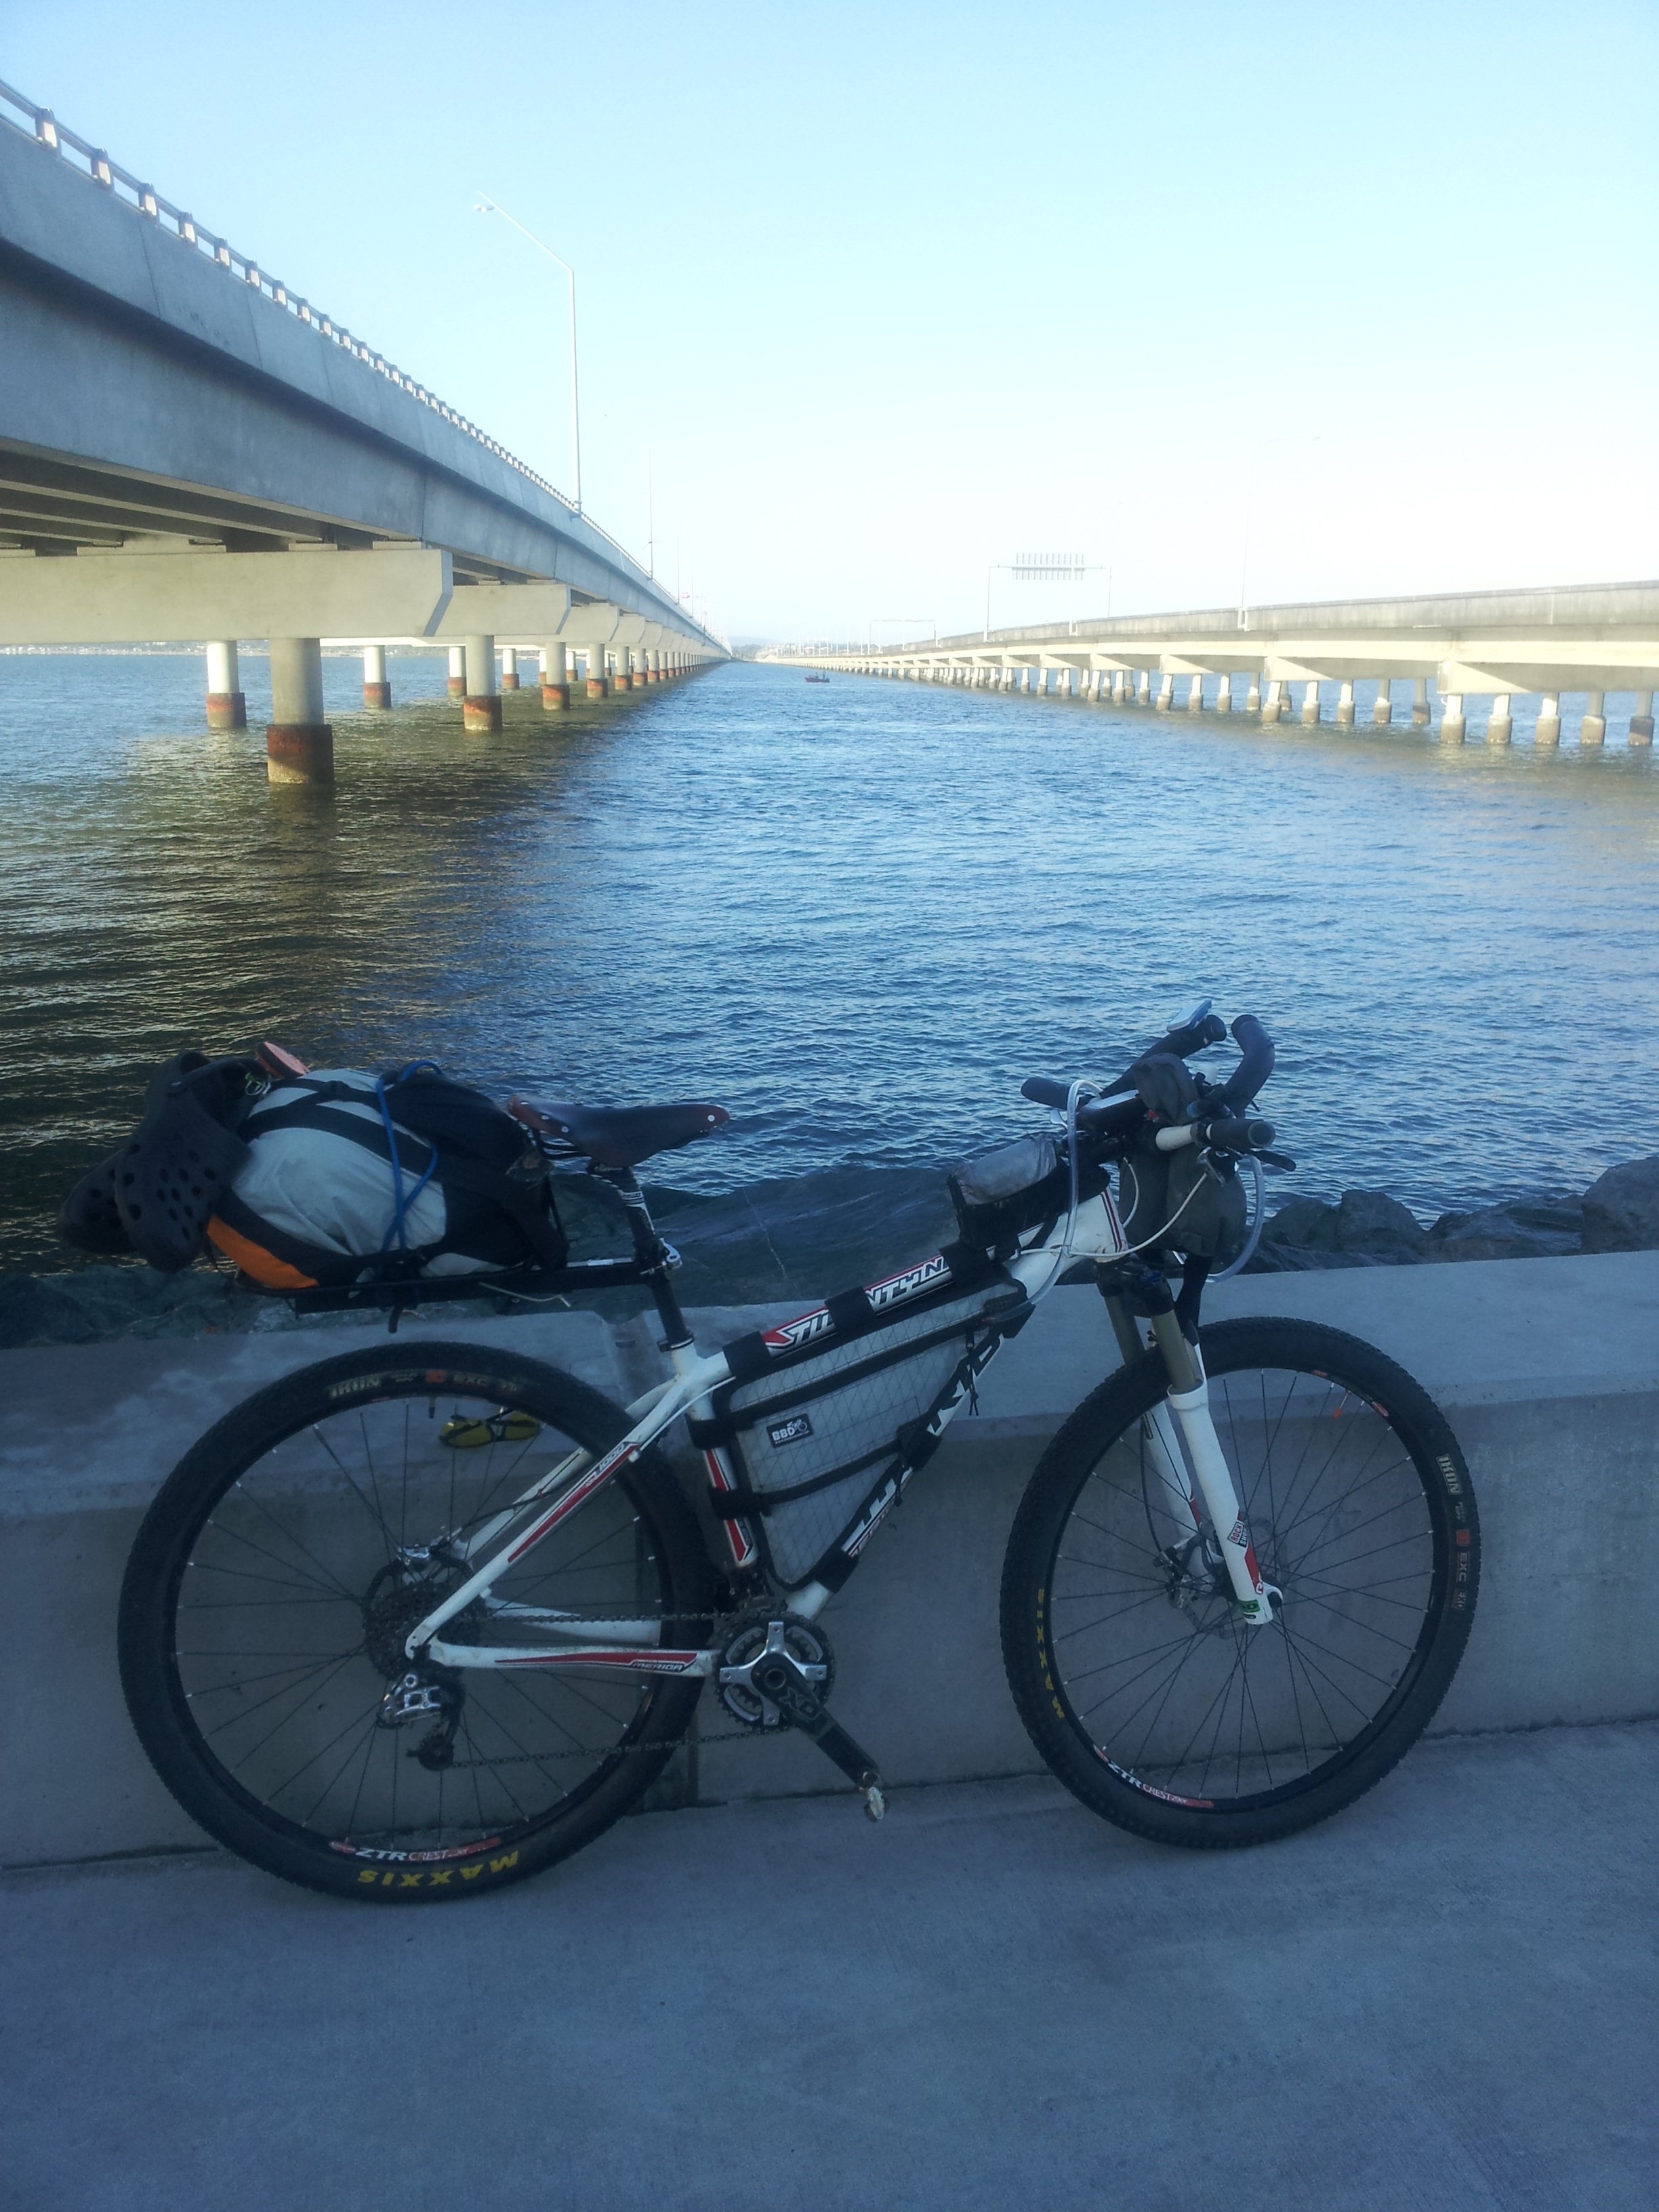
Florida in preparation for this daunting challenge. My focus is going as light as possible but still carrying……
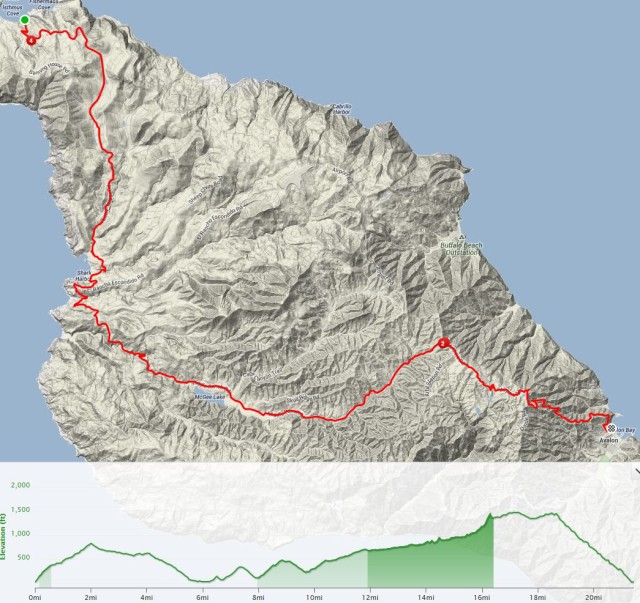
I rode the 5 kms from the campground at Farewell Gardens to Wharariki on the morning of 14th February 2021 at 6.30am to start the inaugural Tour Te Wai pounamu (waters of Greenstone), alone in my thoughts as excitement was rising and simultaneously the emerging sun was scorching the sky to create an incredible Kaleidoscopic atmosphere to begin this intrepid adventure.
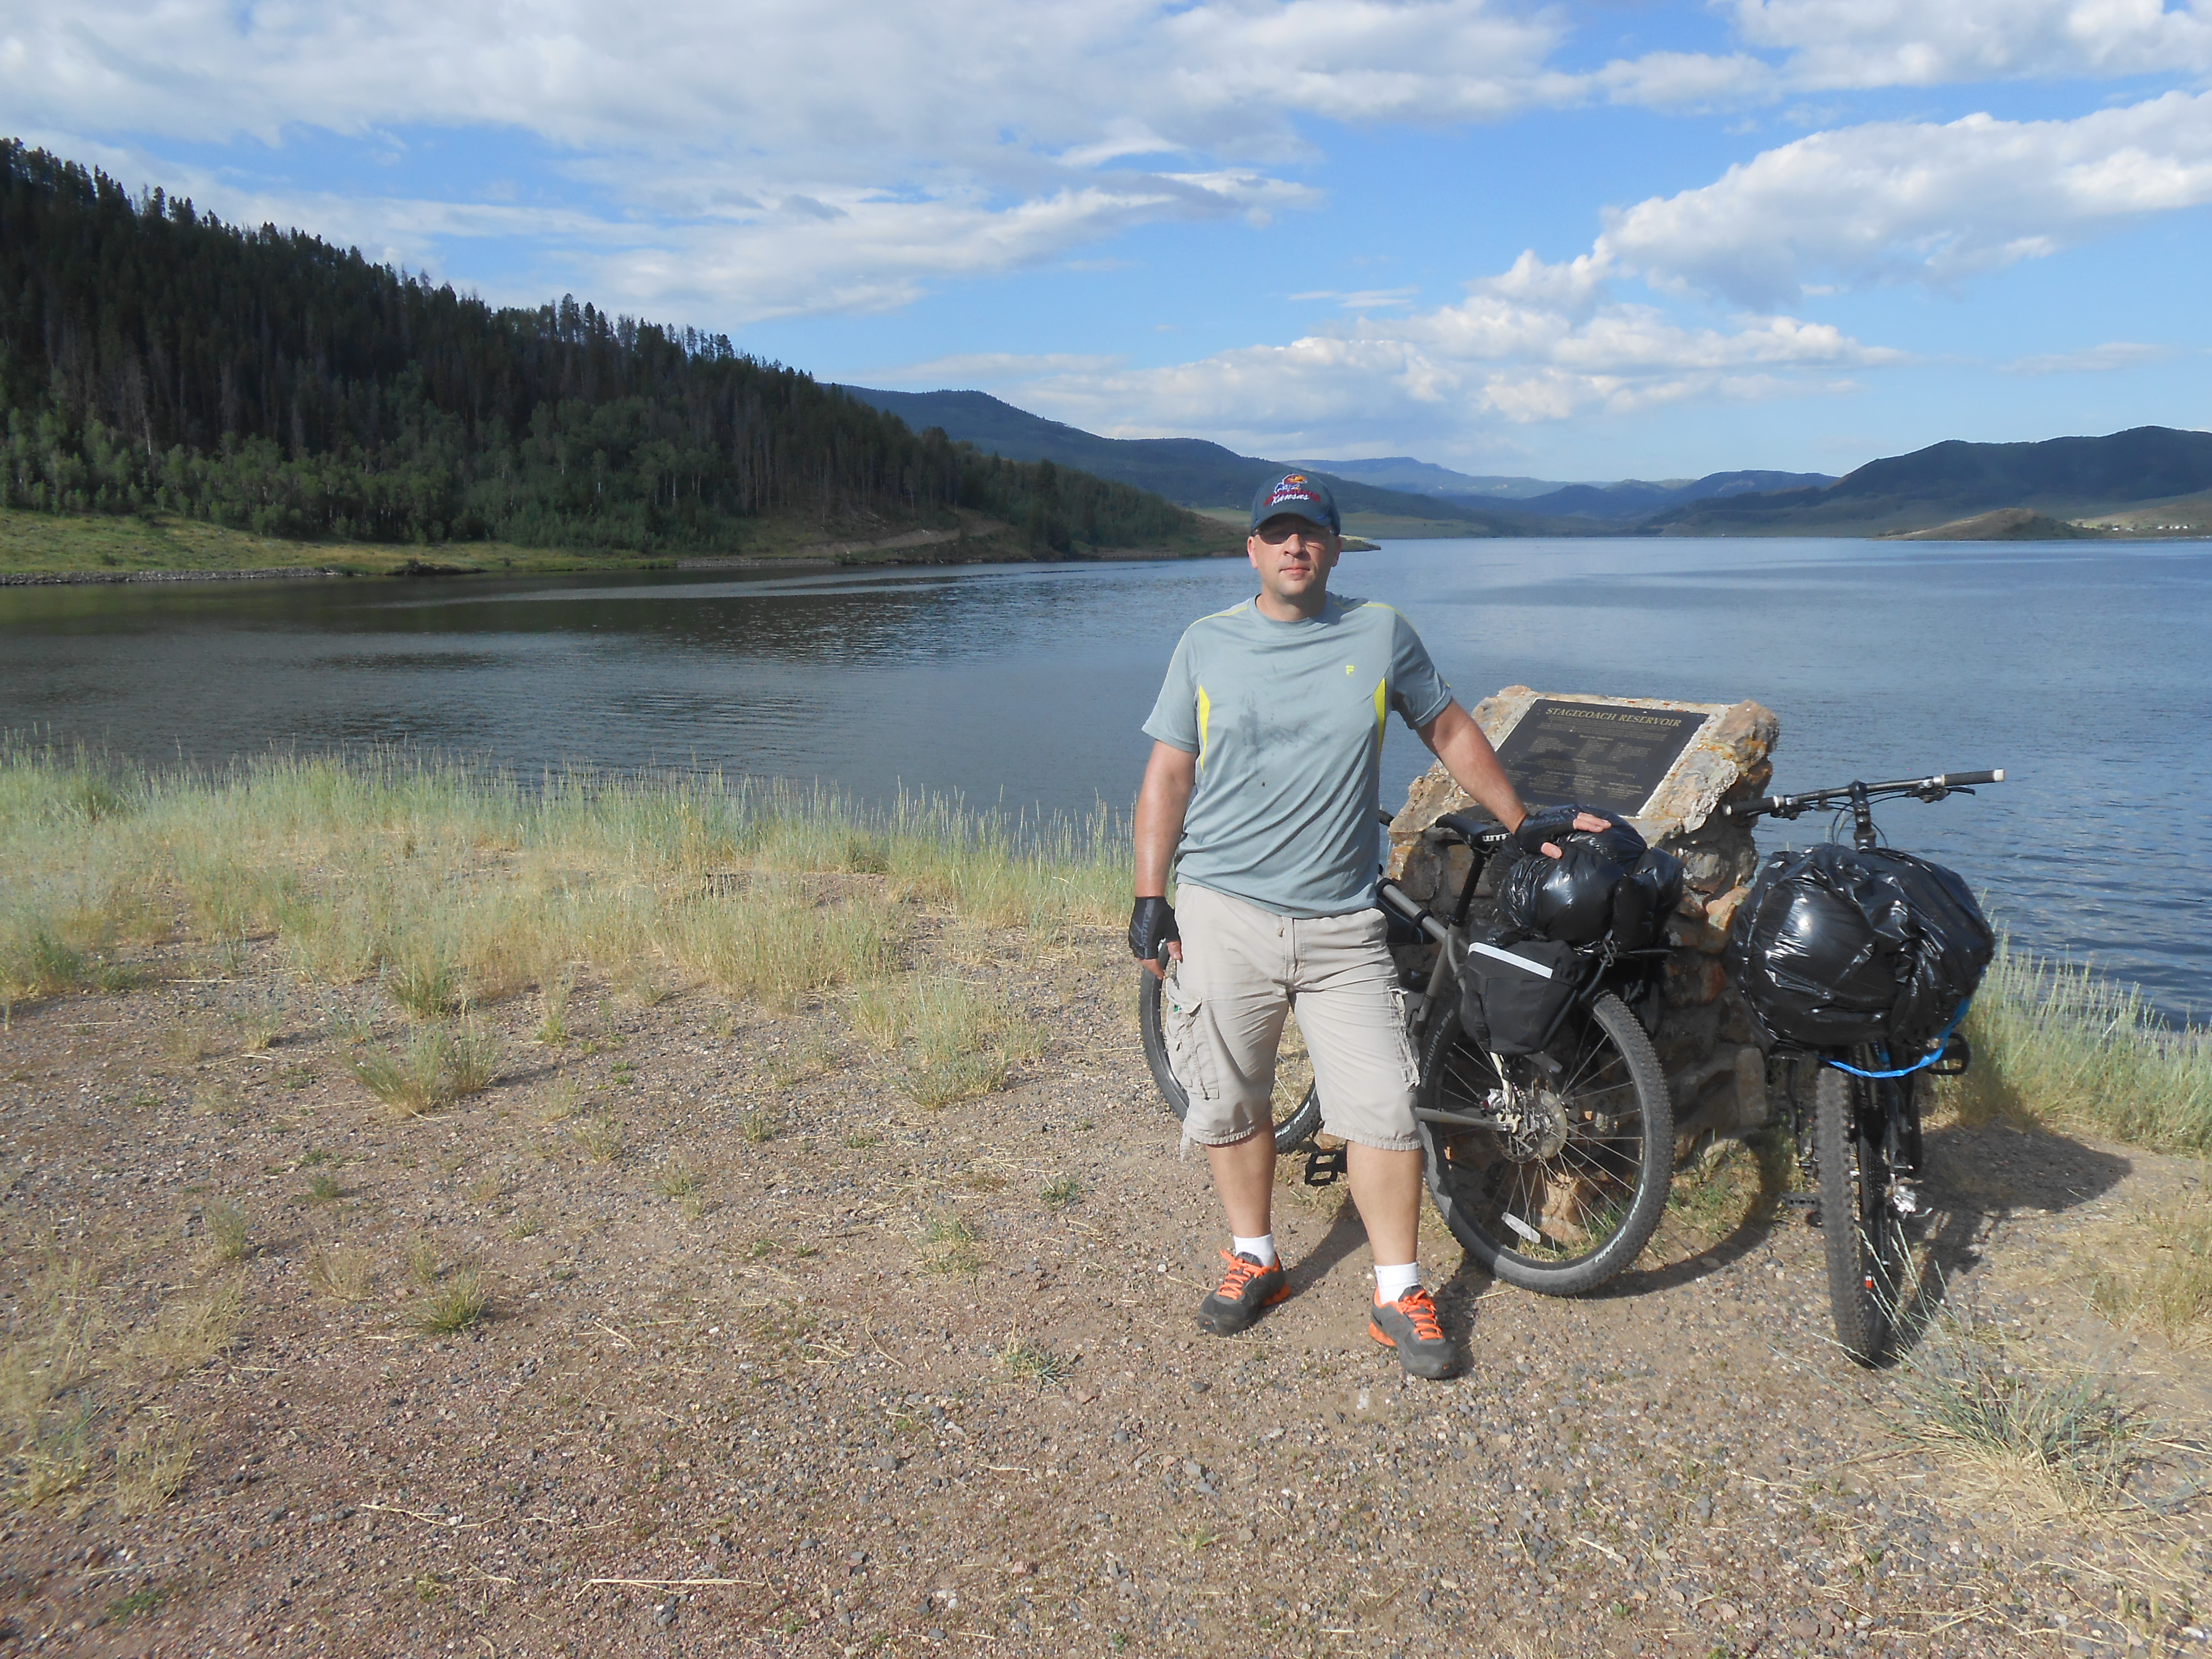
Cape Farewell starting point
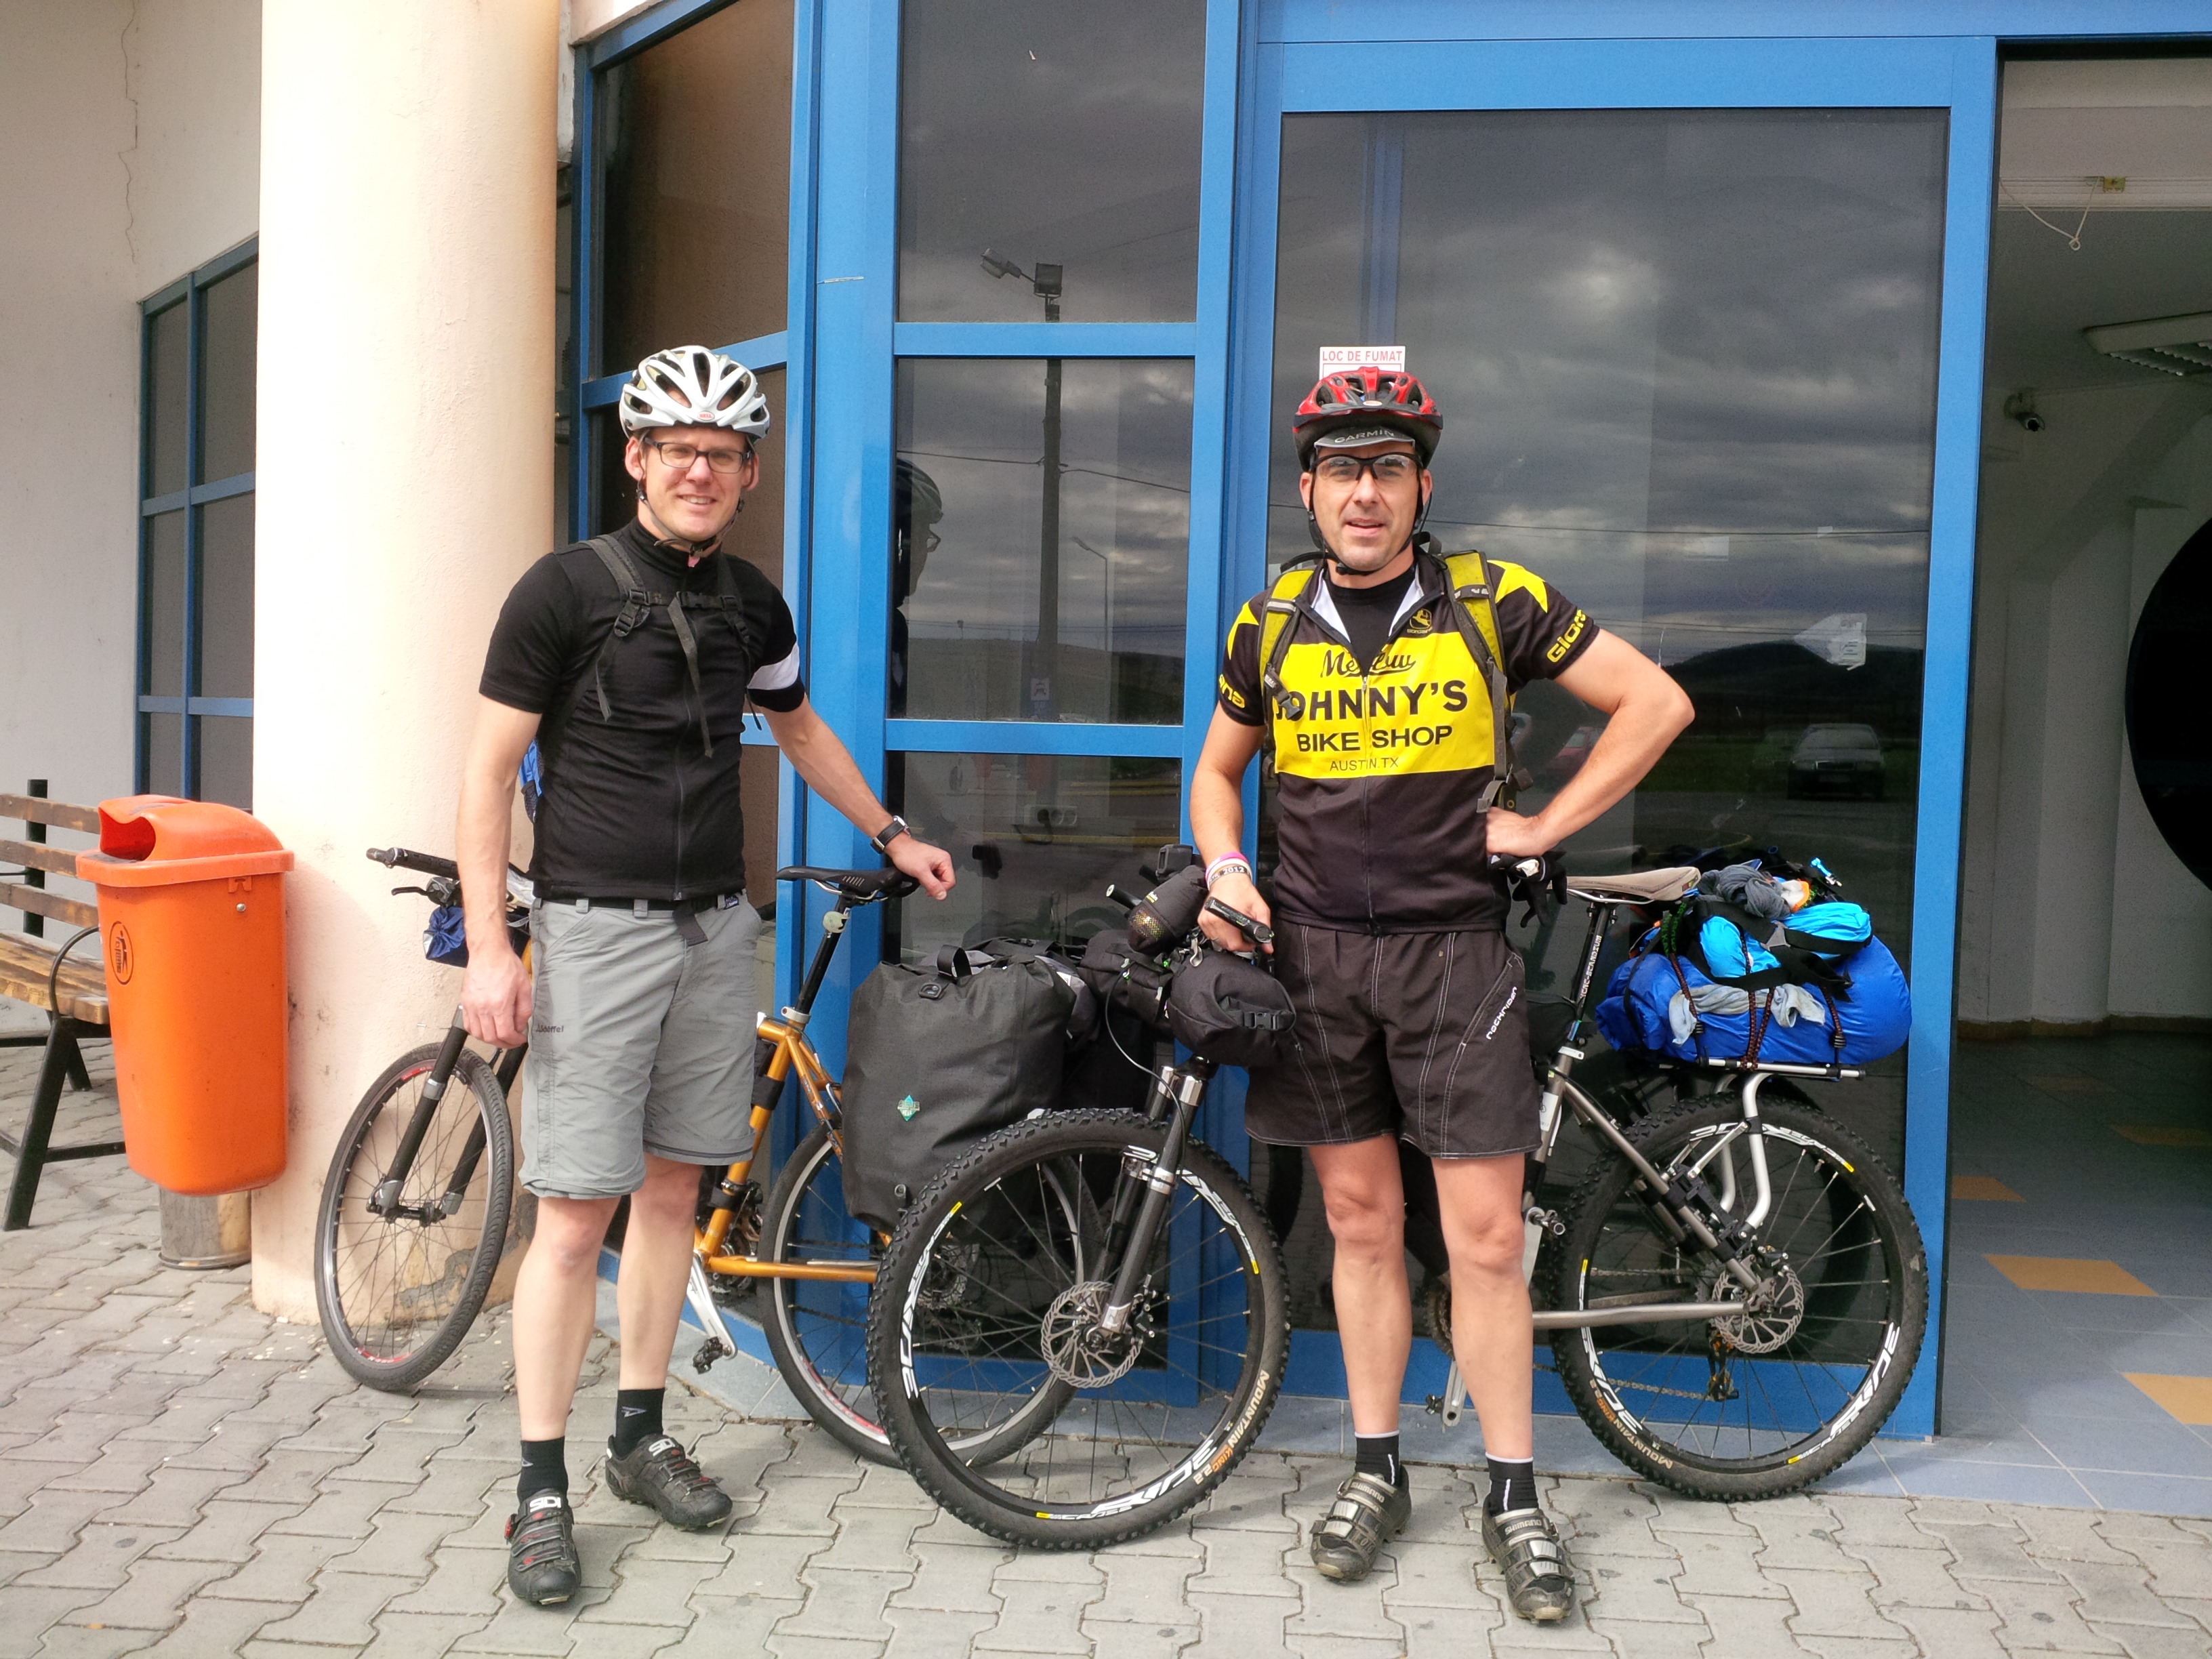
I feel everyone was ready to get rolling finally after months of Training , preparation and tinkering with set ups and the day had finally arrived. Everyone seemed calm and relaxed, the energy was bubbling , excitement, nervousness and anticipation all mixed together. A fabulous cocktail of bikepacking hopes and dreams.
A fantastic and clear Briefing by race designer Brian Alder the night before meant there was not much more to say or do , except to turn on our Spot Trackers and take it all in and roll out
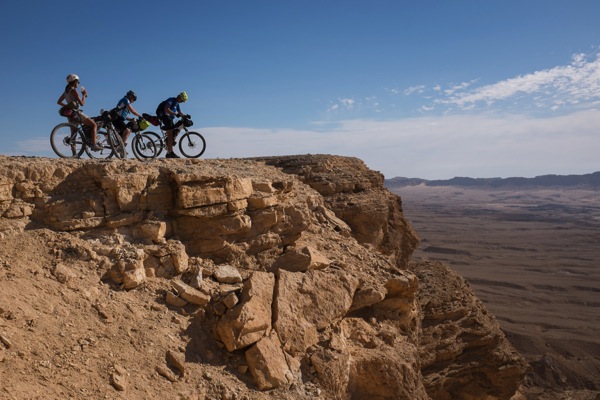
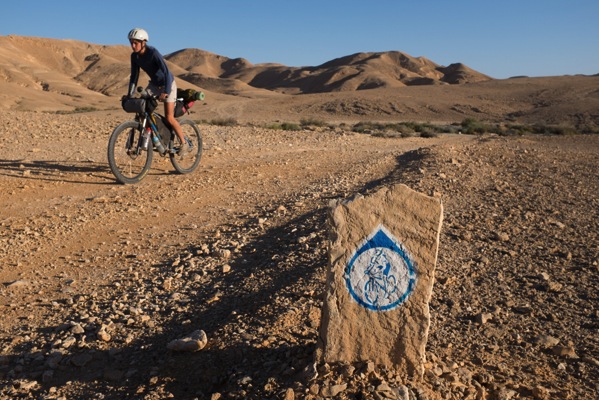
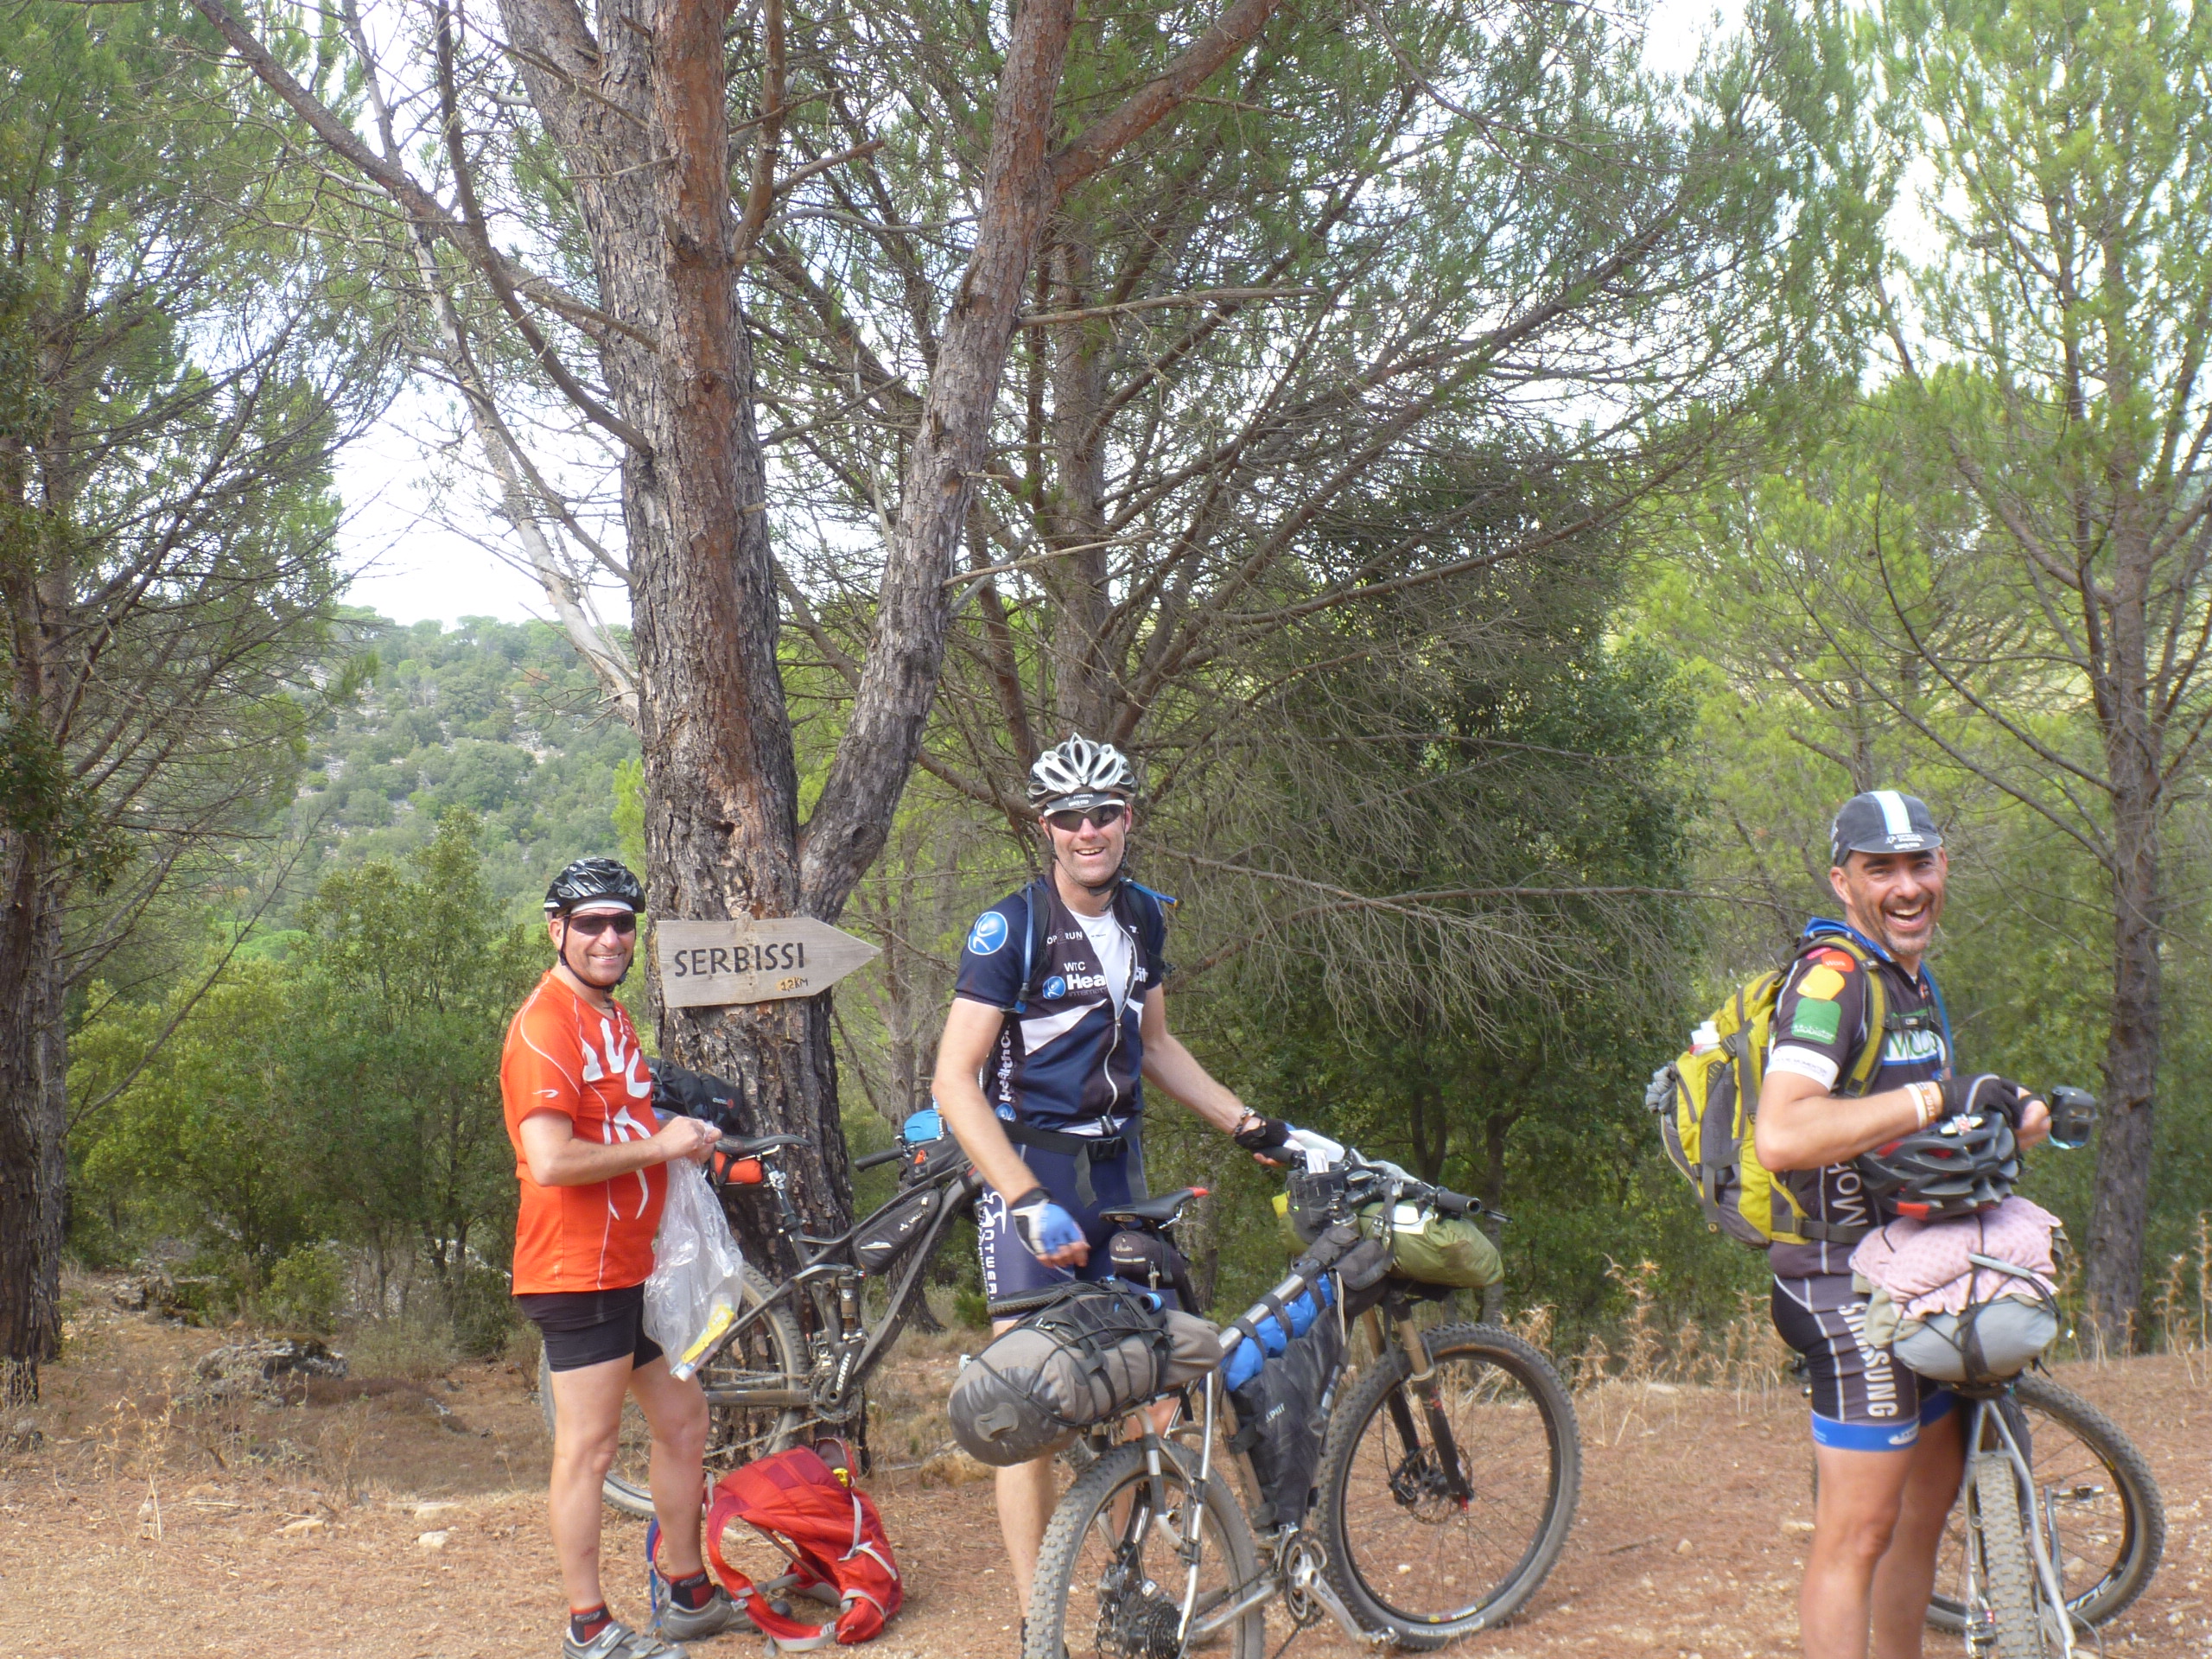
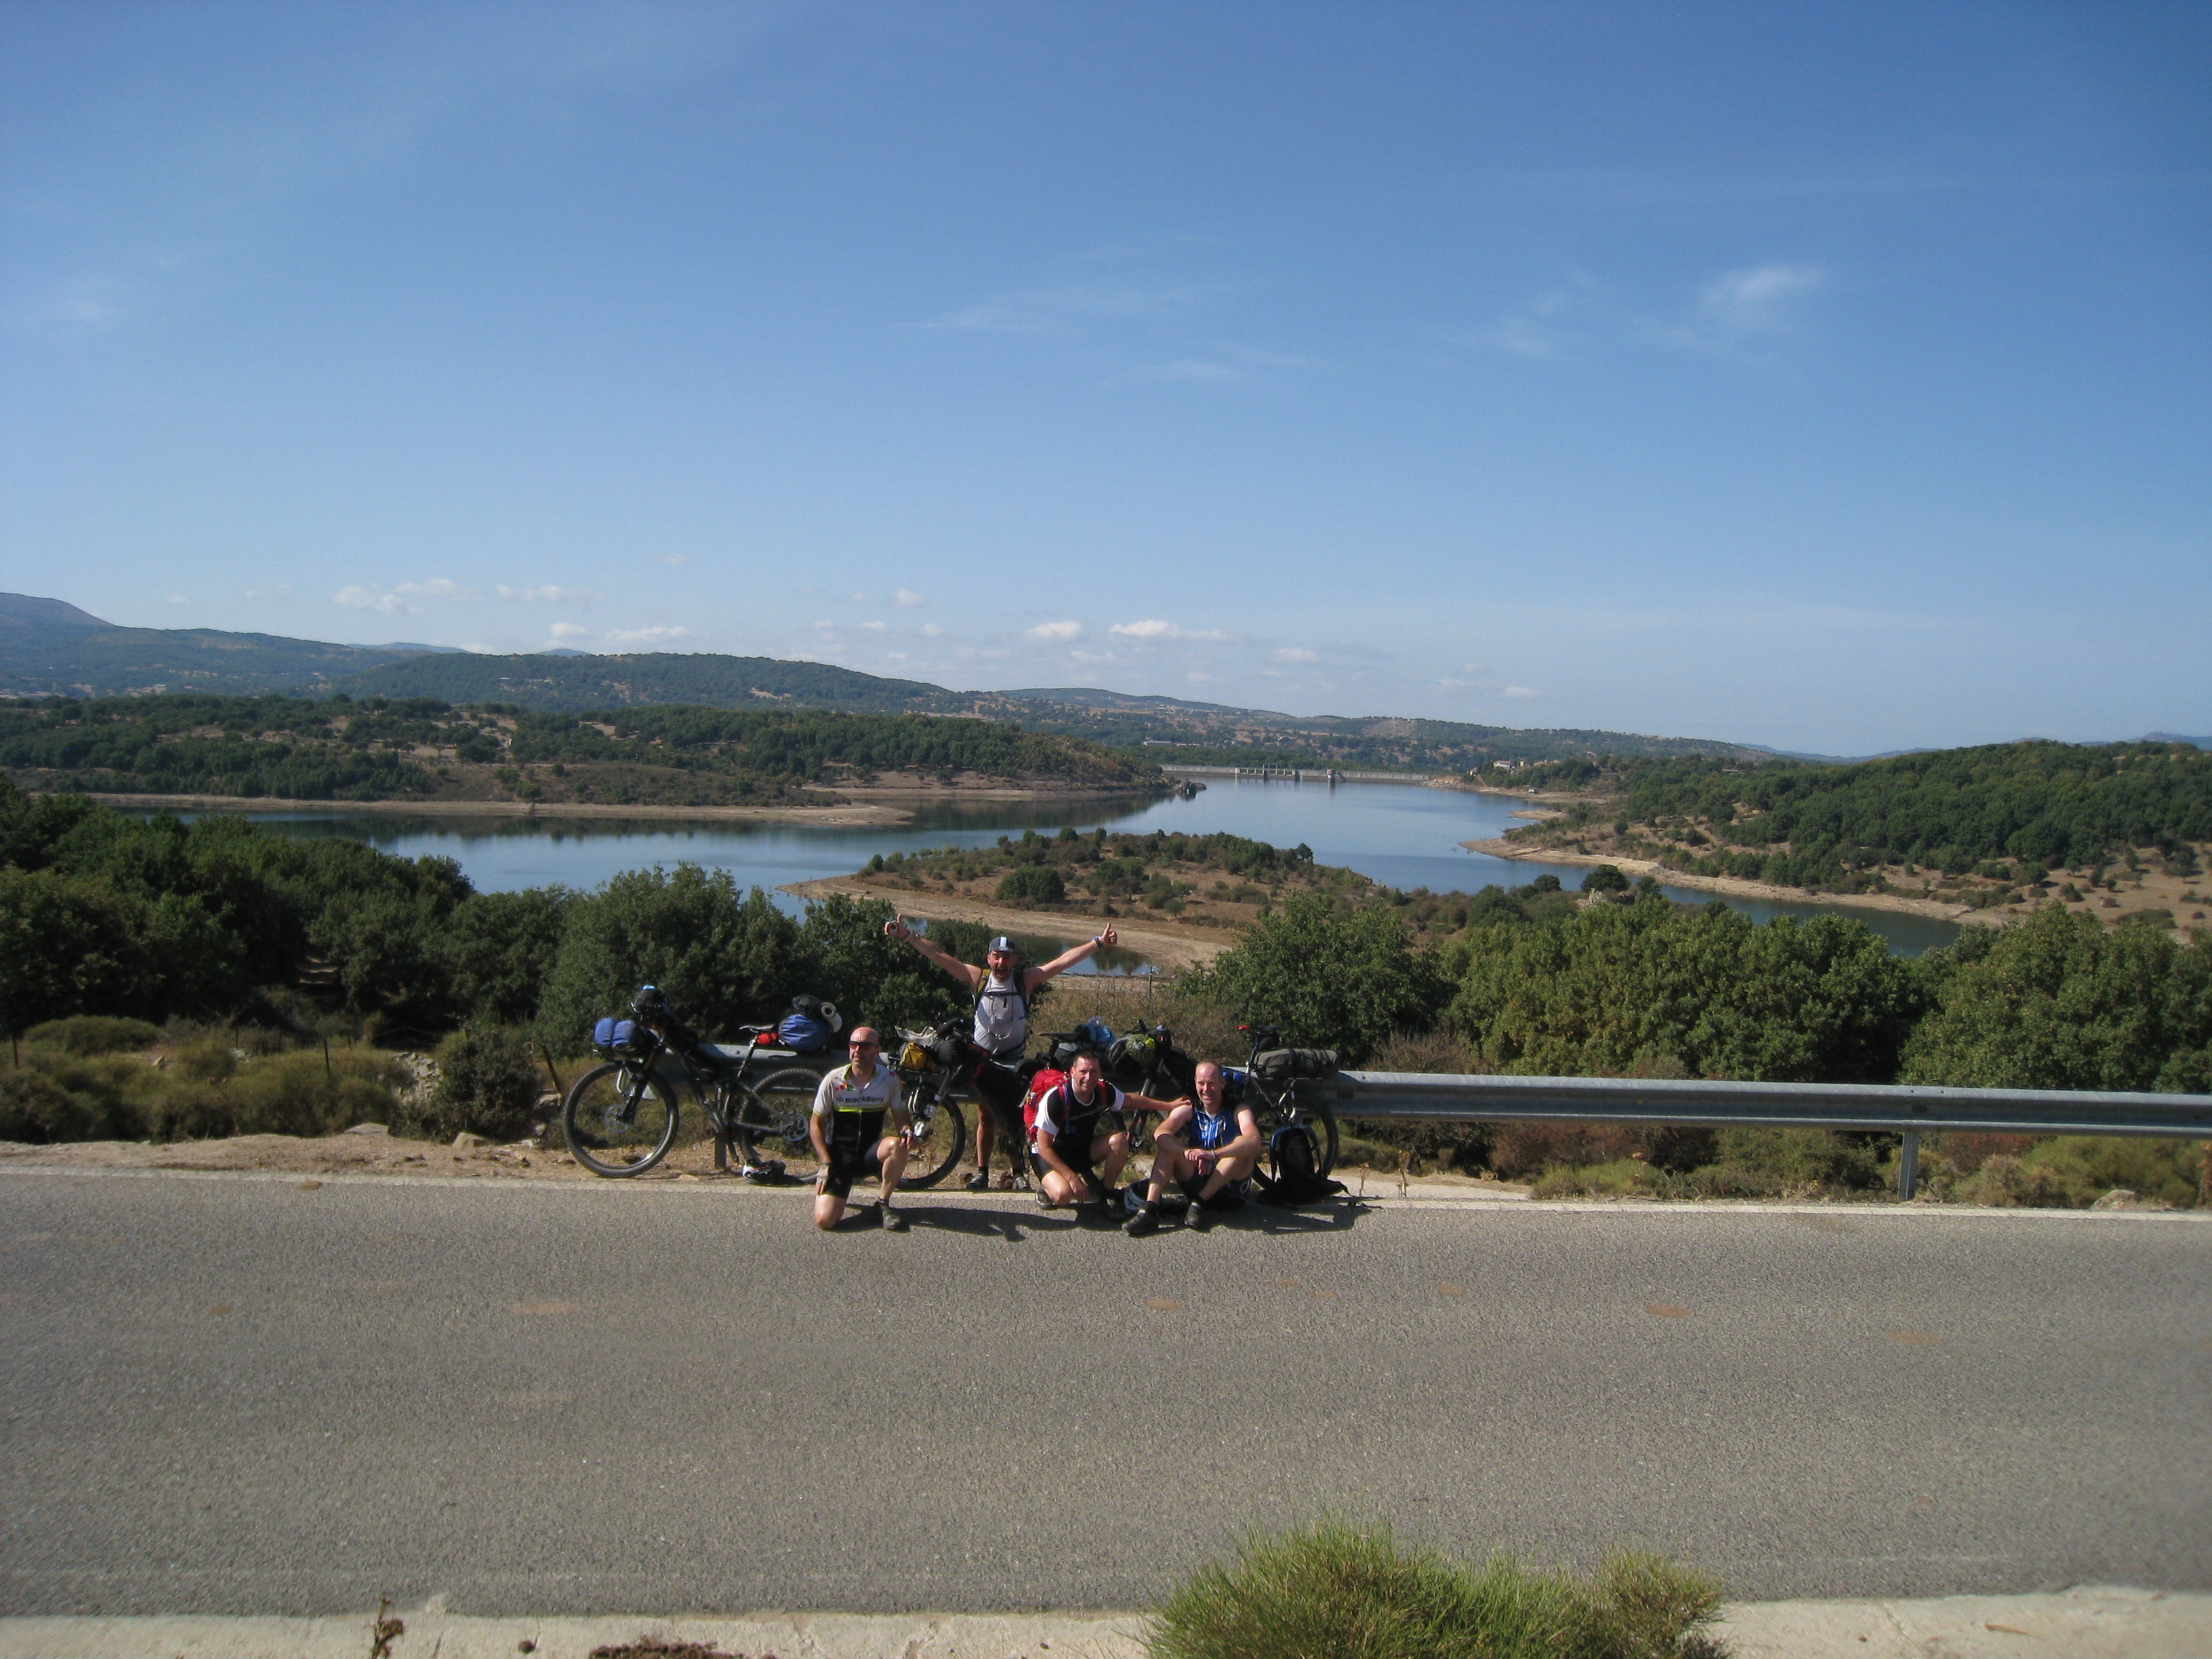
We were off, 37 adventurous souls about to embark on this new exciting Bikepacking race in Aotearoa’s South Island. Brian had put a huge amount of work into creating this route. A huge drawcard for me was knowing that we would be traversing lands other wise off limits to the public. Brian had gained permission for the race to go through over 10 private stations, this was a real privilege.
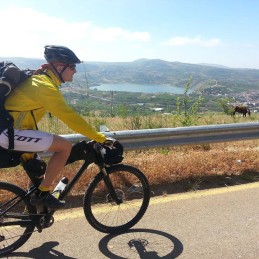
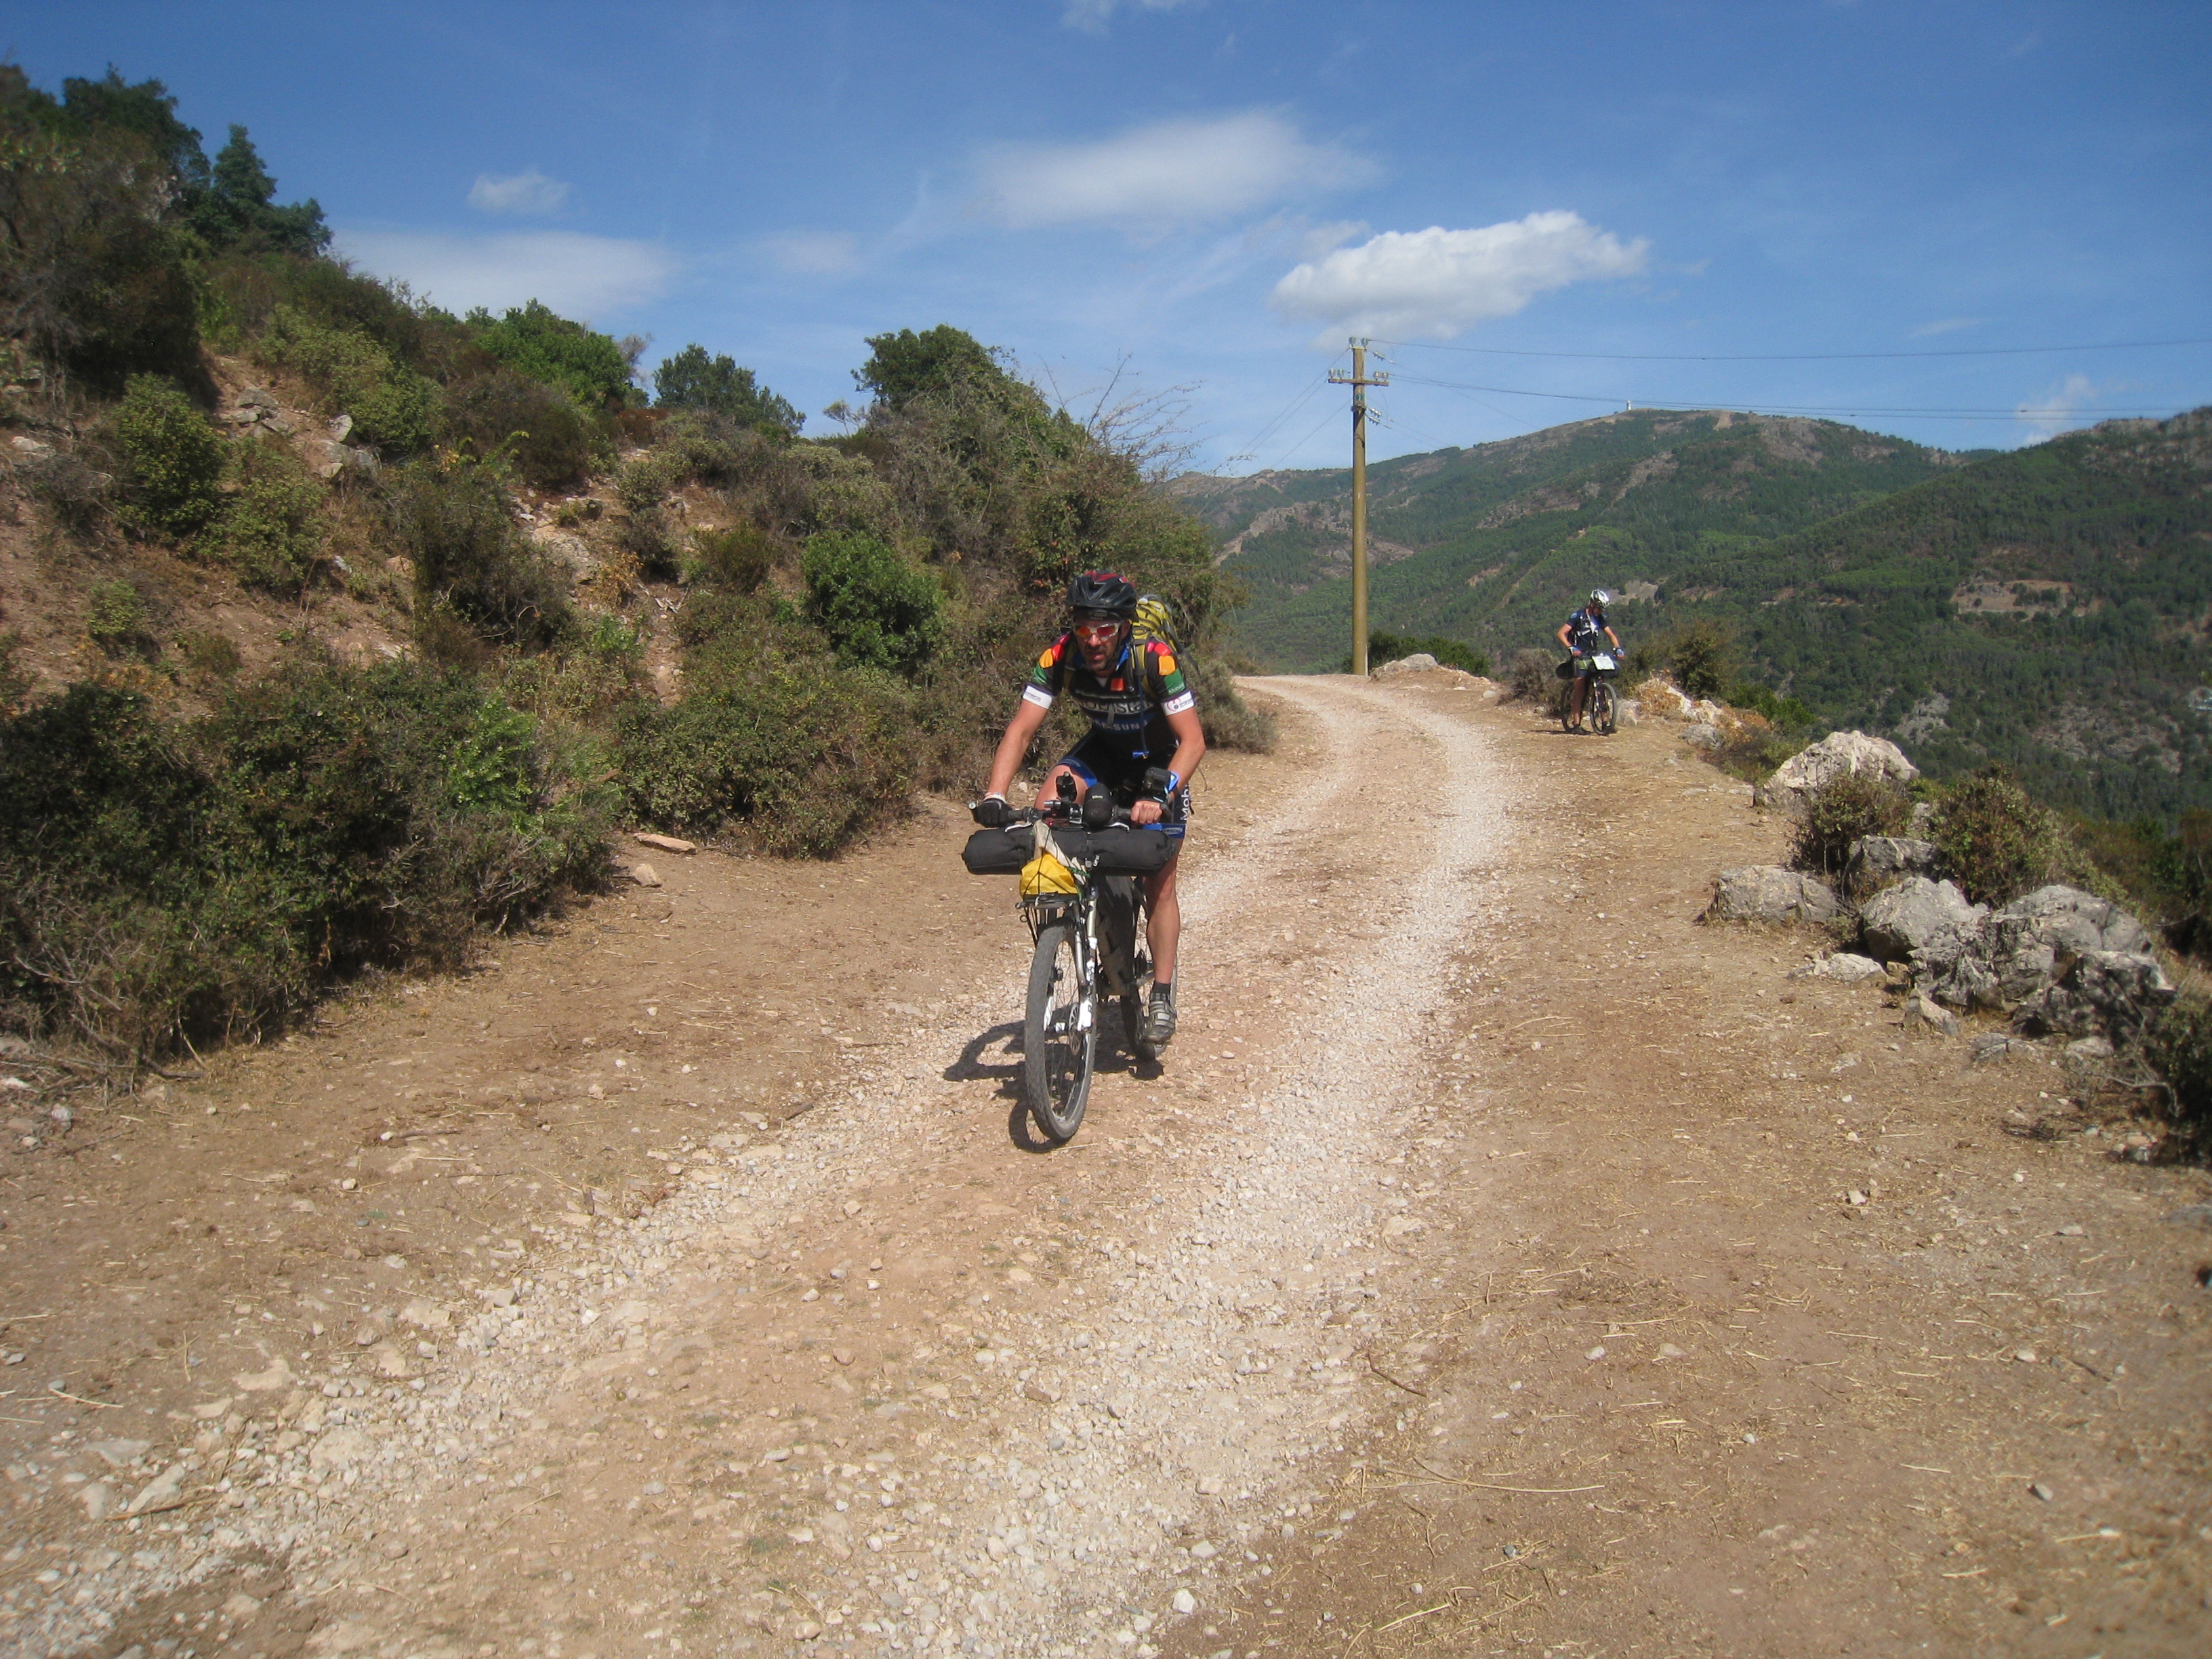
Windy Point – Lake Sumner section
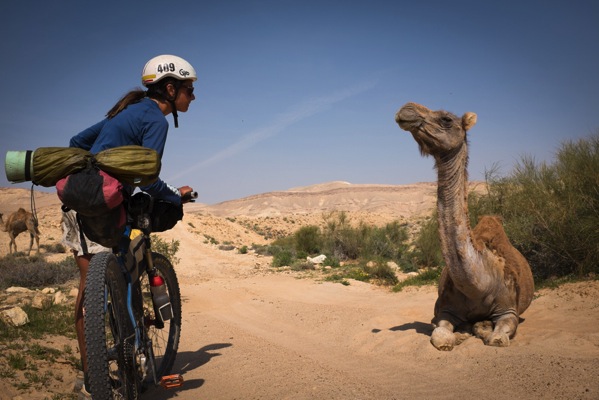
The first 60kms flew by on mainly sealed roads with bit of beach after Collingwood , then on to the small town of Takaka, from here we headed towards the races first major climb, the Rameka Track, a beautiful 5km climb on rocky rooty trails through native forest .On the lower slopes I was just behind Martin Strelka and Ollie Whalley and getting into a climbing rhythm. Then close to the top of the climb and out of seemingly nowhere suddenly I was feeling nauseous, had cold sweats and the energy was draining from my legs. I had to ease up as Martin and Ollie disappeared. Not long after Tony Le Sueur and Patrick Higgins passed me in quick succession.
I went over the top and started to feel a bit better on the downhill, continuing on to the enforced shuttle, to get by the ongoing roadworks on Takaka Hill. Half an hour later on the Motueka West Bank road I was feeling average again , so pulled over and lied on the ground for a 20 minutes as my stomach settled. I must admit there was flashes of concern as I faced these issues not even halfway through Day one.
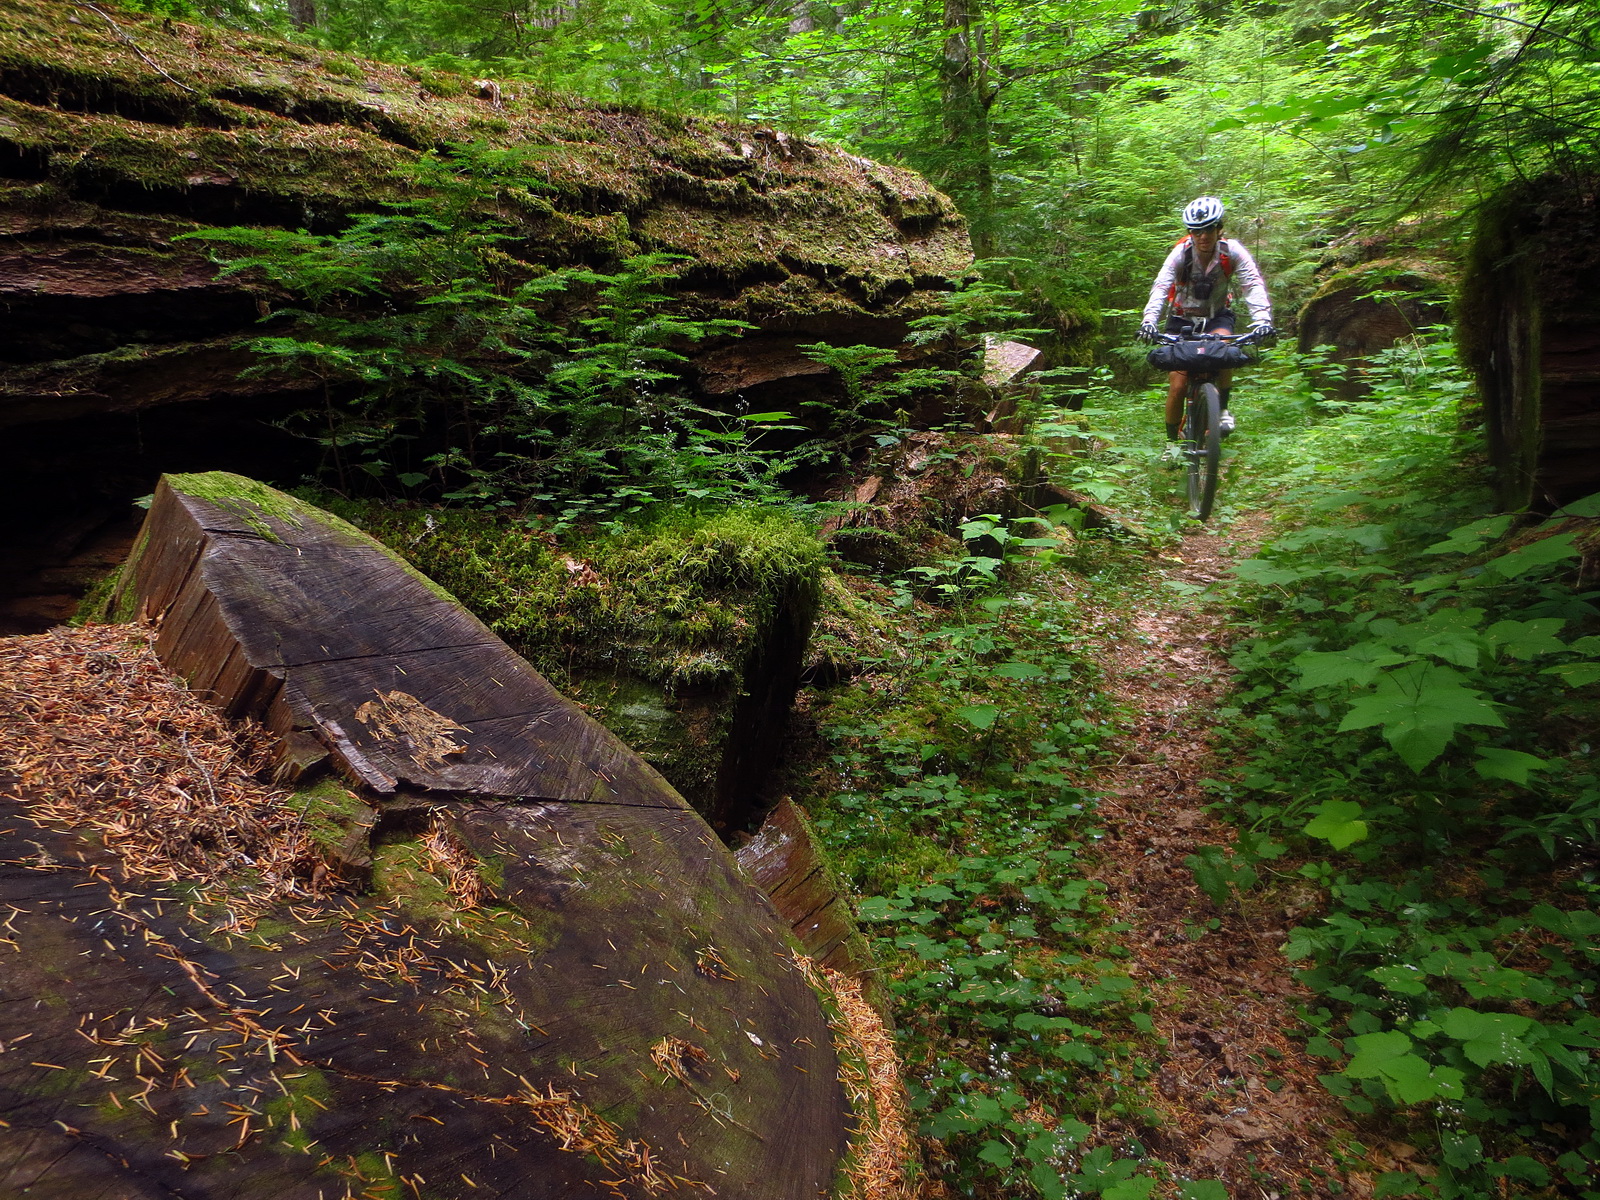
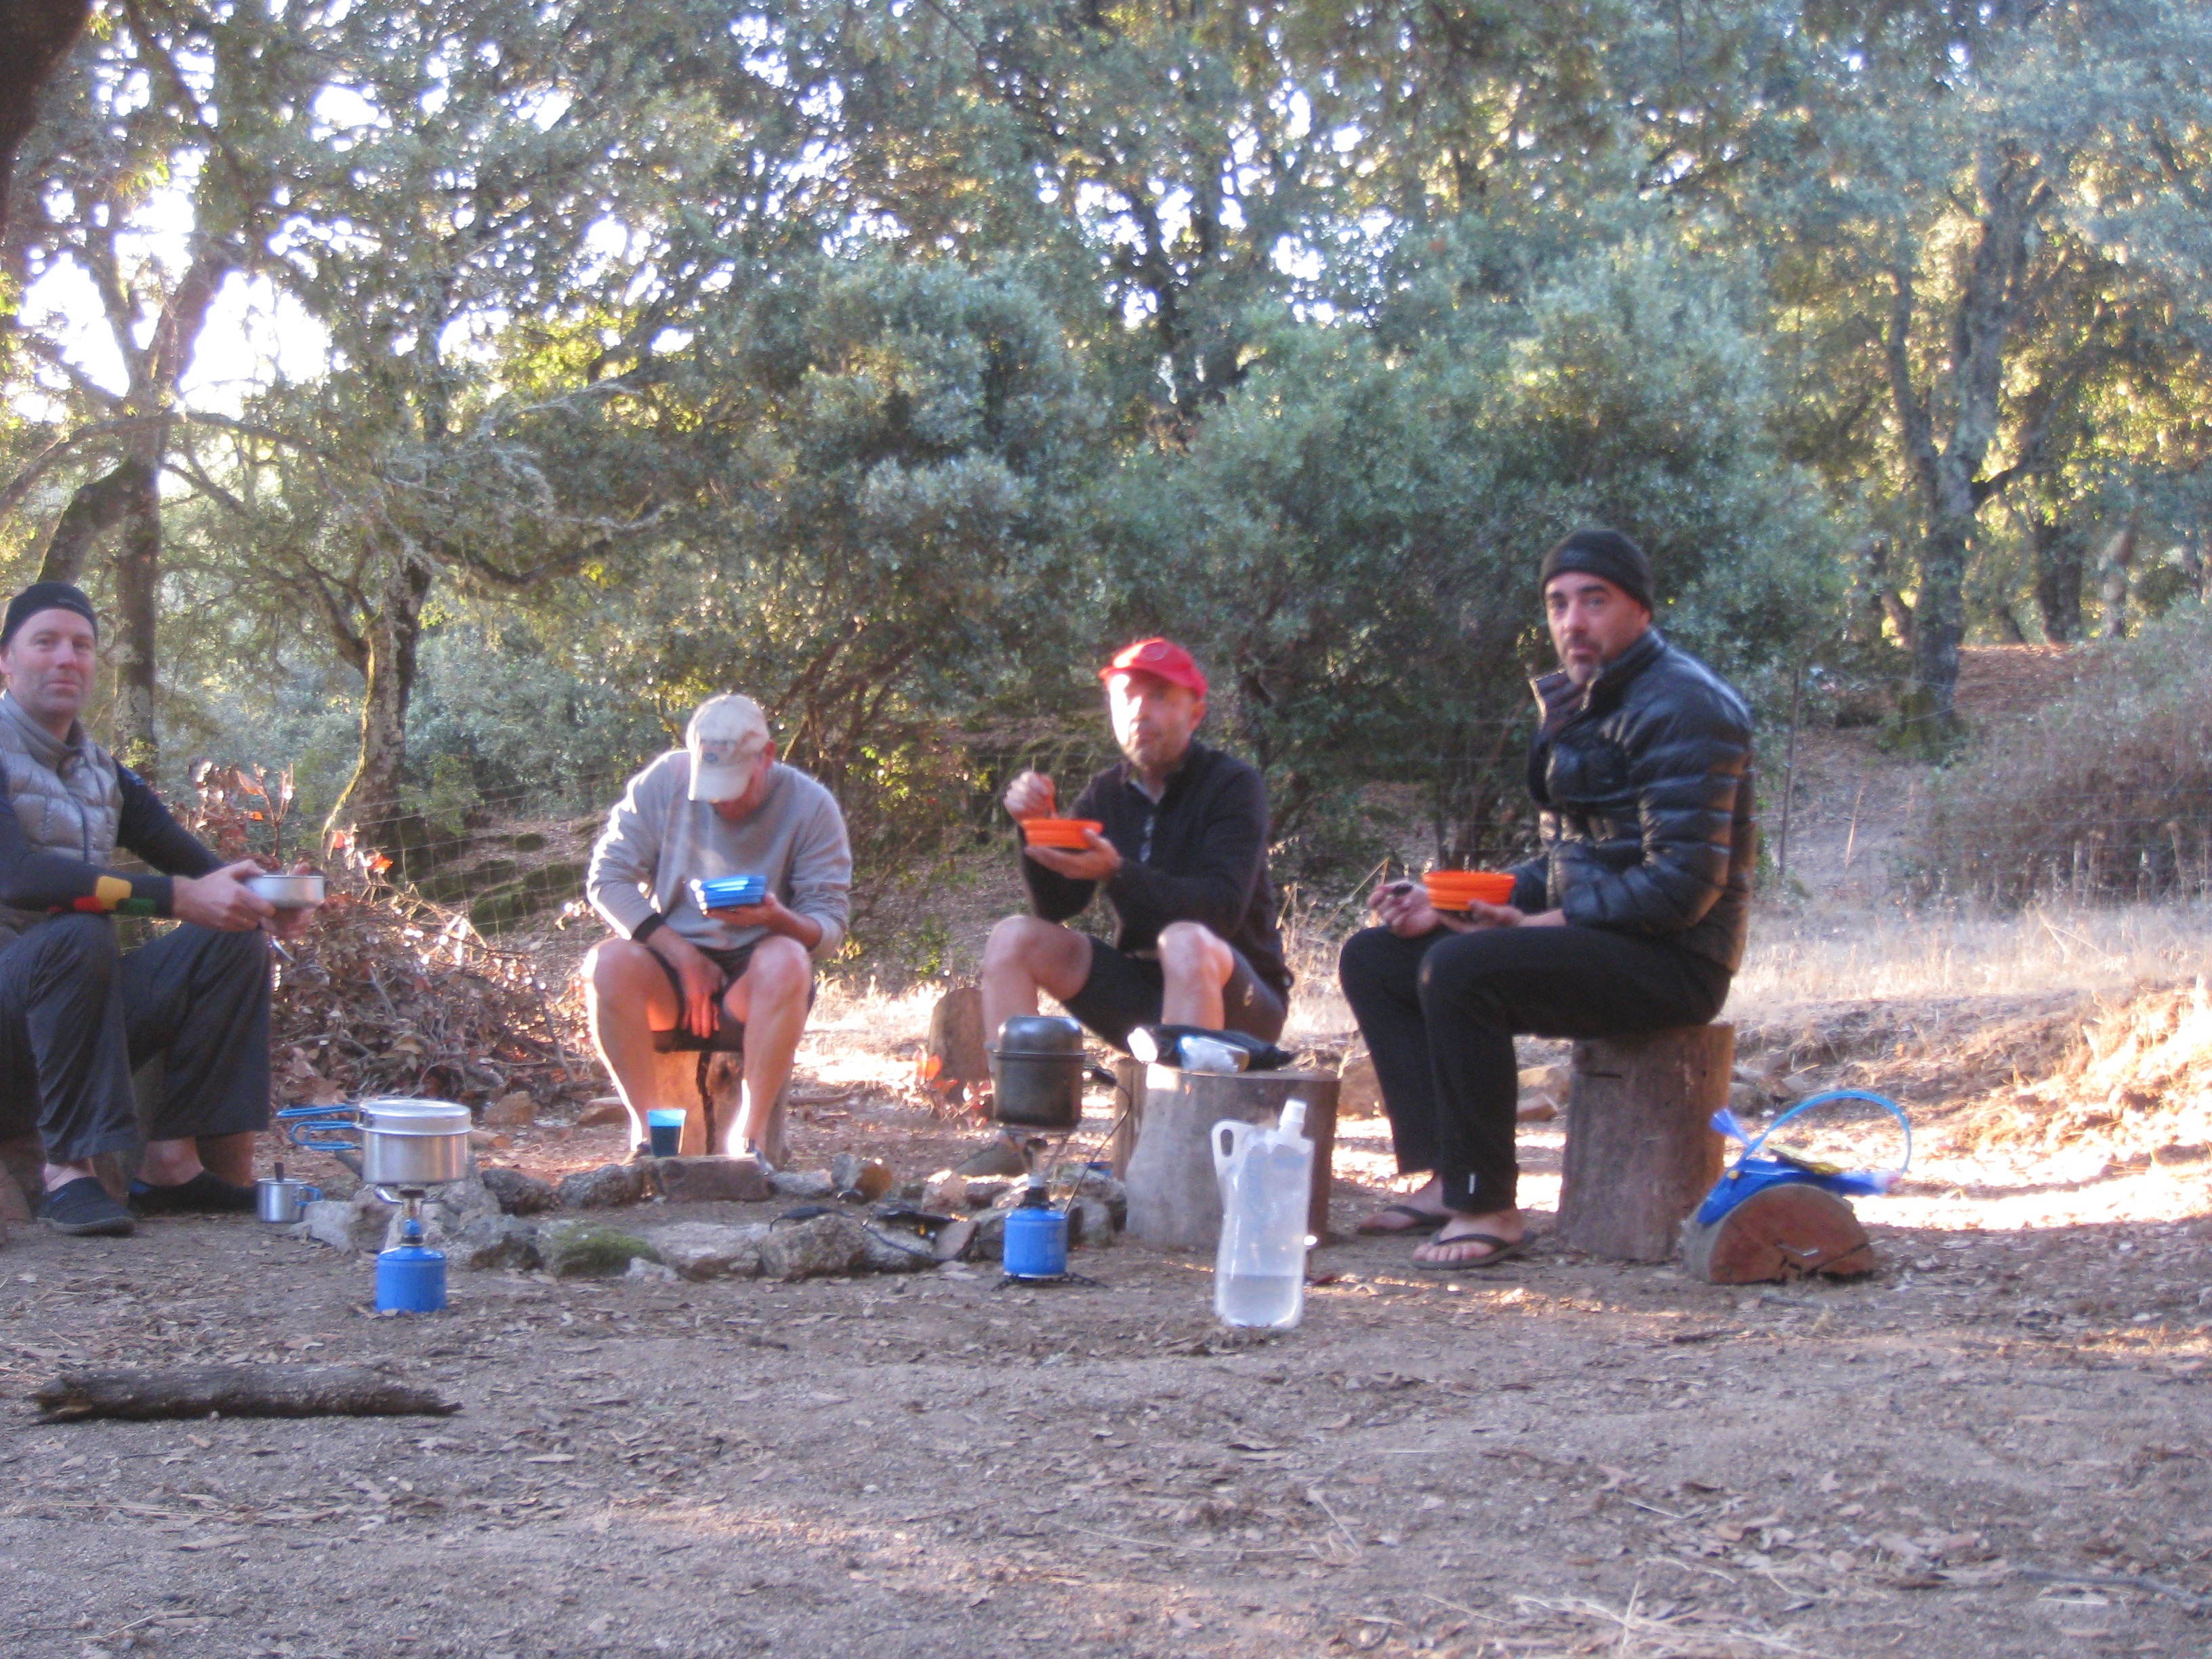
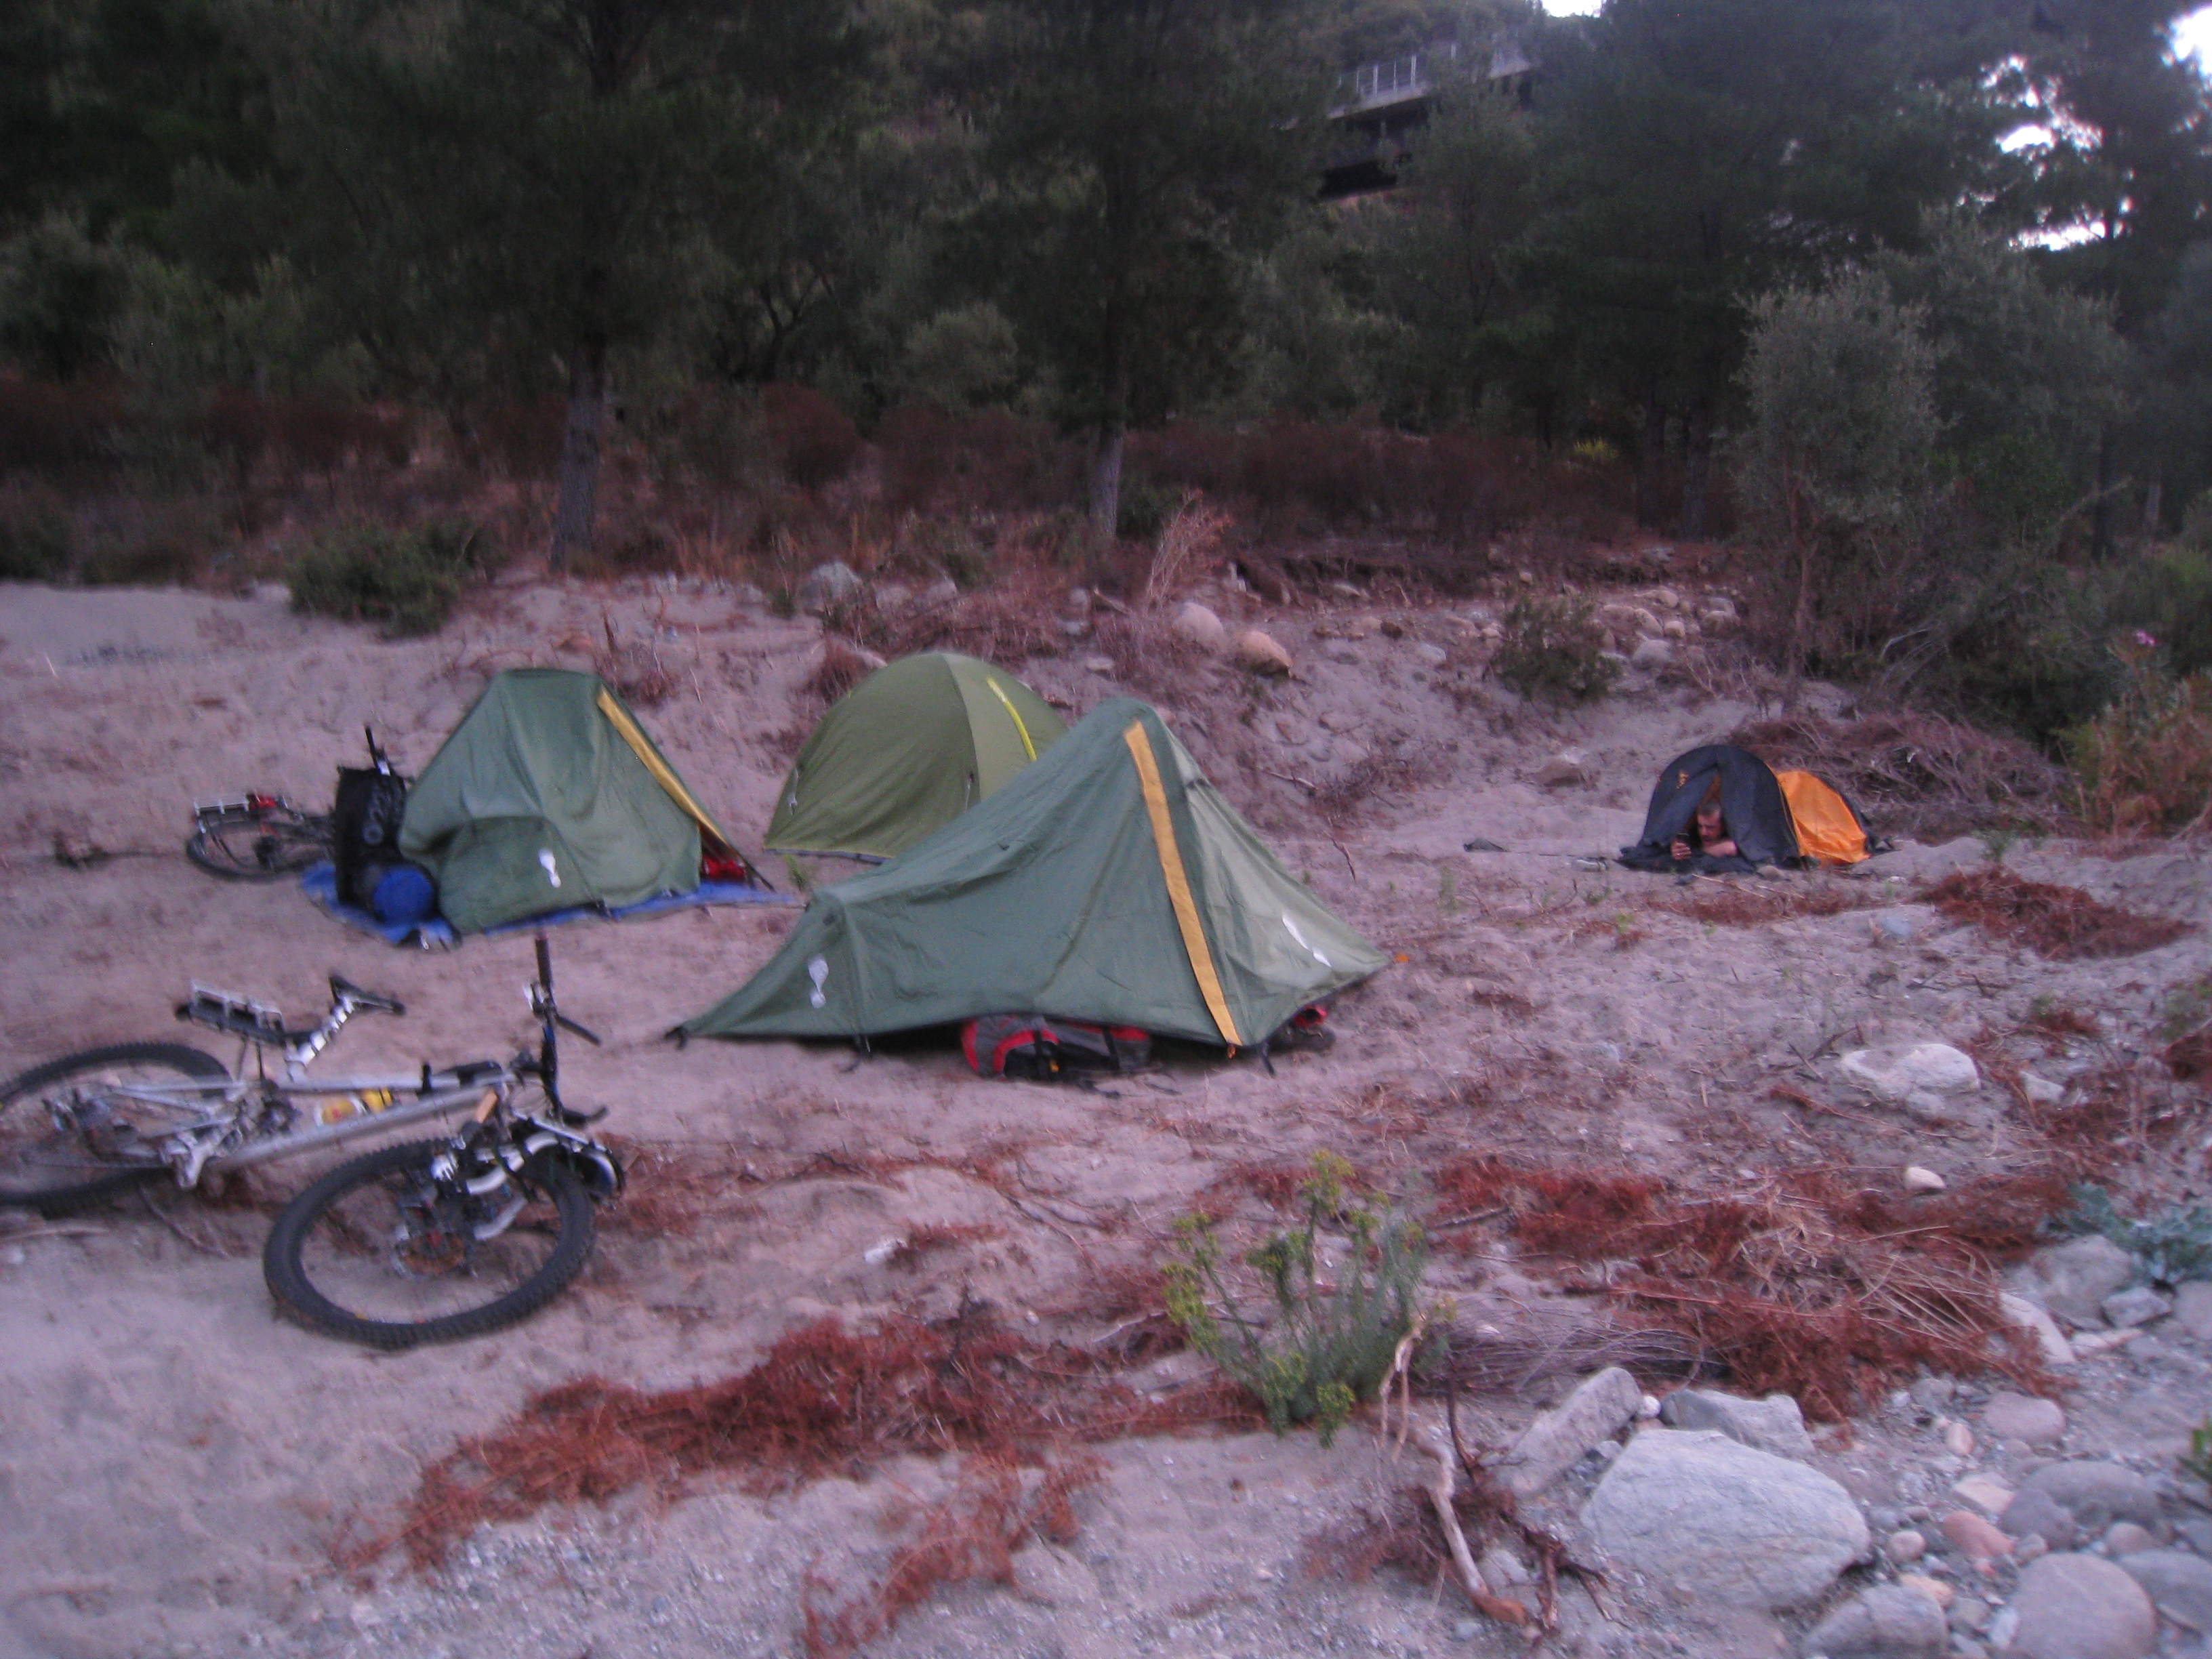
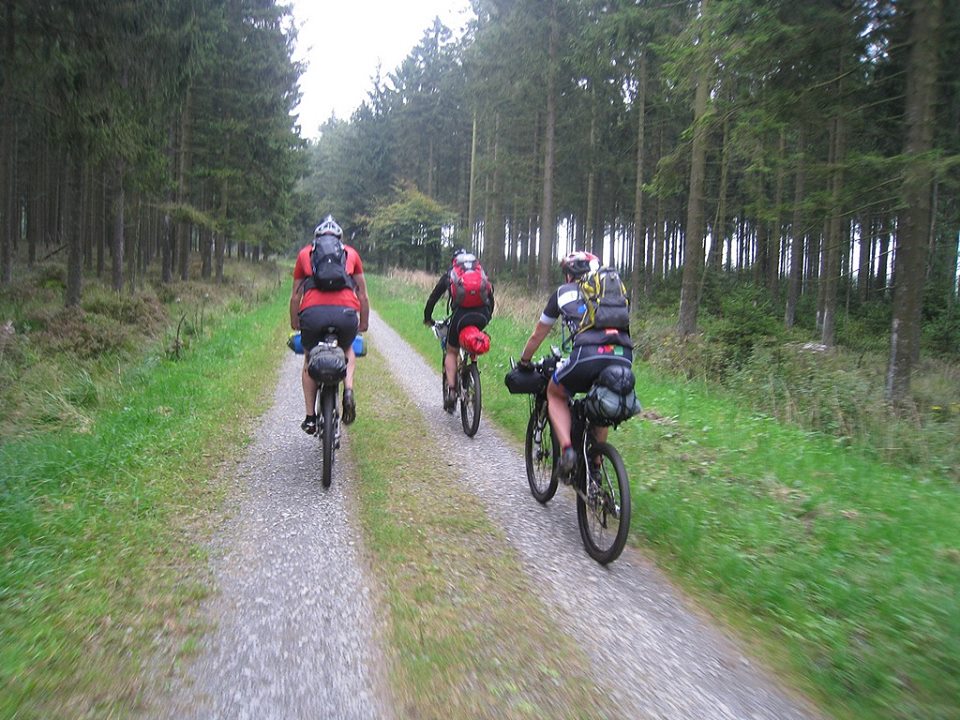
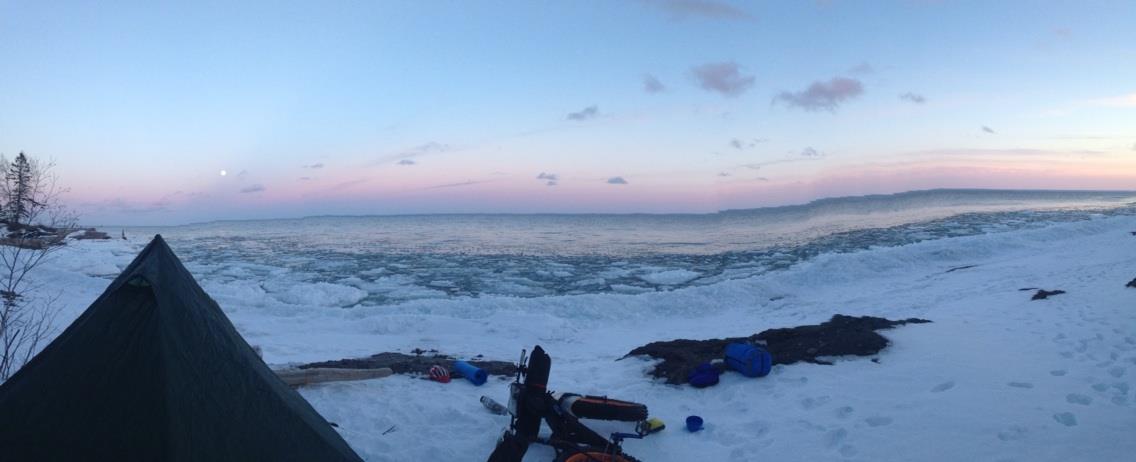
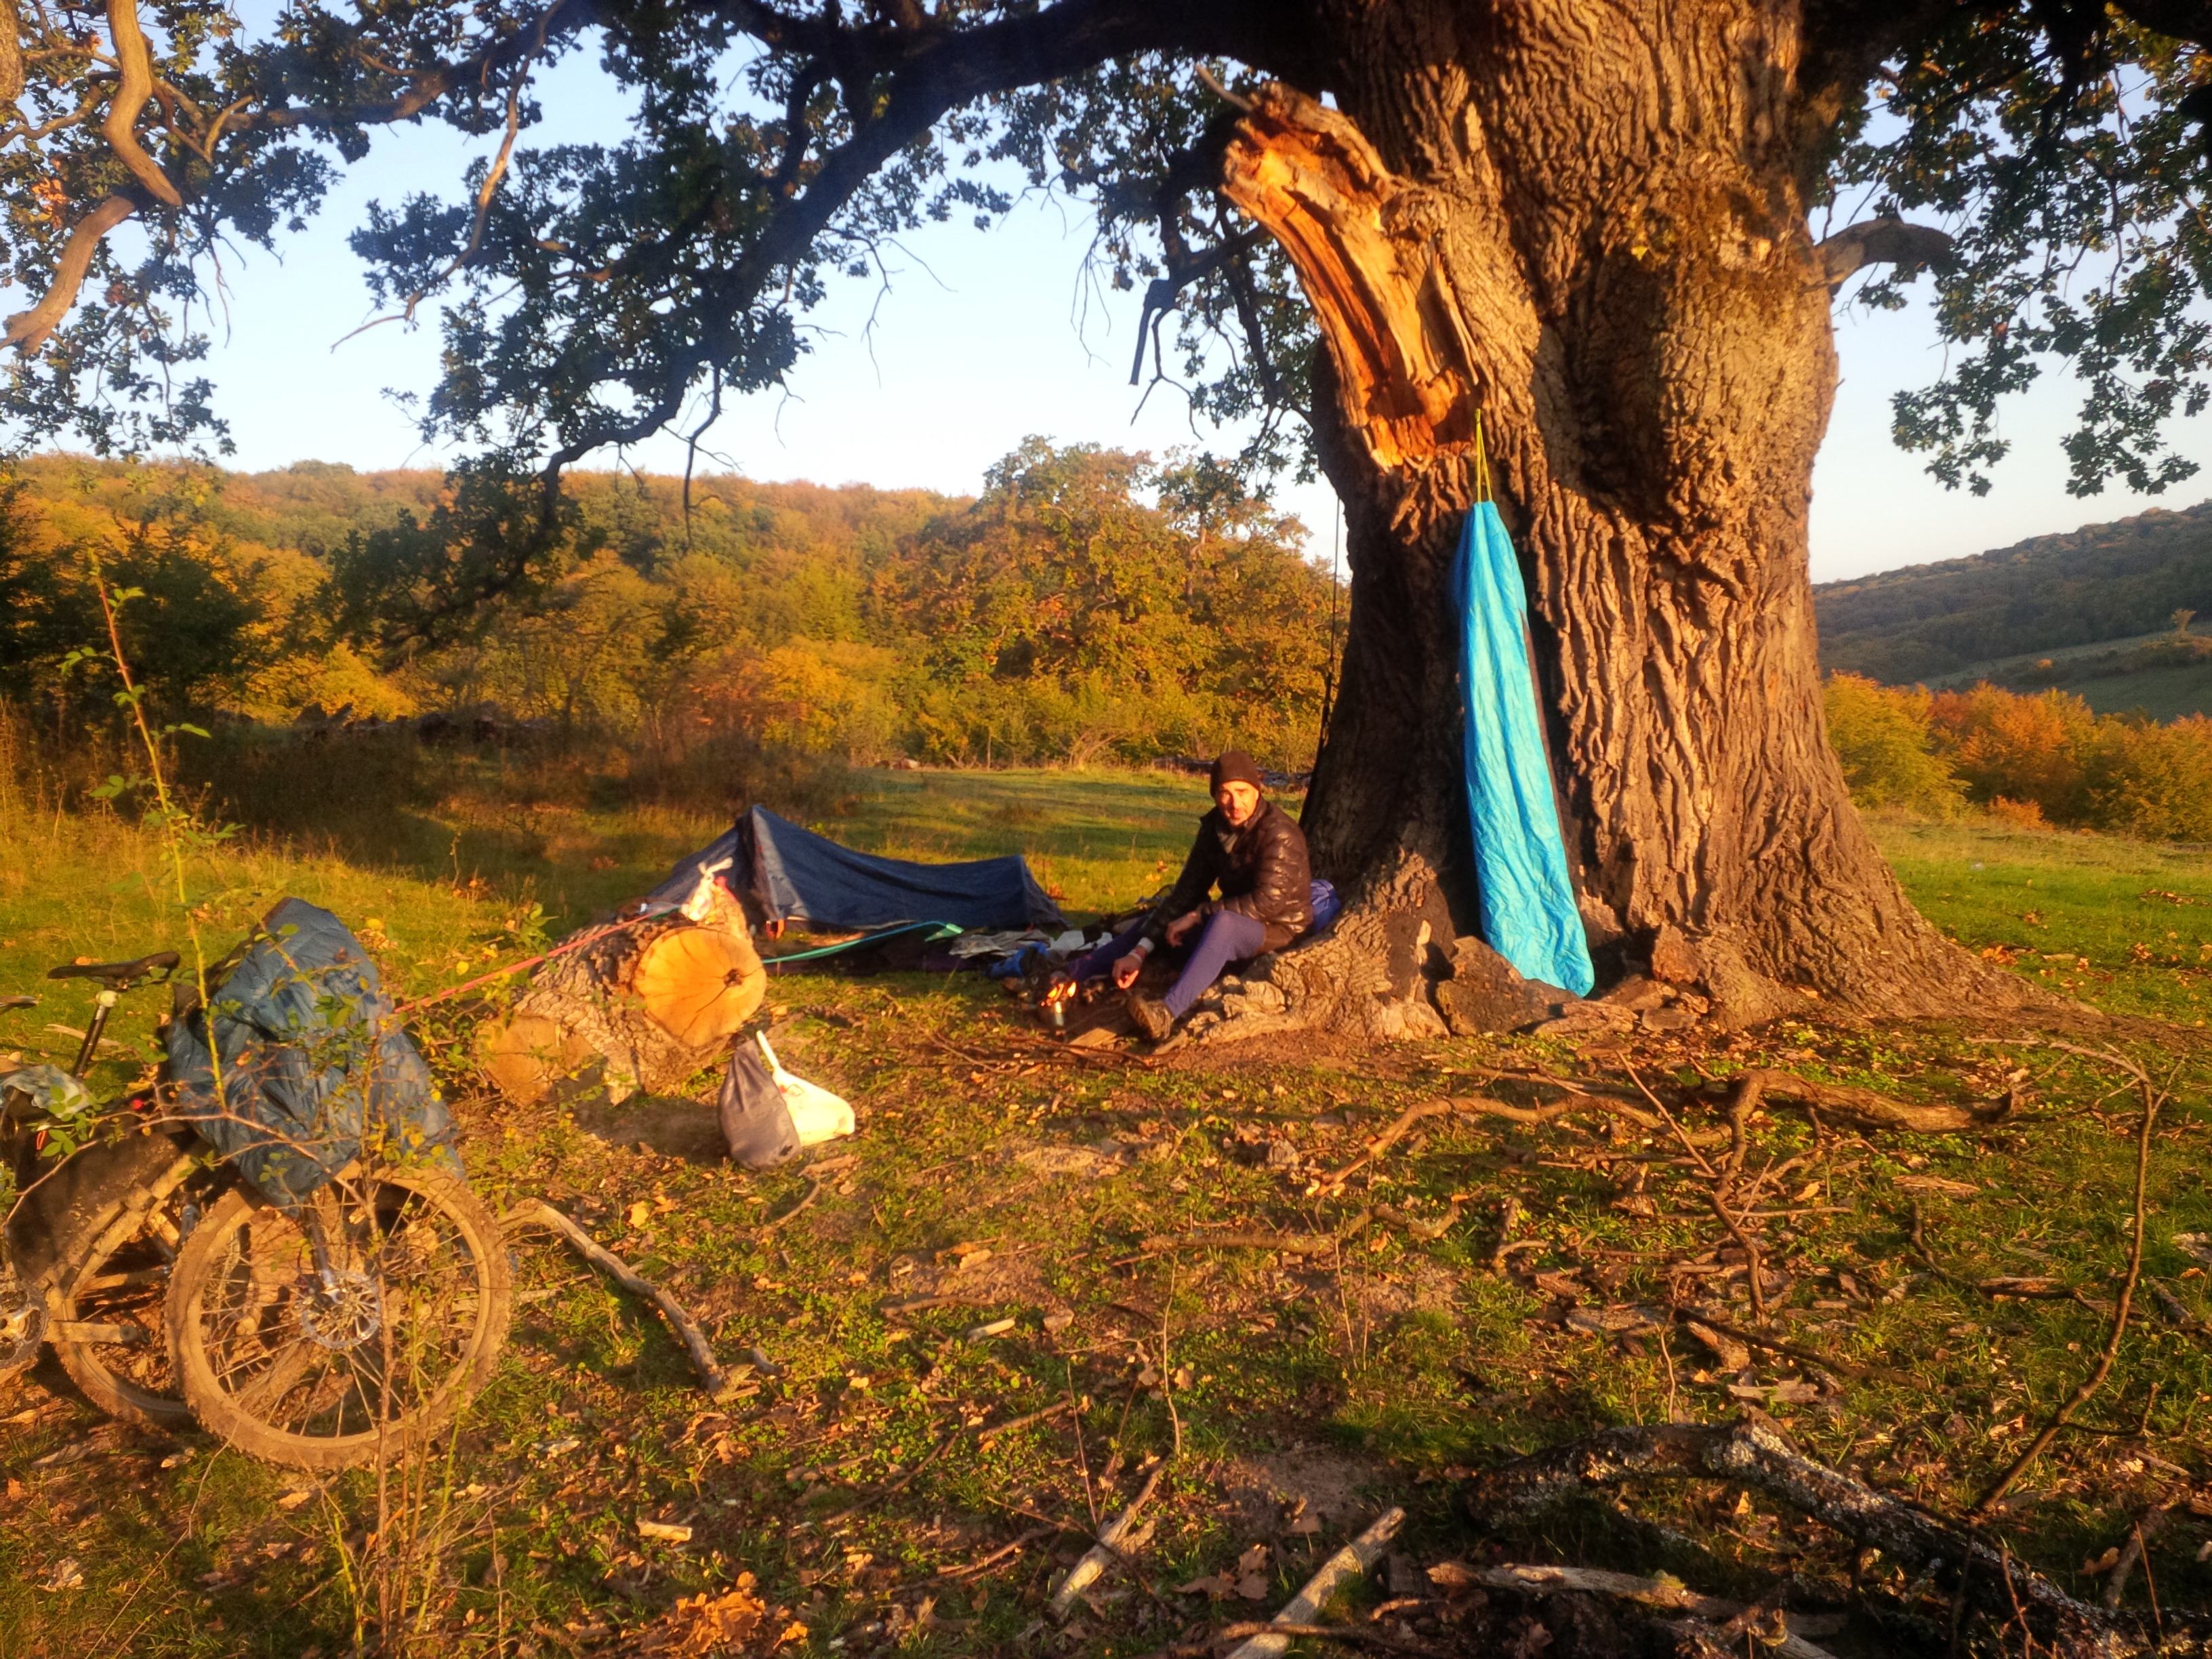
Thankfully a well used mantra ” this too shall pass ” came to fruition , and my wellbeing improved greatly for the rest of the day. I caught up with Tony who said he was now feeling not so great , then I passed Patrick and then Martin who was fixing a flat tyre roadside. I felt like I was back in the game with only Ollie up the road as I rode through the first section of private land. The hours passed without incident as I made my way towards Murchison as the sun was lowering into the western skies. Martin and Patrick pulled up in Murchison just as I was about to roll out after filling my water bottles. Into the darkness I pedalled happily down Matakitaki Road on towards Maruia Saddle, back out onto Highway 6 briefly before heading into another private farm. I eventually arrived at Springs Junction close to midnight. I was tempted to push on over Lewis Pass, but decided it would be best to stop and rest. Somewhere around 1am I got into my Bivy Bag under a shelter at Marble Hill after close to 350kms in the legs for day one. I later found out that I had passed Ollie as he was in his Bivy before the private section and he would pass me as I got some shut eye. What a day that was , I was happy to have a rest and reflect on a day that turned out pretty good after some initial challenges. I was on the bike again before 4am and heading up towards Lewis Pass on a cool crisp morning waiting for the first shimmers of light through the beautiful forest that embraces the road.
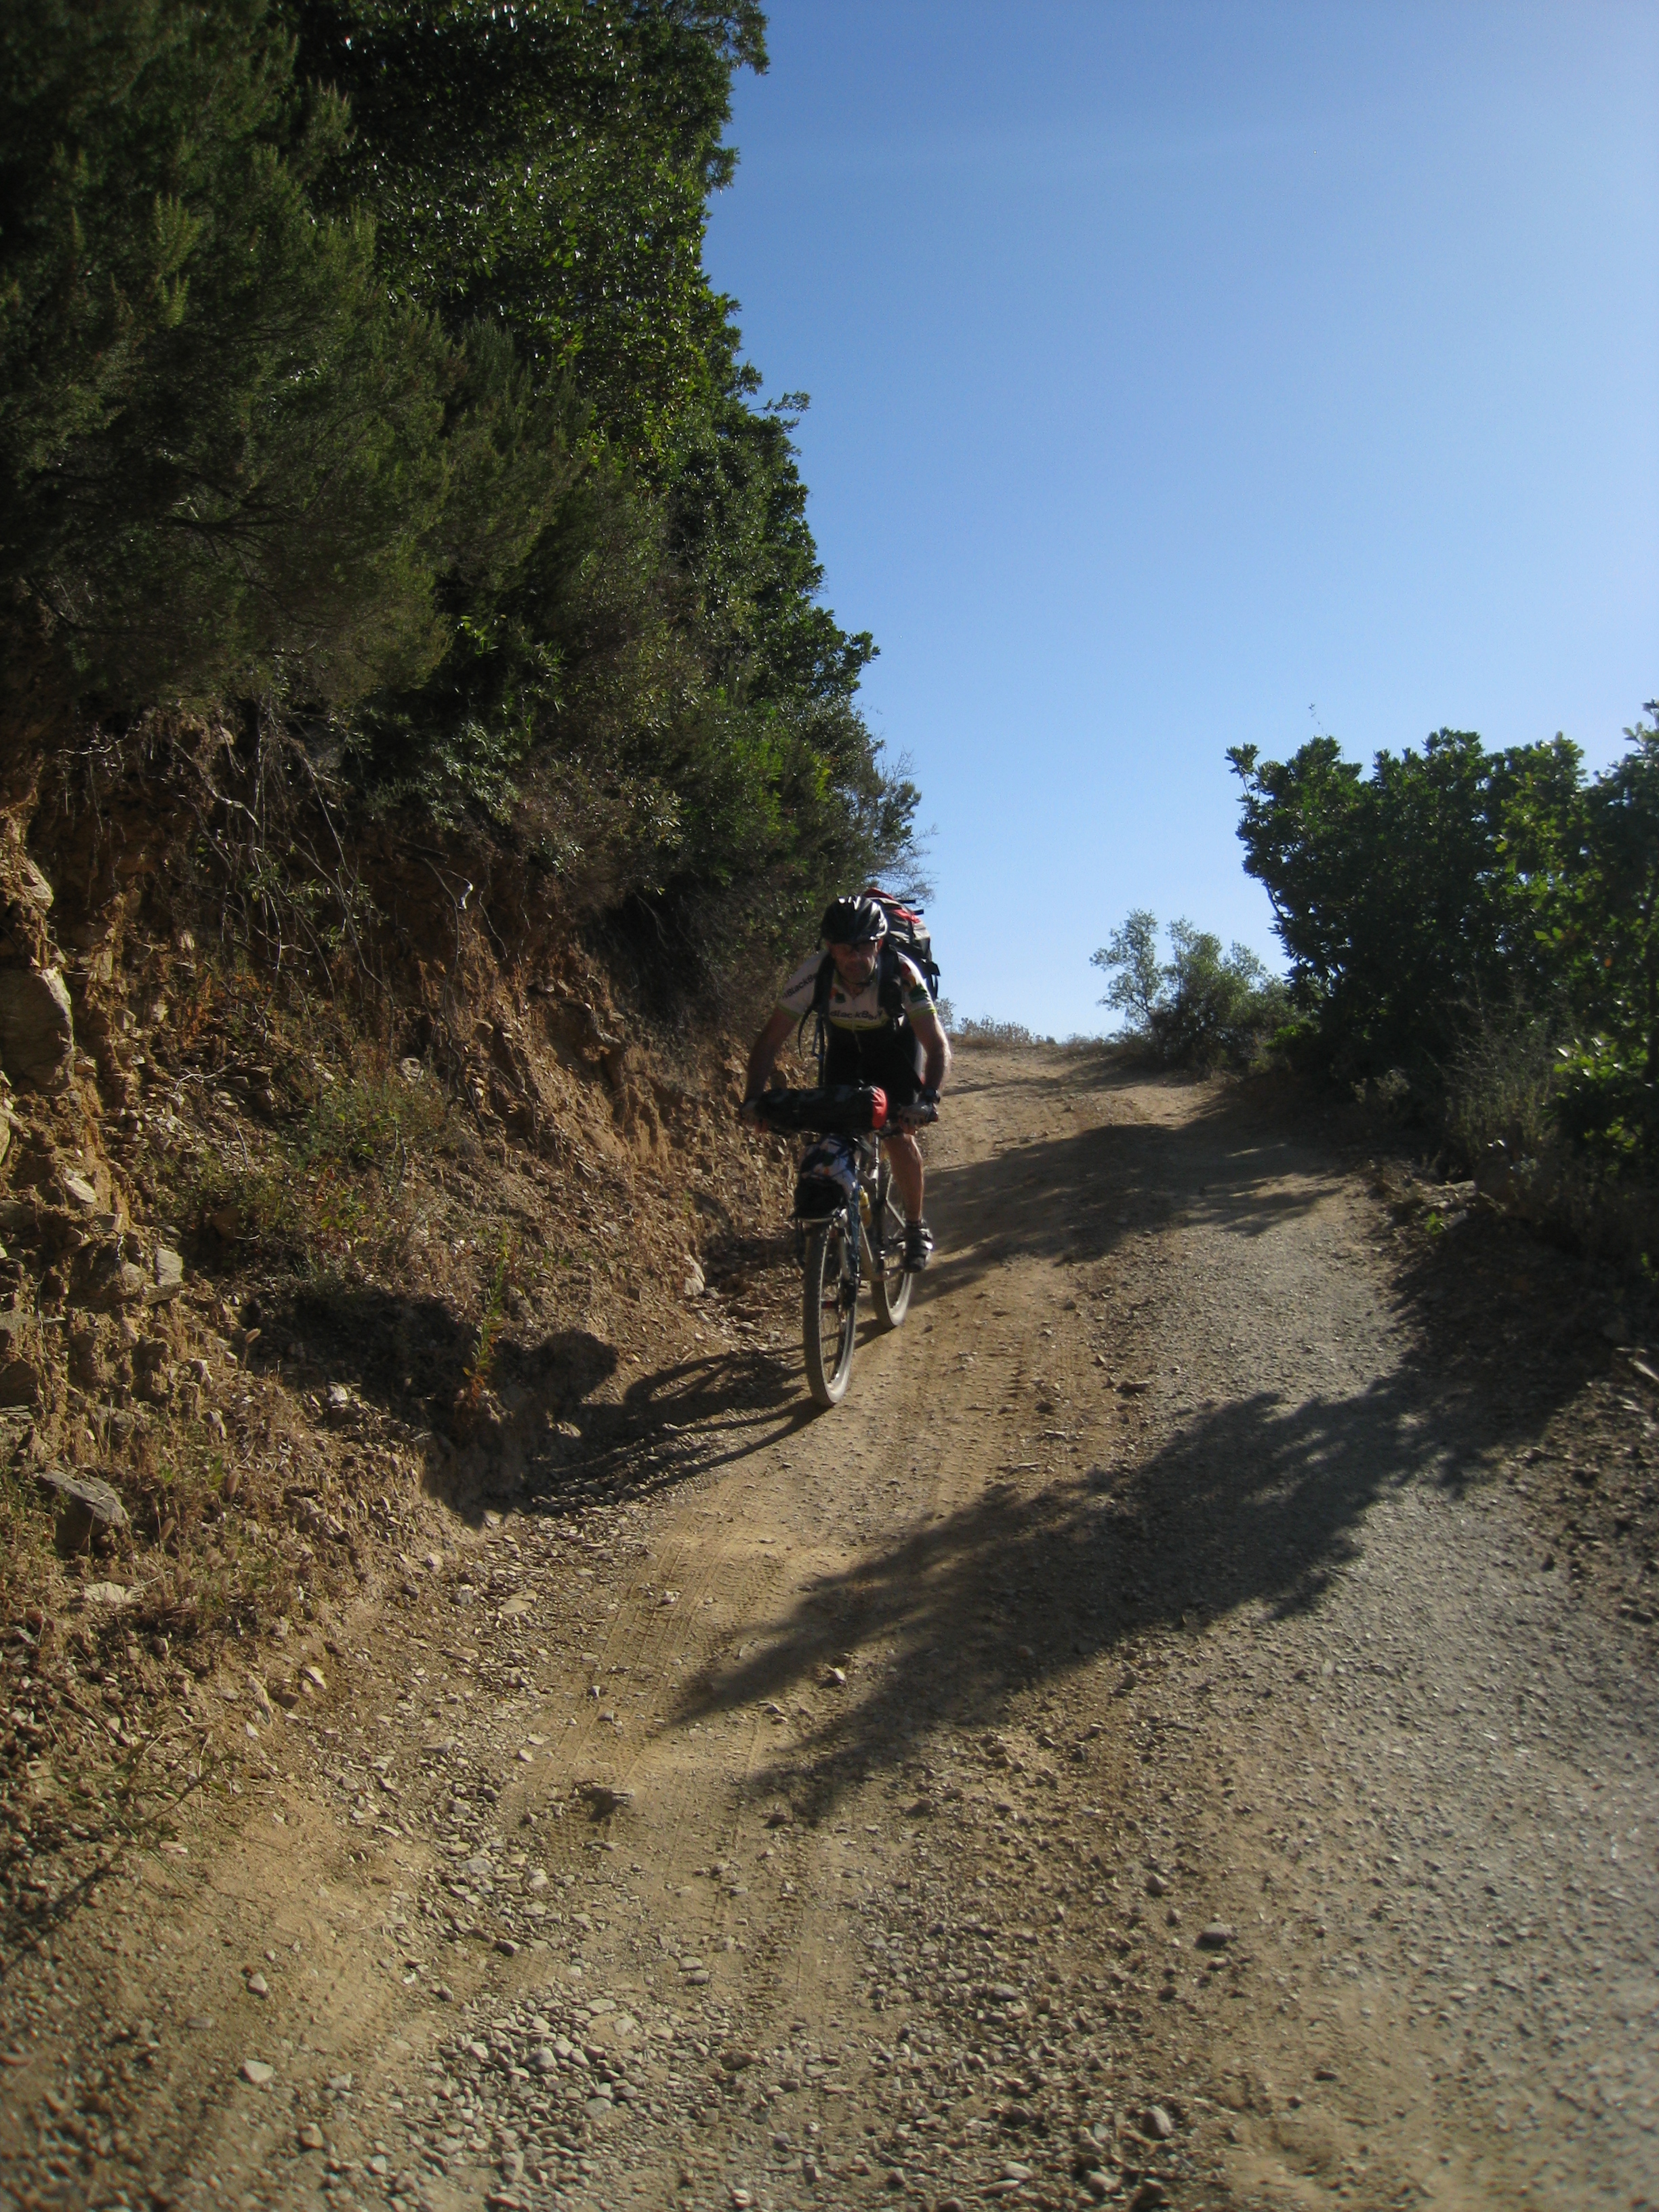
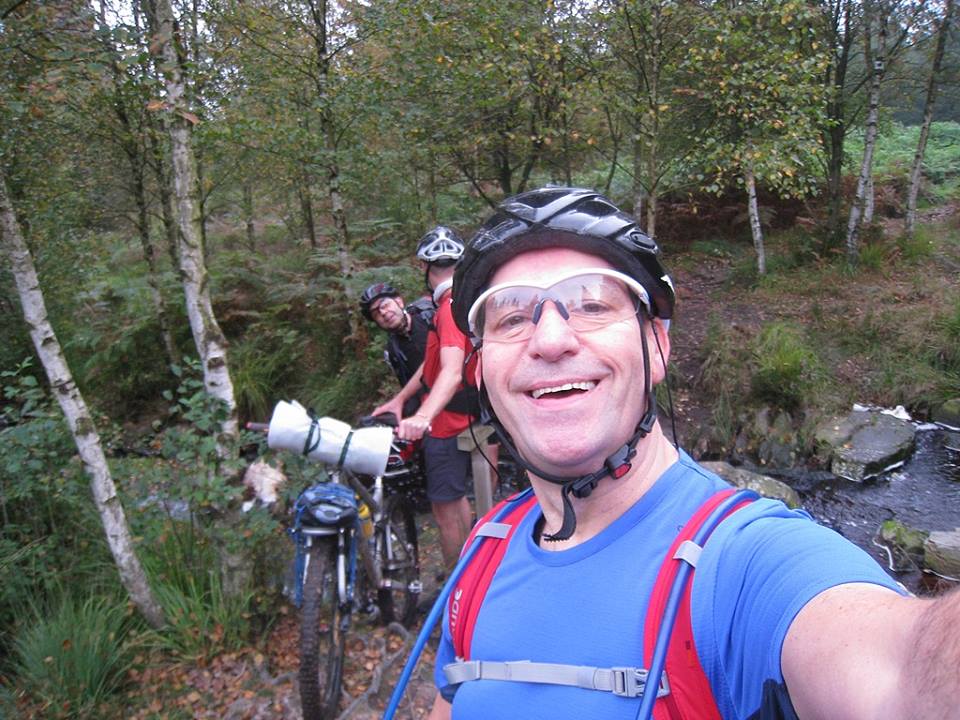
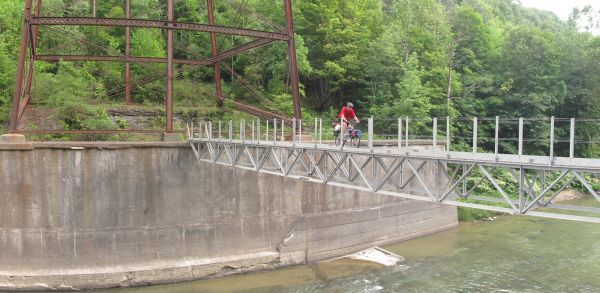
Ollie negotiating another Swingbridge
I , like most riders availed of the option to send a food parcel to the Boyle Village. At the turn off I met Ollie who was preparing to get going, Patrick on the other hand was all tucked up and cosy on the bus shelter bench, he did not look like he was ready to move just yet The next resupply was 240kms away at Methven, this was a bit of an unknown section with numerous private stations we would traverse. I was feeling good and ready to go
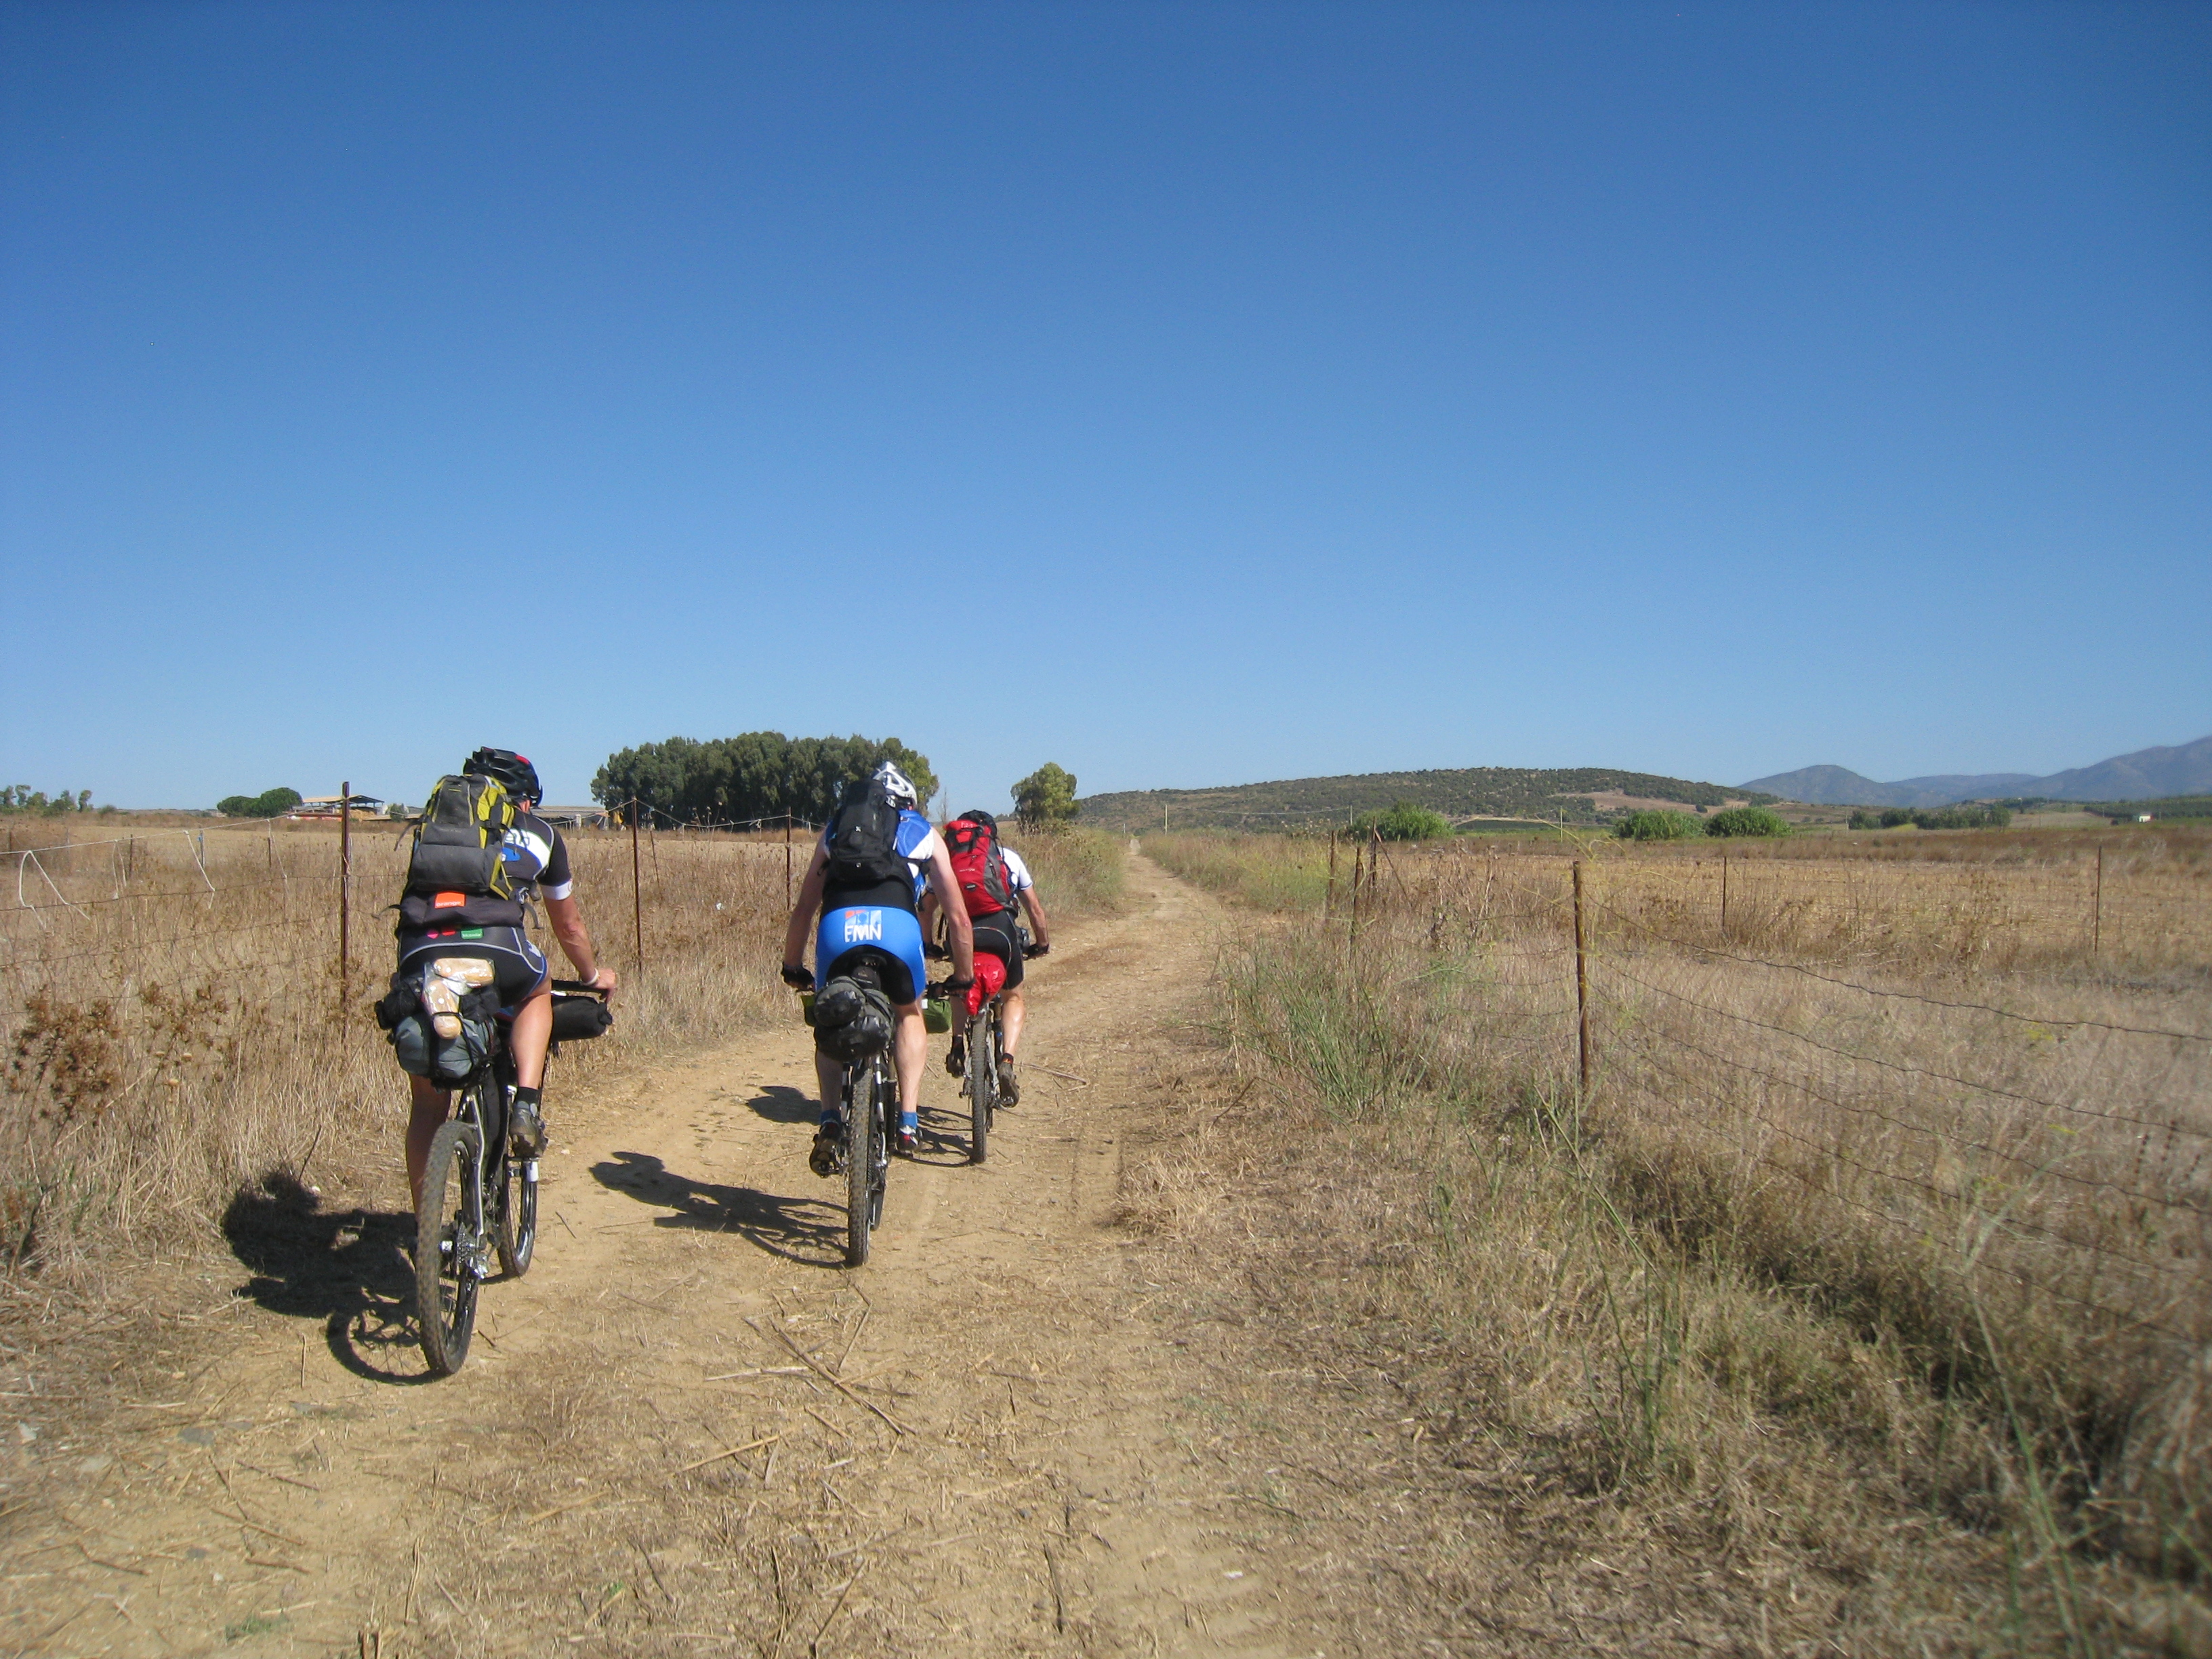
I caught up with Ollie on the highway before Windy Point and the turn off to Lake Sumner. This is a beautiful section along the Hope river on a walking track, Its pretty slow going due to lots of windfall and some gnarly roots resulting in lots of on and off the bike. It was great to ride with Ollie and reconnect after not seeing him since the 2016 Tour Aotearoa. We pushed on knowing only Martin was ahead , although we did not know how far.
Getting high over Lake Sumner
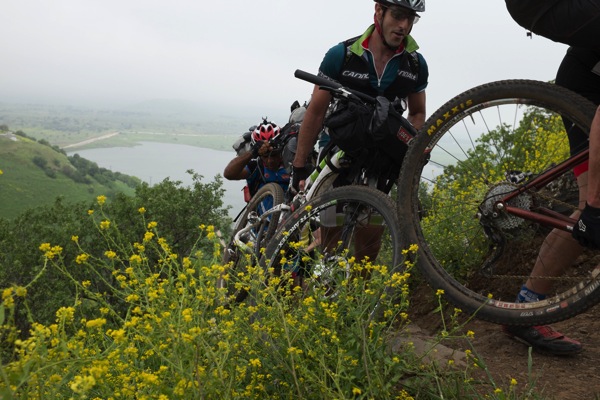
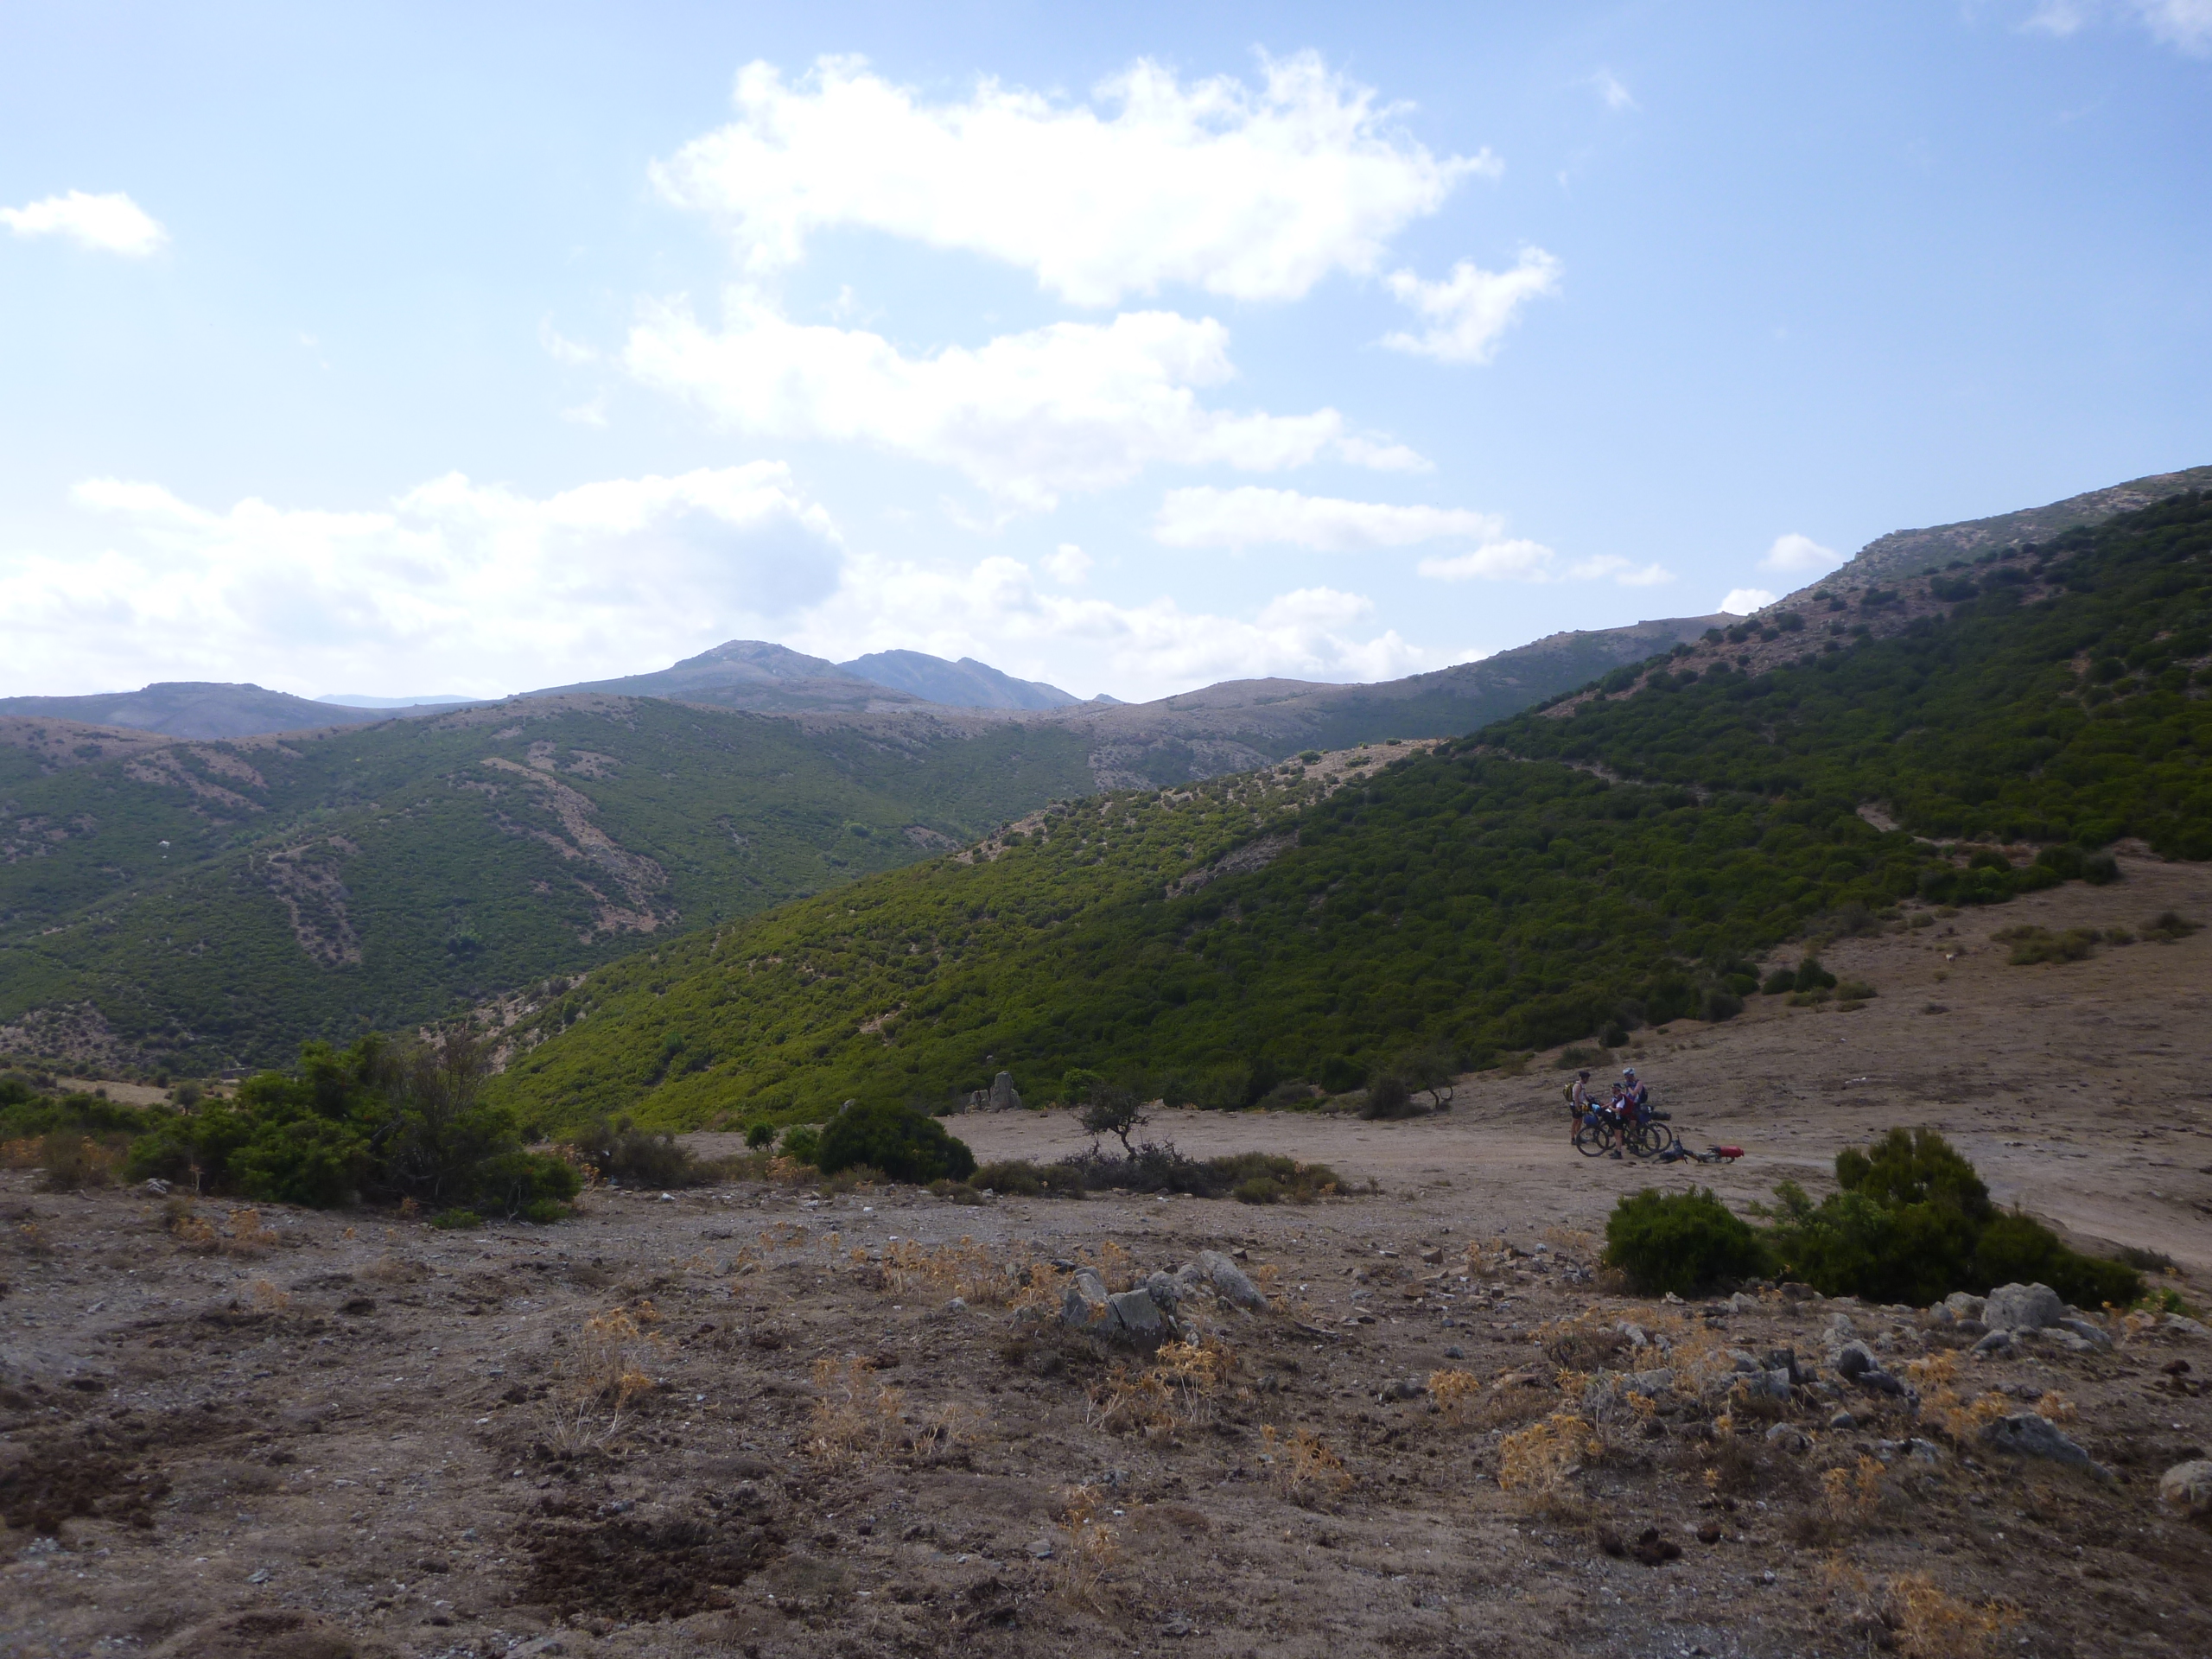
Leaving Lake Sumner and heading into another private station towards Lake Mason about lunchtime on Day 2 , we were greeted with our first sustained Hike a Bike up a super steep trackless hill. The views looking back were spectacular as I sucked in the precious air to replenish my hard working lungs. After skirting around the picturesque Lake Mason , there was some nice riding on farm tracks in amongst the big hills.It felt remote in here , I was happy to be feeling better and was enjoying riding on new territory.
Ollie pushing up the Dampier Range
Another feet resting moment
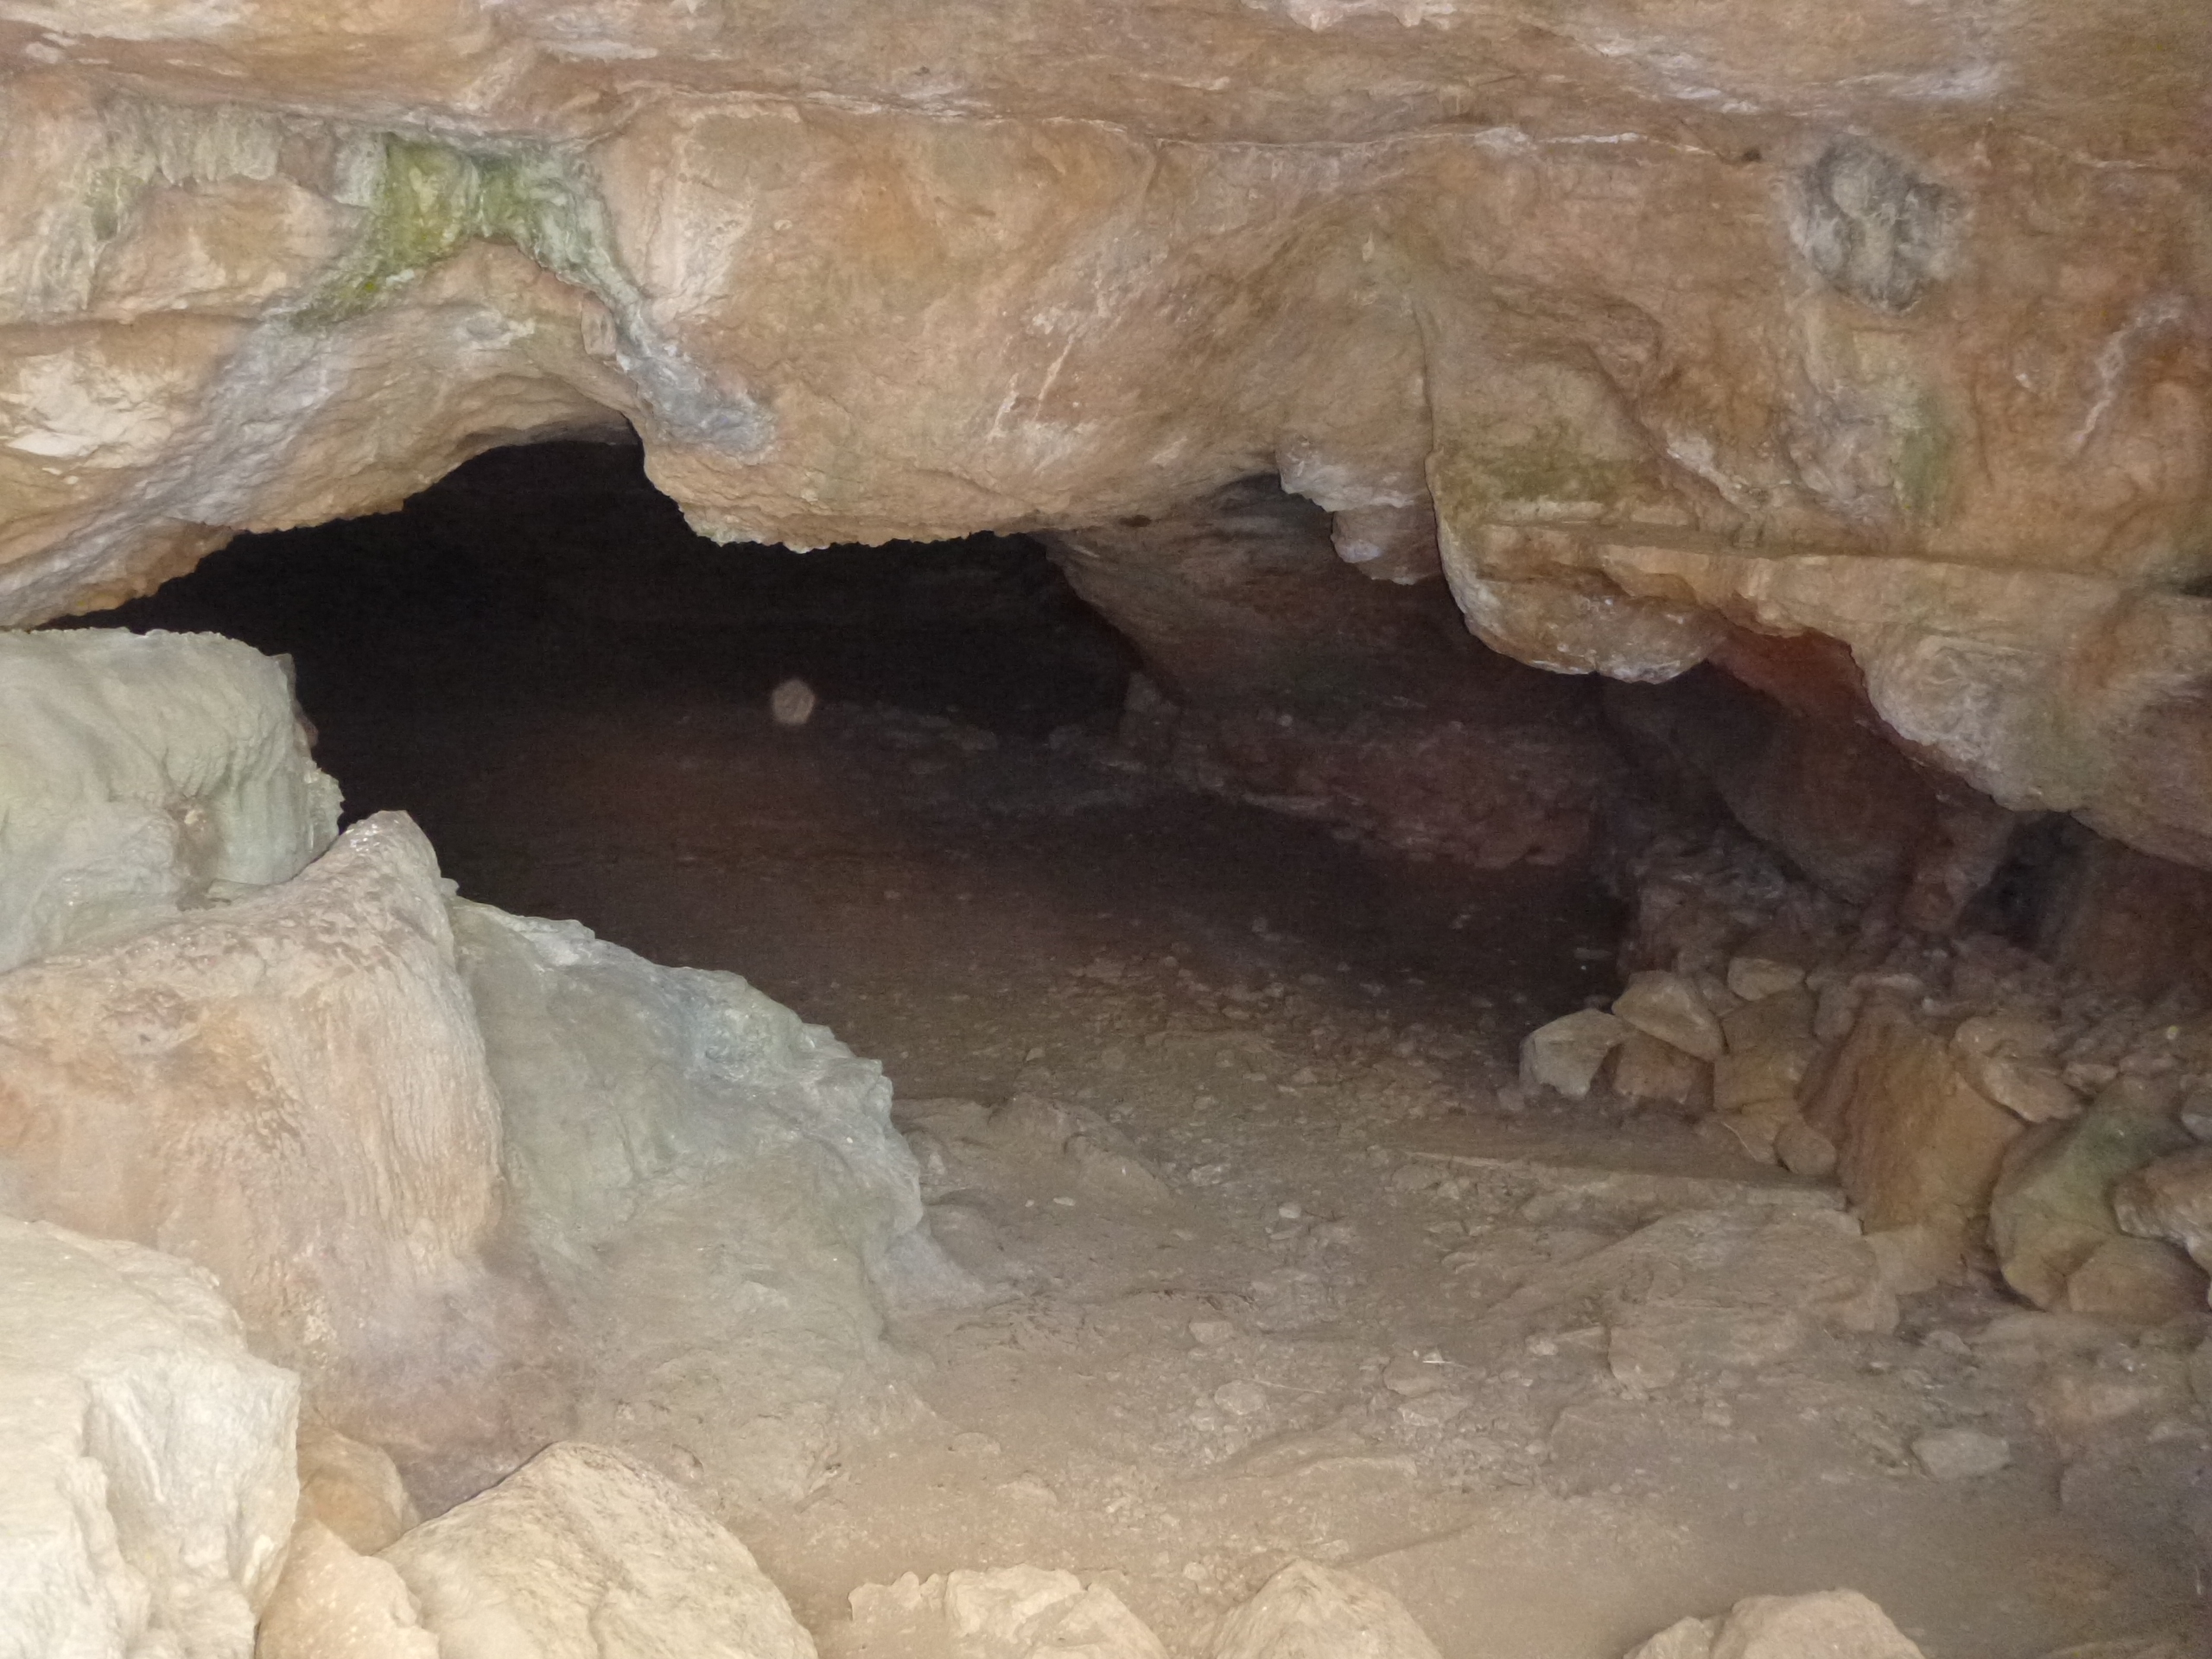
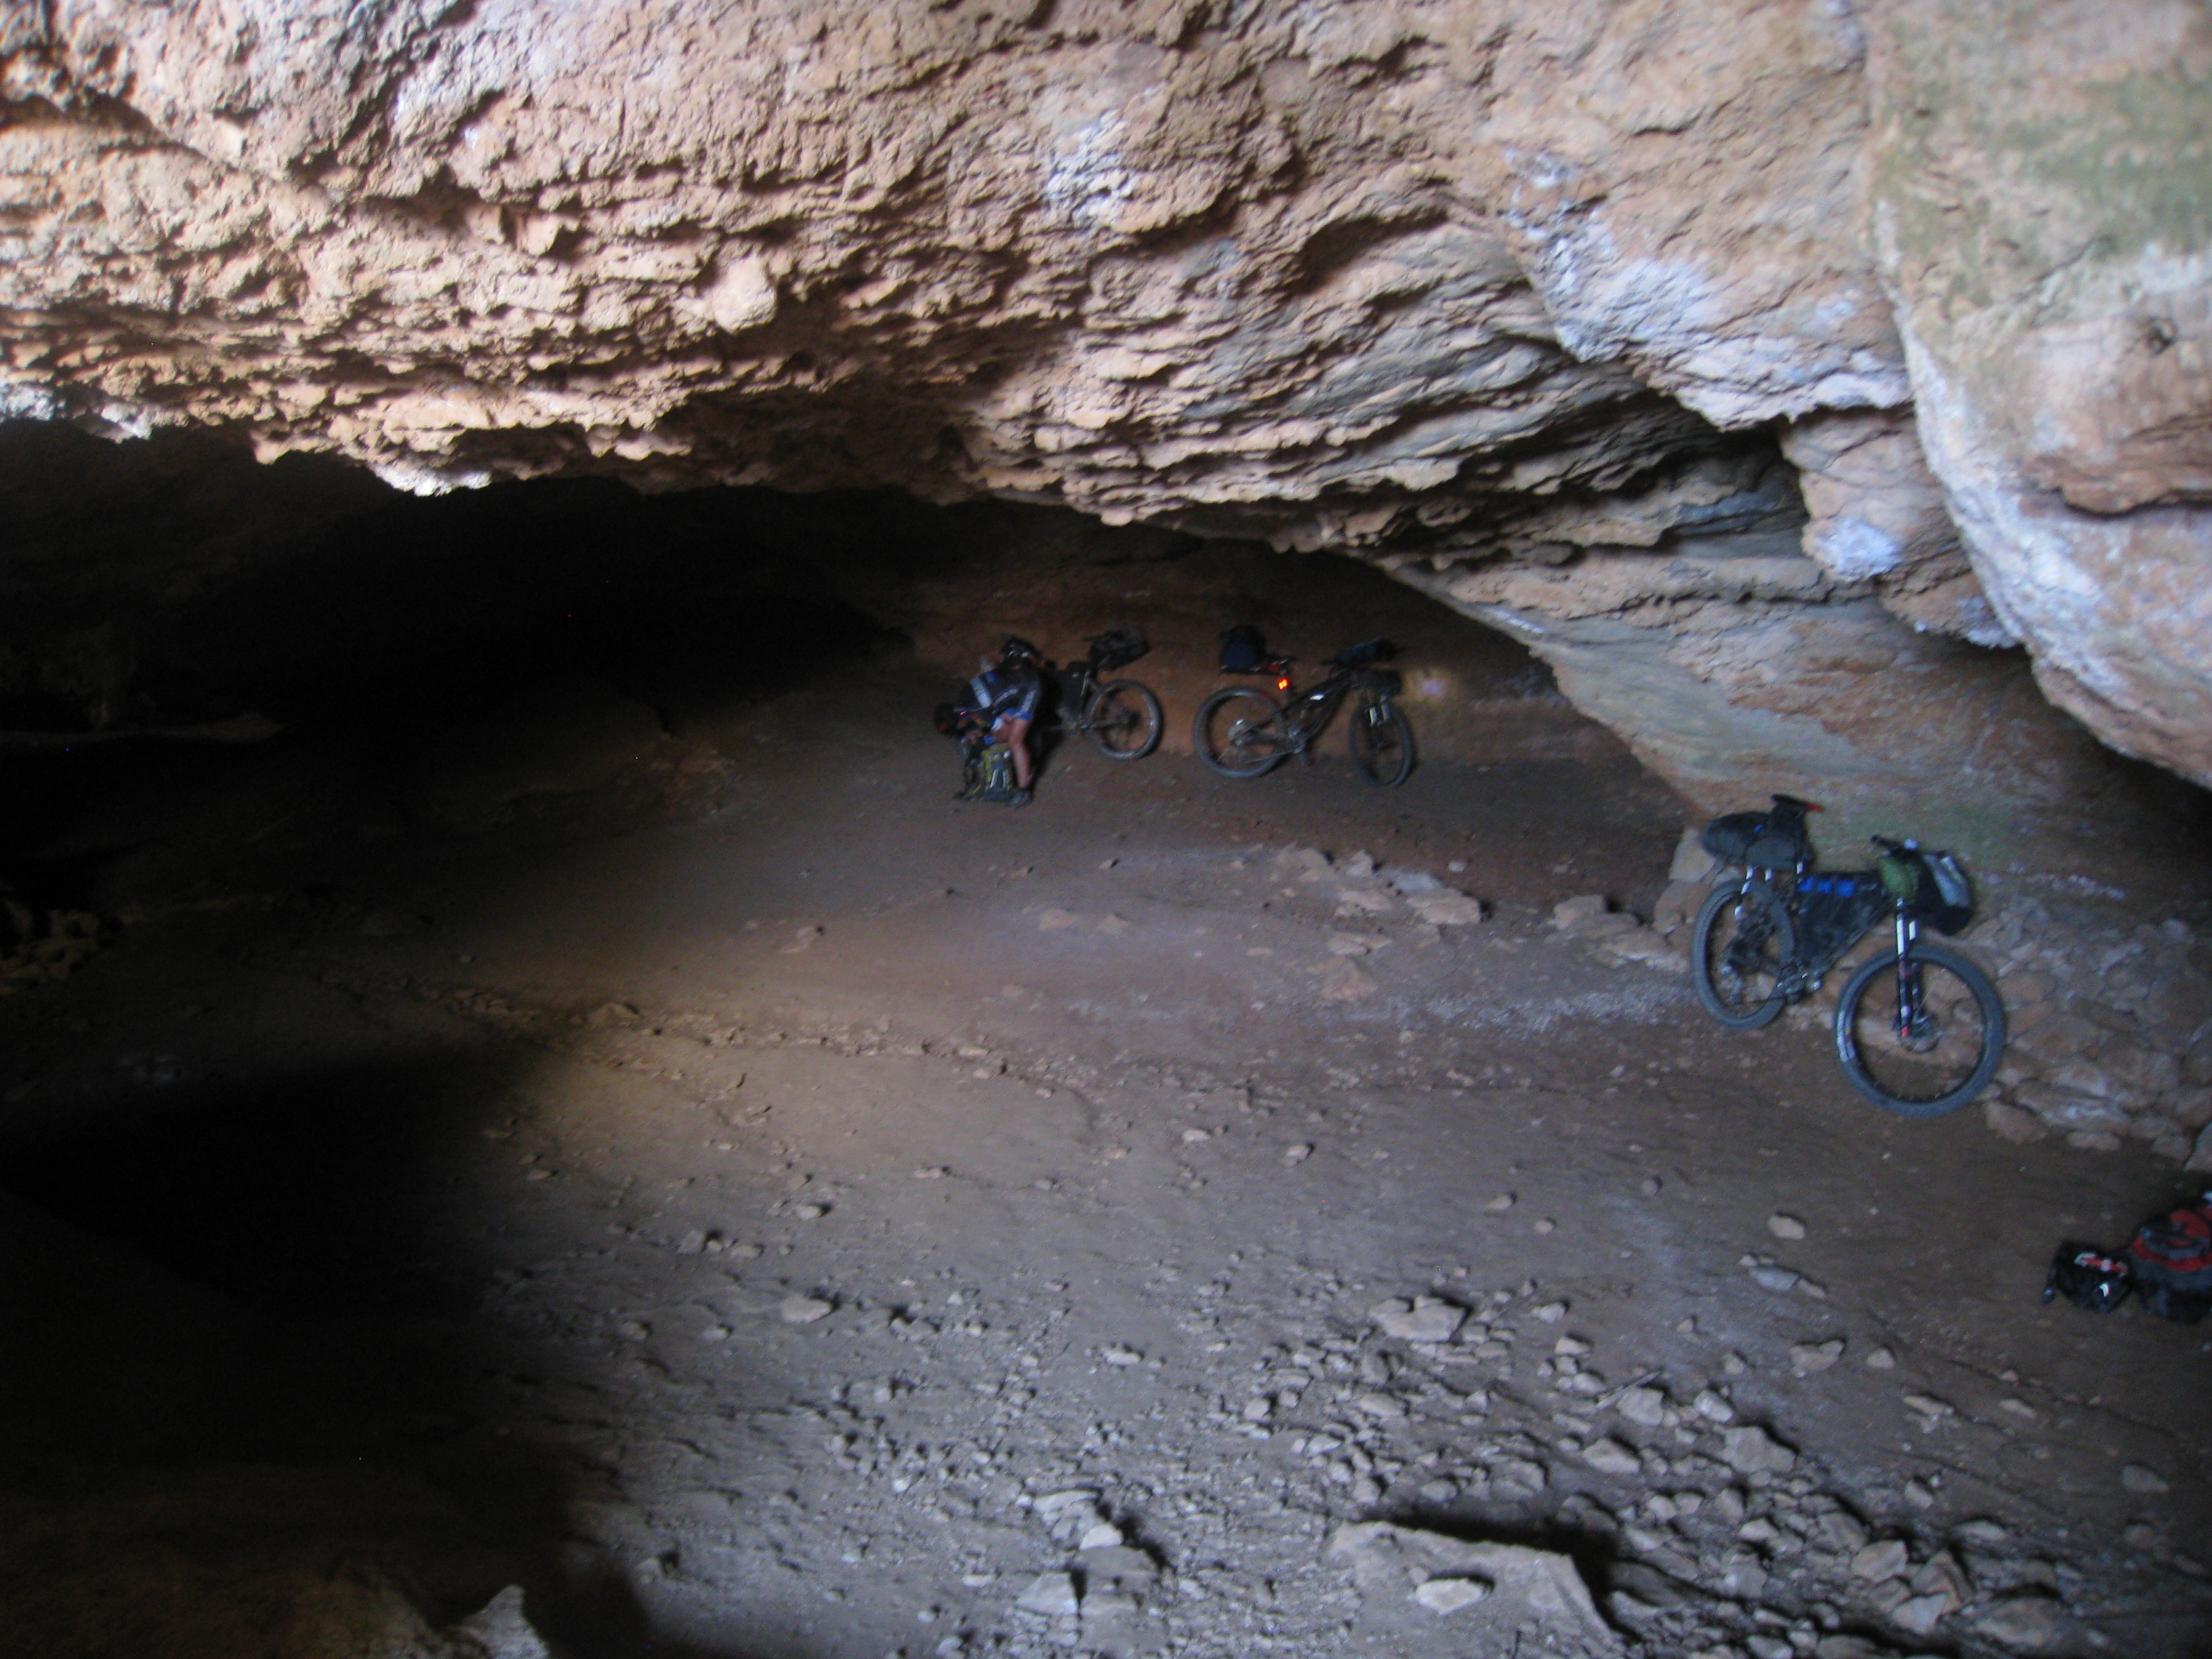
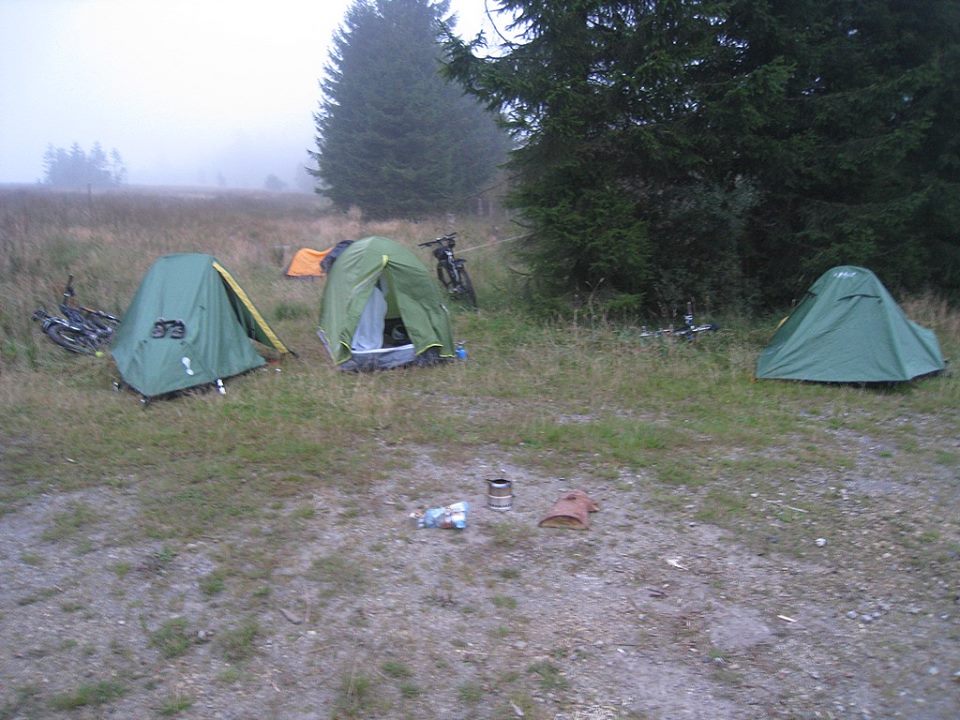
The Dampier Range was next , this was a super hard HAB section. My self and Ollie were pushing up here as the sun was dropping on another epic day. The Tussock grasses seemed to be longer as we got higher and the barely there track was hard to find. To be honest, I did not have a bike carrying system practised pre race, so it was a case of pulling , dragging, lifting and whatever it took to get over this mountain. Myself and Ollie pondered the racers coming behind with heavier set ups than ours, it was a slog . We eventually rolled down to Andersons hut after dark and decided to Bivy outside, as the Hut was a Ramshackle rodent riddled affair. Only 110km today !
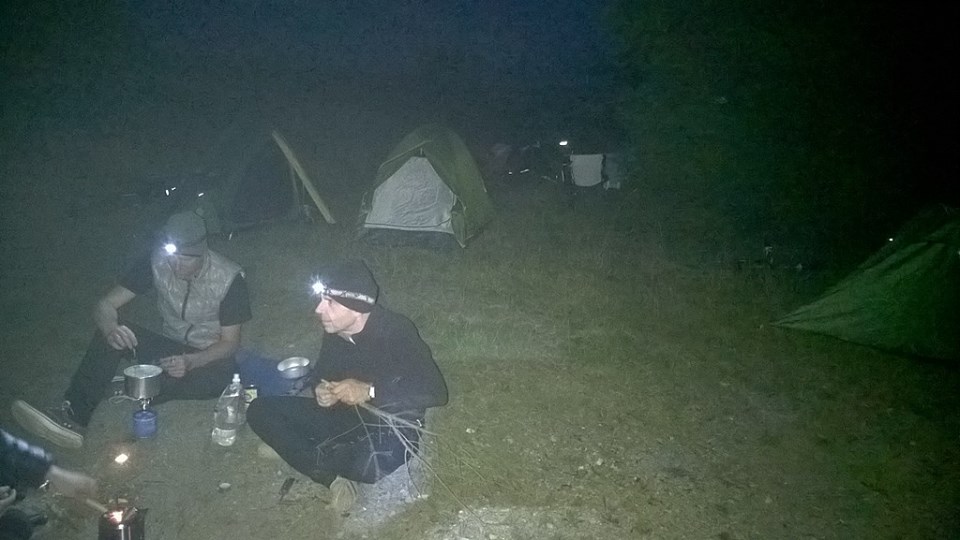
In the dead of night I heard the screeching of brakes coming down the mountain, as I dozed again two riders rolled in, it was Tony and Hedley , who had pushed over the Dampier range in the dark, what an effort. This rude awakening was our alarm, myself and Ollie packed up and rode off into the darkness sometime around 2am I think. Initially I was feeling good but as the hours passed and the first morning light was still to show I was starting to feel a bit groggy. The skies did eventually brighten but it was a cloudy and fresh morning as we rode out through the massive Mt White Station. Before getting to the highway. I seen Rob Dawson all set up with his camera and bike to capture some footage for the TTW film.
This is me cold , wet and feeling sickly
Just before tackling the Cass Saddle LagoonTrack I sat down to have a cold water dehydrated breakfast meal and immediately felt sick. My stomach was churning as I rode and pushed on up the river bed , Ollie was just ahead as we left the river and then climbed steeply up through the bush. At this point my feet were aching and I noticed that the soles were coming apart. I made the crucial mistake of wearing XC carbon soled shoes that were too stiff for all the HAB and got shredded on the rocks of the riverbed. This was a very tough steep push up narrow rocky rooty trails, made even harder with how I was feeling. After I eventually came out into an opening of Tussock , I spotted Ollie way off in the distance, the last time I would see him in this race. By now it was raining and I was cold and I was feeling pretty average. The super nice single track descent off the other side did lift my mood,
Singletrack goodness off Cass Saddle
The rain eased but it proved to be a very long day. Countless crossings of the Harper river ensured my feet remained wet for the third day in a row. Out onto the gravel road that runs parallel to lake Coleridge , I was plotting a plan in my head to get new shoes in Methven, unfortunately getting there seemed to take forever. I arrived about 9pm, had another look at my shoes that were in a pretty bad state and made the decision to stay in town to hopefully buy some new ones at the Bike shop the next day.
Unfortunately BIG ALS in Methven had no shoes for me ):
Big Al’s bike/snow shop did not open until 9am, I was up much earlier getting supplies and some food at the coffee shop and having a catch up with Rob Dawson. He shared insights into his own adventure as he chased the race to capture hours of footage as racers spread out through the backcountry. I was waiting at the door of Big Al’s at 9am as a friendly lady came to open up shop, to my obvious disappointment I was told that they did not stock Mountain Bike shoes. Damn ! All they could do was offer me some super strong glue and hope for the best.We poured some glue into the openings and i quickly got out of there , keen to get moving after being Methven for way too long
Carbon soles falling apart
Rising out of Mesopotamia
I rode out of Methven just after 9am , now lying in sixth place and over 100kms behind the front of the race,I knew it would take a massive effort to pull this back. I was feeling better today and had a renewed sense of determination despite the challenges I had faced so far. As the hours clicked by the temperatures rose as I climbed alongside the Rangitata River past Peel Forest and on towards Mesopotamia. After this it was again into private land and into some steep climbs. I had passed Patrick as he rested in the shade of a tree along the road, this gave me some encouragement and I pushed on. At the bottom of the intimidating steep climb to Bullock Bow Saddle I decided to take off my shoes and push my bike barefoot. This was a huge relief for my aching feet and was comfortable for the most part except for a few sharp stones.
Had a few of these to open and close
My Barefoot walk up Bullock Bow Saddle
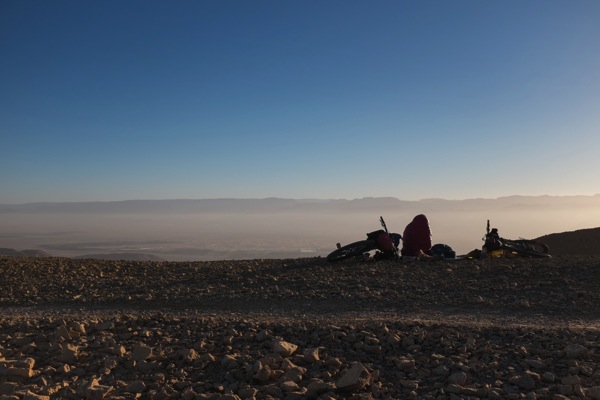
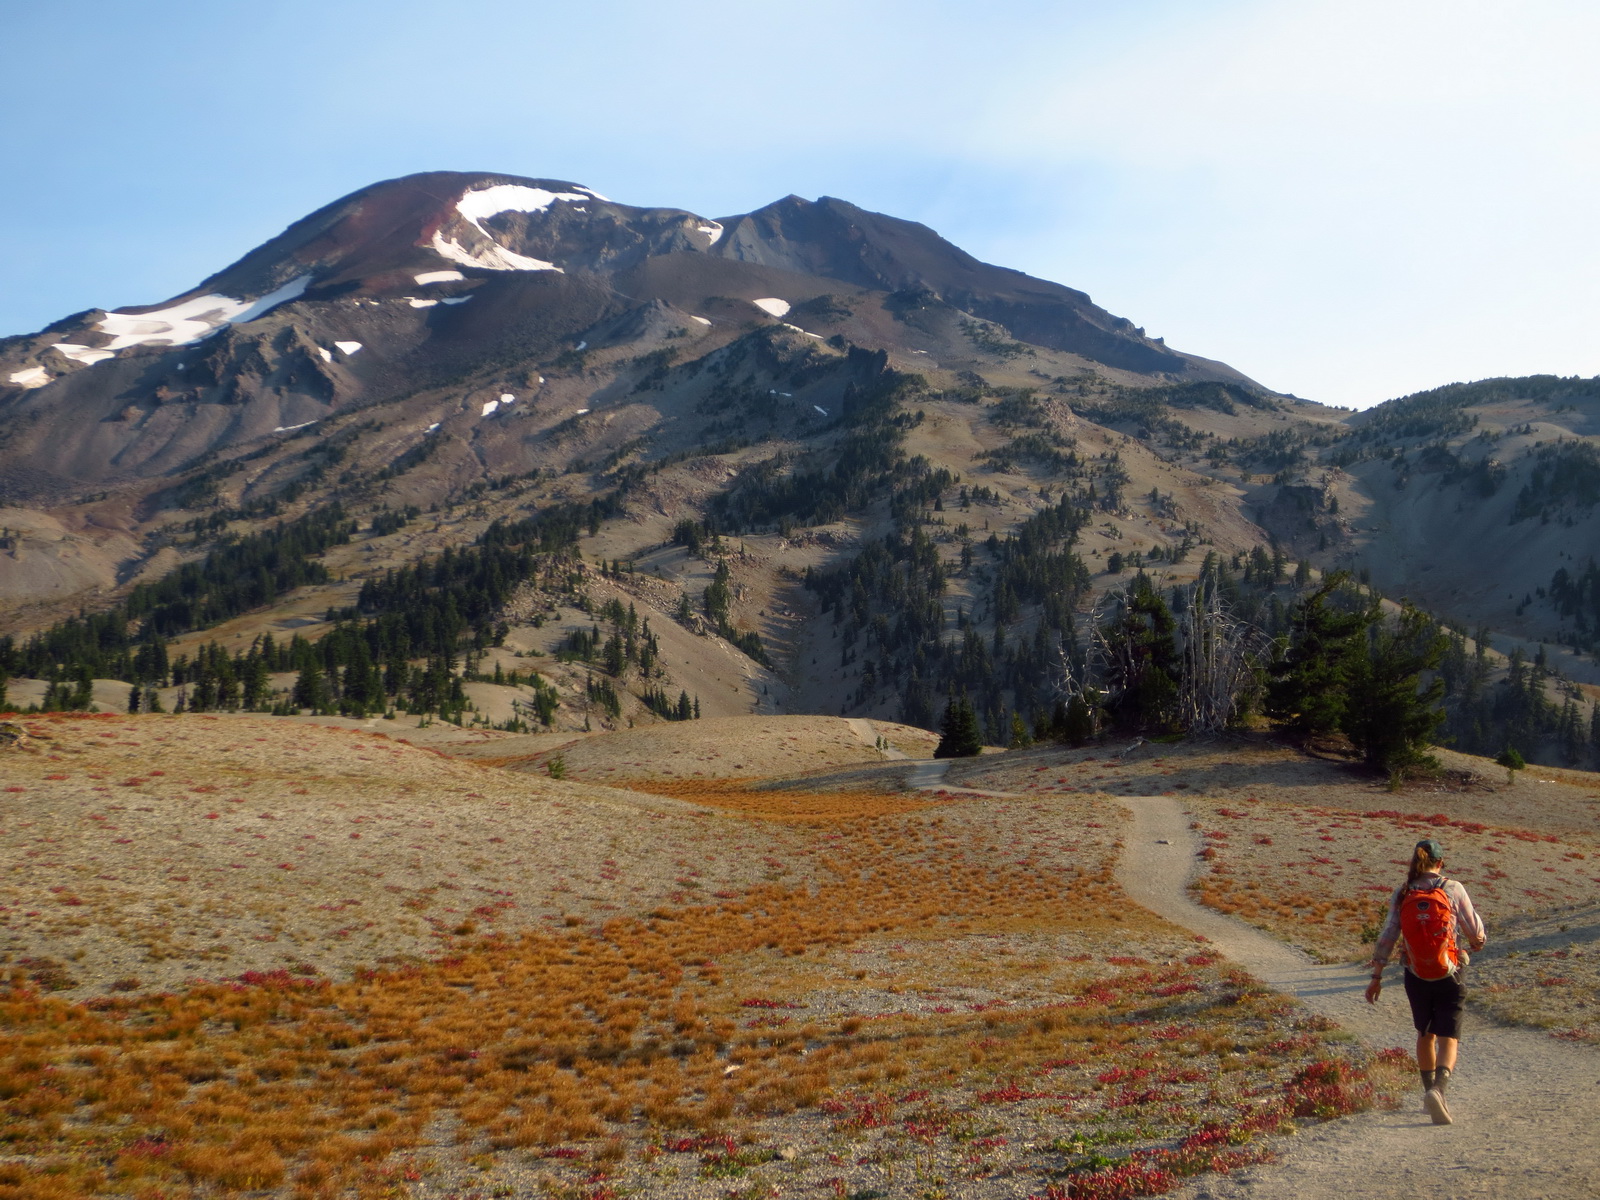
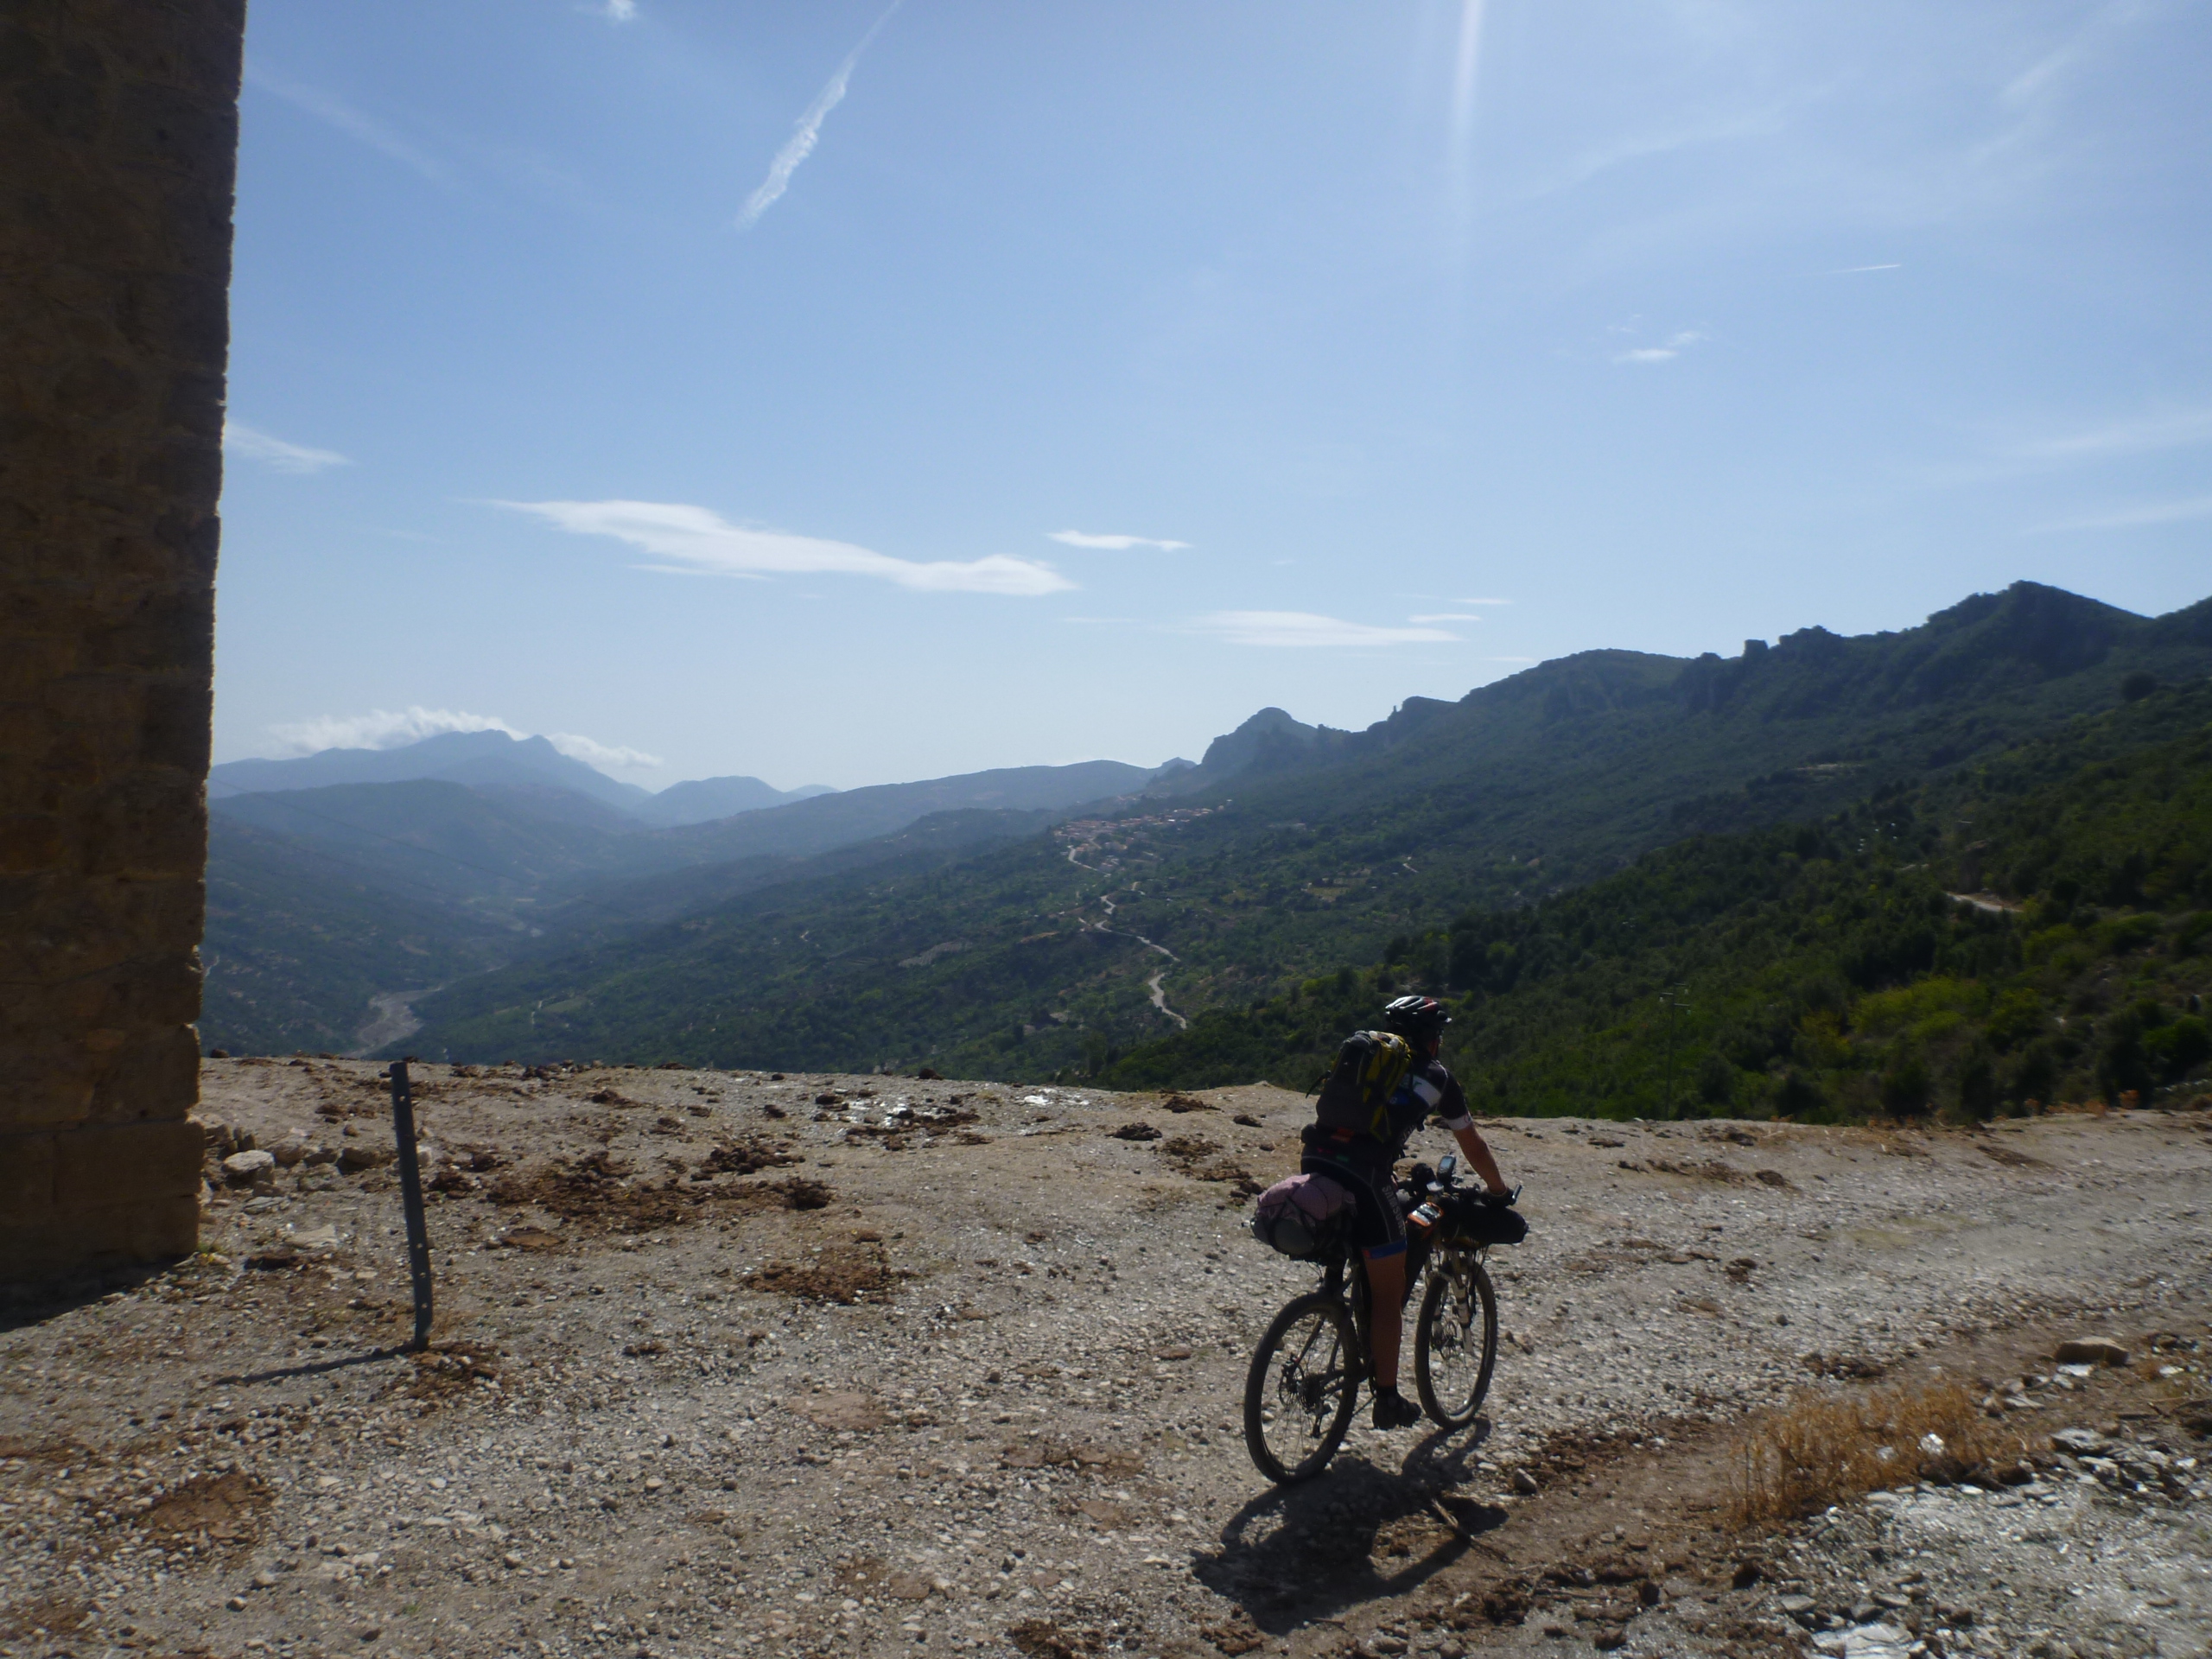
The sun was lowering as I went over the saddle, the views were spectacular as I took a few moments to take it all in, then enjoyed a fast descent and on to Royal Hut . Darkness was setting in amongst the imposing peaks. There was one bike outside the hut, I did not stop, I was committed to getting over the next obstacle, Stag Saddle. This was a tough section in the dark, with lots of river crossings, rocks and steep Tussock terrain. Finding the path was a challenge at times but my headlight would find a marker in the distance and i d aim for that . I reached Stag saddle, 1925 meters and the highest point on the Tour Te Wai pounamu at 12.15am, My arms were knackered from all the lifting , pushing and pulling of my loaded bike up this wildly rugged walking track. I gazed up at the sky and felt like I was in it , surrounded by bright twinkling stars , this was a special moment. I looked down to see the lights of Tekapo and thought to myself that i d be there in a few hours, have a rest then resupply and hit the road. I never thought that actually it would take me nearly 7 hours to reach the township. Unfortunately I was unable to ride many sections of the downhill in the dark and lower down was slow going with more river crossings, rugged trails and more climbing. It was here that I spotted a few Wallabies, first time I d seen them wild in New Zealand.
Bullock Bow Saddle as the sun went down
Race high point
Early morning Bakery stop in Tekapo
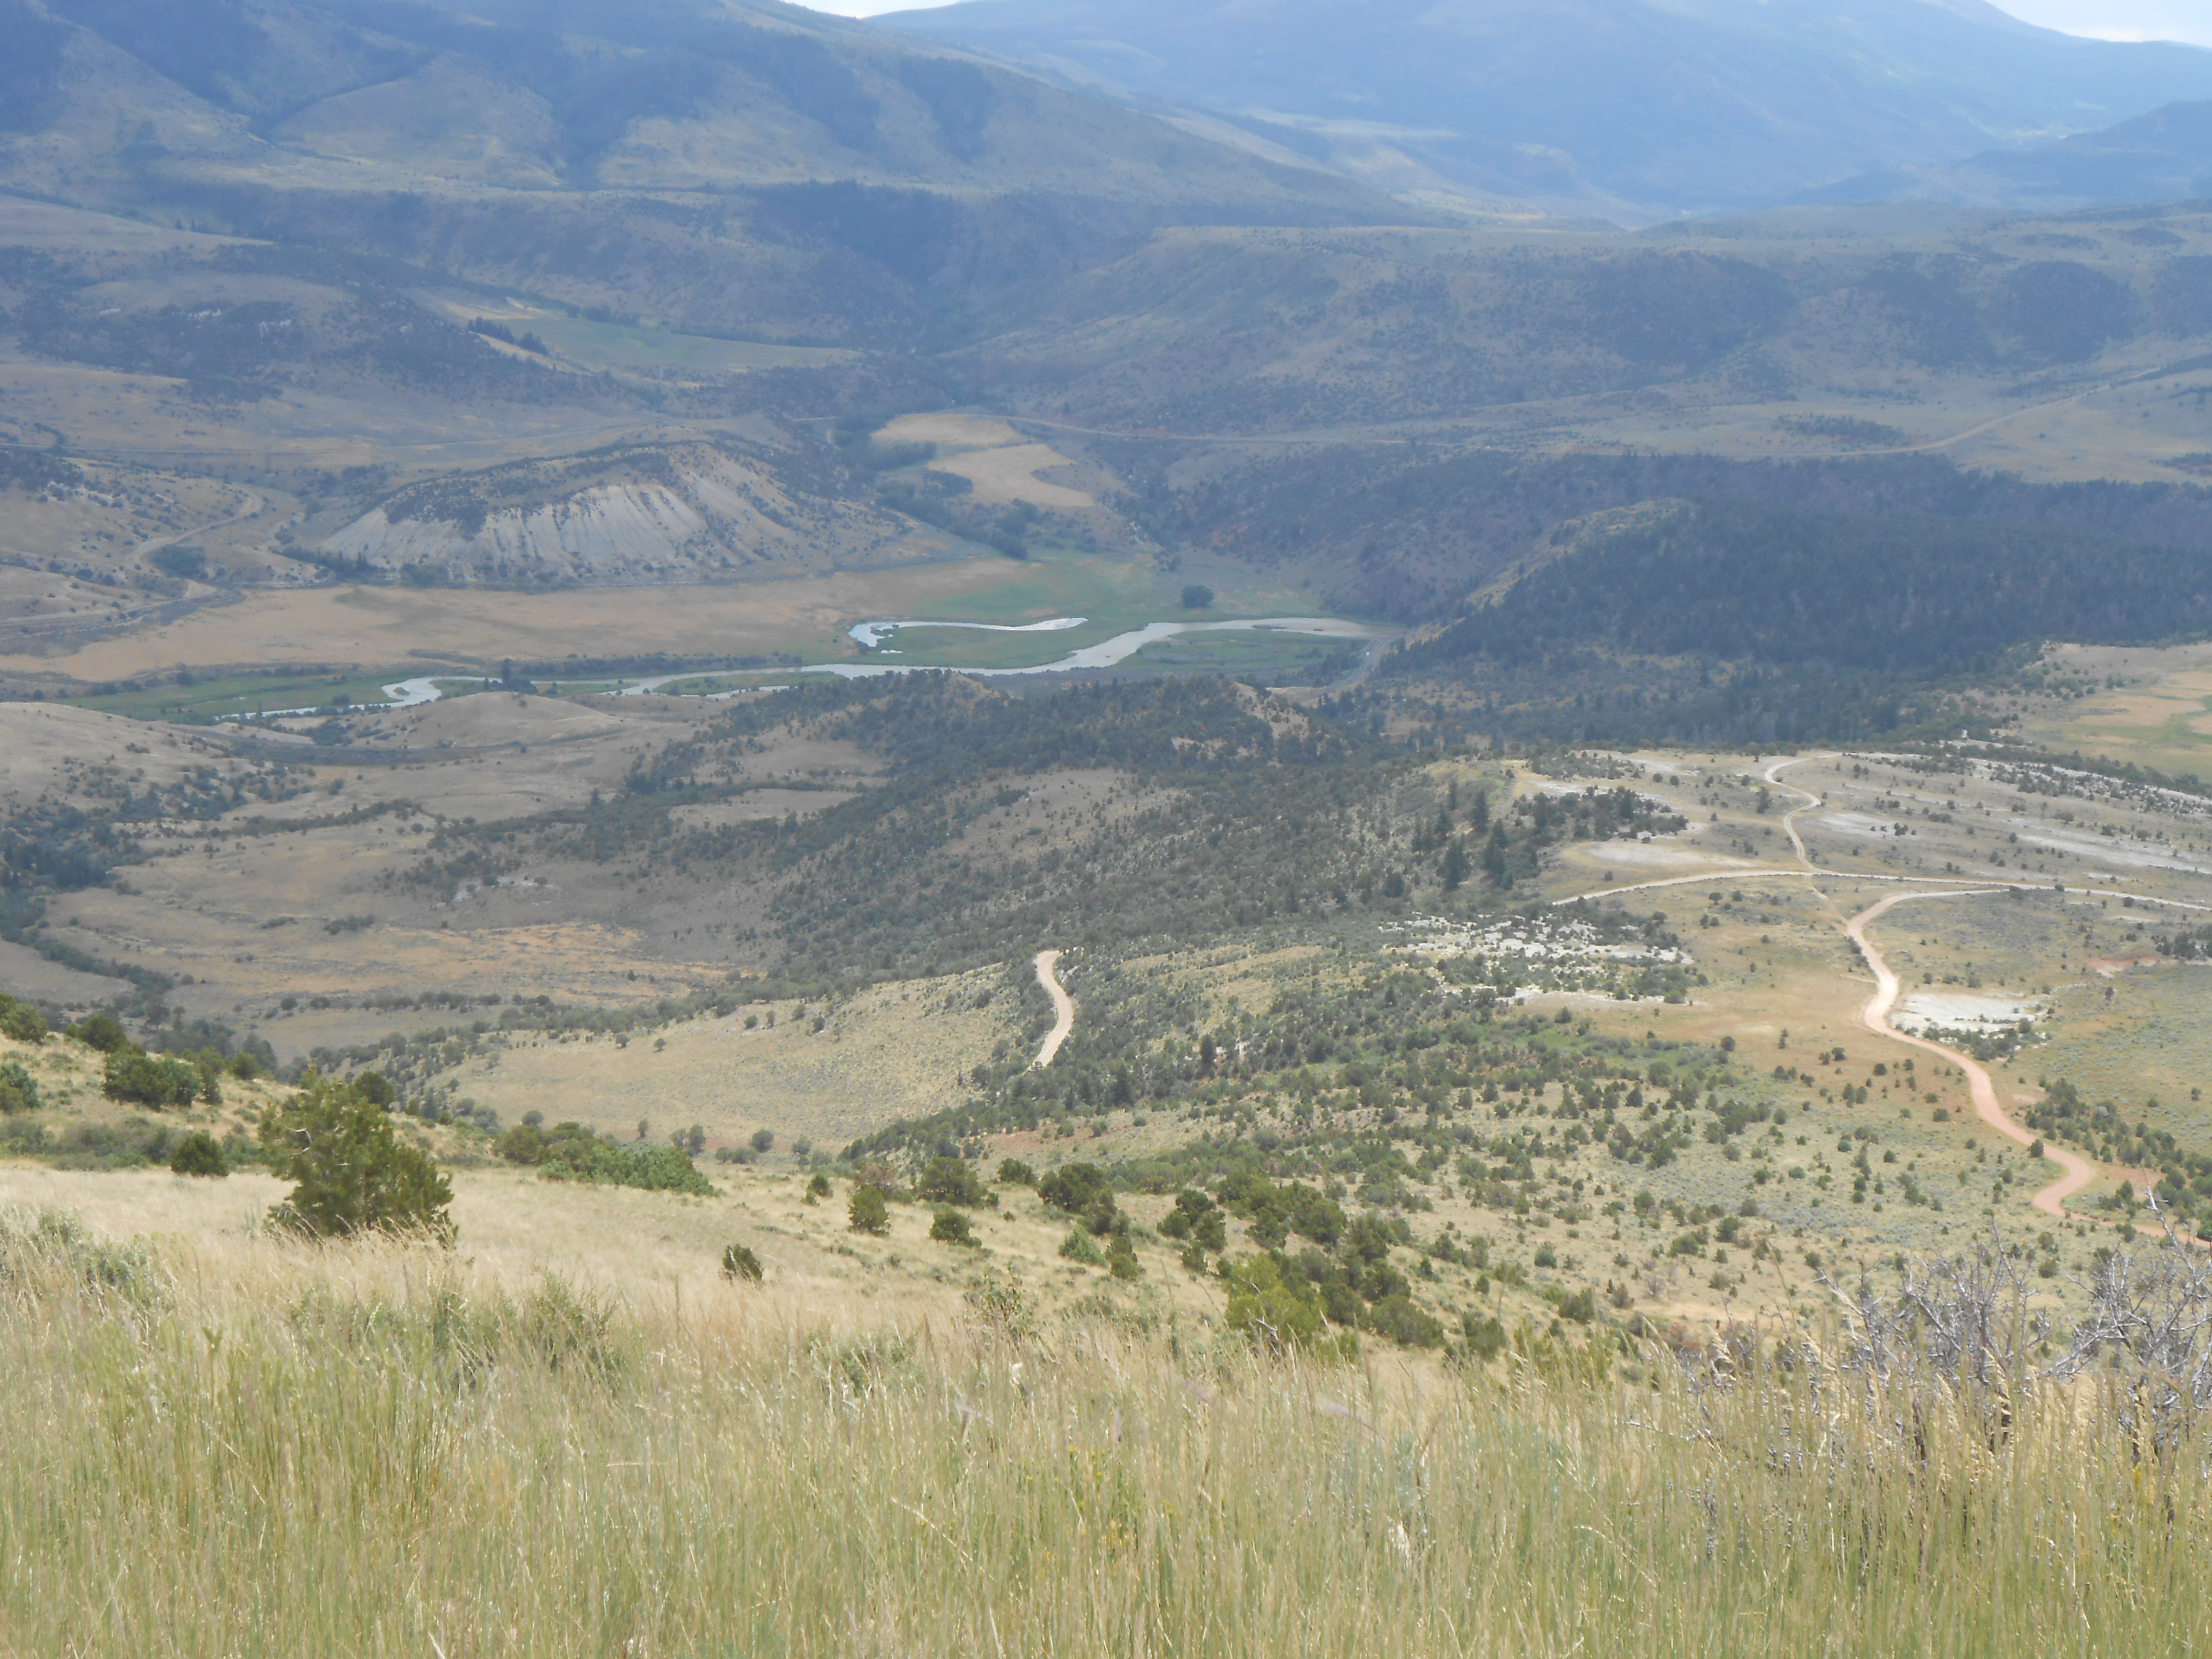
On getting to Tekapo about 7am, I was tired but did not feel totally smashed even though I had just done a 22 hour slog through arguably the toughest section of the race. On checking the tracker I seen I was now in third position although Ollie still had about 100kms on me and Tony was passing Lake Pukaki some 50kms or so ahead. Martins tracker was also in Tekapo, so I was expecting to see him somewhere soon. Catching the front two would be difficult but I was encouraged to keep chasing . A resupply at the Four Square and I was moving again on the quiet flat roads along the canal heading south.
Lake Pukaki and Aoraki in the distance
Next resupply was Otematata . I was very grateful for these flat roads after the previous nights exertions. Looking northwards as I approached the edges of Lake Pukaki, Mt Aoraki and some of the highest peaks of the southern alps shimmered across the lake in what was truly a postcard image. A very rough gravel road gave me a good shaking before popping out through the Haldon Arm Campground .
Lake Benmore
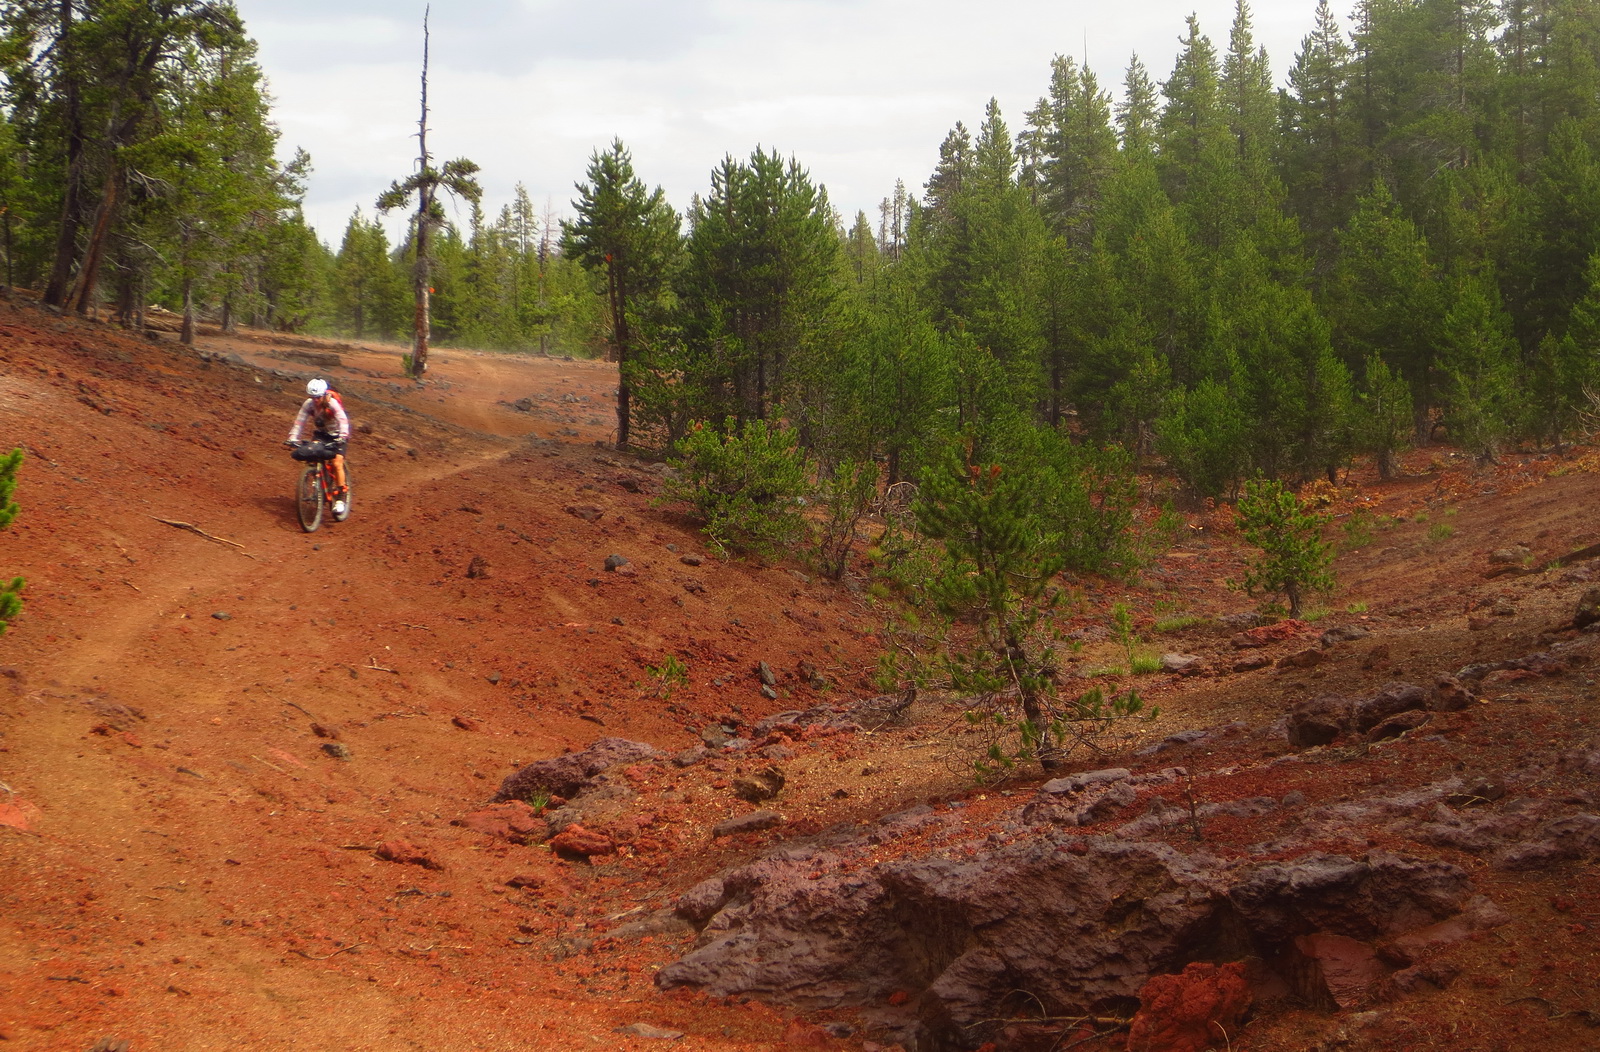
It was lunchtime when I caught my first glimpses of the sprawling Lake Benmore, it was a very hot day and I was tempted to have a swim , but I pushed on and it was too late as I moved away from the lake and entered the next section of private land , Black Forest Station. From this point onwards I began to wilt like some of the plants in this extremely dry section. It was about 30 odd kms to Otematata, but it felt like 100kms. The steep climbs came in quick succession and I could not ride some of them , my legs were jelly and my mind was wandering. I had to get to Otematata and pull my self together. Thankfully I got there just before the shop closed and purchased a massive amount of food and drinks. I went to the park and made up some Avocado, Tomato, Hummus wraps. For some reason during this race I was not able to stomach my normal race food , I craved ” normal ” food. Unfortunately this food is slower when you have to make it up.
Binary Havok by Farm gate and bridge in the Otematata river valley
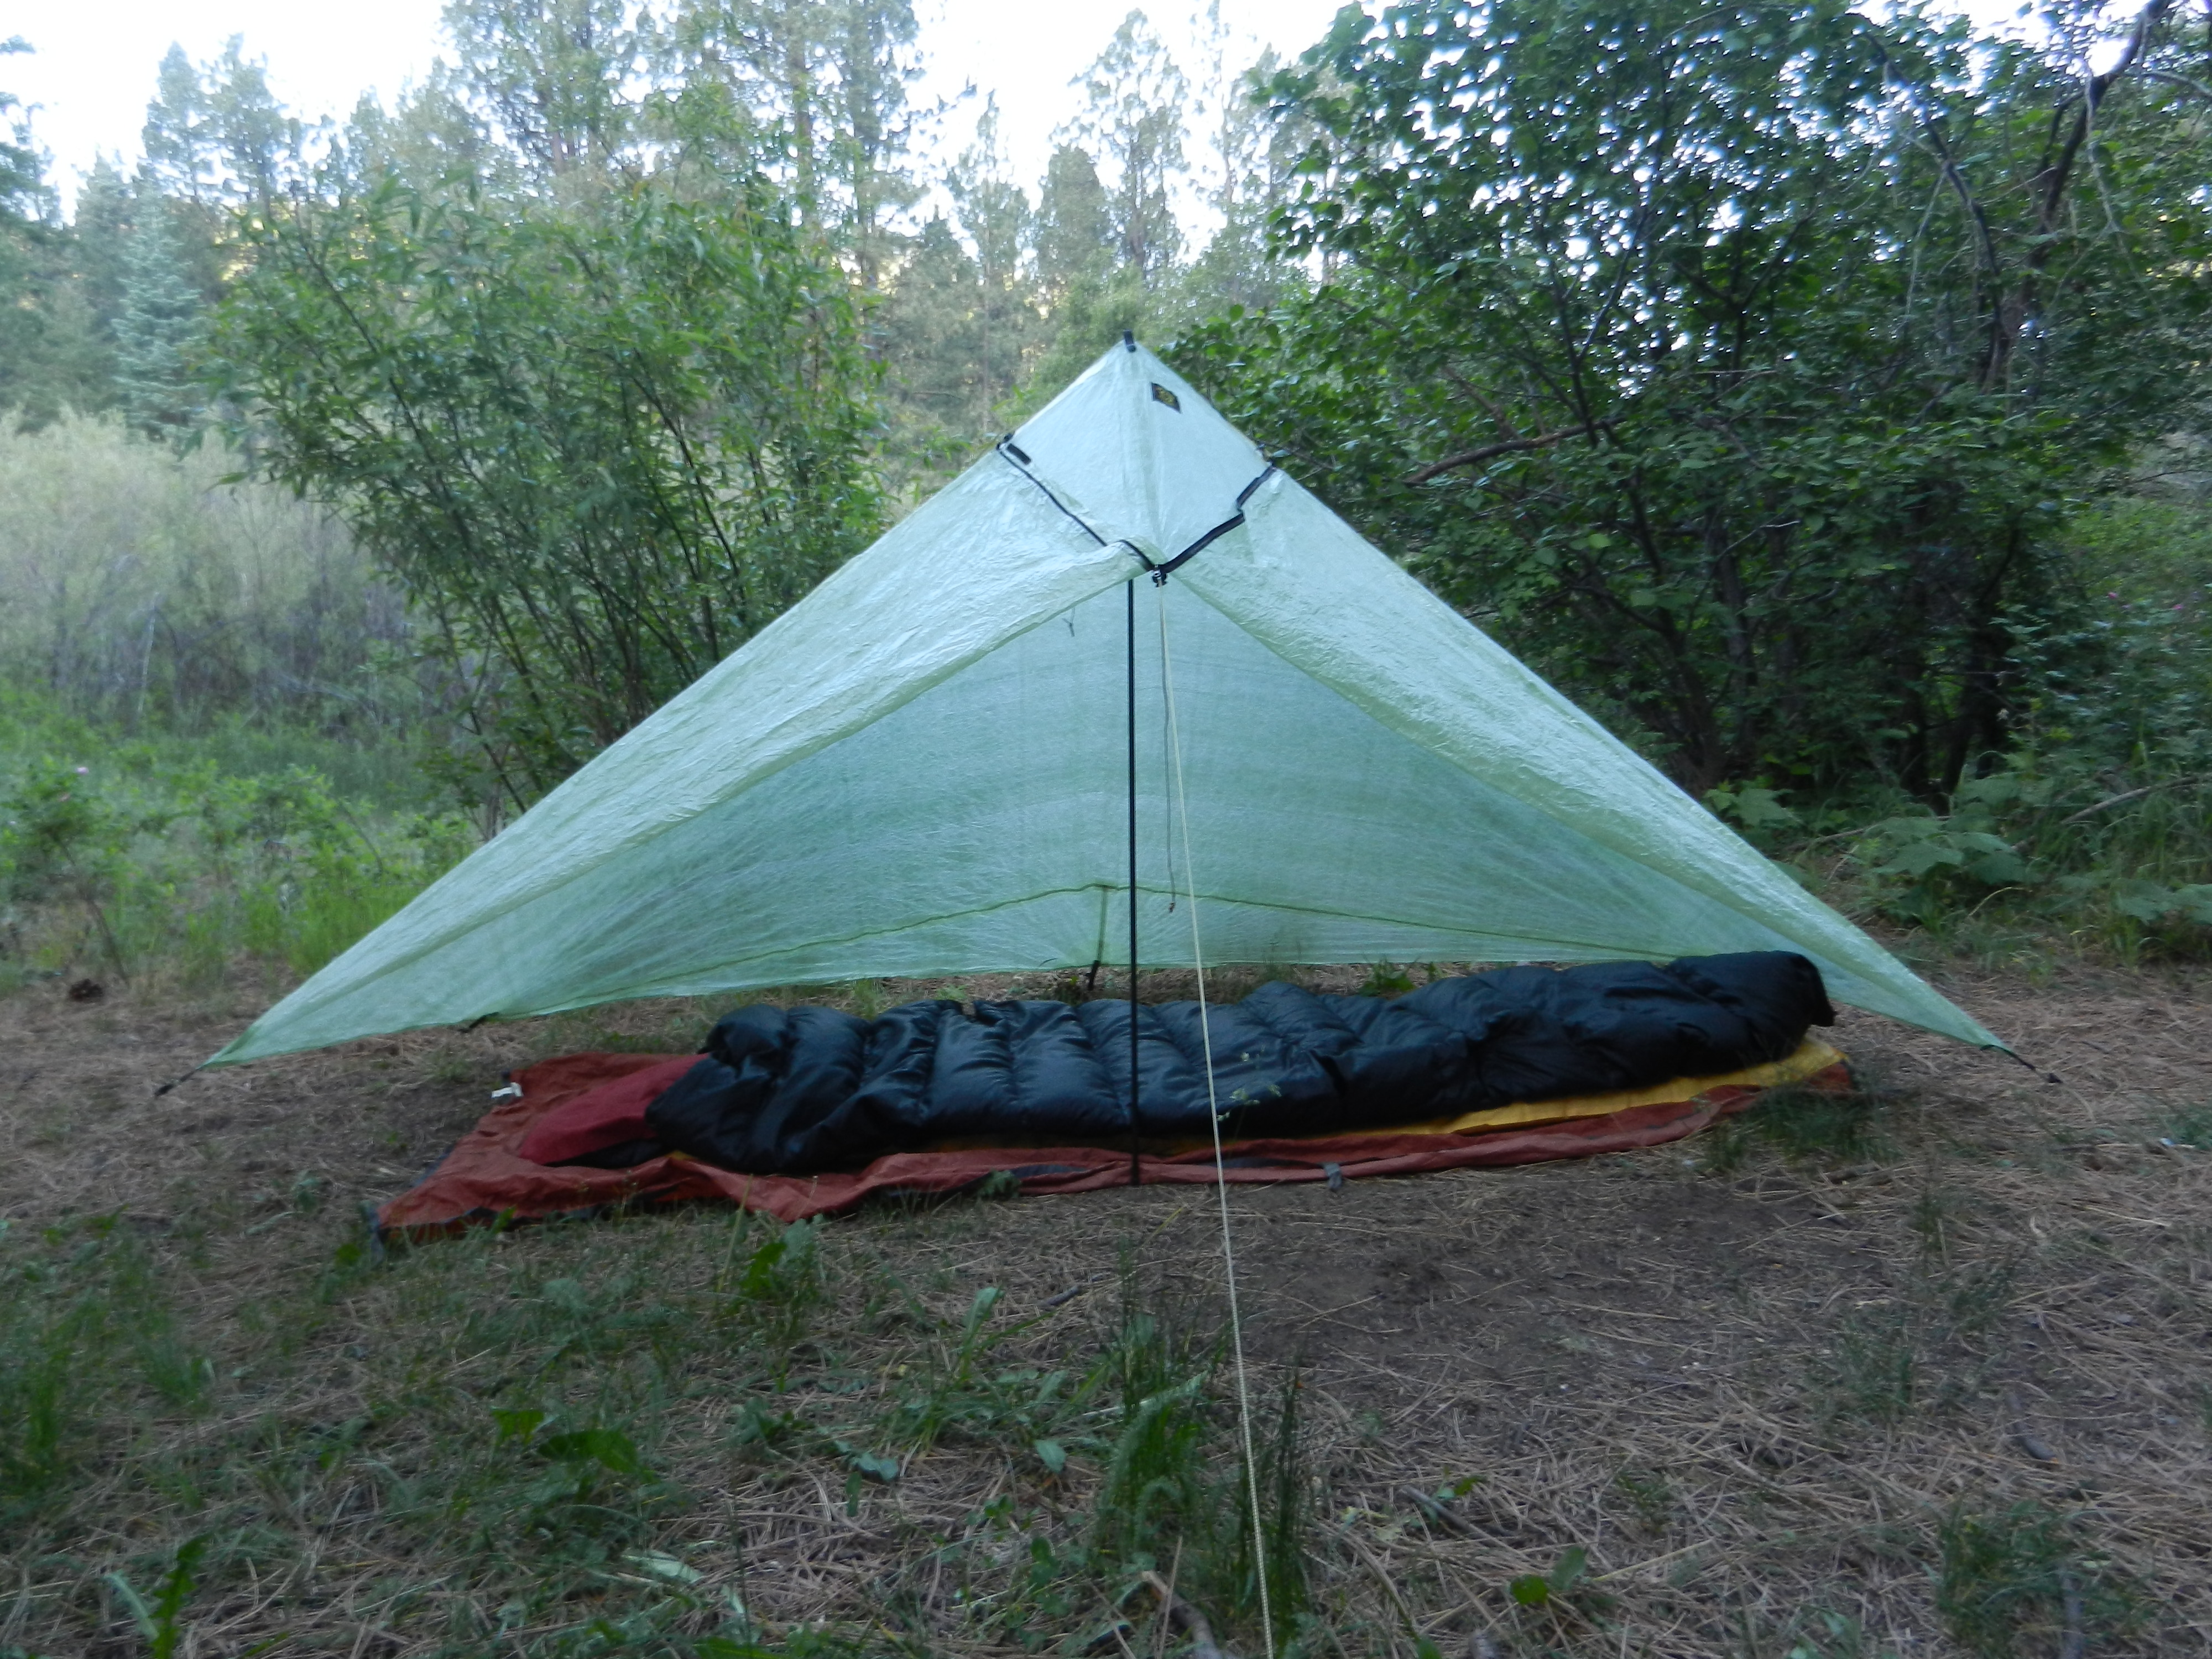
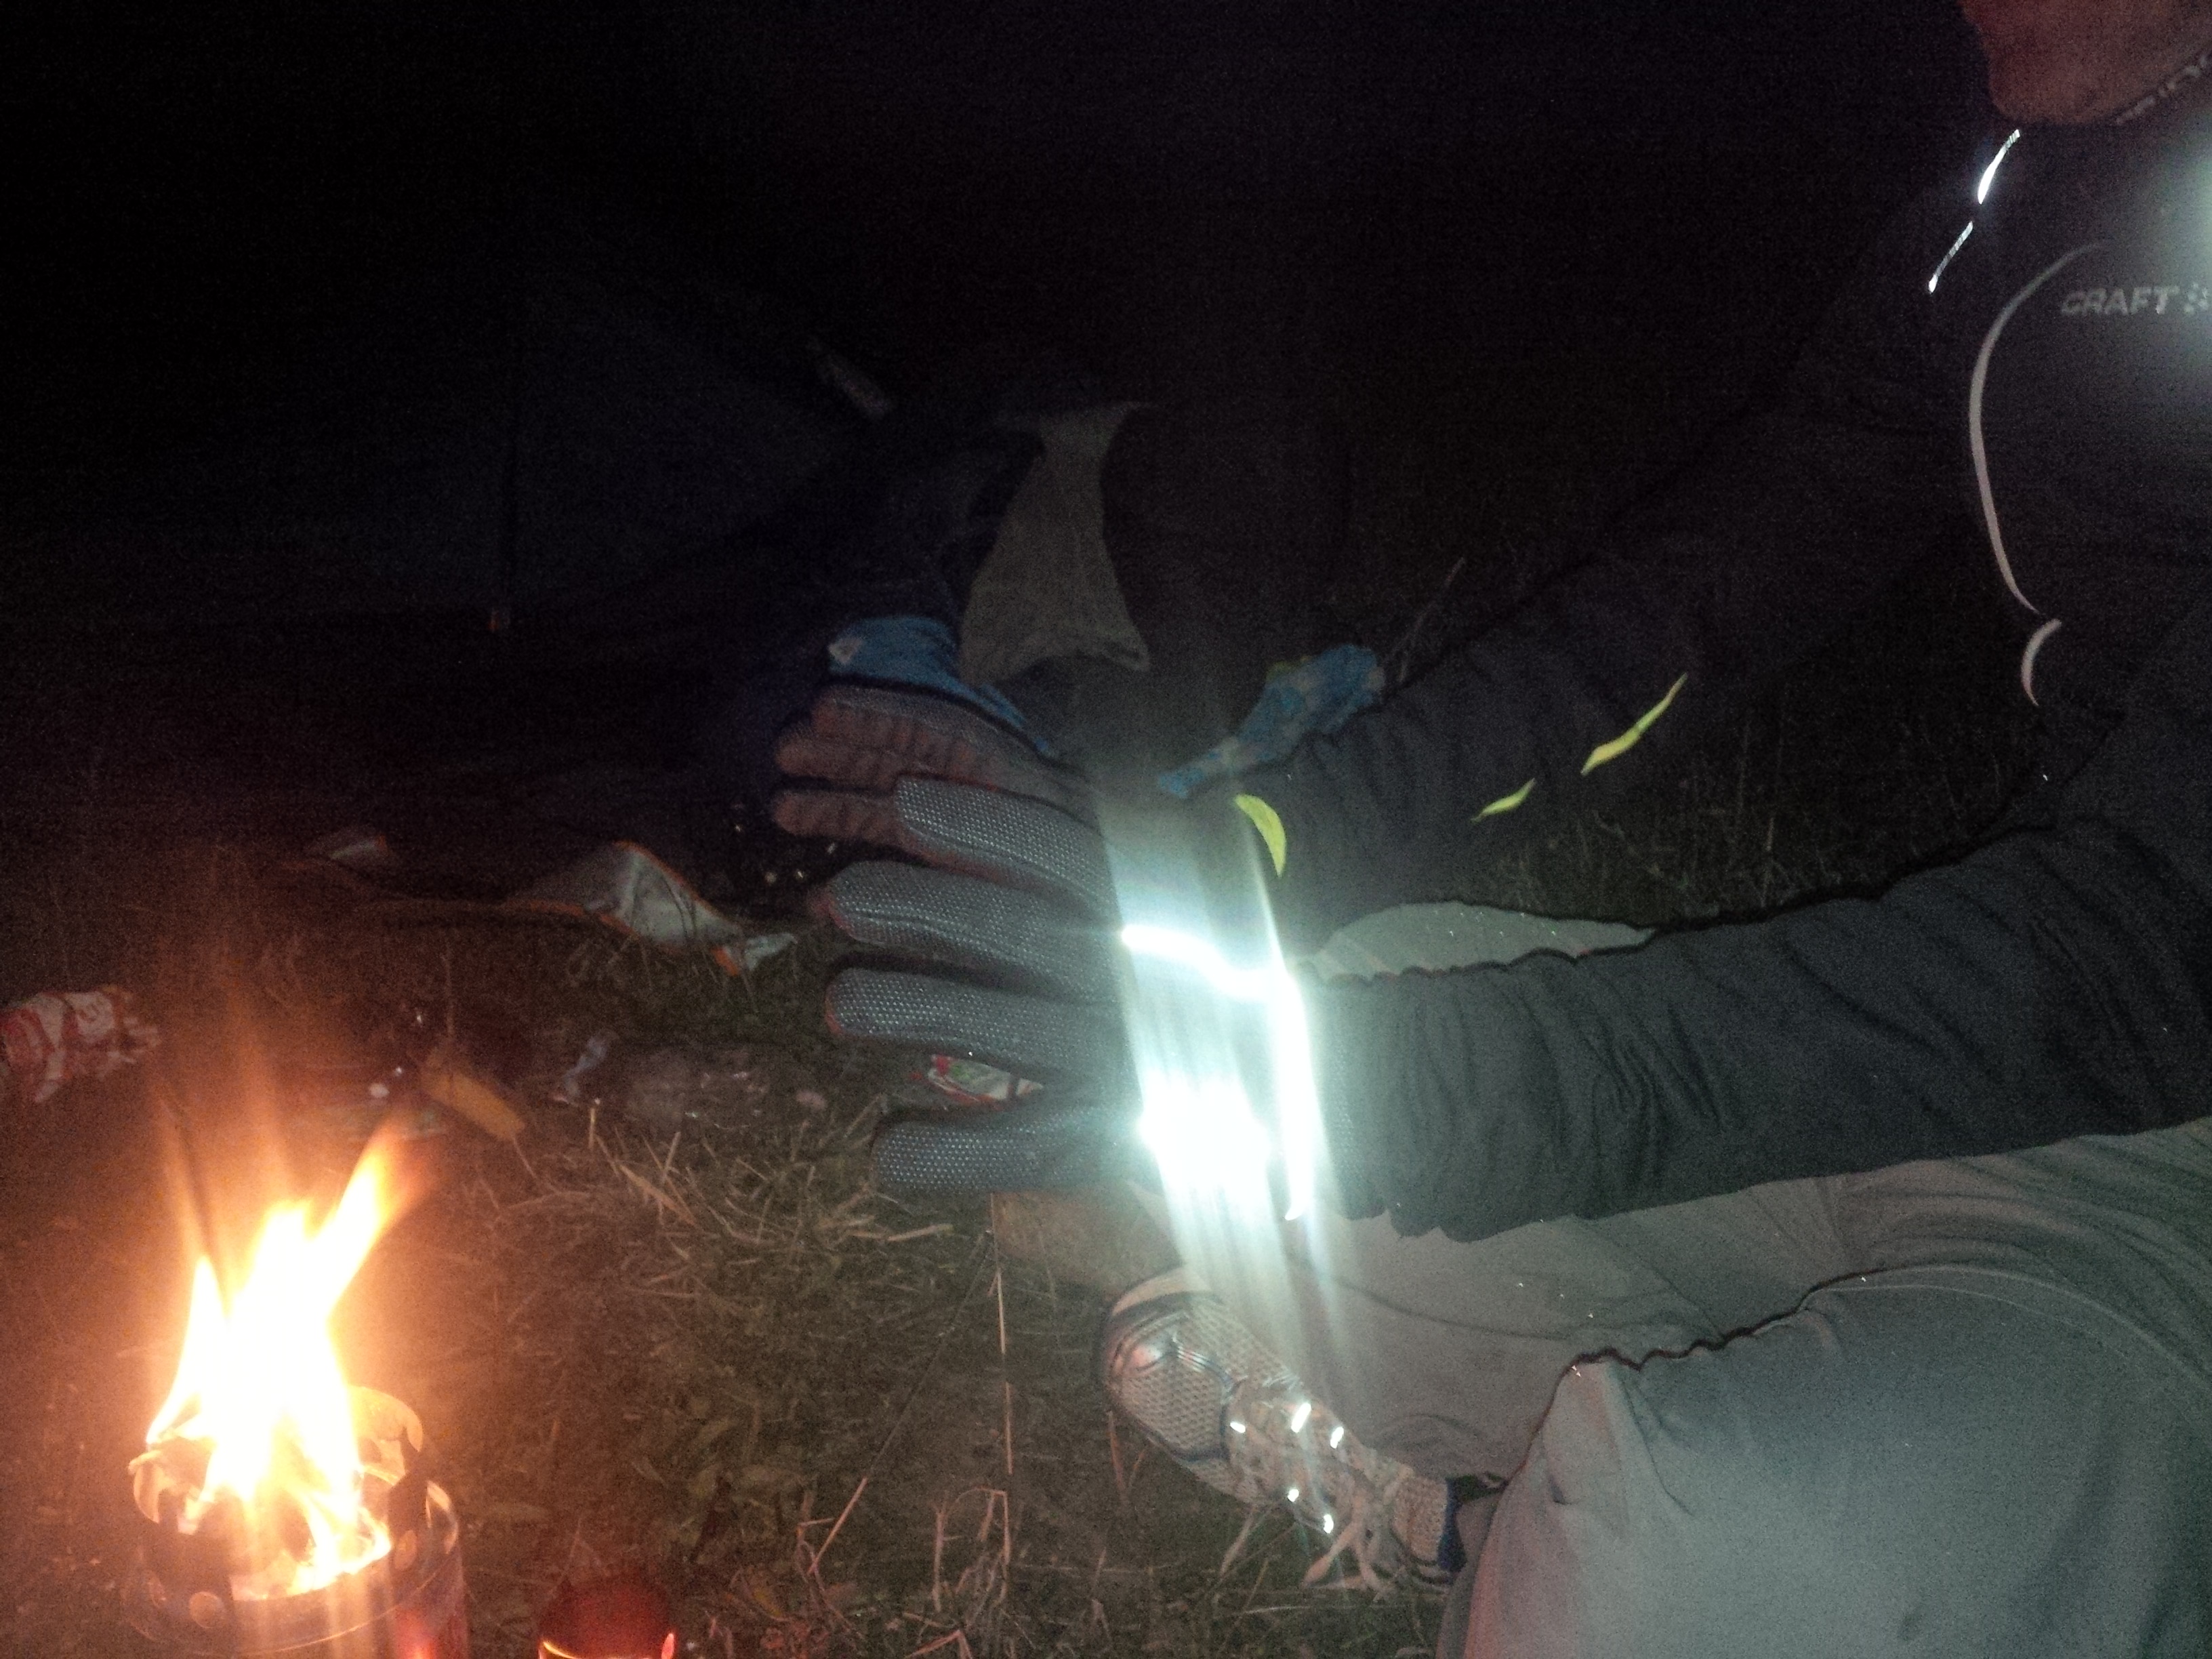
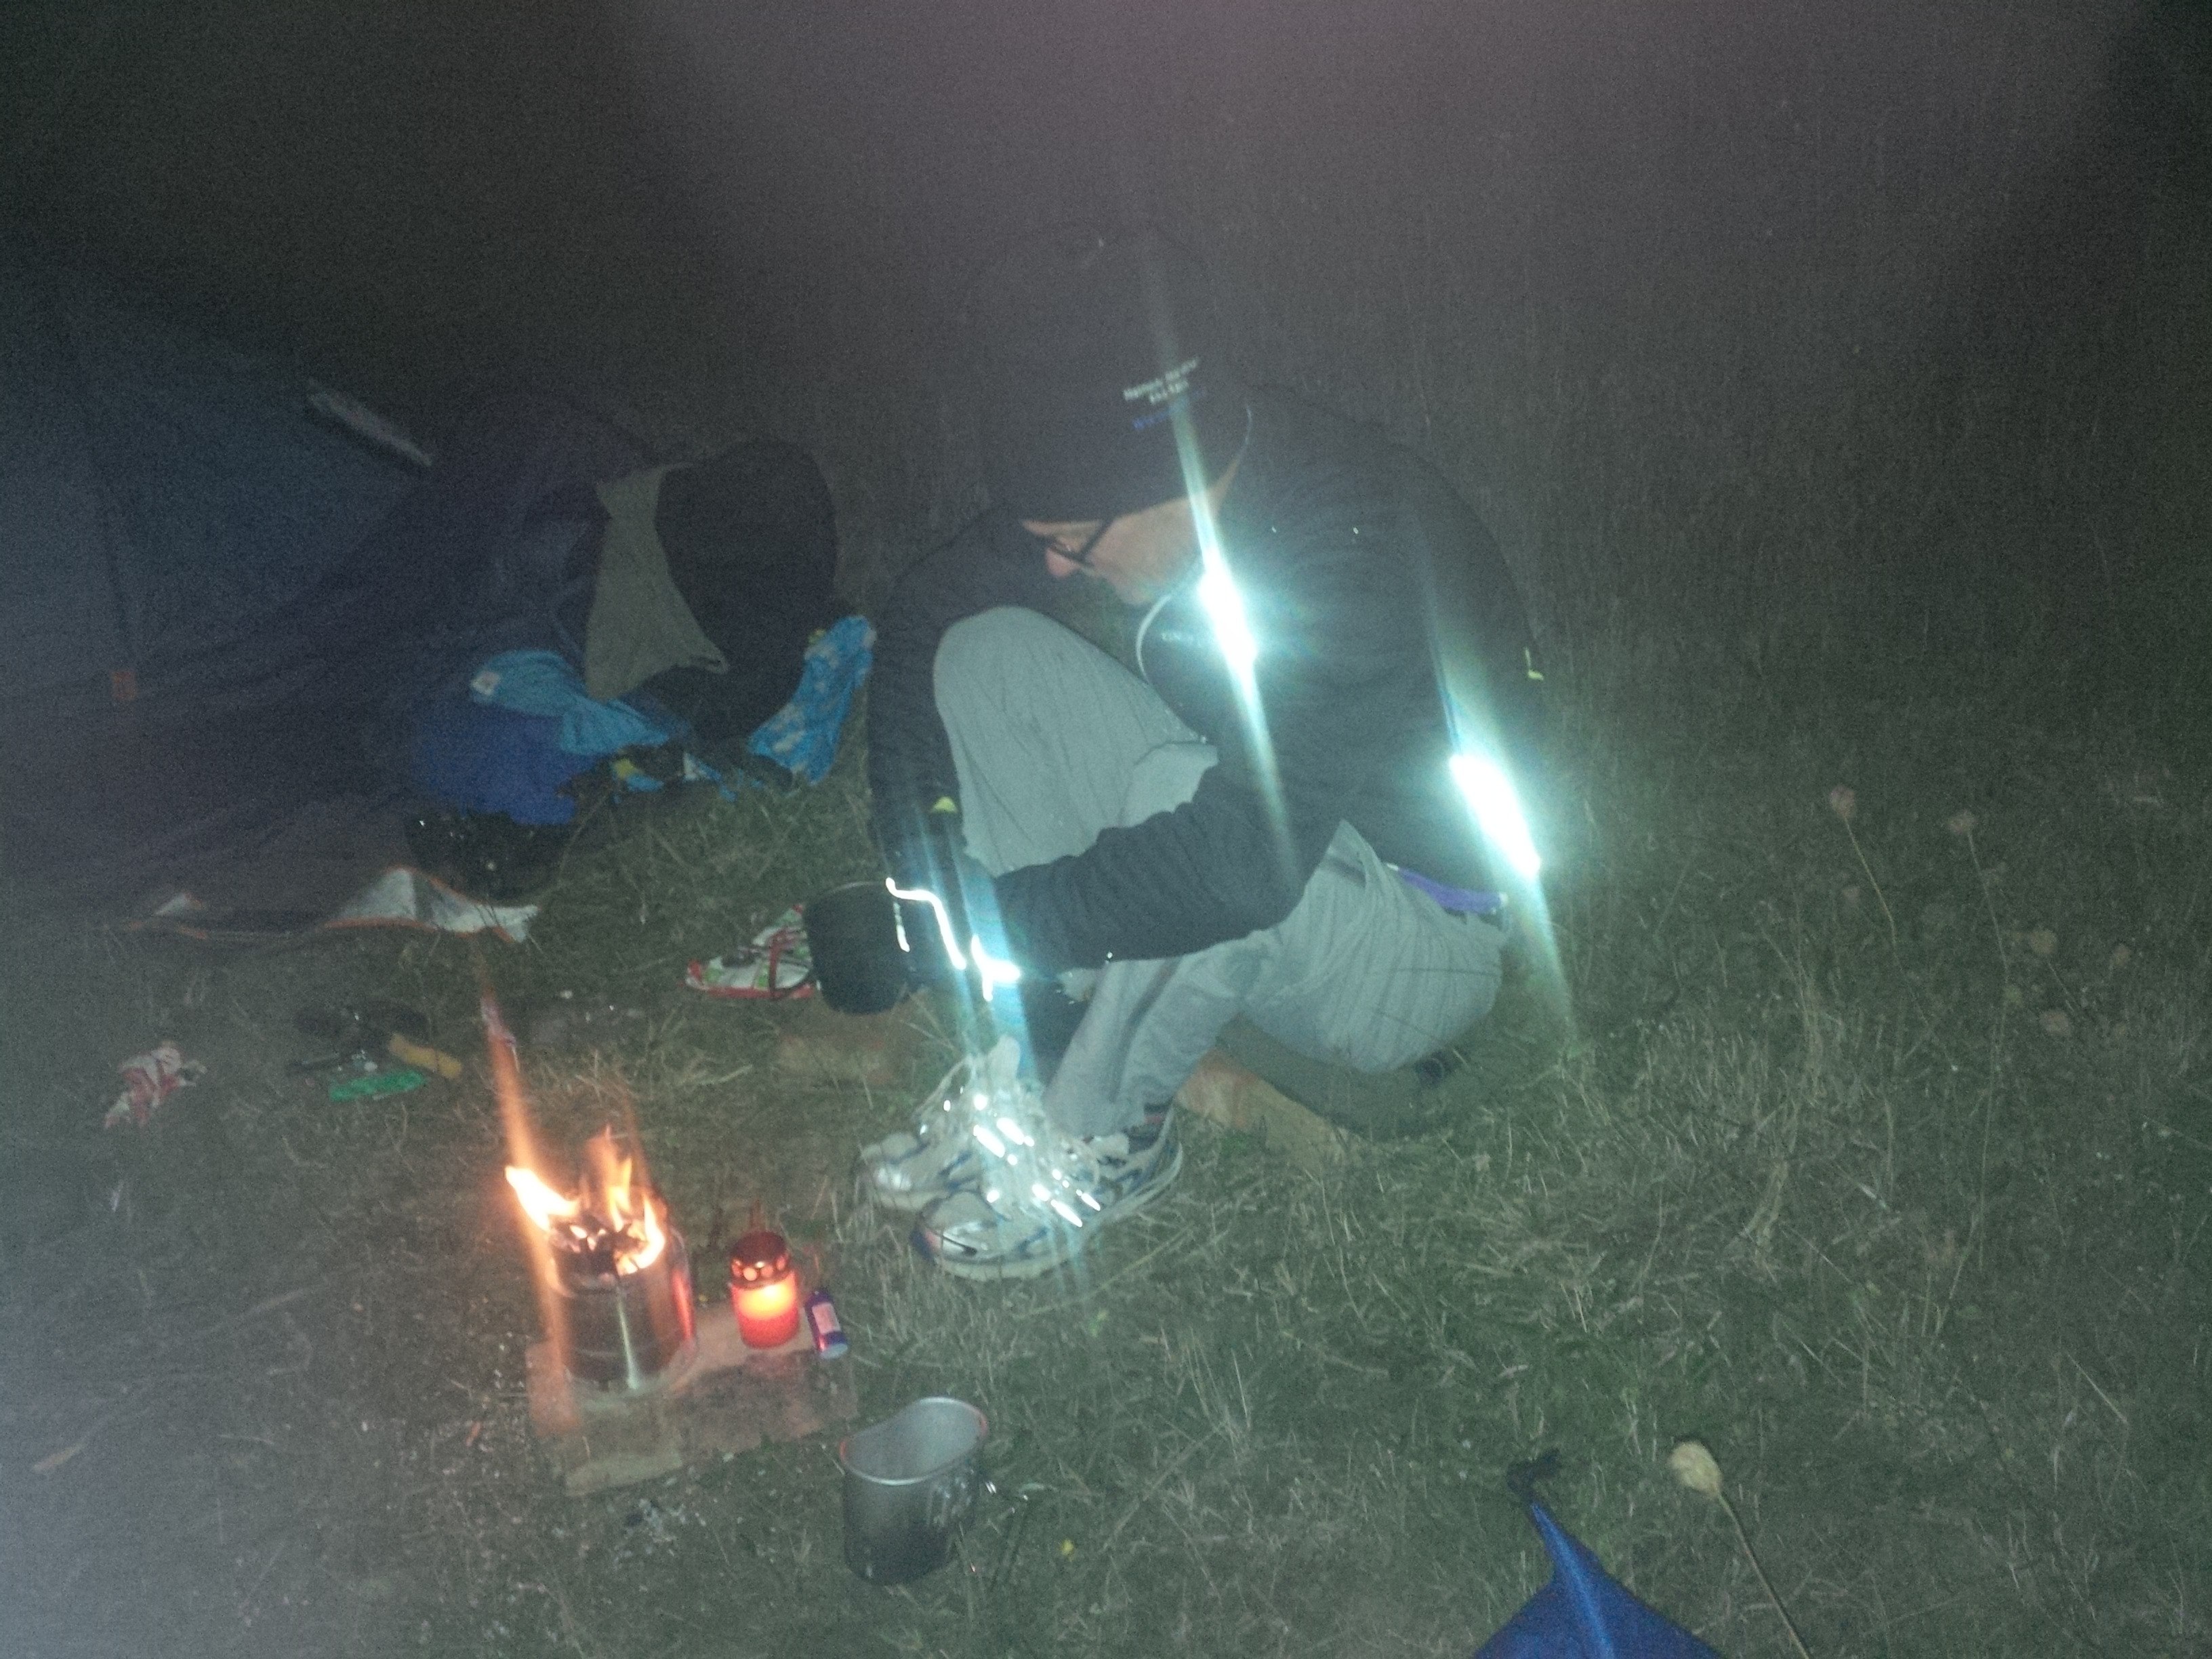
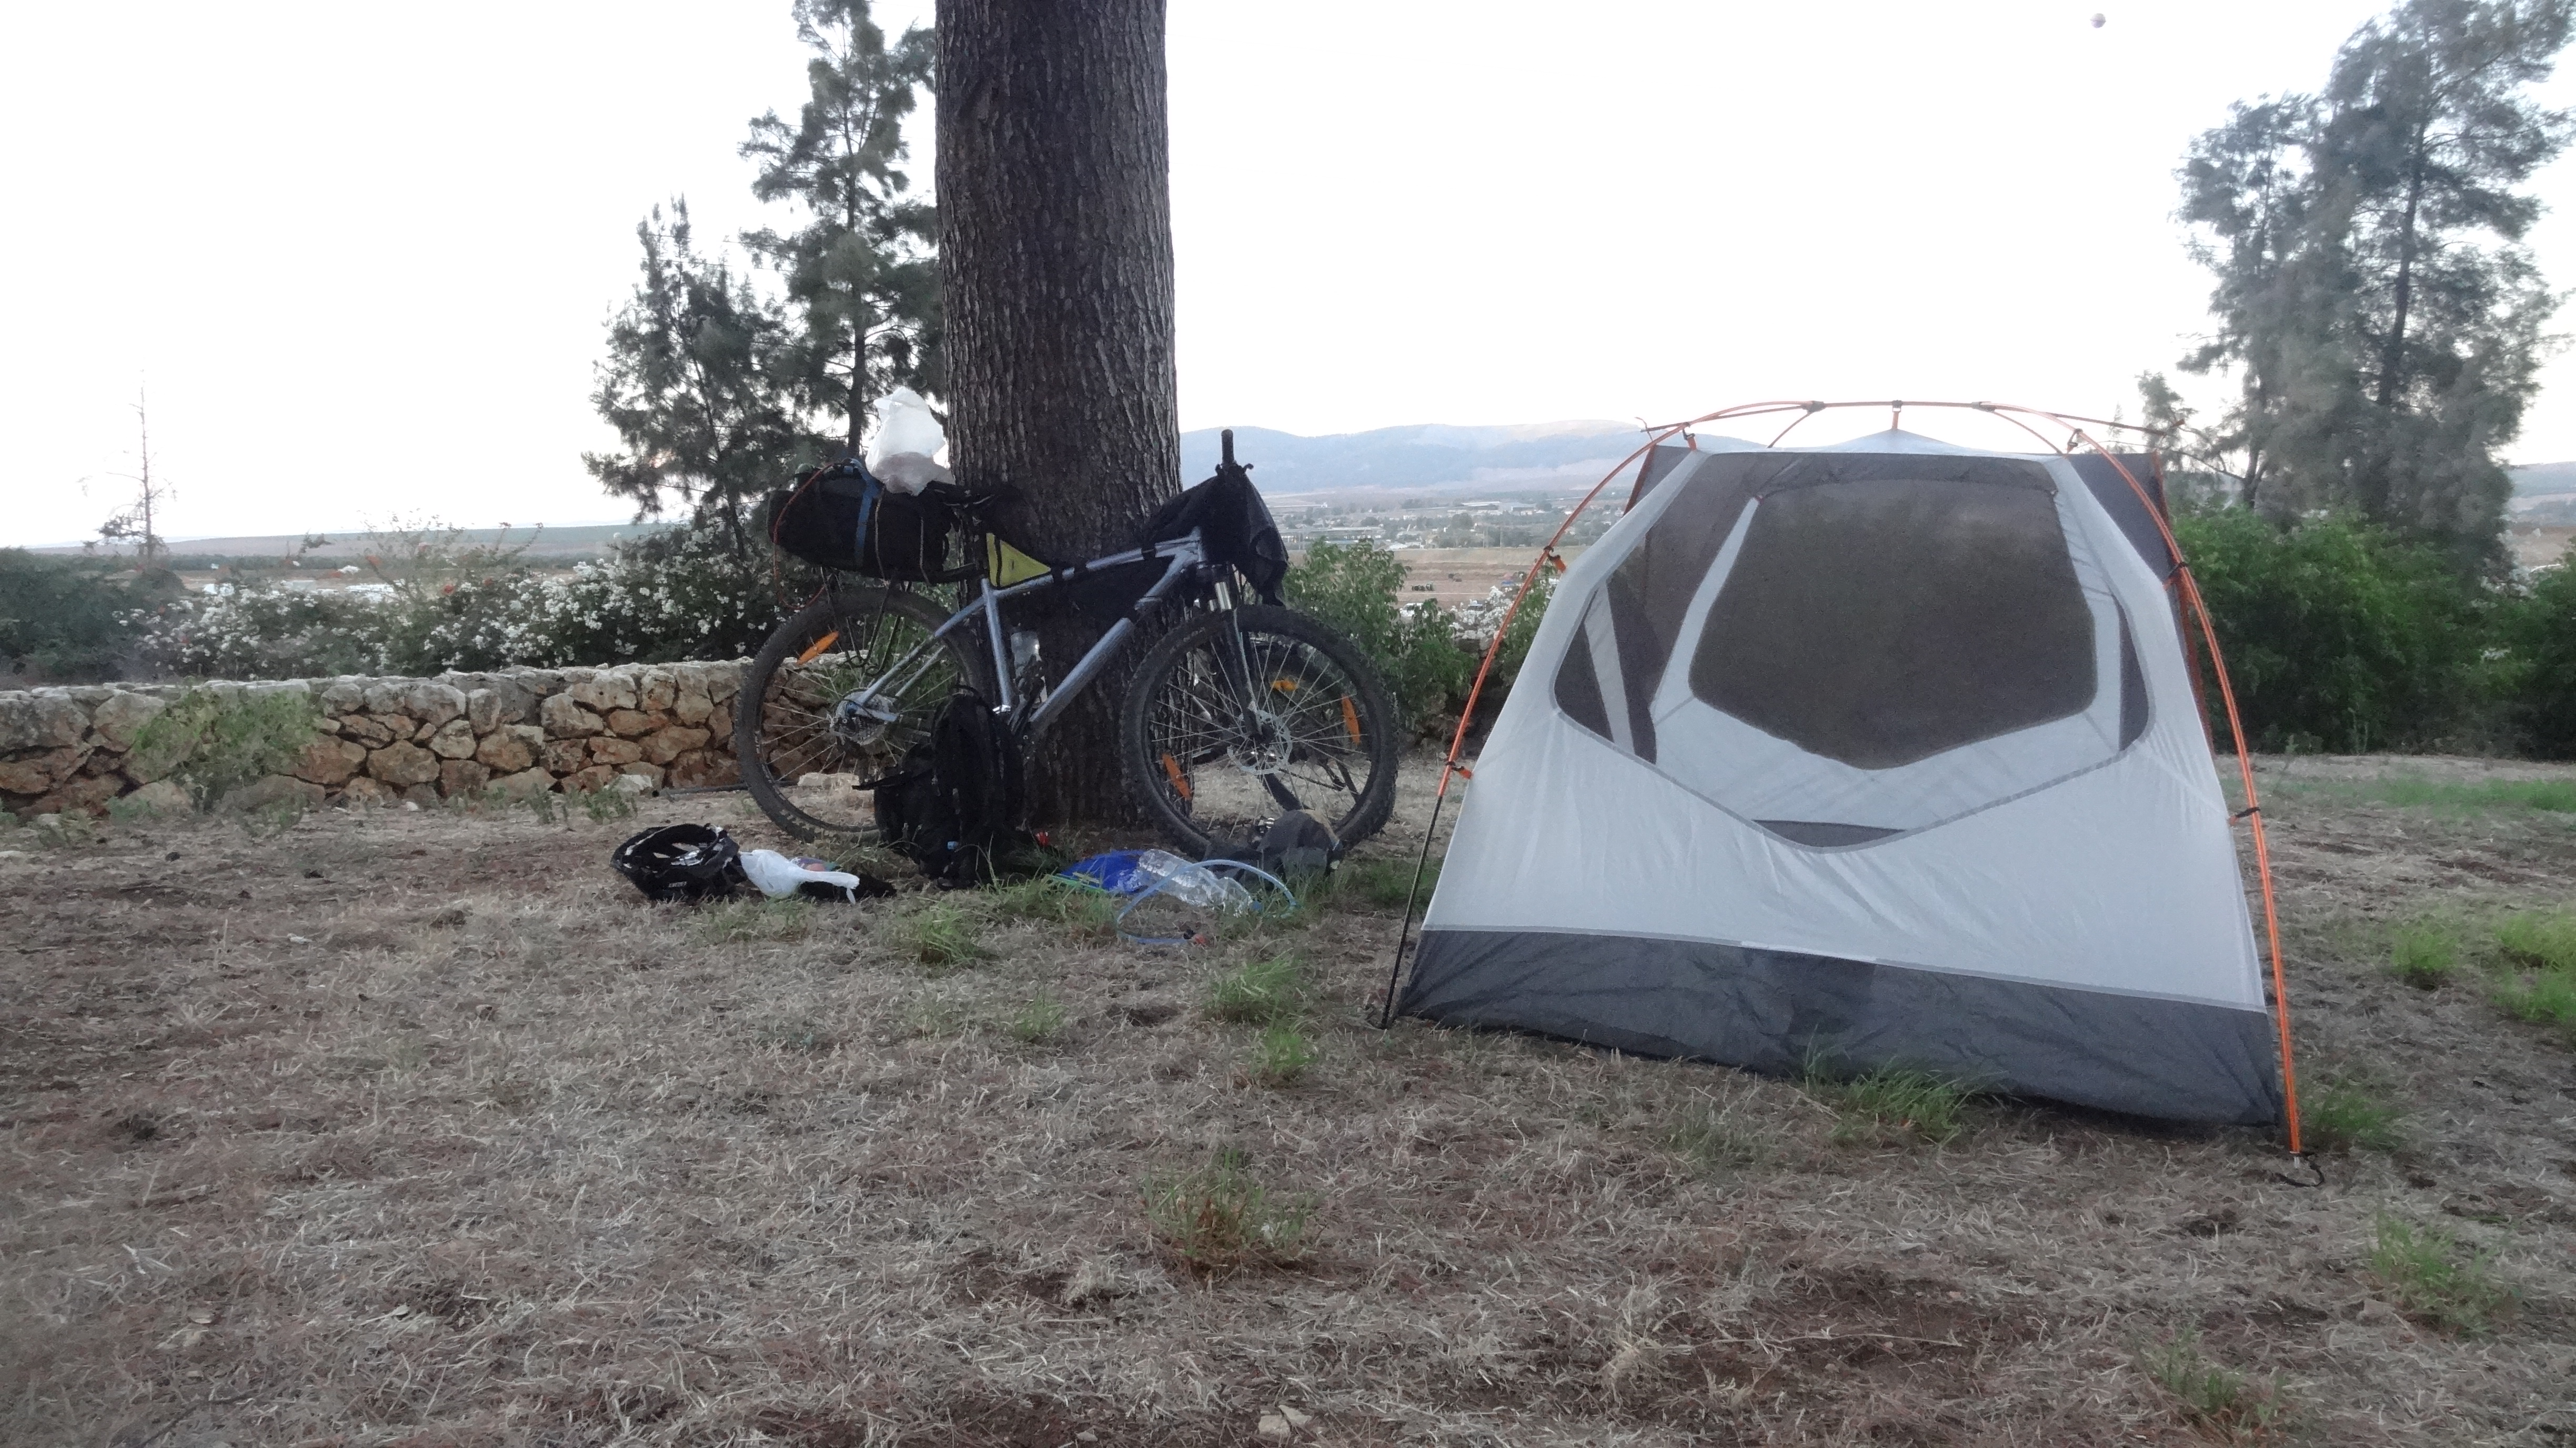
As the sun was lowering on another day I knew I was losing time after a super slow section prior to Otematata and then a long resupply stop , however it must have being required as I felt half human again as I entered the Otematata Station. A steep push up then a fast descent brought me to a beautiful ride alongside the Otematata river as the sun was setting and the colours were changing before my eyes. Darkness fell and I faced a wall, a super steep farm track went straight up meaning I was pushing my bike for hours. There was nt much up here only parched land and lots of sheep munching on dry grass. My mind so wanted to push on but my body said no, my feet were aching again in my battered XC shoes. I got into my Bivy for a very average sleep, I was cold and uncomfortable.
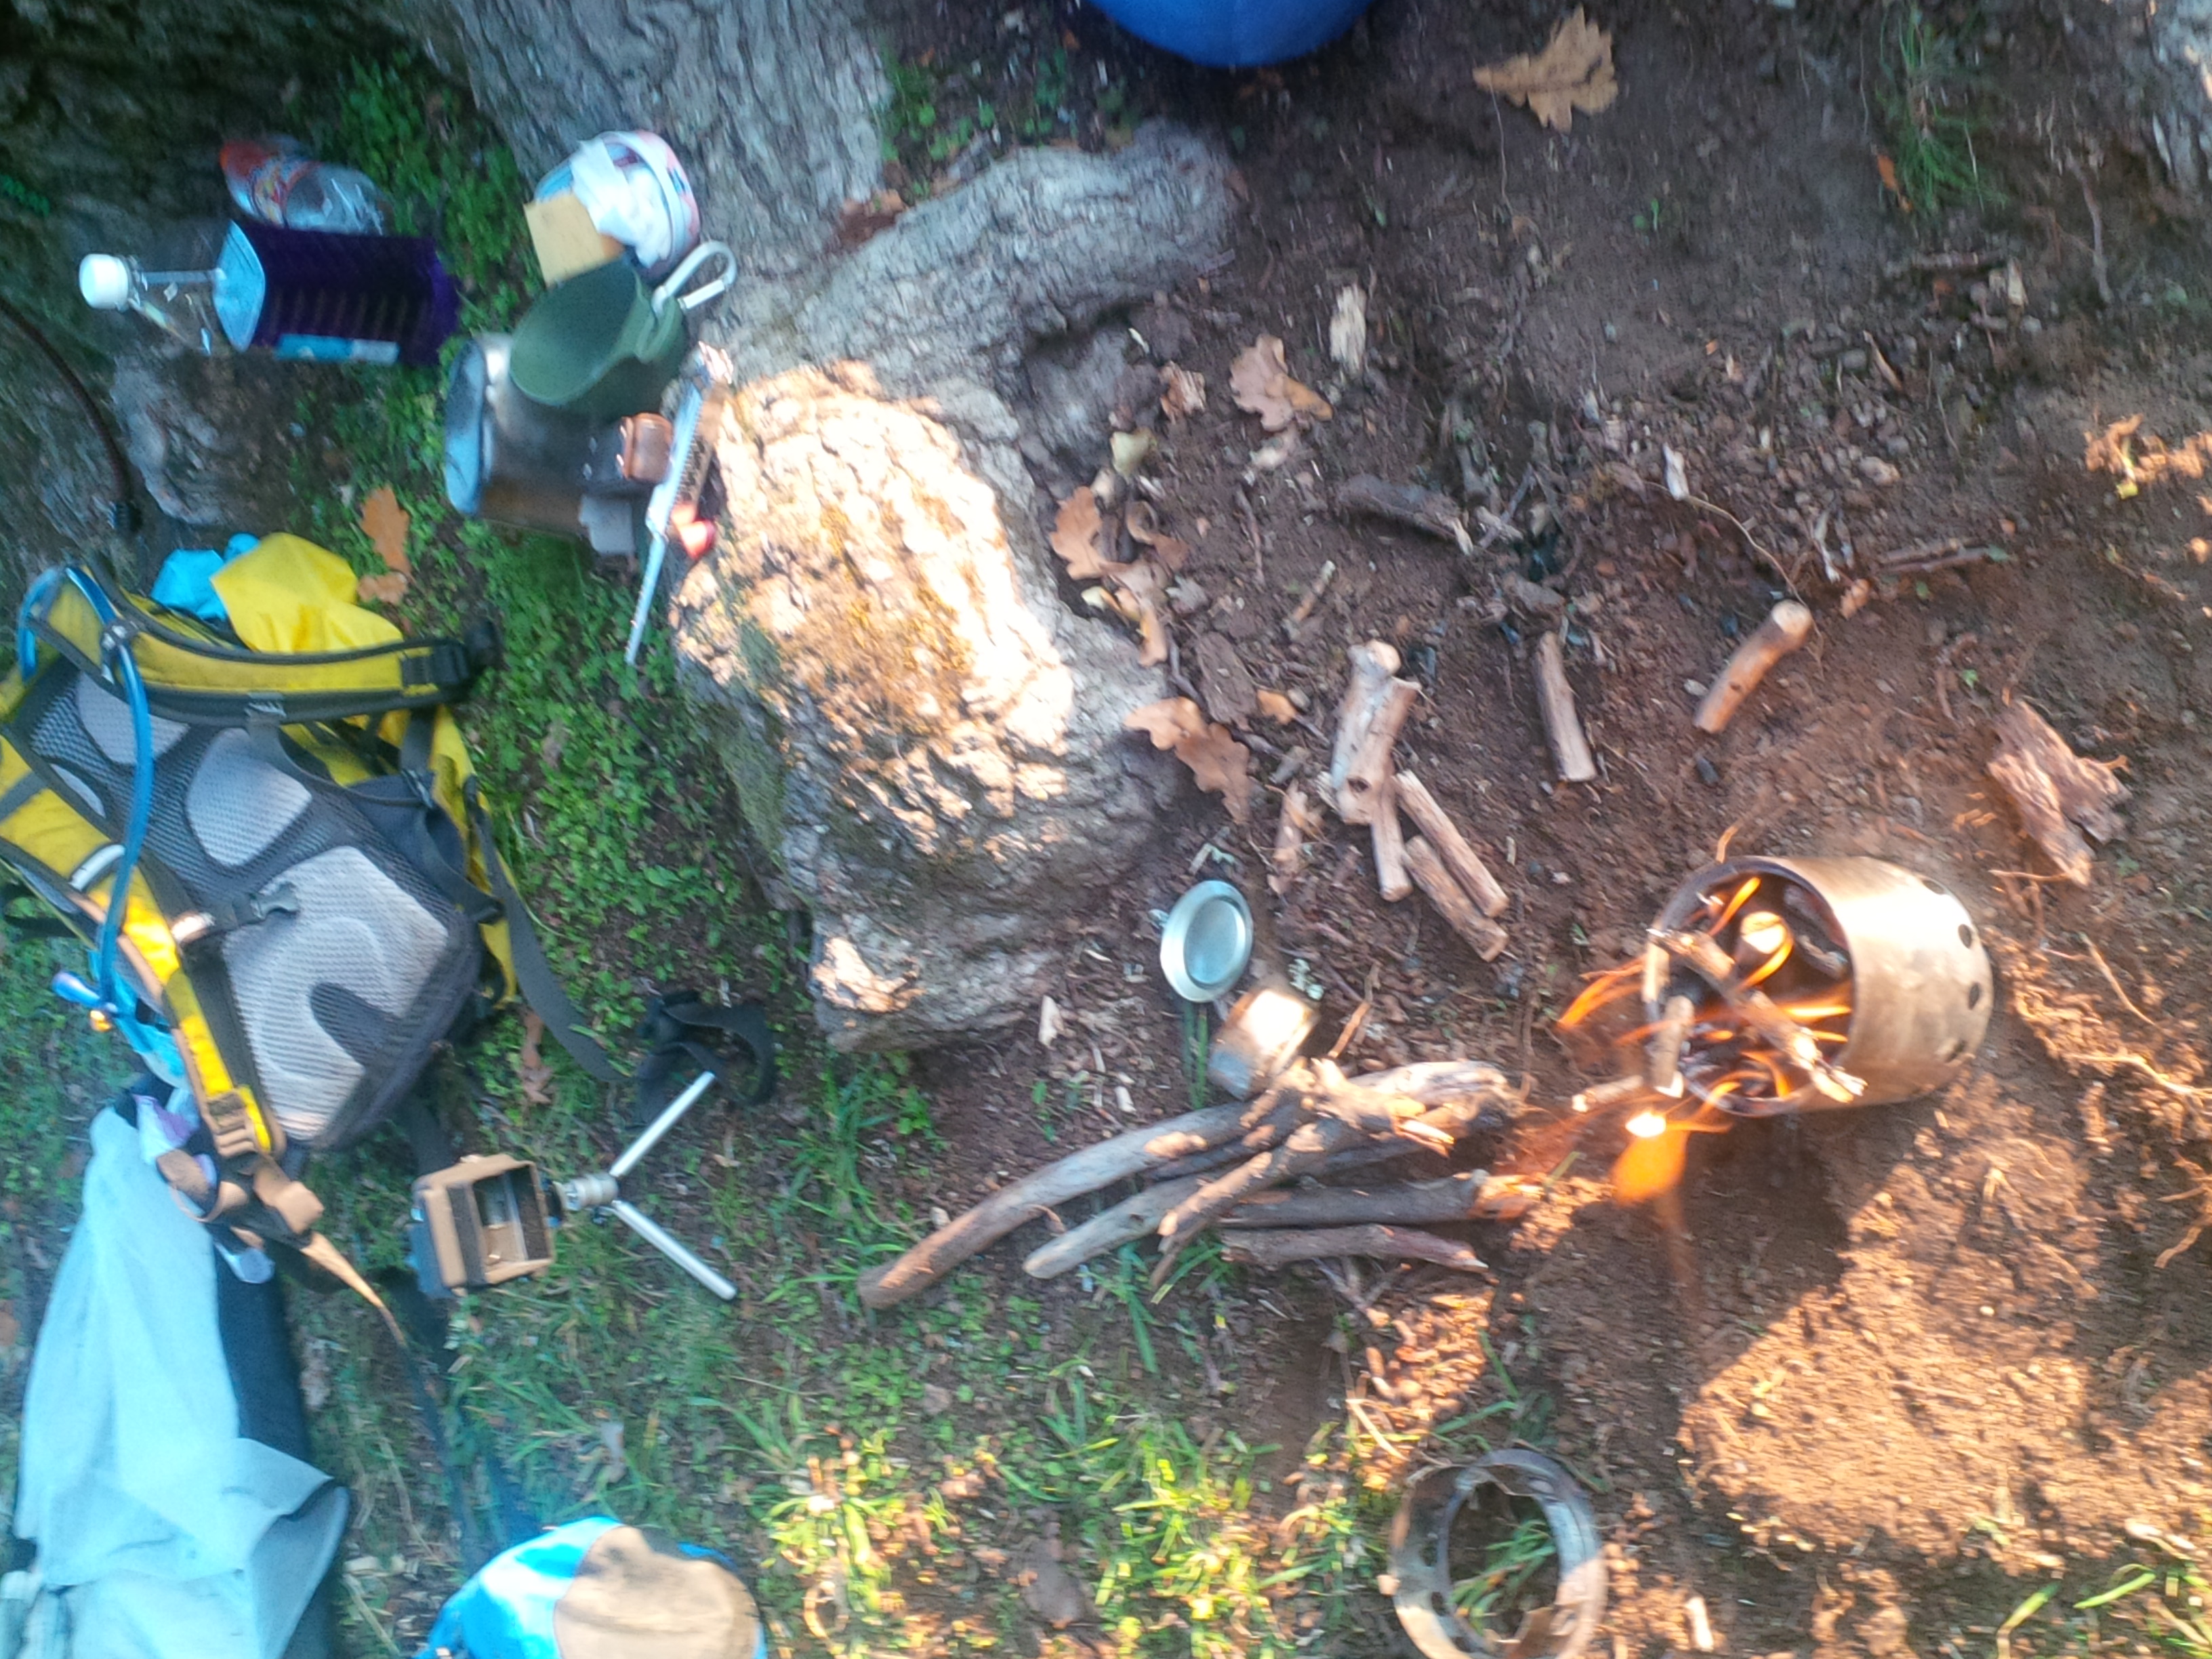
In the months leading up to the race I was testing the Bivy option thinking it would be ideal for a summertime blast through the south island . All my previous races i ve used my lightweight one person tent and I guess I ve just got very used of that. Getting into the confined space of a bivy and attempting to rest just did not seem to work for me. I tossed and turned and sometimes the heavy condensation would leave me cold and just wanting to get out and continue riding.
The beautifully sparse Hawkdun Range
I pushed on in the middle of the night, I felt super sleepy on a few occasions and simply lied down on the dirt to sleep/rest for 20 mins. The rising sun and epic expansive views cheered me up as I pushed on up the aptly named walking spur . I was relieved to eventually crest the Hawkdun range at 1643 meters mid morning. The descent off the range was a super rough boulder strewn track. I was bouncing my way down on my 100ml of Rock Shox Sid suspension when I almost lost it . This was a message to get off the bike and walk for a bit. A 5 minute wait for a huge flock of sheep being moved along the road before rolling into Oturehua, What a night , what an adventure. I parked my bike outside the amazing historic Gillchrists General merchants store, removing my cycling shoes to relieve the pressure on my aching feet and proceeded to spend another decent amount on food and drinks
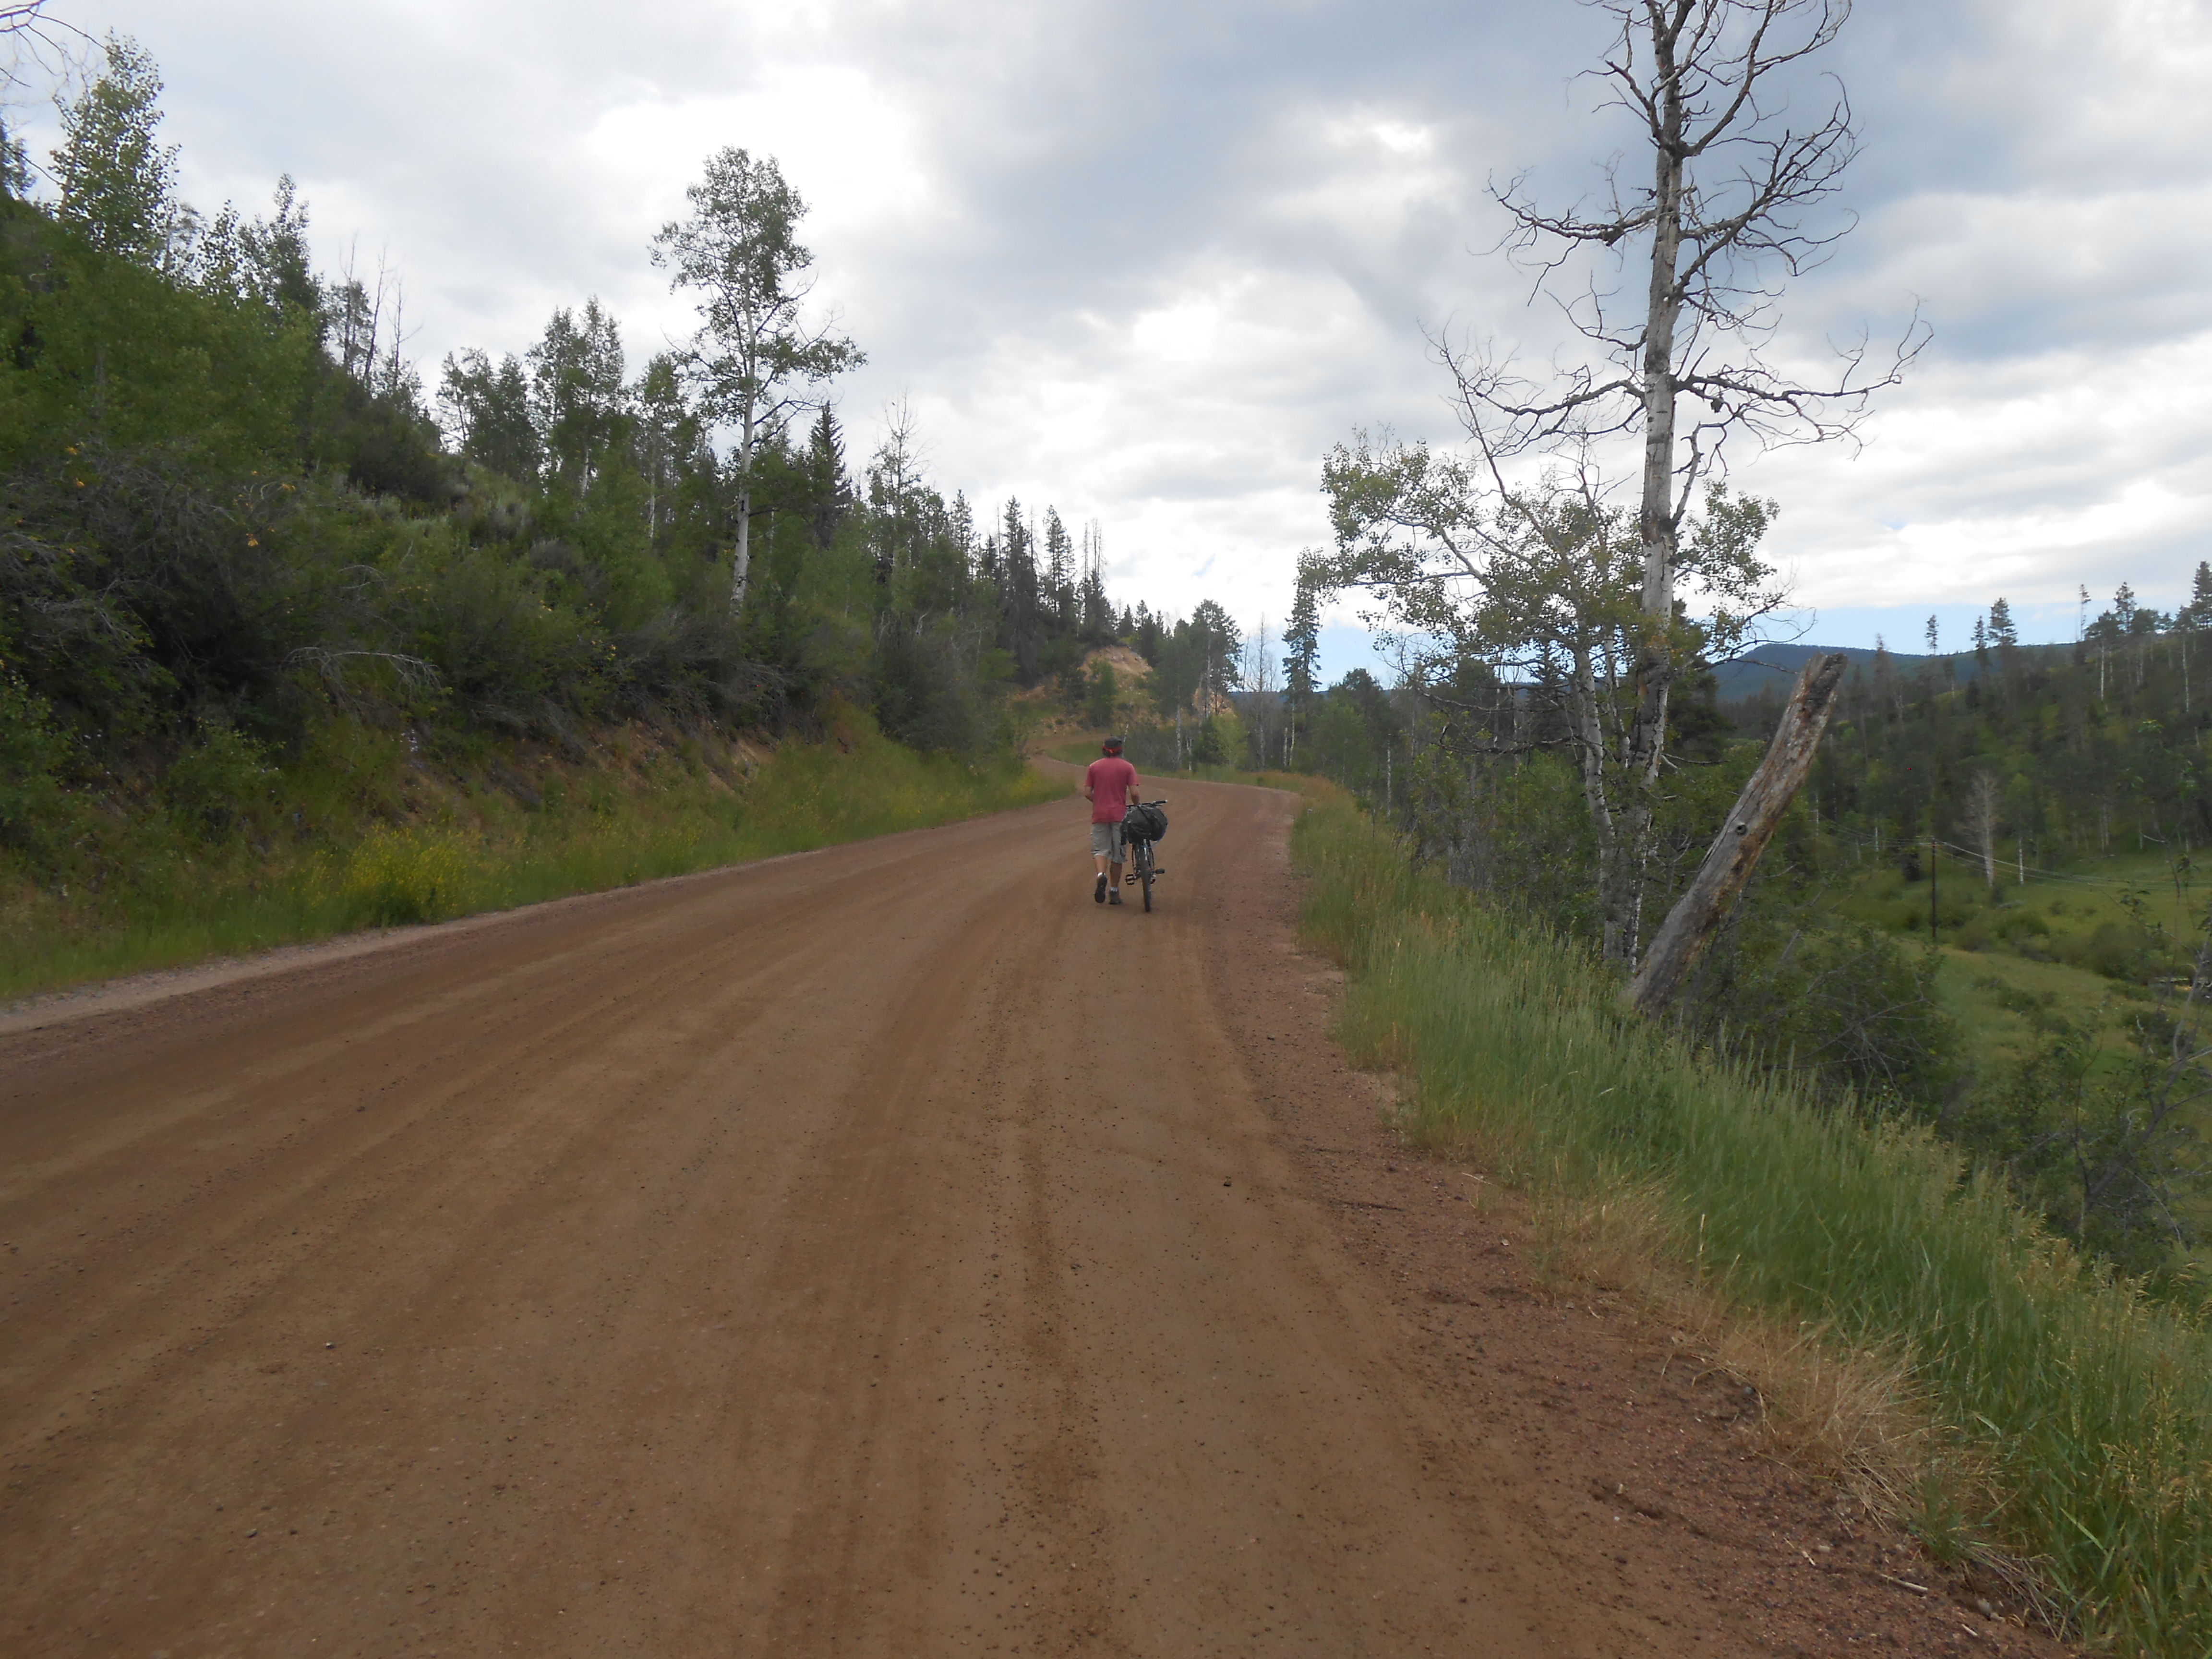
Road delays close to Oturehua
A look at the Maprogress tracking page revealed what I already knew , I was falling behind big time, Tony was about 120ks up the road and Ollie was smashing it over 200 kms away.The day grew hotter and I pushed on hoping to reach Lawrence , 165kms further along the route. When I reached the Poolburn reservoir, I found some shade beside a big rock and dozed for more than an hour. I felt so depleted and flat, I did not have an answer. From my previous experiences of encountering tough times , they have always passed and then I would be feeling absolutely fine again. This was different, My legs were dead since the previous day entering Black Forest Station. I pushed on through this remarkable terrain with its beautiful rocky outcrops .Not long after, Hedley Wilton caught me, we rode together for a while and chatted about our races to this point. He looked fresh and strong before he pulled away and left me to contend with the hills
Another stunning sunset
As the sun began to drop as I passed Lake Onslow I knew I would not get anywhere near Lawrence today. I eventually camped roadside just before a no camping zone. Again sleep was intermittent and I was up moving again in the dead of night. With all this lack of quality rest I was again taking power naps in the dirt as I was willing the sun to rise and warm me up. I was walking hills that normally would be easy climbs, I was determined to finish the race but I had to accept that I did not know when that would be. I had never struggled like this before , it was an eyeopener, a learning curve and a lesson in humility. I knew I had to keep moving forward no matter how slow and somehow figure it out. Things can only improve
Green grass of southland
Another long stopover in Lawrence hoping to recharge, replenish enough for a final hit out. 152 kms to Slope point , the end point of the race, under normal circumstances would be a pretty straightforward day on the pedals. Belly full I rolled out of Lawrence to be greeted by another steep ass hill that burned my legs , then into the undulating hills towards Southland. I arrived in Clinton a hot sweaty mess and all I wanted to do was lie down and sleep , and thats pretty much what I done , I got a room in what looked like the only accommodation option, a run down Hotel . It was only about 6pm and I had nothing left in the tank for today.
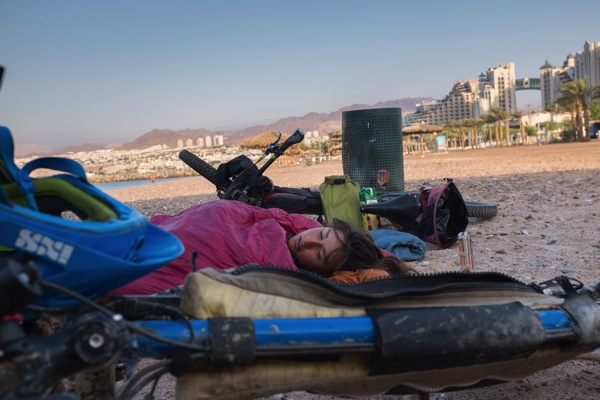
Another 12hour stop, and inevitably riders had passed me during my slumber, 5 in fact , I was now in 9th. To be honest I was not racing the last few days , I was surviving with a grim determination to get to Slope point . Funnily enough the last day I could feel some energy return to my legs and did enjoy my 90 km ride through the beautiful Catlins region. I rode until the road was no more, my race was over. I sat alone with my thoughts on the rocky cliffs that is Slope Point gazing out into the wild south Pacific ocean , happy to be finished , with many unanswered questions in my head, I let it all sink in. I ve had many tough moments in races due to mechanicals and injuries, but this race was a real rollercoaster , I had exhilarating highs and extreme lows and the unshakable fatigue of the last days was hard to take. It might sound crazy, but even in that moment I knew that I would have no hesitation in signing up for this race again. As always I look back with everlasting memories, neither good nor bad , just memories of another adventurous journey where I had to dive deep on so many levels. This is adventure that I live for , that I love and I will continue to push and test my limits to experience all the emotions that make me who I am .
7 DAYS 5 HOURS 15 MINUTES
Massive Congratulations to Inaugural TTW race winner Ollie Whalley on a phenomenal consistent ride .
Congratulations to all the riders, you are all hero’s
Huge Thank you to Brian Alder for creating this monster of a route through the spectacular landscape of Te Waipounamu https://www.tourtewaipounamu.co.nz/
Much Gratitude to the Landowners for allowing us to traverse your lands
Immense Gratitude to my Wife/Coach/ no1 supporter , Mary Jo and our Vibrant Living team for the opportunity to follow my passion once again https://www.vibrantliving.co.nz/
Five Full days after finishing the gruelling Tour Te Waipounamu , I was still down in the deep south and on the startline of another long distance bikepacking race. The inaugural Tuatara 1000 starts and finish’s in Invercargill and covers just over 1000kms of backcountry roads. Admittedly during the last days of the TTW I thought that there was no chance I would be racing so soon again after feeling so low in energy and depleted. Even days before the start I was tuning into my body , to see if I was making the right decision. In the end I got a Yes, game on lets go .
After the TTW finished, I had some restful days in Invercargill. I hung out with Brian Alder for a couple of days and met some others riders and that was really great to have a de brief. I went to Queenstown to see some friends, done some riding and ate heaps of food. My bike set up remained the same and I packed the same gear I used in the TTW, so preparation was relatively easy. I went into this with a day by day perspective as I really did not know how my body would react to more long days on the bike so soon after finishing the last one.
About 60 riders were gathered in Queens Park on an overcast morning on the 27th of February 2021. Most were doing the brevet option, which meant riders had to stop for a designated time within each 24 hrs and about 10 were tackling the non stop version.
It was a reasonably fast start with Hayden McCormick steamrolling it at the front of a strung out peloton. Hayden, an ex pro road rider had no problem leading the bunch, he seemed like a man on a mission. After a couple of hours I made the conscious decision to ride my own pace, I did nt want to chase or push to getaway as I felt I could blow up if I went to hard too soon. I got into my rhythm and generally rode by myself, catching others as well as being passed.
I passed through numerous bays and some wild southland beaches before heading inland in a northerly direction on some glorious gravel roads through countryside i d never being before. Getting to Te Anau after 235kms before 6pm was a great reset before resuming the ride into the calm summers evening. As I approached Mossburn as darkness fell after 322kms, I thought it would be my final destination for the day, however I pushed on for another 25kms or so to find a very glamorous bivvy spot, a very old rickety farm building was my lodging for the night. I was up and moving well before the sunrise on day 2.
On the way to Mossburn as Darkness set in
Next resupply point was the town of Gore , I arrived about 7am and was grateful a cafe was open for a hot drink and breakfast . I caught up with Grant Guise at some point after Gore , we rode together and had a good catch up. On getting to the Tuapeka mouth , we had a wee stop for food , as the ferry across the Clutha river was not running we were resigned to the fact that we had to do the 20km alternate route. Gene Marsh and Myles Gibson turned up, and quickly we were all off down the west side of the river towards Clydevale to cross the road bridge. The day was getting hotter and I was starting to feel the exertions in my legs. I was happy to reach Lawrence in the middle of the day for the last resupply before Dunedin. It was kind of strange to be back here again so soon and in another race. Leaving Lawrence this time took us a different route, eastwards, one thing remained the same though, I was greeted with another big climb not far out of town, this one even bigger than the Breakneck rd climb on the TTW.
The Race situation at this point was Hayden was about 70km ahead of me , Myles and Gene were not that far up the road and Grant was a bit behind having a longer stop in Lawrence. My goal at this point was to get to Dunedin before stopping. As I had not studied the route in any great detail I did not know what to expect. I definitely did not think it would take so long to reach Dunedin. The route skirted around the west side of the city close to Mosgiel . I even had some Hike a Bike, this was however much more straightforward than on the TTW. I was getting pretty jaded as I eventually came close to the city, it was after 11pm and not much was open along the route and I did not know the city well enough to detour to get food. I continued on hoping to pass a shop or something , but soon I was heading out the peninsula into the night on quiet roads. My luxury accommodation for tonight was inside a toilet block at Broad Bay. It was a short rest and I was moving again before 3 am. The night was long as I traversed the Otago peninsula in the dead of night and waited the first light of a new day .
The morning sun was welcome as I passed St Clair, still nothing was open to resupply and I was conscious that I would soon be leaving the city limits and was acutely aware that the next resupply was 100kms further on at Balclutha. I was feeling very sleepy at some point and had a 20 minute lie down in a bus shelter before moving on.
I spotted a Dairy shop and sat outside for a while hoping it would open at 7am , it did and I grabbed some not so nutritious supplies and was on my way. I really enjoyed the next section passing Taieri Beach through farmlands and past Toko mouth. The beaches here and wild and empty and I must return to this area to explore some more . Rob Dawson, Film Maker from the TTW popped out on the road at Taieri Beach to grab a photo as he was slowly making his way home after his epic adventure shooting last weeks race .
On reaching Balclutha after lunch on a glorious summers day I realised that Gene and Myles were not that far behind, I had to keep moving if I wanted to stay in second position. Hayden was close to 100kms ahead and was surely going to ride all the way to the finish in Invercargill. The next section of the route was also very beautiful as I approached the Catlins area, again coming into the same places I was only one week ago . The undulating hills continued into the evening and I was so grateful to be feeling good. As darkness fell I was considering my options, The finish was only about 100kms away, but I was now riding on very little sleep and the guys chasing me were less than 20kms behind.
I continued on, riding somewhat on adrenaline, at the same time I could feel some fatigue in my body, The route of this race had us ride out to Slope point for a there and back , I was sure that I d see Gene and Myles here. I did see lights at some point but never found out if it was them or not. After the Slope Point there and back , I checked the tracking page and seen that Hayden had finished and that Gene and Myles were really not that far behind. I was determined to keep my second position, and even though I did not plan on an all nighter , it looked like the likely scenario with the boys chasing hard behind me. I smashed out another much easier there and back out to Waipapa Point and continued on the sealed road somewhere around 2am
Gene and Myles did eventually stop , maybe around 3am , I kept going thinking in my head that I d get to Invercargill just as things were opening up around 7am. This did not happen and I went into a weird time warp for the next few hours The route brought us down along the Mataura River towards the coast. Down along here there are heaps of ramshackle huts, randomly spread out along the track. As it was dark all I could see was what my light lit up, these huts generally looked in bad shape and there was nobody around, no lights , I felt like I was on the set of a creepy horror movie. I was now really jaded and my sense of perception was very mixed up. As I rode past all these wretched buildings I had a massive sense of Deja Vu , I felt convinced that I had being here before. I knew I had nt , not in this lifetime anyway. I would later find out that these were Fishermans huts for white baiting. I pushed through the sandy beach section and was riding on gravel, like a zombie, I was getting close to falling asleep on the bike, I tried everything to stay alert, shouting, water over my face ,slapping my face etc… nothing worked , I would have to stop . This was frustrating as I only had about 40kms to the end and was hoping to finish it in under 3 full days.
Next challenge was finding a suitable place to lie down, this took a while as it felt like these were roads , with drains either side traversing swamp lands, I came on some big pine trees, jumped over a drain , wrapped up and set the alarm for 30 mins. The alarm startled me , and it felt like I had just shut me eyes, I pulled up the Tracking page and seen the guys were on the move, meaning I had to move also. Unfortunately the sun was struggling to penetrate the low fog , I was cold and pretty much out of water as I slowly made my way into the outskirts of Invercargill.
My wife called me 5 kms from the end thinking that I had already reached the finish, I said call back soon i m not there yet. I reached the Rotunda in Queens Park at 9.15am , taking just over 3 days to complete the 1066kms. Overall not much sleep was had but I felt pretty good for the most part except maybe for things going a little weird in the last hours before the finish.
Bikepacking is tough
So two new races completed between the 14th Feb and 2nd March covering about 2,400 kms of beautifully rugged South Island terrain. Many ups and many downs, all everlasting memories of two more epic adventure rides on two wheels
Big Congrats to Hayden McCormick on a super strong ride and thanks to Gene and Myles for pushing and racing all the way
Thank you to Andy Chalmers for creating this super nice route
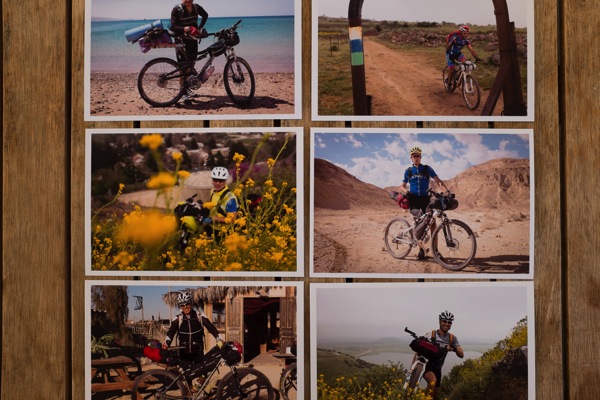
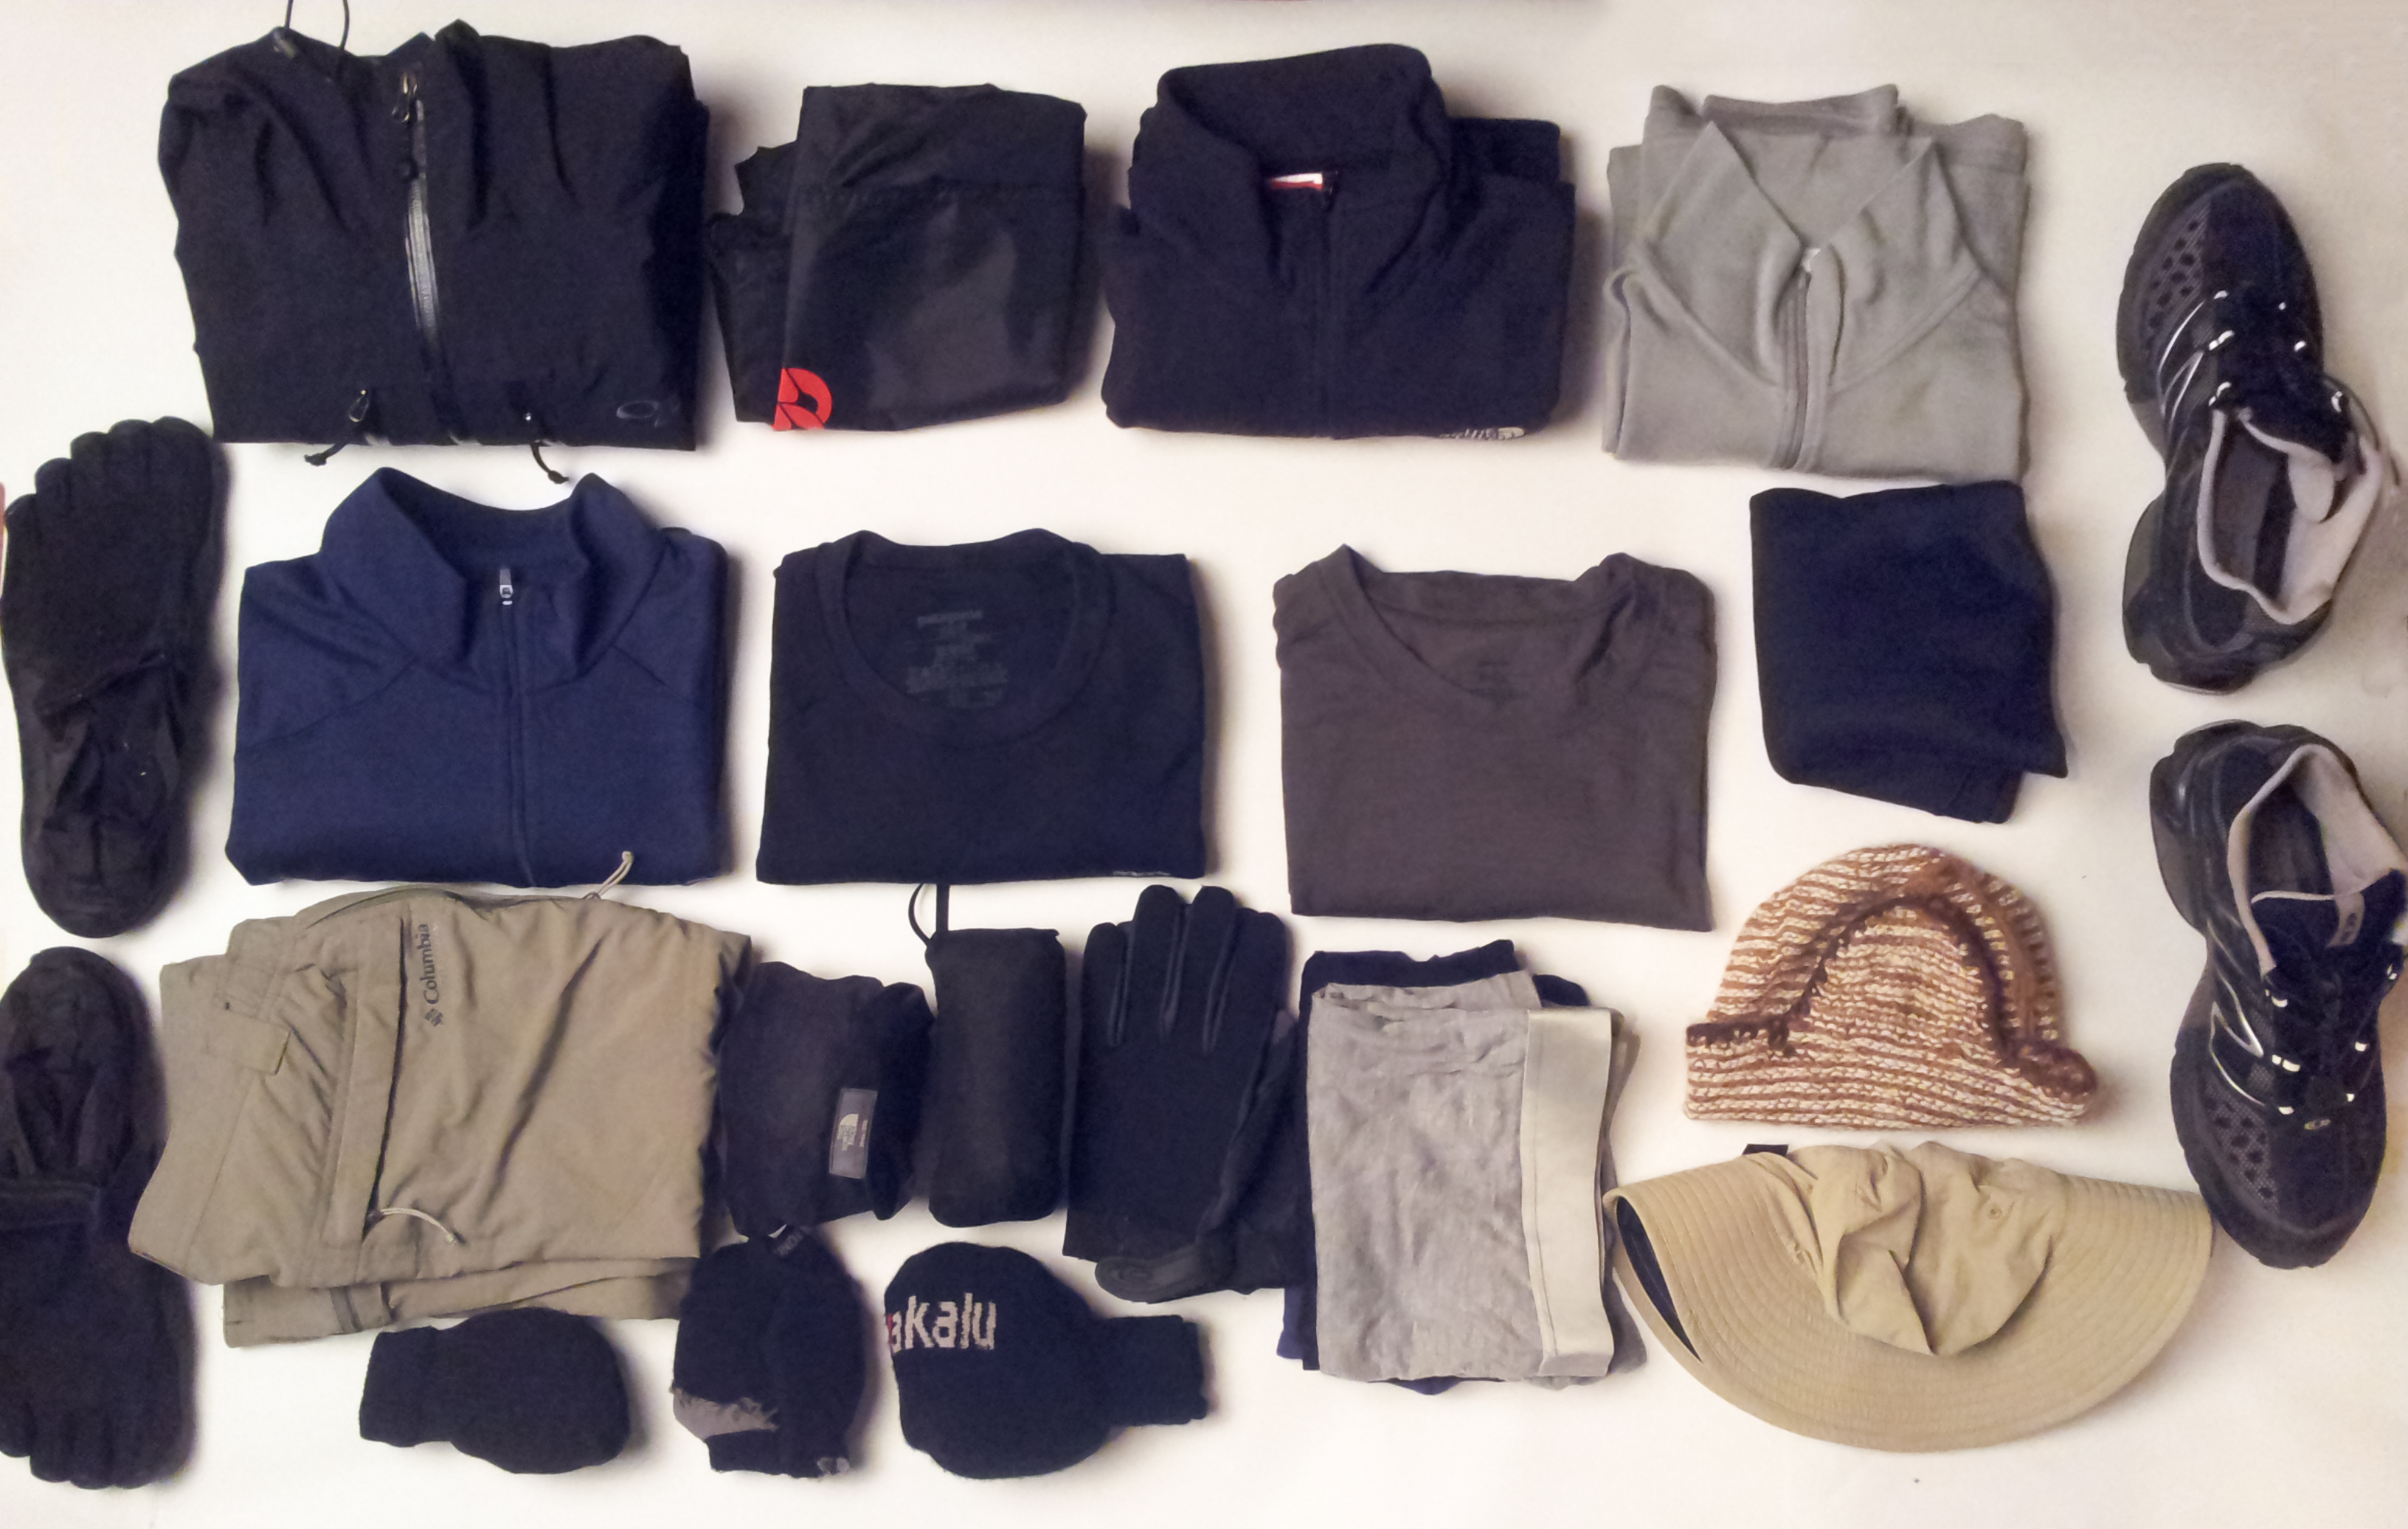
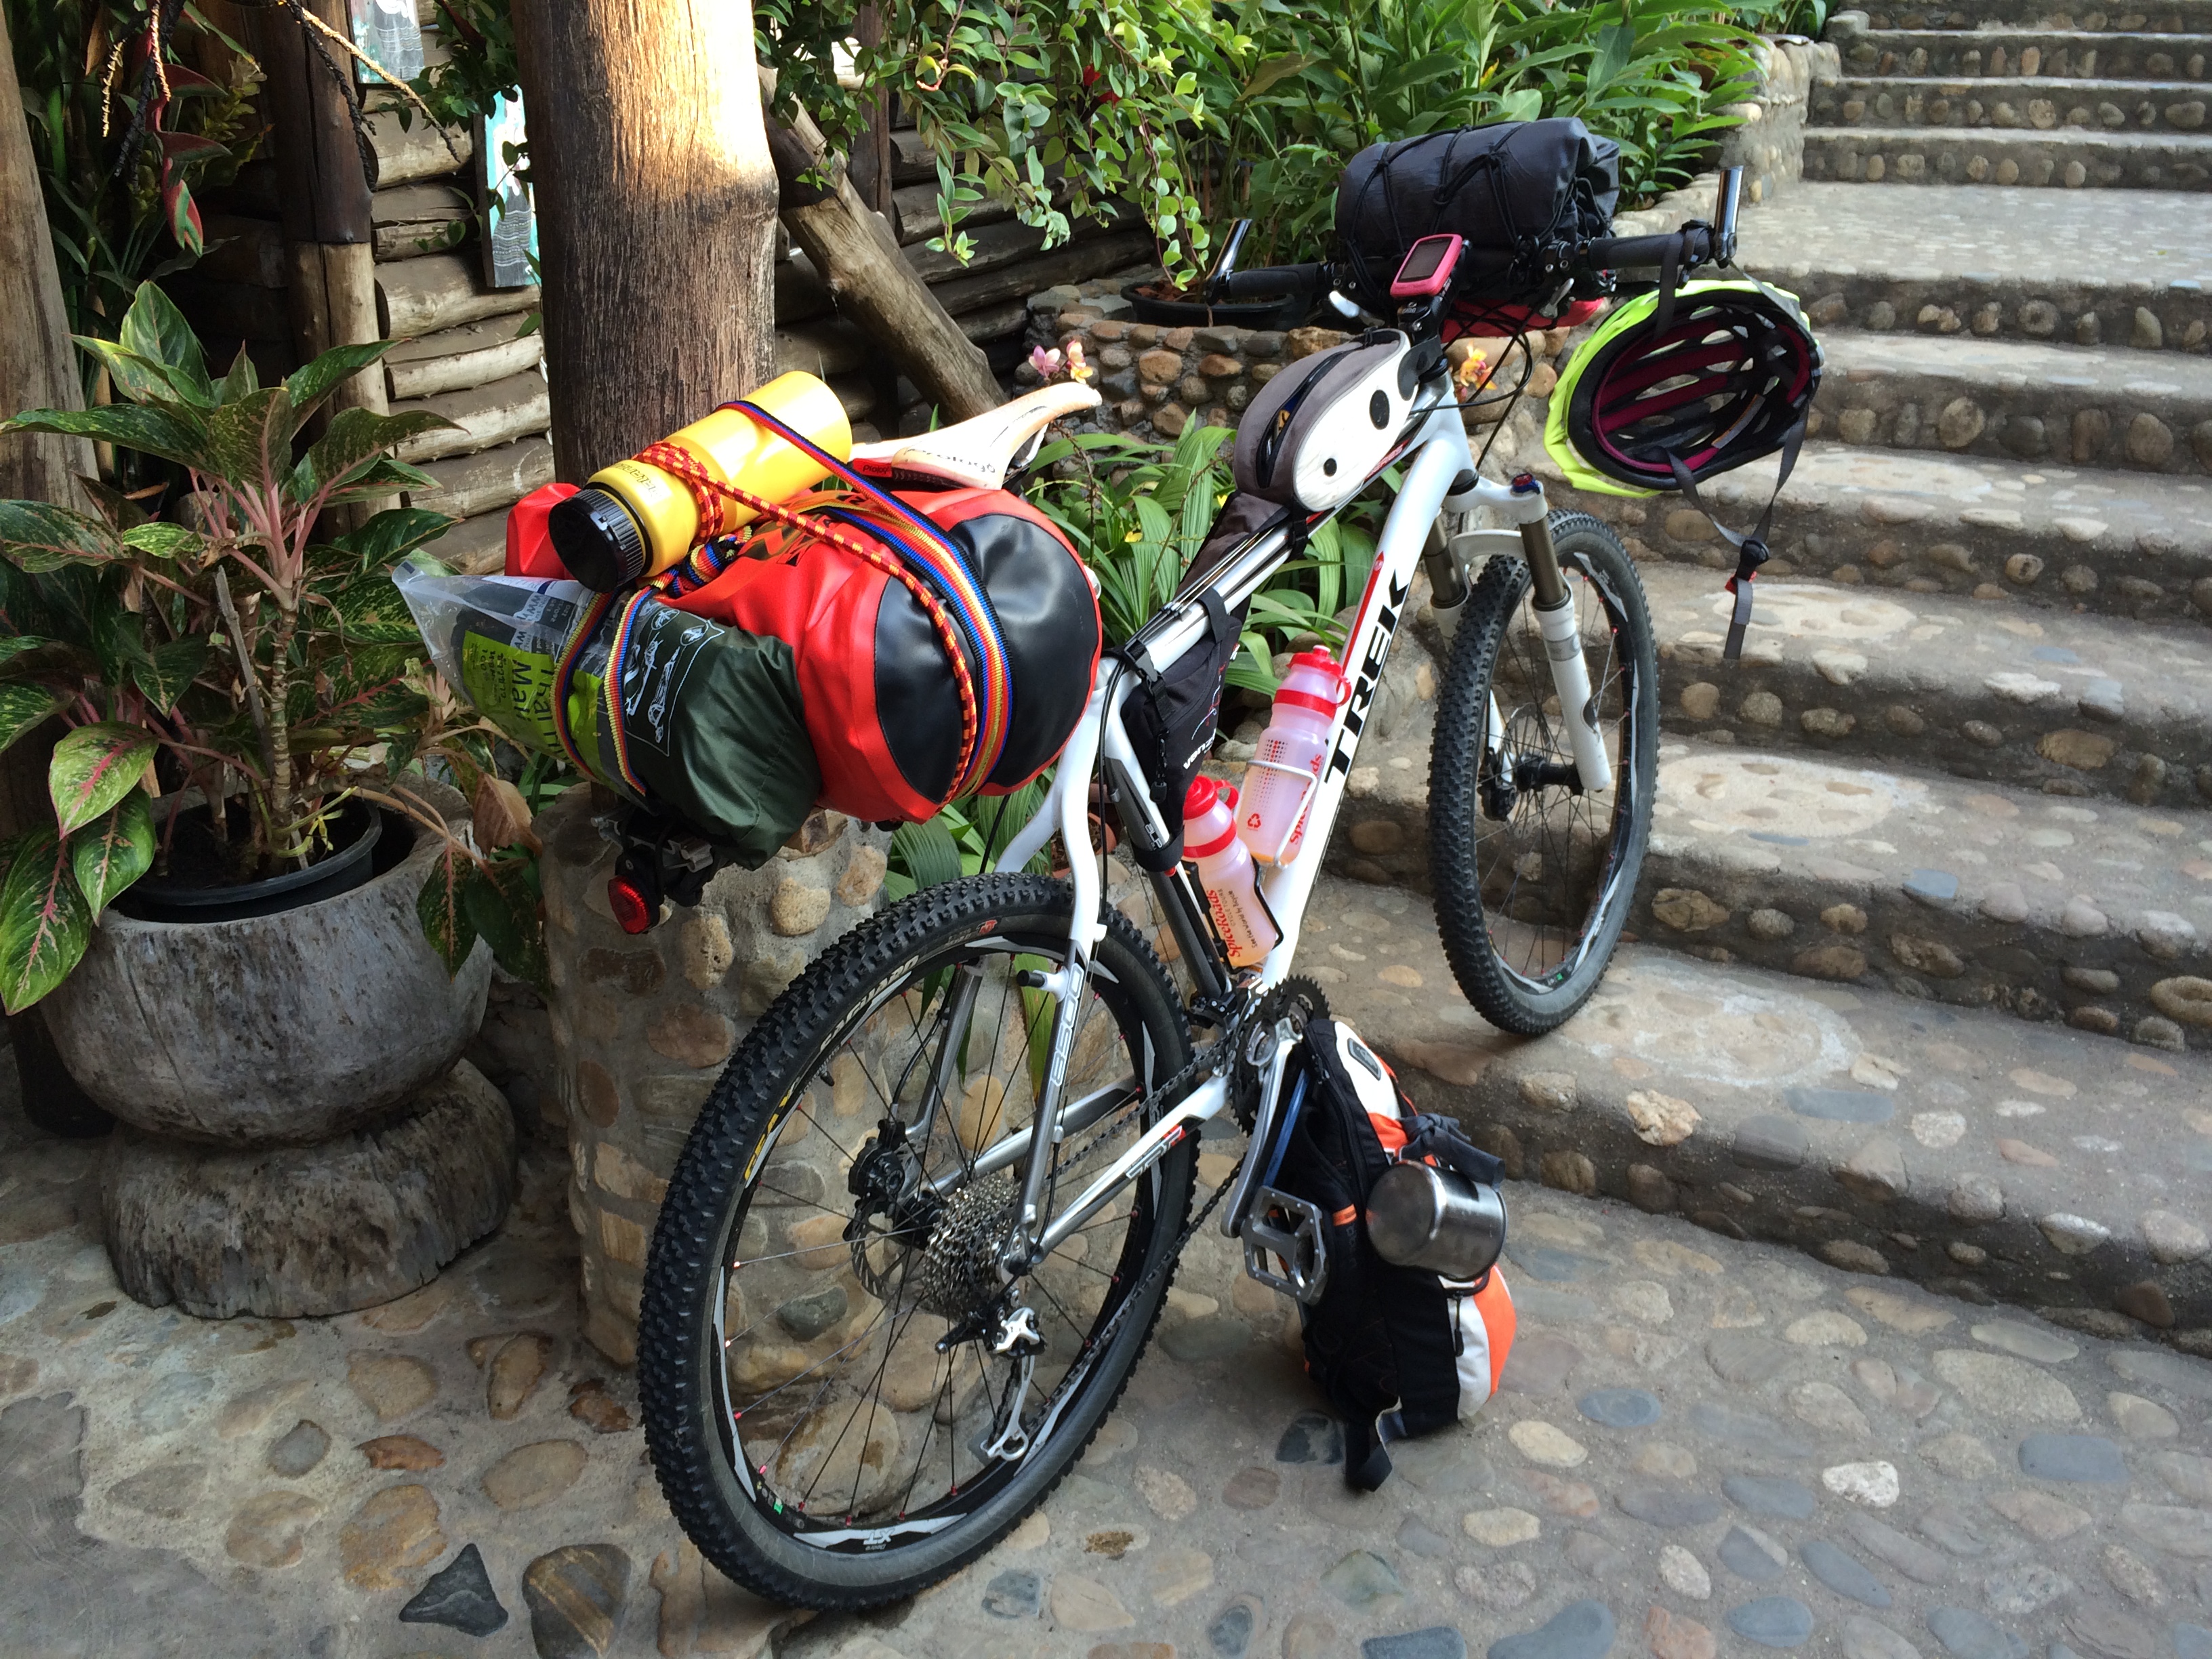
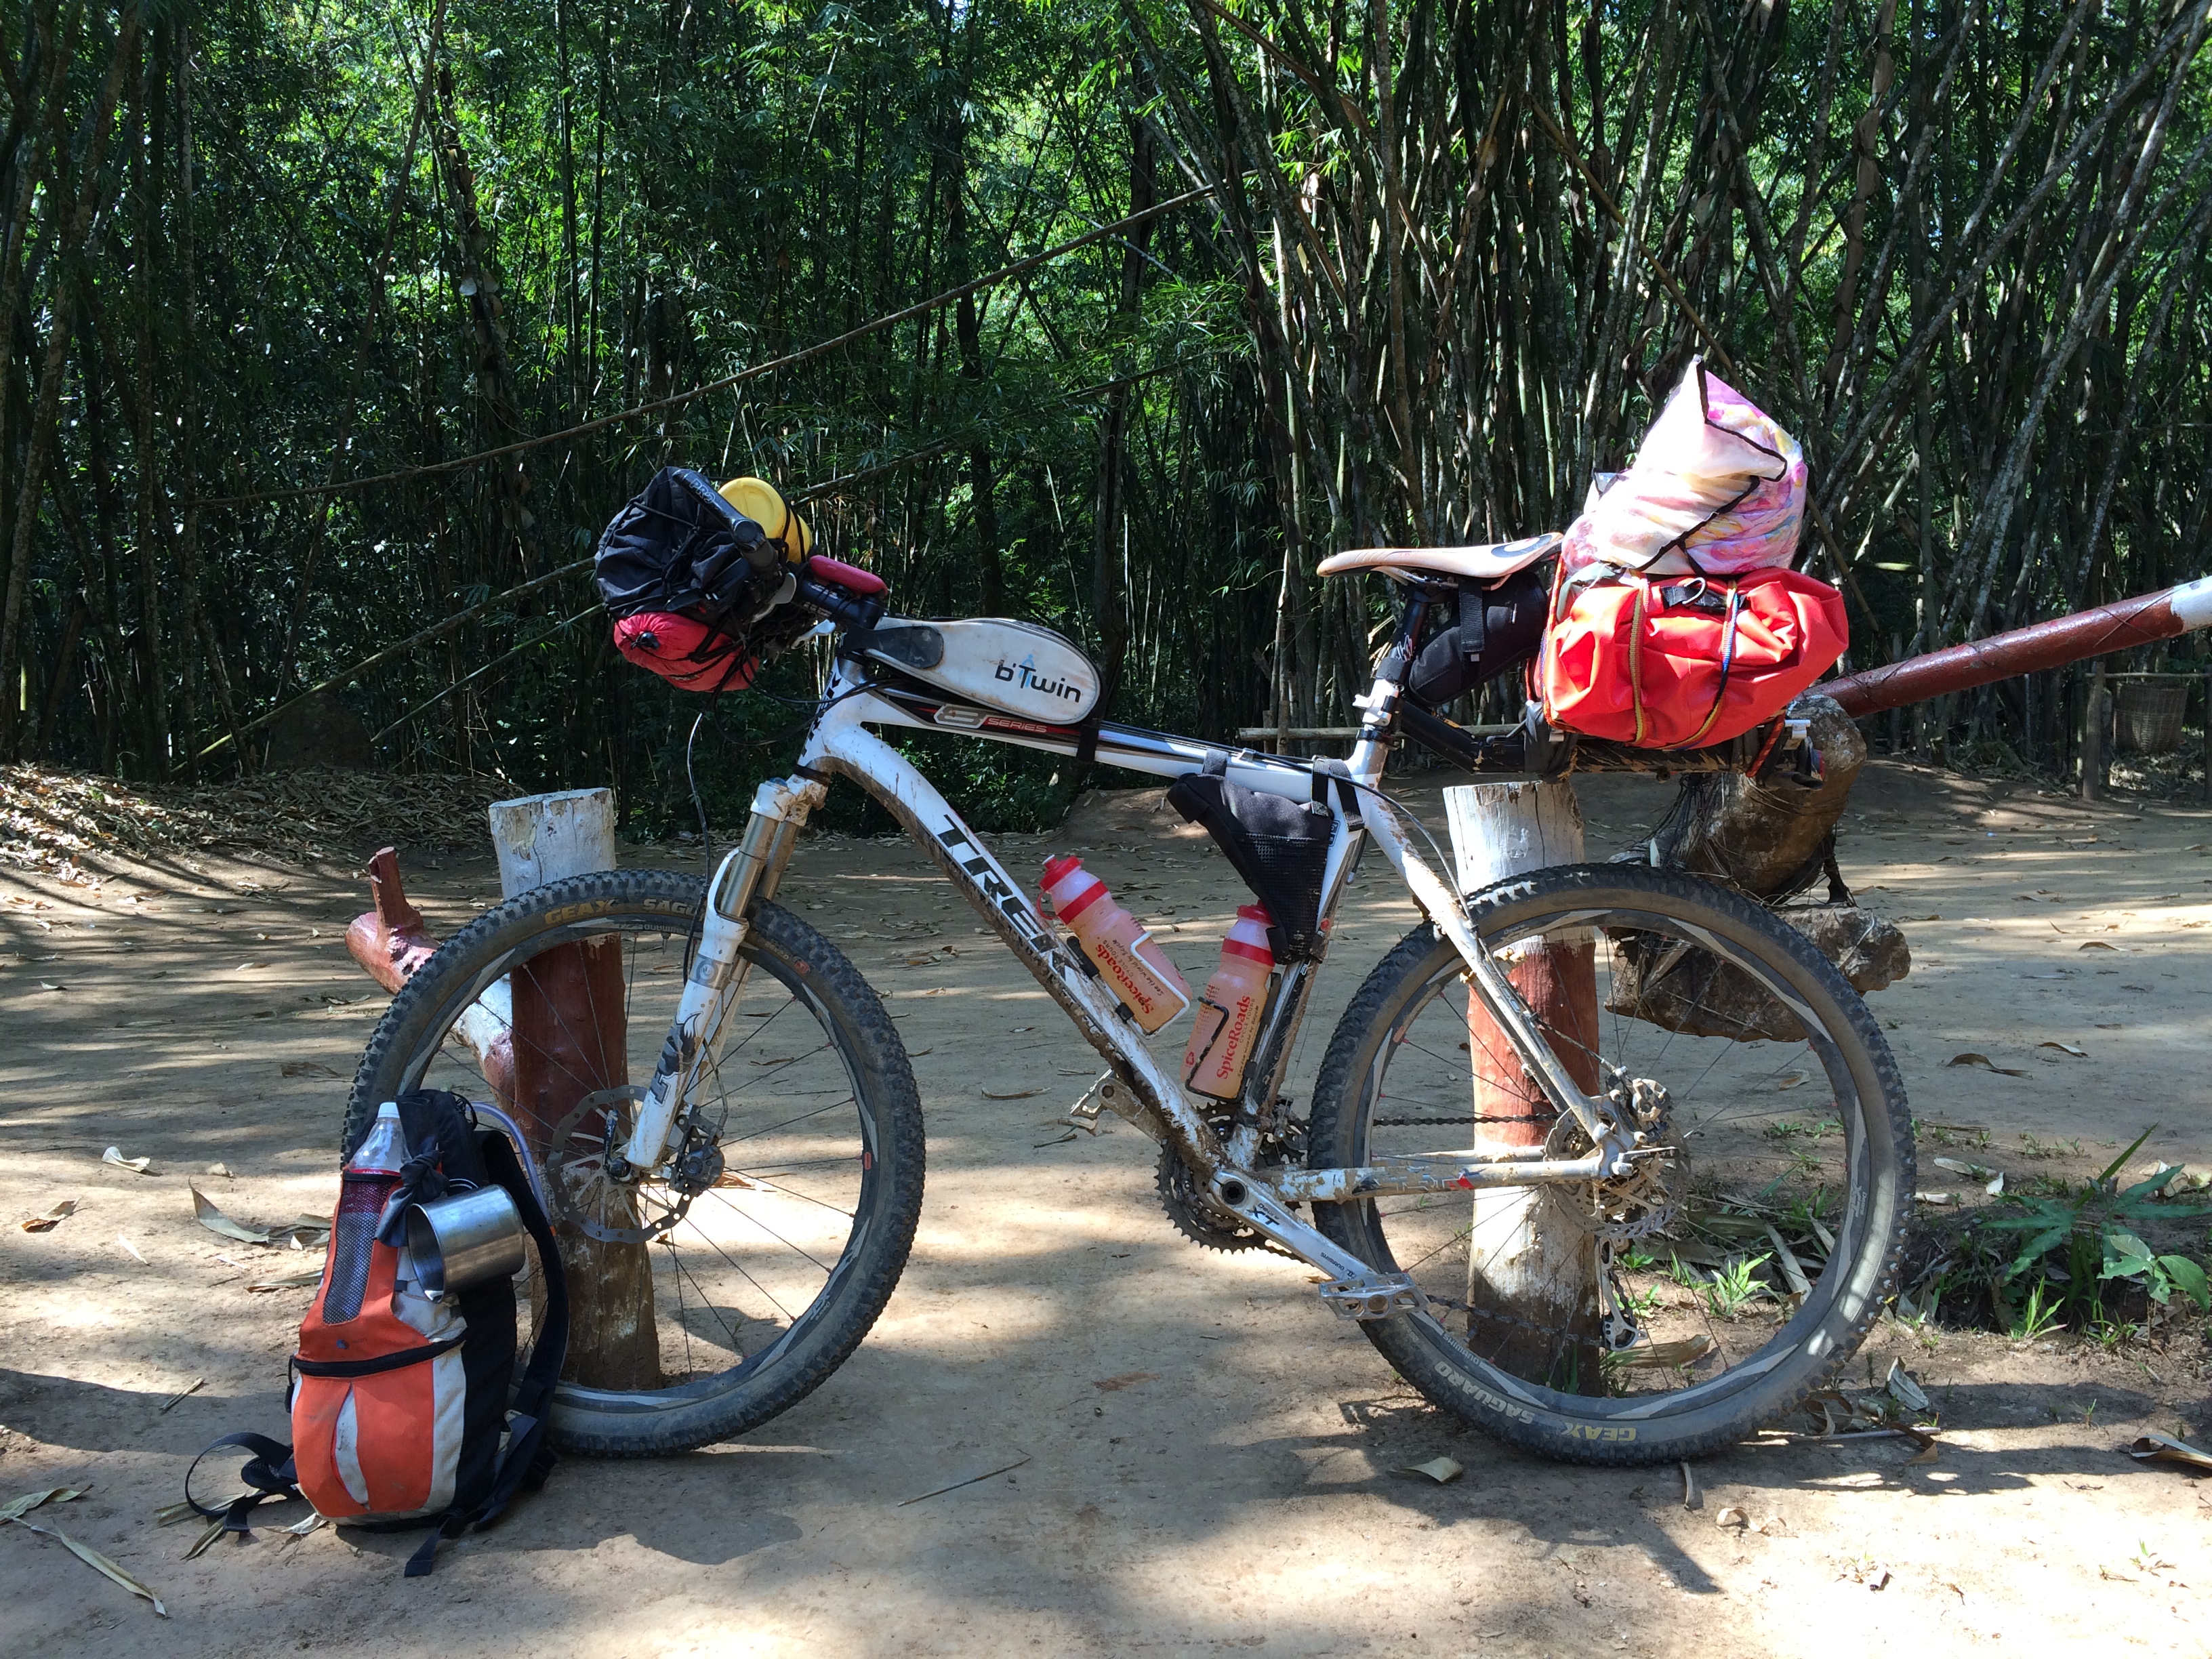
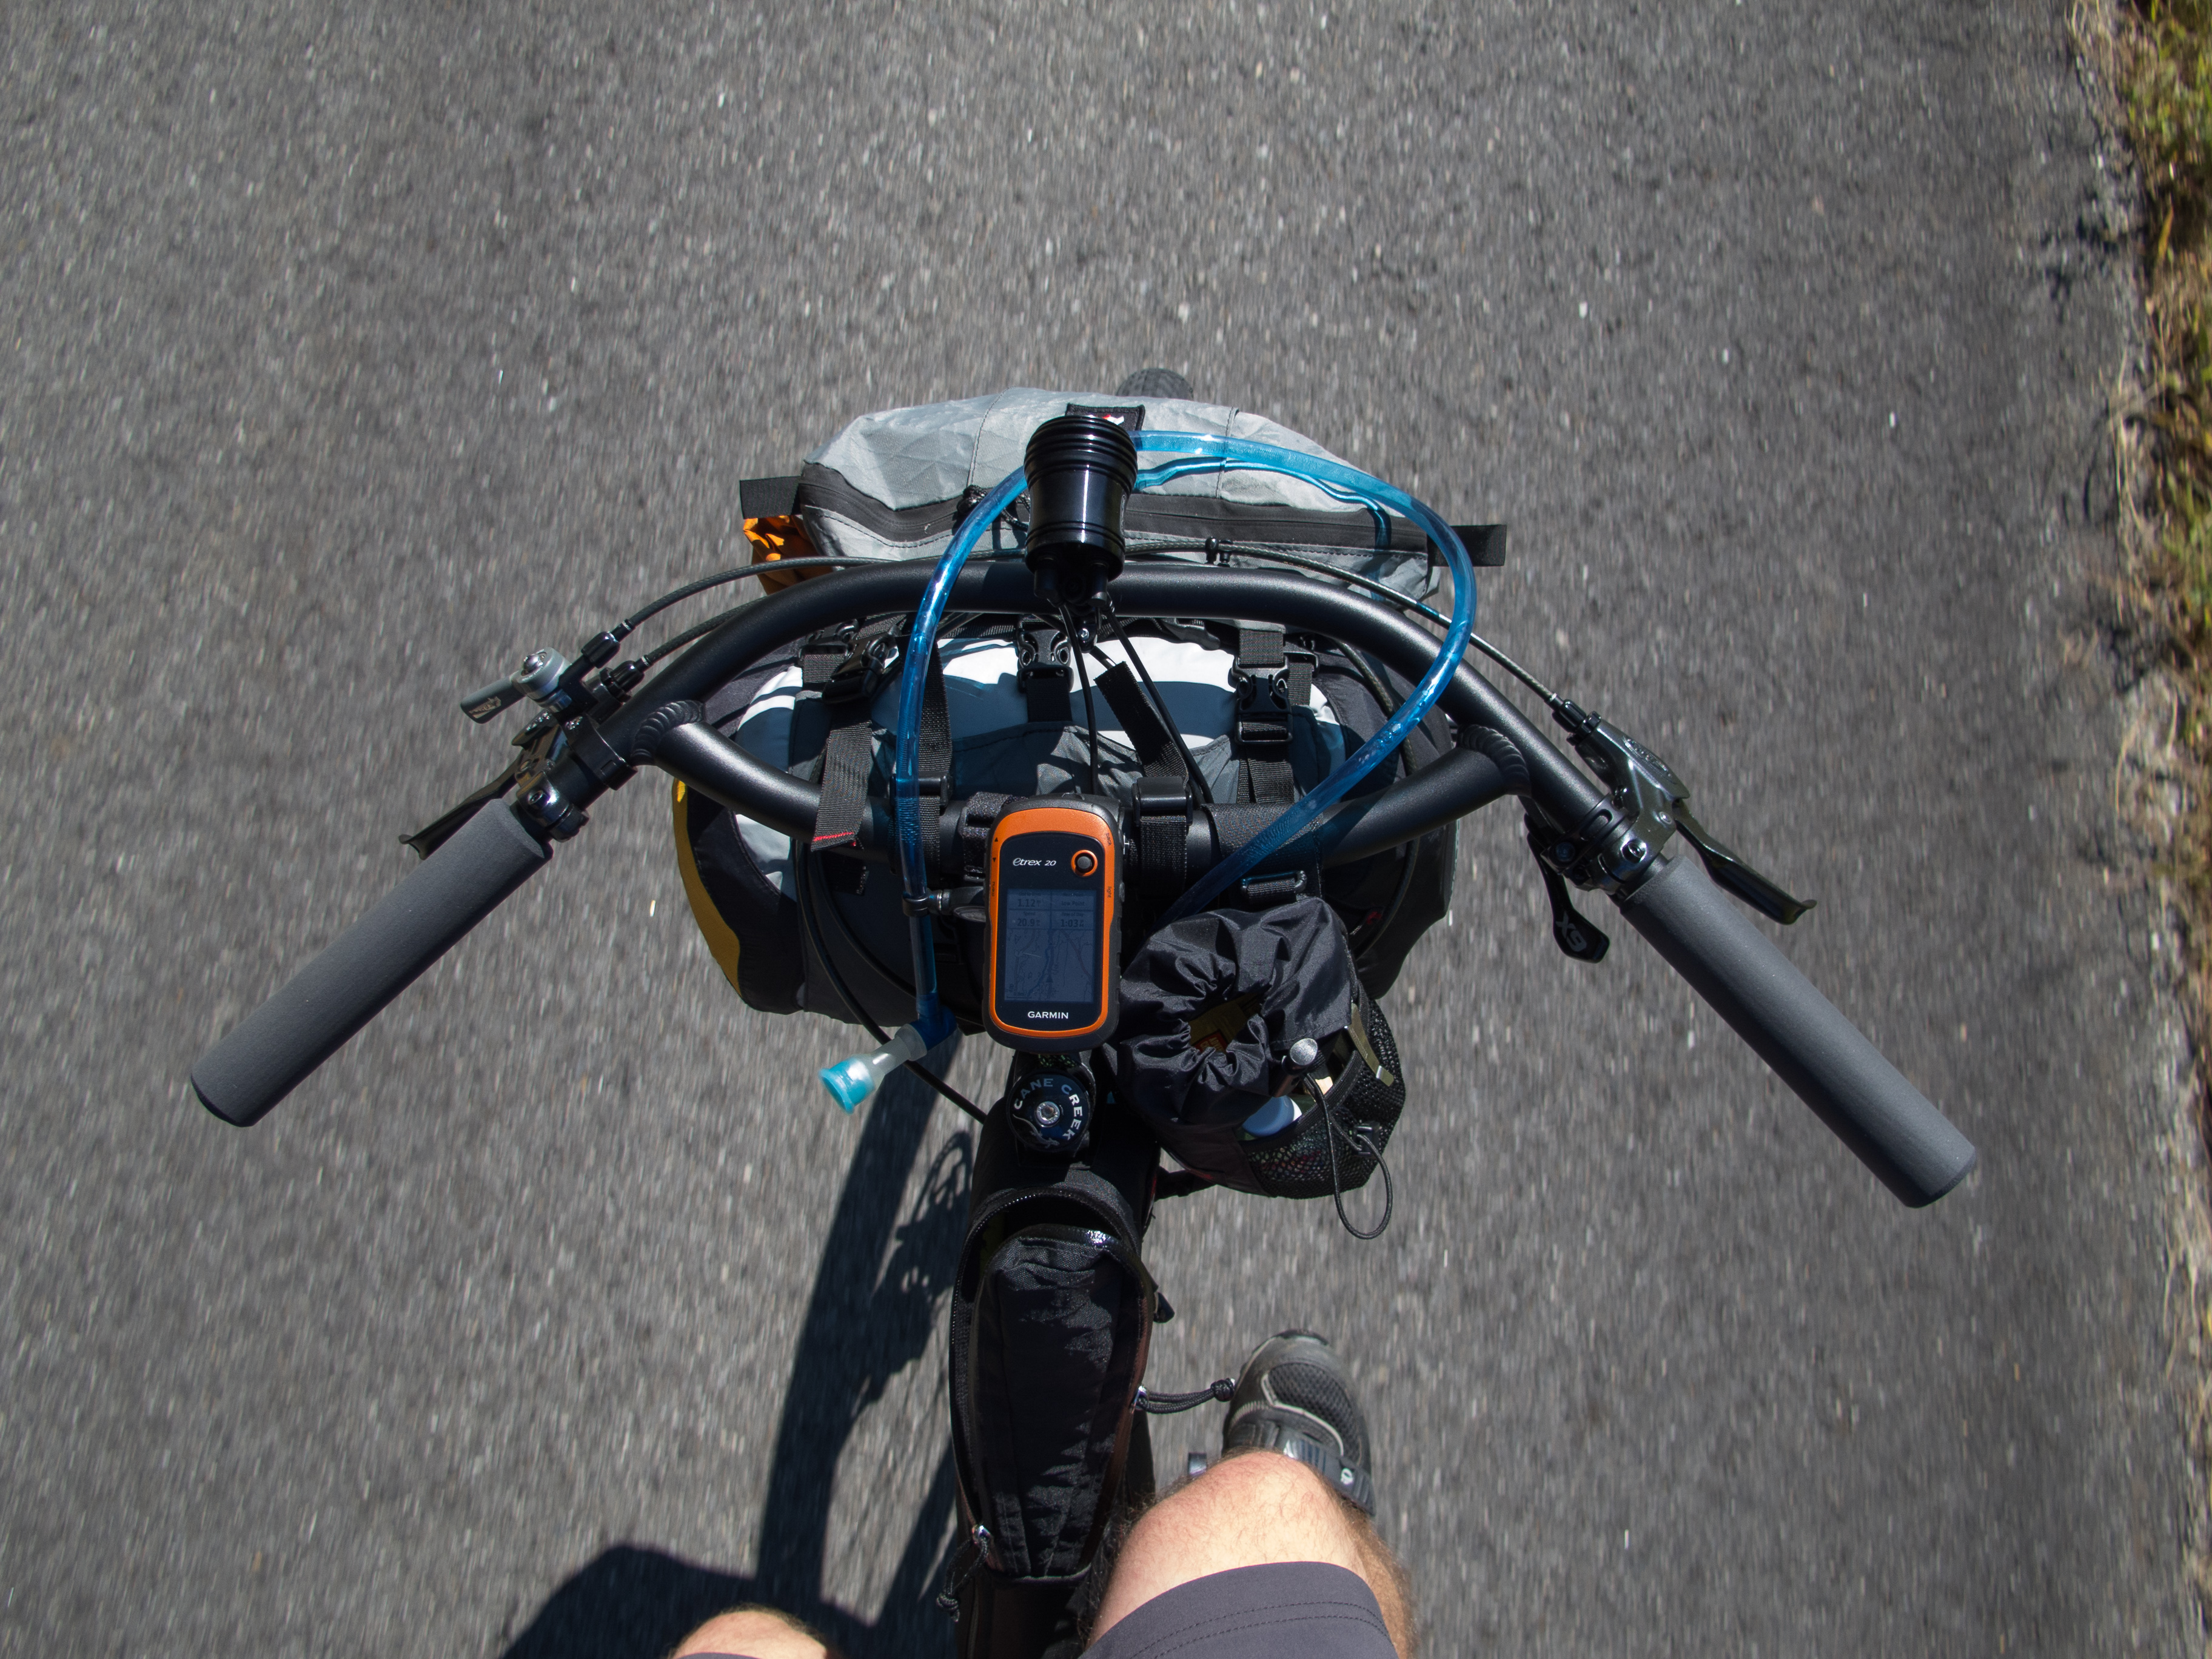
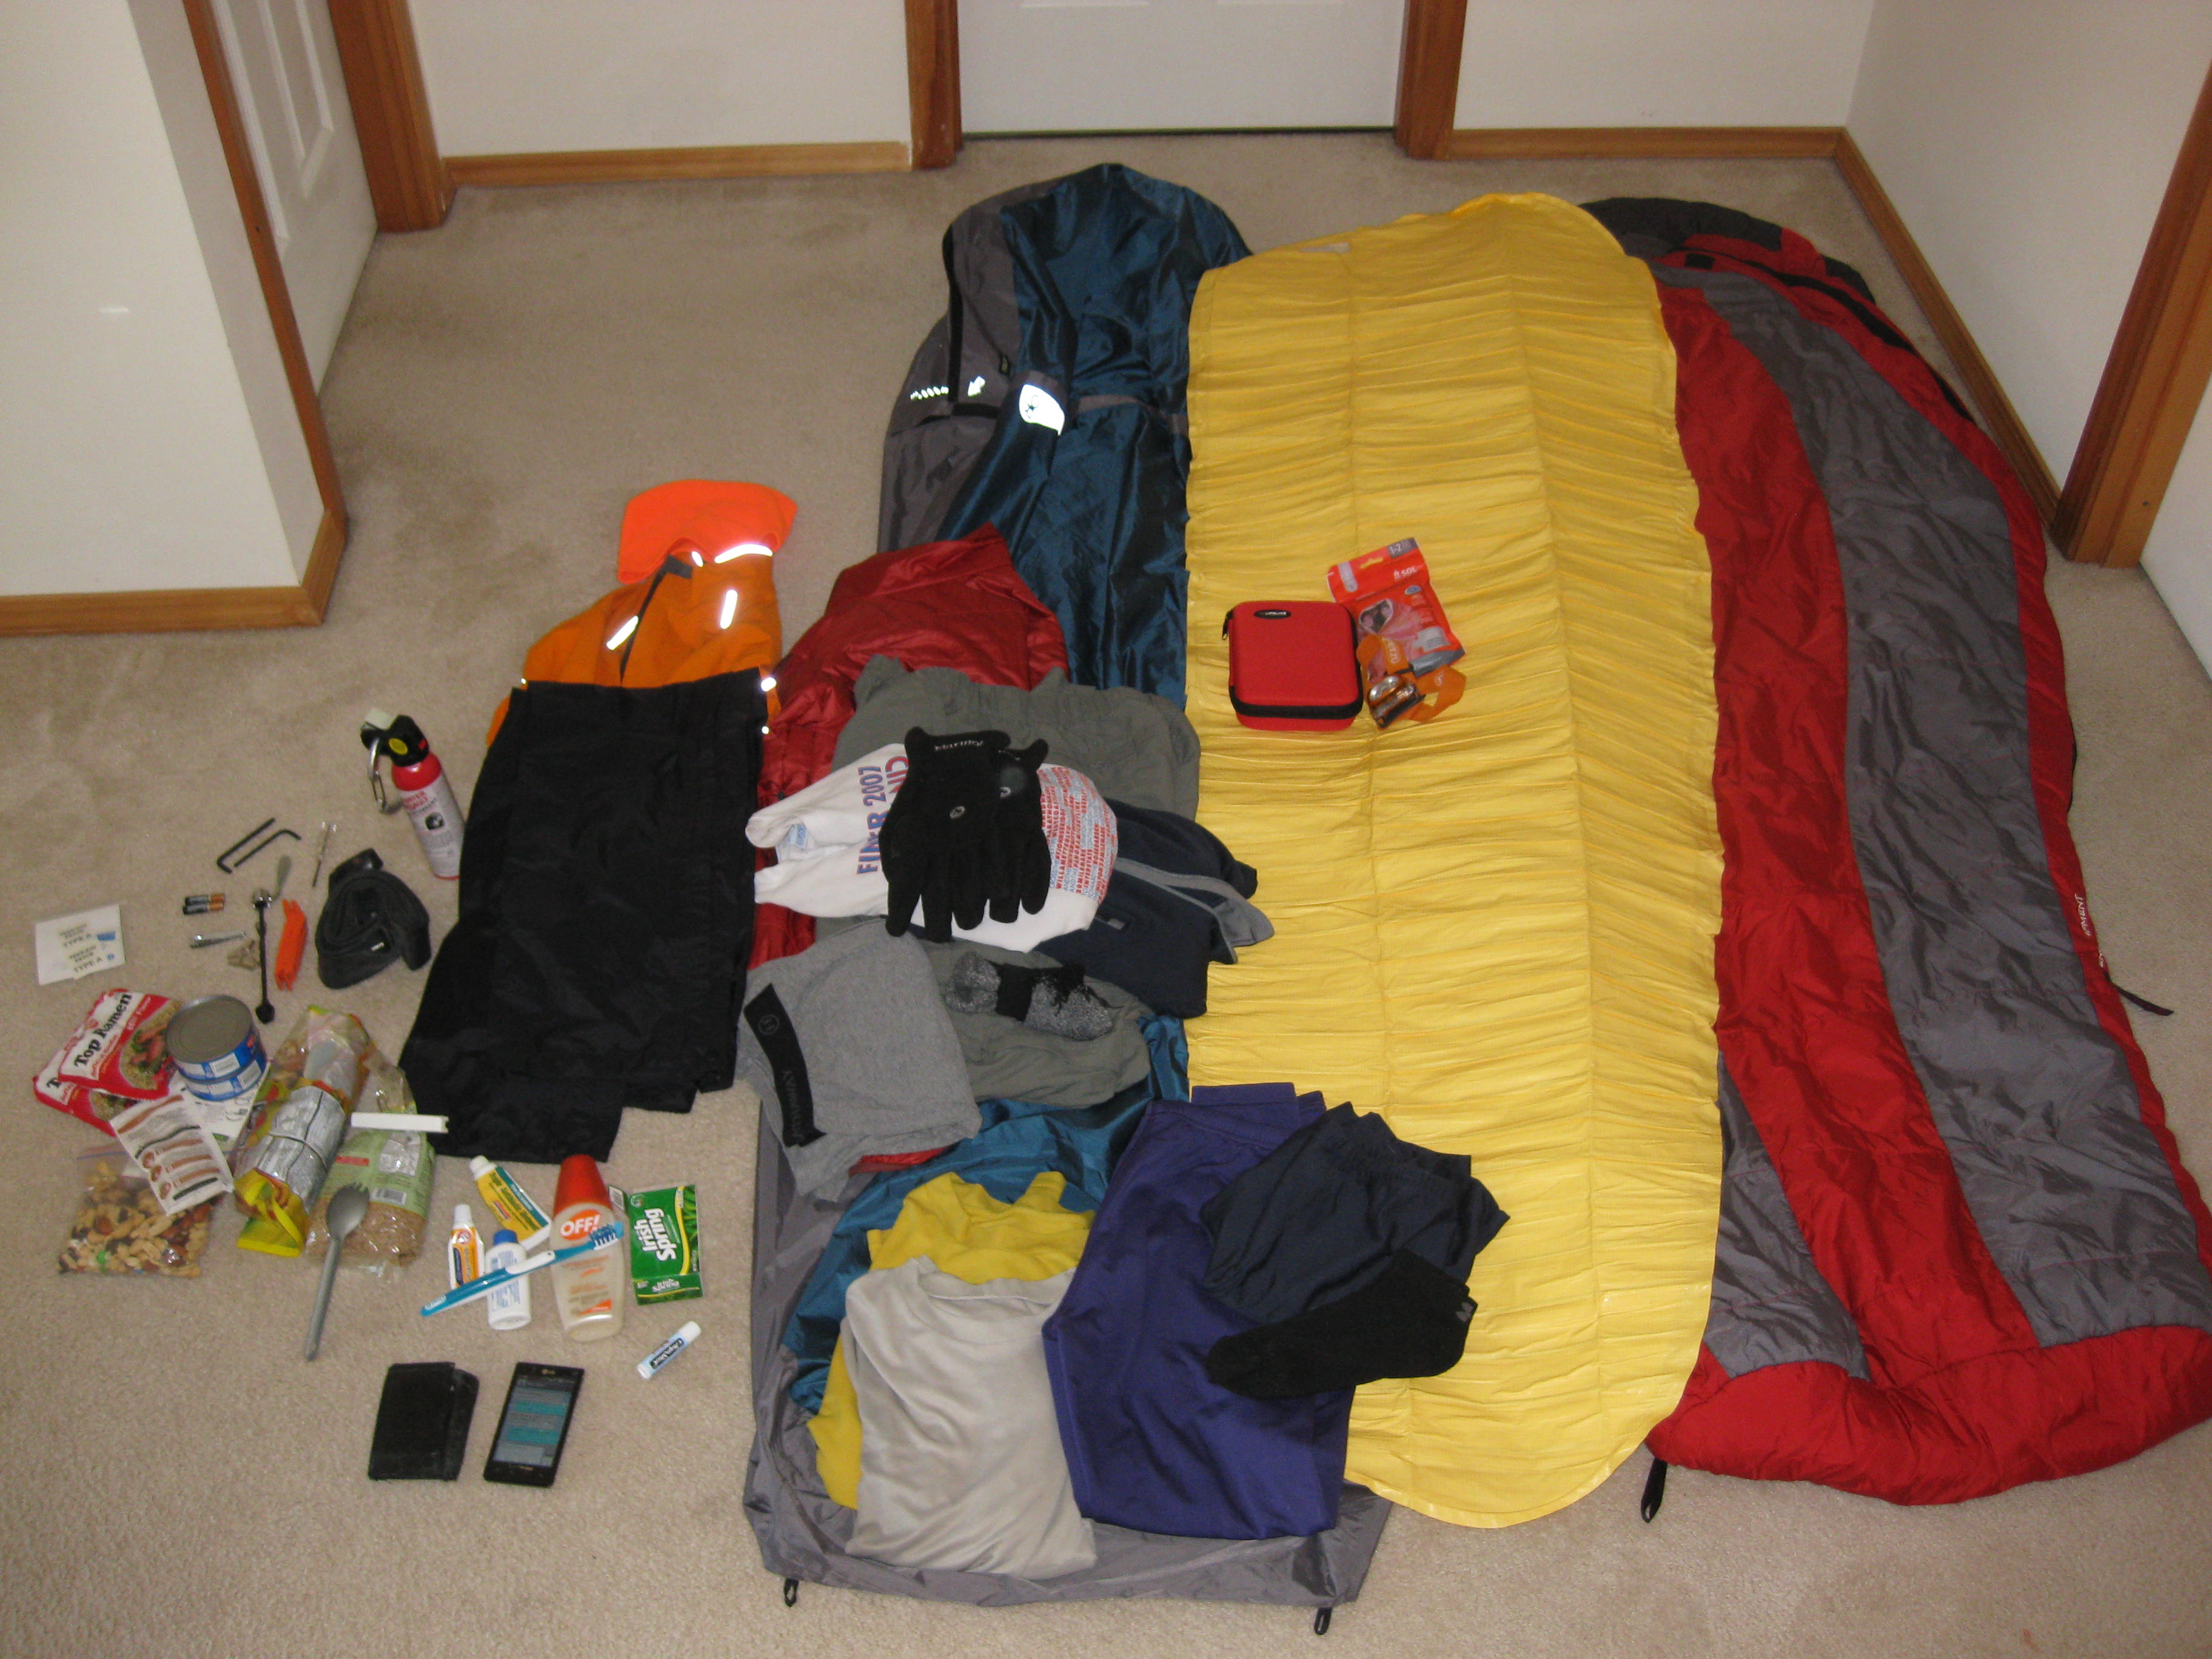
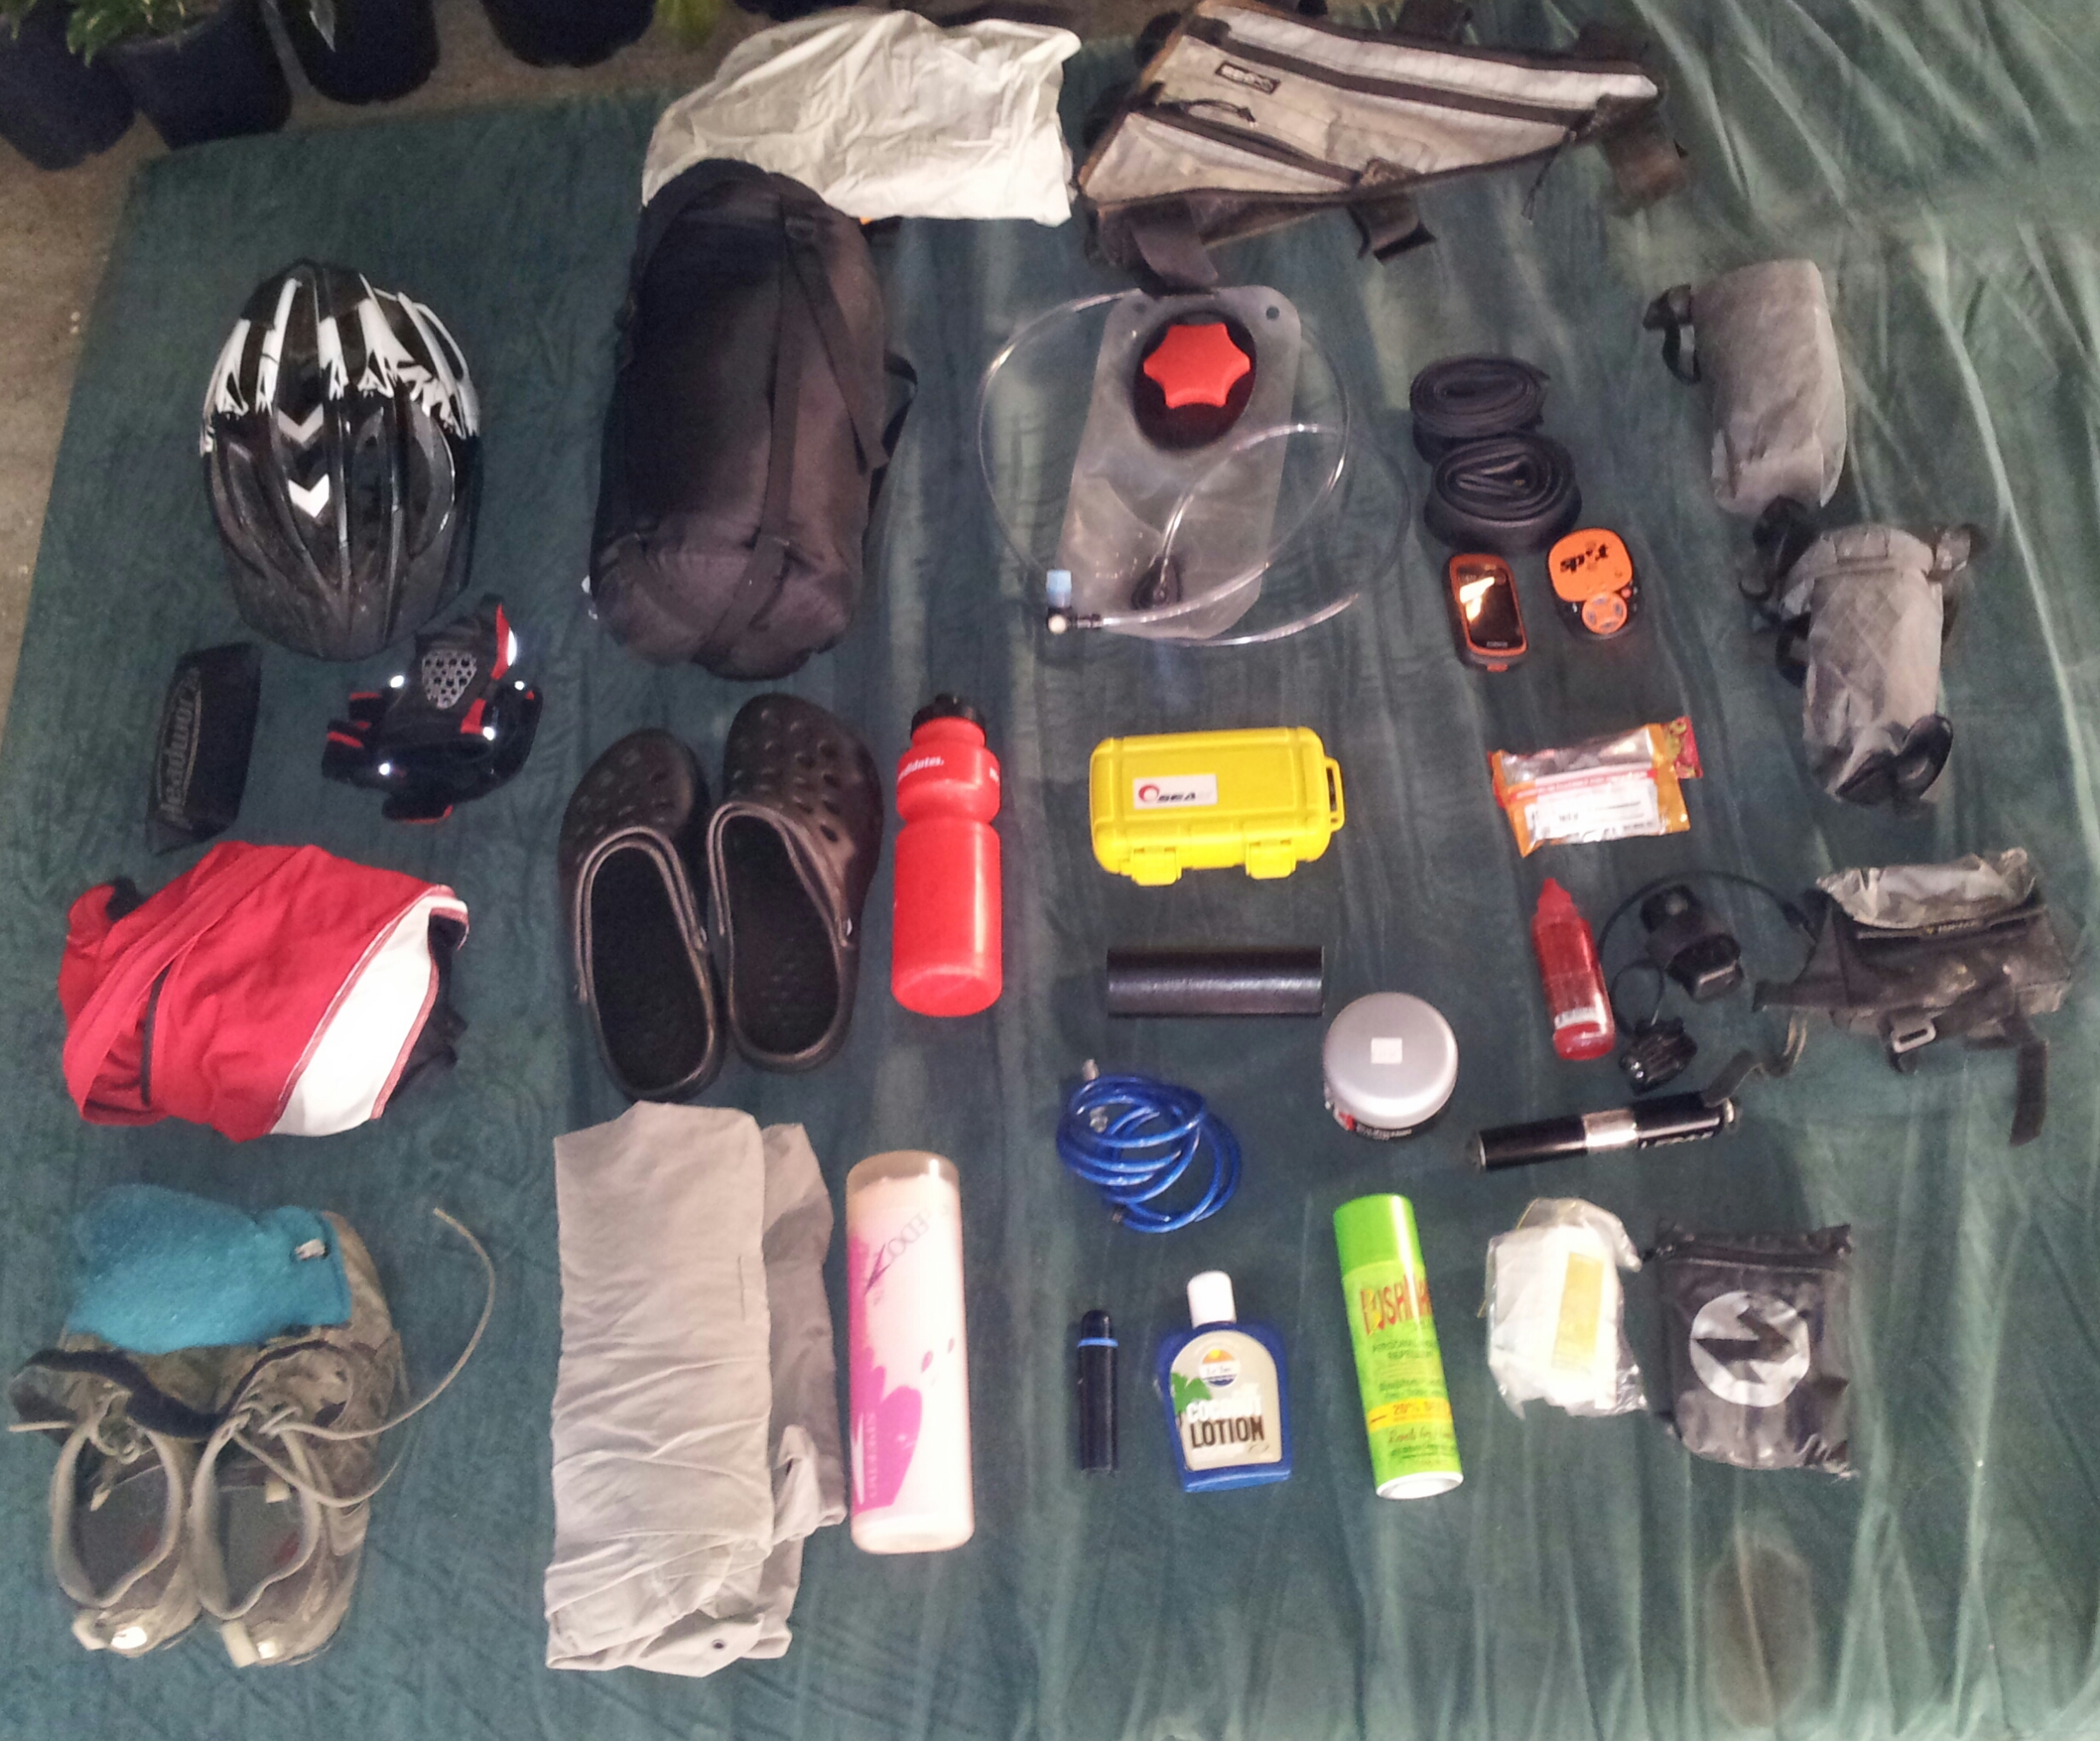
TOUR TE WAIPOUNAMU / TUATARA 1000 GEAR LIST AND THOUGHTS
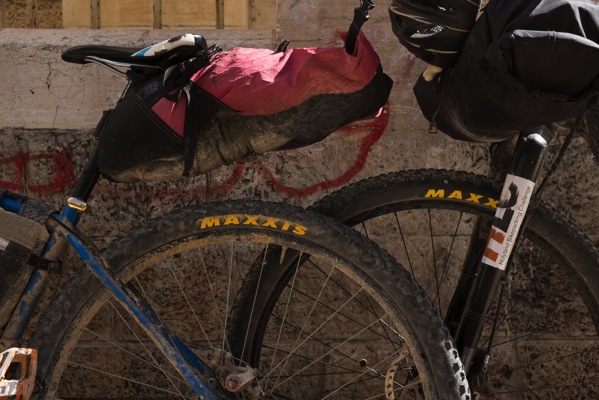
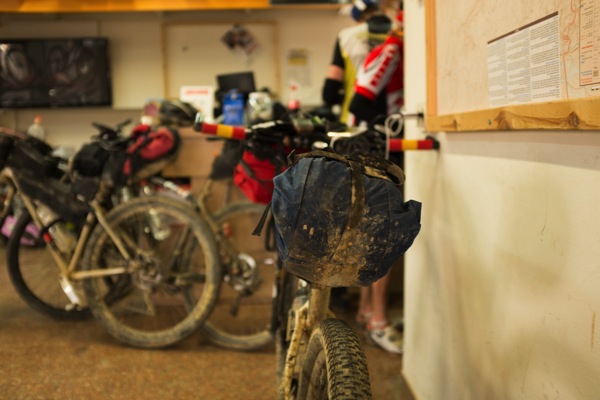
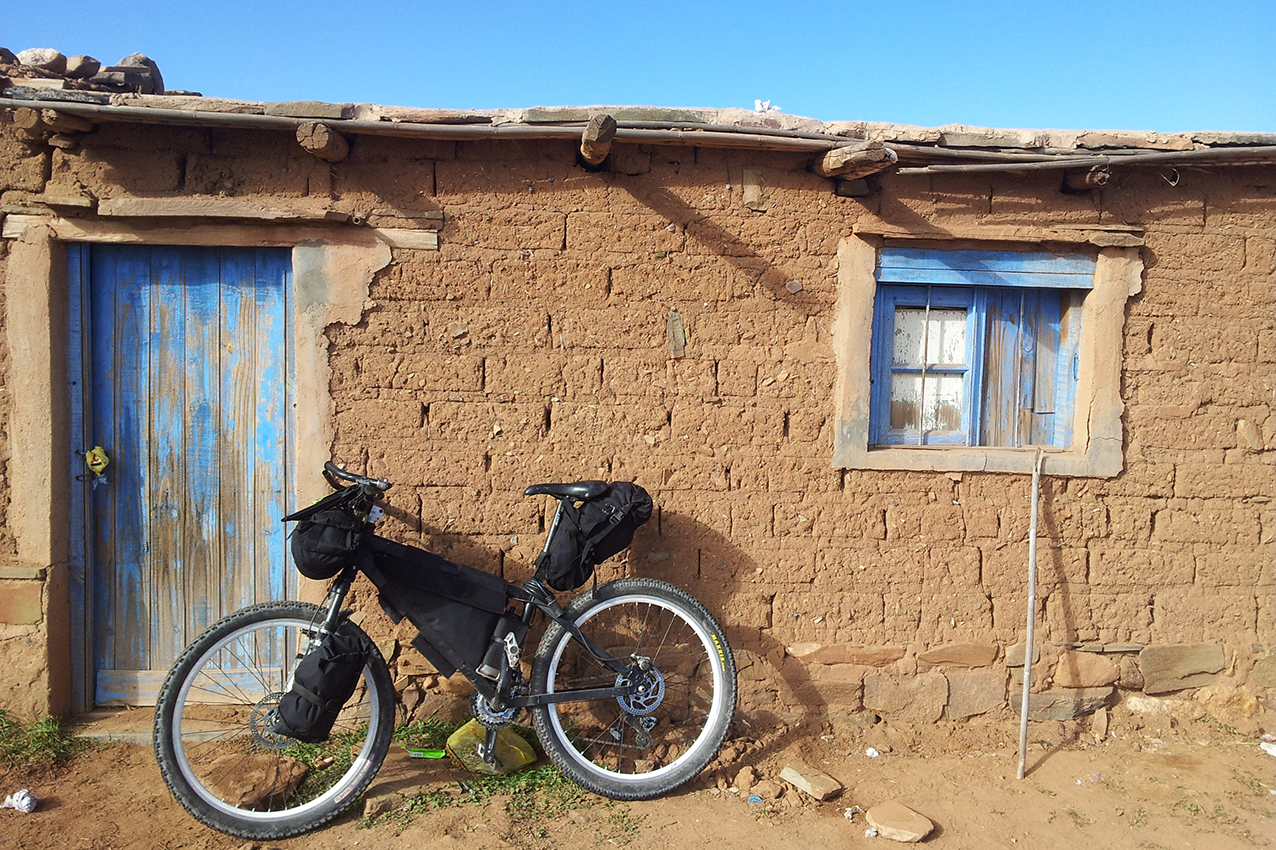
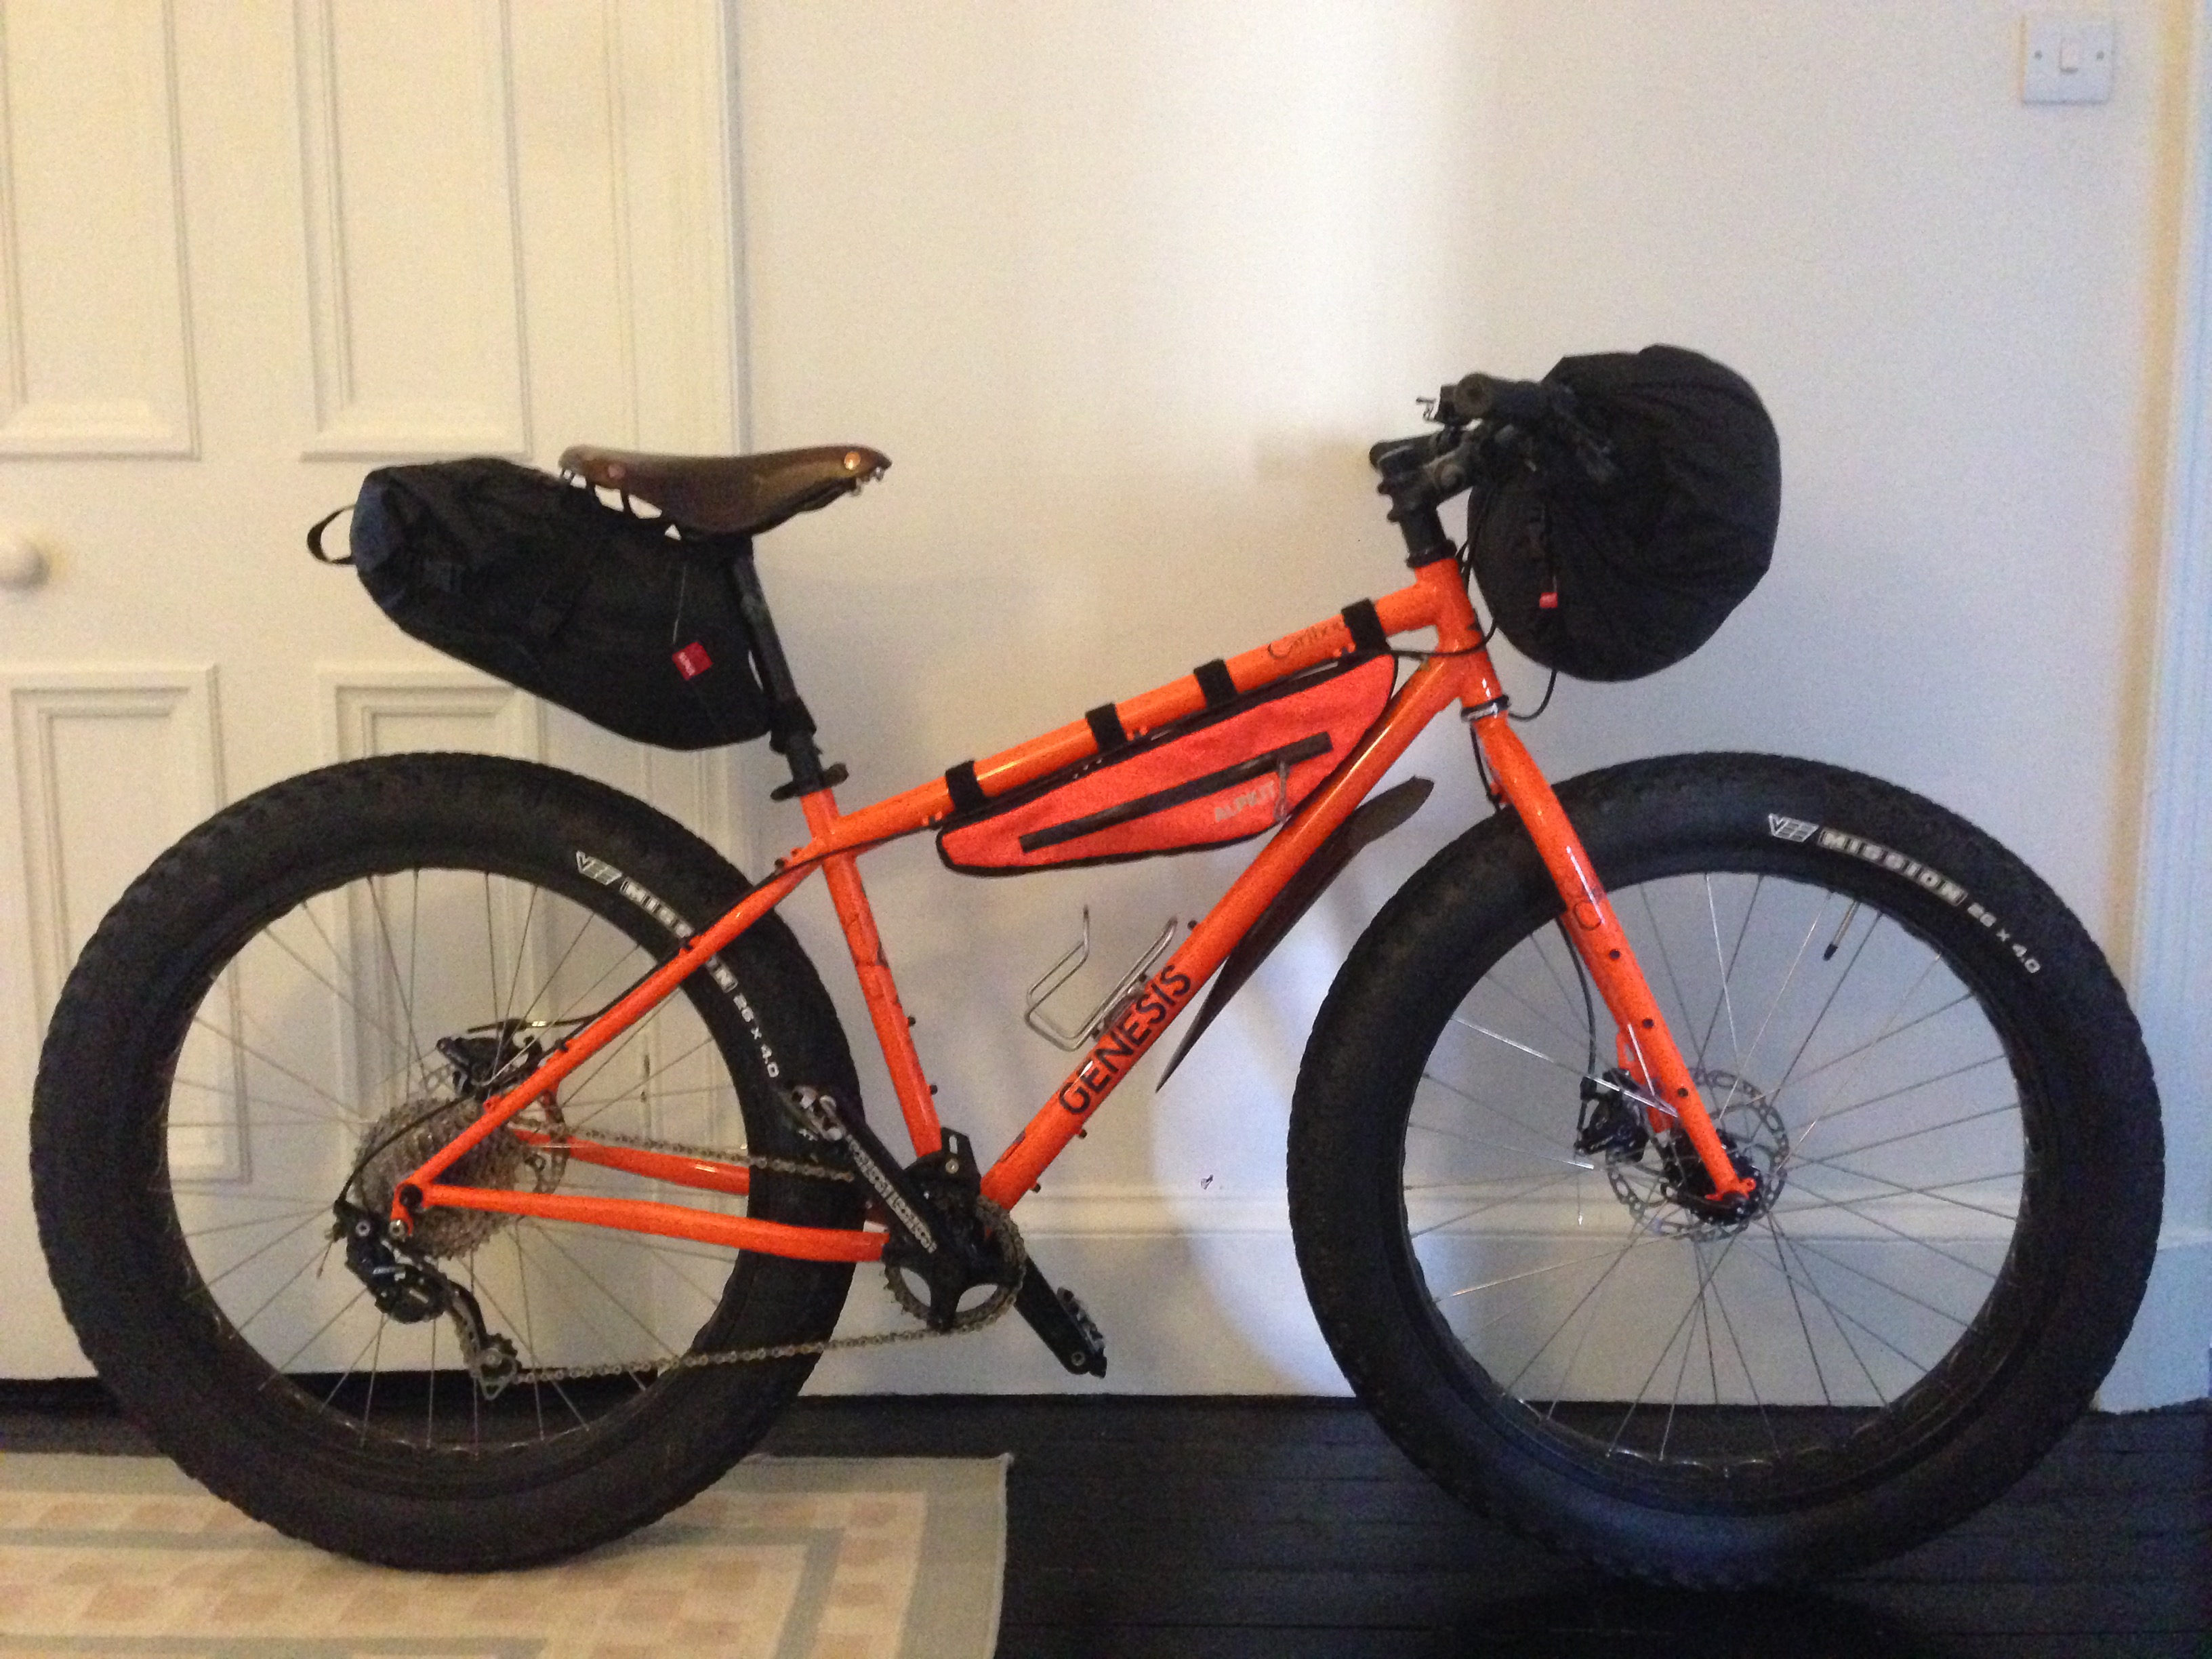
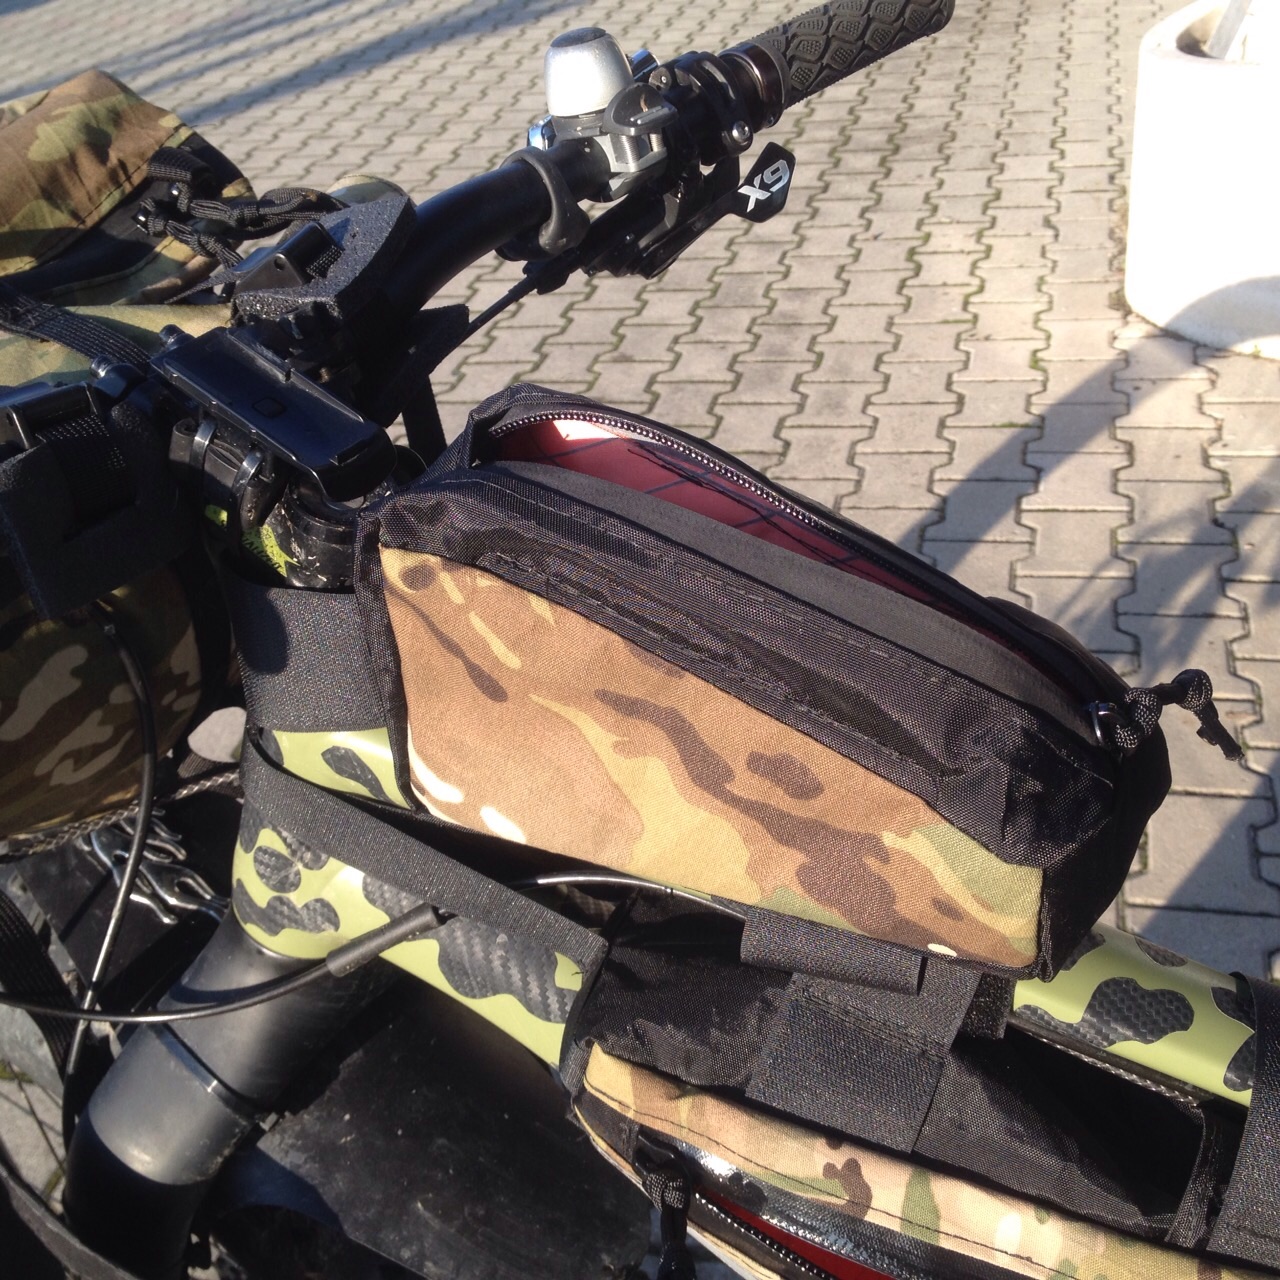
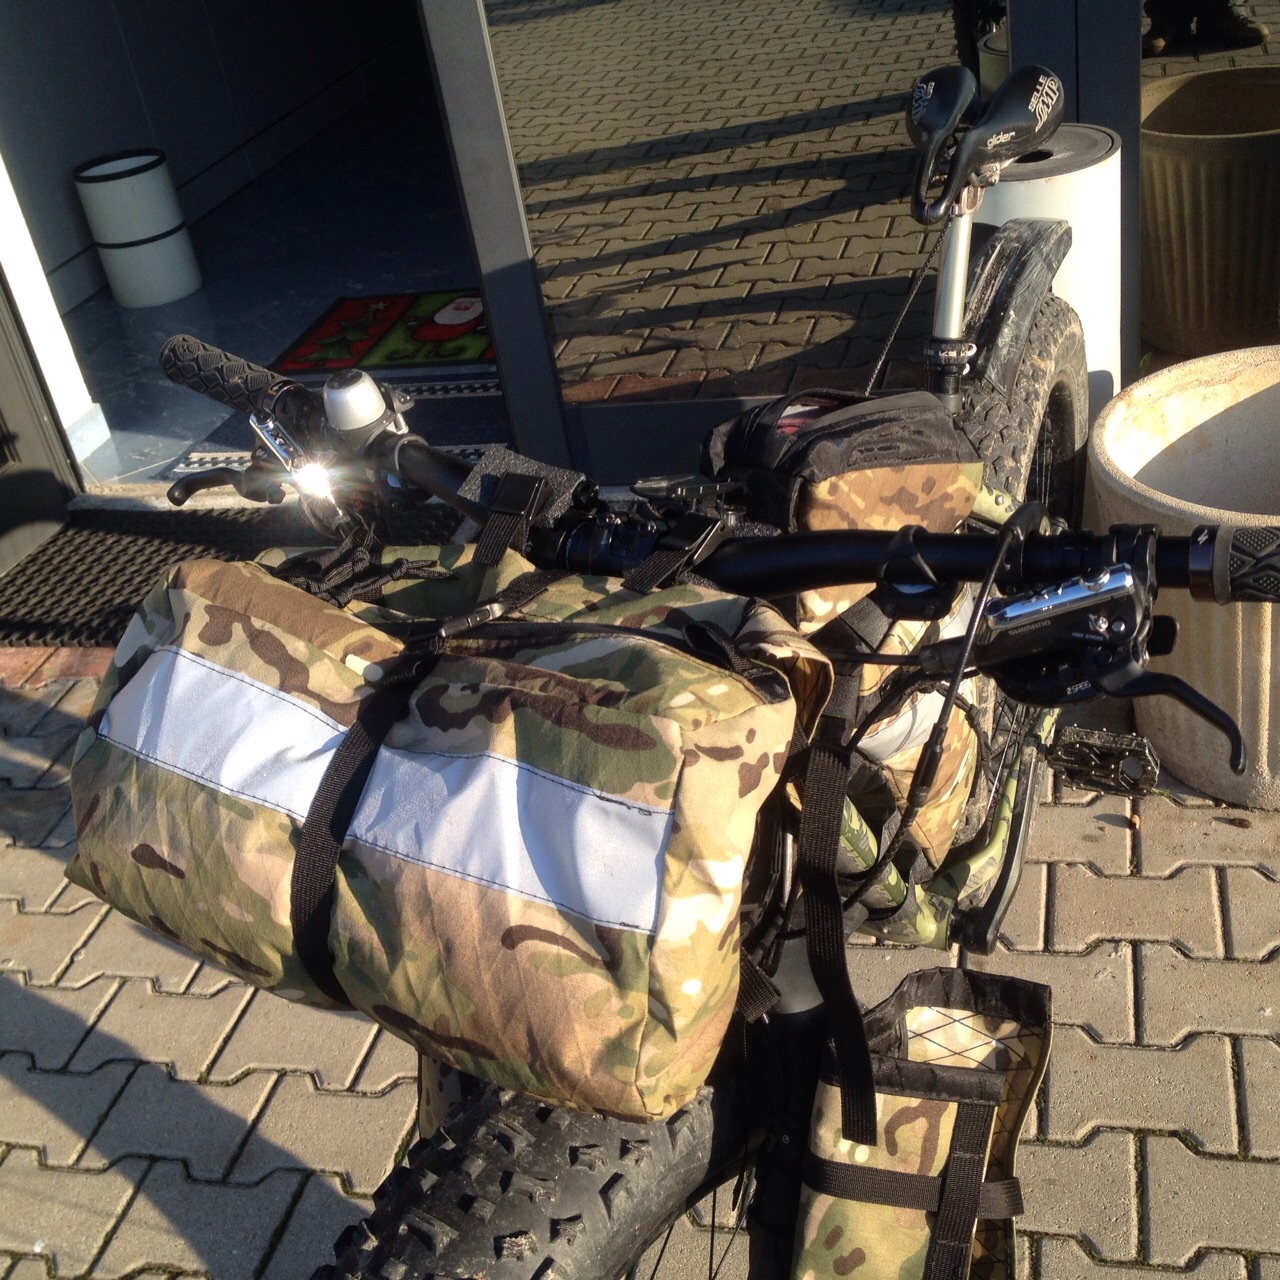
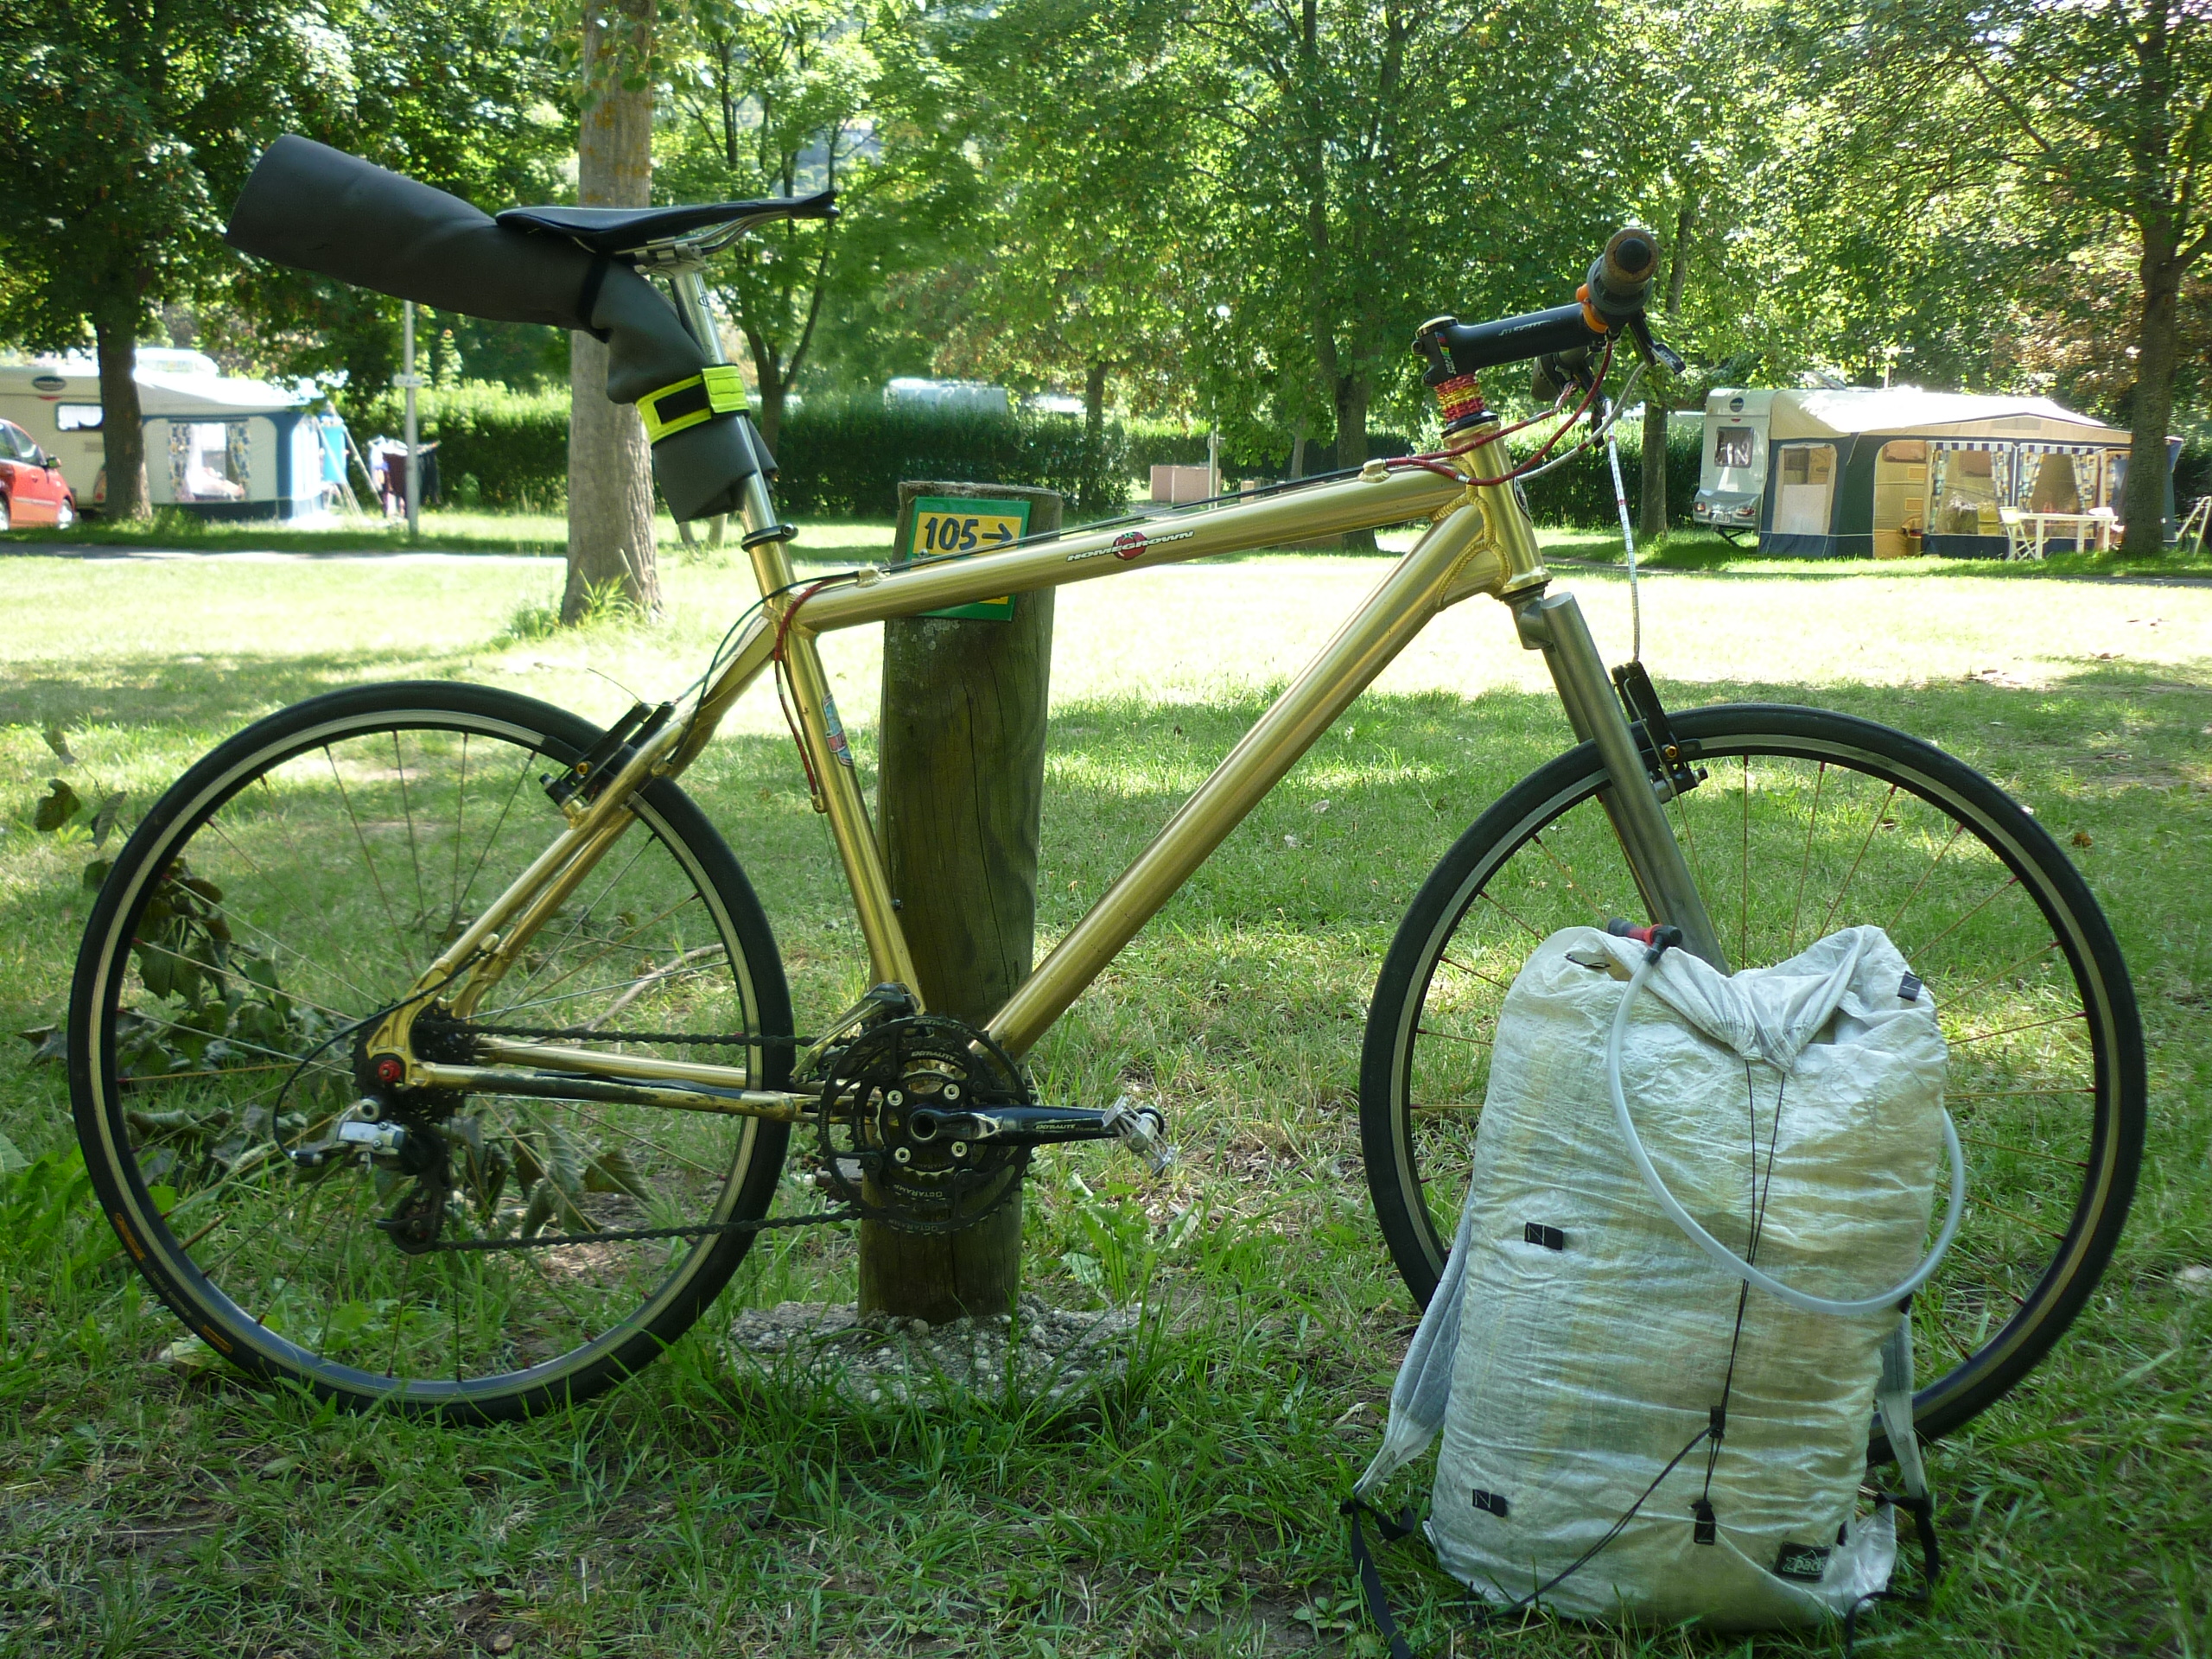
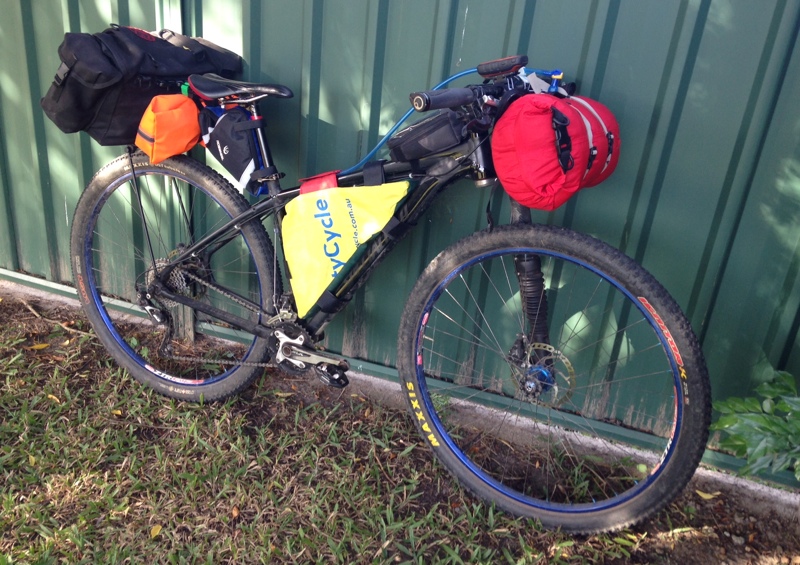
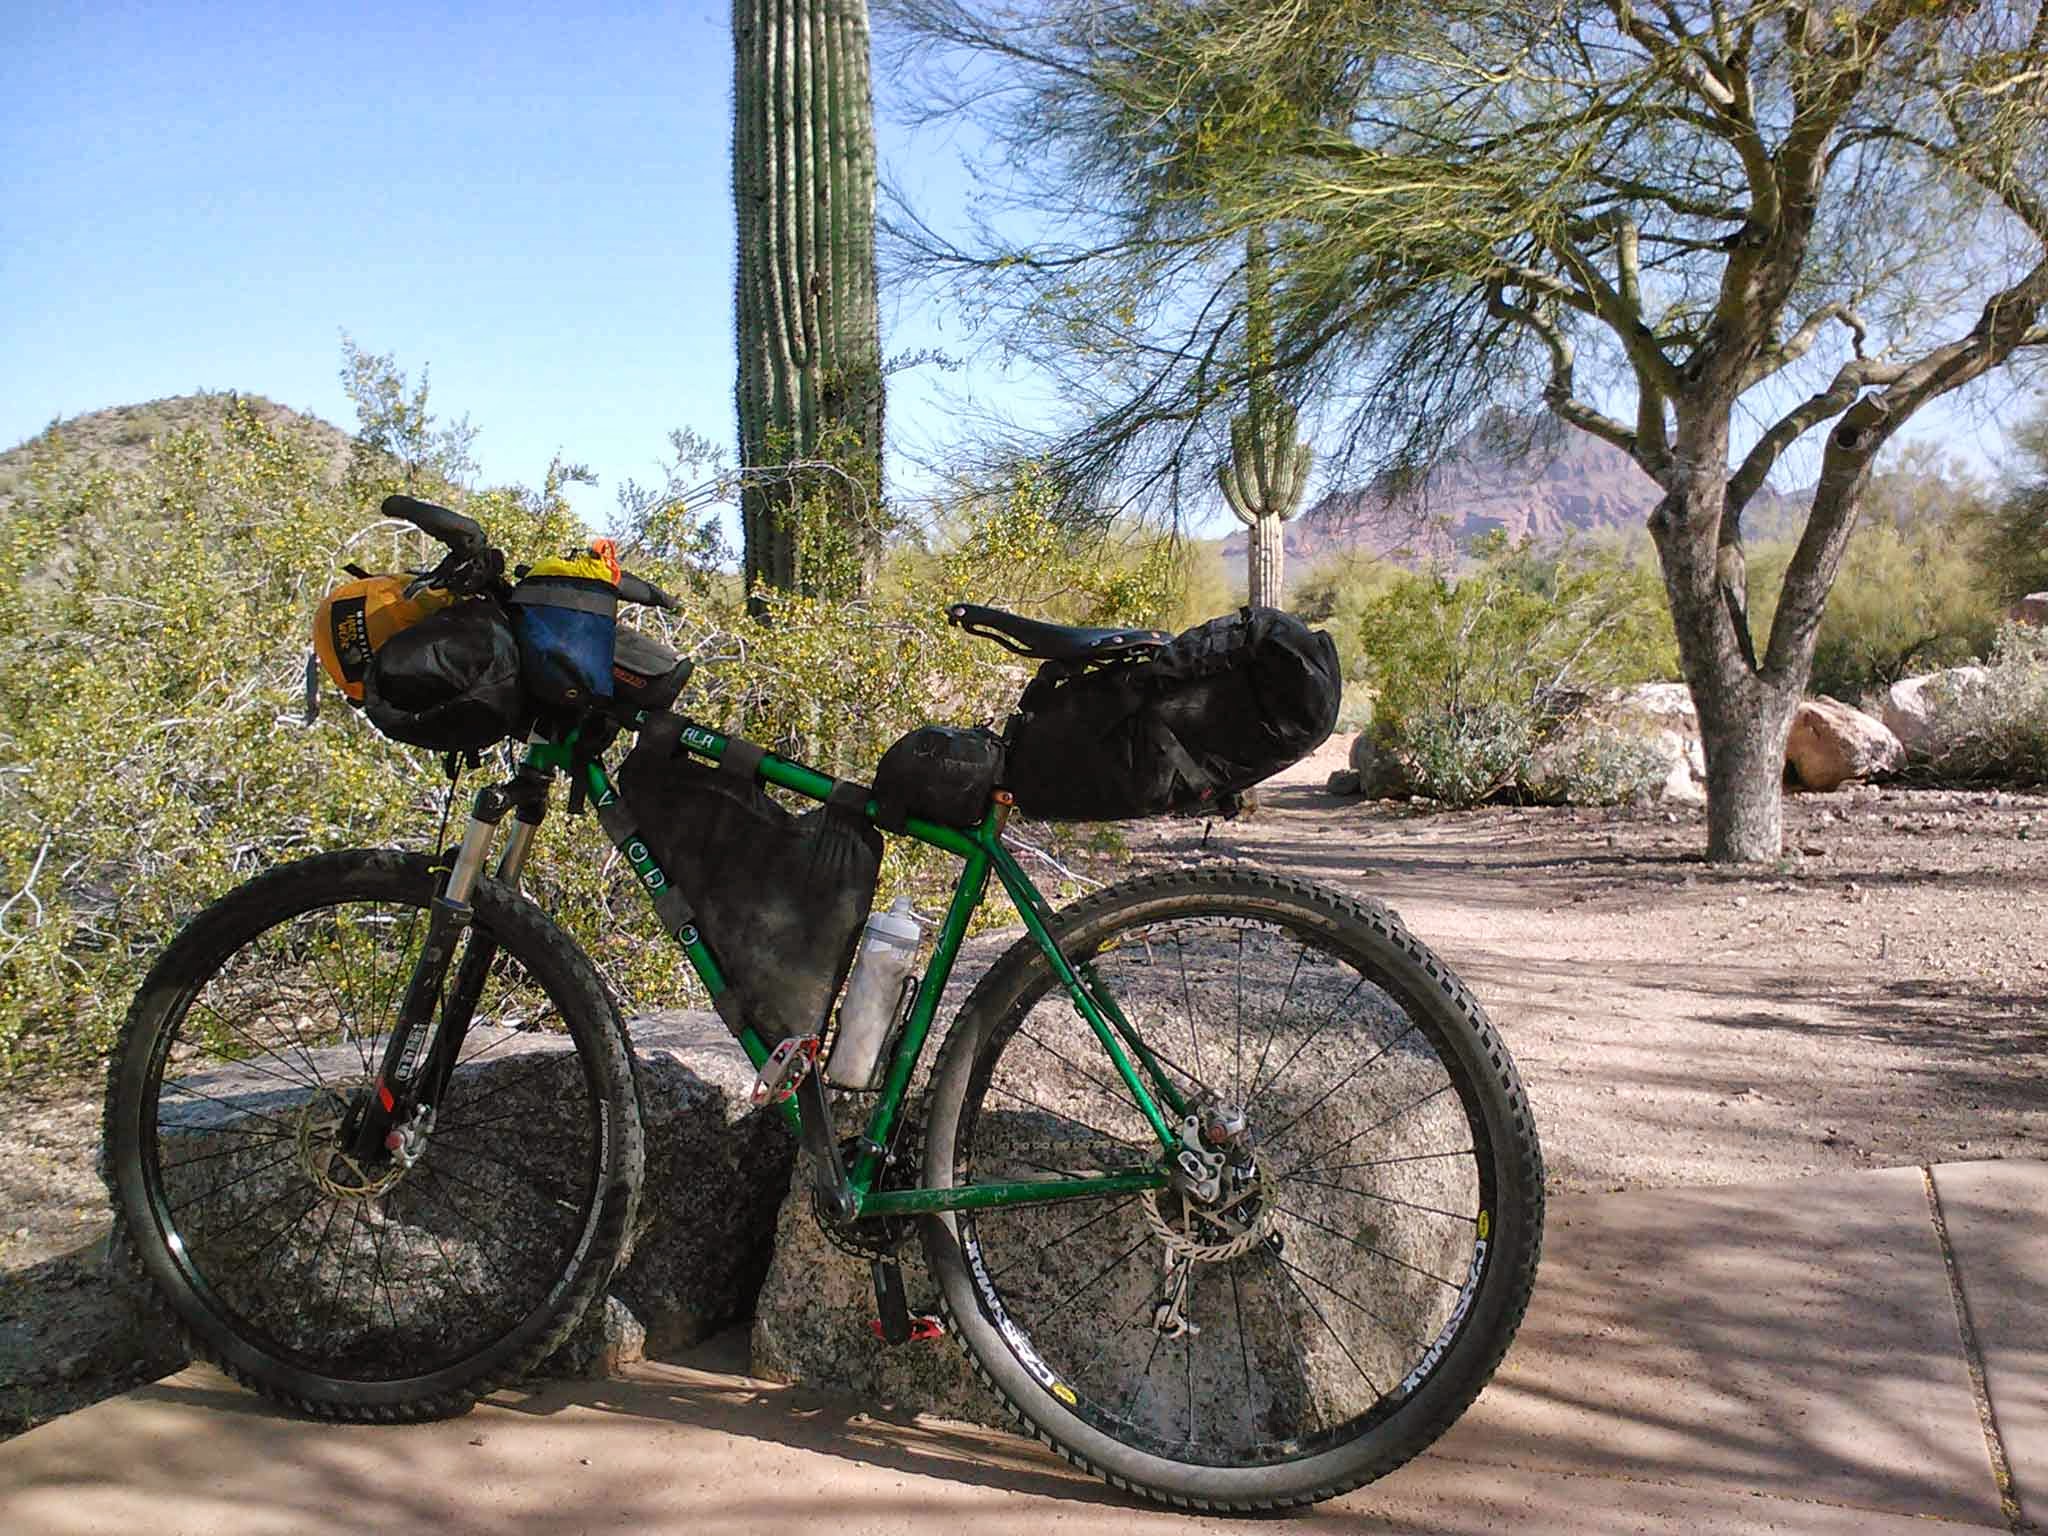
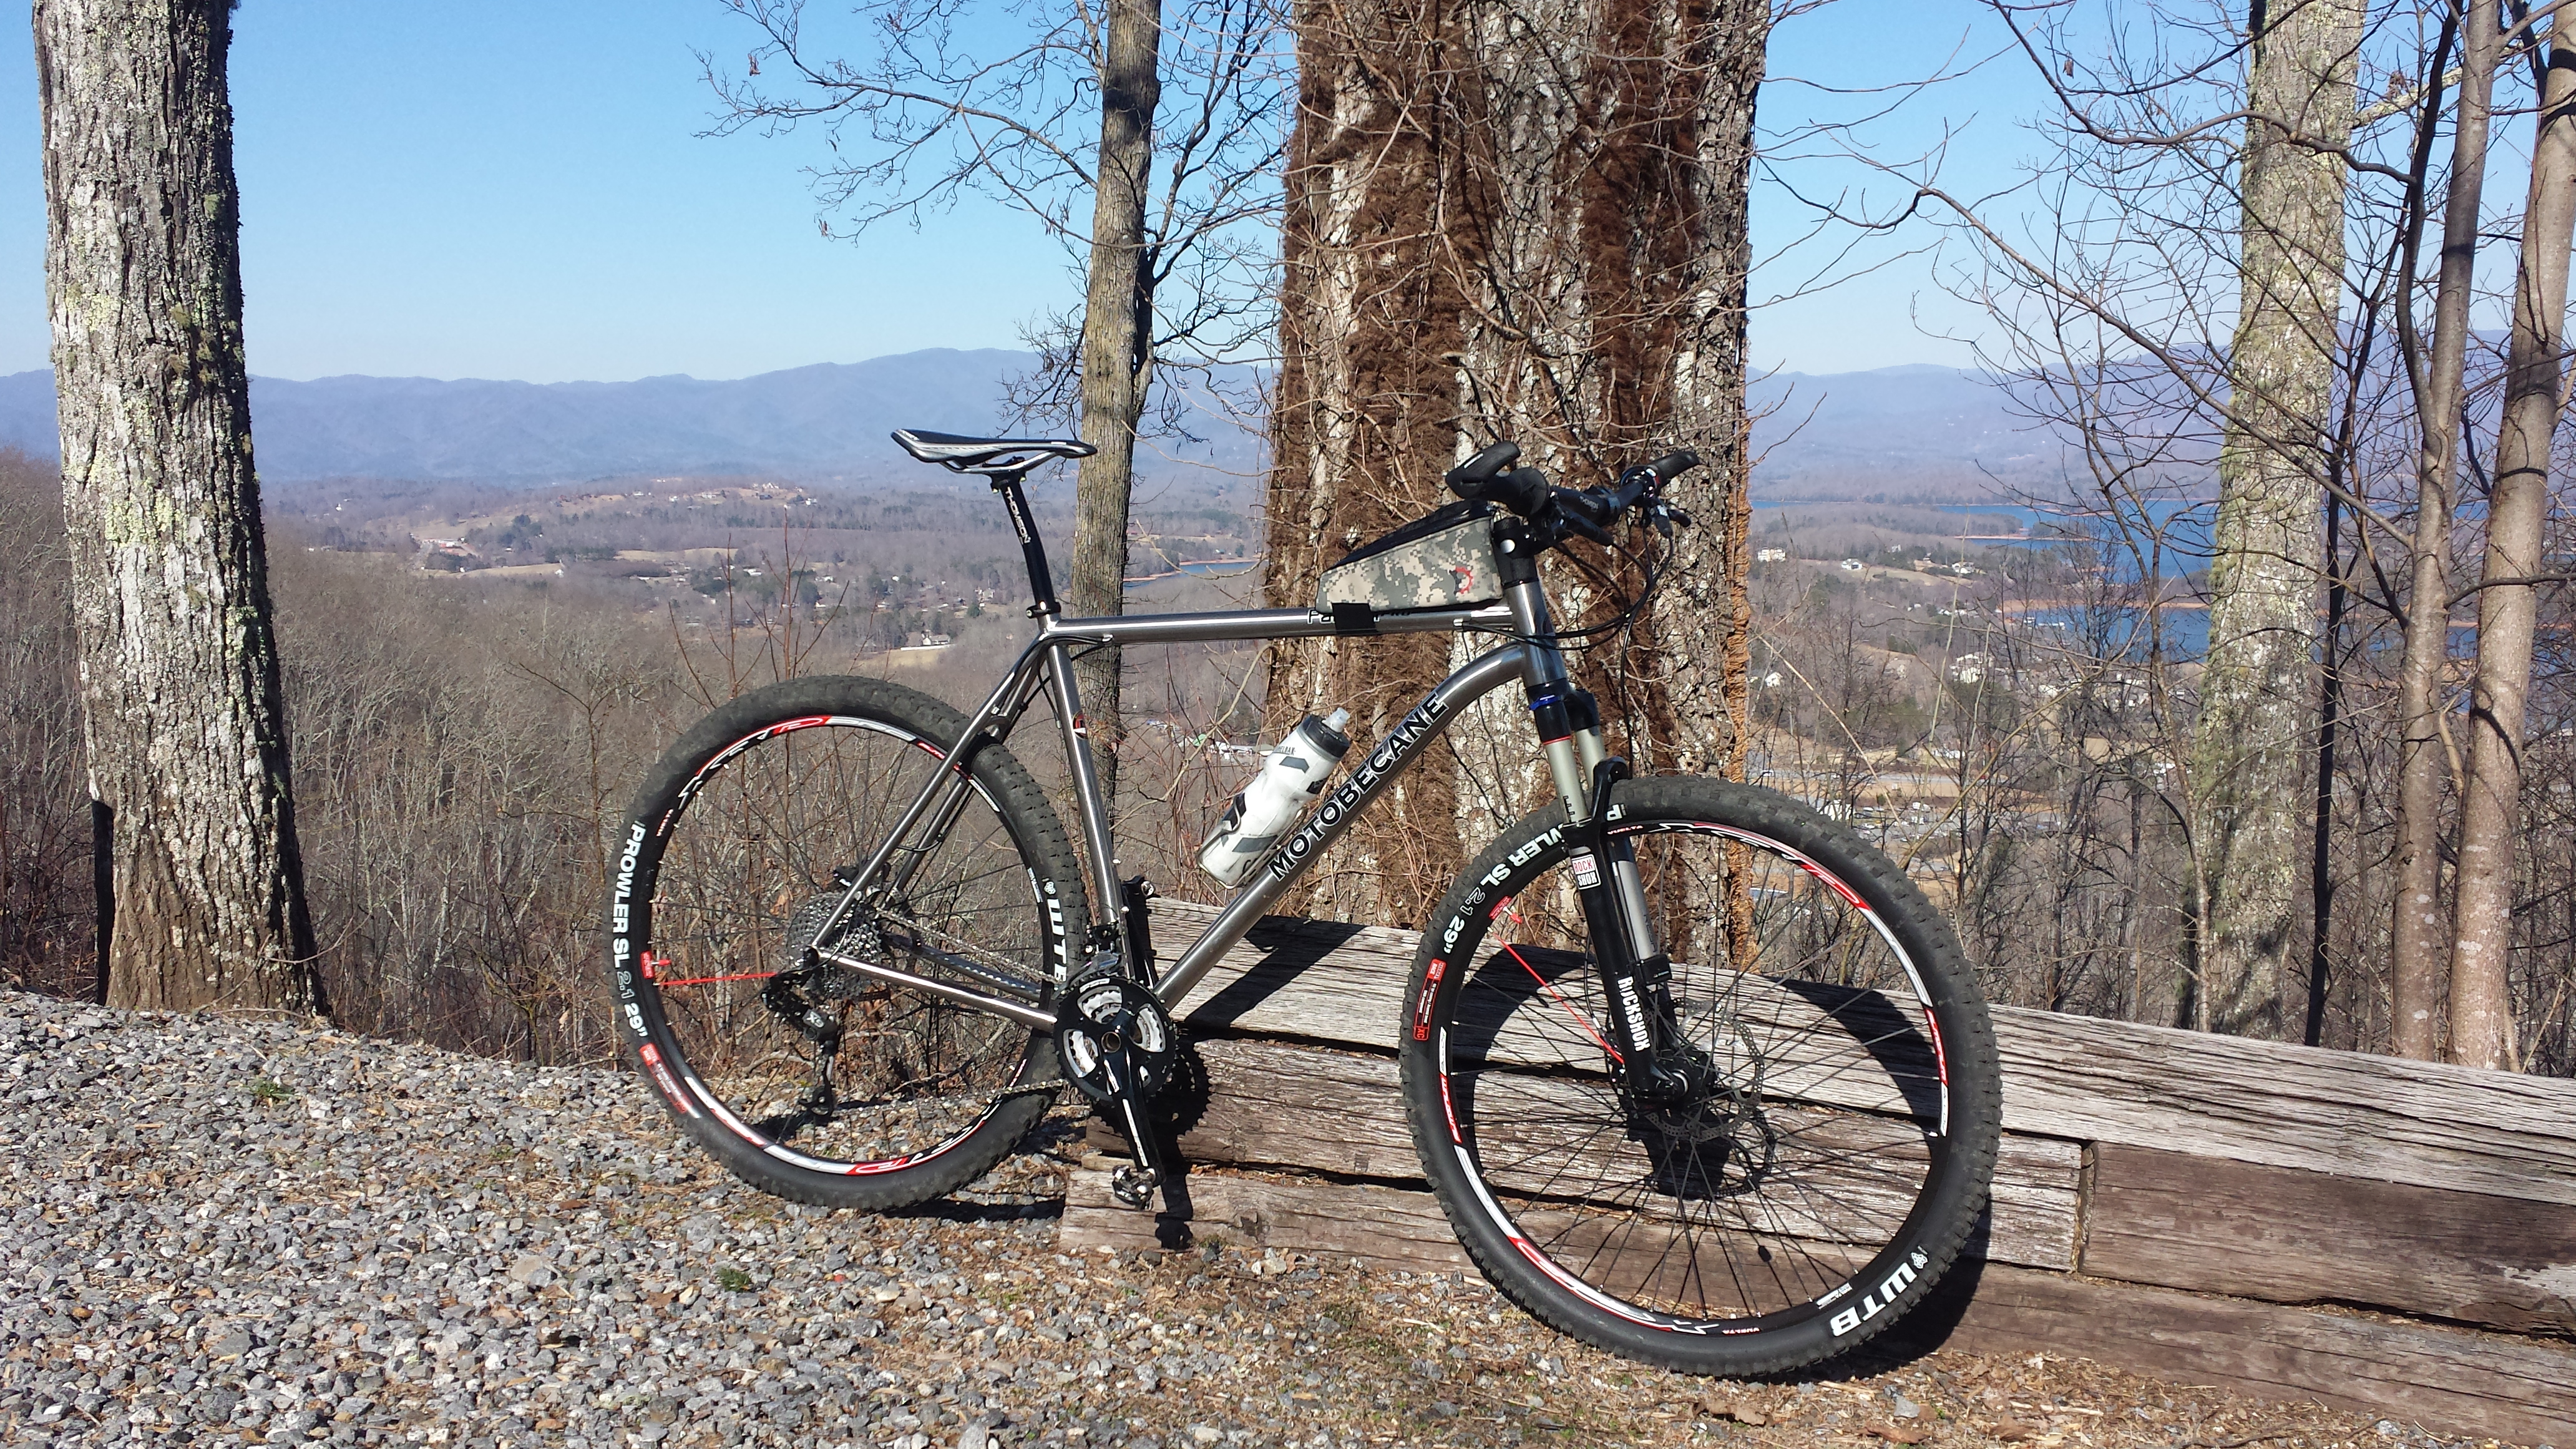
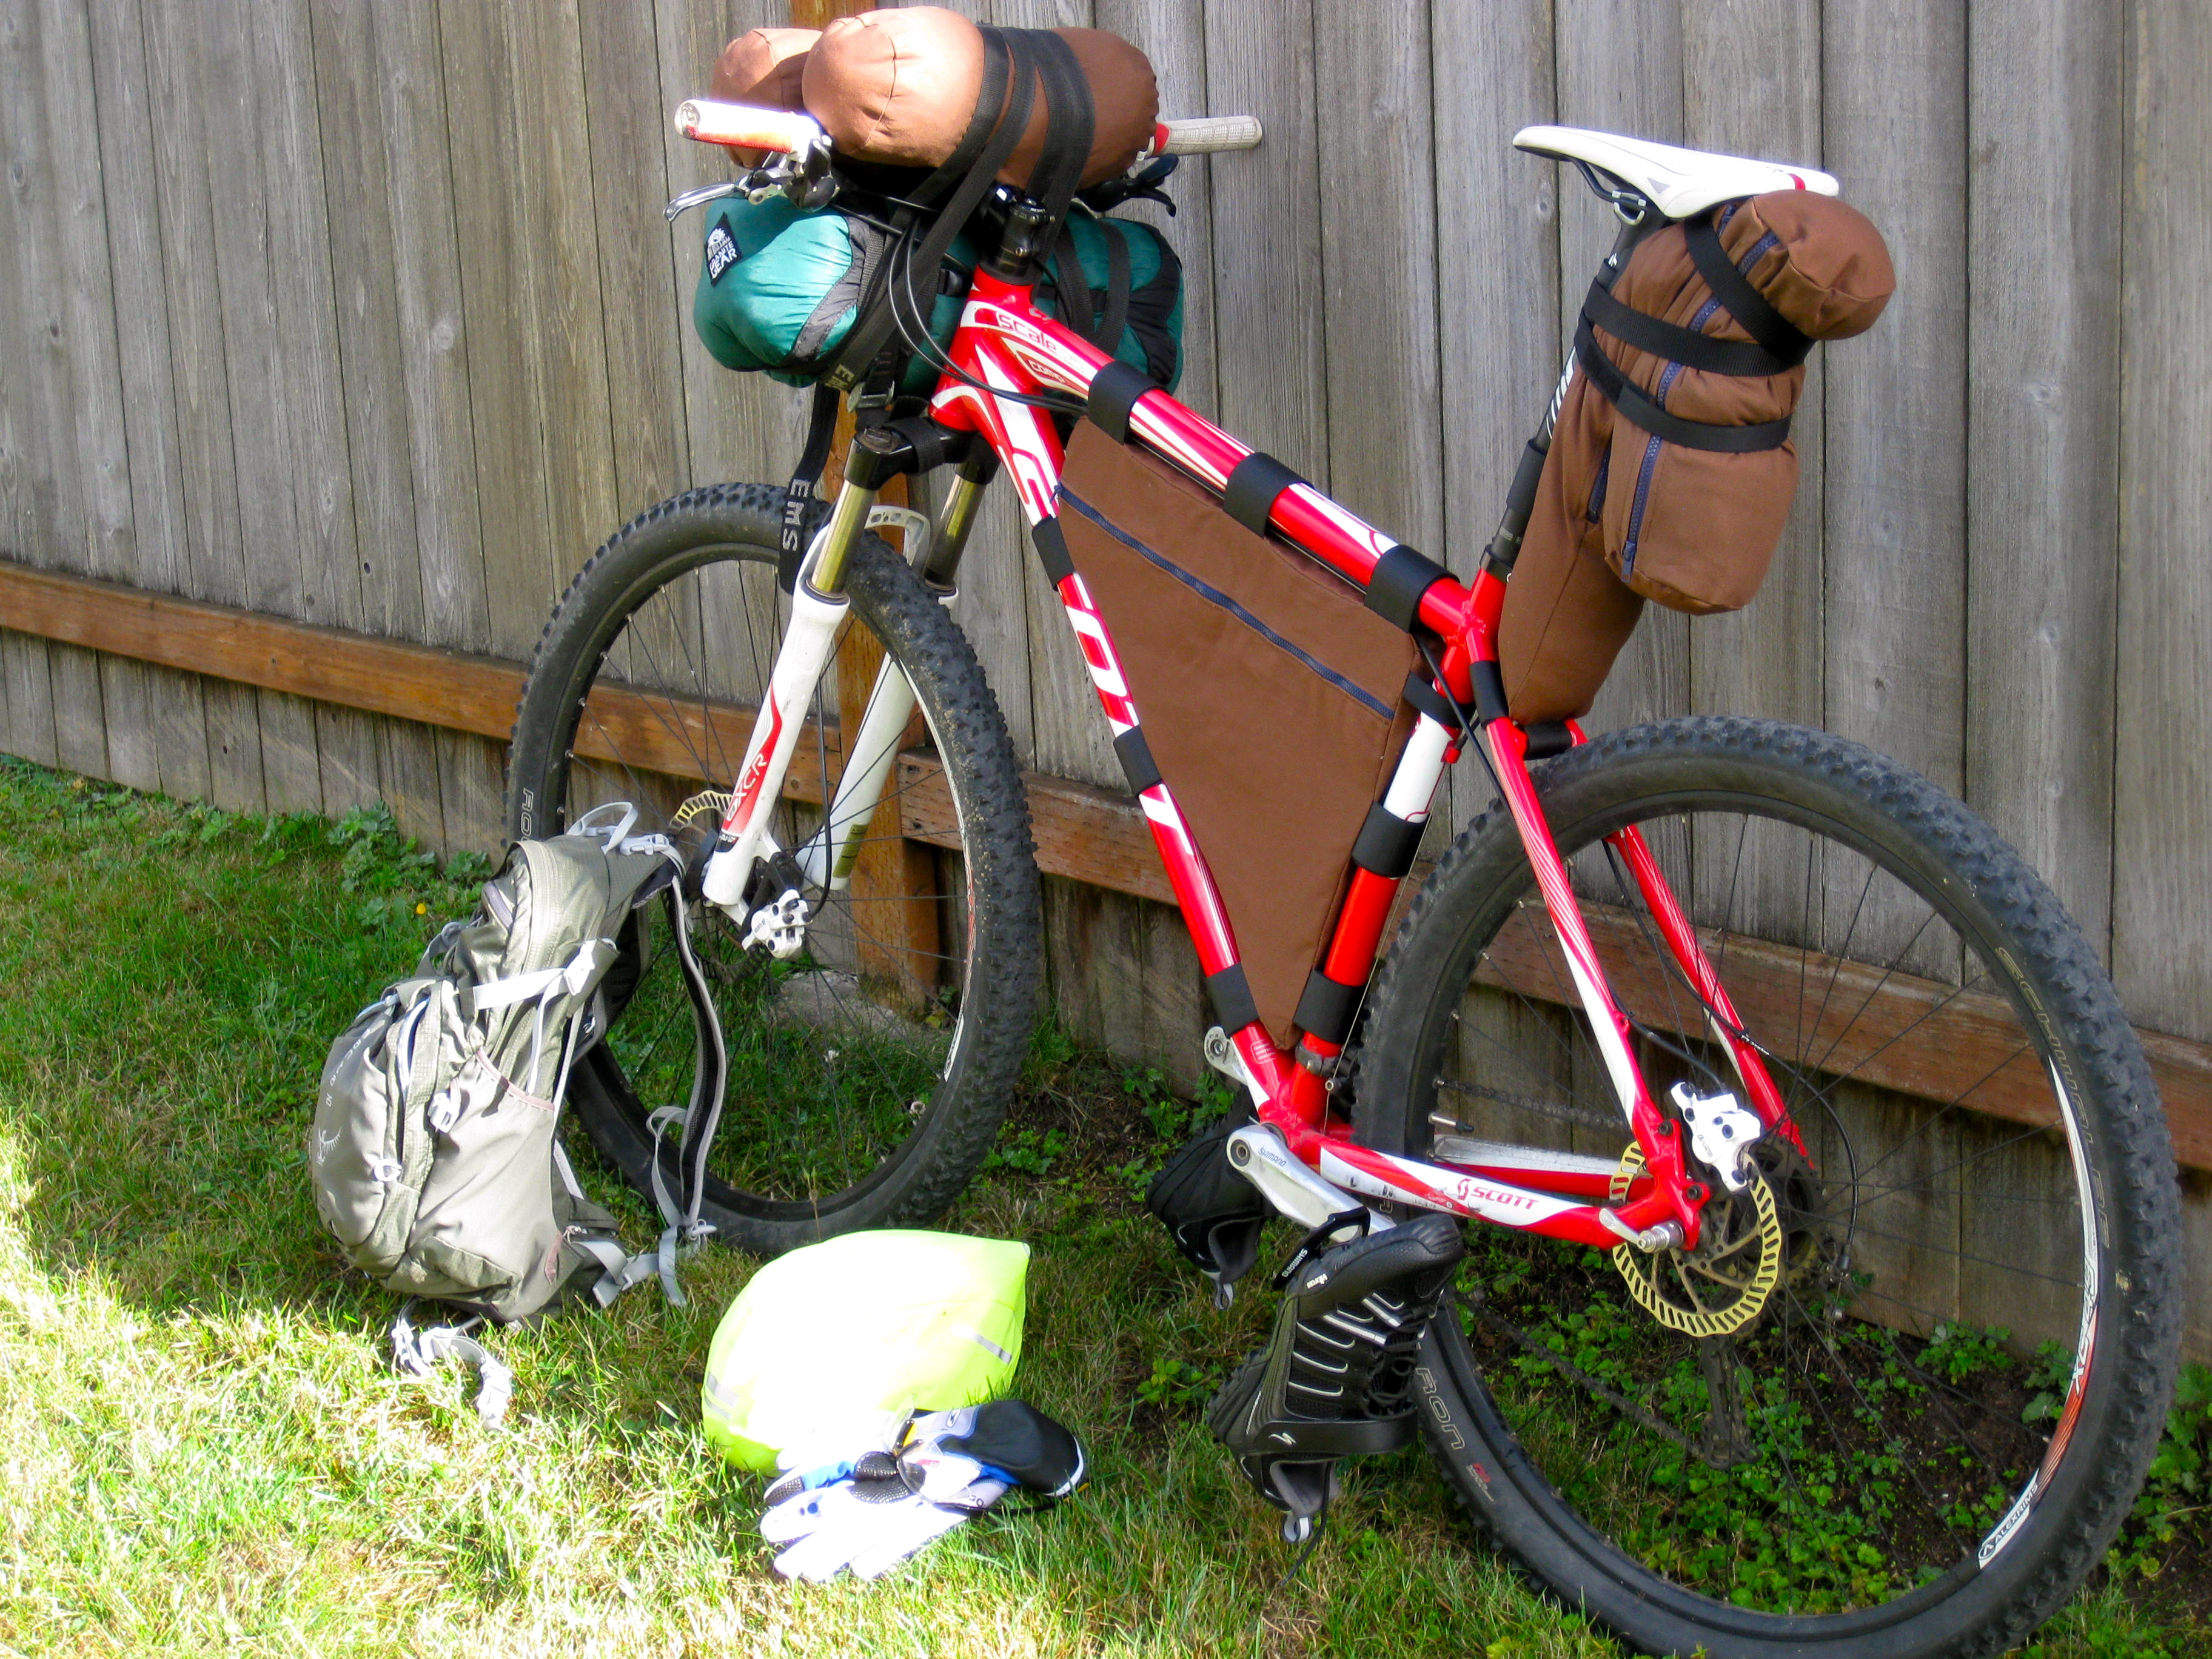
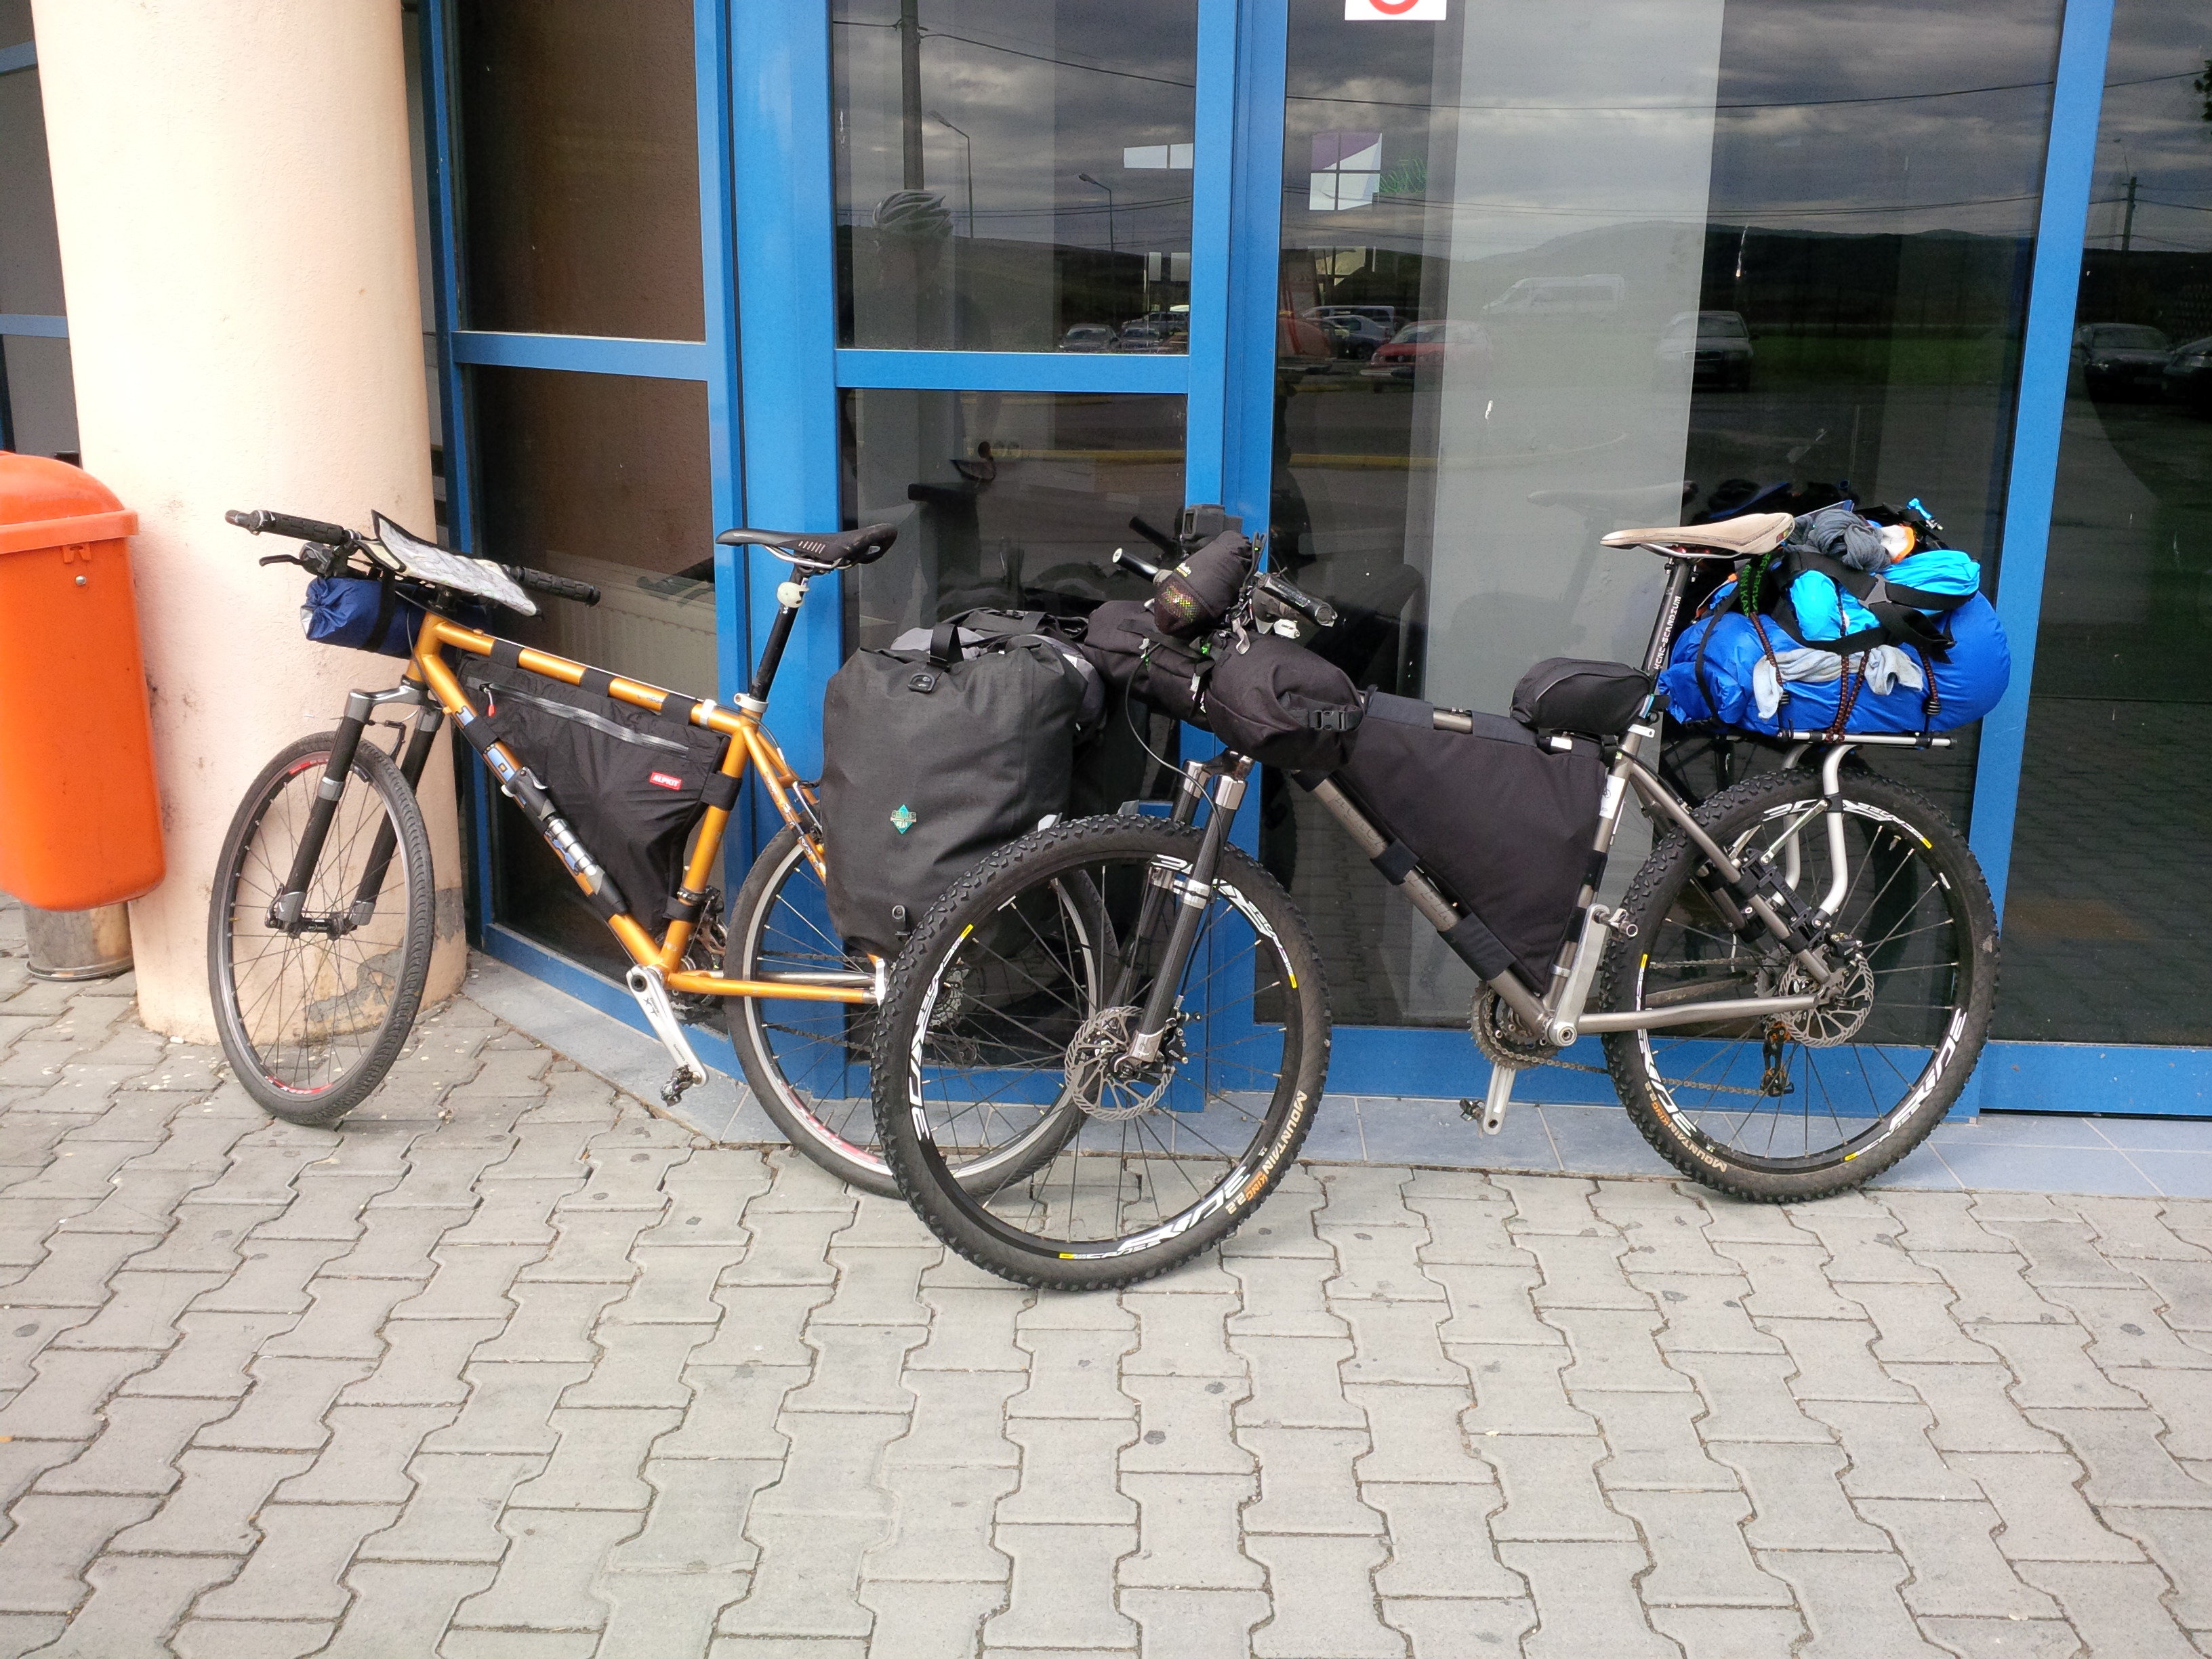
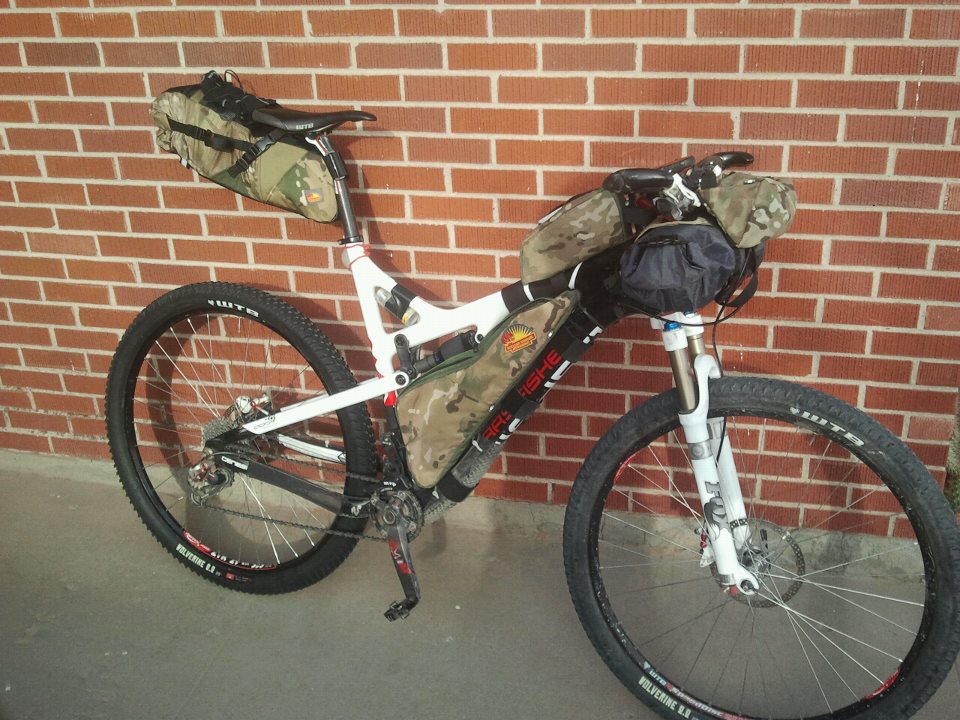
All my gear was in a full set of Apidura Bags loaded onto my new BINARY BICYCLES HAVOK Titanium frame. I had received this beautiful frame well before christmas but only managed to get it together a few weeks before the TTW. Some delays with parts meant I ended up running a 1 x set up instead of the planned 2x. I had a 40T front Chain Ring and 11S 46T Cassette, and I could have done with some more gear range at times. I had no mechanicals during the races.
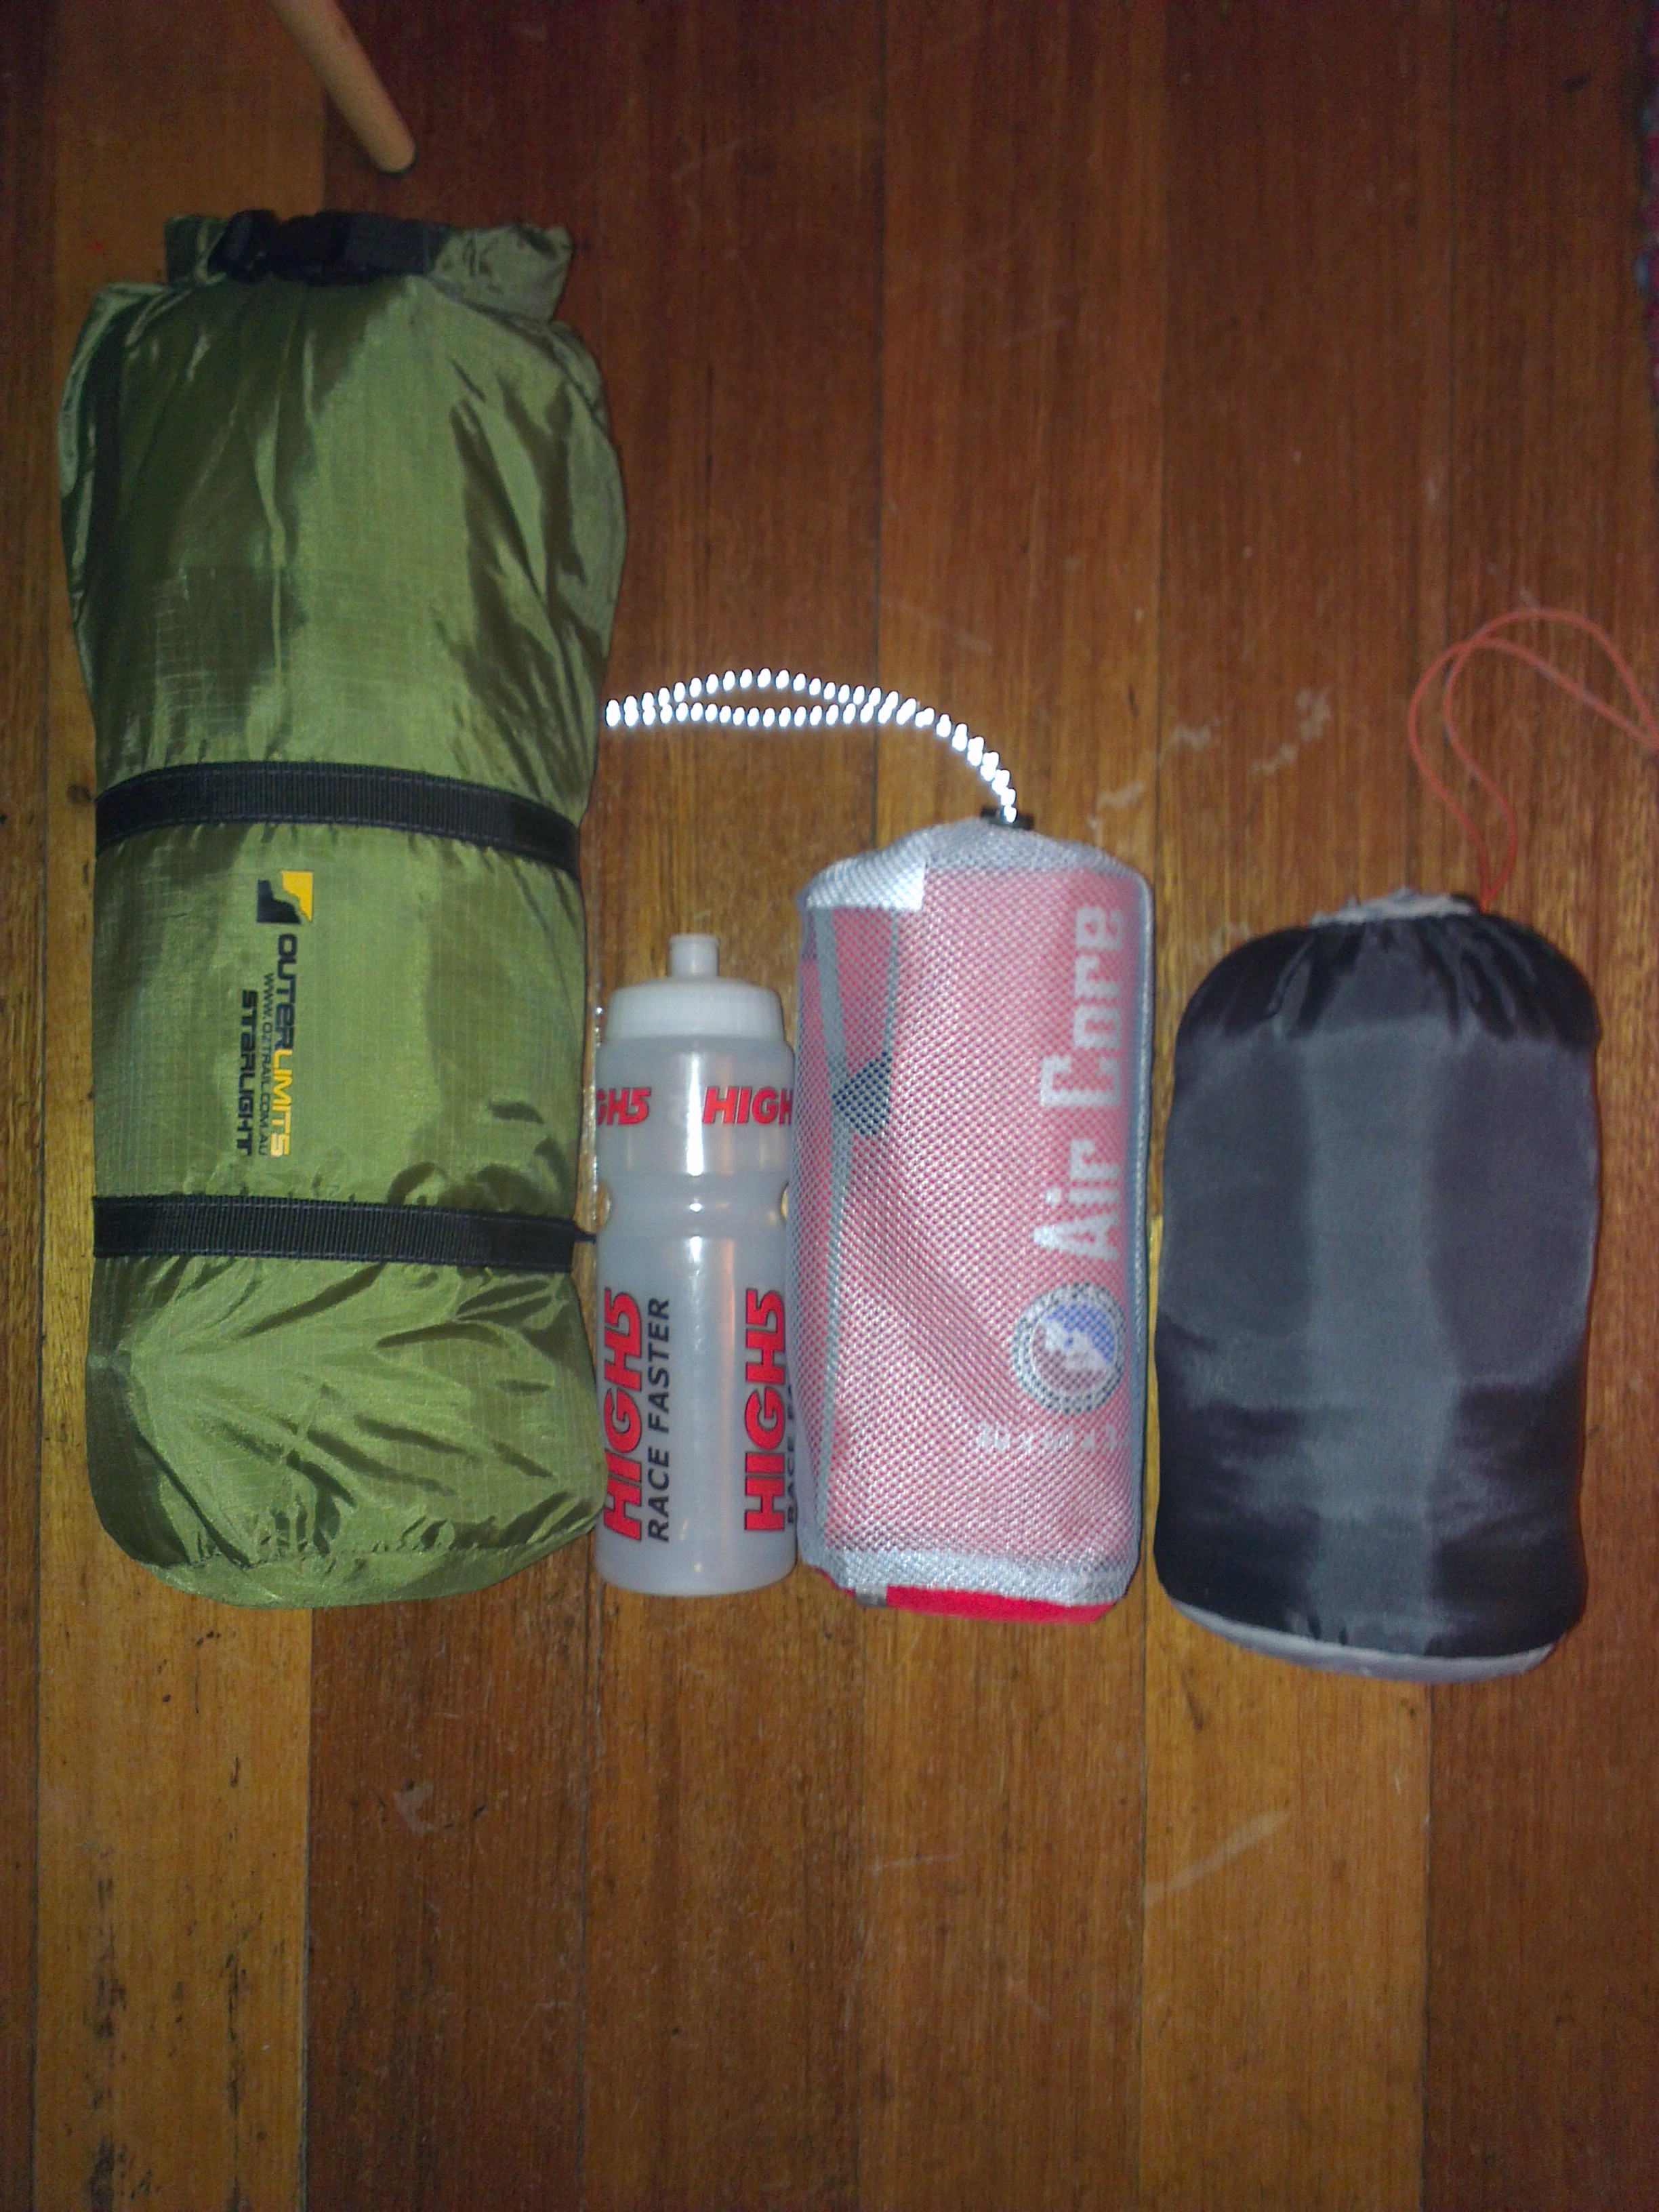
GEAR LIST :
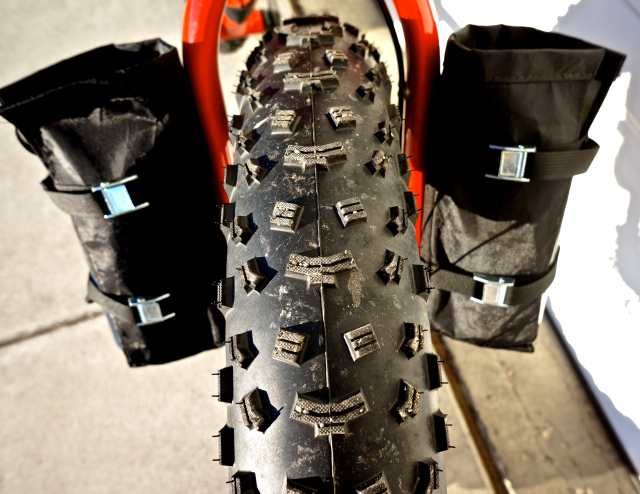
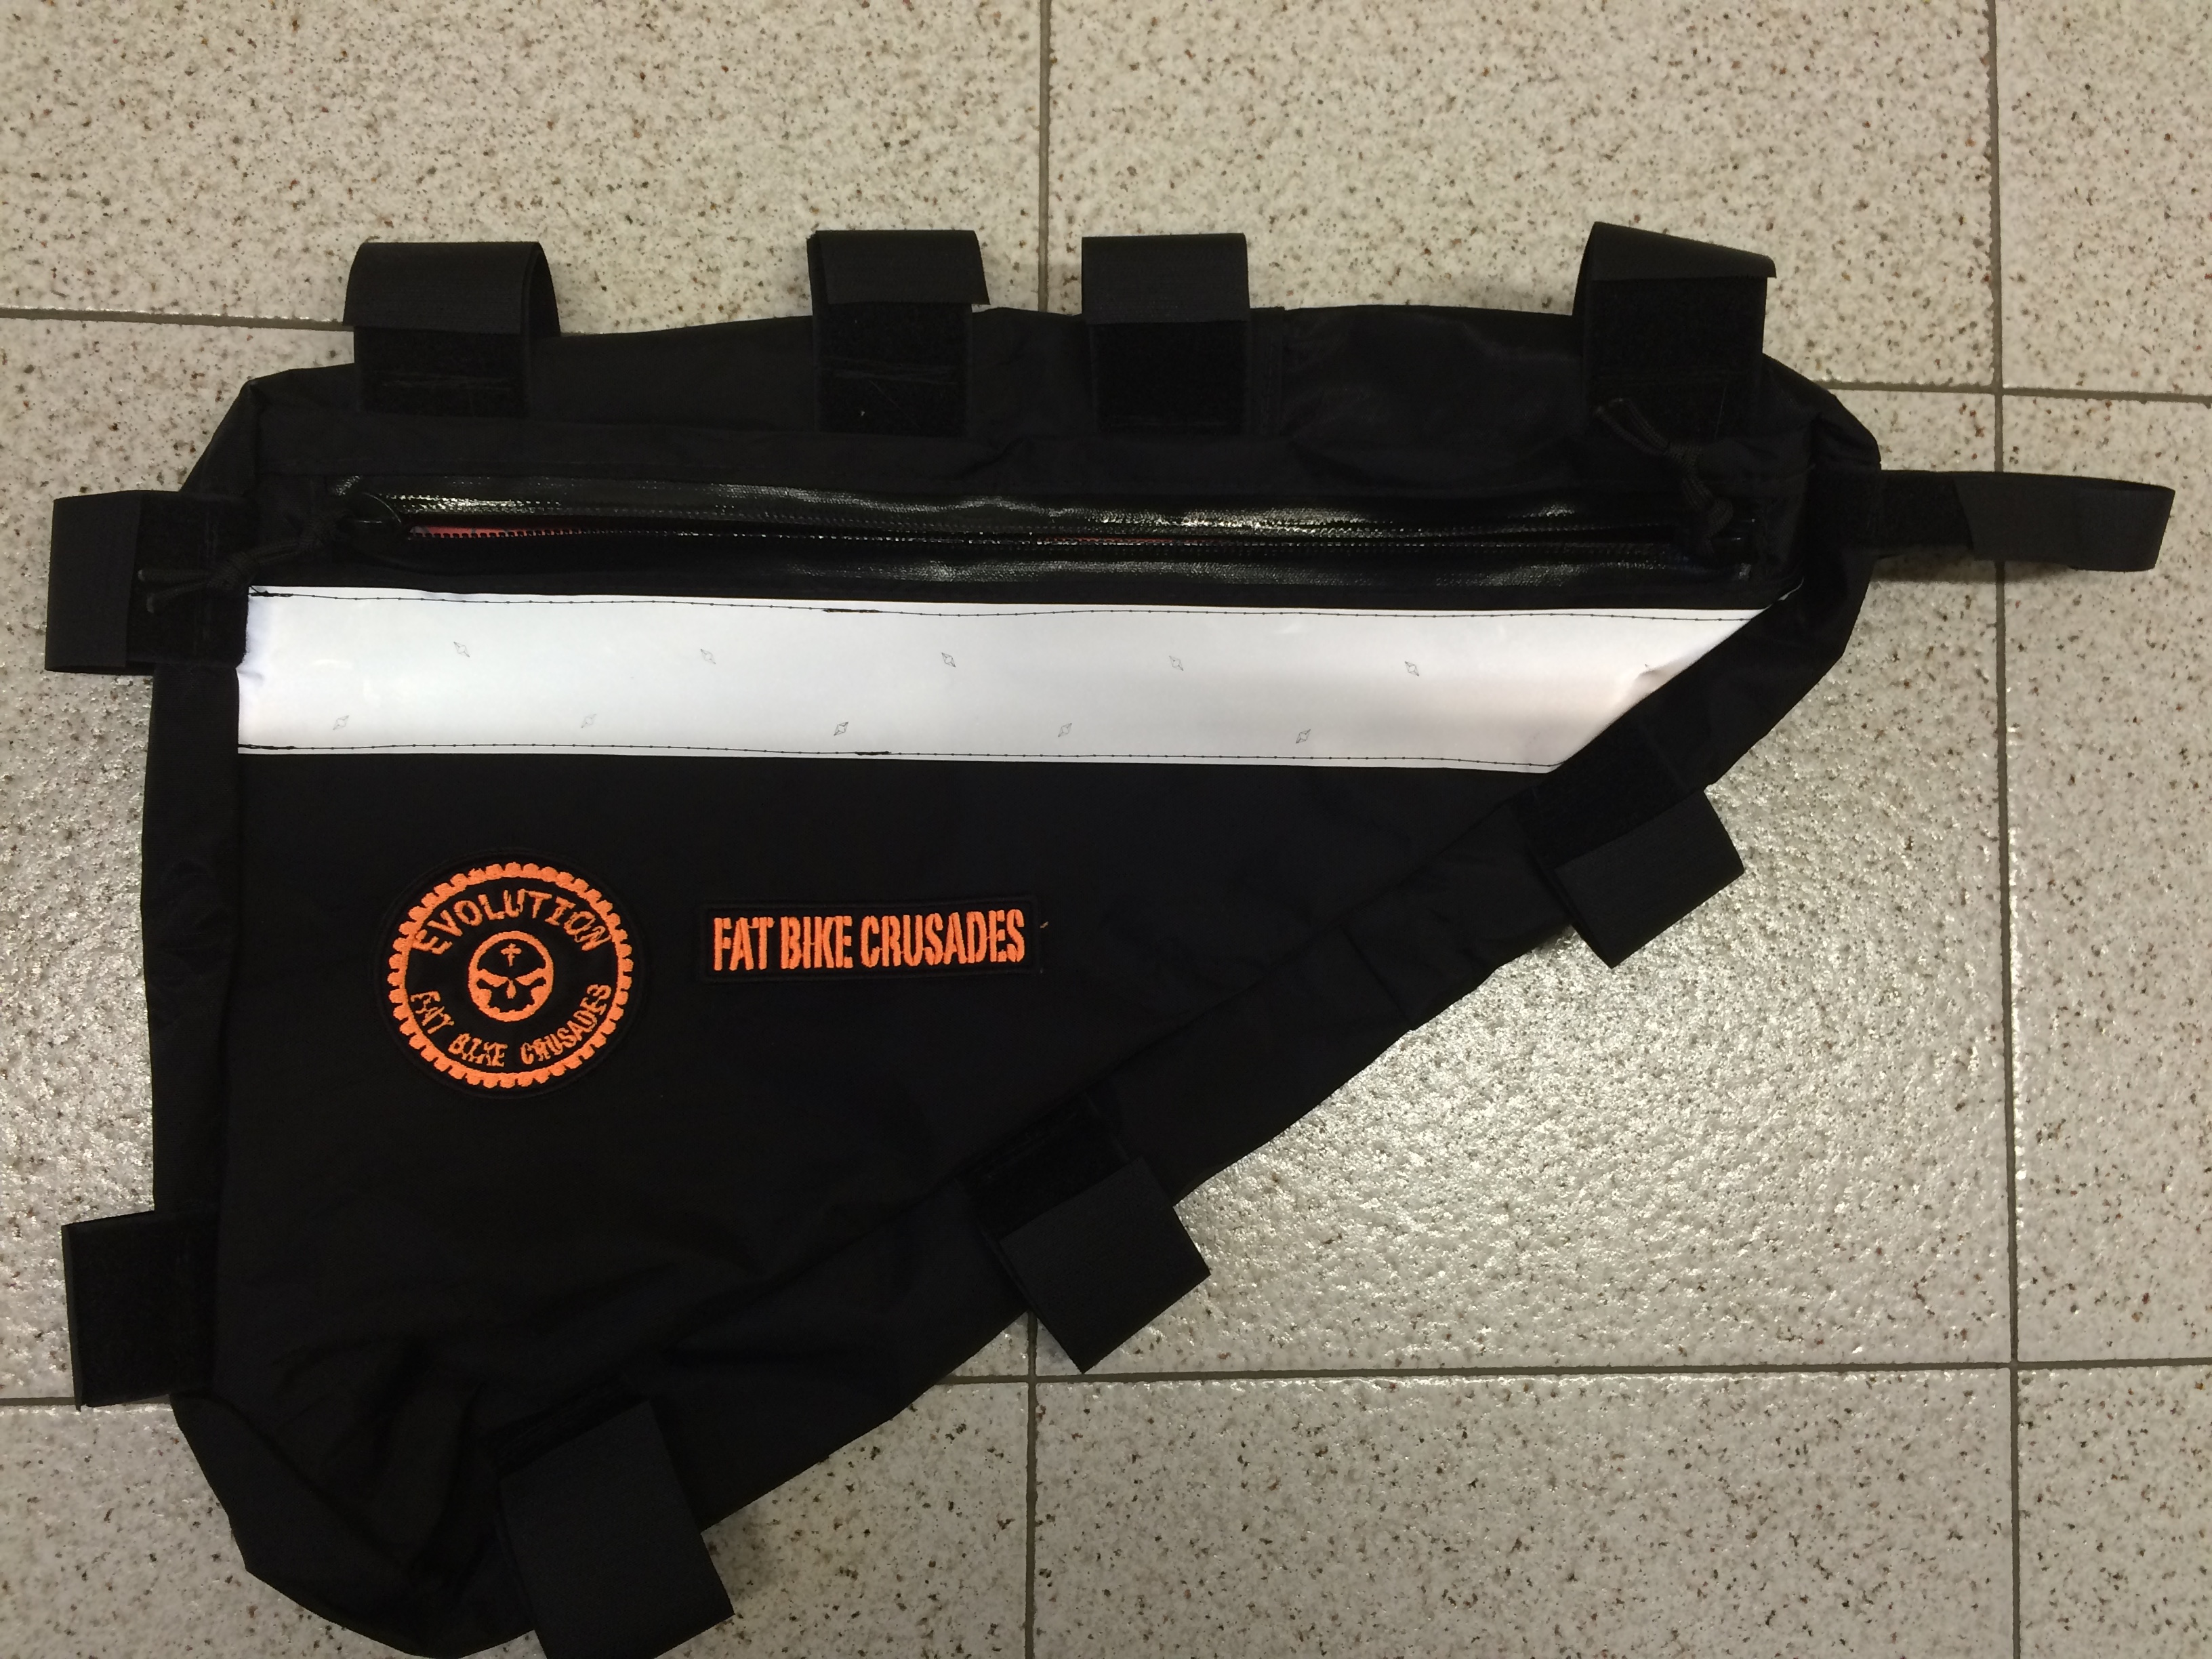
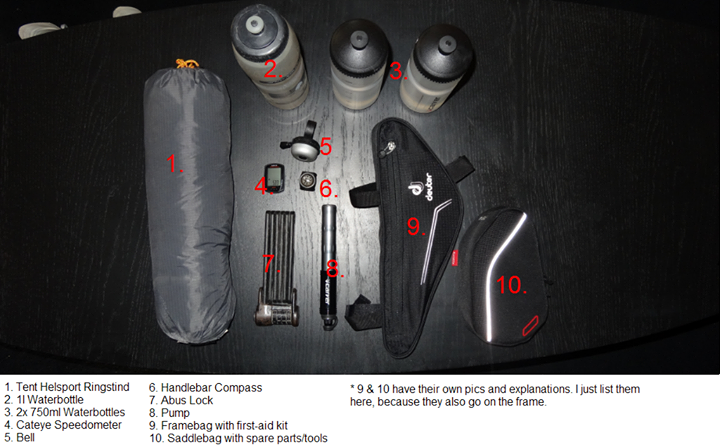
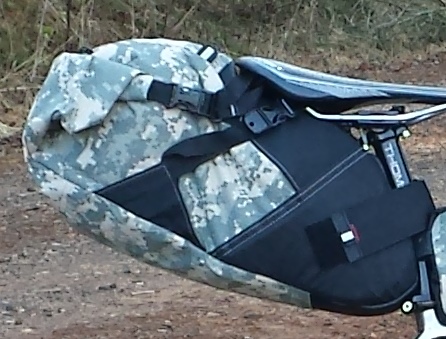
APIDURA EXPEDITION SERIES Saddlepack, Handlebar Pack , Top Tub Pack , Downtube Pack, 2 x Food Pouches, 7L Packable Musette
OUTDOOR RESEARCH Helium Bivy
THERMAREST Neo Lite Sleeping Mat
ENLIGHTENED EQUIPMENT Apex Jacket and Pants
SEA TO SUMMIT Lightweight pillow
RAB Equipment Beanie
SPECIALIZED Masaka Cycling Club Jersey
GROUND EFFECT Limousine Shorts
DHB Base Layer Top
CHAMPION SYSTEM Vibrant Living Socks
GRIP GRAB Gloves
BUFF
SPORTFUL Knee Warmers
SPORTFUL Fiandre Jacket
ENDURA Gillet
GORE TEX ShakeDry Jacket
GORE TEX Waterproof pants
VIGILANTE Base layer Top (for camping)
LAZER Z1 Helmet
SHIMANO RX800 Shoes
JULBO Photo chromic Fury Sunglasses
EXPOSURE Joystick light
MOON NEBULA Rear rechargeable Light
K LITE Bikepacker Pro Dynamo Front Light
SPOT Tracker Gen 4
OCEAN SIGNAL PLB
WAHOO Elemnt GPS Bike Computer
SON Dynamo Hub
VITTORIA MEZCAL 2.25 29ER Front and Back
PRO LOGO Scratch M5 PAS Saddle
EARTHS KITCHEN Certified Natural Sunscreen SPF50
DOTERRA Ice Blue Rub
DETTOL Hand Sanitiser
TOOTBRUSH/TOOTHPASTE
DR ORGANGIC Hemp Oil Lipbalm
KATDYN 0.6 Litre Water Filter
BIOMAXA Biodegradable Lube
Z PACKS Waterproof pouches
LEZYNE Multi Tool / Tyre Levers /Dynaplug / CO2
SPECIALIZED Mini Pump
2 x Ultralight 29er Tubes
SPORK
Emergency Blanket
SUNSAVER 10,000 Cache Battery / Various Charging cables including Di2
I had no Mechanical issues at all in either race, not even a puncture. My new Binary Havok was such a nice ride, smooth and supple and ready for the next challenge I did adjust air pressure at times , pumping up for the sealed road sections and releasing air for the rougher stuff.
My biggest Gear failure was my Shimano Shoes, which started to fall apart quickly on the HAB of the Tour Te Waipounamu. These were way too stiff for all the walking over some rugged terrain, mountain ranges , rooty trails and rocky riverbeds. After the TTW , they went in the bin. I had another pair of the same shoes at home and had them sent down to Invercargill for the Tuatara 1000. They were perfect for this race as there was very little HAB in comparison .
I used my Outdoor Research Helium Bivvy for the first time in a race after a few months of testing in summer conditions beforehand. I love the convenience and speed of set up with the Bivy but have to admit I did not get much super restful sleep. A few cold nights did not help. I was using Enlightened Equipment Synthetic Down Pants and jacket as my Sleep system along with a Vigilante Baselayer. The Jacket is Fantastic but I feel the pants did not give me enough insulation from the cold mountain air.
I was using the Vittoria Mezcals for the first time and I thought they were great. Super grippy and speedy on the sealed roads
All my Apidura Packs continue to perform brilliantly, waterproof, hard wearing and reliable. https://www.apidura.com/
I have being trying out new sunglasses from French brand JULBO for 6 months now. I have the RUSH and FURY models both with Photochromic lens . For these races I went with the Fury. These Photochromic lens are perfect for Ultra Endurance cycling events that I love to do. As Im generally riding before the sun comes up and well after the sun goes down , these lens adjust to the light super quick and protect my eyes from a lot more than just the sun. https://julbo.nz/
I ve also being using Biomaxa products, Bike Lubricant, Bike Cleaner and Degreaser . All these products and fully bio degradable and have zero petro chemicals or any other nasties . I had a small bottle of the lube with me for the TTW and Tuatara 1000 and it was fantastic. Made here in New Zealand https://www.biomaxa.com/
For years I was riding fully rigid on my previous bike , A Salsa Fargo. For my new Binary Havok I put a ROCK SHOX SID SL Ultimate front suspension knowing that the TTW course covered some rugged terrain. This was a great decision and the SID done a fantastic job of handling the rough stuff
My Klite Bikepacker Pro continues to be outstanding after years of lighting my way through different countries https://www.klite.com.au/
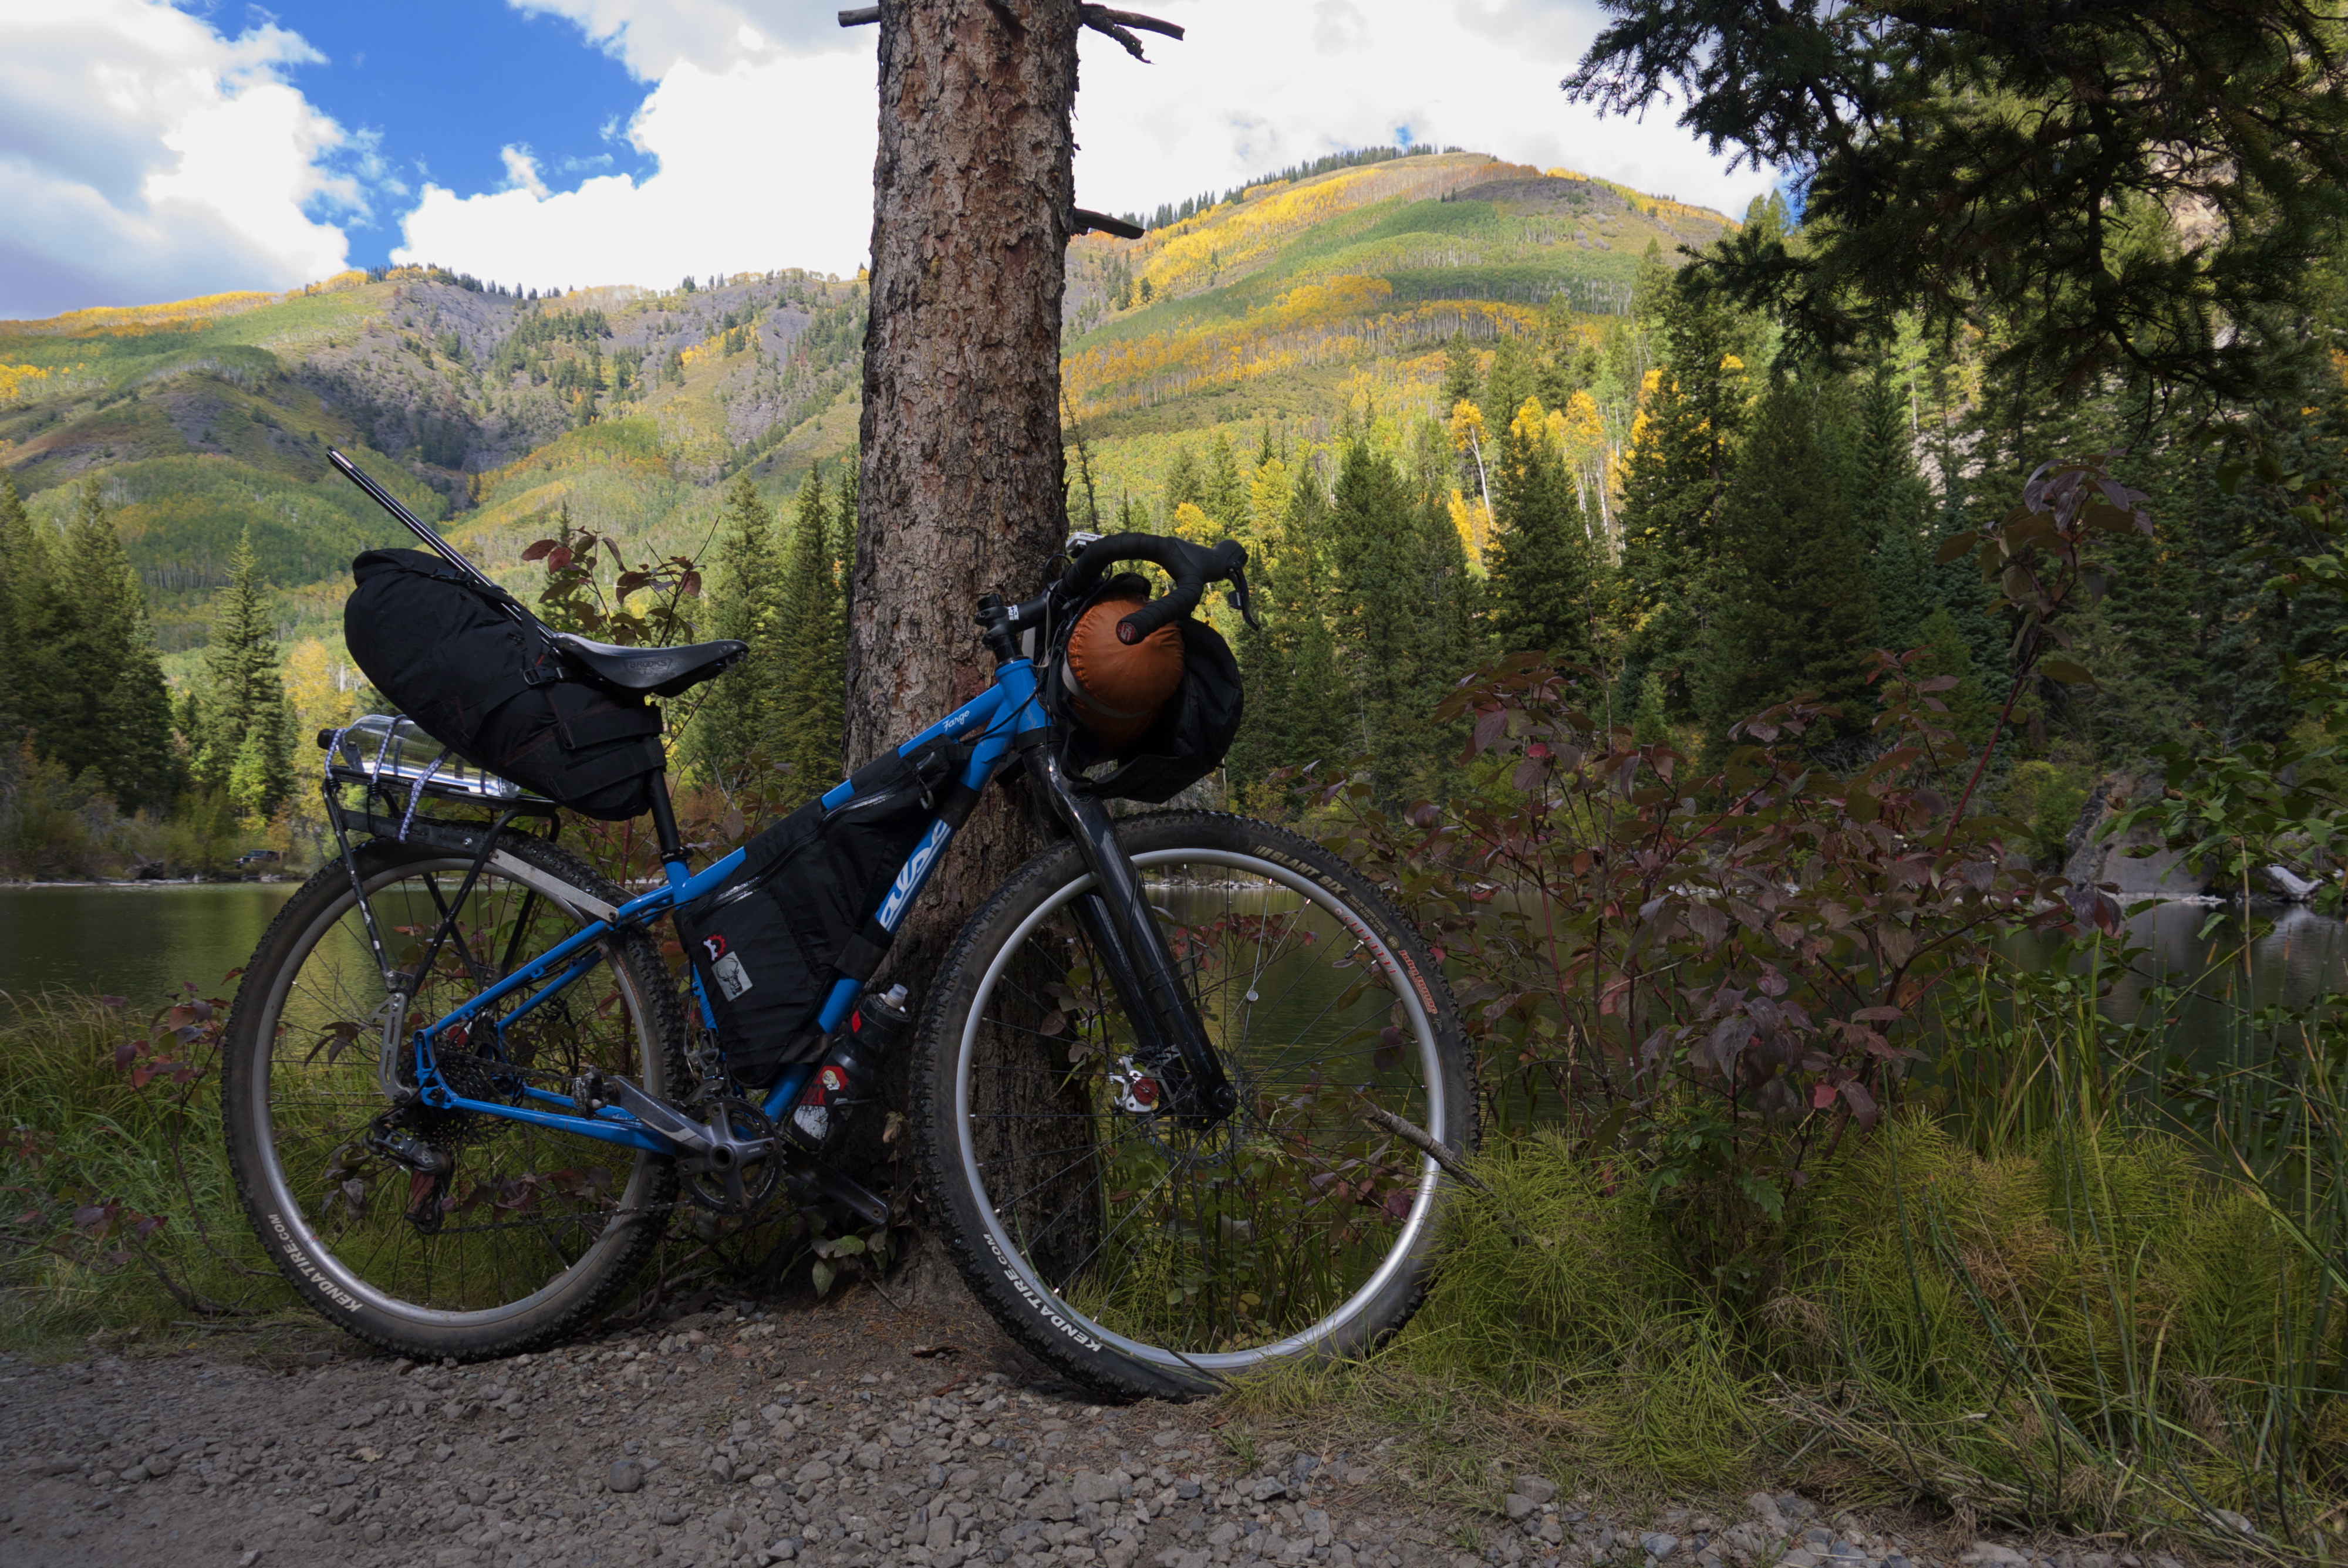
I am now an Ambassador for Binary Bicycles here in New Zealand. I am super proud and privileged to ride these Titanium frames. I had being eyeing up some of their Frames for a while and I just love how this collaboration happened so organically.
Binary Bicycles are based in Arizona, USA. I have not yet met George and Jalene, the owners, but we have being on the same stretch of road at the same time in 2019. As I was nearing the end of my second Tour Divide race , along the final sealed road stretch between Hachita and Antelope Wells in New Mexico I vividly remember two people cheering me on from their campervan. It was George and Jalene , they had being cheering on the frontrunners , especially the winner Chris Seistrup who was riding a Titanium Binary Bicycles SuperB XC.
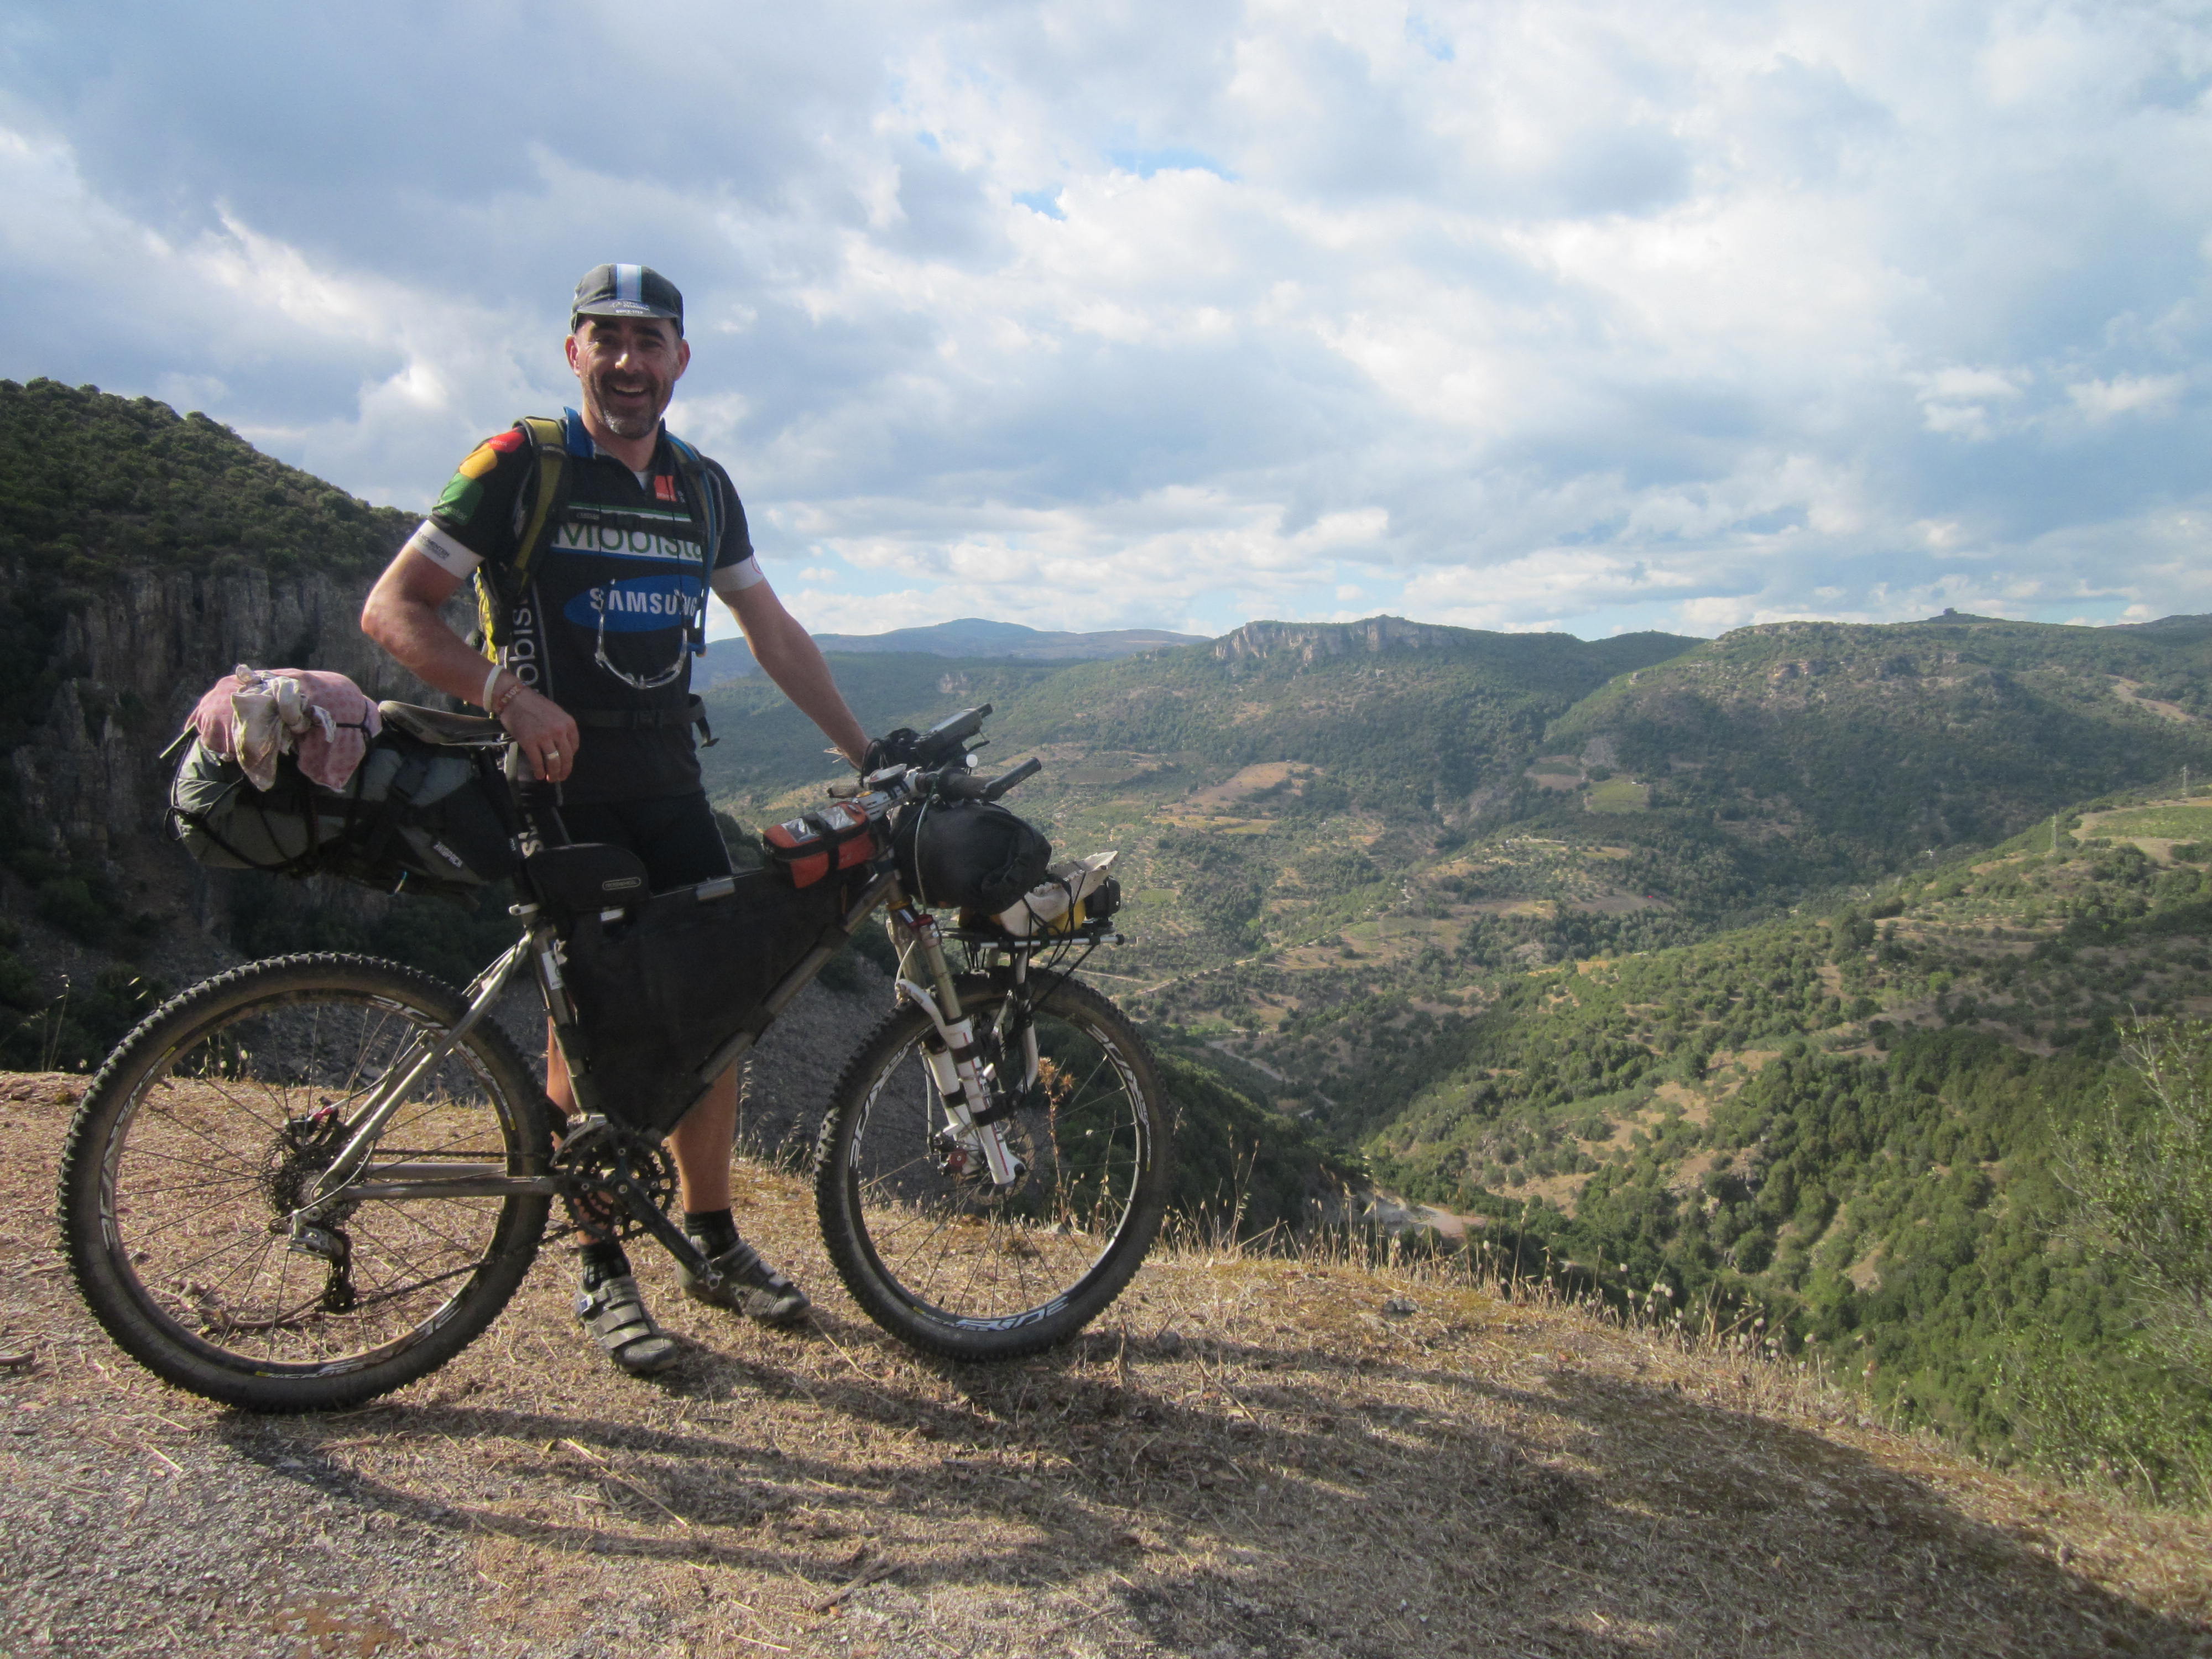
Beautifully crafted HAVOK Frame
Months passed before I knew this and I only discovered it after we exchanged some messages on Instagram, and they told me it was them on the road on that scorching day as I was about to finish another memorable Tour Divide experience. A few more messaging exchanges over the months eventually led to this beautiful collaboration.
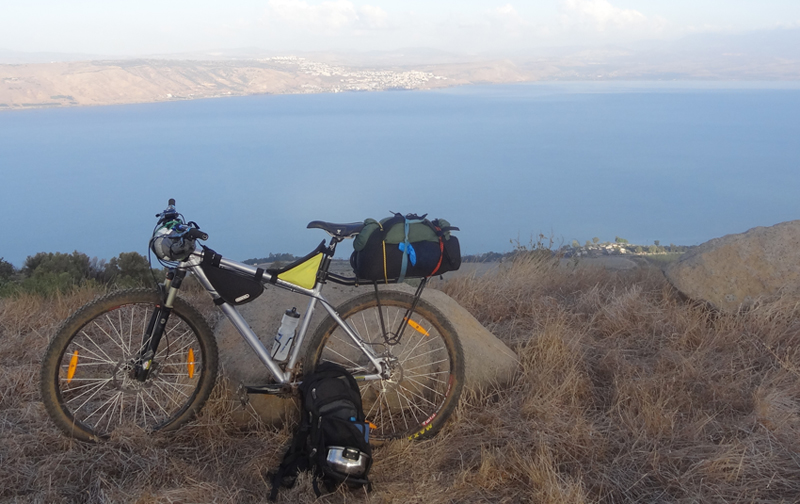
Initially I was just going to get the Binary Grolar, a very versatile gravel bike. Then we talked about getting the Havok as well, My idea was to swap everything over from my long serving Salsa Fargo Ti and this would be my Adventure bike for the rougher terrain, knowing as well I had the Tour Te Waipounamu coming up in a few months . The great thing about Binary bikes is that you can get your frame customised especially for you. I worked closely with George , and with some help from my Bike shop , HUB Cycles in Christchurch we got all the measurements organised and before long two new frames were in production.
Two brand new shiny Titanium frames arrived in late November 2020, they looked amazing , very well made, I was super excited. It was well into December before I brought my Salsa and new Havok frame into Hub Cycles to get it built up. Jimmy, a Hub Cycles Mechanic who has worked on all my bikes over the years would once again be taking on the job. Christmas Holidays, A super busy bike shop and issues getting some parts meant I did not get my new bike until late January. I now had only a few weeks until the inaugural Tour Te Waipounamu was to start on February the 14th. Thankfully the transition was seamless and It felt great to ride.
So my new Binary Havok was about to experience New Zealand for the first time with two new races back to back. ( see my other blogs for stories from my Tour Te Waipounamu and Tuatara 1000)
At the time of writing this I have not yet built up my Binary Grolar, hopefully soon. Its being a whirlwind few months with life, being busy here at Vibrant Living Retreat and managing to get those two races completed.
Im so grateful to George and Jalene at Binary Bicycles for all their support. The process for getting these frames created and customised for me was super easy and i look forward to riding them for years to come.
This loop is suitable for a quick, weekend getaway. Over the approximately 150 miles, there are a couple of big climbs, one up to Chestnut Ridge and two up to Laurel Ridge. The remainder of the route is rolling to flat western PA terrain. Along the route are many alternatives for overnighting, restaurants and food supplies. One should be aware that stores and water sources are limited along Laurel Ridge.
A Google Drive Folder, that includes the files listed below is here.
LHRR_01_to_09.pdf            Route Description, overview maps < Start here!
LHRR_10_to_17.pdf            Map sheets 10-17
LHRR_18_to_25.pdf            Map sheets 18-25
LHRR_26_to_33.pdf            Map sheets 26-33
LHRR_34_to_40.pdf            Map sheets 34-40

LHRR_REV_XX.gpx             GPX file for your GPS (Includes Tracks and Waypoints)
LHRR_Waypoints_REV_XX.csv   CSV file of waypoints

LHRR_README.txt             Listing of folder contents
Pictures
Note: These pictures are taken from along the route, but are from different trips, in different seasons. The fall pictures are from a particular warm November weekend in 2020 when the complete route was ridden. The spring and summer pictures are from other miscellaneous trips that intersected the route.
Here I am again up at the very northern tip of Aotearoa , Cape Reinga lining up for my third time for this increasingly popular brevet. I am super amped and looking forward to riding through this stunning country I now call home . I was starting in wave one this year, in 2016 I was in wave 3. This years edition had 13 start dates spread out between 17 February and 8th March .
I was up on first light down at the beautiful Tapotupotu campground , packed away my camping gear, and rode the short distance up the hill to the Lighthouse carpark, our journeys starting point . I could feel the excited nervous energy as riders gathered and made final adjustments . I chatted with some familiar faces then it was 7am and we were off . I always love when I finally get rolling on a big event or race . After all the training , preparations, planning etc, i m eager to start pedalling and get into my own rhythm .
The wind was favourable and Ninety mile beach passed without incident . I rode with a small group all the way down the beach, chatting at times or just riding with my thoughts. After a quick stop at the shop in Ahipara I found myself riding with old friend Cliff Clermont from USA and Richard Walsh, a Kiwi now living in Australia .
Some nice quiet country roads and 170kms from the start brought me to the landing to catch the ferry for the short crossing to Rawene . Cliff and Richard arrived soon after. Mostly sealed roads weaved past the scenic villages of Opononui and Omapere along the Hokianga Harbour. I was now heading towards photo control point 3 , the majestic Tane Mahuta , God of the forest , a giant Kauri tree in the Waipoua Forest , likely to be well over 1000 years old. Arrived in Dargaville about 8 pm for a Subway resupply with Richard before riding out as the sun set on a beautiful Day 1 on the tour. The decision was easy to ride the extra 100km around Kaipara Harbour instead of riding to Pouto point to catch the ferry as it was not due to leave until 3pm the next day . At 55km past Dargaville we stealth camped on the verandah of the Matakohe Museum for the 6 hour mandatory stop making it 333kms for the day.
I was feeling good on day 2 riding the rolling hills around the Harbour. I had noticed that my Tracker was not showing on the Maprogress website, turned it off and on, and continued . At Mt Eden in Auckland I spent some more time writing emails etc trying to sort out the Tracking issue. Richard rode out of the city and I followed soon after happy to escape the traffic .This time I took the alternate coastal route to Miranda and really enjoyed the riding on a stunning evening . 6 hour stop in Miranda at the end of my second day.
Somewhere on Day 3 my tracker issue were sorted, I was a moving Dot again so family and friends could follow my progress . Another minor technical issue was also happening for me, My Garmin Etrex is normally fed off a cache battery which is in turn is fed from my Dynamo Hub via my K Lite usb charger . This was now not working so I was having to put in lithium batteries instead. A lot of wasted time in Mata Mata and a new cache battery did not solve the issue .A battery with pass through facility is required !! I was about 6 or 7 kms out of Mata Mata and had to turn back to get more batteries. DOH !
I reached the next photo control point at the Centre of North Island after darkness had fallen and camped up further along the road around midnight with around 280kms done. Early the next morning , overcast with a heavy dew amongst the thick bush of the forest , Richard appeared. He had stayed further back at Pureora. We soon warmed up as we climbed into the Timber Trail . This section is rugged , remote and super fun with many epic swing bridges to take you across huge lush gorges. Richard had dropped back and I pushed on getting out to Taumarunui just after 11am. A decent stop , breakfast and coffee was required. I called the Whanganui River Adventures to organise the boat pick to take me from Bridge to nowhere to Pipriki . He said he would be at the landing at 6pm for pick up . By the time I got supplies and sorted myself out it was midday, meaning I had 6 hours to do the 107 kms to reach the jetboat . It was a time trail , I pushed hard , barely stopping , including some hike a bike up the Kaiwhakauka Track , a narrow, rooty steep section not long past Whakahoro. Thankfully the descent down towards The Bridge to Nowhere was dry and fast . I reached the landing at 6 .15 and was relieved to see the boat waiting . As it turns out we ended up waiting for Richard who arrived about 35 minutes later after himself putting in a huge effort . The trip down the river was beautiful in the evening light. A quick stop , bike clean and resupply at the pipriki river base and I was moving again as the light was fading . The fatigue was setting in on this stretch and I was grateful to get to Whanganui and get a room. I dried out my tent etc , still damp from the previous nights heavy dew and set the alarm for another early start .
Day 5 and 6 had me traverse the dry farming landscapes from the west to east of the lower north island.Some beautiful quiet country roads with very little traffic. I had really great weather so far , warm and sunny for the most part . I had a few people come out to cheer me on as I rode past and many small town businesses were excited to welcome the TA riders over the next couple of months . I can imagine some places getting inundated with riders. Day 5 was a 305km day finished with a nice stealth camp on the verandah of the rugby ground building just off course in Masterton. The next day I scored a cabin on the ferry which was great for a nice rest up. Time for the South Island.
Leaving Picton I had a gorgeous evening riding the Queen Charlotte road, past Havelock and Pelorus Bridge with no reason to stop until I noticed I was losing air from my rear tyre. I was now on the gravel road leading to the Maungatapu Trail. I had a quick scan , seen nothing so put a CO2 cannister into the tyre hoping it would re seal . Unfortunately after 10 minutes it was flat again. Further inspection revealed a nail sticking out of the tyre , how did I miss that ? I put a plug in, then I hand pumped the tyre as I only had the one CO2 . I did have to keep topping up every 30 minutes as it was not sealing completely , this was annoying ! This was not the first time i ve went over the Maungatapu in the darkness, although it was better conditions than in the TA 2016 when I was caught in torrential rains from a passing cyclone. A late night resupply in Nelson and I continued on until almost 2am , camping at the domain in Wakefied, this was a long day
The late night meant a later start than normal to accommodate the 6 hours stop . Coffee at the bakery in Wakefield and I was good to go .
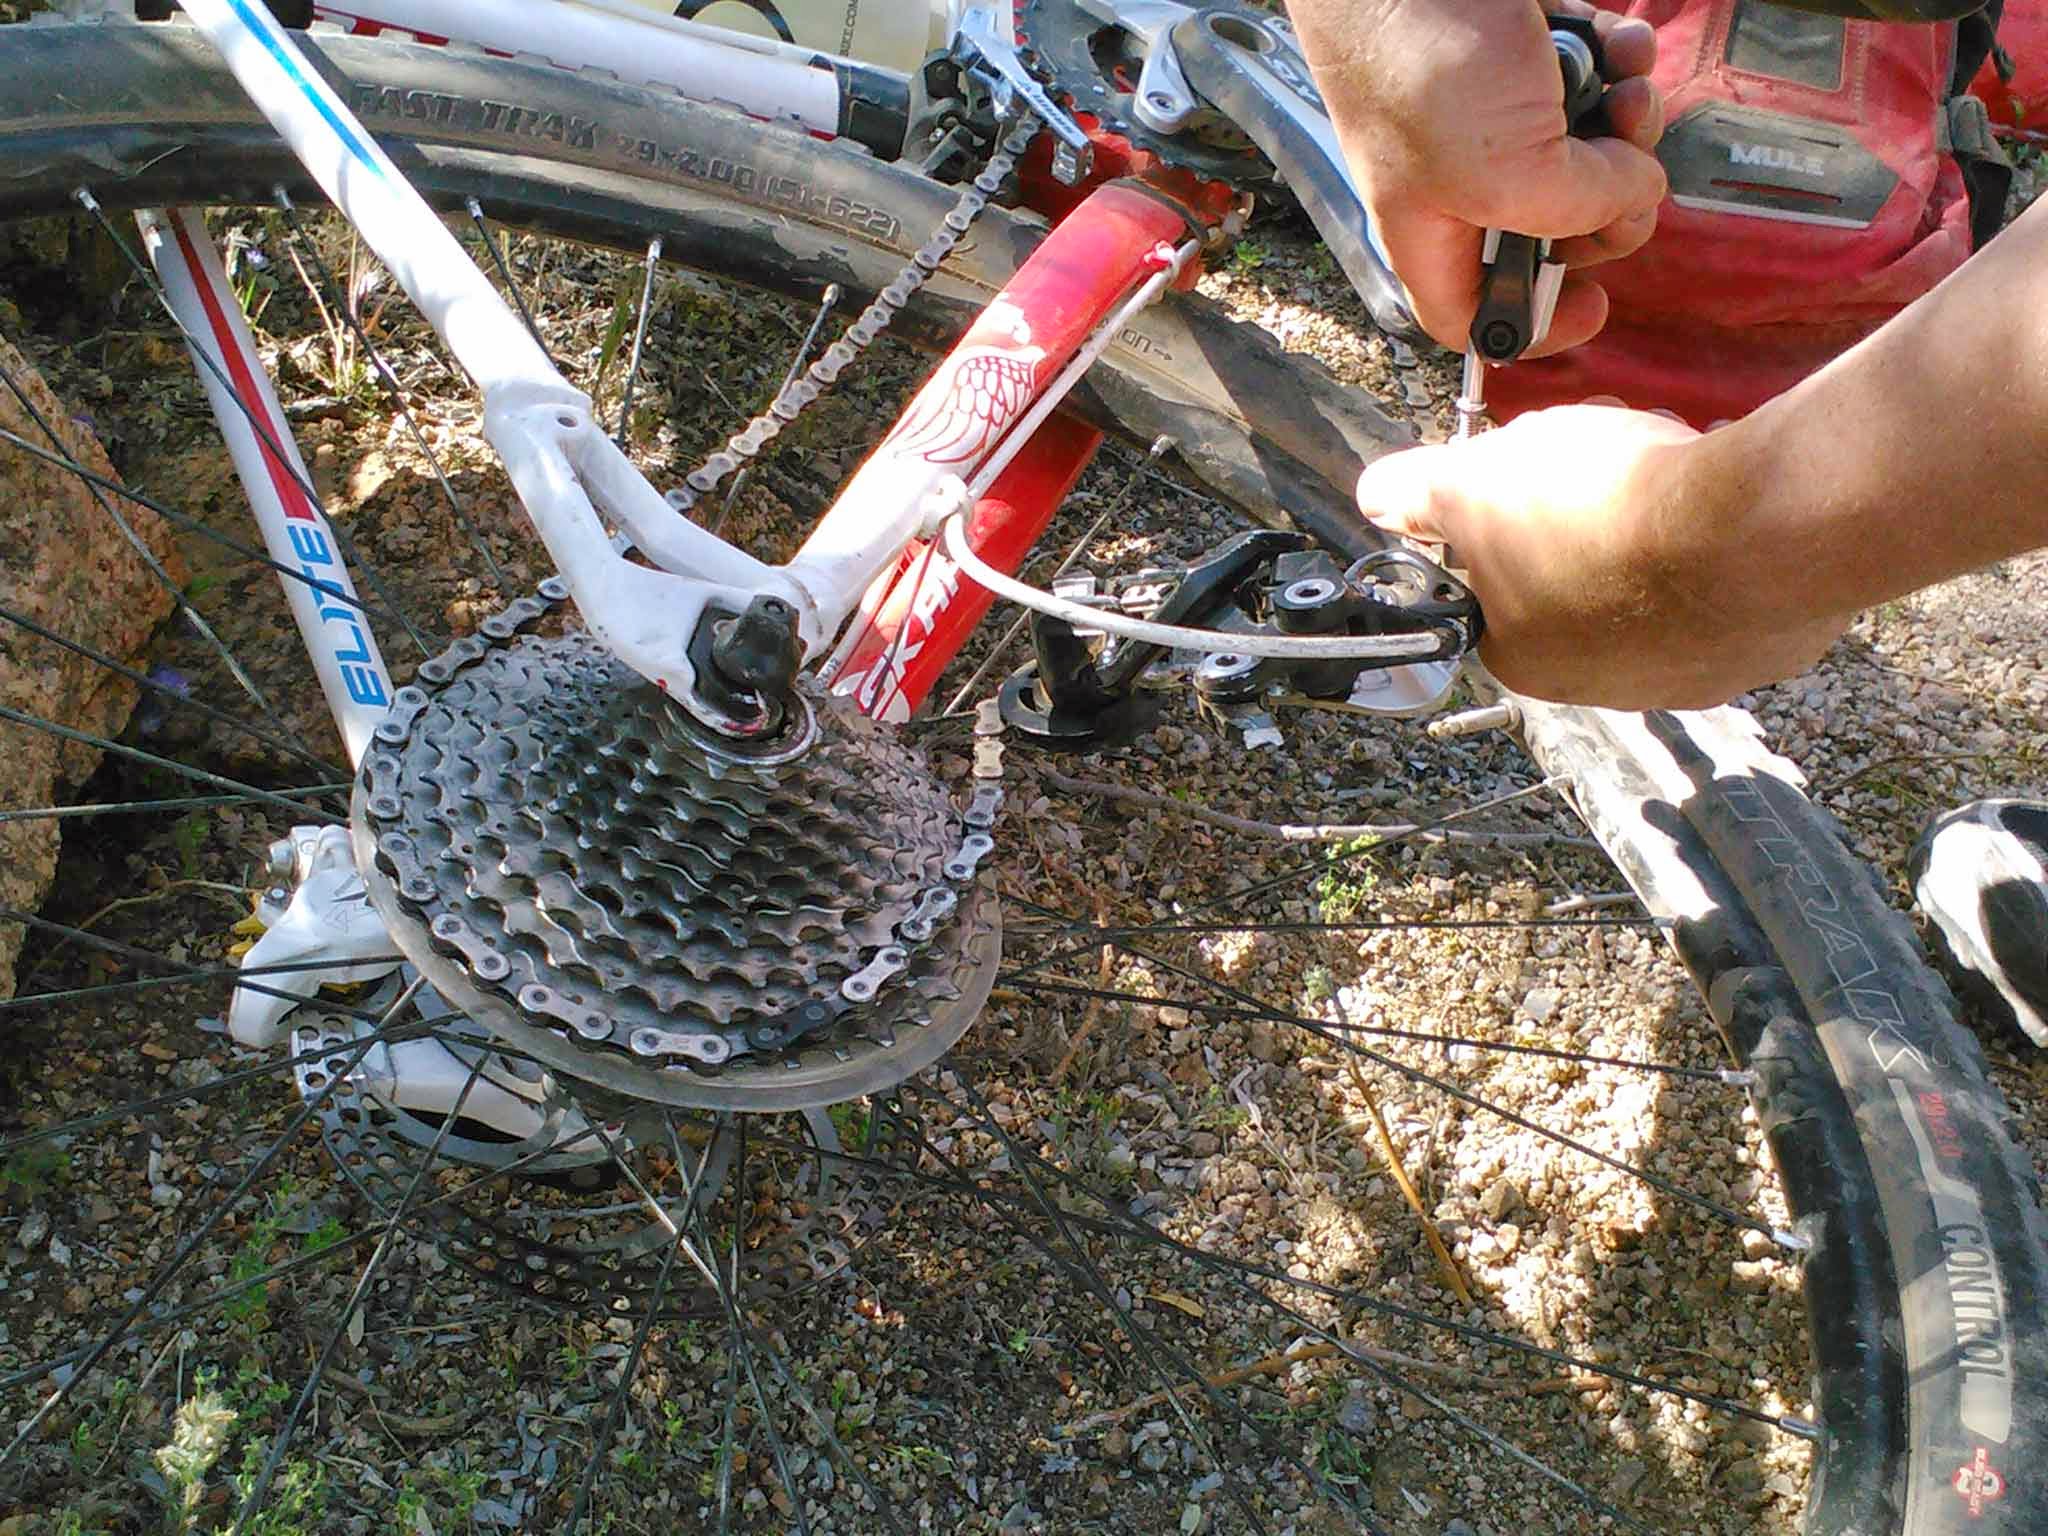
The last couple of days I was noticing that my Di2 was shifting sporadically , looking like it was a problem with a wire connection in the headtube area. I was still having to top up my rear tyre with air also. A bike shop was now not available as I had passed through Nelson late last night . As I neared Tapawera , my shifting had almost completely ceased. A long stop here to fix this involved taking off my handlebars etc to get inside my headtube to find the di2 wires were crushed . Two tiny wires had to be stripped back , then twisted together and taped . I put it all back together and it was working and thankfully it continued to work all the way to Bluff . A Further 20 kms down the Tadmoor valley, I had to stop again. I decided to put a tube in my rear wheel as I was losing air more and more . This turned into a bit of a nightmare. I put a new tube in , beaded the tyre and started pumping, the air was coming straight out WTF ! I took the tube out and there was a big hole in the tube , Damn ! Stick on patches did not want to stick, sticky sealant was everywhere and it was super hot in the mid afternoon sun along the side of the road.A hot sticky mess ensued. Eventually after 1.5 approx I was moving after finally getting a tube to hold the air …The ride to Murchison felt long and my legs were flat as these mechanical issues drained some energy. Thankfully after some drinks and food I was feeling more energised again as I went over the beautiful Maruia saddle , eventually camping riverside by the west bank road turn off . Most eventful day of my Tour .
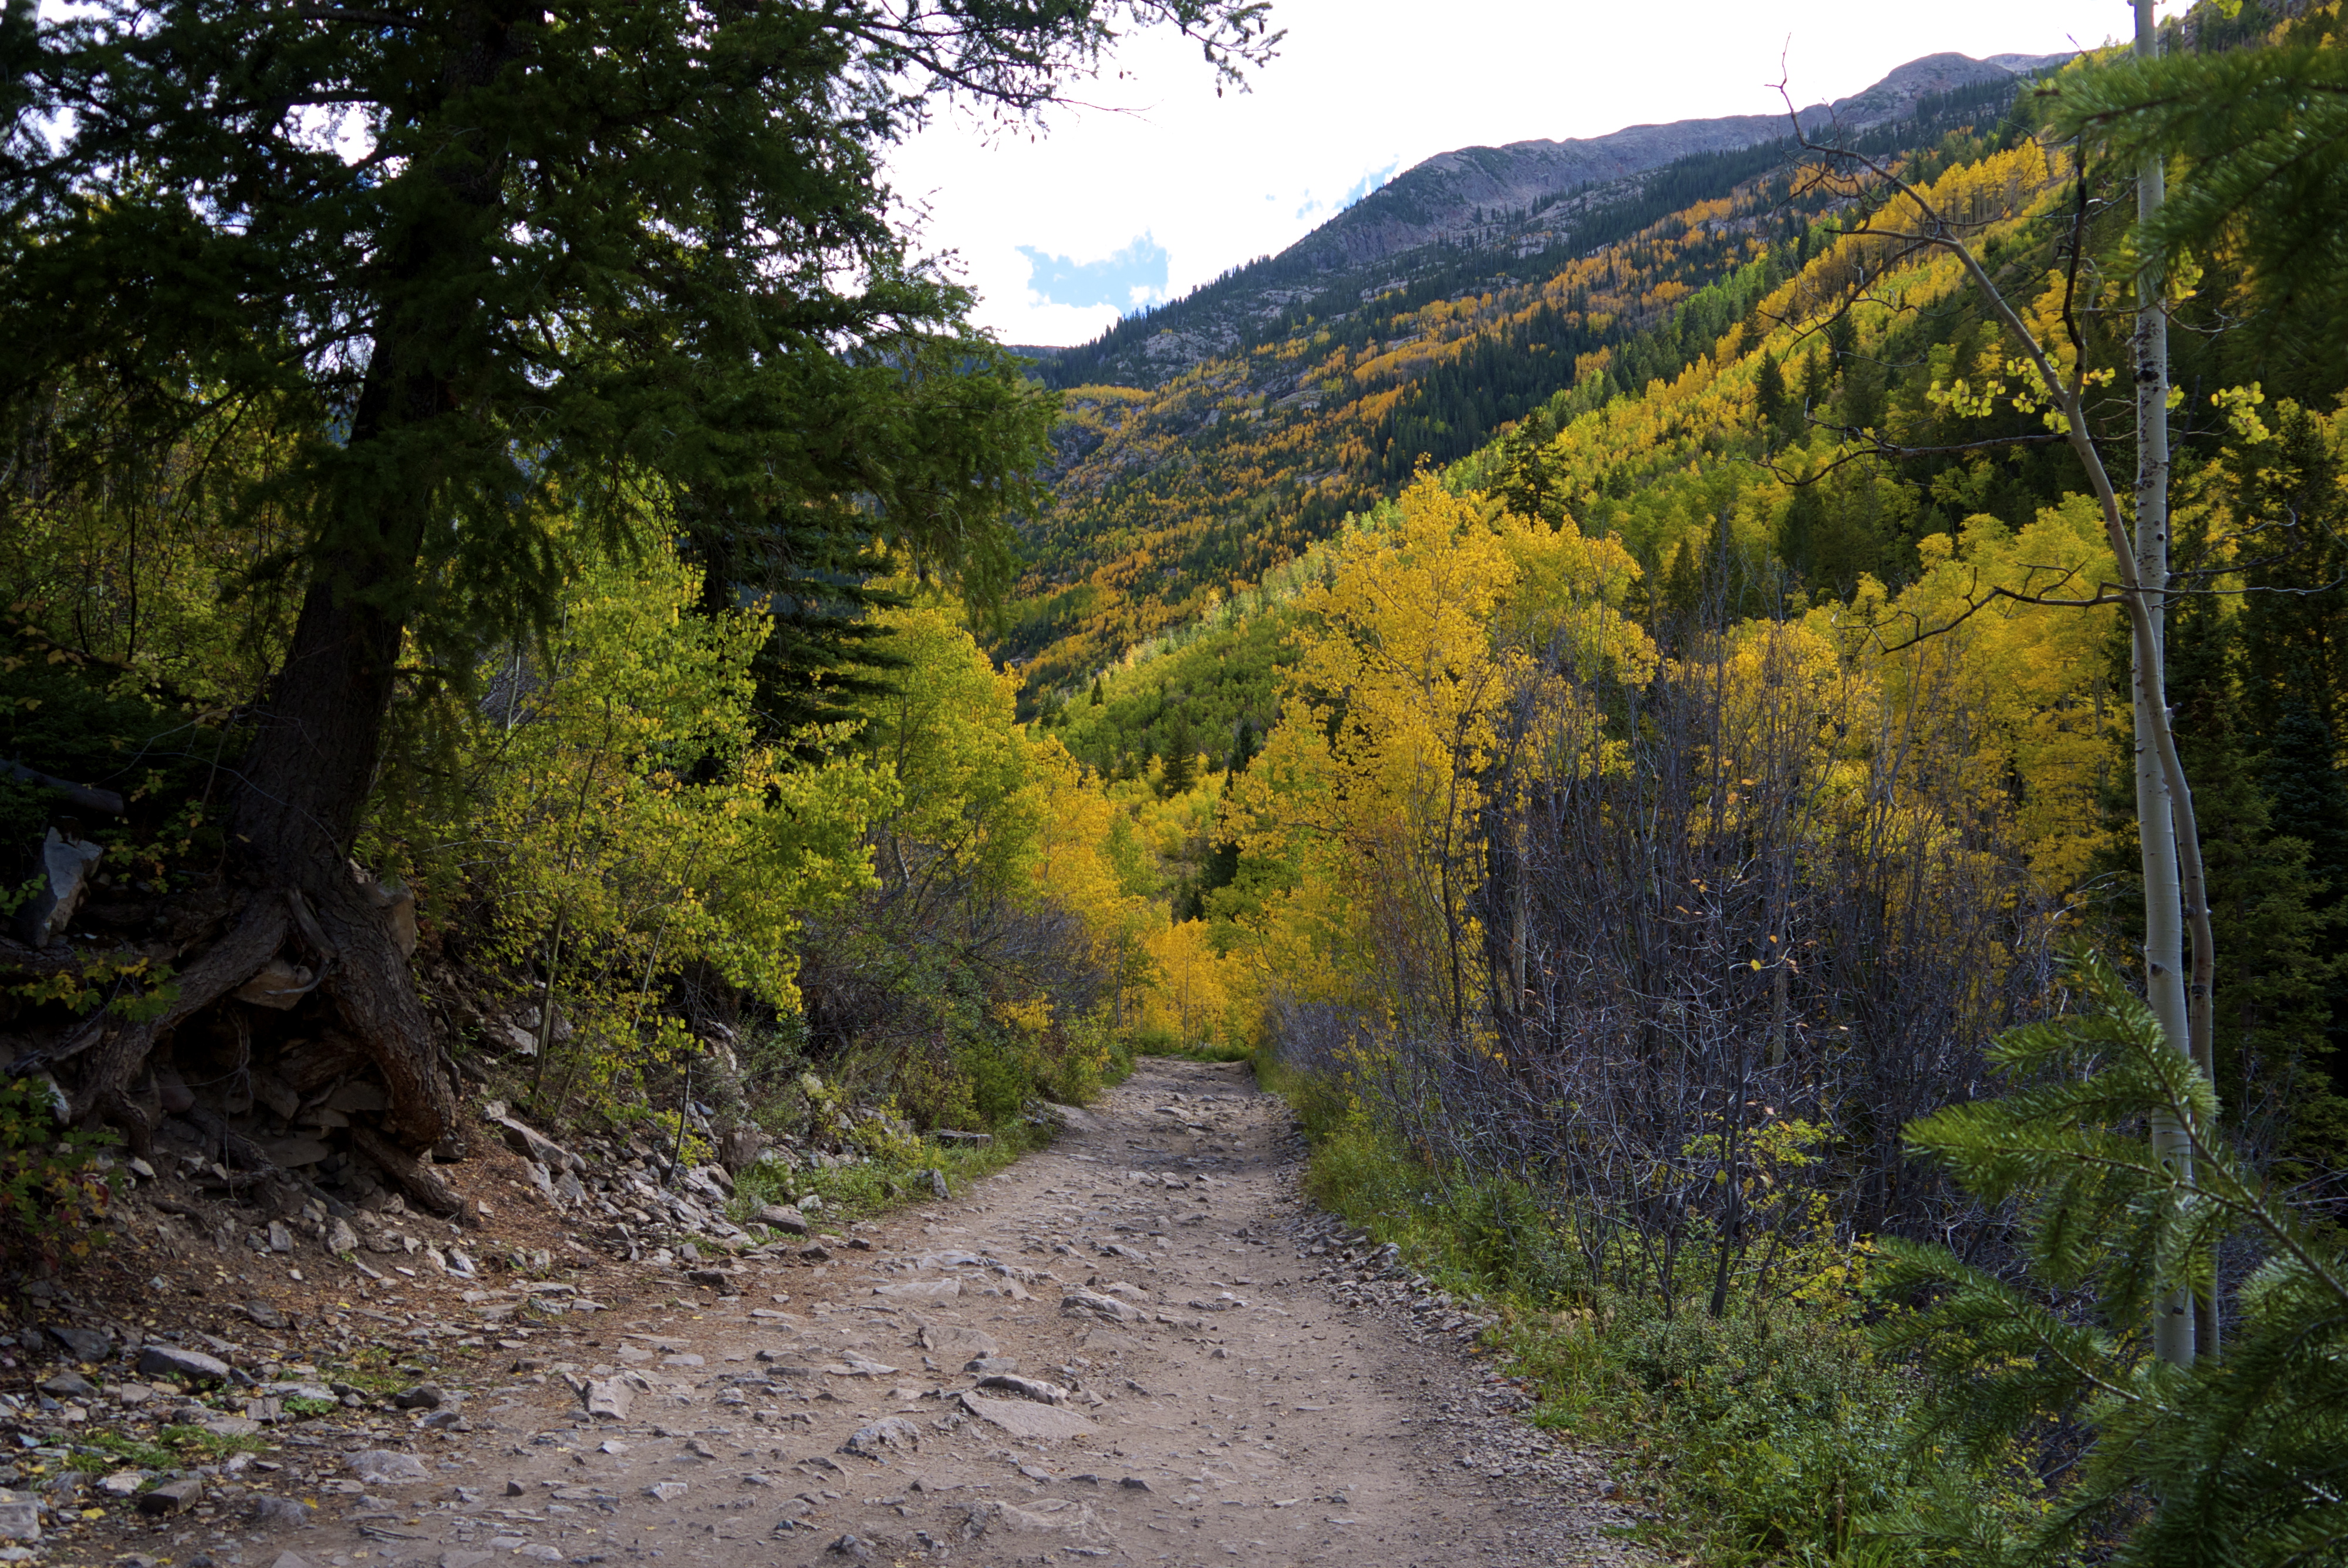
Day 8 was a fresh early morning ride over Rahu saddle and onto Reefton for coffee and food before heading into the epic Big River Section . Ive being through here 6 or 7 times now , its a tough section , not all rideable with steep rocky climbs and rooty singletrack , this is rugged mountain biking whilst on a loaded bike . From Ikamatua I called ahead to Mann cycles in Greymouth to say I was coming to get a rear tyre and tubeless set up again. They very kindly stayed open late to sort me out . I rolled out of Greymouth about 6pm with an intention of getting to Hokitika , 100kms away through the wilderness Trail. I arrived to to a quiet Hokitika sometime after 11pm.
The west coast involves lots of sealed roads, this is unavoidable for the most part as there are no other options. I d ont really mind the road riding so much as long as they are not super busy and this was the case . A big day of nearly 300km got me to Haast staying at the Backpackers .
Day 9 riding out of Haast up the valley on an overcast damp morning , i was feeling very average . My legs felt asleep and I wondered how I would climb Haast Pass at this rate. Thankfully as the day brightened, my body slowly awakened and I was feeling so much better with good energy to tackle this beautiful climb. The day did brighten into a stunning day that matched the scenery as I rode by Makarora , Lake Hawea and into Wanaka . How lucky am I to get to ride my bicycle through landscapes like whats on offer here in Aotearoa. Plans to get across Lake Wakatipu this evening did not work out meaning my tenth night was my longest stopped time , about 11 hours .
A 7 am charter across to Walter Peak on my final day on the Tour , Gravel goodness and a super tailwind , even a short spell of rain meant I made good time to Mossburn . At this stage I was hopeful of catching a flight out of Invercargill at 6.30pm. A headwind not long after Mossburn ,that persisted more or less until Bluff meant catching that Flight would not happen . As I neared Invercargill I even considered riding off course and going to the airport to get on the plane. After a quick chat to my good wife Mary Jo , my tired mind was put straight and I continued into the wind to finish this.
I arrived at Bluff , and was met by a friend Fraser who lives down there . I was delighted to reach the end of this journey after 10 days and 11 hours and about 231 kms for the last day. The headwind had definitely taken a bit out of me at the end but throughout the 3,000kms I felt strong and healthy for the most part. A few mechanical issues and a longer than planned stopover in Queenstown were the only things that disrupted my flow. Delighted to have completed another adventure. I stayed at Frasers that night , had a good catch up , shower and food and up early for a re arranged flight to Christchurch.
17TH February Depart Cape Reinga at 7am 27th February Arrive Bluff 6.55pm
Overall I really enjoyed my ride down the country . I was privileged to be part of this Brevet with hundreds of others taking part. I do not know of any other bikepacking event worldwide that has gained such interest . Talking with small business owners on course , I was told that many people are riding the route or parts of it at times other that the TA. This is really cool. A huge amount of gratitude must go to the Kennett Brothers for their tireless efforts in creating this route and keeping it updated .
Anyone thinking about riding this course should definitely do it. If you can make the time you will not regret it. Hundreds and hundreds of magical stories are created by taking on challenges like this. Adventures like this revive your spirit and revitalise your soul, and then you will want to continued exploring . Its very likely that I will once again line up to ride the Land of The Long White Cloud in the years to come . In the meantime i ve got lots of other adventures to keep me interested.
More Gratitude and love to my supporting wife , Mary jo. Our business and my sponsor Vibrant Living Retreat , and the team Chara and Josefiina who all looked after everything brilliantly as I followed my joy riding my Bicycle over long distances through breathtaking vistas. Thank You, Thank You , Thank You !!!
A little side story to all this was that I was on a mission to get to Bluff between 10/11 days as I had tickets to a concert in Auckland on the 28 and 29th Feb. TOOL , my favourite band for many years were playing two shows , and there was no way I was going to miss this . I met Mary Jo in Christchurch , we flew to Auckland and had an awesome weekend. TOOL were simply incredible in case you were curious ?
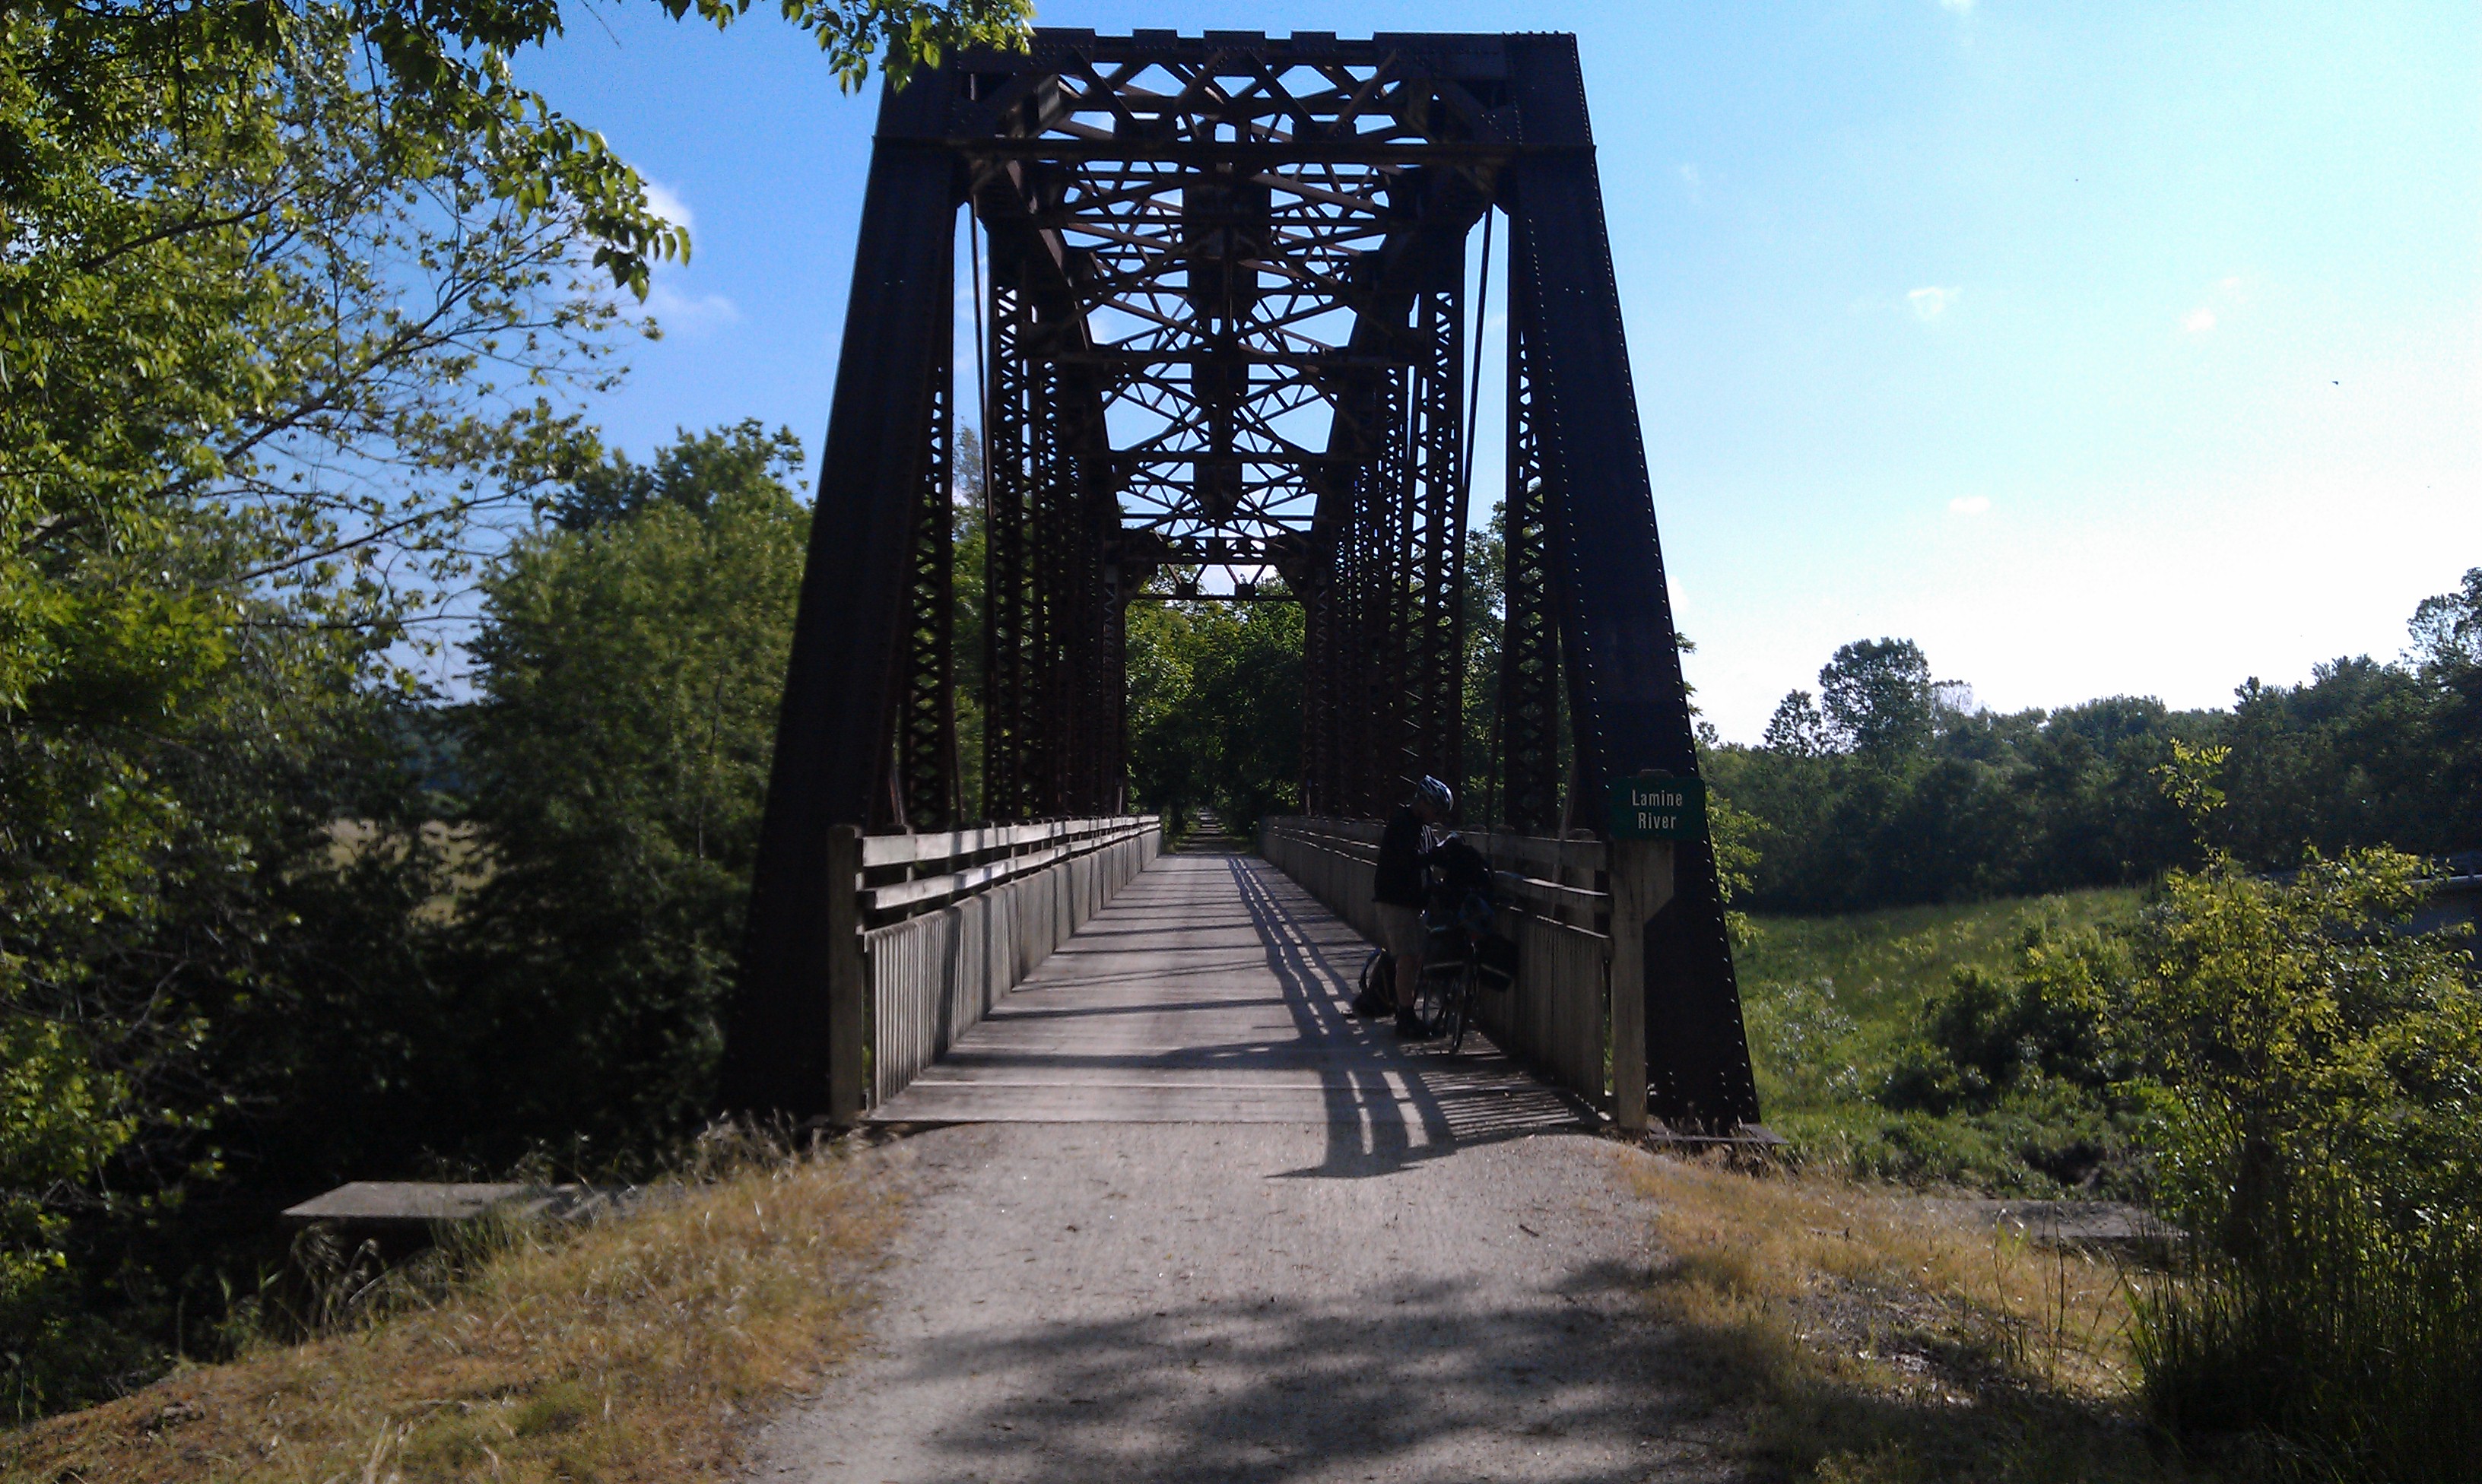
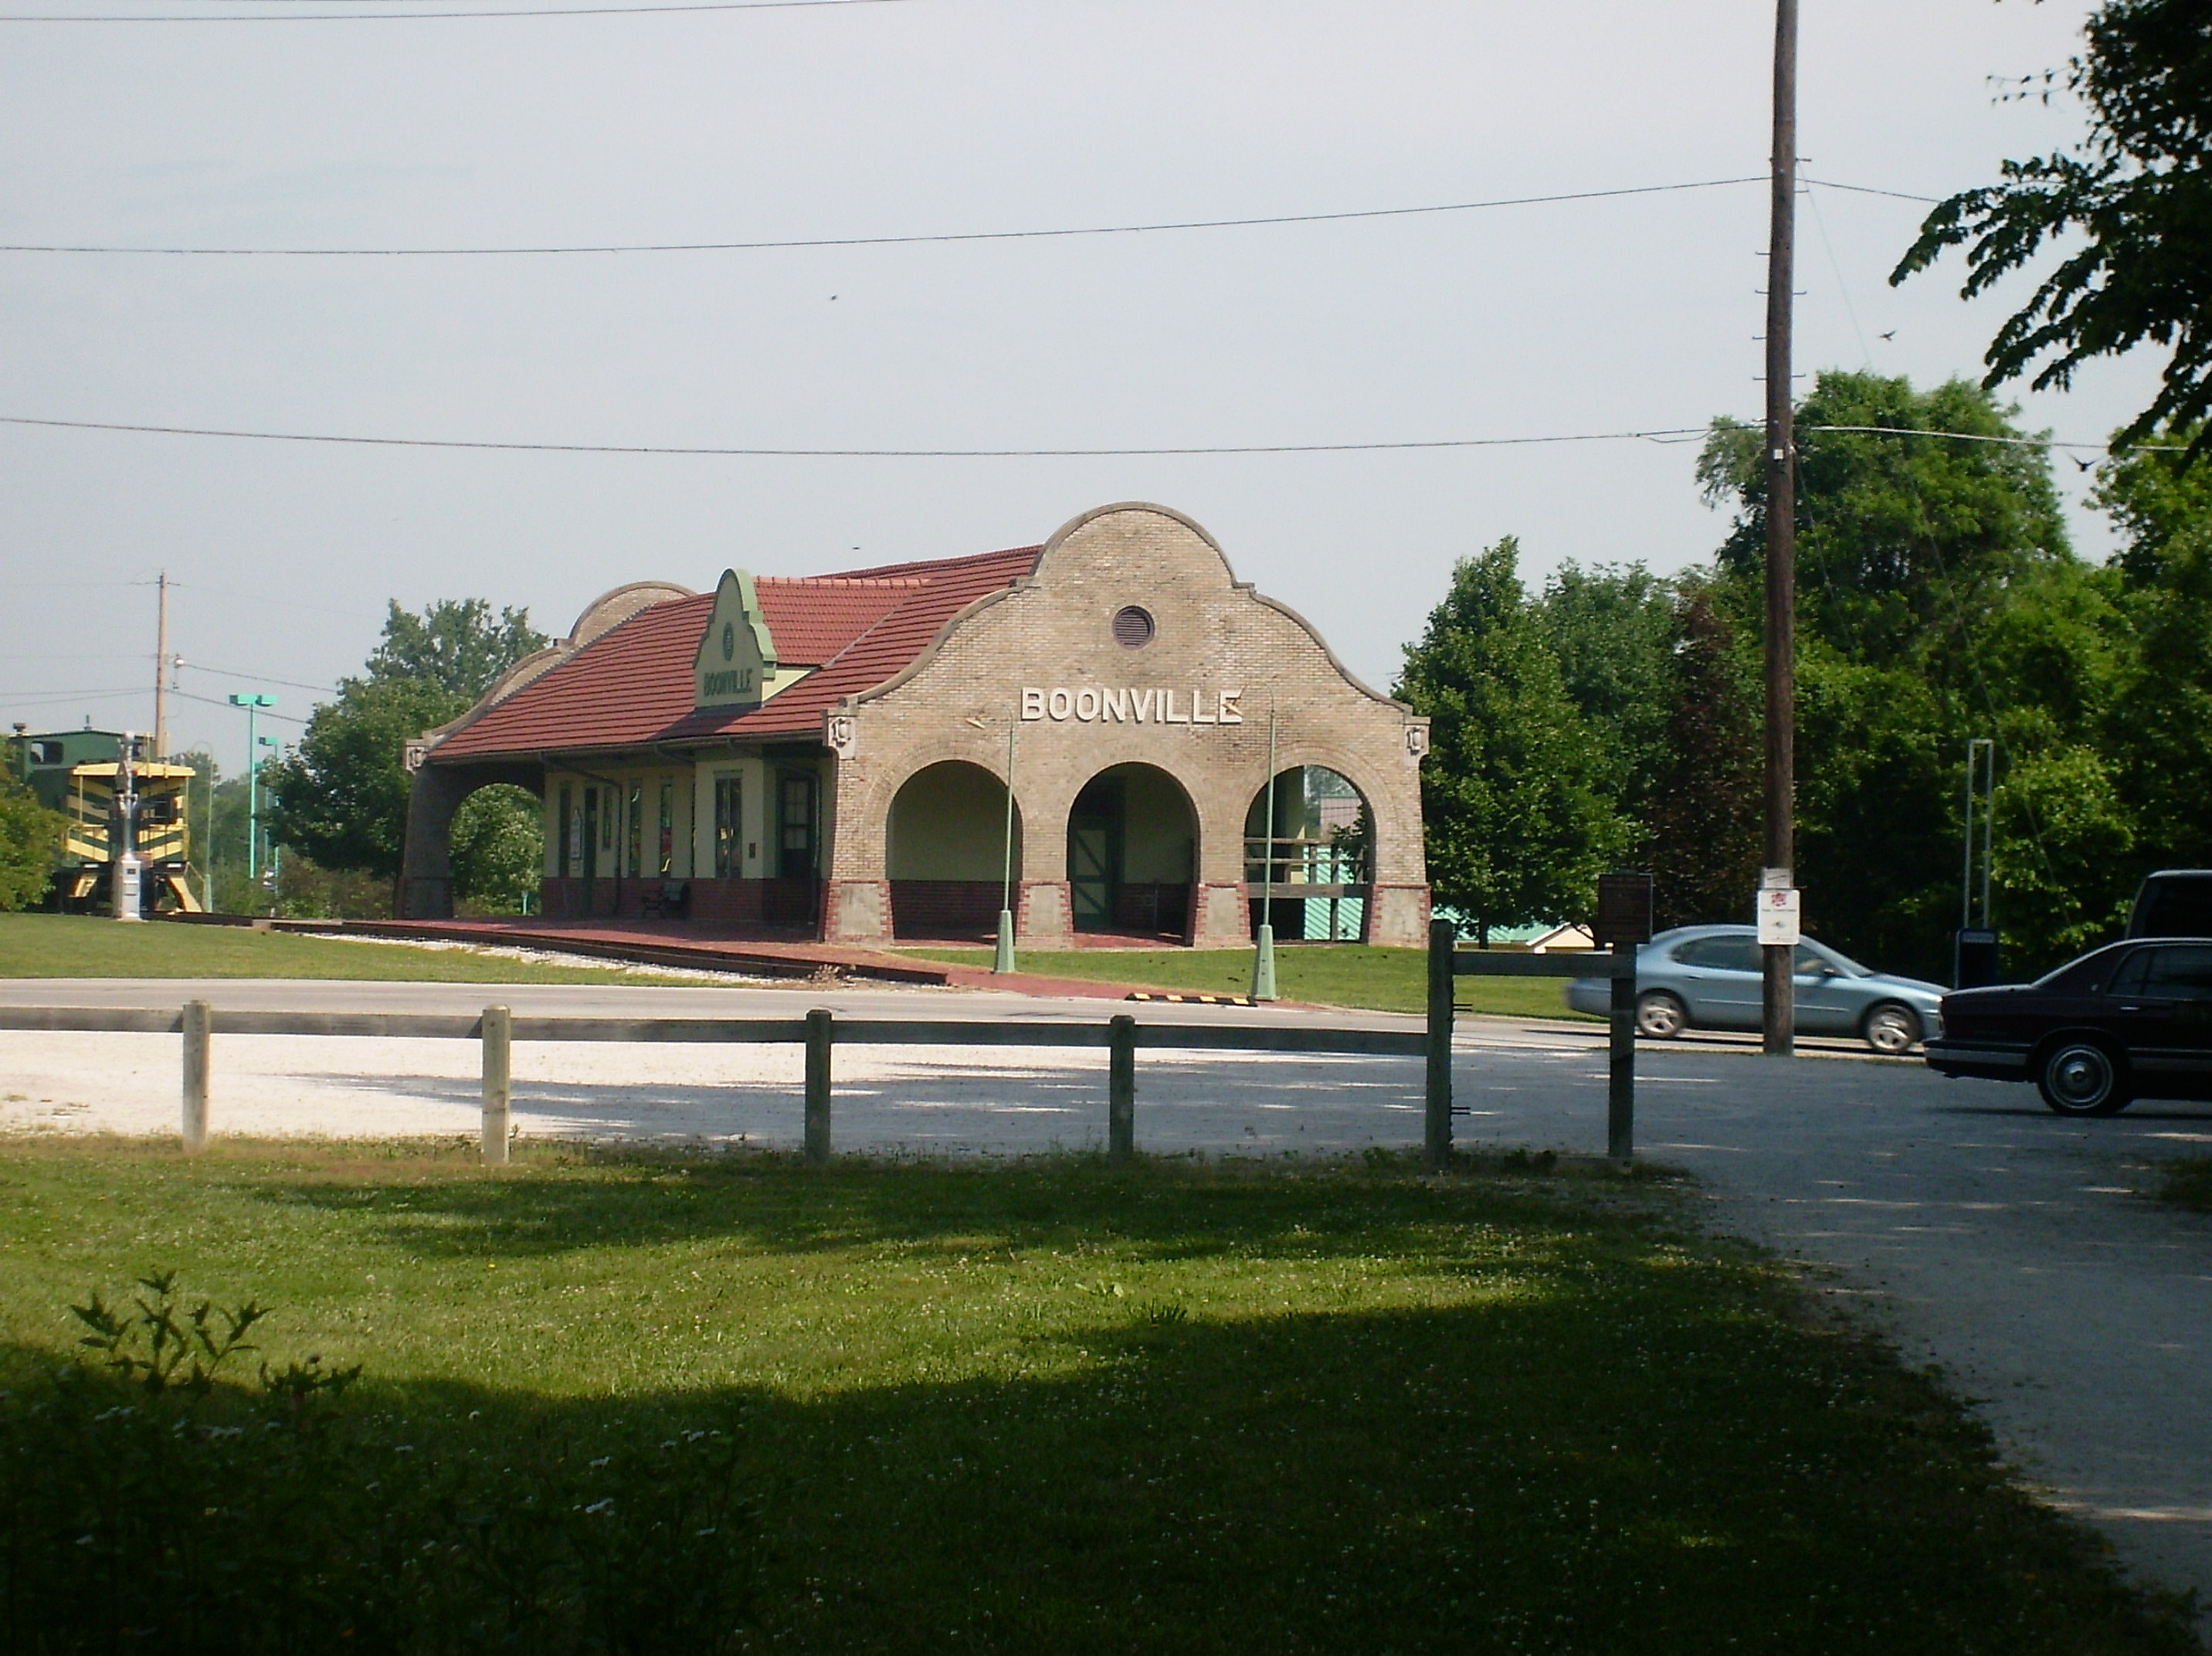
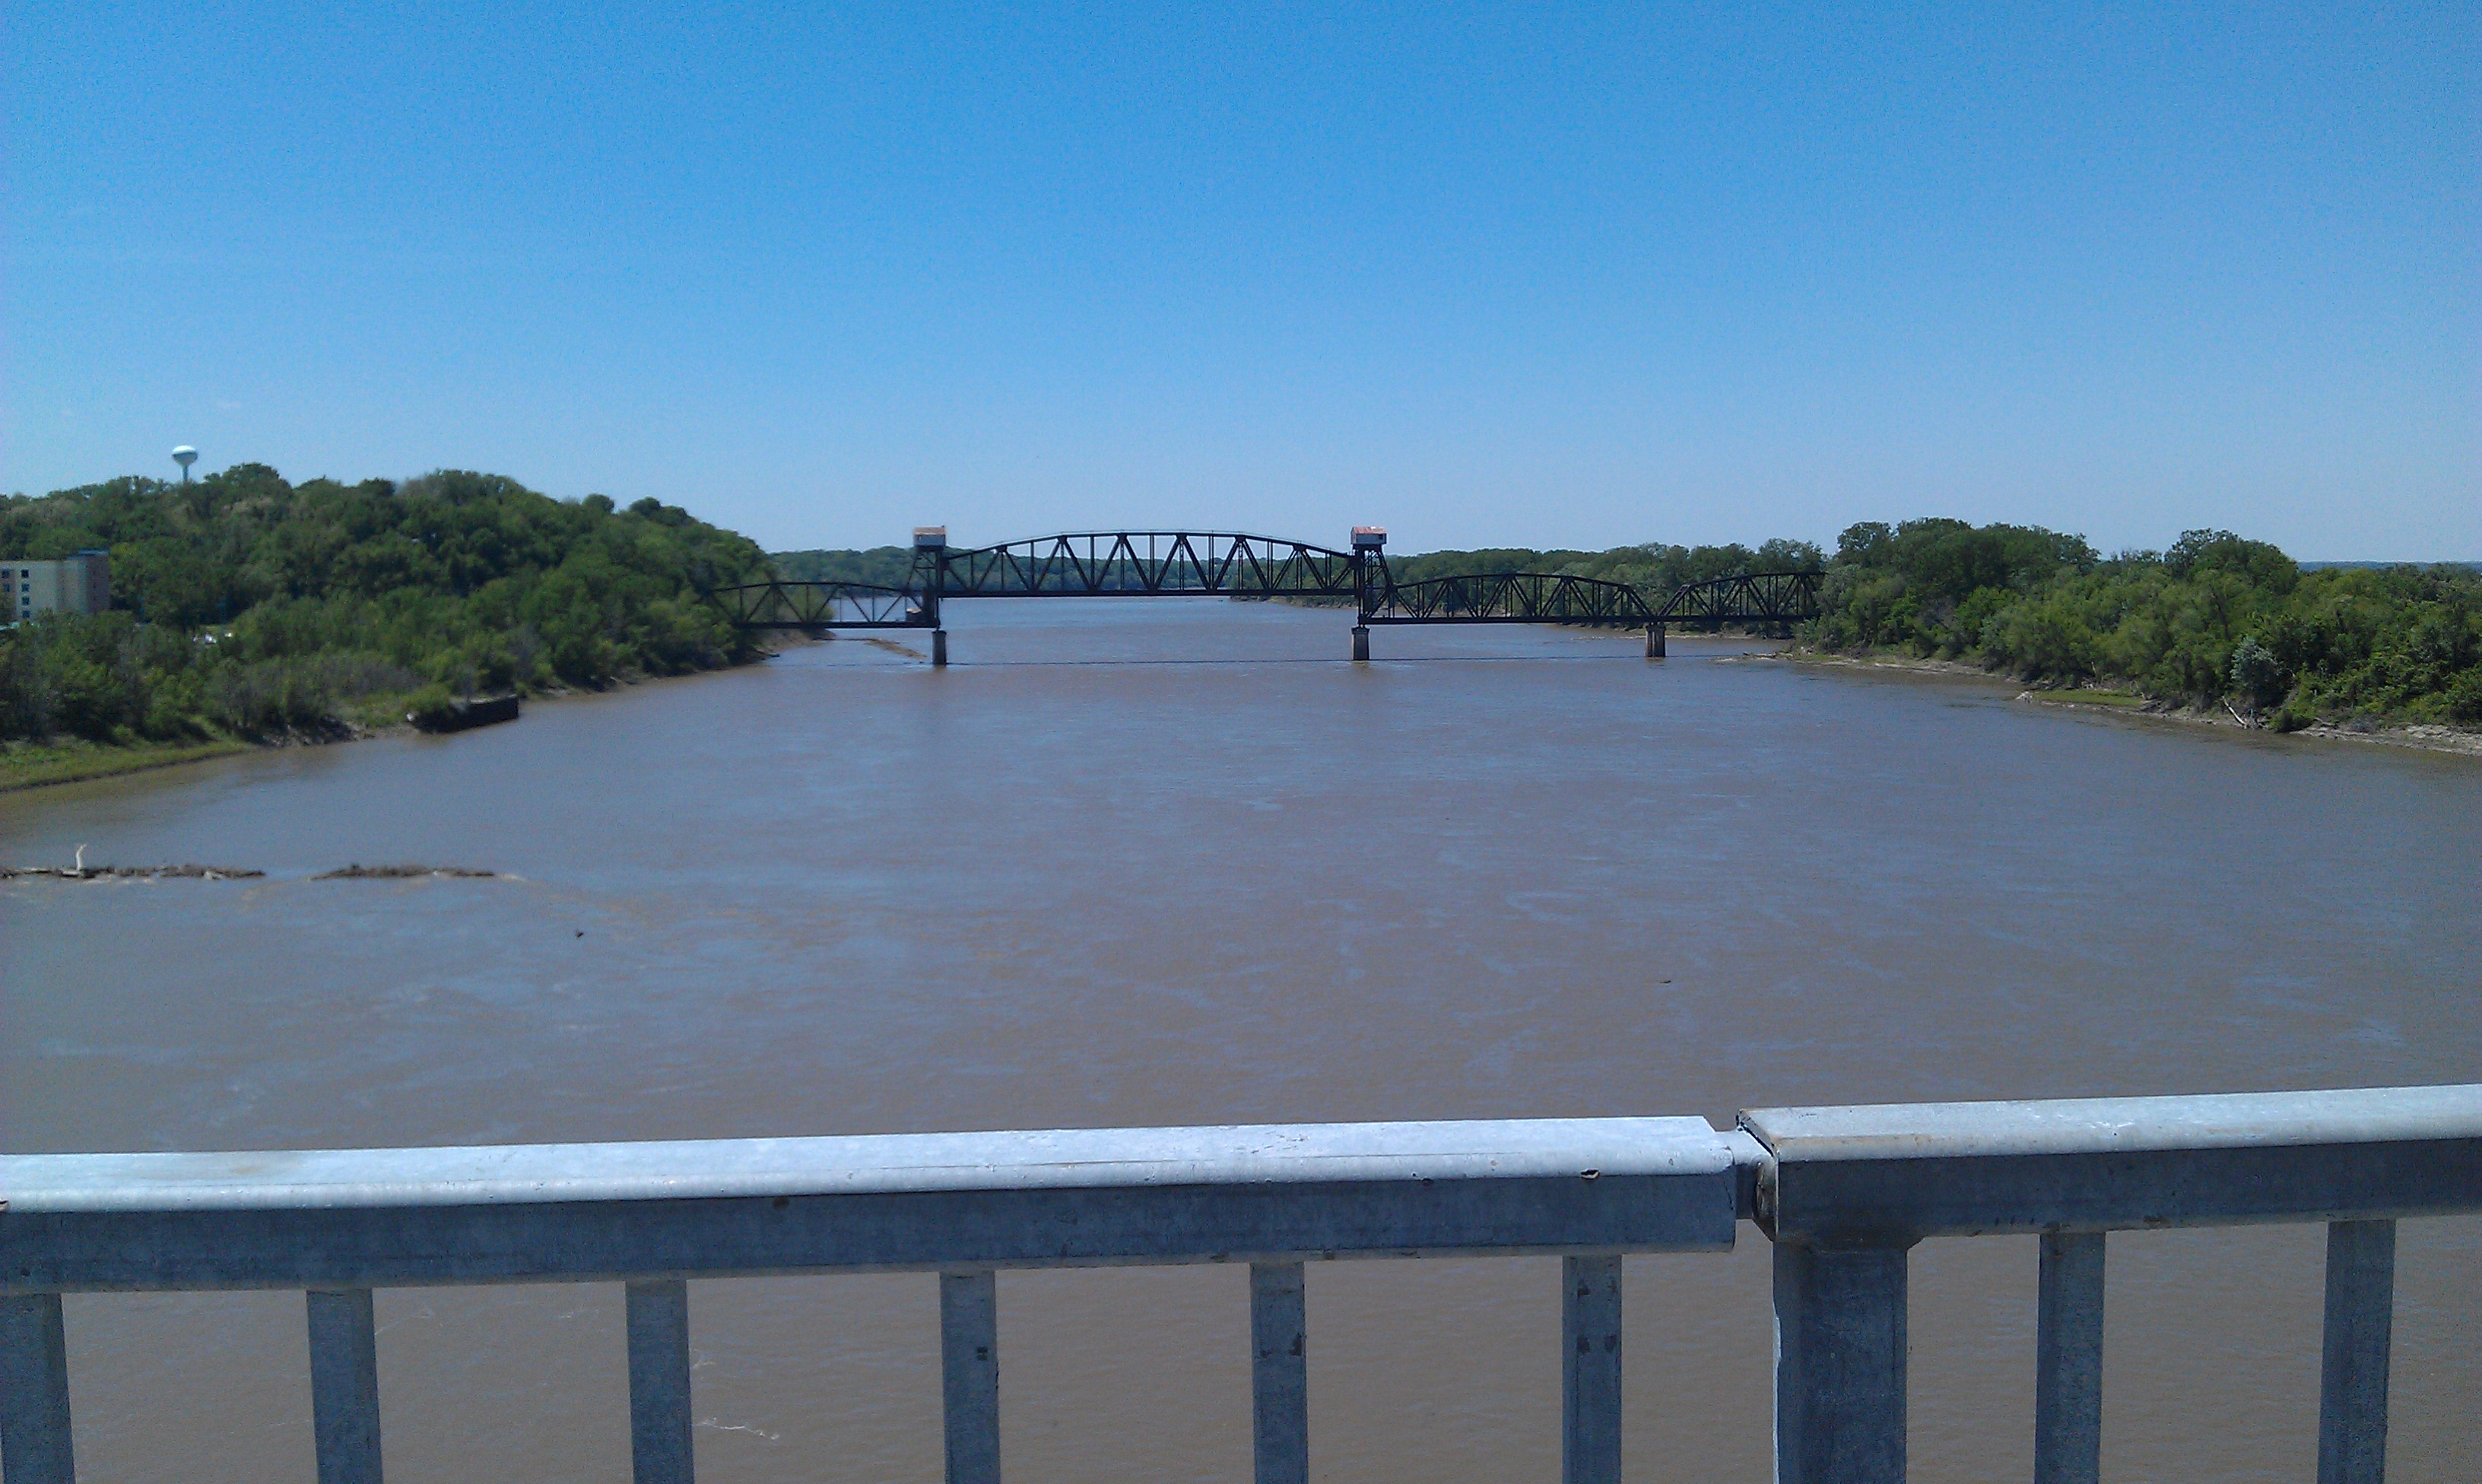
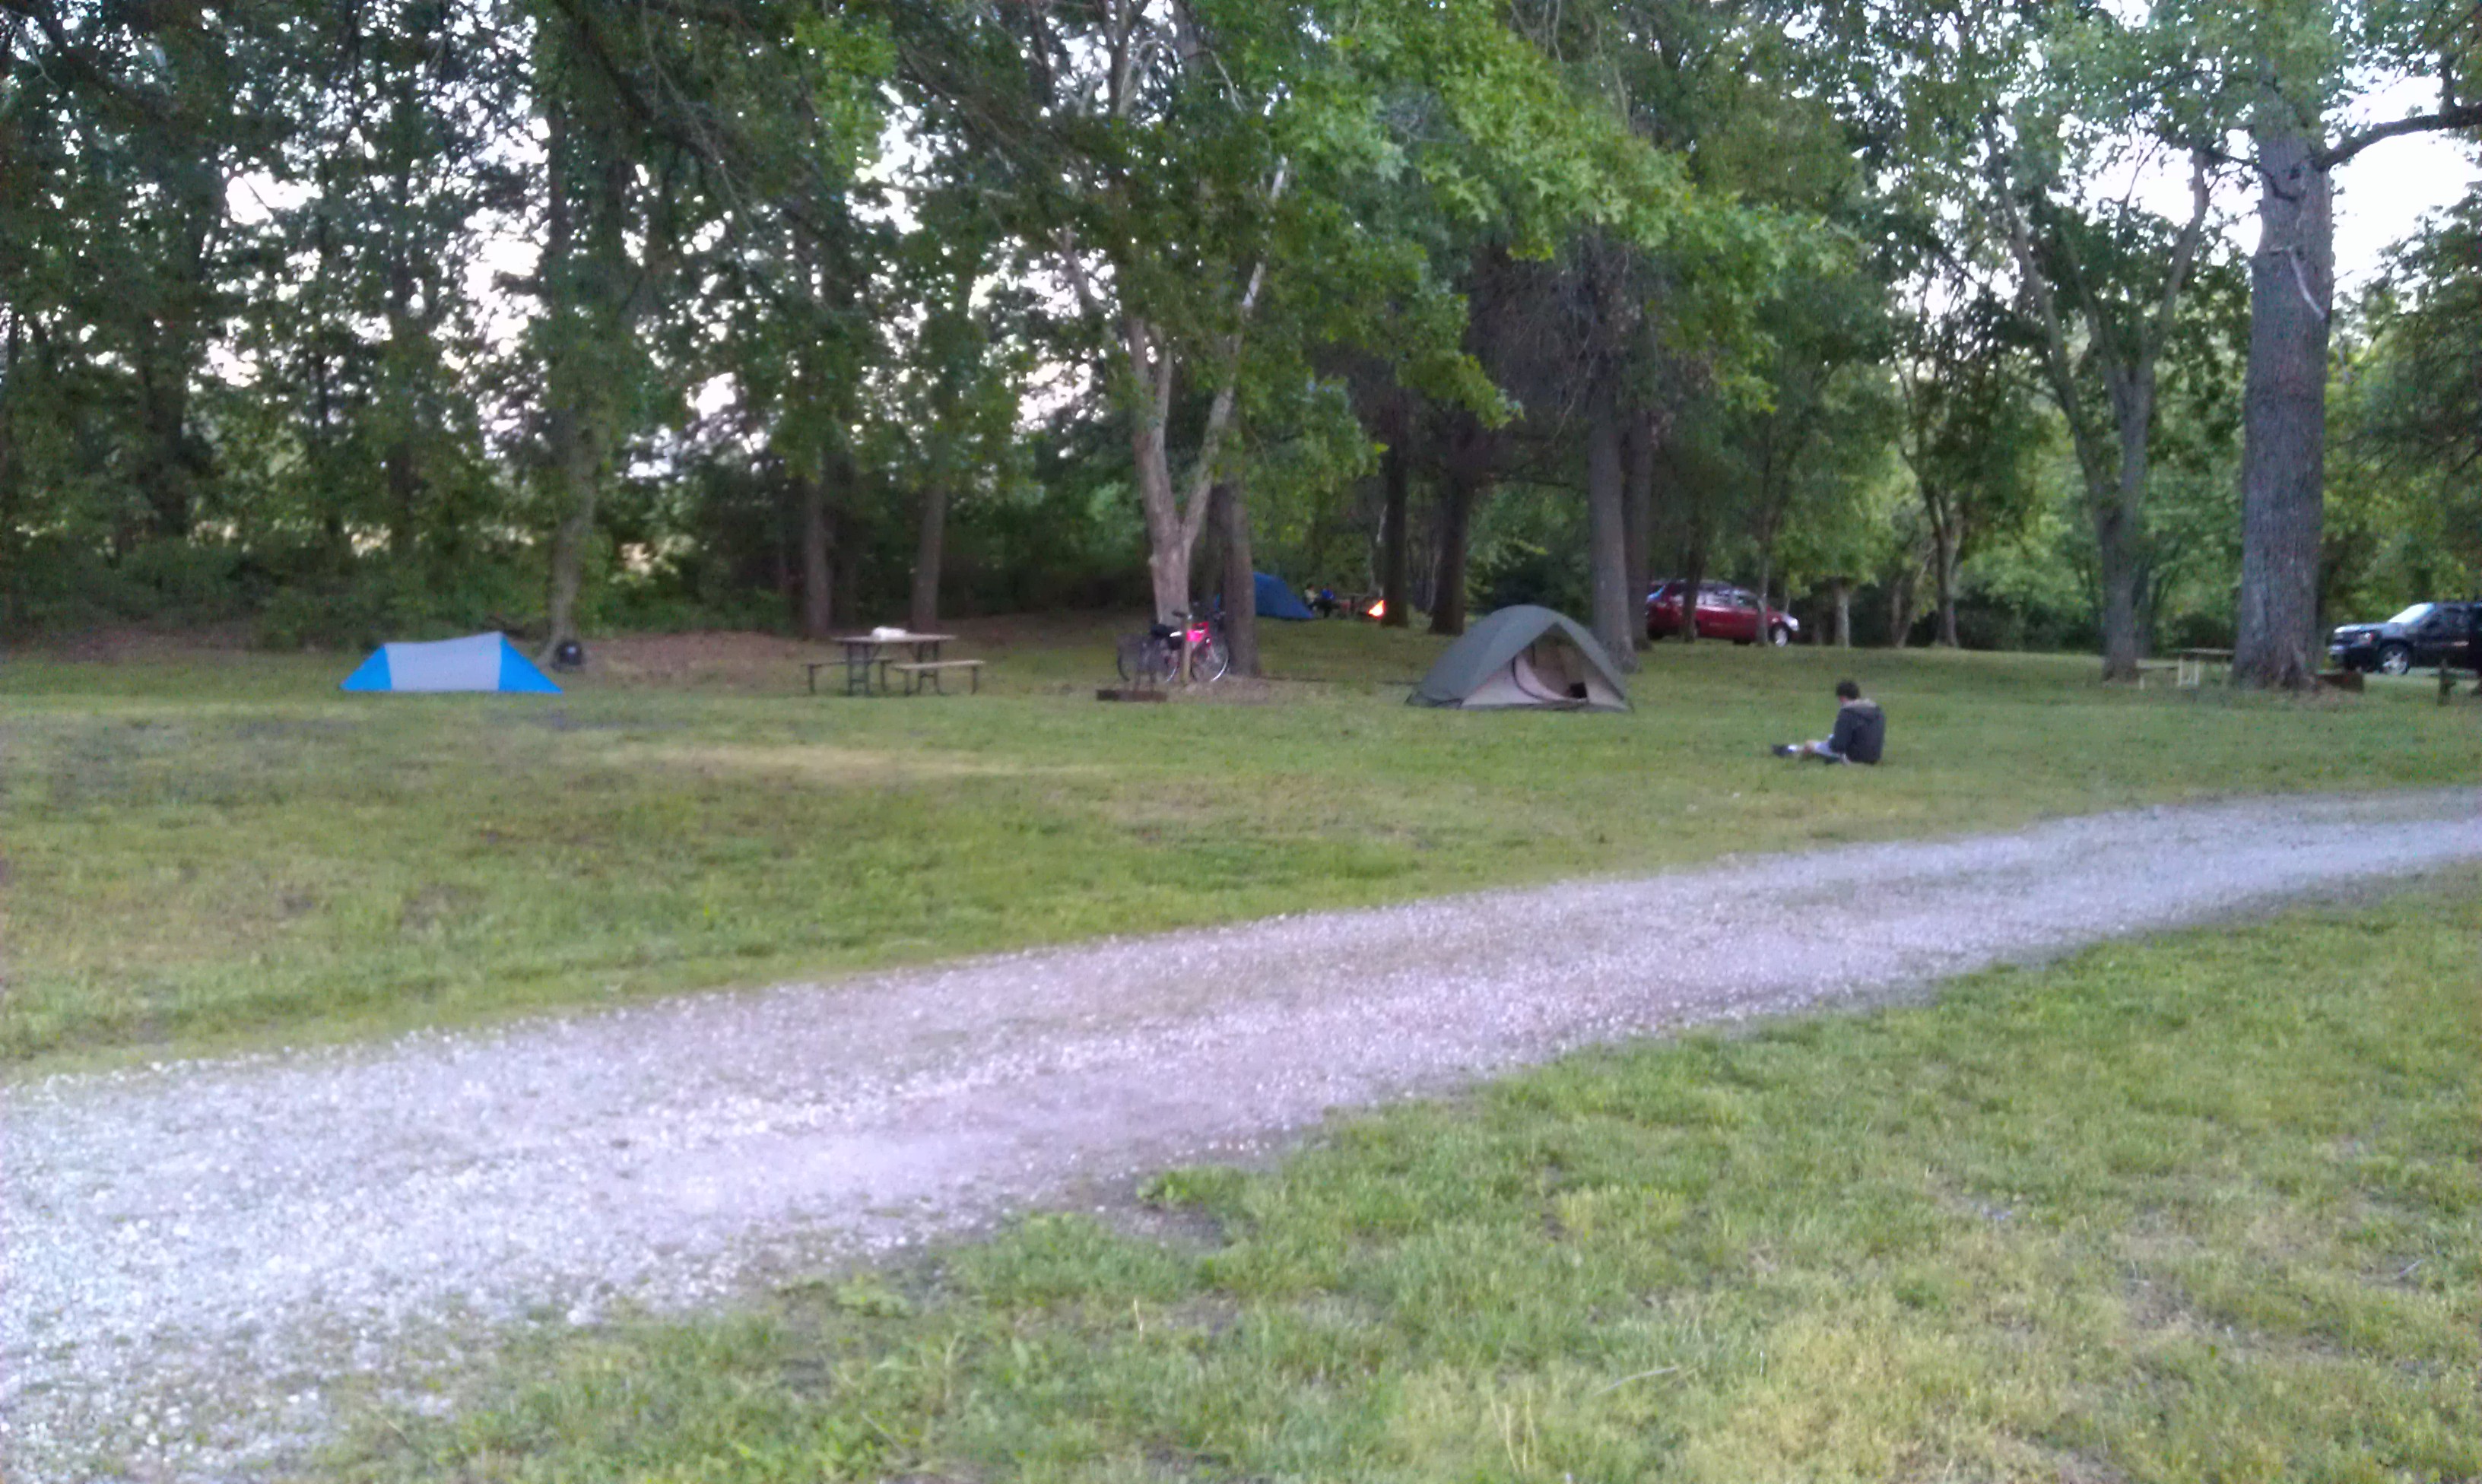
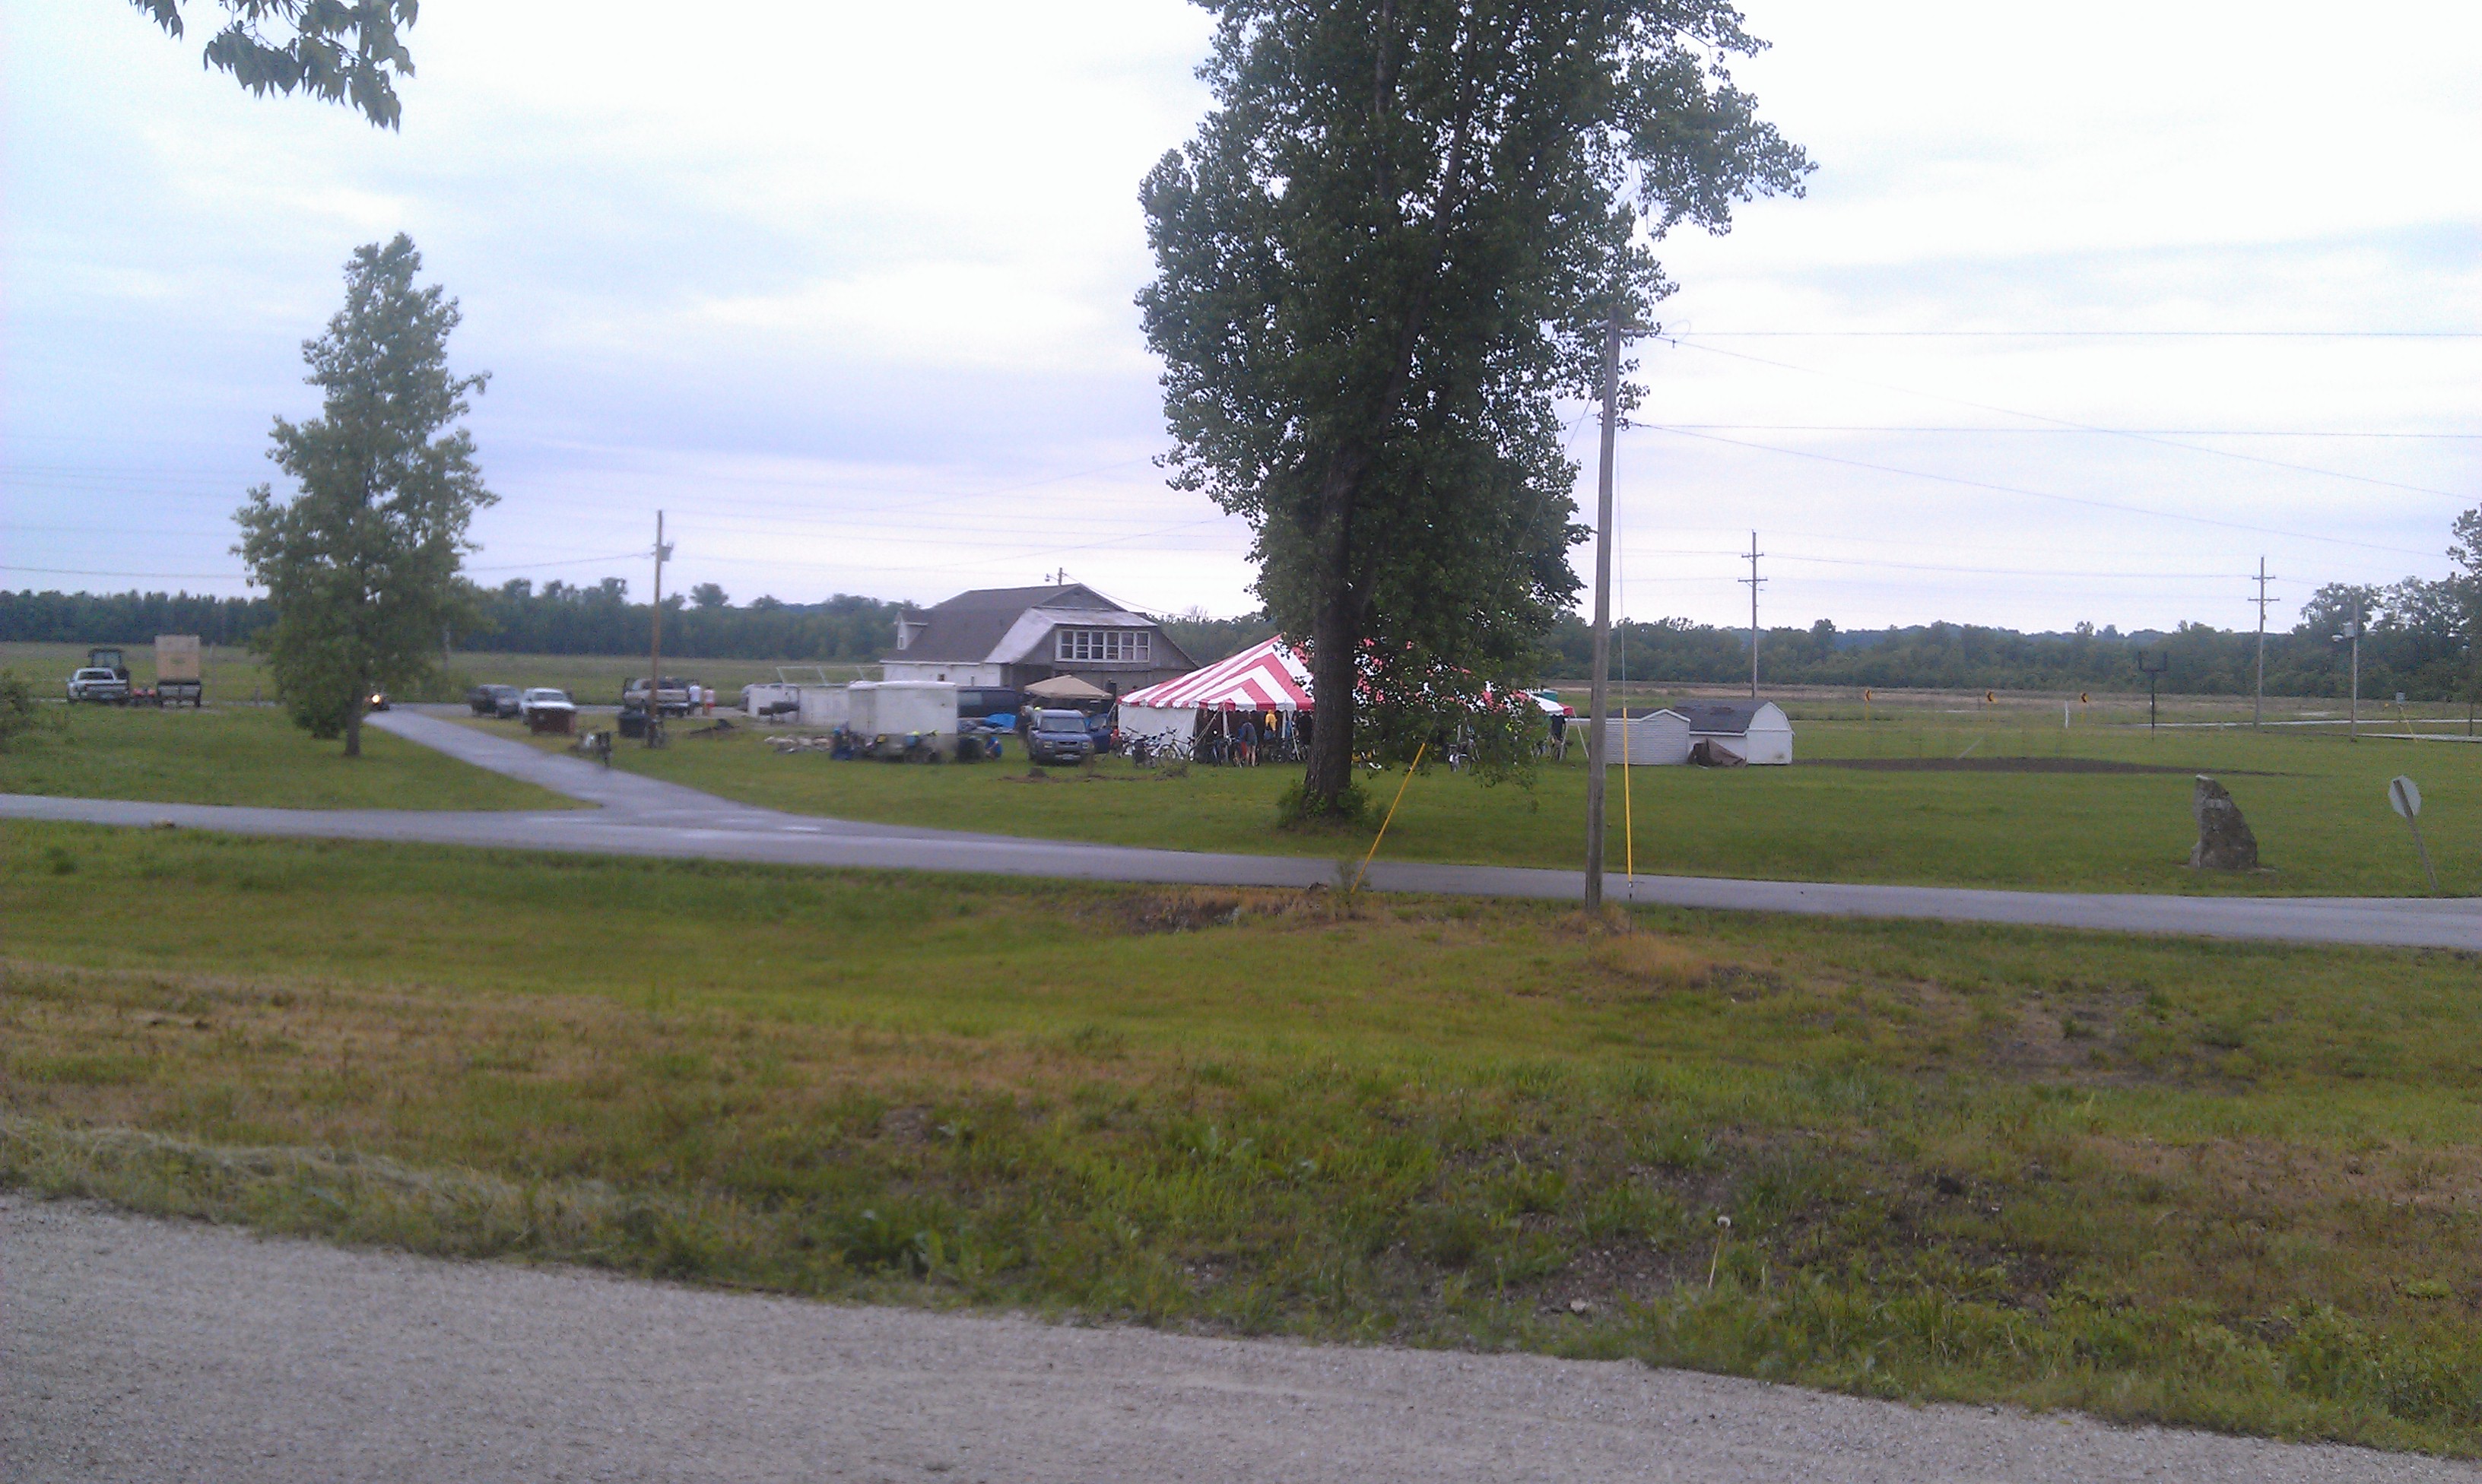
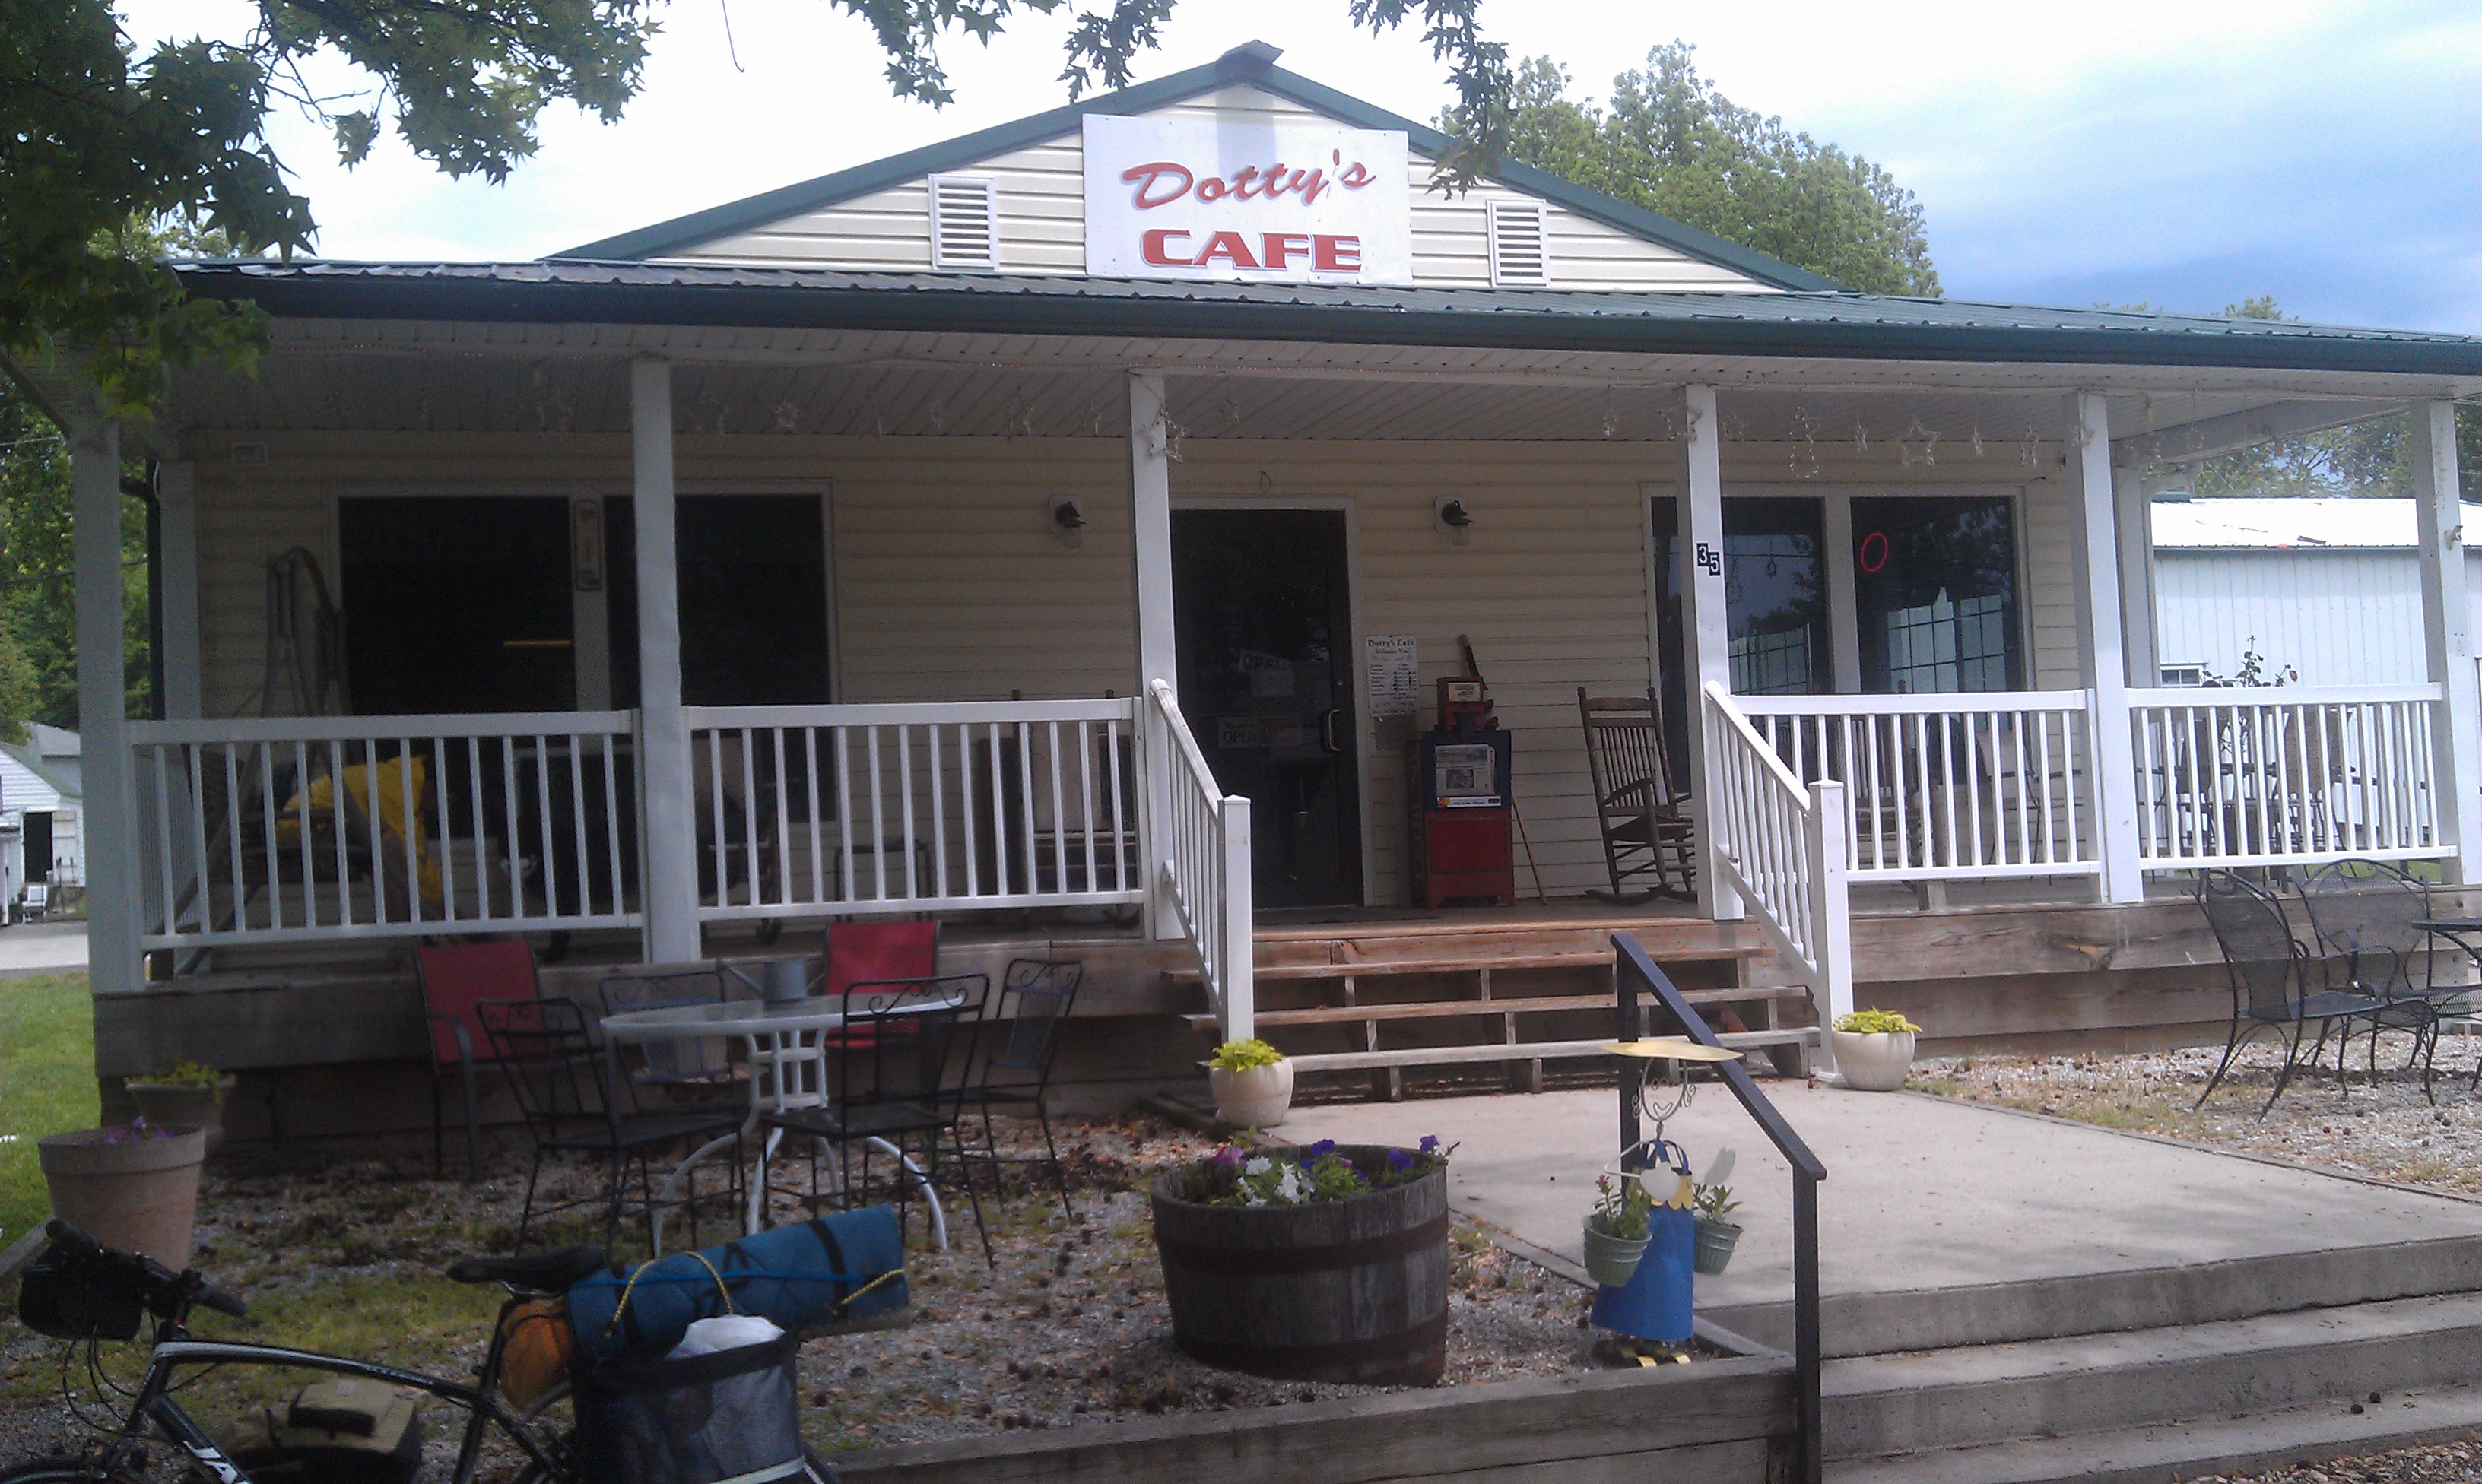
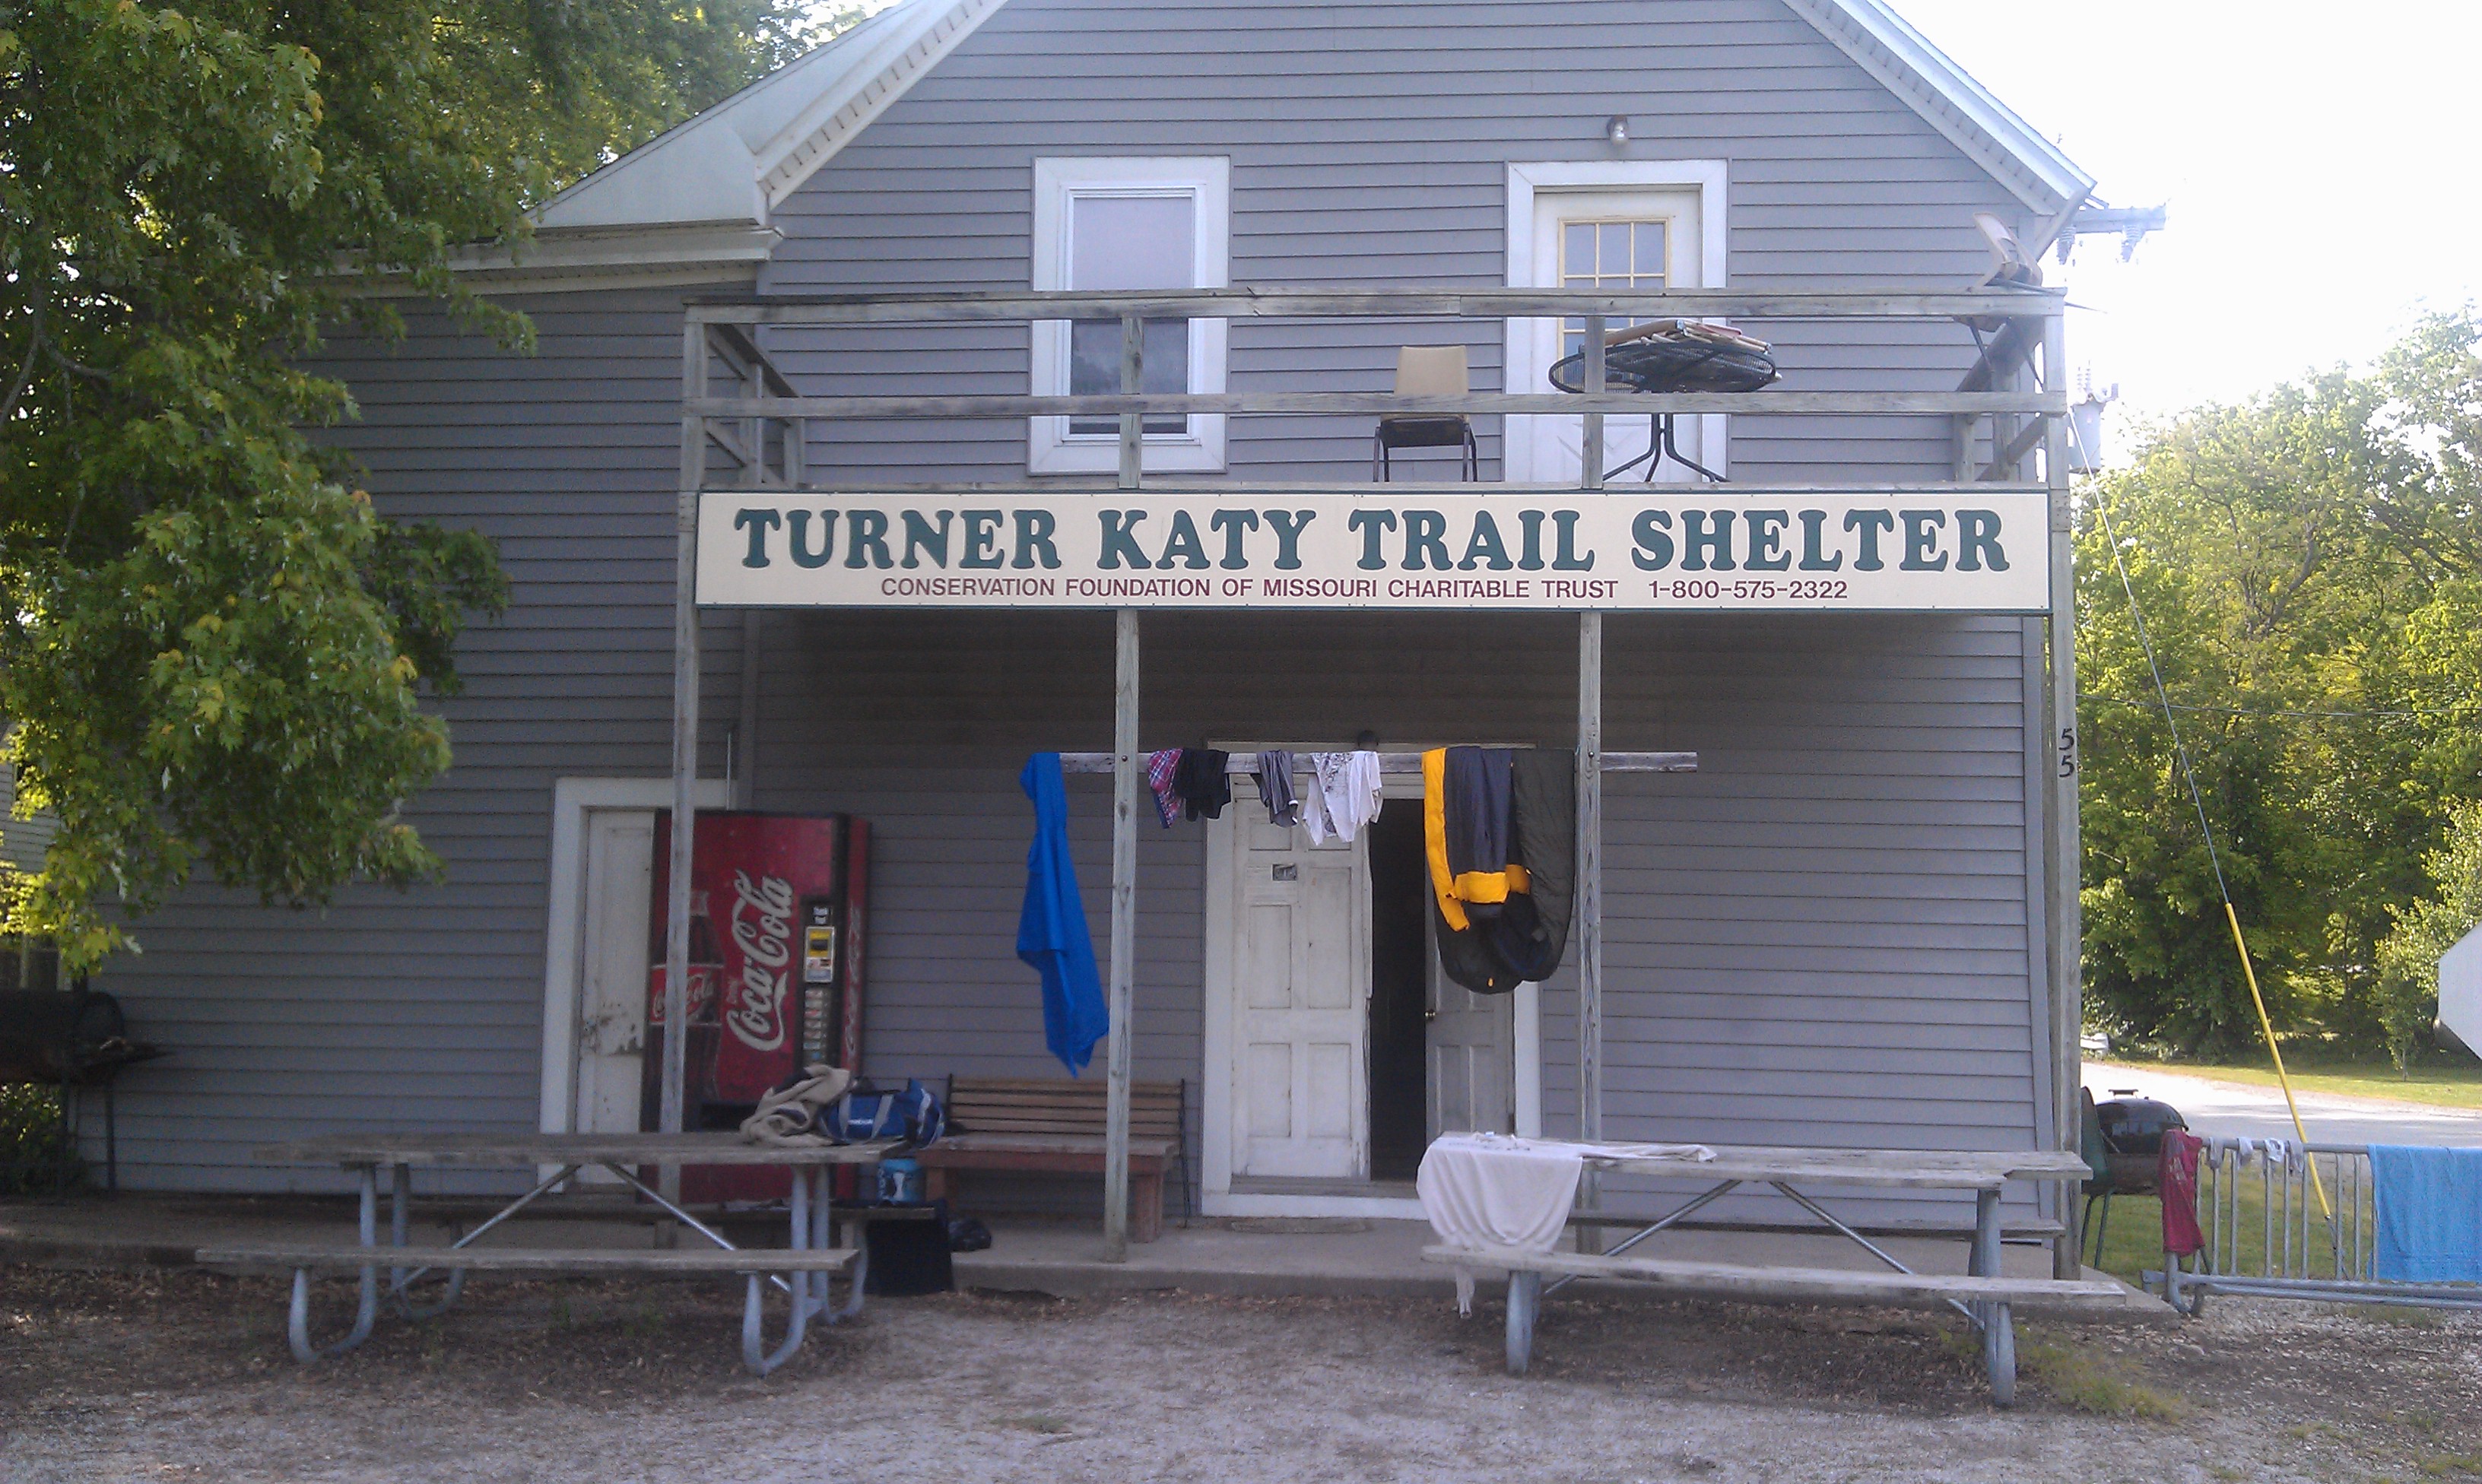
I bikepacked the Katy Trail in Missouri in September 2019.
The Katy Trail (for the most part) travels along the Missouri River in a east/west direction, following the old MKT (Missouri Kansas Texas) railroad. The trail is a “rails-to-trails” trail, built on the old abandoned railroad bed. The Katy Trail is a Missouri State Park, and is run and maintained by the Parks Department of the State of Missouri.
I rode with a friend, Bobby Adams. This was his first bikepacking trip, so we rode at an easier pace than I might have ridden by myself. We rode the trail from from east to west, beginning on in St Louis, MO. I rode 353 miles (which included extra mileage for many trail detours and extra mileage for riding off the trail to get to local restaurants, grocery stores, and other places of interest located in towns along the trail).
Generally, the trail is an easy, well-marked, and well-maintained trail (a great introductory trail for first time bikepackers). Trees line many parts of the trail, providing a significant amount of shade for riders. As the trail is an old rail line, it is very level and does not have any difficult inclines or declines. There are many small towns along the Katy Trail that allow for resupply (food and water). It is possible to ride the trail and and to stay in hotels and/or bed-and-breakfast type inns along the way. For our trip, we bikepacked and camped in tents at various campgrounds and camping points along the trail.
This is a story about an adventure my brother John and I had over 52 years ago in 1966. We peddled our bicycles, unsupported, across the United States from Mountain View, California, to Spencer, New York, at the young ages of 15 and 17. It was, up until that time, the greatest and most difficult challenge I had ever set out to do. I can’t speak for John in this narrative but he and I have been in communication about this story. Just talking about those past memories of our journey together has brought up more and more visions, flashbacks and questions about that early bike packing adventure. I call it bike packing now, but in 1966 it would have been as foreign a concept as handheld computers. After re-creating our route on a Google Earth path line, the statistics are impressive: 2,971 total miles, 102,725 feet of vertical gain traveling 26 riding days for an average of 114 miles per day. Ah, the exuberance and ambition of youth!
We lived in the San Francisco Bay Area since 1958 when our parents moved us to California in that great migration that occurred from east to west during the fifties. In 1966, John and I were attending Awalt High School in Mountain View. Between paper routes and the practical aspects of getting around, my bicycle, for me, was literally a vehicle offering freedom and adventure for a young teenager who could not yet drive. Day rides on weekends into the foothills of the coast range and beyond were common. It wasn’t until a summer trip to upstate New York in 1964 that John and I started talking seriously about a cross country bicycle trip.
There were some obvious challenges that presented themselves, and as determined teenagers we proceeded to address each one head on. First, we needed better bicycles. Those old worn Schwinn two speed bikes we used to get around on were not going to work. We also needed a plan including a route, maps, supplies and gear. We were going to need money which we would have to earn to cover our living expenses, and a trip of this magnitude would require training with lots of “saddle time” in order to be in shape. If that wasn’t enough, the hardest challenge of all still faced us: getting permission from our parents to go. I think the first thing that clued our mom and dad that we were serious about this trip was when travel pamphlets and maps began to arrive from various states in our mailbox. The excitement the maps generated was contagious as we laid them out on our kitchen table, studying various routes, the roads, high mountain passes and towns along the way, the trip became real in my mind. If only we had had Google Earth back then!
John and I purchased our new Schwinn Continental 10 speed bikes together. After a little internet research I have discovered that we paid around $82.00 apiece for them; not a small sum of money in 1966. Each bike was equipped with an odometer that mounted down by the front hub while the distance was “clicked” off by a spoke mounted knob on every rotation. They would continually give us problems maintaining an accurate record of our mileage. A flat rack was mounted over the 27” rear wheel, while twin aluminum water containers graced the handlebars. Those bottles had a large cork cap which we were always afraid of loosing somewhere. Little did we know that we would need to carry at least twice as much water when crossing the great American west.
At my now “young” age of 67, I am still an avid cyclist, enjoying both road and mountain biking while living in Western Colorado. For all of my rides, I would feel naked heading out on any trip without my helmet. In 1966, bicycle helmets were not even considered. Maybe they were available, but I sure can’t remember ever seeing anyone wear one.The only head gear we wore was a soft wool cap which protected our head from the sun, and no sunglasses did we wear. I’ve done my share of bike packing over the years and we still do our annual supported group ride in the fall. We take great effort to ensure our comfort with good food and adequate provisions for the elements. When I look back at our meager camping set up with no tent, flannel sleeping bags, light cotton clothing and a limited water supply, I wonder at our incredible good luck with the weather and our naive attitude that everything will work out just fine. Apparently our personal comfort and safety were not overriding concerns. We must have thought we were invincible. What were my parents thinking?
In 1966 teenagers earned money in various ways. Seasonally, there were cherries, apricots and plums to be picked in the surrounding orchards. We also had supportive neighbors who paid us to wash and sometimes wax their cars. Folding daily newspapers for bicycle delivery was a common sight in our garage. With the money we saved, we budgeted $7.00 per day for food and incidentals – for the two of us. The actual amount was $7.70.
Our training rides became more challenging and longer as our departure date neared. Our parents owned a summer retreat at Lake Berryessa, a 140 mile journey to the north in Napa County. The ride to the lake was not an easy route and took most of a long day with sections of heavy traffic, back country roads and lots of hills. The Delta area was especially treacherous with a high, narrow and heavily trafficked bridge at Antioch and a long stretch of busy highway beyond Rio Vista, with no shoulder to speak of. I especially enjoyed riding those flat levy roads, however, and took the other hazards in stride. Our only overnight training ride was to visit family friends across the Central Valley in Oakdale, a small community at the edge of the foothills of the Sierra’s. This gave us the opportunity to ride back to back 100 mile days while climbing Altamont Pass (768’), east of Livermore, both days. In all, we probably logged more than 1,000 miles training before heading on our long ride.
My parents raised four sons, with John and I falling in the center between Jim, the eldest and Tom the youngest. John and I, being only two years apart, were the closest. Until he went off to college in Oregon, John and I were always together just “messing around” at things that boys do. It was no surprise that together we hatched this wild idea about a cross country bike ride to visit our grandparents near Ithaca, New York. I still have no recollection of my parents saying, “Yes boys, you have our permission to go on this potentially fraught with danger adventure.” There was a time when I realized that we had our parents blessing however, when Mom sewed up two canvas bags to match our sleeping bags for storage of all our personal items and clothing. These we would lash down with a chord next to our thin flannel sleeping bags over the rear wheel and a plastic tarp to cover it all. That was it. We knew we had our green light to go as soon as the school year was over in June.
Our parents did issue three stipulations however to gain their permission for the trip. First, we were to stay in a town each night, and second, we were to check in with the local police when we arrived. This turned out to be a smart move as we could be found within one days’ ride from the last police station we checked in with. The third, we were to call them every Tuesday and Saturday nights. Most of the time this arrangement worked just fine, with the police offering accommodations in the town park or even in their jail cells.
Luckily, John kept a journal of each days’ activities including our mileage, route and road conditions, towns which we passed through and any note worthy happenings of the day. This journal has been invaluable in order to accurately describe the route which we rode, the towns we stopped in each night and even our moods, both high and low, that would inevidably arise. After 52 years, the memory gets short.
Friday, June 17th – The Big Day Arrives
There was a routine which developed right from the first day we left. Each morning we woke early and were usually on the road by 5:30 am. We left Mountain View the morning of June 17, the day after school let out for the summer. The entire family was there to see us off. We wouldn’t see them for over two weeks as they would all be driving out with a planned rendezvous near the Mississippi River just in case we were ready to call it quits. While I am not superstitious, the two flat tires I got before leaving the city limits of Mountain View did have me rattled. A joint decision was made NOT to go back but to deal with the situation at hand. Flat tires were to plague us often on this journey. In 1966, freeways were still primarily an urban experience while the Interstate Highway system was just being built along the rural highways. By then, we were accustomed to heavily trafficked roads with limited shoulders. The big truck rigs that cyclists experience today just didn’t exist. Most of the time, we could avoid the busier roads by altering our course to smaller back roads. Sometimes, it was just not possible.
Our first night was spent in Jackson, California, on Highway 88 in the western foothills of the Sierra Nevada mountains after riding 132 miles. It was the first of many small town parks where we bedded down for the night after a dinner at the local A&W . We would follow 88 over the Sierras via Carson Pass (8,652’) the next day, dropping off the steep eastern side of the mountains into Nevada. It was also our biggest climbing day of the entire trip with over 10,500 feet of vertical gain. Sleeping accommodations were mostly unplanned, such as our night in Carson City, Nevada, which was spent on the ground in a trailer court just east of the capital.
If you’ve never driven or ridden Highway 50 across Nevada – “The Loneliest Road in America”, – you’re missing out on one of America’s premier traveling adventures. Nevada has its own charm with miles and miles of basin and range, sage brush and grand vistas. In 1966 it was not so different as it is today, yet on a bicycle, those endless stretches of straight roads across the basins and the BIG climbs over the ranges, one after another took their toll on us. To this day, Highway 50 across Nevada and Utah remain one of my favorite drives. I hope to someday cross Nevada on my mountain bike on some of the many dirt roads that cross the basin and range. In 1966 sections of Highway 50 were being built over New Pass Summit west of Austin, so John and I rode the original highway through Eastgate, one of the original pony express way stations, and over steep and windy Carroll Summit. Having arrived in Austin early, we decided to head for what we thought was a small town on the east side of Austin and Scott Summits.
As it turned out however, not only did we not end up in town but we missed our first planned telephone call home due to an out of order phone. Needless to say, our parents were concerned. They notified the Nevada State police and since we were a whole day ahead of schedule, we were not where they though we should have been. Unknown to us, there was a police search underway looking for us around Lake Tahoe. The next day, we woke up to two flat tires after spending the night in the back of a pickup truck at an isolated motel east of Scott Summit. That day we accepted a ride with a trucker hauling, of all things, California potatoes to Idaho. In Eureka, Nevada, we were forced to get two “hot patches” placed on our tubes ( Total cost: “two bits”) and ride our bikes on to Ely – 85 miles away. I’ll never forget the “thump, thump thump” of the wheel with those tube distorting patches. After finally calling home, getting our tires repaired and getting a swim in at the city pool, we were feeling pretty good about our next day of riding. We were also spending our first night behind bars in the White Pine County jail.
The jailers in Ely woke us up early and got us on our way with hot chocolate and donuts. After arriving at the junction with Baker, close to the Utah border, we made a decision to go on to Delta, Utah, 95 miles away. Being young in 1966 had some advantages. People were very sympathetic to our mission and offered small bits of help along the entire trip. Water, sodas and snacks were freely offered and accepted. This day the help we received meant our very survival, as we were not packing nearly enough water for the desolate stretch between Baker and Delta. That was to be our longest day of riding both time and distance wise of the entire trip, a total of 155 miles with the last thirty miles fighting a head wind over very flat and desolate terrain. We splurged for a motel and a well deserved shower that night.
After leaving Delta the next morning (June 23rd), we again underestimated the remoteness and isolation of the small “towns” in the west. We should have been packing much more food and water than we were and this day caught us riding for hours on empty stomachs, over 50 miles between Delta and Eureka, Utah. After Eureka however, the highway drops towards Utah Lake and Provo. There we experienced the first urban traffic since the Bay Area. As we approached Provo, all we could see was a massive wall of mountains. Eventually, a narrow canyon became visible which the highway follows. The climb up through Provo Canyon towards Heber is a beautiful ride and that night found us again in a small two cell jail after a ride of 124 miles. Heber is a bit like Mayberry because when we woke the next morning, there was Otis, the town drunk, sleeping it off in the next cell.
The next day would bring us to the high point of our trip when we crossed over Bald Mountain Pass (10,674 ft.), dropping down into Evenston, Wyoming and connecting with Highway 30. There was still snow up on the pass in late June and we knew we were in for a chilly descent. After putting on every stitch of clothes we had, we were still cold as we coasted down the north side of the mountains, almost 30 miles of well deserved downhill riding. It was in Evenston, sleeping outside in the town park, where we realized how inadequate our sleeping bags were. The thin flannel bags just could not keep us warm, even with all our clothes on. Those nights in Wyoming were nights where our water bottles were freezing up.
When we planned our route, we made a decision to avoid the high passes of the Rocky Mountains of Colorado by staying north on the old Highway 30 and Interstate 80 in Wyoming which has no major passes. Interstate 80 was in various stages of completion our entire way across the state. We wound up riding through miles of construction but also on some newly completed freeway which we found extremely enjoyable to ride on since these were not yet open to traffic.
On June 26th, we passed over the Continental Divide before Sinclair. It was kind of anti-climatic as it’s just another hill with nothing so distinctive about it. Others before us had taken advantage of this fact as this was the major thoroughfare for the first transcontinental railroad and thousands of covered wagons heading west. Besides the cold nights, I remember the night in Sinclair, Wyoming being woken up by the park custodian informing us the sprinklers were about to come on and we needed to move. We wound up camped close (like 50 ft) to the Union Pacific main line. What a night! Trains were coming through at regular intervals and the ground would literally shake as it roared by. Why we didn’t get up and move I’ll never know.
By now our tires were showing the wear and tear of riding 100 plus miles each day. About 20 miles west of Laramie, my back tire blew out but luckily we were able to hitch a ride into town and purchase new back tires for both John and me – total bill was $11.70. We spent our last night in Wyoming at the high point between Laramie and Cheyenne called “Tree in the Rock” sandwiched between the east and west bound lanes of Interstate 80. I remember those picnic tables were mighty hard to sleep on. It was also our last cold night of the trip as we headed down onto the great plains, through Cheyenne and into Nebraska.
Following the Platte River eastward on Highway 30 in Nebraska took three days and it was a rather boring ride due to a never ending flat landscape each day. It got warm early in the day and stayed warm into the night. The worst part though was the wind that came directly at us starting by 10 o’clock each morning. These were our most frustrating days of riding, having to drop into our lower gears on flat ground just to make progress against the headwind. The days were a blur of monotonous riding. Sidney to North Platte- 117 miles. North Platte to Kearney – 98 miles. Kearney to Osceola- 91 miles. The miles clicked on by through the flat farm lands of Nebraska as we headed towards Omaha. The country finally began to change for the better after Wahoo, Nebraska. It was more rolling with trees and visually more interesting. July 2nd saw us in Omaha, and crossing the Missouri River into Iowa , riding on to Glenwood, 113 miles that day. By now our scheduled rendezvous with the family was set for July 5th in Burlington, Iowa, on the Mississippi River. That allowed us to slow our pace a bit. July 3rd saw us in Creston, Iowa after riding 82 miles. Then Creston to Ottumwa, Iowa, – 111 miles where we spent another night in jail and finally on to Burlington, Iowa- 77 miles. We arrived by 11:30 in the morning in the rain, our first precipitation of the trip. The family would not arrive until later that evening, but I remember how great it felt NOT to hop on the bike and start pedaling the next morning. Our parents treated us to two nights in the Holiday Inn, relaxing around the swimming pool and eating better than we had for the past two weeks
You might be wondering just exactly what were we eating on this trip. The short answer is plenty of sweets and carbs. We had actually approached both A&W and McDonalds for sponsorships but both corporations declined. We would usually eat pastries and milk in the morning, sodas, sandwiches or burgers for lunch and chicken or pasta for dinner and a daily milkshake. We were not outfitted to do any cooking so we were dependent on restaurants, soda fountains and truck stops for our food. We would carry candy bars and other snacks for a quick bite to eat between meals. We both lost weight as might be expected. I lost 6 pounds and John lost 3 before finishing the trip. Both of us were mighty tired of that diet, and I now wonder why we didn’t expand our culinary horizon a bit more. I’ll just speculate and blame it on being high energy teenagers with limited funds.
It was in Burlington, Iowa that we had our first interview for a local radio station. While traveling through Nebraska, we had been interviewed for two local newspapers in Dawson County and Lexington. It was not to be our last before reaching our destination.
It was in also in Burlington where we both decided to continue on with our cycling adventure. The one day lay over did wonders for our morale and the one day reprieve was welcome. So on July 7th, after paying fifteen cents each to cross the Mississippi River, we continued our trip eastward, watching our family pass us in the station wagon early into Illinois.
We rode on to El Paso, Illinois, after a 120 mile day, sleeping in the town park. As teenagers, it was easy to make friends with other kids in the towns where we stayed. We must have been an unusual site to see for many of these small town kids. I remember a few times after stepping out of a restaurant or soda fountain, there would be people standing around our bicycles looking at our setup for long distant travel. Some had never even seen a ten speed bicycle before.
The next day we rode to the twin lakes town of Monticello, Indiana, 122 miles from El Paso. That was the day I left my wallet at a soda fountain in Gillman and didn’t discover the fact until six miles down the road. It was just then, that a lady drives up and asked if we had left a wallet. The lady drove back to retrieve it for us while we waited. People were very kind and generous to us. While camped along Lake Freeman that evening in Monticello, we met a teenager whose family owned a boat. He was happy to show us around the lake. We had one good spell of rain the next day between Monticello, Indiana, and Van Wert, Ohio, a distance of 123 miles. For rain gear we used parkas. That was it, and they didn’t work too well either, as might be expected. Luckily, the weather was warm and the rain squall came with a tail wind, pushing us into Van Wert at a 21 mph clip. There we showered at the YMCA and got our clothes into a laundromat to dry. We also found ourselves in the Van Wert city jail that night.
As I read through John’s account of our trip, I realize we were riding sometimes long days. My guess is that there was nothing better for us to do so why not get the extra miles in each day. The ride from Van Wert to West Salem, Ohio is 138 miles, our second longest day of the trip plus we set a milestone by riding in four states in three days since leaving Burlington. Our last days of the ride must have seen us with a “lets get there” attitude, as we got closer and closer to Spencer. John even made a note in the journal that we had altered our route to shorten the trip by a day, creating a surprise arrival to our grandparents house. There are a few things that stand out however. We made a brief detour in Akron, Ohio to see the Soap Box Derby Hill. For us kids in the 60’s, the Soap Box Derby was a big deal and the slight detour was well worth the time to see the famous downhill course. Also, shortly after we passed through the small town of Warren, Pennsylvania, I believe, a kid comes riding up to catch us letting us know there was some kid back in town that wanted to “fight”. Wow! We kindly declined and kept on riding. I remember the new dam being built at the time above Warren, as the road bypassing the dam and reservoir was brand new.
The second to last day in hilly Pennsylvania near Polk, John’s rear shifter cable broke leaving him in his two highest gears. Even in the larger town of Franklin, just up the road, a bike shop was not to be found and John was force to ride the rest of the trip with the broken cable. We finally pulled into our grandparents’ home near Spencer tired, suntanned and looking pretty lean.
The confidence that was developed in me cannot be over stated. At 15 years of age, I had a whole new perspective on the world and how my life could be.and it stands today as one of many highlights in my life. I hope this trip inspires others to tax their abilities and take a chance on their next big adventure.
Paul Koski
Nucla, Colorado
2018
The Google earth path line of our route across the US.
Leaving Molas Pass on a recent Durango to Moab Hut to Hut trip.
We live in a country that seldom has to feel the real distance of travel. We let motor powered car tires pound the bitchumen for us. Many Brisbane dwellers usually drive to Cleveland, travel across Morton Bay, Land in Dunwich and drive to 20 mins to their camping destination.
Enter 5 dudes, 5 bikes and 5 Pairs of legs ready for the journey!
The Crew
START
As the 4 of us assembled our bikes with our over packed bags (mostly Aaron), our journey began. I say the 4 of us because we had a 5th member who decided to put his bike rack together the morning of the ride, couldn’t locate some runaway bolts and decided to catch the train to our journeys first destination. Cleaveland Ferry!
We left Brisbane, sharing the roads with the other car drivers. Our chosen path was much busier than expected, but we managed to eat our way to the Cleaveland Ferry just in time to catch our planned Water Taxi!
The water taxi was easy, you just put your bike at the back of the boat, pay $10 and you are there!
Once we got to the other side, the harder part of the ride began. The road rolls across the middle of the island, with peaks and dips along most of the way. Our heavy bikes started to take their toll as we mentally struggled up the inclines.
Adder Rock is a paid campsite, and it ended up costing just under $70 for the 5 of us to camp. As we passed the T-Rex computer operator, we setup camp and began to eat…
We walked to the pub (because we’re responsible bike riders and never operate heavy machinery under the influence of freedom) and had a few beers at sunset.
RETURN
As we woke up, we made our breakfast and set out over the rolling island hills with plenty of momentum. We all found the need for speed as we sped into the Water Taxi terminal in record time.
The journey back was relatively hot for a winters morning. We journeyed back along the route we had ridden the day before, whilst attempting to avoid all the heavy traffic areas.
Every now and then, we need to push the reset button and venture out into the unknown, take a few bikesquats and test out the equipment for the Europe Adventure that is to come in August 2017…. now just to make it more regular!
I hope riders can find these 50-150+ mile routes in San Diego County useful and worthy. The background story is here: About Dirty Century
The Dirty Century tab on trailism.com has links to maps, and gps files (kml, gpx, and tcx). The SDDC (San Diego Dirty Century) North County route has the most detailed map(sample below). It is a bit dated now, so any comments are welcome to help me make updates as I’m a little too far away to check up on the route anymore.
<center><iframe src=”https://www.google.com/maps/d/embed?mid=1wqD89ZzSoKMWfa3Idrz9qM6RxYI” height=”480″ width=”640″></iframe></center> [this map got stripped out of the text/code tab after the save, not sure if you allow iframes, but I pasted into the visual/wysiwyg tab so you could see the code]
^Route is +/- 115 miles, with about 12 miles being pavement depending on your route.
For more maps and tracks go to the dirty century tab at trailism.com. You are welcome to mirror it all here on bikepacking.net.
I’m not sure what else to say other what I did in those links^, other than the fact that I hope you enjoy your ride/s, and part of me wishes I still lived back there. On to new adventures… I left some breadcrumbs behind.
Matte Graphite with black stitch and black trim ( shown : other colors available )
Model Details :
RED X – The designation given to military aircraft mechanically unsuitable for flight . . . The JET Roll RED X is made to carry the essentials to get you back on the road or trail and finish the ride.
The RED X is designed to carry a folding road clincher or tubular, CX, or touring tire up to 700 x 42c along with spare tubes, tools, co2, and a compact pump. With it’s unique expansion capability, the JET Roll RED X will also accommodate a 29″ x 2.10 mountain bike tire.
The JET Roll RED X includes two blue JET Roll Tube Bands and two black JET Roll Tire Bands.
The RED X comes standard with two black leather straps for fastening and attachment to the bike, saddle/seatpost, or cycling gear.
JET Roll RED X Max Tire Size ( folding tires only ):
1 – road, CX, or touring tire up to 700 x 42c
1 – mountain bike tire up to 29″ x 2.10
2 – standard road tires up to 700 x 25c (side by side)
Example items / contents in pictures are not included.
Visit www.justenoughtools.com to view the entire 2016 line of new JET Roll products.
ISM Saddles offer a unique design that fully relieves pressure on sensitive tissue, while still offering a normal saddle profile. ISM’s saddles can be ridden on technical terrain.
There are a wide array of ISM saddles available. Shown here is the mountain bike specific model, the PM 2.0, which is the new version of the Peak model. Comments or reviews below can be about any ISM model, just state which one you have tried.
Tech Specs:
Category: Performance Mountain
Length: 255mm
Width: 135mm
Padding: 30-series Foam and Gel
Rails: Chromoly
Color: Black
Please rate this product: (no login required) (8 votes, average: 3.88 out of 5) Loading ...
I recently completed a milestone on the Arizona Trail, essentially riding all the bike legal portions of the trail from Mexico to Utah. Only a few stray rideable miles remain, about 11 or so scattered around, but those can wait until April. I thought it would be cool to put together a comprehensive post on all the passages my tires have rolled on. This is by no means a substitute for the AZT guidebook, just my thoughts on the trail. Please consider becoming a member of the ATA, make a donation and/or pick up a guidebook if you see more AZT miles in your future as it provides a more in depth look at each passage. Also, while out on the trail, the AZT app is a great resource as well. If bikepacking is in your plans, this water table may come in handy too.
Mountain Biking the Arizona Trail.
There are a few passages exclusively in Wilderness, where bikes are not allowed, so I’ll be skipping those. A few more are partially in Wilderness, but have some bike legal miles to ride, some are worth it, and some are not.
Hopefully this will give prospective riders an idea of what to expect out there. I’ll add blog links for more detail & images of the described passages; some are bikepacking rides where more than one passage was ridden. This doesn’t mean it’s the only way to explore certain passages, as most, if not all, can be done as day rides in some fashion.
It is mostly Wilderness, but there is a short section at the north end in Sunnyside Canyon that can be ridden. A short loop using forest roads can be made to access the AZT and the first miles of singletrack!
This passage begins at Parker Canyon Lake, which also happens to be the starting line for the AZT300. This passage is tough; expect to HAB a few of the hills. It’s also a great ride if you’re prepared. Too often people expect dreamy singletrack down here, there’s some, but you definitely work for the miles on the east passage.
Beginning at Canelo Pass rd the change from east to west is almost immediately seen. The west half of the Canelos rides much better than the east offering more stretches of singletrack through the rolling hills. Re-supply waits at the end of this passage in Patagonia.
Unfortunately there’s a sliver of Wilderness about 2/3 the way through this passage. I rode the southern leg of this recently and I’m glad I did as it was incredibly scenic, remote, but mostly on jeep road that became unrideably steep near the Wilderness boundary. I probably won’t ride this section again since it’s an out-n-back, but I wouldn’t tell others to avoid it either. The return ride down to Patagonia is rippin’ fast!
The northern few miles are really good as you exit Gardner Canyon onto the Flume trail. Even the short 1 ½ mile out-and-back (OnB) south to the Wilderness boundary is worth doing. The AES Kentucky Camp long route utilizes this section of the AZT northbound including all of passage 5 and a few miles of passage 6.
When people talk about riding Kentucky Camp, this is the passage they are referring to. Mostly tall grass lined singletrack through rolling hills throughout, this passage should be on your ‘must ride’ list. There are a few short HAB bits and some descent hills to climb, but the reward is always worth the effort.
More grass lined singletrack waits, but this time the hills get a bit nastier. Fun downhills, great views and grunt climbs are the norm throughout most of this passage. The annual AZT jamboree fundraiser begins here for the earlybird shuttle riders.
The foothills of the Santa Ritas mellow out and the singletrack begs for speed. This entire passage is a hoot as it rolls gently downhill most of the way crossing under SR83 & I-10 to the Gabe Zimmerman TH. This would make an easy, fun OnB starting at GZ.
This passage dips down to Cienega Creek at the start, but this is easily bypassed by staying up on the bridge. Plenty of recent trailwork has made the creek crossing less of a hassle, I recommend checking it out. The trail contours and throws some technical bits at you on its way towards Colossal Cave. La Posta Quemada ranch can be seen on a big switchback decent before the campground, where a short ¼ mile detour will take you to an outdoor snack bar for a burrito & drinks. After the campground the trail has a few tech challenges then becomes fast twisting singletrack through the Pistol Hill TH and on to Hope Camp and the boundary of Saguaro Nat’l Park.
The bike riding resumes up on top of Redington rd near the Italian Trap area. This passage is open to bikes in its entirety, but is sandwiched between two Wilderness areas. Thankfully there’s a popular loop that incorporates most of it before peeling off onto the La Milagrosa trail. This passage has a little bit of everything: buff singletrack, techy descents, wicked HAB, lung busting climbs and views for days. Personally, I think this passage is underrated.
**Bypass route: 11a – Pusch Ridge Wilderness Bypass** uses the famed Lemmon Drop route. Best done as a shuttle in the downhill, southbound, direction, but be warned: there’s still over 4000’ of climbing on the way down!!
Ah yes, the infamous Oracle Ridge trail. Yes, it’s tough. Yes, there’s plenty of HAB and yes, there are other ways down the north side of Mt. Lemmon. There are a few hearty souls who like to ride this outside of the AZT300/750, but there are better options for getting down the mountain. I didn’t think it was as bad as the hype led me to believe, but others may disagree. It is what it is: a means to an end.
This is the shortest passage at a mere 8.3 miles. Don’t let that discourage you from riding it. It’s super fun and can be looped with trails in Oracle State Park (when open) or some dirt roads in the area.
Overall, I feel this passage rides better northbound, but it’s tough either way. It begins at Tiger Mine TH kicking off a lonely, rugged swath of trail all the way to Picketpost. These next few passages aren’t for the novice or unprepared backcountry rider. Make no mistake the Black Hills are strenuous. Expect plenty of ups & downs over rugged, loose rocky terrain. The view of distant Antelope Peak never seems to change even as the miles tick away. The AES Antelope Peak Challenge uses this entire passage for its January event.
A short stint below humming powerlines brings you to a seldom ridden bit of singletrack & jeep road. Depending on the season, the trail may be difficult to follow in places. The trail eventually goes through a gate at the top of a crest and begins a descent down into Ripsey wash. The trail may be overgrown at times and there are plenty of wash crossings. If it hasn’t rained in a while there may be a ½ mile HAB up a sandy wash before rejoining the singletrack. There is a gate at the end of the wash signaling the ascent up The Big Hill. A few steep grunts are waiting along with over a dozen tight switchbacks to the top. The famed Ripsey ridgeline will greet you at the top, take a moment to soak it all in, then begin the 5+ mile white knuckle descent down to the Kelvin TH. High five your buddies at the finish as you just completed an iconic AZ ride.
This is my favorite passage of the entire AZT. It is often ridden in conjunction with passage 17: Alamo Canyon from the Picketpost TH. I think it rides equally well in either direction, but most tend to favor a southbound direction so they can enjoy the 7 mile 2000’ descent to the Gila River out of Martinez Canyon. Don’t overlook the 16 miles of trail along the Gila, its sneaky tough with more climbs than people realize. The Gila River can be filtered for drinking. The easiest way to access the river is where the AZT turns north to begin the climb up to Martinez. Turn south away from the climb, and then veer right onto a 4×4 trail for about 100 yards. There will be an obvious opening in the trees, where during low water times OHV’s can drive across the river.
The trail is superbly constructed through here offering unparalleled views into the ruggedness of Arizona. I like the fact that there is no easy way into Martinez Canyon, those who have been there, earned it.
Aka: Picketpost. This is the easiest trailhead access to metro Phoenix and it happens to be one of the best IMO. This passage is great to ride southbound all the way to Kelvin or equally as good as an OnB ride to suit your fitness levels. The trail generally climbs as it goes southbound over the first 10 miles offering progressively better viewpoints along the way. Three in particular are at miles 5.5, 10 & 12.5. After 12.5 you are now in passage 16: Gila River Canyons. There is no water on this segment outside of a stagnant hidden trough of chocolate milk looking water. Plan accordingly.
This passage tends to get overshadowed by Alamo Canyon and for good reason, but just because 95% or more of riders head south from Picketpost don’t overlook this one. This passage is open to bikes in its entirety all the way north to Rogers Trough. I prefer riding the adjacent forest roads to the top of Montana Mtn. where the AZT turns back into singletrack for a scenic, rugged, yet rideable descent. There are two approaches to this ride, go east up the mountain on FR8/FR650 or take the more picturesque route up the west side on FR172. The AES Picketpost Punisher routes (B & C options) utilize both routes depending on distance desired.
A good chunk of this passage is indeed in Wilderness, but not all of it. I tried making a loop from the Roosevelt bridge and in the end it just wasn’t worth the effort. Way too much gnarly HAB both up & down and virtually no rideable singletrack. I did manage one really cool photo, but that was about it. Avoid this passage with a bike!!
Every once in a while an exploratory ride goes well above perceived expectations. This was one of those rides. The down side: it’s tucked in between two Wilderness areas, it isn’t super long and it’s a bit out of the way. With all that noted, it is totally worth doing especially if you’re in the Roosevelt Lake area. This passage is best done as a CCW loop from either the scenic overlook of Roosevelt Dam or the small parking area off AZ188 on the west side of the bridge. Ride west on AZ188 to FR429. Follow this up to the Mills Ridge TH where the AZT crosses. The OnB up to the Wilderness boundary isn’t great for bikes, but the downhill back to AZ188 is fantastic. There is one chunky HAB and some tech riding in spots, but otherwise the trail is in good shape. The views are unmatched in this area.
This is another relatively unknown passage that is fully open to bikes. This trail trends downhill in the northbound (recommended) direction with a little over half of it on jeep road. Again, this passage is bookended by Wilderness, but a couple of CW loop options exist. Both options begin/end in Sunflower at the Bushnell Tanks turnoff. For a big one day ride, head up Reno Pass on FR22 – embrace the bits of HAB as a long downhill into the Tonto Basin calls. Ride a series of dirt roads paralleling AZ188 to the north over to El Oso rd. This is a graded dirt road climb, but make no mistake, it’s an 8+ mile lung buster. At the top, just past the towers, you’ll link up to the AZT on an undulating ridge top jeep road. This road gives a unique viewpoint, Tonto Basin to the north and the Valley of the Sun to the south. The singletrack split has an ominous beginning as it HAB’s up from the road. The 8 miles back to Sunflower are on what I would classify as primitive trail. It’s almost all rideable, but there are numerous crossings of Boulder Creek which not only require dismounts, but some route finding at times too. (I’ll discuss the other ride option in passage 22) This passage is one of the toughest to follow as the cairns are often buried in tall grass and some of the carsonite signs are knocked down or missing. GPS is highly encouraged for this passage! This passage has also received some much needed trail work recently, so things are improving.
This passage only has about 5 miles of bike worthy trail, but that’s ok as it can be used for a bigger loop. From the Bushnell Tank turnoff in Sunflower follow the trail north for about 5 miles, this leads to a connector trail that will dump out onto the old Beeline Hwy. This leads up to FR201, climb away to the pines where you can ride the Gold Ridge trail down to the Deer Creek TH. Pick up AZ188 and continue into Tonto Basin. Finish the loop off as described in passage 21 for a scenic, tough, 2-day bikepack.
Another option for this passage would be to use it as a staging / warmup spin prior to climbing Mt. Ord.
This passage is mostly Wilderness, but the northernmost 2 miles are outside the boundary. Nothing special here, a bumpy lava rock covered forest road takes you south to the boundary fence. Skip it.
**An interesting note: the AZT is open to bikes all the way to Utah from the Wilderness boundary here, one large caveat when crossing the Grand Canyon though**
This is another passage that is open to bikes, but that doesn’t mean you should take one on it. The first few miles southbound from the Pine TH isn’t too bad, hopefully the folks in the Pine area improve this section of AZT down to Oak Spring where it meets the ill fated Walnut Trail. If these two sections are improved there will be a really nice loop around the town of Pine utilizing the Pine Canyon, Bearfoot & Pine-Strawberry trails. If you decide to ride this section of trail it may be best to do the Town Loop CCW so most of the Walnut trail is downhill. By itself I wouldn’t really recommend the AZT for a bike ride through here.
Over the years the Highline trail out of Pine has developed a notorious reputation for sucking from AZTR750 riders. Fortunately, there’s an ongoing project from VOAZ to improve the Highline over its entire 50 mile length. Quite a bit of it has been completed already, but most of that work is on the section of trail far to the east of where it overlaps with the AZT. Those 18 miles are still rugged in places, but the signs of recent trailwork are evident. Most recently, a re-route of a fall-line section of trail out of the Pine TH has been replaced with arcing switchbacks on a bike friendly grade. While this trail is showing significant signs of improvement, I’d hold off on riding the AZT portion towards Washington Park. I’m guessing about 9 of those 18 miles may be HAB.
HAB. Just gotta accept it on this one, but don’t let it deter you from riding this passage. Most riders will find two substantial HAB’s in each direction, about 10-15 minutes on one & 20-25 on the hike in/out of the reservoir drainage. The rest of the passage is great. There is plenty of good singletrack, fast forest roads, a bit of history and if you’re lucky handlebar high ferns. This can be done as an OnB ride from where the AZT crosses AZ87 or can be done as a loop in conjunction with FR300 (rim rd.) and a slew of other dirt roads in the area.
This passage Is a bit of a mixed bag. Some really good remote forest singletrack and some really crappy lava rock covered jeep road. Again, this can be done as an OnB type of ride or make a loop with the plethora of dirt roads available starting at the AZT crossing of AZ87 north of Clints Well.
This is the second longest passage of the AZT at 33.9 miles. Most of it heading north is great contoured forested singletrack, at least until you cross Lake Mary rd. north of Mormon Lake. This is Anderson Mesa, quite frankly it sucks on a bike. While the terrain is mostly flat on the mesa, if wet, it’s cookie dough. Avoid at all costs in wet weather!! Even when dry it’s not too fun as there are imbedded rocks sprinkled about, but don’t worry, if you miss the rocks – the post-holes from the cattle will get you. You’ve been warned. *Re-supply is available down at Mormon Lake at the general store, there’s also a new pizza joint there too*
This is the first of 4 passages in the Flagstaff area. Most of this passage rides really well, just be warned if it’s wet, the first couple miles north of Marshall Lake and the segment between Walnut Canyon rd. & I-40 can become sticky mud!! The AZT splits near Fisher Pt., passage 33 veers off to the left for a re-supply option into town. Stay right on what’s known as the equestrian bypass towards passage 32 if a town stop isn’t needed or do both and make a loop. I typically ride this passage N->S, but that doesn’t mean it isn’t good the other direction. With the addition of the Flagstaff Loop trail it’s easy to incorporate this section of AZT into a day ride out of Flagstaff.
This passage skirts around the north side of Mt. Elden. The southern section, roughly between the I-40 underpass and Sandy Seep, doubles as the Flagstaff Loop trail, great in either direction. The portion wrapping around Mt. Elden is best done in the southbound, downhill direction.
This passage brings riders to the heart of Flagstaff via the FUTS. Plenty of resupply options abound before returning to dirt near Buffalo Park. Some sneaky tough climbs are tucked into Rocky Ridge as the trail meanders towards Shultz Creek. The trail climbs about halfway up Shutlz Creek before splitting off and merging with passage 34.
This is the longest passage of the AZT at 36 miles and a good portion of it is on fantastic forested singletrack. There are plenty of options for this passage, such as an Around the Mountain loop, shuttle drops at Aspen Corner or FR418 & many other loop options. Most riders tend to stay south of where the AZT crosses FR418 on the north side of Humphrey’s Peak. There are roughly six more solid miles of singletrack heading north from there. Eventually, the singletrack dumps out onto a jeep road south of Missouri Bill Hill. Be warned, this is another area to avoid when wet!! After passing MBH, the trail drops down into the expansive Babbitt Ranch area out of the pines.
Ever wonder what it must be like to ride the Tour Divide? This passage will give you a taste. Wide open range along jeep road & double track make up the majority of the 25.6 miles. You’re bound to see more cattle/horses out here than people. The final 5 miles of the passage return to singletrack, albeit the vague primitive type. The passage ends abruptly at a trail intersection, where a ¼ mile off route is the historic Moqui Stage Station. (Go left, west, at the intersection to see a remnant of a well and the stage stop sign).
This passage almost gets lost in the shuffle, falling between the great riding of Flagstaff and the wonders of the Grand Canyon. A return to forested riding as you pedal north, this passage has a bit of double track and some really good singletrack. Riding northbound is slightly uphill and the trail can be a bit rubbly in places, so it’s no cake walk, but also not a total beatdown either. This passage offers the first glimpse into the Grand Canyon finishing off at the Grand View Lookout tower. Be sure to climb the tower for a cool view into the gorge.
The first 14 miles west of Grand View trend downhill towards Tusayan on fast singletrack & forest road. Don’t blink, it’ll be over quick! Resupply in Tusayan if needed or continue into the park via a utility corridor. The trail crosses under SR64 a couple of times and returns to singletrack as it climbs gently towards the terminus at the South Kaibab trailhead. Stop and take it all in, it’s the Grand Canyon!!
Bikes cannot be ridden below the rim at the Canyon, they are allowed under one circumstance: the wheels must NOT touch the ground. If you don’t want to pay for a shuttle service or ride the 220+ miles around the Canyon, disassemble the bike and attach it to your back then hike away. Most people who do this will do so during the AZTR750. With or without a bike, the rim-2-rim hike should be a ‘must do’ on anyone’s list.
Reassemble your bike at the North Kaibab trailhead OR an easier approach: spend some time on the north rim for day rides along the AZT or bikepack it to link a few sections together. This passage doesn’t really jump out at you to grab your attention. There are some fun bits, but most of it is within a utility corridor or slightly overgrown singletrack. The final downhill mile from near the North Rim Lookout tower is a blast ending this passage at the National Park boundary fence.
The first of many alpine grassy meadows begins at the GCNP boundary. The theme of this passage is rinse, wash & repeat. As in, ride through a meadow, HAB up into the forest, ride great wooded trail and descend back into a meadow. Another highlight of this passage is the East Rim overlook. The trail skirts the cliff edge next to the Saddle Mountain Wilderness for impressive views to the east.
This passage begins with a nice AZT HAB up Telephone Hill. The trail follows AZ67 closely for a few miles as it enters an old burn area. The singletrack through here contours the hillside and is generally fast and flowy. There’s one large drainage requiring a 15 minute HAB out, but otherwise the trail is very bike friendly. The burn area subsides and the singletrack dumps out into a small canyon where a jeep road takes you mostly downhill to the junction of US89A. Plenty of good camping options near the end and a short spin off route for resupply in Jabob Lake is only a mile or two away.
IMO, the final two passages are highly underrated and ofter overlooked, probably due to their location. Riding northbound on this passage is about as easy and fun a ride as can be had. The terrain is mostly level to downhill through the forest. Scrubland begins to appear near Government Reservoir as the trail continues to be fast through the smaller vegetation.
At 10.8 miles Buckskin Mountain is the second shortest passage, but it’s one of the more memorable ones. While this passage completes the AZT into Stateline CG on the Utah line, there are a few punchy tech cllmbs along the way. The sight of the red Vermilion Cliffs is something every mountain biker should witness. The final miles of trail drop off the Kaibab Plateau on what appears to be a dizzying array of endless switchbacks losing 1200’ of elevation. In reality, those switchbacks are large rounded curves! What a way to cap off a great ride.
43 – Buckskin Mountain
43 – Buckskin Mountain
43 – Buckskin Mountain
43 – Buckskin Mountain
Where will you ride?
AZT ‘Golden Spike’ on Passage 16: Gila River Canyons
Screenshot of my current totals. Blank spreadsheet may be downloaded here. Courtesy of my co-worker, Rob.
The Holyland Challenge crosses the tiny country of Israel in a truly serpentine fashion, connecting over 850 miles (1400km) of singletrack and dirt tracks from the snowy peak of Mt. Hermon in the north to the sun-soaked Red Sea city of Eilat. Traverse the Golan Heights, ring around the Sea of Galilee, ride the boardwalk along the Mediterranean Sea into the modern city of Tel Aviv, push through the crowded souk in the old city of Jerusalem, descend 4000ft to the Dead Sea, and enjoy the flowing, durable trail of the world’s first government sponsored national singletrack biking trail– the Israel Bike Trail– which comprises the last 200 miles of the route across the Negev Desert. Pack your bags with hummus and pita, halva, fresh cucumbers, a tall can of Goldstar lager- it’s a big ride.
Distance: 860 miles
Unpaved: 90%
Singletrack: 40%
Total ascent: 68,000ft
High Point: 3700ft (Mt. Hermon, Majdal al-Shams)
Low Point: -1200ft (Dead Sea)
The Holyland Challenge (HLC) is an adventurous path across Israel exclusively comprised of public-access routes and is open to ride at any time of the year. Summers are hot and dry, winters in the north may be cool and rainy. In many areas substantial rains can lead to unridable conditions or flash floods, although most of the country is dry most of the time. The northern half of the country, north of Be’er Sheva is characterized by a classic Mediterranean climate, while the southern half of the country is desert. Spring and fall are the best times to ride, especially March and April. Winter can be surprisingly cool, although anyone from a more northern climate won’t be surprised by the weather.
The HLC route begins in the Golan Heights, which despite historical conflict, has been safe and stable for several decades. The route does not enter the West Bank, although a tour through modern Palestine is recommended if time allows. There are some fantastic natural trails in the West Bank, including the famed Sugar Trail through the Judaean Desert from Jerusalem down to Jericho at the Dead Sea. The entire country is littered with scenic, adventurous routes.
Travel in Israel is simple and safe. Still, the HLC route manages to provide some context for the challenges which face Israel. You will ride along a tall security fence along the border of Syria, you pass an informal gap in the three-part security fence near Lahav between Area C of the West Bank and Israel which is frequently passed by Palestinians, and you finish in Eilat just a few miles from both Jordan and Egypt, in sight of Saudi Arabia. The route passes through many planned Jewish communities, the thriving metropolis of Tel Aviv, Arab Druz communities, Christian Arab communities, and through a number of cities with mixed personalities including strong Jewish immigrant populations from former Soviet nations and Ethiopia.
As a visitor to Israel you can expect to be welcomed by everyone you meet, and the famed hospitality of the Middle East is not exclusive to any one cultural group, but is shared by all. If you are lucky, while traveling in Israel, you may share tea with Bedouins in the desert, a meal recognizing the Passover Seder with a Jewish family, and coffee in a Palestinian community. Visitors to Israel have a special opportunity to meet diverse groups in private settings, a luxury not immediately available to many local residents– Jewish, Palestinian, or otherwise– due to cultural tensions. Visitors from Europe and the English-speaking world will feel at home in modern Israeli society. English is widely spoken, especially among educated professionals and those working in tourism. Cities feature progressive planning, bike paths, and housing, while public transit via trains and the Egged bus system is simple and afordable, even with a bike. If you ever need anything, just ask. You are likely to receive more answers or assistance than you need.
The HLC originated in 2014 as an organized bikepacking challenge across Israel with over two dozen participants at the start line. Zohar Kantor returned from the Tour Divide in 2012 with the energy to create something similar at home; Limor Shany was enlisted to develop a track across the country, building on his organized mountain bike tours of Israel; Ilan Tevet is responsible for much of the organization and networking which has made the HLC event successful.
Less than half the field finished in 2014, led by Israel’s legendary sponsored rider Hanoch Redlich, who completed the course in 6:10:06 to establish a strong record. Riders from the UK, Spain, Germany, and the USA have participated in the event. The HLC has ignited an already simmering interest in self-supported bikepacking in Israel, which will continue with the third annual HLC on April 7, 2016. This year a half distance will also be offered to Jerusalem, called the HLC700.
The HLC 2015 was plagued by rain in the north, unridable trail conditions, and a restart in Arad. However, the route is technically rideable all year. Visit the HLC website for abundant resources and GPX tracks including a list of POIs along the route.
The HLC manages to create a remote off-pavement experience despite Israel’s small size and booming population, which is growing beyond 8 million people in an area only a little larger than New Jersey. The southern half of the country, comprised of the Judaean and Negev Deserts, only accounts for about 8% of the population. The populous northern part of Israel is loosely divided into “the center” and “the north”. Jerusalem is the historical cultural capital of the region to people of the three Abrahamic religions, and is the most religious Jewish city in Israel. Tel Aviv is the bustling, modern, secular city by the sea, with abundant public beaches, modern eateries, and urban planning rivaled only by the usual northern European countries. In between Mt. Hermon and Eilat are hundreds of smaller communities, a few deeply rooted in history, yet most a part of the repopulation of Israel by Zionist Jews in the last century. Many small communities were founded on the socialist ideals of the early and middle part of the century, and feature the social remnants of communal living structures. Even as modern life moves away from socialized structures, families and communities remain very strong.
In the style of most off-pavement touring in Europe, the HLC is a diverse resource. The route, which can only be followed via GPS, is comprised of new singletrack comprising local mountain bike trail systems developed by the JNF-KKL, well-used farm roads, marked hiking trails such as the Israel National Trail and the Golan Trail, and backcountry 4×4 routes in the Negev Desert. There are many creative connections along the way which make such a well-informed track a pleasure to follow, and a peerless tool to a first-time visitor in a foreign land. Some hike a bike is necessary, but none are especially long or arduous. Much of Israel is defined by fragmented limestone trails, which require constant attention, although many smoother sections provide relief. In all, there is a lot or real mountain biking and a lot of pleasant dirt road touring.
A hardtail bike with a suspension fork is recommended, although many riders prefer full-suspension bikes in Israel. Tubeless tires are essential, and more durable casings such as Maxxis EXO or LUST, Schwalbe Snakeskin, and Specialized Grid are recommended. There are several good bike shops along the route, and many more if you are willing to travel off route. Check out the supportive shops right on the HLC track at the Alon HaGalil All-Terrain Center, Haitham Cycling in Daliyat al-Karmel, and the Geofun Desert Cycling Center in Midreshet Ben Gurian (Sde Boker).
It is possible to travel extremely light on the HLC as food and water are never far away, and a series of useful waypoints indicates where services can be found along the route. A few longer sections without water require some advance planning in the desert, but even the longest section between Ein Tamar and Sde Boker is cut in half by taking a several mile paved detour to refill water. Weather is typically warm and dry, and bothersome insects such as mosquitoes are limited, although scorpions and snakes are present in the warmer months. Reintroduced ibex and wild ass, as well as domesticated camels are sometimes spotted in the Negev. Sheep are herded widely across the Middle East, although sheep dogs are rarely an issue in Israel.
In almost any small community, it is appropriate to ask for a place to sleep, and to be rewarded with a pleasant campsite or even indoor accommodations, if desired. A bivy and a summer weight sleeping bag (or less) is appropriate for the HLC, although a lightweight tent may be best for a more casual touring pace. A lightweight bikepacking set-up is highly recommended. Be prepared to lift your bike to shoulder height on a few occasions.
Highlights from the trail:
Wildflowers in the Golan Heights, the crowded markets of the Old City of Jerusalem, swimming in the Sea of Galilee, the hyper-modern city of Tel Aviv, the expansive Negev desert, swimming in the Red Sea at the finish in Eilat.
The Israel Bike Trail, a rapidly expanding national mountain bike trail across the country. As the trail develops, the HLC may evolve to include newer sections of the IBT. For now, the HLC track is the best ready-made bikepacking route across Israel.
Middle Eastern hospitality, locally grown produce, Levantine food. Cucumbers, dates, tomatoes, grapefruits; halva, hummus, and pita; coffee with cardamom, Israeli wines and the flavors of the emergent microbrewery scene. Ask local bikepackers how to get some Zba Beer, the official beer of bikepacking and the HLC in Israel.
Good to know:
Israel is extremely safe. Aside from what you read in the newspapers, areas travelled by the HLC route showcase a happy, healthy country which is a great source of pride for many people. Entering the country by land or air requires rigorous screening at immigration, whereafter you will enjoy the same liberties as other Israelis. On the ground you will learn a lot more about the issues which challenge the region, both inside the borders of Israel and abroad. An open mind and occasional restraint in conversation are essential.
Many Israelis are confident, proud, and knowing. Expect low level arguments along with incredible kindness and hospitality. You will argue, make friends, and figure it out.
It is possible to travel to Egypt and Jordan. At this time, none of the land borders to Syria and Lebanon are open. There is one crossing to Egypt at Eilat/Taba and three border crossings to Jordan. The southernmost crossing at Eilat/Aqaba provides free entrance to Jordan as part of a program to incentivize tourism in the less populous southern part of the country. Wadi Rum and Petra, the two most famous destinations in Jordan, are easy to access from Aqaba by bike within a few days.
There are many military training sites in Israel, especially in the Negev Desert. Respect the signs which prohibit entrance to certain areas. However, the concrete blocks painted with “No Entrance” signage are sometimes present in areas which you are allowed to pass, either during certain days of the week or during daylight hours. Ask locally for more info.
Camping, food, and water:
Camping is essentially legal anywhere. Public forests feature copious picnic areas and fire pits, all of which are suitable for camping. Ask in small communities for a place to put a tent. Many small communities are gated, with one or two main vehicular entrances. Camping is officially restricted in the nature reserves. Entering or remaining in these reserves is officially prohibited past dark.
There are many options for impromptu shelter along the route if needed. In several months along the HLC, we camped in a cave outside Jerusalem, in an abandoned farm structure next to the Sea of Galilee, in an abandoned miltary bunker outside Be’er Ora, on the beach in Tel Aviv, in an abandoned bus on the Jordanian border and even in a large tent intended as shelter for hikers on the Israel National Trail at Shaharut.
In small communities, where well stocked stores are well priced to serve the community. At gas stations, which are marked as waypoints on the route to aid HLC racers who rely on 24-hour businesses. Be sure to stock up on delicacies only found in Arab towns in the north, such as Majdal al-Shams, Jish, and Daliyat al-Karmel. The crowded market in Jerusalem is also a great place to feed.
Most stores are closed on shabbat, Saturday. Good luck finding bread and beer during Pesach, or Passover. Bread can always be found in Arab communities.
Water is found often enough that only 3-5 liters is required as a maximum capacity, and less is adequate in cooler months. During the race on a hot day, some riders will carry more, but a touring pace allows diversions for more frequent resupply. The two longest sections without water are from Ein Tamar at the south Dead Sea to Sde Boker (divert to the Oron or Zim plant for water at the halfway point), and from Shaharut to services in Timna National Park.
There is a small cafe in Ne’ot Semadar in the south, but no store, which came as a surprise to us despite the size of the community. Yehuda has a small store in the outlet mall, open during the day. Be’er Menuha has a store open 24 hours, just off route. Ein Tamar at the Dead Sea is a mile off route but is worth a visit for the great store and public camping adjacent to the large pavilion. Bathrooms and fresh water are available. In the northern half of the route resupply is uncomplicated.
Images are from three months of touring in Israel, often on or near the HLC track, Lael raced the HLC 2015 while I chased the race, spectating and photographing from Mt. Hermon to Eilat. The southern half of Israel is desert, with few people and well developed trails. The northern half of the country has more people, more moisture, and many more roads and trails. While we preferred our time in the desert, many Israelis and Europeans have stated that they prefer the north, especially during the green months of spring. Our travels began Feb 1 and ended May 4, 2015.
The Hot Sisters Hot Springs route highlights singletrack, hot springs and mountain climbs (on foot) all through the central Cascades in Oregon. It starts and ends in Bend, Oregon.
Core loop = red, alternates = cyan
Route overview
The route traces a primarly singletrack circle around the most prominent landmarks in the Oregon Cascades — the Three Sisters. The Sisters are volcanoes that sit at over 10,000 feet. Views of the Sisters can be found from all over the route. While making the circuit, the route brings bikepackers to seven natural hot springs, all exquisitely soakable. In the trail department, some of the finest and most famous singletracks in Oregon are featured. On the western side, it covers the three major river drainages (and trail systems): the North Umpqua, Middle Fork of the Willamette and the McKenzie Rivers. On the east, Newberry Crater, Metolious Windigo and Mrazek are a few of the highlights.
List of trails used (in order):
Swamp Wells, Newberry Crater Trail, Peter Skene Odgen, Metolius Windigo, Waldo Lake, Oldenburg Lake, North Umpqua, Middle Fork Willamette, Salmon Creek, King Castle, McKenzie River, Santiam Wagon Road, Dark/Scout/Suttle Lake, Lake View, Sisters Tie, Peterson Ridge, Mrazek.
Trail type
Every effort was made to maximize rideable singletrack on this route. There is still a fair amount of dirt road riding, but over half the route is on singletrack, and hike-a-bike is very minimal, especially compared to other classic bikepacking routes.
Most of the dirt (and paved!) roads are low traffic, though they can climb a lot!
Statistics
Core loop mileage: 460 miles
Singletrack mileage: ~245 miles
Elevation gain: 42,000 feet
Hot Springs: 7, on route (or requiring short hikes from the route)
Lookout/Mountain climbs: 10, including alternates
Developed campgrounds: 50+ on route
Dispersed/freecamping: available on most of the route
Longest stretch between resupply: ~70 miles, primarily on forest roads
Alternates:
McCredie/BunchGrass – An advanced option with minimal resupply that adds a hot spring, a mountain climb, a lookout and several thousand feet of climbing Crater Lake Spur – A 30 mile primarily off-road route to the rim of Crater Lake (National Park) South Sister Climbers Trail – A 12 mile spur to free camping available at the South Sister trailhead (Devils Lake). From there it is a 6 mile hike, up 5000 feet, to the summit of South Sister at over 10,000 feet. This is the culminating hike of the trip, surveying all of the terrain on the route. Olallie Lookout / Singletrack descent – A 3000 foot climb on graded roads leads to a high pass bordering the Three Sisters Wilderness. From the pass a 2.5 mile hike leads to the Olallie Lookout in the Wilderness. Going the other direction, with bikes, features some overgrown contour riding that culminates in the fast and fun Olallie descent — a classic trail.
Finding natural hot springs is often a bit of an adventure. The waypoints file has the locations of them all, but part of the fun (and reward) is seeking them out. Here are some details for the springs on the route.
East Lake Hot Springs – East Lake is one of two natural lakes formed in the Newberry Caldera. On the southern shore, past the lodge and boat ramp, a small and sometimes steep trail of use leads to an area where rocks line a number of small pools that are in the lake. Paulina Springs – requiring a 2 mile mostly flat hike, this hot spring is a little more secluded than East Lake. Hot water emerges from the thermals below the western lake in the Caldera. Look for signs of hot water and small trails of use dropping off the main trail, down to the lake shore. This one is a fantastic soak. McCredie Hot Springs (on McCredie alternate): A number of nice pools are found on the south side of Salt Creek. Cross to the south side on the car bridge, then follow a semi-rideable trail west along the banks until it drops to the creek about 0.4 miles from the road. Umpqua Hot Springs – A popular but exquisite soak perched on the rocks above the Umpqua River. It is a very short hike off the main trail. In past years it has been a zoo of folks living nearby, but in 2016 camping nearby has been prohibited, in an effort to keep better care of the area. Wall Creek Warm Spring – Although only 98 degrees, this is a very comfortable soak in a beautiful and private forest setting. From the first switchback on FR 1934 follow the trail that leaves from a pullout/campsite about a quarter mile from the road. You’ll find a couple of warm and bubbling pools of clear water. Camping is possible off the bike right near the springs. Terwilliger Hot Springs – One of the best hot springs in Oregon, this one is popular for a reason. There’s a $6 per person fee and a half mile hike up to the cascading pools. Clothing is optional, and there is quite a mix of soakers. Not to be missed! It is pretty easy to ditch bikes in the woods somewhere near the trailhead. Belknap Hot Springs – part of a lodge and resort, this is the least primitive spring on the route but still a nice one. A small fee gives access to the hot springs fed pool as well as the showers. The gardens on the grounds are nicely kept, and poking around can lead to finding several sources of the hot water (but nothing soakable). Bigelow Hot Springs – A small grotto along the McKenzie river provides a killer soak at a nice temperature. It can be a little hard to find — use the waypoint to get near and look for a trail below the McKenzie River, going south from a bridge over the river. Don’t miss this one!
Mountain Climbs
The route gives close access to a number of mountain climbs and fire lookout towers. These can be excellent breaks from pedaling and always give impressive views sometimes absent from the heavily forested trails on the route. We highly recommend carrying a pair of shoes suitable for short hikes (for the hot springs, as well).
The tops of accessible mountains are noted in the waypoints file. In most cases the route should be pretty straightforward.
Caveats
While the route doesn’t have many of the usual challenges that bikepacking routes have, like high altitude, rough terrain, extended hike-a-bikes, etc, there are a few challenge unique to the Pacific Northwest. Specifically:
Bugs – Depending on the season, mosquitoes can be pretty bad in certain areas of the route. Consider bringing a tent. On the exploratory ride we probably only had 3-4 buggy nights, but we were grateful for a tent on them. Poison Oak – This plant is present at lower elevations on the route (particularly lower Umpqua River Trail). Consider bringing creams for either pre-exposure application, or post-ride cleansing. We used the former and had no issues or rashes. Also jump in rivers and hot springs whenever possible! Trees – Blowdowns are a constant struggle on some of these trails. We found it to not be an issue riding even somewhat early season. Luckily there is a core of dedicated volunteers (mountain bikers!) in the area.
Trip Reports
From the exploratory ride (July 2015):
Scott’s diary starts here.
Eszter’s starts here.
Thanks
For the (brilliant) idea of a hot springs themed bikepacking route, we owe thanks to Casey Greene of Adventure Cycling.
Thanks to Gary Meyer for his help scouting the route, and for route suggestions throughout. Steve Westberg also provided valuable route beta, poison oak potions and a place to stage the exploratory ride on the route. Jolene Carpenter gave us much enthusiasm as well as route beta along the way. Thanks to GOATS/Sisters Trails/Bend Trails groups for all the trail work and clearing. And most of all, thanks to Ez for being the best riding (and hiking, soaking) partner ever.
Photos
For more photos, with captions and overview text, visit Scott’s blog:
OregonCascades – Crater Lake Rim at Merriam Point – elevation 7300 ft
I completed a week-long, 215 mile, solo mountain bikepacking trek in the Oregon Cascades in July 2015. At the end of the trek, I added another 40 miles of mountain biking on local trails, making my week’s mileage 255 miles.
Basic route: Oakridge Oregon to Crater Lake, down the North Umpqua River, up Steamboat Creek, over the Calapooya Mountains, and back to Oakridge.
It was an epic adventure for me – sleeping in a hammock, biking through the Oregon wilderness, drawing drinking water from streams and rivers, climbing in mountainous elevations, dealing with an unseasonal heat wave, skirting a forest fire, and meeting many kind people.
I’ve heard several times “it’s not about the bike” so I headed to bikepack northern Argentina with the gear I already owned.
Unfortunately altitude (everything above 10000 feet/3000m) and strong winds were worse than expected and with a bike with the wrong geometry I ended up riding only 250+ miles (60 trail & 25 singletrack)… but still was a very good way to put myself and some gear to the test!
An ultralight, 3-season tent for 2 that weighs in at 1 lb. 15 oz., this tent grants protection from bugs and rain at a weight one person can easily carry alone.
Best use Backpacking
Seasons 3-season
Sleeping capacity 2-person
Minimum trail weight 1 lb. 15 oz.
Fly / footprint pitch weight 1 lb. 7 oz.
Packaged weight 2 lbs. 5 oz.
Packed size 4 x 18.5 inches
Floor dimensions 86 x 52 (foot width) 42 inches
Floor area 28 square feet
Vestibule area 7 square feet
Peak height 38 inches
Number of doors 1 door
Number of poles 1 hubbed poleset
Pole material Aluminum DAC Featherlite NSL
Pole diameter 9.0 millimeters
Canopy fabric Ripstop nylon/polyester mesh
Floor fabric Coated ripstop nylon
Rainfly fabric Coated ripstop nylon
Ultralight Yes
Design type Freestanding
Hello, I put together a charity mountain bike ride in 2008 across Nevada from Great Basin National Park to Reno. Have ridden it three times – 2 times west to east, and once east to west. Following dirt roads for 527 miles crossing 12 mountain ranges. Takes me 11 days (10 days of riding, 1 day off). Please check out xnvmtb.com for details of ride. Incredible route through the Great Basin. Camp the entire route. Will be riding this year August 31st to Septamber 10th as a solo rider without a support vehicle.
HOW MANY PHOTOS DO YOU HAVE OF YOUR FAMILY AND YOURSELF?
HUNDREDS? THOUSANDS? MORE THAN YOU CAN COUNT?
WHAT IF YOU HAD NONE???
During my travels, I’ve found this is an unfortunate reality for thousands in South America and as a photographer I thought I could make a difference… one photo at a time.
I’m starting with Argentina and I’m planning to ride a new country every other year, making Family Portraits for those who’ve none.
By September I’ll start bikepacking 4000 miles (6000 km) along the Cordillera de los Andes, from La Quiaca to Ushuaia (through Ruta 40 and beyond).
I’ll be making & printing portraits for the local people I meet along the road and I’m also collaborating with Fundacion Ruta 40 (a local NGO) to visit the most remote rural schools they support to make (& print) their student’s portraits. Carrying a small portable photography studio will let me print their ONE photo on the spot.
Due to the recent volcano activity at Patagonia, I’m putting together the best bikepacking gear to cycle BR-319, one of the best preserved areas of the Brazilian Amazon (for my 2nd warm up trip).
I just returned from a short warm up trip through Northern Argentina (I’ll divide this trip in 3 shorter trips for their report).
I thought it was true when people say “It’s not about the bike” and I did this first trip with the gear I already owned, which unfortunately was an old dirt jumper with 26×2.40 tires & DIY bikepacking’s bags. It’s true you don’t need a fancy bike to cycle the world, but my bike geometry was much more important than I thought and it was REALLY uncomfortable to ride on pavement for several hours.
Unfortunately altitude (everything above 10000 feet/3000m) and strong winds were worse than expected and I ended up riding only 250+ miles (60 trail & 25 singletrack)… but still was a very good way to put myself and some gear to the test!
I’m planning to amend this mistake by putting together the best bikepacking gear I could get for my 2nd warm up trip through the Amazon jungle, if you have any tip/suggestion please get in touch!
Tilcara-Abra de Punta Corral-Tumbaya-Tilcara (50 miles, 50% singletrack).
I arrived to Tilcara at 8200 feet (2500m) and the following morning I’d the brilliant idea of joining Abra de Punta Corral Pilgrimage. Every year, thousands of local people trek to a little chapel at 13000+ feet (4.000 m) to give their respects to Virgen del Abra de Punta Corral, followed by Sikuri bands (more than 80) playing music all the way up & down the Pilgrimage . This brilliant plan ended up with pushing a loaded bike uphill for 52800+ feet (16km) during 8 straight hours till I reached the little church (where I spent 2 nights with the locals). Even if I’s properly acclimatized to altitude, it would had been impossible to ride the way up, due to the high amount of people walking through a narrow trail during this time of the year.
The descent was also made through the same narrow trail, so I decided to get down through the opposite direction (Tumbaya) a 13 miles (22km) very fun descent on loose trail going from 13000+ feet (4000m) to 8200 feet (2500m). If you’re an experience rider I recommend you to do this route in the opposite direction; starting at Tumbaya is going to be a 4 miles (7km) longer climb, but it’s not as steep as Tilcara and you should be able to ride it all the way up… and the 9 miles (15km) descent through Tilcara should be amazing is you’ve a good steed (and you are a skilled cyclist)!
La Cienaga is a small village 10km away from Purmamarca and Escuela Nº53 Dr. Marcelino Vargas’ location, a small rural school with 8 students (who walk up to 12 miles a day to go to class) that I visited to collaborate with Fundacion Ruta 40 (a local NGO contributing in the comprehensive development of rural schools) making photos of the kids, classroom, & school.
After La Ciega you reach Cuesta de Lipan, a 112500 feet (34.3km)ascent that goes from 7837 to 13681 feet (2389 to 4170m) before reaching Salinas Grandes (salt flats). It was definitively the hardest time I ever had in the saddle, but the twisting descent on tarmac was AMAZING even with an fully loaded old dirt jumper with 2.4 tires (it might be one of the best roads for 2 wheels in the world!)… and it was the very first time I ever wished for a lightweight road bike 😉
I was camping at Tilcara and I had to ride 27 extra miles (45km) uphill on tarmac to reach Humahuaca. Two blocks from the main street you’ll find a gravel road that later turns to trail and will take you to Serrania del Hornocal or the 14 colors mountain after a 82000 feet (25km) climb. The ascent going from 8200+ feet ( 2500m) to 14000+ feet (4317m) is almost as bad as Cuesta de Lipan, but the views at the summit (and during the trail) are amazing… almost as good as the descent 🙂
After the trip to the salt flats (and before Hornocal), I was supposed to cycle to Iruya (a small Kolla village in the middle of the mountains), but I was completely exhausted after the tough climb and I ended up leaving the bicycle at Tilcara and taking a bus (needs 4 hours to reach there).
I did some trekking and I also made a wedding portrait (trash the dress) up in the mountains for a sweet couple I met! I’m not allowed to post their photos (yet) but here is a BTS shot 🙂
I hope you liked my little 1st warm up trip… I promise the next one through the Amazon jungle will be MUCH better 🙂
PLEASE HELP ME TO SPREAD THE WORD ABOUT MY LITTLE PERSONAL PROJECT, REMEMBER YOUR SUPPORT WILL PUT A PRINT ON SOMEONE’S HAND!!!
I laid awake just a few minutes before dawn, listening to the pitter-patter of rain on my tent, thinking how nice it was to be dry. For most of the night we were only a sheet of polyurithane canvas away from being hammered by the atmospheric showerhead.
The rain finally stopped. Beads of water rolled off the tarp onto my hand, when I finally zipped down the tent door and popped my head out. Wispy clouds pierced by the giant toothpicks of Engelmann Spruce, hung overhead. I packed my gear into the Honda Accord while waiting for my friend, riding partner and support driver Sean to awake. I couldn’t help but think, Sean had been missing out on the best this trip had to offer, by not seeing the morning clouds and dew, not to mention the red of the rising sun, even if it was a bit damp out. Instead of riding the length of the trip with me he would daily drive the car to our endpoint for each day’s trip, and then he would saddle up and ride his Cannondale out to meet me at whereever I was on the trail. Then we would pedal the last short bit of trail to the car, chill, chow, find a place to camp out by the trailhead and call it a day.
This last overnight I had struggled to find a good position to rest on the rocky ground, earning only a fitful sleep. Still tired upon awaking, I was keenly aware of how wet it was outside, and wondered how much it would affect reaching my goal for the day: a 46 mile trek over a spaghetti-tangled line of gnarly singletrack. A path that would require passage first over high ridgepoints and across tundra, barren rock, before submerging beneath tree stands on a wildly rooted foot trail.
It was day 4 of 6 of a three-century trail ride along the mid to southern Colorado Rockies from the Mosquito Range to the far side of the San Juan Mountains at Telluride. Beginning the expedition in late August several miles south of Breckenridge, Sean and I were now somewhere in the middle of Gunnison National Forest in the Sawatch Mountains. This earthen flank of massive bulwarks made up some of the most awesome spectacles along the American Continental Divide. With seven of Colorado’s 14,000 foot peaks among its ranks, it defends the highest ground in all of the country, and undoubtedly it has been the background for many postcards defining the Centennial State.
Before departing that misty morning from the Monarch Crest Store off of Hwy-50, we had our picture taken by the sign for Monarch Pass (el. 11,312 ft .). After unracking my vintage 7-speed Trek 820 and lubing the chain, I started to crank my pedals at 8:30 a.m. – an unusually late hour given the amount of daylight already gracing the still frosty ground. Churning up the steep two-track towards a gondola to a line that branched off the right I broke away from the wide jeep track, ripping down a narrow foot trail etched into the slope. I could feel the adrenaline surge through my body as my bike clung to the ledge of a sheer dropoff.
The land oscilated from talus ledges on hardpack to 30 degree climbs over rockgardens. In one instance flying downhill on a short, steep descent, I slammed the wheels into a solitary rocky prominence that nearly forced me into a back flip. In a last second move I abdicated the saddle and kissed the dirt. Shaking it off, I climbed back into the saddle and attacked the next hoard of baby-heads at speed. Dodging and jumping over the trail impediments for a good 5 minutes, suddenly the front wheel bounced skyward. My feet left the flat pedals as I seemingly unicycled over the boulder before nose-diving my front tire back to the ground. While fun, one had to hope that the trail would settle down some so I still had the energy to complete the trip before the sun took a siesta.
It was late in the morning just two days before, when I struggled up the boulder-strewn ridge on the west side of Taylor Pass’ 4wd trail FR#761. Alternately propelling myself forward both on two wheels or by foot with the weight of the bike on my shoulders, I so wished I had made the recommended mechanical adjustments to my bike, whose largest gear was still only 28-teeth at that point. Whether due to overconfidence or being tight with money, I waited too long to realize the importance of rebuilding my drivetrain to meet the preciptious trails. Finally 5.5 miles later on the talus trek I stopped for a moment to regain some of my strength, and felt a rebellion of my digestive track. Having pushed myself up an unrelenting incline of loose rocks and boulders, I was soon on the ground writhing in dry heaves. Water and rest is a good thing, but I apparently forgot that an hour into my uphill charge.
Having grown up in the Blue Earth river valley of, Minnesota, I was only just starting to appreciate the lower oxygen levels, not to mention the advanced gear requirements to ride talus slopes. I kept telling myself the thin air really didn’t matter, and wasn’t going to affect me too much. It was all in my head — mind over matter.
Sucking air vehemently after I was unable to dispell anything from my empty stomach, I paused to look around me. Amid the odyssey a marmot popped out from behind a rock just a few feet in front of me. I groped for my camera a Canon Powershot A480, but with only the slightest move of my hand his eyes fixed upon me. Even before I could bring the viewfinder to my eye he scampered behind the boulder.
Since becoming serious about riding back in college at Minnesota State, I had a tended to be a bit masochistic about the sport, spilling my cookies after 80 miles of virtually non-stop riding over paved paths of rails-to-trails between Mankato and Fairbault, MN. So, I was fearless to attack the mountains. Despite the change in altitude after moving to Denver, this was only the second day of my the first experience pedalling over unstable ground for countless miles. I had come to realize my feeble mortality in the higher altitude. After regaining my composure, I leaned against a rock looking upon the vast expanse of mountain peaks, while simultaneously drinking my electrolite-empowered water. Taking a few more minutes to rest, I finally, hopped back on the bike and torqued my pedals over the next hilltop, negotiating several annoying rocky crags.
Just 100 feet from the apex of Taylor Pass I hung over my bike handle bars for a short rest. A couple minutes later I heard a caravan of ATV’s approaching from behind me. The tranquility of the area immediately disappeared along with feelings of exhaustion. As the hum of their engines slowly rode up behind me over the sea of rock, I hopped back on the wheels for one final push. Undoubtedly saving face I torqued my pedals up another 100 feet of the alternately steep to moderate slope. Spinning furiously to the top I dismounted next to a sign for Taylor Pass elevation 11,925 feet. The day before I was at 13,200 feet at Mosquito Pass, and that one seemed so much easier.
The awesome panorama at the top along with the company of boisterous 4-wheelers made this normally serene area seem almost circus-like. Two or maybe three guys walked over and interogated me in a friendly manner over this mad concept of cycling the pass. After this brief exchange they offered me a sandwich, pitying me for having only power shots and protein bars.
After oohing and awing together over the imposing skyline and making some small talk, the head of the party asked if I would prefer to ride with them or attempt to take my bike down across Taylor Creek. It would be another year before I was aware of the more ridable trail that waited for me on my right, well that and I had intended to go down Taylor Creek this year.
It was a constant rockfall and at times the trail was one with the creek, as the water level of Taylor had not dried up yet due to the unusual amount of rainfall in the high country this summer. So, I gratefully accepted his invitation. We strapped my bike on the back of the larger ATV and drove down several feet before going through and across the large mountain sluice. The trail was covered with watermelon and beach-ball sized boulders partially submerged in the mountain stream. The relatively short distance we covered lasted for what seemed like forever due to all the bouncing and jarring along the way, and to no surprise the wire to my odometer-speedometer severed. Fortunately I had some electrical tape with which to reconnect the wires.
Fast-forward to the present, and indeed today’s events would offer new challenges that might make the crawl up Taylor Pass seem tolerable.
As I spinned onto the narrow trail towards Peel Point — the height of Monarch Crest, I could feel the presence of several other knobby wheels behind me. I counted approximately ten other riders pedaling in front and behind me. I was honored to finally share the trail with so many other cyclists.
At Peel Point 12,600 ft in elevation I stopped a little ways before a radical decline, took a few more shots and exchanged some small talk with a guy who was on a tour that looped back to Salida. He was with a large group, but had taken an opportunity here to enjoy the spectra of an boundless mountain peaks and swap trip stories with me. The rest of the ride to Marshall Pass, whether riding uphill or downhill was a breeze. At this juncture on a dirt road a large crew of French roadies pulled into the parking lot where I was breaking at 11:30 a.m. Listening to their chatter it was curious seeing such a foreign element in this comparatively remote area.
By noon I was off again, following a couple casual riders. Not an hour passed though and at the turn for Silver Creek Trail, I again was playing solitaire as I watched the others ride off back towards Poncho Springs.
Almost immediately I approached a 30-percent grade on a ATV trail. Struggling desperately to maintain a rhythm on a waterfall of baby-heads, I slowly ascended upwards.
Next the trail alternated from rocky slopes to a narrow, rooted path. The dry bones of a deer carcass lay just off the trail on my left. I made a sudden shift and sharp right to avoid it and whatever my imagination told me was lurking nearby.
While slashing through a wide creek , I could hear the hum of two motorbikers approached from behind. I stopped and pulled off to let the two bulldoze past me.
Shortly thereafter the skies darkened and a few minute droplets soon transformed into a monsoon. Incredibly there was no wind. Nevertheless, the hammering rain, turned the trail into mud and I was forced to dismount and push my bike towards a campsite a mile or so ahead. With the added weight of my gear, I was wishing I had spent the extra bucks for that 100% water-proof jacket. A few minutes later a motorcyclist returned. My trail trashing enemy just a few minutes ago suggested a shortcut on the Tank Seven Trail down to the town of Sargents. Naturally, I was thankful for the tip, but feeling a little tentative about turning back and trying this uncertain route. Yet the gentleman was certain I could better circumvent the ominous weather conditions by excepting the challenge. Checking my waterproof map in the downpour, I reluctantly took his advice and abandoned my original goal, assured that I would not reach even Sean at the North Pass before darkness would stop my progress.
After finding the trail then tracking for what seemed like hours of pushing and carrying my bike on the washed out pathway, I had gradually become disheartened. The track was increasingly faint and seemed at times nonexistent. The addition of large slick rocks and flooded stream beds was exasperated by muddy, talus slopes. Traipsing through the sludge I felt like I was starting to get lost, so I pulled out my compass, turned my wheels in the general direction of the CDT (Continental Divide Trail) and retraced my steps and/or revolutions.
Having exerted myself and stressed my body so completely in my haste, I took more than a few spills in my effort to get back on track and make real progress before dusk. Already wiped from piggy-backing and pushing my bike across uneven terrain, I sat my soaked fanny back in the saddle and followed the tread back to a natural gas pipeline, and continued spinning along the snaking line to a familiar overlook.
An injection of adrenaline pumped through my veins, deleting all prior messages of weariness. I alternated between pushing and pedaling methodically with meager hopes of back-tracking to Marshall Pass before dark.
When the rain finally stopped a thick fog hung in the air, gradually dissipating into a string of vapor as I followed a tree studded ridgeline. No matter how hard I pressed myself the crimson western skies spelled the final chapter of the day. I contemplated where under the canvas of the dampened, old growth forest and seesawing hills that I should stop for the night .
When the sun finally settled down behind a silhouette of jagged massifs I probably should have still been in the thick of the doghair pines, but by divine interference the light hung on just long enough for me to reach a clearing. Hunkering down in the tall grass meadow on a incline, I laid my backpack down and curled up in a fetal position to stay warm since my clothing and gear were wet from the deluge. Fortunately there were still plenty of uneaten granola and protein bars in my pack.
Spotting myself in the center of the clearing just off the trail, I had a pretty good view of anything that could approach from anywhere but behind me upslope. The slanted ground allowed me to still recline as much as I could take the cold ground and still have a good view my surroundings.
As soon as I crouched into position the sky blackened. I had not been fully prepared to do an overnight, while my trailbuddy Sean was carrying the tent and camping gear. I tried to appreciate the peacefulness as light bulbs of the universe continued to illuminate my surroundings. Even so, the temperatures dropped drastically and I rubbed my bare ankles furiously with my bare hands. The biker gloves were soaked and useless. Here in the wild, it was like a little bit of heaven mixed with hell.
With time on my hands, I was thankful that my wife and three children were home safe and warm. On the other hand, I was certain that by now the alarm bells had gone off when I wasn’t able to call or answer my now altitude-sensitive cell. My eyes were busy both absorbing the tranquility and being bored with the sameness. A cold, crisp night breeze kept me awake and focused on what lurked behind the trees. In spite of only a fitful sleep, at around 5 a.m. with barely a hint of sunlight I was back on my feet and pedaling off towards Marshall Pass. As I headed down the hill two deer hopped across my slender path several feet in front of me. As they stared at me with a perplexed look of — “What the hell is this guy doing here?”, I stopped only once more to take in the moment, capture it on film, and roll out with a vengence.
Sometime thereafter I finally arrived at Marshall Pass and the familiar Forest Road 243. I had only 17 miles or so to get to Sargents on this wide track, so it should’ve been a relatively easy ride. After five miles of easy, winding downhill from the mountain pass, I zipped past a road closure sign. Without flinching, I pushed on giving no heed to the warning. After another mile I was stopped by a orange construction blockade. Cautiously I pedalled to the brink of a sinkhole, squeezed the brakes and stared down at the ten-foot vertical drop into a stream. I sighed at the thought, of having to scramble down this nasty terrain again, but really after yesterday much less the last couple days this stuff was getting to be routine. I dismounted, picked up my bike and started sidestepping down the embankment, but ended up sliding down most of it. Going up the other side fortunately was easier following the catapillar’s tracks to the continuation of a road. The rest of the trip was fast and finally blah, marked only by mud puddles and a mountainous horizon.
When I arrived in Sargent, I was covered in muck from head to toe. With barely enough change on hand, I asked for permission to make a call from the store phone at the Tomichi Trading Post. My cell phone by now had run out of juice. The store clerk responded “Sure!” without even flinching at my appearance. First I left a message for Sean, who must have still been out of range, then called my wife at home.
Instead my neighbor Vicky answered, and told me that she and three of my friends had contacted Sean and driven up here last night to begin a search. They had spent the night in Gunnison, a resort town and municipal center for the National Forest and County with that name. Previously, I had hoped that I would catch up with Sean, get cleaned up and continue the westward track the next day after a bit of rest, but with this information that was not likely.
Vicky gave me the number to the Gunnison Police, and I quickly called to give them my location. My heart dropped at the thought of a journey cut short. Nonetheless, I was indeed most thankful for friends, who had come to my assistance in this moment of seeming peril.
Looking disheveled and homeless I sat on the bench outside the trading post, waiting for their arrival. They pulled up an hour later, but I didn’t even notice until Steve, Jill and Tony jump out of the Plymouth Voyageur smiling. Then out came my Marcia, who just looked on in disbelief. With not too sharp of a tone, she begged me to just get in the car and leave my bike where it lay. With Steve’s help we loaded the Trek in the back and hopped in the minivan. Having endured a night near 11,000 feet in elevation, it soon came to me after sitting down in a soft vinyl seat how wiped I was really was. The nap on the way back felt good. Regardless of the outcome of the trip as a whole, this was a moment to be thankful. To have my friends and wife finally see me in my element was both humbling and an honor.
Here was my bike for a few months trip in south america. It’s not designed for rough terrain MTB but works on trails and have some stuffs that could be interesting. Being in dry places were you need LOT of water:
2 panniers + one backpack rear. On the diagonal tube: one 1L bottle above, one 1L gasoline bottle below (for stove). Bottle supports are fixed with plumber tubes support. These worked greatbut one day one of the support broke, need to have spare.
Each side of the fork had a support for 1.5L bottle, attached by plumbery tubes support.
This worked OK only if the bottles were supported with pieces of tubes (two at least per bottle, more than shown on the picture). On rough trails and full bottle it can fall.
I’m involved on various forums and Facebook groups and it seems the interest in Fat Biking is gaining momentum. For many in the community, Fat Tire bikes are no longer considered just ‘snow bikes’. And why should they be? Sure, that large 4″ tire has a fair amount of rolling resistance, and if you go for one of the heavier bikes it’s sure to give you a workout, but fat bikes are versatile, comfortable, durable, and, as we all like to point out ad nauseum, they’re a lot of fun too!
Last year, towards the end of my first season of frequent cycling, I set about deciding what bikes to own in 2015. My only steed, a GT Karakoram 29er, had taken me everywhere over the course of the year. It had doubled as a road bike, a gravel bike, a trail bike, a singletrack machine, and…..as a touring rig.
Hardly ideal, but as I said, this was my first year of cycling so it was very much a moving target, a fluid situation. But I was going to need a new ‘do it all’ bike for the 2015 season, I just wasn’t sure what to buy. The bikes which were on my radar, and still are to varying degrees, included the Cannondale CAADX, the Salsa Vaya, the Trek 920 and the Salsa Fargo.
In October 2014 I pretty much decided that I wanted to try and stay fit through the winter and the best way to do that was to go out and buy a fat bike. So I did, a Charge Cooker Maxi2, which I replaced in February with a Salsa Beargrease Carbon [reviewed at the link].
I really, really like the Beargrease, it’s head and shoulders above the old Charge Maxi I owned previously.
So after the usual four months of Wisconsin winter, I emerged in Mid-March wondering two things –
1 – How was my fitness/endurance after 4 months of fat biking?
2 – Am I any closer to deciding on a bike for 2015?
The fitness angle is an interesting one. In 2014 I started the year by losing a lot of weight and basically getting somewhat fit. I’m an older guy in my early 50’s, and I’ve never been an athletic type, so ‘fit’ for me meant being able to run up a few stairs without getting breathless.
Slowly I built up my fitness over the course of the riding season. By September I was ready to have a crack at my first Century ride, which I completed on my 29er in a little over 7 hours. A week later I did my second and last Century of the season.
So I was building fitness and riding longer distances, but when winter came along, and the fat bike appeared on the scene, my riding distances and duration/time in the saddle, tapered off a lot. I couldn’t stand to be out in the cold for more than a couple hours, so my workouts were shorter, but of high intensity.
So I was curious how my fitness levels were now, in March 2015, compared with how they had been at the close of Fall.
Also, I needed to get serious about picking a bike. I’d procrastinated towards the end of the year and now spring was almost upon us I needed to make a decision pretty soon.
But then, I started to read all of the forum ‘chatter’ about people running fat bikes year round. People were racing fat tire bikes in snow, on gravel, on dirt etc. People were riding fat tire bikes recreationally on the beach, on gravel, even on asphalt. And people were selling off their mountain bikes and replacing them with fat bikes. Heck, people were even bikepacking on fat bikes!
Wow.
Perhaps I have everything I need from a bike right here with the Salsa Beargrease?
There was only one way to find out.
Taking the Beargrease on a road-trip
I’d bought a few things at the various online sales over the winter and I was already itching to give them a try.
I’d picked up a seatpost pannier rack from Amazon.com It was going to need to be modified to run panniers on both sides of the rack and clear the 4″ tire, but it worked well with a single pannier.
I picked up a pair of Ortlieb Back Roller classics, a handlebar extender and a few other bits and pieces.
So on the eve of Friday the 13th, I booked a hotel room some 80 miles or so away from my home, and packed up the Beargrease ready for her first big trip!
On Friday the 13th I rolled out into a cold and windy Wisconsin morning, filled with excitement and trepidation in equal measures.
The weather forecast had been fairly accurate for once – a cold, brisk 30mph wind blowing from the South East, pretty much a headwind the entire route. Temps were going to be colder by the Lake (Michigan), my intended route – 25 degrees rising to 35 later in the day. Skies were overcast with some sun poking through here and there.
The trip was awesome.
Sure, the 4″ tires make pedaling quite hard, but the bike is comfortable to ride for long distances with it’s relaxed and upright riding position.
Carrying the gear on the single pannier mount, a couple of toolkits (seatpost mounted and another under the bars) and a few items of light clothing in a backpack, proved completely hassle free.
I cycled south from Egg Harbor WI, through Sturgeon Bay then down the lakeside for my first brief rest-stop in Algoma WI
Riding on from Algoma and down to Kewaunee, I took a few minutes off to enjoy a good cheeseburger from a Citgo Gas station!
I made the hotel before 4pm. Approximately 79 miles covered on the first day.
I felt good, my energy levels were very good and my leg muscles were doing just fine. My rolling average was only 10 mph but I attribute that pace as much to the hard headwind as I do to the 4″ tires.
But I was in good shape – no backache, no neck pain, no muscle soreness. It was a good first day in the saddle.
On Saturday morning I was expecting to catch a ride home on the tailwind so I started the day off quite late, around 8am.
To my amazement the wind had pulled the old switcheroo on me and had shifted almost 180 degrees and was now blowing hard out of the North West. That pretty much meant another day riding into a 25mph headwind.
Saturday’s riding wasn’t very pleasant. I grew tired of the strong winds quickly and tried to reroute onto a couple of gravel trails which I knew would offer some shelter from the wind.
I rode part of the Devils River State Trail and later on in the ride, the Ahnapee State Trail – both packed gravel with some wet/muddy sections of dirt here and there.
The whole trip home was a slog. With the reroutes it added distance and I made it home with 90.13 miles on the clock.
It was late when I arrived home, after 8pm, and I was pretty tired.
170 miles over two days was a lot for my first ride of the season, but it felt good having completed it.
Conclusion
Yes, it’s possible to tour on asphalt on a Fat Tire bike. The experience could certainly be improved by adding a 29er wheelset or a 29+ wheelset, but then it wouldn’t really be a fat tire bike, would it?
I think it’s viable for me, given that I probably won’t do too many road trips of this magnitude. I’ll probably camp 3 or 4 times over the course of the year ahead and perhaps limit my daily mileage to a more sensible 60 or so. For which, the Salsa Beargrease will work just fine.
That’s not to say I wont add another bike to my collection before long 🙂
This is my setup for a 4-day tour with MTB which I did in Thailand near the border with Myanmar through forest. All dirt roads, very steep up and down hills, uncountable river crossings, quite hot during day, unexpected very cold during nighttime (lesson learned!).
20 liter drybag with mostly food stuffs, also 1 clean set of cycling gear, and 1 set of clothes for night-time. Tied to a simple seatpost TopPeak “rack”. I added 2 short pieces of wood to the rack (about 3 x 3 x 35 cm), which I tied with old inner tube to the rack. This way I could better tie the bags to the rack. I used straps with a small metal ‘lock’ which works great, the bags never loosened even a little bit. I had a spare bungee cord as well, and a few pieces of rope for tying stuff, drying line, etc.
Hammock from SiamHammock with ‘built-in’ mosquito net, this hammock can be used as a mini tent as well. Tied to back of bike (green bag).
I also brought a rainsheet for the hammock, just in case (I didn’t need it). Tied to handlebar with bungee cord net (small red bag).
Thermarest sleeping mat. Tied to handlebar as well (dark grey).
1 liter bottle with filter (yellow bottle), tied most of the time to handlebar. Useful because there was only river water available.
A bag for easy-to-grab things on the top-tube.
A small frame bag with medicines and some other small things.
Seat bag with innertubes in case the tubeless tires won’t seal and some not often to use tools.
A medium-size camelbag with snacks, nuts, electrolyte powder and 3 liter bladder.
2 bottles of about 600 ml each on the frame.
Thankfully I got a blanket from a village at the end of the first day, which I tied on top of the drybag with a bungee cord (in nice pink with flower decorations!).
I carried some tools and some things to repair my bike, but after only 20km a stick flew into my rear derailleur and comletely bent it. I didn’t bring a spare derailleur, but luckily nothing was broken. So we carefully bent everything back into shape more or less, leaving me with 2 working gears for the rest of the trip.
The Dragon’s Spine route crosses South Africa and Lesotho, originating from a 2013 publication by David Bristow and Steve Thomas called Riding the Dragon’s Spine. The 2400mi route is primarily unpaved and connects Cape Town and the Western Cape with the border of Zimbabwe, near Messina in the Limpopo Province. The book schedules the route into 58 segments, each beginning and ending where water and shelter are available, although any schedule may be kept as this is a self-guided tour exclusively on public thoroughfares, a welcomed feature in a country where private property and locked gates limit access to a lot of land.
Most of the route is characterized by high quality dirt roads, with several notable exceptions. The route across Lesotho is very different than in South Africa, owing to the way land is used and managed in that country– there are no fences, and there are people and informal trails everywhere. The route follows many rough dirt roads and abandoned doubletracks, as well as some sheep and donkey trails and a few paved stretches to make necessary connections. In the poor northern province of Limpopo, near Zimbabwe and Mozambique, you will be routed onto ill-maintained dirt roads and natural walking trails amidst poorer black communities. In the KwaZulu-Natal province, railroad service roads play into the route. Across the karoo, an arid grass and scrubland where large tracts of land are fenced for grazing, graded dirt roads extend for miles. In the Western Cape, several adventurous sections are included within the Cape Fold mountains such as a steep hike up (or down) The Ladder, an historic donkey trail into a valley informally called The Hell, settled long ago by especially hardy Afrikaners. Yet, most of the route is passed on pleasant dirt roads, through small communities, with uncomplicated logistics regarding food, water, and shelter. As intended, this route is likely to become South Africa’s “Great Divide”, much like the famed dirt route across America.
The route is open most of the year, although summers can be extremely hot, especially in Limpopo, and the sun is intense at these latitudes. In winter, snow may fall on sections of the route in Lesotho and the surrounding highlands. A bike with 2.0″ tires is recommended and as always, packing light is advised. A rigid mountain bike designed for dirt roads such as a Salsa Fargo or Surly Ogre will be suitable for most of the route, although a suspension fork is a nice addition to extend the capacity of the bike on rough roads and through the few technical sections. A proper mountain bike may be more than is required on some of the longer stretches of graded dirt road, but will make the tough days more enjoyable. Almost any mountain bike will do. Tubeless tires are highly recommended as thorny acacia trees are common throughout the country. In warmer months, plan to be able to carry up to 4 liters of water per person, while an insulating layer such as a down jacket may be advisable nearer to winter for cold nights and crisp mornings. In any part of South Africa if you ask for water or a place to camp, you are likely to get a lot more– South Africans are especially kind and giving to travelers.
Much of the route is technically passable on a rigid 26″ wheel mountain bike or a stout touring bike such as the Surly LHT or Thorn Nomad, which I mention to assist cyclists who are planning for a longer trip through Africa and have designed their bicycles with other priorities in mind. A few sections may require more walking than on a modern MTB. Alternatively, detours can be made to bypass steep hike-a-bike in Lesotho and out of The Hell (Gamkaskloof).
Wild camping is unofficially possible along much of the route. It is acceptable to knock on the door of a rural farmhouse to ask to camp nearby as well. While South Africans claim crime to be a major issue, you will be traveling mostly through rural areas. We felt safe for the duration of our three months in the country, although best to keep an eye on your bike when in town.
English is spoken in much of South Africa, although not always as a first language. The country claims eleven official languages, including 9 traditional languages and Afrikaans, a Dutch-African language spoken by most white farmers and their families, as well as many blacks and coloreds. These racial descriptors are different than in America, and are in common use. In Lesotho, English is less common in the countryside.
Lastly, South Africa is a dynamic country, much alike and unlike the USA. The history of the five last centuries mirrors American history in many ways, yet until twenty years ago a small white minority wielded control over the black majority through the official institution of Apartheid. You will see living history in South Africa as many blacks still live in poor townships, like shantytowns or ghettoes out of town. Whites generally live like middle class Americans or Europeans. People all across South Africa are curious and friendly, just be prepared to learn a lot. Lesotho is much different as the country is almost only populated by the Basotho people who continue to live traditional lives in the mountains, growing maize and herding sheep, although the nearby capital of Maseru is a bustling African city and the country’s infrastructure is rapidly growing. In Lesotho, people are absolutely everywhere. Don’t be surprised if you don’t get much privacy in your time there as the people are very curious.
Note: We did not use the guidebook, but had the chance to browse it briefly. However, I would have gladly used it if I’d had the chance to procure it beforehand. It is technically possible to follow the route simply by GPS. We technically rode about 80% of the route as we diverted to Swaziland, the Wolksberg Wilderness, and only discovered the route about a week after leaving Cape Town, although we had covered much of the same tracks up to that point.
Took some time to re-use a Shoppers Drug mart lightly insulated shopping bag and made a giant feed back for 2.99$. Ok….my mom did it, not me! She saw that I was browsing the net for feed bags and complaining about prices so she took some initiative and voila! Just have to sew on the velcro and should be good to go up front to replace my smaller feed bag.
I just wanted to put in the good word for Six Moon Designs “Deschutes” Cuben Fiber Tarp Tent. This is a six sided pyramid tarp. I feel that “fitted” tarps give you better coverage with less material as compared to a flat tarp. The specs off the website will tell you that it is 105 inches long… 80 inches wide…. 48 inches tall. Because the pyramid it doesn’t seem quite that big as you lose usable space around the edges and the 48 inch tall doesn’t feel quite that tall. Nonetheless, it’s amongst the largest of the Cuben Fiber six sided pyramid tents on the market. I am 6’4″ and it fits me just fine plus my gear. The claimed wage is 7 ounces… My scale says 7.5…. I added the little plastic tensioners bringing the total to 8 ounces. It is also very compact….ummmmm…. About the size of a 1 L Nalgene bottle. It is designed to be supported by a trekking pole…. But I use the carbon fiber pole that is sold by Six Moon Designs which weighs 1.8 ounces and cost $30
If you look carefully at the photos one picture shows the zipper ‘open’ and the guidelines are long enabling the tarp to be up off the ground for more ventilation and for more interior space. Another photo shows it zipped ‘down’ and the guidelines are supershort…. This is what I call “Storm Mode”…less room, more protection.
This tarp cost $330… They make the same tarp out of silica nylon which weighs 13 ounces and costs $165…. Speaking in round numbers, half the price, twice the weight and bulk.
There are two other companies making similar design tarps. One is Bear Paw Wilderness Designs “Lair” which will allow numerous customizations. The other is Z-Packs “Hexamid” which also has some customization options. Cuben fiber is “THE” material for BikePacking. There are other designs using Cuben Fiber but the modified six-sided pyramid is the best (for me)
After a mapping, day dreaming, and beer drinking between bike folk, we’re stoked to officially announce “The Caldera 500″. Mark your calendars now. The revolution will not be televised. The official Caldera 500 Page is up and running and full of all the info…
Grand Depart of the inaugural “Caldera 500″ will be on Friday, September 18th, 2015 at 7am.
Umm. Yeah. So what exactly is this caldera deal?
We’ve got a 500 mile (give or take) loop around, over, and through one of the the most majestic, geologically rich regions in the world. To get through said 500 mile loop, you’ve gotta earn it with 70+k of climbing. Ride start/end is at 8,000′ with much of the route at 10-11,000′. 95% on dirt. This ain’t a sag supported, aero tucked, bottle handup, strava sort of affair. This is a soggy chamois, brown teeth, hallucination-inducing HAB fest, that will take you through heaven and hell on earth. Loose screws are a prerequisite.
If someone could offer one trip that will maximize the true heart and nature of the country you are visiting and to do that while riding my mountain bike – I would say “let’s go”!
The HLC is exactly that! It’s an epic, self-supported, extreme bikepacking race that will take you across 1,400 Km of Israel’s best sites and wild nature.
It’s a race that combines religious sites such as Jerusalem & Galilee and the Sea of Galilee, modern attractions like the long cost line, the forests of Israel and the Desert.
HLC 2014
The first year of the race. 27 Brave/Adventurers riders stand on the start line – only 10 will finish.
the first day was an ‘all-together-ride’ through the highlands of the Golan heights. Slowly the riders got into their on pace. on the first night you could still see groups of riders camping and telling trail stories but that was the last night most of the riders slept together…
The long hours on the saddle, special food and water logistics, bike reapers started to appear and each rider was on his own.
Riders reported during the race on the groups Facebook page and on What’s-up and a track-leaders spot system enabled the wives/family to track the riders as they move.
The desert heat welcomed only the toughest that survived the first 800 km to an blazing heat. The riders needed to change their ride schedule and ride very early in the day and late afternoon to avoid the noon desert sun.
I wasn’t one of them. After 4 days out and 500 km into the race my body alerted me it is time to end this. I was sick during the race and with the extreme effort i got sicker.
Terrain: mix of high-land, 4×4 gravel roads, single tracks and desert.
Touring Time: 6 – 16 days
2015 race date: April 9th 7:00
Without organizers and without sponsors our riders community is trying to make the best international event of the HLC. riders support riders and everyone takes a small task on himself to make the best of this event.
for example:
a bus will drive riders from the center of Israel (Tel Aviv) to the start point on Apr 8th (shared cost)
a special rate hotel for the first night on the start point (magdal shams)
rider spot system thorough track-leaders will track you (special price)
My first venture cinching a bag on my bike was back in ’84 or so, I was in junior high and had a early edition Hardrock with a bullnose handlebar that accepted my 10 pound hollofil (some hyperbole here) quite nicely. The trip was planned, friends invited, (one showed) and we were off. It was my first and last trip into the mountains intending to camp from two wheels. We pushed, flipped, and rolled until eventually ditching the bikes to carry the bags up the hill until a resting spot near the summit could be found where we vowed never to return to the backcountry this way again. I later moved to the East Coast where the mountains were a little more accommodating for bike camping (my friends there called the Rockies “oppressive grandeur” unwelcoming to two wheels), but never found the time to really test the sport again. Fast forward 30 years, I’m back in Idaho, and find myself heading into the same mountain range again, this side from the west, onto the Crestline trail, where my supportive wife has agreed to accompany me while I satisfy my need to re-trial this sport.
After much on-line review using the outstanding blogs in this forum, I invested in a Revelate Design’s Viscacha and their Sweetroll to carry my goods. The seat bag held the stove/fuel, my clothes, fishing reel (I couldn’t pass up the opportunity to venture for high altitude trout), and food for the planned 24 hour trip. The Sweetroll packaged my tent stakes and rainfly (no tent- I’ll get to that later) to my handlebars. Because I was going to carry as much as possible and limit my wife’s load, I was the family mule adding additional capacity backside with a 30 liter daypack. Giddy-Up!
After reviewing trails that I had ridden over the years in this area, plus the Idaho Hot Springs Loop from Adventure Cycling Assoc. and the McCall Idaho Mountain Bike Trail Map, I settled on a something that received a “blue square” rating. This was to be a quick-trip-test, nothing too difficult, an opportunity to trial the equipment, and determine an average pace for longer, future rides that were already being planned before I had loaded the bikes for this trip. Optimism: noun 1. hopefulness and confidence about the future or the successful outcome of something. My wife began to use phrases like, “it will be an adventure,” so I was under the false impression that she understood this was not a typical ride out the backdoor on some soft foothills single track. Occasionally a comment like, “we’ll be in a meadow with single track and easy riding – right?” was responded to with a grunt. I was unwilling to agree, nor respond in the negative and lose all chance of her attendance.
To access the trailhead, a dirt road (#432) crosses the Payette River on the right side of Warren Wagon road north of McCall 16 miles from downtown. From the parking lot, there is a seven mile climb from 5,400ft to around 7,000ft. Parking can be had at the trail head if you want to immediately hit the single track, or at several stops along the climb if you want to strike a balance between the two.
The trail is considered a hiking/motorcycle trail, and since I had done it pack-less on my bike a year earlier, I knew there were some HAB sections. Motorcycles tend to dig the tires a bit more than legs are capable of doing, so there are some rutted sections. I didn’t know exactly what a pack would mean to my mobility, but that’s what this trip was about.
The first several miles were wonderful! Passing through the meadows that my wife had hoped for, then the downhill began and our pace picked up. I was on a Salsa Spearfish, and my tailpipe pack (the Vischacha) did a great job, but occasionally bounced off my rear 29-er when the going got rough. So, on the return, I moved out the stove, etc. and replaced it with items that could be compressed tightly under my seat which avoided the occasional skid on the fabric I experienced on the way in. Occasionally I looked back to see a smile and thought all was good.
Four miles into the single track progress slows dramatically as you pass over and through dry creek beds. My looking back became more frequent and concerned now, as I occasionally heard sounds of metal on rock and a few choice words of frustration (“were those directed at me??”). The trail essentially rides north to south and the occasional creeks run perpendicular East to West, so the trail climbs up and down losing and gaining around 500ft for a couple passes crossing a few creeks until it nears a downhill into Heart Lake.
I had two apps running on my iPhone tracking our travels. Topo kept track of our location and Map My Run for our distance traveled and pace. I had downloaded the region we were in, so Topo worked well, and fortunately, we maintained good bars of cell service so we were able to provide the occasional text back home to the kids informing them of our slow progress as a well as a high degree of location accuracy.
As we came to another saddle and looked across the meadow that held heart lake, I knew from my earlier pack less travel that a long climb out of the Box Lake drainage area was ahead of us. My wife looked a tad defeated. Biking usually didn’t require your feet to be grounded this often. Perhaps it was time to just stick to our feet.
We hid the bikes off trail, unstrapped the bags, threw them over our shoulders and headed over a small incline a little short of a half mile where we had a great view of Brush Lake. After unloading the packs, I realized that the tent was left back home in a useless pile in the living room and we had been packing the rainfly instead. A quick boy scout modification with some local branches as stakes and we were good to go.
After an attempted stint at fly fishing and a great dehydrated dinner from Mary Janes Farm (http://www.maryjanesfarm.org), we watched the sun set and retreated to our down beds to fight off a low of around 20 degrees or so that night. Awakening with a glaze of ice on the bags, but still cozy, we were ready for the journey back.
The return trip was much easier as we were prepared for what was in front of us. We finished with a gradual downhill to the car and even after the challenges we experienced, I got a high five and a promise from my wife to return (this time to a more manageable trail) back on bike again!
We rode a combination of the Coconino Loop and the AZT up to Flagstaff. Our intention was to ride, round trip, from Sedona to The Grand Canyon, but snow and other speed bumps slowed us down. We played in Flagstaff a while then rode back down to Sedona to get a break from the snow and tear up their single-track.
I’m currently riding a Surly Karate Monkey. No idea which year it is, but it still has bosses for canti brakes. 4130 steel frame and a bulletproof paint job pair up with 36-spoke wheels, making for a solid adventure bike. I use Maxxis tires, a High Roller II in the front and a Minion DHR in the rear, both 2.3-inch.
My drivetrain is full Sram X9, and my seatpost and handlebars are aluminum. The bike is pretty light, for what it is. The Surly rigid fork weighs 1-2 pounds less than a suspension fork, and has mounts for Salsa Anything cages or traditional cages, like the Lezyne Power Cages i’m currently running.
I swapped over to Avid BB7 Mechanical disc brakes from the hydraulic ones it came with (I bought it used) for more field-serviceable parts. Cabling is currently stainless steel, but I’m upgrading to Jagwire Mountain Pro.
Sea to Summit Compressible Dry bag strapped to handlebars: Held 1 down coat, 1 raincoat, 2 pair of wicking socks, 2 pair of wool socks, 1 pair pants, 1 pair shorts, 2 pair of boxers, 2 shirts (one for riding one for town), and a 15 degree down sleeping bag.
Revelete Designs Frame Bag: Contained foods, quick snacks, heavier items to keep bike balanced.
Carradice Rear Rack and Nelson Camper Longflap bag: Stored food, accessories, extra shoes, water bladder, etc
Therm-a-rest Sleeping Pad
Please contact me on the site if you have any questions about my setup or the divide in general.
Cleaveland Mountaineering is a bikepacking bag manufacturer that is based out of Italy. Tested in Great Travel in Patagonia and Alaska, recognized for high quality , reliability and duration.
Evolution of Cleaveland, contact: evolutionfatbike@gmail.com
More info in Italian:
Bikers, vi informiamo con piacere che Evolution è ufficialmente esclusivista per l’Italia del marchio Cleaveland Mountaineering per il bike packing. Borse artigianali rinomate, testate nei Grandi Viaggi in Patagonia e Alaska, riconosciute per l’elevata qualità, affidabilità e durata.
Evolution by Cleaveland in vendita:
Frame bag della vostra Misura: 150 €
Top tube: 60 €
Borsa a manubrio: 115 €
Borsa a forca: 75 €
Nei colori Camou e nero. Alcuni pezzi già in pronta consegna.
Spese di spedizione incluse. Contattaci per e-mail per Qualsiasi tipo di Informazione: evolutionfatbike@gmail.com
Dual is an uncompromising line of eyewear designed to enhance your outdoors experience. Our sports oriented power sunglasses complement your active lifestyle by improving your vision of hard-to-read products such as cycle computers and cell phones by way of a discreet magnification area molded into the lower portion of the lenses.
The 3.5 ounce Sawyer Squeeze Water Filtration System is the most technologically advanced and durable, yet incredibly simple to use water filtration solution on the market.
Winner of BACKPACKER Magazine’s highly sought after Editors’ Choice Award in 2012.
Don’t ever pop a pill, pump a filter, or wait for filtered water again. With a life expectancy of 1,000,000 gallons, the Sawyer Squeeze filter is truly a lifetime of water in the palm of your hand.
Living in the high desert I started riding further and further from the house. I decided to build my own and save $$ Using a cheap Singer sewing machine and plans from around the Internet.
I bought fabric by the yard, straps, buckles and velcro at the store for less than $50.
My first build was the seat bag which ended up sagging a bit, easily fixed with a large Velcro strapped around the bag and under the saddle (can be removed pretty fast) . Inside the bag I fit my Eureka solitaire tent, long sleeve shirt and long pants, food.
Second build was the frame bag which was a lot easier (warning: avoid my first try: I sewed the Velcro backwards and had to take the whole thing apart). Inside I fit an extra water bladder, food, tools, spare tube, first aid kit, pump. Bag is holding up great (only downside is the back of Velcro rubs on frame and discolored it a bit).
Last, I used large Velcro straps to hold my Swiss sports compact sleeping bag and tent poles to the handlebars. (Could use plans for a handlebar system, anyone help?)
Rest of my water and gear fits in my High Sierra Camelback . (Extra straps, twist ties, sleeping mat).
I have tested the set up on a sub 24 with plans to go longer in future. Overall this set up worked well, in future I will include a book or iPod as it can get lonely once the sun has set (early for desert winters!). For food, I only brought dry goods to make it easier.
This is my set-up for a recent 3 day 150km round trip from my home into the Peak District UK with my girlfriend. I’ll add a link to my blog for a full write up on the trip as soon as I finish writing it up. I had done a couple of sub-24’s with this set-up so I’m still to find which is the best way to pack everything but so far the alpkit bikepacking luggage has been great. The only issue I have is with the kanga handlebar harness which has two carbon stays inserted in it to make it a more stable platform for attaching the drybags but unless you have a really tall headtube and a load of spacers beneath your stem you can’t use lights on your bars. I’m going to try cutting the stays down a bit to see if this will make a difference. I have tried using a kcmc bar extension but even that wasn’t enough to raise the lights above the harness. Before using the alpkit bag set I just had a DIY set-up which was just strapping drybags to my bars and I used a seatpost rack.
Here’s a list of some of the items I used/carried
On One Lurcher carbon 29er
Alpkit bike luggage set – Koala seatpack, Kanga bar harness. 13l Airlock X-tra drybag, Roo pouch, Possum frame bag, Stem cell feed bag, Fuel pod top tube bag.
Terra Nova Laser Comp 1 tent
Klymit Static V sleep mat
Vango Ultralight 200 summer sleeping bag
Snugpack TS1 Thermal sleeping bag liner
OMM 32l classic backpack with 3l Osprey bladder
Alpkit Filo Down jacket
Helly Hansen Lifa long johns, HH Warm Ice Crew Merino long sleeve baselayer & Embers Merino beanie
Alpkit Myti pot & Myti mug, Ti-foon
Alpkit Kraku Ti gas stove & Esbit Ti solid fuel ultalight stove for back up
Travel Tap water purifying bottle
Alpkit gamma & manta head torches & Glowe lantern
Garmin Dakota 20 with full GB 1-50,000 mapping & Dark & White Peak 1-25,000 waterproof maps
This is by no means a super light set-up and for solo & shorter trips I would probably use my Tarp & bivvy bag. Also for trips with the girlfriend i will need to upgrade the tent to a proper 2 man or I should say one man one woman . I will be upgrading my sleeping bag to a lightweight down one when I can and just generally refining my set-up & packing system over time.
Below is the link to my blog post about the trip
The Bike Odyssey is a multi-day stage race held in June, including one prologue stage in Laista and seven transit stages which begin and end in different villages. The total distance of the route is about 400mi (600km) with lots of climbing. The route connects about 80% dirt roads and 20% pavement and is entirely rideable. Greek dirt roads are most commonly is good condition, with little to no traffic. A few sections are modestly technical, typically due to steep grades, loose rocks, and erosion. The mountainous paved roads all feature extremely low traffic. Water is available everywhere on the route, thanks to a well-developed network of public springs. Every town center has a spring, and hundreds are available along the route. A few springs will surprise you at the top of an extended climb. Many villages no longer have stores, although it may be possible to purchase some bread or cheese, or chips and a candy bar from the cafes that remain. Best to stock up on the essentials in the few larger towns, and augment supplies along the way as needed. Over the eight or nine day period we sourced food in Konitsa (a day’s ride from Laista), Metsovo (just off route, via a descent), Karpenissi (on the newer race route, a small detour on the old route), and Gravia (on route).
The version of the route which we followed deviates from the route scheduled for 2015. I suspect our GPS track dates from an earlier version of the race. The first four days are mostly unchanged. We rode the route in October 2014. A 200m section of road was washed out in the Pindos National Park, and was unrideable, but was easy to hike. Also, our GPS track indicated a few wrong turns which were easy to spot, as mostly no road or trail existed in the direction they suggested. In such cases, stay on the main road. At many junctions along the route, Bike Odyssey placards will be present along with red painted arrows and/or red and white plastic marking tape. Base maps from openmtbmap.org are recommended for Greece and most of Europe.
The simple light structure of a tarp is great for building different types of shelter systems in the backcountry. It features reinforced eyelets, webbing tapes for multiple set up options, uses their high quality silicon nylon Competition fabric and is a lighter option to the Adventure Tarp. Waterproof Tarp 7′ 10″ x 9′ 6″ in a Forest Green color that folds up nicely to be stored in a black nylon pull string bag that is included.
Eyelets – 8 (with ridge line tie off)
Weight approx. – 1.2 lbs
Material – Nylon 5000mm HH (comparison to the Adventure Tarp’s 4000mm HH Poly)
From to App description: Gaia GPS is the ultimate app for backcountry, off-grid, and off-trail adventures. Painstakingly crafted since 2009, Gaia offers the full functionality of a handheld, backcountry GPS unit, with the best outdoor maps on the App Store.
The Lezyne Shock Drive is a lightweight, compact shock pump made of custom CNC machined aluminum perfect for quick trailside pressure adjustments. The high pressure hose threads onto shock valves for a secure connection. A water resistant gauge is integrated into the hose for a slim pump profile. The bleeder valve button allows for fine tuning of shock pressures.
Comfortable ergonomic bicycle seats for all bike riders
Cradles your “sit-bones” to alleviate pressure points
Wide seat area for better weight distribution
Eliminates chafing on the inner thigh area
Ergonomic center relief eliminates pelvic/perineal pressure
Comfortable “long-ride” suspension system
Ventilated seat slots reduce heat/moisture buildup
I just returned to the flatlands of Kansas after a few days of touring the Great Divide Mountain Bike Route which led me on a course form Steamboat Springs, Colorado down to Ute Pass. I had been planning this trip for the better part of a year. I had been doing a fair amount of riding prior to the trip in preparation for some of the distances. I had initially planned on riding from Steamboat Springs to Lynx Pass on day one. This section would have encompassed about forty miles about half of which would be on pavement. The remaining dirt road would be mostly uphill. Day two would entail riding from Lynx Pass to Kremmling, which would be another thirty five to forty miles of what was thought to be mostly downhill to Radium and then uphill to Kremmling. Day three we were to ride from Kremmling to a campground on the eastern side of Ute Pass during which we would have traversed another thirty five or so miles. The plan was to then go over Ute Pass and down in to Silverthorne which would have been about another twenty three or so miles.
Our taste of the divide started on Tuesday night in Denver with some friends whom we had not seen in several years. Part of our planning included a couple of days to acclimatize in preparation for the altitude in comparison to my normal riding conditions in southeast Kansas. The night was well spent. Wednesday morning, we then than loaded up in the van and headed up to Steamboat Springs. The drive and views were wonderful. We had rented a condo at Steamboat Springs for two days. Our trip was to include several components, one of which was a family vacation including my lovely wife and our three daughters, ages nine, eleven and thirteen. My son and I were to do the riding and meet the ladies of the house at various spots throughout the trip. So although we did ride equipped to camp, Kathy and the girls, along with the van (affectionately dubbed the chuck wagon), met and at times picked us up following sections of the ride at which time we would then drive to a camp ground if needed.
View from the condo balcony at Steamboat Springs
On our second day in Steamboat Springs, we decided to go on a five or so mile hike to the north of town. After arriving at the trail head, we set out on foot to see what we might discover. Not being familiar with the trail and attempting to follow the instructions on the material in hand, we ended up taking the long way around which made things a bit more challenging. However it was a great walk and we did not get rained on given our late start. Our hike included several notable discoveries.
Kathy and Sidney on the hike north of Steamboat
Poop is not something that I have spent a lot of time studying. However, in the mountains it does come in handy to be familiar with that which is left behind from certain four-legged beasts which although may mean you no harm, can at times present certain potentially hazardous encounters. After hiking up and over a pass, we entered a fairly wooded section of the trail and discovered what I considered a large amount of poop which appeared to my untrained eyes to be similar to that of the standard cow pie found in eastern Kansas. However some of the excrement also appeared to be similar to that which may be discharged from the local bear populace. As we continued down the trail, we began to hear things. I first heard what sounded to be like a low beastly growl off in the distance. We also noticed that there were numerous areas in the grass along the trail that were matted down and had clearly been used as a bed for by some large animal or animals in the area.
As we continued down the trail the animal noise began to get closer. I had never known bears to make a lot of noise and I have also never known bears to stick around much when people area around so my mind then went to that of a moose. As we slowly continued down our path, we began to hear more than one groaning beast in the woods. As we were coming around a corner, I noticed movement in the woods. As I focused my attention on the area of the movement, I then noticed the brown face of a cow staring back at me with the normal bewildered cow face that you so often see when riding down country roads in Kansas. I had forgotten that there are a number of free range areas in Colorado and this was one of them. Before long we were being followed by a number of cows that had appeared from the woods along our isolated trail. We continued our trek somewhat relieved, with cows in tow.
Local wild life
The trail wound down to a beautiful creek where we stopped for some lunch which we had packed along the way. Another family came from the other direction of the trail and was enjoying the other side of the creek while we ate our lunch. After finishing our brief siesta, the lady that was across the creek hollered over to us that there were some cows coming down in to our area of the creek bed. I guess I should say it was the cattle’s area of the creek bed. Several cows then appeared from the trail above us and slowly walked down to the creek right next to us and stopped for a drink. It was all very entertaining. The cows eventually headed back up out of the creek bed and we picked up our stuff and walked on.
This creek made for a great lunch stop
One of the features of this trail was an old rustic barn. Upon arrival, the girls and Tyler decided to climb up and explore the hayloft. It was a great time for all including Kathy who joined them for a picture up top. Everyone then came back down and we continued along the trail which continued along a mountainside above a creek that roared below us. We eventually made it back to the parking area after walking the full loop and headed back to the condo. It was a great family hike and a great way to get our lungs ready for a ride at the altitude. Just as we arrived back at the condo from our little hike, it began to rain and hail heavily. The weather in Colorado this year had up to this point been very wet. We hoped that this was not foreshadowing of days to come.
Old barn along the trail
Day One: Steamboat Springs to Lynx Pass
After enjoying a decent sleep for the second night in the condo, Tyler and I rose early the following morning to begin the biking portion of our family adventure. The goal for the day was Lynx Pass. Based on the maps and other computer resources, we determined the mileage to be somewhere in the neighborhood of around forty miles. I had initially planned on taking a Camel Back with me to carry water and a few extra supplies that might not fit in my small panniers and my small frame bag. In consideration of the mountain terrain and the fact that we were meeting the girls at the top of the pass, I chose to lighten the load and just take enough items for one night should we be stranded due to a mechanical or some other unforeseen reason. This ended up being a good move for me.
The equipment that I took consisted of the following:
Bike (Salsa Fargo)
Eureka Two Man Tent
North Face Sleeping Bag
Small Back Pad
Extra Clothing (1 pair of socks, 1 underwear, 1 shirt, 1 shorts, 1 long sleeve shirt, 1 rain gear)
First Needs Water Filter
Three Bottles of Water
Tool Kit (2 tubes, tire wrenches, Allen wrenches, star wrenches, multi-purpose tool, chain lube)
Food (Trail mix, dried fruit, power bars)
As far as positioning goes, I strapped the tent across my handle bars. Tyler carried the poles and the tent cover. I combined the tent and the back pad inside of a water resistant bag and strapped it on the top of the rack on the back of the bike. The tool kit was stored in the small frame back and all other items were tucked away inside of the panniers on the back of the bike. Everything was positioned well and secured tightly for the trip. In retrospect, I would have been fine for a couple of overnight stays if we would have wanted to. If we were going to be bike camping on our own, I would have added my penny stove, a very small mess kit and a couple of dried meals. But as it was, those items were not needed.
Once we had loaded up the bikes we rode out headed south from Steamboat Springs. The weather was perfectly cool. The ride from Steamboat was on pavement for several miles. As we headed out, we passed a road rider that was taking a break just outside of town. He caught and passed us pretty quickly as we continued south. The early part of the day consisted of mostly rolling hills. These hills were a good warm up for what was to come. We stopped a couple miles south of Steamboat Springs to take a few pictures looking back at the town before it was finally out of sight.
Farewell to Steamboat Springs
Continuing our trek south, we missed our first turn which exited the road and added about four miles to the days riding. When we realized it we had gone up the road about two miles up hill so the two miles back was nice. Our road rider came up behind us again at this point. He was flying. A pickup truck had just passed us and he was keeping up and in fact almost passed it on the way by. It was impressive. I cannot imagine a better training ground for a road racer than the Colorado roads. The rider turned around after the truck sped off and came back to join us on the ride. He asked us what we were doing and I told him that we were riding a section of the Great Divide Mountain Bike Route to Lynx Pass. He said that he had a friend that had ridden to Lynx Pass the week before. He said that it was a really nice ride but that his friend had advised him that it was really “buggy” up there last week. Given all the rain that the state had received this year I did not doubt it. He confirmed the turn off that was ahead and then took off and disappeared in the distance.
Once we made it back to our missed exit, we headed south again until reaching Highway 131 which we road on for about a quarter mile then continued our trek to the south which brought us to Catamount Lake. The view of the lake was spectacular and the mountain backdrop was incredibly beautiful. We ran in to another rider out for a morning ride, who had stopped to watch a deer with two little ones in a field of tall grass just south of the lake. He said that he had been up to Lynx Pass in years past and it was some great riding. He had been up in Steamboat on business so he was headed back but he wished us well. One thing I have really learned to enjoy about bike riding is the community nature that exists between riders. I very rarely come across a rider that is not willing to share their experiences on the road or help out when needed.
Catamount Reservoir to the south of Steamboat Springs
After leaving the lake, and continuing for several miles, the route takes you off the pavement onto a forest road most of the way to Lynx Pass. There was very little pavement between the first forest road and Lynx Pass, if any. The forest road we were on was wonderful and for a while it was only slightly uphill running next to a small river that was flowing very fast creating a wonderful watery orchestra of sound in the woods. The road was mostly dirt with a few potholes to bring you back on focus should you be spending a little too much time watching the river, rather than the road.
Creek on the way Stage Coach Lake
The road eventually wound to the west and began some consistent, albeit not extremely long, climbs. It rose above the river and a number of other creeks where we could see a few fly fishermen enjoying a great morning in search of brown and brook trout. Eventually the ride brought us to Stagecoach Lake. Stagecoach Lake is an 820 acre reservoir that is surrounded by mountains. The trail around the lake was incredible with some really good single track directly next to the lake. It was not technical and very smooth and rolling. The trail made for a great ride for a couple of miles.
The lake and area also has a great history beginning with the Ute and Snoshone Tribes using the area for hunting, gathering and making stone tools. French trappers and traders began using the valley in the 1700’s and paved the way for mining and cattle and sheep ranching which continues today. The park was also a stop on a Stagecoach Line running from Toponas to Steamboat Springs. The stagecoach Line went our out of service in 1907 (information provided by Colorado Parks and Wildlife).
Stage Coach Lake
At Stagecoach Lake we were at approximately 22 miles into our planned 40 or so mile day. When we left the lake we began the climb up to Lynx Pass. Having done the majority of my riding in Kansas recently, I had somehow forgotten how long some of the climbs in Colorado can be. Since the ride, I have looked at the elevation chart and realized that we had in fact been riding uphill since we left Steamboat Springs. This however became very noticeable as we continued on from Stagecoach Lake to Lynx Pass. In Kansas when we come across up hills sections either on pavement or gravel, the hills tend to be rolling and generally no more than a couple of miles long. There is are also a number of places in between even on longer uphill sections where it levels out or the climb lets up a little to rest. In mountains you are either going up or down. And from a time perspective you are always going up much longer that you are going down. In eighteen mile stretch from Stagecoach Lake to Lynx Pass you are primarily going up. Fortunately the beauty of the surroundings provides a great backdrop for slow riding.
Somewhere between Stagecoach Lake and Lynx Pass, I was passed by another rider who was from Minnesota. Neil told me that he was riding from the Colorado section of the trail from the northern border to the southern border with New Mexico. He said that he wanted to eventually do the entire route from Canada to Mexico but could only get a couple of weeks off this year to do the section that we were on. We talked bikes, riding, and distances. We also talked of things we had seen and people we had met along the way so far. Again I discovered another friendly ride to share some time on the ride with. Best of luck Neil and hopefully your ride was completed safely.
The road up to Lynx Pass
A little push following a long uphill
After climbing approximately two thousand feet in altitude over approximately thirty seven miles of riding, I finally came to the conclusion that there was no shame in walking the last two miles to camp. If there was any shame in pushing my bike up the last steep two miles to the top of Lynx Pass I really didn’t much care. So much of bike riding is mental and my mental had melted in the sun so I turned the remainder of the uphill into a leisurely stroll. Truth be told there was nothing leisurely about it. It was a pain in the neck, back, legs, feet, posterior and other places. As we crested the top of Lynx Pass, we hopped back on the bikes to ride to the campground which was just on the other side. It was nice to see the girls and Kathy waving as we rolled in to the campground after a long day of riding. In total, we had ridden somewhere around forty miles and gained 3485 feet of altitude. Not bad for a couple of flatlanders. It was early afternoon as we set up camp and got dinner ready as a family.
A look back just before the top of Lynx Pass
Day two: Lynx Pass to Radium
After resting in the tent we arose the next morning to a beautiful day for riding. Truthfully I thought about packing it up and just doing a driving campground tour for a couple of days after the last couple of mile walk up to Lynx Pass. But I would have felt very defeated if we had not at least ridden to Radium which according to the map was predominately downhill. I did learn however that you must be careful not to assume that just because a map indicates that you may be losing altitude, that it does not mean you are always going downhill. In fact the ride down to the Colorado River ended up being filled with numerous up and downs which were both thrilling and daunting.
As I said earlier there is no level ground in the mountains. You are either going up or down, sometimes at a very rapid pace. I had talked to the camp host the night before and told them what we were doing. They shared the ominous news that they had just spoken with some bike riders that were doing the route going north from Mexico. They had shared the news that the section from the Colorado River to Lynx Pass was the most difficult of the ride so far. From my perspective, this was good news since we were going the opposite direction.
We headed out going downhill for a couple of miles until crossing highway 134. The first section of the day’s ride was beautiful. We passed a field where we could see several antelope grazing making the mountain scenery even more spectacular. Once we crossed the highway, we entered a section of rolling hills that eventually dropped to a creek that we had to cross. Prior to the creek, we came across the old Rock Creek Station which was an old Wells Fargo stop in to the 1880’s.
An old Wells Fargo station along the route
A climb began after crossing the creek which continued for several miles until reaching highway 134 again. Another gravel/dirt road headed south towards Radium. We headed towards Radium expecting a downhill to the river to start shortly. Let’s just say that it did not quite work out that way.
The next several miles that lie ahead were filled with numerous climbs and drops. The drops were great. The climbs were steep. Some of the drops were very fast and at times a bit slippery for the bikes. Not due to the recent rains but rather the loose surface of rock, gravel and dirt. I must admit that it was quite exhilarating. Tyler was about taken out by a cow in the road and I fish tailed several times throughout the day.
During one downhill section, we had just reached the bottom and while moving at a pretty quick pace, I saw what looked like a badger in the road ahead of me. The color however was off and something did not look quite right. Tyler was up ahead and as he passed the critter, it ran back in to the tall grass on the south side of the dirt road we were on. As I passed, it had spun around in the tall grass and was looking at me straight on. It was a brown in color creature with a square nose and mouth. There were not stripes on the nose but there was a sort of bow across the top of the eyes. Along with the color and the general appearance I believe that it was a wolverine cub. I know that there are not many wolverines in Colorado, albeit that they are apparently making their way back in from the north. But given the appearance, I would almost guarantee that is what it was. I thought about stopping for a picture but given its small size I figured that the mother might be around somewhere and wanted nothing to do with the risks of stopping to take a picture so I rode off and will always wonder I suppose. Tyler said he also believed it to have been a wolverine. Whatever it was, it was a great highlight to the ride.
On the edge of the abyss
As we continued on our trek to the Colorado River, the hills began to get more and more extreme. When reaching the bottom of several downhill sections, we would spend a little time hoofing it up the hill in front of us. Some of the hills were steep enough to make it difficult to push a bike up. At one point, Tyler raced down a hill in order to catch a Jeep that had passed us just to speak with the driver who confirmed our route. Tyler said the Jeep chase was fast and fun. I caught up with them before we headed on. They passed us again and we caught them when they had stopped at the top of the last big downhill before reaching the river.
A look from the to before the downhill
to the Colorado River
The last drop down was very steep, windy and included many blind corners which presented the possible hazard of unseen vehicles coming our way. The only person that has ever died during the Tour Divide succumbed to injuries that he suffered after hitting a vehicle around one of these corners. We were as cautious as possible and had no problems. It was a wonderful sight to again see Kathy and the girls in the Radium parking lot as we crossed the river bridge and dropped down to the parking area to meet them. We loaded up and drove to our next campsite which was at the bottom of Ute Pass several miles to the south of our present location. We had survived another twenty miles and 2000 feet of elevation drop albeit on what was an incredible up and down roller coaster ride.
That night we camped and took it easy the following day. The campground we were in was wonderful right next to a decent size creek in what was discovered to be a very marshy area which made it a great moose habitat which we would later discover. The next day we took a day off and drove down to Frisco and rented some paddle boats. We all had a blast on the lake and enjoyed a nice relaxing day in some very beautiful country. After returning to camp, we prepared dinner and talked of riding over Ute Pass the following day with a little hesitation. It was predominately pavement other than the three or so miles out of the camping area, but it was still pretty daunting after coming over it in a car. After cleaning up and watching the sun set we turned in looking forward to what lie ahead on the morrow.
Sunset in the camp ground
Day Three: Ute Pass
Tyler and I awoke around day break on the last day of the ride. We were thinking the same thing. After sleeping pretty well the warmth of our sleeping bags made it very tempting to stay put in the tent. I would have felt like the trip was not complete without a ride over Ute Pass, so I got up stepped out of the tent to the shadow of the mountains at sunrise.
It is always when you are not looking for things in the wilderness that the things you have looked for previously seemingly appear from nowhere. As I stood enjoying the morning air, I looked over my left shoulder and saw what at first appeared to a dark spot against the landscape at about forty yards on the opposite side of the camp that I did not remember being there the night before. As I looked at it more closely, the dark spot then began to move very slowly and take on the form of a large moose just on the other side of the camp. I had seen moose in Colorado before, but never this close. It was as my wife said later, a majestic experience.
I whispered to Tyler, who was still in the tent, that there was a moose in camp and to get the girls up while I kept an eye on it. Kathy and the girls arrived from their tent a few moments later while the moose was still standing there. The moose seemed as curious about us as we were about him. Our presence did not frighten him and he continued to walk along the base of the mountain on the other side of camp. After several minutes, the moose turned around and trotted off into the forest. What great way to start the day.
After our experience with the moose in camp, the girls went back to bed and Tyler and I geared up and headed down the road for a final taste of the divide. There was a section of dirt road coming out of camp that stretched out for about three miles. It was mostly rolling with a few little climbs and a small dips. It was cold enough to cause my finger tips to become a little uncomfortable, but it was a good ride to pavement. We saw numerous deer meandering in the forests as we rode.
After about two miles of riding, the tree line broke and there was a river that ran parallel to the road we were on. In the middle of the river was a rock bar where to my surprise, stood another large moose with a huge rack. There were some bushes on the rock bar that the moose apparently favored for breakfast which we had momentarily interrupted. He looked at us and continued his snack while we watched in amazement. He was only thirty to forty yards away and totally unconcerned. He continued eating for awhile and then slowly walked back towards the opposite river bank. The bank was an easy six to eight feet in height and he walked up it with no problem. He then strolled gently out of sight in to the woods. I was definitely glad that we had decided to ride out rather than sleep in. They say the early bird catches the worm. I guess the same thing is true for moose.
Another moose along the way
After the moose wandered off in to the wilderness, we continued our journey to the base of Ute Pass. Once we reached pavement the uphill began. From that point we had four miles up hill and then approximately six or so miles downhill. The climb was slow but steady. Once you get used to slow riding, it becomes somewhat meditative. You just keep your peddles moving while enjoying the great scenery. And there was plenty of great scenery to see. I saw more deer and several elk along the way. The elk were up high just below a ridge. I would not have seen them in a car. That is one of the wonderful things about bicycling. You can see so much more at a bicycle pace. The Henderson Mill marked our approximate half way point to the top. It is a huge lumber mill that has in fact produced some local damage to the forest which can be clearly seen.
The top came faster than I thought it would as I found Tyler parked on the side of the road just before cresting the pass. We took a little break and shot a few pictures at the tip before beginning the ride down the other side.
At the top of Ute Pass
After taking our short siesta, we headed down the west side of the pass to Highway 9. It started out fairly gradual. After a quarter mile of so the grade increased and we were off on a windy downhill ride that was better than any roller coaster I have ever ridden. The day before, while driving this pass in the van, I had clocked a bicycle rider coming down the pass at fifty miles per hour in one section. I do not think I reached fifty miles per hour but I am sure I hit the forty mile per hour mark. It is hard to say when you are tucked down and enjoying the wind in your face. It had taken us a couple of hours to get up the back side of the pass and the downhill only lasted for ten minutes to fifteen minutes. It made the climb well worth it.
A great view as we began the downhill portion of Ute Pass
The downhill finished out with a long straight decline that put us out right on Highway 9 that heads south into Silverthorne. Kathy and the girls picked us up at a spot somewhere in between along a river that ran under the highway. Moose, elk, deer and a great downhill made for a spectacular conclusion to three days of riding in Colorado. I can’t wait to do it again.
getty-up at campsite near Le Puy-en-Velay, France 2011-07-25
2 014 summer, I used this set-up for a 7 500km, 145 day bike-packing tour, following (to the extent possible) the major mountain stages of the three cycling tours — Giro d’Italia, Tour de France and Vuelta a Espana, as well as the Criterium du Dauphine, Tour de Suisse and the World Championships (in Ponferrada, Spain). For mountain stages that I could not make during the races, I used the intervals between races to cycle to those regions and do the climbs. 2 011 summer, my girlfriend and I did a 77-day, 3 300km bike-packing tour of southern France, catching as many stages of the Tour de France as we could (5) and otherwise cycling in the Alps, Massif, Atlantic and Mediterranean regions and, finally, the Vercors.
The vast majority of both trips was on paved roads, typically rural “routes departmental.” These sometimes turned into double track and, rarely, single track, but were mostly in good condition. For the 2 014 trip, in Italy and France I camped nearly every night. Because Spain has a paucity of campgrounds and because it has an extensive network of pilgrim hostels in the region in which I cycled (the far north and west; they’re 7 – 17 euros/night, less expensive than campgrounds), I split my nights evenly between camping and hostels. For the 2 011 trip, we camped 70% of the time (sometimes “sauvage” but mostly of the paying kind) and stayed in hostels the other days.
For my 2 011 trip, my base gear had weighed 3,27kg and taken up 18 liters. For my 2 014 trip, I reduced this to 2,73kg and 16 liters, mostly by using an Apple iPod Touch (113g including USB cable and plug) to replace the dictionary, maps, book, and camera (340g aggregate). The iPod also allowed me to have better internet access, though, due to anti-terrorism laws in Italy and France, finding publicly-accessible wireless networks was often difficult. I saved a measure of weight with lighter clothing, too, particularly a lighter rain jacket, rain pants (from ZPacks) and shirts (Rahon) and long-johns. I also lightened the bike to 5,89kg, mostly by running 1 by 10 gearing. On a hot day I carried 2 liters of water in a water pouch. On a <300°K day I generally carried 1,2 liters – 1,5 liters. I also carried food, though typically less than 300g. For the sake of my back, I kept the aggregate backpack weight (base gear, water, food) below 5,5kg. I also wore light clothing. Helmet (195g), jersey (96g), shorts (145g), overshorts (145g), gloves (33g) and shoes (214g) combined to 864g.
My 2 014 set-up generally worked well. As in 2 011, my bike’s handling and climbing characteristics, both strong points for it, were not affected. I had no problems with back pain, butt pain was manageable (though I got a saddle sore (and strep throat!) after pushing too hard getting from the Giro d’Italia to the Criterium du Dauphine), I had ready access to my water and I felt unencumbered at the end of the day. Despite a wet summer, I mostly stayed dry and nearly always warm. As in 2 011, I thrice had some trouble sleeping due to cold (my gear was good down to around 280°K). I otherwise slept relatively well, despite my sleeping pad having been pilfered (which I did not replace) in Italy.
I did experience two significant equipment problems. The available mapping apps I used had either a enragingly unfriendly interface with useless features (GPS CoPilot, the GPS and dependent voice functions of which are non-functional) or, in the case of “crowd-sourced” mapping apps, whole areas that had no information at all. When my iPod Touch was stolen at a campground in France, I was forced to use tourist maps, which do not have sufficient detail for navigation, until I was able to procure a replacement iPod. More serious was an equipment failure on my bicycle. My rear hub, which had approximtaely 30 000km on it, failed in France, forcing me to purchase a wheel nearly twice as heavy (1 210g, v. 660g) for the duration of the trip.
If anyone is interested, I have specific gear reviews at a blog (chrysafeniosquince.blogspot.com).
The base gear:
backpack: ZPacks Zero (24 liter; 96g)
sleeping bag: Western Mountaineering HiLite (200cm model; 523g, including sack)
tent: Gossamer Gear The One (633g, including sack, poles & stakes; the zippers eventually failed, but only after years of hard use)
extra clothing: long johns, rain gear, 2 shirts, hat, socks, et c. (629g)
toiletries: 79g (this varied a bit depending on how much I’d used of soap, tooth paste and medications)
bike-related items: tools, lock, lube, spare parts, et c. (519g)
other sundries: iPod, charger, spork, bowl (a converted 450ml Trader Joe’s plastic container) et c. (143g)
sleeping pad (attached to bike as a sort of fender): PlastaZote EVA (3mm by 50cm by 180cm; 56g, including straps; stolen and not replaced)
Had a chance for a quick 2 day trip in the Colorado High Country. This time of year the Rockies are stunning. I started in Marble, rode over Schofield Pass, camped a night just off the summit, and rode the 401 down valley before turning around and heading back to Marble. You can see a full trip report at http://backroadrambling.com/
Things to Know: Start in Marble, plenty of parking near Beaver lake. The ride to Schofield Pass is beautiful but bumpy! Water is plentiful and not an issue. The 401 is some nice flowing single track. Hit the trail at the summit of Schofield Pass, the earlier the better as the trail gets a lot of use.
I normally don’t do gear lists – largely because I’m not a gear whore – but I’ve gotten a few requests for descriptions of what we’re carrying, so I figure, why not.
I’m doing this from memory, so I’m sure I’ll forget a few things.
The goal of our trip is to ride trail. Rough, smooth, rocky, rooty – and to be able to enjoy it. We make our sacrifices for this goal, but we still want to feel comfortable sleeping 8 hours a night and hanging out at camp some.
Our basic plan is to carry stuff that’ll last without being too heavy. We know the misery of riding with heavy bikes, so we cut weight where we can without breaking the bank. We go fairly minimalist with a few leisure items. Well, I carry a few leisure items, I don’t think Scott has any.
Bikes: The goal is to ride as much trail and as little road as possible. Thus, dual-suspension is awesome, as are big wheels.
We’re running Panaracer Rampages for tires, some of the only tires we’ve found that hold up to Tucson and desert touring. Pretty basic parts, 2×10 drivetrains, hydraulic disc brakes, clipless pedals. Scott’s running a 20t inner chainring, I’m running a 22. I’ll be switching to a 20 as soon as we get to Durango. Scott’s also running a Spyderflex saddle with a dropper post.
Bags: We’ve found that for trails, it’s best to have weight both on the bikes and in packs. Since Scott can’t run a seat bag, he has more in the pack and less on the bike. I do everything but water and the iPad (and spare food when needed) on the bike.
Me: All Revelate Designs – seatbag, frame bag, Sweetroll, Pocket-thingy. Gastank. Feedbag. Most of these bags have come with me racing and I love them all. Eric does good. On my back, an Osprey Hornet (small one) which is proving to be the bag that won’t die.
Scott: Revelate pocket thingy holding a compression sack on handlebars, Gastank, Jerry Can and two feedbags. On his back, a bigger 25L Osprey pack.
Sleeping: We can’t weather an intense storm, nor be comfortable below freezing, but our “race” setups seem to be good enough so far. We have warmer bags sitting in Boulder ready to be shipped if it gets too cold for comfort.
Instead of a tent, we carry a 10 x 8′ tarp. It’s not cuban fiber light, but it’s not bad (made of Silnylon). We’ve set it up once this trip as we prefer sleeping under the stars whenever possible.
Me: Montbell 40 degree down bag, Montbell sleeping bag “cover” (this might get swapped for a real bivy in CO), Big Agnes sleeping pad (lightest they make — Air Core SL).
Scott: 1 pound Western Mountaineering Highlite 40 degree bag, Adventure Medical Kit emergency bivy, same BA sleeping pad
Clothing: I think this is where we carry less than most hikers.
Me: Two pairs of chamois (girls, trust me on this one), baggy shorts, Columbia ProFishingGear long-sleeve shirt, fleece knee warmers, Swiftwick wool socks, Montbell light down jacket, longsleeve thin wool top, hat, warm fuzzy socks (luxury item), bike gloves, Pearl Izumi hike-a-bike shoes, rain jacket. I generally sleep in everything minus the rain jacket and chamois.
Scott: Chamois, baggy shorts, long sleeve collared shirt, arm warmers, knee warmers, Swiftwick wool socks, medium weight down jacket, rain jacket, hat, bike gloves, Pearl Izumi hike-a-bike shoes.
Cooking: Going stove-less is for suckers. And for racers. We carry a MSR (I think) Pocket Rocket that I bought 15+ years ago when EMS was closing in Boulder. A standard fuel canister seems to get us across a state or so. We carry two sporks and a 500 mL titanium pot. (My spork is bigger and Scott claims it lets me eat faster, thus get more food)
Lights: We’re not planning on riding at night, but we could.
Me: Mini light attached to helmet for camp stuff. Light and Motion rechargeable light in case we have to ride at night. This might get replaced in Durango.
Scott: Princeton Tech Eos. Runs on AAA’s. I’ll probably go this route north of here.
Water: We had capacity for about 200 oz each through NM. We’re reducing that now that we’re more concerned about snow than heat. We both have a 100 oz bladder and Scott has two bottles. I carry a spare 20 oz Dr. Pepper bottle for when we pick up water close to dinner. We’re using Sawyer in-line filters which we love and have had no issues with.
Random bits and pieces:
Electronics: We both have Smartphones and I’m carrying an iPad mini with keyboard. We have chargers for these, headphones, and a few other wires.
Navigation: We’re doing our best to follow the Ley Route on the CDT. Scott uses a Garmin eTrex 30 loaded with a bunch of tracks, alternates, and way-points. I carry a eTrex 20 as a backup. Scott also has the Guthook App on his phone for a better overview of what’s to come. We bought a map of the forest north of Cuba and sent it home from Ghost Ranch.
Tools: Multitool with chaintool and knife, 2 pumps, quick links, duct tape, various nuts and bolts, derailleur cable, two tubes, two 2-ounce bottles of Stans, tire plugs, patch kit, full sized shock pump (we may replace it with a smaller one).
Other stuff: Small first aid kit, small cable lock (keeping honest people honest), bathroom stuff (toothbrushes, travel sized toothpaste, floss, Scott’s eye care stuff and glasses), sunscreen, small thing of chamois cream that we use once in a blue moon, sunglasses.
Camera: Pictures are key.
Me: GoPro 3+ hero (this may get sent home) and a Canon Powershot something or other.
Scott: Cannon Powershot Elf 110.
I think that without food and water, we’re probably at about 10 lbs or so. We can comfortably carry three full days and two nights of food. We can get in three nights worth, but we start to whine about it and riding starts to get sub-fun, especially if we’re hauling a lot of water.
It’s pretty simple. Refined through racing, adapted for comfort.
Extra: We’re also shipping a “bounce” box that we pick up whenever Scott needs to work, or we know we’ll be there for an extended period of time. It ends up weighing about 20 pounds and seems to cost us about $20 to ship. In it we have:
2 small laptops + chargers
Battery chargers
Town clothes (shorts, t-shirt, underwear, socks)
Extra food that we bought too much of
Hair brush
Spare brake pads
Sandals
My gear for the last trip I did, a three month tour from Liberia through Sierra Leone, Guinee, Guinee-Bissua, Gambia, Senegal, Mauretania, West-Sahara, Morocco, Portugal, Spain, Andorra, France, Monaco, Italy and San Marino.
At the time I did not knew that “bikepacking” exists, so I didnt find out about any companies making framebags and the like, I just went to the local bike shop and build things myself. I used a normal handlebar bag (removed the heavier plastic casing) and strapped my matress up front (not shown on pic). The triangular bag holds mosquito spray, sunscreen and first aid kit, the saddle bag is for spare parts and tools, the tent (Helsport Ringstind Superlight) goes into the bottle holder, and I have 3 bottles on the frame. I also had a camelbag, 2L, in my backpack, but never used it.
In addition to the things shown I carried a 25L backpack, which was half empty most of the time. It was mostly for carrying extra food, documents, my clothing and having my valuables close on my body. It weights 500gr, with luggage about 3kg. In total I had ~20kg, 2,5k water, 7,5kg bike and ~10kg gear.
Took me 89 days to do the roughly 10k kilometers, and I had lots of restdays due to waiting on visas. I did do one taxi ride, one time hitchhiking in a boring stretch in WestSahara/Dhakla, and a bus from Madrid to Barcelona, because I couldnt be bothered to ride in and out of the two largest cities in Spain, its too much hassle.
Bike is a Carver Evolution Carbon.
If you want to find out more, come by www.unlocked-achievements.com, I did quite a few tours already, current count is 115 countries. I’m currently preparing my next trip, ~30.000km through Siberia in winter to get to Japan, and do the Silkroad in summer to return to Europe.
PS: Now I’m itching to get my hands on proper bike-packing bags. 😉
My 2012 Gen2 Fargo has gone through a number of changes, most recently swapping the Woodchippers (which I really like for dirt road / gravel / mild single track) to a Jones Loop bar. The bike is a medium and I’m running my old (pre-Revelate, long live Epic Designs!) front harness and pouch and seat bag, which were made custom for my Surly CrossCheck and IF Ti Club Racer. Once I got the Fargo I added a full frame bag, gas tank, jerry can, and feedbags. I have used the everything cages, but don’t run them often, except when I need extra carrying capacity, or want to carry insulated Nalgene bottles up front. I run a dyno hub and need to wire up the USBWerk for topping off a battery or running my Garmin, and it will keep a FenixUC40 USB topped off. In testing the USBWerk works great, and I would love to have this integrated into my kit for longer trips.
Cockpit is the Jones Loop bar with chunky grips (after some use I need to tape the rest of the bars). X9 trigger rear, Friction front, on a Paul Thumbie pushing a X5 triple derailer (cheap!). Garmin eTrex20, hydro tube connected to a Showers Pass Veleau reel (last way longer than the ID badge reels), feed bag (most times I run 2), Avid Speed Dial Levers (need to find something with the pinch bolt in a more comfortable location…). Gas tank with my Canon G12 and spare AA and AAA batteries. Custom harness and pouch made back in 2008 or 2009 for a dry bag.
Front is my sleep kit and sometimes camp clothes tucked into a dry bag in harness. The dry bag pops out easily and gets tossed into my tent for unpacking.
Pouch contains personal items I might need easy access to – glasses, eye drops, meds, toiletries, first aid kit, etc.
Rear bag contains tent, cook kit, clothes, food, etc.
Frame bag contains tube(s), tent poles, hydro bladder and Sawyer inline filter and misc stuff in the thin pouch.
My current kit, for 3 season riding used last weekend:
(This is bordering on a luxury list for me… I brought a pillow on the last trip… something that doesn’t go on longer trips as I use the space for food / extra clothes)
(no food or water included in weights)
Fargo naked with Revo and Redeye lights, dyno wheel, etc. 29#
Fargo 35.2# with GPS, hydro hose, Revo, Redeye, Lezyne pump, frame bag as noted below:
On bike frame bags, feed bag, gas tank and jerry can 6.2# Frame bag Arm warmers, gloves, folding camp saw, knife, Fenix LD22 vest and woolie, tent pole, tent stakes, spare tube, empty bladder, sawyer mini inline with hydro bladder
Jerry can with tools, multitool with pliers, 1 brake, 1 shift cable (tucked into sides of bag stiffener), der hanger, patch kit, fiber spoke, tire levers, spare master link
Feedbag(s) with hand sanitizer (no food for weights, but generally my road food goes here)
Gas tank with Canon G12 camera and batteries (4aa and 4aaa)
Front harness and rear saddle bag 14#
Front bag 8# Sleeping pad, sleeping bag, pillow!, personal stuff, water purification, toiletries, headlamp, showers pass crossover tucked into harness (need to change this – lost it after this photo)
Total Kit without food / water 20.2# Total rig without food / water 49.2#
On person – wallet, cellphone, SPOT tracker, cycling cap
Bikepacking List Fall (3Season)
Personal: Glasses in case with cloth cleaner Contact Case eye drops Sunglasses Maps / Cue card Knife (in mesh in Feedbag)
Electronics: GPS garmin etrex 20 on bike Camera canon g12 Batteries AAA and AA Headlamp Princeton tec small thing Fenix flashlight for helmet Revo dyno headlight Redeye dyno tailight
Meds: First aid kit Tums Ibuprofen TP Shovel Wipes Lantiseptic Tiny towel
Cook Kit: Stove Snow Peak Ti700 Pot Snow Peak double wall cup (if ‘luxury’ camping…) Ti Spork Snow Peak Gigapower stove with Piezo ignition MSR fuel canister Bear (critter) bag and line with carabiner
Food: As req’d
Hydration: Water bladder(s) Aqua Mira drops Sawyer minor inline filter Nuun tabs for flavor, electrolytes
Shelter: TarpTent Contrail Pole Stakes Sleeping bag big agnes fish hawk 30d down Sleeping pad big agnes insulated air core
Bike Mech: Tube Patch kit Tire boot Tire levers Pump Multitool Derailler hanger (if Fargo) Brake pads (1 set) Zip ties Electrical tape Chain Lube Shift cable Brake cable
Clothes: Boxers Dry gloves Dry Socks Patagonia puff Rain pants or MUSA knickers Showers Pass jacket Thin ibex woolie
On body: Cycling shorts Socks Shoes Pi x alps pro Rapha jersey (got to be fashionable) Thin cap Helmet SPOT Wallet / iphone Cycling gloves (if dirt road / single track)
How do you know when you’ve had an incredible 3 days of bikepacking? When you arrive at work the following day and can not remember ANY of your passwords!!
Labor Day weekend rolled around and with it an excuse to head north to the Kaibab Plateau and the north rim of the Grand Canyon. Last year a few of us did a similar loop, or an attempt at least, of 140 miles over 2 days. It was hard. Real hard. I wanted to savor this one a bit more, do all my riding in daylight hours, so a 3 day variety was concocted. I originally put in an out-n-back, OnB, option to Point Sublime, but on paper we weren’t sure about tacking on a 5 mile climb.
The core group of usual suspects were rounded up where Ray & Bart were still going to knock out the loop in 2 days due to time constraints. Meanwhile, Team Tour: Jeff, Nancy, Steve and I would ride at a more leisurely pace for 3 days. The forecast was looking very promising, highs in the mid to upper 70’s, low’s in the upper 40’s and 0% chance of rain!! My tent would not leave the car, replaced with a stuffed football for a pillow!! Who says bikepacking has to be uncomfortable?
I was able to leave work around lunchtime and made quick work getting through metro Phoenix on a holiday Friday. I checked in with K to let her know I was headed north and five minutes later as I reached New River my face went flush. Shit!!!! I forgot my 100oz bladder back at work in the freezer! Ugh. I was already an hour into my trek north, now what. Turn around? Wait…Steve was getting out of work a bit later and wasn’t far from my work. A quick call and he saved my ass, snagging the bladder before things closed up for the day. Dude, I owe you one.
Maybe next time I’ll take the express route.
Mind now at ease and back on bikepacking mode I made good time into Flagstaff and pulled into Jacob Lake to meet the others around 6:30p. Sun still shining!! Steve arrived around 9:30p and Bart sometime around midnight.
Day 1: Forest Roads & the Rainbow Rim
We woke to my temp gauge reading 39º!! It was a bit of a slow morning, but we all seemed to be on a similar sluggish pace. Ray & Bart hung around for the group photo and were soon off down the dirt road. The rest of us followed suit about 10 minutes later.
Six nutjobs ready for an adventure. Photo by Jeff.
The ride starts off easy enough, gentle climbing on well maintained forest roads, but I could tell immediately I was out of my comfort zone. My lack of recent riding was going to make this trip much more difficult, throw in an average elevation near 8000′ and pedaling a loaded bike, I had my work cut out for me.
The gang stomping out the miles.
An early vista, we’d soon drop down to the canyon floor.
The others started peeling off layers, but I knew a big downhill was only a mile ahead. I’m glad I waited, I peeked at my GPS to see 35+ mph on the descent. Steve and I started up a short piece of pavement, we glanced ahead and what did we see? Look: it’s Ray & Bart!! Steve took off on the climb to chase them down, all part of our ‘catch & release’ program. They kept going while the four of us re-grouped before another long downhill to the low point of the route through Warm Springs? Canyon.
Careful or you’ll miss the turnoff.
Time to shed layers.
Some petroglyphs along the way.
From the canyon floor we had a short grunt climb up to the scrub land on the western edge of the plateau. Every so often we were afforded a glimpse to the west. 30 miles of forest road lie in front of our tires before hitting the Rainbow Rim trail.
Nancy powering the loaded singlespeed (SS) up a healthy grade. Photo by Jeff.
I was in good spirits even if my legs were screaming at me to stop. Photo by Jeff.
The climb out of Warm Springs isn’t real steep or super long, but it was enough of an effort to really put a hurt on me. My quads hurt. We were barely 15 miles in with a goal of around 65 for the day. I knew I was in for a battle all day. Thank goodness we were on a tour pace, I needed the extra breaks and it allowed me to never really fall too far behind. The others could tell I just wasn’t myself, and I really appreciated the frequent stops.
Jeff came across this fatty crossing the road, by the time I rolled up he was giving us the business from the bushes.
Lots of this early on. Photo by Jeff.
Ahh, back in the trees. Aspens too!! Photo by Jeff.
Getting close to the rim now. Photo by Jeff.
Found this rustic cabin by Big Saddle Tank.
We reached the split for Crazy Jug Pt., we weren’t going out to this overlook, instead we were in search of the ‘rim trail’ as seen on topo maps of the area. Our hope was to shave off a bunch of miles and a long uphill grind in favor of a trail connecting us over to the end of the Rainbow Rim trail at Parissawampitts Pt.
We poked around a bit, determined where we were on the small printed map I had, and concurred that the vague trail marked as FR D1884 was probably what we were searching for. Unfortunately, it was a rubbly mess and overgrown from the start. No thanks. Back to the original route.
Rim Trail??
Solo snack break among the aspens.
Finally! The Rainbow Rim trail.
After our Rim Trail excursion, I fell off the back of the group quickly. A few miles down the road I stopped for a jolt of energy for the upcoming climb. It helped, but I still found myself in HAB mode on the chundery forest road. At the top the miles peeled off rapidly descending to Parissawampitts Pt. I was so ready for a long lunch break…and a nap!!
The trailhead was empty when I rolled in. I was expecting to see the others, but they moved on to a better spot with a view. For about 30 seconds I was dreading that they decided to push on to the next overlook a few miles down the trail. Whew! They were perched on a super canyon overlook already digging into lunch.
Perfect spot for a break. Photo by Jeff.
Contrast in styles, Steve kickin’ back relaxing. Photo by Jeff.
Me, spent, whooped and ready to lay out my sleeping bag! Photo by Jeff.
Parissawampitts view.
The mighty SS duo, Nancy & Jeff.
The extended lunch break was sorely needed. Belly satisfied, we started east on the Rainbow Rim trail. Our initial goal was Timp Pt. at the eastern end of the trail, but we all agreed if time permitted we’d prefer to push on to Quaking Aspen Spring another 5 miles away.
The Rainbow Rim trail is unique in that it is true singletrack that winds in & out of drainages right up to the edge of the Grand Canyon. There are a bunch of points along the way, Fence, Locust, North Timp & Timp after leaving Parissawampitts. Most of the trail is great riding too, nice flow, some long gradual downhills and good climbing grades. I recalled from last year how I thought the trail was better past Locust Pt. I would still say the same, but it’s not a huge contrast in differences.
Not a bad trailside view!! Photo by Jeff.
Rippin’ singletrack.
Near Fence Pt.
Rainbow Rim is approximately 18 miles long, we stopped briefly at all the big overlooks and talk soon turned to the reliability of Quaking Aspen Spring. We all were getting a bit concerned about our water levels and the tough route that was to follow the next day.
At Locust Pt. we ran into another rider who had just finished for the day. I asked if he had any water to spare, he gladly offered up most of his water bottle from the cooler!! I had really begun to suck down the H2O. Nothing like riding yourself back into shape on a 3-day bikepacking ride.
As luck would have it, a few miles down the trail we spotted a series of small water tanks off the trail!! Glorious!! Time for a water filtering party.
Impromptu watering hole. We later found out it was for an equestrian event!!
I believe it was around 5p or so when we reached Timp Pt. Still plenty of daylight left for the 5 miles to the spring. But wait…there’s more Rainbow Rim!! There’s a new extension in the works and we were able to sample the first 1+ miles of new tread. We missed one turn along the way resulting in a short steep drainage crossing, but otherwise the trail was already packed in quite nicely. We reached the end of the extension then bushwacked a few hundred yards over to the dirt road to resume our route.
View from Timp Pt.
Timp Pt. trailhead.
Steve and I assuming the position. Photo by Jeff.
I figured my legs had just enough left to get me to camp. One thing about the Kaibab, most of the forest roads are in really good shape. The only snag? A ‘Road Closed’ sign stood in our way!! The was a small prescribed burn going on which appeared to be winding down. A vehicle exited from behind the closed sign signaling an ‘all clear’ to us.
Looks like a good place to camp!! Photo by Jeff.
A few fast miles later we arrived at Quaking Aspen Spring to find…..WATER!! The spring was contained in a concrete housing just up a few steps onto the hillside. I didn’t want to sit down right away for fear of not getting back up!
Our home for the night.
This made for a nice cooking surface too.
…and a refrigerator!! Photo by Jeff.
I took care of all my chores before settling down for dinner, Garmin charger, air mattress, etc. We sat around watching it grow darker by the minute. Our secluded valley meadow was eerily quiet, surreal. You could have heard a single leaf drop to the ground. Before long the Milky Way was above our heads with a billion stars free of light pollution. Livin’ large.
The mild temps allowed me to swap out my tent in favor of a comfy camp pillow!! Photo by Jeff.
Day 2: Sublime Detour
Sunday morning wasn’t as chilly as Jacob Lake, so it was a bit easier to get moving. I normally don’t drink hot coffee, but decided last week to try out some single serve coffee packets for the cool mornings. Fry’s had a few varieties on close out so I wiped the shelf clean. I must say it was a nice change of pace & compliment to my oatmeal.
Breakfast by the spring. Photo by Jeff.
We pushed off with some easy forest roads to start the morning. I knew there was a grunt climb approaching and first reports were in: my legs felt almost normal!!
One aspen in the bunch was already in fall form.
Steve taking the direct route. Photo by Jeff.
We reached the junction where I deviated off the course last year and veered right. What followed next were some surprisingly good stretches of forest road. A few long contouring downhills brought us quickly to the Grand Canyon park boundary. We were making great time and I was wondering when we’d hit the rough stuff I had heard about.
I much prefer this method of entry over the seemingly endless line of cars at the South Rim.
Into the park we go!
Maybe next time a visit to Swamp Pt. is in order.
Good climbing grades early on.
We were on the prowl for the Kanabownits fire tower & spring. We dropped down into a side canyon and I realized we missed the turn to the fire tower. No way I was going back up, so we focused on finding the elusive spring. No luck there either, but we were good on water anyway after filling up at camp.
A few miles later we arrived at a ‘T’, turn right and go to Pt. Sublime, stay left and continue on with the route to the North Rim. Jeff posed the question, ‘Do you want to check out Pt. Sublime?’. Almost immediately the rest of us nodded in agreement, let’s do it! We knew it would be mostly downhill on the way out, hoping the climb back wouldn’t be to much of a sufferfest.
The ride out started with a climb! At least we’ll finish our return on a downhill. The next 4 1/2 miles were a nice gradual coast downhill. We cruised by a group of 4×4’s parked off the side then made the climb up the final 1/2 mile to the overlook. Only a couple of vehicles were there and one was leaving.
We scrambled out to a ledge past the last tree to see this:
270º+ cell phone panorama. Simply incredible. Best view in the Canyon IMO.
It was a tad windy
Nice work Colorado River.
Massive cliffs of the Grand Canyon.
What a perfect morning to be on the Canyon’s edge, so clear.
Oh, the places that bike takes me.
We retraced our tracks back up Pt. Sublime road as a few more tourists rambled down the road. I spotted my obligatory Kaibab squirrel too!! We all remarked how easy the climb out seemed. To quote a friend, ‘That was a good life decision’, so glad we opted for the scenic detour.
We rejoined our route to find a steeper grade and slightly deteriorated road conditions. This would be the beginning of a series of seemingly relentless ups & downs. To say this section was taxing would be a gross understatement. The spry feeling in my morning legs had evaporated as the HAB’s became more frequent. The good news? It was ‘only’ 11 miles or so to the North Rim and ALL downhills were welcomed as ‘free miles’!!
A nice camp spot at a place we call Pt. Sublime-ish, closest the route gets without doing the OnB.
Pt. Sublime-ish.
Trying to muster the energy for a late lunch push. Photo by Nancy.
Not all of it was punishing, near the end a few meadows appeared albeit with sandy roads. Photo by Jeff.
We were finally nearing the North Rim, I had fallen off the back once more as my mind wandered to thoughts of lunch. I saw the first Arizona Trail (AZT) marker and knew I was very close. I was ready to chill for a bit.
Afternoon shadows creeping in, Humphrey’s Peak on the horizon.
The pic above is the reward for relaxing here.
One of my favorite National Park signs.
I think it was around 4:30p or so when we left the North Rim. Our main objective was to reach the park boundary along the AZT before making camp some 12 miles away. We had a stretch goal of reaching the East Rim overlook, another 7 miles farther, but that wasn’t looking probable after our Pt. Sublime detour.
AZT Passage #39. What can I say about it. It had more climbing than I remembered. A few more HAB sections too. There were some really nice stretches of singletrack mixed in, but it was borderline overgrown. Then there’s the drab utility corridor the trail follows for a couple of miles before dropping down near the park entrance booth. It’s an ok passage, doesn’t really jump out at you with awe inspiring views that’s for sure. It’s more of a means to an end and end it did, after a mile+ gravel climb turn singletrack descent.
Primitive singletrack. Photo by Jeff.
Couldn’t quite ride under this one.
Utility corridor.
I was last to the top of the climb as the sun was getting low on the horizon. We missed the Kanabownits fire tower, so I opted to ride over to the North Rim lookout tower to catch the sunset.
Park housing near the entrance station.
Found these cool hiking blazes on the gravel climb to the fire lookout tower.
A bit of a grind at the end of a long hard day.
A little rickety, but worth the climb up.
Humphrey’s Peak succumbing to alpenglow.
The final mile of #39 is sweet, twisting singletrack through the forest then one short grass covered meadow to the park boundary. It’s a small taste of what’s to come.
Completing our tour through the Grand Canyon’s north rim area.
37 miles to Jacob Lake tomorrow, for now we camp here.
I found the others near treeline sprawled out on the bumpy terrain. Evening meals gobbled down, we settled in early for a much required long rest.
The sliver of moon set and the sky turned black once more. The Big Dipper rocked me to sleep. I woke sometime after midnight to see the Dipper’s handle set below the treetop shadows. Back to dreamland I went.
Day3: Meadows & Burnout Along the AZT
Our day was set up nicely. 37 miles of AZT back to Jacob Lake. We were hoping for an early afternoon finish before the 6 hour drive home.
Early on the theme was simple: ride through a meadow, HAB up into the forest, cruise sweet tree-lined singletrack, descend to the next meadow, repeat. And so it went.
Our day started with a few ‘warm up’ miles like this.
Nancy enjoying the sunshine. Photo by Jeff.
Let’s push!!
If you have to HAB, might as well enjoy it. Photo by Jeff.
Short detour to the East Rim trailhead.
Nancy along the East Rim overlook, Navajo Mtn on the horizon. Photo by Jeff.
Saddle Mtn. Wilderness boundary. Photo by Nancy.
Wide singletrack makes for fast riding. Photo by Jeff.
I came across a few of the stock ponds from last year and all of them had water. This can be a challenge on the Kaibab. The others got out in front of me as I stopped for picture taking. I was really enjoying the flowy forest singletrack when something caught my eye…
Trail magic!! I took this opportunity to add to my stash.
Most of the trail up here is good, sans the HAB sections!!
Double track that rides like singletrack.
Look closely, you’ll find Jeff & Nancy finishing their HAB!! Mine was about to begin.
Snack break!! Pre-cut avacado, perfect. Photo by Jeff.
The Kaibab squirrel makes an appearance on the AZT signs up here.
AZT fading to grass next to AZ67.
I was cruising along through another meadow, came around a turn to find Steve futzing with his rear wheel. Jeff & Nancy had also stopped to see what was going on. Steve had been riding really strong all 3 days and now it appeared his ride was over. Sucked in rear derailleur, busted hanger & spokes!!
Only 18 miles from the finish too. Photo by Jeff.
One of his sun sleeves fell off his pack and became tangled in the rear derailleur causing the mishap. Next time put those things on!! He ended up hitching a ride back to Jacob Lake & luckily this all happened only a 100 yards or so away from AZ67.
As soon as we left Steve we had a rather hefty HAB staring us down. One of two bigger efforts on the day, the second was to come 10 miles later. At the top of the HAB the scenery transformed into the burn area. It’s a stark contrast to what we’d been riding through up until this point. Lots of low lying greenery with sheered off trees. While the forest recovers, the trail is already back in top form. Good contouring singletrack for miles on end.
The trail is about to get fast!!
Typical terrain through the burn area.
Looking northeast towards the Vermilion Cliffs.
Vermilion Cliffs and a faint Navajo Mtn. in the distance.
I knew there was only one climb left, but it was a doozy. A steep drop down a rather large drainage followed by a HAB out the opposite side. The ride down was sketchy enough. I almost went OTB as I clipped a large rock with my front tire going off a ledge drop!!
The short flat trail at the bottom was spectacular!
Start pushing.
The burn area finally gave way to more forest singletrack. Five miles later we had crested the final descent towards Jacob Lake.
Finally, a giant information board with useful maps!! We saw at least 4 others, all were blank. Photo by Jeff.
The AZT on the Kaibab, aka Trail No. 101.
As the final miles approached, I had been hyping the big descent to Jeff. Last year it was fast, this year, well, not so much. Storms had done a number on the terrain creating huge ruts and off camber riding surfaces. 90% of the downhill is on an old forest road through a canyon too, but not even the wider girth helped much. As an added bonus there were a few downed trees to contend with as well. It took twice as long to exit the canyon as I had hoped, but all that remained were a couple of miles of tree-lined trail. Oh, and a few dismounts to climb some rock outcroppings!
Right when things would speed up…tree.
One final HAB.
Loop complete before 2pm! The trail magic providers were found!! A group of 3 AZT section hikers left a few gallons along the trail.
Another fine bike outing in the books. I caught up with Jeff & Nancy back at the cars, Steve had already come and gone. We shot over to the Jacob Lake Inn for post-ride grub while downing Coke after Coke!
Even if I wasn’t in the best fitness, I’m sure glad I did this ride. The route is top notch albeit tough as nails. When suffering on the saddle it’s nice to have good friends along. Until next time.
The drive to/from the Kaibab is always spectacular. The return trip was no exception as the afternoon grew long. I stopped for a few pics & pointed the DSLR out the window for a few others. If you’re ever presented with the opportunity to drive through this part of Arizona – TAKE IT.
US89A stretches out beneath the Vermilion Cliffs.
Kaibab Plateau meets the Vermilion Cliffs at House Rock Valley.
Large boulders scattered about near Cliff Dwellings.
How large? That large.
Soap Creek canyon cutting its way towards the Colorado River gorge.
Echo Cliffs.
Humphrey’s Peak, highest point in AZ at 12,633 ft.
Home made bags on my Trek Remedy 8 29er. Handle bar sling secures lightweight OR dry bag with sleep kit and warm gear to the handle bars. Bag below the seat has repair kit, tubes, CO2 cartridges, multi tool and zip ties. Saddle bag has the rest of the clothing as well has an elastic “spider web” on the top for securing shoes and other items if need be. all the bags were made with 1000D coated cordura material. I used old retired fire hose for the bottom of the saddle bag and anywhere there is a rub point. The rubber side of the fire hose offers a great protection barrier. The seams were sealed using Aquaseal seam sealer for optimal water resistance. I sacrificed weight for durability by going with 1000D cordura and fire hose for its rough durability against tears or damage. I am carrying a smaller backpack for carrying food, water, first aid kit and small random items. for its rough durab
<strong>NO WHINING</strong>
My initial response to this misery is to put the blame on someone and then to either make hurtful comments to that person or pout; preferably both. This is not the way I had wanted to go. My route would have been much easier and would have involved effortless pedaling through be-flowered high mountain meadows with cool breezes at our backs, and butterflies. Instead we have been climbing on a dirt road for the last six miles and we still have two more miles to the summit.
Also aggravating me is the thought of the person I hold responsible- Sky King- sitting at the top right now waiting for me and almost certainly judging me for my lack of restraint at the Salmon River Brewery last night. They had barley wine. What was the Bike Hermit™ supposed to do? I am stewing at the top of the pass where we stop to eat lunch. I want to whine and to express my temper, but nobody else is complaining and so I keep it to myself.
It is looking less and less likely that we will make it to the Bear Pete trailhead today. The Bear Pete Trail is a 15 mile section of the 172 mile Secesh Option of the Idaho Hot Springs route map put out by Adventure Cycling Association. Adding to my frustration is my self imposed expectation of responsibility to the thousands of faithful readers who depend on this blog for all their bike touring news. I want to report the actual conditions of this trail, especially since we have been told by a local that it is almost un-rideable even with an unloaded mountain bike. The people at the McCall Ranger District of the Payette National Forest were very helpful and were able to tell us where crews had been and where they were currently working to clear downed trees from the trail.
<strong>MORE BIGGER TIRES</strong>
The more bikepacking I do the more I am convinced that three inch tires are the way to go. On this trip we are four people; two riding Surly ECR bikes with 29×3″ tires, one on a Salsa Fargo and me on the Big Dummy with three inch wide tires. You’ll have loose gravel and sand, boulder strewn singletrack, and off piste corrections in bikepacking and those sectors are smoothed out with bigger tires. Lack of traction also becomes less of a limiting factor. The disadvantage may be on paved sections but lately our trips have been mostly in the backcountry on “varied” surfaces. That said, the 29×3″ Surly Knard tires on the ECR roll surprisingly fast.
Water Gatherer
Bonus!
End of the “Trail”
We camp in the puckerbrush on the northwest side of Granite Lake, about a mile down a single track trail, where we are protected from the RV campers. After setting up camp we ride a half mile further along the trail and discover a broad meadow with slow moving spring fed streams where we filter water into our bottles and bladders for the next day. Some sort of horned beast walked through our camp in the middle of the night; two of us heard it snorting and clomping around on the granite outcroppings.
<a href=”http://biketouringnews.com/wp-content/uploads/2014/07/water.jpg”><img src=”http://biketouringnews.com/wp-content/uploads/2014/07/water.jpg” alt=”picture of bike and bottle cages” width=”500″ height=”375″ class=”size-full wp-image-7019″ /></a> Salsa Anything Cage with Surly Junk Straps and Revelate Designs Mountain Feedbags doing extra duty for collecting water.
<strong>FAILURE AS AN OPTION</strong>
Two of us decide to push ahead the next day on the trail to Upper Payette Lake and maybe beyond to the Bear Pete trailhead, while the other two return to McCall the way we came yesterday. Soon- and this may come as no surprise to those who have been bikepacking with me- we were lost. The “trail” we had been following was only intermittently visible but was marked at intervals with two or three rocks stacked one on top of another. And the bigger downed trees blocking the way had been sectioned, creating passageways through which we could wheel the bikes. The trail shown on the forest service map I carried worryingly indicated a different bearing than the trail we were on, but there was no sign of another trail. We arrived at the top of the drainage where a great granite blister of the Idaho Batholith blocked our passage and we turned back.
<strong>THERE’S AN APP FOR THAT </strong>
Being lost and disoriented is unnerving. Even though all we had to do on this day was follow the stream back down to the main trail, I still could induce a minor panic if I let myself. That’s why, when I was back safely in front of the computer and found the Adventure Cycling GPS files page for the <a href=”http://www.adventurecycling.org/routes-and-maps/adventure-cycling-route-network/gps-information/idaho-hot-springs-mountain-bike-route-gps-data/” title=”Idaho Hot Springs Route” target=”_blank”>Idaho Hot Springs Route</a>, I immediately downloaded the files and the apps for my Droid phone. The app for Droid is called Locus (there is a free version but I splurged for the Pro version for $8.75) I used Dropbox on the phone and the computer to upload the files and it was ridiculously easy. All the instructions are on the Adventure Cycling page linked above.
Now that I have a backup for the map I feel a little more confident about trying some more sections of the route. This is some rugged, remote and unforgiving country. A small mistake can turn into a large problem and I might as well take every available advantage. I will still take my paper map and $13.00 compass though.
Please remember we carry bags, racks, tools, components and complete bikes for bikepacking and bike camping at <a href=”http://store.biketouringnews.com/” title=”Bike Touring News Store” target=”_blank”>the Bike Touring News Store
</a>
I spent the last couple of summers riding and running the Colorado Trail, culminating in a 6-day bikepacking adventure over the final 280 or so miles. My son is an aspiring film-maker so he and I put together this little mini-movie of the whole project. I hope you enjoy.
Nevada City, CA over Purdon Crossing to the San Juan Ridge, up to Challenge then LaPorte, over to Graeagle, down to Yuba Pass, down to Henness Pass Rd, over to Meadow Lake Rd / Graniteville Rd, thru Malakoff Diggins park, over Edwards Crossing and home.
185 miles, 4 days plus an evening, 85 miles or so of dirt road, but no singletrack. Between 21000 and 26000 feet of climb depending on how you calculate it. The goal was to do as much dirt road as possible (and to not use a car).
This was our second bikepacking trip, it looked like we may have bitten off more than we could chew, but it worked out great! Highly recommended for a nice loop around the Sierra Buttes.
Also highly recommended is Johnsville-McRae road from Quincy LaPorte Road (at Gibsonville town site) all the way to Plumas-Eureka State Park (where it becomes paved) and on to Graeagle. Other than that last section of nice fast paved descent, it’s all dirt, but good quality. Bring a good USFS or USGS map and know how to use it, cause there are some turns you wouldn’t want to miss (it’s 25 miles or so of dirt), and a GPS helps for a reality check in some places. We went clockwise and it seemed like that was the right choice – better tread and easier grade for the climbs, chunkier on the descents from McRae Ridge to the end.
We used a TarpTent Squall (disclosure – my girlfriend and ride companion (the artist at bootsmcfarland.com) works for TarpTent – www.tarptent.com – there are other TarpTent reviews on this site – but used a TarpTent for years as a PCT section hiker before getting the job there) – we’ve used it together for several PCT sections over the last several years. It’s a good fit for this type of trip being low bulk and low weight, and you can get extra-beefy poles now too – last year we took a single hiking pole on the bike instead but that was a bit bulkier.
Here’s a folder with the full size map cause apparently clicking on the map below just shows the profile…? and gpx files (one file has one track for the entire route; one file has tracks by tread type) and a kml file – I’m looking for a better way to share those – suggestions?
The Black Hornet, all loaded up and ready to roll.
UPDATED (see end of post).
The bike is a Specialized Carve 29er, with a retrofitted Cannondale Lefty. It’s an excellent XC machine, and yet it handles beautifully with a full touring load.
Up front is a Mountain Designs dry bag, held to the bars by a Revelate Designs Sling. It holds a sleeping bag, bivvy bag, and hiker’s fly.
The frame bag is an original, made by a man who isn’t afraid of a sewing machine challenge, Dean Winchester. He worked from a pattern he found online, and used recycled materials — a couple of those ubiquitous nylon drawstring bags that are given away as promotional items. So one side of the frame bag comes from Griffith University, and the other side represents Brisbane’s CityCycle hire bikes.
The frame bag holds a 3L Camelbak bladder, and tools and a spare tube and pump. The hydration hose is held to the handlebar by a clip that I made out of Plastimake.
The Bagman support required a lot of modification to work with this bike. A secondary saddle clamp puts the mounting position of the saddlebag slightly higher and further back (so that the bag & support clears the rear tyre), and the support struts now attach to the mounting points just above the rear hub, rather than on the seat stays just near the seat-post collar. Thanks to another friend, Bruce Lanham for the MacGuyvering required to make the Bagman support work.
Three smaller bags are attached to the saddle rails and to the top tube. The top tube bag is a Birzman and it holds snacks & sunscreen, the ‘Roswell’ bag under the seat has some food and cutlery. The orange nylon shoe bag, attached to the Bagman rails, holds a pair of crocs (well, an off-brand equivalent!) for wearing around camp.
On a recent overnighter, I was pleasantly surprised at how well the bike climbs despite this load. The traction is brilliant, and even though with a standard 2×10 Shimano SLX setup the bottom gear isn’t especially low, I still managed to ride every metre of a 5km climb on a dirt road, which gained 700 metres of elevation and averaged around 12%. And I’m no powerhouse.
And there will be an article in the special ‘travel’ edition of Australian Mountain Bike mag, coming out late November.
I’m mostly happy to report that everything in my set-up works well. The lone exception was the Carradice Bagman 2 Expedition, which broke halfway through my Munda Biddi trip. I can’t blame Carradice, or the design of the Bagman support, because I altered mine very substantially, to work on a bike with less than 20 cm clearance from the seat to the back tyre.
I’m going to buy a Thule Pack ‘n’ Pedal rack to support the Carradice SuperC bag before the next expedition.
Fanny Pack on top of seatbag – EastPak. Solar charger, Headnet, bugspray, batteries
Because of my skinny drop bars I can only use about 50-60% of the Revelate Sweetroll capacity, which is why I have the fannypack on top of the seatbag. I’m trying to figure out how to drop stuff or reconfigure something to get rid of it. I don’t want to wear a backpack at all but am considering wearing the fannypack since it rides low and shouldn’t cause back pain.
I can buy food along the way as there are enough places to stop. I can also refill water pretty regularly but there are some long sections w/no refill and summers in the DC area are notoriously brutal.
I’m a relative newbie at this, did 100 miles of the C&O 20 years ago on an old MTB, but feel free to give advice or criticize.
The Revelation quilt, by Enlightened Equipment, is an ultralight quilt designed for versatility and comfort. It sheds the full-length zipper of a traditional sleeping bags and instead is designed to be used open-back (with a sleeping pad for ground sleepers, or an underquilt for hammock sleepers). It also utilizes a partially-zippered footbox, which allows it to be closed tight or opened flat like a blanket, making it simple to vent excess heat during warmer nights. It is available in 4 lengths for users up to 6’8″ tall, and 4 widths, and temperature ratings from 50°F down to 0°F. It is filled standard with 750fp Duck Down, upgradeable to 800fp Goose Down. A Pro model is also available with 850fp water resistant down standard, upgradeable to 900fp water resistant down. All Enlightened Equipment quilts are made by hand in idyllic Winona, Minnesota, in the United States.
Los Padres Bikepacking Tour with the Thacher School – Sierra Madre and San Rafael Mountains
May 18-23, 2014
Over the course of 6 days, 10 students from the Thacher School and I bikepacked the Sierra Madre Rd/Buckhorn Rd route across a section of the Los Padres National Forest. We departed from Aliso Canyon Campground, climbed to the Sierra Madre Road via the Hog Pen Spring Trail, followed the Sierra Madre Rd to the Buckhorn and the rode some great single track near 19 Oaks Camp as well as the last mile of the Santa Cruz Trail above Upper Oso Campground. This trip was organized as part of our bi-annual (fall and spring) 6-day expeditions into the backcountry as part of our school’s curriculum.
We had a wonderful tour and enjoyed camping in the solitude of the Los Padres. This part of California is absolutely amazing; it never fails to delight and surprise. Conditions were cool, water was readily available and the students were among the most adventuresome and enthusiastic about bikepacking as I have ever experienced. Some bumps, scrapes and minor crashes were sustained, but my students wore the scars and bandages like badges of honor. We also had very few mechanical issues, but one of our group bent his front rim badly only 2 miles from Upper Oso Camp. He was forced to pack up his bike and hike out, but otherwise sustained only a scratch. “I am just bummed to not be able to keep riding singletrack” was his only negative response after the crash. Upon reaching the road, one of his comrades gave him his bike to ride the 1.4 miles while he “piggybacked” on the OMM rack of a fellow student. They bent the rack skewer a bit, but otherwise I have to praise them for coming up with a solution and keeping the band together. Awesome kids.
Our camps were: Hog Pen Spring Camp, Painted Rock Camp, Alamar Camp (a dry camp, but sufficient water was available at Chokecherry Spring), Bluff Camp, and 19 Oaks Camp.
Water info:
Hog Pen Spring – trough was full, steady trickle from the spring
Painted Rock – used Montgomery # 2 Spring – cattle trough – very fine sediment, supply a little low. Montgomery # 1 was pooling, but insufficient supply for our group.
Oak Spring – steady trickle as of 5/20
Chokecherry Spring – steady trickle down the creek. 26 oz in 1 minute (5/20)
Bluff Camp – 32 oz in 18 sec. (5/21)
19 Oaks – ample water in pools in the creek below camp (5/22)
Essential gear:
I am deeply appreciative of the superb racks from Old Man Mountain in Santa Barbara as well the support from Channing. These racks have been solid and are easy for my students to work with in the field (a critical element with a large group).
I used a handlebar bag (a Sweetroll), Gas Tank and Jerry Can from Revelate Designs this spring and am very pleased with how well they install and pack loads on the bike. For one reason or another I have been skeptical of carrying gear on my handlebars on technical single track, but this bar bag has changed, or perhaps better informed, my perspective on carrying gear in this manner. Mounted on a Santa Cruz Blur, I didn’t feel that the load on the front was problematic at all while riding. In fact, I appreciated the way that it allowed me to balance out the bike.
Hammer Gel, Hammer Perpetuem and Endurolytes. These fuels and supplements are always in my pack/jersey pocket and they make all the difference in the world on extended efforts in the mountains; my go to energy and electrolyte source.
This is my Salsa Fargo set up. I used it on my college football tour from Jackson WY to Clemson SC in September 2013 (USC v Arkansas and Clemson v Florida St.). It was the same for this Spring in Scotland and Iceland with flip flops traded for booties and the front water bottle replaced with a jar of peanut butter (the western US is a lot dryer than the North Atlantic) I am gearing up for the Tour Divide next month and am curious about suggestions for additions (bug spray) or subtractions.
I’ve been scouting a 3-day bikepacking loop from my front door for the better part of a year. I gave it a go last year, but a few things went awry and I bailed out on day 2. This year the route was almost 100% dialed in beforehand and I had two compadres willing to tag along. Larry from Tucson & Michael who is practically a neighbor. I hadn’t met either fella beforehand so it was nice to meet some new bikepackers.
Larry and I had to meet up with Michael a bit down the road after he discovered a tire issue at my house! The route starts off with a few miles of greenbelt, then some miles of canal before dumping on pavement for a short stint. 20 miles from the start we were set for singletrack.
Nice way to warm up.
We could see the mountain path of the day all around us.
Hawes singletrack begins here.
After the 3 mile TRW trail we met up with Michael and jumped over to the Hawes trail system. We were only a few miles into it when I was dropping down some switchbacks and heard a crash behind me. It was Michael and his rear derailleur had snapped, arms bloodied. He was forced to bail before the ride really got going. I felt bad as this was going to be his first bikepacking trip and he seemed well prepared minus a spare hanger.
Michael’s day ended here.
Larry and I pressed on, climbing up to the Twisted Sister trail, connecting to Wild Horse and the NRA jumpline singletrack before crossing Usury Pass rd to the backdoor entrance of Pass Mtn.
No radness on this day.
Looking down at Bulldog Canyon from the Pass Mtn trail.
The Pass Mtn trail would be our big effort for the day. Some HAB going up & down the upper section of the descent. The trail doesn’t smooth out much, if at all, but it’s rideable through the chunk. It felt good to roll on pavement for a mile afterwards!!
We hooked together some trails in Usury Mtn park and an open desert space on our way towards the Goldfield Mtns. This area is very scenic and highly underused by mountain bikers. There’s no trail system, but there’s singletrack to be mined in the hills…if you can find it!!
Superstition Mtns getting close as we exit the Goldfields.
The afternoon wore on and we turned our attention to dinner. A fine Mexican cafe won out, we just had to ride the Jacob Crosscut trail & some neighborhood roads to get there. To my surprise the JCT has had some work done on it recently making it much more fun to ride, but still presented some technical challenges. I became very curious to know how far east the trailwork extended, but that was for another day. We ate dinner, grabbed some re-supply from the grocery store around the corner and rode a few miles of the Gold Canyon trails in the dark before settling in for the evening.
Our campsite for day 1, top of the Vortex in Gold Canyon.
The Vortex is a small slice of Sedona newage perched on a small hill inside the Gold Canyon trail system. The views at night are fantastic!! It’s cool to see the lights from town, the glow of the big city to the west and still be able to see the Milky Way while listening to coyotes howl in the distance.
The next morning we finished off the rest of our route through Gold Canyon being sure to hit the pump-trackish K-Trail. This day would be our toughest as we had a good 30 miles before reaching the Picketpost trailhead, then we’d be riding south on the Arizona Trail towards Kelvin. That alone is a nice day in the saddle. The forecast highs were to be in the mid-80’s as well.
Playing on the rocks of Gold Canyon.
On our way to Picketpost I had changed up the route slightly from last year finding a way to Hewitt Station rd without the need of riding the shoulder on busy US60. The added bonus? A convenience store in Queen Valley was now on route!! This allowed us to fill up on water, 25 cents to fill both of our bladders, and skip the 4 mile out-n-back into Superior.
A true oasis in the desert, shade, cold drinks & food in Queen Valley.
It was starting to get warm as it approached noon. The shooters were out in force on Hewitt Station rd, taking aim at hillside targets. We met up with the AZT and rolled into the Picketpost trailhead around 1pm. We ran into a bunch of riders finishing up eager to hear what we were up to. We also met a couple preparing for an attempt on the AZT300 in a couple of weeks. I shared some of my experiences from last year and in exchange they offered a couple of ginger beers for our dinner down by the river.
We started south around 1:30p, it was warm, but not uncomfortable. Not wanting to over exert ourselves in the midday sun we focused on steady progress down to the river.
Poppies were out in force along some sections of trail.
Larry rounds the corner with an impressive view of Picketpost Mtn cheering him on.
Our 2nd Gila Monster within an hour!!
Gila Valley overlook right at sunset.
We geared up for some night riding, beginning with a 6+ mile descent to the Gila River and our next water source. It was fun to watch Larry’s light dancing above me as the trail zig-zagged its way down the canyon. The towering cliff walls silhouettes were barely visible through the darkness. I knew we wouldn’t make it all the way to the Kelvin trailhead this evening, so our adjusted goal was to make it close to where the singletrack turns to jeep road and find camp.
We spotted a nice grassy area under some trees, cooked dinner and downed our tasty ginger beers. This night was a little different as we could hear the faint gurgling of the Gila River while staring at the stars. Lucky indeed.
Our camping spot near the Gila River.
The next day started out with a little bit of trail, then a few miles of jeep roads to warm our legs up. The next six miles or so contour the hillside above the Gila River. All of a sudden things began to get interesting. First, my GPS signaled a ‘low battery’ warning only 30 minutes into the day?!?! It had shown a full charge at camp. Next, my rear tire was snipered by a pea-sized rock and lost almost all the sealant inside. It took a while, but with the help of tire bacon, I was able to stay tubeless until the end. Lastly, still a couple miles away from Kelvin my GPS & Larry’s died completely!! I knew the route enough to get us home, but there were a few turns here & there that I was unsure about. Luckily I could give just enough juice to the GPS to see where we were on the route if a decision needed to be made.
Lush Gila Valley in the middle of the desert.
It’s a gusher!!
The Gila can be a dangerous place if you’re not paying attention!!
One last climb before Kelvin.
Kelvin trailhead.
It was around 12:30p when we left the Kelvin trailhead, topped off with water, and made our way towards the Florence-Kelvin Hwy climb. It was the last real effort of the ride. At least it’s a well graded dirt road at a decent grade, but 4 1/2 miles on a loaded bike is still a slog.
At the top I consulted with the GPS and we made our way over to a power sub-station. It was here that I made a slight navigational error, taking us down a sandy powerline, thankfully it was angled downhill enough to ride, but it took extra concentration and effort.
The sand highway towards Area 52.
We opted to skip the freeride playground known as Area 52 since it was getting late in the afternoon. We had our sights & stomachs set on reaching Florence before nightfall. A short HAB and rubbly stretch on the Area 52 bypass led us to a series of fast 2-track near the banks of the Gila River. As the miles ticked by we talked more & more about getting food and ice cold drinks in Florence. I was waiting to come across the gauging station, where we could cross the now diverted waters of the Gila only 7 miles from town.
The diverted Gila looked quite refreshing.
We rounded a bend and saw a car approaching us on the dirt road, huh? We hadn’t seen a soul in over a day and now a sedan is driving on this road? Turns out, it was my buddy, Arturo, who had SPOT stalked us knowing we could use some cold drinks!! Score one for the SAG wagon!! We snagged some Cokes & Gatorades before making the final push into the wind towards town.
Two very happy bikepackers at Arturo’s SAG stop.
We reached Florence before sunset, ate and switched over to night riding mode. 40 miles to go. We mashed out the first few rather quickly aided by a couple of dogs chasing us down a canal bank! We rode up a lonely dirt road, where i almost dove into a washed out section of road in the dark – it was waaay too close of a call. At the end of the road I discovered my GPS had fallen off my secondary mount and wriggled free from the zip-ties as well. I was bummed big time. We opted to finish the ride on pavement for the last 10-15 miles. I ended up going back out to the dirt road the next day and found my GPS lying all by its lonesome, whew!
What a fantastic 3 days of riding. Amazing trails, incredible views, great company and all right out my front door!! Tough to compete with that. See you next year!!
For more details on the ride, check out the full three part report here: Salty-Gila Tour
About two years ago, my uncle Bruce, who is in his sixties, began using a bicycle to stay in shape. He was a previous marathon runner who had begun to suffer some of the physical challenges of distance running and decided to at a minimum supplement his other physical endeavors with bicycle riding. Being of the travelling sort, he decided that he would venture down the Katy Trail and ride from Saint Charles Missouri (suburb of St. Louis), where he lives, to Clinton Missouri. After listening to him speak of the adventure, we began to entertain the idea of riding the trail together.
For those that are not familiar with rail trails, they are patches of old abandoned rail road right of ways that have been converted into recreational trails for the purpose of walking, riding bicycles and sometimes horseback riding. The Katy trail compasses a little over 237 miles if ridden from Clinton to St. Louis, and is a designated Missouri State park.
Riding rail trails was not new to me at the time. In Iola, Kansas, where I currently call home, there is a rail trail that runs from Ottawa, Kansas to Iola. My youngest son had ridden the entire trail to Ottawa and back the year before and I had been riding the trail quite often to the north of Iola. I had actually ridden a small portion of the Katy trail in my late twenties which left me the desire to complete the trail in its entirety. After speaking with my uncle several times and kicking the idea around with my college age sons, we decided to turn the idea into reality and ride the Katy Trail in May of 2013.
My uncle is a college professor in St. Louis and his schedule would allow for a narrow window of opportunity for a multi-day ride between the end of May and the middle of June when summer classes began again. After kicking around a few possible dates, we agreed to meet in Sedalia, Missouri on May 23rd of 2013. He was going to ride the trail both ways from Saint Charles to Sedalia and meet myself, Kyle and Tyler there. We decided to camp in Sedalia on the 23rd and begin the ride east on the morning to the 24th. We did not have the time to ride the trail in both directions so the boys and I had planned on riding from Sedalia to St. Louis and then take the Amtrak train back to Sedalia. We planned a couple of extra days to see some sights in St. Louis and spend some time with my extended family.
The train is a great way to go; it was $35 one way from St. Louis back to Sedalia with an extra $10 for the bicycle. They can only take a limited number of fully loaded bicycles on a train however, so if you are planning this trip with a larger group of people, it would be wise to contact Amtrak prior to the trip and make sure that spots are available for you and your ride.
On May 23rd, 2014, I left Iola and picked up the boys in Pittsburg, Kansas. We stopped at Tailwind Bicycles in Pittsburg and picked up a couple of last second items and then headed east to Sedalia, Missouri. We arrived in Sedalia and parked the van in the parking lot of the Amtrak train depot. We then unloaded our bikes and equipment.
For this trip I chose to ride a 1980’s model Specialized Crossroads bicycle with straight mountain bike style handle bars. I rode with 700cx35 off- road tires which provided great comfort and traction on the trail. Most of the rail trails that I have ridden are very smooth and fairly level trails that are covered with compressed pea gravel. As such, they can be ridden on almost any type of bicycle and all sizes of tires. I found that the 700cx35 tires were very comfortable and kept the drag to a minimum. I did not take any real fancy high- end equipment with me for the trip. I did carry a Camel backpack with a water bladder, which for the record I will probably leave behind the next time I ride the Katy Trail. Water sources along the trail are plenteous, and I had no real need to pack extra water on my back. I also carried two water bottles attached to standard water bottle holders on my bicycle frame.
I did purchase an inexpensive rear rack and some small water resistant panniers from Nashbar, in which I carried the majority of my travel items and food. I also travelled with a Koppen Lokal 1 single person tent and a North Face down sleeping bag, supplemented with an inexpensive self- inflatable mattress. I attached the tent on my top tube. I attached the mattress across my handle bars with Velcro straps and the sleeping bag I stuffed inside of an old backpack that I had removed the shoulder straps from. I mounted the sleeping bag on the top of the rear rack and secured it with bungee cords. The backpack was just the right size to stuff the sleeping bag in without being too bulky for the ride. It also contained some additional room for a few extra items. The bicycle and above mentioned gear is pictured below.
My Loaded Bicycle
Once we had unloaded the bicycles and secured the van, we were off and riding to the Sedalia fairgrounds which is only couple of miles from the train station. We had agreed to meet my uncle at the fairgrounds and camp there for the night and then hit the trail in the morning. The ride to the fairgrounds was for the most part uneventful. Once we arrived at the fairgrounds we were able to locate my uncle who had arrived earlier and had already set up camp on the northwest side of the park. The campgrounds included water and shower facilities. There were also outlets in the bathrooms with which to charge up your cell phones or other electronic devices as needed. The park security guard came around later in the evening and picked up the five dollar tent camping fee which I considered a very fair price considering the accommodations.
The fairgrounds are within easy walking or riding distance from several convenience stores and restaurants. After setting up camp, the boys and I took a small ride to the Katy Trail entrance which is just to the south of the fairgrounds and very well marked. Upon our return we walked into town and found a local Starbucks and had dinner and coffee and spent some time catching up with my uncle. After we had our fill of coffee and conversation we returned to our campsite and turned in for the evening.
Camping at the State Fairgrounds in Sedalia Missouri
On May 24th, 2013, our ride began. We arose to cool weather and a slight chance of rain which never materialized. After having a quick breakfast we headed out onto the trail. Our goal for the first day was to reach New Franklin which is approximately 38 miles from the Sedalia Fairgrounds. The weather was beautiful for riding. It was cool and the wind was minimal. The ride itself was beautiful. The majority of the ride to New Franklin was mostly wooded and canopy covered which provided for some great shade as the day warmed up. We were in no rush so we stopped often and took pictures various locations.
There is quite a bit of history to be seen along the Katy trail as you traverse old rail bridges, creeks and waterways. There are numerous signs which point out historical landmarks and tell tales of days gone by.
The Lamine River Bridge was built in 1909-1910 by the King Bridge Company of Cleveland Ohio. It replaced an earlier wooden trestle bridge and carried the Missouri-Kansas-Texas railway across the Lamine River. This bridge is just one of the many historical sites that you find along the trail.
As we continued our ride, we of course had to work out a few small kinks in our equipment and means of attachment. The first problem was with the rack that I had purchased for my youngest son’s bicycle. I did not put Lock Tight on the nuts and bolts used to attach it to the seat post mount. At one point during our first day’s ride, the nut fell off of the mount. Fortunately, I had brought along some extra nuts and bolts just in case of such an emergency. If you should decide to take a trip such as the Katy Trail or other multi-day distance ride, I highly recommend getting to know your bicycle and at least familiarize yourself with basic bicycle maintenance. Things like changing tubes and making minor adjustments to spokes and shifters, at times, can be very helpful. Fortunately, the Katy Trail passes through many small towns and bicycle shops are readily available for any major repairs that may hinder your progress. My younger son also had a flat in route to Boonville. Other than these two instances, we had no other mechanical issues for the remainder of the ride.
As you enter Boonville, you are immediately rewarded with the discovery of the Boonville Train Depot which has been restored and is a small museum of sorts.
Between Boonville and New Franklin Missouri, you must cross the Missouri River. The Katy Trail follows the Missouri River for the most part from Boonville to St. Louis. The river is not always in sight but you are never far away from a fabulous view.
The Boonville Crossing is fabulous. The view of old MKT Lift Bridge is wonderful. The center section of the MKT Bridge raised and lowered allowing river traffic to pass beneath. The bridge was constructed in 1932 and at the time its 400 foot central lift span was the longest in the country.
After passing through Boonville, we found a local grocery store where we picked up some sandwiches and snacks for the evening to come. I have discovered that my appetite when riding bicycles goes through the roof. After obtaining our evenings grub, we headed up the trail a couple of more miles to the Boonville Camp Ground which was just shy of New Franklin Missouri. Again the campground was fantastic and included water, showers and electrical outlets.
We had arrived with plenty of daylight left and were able to spend a lot of time enjoying each other’s company and relaxing. Fortunately we had called ahead to reserve a campsite at the Boonville Campground.
We did not realize it but he had decided to ride on the same weekend that the Pedaler’s Jamboree is held. The Pedaler’s Jamboree is a weekend biking, camping and music event in and around the area of Rocheport, Missouri. The event includes a seventy five mile bicycle ride from Columbia, Missouri to Rocheport along the Katy Trail and attracts somewhere in the neighborhood of two thousand (that’s right, 2000 riders) each year. The event includes music in and around Rocheport, some of which is directly along the trail. This created a small dilemma for me being a music lover. I really wanted for stay around the area and attend some of the local concerts over the weekend. It would be a great time but we decided to go ahead and continue on. I went on a small evening ride along the trail and around the campground and then returned to turn in for the evening.
The Boonville Campground which included water, showers and electricity all for a five dollar fee.
We awoke on day two of our Katy Trail adventure with a strong possibility of rain. Our goal was to ride to ride from our current location just to the west of New Franklin to Tebbetts, Missouri, a span of approximately sixty miles. We were not sure of what the trail traffic would be like heading out on the other side of Rocheport. The idea of riding into 2,000 bicycle riders heading our way for the Pedaler’s Jamboree presented an odd mental image, so we hit the trail earlier hoping to miss the traffic.
While in route to Rocheport, we rode into our first and only rain storm. It was a gully washer however. Being younger, the boys kept a much faster pace than Bruce and I did (at least that is the excuse I am using). We had agreed that we were going to stop in Tebbetts and therefore we could meet there if our riding pace was not the same. As Bruce and I approached Rocheport, the rain began to fall. We rode it through to the Rocheport tunnel where we were able to stay dry for a few minutes until the next lull in the storm.
Rocheport Tunnel
The rain let up enough for us to exit the tunnel and ride to the Trailside Café and Bike Shop which is conveniently along the trail in Rocheport. Bruce and I decided to ride the storm out over bacon, eggs, hash browns, pancakes, coffee and orange juice. The Trailside Café and Bike Shop is a diner that is directly connected to a bicycle shop as the name implies. The shop is a great place for riders to obtain parts or get repair work done along the trail. They also rent bicycles for those that want to go out on the trail for a day ride or tool around town.
Rocheport is somewhat of an anomaly. It is a very artsy community in the heart of Missouri. I would compare it to a mini-Boulder, Colorado along the Missouri River. The area is beautiful and the town is filled with old Victorian style homes and buildings. The town also has numerous museums and galleries. There are several bed and breakfasts in town which make Rocheport a great weekend getaway.
A tent where a live band was playing along the Katy Trail just to the east of Rocheport, Missouri. This gathering point was part of the Pedaler’s Jamboree which is a bicycle event held in and around Rocheport every year.
Once the rain stopped, Bruce and mounted up and continued our trek to Tebbetts. Between Rocheport and Tebbetts lies the small town of Hartsburg, Missouri. A couple of miles outside of Hartsburg, we met a fellow trail rider who was from Finland. He was riding across county and riding along the Katy Trail as part of his journey. He was very entertaining and had previously ridden the Great Divide Trail which is on my bucket list of things to do by bicycle.
As we all three rode into Hartsburg we found the two younger members of our entourage on the porch of Dotty’s Café. For a moment I felt like I had walked into their bedroom back at the house. They had their shoes, socks and other gear strewn all over the place. I did not realize that while Bruce and I were staying dry and enjoying breakfast, they had been forced to drive through the down poor which had actually become somewhat frightening. They were soaked to the bone. They had rain gear but it will only go so far in an all out hour long downpour. I must admit, I smirked a bit at their misfortune. I was feeling a little left behind by their youthfulness. Obviously the slow patient wisdom of age had paid off (at least that is my excuse).
Dotty’s Café in Hartsburg Missouri is a great little diner and her blueberry cobbler ala-mode is to die for.
The opportunity for dining along the route is plenteous as you encounter small towns all along the way. We decided to have lunch with our newfound friend from Finland. One of the great things about touring on the back of a bicycle is the people you meet along the way. How often in our day to day busy life do we make the time to meet new and enlightening people?
After topping off our lunch with some of Dotty’s homemade blueberry cobbler, we hit the trail once again. Being from St. Louis, Bruce had given our new acquaintance some good tips on riding through the metropolis and we parted ways. May the wind still be at your back wherever you may be. The boys’ things had dried out a bit and they packed up and we all headed out.
We arrived in Tebbetts in the late afternoon. Bruce had told us that there was a hostel in Tebbetts that was a good place to stay. The hostel was just a block off of the trail and was very visible. Tebbetts is a very small community and there were no stores or places to get food, so be sure to plan ahead and pack a meal if you are looking forward to dinner. Since we had eaten two good meals earlier in the day we got by on some fruit and nuts that we had brought along for the ride.
The Turner Katy Trail Shelter is a house that was donated to the Katy trail. The home was converted into a comfortable place for trail travelers to spend the night. It includes multiple bunk beds, three showers, a kitchen including microwave and refrigerator. It also has a small bike shop in the back room where you can clean, repair or make adjustments to your ride. For us it was a night out of the tents and a great place to dry out our gear. The shelter encourages a small donation but it is not required.
The Turner Katy Trail Shelter in Tebbetts, Missouri. Donations of five dollars are encouraged but not required.
While at the hostel in Tebbetts we met several young men and woman that had just graduated from college on the east coast. After graduation, they decided to ride across the country before starting their new careers. They were also supporting cancer research along the way. We also met a wonderful couple who were traveling from St. Louis to Clinton and back again with their children. The ages of the children varied from preschool to middle school. The parents said that they were on their second day and things were going well. They said that the children were doing wonderful along the way. The Katy Trail along with the other rail trails that I have ridden provide for great riding opportunities for families including children of all ages. The nature of the trail, the level riding and lack of traffic make for extremely safe conditions for children.
After sleeping well on the mattresses inside the Turner Katy Trail Shelter, we arose the next day refreshed and ready to ride. We had kicked around the idea of riding through to St. Louis but instead decided to just head out and see what the day would bring. We had plenty of time and were in no rush to get anywhere in particular.
The trail to the east of Tebbetts was beautiful. We stopped at a local grocery store in a small town to the east of Tebbetts and grabbed a couple of sausage and egg biscuits from the local retailer. Unfortunately small local grocers such as this are becoming very rare.
We stopped at a small local grocery store for breakfast. The small local grocer has become very rare today.
After our short breakfast stop we continued on to Marthasville. The ride was glorious with numerous views of the river. We also encountered some central Missouri wildlife along the trail which included dear, squirrels, rabbits, turtles, and several snakes including one Copper Head that had coiled up right in the middle of the trail with his head sticking up. I lifted my feet up considerably as I rode past. We also encountered one large rock which begged to have its picture taken. I am not talking about me; I am talking about the actual rock.
River scenery also provided numerous views and photo opportunities.
Upon entering Marthasville, Missouri, we immediately located the camping area which was just to the south of the trail. The camping area was no more than a field that had been designated for trail riders to set up tents. It did include a rustic settler’s cabin as a piece of local history. Although there were no facilities directly on the campground itself, the town, as part of its hospitality to travelers leaves the facilities at the local baseball fields open for bikers and hikers to use. The facilities included several bathrooms, showers, water and electrical outlets as well. The income to local businesses and additional tax base returned to the town more than covers the expense.
After setting up camp and cleaning up a bit we decided to grab dinner at Philly’s Pizza which was about two blocks from the trail and very accessible. Philly’s is a great sandwich and pizza shop. Speaking from experience, they also serve fine lasagna. After dinner we returned to our camp with full tummies and quite prepared for a good night’s sleep. While in camp, we met a retired couple that was travelling the trail. Given the economy and their love for bicycling they informed us that they had decided to buy bicycles and travel the countries rail trails together over the summer. They were in no rush to get anywhere in particular and just rode every day until they became tired and decided to stop and set up camp. They had toured quite extensively and planned on continuing to do so. Not a bad idea if you ask me. May the wind be at your back wherever you may be.
Our campsite in Marthasville, Missouri. The trail runs along the tree line just beyond our camp.
Our fourth and final day of riding was going to be a fairly short one which would consist of riding from Marthasville to Saint Charles, Missouri, a suburb of St. Louis. It had rained a bit during the night so we allowed our tents to dry out for a while and loaded up. The wind was against us most of the day and another large storm was expected so we continued ride pretty steady throughout the day. The last day for me is always a bit rushed. With the end in sight, I tend to begin thinking about getting back home and getting back to the daily grind.
We did stop to take in some of the scenery along the way though. We also discovered a bicycle shop just off the trail in Defiance, Missouri that had an ice cream cooler (bonus). As I have said before, the facilities and services along the Katy Trail are simply outstanding. You can ride and remain as remote as you desire or you could plan your trip and stay in a hotel, hostel or bed and breakfast every night. There are opportunities to resupply or eat out around every corner. Due to the numerous amenities along the way, you can pack as heavy or as light as is comfortable for you. In my opinion you could simply pack some clothes, water and a small bicycle repair kit and go ultra light all the way across the state. The hotels and bed and breakfast would be a little more pricey than free to five dollars, but it is nice to have the option.
A bike shop in Defiance, Missouri along the trail included an ice cream cooler inside.
Bruce and the boys along the Missouri River between Marthasville and Saint Charles
After stopping in Defiance for ice cream at a local bike shop we cruised on into Saint Louis where we arrived shortly after noon. Having family in St. Louis, Bruce had arranged for my cousin to pick us up at a restaurant in Saint Charles and transport us back to the house.
After spending the next two days touring St. Louis by car rather than bicycle it was time to head back. Although we were dropped off at the train station in Saint Louis, there is a depot in Saint Charles that is fairly accessible by bicycle so you can either ride directly from the trail to the station or you can find a hotel or local camping spot and ride directly to the station and get on the train. Getting on the train was simple enough. They had us load our bicycles on the train inside the rear of the last car. The bicycles are transported fully loaded so all of your gear and equipment remains strapped on the bike. The train ride back to Sedalia was very relaxing and allowed me to recount the overall experience of my first multi-day Katy Trail ride. It was a great time. I met some wonderful people and saw some wonderful things. I also got to spend some time and create some cherished memories with my sons and my uncle which I will not soon forget. We eventually arrived in Sedalia and hopped off the train, loaded our bikes back in the van and headed home.
Hopefully this will encourage you to ride the rails by bicycle. Take advantage of the time you have to slow down a bit and enjoy the wind in your face, the sun on your back, and see the scenery that we so often miss by not making time for the simplest of things.
What’s not to like about living with only whats strapped to your back…or in this case your bike. For me bikepacking has evolved from backpacking. Having been a avid rider of Mtb’s for the better part of 18 years and a backpacker for not quite that long, it only made sense to combine the two. Now I have crammed my pack gear in kayaks, on horses backs, to the handle bars of dirt bikes…you name it, so why it took this long for me to come around to putting it on my mtb is beyond me. To say I’m hooked may be an understatement. My treks on the bike usually last from 1 to 5 nights, and cover from 50 to 70 miles per day. I try to choose routes that are 10% pavement, 80% double track (forest service rd) and 10% single track. I prefer to be in the woods so the pavement miles I log are usually from the house to the trail.
The Bike
Frame: Motobecane Phantom pro Ti w/Reba Rl fork
Drivtrain: X-9 w/xo gripshift
Extras: Thomson seat post, Stem and bars. Ergon g2 grips and Profile Design aero bars. Sigma rox6.0 computer.
The Bags
All my packing bags are Relevate design products, they pack well, are super tough, pretty dang water proof, and most importantly to me they secure well for rough and rocky technical single track.
Seat Bag: Pika….holds my tarp, Hammock, down jacket (in winter) with plenty of room to spare.
Cockpit: Jerrycan / Gas tank…these hady little rigs hold tools, spare tubes, tire boot, mutitool, snacks, packlite towel, any small loose Items I may need to store.
Frame Bag: Tangle size large….Im a large dude, so I ride a 22.5 inch frame and still have just barely enough room for the size large. Its a great alternative to a full frame bag and it still allows me to carry water bottles, Bonus! Usually I keep my food items here and a water bladder if I choose not to wear it on my back. Its nice to have the heaviest of my items centered on my bike. Also keep toilet paper/maps here for easy on the access.
Handle bars: Harness with a 10L O/R dry bag and front pocket…the Harness firmly secures my dry bag to the handle bars and the dry bag conatins my sleeping insulation- Over and underquilts if I’m hammocking or Bivy and and overquilt if I’m on the ground. The front pocket I could do without, but its to handy not to take. Its secures to the harness and holds Items that I may take on and off during the day. (Typically for winter) gloves, xtra layers, wind shirt etc..it also has mesh pockets on each end that are handy for my headlamp/sunglasses and watever im taking for a wallet in the other.
The Rest
Shelter/insulation: (in the air) MaCcats standard tarp w/diy hammock. Hammock Gear underquilt/ Golite overquilt. Cacoon hyperlite pillow.
(on the ground) same tarp w/tigoat omni raven bivy. overquilt. Gossamer Gear torsolite pad.
Im fairly new to the game and always looking for new ideas or better ways to do things so I’d appreciate any input more experinced folks may have to offer.
A recent weekend presented the opportunity for a unique adventure, right here in our own backyard.
Lake Superior has frozen over for a large part, including the tip of the lake, at Duluth.
The forecast also called for below freezing temps, including nighttime temps below 0F(-18C), to firm up the snow that had been getting soft in the last few warm days.
All we knew was that there was good, bare ice for a few miles past town, but after that, the lake was open. What the shore would be like was anybody’s guess.
We headed out from home, and rode some singletrack through a city park down to the lake.
Smooth, but very slippery, even with studded tires, the lake ice was fun to ride.
Looking back at the Duluth skyline from the lake
After about 2.5 miles the ice ran out and we hopped onto the narrow strip of cobble beach below some houses.
Then we got to the safe harbor.
After the safe harbor the shoreline consisted of rock shelves sloping gently down to the lake. This was fairly rideable, the snow filled up the gaps between the rocks, but was soft enough to make for a hard time plowing through from rock to rock. Sometimes we could ride the crushed ‘icecubes’ piled along the waters edge, as they were mostly hard packed, but very slippery.
At the mouth of the French River we were greeted by open water, but when we realized there were lots of small rocks sticking out we decided to try riding through, and we managed to stay dry.
We put up the tent on the beach just a little bit further and enjoyed dinner with a full moon shining over the lake.
On Sunday morning the snow had frozen into a hard crust and we had easy cruising along the rock shelf back towards the safe harbor.
As the day wore on, the snow softened and we were back to hunting for patches of overflow ice and rock.
After passing the houses south of the harbor we discovered that during the night maybe half a mile of ice that we had ridden in the day before had blown away, leaving rocky cliffs leading right up to the water.
With some serious bike hauling and scrambling we managed to make it past this section, having to detour only one headland section up onto the highway(200 yards). This was the only time we left the shore.
Tired and happy to have pulled off such a unique trip we pulled into my driveway 24hrs after leaving, 20 miles and a whole heap of memories richer.
It was a true adventure to set out on a trip where we would nottry use any manmade terrain, a route that did not exist before we thought it up, and where we had no idea whether or not it would be possible.
The bike is a Scott Scale Comp 29er Hardtail, XL. I have a sleeping bag under the handlebars, bivy sack and rain jacket and pants on top. Frame bag has tools, food, and city clothes, under seat is down jacket and neo-air mattress strapped to the back of that. Gallon of water in the backpack with a pair of city shoes. Made these from ‘duck cloth’ and velcro for about $25 total. Not waterproof but trash bags inside work well for that. Is this too much weight up front? Running down the fire-roads and pavement it works fine, but I haven’t used it on single-track yet. Bike weight 30 lbs, gear weight 30 lbs.
I have wanted to Mountain Bike Catalina Island for awhile. I had planned to wait for the Catalina Island Gran Fondo put on by Team Big Bear. With this warm winter the thought of Bike packing has also been brewing in my head. With buzz of the Arrowhead 135 and Iditarod which also get my head going about bikepacking. So anyway I kinda contacted my buddy KC about bikepacking Catalina Island on his facebook page since I just happen to have a few days off work last minute. A couple hours later KC replied “are you serious because I took a week off work thinking I would give it a go at Stagecoach 400” so 2 days before the trip, done we are bikepacking Catalina Island. I did some online search for campgrounds on the Island and reserved a campground online for Wednesday at Hermit Gulch it was $21 a night per person. I was not sure if I would make it so I just paid for 1 person to hold the campground.
Pack it Load it
I was very excited! I did a rare thing and took the afternoon off playing and packed, instead of waiting the last minute and just throw everything I think I needed in the car and zoom down. I still managed to miss a couple things like my merino wool underwear and a merino wool long sleeve shirt for lounging around in. I had to work until 11:30pm so the thought of getting up at 3:30am to drive to Joshua Tree to pick up KC was the only thing I was not excited I AM NOT A MORNING PERSON THINKING TO MYSELF. After I got off work stopped at A-frame Liquor to grab a Epic I.P.A. and a Red Bull. IPA to fall asleep Redbull to give me wings to Drive to Joshua Tree then to Catalina Island. I was really hoping to make that 5:30pm boat.
Alarm rings 3:30AM FUG I walked to the refrigerator to find my red bull hopped in the shower and hopped in the car everything loaded cruise control a couple miles over the speed limit gave KC a call meet him at 10:00ish am
KC Pick up
Damn made nice time loaded his stuff and managed to make it to Downtown Long Beach Landing after finding are overnight parking at $15 a night.
Packing Bike Parking Area
We put the bikebags on the bikes and road to ticket window at age 55 KC was happy to get his first senior discount at about $35 one way ticket myself $47 with bike woohoo caught the 2:00pm boat.
Tickets
Now on the boat I got to relax, but I was excited. From the boat we could see pods of Dolphins and a few seals. No Whales.
The Downtown Landing to Avalon boat trip was approximately 1 hour.
The Island
We unloaded are bikes to the dock.
KC undocking his Bike
The first thing I did was look into the clear water I saw the State fish the Garibaldi a gold fish like.
The State Fish
Welcome To Catalina Island
I looked around at the Avalon village reminded me of Capatola meets Santa Barbara meets a foreign country.
Avalon
Small golf carts and cars. Riding in the streets you had to pay attention or you where going to get your arse ran over there is a lot happening.
KC and the Golf Carts
We wanted to get are permit for biking at Catalina Island Conservancy since we where 3 hours earlier then I had thought we would be.
After setting up camp we went back to town and grabbed a beer and $1 happy hour tacos at the Sandlot then we went down to the strip and had a couple beer at first what I thought was a brewery but just the best place in town to grab a craft beer.
KC and those yummy Tacos
Ok had a few and road back by the Wrigley Historic spring training Baseball Field
Wrigley Field Spring Training
Then headed back to camp but first had to grab a beer at the liquor store
KC Packing up a Beer
The liquor store carried mostly river beer but they had a Mission IPA which we enjoyed.
Talking Stories
Crawled in my tent and slept great.
The California Quail
I awaken up to see the California bird the Quail.
We packed up are gear went back to town and had breakfast once fueled we set out to find are road to Two Harbors.
There was no sign so we headed what we thought was the right way after climbing a good climb only dead end until a private resort area so we asked the guard do you know the way to the airport yes go back and just go right right right. haha
We turned around still a little confused I looked at the map I bought and found the right way.
Over Looking Avalon, CA
The Road started gaining elevation right away. After a mile of steep climbing your at a gate and a sign saying you are entering the Catalina Conservancy and also the Main entrance to the zipline that looked fun but I had only a few days on the Island so I had to stay focus on the ride.
Big Climb Over Look
After a couple miles of elevator type climbing you come up to a great eagle like look out over the pacific ocean and you remember you are riding your bike on an Island.
Eagles Eye
from here we rode a rolling style about 80% paved road to the airport.
Rolling
Airport
Elevation
Terrain Map
Where we dined on Bison and Veggie tacos SO GOOOOD! This was also a nice break period.
Tacos
From the airport this is where it gets wild the paved road turns to a nice gravel road.
The Wild Dirt
and a nice downhill.
DownHill
After about 3 miles you come to the Wrigley Field Ranch.
Wrigley Ranch
Ok now a small grind up a semi steep hill. then back to a fun downhill
Down Down Down
but we had to watch the corners there was a fair amount of traffic.
We came to Little Harbor gave it a look and decided we would come back to it on are way back.
Over looking Little Harbor
By this point we where 12 miles into the ride which don’t seem like much but there are some big climbs and we are exposed to the sun.
Start of Another Climb
We start looking up at another big grind and start thinking about setting up camp and Beer and Food.
Two Harbors Top of the climb
Once at the top for a pretty good size climb we get excited we could see are campground area and the little village of Two Harbors.
We dropped down to the campground area first we went around looking for the office. The signage was not great so we had a treasure hunt trying to find the checkin area. Finally found it and there was a sign just go find a campground no reservation needed. The next thing was to find are campground on the way I saw the Island fox cool little guy.
The Island Fox
Once we found are campground we where like ok not that great of spot so we moved to a killer look out of Isthmus Cove one of the Names of the Two Harbors.
camp Over looking Isthmus Cove
So we setup are tent and checked out what are food and beer options where.
It was a 5:15pm glad we went into the store because they closed at 6pm we would not had have beer and snacks for the camp We both grabbed a couple of IPAs and some chips for later.
Ordering
We went next door to the Resturant to dine and have a beer. KC ordered the Fish and Chips which where amazing and I a bison burger.
After being content from dinner we rode around
Checking Out the Bison
This is where we saw the other harbor (Catalina Harbor), Bison and Disk Golf which I wished I had brought a couple so we could play.
Disk Golf
Then headed back to the site and enjoy are beers and stories. That same fox came back to check to see if we had snacks sorry little fella but you need to find your own grinds.
Good Morning
I slept pretty good but it was time to pack up and grab breakfast. OMG that breakfast burrito was soo good and big saved half. Now to find this road out of town.
Elevation Scale
Terrain Map
That fun Downhill that lead us to town became a pretty good climb back out of town.
Once to the peak we had a nice downhill this time we stopped to checkout little harbor.
Little Harbor
Living in a mountain town I have wanted to put my feet in the ocean and enjoy the sand. So for me this was a must stop the water was cold so I didn’t stay in long.
Now I was thinking of those Tacos at the airport. So it became a Mission to climb the 6 mile kinda steep gradual grade back.
Heard of Bison final Climb to the airport
Once back to the airport we devored those tasty tacos and chips and salsa and the other half of are burritos.
Now back to the rolling paved road back to Avalon which we where excited that we where alomost home free I was looking forward to the fast windy downhill but you gotta check yourself there is quite a bit of traffic to the airport from here.
Instead of racing to catch a boat back we would enjoy another night of camping at Hermit Gulch Campground before catching the 10:15am boat back to Downtown landing the next day.
We went back to the Sandlot for more happy hour tacos at a buck a piece and grabbed another 22ounce of Mission IPAs Life is Good.
The next morning we got up around 7am and KC made us some coffee and we slowly took an hour to pack up are camp and head back to the ticket office to buy are ticket back to Reality.
Been there Done that great trip last minute trip turned out great Happy Trails.
Awaiting for boat back to Reality
Stuff I brought.
The Bike was a Rigid Giant XTC 29r with rigid Carbon Forks
Packed in the Handlebar Bag (burrito bag) was my tent and Rain fly and a Thermorest sleeping pad which I want to upgrade to the new ultralight pads. and my tent poles.
My feed bag I carried a couple cliff bars and a Gatorade.
my frame bag I had a Ti coffee cup, single coffee packets, oatmeal and miso soup as a food backup but we knew we where going to eat at eateries. A usb battery pack to charge phone. Suncreen windbreaker packing towel for the shower. And TP.
The seat bag is where I kept my down jacket, thermals, boardshorts,
I also have a Dakine 3liters hydrations pack where I kept my tubes and bike multi tool.
A comment to a prior trip report mentioned the proposed Triple Divide Trail being developed between Rochester, NY, the eastern Triple Point and Williamsport, PA. The Triple Divide Trail is an obvious addition to the slowly evolving eastern divide/east coast North-South route.
At 133 miles from the Triple Divide Point to Lake Ontario, this isn’t a very long stretch of route. For that matter, this trail itself isn’t going to excite any hardcore mountain bikers. As of this writing, it is mostly undeveloped rail trail, grassy snowmobile trail, and near Rochester, urban/suburban multi-use trail. Although there isn’t much single track, there are a few redeeming qualities to this segment. First, using Rochester as terminus as an eastern North/South puts an regional airport right on the route, within 15 miles of the route’s terminus. Second, the Rochester area greenway system is outstanding. Prior to this ride, about all I knew about Rochester was that it is famous for heavy snows, noteworthy corporations (Kodak, Xerox, Genesee Beer and Rochester carburetors) . What I found was that the greenway, with trails and parkland, paralleling the Genesee River as it cascades down multiple waterfalls right through downtown, is a true gem. Finally, Letchworth State Park, with waterfalls and a deep canyon offers some unique geography along the route.
I road the trail as a out and back. I stayed on route northbound. Returning southbound, I couldn’t stand anymore grassy riding, so I bailed out to the roads.
This link more or less includes the basic route in green, as well as the other routes that have been reported on at one time or another.
Patched up RR Bridge
Railroad Grade
Please, no more grass
Wellsville, NY
Genesee River Waterfall
Downtown Rochester
Brew!
“Boy, could I go for a Genny Now!”
Distorted Panoramic, Trail, Bridge, River, Hydro Plant, Falls
In late November 2013, I went on my first solo mtb trip along the Goldfields Track, in the central historical goldfields of Victora, Australia. The trip was a 35km roundtrip through amazing flowing singletrack and sections of fire road, with an overnight camp at Vaughan Springs. The Goldfields Track – a section of the Great Dividing Trail – is a walking track that runs between Bendigo and Ballarat, two historical goldrush towns, now major rural centres.
For my first solo trip, I decided not to be too ambitious. A 2-3 hour ride from the edge of town to the campsite-which I started on late afternoon, then a half day of riding the next day. The solitude was addictive. I met no one else on the trail apart from a couple of boxing kangaroos and a range of birdlife.
Gear List
Giant Trance x29er 1
Thule Pack n’ Pedal Tour (pannier rack – can be fitted front or rear)
CamelBak Alpine Pro 30l (with 3l bladder)
Sea to Summit compression dry sack (Medium)
Topeak Tri-bag top tube bag
Bike tools, spares etc.
These were mainly kept in my top tube bag, with the exception of the pump and headlamp, which were in my CamelBak.
The top tube bag had a Lezyne bike multitool, Leatherman Wave multitool, Dry patch kit, Spare chain links
In my CamelBak I had a Fenix headlamp with spare batteries, and a crankbrothers mini pump.
Shelter and cooking
OzTrail Starlight 2 (actually 1!) person tent
Big Agnes Air Core sleeping pad
Kathmandu Comet sleeping
Trangia spirit burner stove
GearPod stove pod kit (solid fuel and spirit stove, windshield and mug)
Waterproof matches
Clothes
L/s downhill-style cycling jersey (loosefit)
S/s cycling jersey (loosefit)
Merino wool l/s top (x2)
Merino wool s/s top
Columbia convertible pants (light, quickdry)
Fleece mid-layer top
Flannelette PJ bottoms
Light foldaway rain jacket
Trail running shoes (old pear of Nike ACG)
Socks and undies!
Food
Tinned tuna in tomato
Mexican style burrito wraps
Instant noodles
Energy bars (x4)
Gels (x4)
Coffee/sugar and a mini long life milk carton
Navigation and Tech
Ipad, HTC phone / GPS
Topo map of region
Tourist maps to region
First aid and medicine
St John’s First Aid Kit supplemented with quikclot sport (25g), compression bandages and non-woven combine dressing (mainly for cuts, bleeds and snakebite).
Ibuprofen, Paracetamol, Antihistamine
How things held up
The Giant Trance 29er was superbly capable for the task. Even with gear on front and back, it was zippy through singletrack and the stock standard NobyNic 2.25″ roll fast and grip just as well as they roll.
My best investment in gear would have to be the Thule Pack ‘n Pedal. An ingenious way to carry gear on your mountain bike. It was very stable throughout the ride, with my hammering down steep and rocky descents. The Pack ‘n Pedal went nowhere! It worked really well with my dropper seat, which is the advantage over seatpost bags. Revelate make some very nice gear by way of seatpost bags, but nothing beats the ability to hammer a descent while bikepacking. The Pack ‘n Pedal attaches to the rear chain stay (and opposing stay), so on a full suspension bike, the gear weight is distributed over the stays that make up the rear triangle – this means no sitting on your gear if (and when) you drop the saddle. I wouldn’t make a habit of rough descents with a gear-laden bike though!
My best investment in clothing would be a tie between a good merino top (excellent breath-ability) and columbia’s convertible pants. The pants are incredibly light, water resistant and hard-wearing. Mine are about 6 years old, and still going strong. If it gets too hot, I just zip the leggings off.
Lessons Learned!
1. Factor in navigation time. Even though I was riding on a marked track, walking tracks appear to be less intuitive to riders and the track was overgrown in a few places due to recent rains. I found myself having to get off quite a few times, check my GPS position and consult the topo map. I got lost, at least twice and had to backtrack. All of these stoppages cost time. I almost pitched my tent in the dark, which is not optimal.
2. I packed too many clothes. For an overnight trip in warmer weather, I could have done without 1 merino top and the fleece PJ bottoms. Even though the weather was fine, I felt comfortable knowing I had a fleece top as insurance, in case temps dropped.
3. More water stowed would have been good. It was only an overnight, but in the heat, my 3l CamelBak was not enough-especially since I needed to be self sufficient as far as water goes. I’ve heard advice that 3l a day is sufficient, however this was certainly not the case for me. For my next trip, I’m going to fit at least another two water carriers to my bike, in addition to the CamelBak!
4.Related to point 1, pack a compass. Even if your only map is in your head!! It’s always good to know which way is North. My GPS has no internal compass, so I had to move off point for a good half hour to get direction/bearing!
Here’s a video of part of the water race singletrack section. There were other sublime section of singletrack, running alongside massive abandoned mining pits, and Australian bush all around.
I just finished riding the White Rim Trail in Canyonlands National Park. It was such a sweet trip I had to share. Although doable in a single long day we decided to break it up a bit and enjoy the ride. We spent 2 nights camped under the stars. Being January, we did not run into a single other trail user once we entered the park. You can read about the trip here http://backroadrambling.com/
my name is mike and I don’t type in complete sentences sometimes or can win any spelling bees, so beer with me. this is my first attempt at a long ride report/blog like entry. I will probably give some information that is decent for new to bike packing people and I think this might be an entertaining yet somewhat coherent story.
the words below will be about me and my first bikepacking trip that occurred 12/27-12/28 2013
the photos were taken with an iphone 4s. my buddies have a lot of great photos on this trip. contact me if you want to see.
I think two years ago a riding buddy was talking to me about bike packing and it really got me interested. Long story short. Money required and proposed routes didn’t get my attention until a few months ago when I saw this catalina overnight trip. I never been there before and the route looked better than previous routes.
GEAR LIST
80$ Ozark sleeping bag 750 grams (kept me warm without using it as intended as a mummy bag)
32$ 10 L sea to summit compression bag (sleeping bag and clothes inside)
5$ 10 L dry bag (tent, tarp, sleeping pad inside) tent and pad borrowed
5$ tarp 12$ flexible rubber ties
8$ cord and buckles
revelate feedbag, seat bag turned around, verysmall frame bag, camel back. two water bottles (already owned)
FYI
Ferry with bike Roundtrip is 80$. a year bike pass is 35$. camping at two harbors is 1$ until the end of feb?
if you don’t want carry any gear except water and snacks. YOU can rent camping gear from two harbors campground in advance. eat along the way. get water along the way.
THE RIDE
the rough plan was. take ferry from long beach at 615. get bike pass at 830. get to two harbors before dark. then the next day. get up. ride back to Avalon. take ferry back at 6pm
the ride was a little bit of pavement. and the rest was fireroad. 53 miles total and 7000 feet of climbing. the ride was difficult. the amount of climbing paired with the mileage and my less riding in the winter really hit me. it was probably the hardest two days of riding since Oregon in July. challenging, yet fun and interesting. a learning experience for the body and mind.
the weather probably ranged from 40-77 degrees
day 1 31 miles 4000 feet of climbing. stop at airport for lunch
day 2 22 miles at 3000 feet of climbing.
I only got 3.5 hours of sleep the night before the ride. 730-11. I fought with myself until 145 with trying different ways to fall back asleep(drove my wife crazy for a few hours) and I said forget it at 145. I decided to get up and eat 3 eggs and 5 pieces of bacon. drank some coffee and watched an episode of the walking dead. I was only tired on the drive when we were in anahiem. I figured I would sleep really good that night in the tent. I slept ok.
DAY 1
the boat ride over was nice and comfy. good seats. nice view of the sunrise. nice view of the island. oh man was it a perfect morning. Not so perfect at 3pm when climbing to two harbors camp from little harbor camp. when we got to Avalon, we rode around town looking for a breakfast spot, the building and golf carts tripped me out, we checked out the scuba spot and eventually went to vons for breakfast. (yogurt drink, banana and two string cheese). we then made our way to the conservancy at 830 to get our bike pass. and we were on our way to the airport in the sky.
sunrise in long beach
the ride to the airport was pretty easy except the first 3 miles climbing stagecoach road. it was a 45 minute climb. great ocean views for half of it and a good amount of shade really helped the mental game. after the climb it was a nice gradual up and down to the airport with great views of the interior island to the left and the ocean/mainland to the right. it was cool that we could see the mainland across 20 miles of ocean.
we ate buffalo burgers and refueled at the airport. I recommend the buffalo burger with bacon and blue cheese. this is also a great place to wash up and refill on water/other drinks. they did have a decent selection of microbrewed beer for a decent price but I knew the day was going to be tough so I did not give into temptation.
from the airport we back tracked 2 miles along airport road to cape canyon road that passed by black jack campground. (which looked like a nice tree covered campground) cape canyon started with a decent climb that was slowed down due to a torn sidewall. eventually the sidewall was repaired and we continued to the crazy downhill that cape canyon offered. I don’t think I pedaled for 4 miles. fun yet challenging with the gear. some of the views reminded me of chino hills state park. we all had big smiles on our face all the way to middle ranch road.
view near blackjack campground
when we made it to middle ranch road I was thinking. ok this is cool. but soon enough we were close to the coast. we could see the road dropping to sea level and then climbing back up. it was very daunting. (try not to look, but look so you can plan haha) I just pedaled and kept head down, trying to remain positive. I did and when the view of little harbor campground came into view. we were thrilled.
the worst part of day 1 was the climb from little harbor to two harbors. I think it was 4 mile climb that really sucked everything out of me. I was hot, sweat everywhere, pissed, hating life, seemed like it would never end, “said this is going to suck tomorrow” which it did but not as bad as I thought when I was thinking then lol.
me and alex had some cheer leaders at certain points of the climb but they were not hot so they didn’t help much. I don’t think I have ever been in granny gear for so long.
at one point a couple was walking the opposite way. kind of strange since they had flip flops on and were 3 miles from town and had 3 miles to go to camp. tangents I know.
eventually we ended the climb and could see two harbors. it was all down hill from there. we went into town, checked in and found out that camping was cheaper than expected. the lady was really nice and really hooked us up. No not in that way. we walked our bikes back to camp and set up before dark.
the camp was really close to the beach and I couldn’t ask for better condtions.
we went back to town for dinner(non camping food, like steak, fish and chips, etc) and supplies for the next day. had a nice camp fire and was harassed by a fox, loud boat party and backpackers with a guitar but we eventually got our beast sleep. I had a nightcap that consisted of OLD RASPUTEN.
FYI
the food and drinks at two harbors are pricey. 4$ big Gatorade 2$ snickers. etc that sandwhich and fries wasn’t bad priced at 14$.
the store at two harbors does have a good amount of supplies for camping/cooking. goodselection of beer just double the normal price. singles, bombers and 6packs.
I think the rasputens were 3.50 each.
DAY 2
started at 3am. dark chocolate with coconut. 6am. bacon jerkey and almonds. we didn’t started riding until 8 because my set up takes a while to setup. next time I go I will have quick and easy set up. I felt the pressure of the guys waiting to get going. alex took off a little early and I was surprised to see him only a mile up the road.
finished jerkey at little harbor campground
mentally I was not looking forward to riding back to Avalon and physically I wasn’t ready either. I sat on my bike and man it hurt. even with chammy butter.
it was a two mile climb out of camp. after a mile I was in it to win it. something clicked and the pain went away. eventually we made it to the top and I knew it was downhill until little harbor campground (4 miles) that was a really fun downhill that lift my spirits and I think others too. tangent. the gas company truck passed me really fast. I didn’t enjoy the dust. he slowed down for everyone else though ha
we ran into two other bikes packers at little harbor. a couple on hybrid bikes. I didn’t talk to them. alex and jeff did. I guess the ranger was delivering water since it was turned off. that campground looks like a cool spot if you bring enough food and water. im glad I filled a Gatorade bottle at camp from the night before. the next couple miles were painful from little harbor to middle ranch. it was like. climb up a hill. descend back to sea level and then climb a hill. then descend, etc etc etc,
we made it to the cool looking barn, shack that we passed yesterday. I had to get a few photos.
MVMG
cool photo of alex
soon after that we rode pass a fox exhibit that was closed but we did see a fox
at this point I said wow. today is better, you get more reward for tall the climbing. from what I remember. it was climb a big hill. get sweaty and hate life. then descend. cool off and love life. it was a nice feeling. great views of the coast.
soon after that we were at the merger of cape canyon and middle ranch road where a eagle exhibit is.
from the eagles to airport road was a nice gradual fire road climb until the last quarter mile. granny gear in the sun. since I knew water refill was soon I started dumping water on my head to cool down. I knew that was my last hill of the day. me and alex were in a good amount of pain. I think it pain was from the lack of chammy butter. TMI. I could not continue to the extra 11 mile loop around Avalon. bad thing was after that climb we still had to climb to the park for water. luckily it was a gradual up and down road climb. this time views of ocean on the left.
1st time backpacking thumbs up. shadow of bags
a thought that occurred to me several times on the trip back to Avalon was wow the roads are busier today. tourism. weekends. Island Tours. etc. we saw many tour buses and vans and jeeps. I wonder what the people thought when they saw us struggling up the road with all our gear.
once we got to the park. we took a break. washed up. refilled water and layed down on the ground. it was a nice rest. probably could of stayed there for hours. at that point me and alex decided to bail out and take the easy way back to Avalon. jeff and mark continued to the 11 mile loop around to Avalon. I guess it was a tough ride and I was glad we didn’t attempt after hearing about the journey.
me and alex made it back to town. hit up the showers. I had a nice cold starbucks coffee in a bottle. so good. after shower we went to luau larrys for pizza and a beer. what a perfect way to end the trip. the pizza was ok. the green flash ipa was outstanding as usual. 5.75$ for pint.
since we got to town a little earlier we got to leave town a few hours earlier for 5 dollars more. worth it. we were all tired.
funny how a lot of people cut in front of me in line, didn’t care much. I just popped the headphones in my ears and stared at ocean.
we watched a pelican beg for fisherman food. I listened to music in line and on the boat back to longbeach and occasionally looking up for some hot tamales while I thought of the experience we had.
FOR NEXT TIME
id like to pack clothes that are more suited for weather. I brought thermals that I did not use. they were heavy and bulky.
id like to have a set of sleeping socks. id like to have camp sandals or shoes next time.
A MAJOR thing id like to have is one of the REVELATE seat bags. like the PIKA. it will make loading up so much easier on day TWO.
id like a nice hot cup of coffee to start day two.
I also want to do routes and trips that include places I haven’t been before or rode before just like this catalina trip.
photos below are from alex and jeff
that is me in Avalon ready to start the journey
this is end of journey. walking to boat. I didn’t notice the brewery haha
view close to our campsite
little harbor
top of climb from avalon
this is where you pick up your bike pass in avalon
climbing out of camp
last climb on middle ranch road trying to make it up to airport road. im mashing
jeff and mark cruising near two harbors camp
Thanks for reading. I think there is a plan to do this again in February of 2014. mikeselvar@yahoo.com
the groups below are who I usually ride with. check them out.
The Stella’s powerfully focused beam & compact size make a versatile light for any type of riding and is perfectly designed to run on your helmet. Its efficient design offers huge run-times while carrying very little weight – built with the epic in mind.
This convenient filter can be used as an inline filter on a hydration pack, a pre-filter for an existing pump system with the provided faucet adapter, or with a gravity bag. Includes: Sawyer PointONE™ 0.10 Absolute Micron Inline Water Filter, Faucet Adapter, Hydration Pack Assembly Kit, Cleaning and Maintenance Instructions. Weight: 1.8 ounces. Life Expectancy: 1 Million Gallons Guaranteed.
Our vision for the Wölvhammer transcended traditional cycling footwear and originated from the conceptual standpoint of a mountaineering boot. On the inside we max out the insulation package with 200g Thinsulate on the forefoot and NASA-approved aerogel in the insole to block cold cleats. On the outside, 1000D CORDURA® and waterproof-breathable Sympatex block moisture and manage perspiration. For deep snow, easily add knee-high gaiters using the dedicated hook on the toe box. And of course, the Vibram sole is ready for any SPD-compatible cleat of your choice. These are the finest winter cycling shoes ever made.
We’ve cycle toured before, and with our son we’ve done lots of camping: overnight ski touring, multi-day hiking trips, and plenty of mountain biking day trips. We had managed to acquire a Tout Terrain Singletrailer at the start of the year, and had been using it non-stop since for toddler single track adventures. But this was going to be the first time we would combine everything into a bike packing trip. Apart from the Singletrailer, our set-up wasn’t very hi-tech, but it definitely worked for our purposes (although I’m sure Alex would have been happier if I had more weight-carrying capacity).
We’d been hoping to get out on a few overnight trips this summer, but our options had been limited by the flooding in June. Thankfully Kananaskis had finally opened up a little, and so we set on Jumpingpound Ridge as a likely destination.
Here’s my faithful steed all kitted out for the ride. Thermarest strapped under saddle, all our sleeping gear strapped onto handlebars (with some dodgy home-made straps we knocked up). Extra water carrying capacity on front fork. We both wore hydrapacks to carry our spare clothes/extra layers plus a few other bits and pieces.
After unloading and packing at the Dawson Recreation Area, it was off down the Powderface Trail – closed to public vehicles at the moment, as it’s being used by Shell while their usual access road is still inaccessible post-flood. It made for a rather pleasant ride, as there were hardly any vehicles driving past and creating huge lung-coating dust clouds. As a result we could actually enjoy the wildflowers and small animals hopping about the place, squeaking furiously at us.
There were a few new bridges along the road though, it hadn’t escaped the flooding unscathed – here you can see the old bridge off to the right:
After our quiet gradual uphill along the road, we turned to the east, and started climbing up the Jumpingpound Summit Trail. It’s the shortest path to the summit, and also the easiest.
Nontheless, some pushing was required. Our son was booted out of the trailer and helped push Papa up the hill.
We had dinner on the ridge, just below the summit – just some pasta combined with dehydrated meals. Not fancy, but nice and warm.
And we did a little rock climbing.
As we ate, the weather had started to get a little wild. The wind was picking up, and there was rain threatening from the west. We beat a hasty retreat down into the trees, and set up camp in time to be rained on for a while. The shower was short-lived, and we emerged from our tent to a rainbow!
After a little exploration, and hanging-of-the-food-so-bears-don’t-eat-it-or-us, we retreated to the tent for the night and tried to get some sleep.
It wasn’t the best night we’ve had in the tent, but we were warm enough, and all got some sleep at least. The following morning dawned cool and sunny, and we emerged from our warm shelter and pushed back up to the trail.
From there it was just some picture-perfect ridge riding for a while…
And then a wonderfully fun descent, totally rideable for Alex with the trailer even, as we turned down the Jumpingpound Trail rather than riding up Cox Hill (as tempted as I was).
To regain the road we had to ford the mighty river, as the old pedestrian bridge was still out. Thankfully it wasn’t terribly mighty, and it was actually quite easy to ride across.
And from there it was largely downhill back to the car, hoorah!
Total trip distance: 33km (Day 1: 18km, Day 2: 15km) Total elevation gain: 860m (807m of that on Day 1) More details: We started and finished at the Dawson Recreation/Camping Area, where the Cox Hill trail joins the road. The road is currently closed to public vehicles beyond that point.
The bike-packing with toddler packing list: General camping/food
Tarp Tent Rainshadow 2
Down quilt (home made, sleeps 3)
Sleeping bag liners x 2
enLIGHTened equipment ProtegeX Quilt (for the toddler – ended up being used largely by me, to maintain some level of warmth when I was kicked off my thermarest and out from under the quilt)
Prolite Thermarests x 2
Pot, lid, spandongles
MSR Pocket Rocket plus cannister
Sporks x 2, plastic spoon
Insect repellant (completely pointless, would not bring again)
First aid kid (one for injury, one for comfort – including TP)
9 litres of water (ended up being overkill, but it was forecast to be warm, and there’s no water at all where we were camping)
Headlamps (we just used our Ayups, which double as bike lights quite nicely)
Dinner (2 packets of dehy meals, and a ziplock with pasta)
Snacks and breakfast
We both brought enough clothes to wear overnight and keep warm (I was longing for a down sweater, glad I had buff and toque), with spare knicks, socks and underpants.
Unwarranted technology
iPod (for listening to audiobooks for half the night, when kicked off thermarest by restive toddler)
EOS 7D Camera
Garmin Forerunner 305 (Alex had his Garmin eTrex GPS)
Spot tracker
For the toddler
Diapers
Wipes in ziplock
Plastic bag
Hat
Spare t-shirt
Fleece top
Fleece pants
Thermal pants
Socks
Did a few bikepacking trips in the late 90’s around the Maah Dah Hey trail while we rode and built a few portions of it, but this was my first in a long time and first solo.
Planned to ride from Kenosha to Searle Pass and back over the course of two days. Rarely do things go as planned…
Started my day at 6 am and was riding some very fast and smooth singletrack from Kenosha to Georgia Pass (bike path/Peaks trail around the Ten mile range). Great climbing over about 12 miles with no real HAB sections. Enjoyed the view at Georgia and had a blast descending into Breckenridge. The conditions were all I could ask for until about 1130/1145 things began to get wet. I enjoyed the first gentle rain and took a break with a few riders doing a loop from Breck to enjoy the local greenery as we hoped the rain would pass. It let up and we rode on, however as we descended into Breck the rain went from heavy to torrential. I was happy that all of my bags were waterproof…except my backpack. And I appeared to have left the fly at home. I made it into Breck around 1pm and tried to dry some gear out at a local watering hole. I was not wise in the early rain to move my gear to ensure it would be dry so all of my clothing and arm/leg warmers were soaked 🙁
I dried a few things out while the rain pounded down and enjoyed a few milk stouts before heading back up to Georgia pass. I was making fairly good time until the rain made the trails into rivers. I felt it best to start the muddy climb back up to Georgia instead. I ended up getting in 48 miles the first day and camped on the route up to Old Georgia pass. The trails were too muddy to climb so I hopped back onto the road which was as muddy, but offered a bit better traction. I found an broken down log cabin that I made a lean-to with and was able to get myself and my entire bike out of the rain for the night. It rained pretty continuously from about 8pm-4/5am.
On day 2 I continued the climb back up to Georgia pass which involved less riding than it should have due to the muddy nature of the road. I made it back to the pass and enjoyed the descent down the Jefferson trail before returning to the CT. Arrived at the car at 1030 am and enjoyed a cold one before driving back to Fort C. A quick 16 miles back to the car for a day and half total of 63 miles. Wish I had the chance to push for the original plan but it was great regardless.
Overall I learned some lessons about what I needed to bring and had a blast on a solo adventure.
A few more pics:
this is where I set up camp. Since I only had a tarp I did the classic A frame set up….then i decided I’d like to keep the bike as dry as possible throughout the night so I moved the tarp onto the wall on the right. Bike, myself and all my gear didn’t get any wetter over night
great view back toward Kenosha pass, great descent
the last thing I wanted to include here is my happiness/success with this hyrdration setup I ran. I’m using Revelate’s tangle and gas tank to create a way to get my water off my back. I ran about 80oz in the tangle bag with my tools/pump/misc items in the smaller pocket. I then ran the hose up through one of the two loops on the gas tank and then placed it inside my brake/shifter cable netting. I’ve run with this setup for many other rides and only on rare occassions does the hose come out from the cable netting. If it does, its held up by the gas tank. If you don’t run the gas tank then the hyrdation tubing does not stay put nearly as well.
Need to give your wrists a break? The Carver Bikes MyTi Handlebar has “swept” the alt-bar market with a light, forgiving alt bar. Constructed from 1.55mm thick 3/2.5 Titanium alloy and with a 200mm wide grip area on each side that sweeps back at a 29degree angle, the MyTi lets you ride longer and harder without the pins and needles. Overall bar width is 710mm, and you can choose between 25.4mm or 31.8 mm shims.
On September 22nd I went with a friend for a 2 days 1 nigh bikepacking, from northern Golan Heights – a Syrian land occupied by Israel in 1967 and 73, to Netanya – a city on the shore of the Mediterranean sea, where my parents live. It’s 210km all together, some 50km of it was on road, and the rest off road. the road included singletracks,4×4 roads, and dirt roads. it took net of 15 riding hours, 14kmh average. on the first day we covered 130km and 80 on the second.
The setup –
Bike –
Felt Nine Race 2012 – a hard tail 29er, rockshox reba on front, XT and SLX equipped. Front tire – Kenda Nevegal 2.2, Rear tire – Maxxis Crossmark 2.1 – 14KG all together.
On the bike – 2 frame bags – the black one included spare inner rube and repair tools – leatherman, multitool, pancture kit, pump. the yellow one for snacks.
1x 750ml water bottle.
On the handlebar I put my REI half dome 2 tent, without the rainfly.
A saddle pole Rack (not such a good choice for a road with singletracks and bumps) – on it I had a LowePro Flipside 300 bag – Originally a camera bag. It is a strong bag.
In the bag – 1x camping stove – the most simple one I have. 1xcamping tea pot, just enough coffee, sugar, and tea for 2 days. 2 packages of ready to eat rice with lentils – 5 minutes cooking and it’s ready. 1 pasta bag, and 1 Pesto sauce. we only had he pasta with pesto in the end. and the rice came back home with me.
first aid kit, nylon bag. tooth paste, tooth brush, soap. smallest towel found. another spare tube. lightest long sleeve shirt I found for the night, underwear.
tied on the bag – a sleeping bag – the lightest I found among my friends. weighs around 900Grams.
a backpack – 3 littre water bag, small camera, cooking pot, wallet, smart phone.2 extra batteries for the phone, maps. when navigation was needed I put the smartphone on the handlebar and navigated according to recorded tracks I downloaded in advance.
the total equipment weight was around 10Kg, including the 3.750 litter of water.
my conclusions from that trip –
1. learn how to calculate the amount of food to carry.
2. seat post back rack was too weak on singletracks and bumpy roads with this weight on it. buy a good frame rack.
3. the weight center was too high because of the location of the bag on the back, next time I will carry most weight closest to the axels of the wheels.
4. for this specific rout – Kenda Nevegal was just too much. change it to a lighter tire.
I was messing around in Topofusion one evening looking for a possible dirt route that would loop the northernmost two passages of the Arizona Trail. I was finding some forest roads here and there, but nothing was jumping out at me. I noticed Scott had added a new map layer into the software titled ‘Juicy Trails‘, hmmm, what’s this? I applied the layer and began to pan around the region. Low and behold I spotted a trail running northwest from House Rock Valley rd called the Navajo Trail. A little search on the interwebs made this trail very intriguing. I drafted a figure 8 route starting at Stateline campground on the AZ/UT border, heading south on House Rock Valley rd to the Navajo Trail, then a series of forest roads to Jacob Lake where we’d spend the night and re-supply. The following day would be mostly downhill and shorter on all singletrack of the AZT back to Stateline CG.
I needed a date and some willing participants for an exploratory type ride that most certainly had a fair amount of hike-a-bike (HAB). A few of my riding friends were interested, but had reservations re: Navajo Trail. In step Michelle and Tim; after a bit of convincing that the pace would be slow with plenty of photo opportunities!!
We all met at Tim’s on Friday afternoon and piled two bikes on the roof and my bike on the back, then all the gear for bikepacking plus 3 adults into……a mini cooper! Yeah, it was a clown car like no other. I assumed my position in the remnants of the back seat, but surprisingly had plenty of room. The tricky part was getting in/out of the seat!!
Ideal transportation for a bikepacking weekend!
We hit the road around 4pm and slowly made our way free of the urban gridlock. A quick dinner stop in Flagstaff and we were in rural northern AZ in no time.
By all accounts House Rock Valley rd was easily traveled by any car, reports warned of death mud if wet. Conditions were dry as a bone and the road was well maintained sans a few sections of washboards. There were at least 4 wash crossings where ruts were visible from vehicles getting bogged down during wet times. The mini was flawless, but a couple miles from Stateline we heard some clanking on the roof!! Uh oh. The washboarding had jiggled the roof-rack loose and a couple bolts fell out! At least we stopped quickly enough to retrieve all the parts and made it to Stateline sometime around 11pm.
It was a chilly night down in the low 30’s, but not too bad. The sun took a while to rise due to the high canyon walls. Tim & Michelle started to freak out when they thought it was already almost 9am!! We were practically on the UT border, which happens to be 1 hour ahead of AZ, when we confirmed it was just after 8am. We still took our time, packing up, eating breakfast and finding Michelle’s rear axle had worked its way loose from the washboarded road. Luckily I always remove my drive-side pedal for my bike rack and had my cone wrench on hand, coupled with a leatherman, it was an easy fix. We finally started riding south around 10am, not the preferred time, but we weren’t shooting for a break of dawn getaway either.
The first 14 miles were spent on House Rock Valley rd enjoying the views we missed on our arrival.
Getting underway onto House Rock Valley rd.
A few undulating climbs to start.
Great day to be out on a bike.
Red rocks littered the first half of the road ride.
Soon the wide open plains appeared.
A trail for another adventure??
One last climb before our turnoff.
A nice two mile descent to the Navajo trailhead.
We pulled into an open area marked by a brown hiker sign and rode up to a gate with an old weathered sign that read ‘Navajo Trail No. 19’ This is the place. Michelle was leery of what lie ahead, I was ready to push my bike up the mountain and start riding while Tim may have wondered what exactly he got himself into.
When I put this route together I initially used satellite imagery to draw in the Navajo Trail as I could easily see it on the map. The problem was when I switched to the Juicy Trails map layer the route was shifted quite considerably. Not knowing the true trail conditions this was an issue, which one was going to most closely represent what was actually there? I used the Juicy Trails website to check on some known trails in the Phoenix area and from what I could tell the tracks were spot on. So, I went back and moved my satellite route over to the Juicy Trails alignment. Looking back now, this was key to our successful ride.
Immediately on the other side of the gate the trail was barely visible, but we could see it across the field we had to navigate. Straight ahead! We started climbing and I was down in granny gear soon enough. The trail quickly spiked skyward and became quite chunky, time for HAB.
What would the next 12 miles bring?
Easy to follow in spots, non-existent in others.
Kaibab Plateau Tr is the Arizona Trail or Trail No. 101.
One final push before the walking begins.
These small signs were few and far between, but helpful along the way.
Up, up, up.
You are here.
With each footstep up the mountainside the views became more impressive.
Tim working it around a switchback.
See, it wasn’t ALL HAB!! (This helmetless section was only 50 feet long!)
Vermilion Cliffs towering over House Rock Valley rd.
Looks like a house shaped rock on the horizon.
Some sections made you pause until a cairn was sighted.
Far below, the trailhead stands out.
The big push finally comes to an end.
We took a short break at the top then started pedaling once more. We had now gained the plateau and were riding in the trees on a nice wide singletrack corridor.
Most of the trail was easy to follow, but we’d hit at least 4 spots where nothing was visible on the ground. A GPS with a loaded track is mandatory for the Navajo Trail.
Some surprising sections of singletrack.
A few miles in we were treated to our first views of Zion Nat’l Park.
A steep downhill into Summit Valley and the AZT crossing.
Lunch break at the AZT crossing.
This was a really nice sign…in the middle of nowhere, a few hundred yards west from the AZT on FR248.
FR795 deadends at the Navajo Trait tank, then this begins, more great singletrack!!
A few splashes of color could still be found.
Closer to Zion, we ready for our final steep descent.
You’d be all smiles too standing here.
We HAB’d down a steep scree slope from that ridge, then resumed a fast trail to here. The end of the Navajo Trail.
The Navajo Trail dumped us out onto FR248D, a nondescript road on the open shrub filled plains. The sun was dropping fast and we still had 20 miles to go until Jacob Lake. It was now 4:30p, we knew we’d be riding into the night, but could we still make the Inn before the grill closed at 8p??
We initially thought we descended the scar on the ridge, little did we know, we were about to climb it.
FR248D.
Making the turn eastward.
A lone tree basks in the cool golden hour light.
Nothing but fence posts for miles.
We started our gradual climb back up to the plateau, the scarred switchback inching closer until it was clear we’d be climbing it. The sun was now just above the horizon, a little past 5:30p, that left 2 1/2 hours to make it to the Inn for dinner. Michelle was starting to slow, this was going to be her longest ride to date….on a fully loaded bike….at elevation, but she was plugging along. I took the opportunity to get myself ready for some night riding at the switchback while I waited for them to meet up.
FR248D barely visible below the setting rays.
On the push up to the plateau.
Not a bad grade, at least the HAB was done for the day.
We regrouped just as the sun dipped below the horizon. We decided it would be best to send me along to get to the Jacob Lake Inn before the grill closed. We also slightly modified the route over the last 5 miles for a more direct route & a little less climbing. I gave Michelle & Tim my paper map of the area, wished them luck and continued on in hopes of snagging some good eats.
One small item of note: my handpump had stopped working earlier in the day and my rear tire was being suspect. I did have a CO2 cartridge, but really hoped I could make it to the Inn without issue.
I really enjoy riding at night. On the forest roads lights can be on low and you settle into a rhythm, often peering into the darkness around you, perhaps on the lookout for another set of eyeballs.
On this night I rode into a most unexpected sight. It was at the junction of FR248D & FR248A, there was a small gap in the trees to the east with an almost burnt orange glow a full moon was rising! It was fantastic, the darkest orange moon I’d ever witnessed. There was no way I could capture the image without a tripod, so I just stopped for a minute and burned it into my memory bank. Moments like that make you very thankful for the ability and opportunity to be outside enjoying nature.
A few miles down the road my front end suddenly became very squishy. Drat. I had to resort to my CO2. I had an idea, I needed a little air in the rear tire as well, so I set the valves to the ready position, hit the front tire with 2/3rds of the cartridge, backed it off, then hit the rear tire with the remainder. Bam!! Fully inflated I was back to mashing in no time.
I kept checking the time 6:30p, 7p, 7:20p, then I came to FR248. Cool. A few miles later I was on the paved US89A, it was 7:30p. After a deceiving 1 1/2 miles of pavement I arrived at the Inn and asked if the grill was still going. Yes it was and until 9p!! The manager on duty was kind enough to put my bike in the office while I ate. Eat I did. I woofed down a tasty club sandwich, fountain cokes, hot chocolate and cherry pie ala mode!
It was now 8:30p and still no sign of Michelle & Tim. By 8:50p I put in an order for them, then checked to see if there were any available rooms for the night. I figured Michelle was really feeling it and probably wouldn’t mind skipping a night of cold camping. For the record, I didn’t mind either as the temps were forecast to dip into the upper 20’s. I grabbed my bike and the food order, went outside just as they were rolling into the parking lot!! Perfect. We quickly agreed on the room, checked in, showered, and were asleep around 11p. **Yes, we carried all our bikepacking gear for nothing!! A training ride perhaps?**
Day 2: AZT 42-43
The only services for miles.
AZT trailhead, near where we were supposed to camp.
Passage 42 started off with two very short HAB’s over loose terrain, after that it was mile upon mile of cruisin’ singletrack through the forest. From Jacob Lake to Stateline the elevation profile was very favorable. I’d venture a guess that only 2 of the 30 miles were uphill, the rest was either level or angling downhill.
Our first sighting of the red rocks near Stateline & Navajo Mtn.
We crossed 5 drainages before the long descent into Stateline.
Tim diggin’ in.
Almost 70 miles in and still smiling!!
We started a long gradual descent crisscrossing a wash on a soft red powder-sand surface. I must’ve been doing 15-17 mph when my front tire gave away and I washed out coming to an abrupt halt in the dirt. Only a small cut on my knee, a few prickly pear spines in my leg, but at least the bike was fine, back to the trail!!
The last couple of miles are a hoot, dropping some 1500′ down the mountainside into Stateline. The switchbacks are not sharp, rather large arcing curves. Be sure your brakes are good to go on this one.
Another fun section through a canyon.
Getting close now.
It was tough to keep your eyes on the trail here.
Another great ride about to wrap up.
A look back on the final descent.
Go ride some today.
End of the line.
Back where we started. Photo by Michelle.
We finished up around 3:30p, a bit too late for a side trip over to Wire Pass trailhead for a quick hike into a sandstone slot canyon. We loaded up the clown car for the 6 hour drive home and were treated to more incredible views while the sun set over the high desert. I’ll definitely be back to ride this loop again, it far exceeded my expectations. As always, it’s extra fun to do a ride like this in good company, thanks to Michelle & Tim for joining in on the fun.
It really is called Stateline for a reason.
Heading into Utah you get this sign.
On the border.
Heading back into Arizona you get this sign.
Saw a few wild horses on our way out on House Rock Valley rd.
Cool rustic barn on the open plains.
Such a beautiful place, try and catch it near sunrise or sunset!!
Clown car filled to capacity.
Fiery cliffs near Marble Canyon.
The Colorado River slices a chasm through the region just south of Lee’s Ferry.
Overall, I took far too many things than needed for this run, but this setup is the basis for most of my adventures. I also add in a puffy vest or jacket and SealSkins waterproof socks, depending on conditions. Also, the list doesn’t include the clothing I wear: Performance shorts, Capilene long sleeve top and/or Voler team jersey, long finger gloves, Defeet wool socks, Headsweats hat, Giro Xar helmet, PI X-Alp Pro old style shoes, Tifosi glasses.
Bike:
Niner Air-9 Scandium model w/ Fox F29 FIT RLC set to 100mm
XTR 9 speed ‘Flippy Shift Levers’ gruppo
Stans ArchEX rims / 330 hubs w/ Enduro ceramic hybrid upgrade and Geax Seguaro set up tubeless
Various other older style bits- Time pedals, WTB Rocket V Saddle, Ergon grips on MonkeyXC bars, WTB stem, Thomson post
This is not a bikepacking bike. This is a “fully-loaded and long distances touring on mostly quiet rough roads” bike. About 49 weeks and about 15,000 miles / 25,000 km, in a loop of the Continental USA and some of Canada and Alaska.
Coffee on the Wyoming border.
Including but not limited to:
– real sleeping bag (night low 20F, day high 108F) and a pad
– double wall tent with a pole and stakes
– 1 litre pot, stove, fuel, coffee cup
– a couple days’ of food
– puff jacket
– full gore tex, almost waterproof socks and mittens, fleece gloves, wool hat
– 2 tallboys (Rainier)
– 2 pairs long underwear tops and bottoms
– space for about a gallon of water
– 4 bizarre thoughts
– tools: all the usual, plus Rohloff stuff and two spare tubes
16″ Surly Troll, steel, mechanical disc brakes, fenders, everything is heavy and awesome. All bags by Revelate Designs but one is from the Epic era. Maybe a 30 pound bike with 20 pounds of gear? Rear rack for strapping a spare tire to, or to carry a big tarp on, or to hold a $5 hot-and-ready from Little Caesar’s — but I’d rather pony up the extra dollar and get a second topping and wait 10 minutes at Domino’s. Better, and more, sauce.
Texas
Pitch your tent, pitch your tarp, build a fire. Stop being so serious.
In the Sweet Roll I have my Sleeping Bag and Down Sweater in the anything cage on the left I have my JetBoil stove and on the right my sleeping pad.
Cockpit I have my Garmin oregon t450, Sigma BC 2209 MHR and my nightrider light.
My Viscacha I have my tent with poles and keep some cloths in there to. My Frame bag has my mug with tea bags inside, first aid kit, gear repair kit, emergency blanket, wet wipe, sponge, personal hygiene items and extra batteries, dish towel, soap, spork and steripen. Most of the other gear along with food goes into my CamelBak,
Bikepacking Gear List:
– Bike Gear:
– 2013 Salsa Fargo 2
– 2 x Salsa Anything Cages
– 2 x Sea to Summit Dry Bags – Small
– Salsa Frame Bag
– Revelate Design Sweet Roll
– Revelate Design Viscacha
– Sigma BC 2209 MHR
– Heartrate Monitor Strap
– Garmin Oregon 450t
– Extra Batteries 2 x AA
– Kitchen Gear:
– Jetboil Stove (Orginal back when they only had one model)
Nuclear Sunrise Stitchworks offers a variety of stock items and performs custom work with a turnaround of a couple of weeks or less. Hand crafted in El Paso, Texas using a variety of materials including Dimension Polyant XPAC in a variety of colors.
Stock products include the Fat Man and Little Boy seat bags, Titan and Trinity tanks, Silo feedbag, Stealth and Superfortress harness.
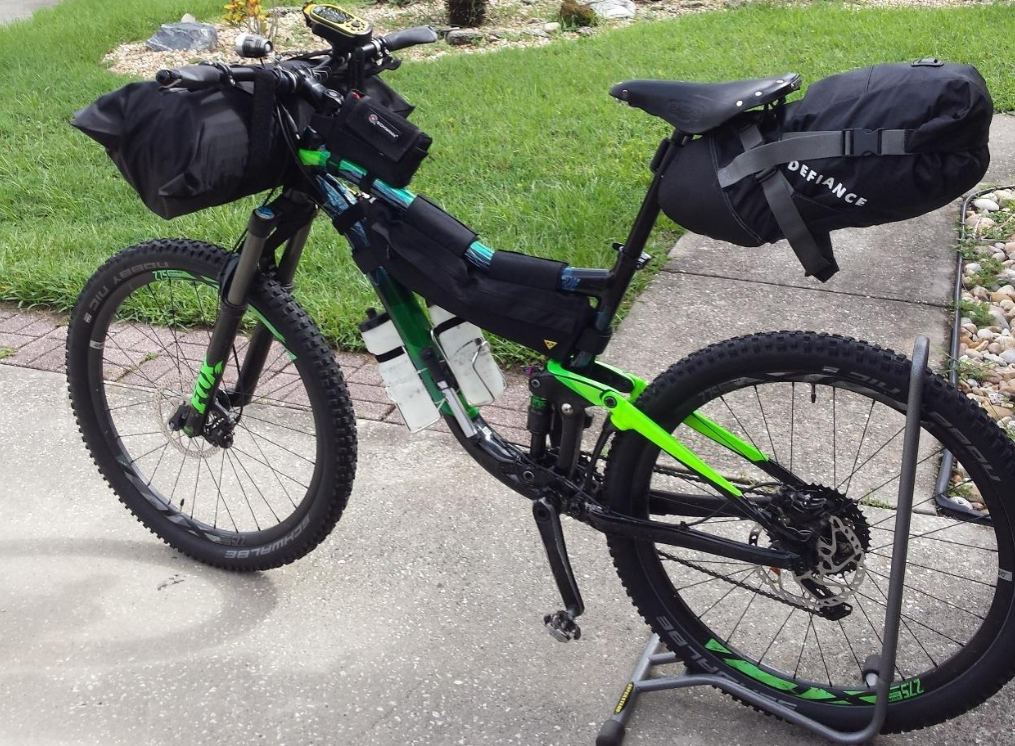


 I , like most riders availed of the option to send a food parcel to the Boyle Village. At the turn off I met Ollie who was preparing to get going, Patrick on the other hand was all tucked up and cosy on the bus shelter bench, he did not look like he was ready to move just yet The next resupply was 240kms away at Methven, this was a bit of an unknown section with numerous private stations we would traverse. I was feeling good and ready to go


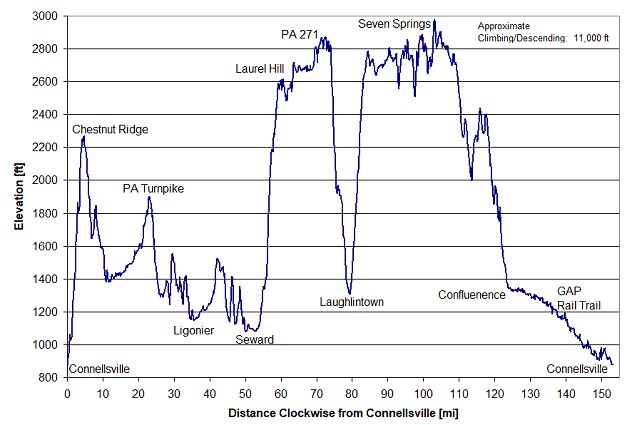
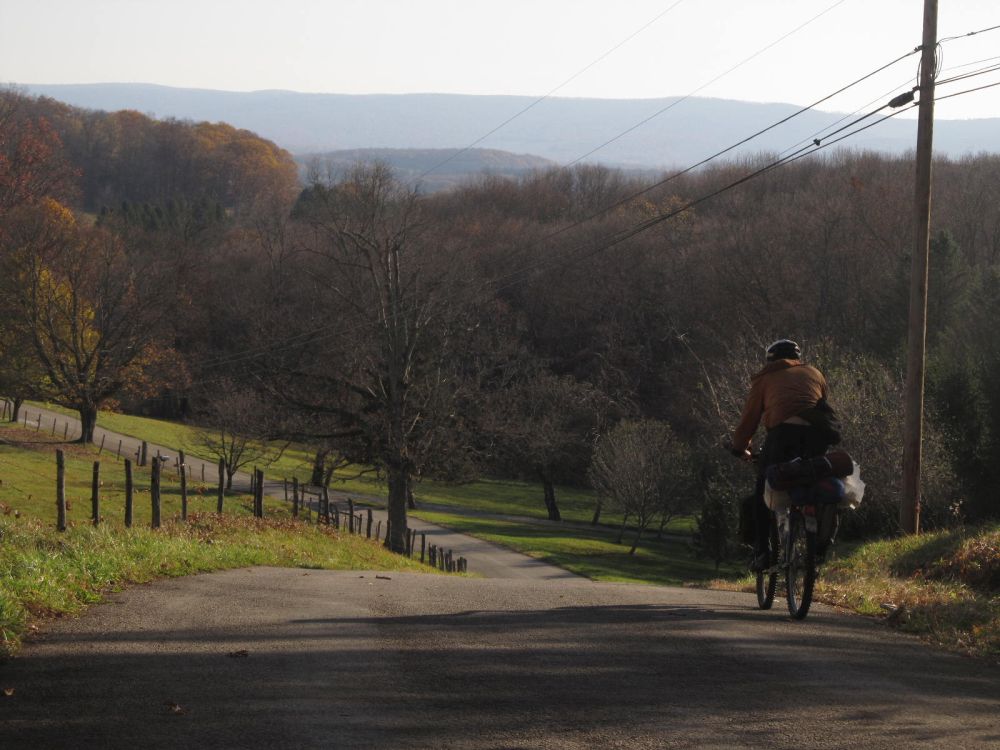
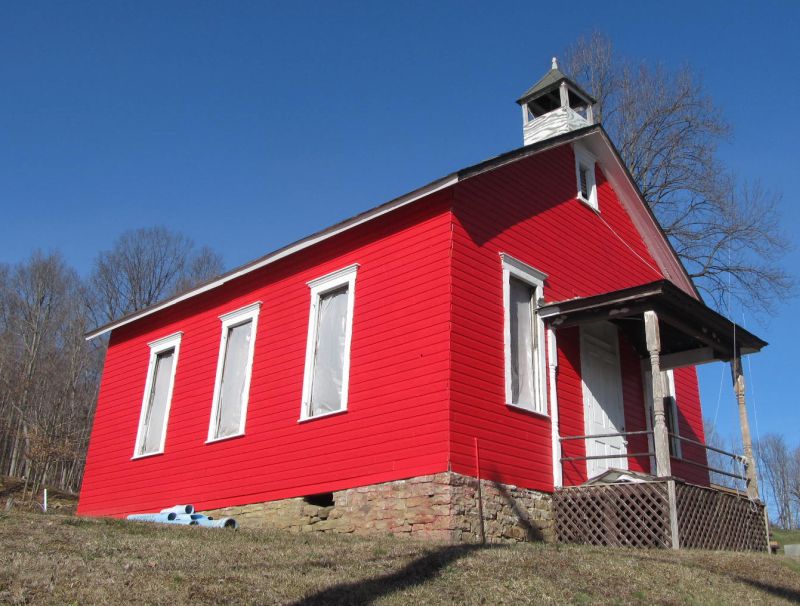
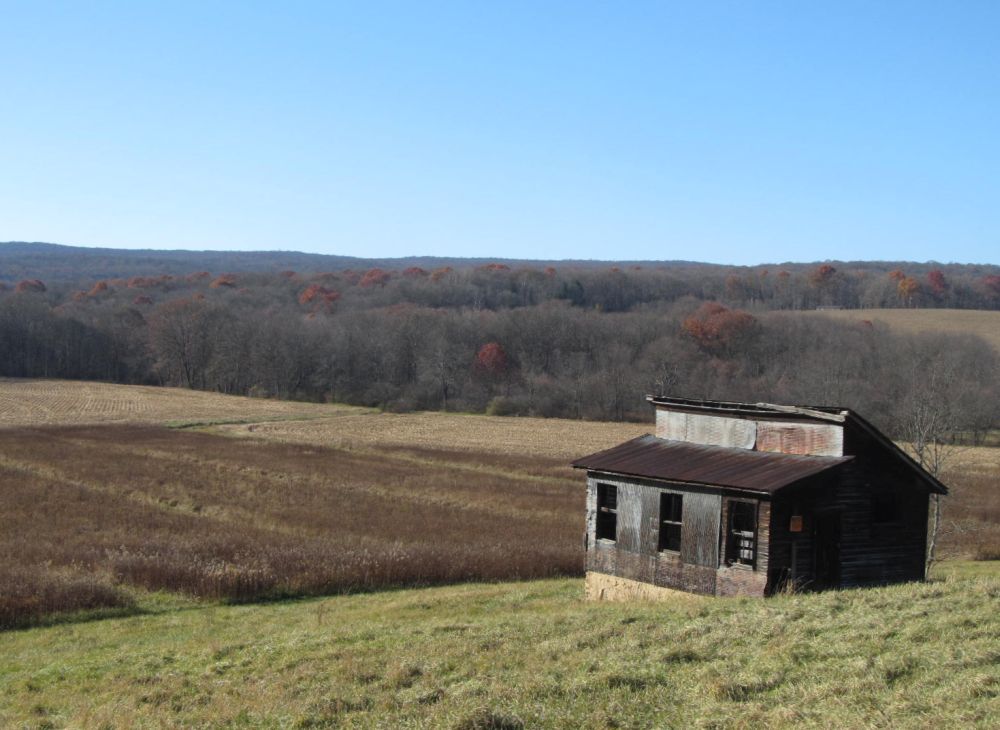


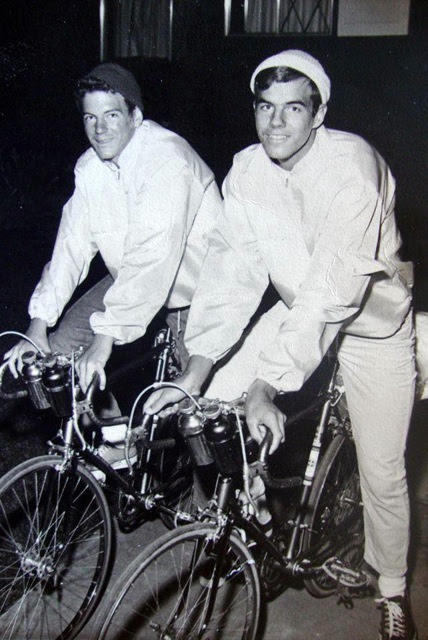

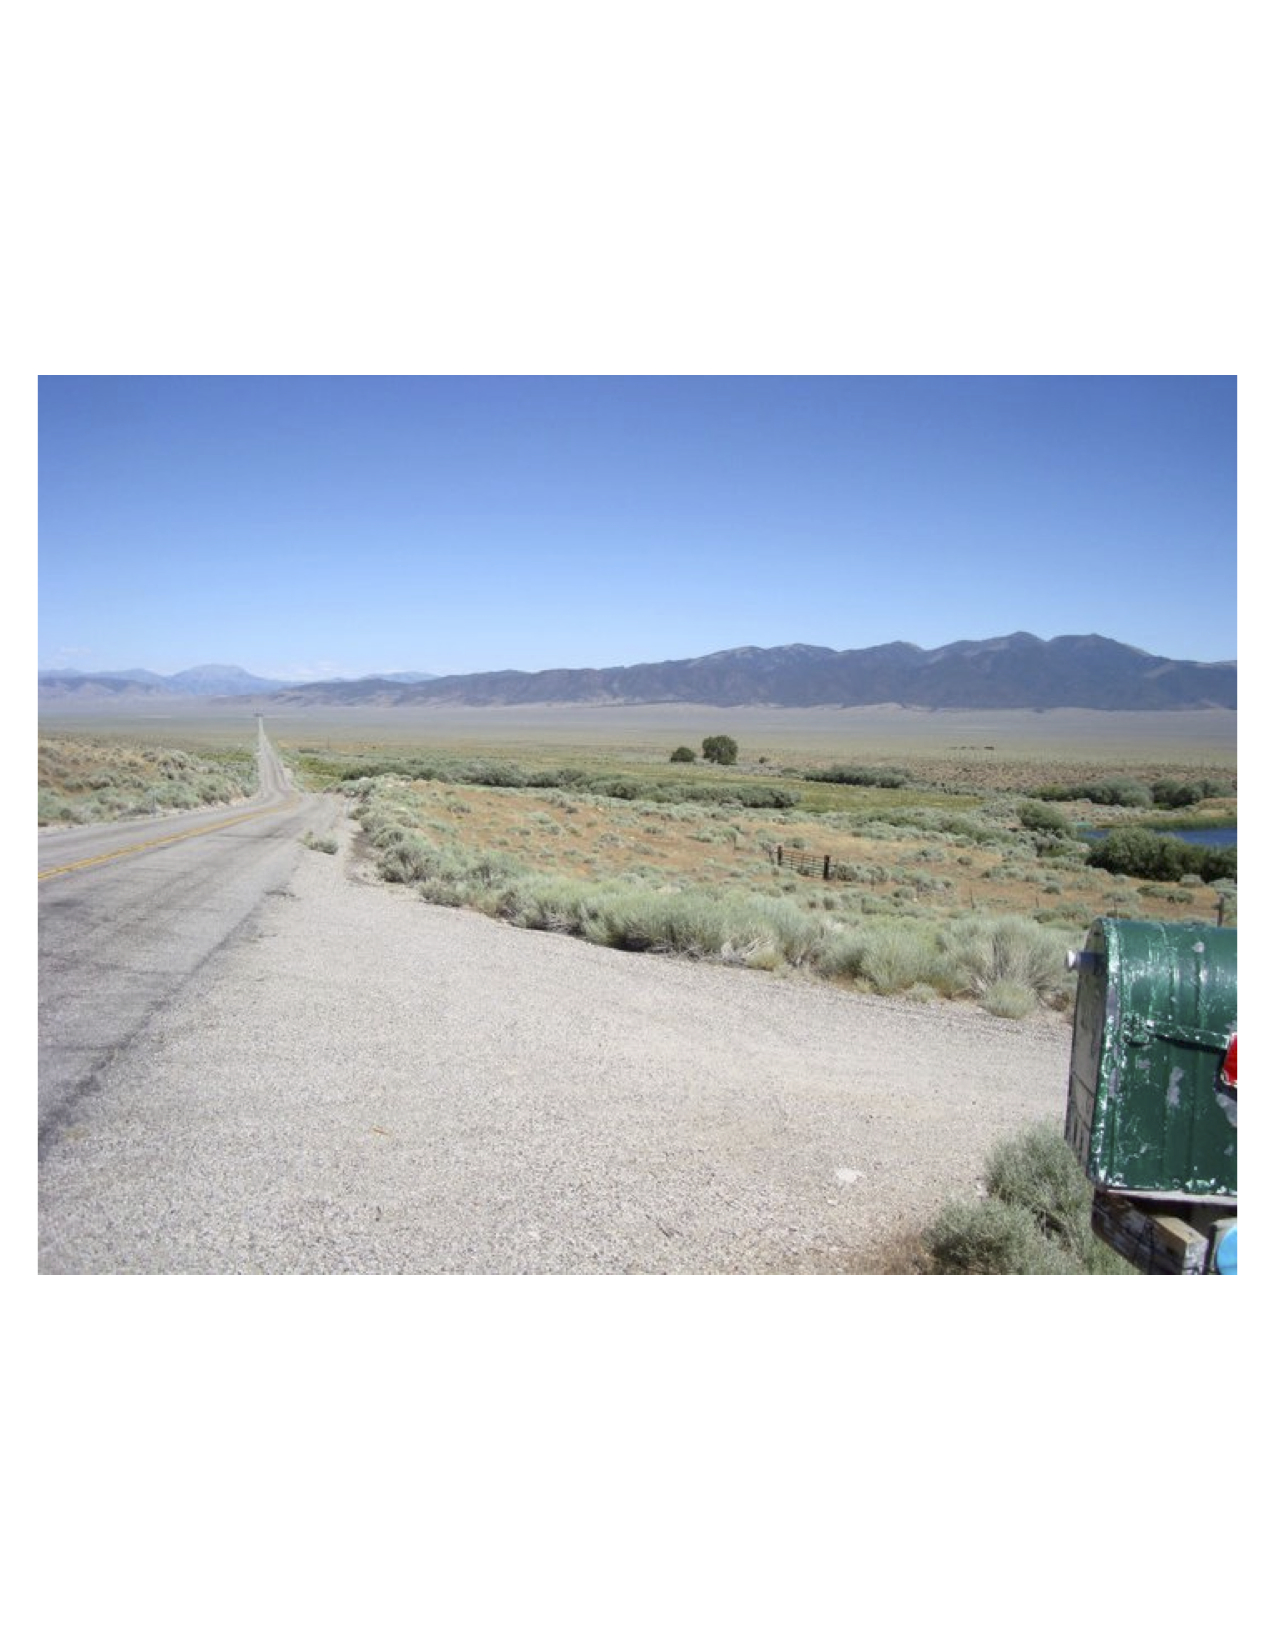
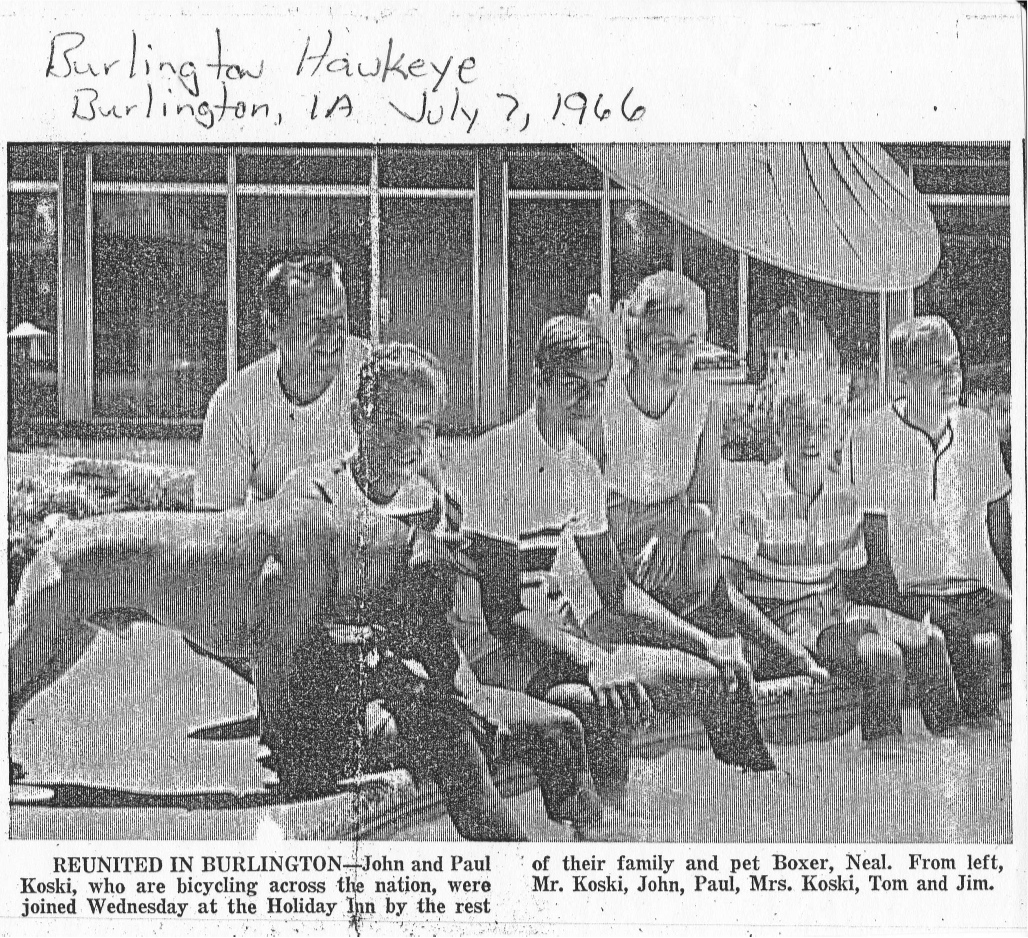

 Following the Platte River eastward on Highway 30 in Nebraska took three days and it was a rather boring ride due to a never ending flat landscape each day. It got warm early in the day and stayed warm into the night. The worst part though was the wind that came directly at us starting by 10 o’clock each morning. These were our most frustrating days of riding, having to drop into our lower gears on flat ground just to make progress against the headwind. The days were a blur of monotonous riding. Sidney to North Platte- 117 miles. North Platte to Kearney – 98 miles. Kearney to Osceola- 91 miles. The miles clicked on by through the flat farm lands of Nebraska as we headed towards Omaha. The country finally began to change for the better after Wahoo, Nebraska. It was more rolling with trees and visually more interesting. July 2nd saw us in Omaha, and crossing the Missouri River into Iowa , riding on to Glenwood, 113 miles that day. By now our scheduled rendezvous with the family was set for July 5th in Burlington, Iowa, on the Mississippi River. That allowed us to slow our pace a bit. July 3rd saw us in Creston, Iowa after riding 82 miles. Then Creston to Ottumwa, Iowa, – 111 miles where we spent another night in jail and finally on to Burlington, Iowa- 77 miles. We arrived by 11:30 in the morning in the rain, our first precipitation of the trip. The family would not arrive until later that evening, but I remember how great it felt NOT to hop on the bike and start pedaling the next morning. Our parents treated us to two nights in the Holiday Inn, relaxing around the swimming pool and eating better than we had for the past two weeks
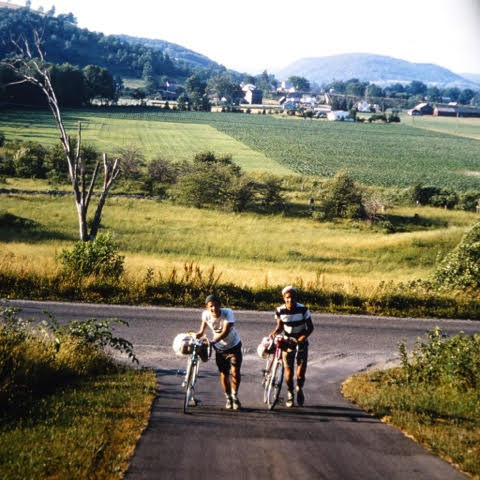
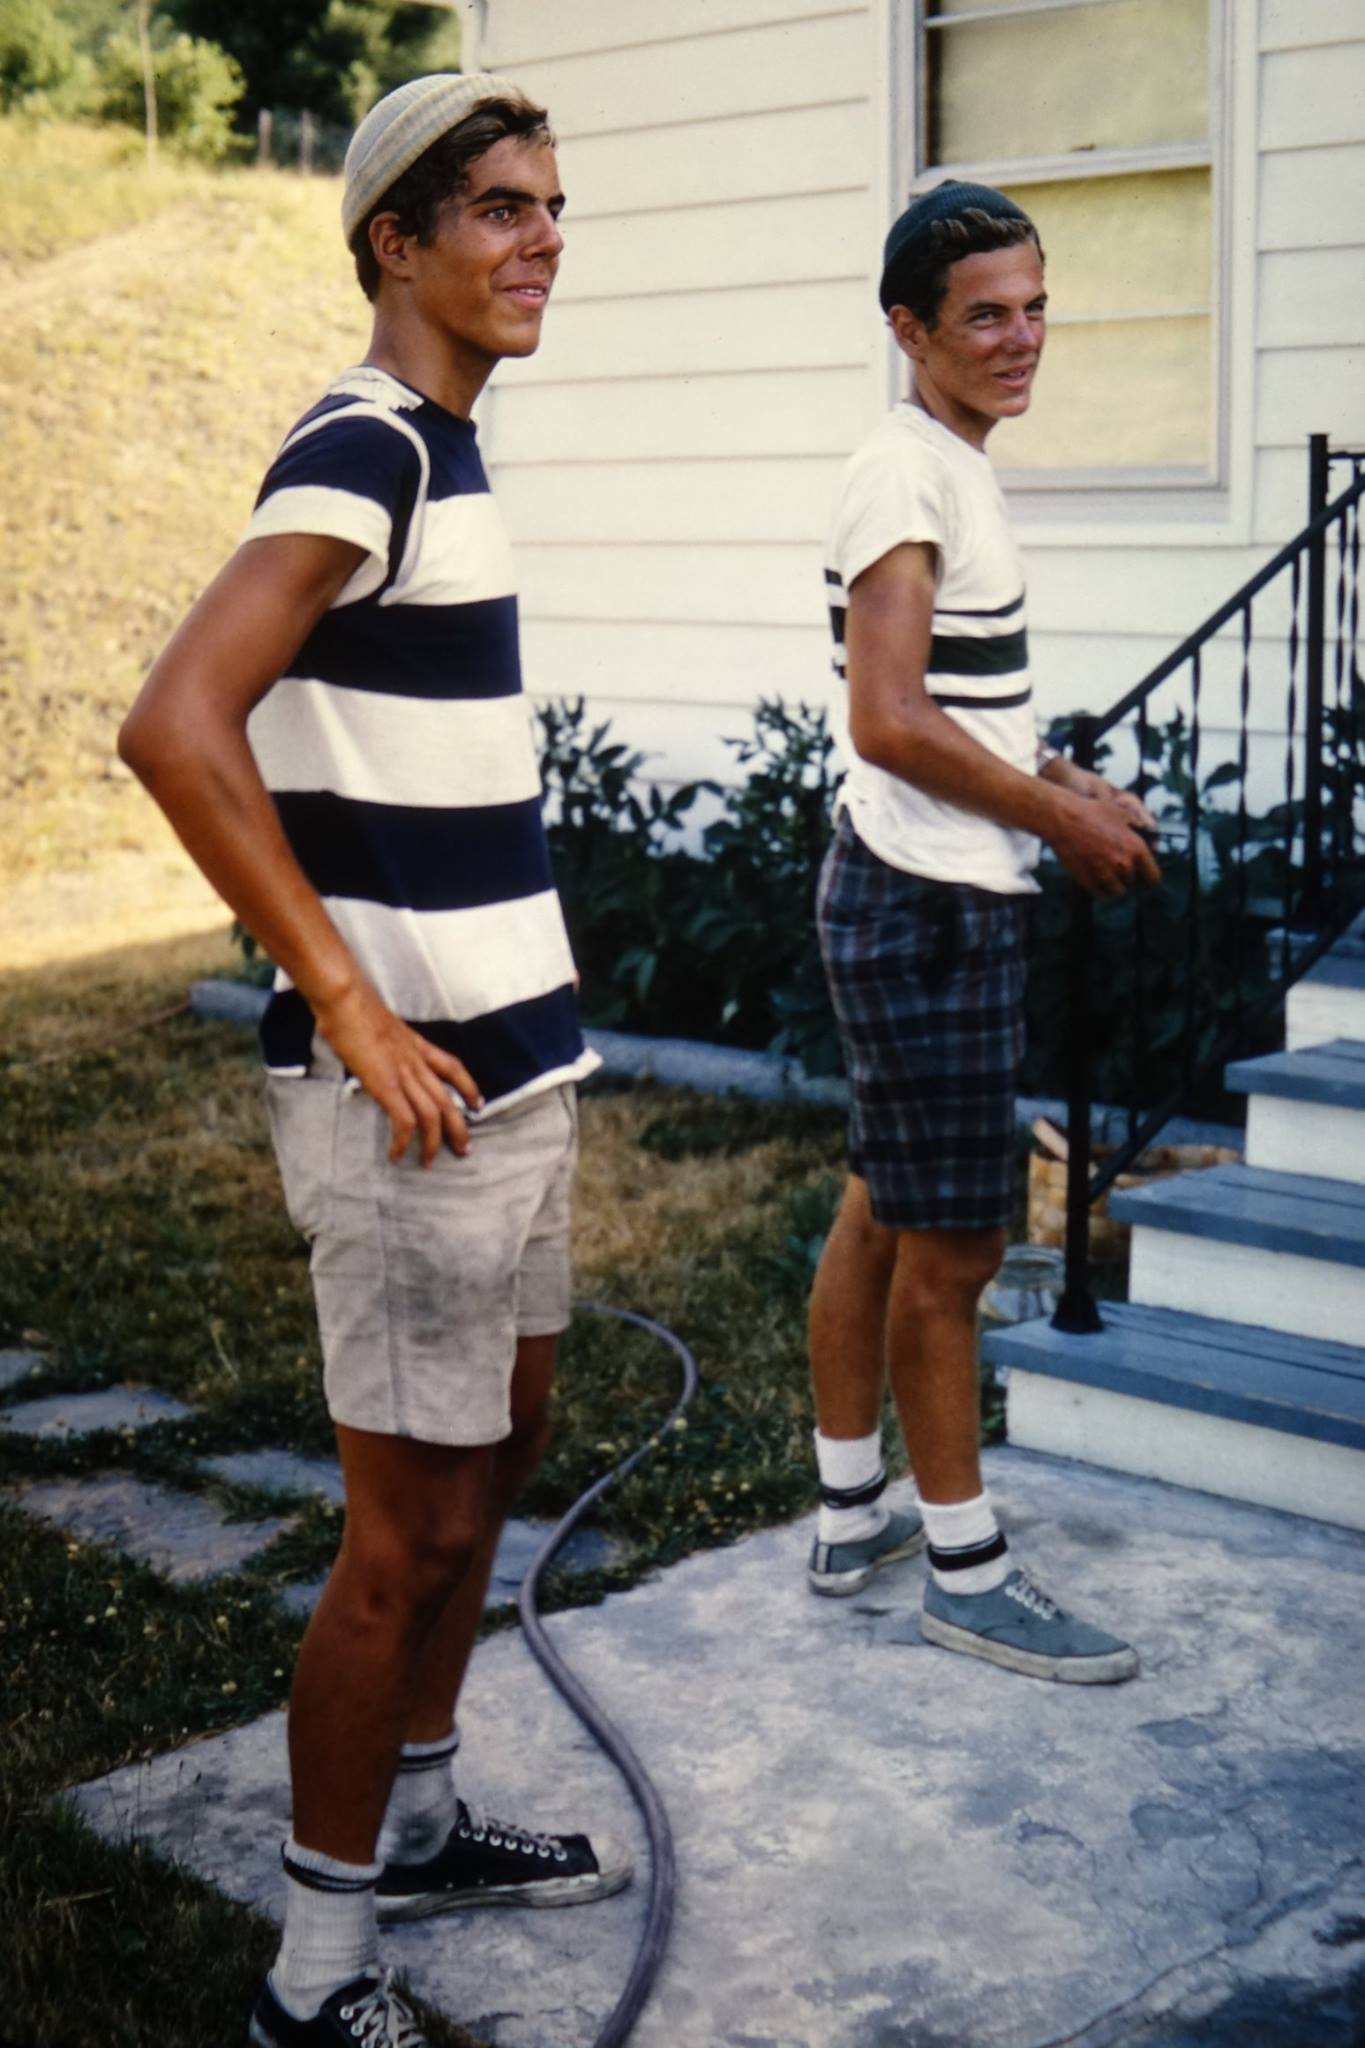


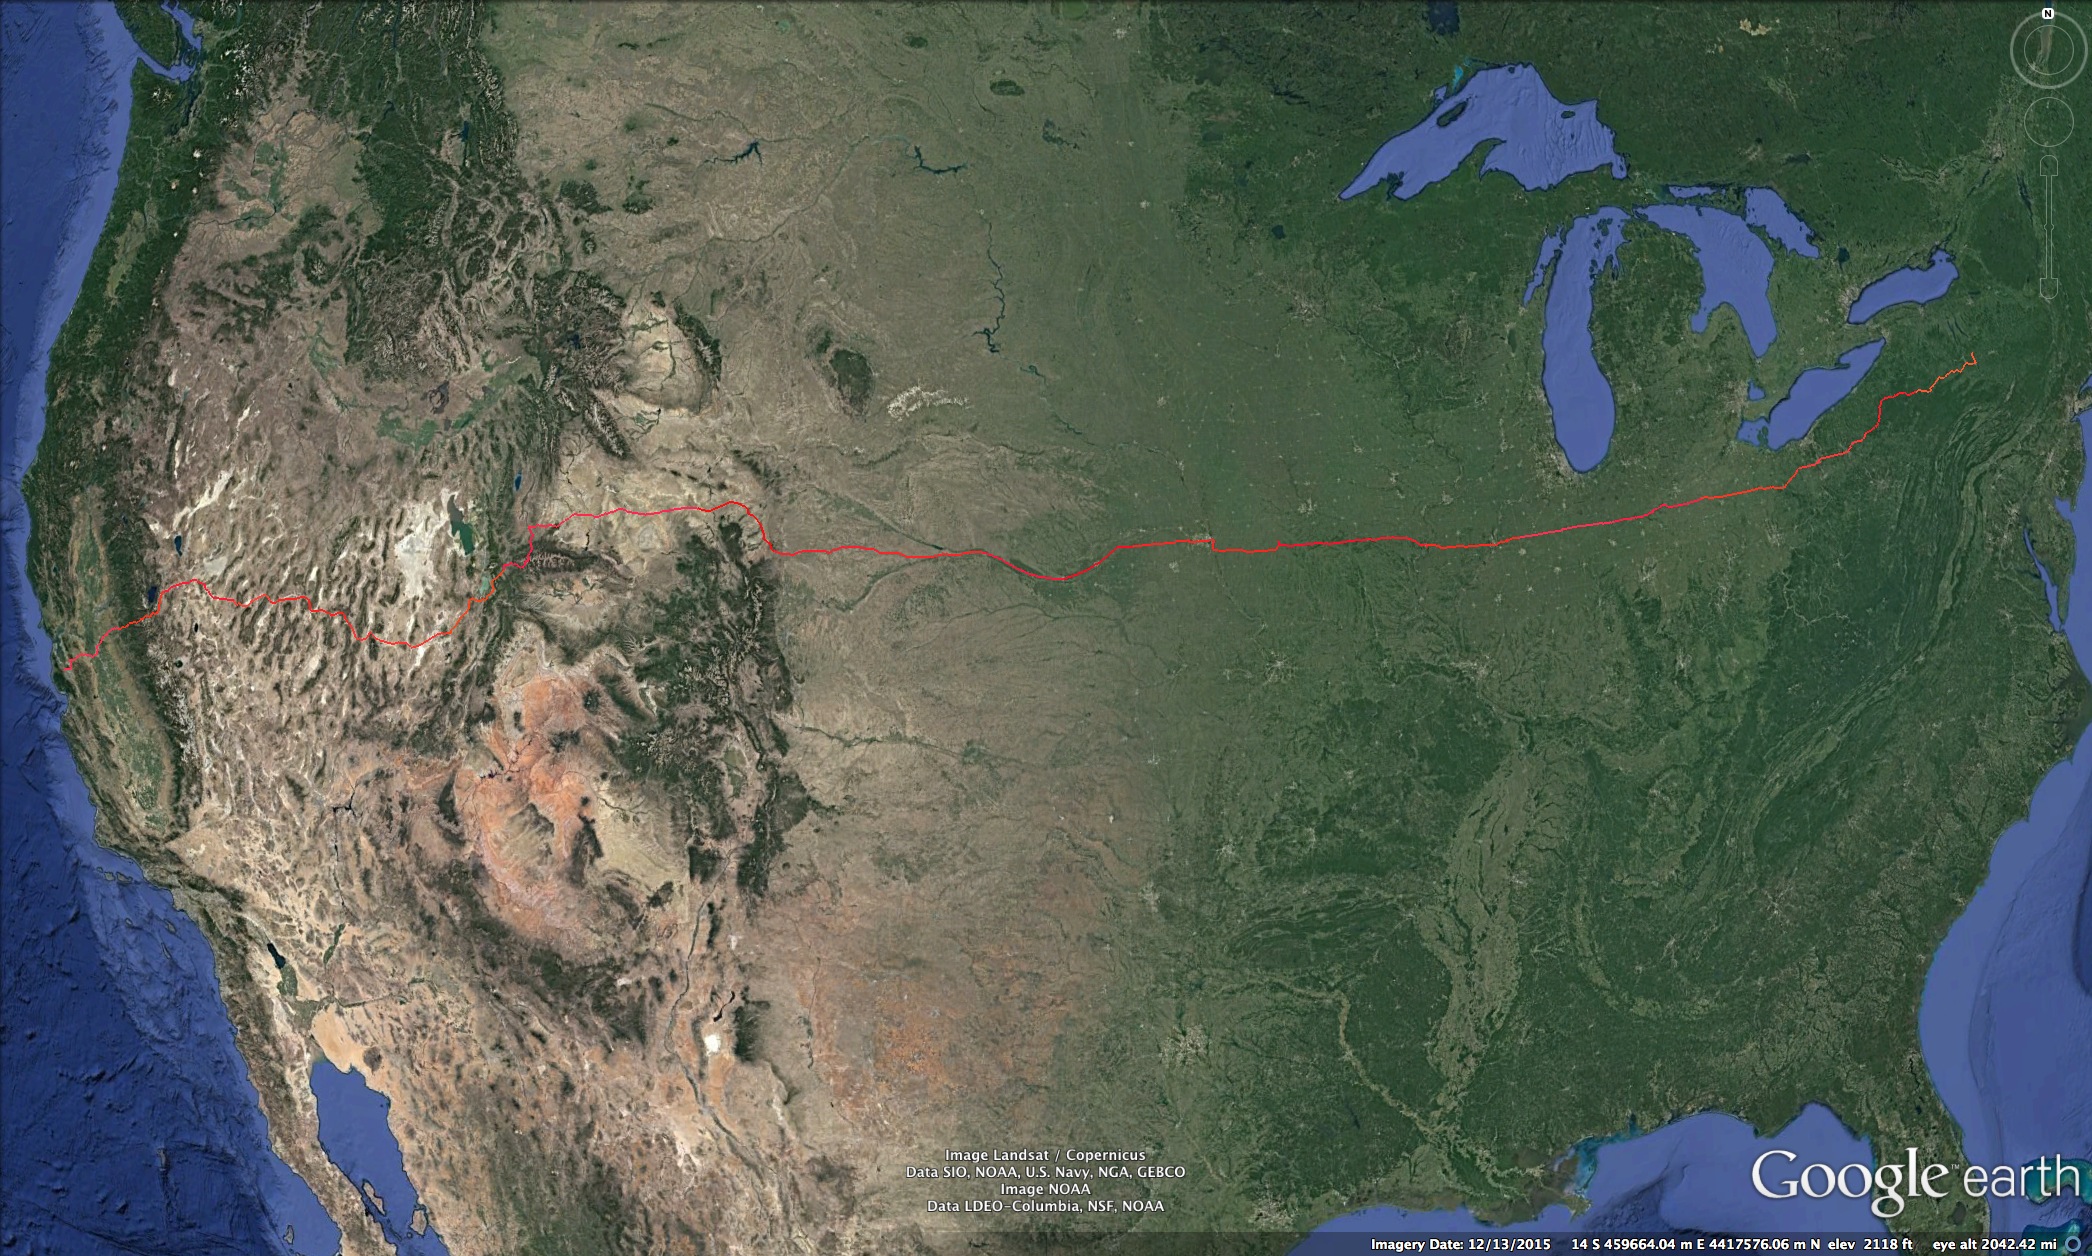


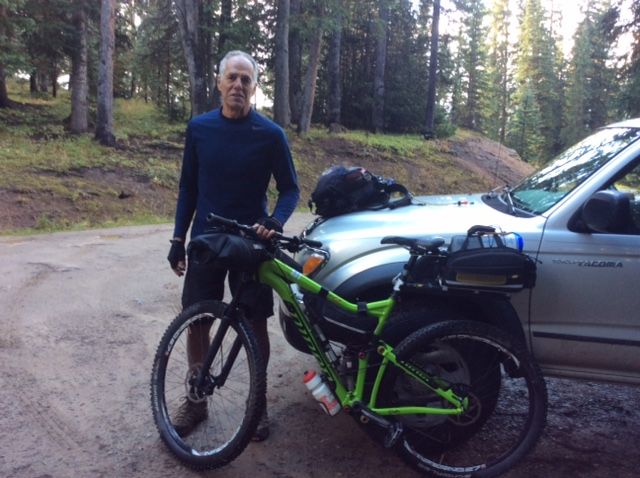
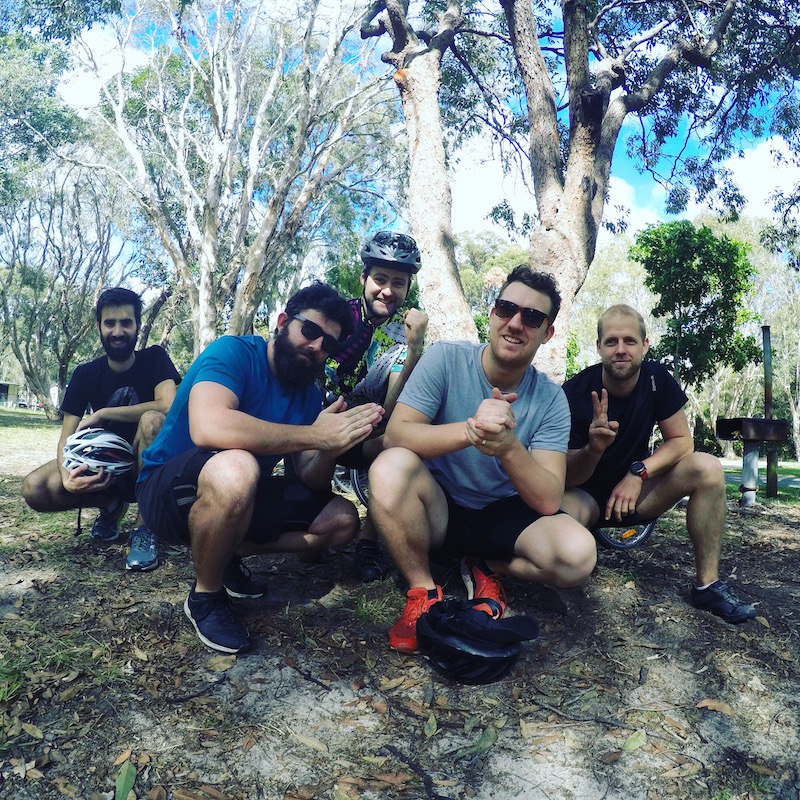
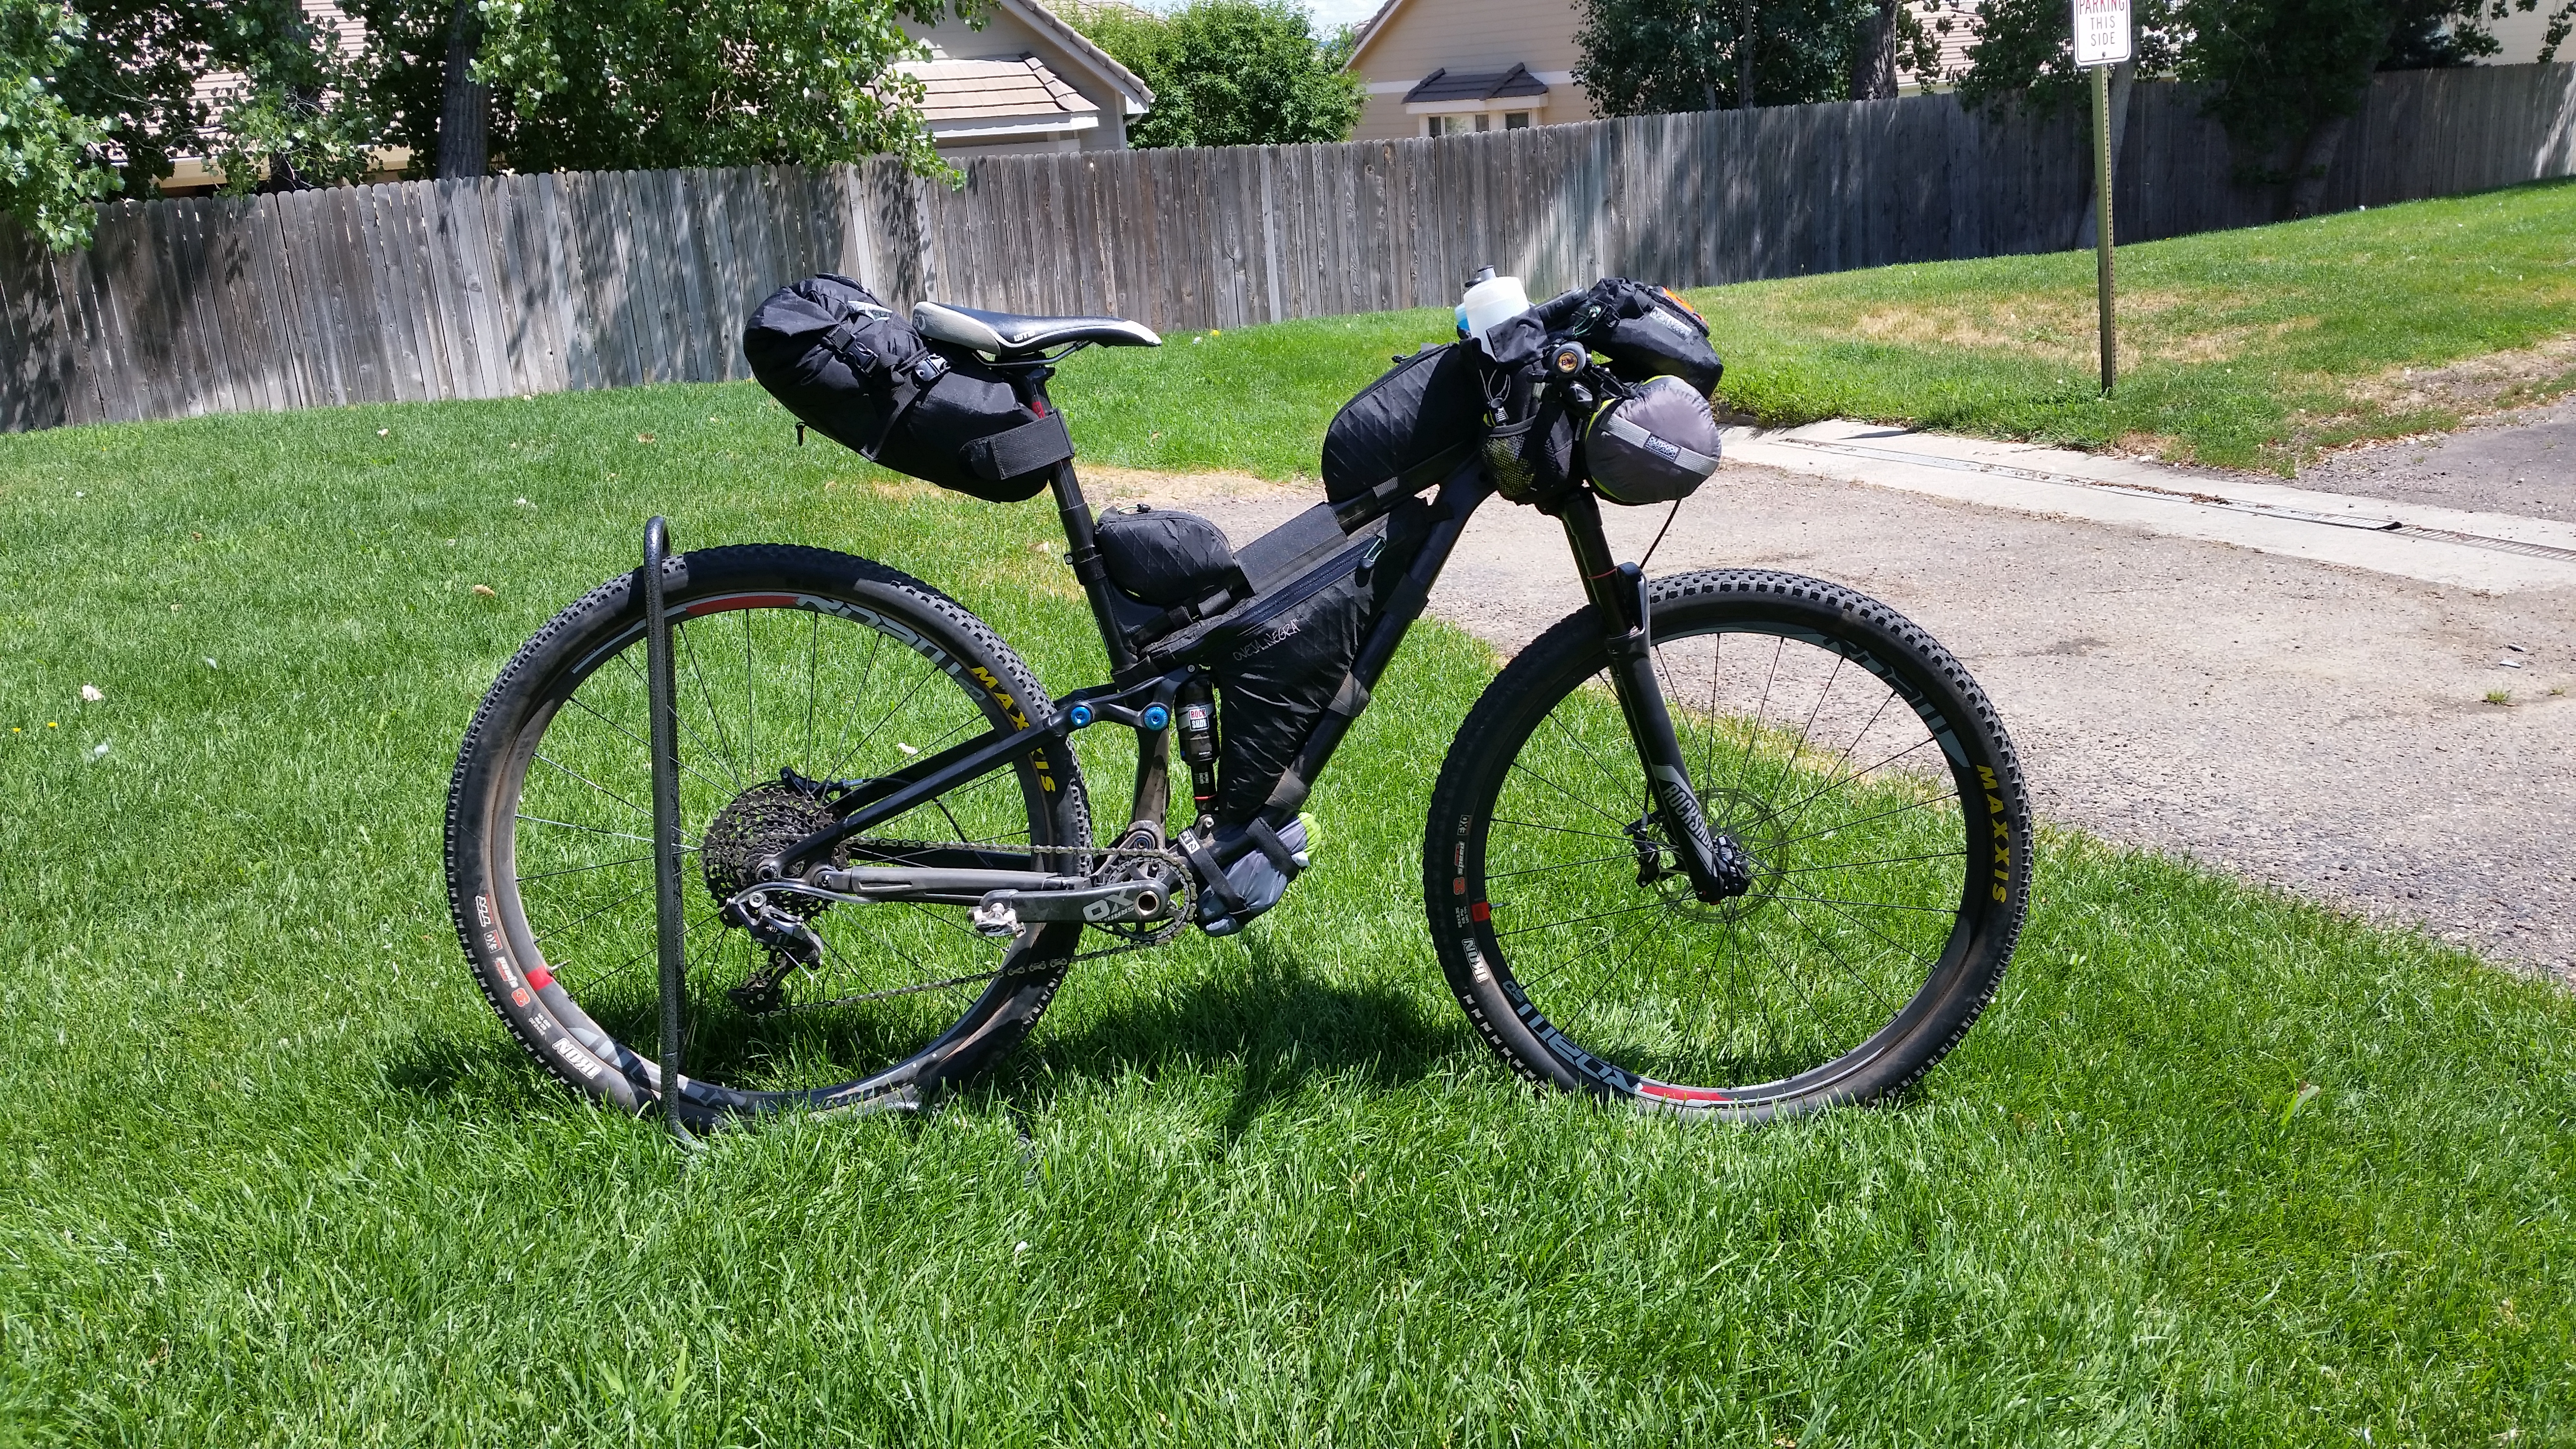
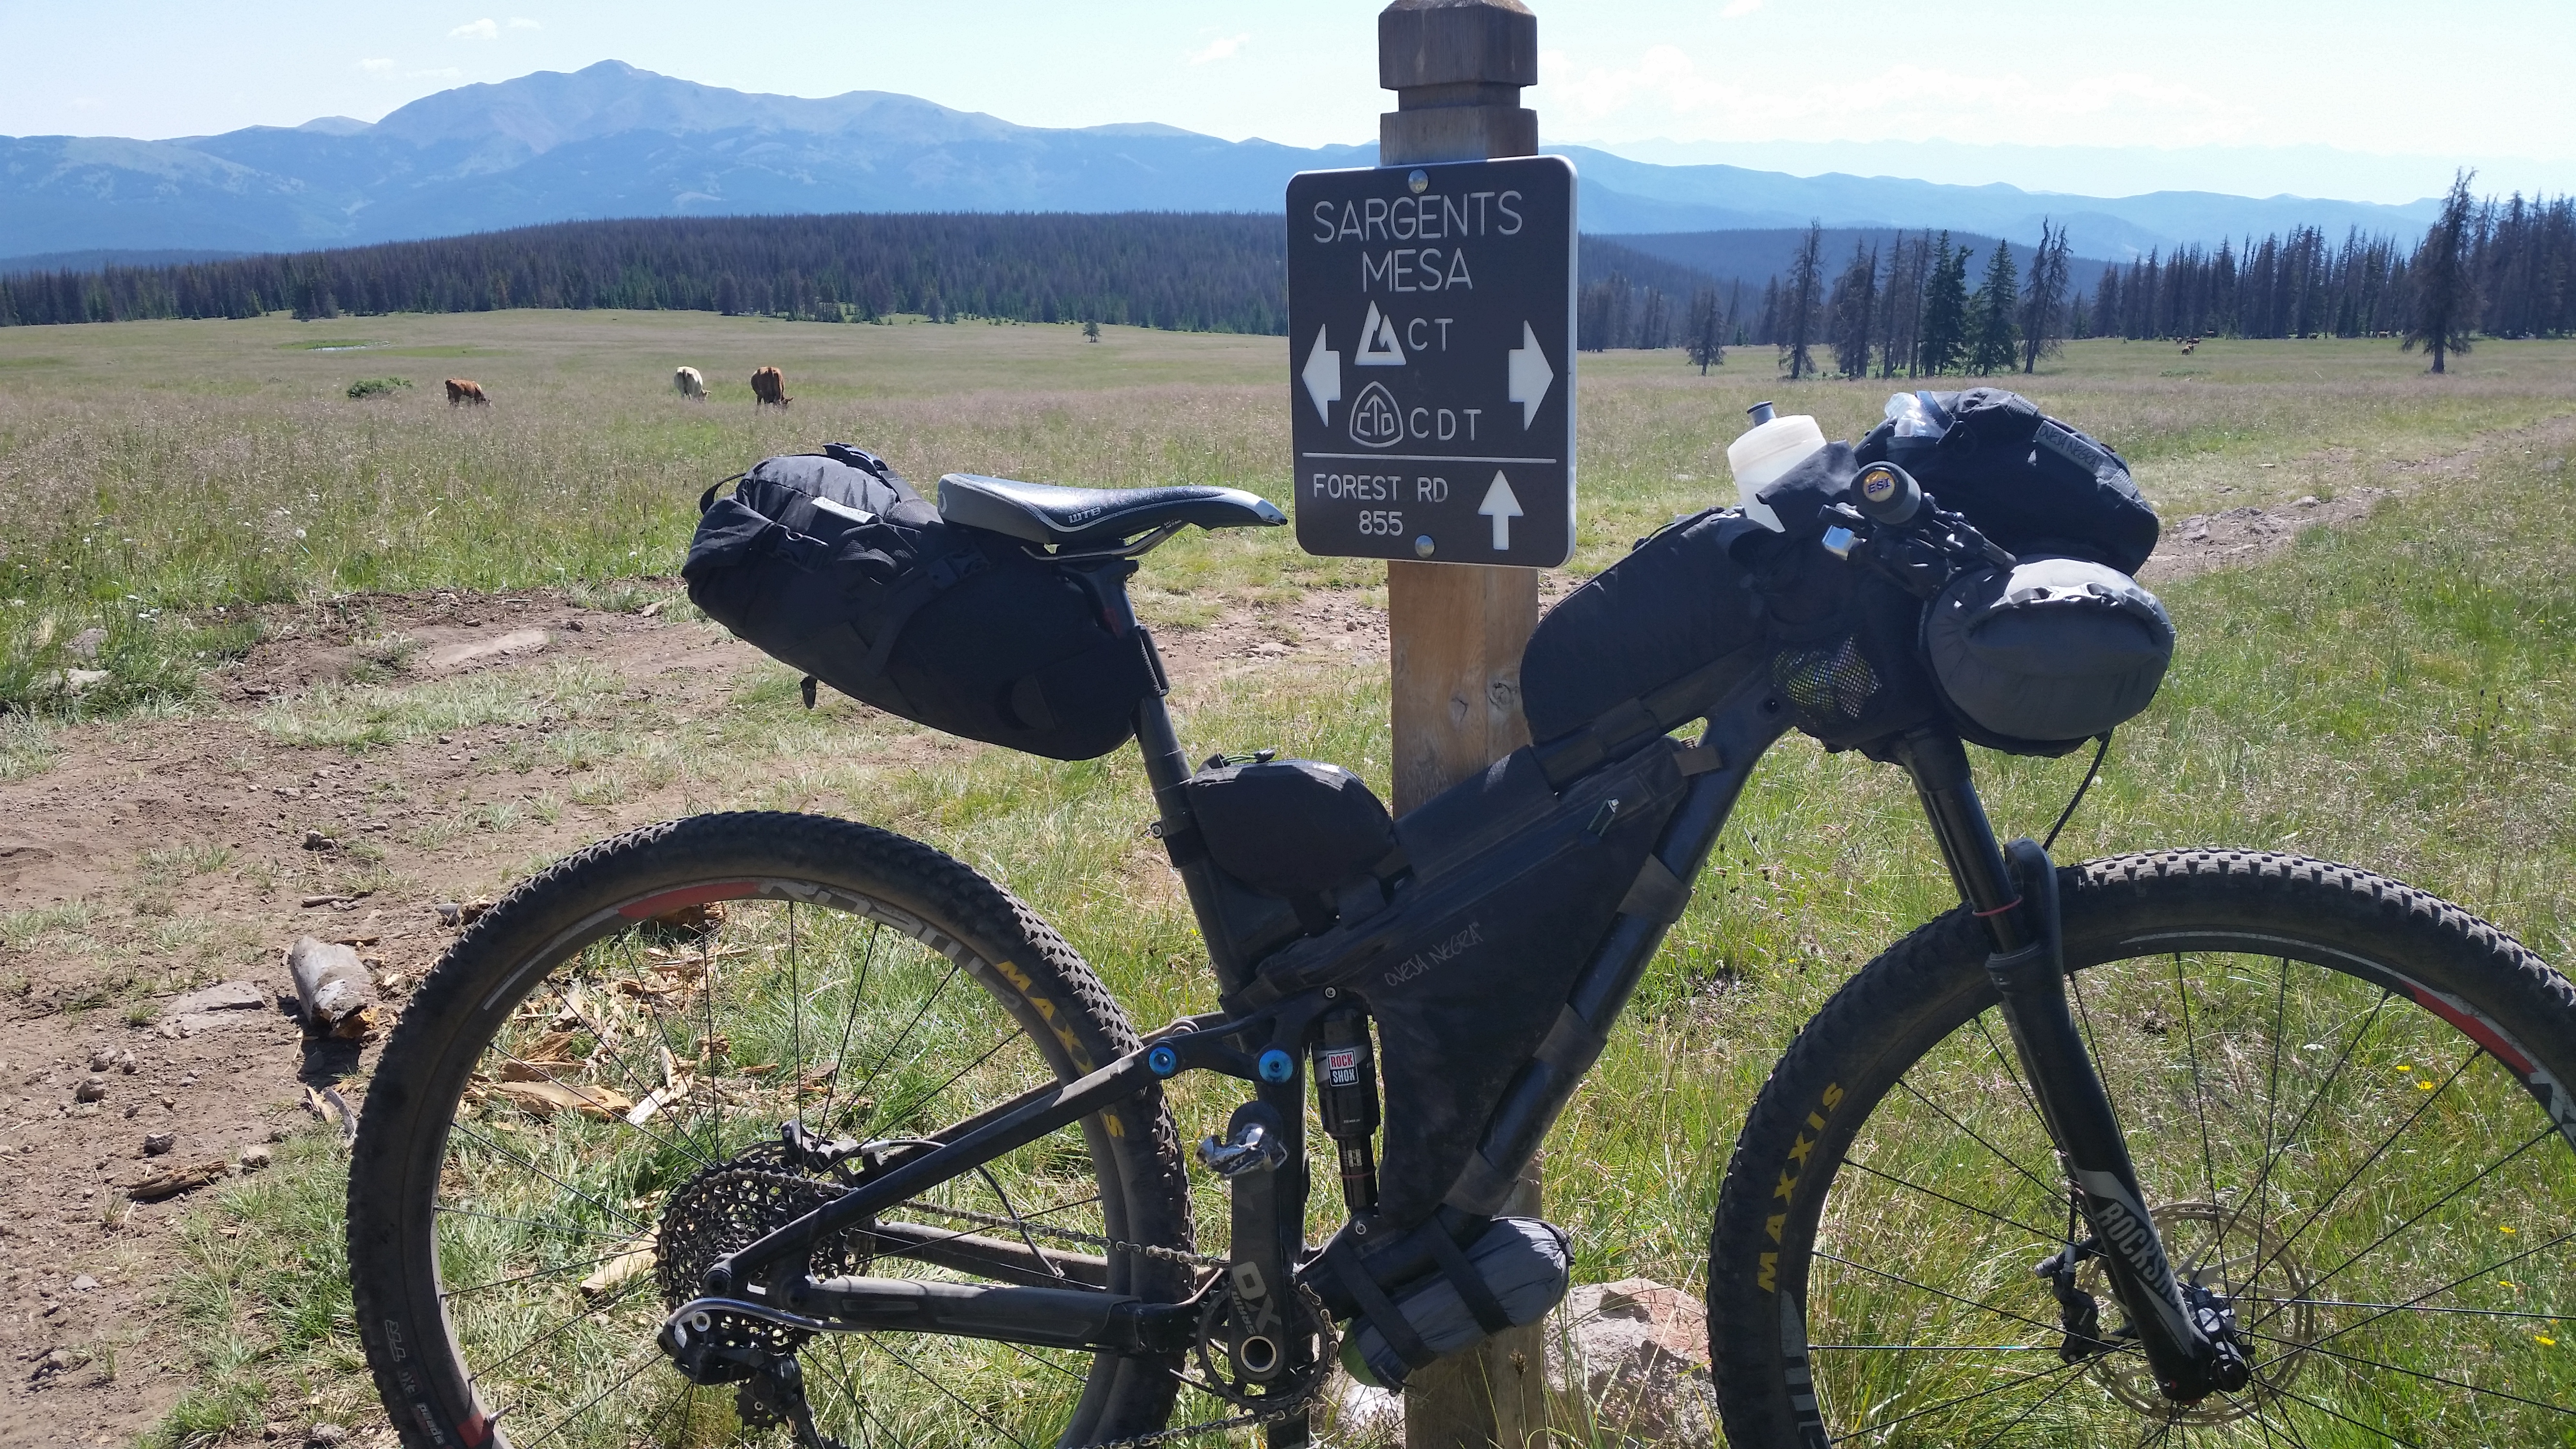
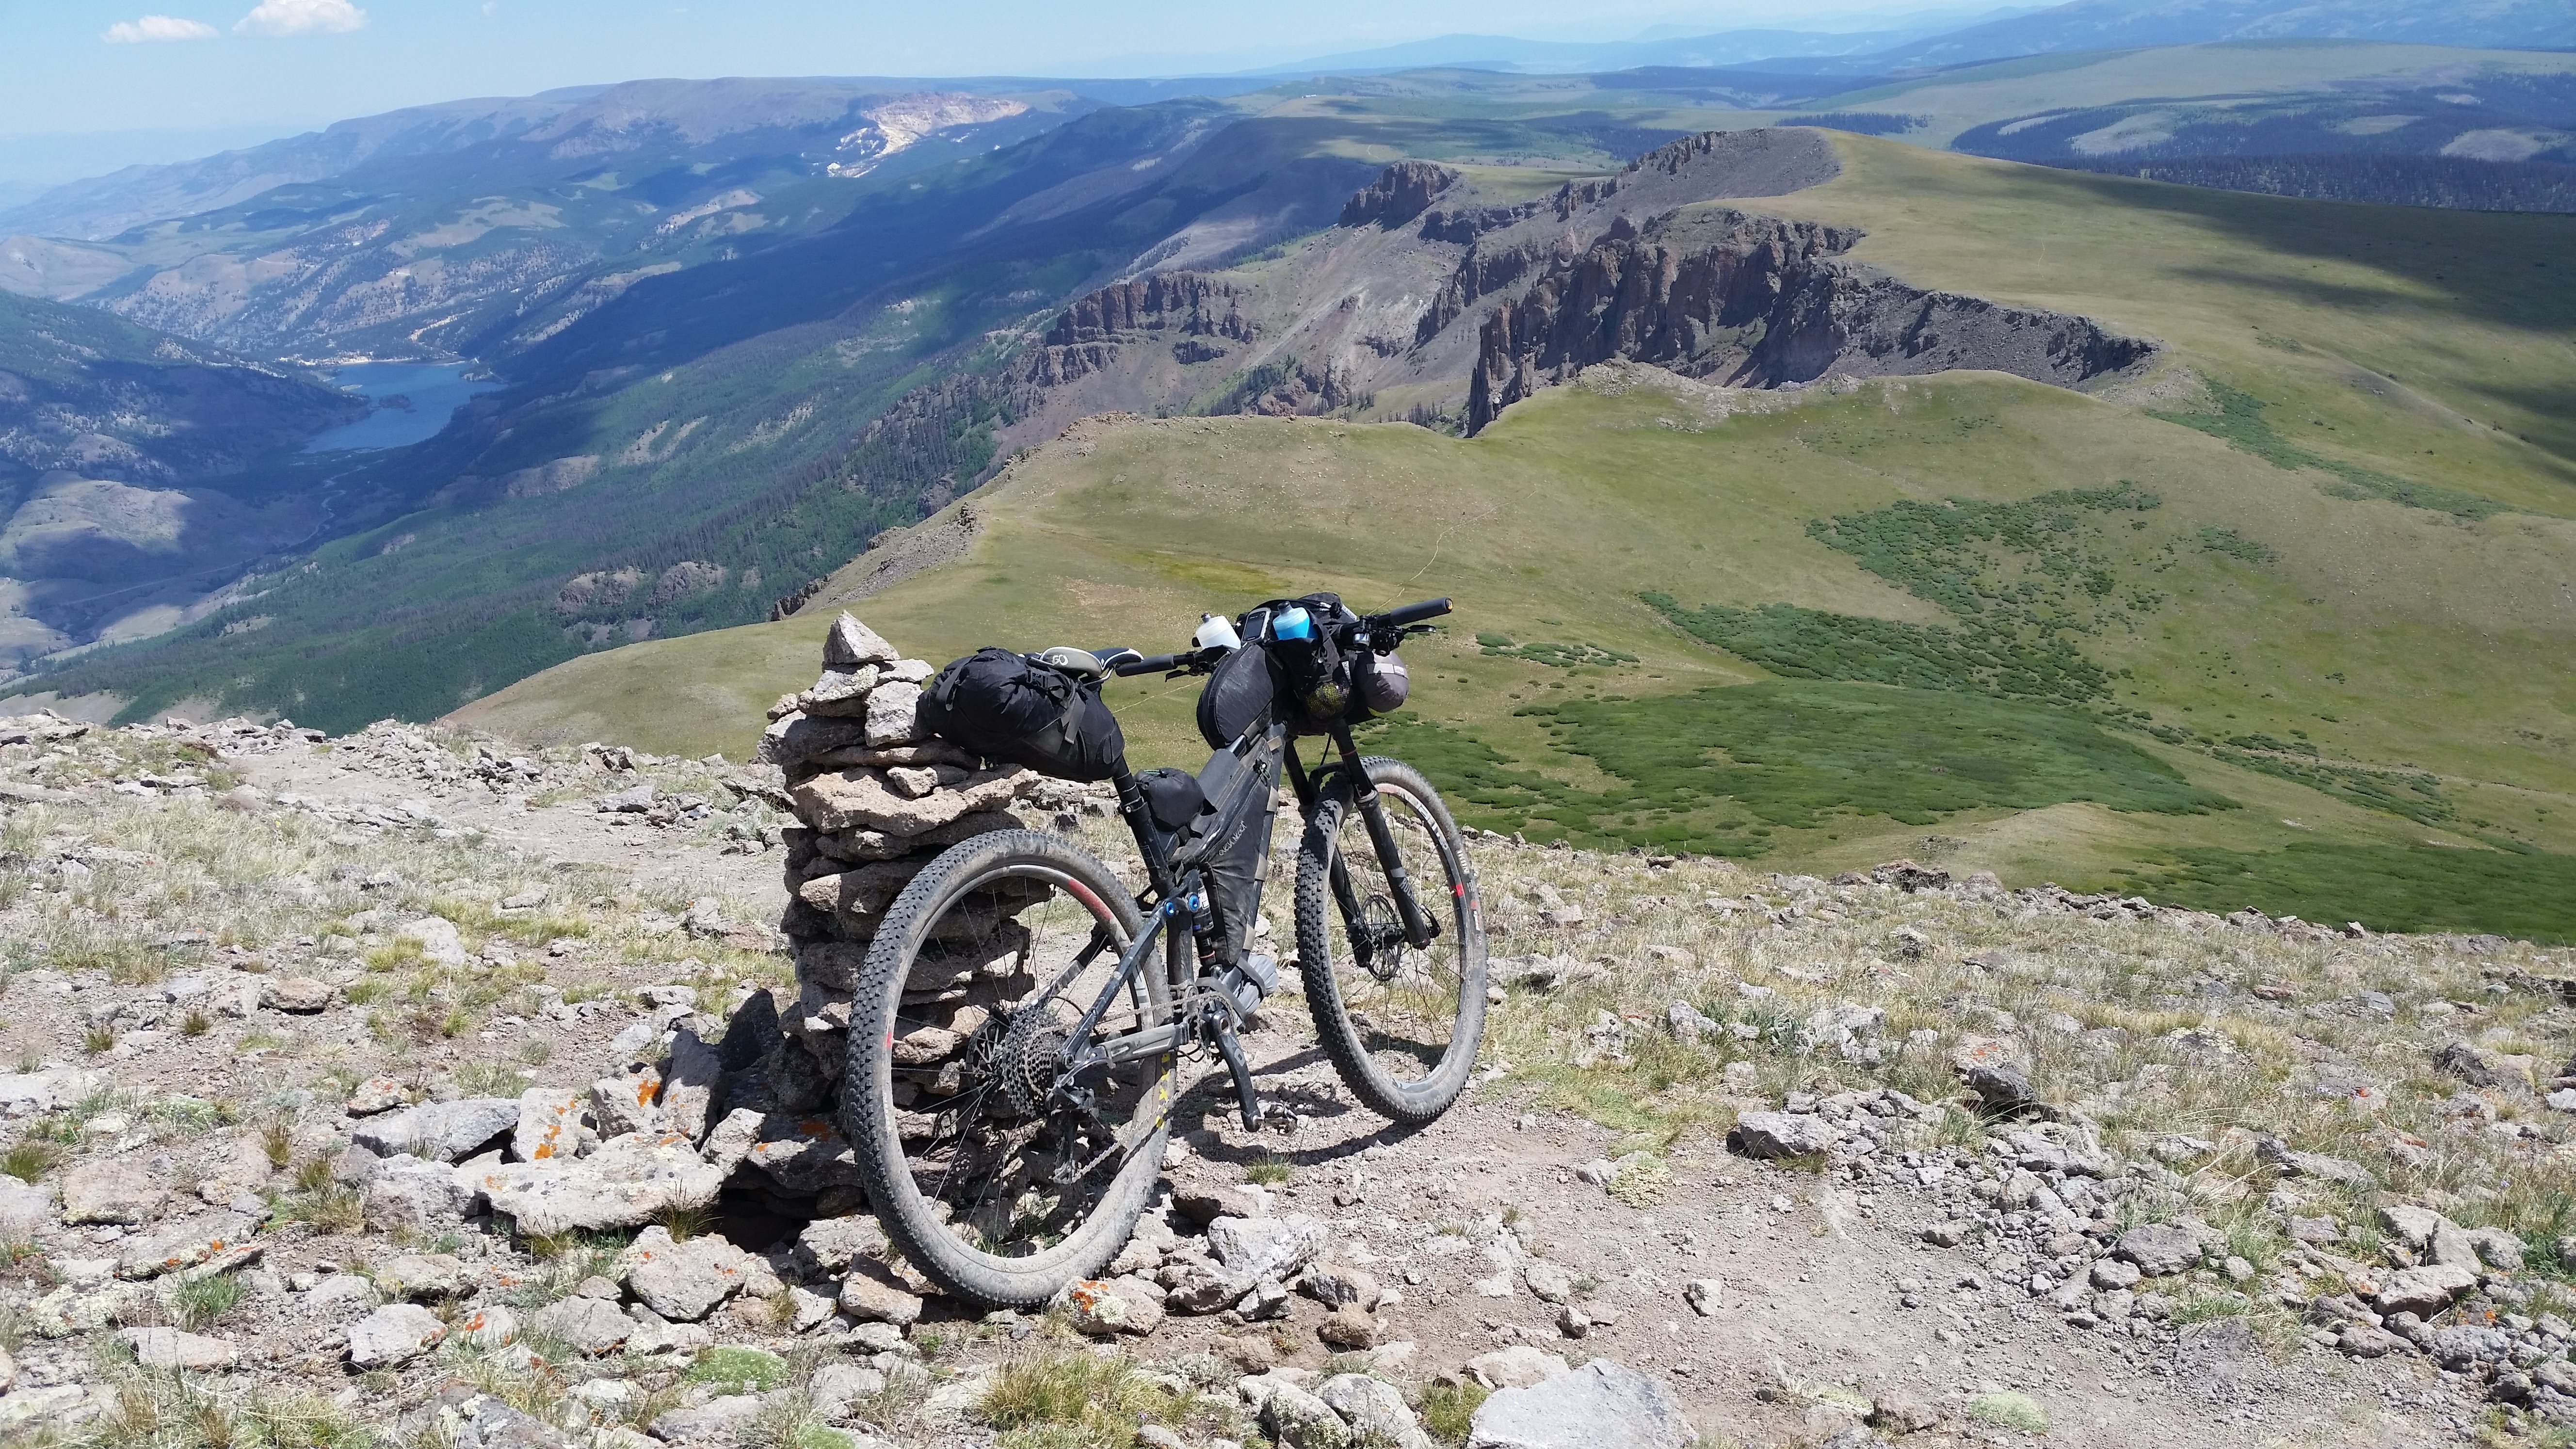
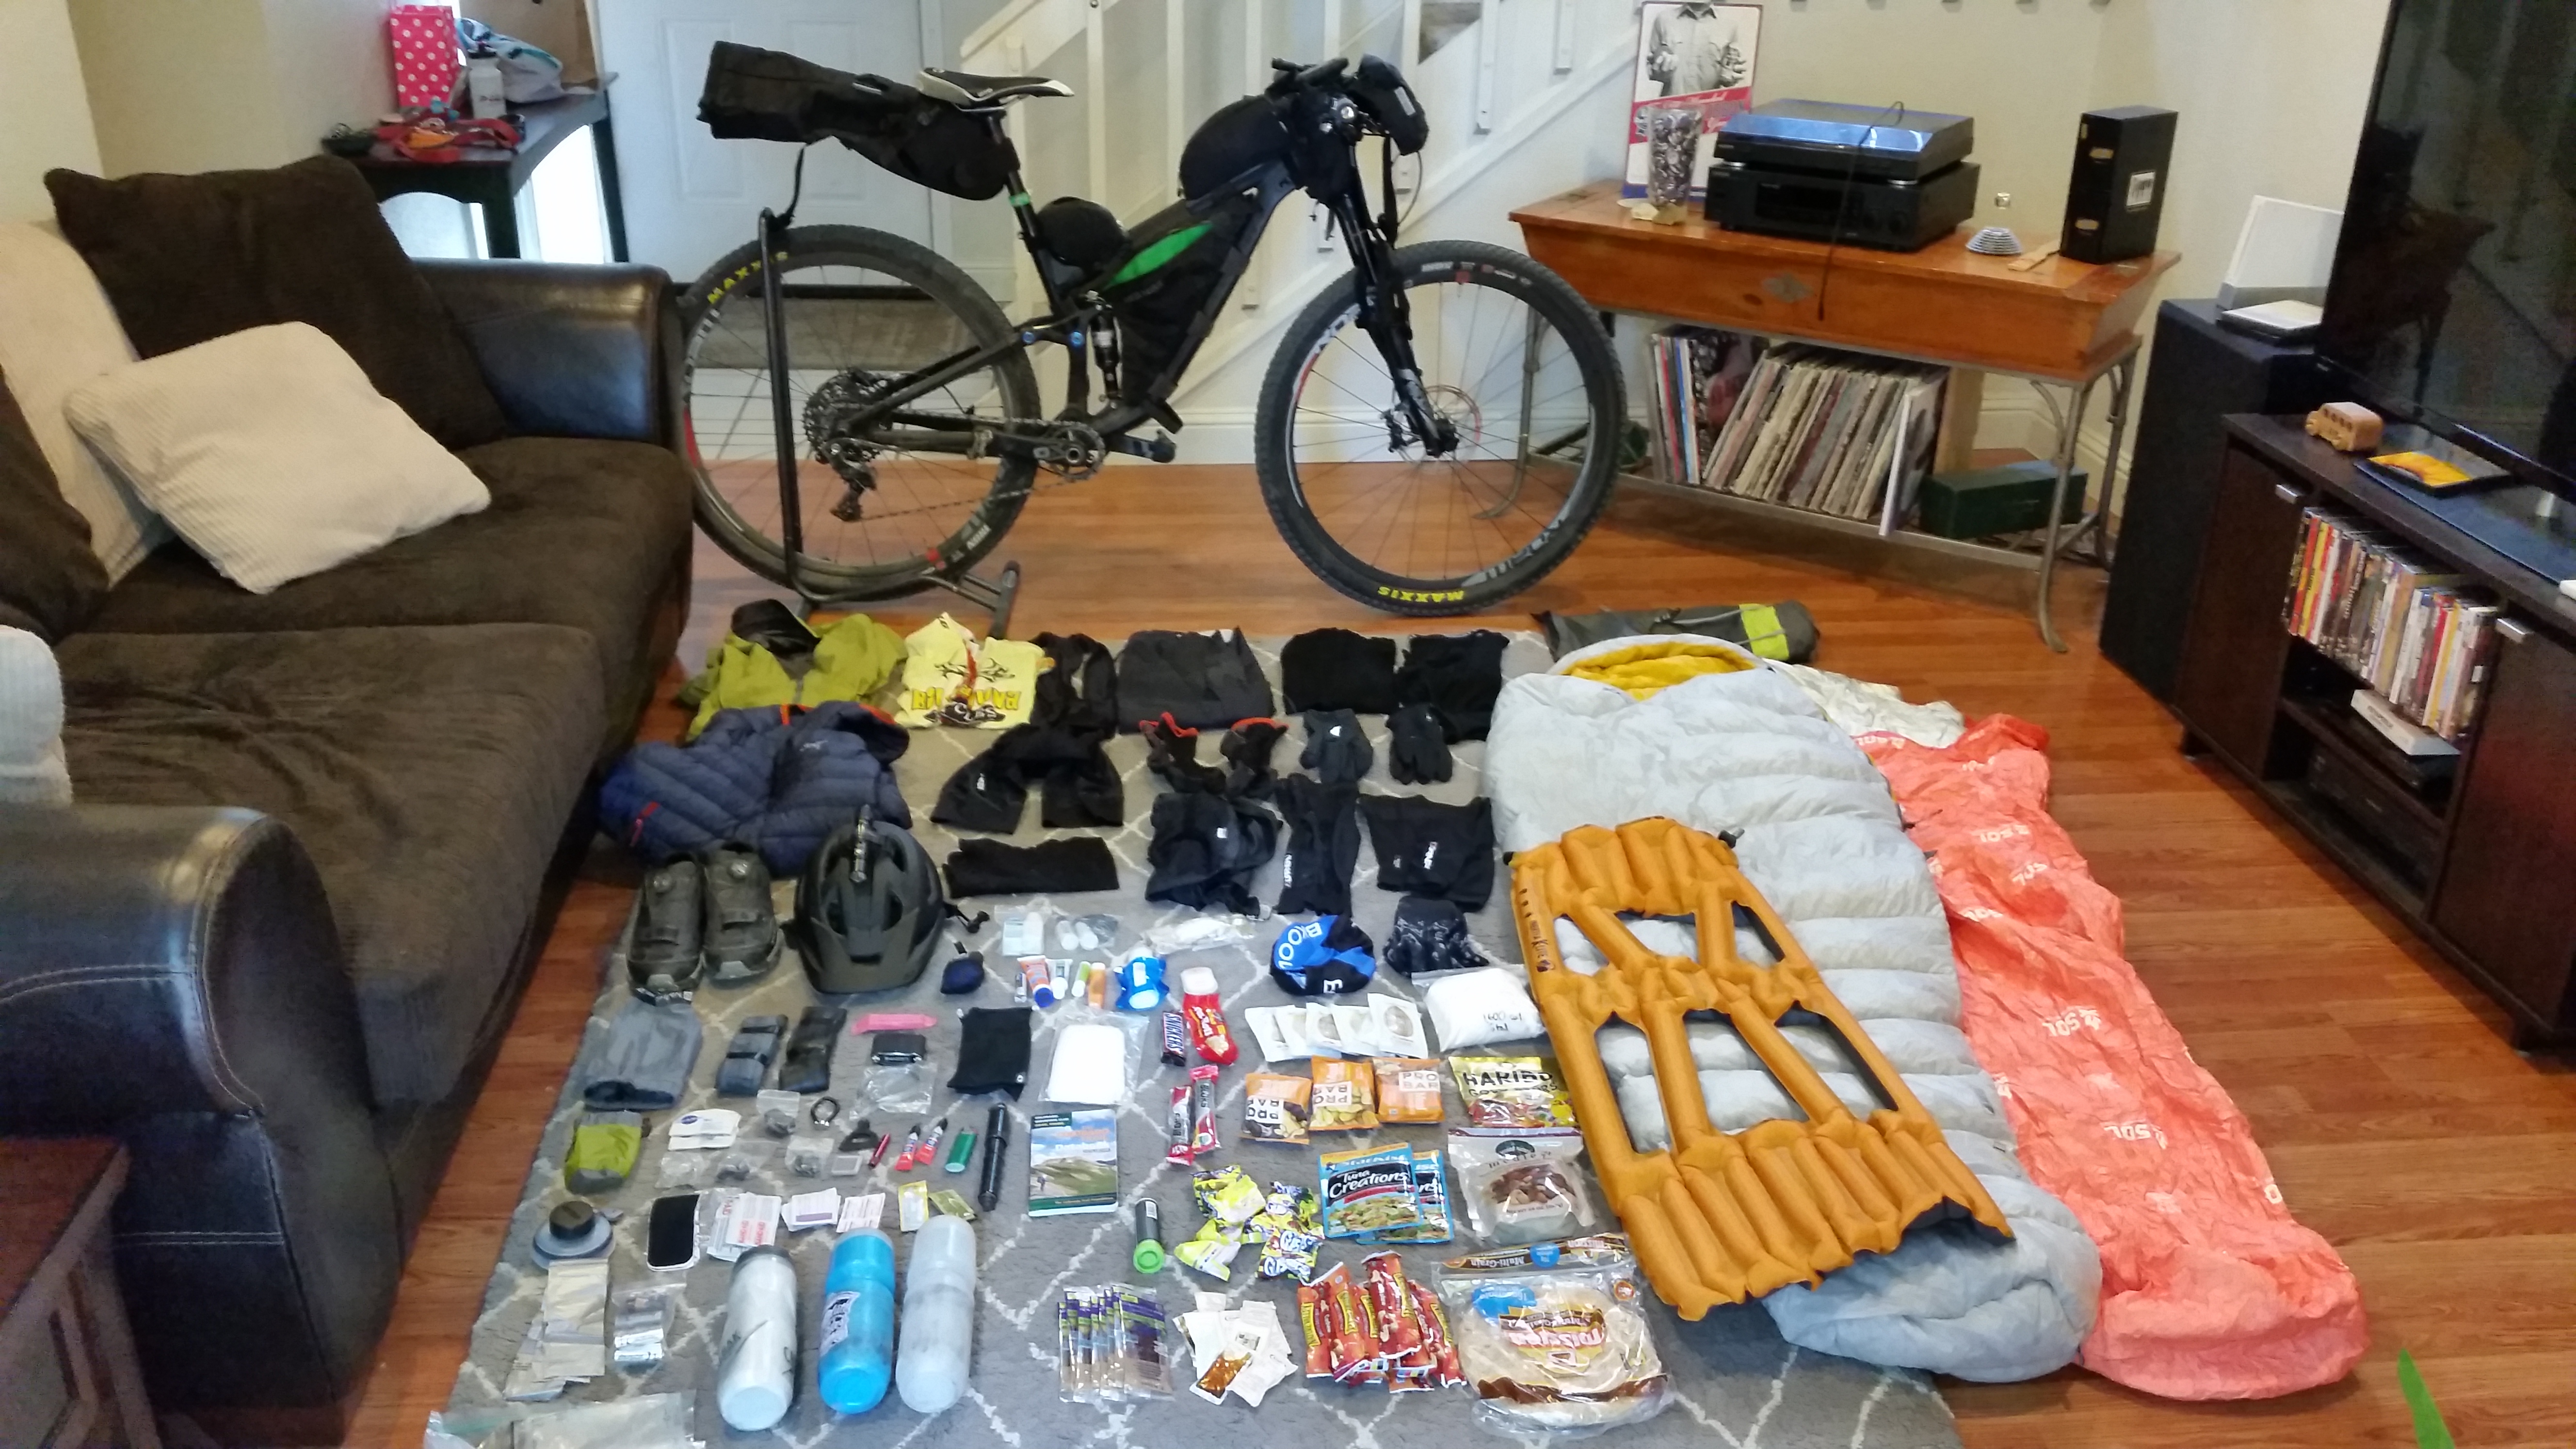
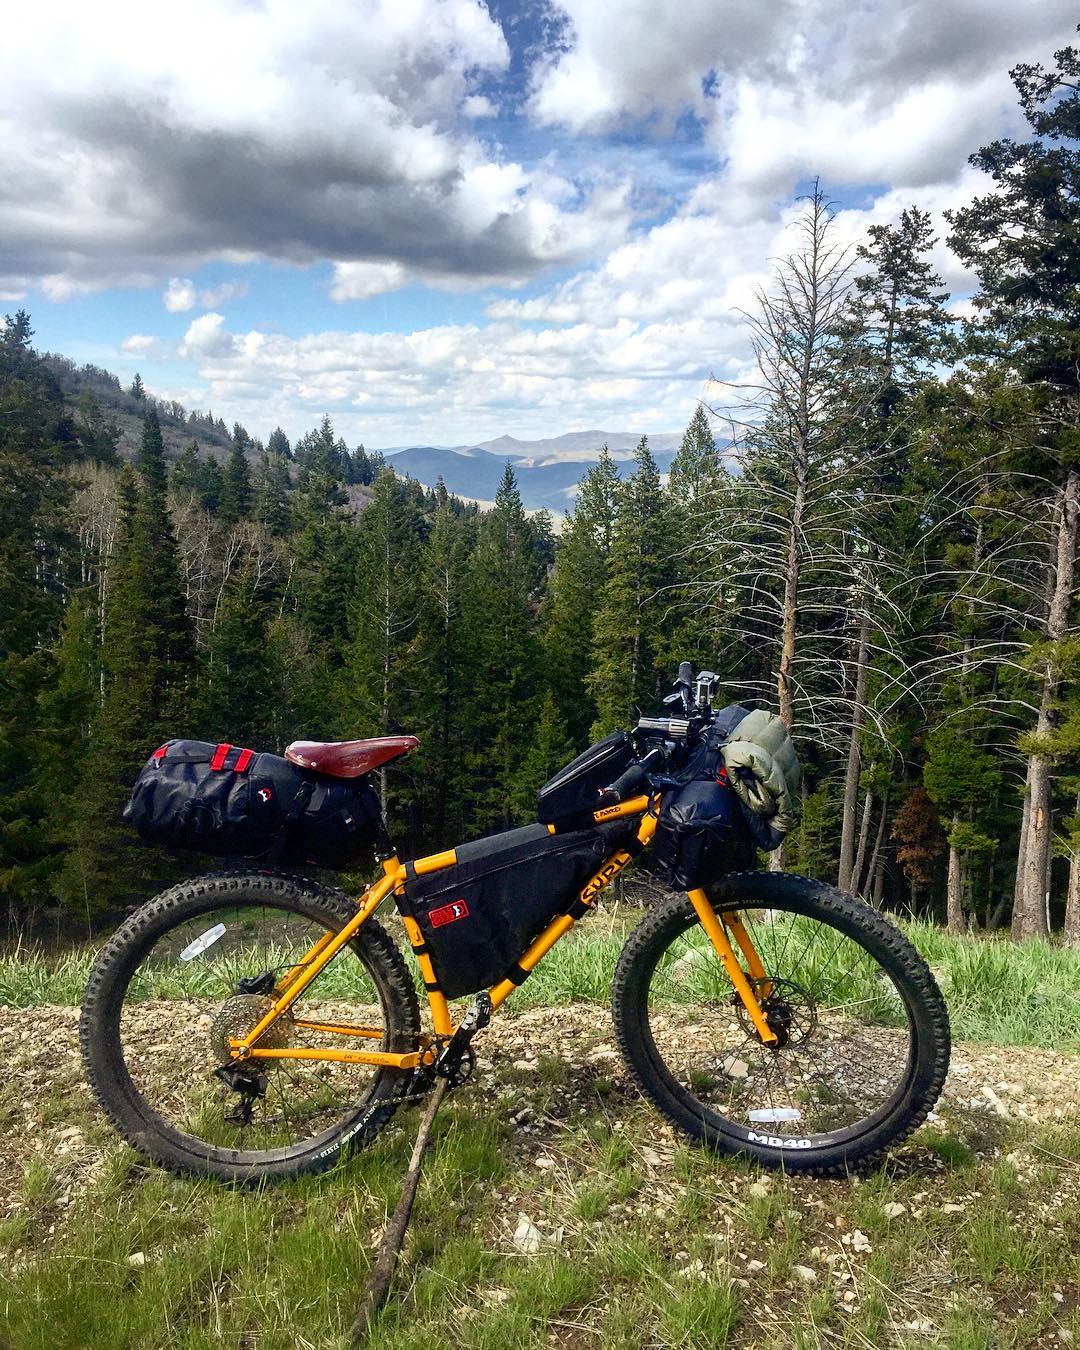
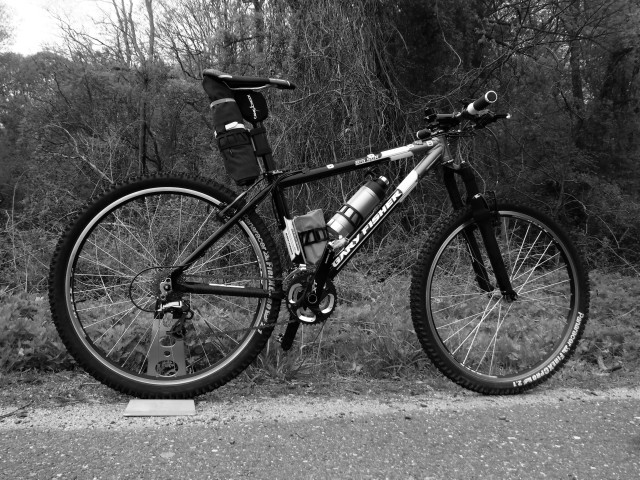
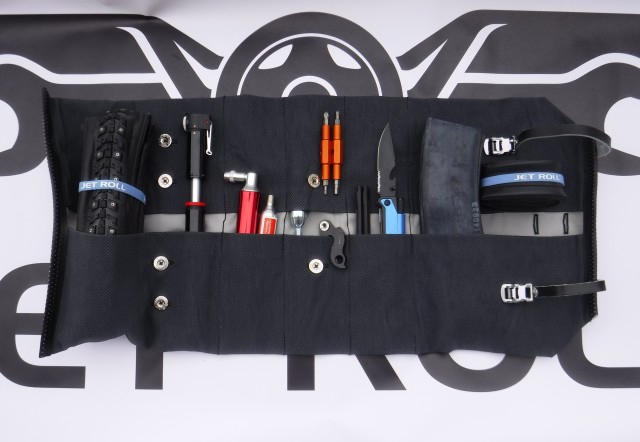
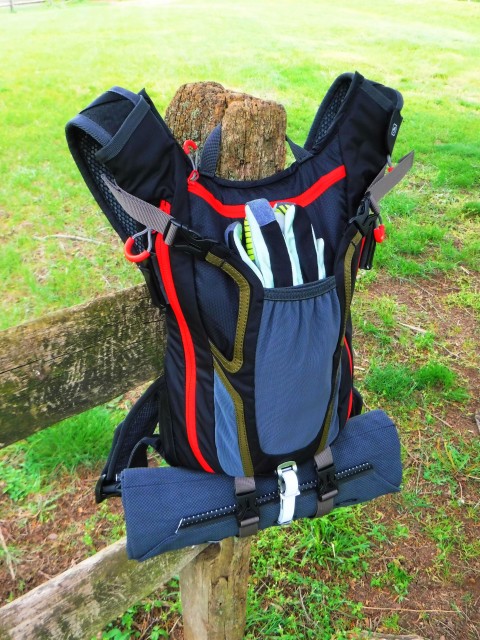

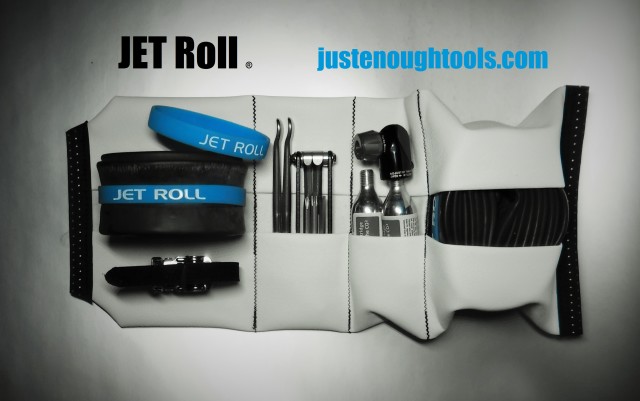
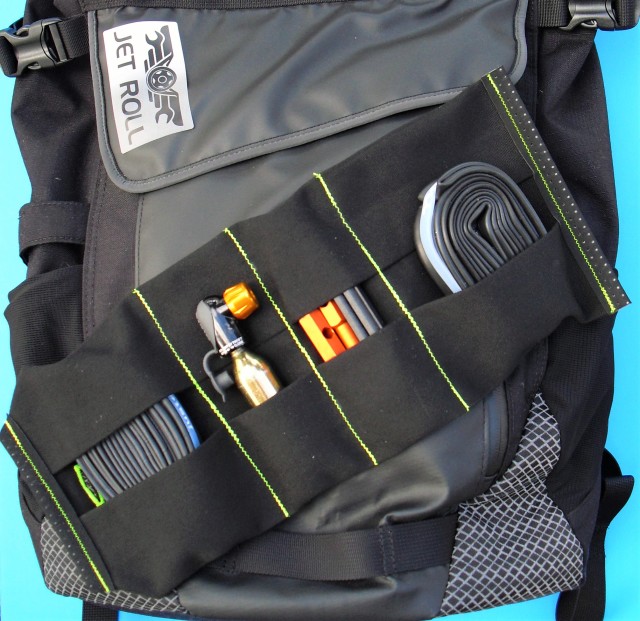
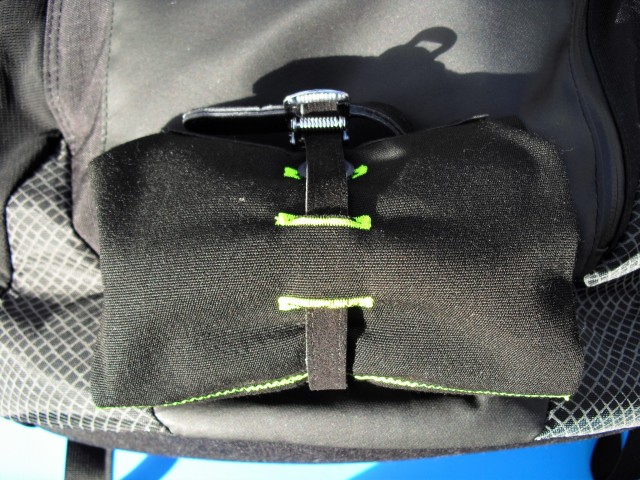
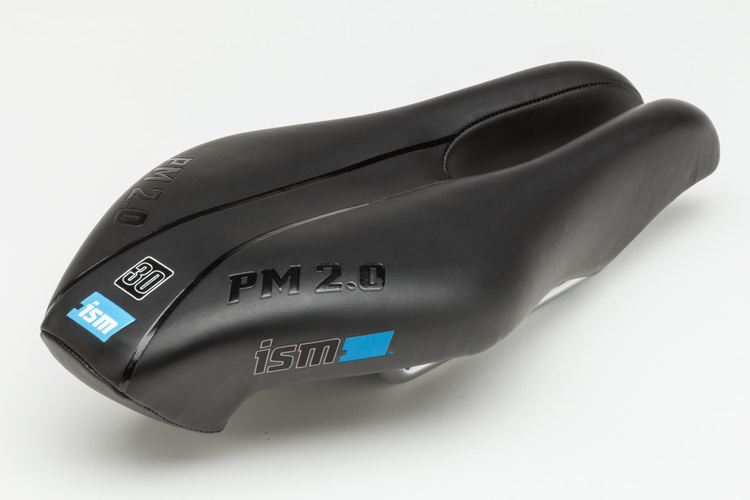


 (8 votes, average: 3.88 out of 5)