Personal setups » Lewis & Clark Bicycle Trail – OR to ND – 2004
Oregon to North Dakota
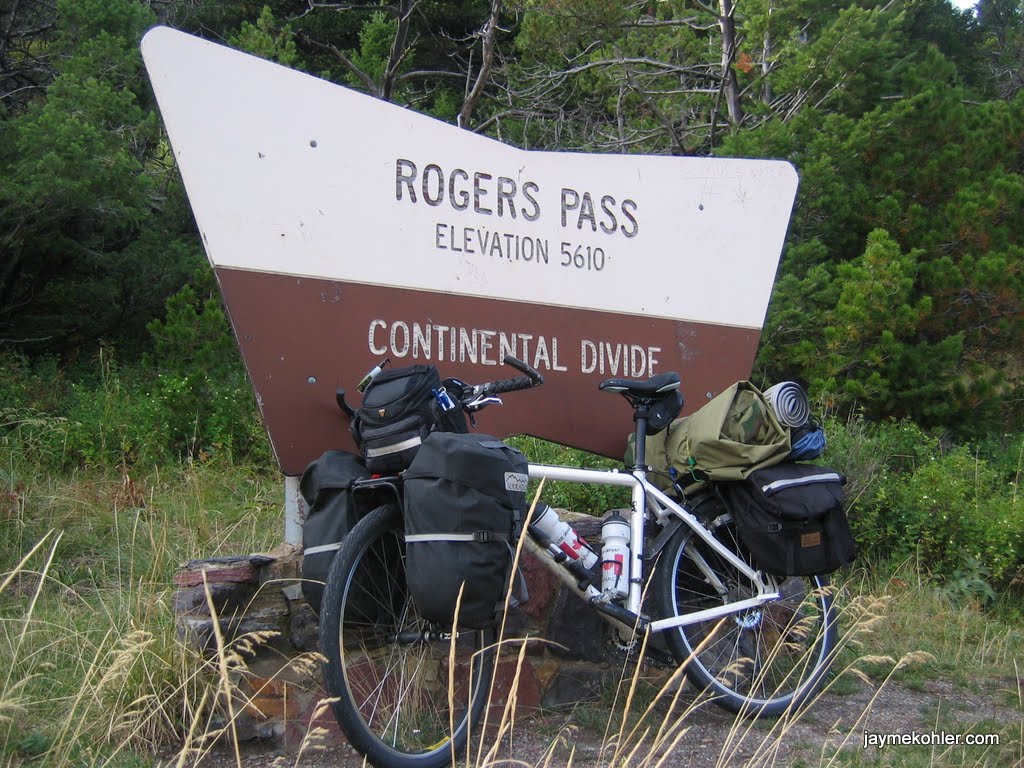
31 August to 20 September 2004
I spent spent nine months planning my first bicycle tour while serving as an Marine Corps embassy guard. The tour journal can be found at http://jaymekohler.com/cycling. They include audio and video clips as well. The Picasa photo gallery can be found here.
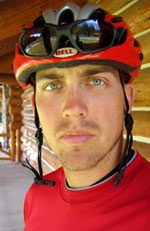
Typical daily riding gear
Helmet – Bell X-Ray ’02
I rode without a visor the entire trip because a) I lost the damn thing in a road race in South Africa, and b) it doesn’t obstruct forward vision when riding for hours on end in a modified tuck. The X-ray also has a great retention system with a micro-adjustment dial that adapts to headbands or bandanas.
Headband – Pace USA
I like wearing a headband because it keeps the sweat from running in my eyes and extends the life of the pads in my helmet. I avoid wearing bandanas in hot weather to avoid overheating.
Sunglasses – Smith Buzzsaw
The Buzzsaw’s interchangeable lenses were great. I kept two sets on hand, an amber set for overcast or rainy days and a dark set. It pays to always wear some kind of eye protection in all light conditions. The glare off asphalt will wear you down.
Jersey, short sleeve – Fox
The jersey I wore was loose but not flapping, snug but not constricting. Find a happy medium that affords mobility without excess fabric.
Gloves, fingerless – Performance Men’s Classic CoolMax
These gloves were a steal for just under $10. They had a CoolMax back and slightly padded palms without bulkiness. The fingerless feature was great for increased dexterity in all situations. Don’t spend $50 on high-tech gloves that promise the world. Bar ends and correct handle bar and seat position are more important in avoiding numbness.
Shorts, cycling, spandex mid thigh – generic
Baggy cargo shorts take too long to dry. They’re excessively bulky, heavy, and not nearly as efficient as spandex in a tour. I maintained two pair of spandex riding shorts on opposite ends of the cost spectrum and spent the majority of my time in the more expensive pair (whenever they were relatively clean). Considering that all your time spent in the saddle will be on your butt, do NOT cut corners with cycling shorts. Buy the best you can afford and leave the $200 binoculars on the store shelf.
Socks, cycling – DeFeet
Cycling specific socks are a must. They’re airy, comfortable, quick drying, and synthetic, making them easy to maintain. I wore the DeFeet Speedos (black or gray to avoid stains), which came to ankle bone level.
Shoes – Diadora Gecko ATB
I had my Geckos three years before I rode this tour, but they began hurting my feet after 1300 miles. Regardless of choice, use a pair proved to be comfortable over time. Ensure a stiff sole but flexible upper. Shoes don’t disintegrate suddenly, regardless of age, so rushing out to buy a brand new pair before a tour is useless. Simply inspect the area where the cleats mount to the shoe for cracks or tears and be on your way.
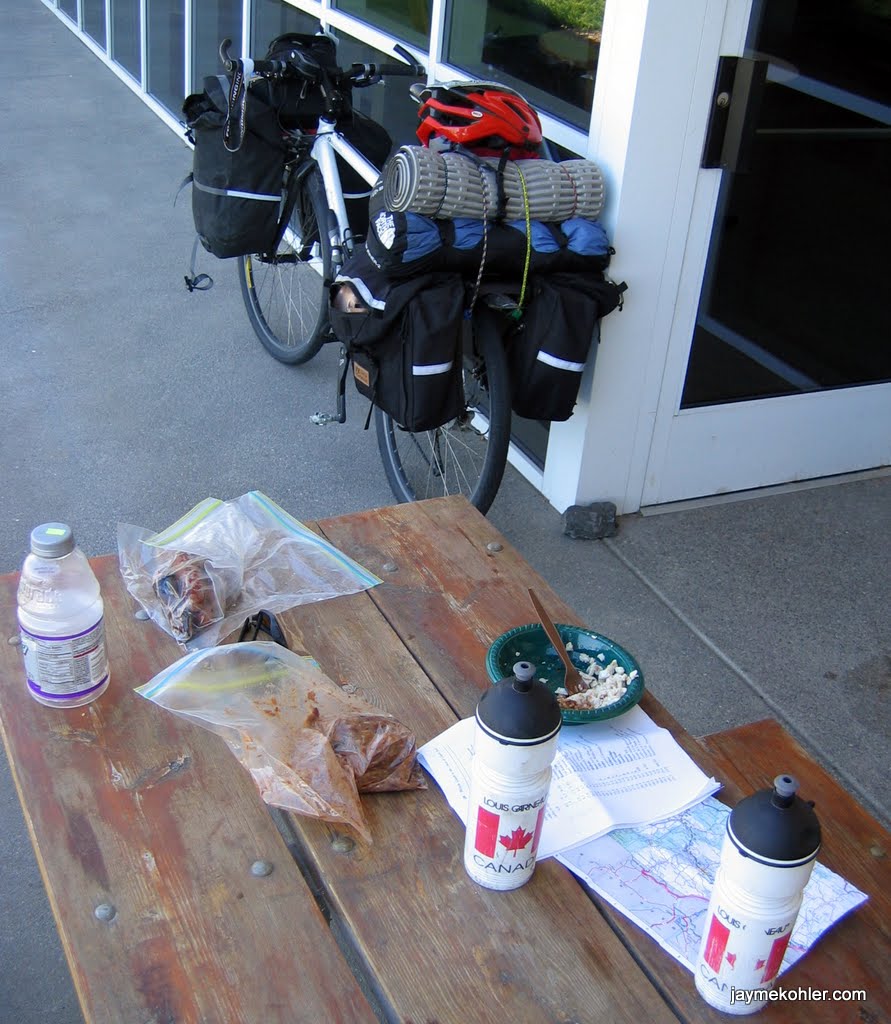
Bicycle
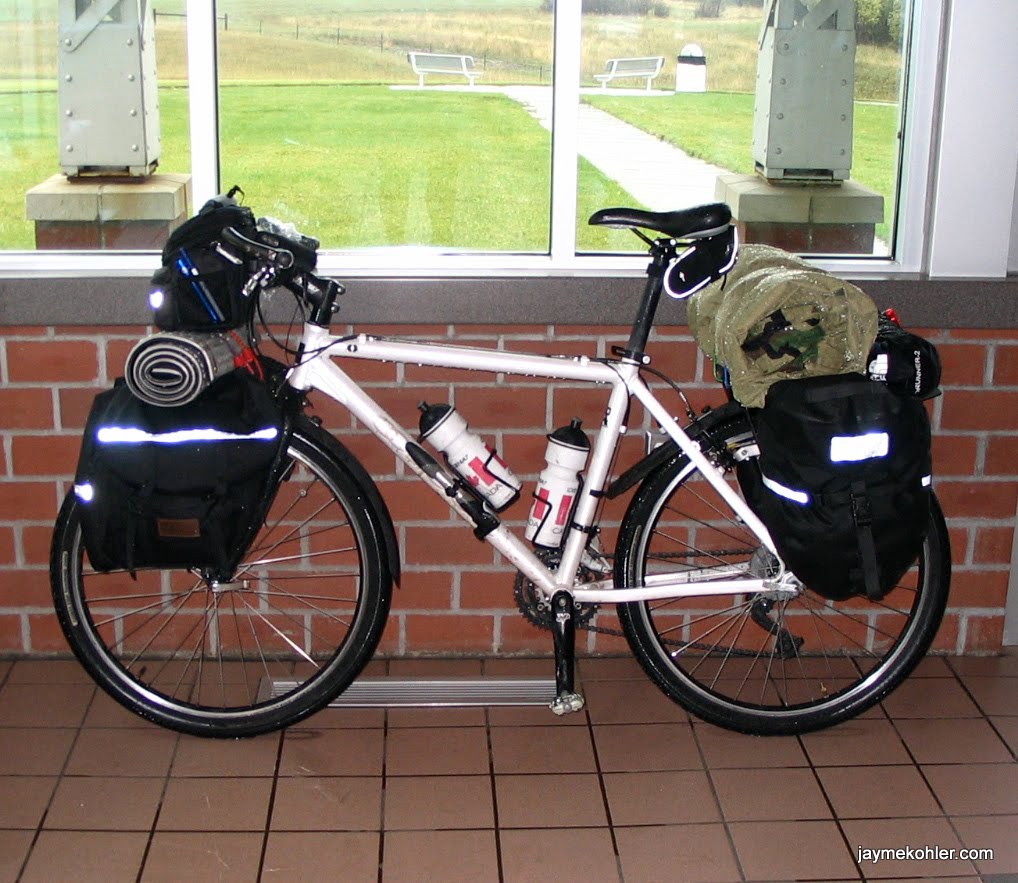
Eclipse – fully rigid frame
I bought and configured this bike in Ottawa, Canada specifically for my Lewis and Clark tour. The only things that really made it unique were 14 gauge spokes, a rigid front fork, and an adjustable stem (which I traded out for a standard stem soon after). The key to a good touring bike is one you are comfortable on and is maintained well.
Handlebar bag – Topeak Tour Guide
This handlebar bag is wonderful, but the mount sucks. It didn’t matter how much I shimmed the mounting brackets with rubber or how tightly I cranked the bolts. It still rotated downward to the point I couldn’t get into the top pocket without grabbing it and moving it back into place. By trip’s end I had strapped my sleeping pad over my front rack and let the handlebar bag rest on it. Mounting bracket design flaws aside, it was a great little bag with plenty of pockets and room. A handlebar bag is a must for maps, documents, money, snacks, and little odds and ends you find yourself needing without having to dig through a pannier.
MP3 player – Rio Cali 256MB (w/ extra 512MB SD card)
I used a 1/8” jack mono earbud, with a 1/4” stereo adapter, in my right ear. This way I could hear traffic approaching on my left with a slight turn of my head. Do NOT wear full headphones while cycling in traffic. It’s stupid and dangerous. Having music and/or radio on the tour was a blessed luxury. Ensure you’ve got plenty of music to keep you motivated/occupied while spending 8+ hours a day in the saddle.
Pepper spray
Pepper spray is a great way to ward off pursuing dogs, porcupines rummaging through your panniers, or crazed backwoodsmen missing most their teeth. Unfortunately, my pepper spray was confiscated by airport security when it was discovered in my handlebar bag (which I was using as a carry-on from Bismarck, ND to Portland, OR on the initial push to the trail head). Bring it, just stow it in a pannier under the plane. Thankfully, I never needed it.
Leatherman Wave
A multitool on crack, the Leatherman Wave can grip, fix, cut, or screw practically anything. Again, ensure it is stowed under the plane.
Assorted chow
Snacky stuff. My handlebar bar had an assortment of Twinkies, Snickers, Nutrigrain bars, and tooth rotting candy to aid in my blending with the locals. A snack an hour keeps fatigue away.
Lock – generic 6ft coiled cable
I used a very thin, lightweight coiled cable lock for the trip. Any 10 year old with their dad’s pliers could have broken it, but it simply made the bike longer to steal. I actually only used it once in a city park in Pomeroy, OR while I was eating breakfast at a restaurant.
Camera – Canon A80 4.0 megapixel digital
Don’t be caught without adequate storage for plenty of pictures and video. It’s the only way to prove you weren’t holed up in a brothel the duration of your tour.
Important documents – money, map, schedule
I didn’t dig through panniers for these items. I kept them up front where I could reach them at any time.
Navigation – Garmin eTrex Vista GPS
The best thing about having a GPS with me was the shear volume of data I collected about my ride on a daily basis. It also helped me navigate through cities better than any map I had. I recommend taking a GPS if you’ve got the option or the cash. For a few extra bucks and some time, you can get one and input your course with detailed directions. Regardless, bring a map and compass!
Wheelset – Atomic/Ace-19 14g
The wheelset itself isn’t all that important. Just make sure they’re built for a touring load and the hubs have been serviced recently.
Tires – Continental Top Touring 2000
Despite a few shady reviews of these tires about excessively tight fits on some rims, I was impressed by every facet of their performance. They’re narrow but not dangerously so, take gravel roads very well, and have minimal rolling resistance. Continental makes the best touring tire. Stick with them.
Tubes, presta valve – Slime 26” with Slime liners
I’ve always ridden with Slime liners and tubes. My only flat tire in almost 1500 miles was a pinch flat from running over a jagged rock.
Fender, front – Zefal
Use a front fender that tracks the tire. A down tube style fender isn’t good enough. My Zefal fender is an old style that I could mount to my rigid fork, but modern models have quick release mounting that hides away in the steer tube.
Fender, rear – Zefal
I used to love my Zefal rear fender, until I cycled in a couple deluges and realized how inadequate the frontal coverage (near the bottom bracket) was. The front of it mounted about 2/3 of the way down the seat tube, causing water from the tire to kick up and over the entire drive train and my feet and lower legs. Find a rear fender that extends to at least the chain stays, near the bottom bracket, in order to avoid Ice Foot on cold, wet days.
Bar ends – Bontrager
Bar ends are a must in order to vary hand positions and maintain comfort. If you’re currently using bar ends that you like on another bike, use them for a tour.
Cycle computer – dB 4LW Wireless
A cycle computer is an absolute necessity to gauge distances and averages on a tour. Wireless computers kick ass, but make sure you bring an extra battery just in case. Mine was relatively new so it wasn’t a concern. They are also susceptible to neon signs, which cause them to tick away mileage at about 120 mph. I leaned my bike next to a neon Open sign of a restaurant and came back thirty minutes later with 73 extra miles on the odometer.
2 water bottle cages – Performance Terra Lite
Buy water bottle cages that you cannot physically see the weld on. They will break at the weld after only days of use. I buy bottle cages that have the weld at the top and is covered by a small, metal sleeve. I’ve never had one break. They’re tough to find but are around if you look enough.
Water bottle, 2 33 oz (1 liter) – generic
In addition to my two 32 oz generic water bottles on the bike frame, I kept two 32 oz Gatorade bottles in my panniers for reserve. As tempting as a backpack hydration system sounds, carrying 3 liters of water on your back for 75 miles a day is a real pain in the ass. Literally. Keep the water on the bike and off your back. A Camlebak bladder attached to my front rack and an extended drink tube was an option I considered, but never got around to exploring.
Pump – Topeak Mini Master Blaster DX
In my opinion, Topeak make the best pumps ever. This little number was lightweight, solid, and stayed out of the way until the one time when I needed it. If you’re running good tires, tubes, and liners, you don’t need to worry about a rash of flats. A mini pump that uses more stroked per tire should work just fine.
Rear rack – Old Man Mountain Cold Springs
This rack is the next best thing to hot wings at Hooters. I can’t say enough good stuff about it. If you’re going racks and panniers for your tour, buy this one. Now. It’s worth every penny.
Nashbar ATB panniers
These panniers are Cordura nylon. In other words, not waterproof. I kept my MREs in them and a few odds and ends that I didn’t mind getting wet. They were fairly cheap, too, even when I bought them in 1997.
Front rack – Headland Rover
As this ride developed into a self contained tour, which meant carrying the majority of my own chow, I purchased this rack at the last minute (literally, it arrived the day before I was scheduled to fly out). Headland is a less expensive version of Old Man Mountain but made by the same company. There are precious few differences in weight and characteristics. Pick the one you like best. Again, worth every penny.
Panniers – Serratus Aqua-Not
I purchased these panniers at Mountain Equipment Co-op in Ottawa, Canada (but you can order them online with greenbacks). The good: Almost indestructible, truly waterproof, awesome retention system. The bad: only one big pocket. If you’ve got some semblance of organization skills, the bad won’t affect you that much. I recommend waterproof panniers and NEVER “waterproof pannier covers” because they generally are not. Plastic grocery bags are a no-cost alternative if waterproof panniers aren’t an option. Regardless, ensure all your things are waterproofed.
Seat wedge – Jandd mini mountain wedge
A seat wedge always contains my bike survival kit (patch kit, tire boot, mutiltool). Get one. Use it.
Multitool – Topeak Hummer
There was a time I swore by the Topeak Alien, which is the Swiss Army Knife of cycling multitools, but the Hummer has everything important you will ever need in a much more compact package. The best part of it is the integrated tire levers.
Tube, slime – 26”
Slime tubes are gooood. Buy them.
Patch Kit/tire boots – Park
I’ve had good luck with Park instant patches, so I use them. If you want a longer, more durable repair job, a traditional rubber cement patch kit is a must.
Front Panniers contents
Camping supplies
Flashlight, AAA mini mag
Extremely compact and uses the same batteries as my MP3 player.
Water purification – Katadyn Micropur Purification Tablets
I never needed these, but they took up almost no room in my 1st Aid kit and are great in emergencies. The downside is it takes about four hours to make drinkable water. It’s not last minute decision to use these.
Sleeping bag – generic
My bag was 2lbs 3 ozs and rated to 35 degrees. I slept in running shorts and a t-shirt. The average night time temperature on my tour, in my tent, was 45 degrees. I never got chilled.
USMC issue Gore-Tex bivvy cover
Another pound in the mix, a waterproof, Gore-Tex bivvy cover is a great addition to any bag to extend its temperature rating and keep it dry on damp ground. It doubled as a ground cloth, but a custom cut piece of Tyvex is nice to have.
Liner, silk
A sleeping bag liner is used primarily to keep your bag clean when you get all grungy for days or weeks at a time. I had great plans for this $50 dollar add on, but I only used the damn thing once. It was way too cramped. I packed it back up and didn’t take it out again. If you’re concerned with a nasty sleeping bag by the end of your tour, take a few extra minutes before you crawl in and rinse the road grime off your legs.
Bungee Cords – assorted generic
I took a crapload of bungee cords and only used four. I attribute this to my last minute packing job and never figuring out how many I’d need. Don’t make my mistake.
North Face Roadrunner 2 tent (fly only)
This fly only option was the perfect compromise between a full tent and a tarp. With a little adaptation and nylon cord, I could pitch my North Face fly only and save 3 lbs off the total tent weight. It was also a breeze to set up instead of messing with a tarp. Investigate your options.
Fire starter – Bic lighter, matches
Campfires kick ass on a cycling tour, given the opportunity. Bring a fire starter to give yourself the option.
Clothing
Pants, zip-off – REI Sahara Convertible
These are the best pants ever. Quick drying, comfortable off the bike, and stylish, they double as shorts if you’re chillin’ around town after a hard day in the saddle.
Jacket, Performance clear rain
I sweat like a beast in this thing. On cold rains I froze my butt off. Bring a permeable rain jacket and pants (Gore-Tex or equivalent) and save yourself the misery.
Shirt, 2 long sleeve T – generic (synthetic)
Layers, layers, layers. I wore the long sleeve under the short sleeve so I could shed accordingly. Cheap, synthetic shirts can be found at Wal Mart for under $10 a piece. Don’t break the bank buying these shirts, but don’t wear cotton either. Nylon and polyester are the fabrics you want.
Shirt, 2 short sleeve – generic (synthetic)
Same story as with the long sleeve. Find them at bulk or discount clothing stores.
Shirt, 2 tank top – generic (synthetic)
I only wore a tank top once on the tour because it was fairly cold. Watch out for chaffed nipples with tank tops blowing in the wind. I’m serious.
arm warmers – Performance polypropylene
My tour started two months behind schedule. I threw arm warmers in at the last second. Thank God! I used them extensively. They take up very little weight and space.
helmet liner
The helmet liner worked great on or off the bike when I was hanging out in the cold or sleeping with my head out of my bag. I fleece skull cap would work just as well.
Headband – Pace USA
Extra headband for convenience.
Shorts, cycling, spandex mid thigh – generic
Extra cycling shorts because they get dirty quick.
Shorts, cycling, spandex briefs – Andiamo CoolMax Padded
These were a good idea for use with my zip off pants, but I never wore them. Next time they’re staying at home.
Tights, cycling reflective – Performance Illuminite
Another cool to cold weather necessity. Leg warmers may be substituted. I used these all the time.
Socks, 4 pair, cycling – DeFeet
Avoid trench foot! Extra socks don’t waste space or weight.
USMC issue PT shorts
I slept in these things to give “the goods” time to air out at night.
Sandals
I didn’t bring extra shoes, just slip on Nike sandals. I wore them whenever I stopped for the day. Tevas are bulky and heavy. Get a pair of cheap sandals that weigh practically nothing.
Personal health & hygiene (travel sizes)
First Aid kit – Campmor Hiker (stripped down to bare essentials)
Light but slightly bulky, I used the kit bag to hold extra little stuff like cables and water tabs. I never got hurt or needed it, but you can bet it’ll come with me on my next tour.
Microfiber Towel/washcloth
The towel is awesome, super absorbent, large, and dries very fast. I forgot to buy a washcloth. Next time I’ll steal one from a hotel room.
Toiletry kit
toothbrush, toothpaste, floss
Don’t be caught with furry teeth or dragon breath.
soap – Camp Suds
Camp Suds was chosen over regular soap for its versatility in washing body and clothes. The only change I’ll make is going with a cap that I can pop open and squeeze rather than just dump.
Q-tips
Baby powder
Whatever else happens in the world, nuclear war, global famine, or Hillary Clinton being elected president, bring baby powder on your tour. It will save the thing(s) you hold most dear from undue wear and tear.
wet wipes
A bath in a box, wet wipes are good for scrubbing the funk off your, well, whatever and powdering up for the next day’s ride. I brought wetnaps and didn’t have to deal with some bulky container or leaky bag.
Bike parts & tools/miscellaneous
Shifter cable – generic
Brake cable – generic
Cord – generic
Tie anything, to include a clothes line, to your panniers, or that 18 year old hooker that you picked up at the last Greyhound station.
Chain lube – White lightning
I used to think that White Lightning was God’s gift to chain lube, but it’s simply not designed for a tour where a good drive train scrubbing is difficult to do. As a wax based lube, it gunks up too bad. I switched to an oil based lube in Great Fall, MT and never regretted it.
AA and AAA batteries
Batteries for my camera, GPS, MP3 player, and flashlight. Don’t get crazy and buy dozens to carry with you. Pick them up along the way. Keep an extra set or two on the bike and that’s all.
Sunscreen
Carry 30 SPF. Anything higher and you’re wasting money. Anything less and you may spontaneously combust.
Mosquito spray
Mosquitoes have been known to bring silverware to feast on you. Keep them at bay or you’ll be itching like a leper.
Notebook & pen
For journal writing or scribbling “Show me your tits!” signs to passers by. I brought a full 8.5″x11″ notebook and didn’t use a fraction of it. Next time I’m bringing a smaller sized one.
Umbrella
The umbrella made a great temporary shelter on the side of the road while I waited for storms to pass. It weighed ½ lb and was ultra compact. It didn’t survive the tour due to mechanical failure. Blame it on the hailstorm I got caught in.
Rear Paniers Contents
Chow
MREs (Meals Ready to Eat)
Food on a self contained tour is always an issue and matter of debate. I didn’t want to have to cook my chow or bring along a stove and fuel, so I went with MREs. The good: they’re ready quickly, have plenty of calories, and are diverse. The bad: they’re heavy as hell. Three weeks of MREs, at one meal a day, weighed over 35 lbs. My rear panniers were nothing but MREs. As the weight of my rear panniers decreased with every meal I ate, I eventually switched them with the front panniers. I’m investigating other options for my next tour with the weight, quantity, and space debate with a stove, fuel, and dehydrated food configuration. On a side note, don’t expect to do your daily food shopping at C-stores along the way. They’re an intestinal turning combination of candy, junk food, and microwavables designed for the overweight motor tourist. Stopping by grocery stores is a better option.
Thanks for sharing! Nice to hear what worked and what didn’t.
My westbound tour the following year saw changes in my gear list, primarily the use of a B.O.B. trailer. I plan on writing up a smaller gear list with those changes.
Great packing list for people getting into tour biking. I was suprised that you when with the MRE option instead dehydrated food or even some freeze dried options that are out there. I work for a food storage company and find that MRE’s usually don’t stack up in taste and weight. What are your plans for your next ride?
I went with MREs because of availability. I’m a Marine and save the ones I don’t eat during field ops. I think they taste great (well, most of them anyways) and have plenty of options to choose from. I field strip them down to individual packets, then compartmentalize main meals, snacks, spreads, etc. for easy access on the tour. As I stated before, they’re heavy, but options are available. For instance, I’ve never needed one per day, as I’ve eaten on the road from time to time. You could also mail forward some of the rations for longer tours. In my Boy Scout days, I rolled with dehydrated food and always hated having to drag along a stove and then heat water blah blah blah. They were expensive too.
Have saved your information for more review later as I get ready for a tour this June…I backpack, but haven’t bikepacked since the mid-80’s, and you’ve given me a lot of very good information to use. Many thanks for taking the time to spell it all out!
Thanks for the info. If you had to do it all over again what would you do about food? Are you the only bicycle rider that doesn’t like to brew your own coffee while your still half asleep in your tent?
I’ve completed a few smaller tours since this one in 2004, but I’ve always brought MREs. However, I know now that I don’t need as many MREs as I think, so that cuts back on the load.
I’ve been peakbagging (hiking for the sole purpose of summiting mountains) for the past three years now, and seeing the various cook kits and chow on the trail has been enlightening. If I had to make a snap decision, maybe a JetBoil stove? I’ve also conducted a LOT of research on ultralight backpacking, so my bike touring load will never be the same again. It’s worth some looking into.
While traveling, my morning has always been get-up-and-go. I never took the time for coffee. But it DOES sound like a good idea…
I know I’m a bit late to the dance on this but thanks for posting. I am wanting to get into bikepacking and this helps tremendously. I am a big fan of MREs as well and usually pack them on backpacking or peak bagging trips. Thank you for your service. It means a lot.